03_CIRCULAR OPEN-SOURCE FASHION
Overview
Circularity has been around the design field for a while. The cyclical logic of nature’s operating systems has to be taken as a matrix and transferred to human operating systems.
The main idea of circularity is to reuse resources, materials, fabrics, and products, keeping them in the loop following the cradle-to-cradle principle and even more... When speaking about the resources this can happen on many strategic as well as creative levels of human production.
The idea of this week comes down to using as little as possible. Space and material wise. And the principles we learned about this week were trying to address just that. Zero waste can mean creating without making any waste within the process, but it’s also the final product that needs to be taken into consideration. The other thing that this assignment focused on is design in the world of patterns, cut-outs and tessellation principles, addressing the importance of smart usage of surfaces. Adding the open-source to it, an idea of making things better than they are for everyone by transparency and accessibility of knowledge and technology.
References and Ispiration

1 - Josef Albers paper exercises from a single sheet
2 – Kenji Abe
4 – Ane Christensen
5 – Dior
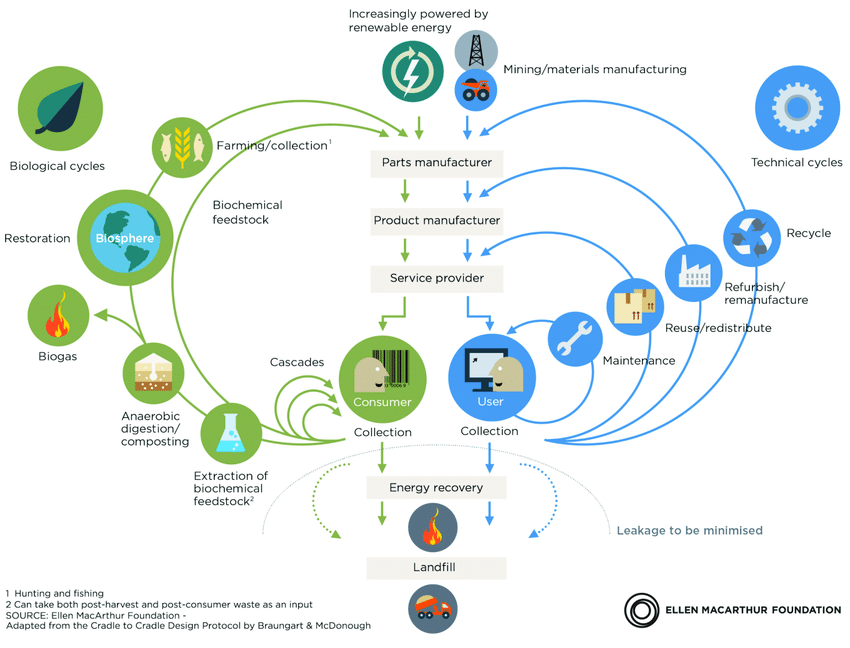
6 – Ellen MacArthur Foundation
7 – FabBrick
8 – Katrin Krupka
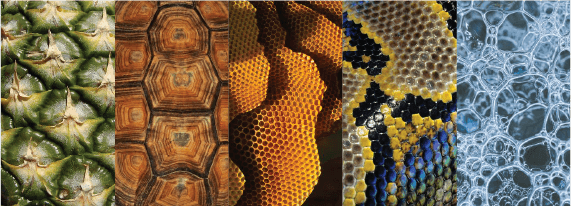
9 - Honeycomb
Kirigami principle
Looking at the references, I was most inspired by origami and kirigami techniques - creating with paper. I was excited to try out cut-outs with different biomaterial, making a functional object out of it.
Kirigami is a traditional art form originating from Japan, which involves creating intricate designs by cutting and folding paper. The word "kirigami" is derived from the Japanese words "kiru" (meaning "to cut") and "kami" (meaning "paper"). Unlike origami, which only involves folding paper, kirigami involves both cutting and folding.
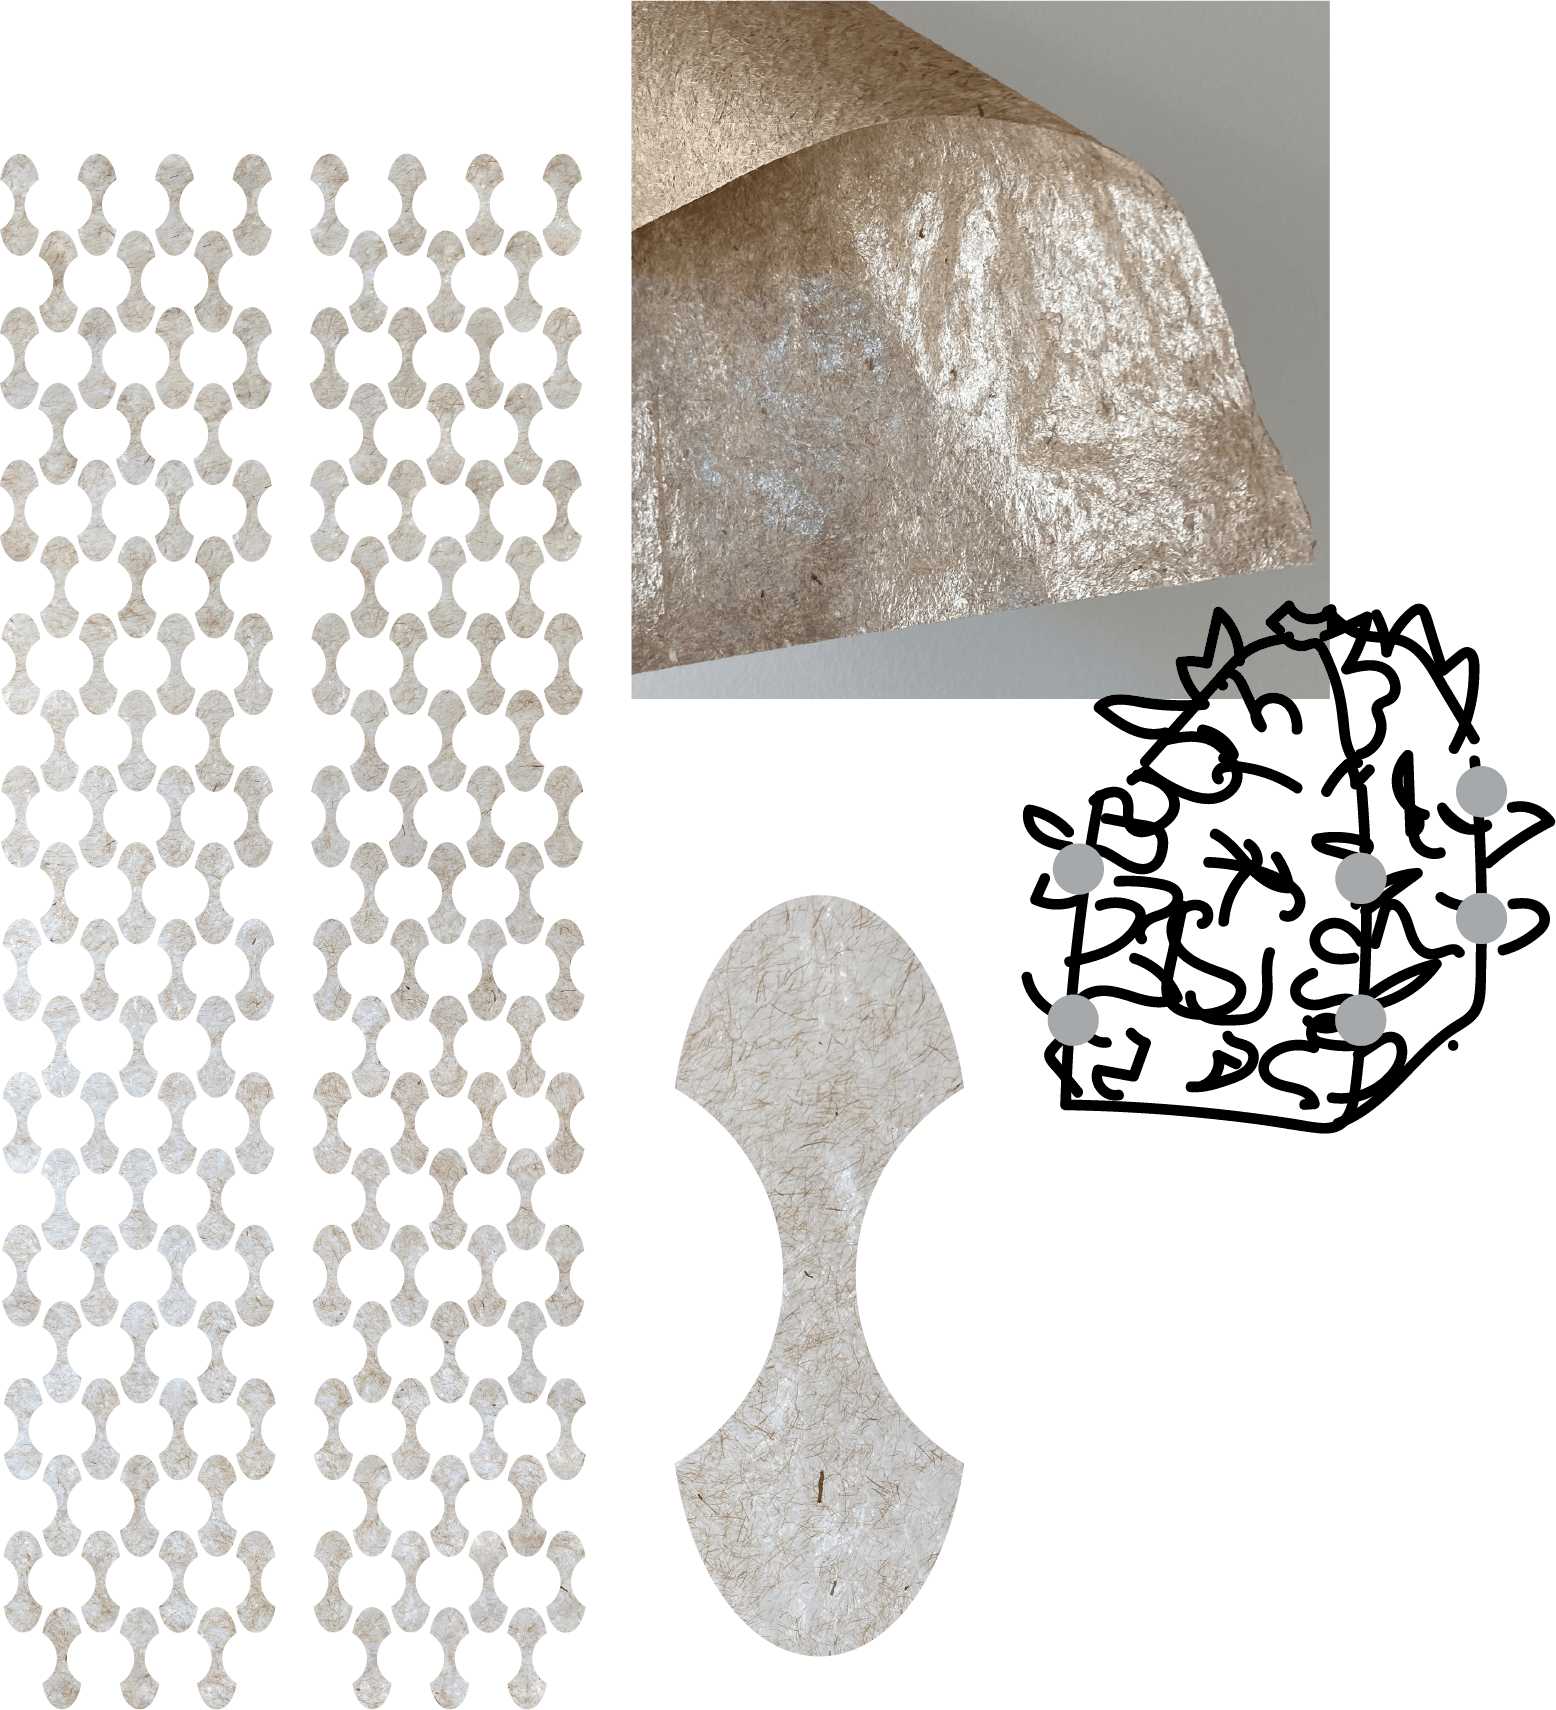
I started my project by experimenting with small paper cutouts to get a feel for the paper's structure. I made a circular and rectangular one.
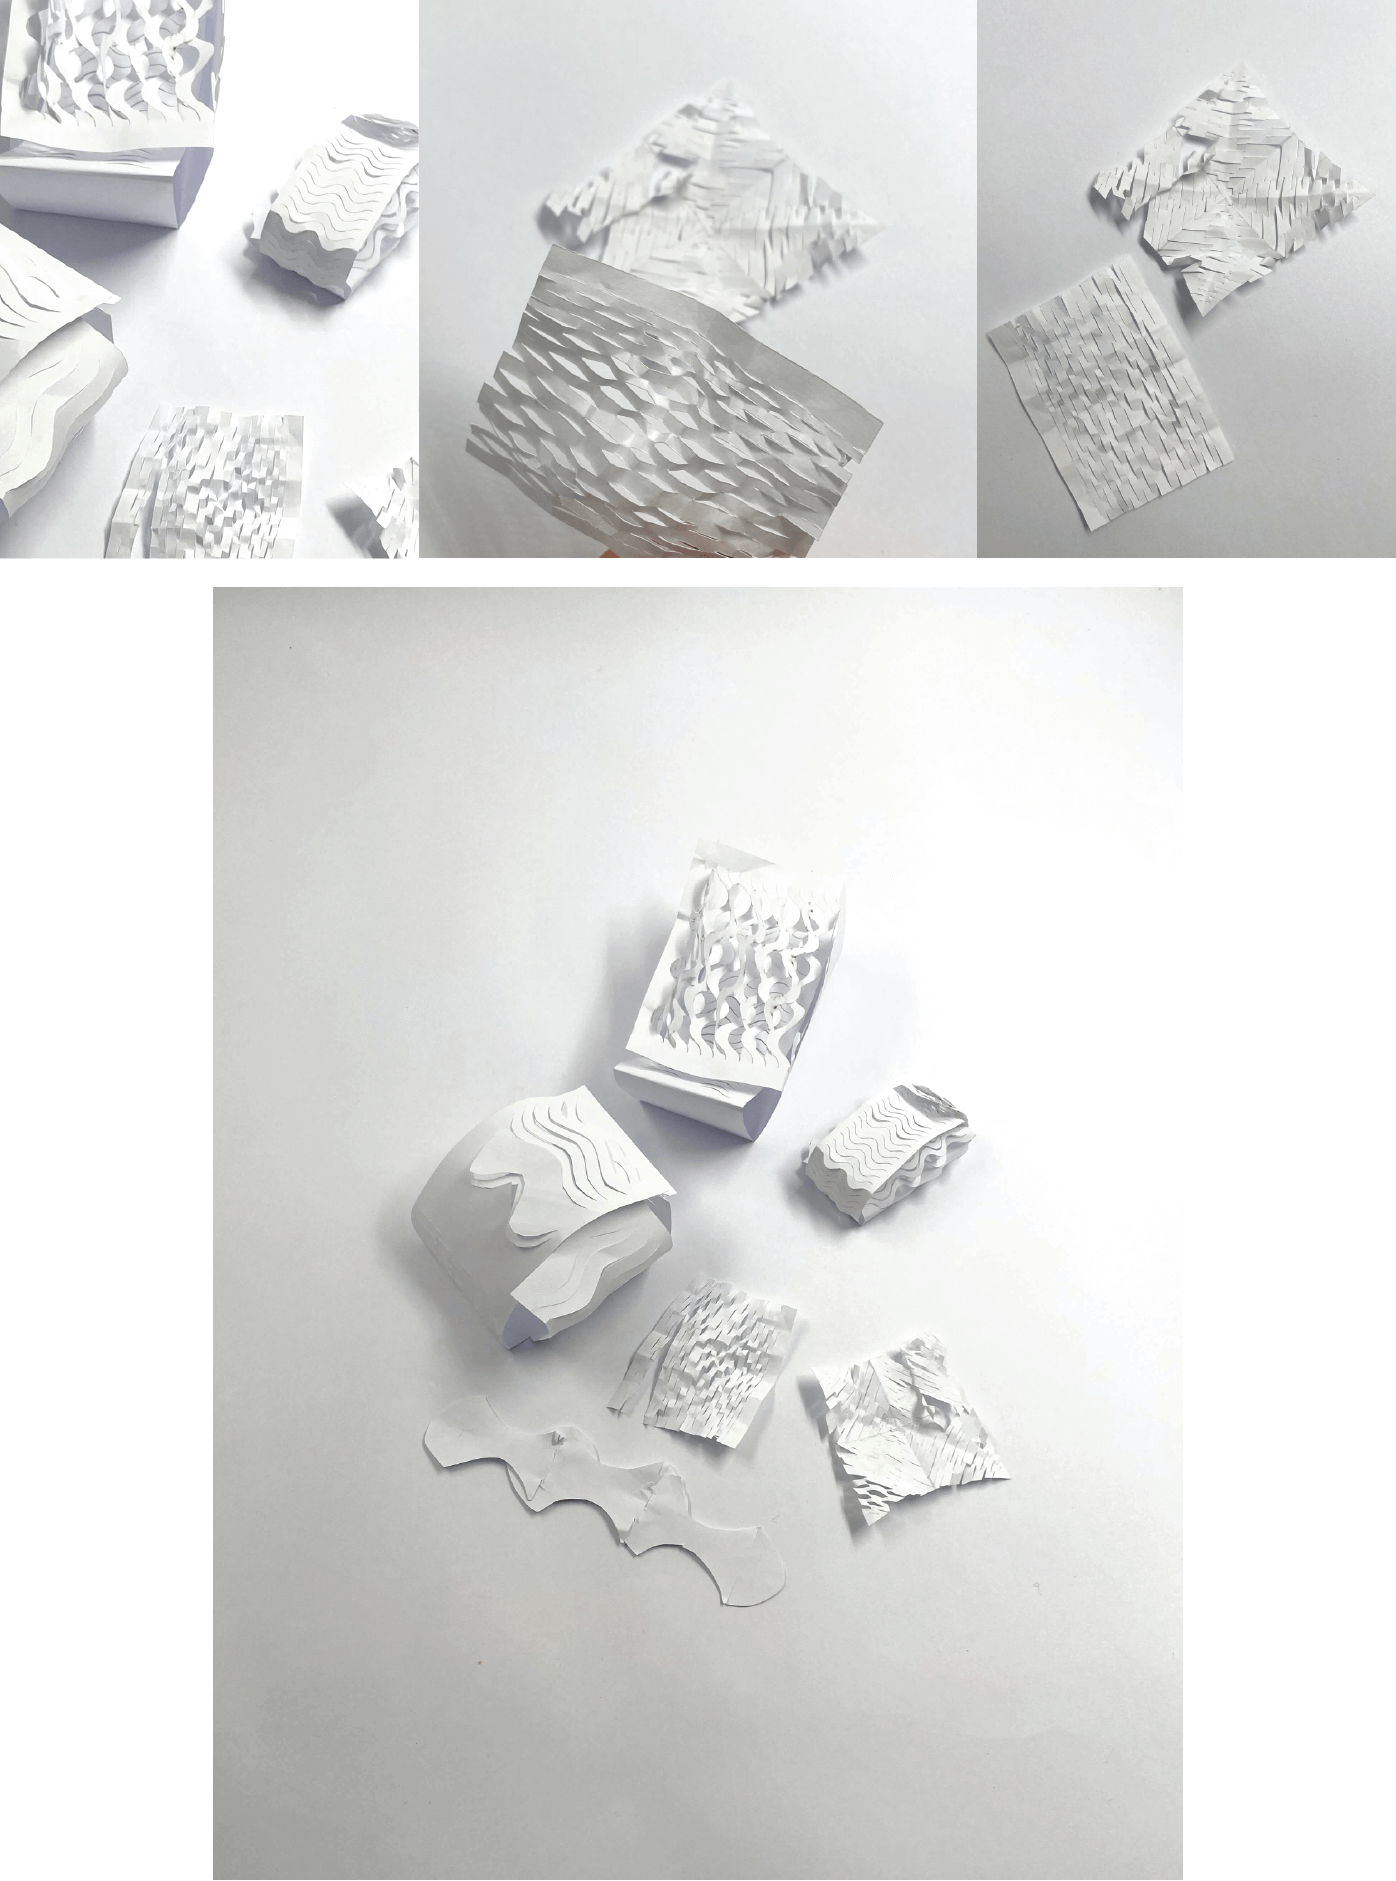
The next step was creating a pattern on a bigger scale. I designed the following pattern in Illustrator and laser cut the ''package''.

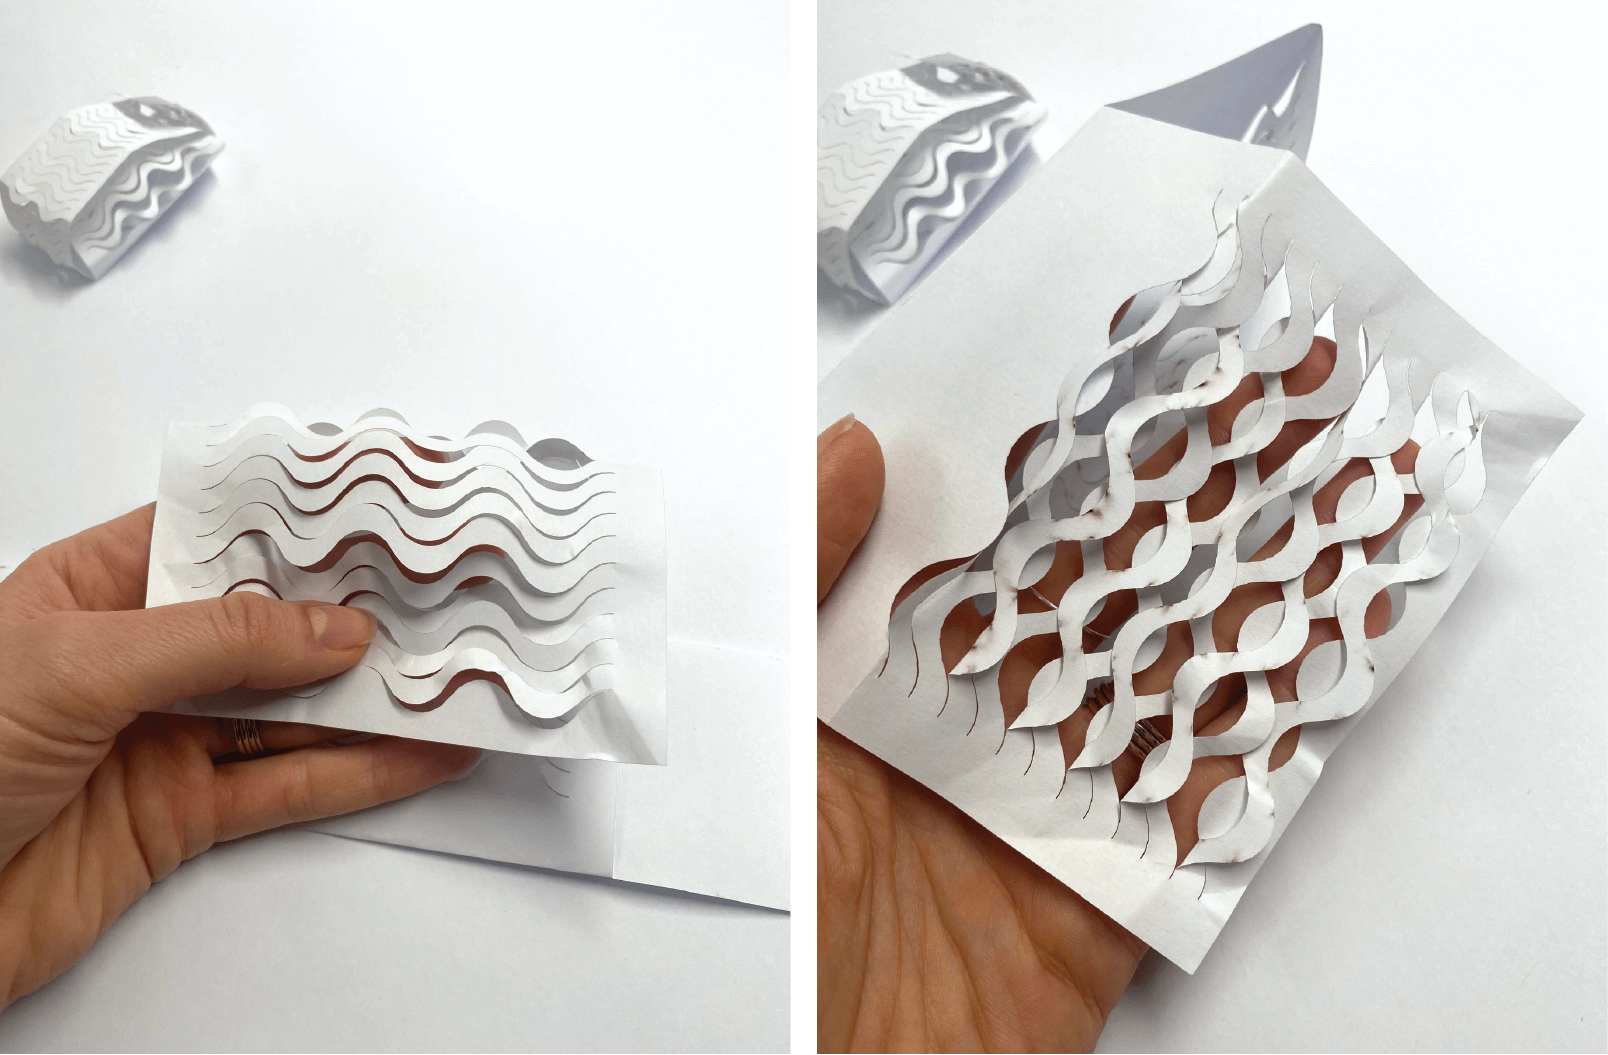
For cutting the design with paper I used the following settings:
| Power | Speed | Hz |
| 20 | 1 | 1000 |
Photo pack
NOTE: This is where my assignment went for a walk. I honestly don't know why I did not continue with this one. Perhaps I wanted to try all the other inspiring techniques and principles we have learned in this week. Combining everything in one design ☹
Ideation
Coming from a different background than fashion or textile design, I was excited by the world of patterns and how to use them meaningfully. These approaches make sense when you are trying to calculate your way out of wasteful processes and design.
My idea was to transfer this logic onto packaging design. Thinking of a fabric and replacing it with biomaterials I have made in the past, was something I was trying to explore further. However, despite good intentions, my results were not satisfactory. The main issue was designing for a different material than the one I had used previously. Another problem was trying to combine tessellation and pattern as a functional aspect of the design. Maybe not this week.. :)
But here we go..
Pattern making and tessilation principles
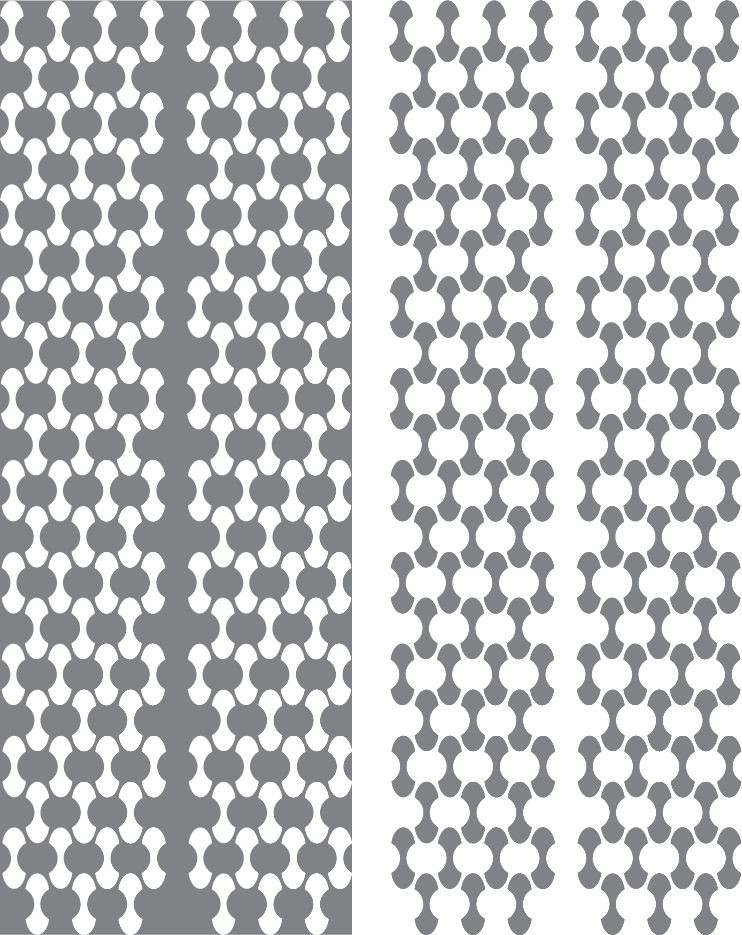
1 - First I made some simple patterns.
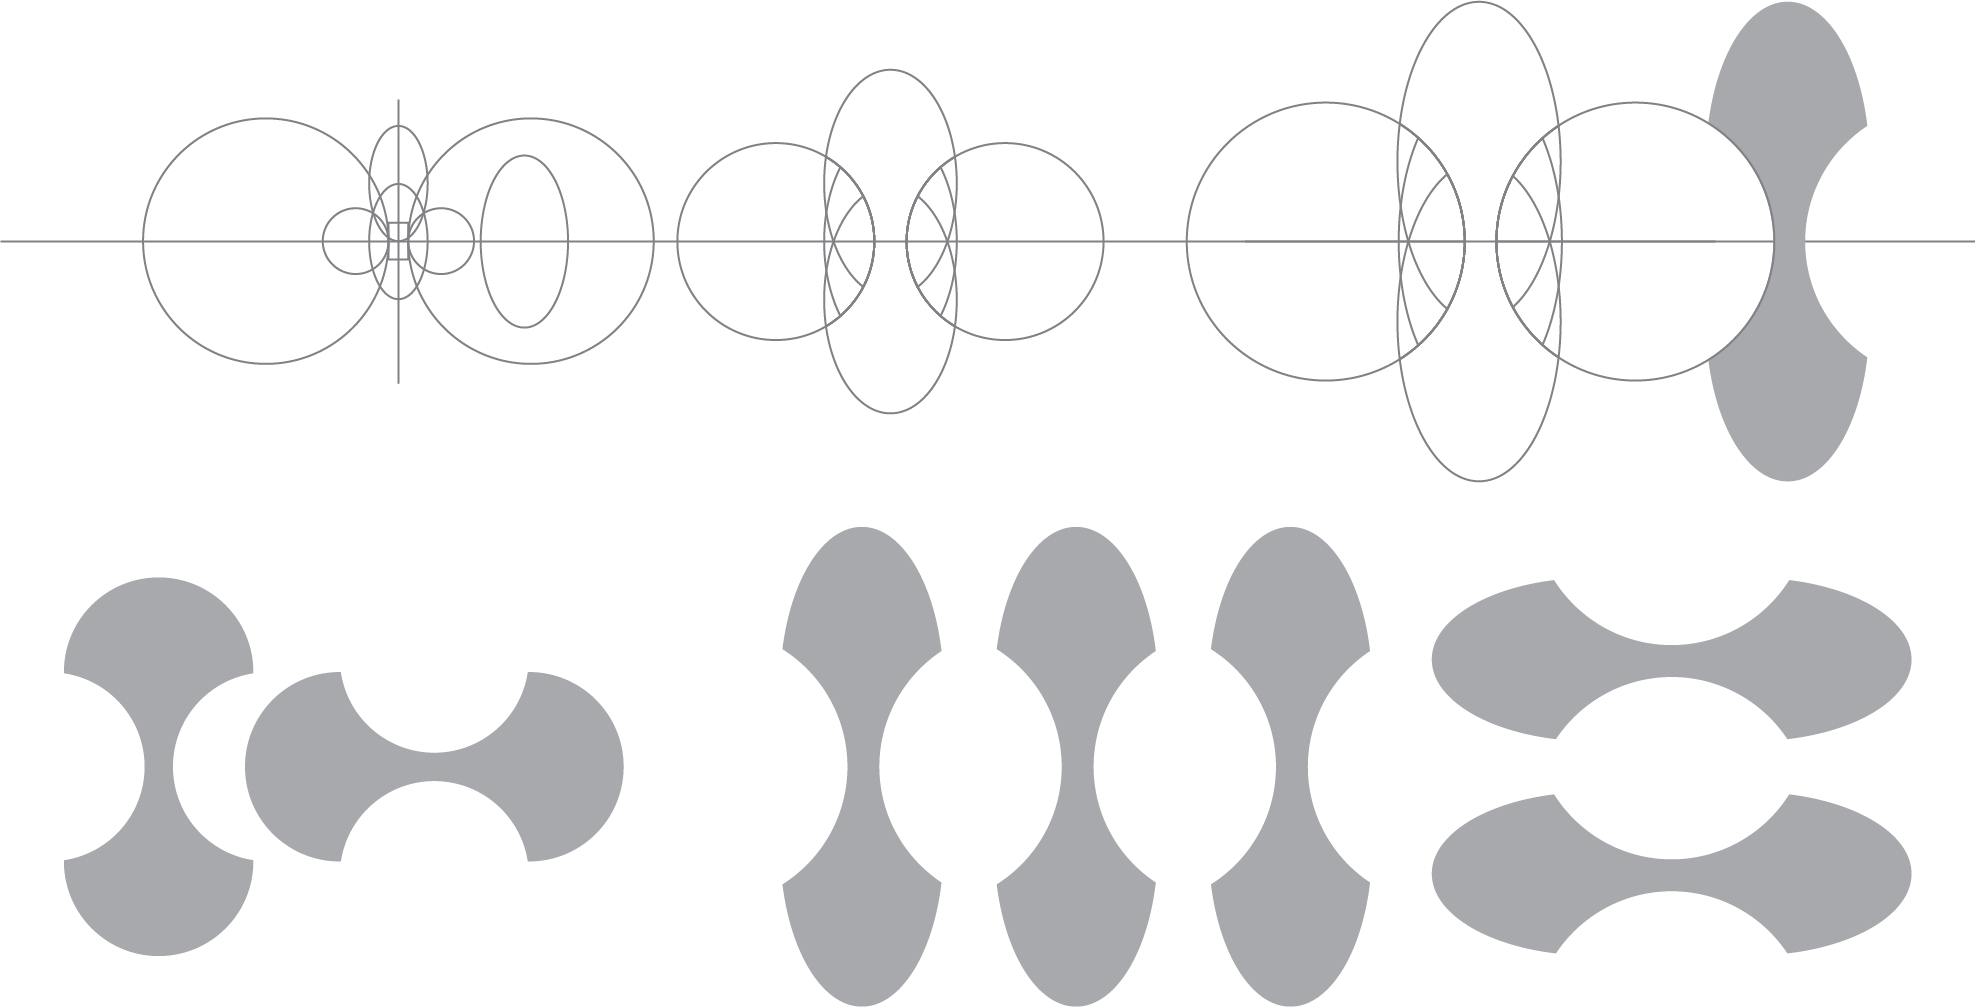

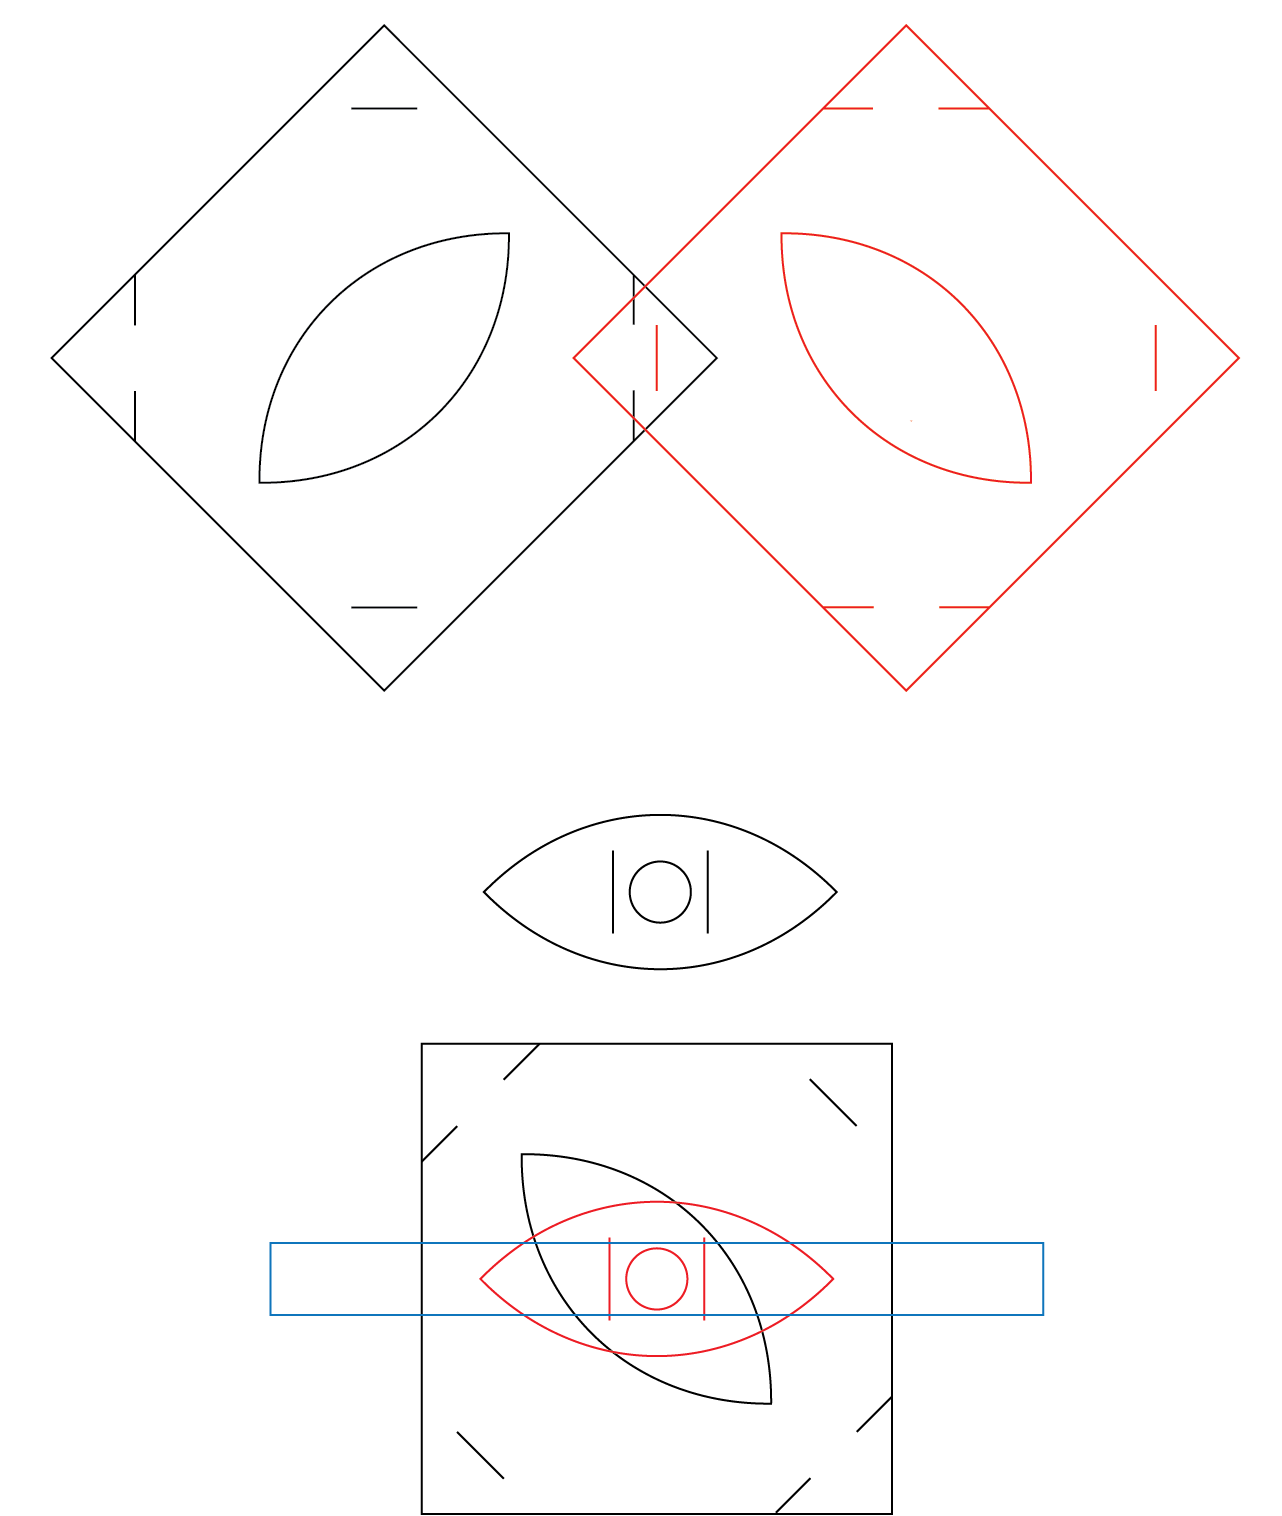
2 - I picked the following pattern to transfer it onto packaging blueprint.
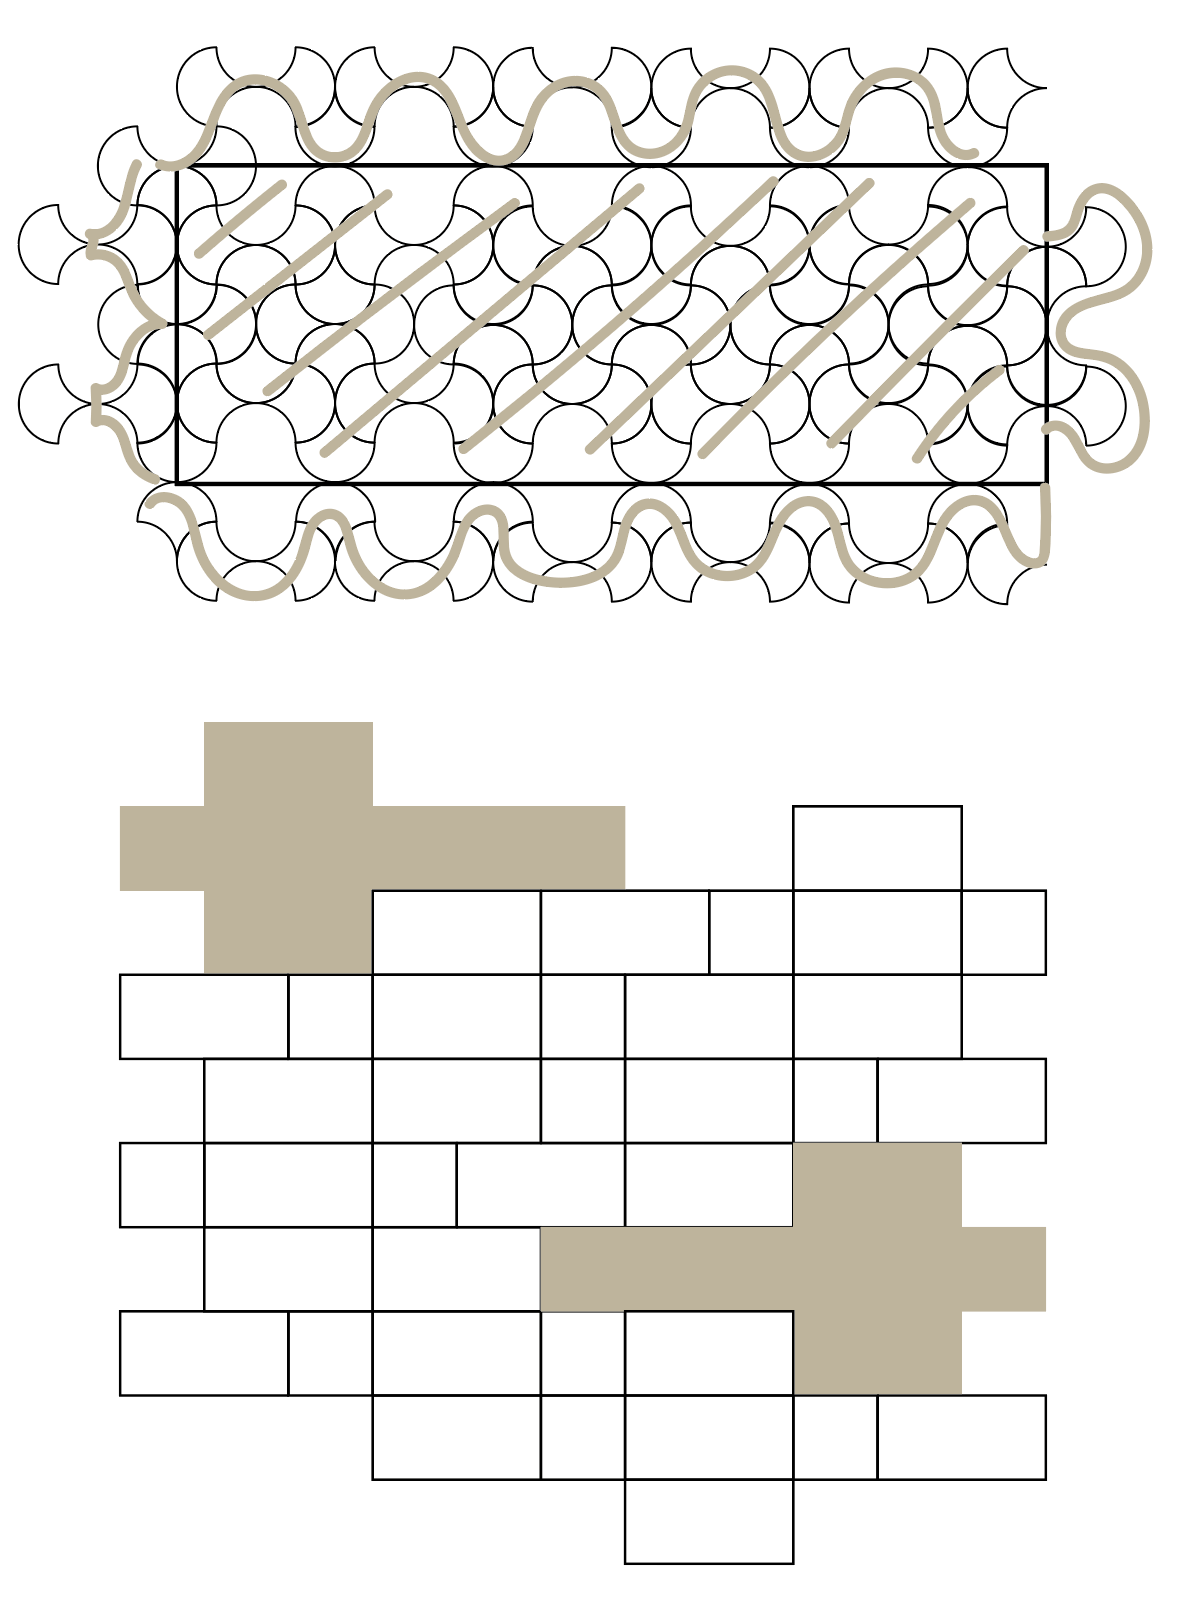
3 - I transferred the pattern from the packaging blueprint onto the cross blueprint. I then tried to follow the outlines of the pattern, tessellation, and packaging blueprints all at once. This turned out to be a bit too ambitious and I ended up making a bit of a mess. If the idea would work, the design would result in zero-waste production, using patterns as a functional detail for closing the future packaging, as shown below. However, I learned a valuable lesson from this experience.

4 - I learned a valuable lesson when I tried to laser cut my design using fabric instead of the biomaterial I had planned to use. The design was meant for solid structures and not for soft, flexible ones made of fabrics. As a result, the design collapsed, but it was a good learning experience
photo not included
Final outcome of the week
I decided to create something completely new, since the tests done before were not a succesful story. I designed a new pattern, that I would cut out of a fabric and construct a top from it by simple male-female-parts principle.
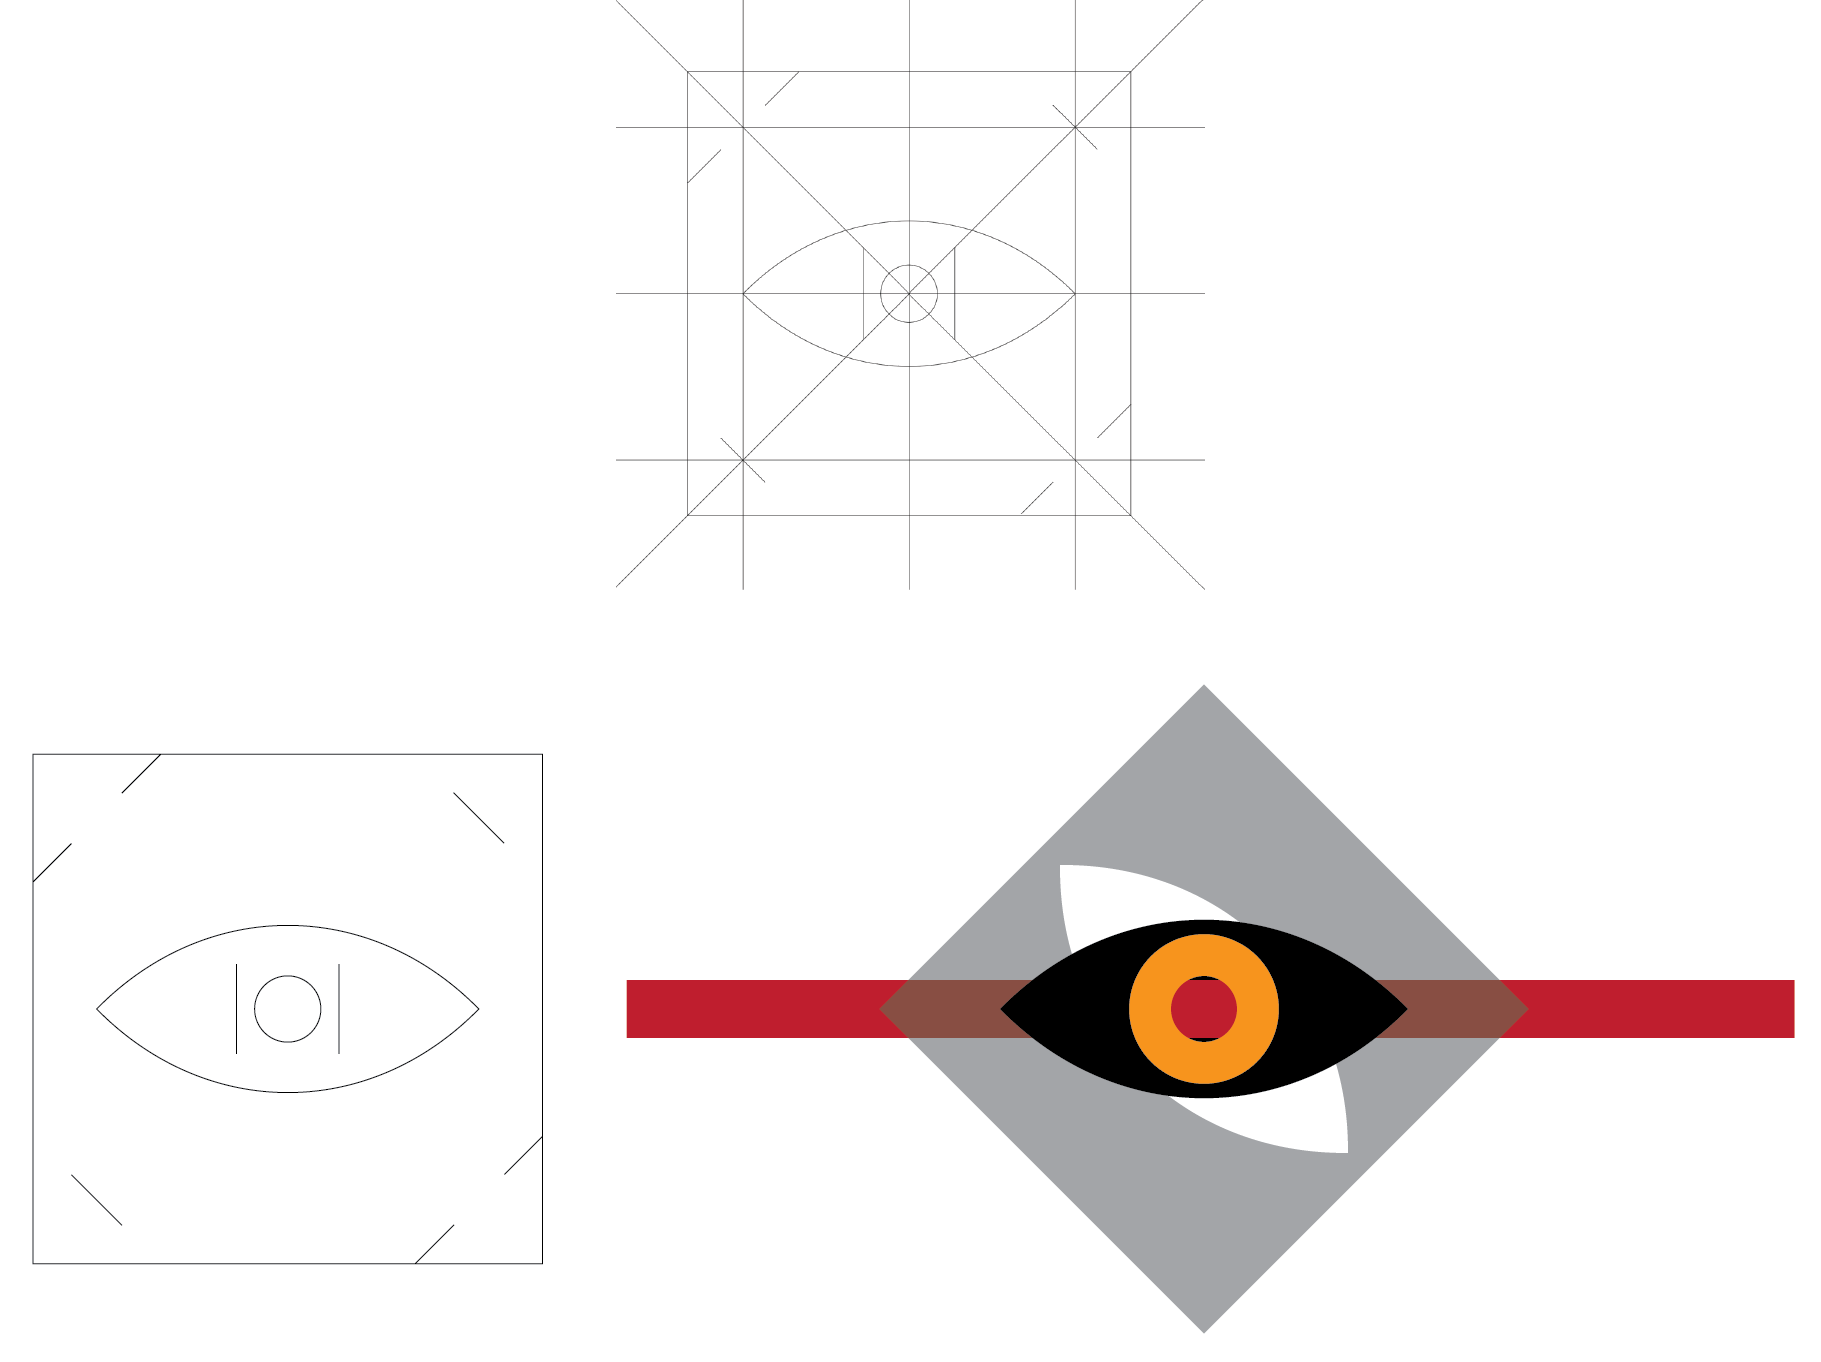
Step 1 - The idea of a new design:
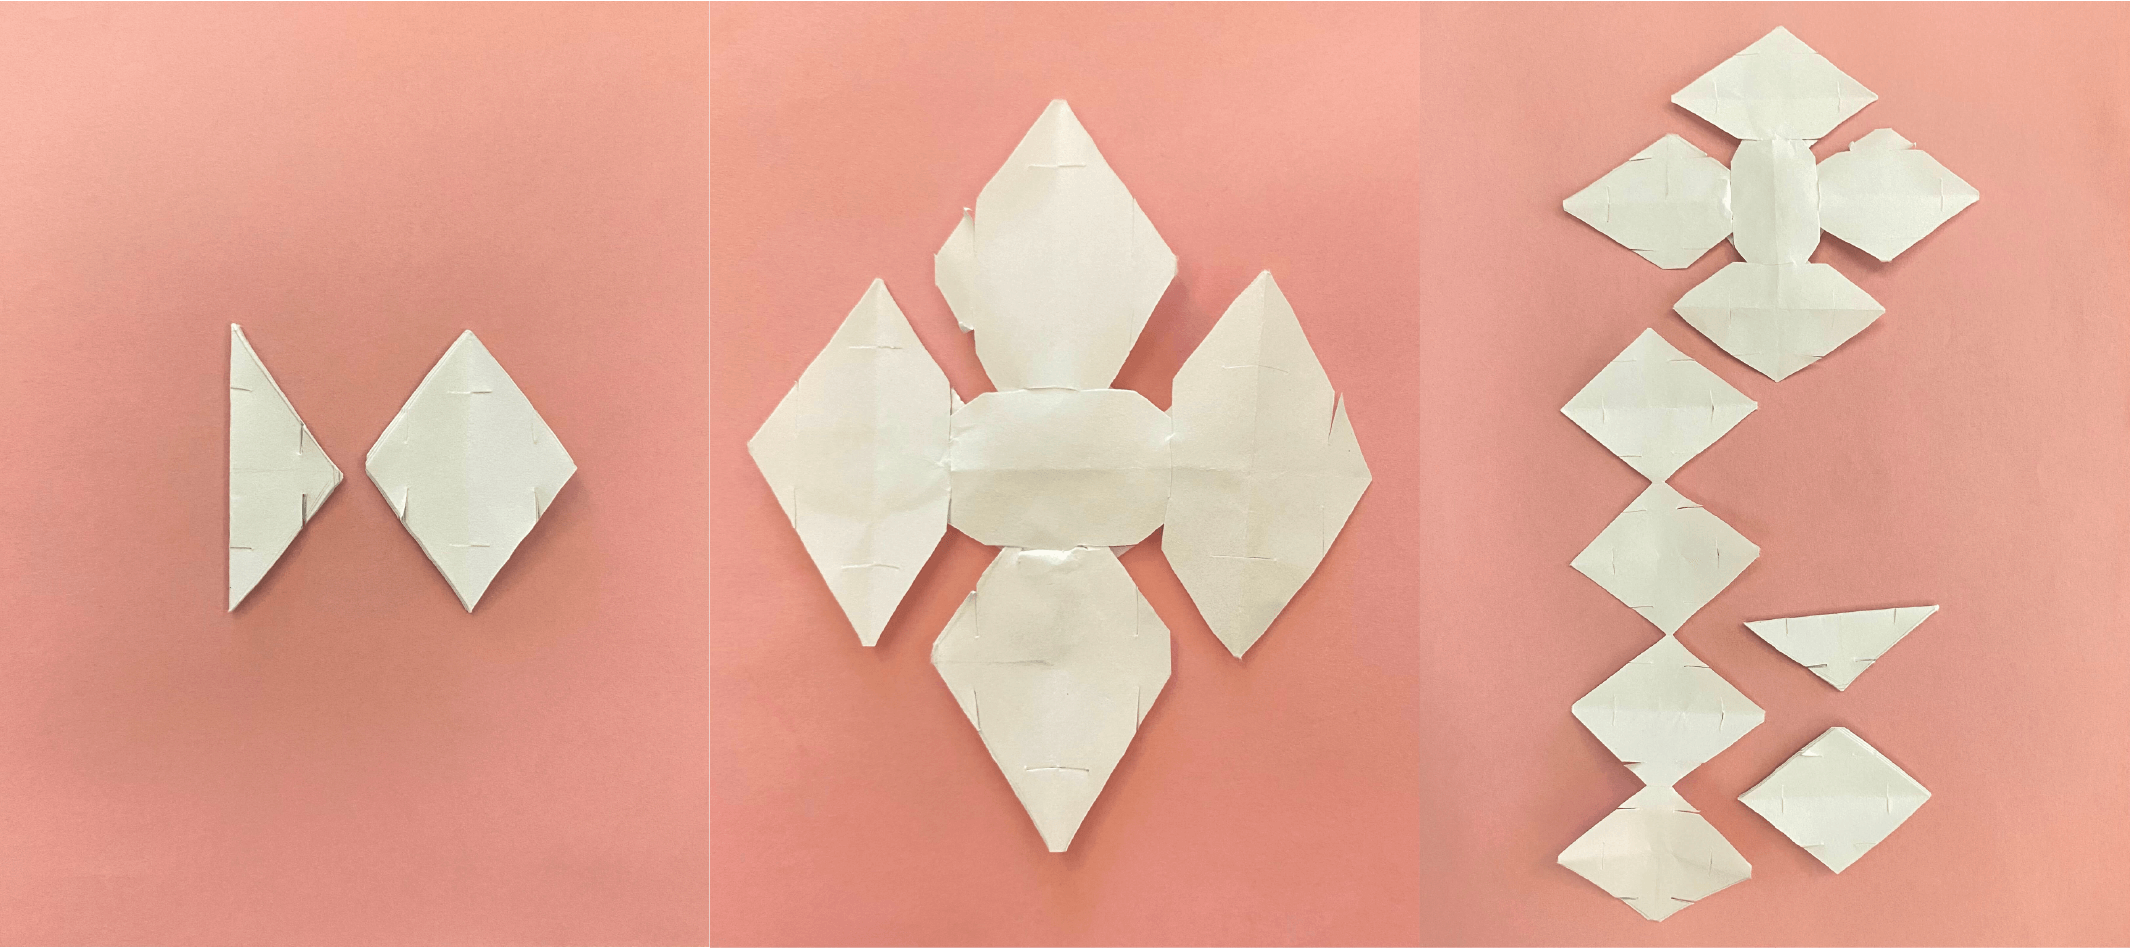
Step 2 - I made some paper diamonds to test the future joints of the pattern top. I used positive - negative principle for construction (female, male).
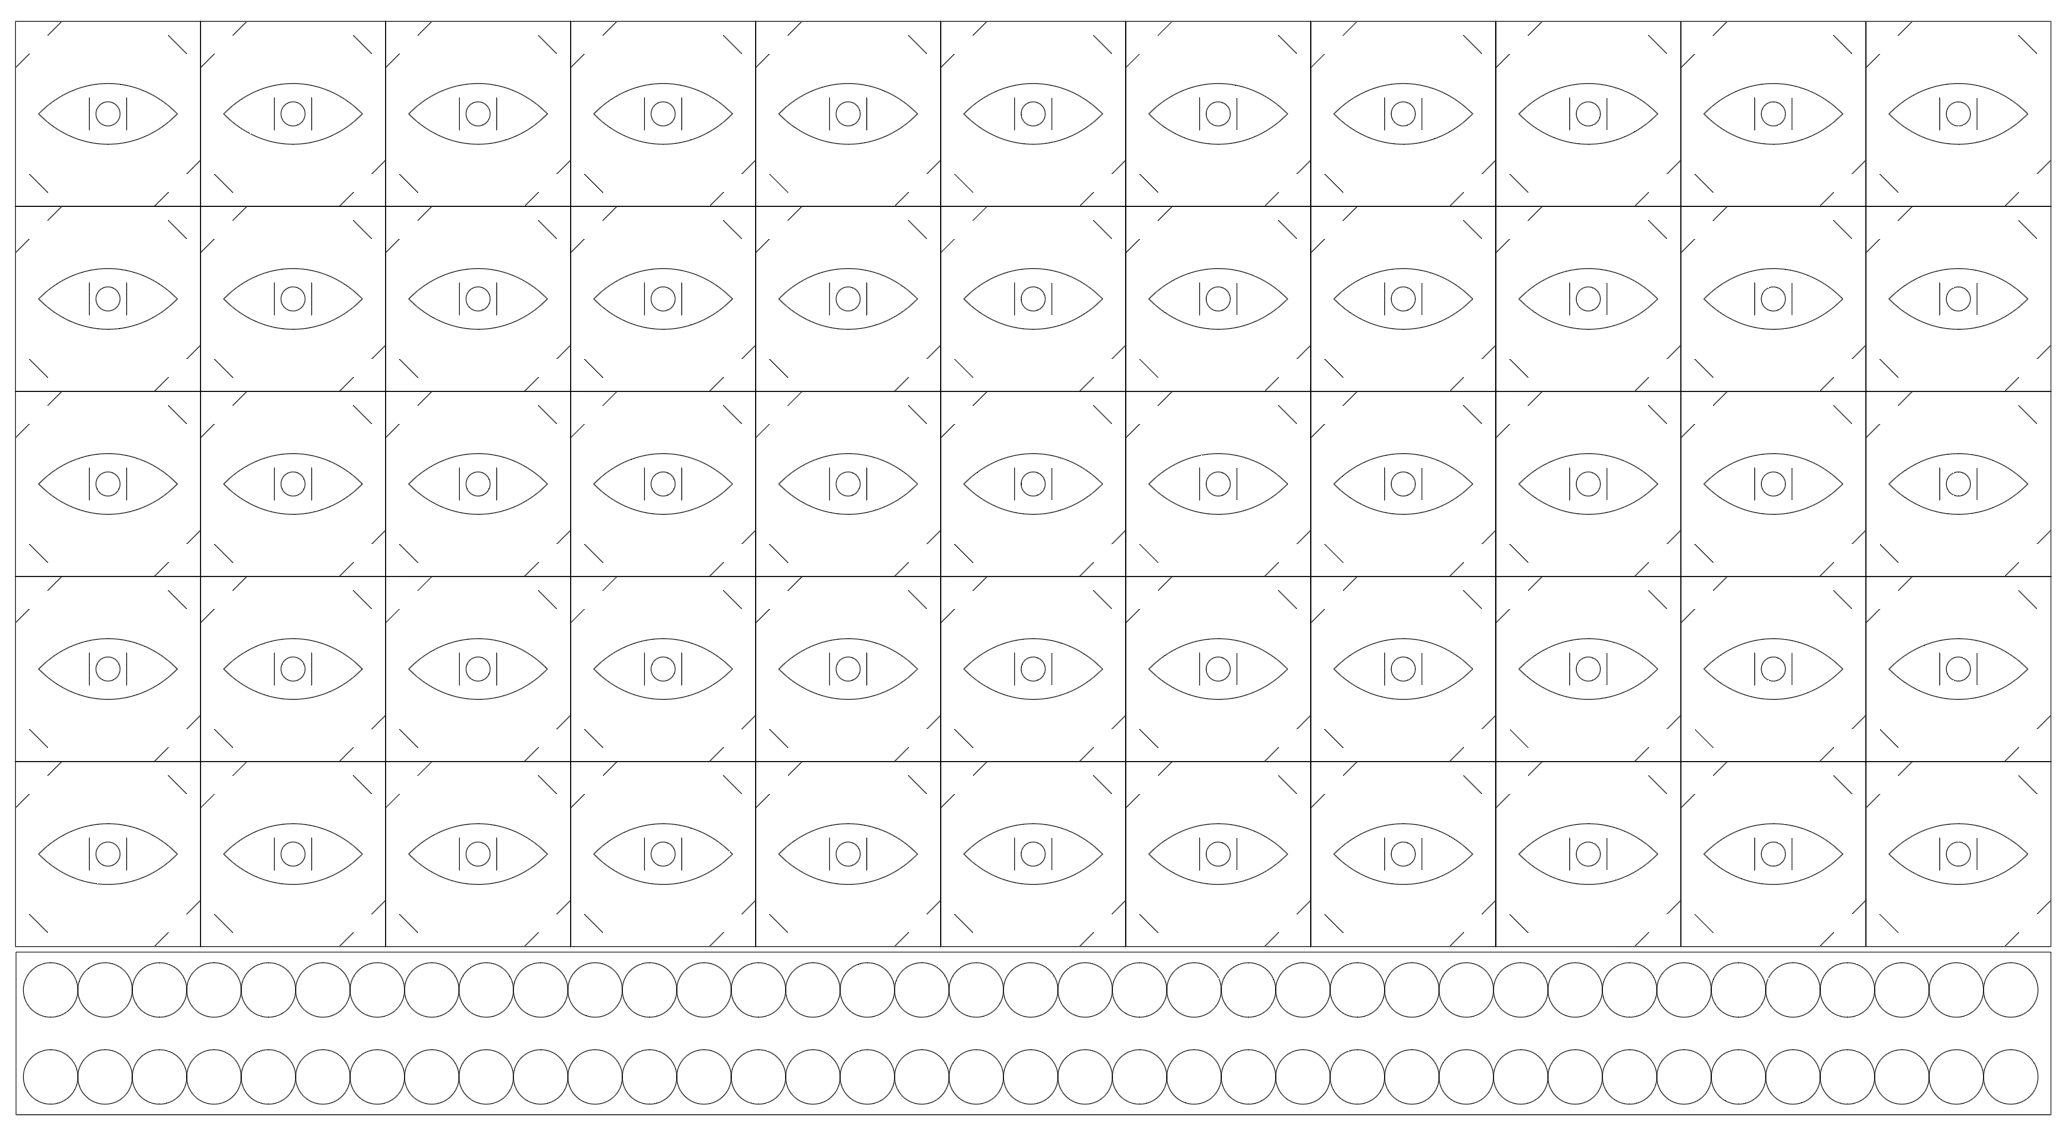
Step 3 - Once done, I designed a bigger pattern of the eye, following zero waste principle and using a whole piece of fabric (100 cm x 60 cm, the size of the laser cutting bed).
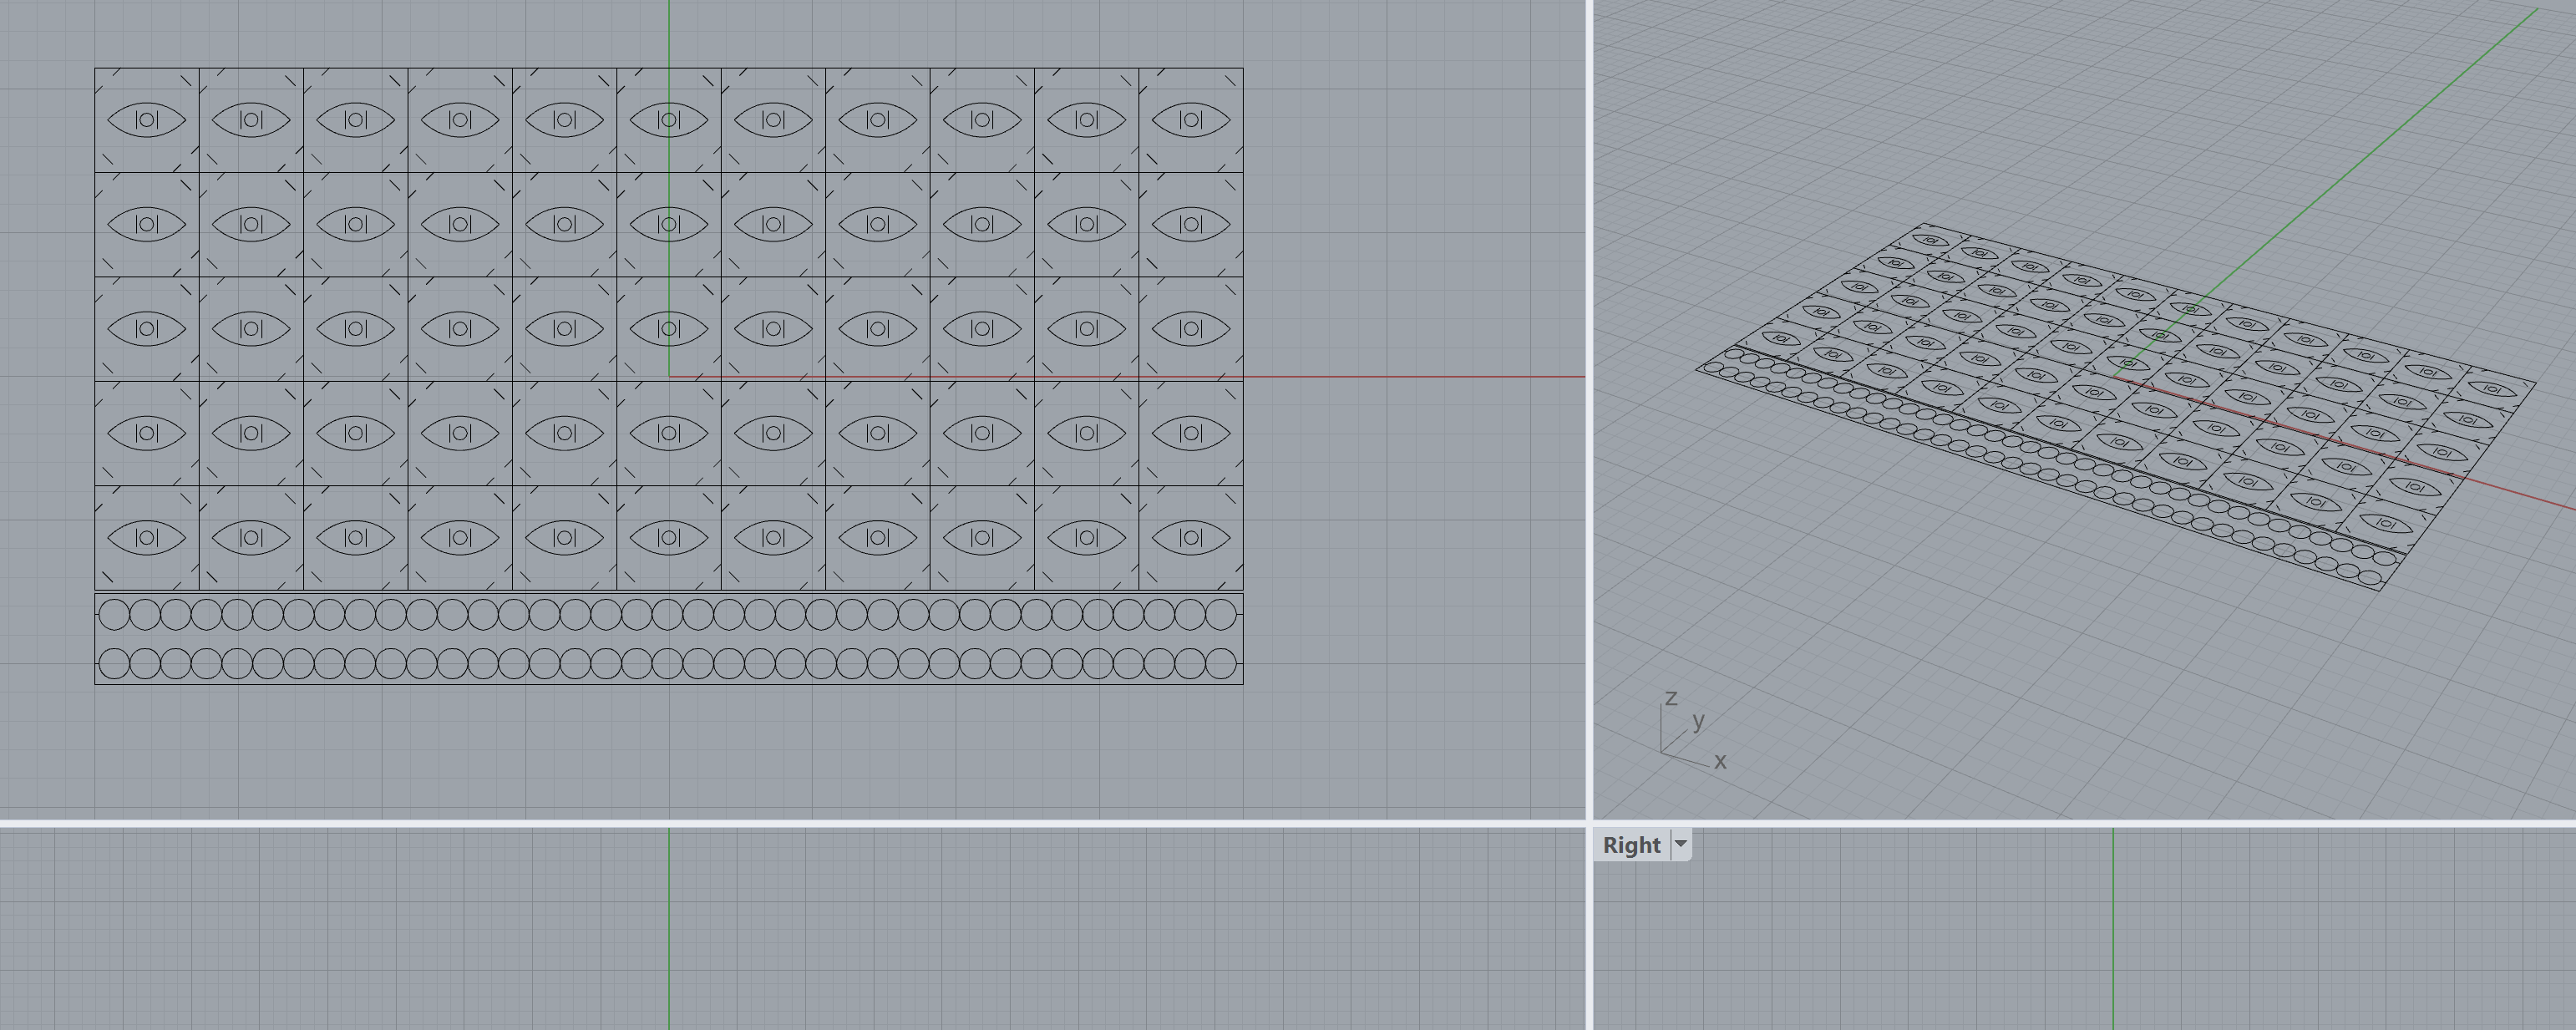
Step 4 - From Illustrator to Rhino, where steps for laser cutting are programmed.
Step 5 - Laser cutting
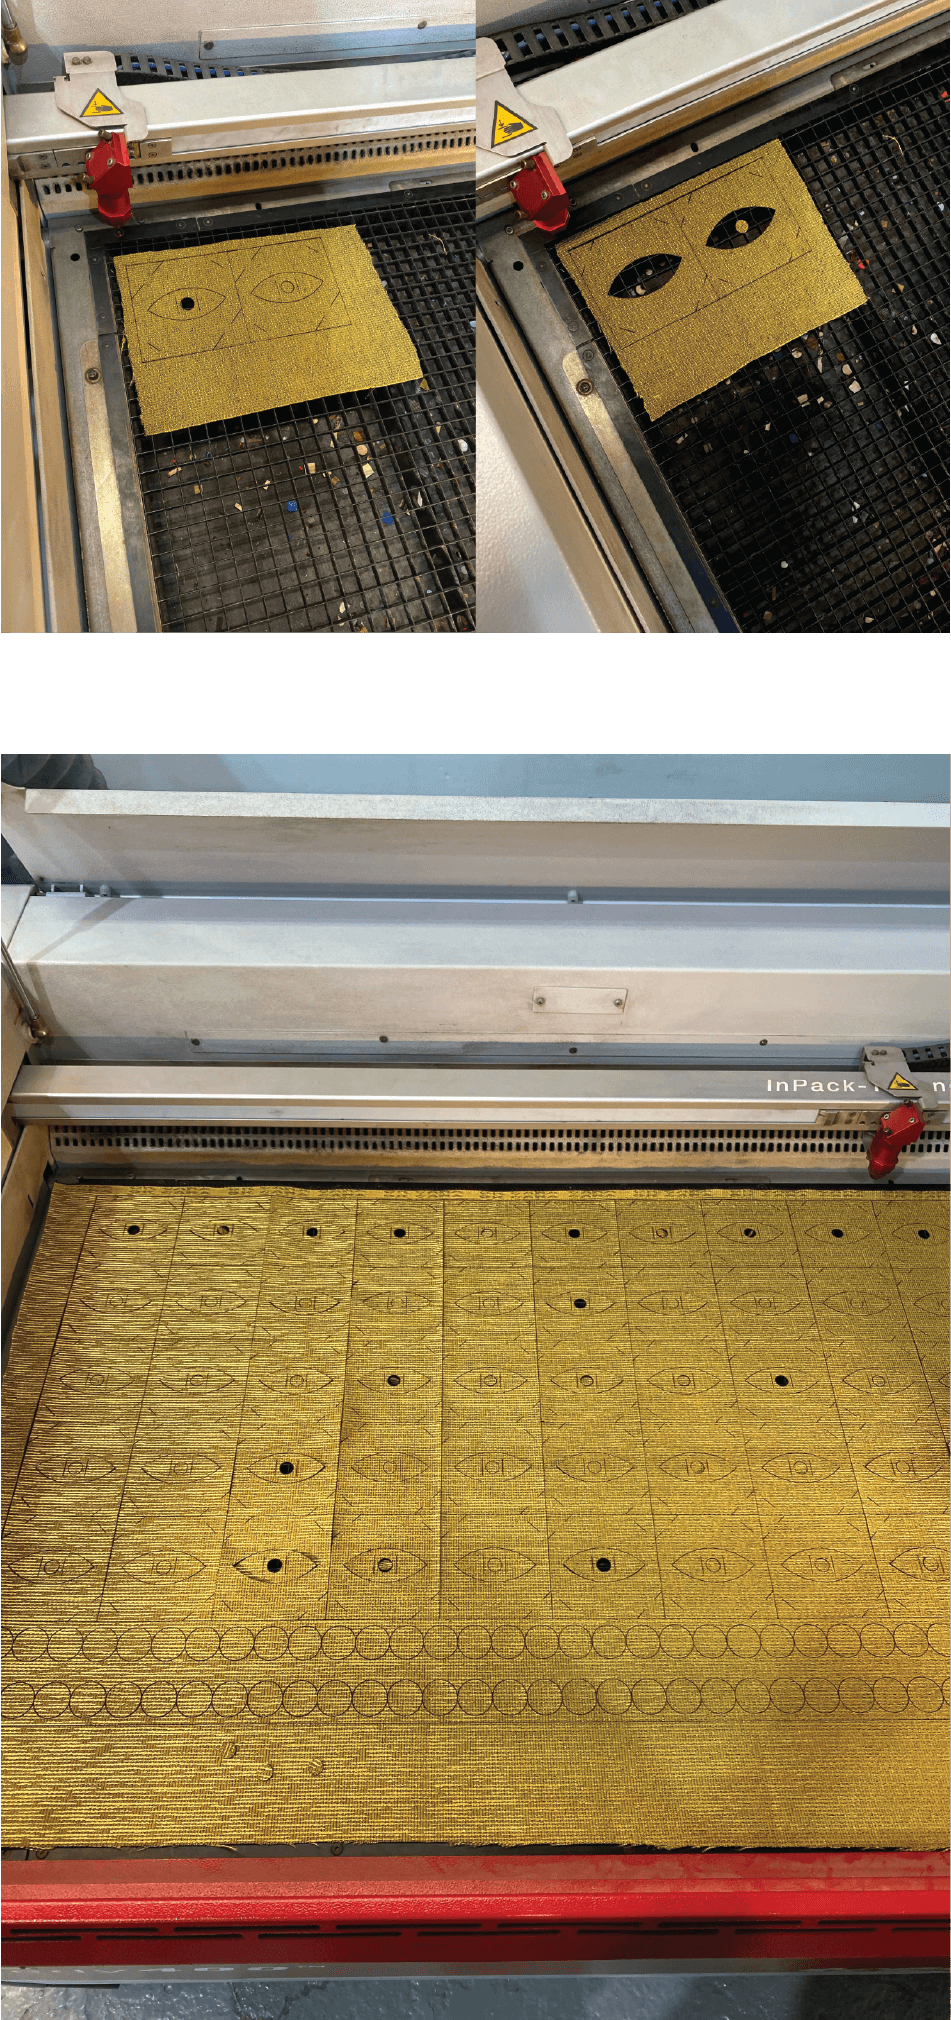
Laser settings:
Laser cutting settings are customized based on the material you want to cut. For this particular assignment, I used a golden woven synthetic fabric that felt durable enough to hold the structure together and comfortable to wear. However, the initial settings I used did not work well with the fabric, resulting in incomplete cuts. I had to modify the settings to get the perfect cut that did not burn the fabric.
First settings i used:
| Power | Speed | Hz |
| 60 | 4 | 1000 |
Settings that work with this fabric.
| Power | Speed | Hz |
| 60 | 2 | 1000 |

Step 6 - Construction process
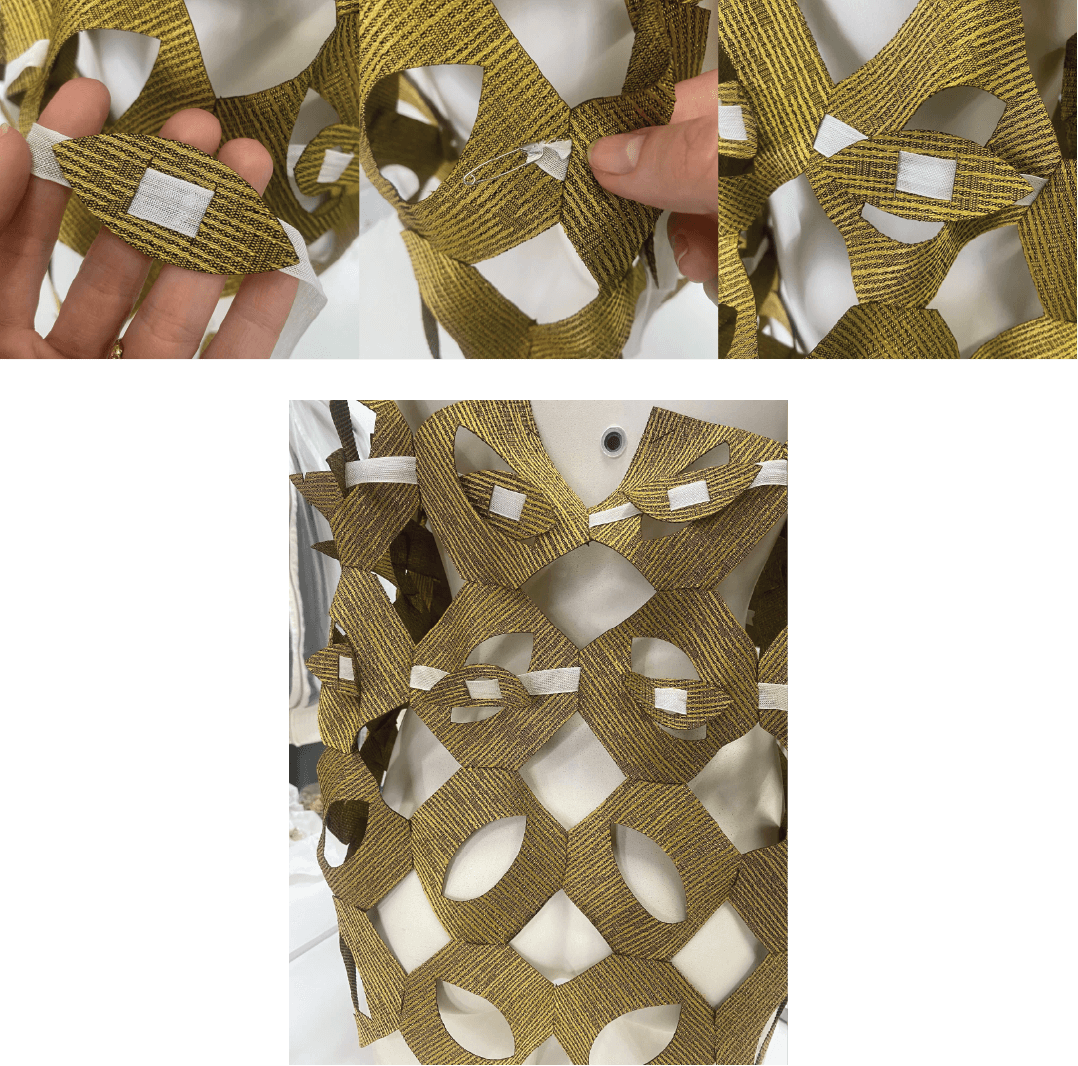
Final outcome

Files
The file for the eye pattern can be downloaded here.