11_TEXTILE SCAFFOLD
Overview
A textile scaffold refers to a structure made from textile materials, typically fibres or fabrics, that is used to provide support, reinforcement, or containment in various applications. Textile scaffolds find applications in different fields, including construction, engineering, medicine, and tissue engineering. The choice of textile materials can vary based on the specific requirements of the application.
This week consisted of 7 different techniques for reshaping, restructuring or reinforcing textiles. The fun part was an exploration of how to make soft materials look hard, or hard materials look soft.
• Leather molding
• Biocomposites & composites
• Digital & biological fabrication
• Crystallization using alum and borax salts
• Fabric formwork
• CNC milling for making textile molds
• Wood + textile lamination
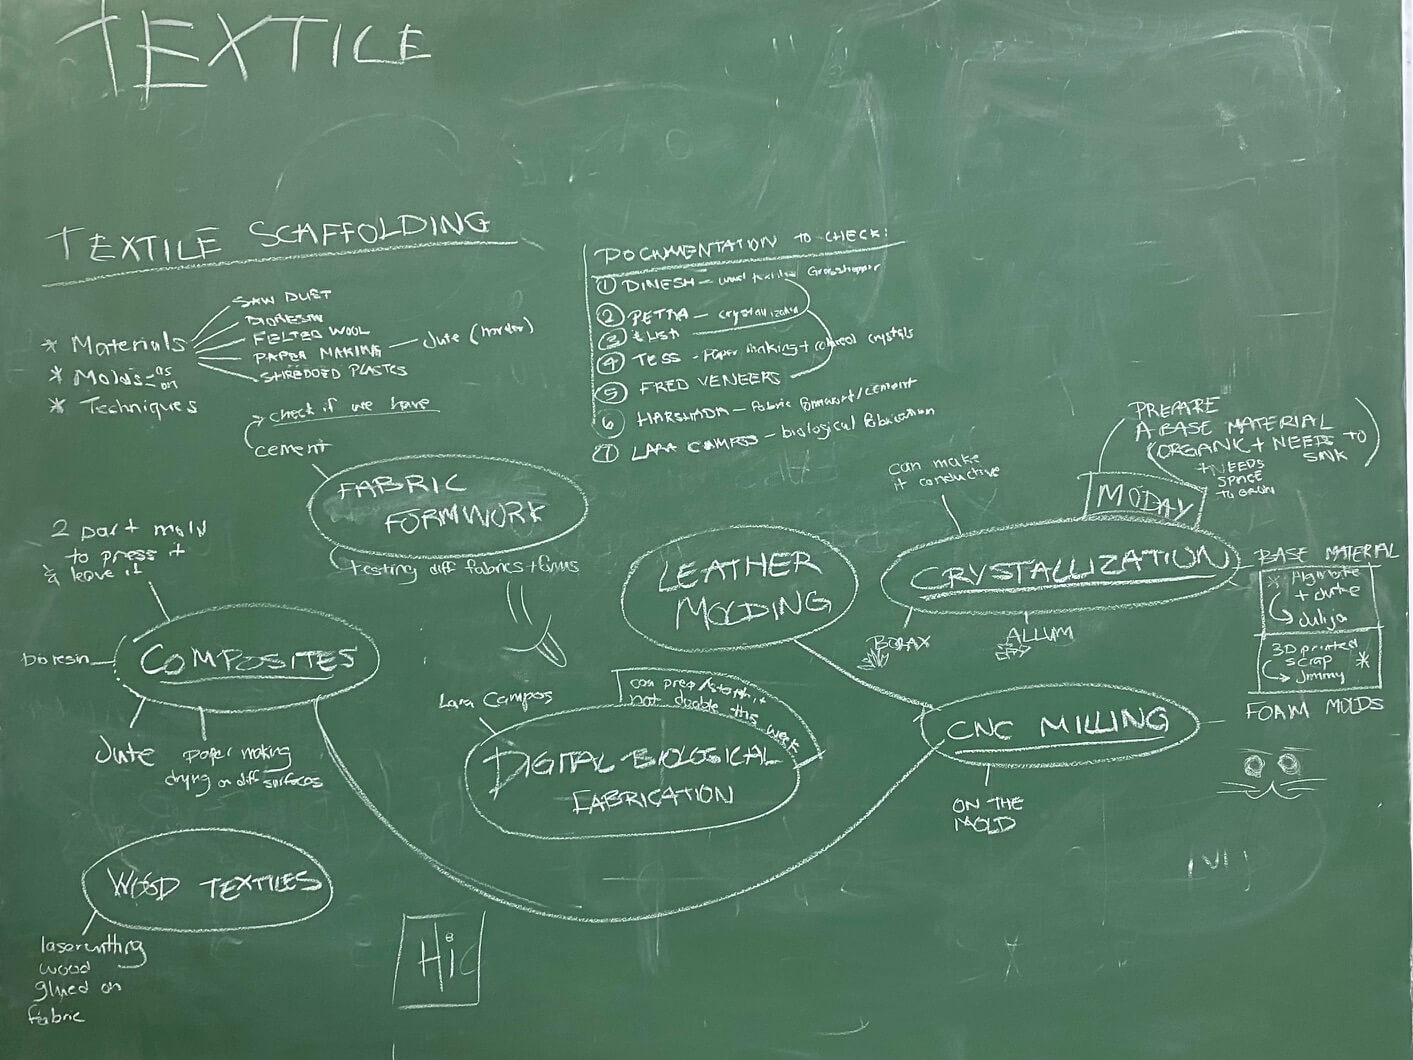
After the global week's lecture, we as a group had a brainstorming session and put down all the materials, techniques and principles, that are available at our FabLab in Barcelona and would help to guide us throughout this assignment.
Inspiration & References

1 – Sea salt as a building material - Industry by Nature, by Karlijn Sibbel
2 – Balmain's leather molded dress
3 - XenoDerma, Spider web morphogenesis - by Ecologic Studio
4 - Gaetano Pesce - Golgotha Chair, 1972, MoMa
5 - Neri Oxman - Silk Pavilion I
6 - The Bagworm moth caterpillar cuts up pieces of plant to create itself a home
CNC Milling
CNC milling, or Computer Numerical Control milling, is a machining process that utilizes computerized controls and cutting tools to remove material from a workpiece. This process is widely used in manufacturing and prototyping to create complex parts and components with precision. For this assignment, we used a 3-axis subtractive manufacturing process.

Advantages of CNC milling technology:
• Precision: CNC milling machines can achieve high levels of precision and accuracy in machining complex geometries.
• Repeatability: Once a CNC program is created, the same program can be used to produce identical parts repeatedly.
• Versatility: CNC milling can be used to machine a wide range of materials, including metals, plastics, and composites.
Steps we took for making a mold
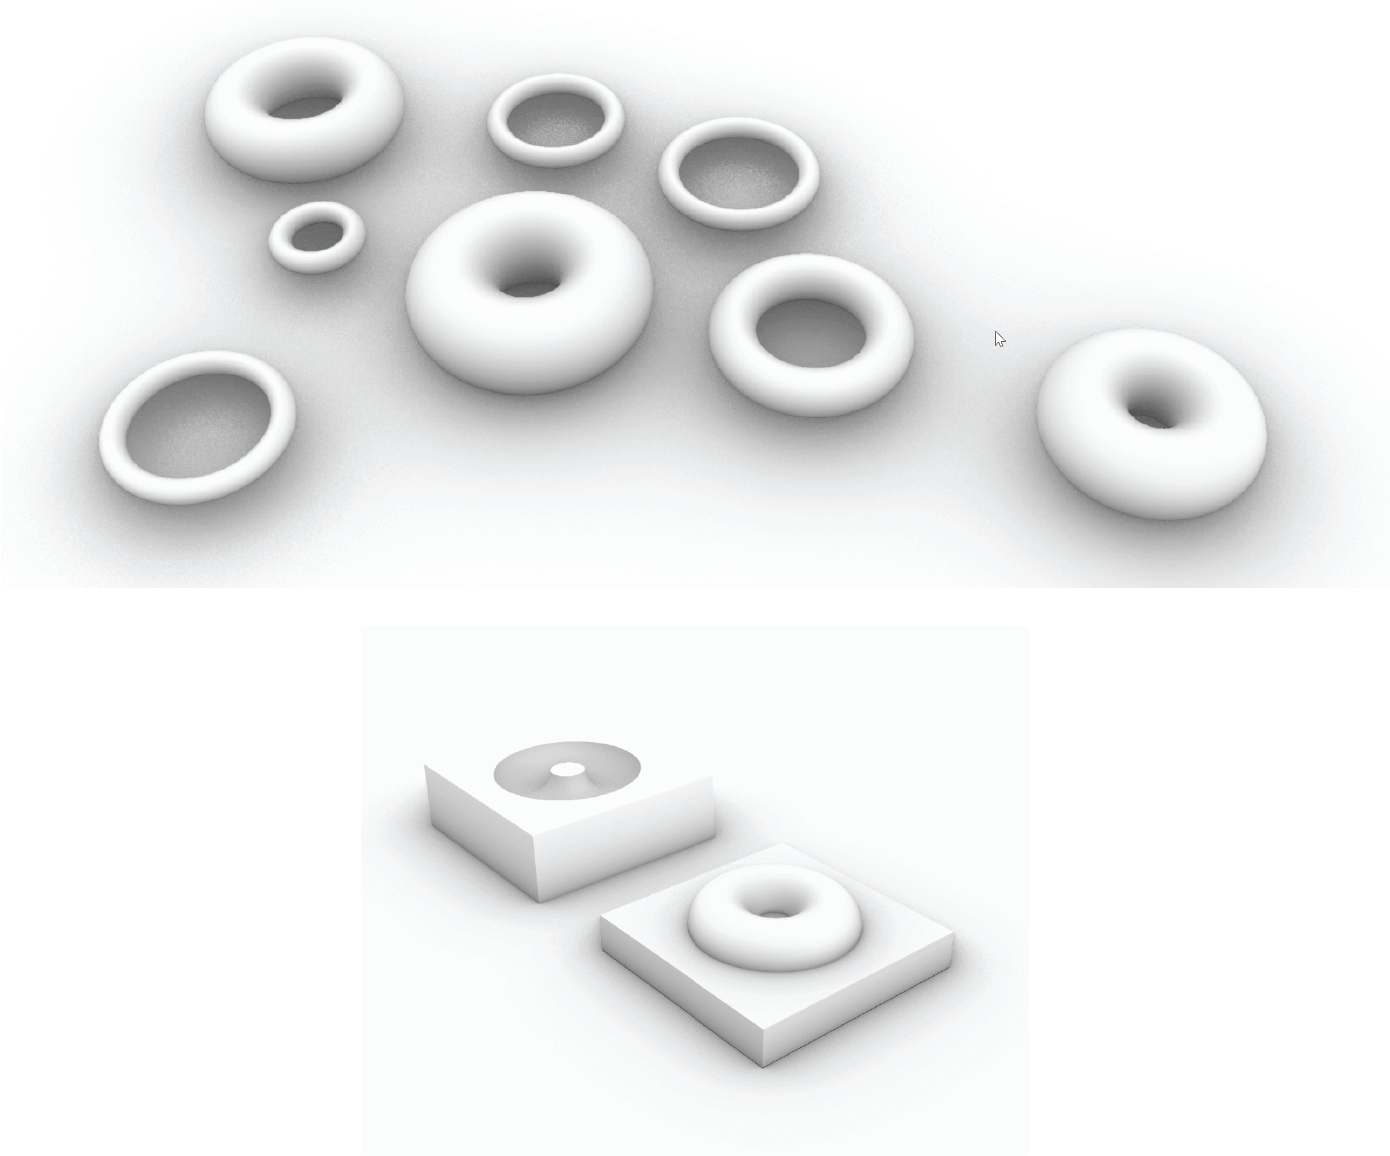
1. Designing the CAD model:
The first step involved designing the desired model in Rhino. For this assignment, I chose to make a doughnut mold. A simple round shape of the model would allow me to use different materials to mould them. Note: Keep in mind that sharp edges might not work well with molding certain materials. The thickness of the materials you want to use for the molds is also something you need to consider while designing the model.

2. Programming settings and instructions for the CNC machine:
Once the design was complete, we put our model through the CNC program – RhinoCam plugin, which creates the toolpaths and a G-code (also RS-274) for the machine to process.
RhinoCam file set up process:
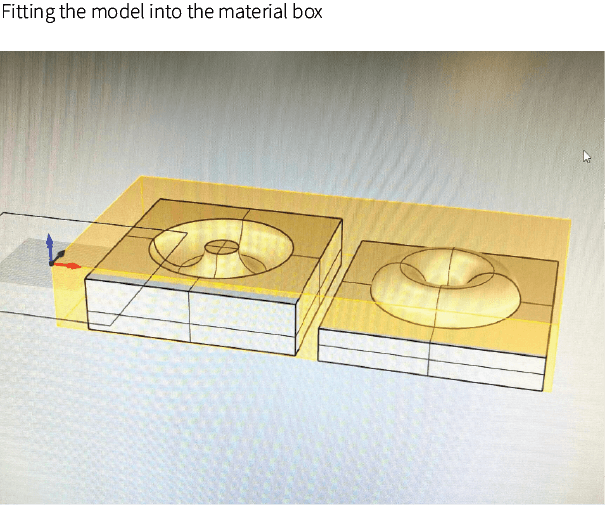
Step 1 - Setting up the material you will be cutting in the Stock section. The most important thing is to select the correct zero point, the correct coordinates and the correct height dimension of the model. The zero point is the top left of the stock box. You have to measure the material the machine will drill into, and according to that, you set these settings correctly. This is an important step because the following ones will be set by this one.
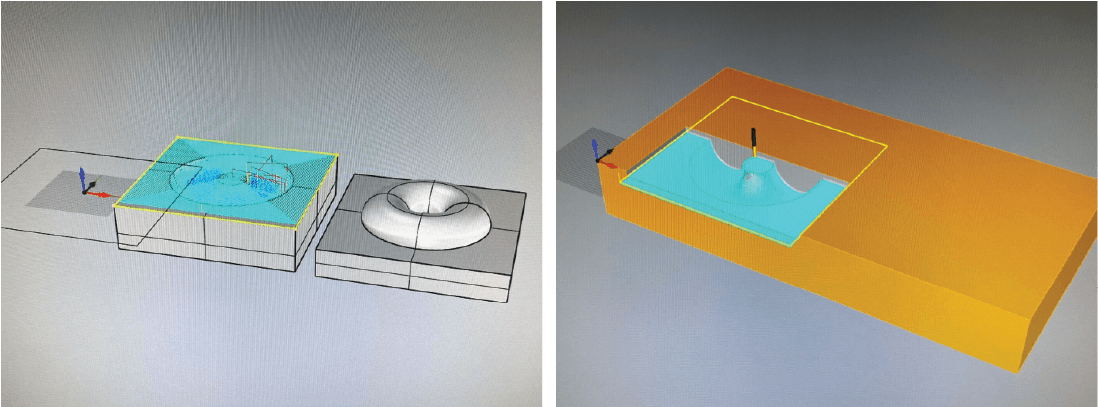
Step 2 - Once the box is set, you have to make sure that the model fits inside. You kind of dip it in, covering all the surfaces of it. Note: to minimize the cutting material and the time of the drilling, try to put the model as close to the surface of the box as possible.
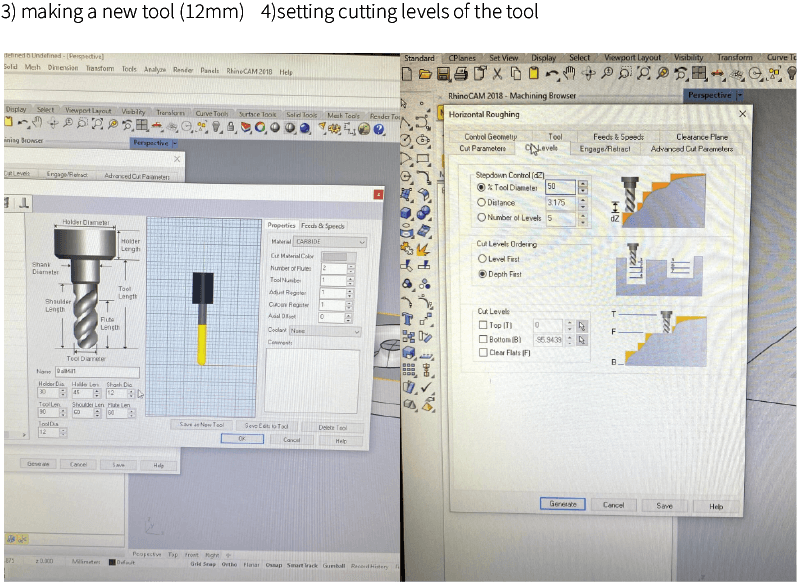
Step 3 - The next step is setting up the first pathway for the drill, it's called Horizontal Roughing. With that one, the machine cuts out most of the material. Under the Machine operations, you can find tools for the job. Select horizontal roughing and a window of different settings appears. For this documentation, I will show the important ones, but you can find really good documentation on these settings at Hala Amer's page.
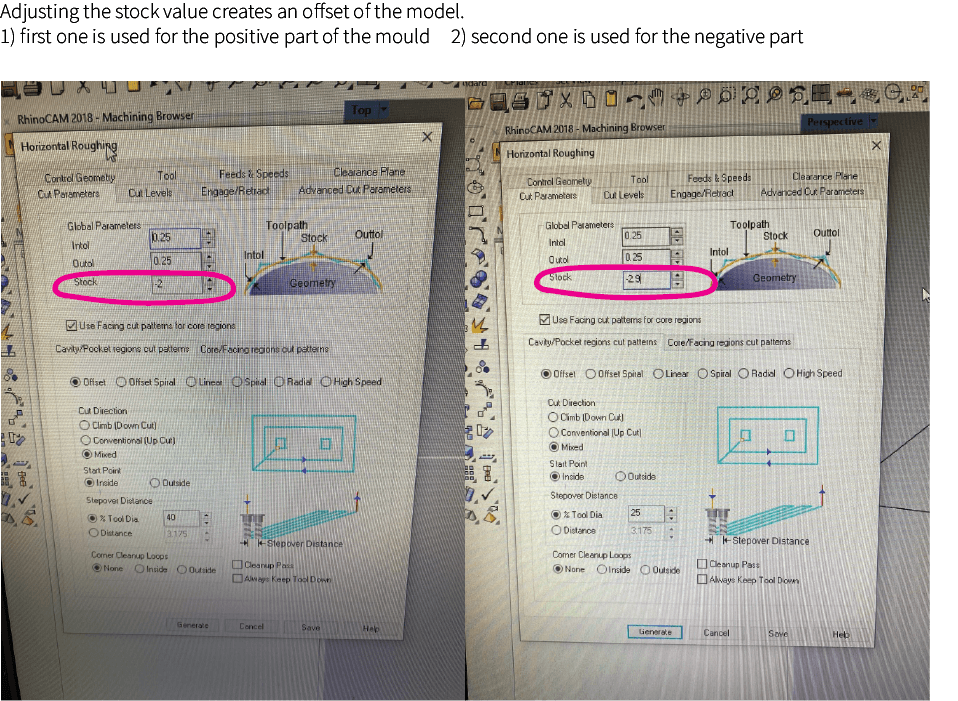
Selecting the first part of the mould by choosing the correct edges of the surface. Then create a new tool, using a 12mm ball-end for the roughing process. An important setting is cut parameters. These define the offset of the model so that you can mould different thicknesses of the materials. If you are planning to use a thicker one, the offset should be a higher number. Note: Keep in mind you need to balance this setting with both positive and negative part.

The next step is called Parallel Finishing. This step creates a detailed, smooth and even surface of the model. Creating a new tool with 6mm drilling ball-end. The settings used for the roughing process stay the same, you only change the tool, from 12mm to 6mm. The last part is Axis Profiling. This one cuts out the model from the main box material. Make sure you cut outside your vector so that the drill doesn't touches your model. The depth and width are determined by the box's parameters.
Step 4 - Once done, export the job operations separately. It's good to name the jobs by the tool bit diameter and the process.
Step 5 - After that, the program creates G-codes for the three machine processes.

3. Setting up the workplace bed:
To set up the CNC bed, place the material according to the design you have made in the Rhino. To put it firmly in place and prevent it from moving during the process, you have to drill 4 little boards on each side of the model for it to hold it down.

4. Machining:
The machine follows the programmed instructions made before, that move the cutting tool along the toolpaths, removing material from the workpiece by reading the G-code.


5. Final outcome:

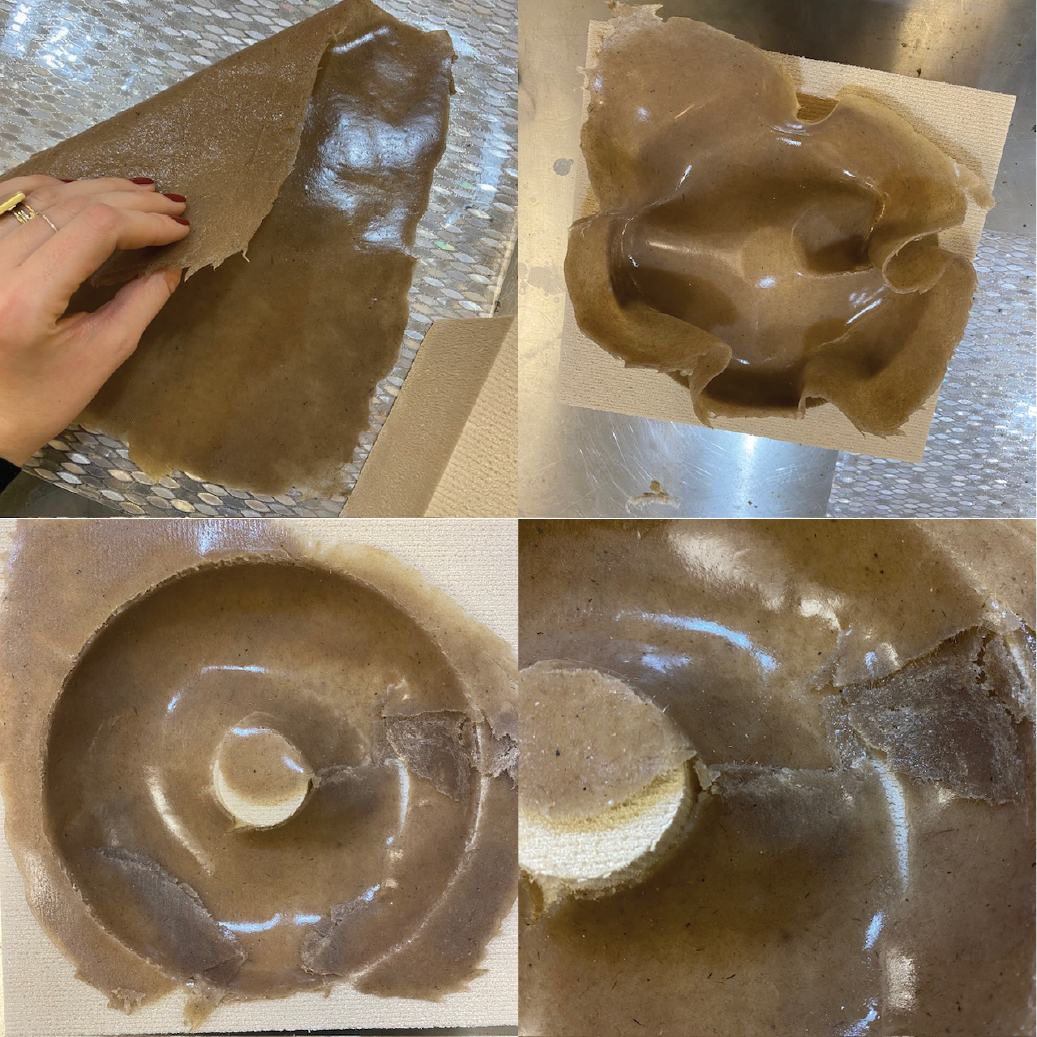
Molding leather and jute biocomposite
Leather
Steps we took for leather molding:
Step 1 - Preparation of the material: searching for the right piece in a box of cut-out scraps of leather and faux leather. This techniques will only work with real leather and not synthetic one.
Step 2 - Cooking the leather for at least half an hour for it to soften. The longer you cook it the better outcome will be. Note: the water has to simmer all the time material is soaked.
Step 3 - Afterwards, you carefully place the leather on top of the mold and pull it from all the sides to firmly stretch the material. Close the mold with the negative/positive part and attach the clamps on at least 3 sides of the mold strongly.
Step 4 - Let the mold do its thing. The leather is left inside until it dries, but after two or three days the results will also be nice.
Results


Note: We had some trouble with the CNC machine in the FabLab, it did not work properly for two days. The results shown were made with an old mold, a bicycle seat.
Jute biocomposites
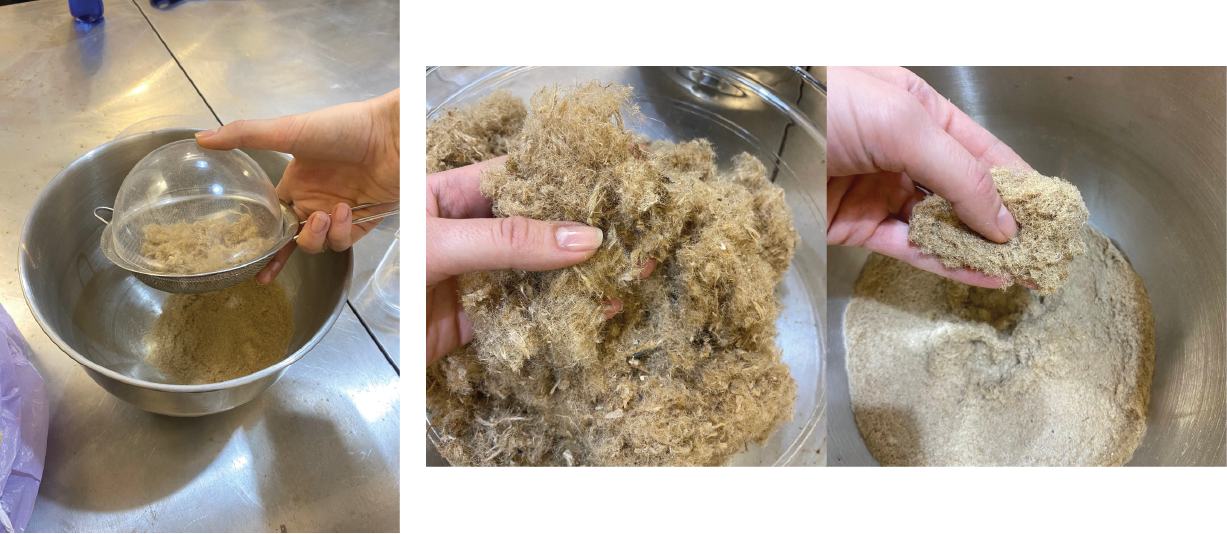
I tried to make a biomaterial, that would be molded with the model I made. First I tried to get the fibres by cutting jute bags with the shredder at the lab. I had to run the jute fabric through three times, to get the best results.

After that, I divided the material into two parts. The first one was a powdery-like material, a finer and softer one.
Recipe I used to make alginate binder and jute fibres composite
| Sodium Alignate | 15g |
| Water | 500ml |
| Glycerol | 30ml |
| Jute fibers/powder | 15g-20g |
| Calcium chloride | 10g |
| Water | 100ml |
For this assignment, I only used the fine one and combined it with alginate. The plan was:
1 – Make a biomaterial
2 - Let it half-dry
3 – Press it into the mold
4 – Let it dry
Results
The outcome of this plan was not the best one. First, I believe alginate might not be the best binder for jute fibres and molding technique because it tends to fall apart easily while still a bit wet. Second, I think I should have let the material dry in the mold before taking it out. And third, I should try to make a biomaterial and pour it into/onto the mold. Definitely worth trying out.

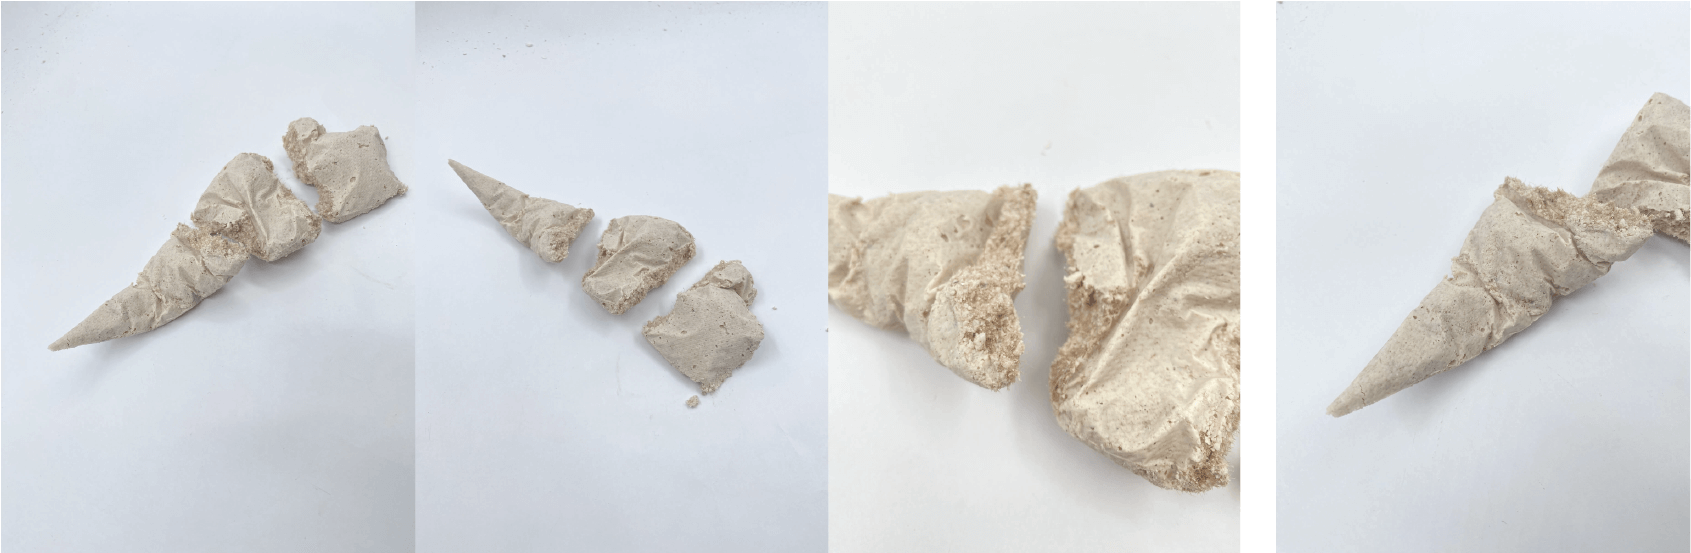
Crystallization
The crystallization technique, I find it interesting due to the exploration and observation of the matter itself. The creation of crystals and the transformation of different aggregate states was an exciting process. For this experiment, I used alum salt and borax salt. The same process refers to both ingredients.
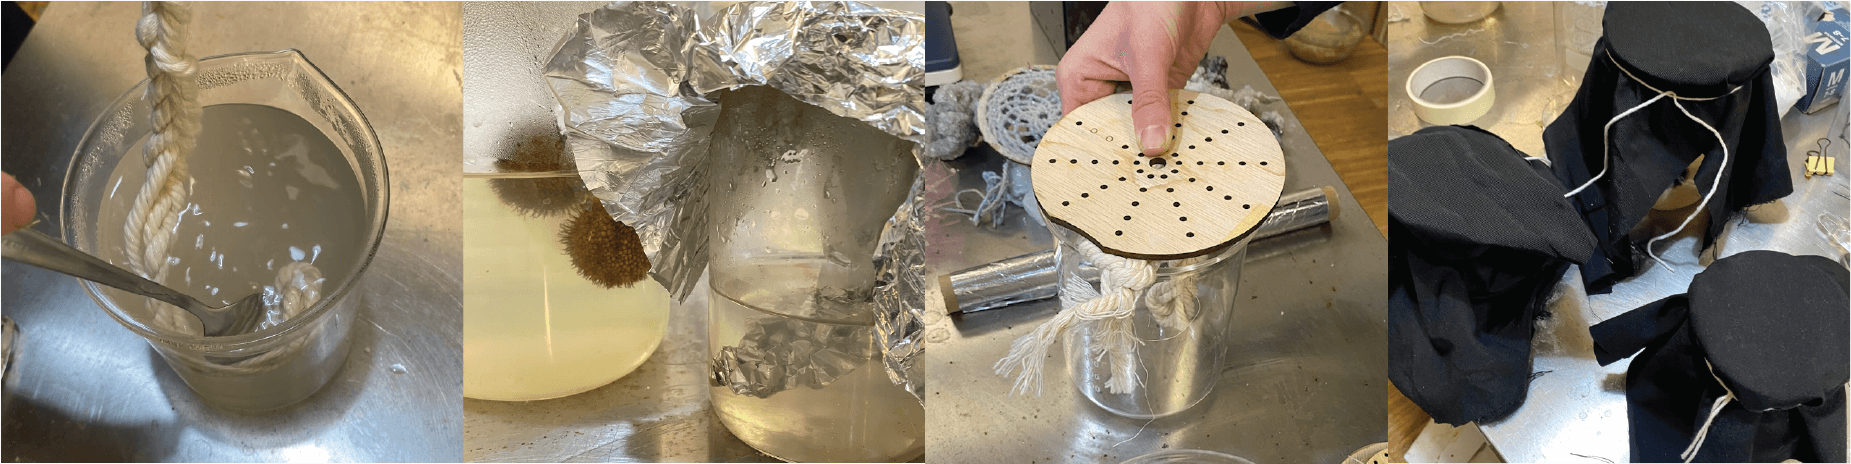
Step 1 – Preheat the water until it starts to boil.
Step 2 – Add the alum/borax salt. It's important to add it while water is still hot.
Step 3 – Stir the mixture well, until all the salt dissolves. I mixed it for at least 10 min. This creates more energy between the particles and the crystallization results will be better.
Step 4 – Place the desired object into a bowl in a way that it doesn't touch any surface. This is an important step, if placed in the middle, the crystals will form better around the object and you will be able to get the finished result out of the bowl easier. We tied the objects with a thread.
Step 5 – Cover the bowl with aluminium foil or textile, and place it in a dark spot. Leave it there for at least 6h. The longer, the better. I left mines for a day.
Step 6 – Voilà!
KEEP IN MIND: The crystallization process will be more effective if the object chosen has a textured surface with holes or unevenness. This is because crystals adhere better to rough surfaces, which affects the final outcome.
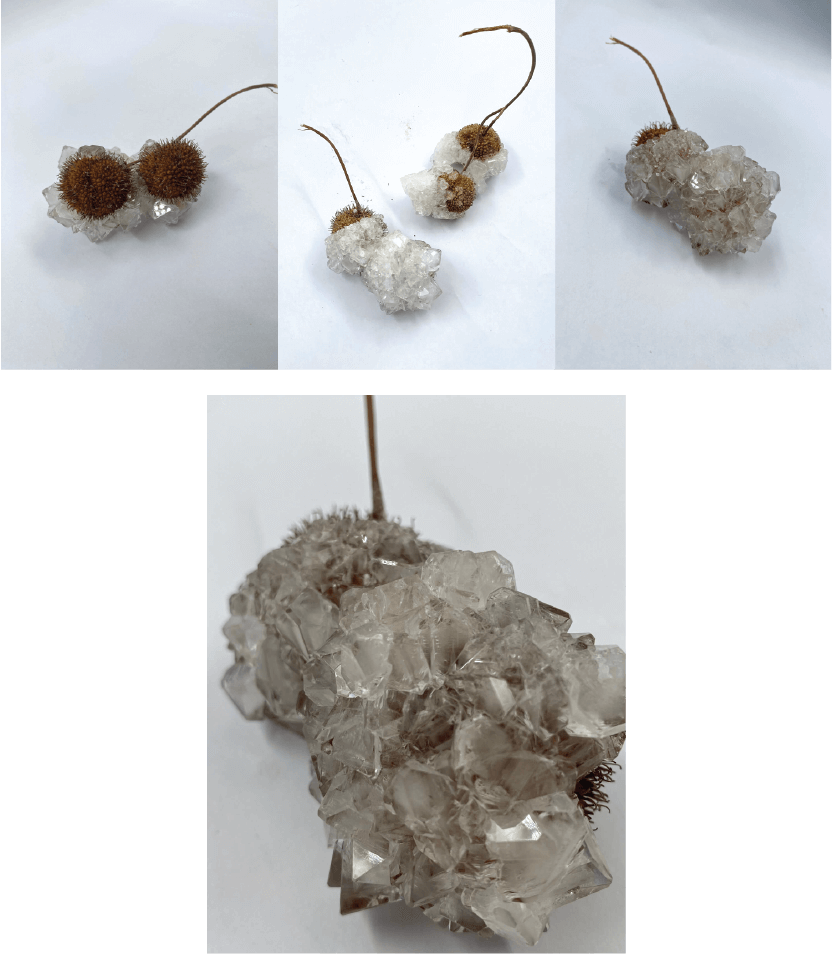
Alum
Alum refers to a class of chemical compounds that contain a double-sulfate salt. The most common form of alum is potassium aluminium sulfate which has been used for various purposes throughout history due to its astringent and antiseptic properties.

Recipe:
| Alum | 200g |
| Water | 500ml |
Results
Borax
Borax, also known as sodium borate, is a boron compound, a mineral, and a salt of boric acid. The most common form of borax is a white, crystalline powder that dissolves in water. It is naturally found in evaporite deposits produced by the repeated evaporation of seasonal lakes. It has been used for various purposes throughout history, including as a cleaning agent, a pesticide, and in the production of glass and ceramics.

Recipe:
| Borax | 120g |
| Water | 500ml |
Results

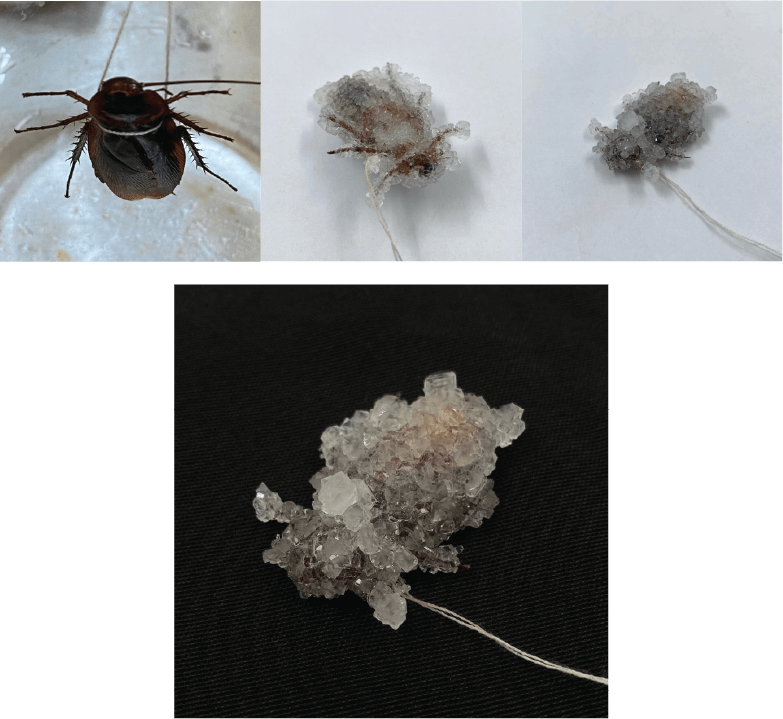
Note: For this purpose I did not do any harm to the la cucaracha. The boy was laying in our biolab for some time.
Fabric formwork
In this experiment, I played around with the contrast between soft and hard surfaces that can be created with the combination of different textiles, fibres and calcium carbonate.
Note: With these experiments I might not get the best results. The shown materials cracked a lot. That happend due to CC mixture not being thick enough and also the properties of the CC itself.
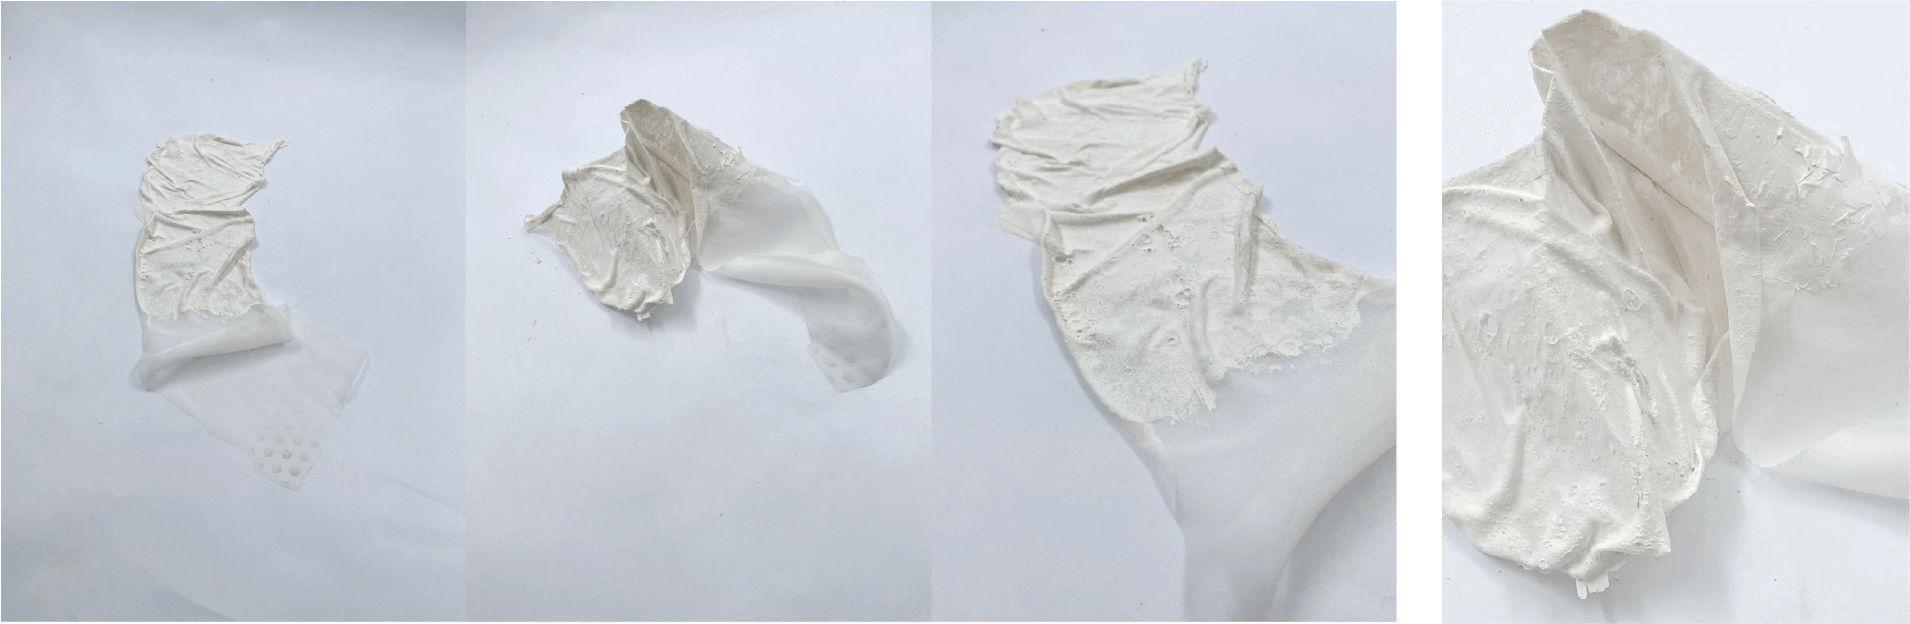
Calcium Carbonate + Silk
The silk experiment was made by dipping the fabric into the CC and water mixture. I left it to dry over the weekend. The results might not be the best ones. It seems the calcium carbonate was too liquid when I used it.
Calcium Carbonate + Jute fibers
In the next experiment, I tried combining jute fibres with CC to get a composite. The principle is quite simple, mixing the shredded jute fibers into a CC creates a composite, which can be either molded, combined with other material structures (wire), poured onto other surfaces etc.