Production
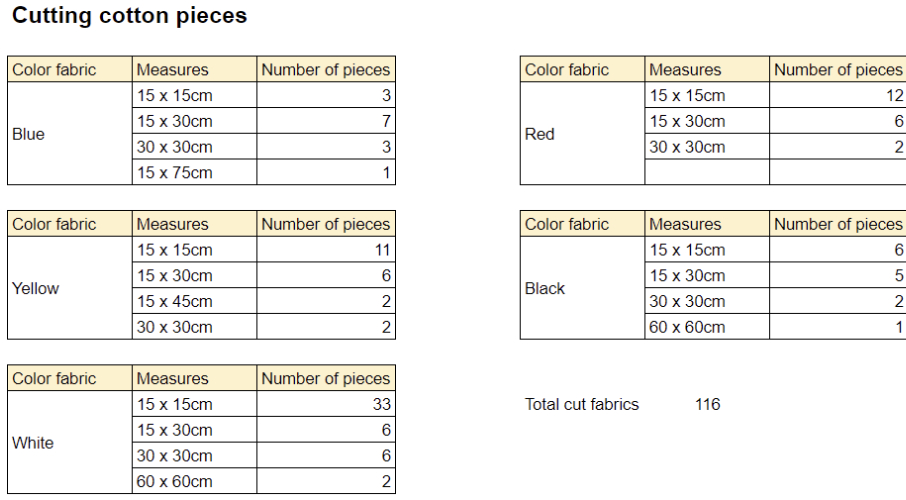
✂️ First, I cut all the pieces of black and white cotton (sheets collected from my French grandmothers' laundry) I needed for the dyeing and embroidery parts.
Fabric dyeing
The next step is to mordant the fabrics before dyeing. I then sorted the number of pieces I needed by color to be dyed.
| Color to | Fiber weight |
|---|---|
| Yellow | 210gr |
| Red | 175gr |
| Blue | 219gr |
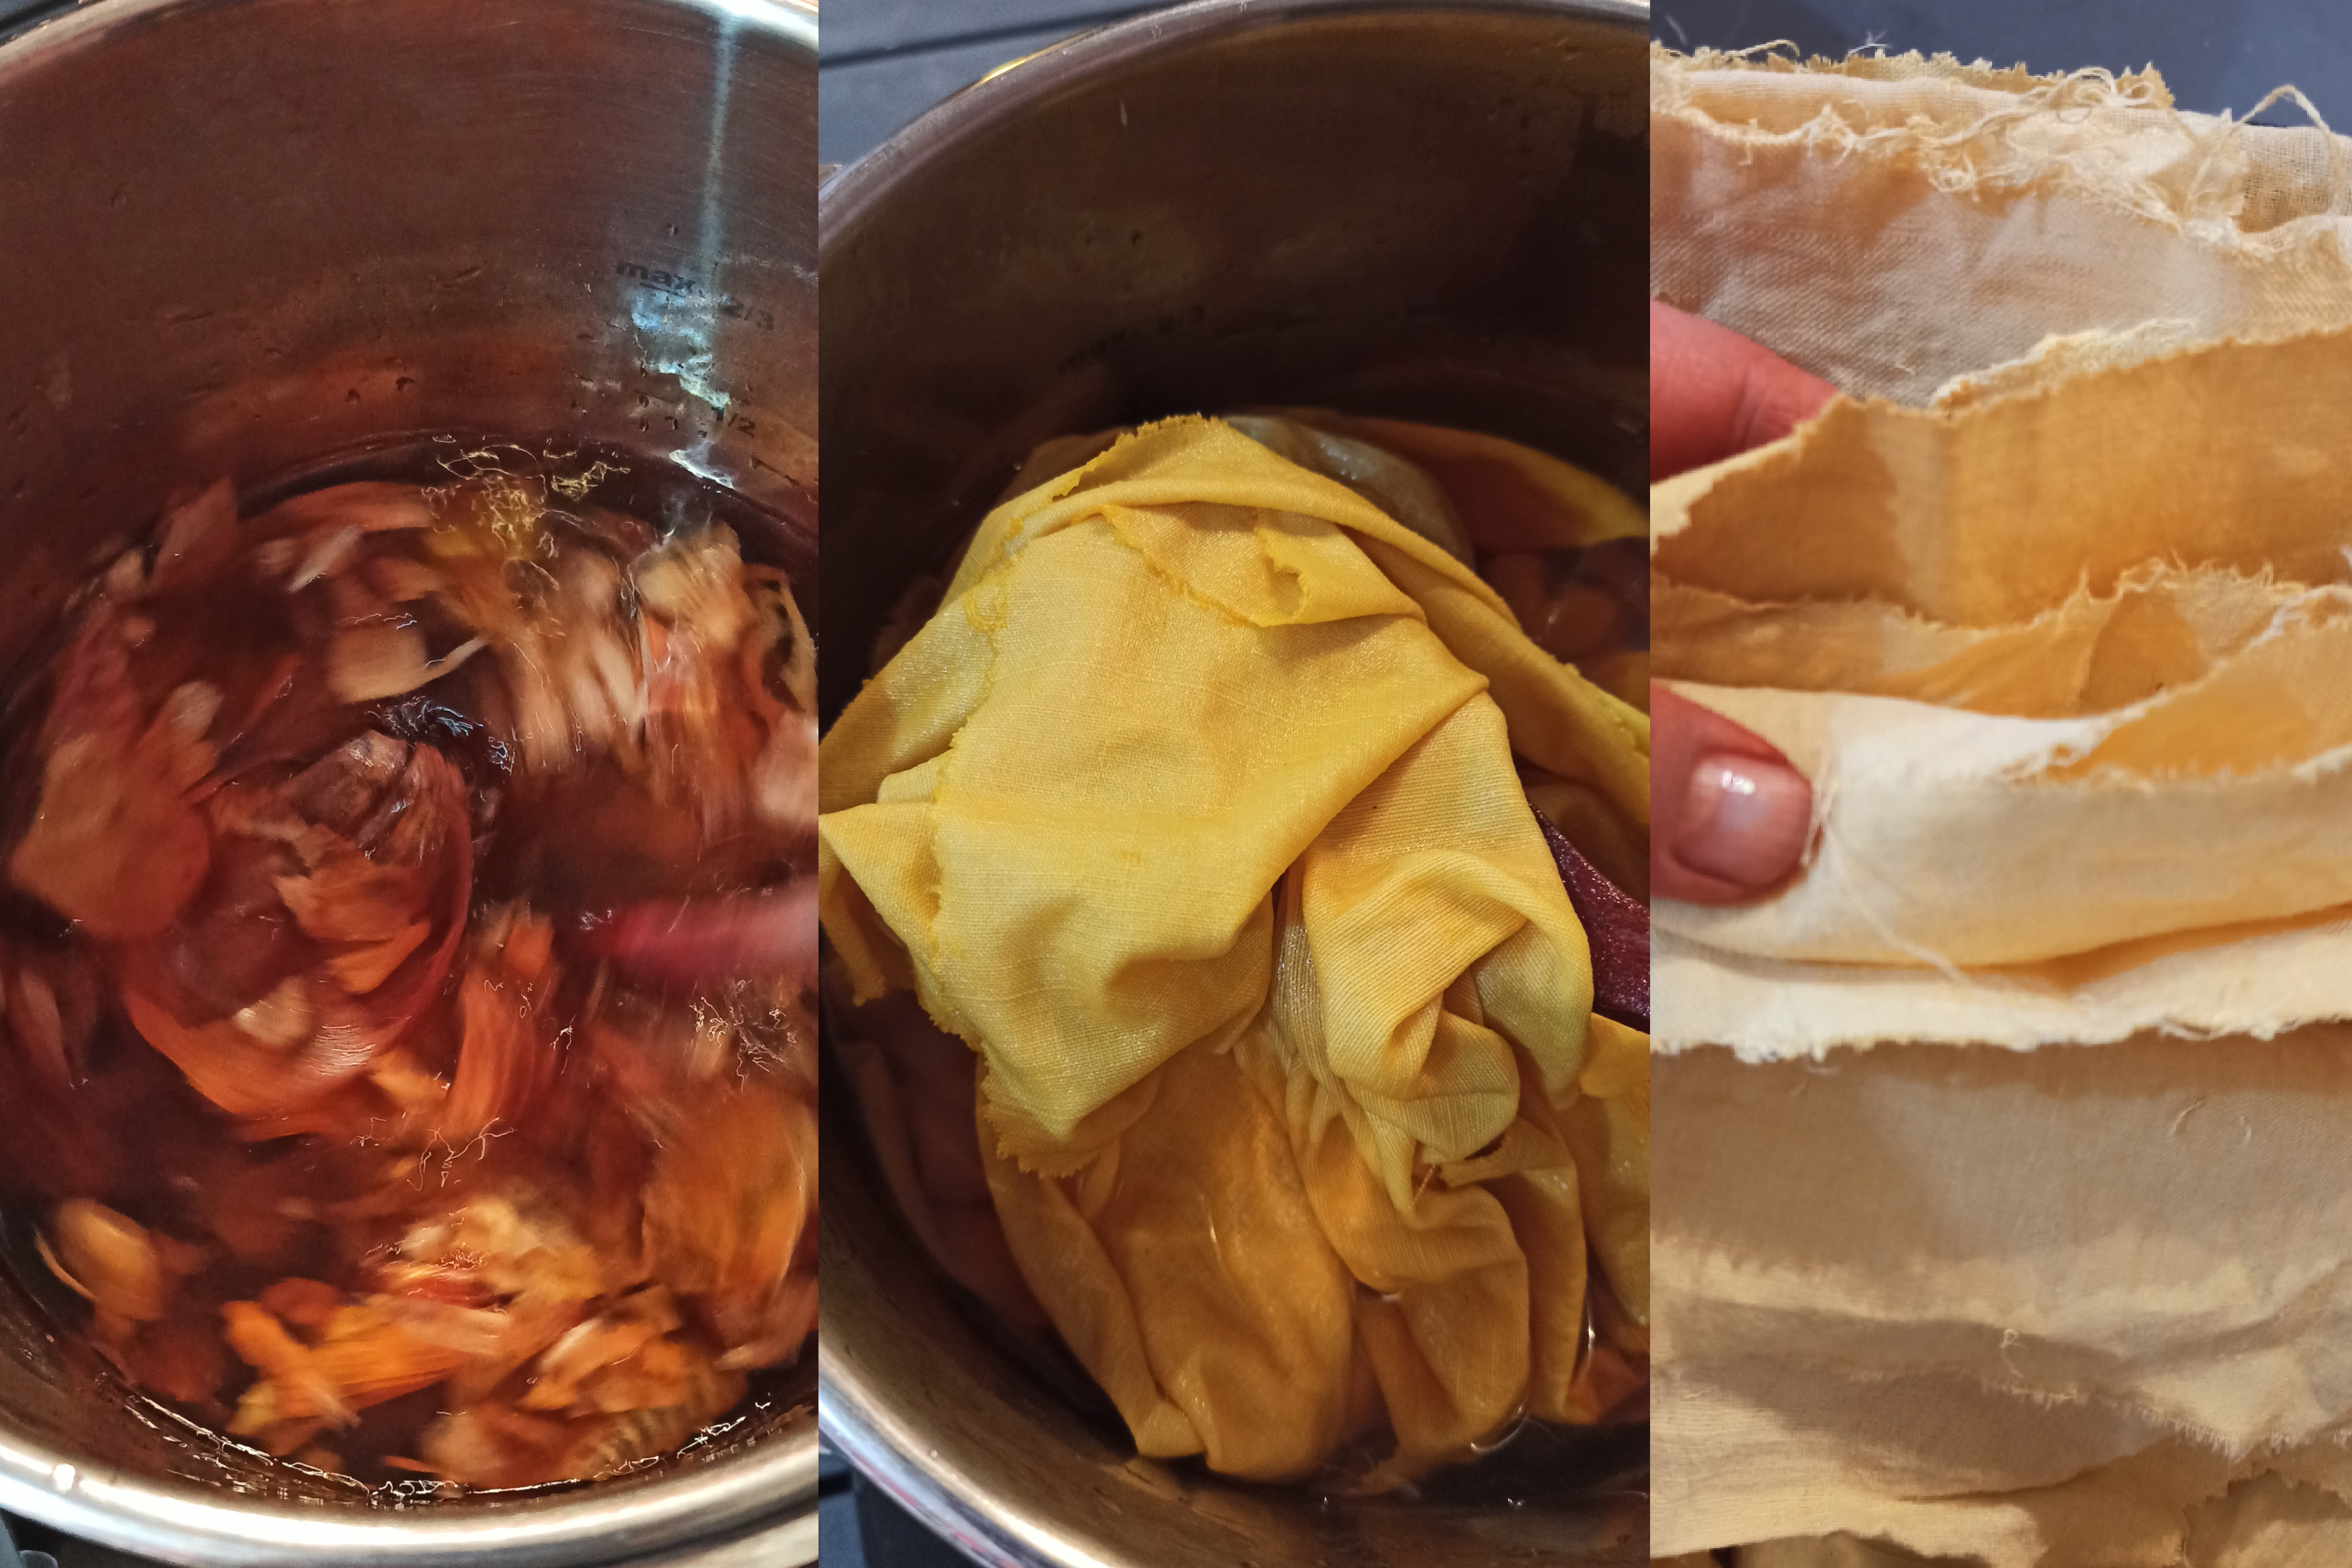
Onion dye
I used 25g of onion skins from my kitchen.
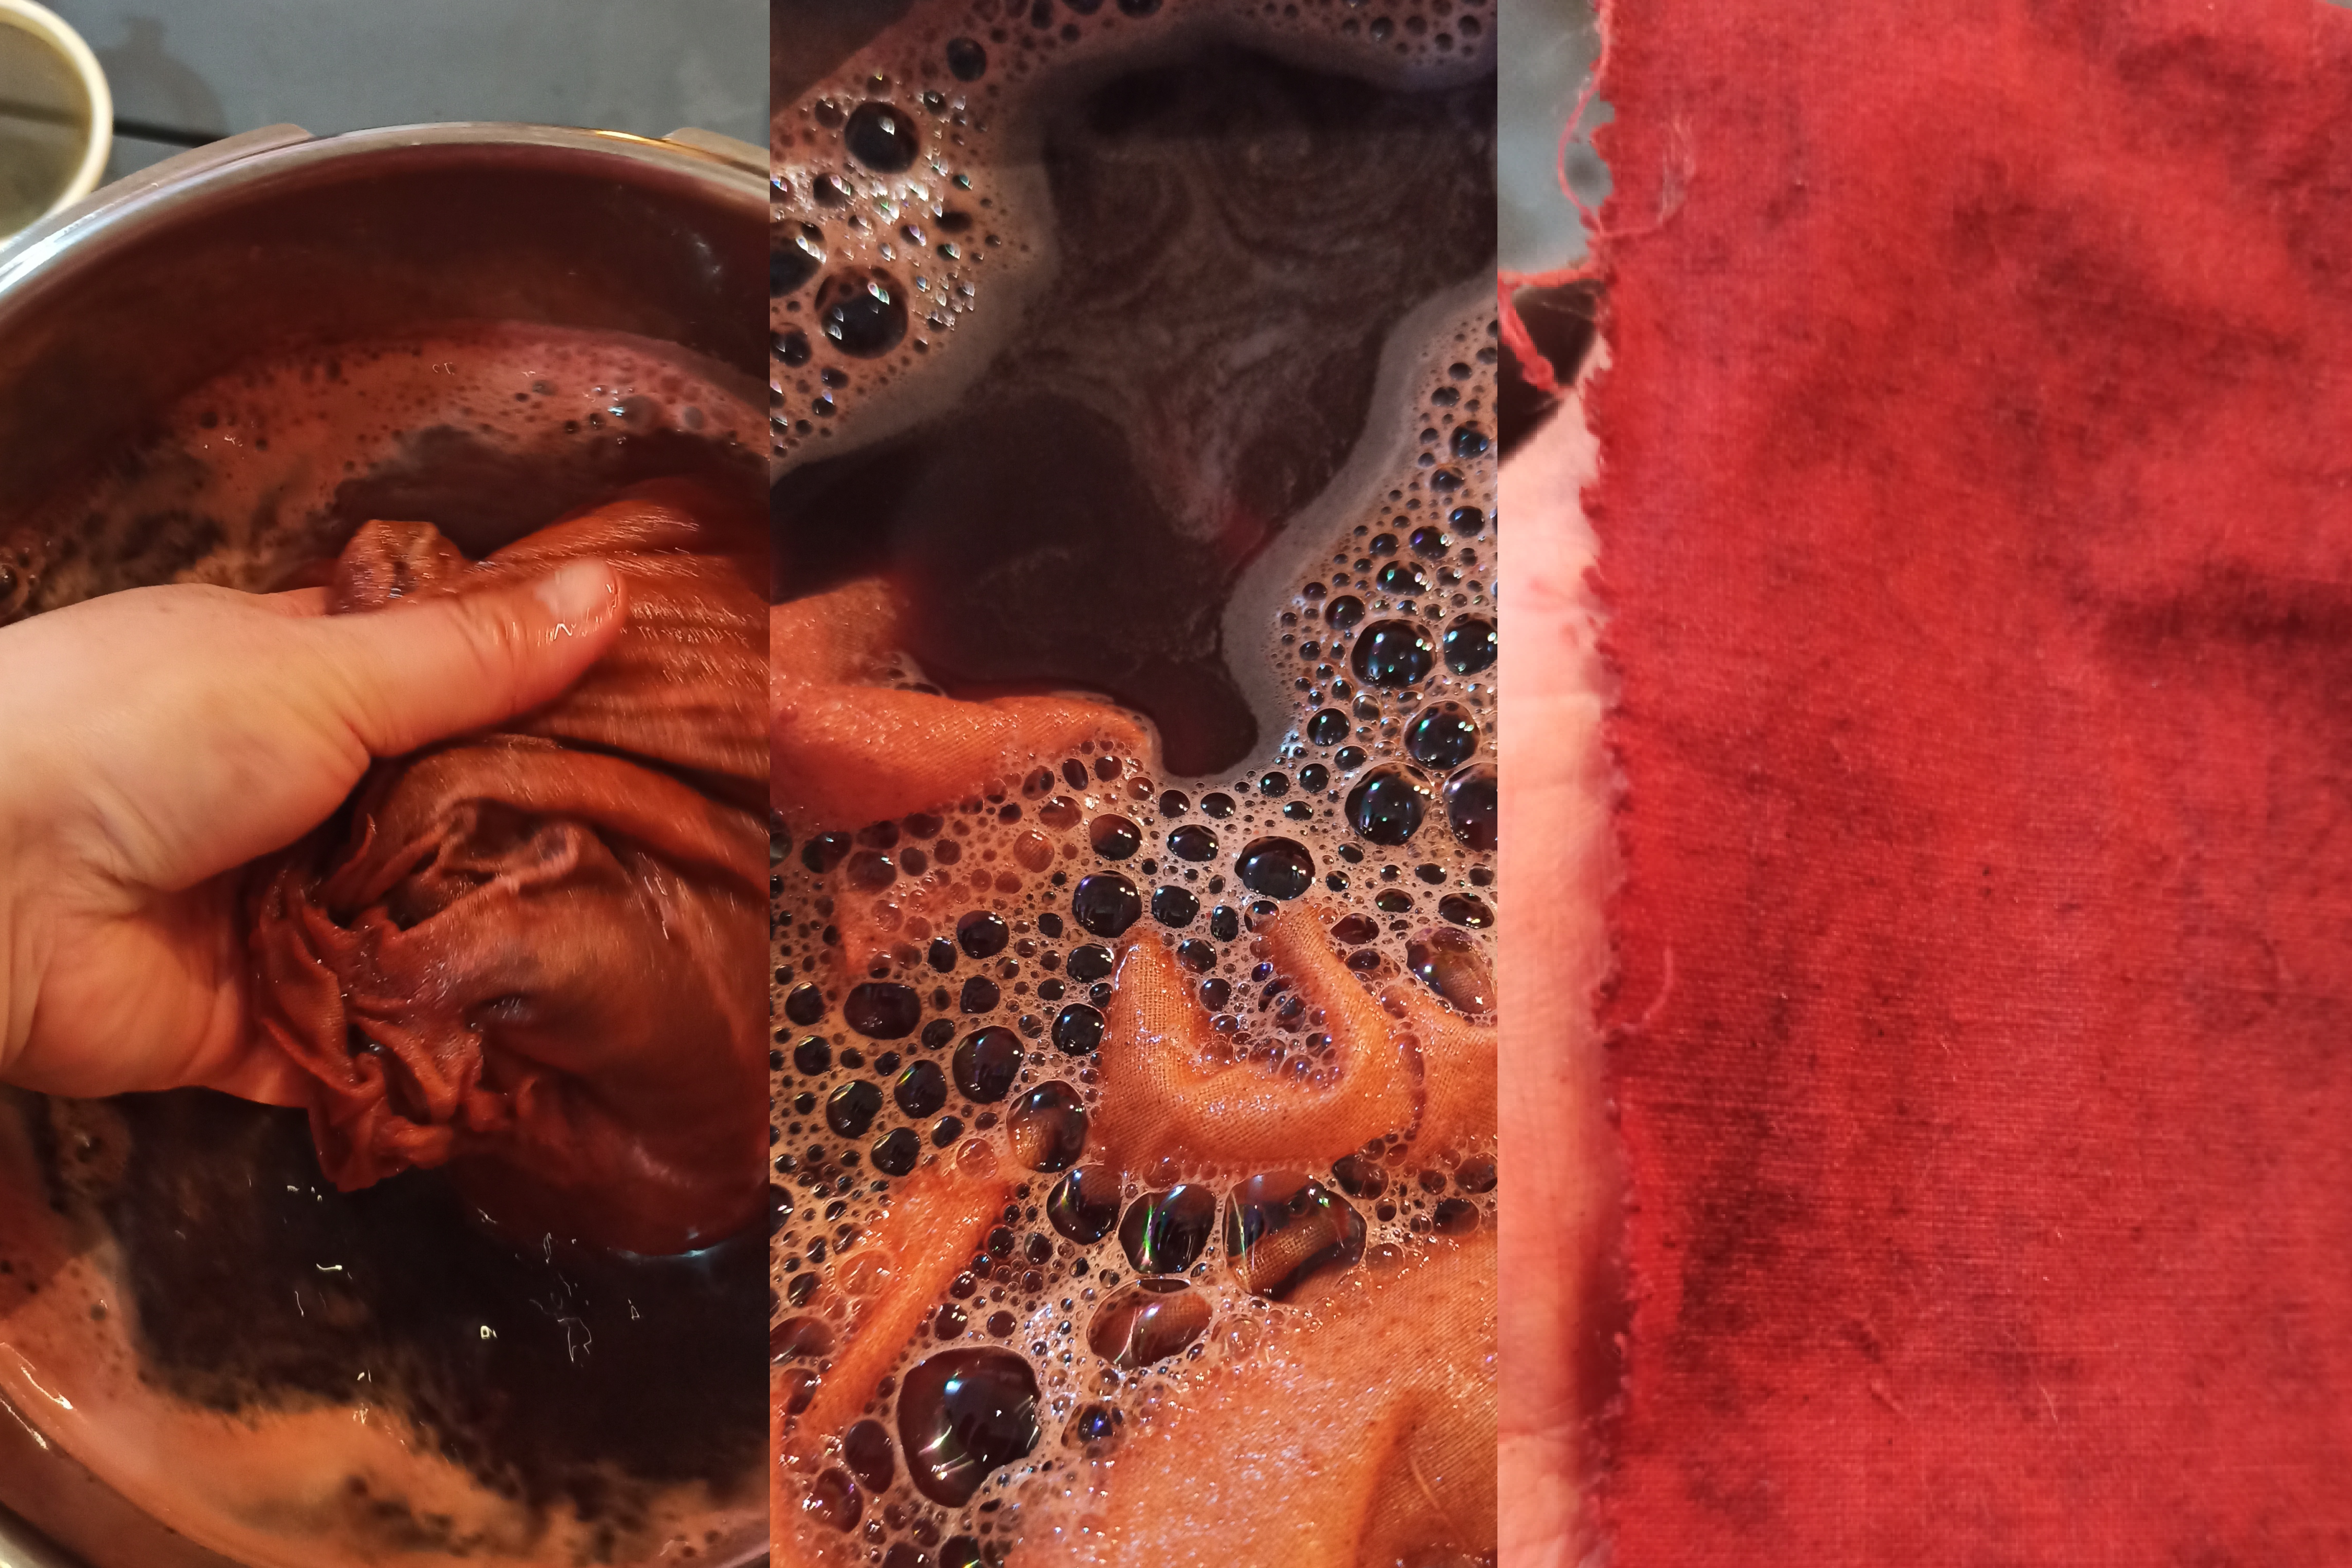
Madder root dye
I used 85 gr madder extract (50% extract/fiber weight) for this red dyeing.
Black beans dye
I used 250gr black beans which I left to soak for over 12 hours before cold dyeing the fabric for over 6-10 hours.
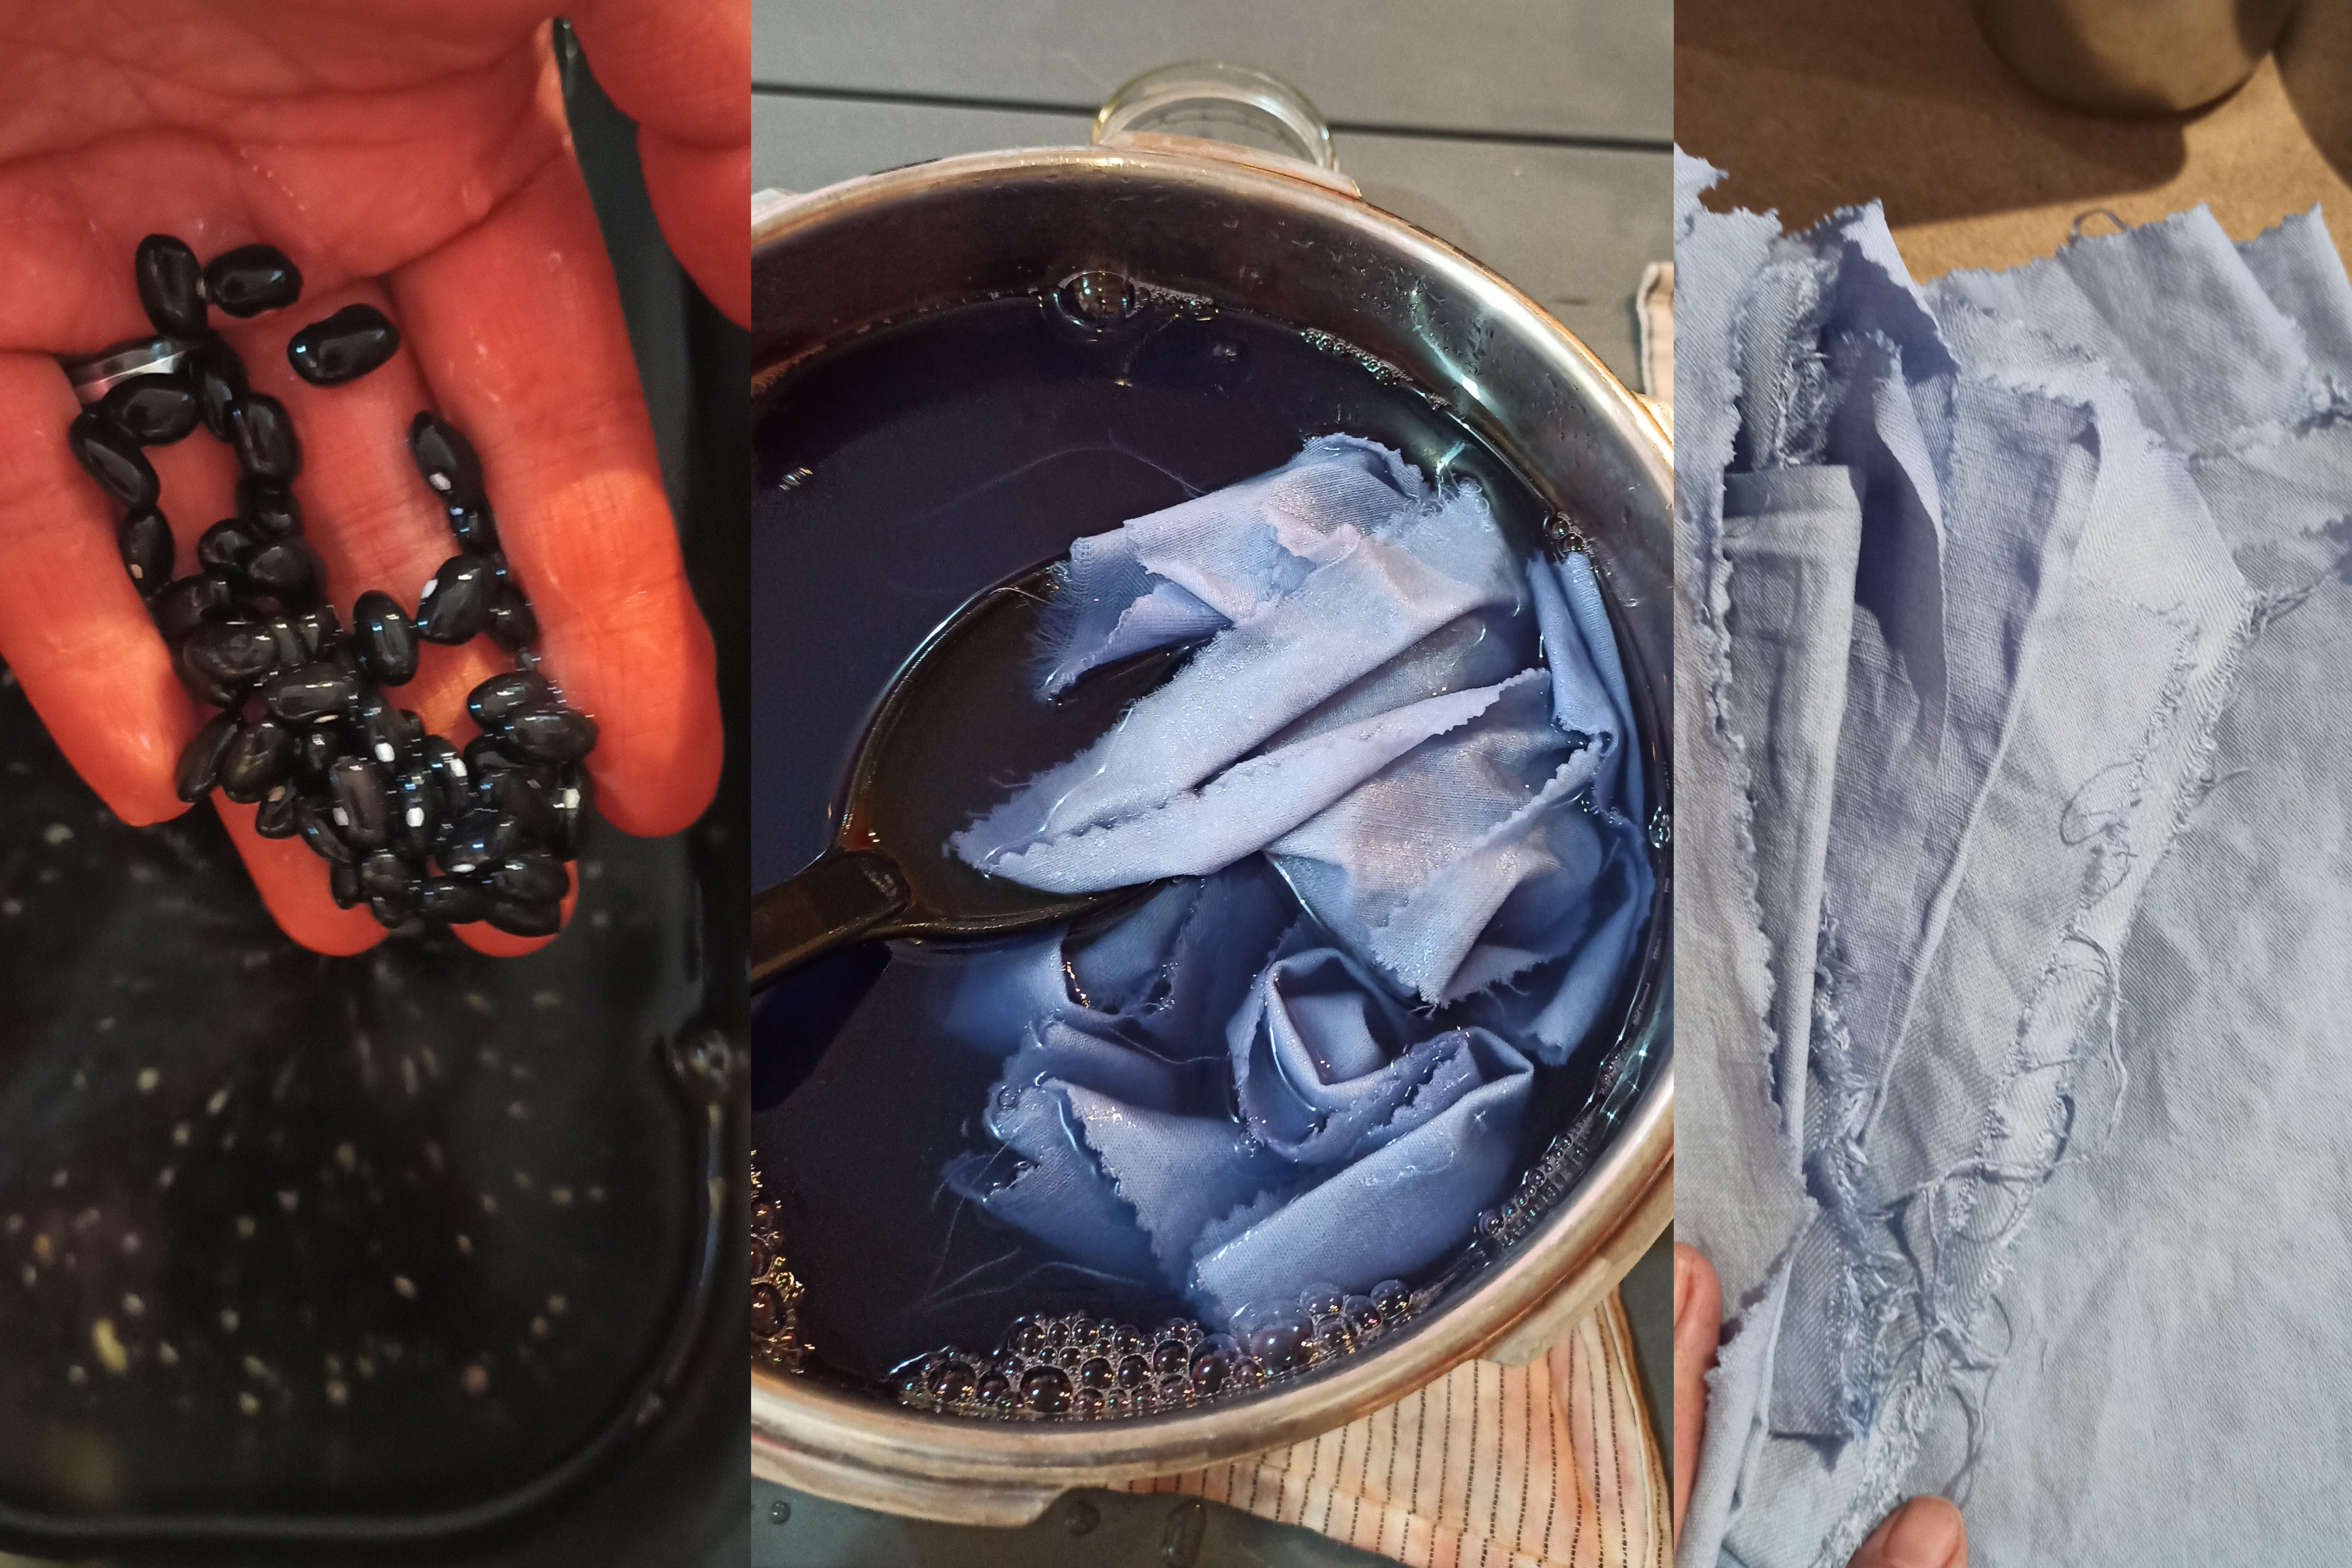
The colors of the dyes come together quite well and are just what I wanted. I'm delighted with the rendering of the blue (without having to use indigo, which would have taken much much longer to make).😅 My mini-me had a lot of fun stirring the pot of dye, inventing a story about a witch preparing a potion... 🧙🏻♀️😆
Textile Paper
Cotton and Linen mix
Inspired by the Precious Textile Project of Le Textile Lab, I made textile paper to translate parts of my language.
Using the Hollander Beater, I first tried textile paper with white cotton scraps, but the result wasn't strong enough. The paper tore too easily and crumbled if touched too much.
I then mixed the cotton scraps with linen for a thicker, more solid result (these pieces will later be laser-cut).
Once the paper sheets were dry, I flattened them by passing them under the hot press.
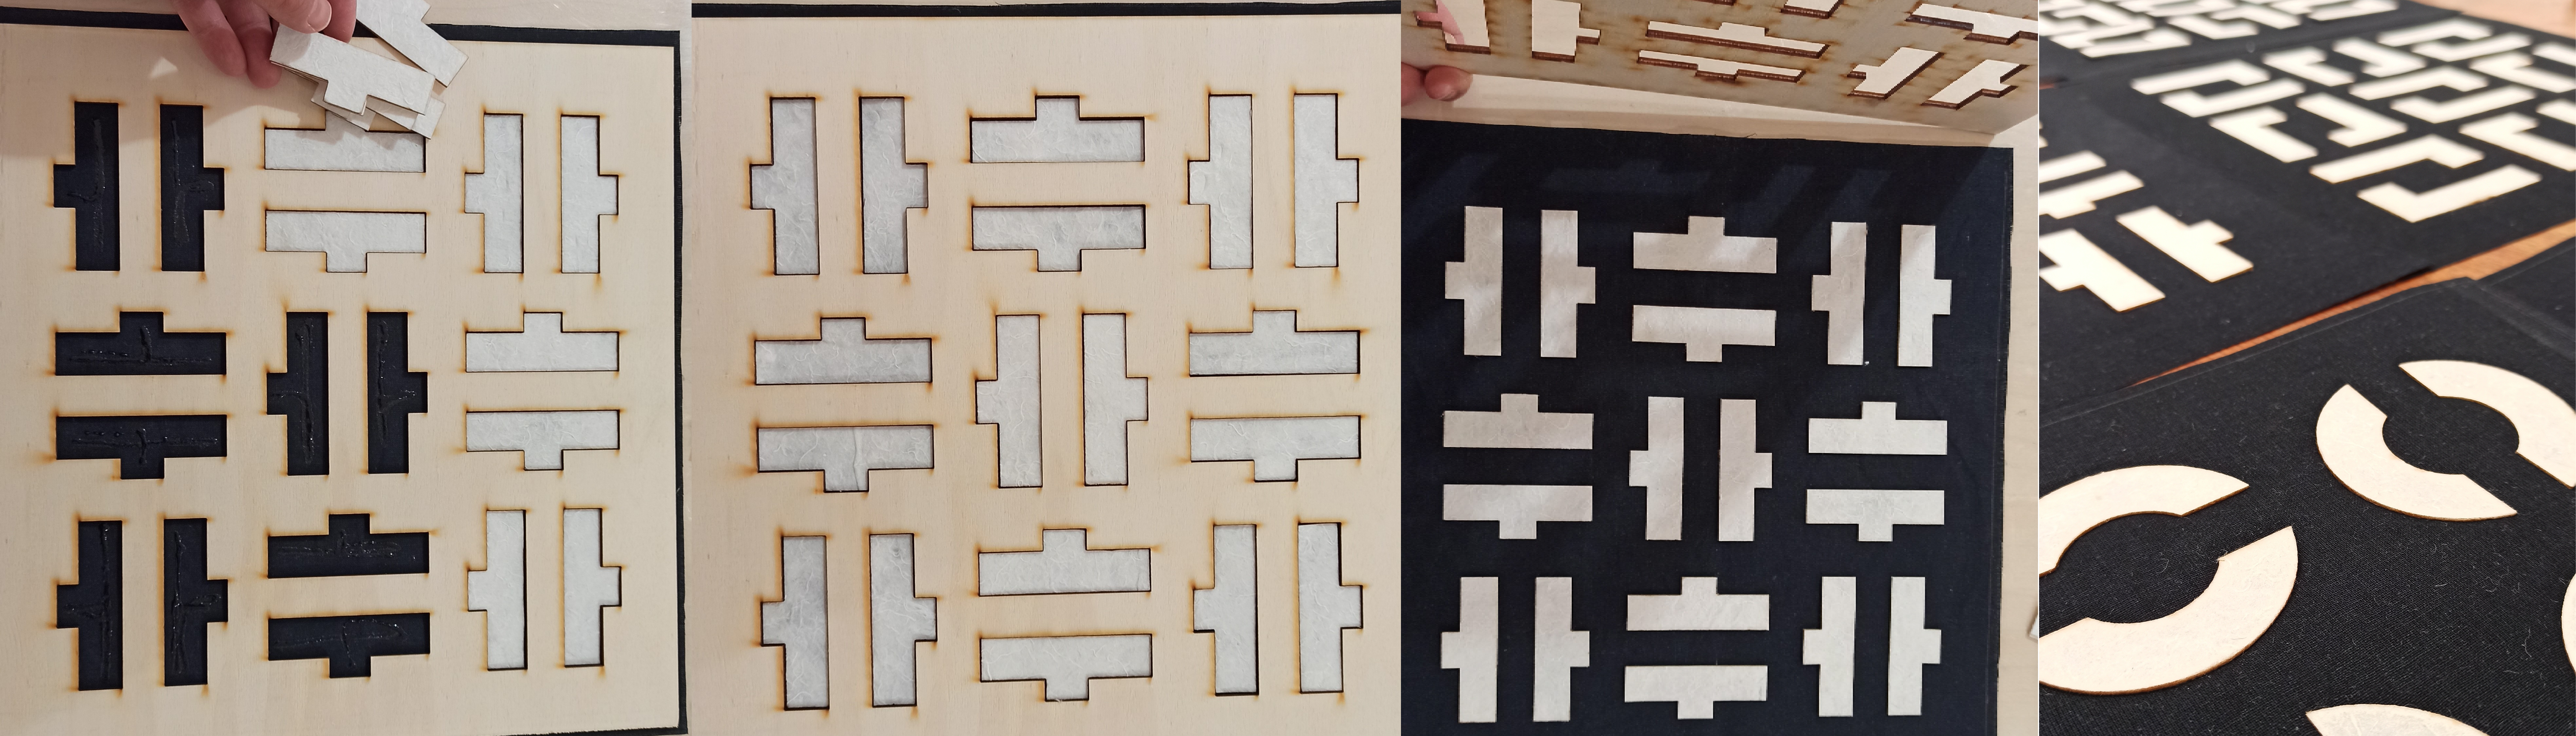
Laser cutting of patterns
An initial test was carried out using laser cutting with rigid cotton parameters: Power 35/ Speed 100
But the laser didn't cut enough. I ran a few more tests before finding the right settings for my textile paper (a mix of cotton and white linen):Power 40/ Speed 2.
The cutting parameters have been saved in the laser cutting software in the materials library: Textiles/Cotton paper.
I glued them on panels 1 and 2 with the help of a pattern cut out of medium to put each piece of a motif in the right place. The paper makes connection between these two panels.
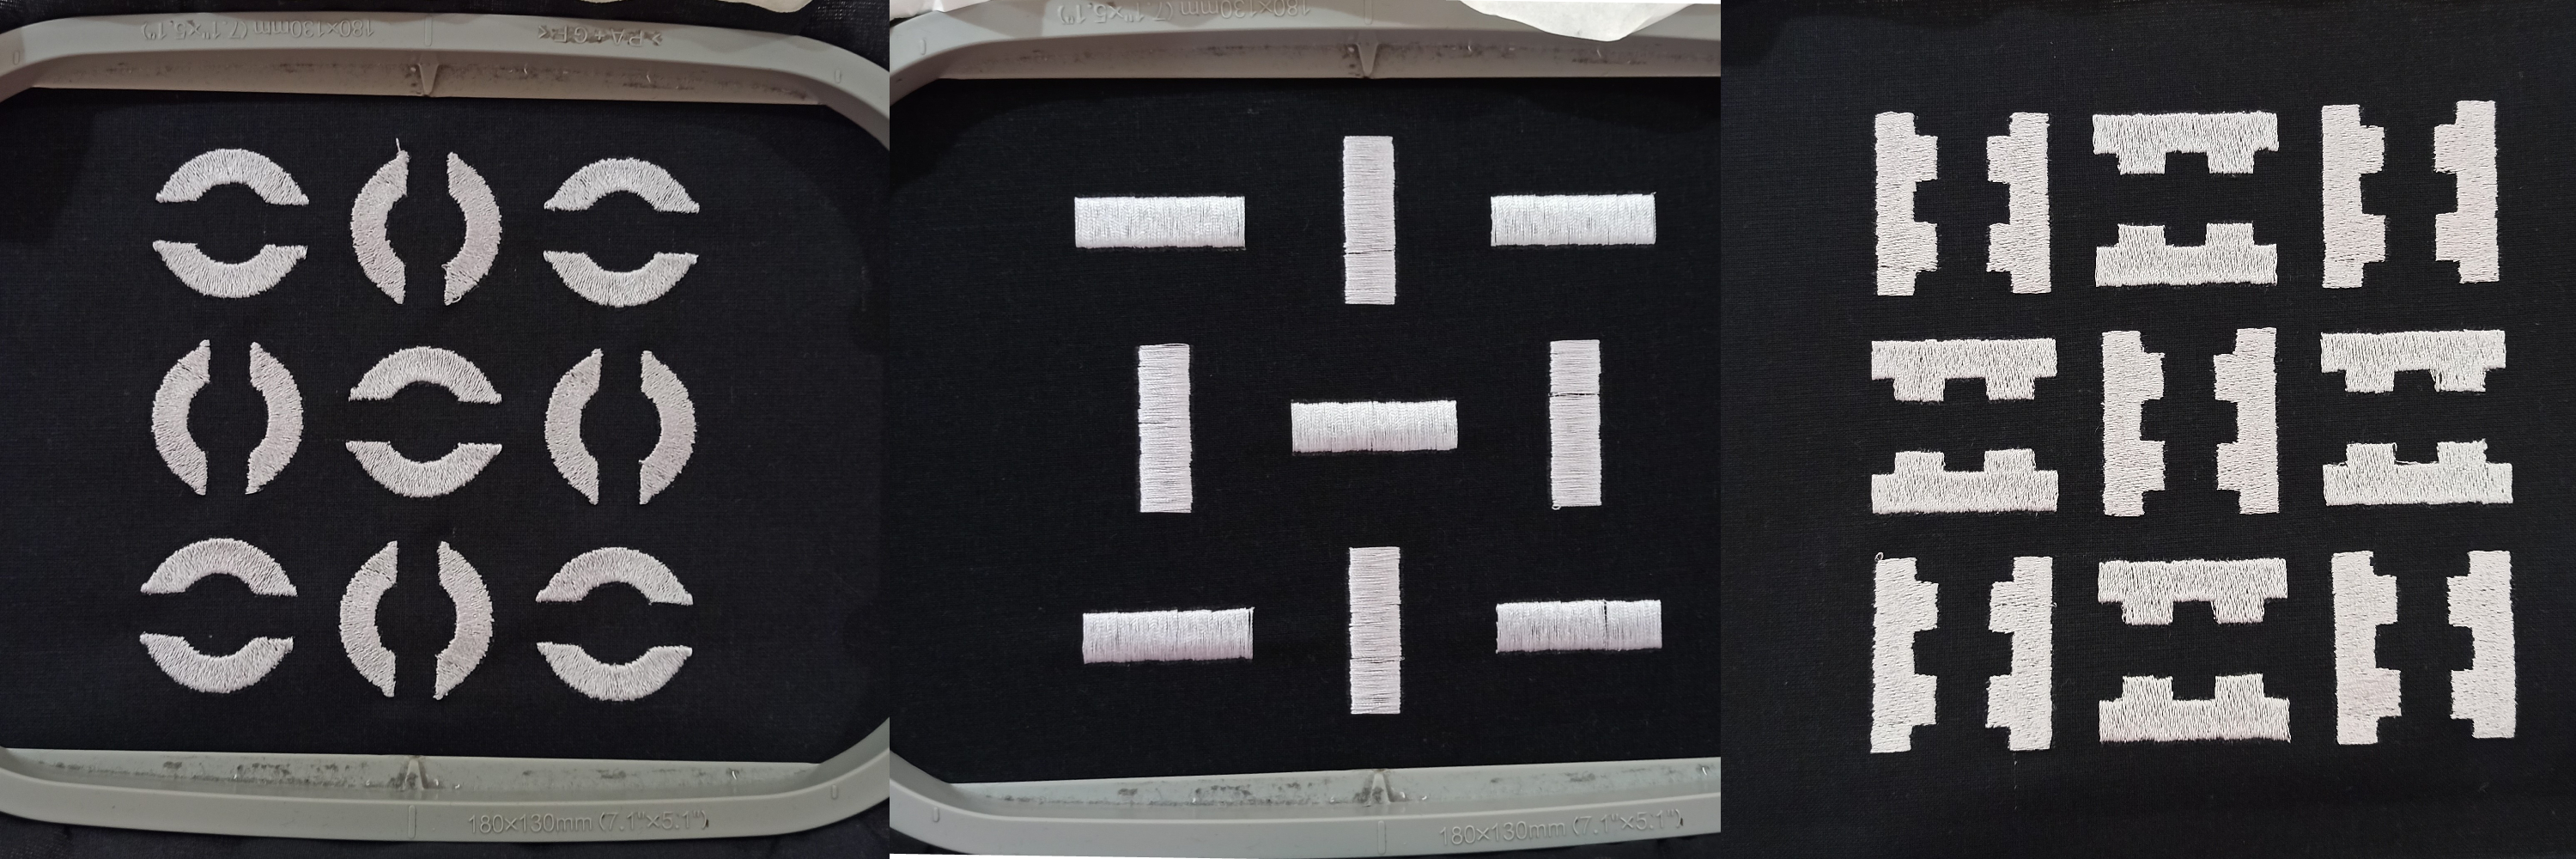
Embroideries
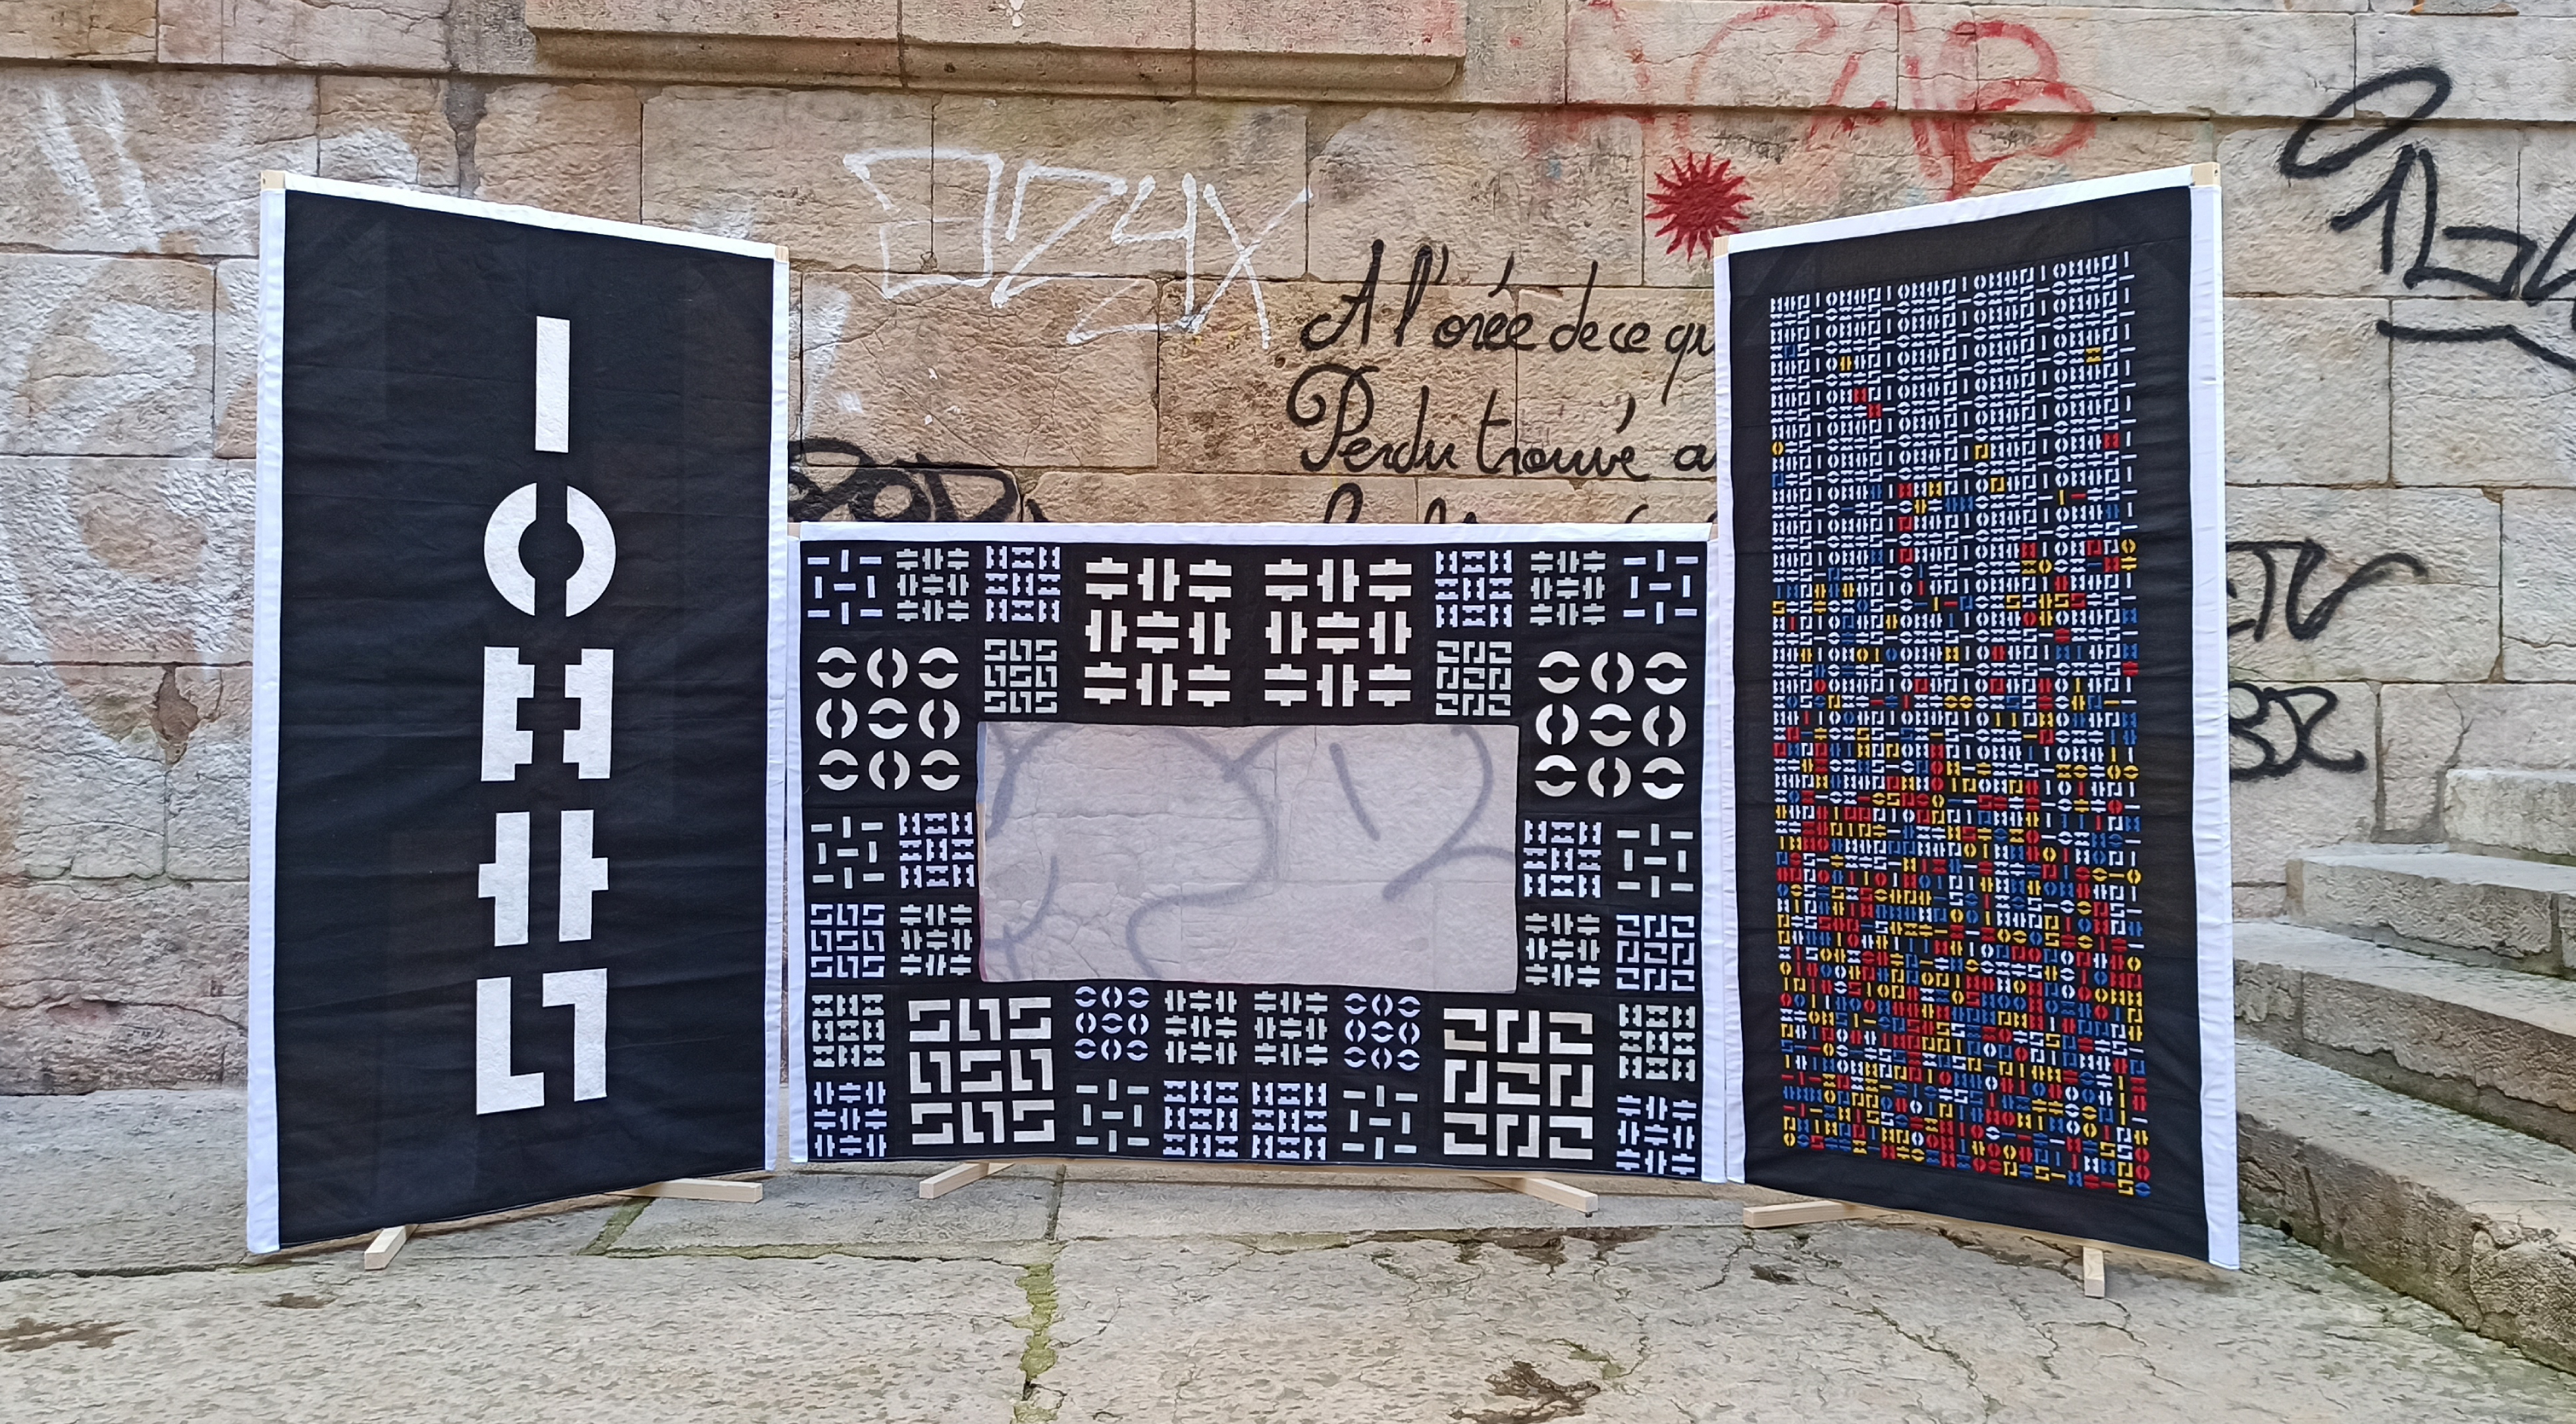
First, I embroidered the 14 squares that make up panel 2. Wanting to keep the link between the panels and my language, the embroideries were made with White thread in fill stitch. This corresponds to a total of 918,982 stitches and about 9h20.
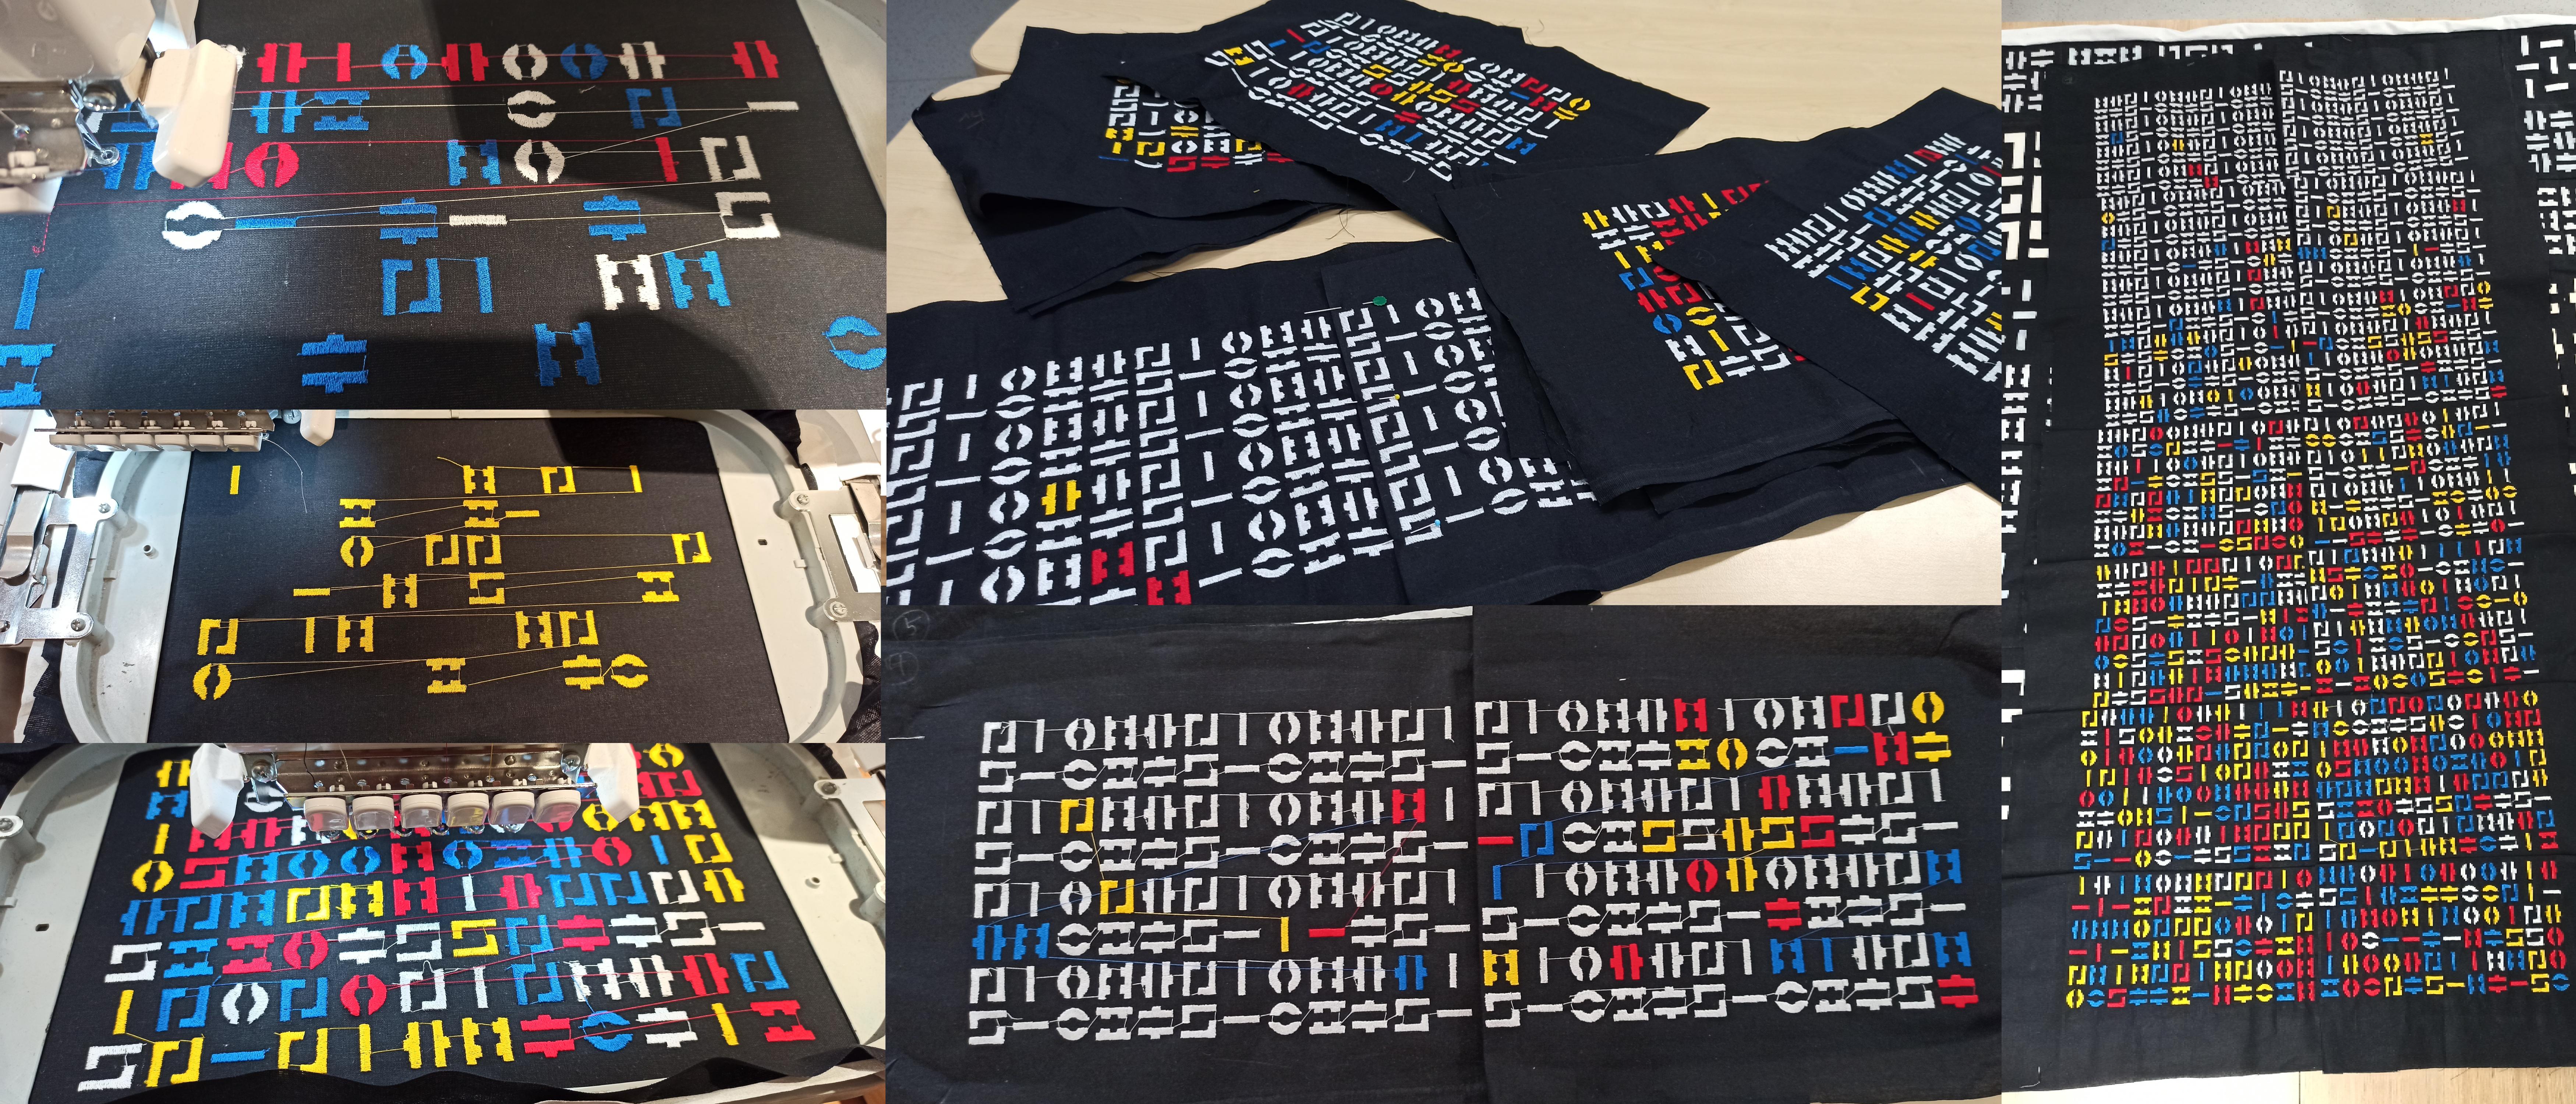
The embroidery on panel 3 was done with all the chosen colors (blue, red, yellow and white threads) on black cotton.
I then had to think about how I was going to embroider panel 3 on the black cotton piece measuring 1500x750mm.
I made a few attempts at laying the cylinder with the non-woven cotton, but I wasn't satisfied. The largest cylinder to use on the digital embroidery machine measures 300x200mm.
I then decided, for the sake of practicality, to divide my embroidery file into 14 embroidery pieces. This allowed me to have my design for panel 3, without any "errors or connection problems".
It was necessary to cut 14 pieces from the large black cotton fabric of panel 3, as well as the necessary number of non-woven cottons.
That's a total of 945,934 stitches for around 34 hours on the machine (including handling, thread breaks, etc.) 😅.
That have been assembled with the sewing machine to form the motif on panel 3.
Embroideries make the link between panel 2 and panel 3.
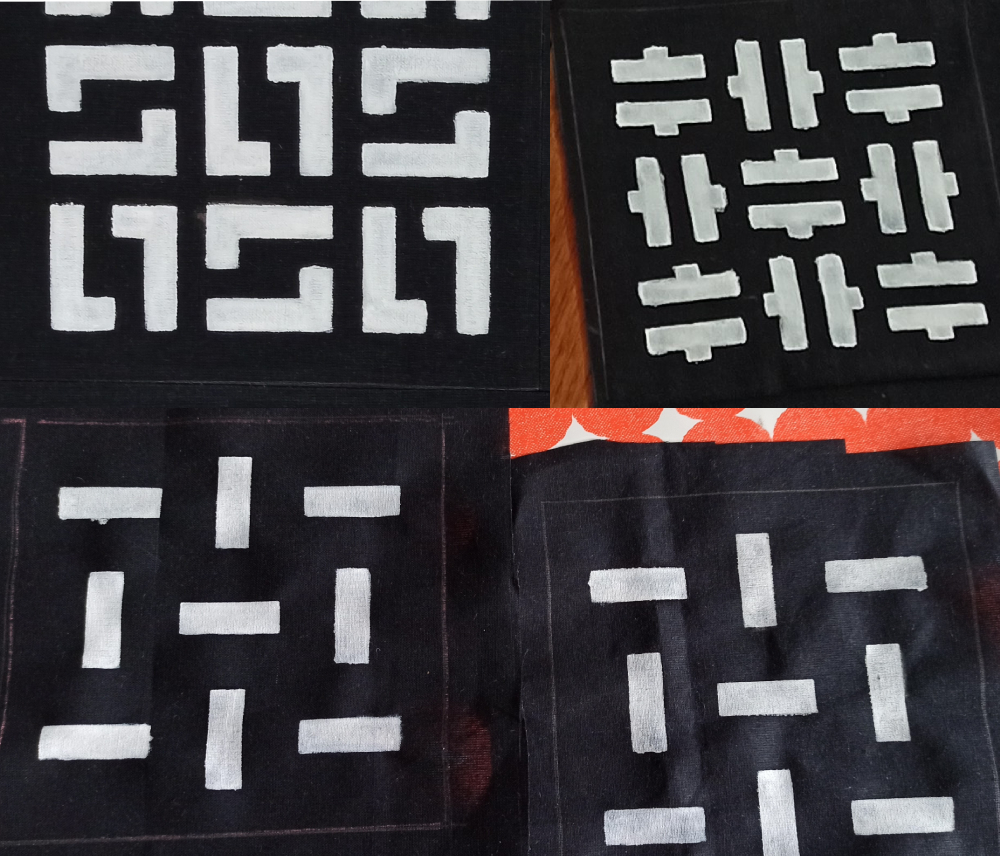
Pattern with stencils
The patterns painted on the squares in panel 2 are inspired by the stencil method I used with my pattern machine created in my Week 10.
I used White acrylic ink and stencils on Black cotton.
Workspace-The Textile lab
When you optimize work time and space (heat press, painting stencils, editing documentation, embroidery in progress...) at Textile Lab (Passage Thiaffait)! 😁
Folding screen assembly
- Sew the dyed fabrics together per panel (all re-cut to size with a 0.5cm seam allowance)
- Sew the white cotton sateen strips to the black side of the panels
- Cut and screw the pine cleats to form the 3 frames of the 3 panels
- Sew sides of Panel 3 and position on pine frame
- Sew black squares to Panel 2 (mix of techniques)
- Join the two sides of Panel 2 and position it on the pine frame
- Join the two sides of Panel 1, then glue the language to the black cotton once positioned on the pine. The textile paper language were added after final assembly on the frame, for Panel 1, to avoid damaging the textile paper.
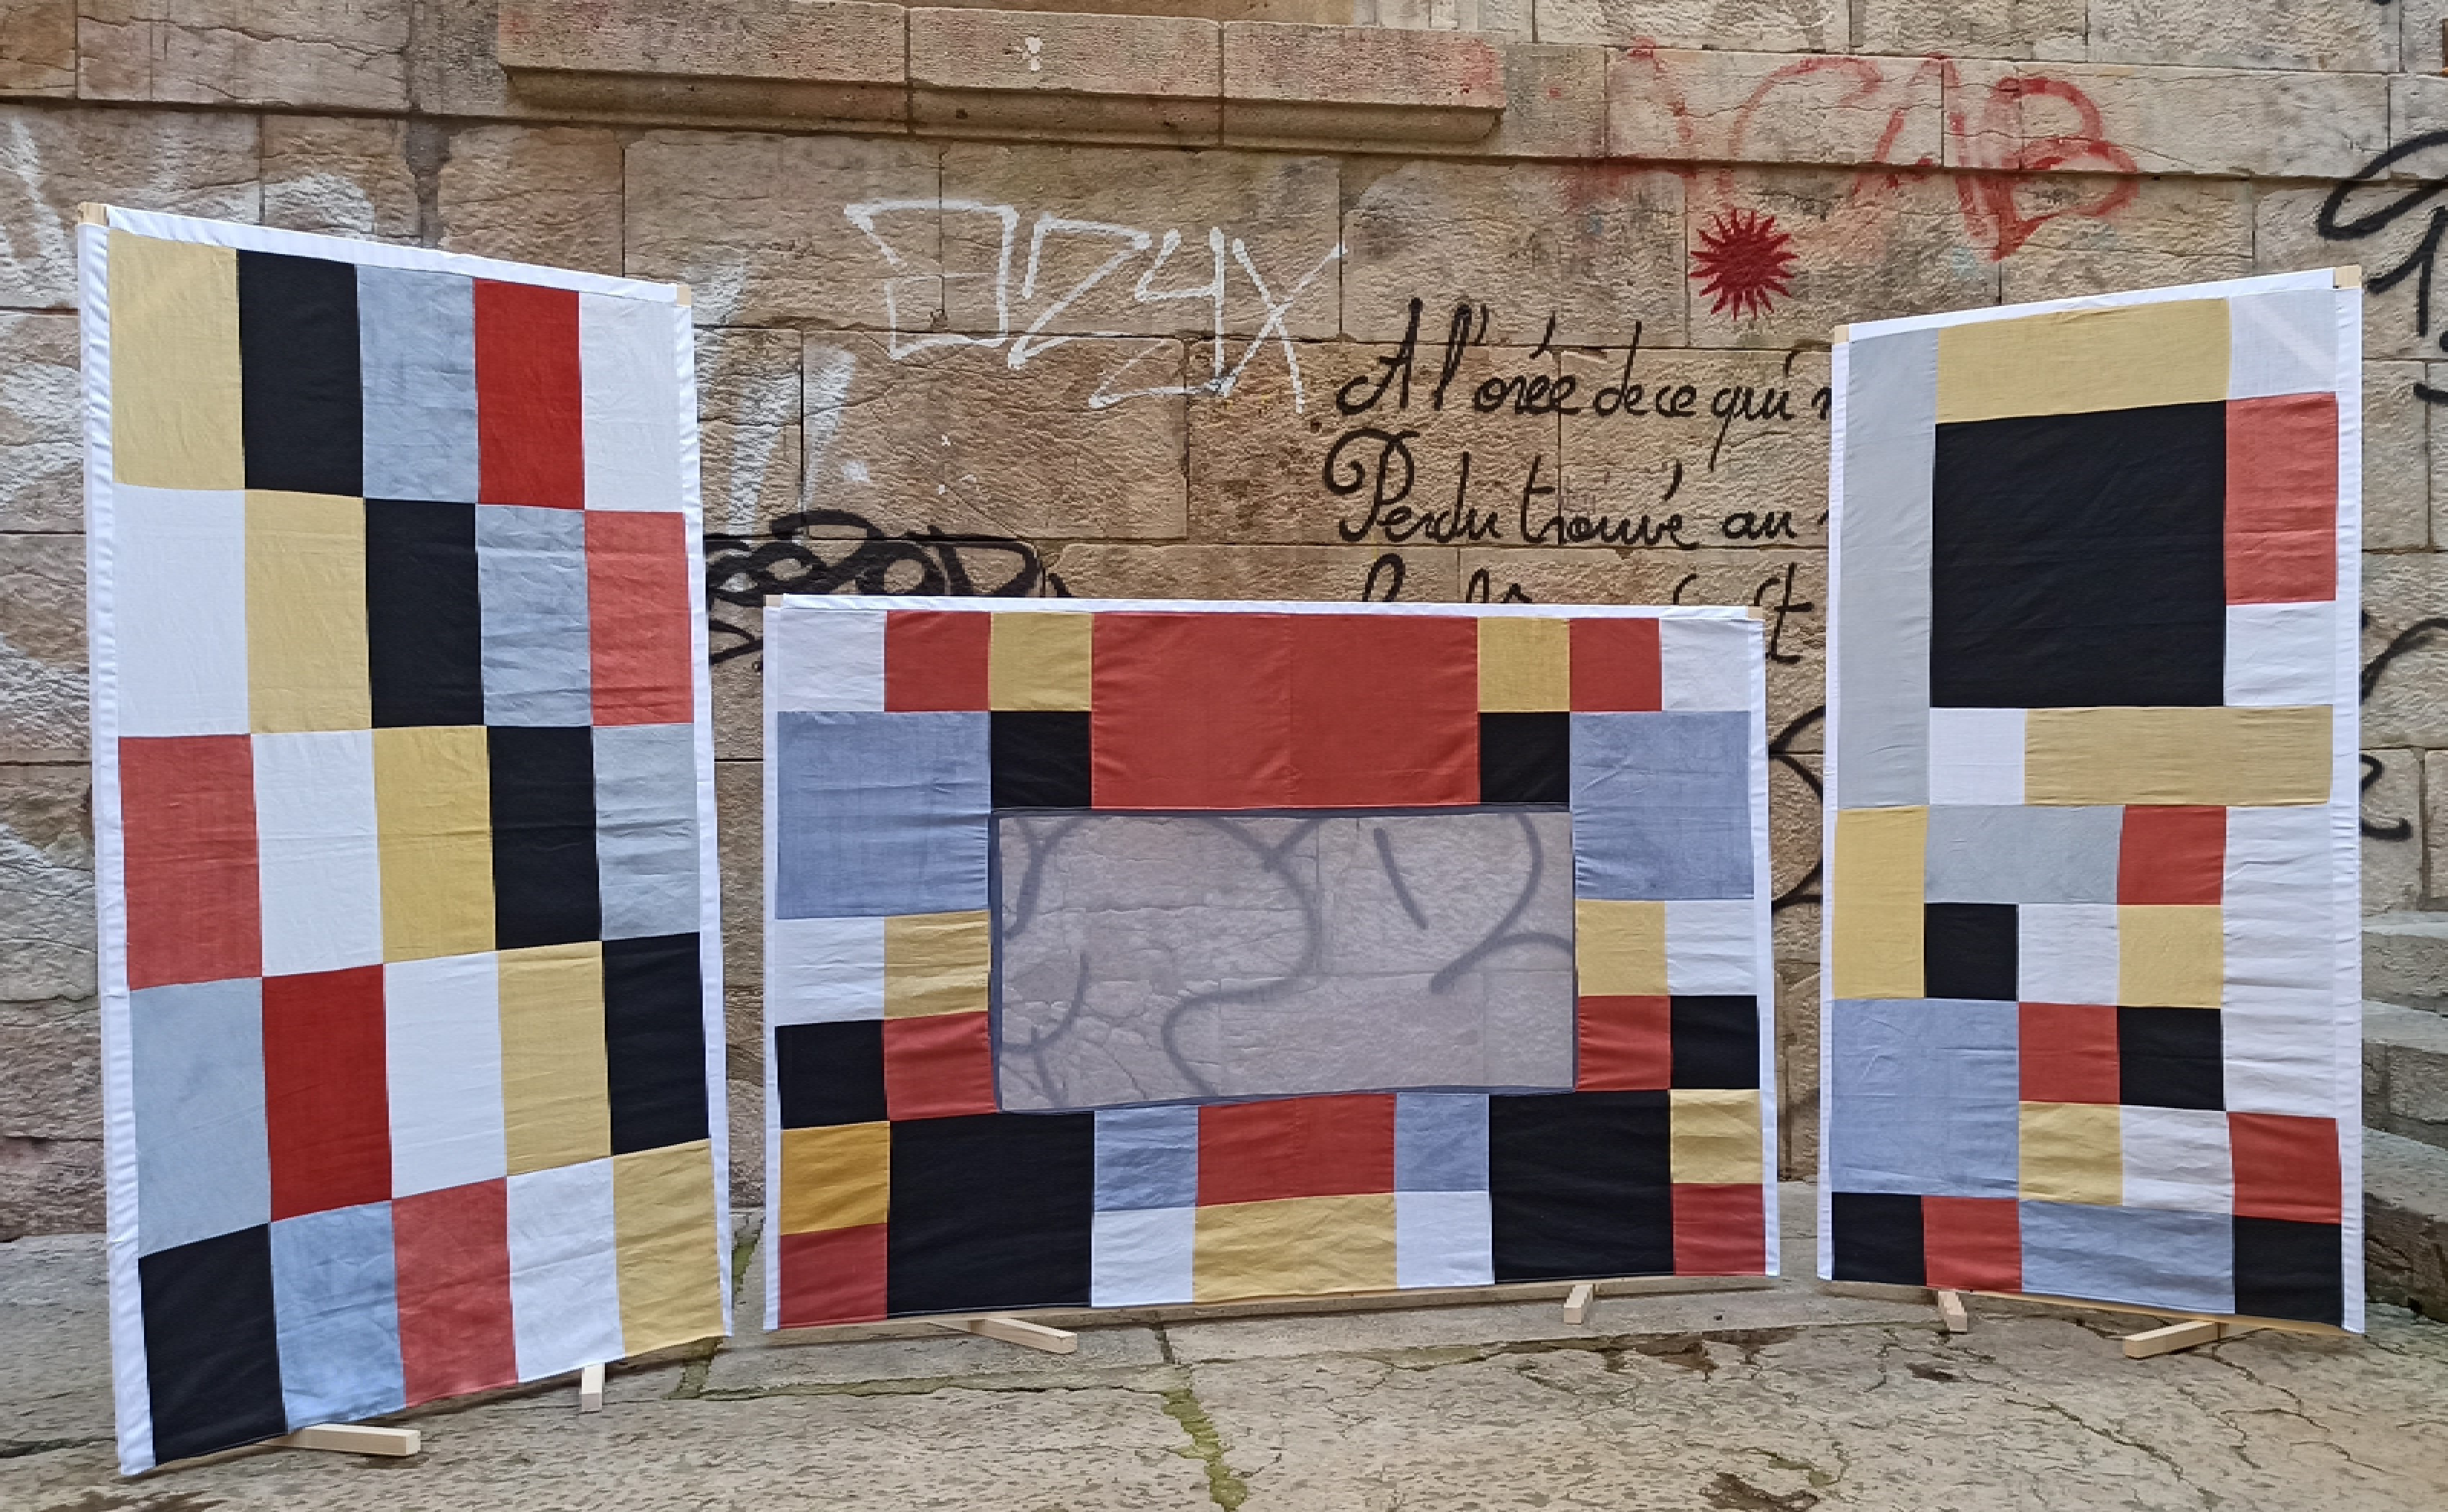
RESULTS
Final assembly with the sides of the dyed fabrics and those with the language on the black cotton side.