7. Computational Couture
🗓️ 2023_October 31st to November 06th
📈 Work of the week!
This week was not the easiest in terms of research work and training. Not being familiar with Grasshopper, and despite having watched a number of tutorials to better understand it, it was difficult to get the hang of it.
I found it very difficult to use and understand GrassHopper, to modify a component and its parameters, and to understand the libraries. There's a sense of frustration that I didn't get to the end of my project this week, despite all the testing I did.
alumni's inspirations
📚 References & Inspiration
Julia Koerner's lecture was amazing. Everything was inspiring, and I wanted to test everything on the 3D printer, but little did I know that it wouldn't be an easy task; especially when you don't master the software in question.
Presentation of her work
Iris Van Herpen's creations are on a whole other level, and make you dream.
Iris Van Herpen, Ludi Naturae, Process film (short)
I really enjoyed the interview of Brigitte Kock, founder of Paraprint. Her creations are great and it's very interesting to know more about her techniques.

Screenshot from Youtube
During the week's research on OS Circular Fashion (week03), I was already intrigate by 3D printings and creations with textile and fashion. I was tempted to try the Nervous System and Mark Fornes references.
🧰 Tools
These are the principles tools used for this week's assignements
⏳ Process and workflow
Rhino and Grasshopper ... a long long journey 🙃🥵
First of all, to be able to generate a pattern, you need to use a vectorization software such as Rhino.
Grasshopper is the Algorythmic modeling for Rhino. It's programming.
There are 3 keys concepts: the components, the chaining-components and parameters. You need to give informations to the components to build algorithms
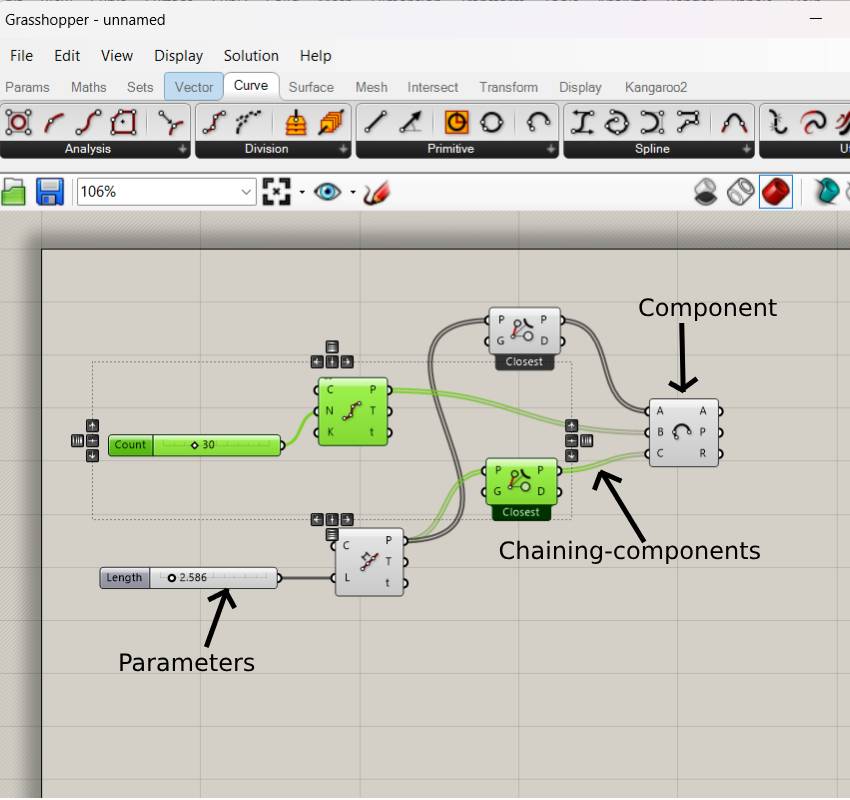
After understanding the basics of Grasshopper, it is recommended to start with already made patches in order to understand the principles and operations of Grasshopper (such as patterning, surface mapping, parametric subdivision,...) and to test again and again
additional tutorials to get started with Grasshopper
🖨️ How to use Zmorph, the 3D Printer
First of all, you need to prepare your file to be printed, and save it in .stl format.
Cura is the software that lets you operate the 3D printer, view the rendering for printing, time, speed,....
I was also able to take advantage of another 3D printer during the weekend, the Zortrax M200.
The printer is used with the Z-Suite software, which is the slicer programme. The process is quite similar to ZMorph.
But most of the tests were done with the Textile Lab 3D printer, Zmorph.
You need to add a “Custom FFF Printer”, name it and indicate the following machine parameters (the “Start G-code” and “End G-code” parts are generated automatically). We used a single extruder 1.75, with a 0.4mm nozzle.
| Ultimaker Cura | Slicing parameters |
|---|---|
 |
 |
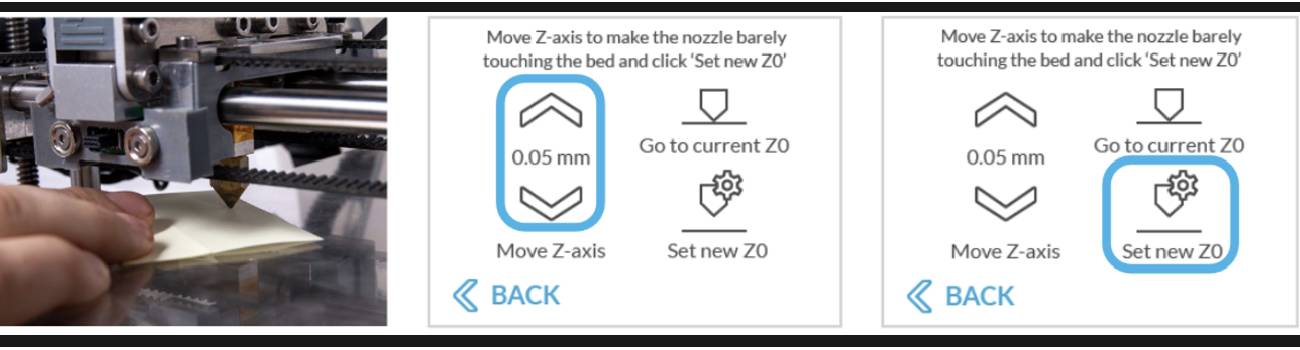
- Manual Calibration
Go to the Maintenance menu > Calibrate > Manual

Then take a sheet of paper.
Press "Go to current Z0", then use the arrows to move the Z axis by 0.05mm to the correct height: the paper should rub against the nozzle, but should be able to move without being blocked.
When OK, press "Set new Z0".
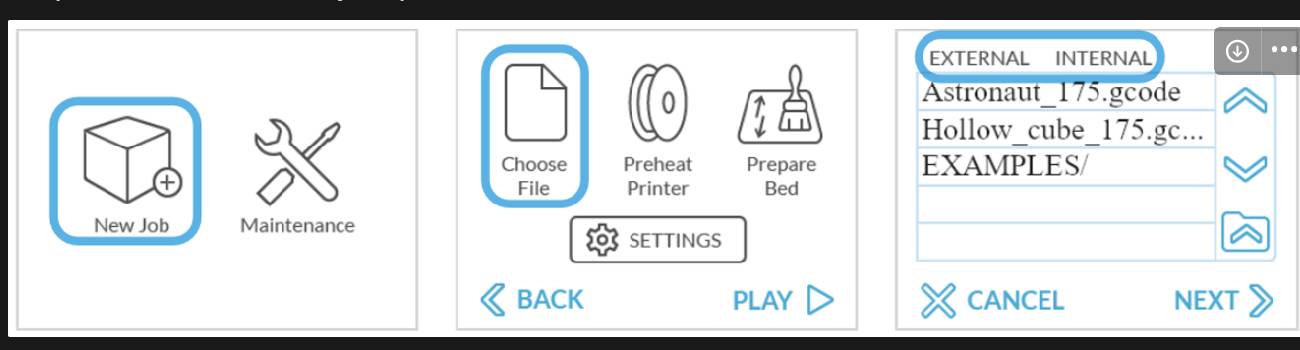
- Start printing
Transfer the file to the SD card and insert it to the right of the screen.
Click on “New Project”, then on “Choose File”.
Click on "Next" to start printing.
Once the nozzle and platen are heated, a green check mark will appear on the screen next to preheat.
The printing temperatures are as follows (the parameters are already set but can be modified depending on the filament used):
Nozzle: 200°C
Plateau: 60°C
While the nozzle is heating, click on “Prepare Bed”. The plate will approach and the nozzle will rise a little. Check that the plate is clean and that the covering is well stuck. Apply a little hairspray, protecting the nozzle.
To start printing, press “Start” at the bottom right of the screen.
Don't forget to connect the external fan when printing PLA.
You can find more via Textile Lab's Educational Resources sources of my screenshots.
Step 1:Test Triangle Patch with Grasshopper
Following Eugenio Bettucchi's tutorial, I took one of these patches and modified the geometric shape to obtain a variation of triangles.
I was inspired by bags with holographic geometric shapes.
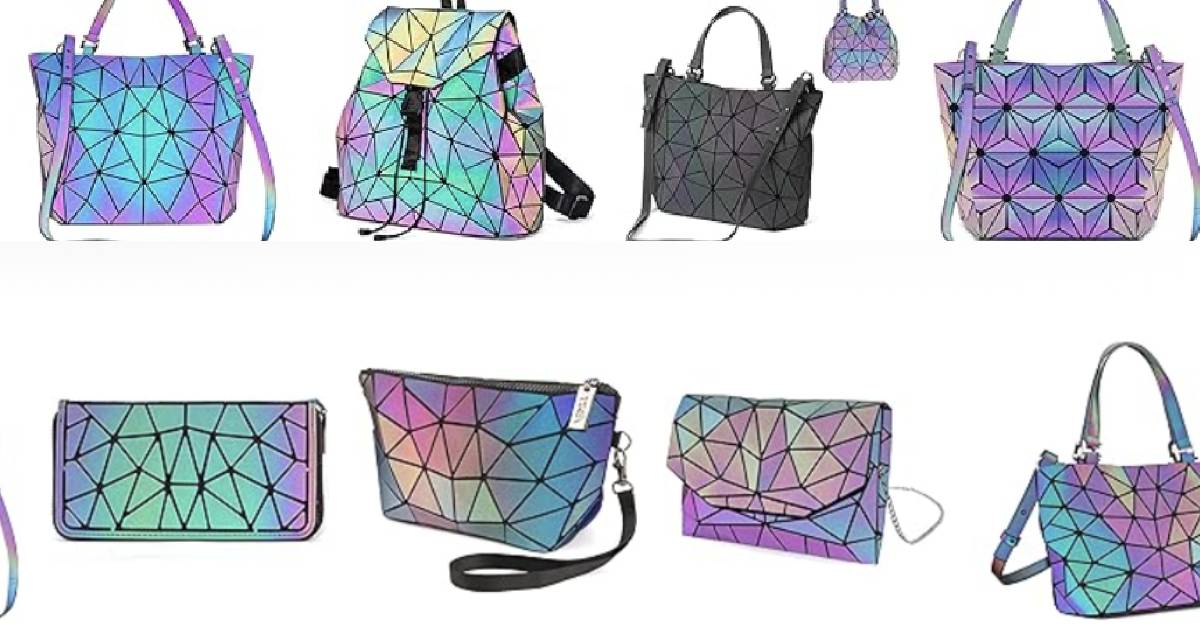
Screenshot from google research

3D model
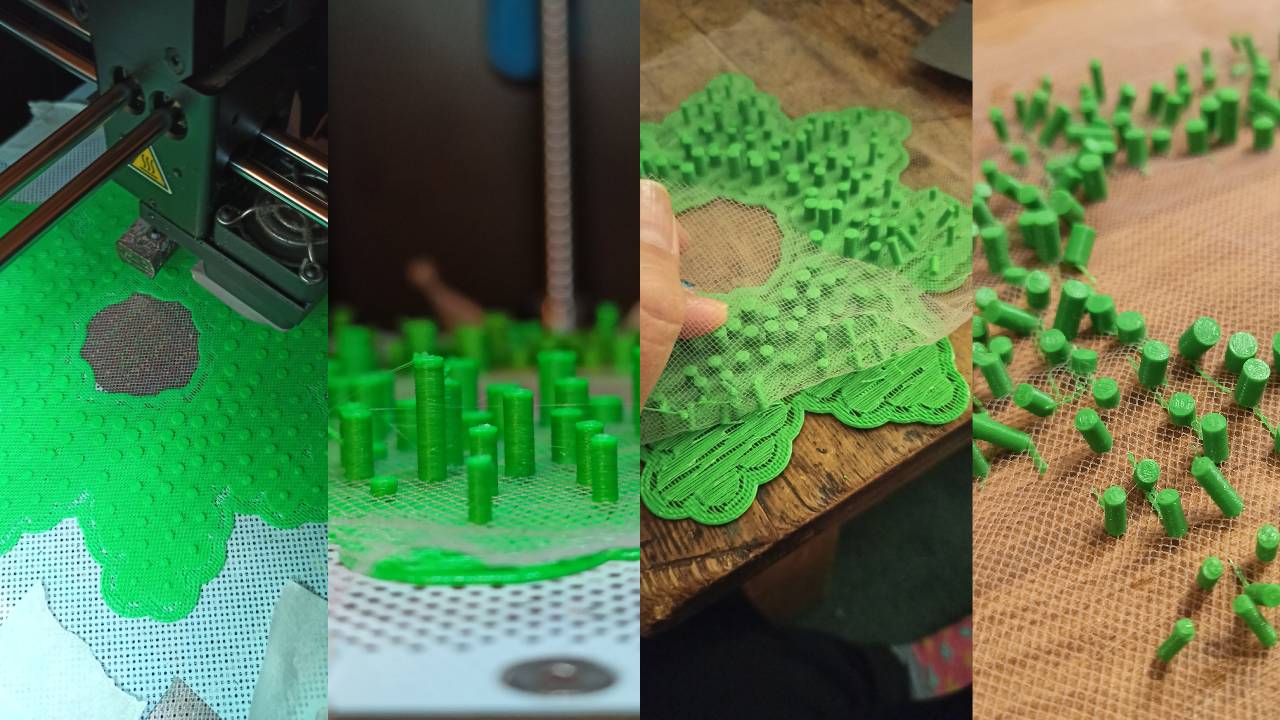
Step 2: Print model
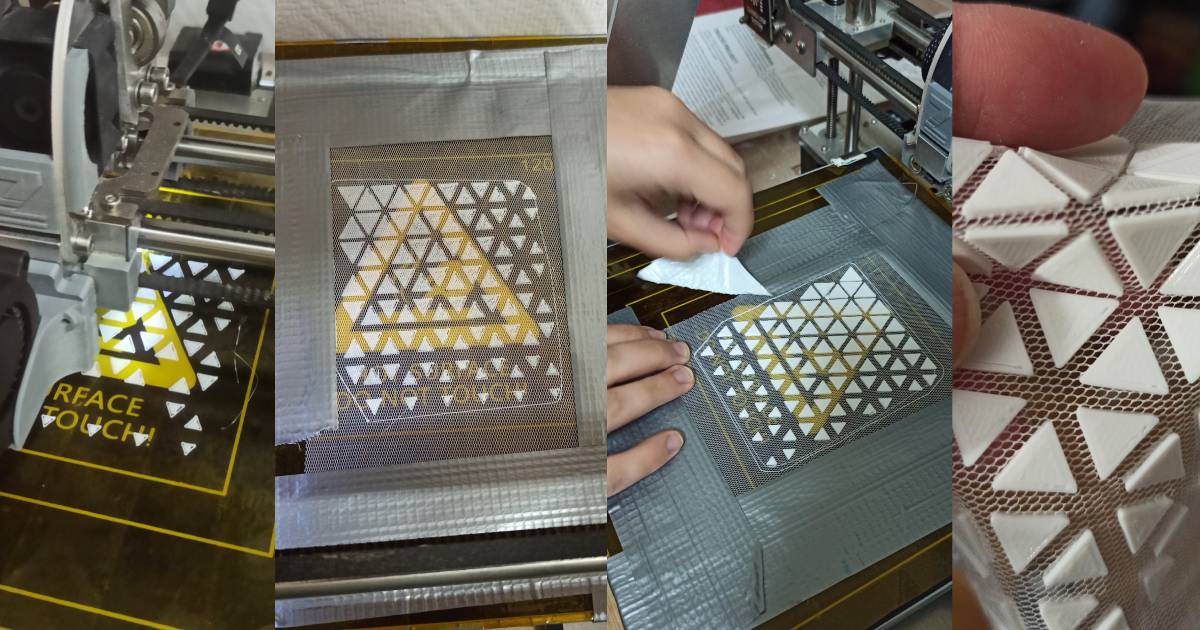
Diane showed me how to print with tulle (sandwich style) without rafting.
1. Allow a few layers of print to set, then pause
2. Fix the tulle on the tray so that it doesn't move, and resume printing
3. Remove adhesives or fasteners from tray
4. Check that the tulle is well set with the print
Video result triangle and tulle
Step 3: Test another patch with Grasshopper
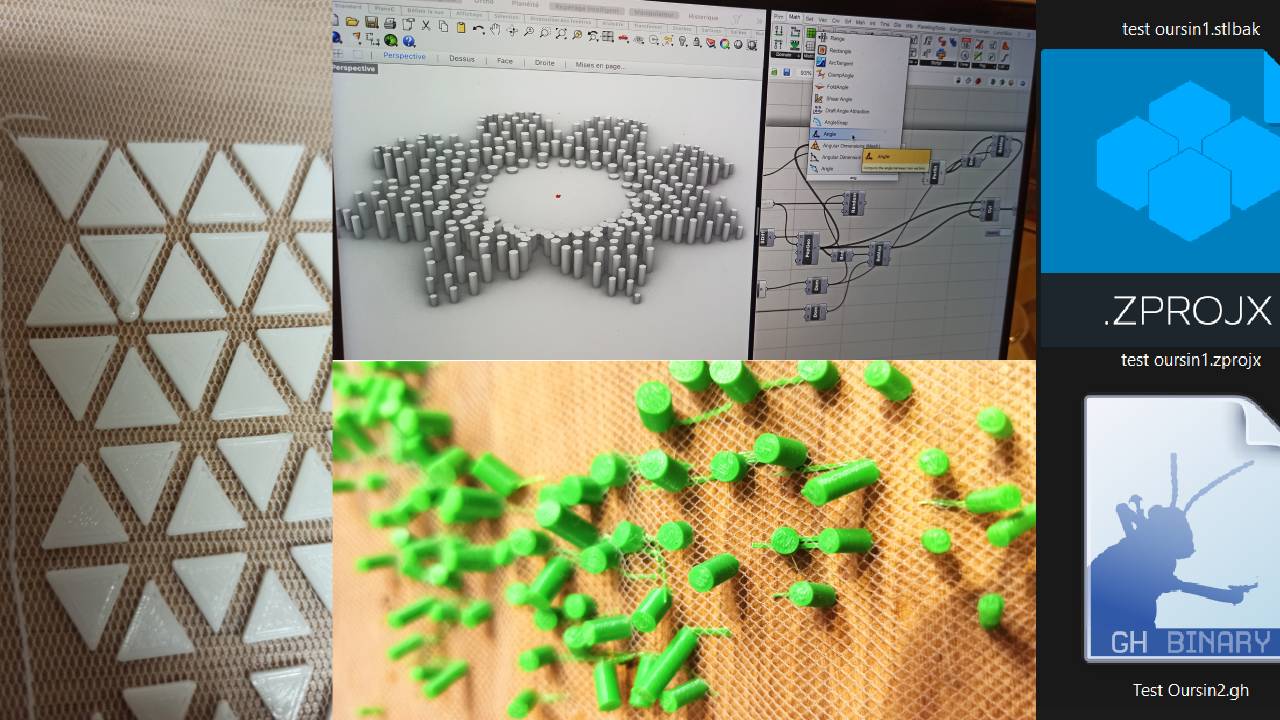
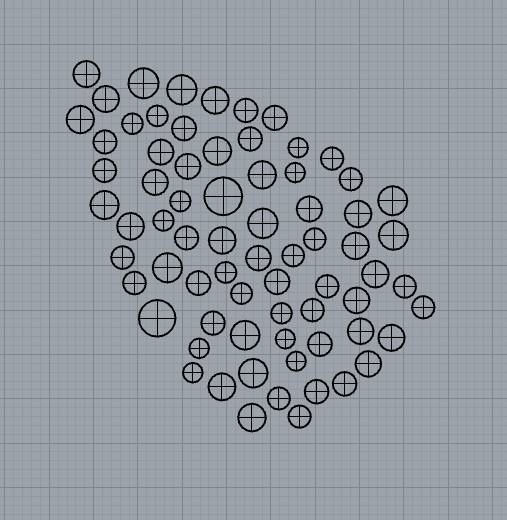
Inspired by Julia Koerner's ideas and references on sea sponges, I tried to reproduce the texture of jellyfish, but the result didn't suit me and reminded me more of sea urchins. I wanted to try again with the "sandwich" method to reproduce the needles of sea urchins.
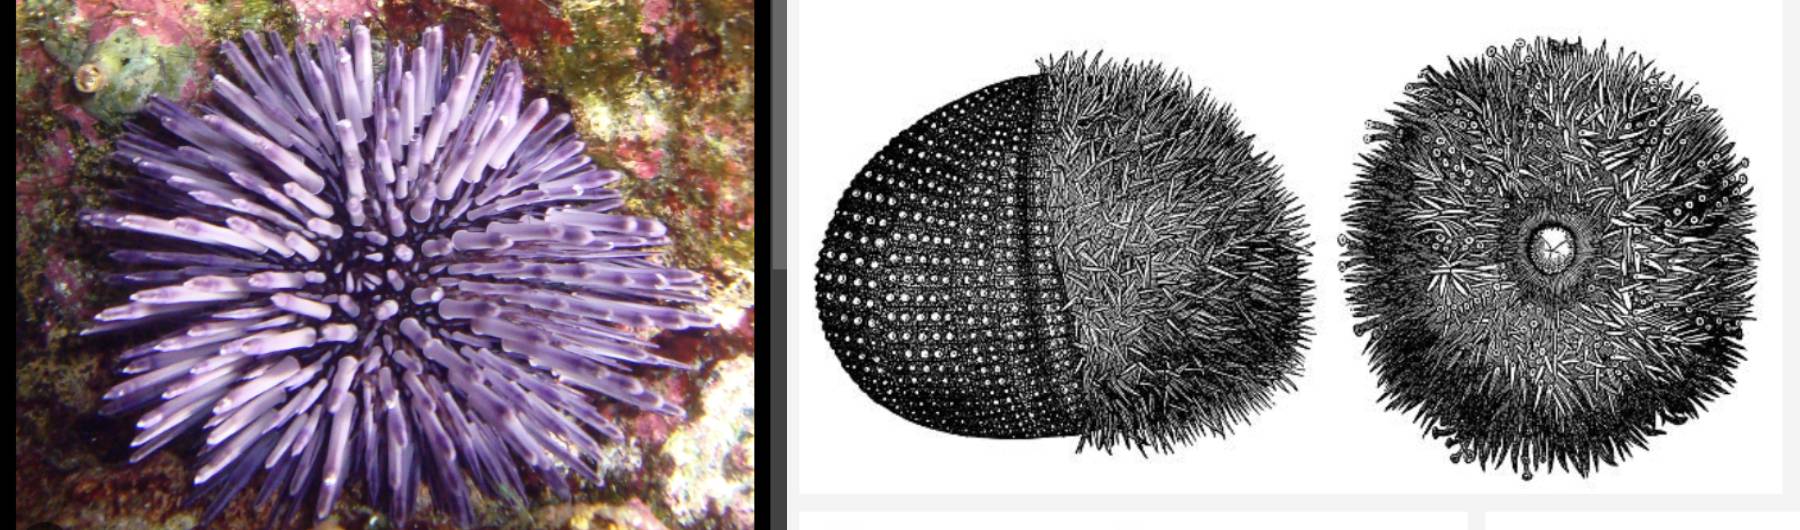 screenshots from google research
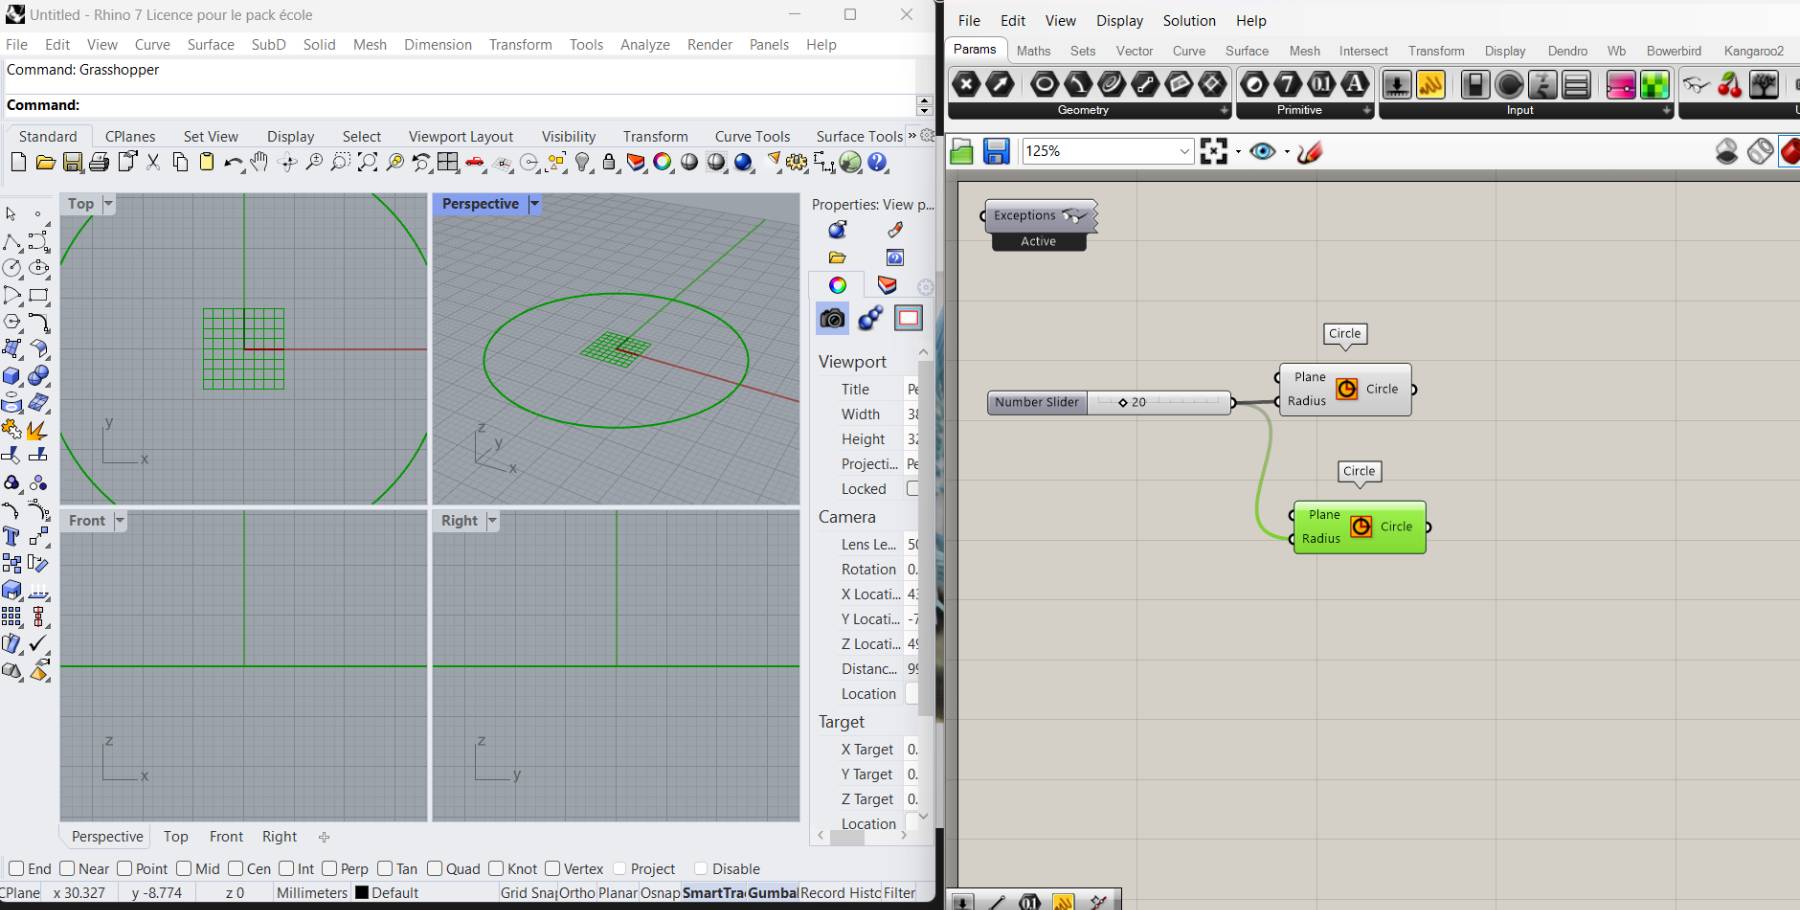
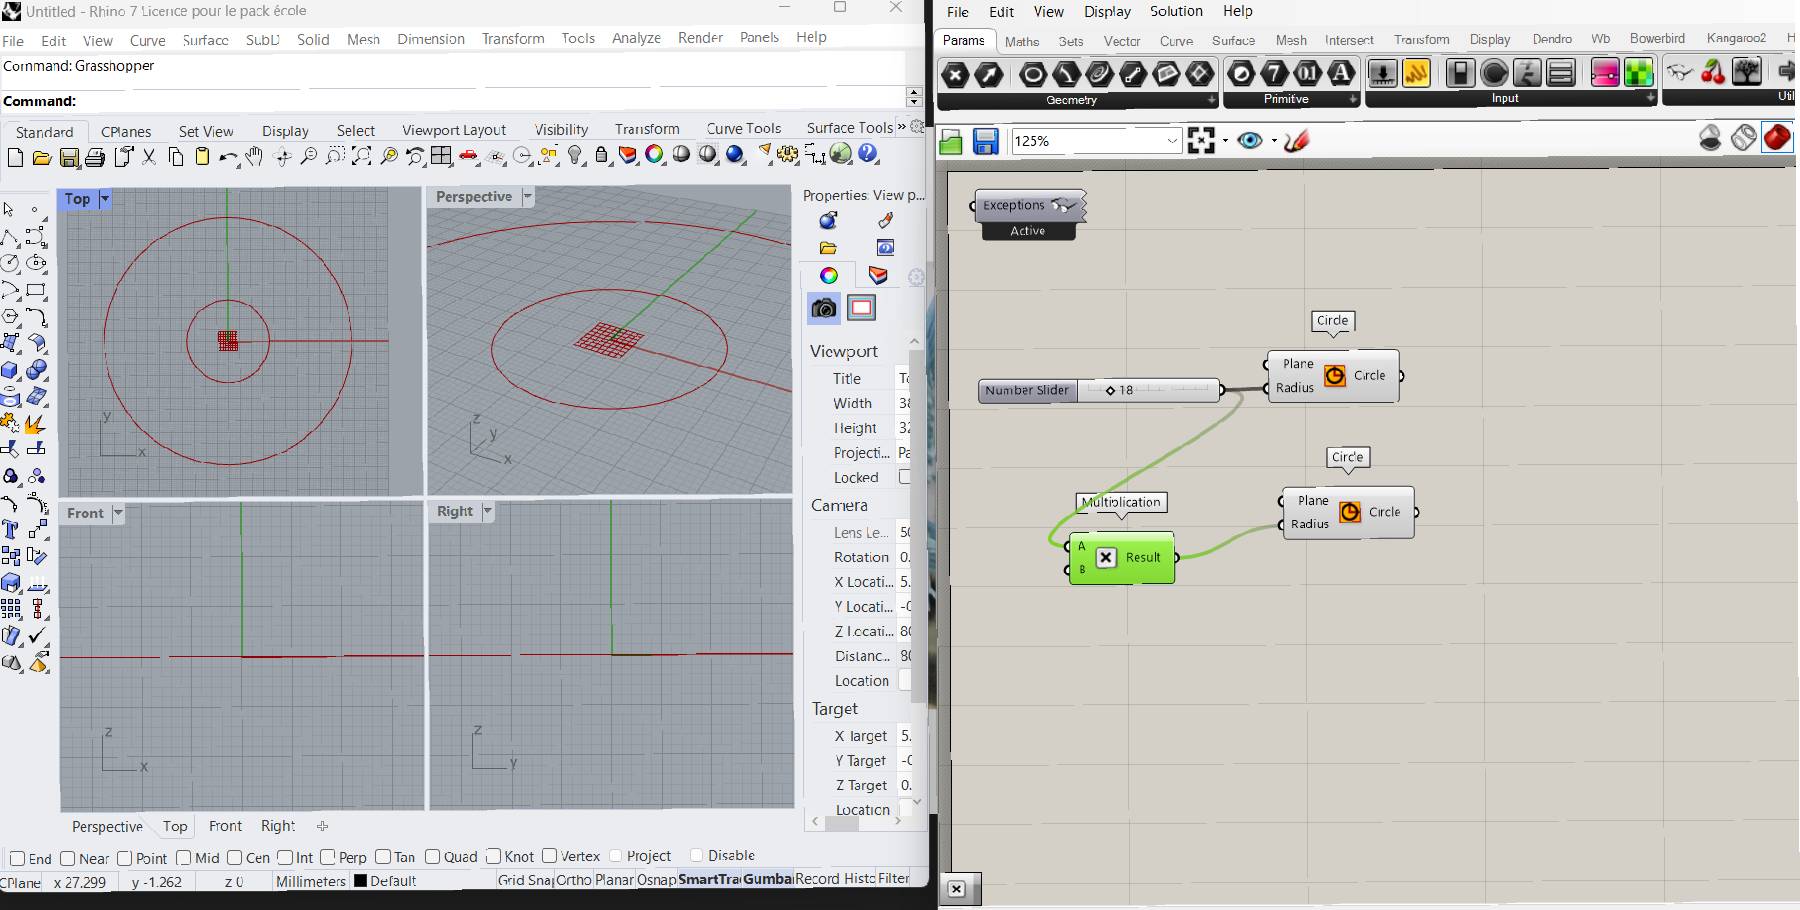
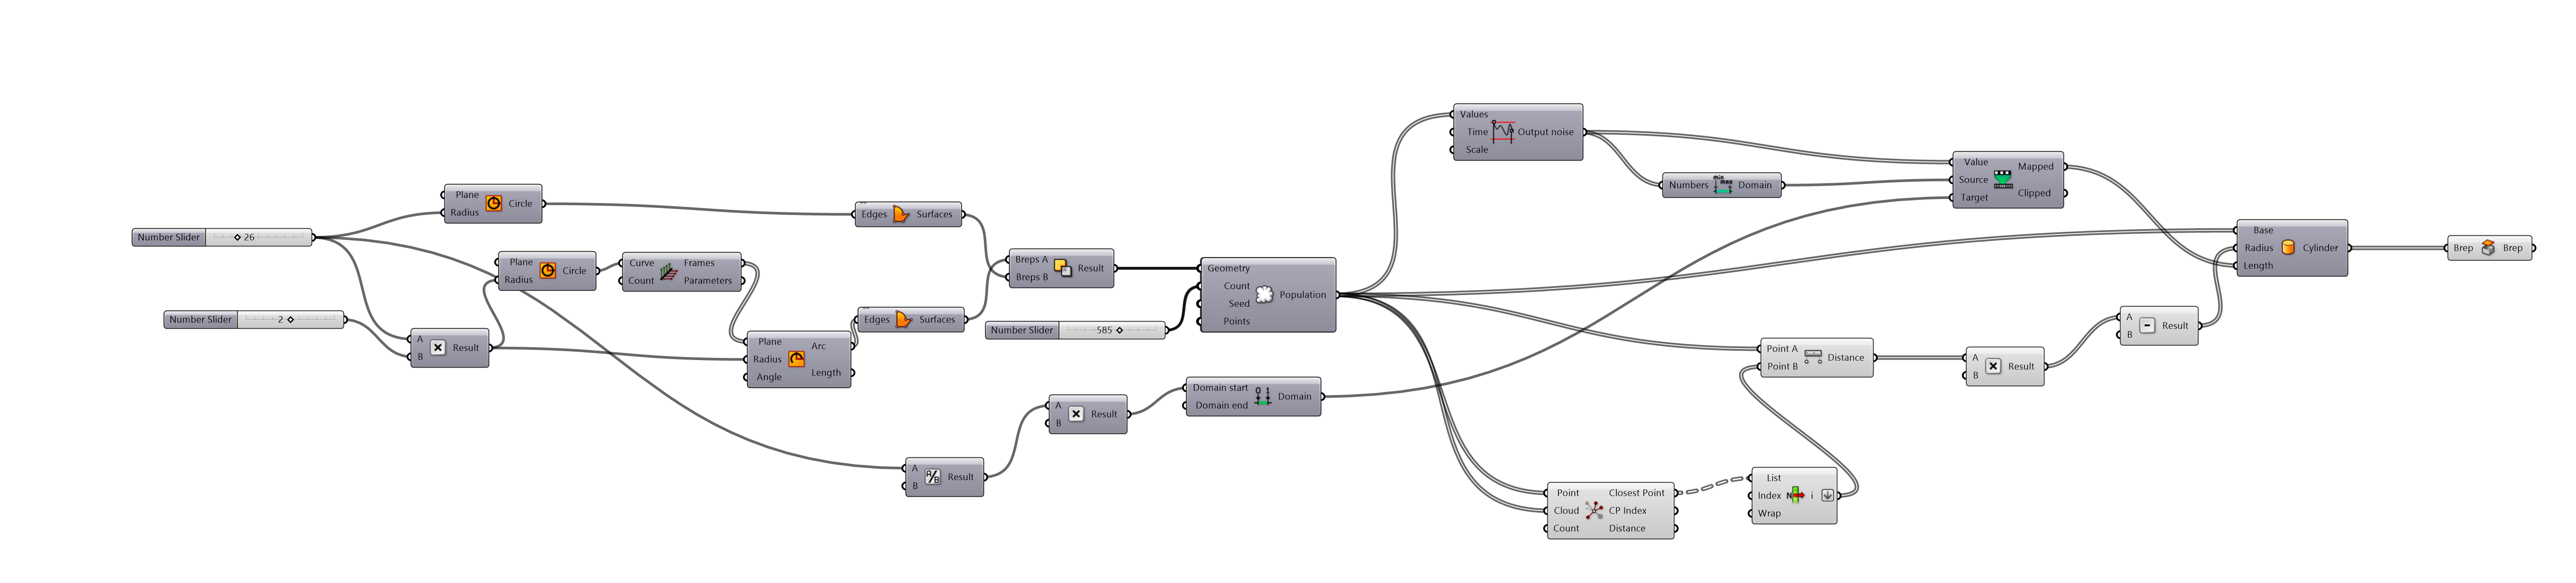
Process with Grasshopper
-
Add circles to have a base shape
-
Add a multiplicater
-
Set integer to define the base points to slice
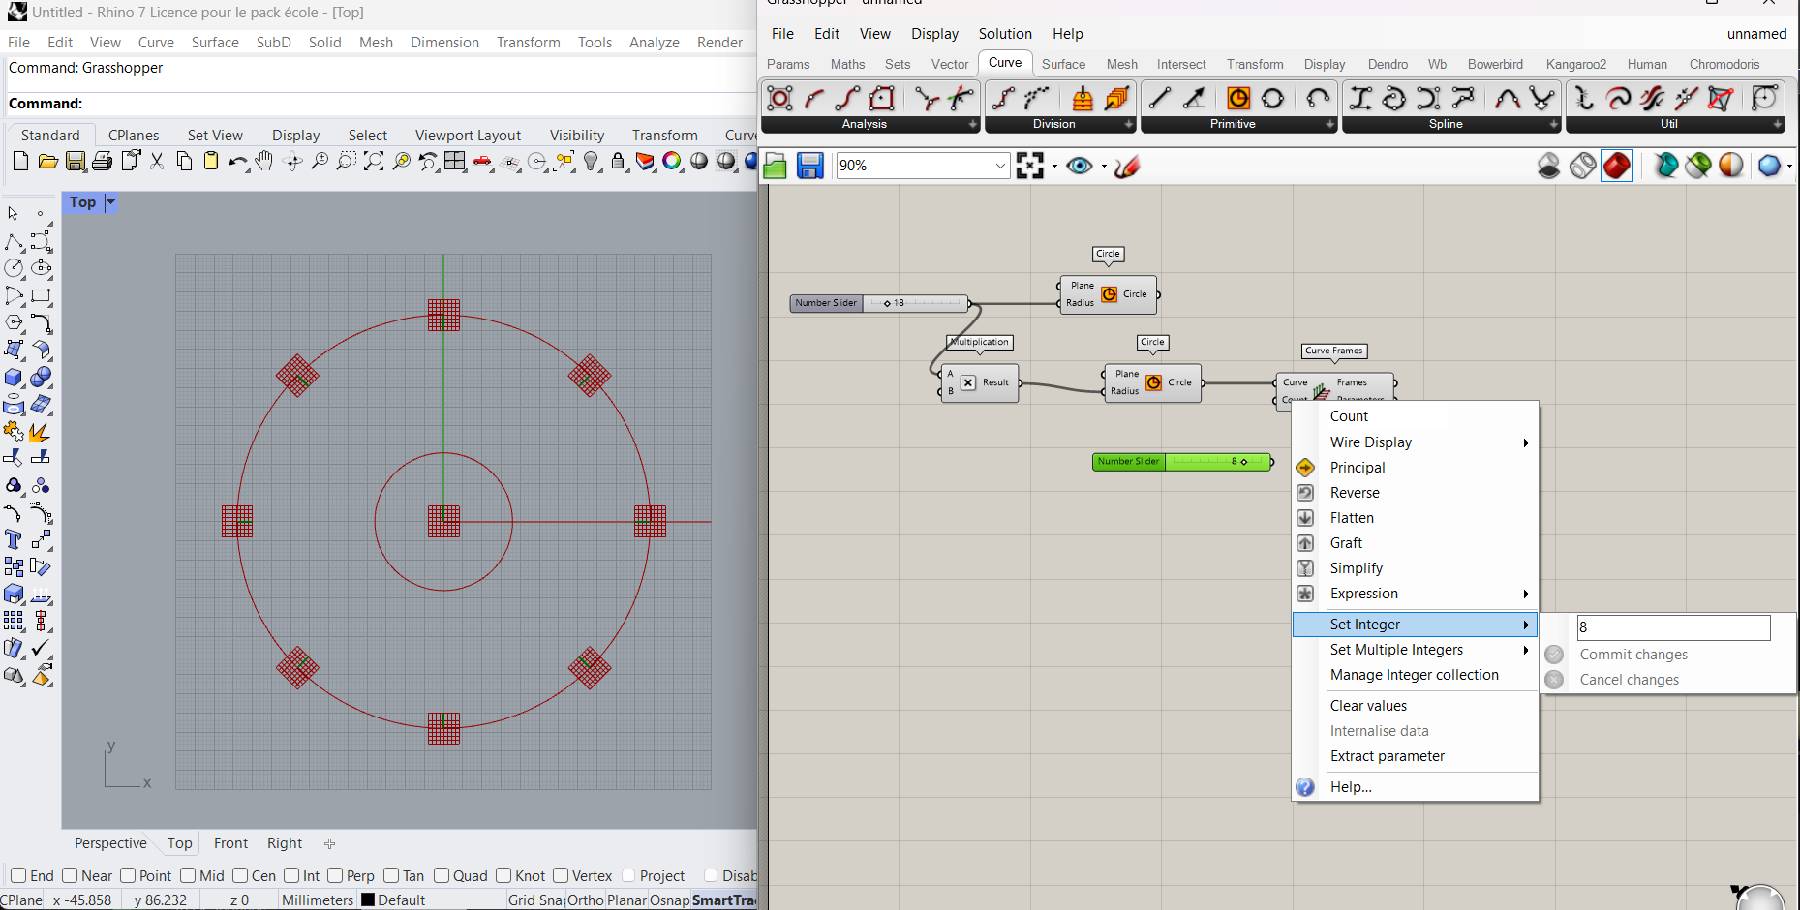
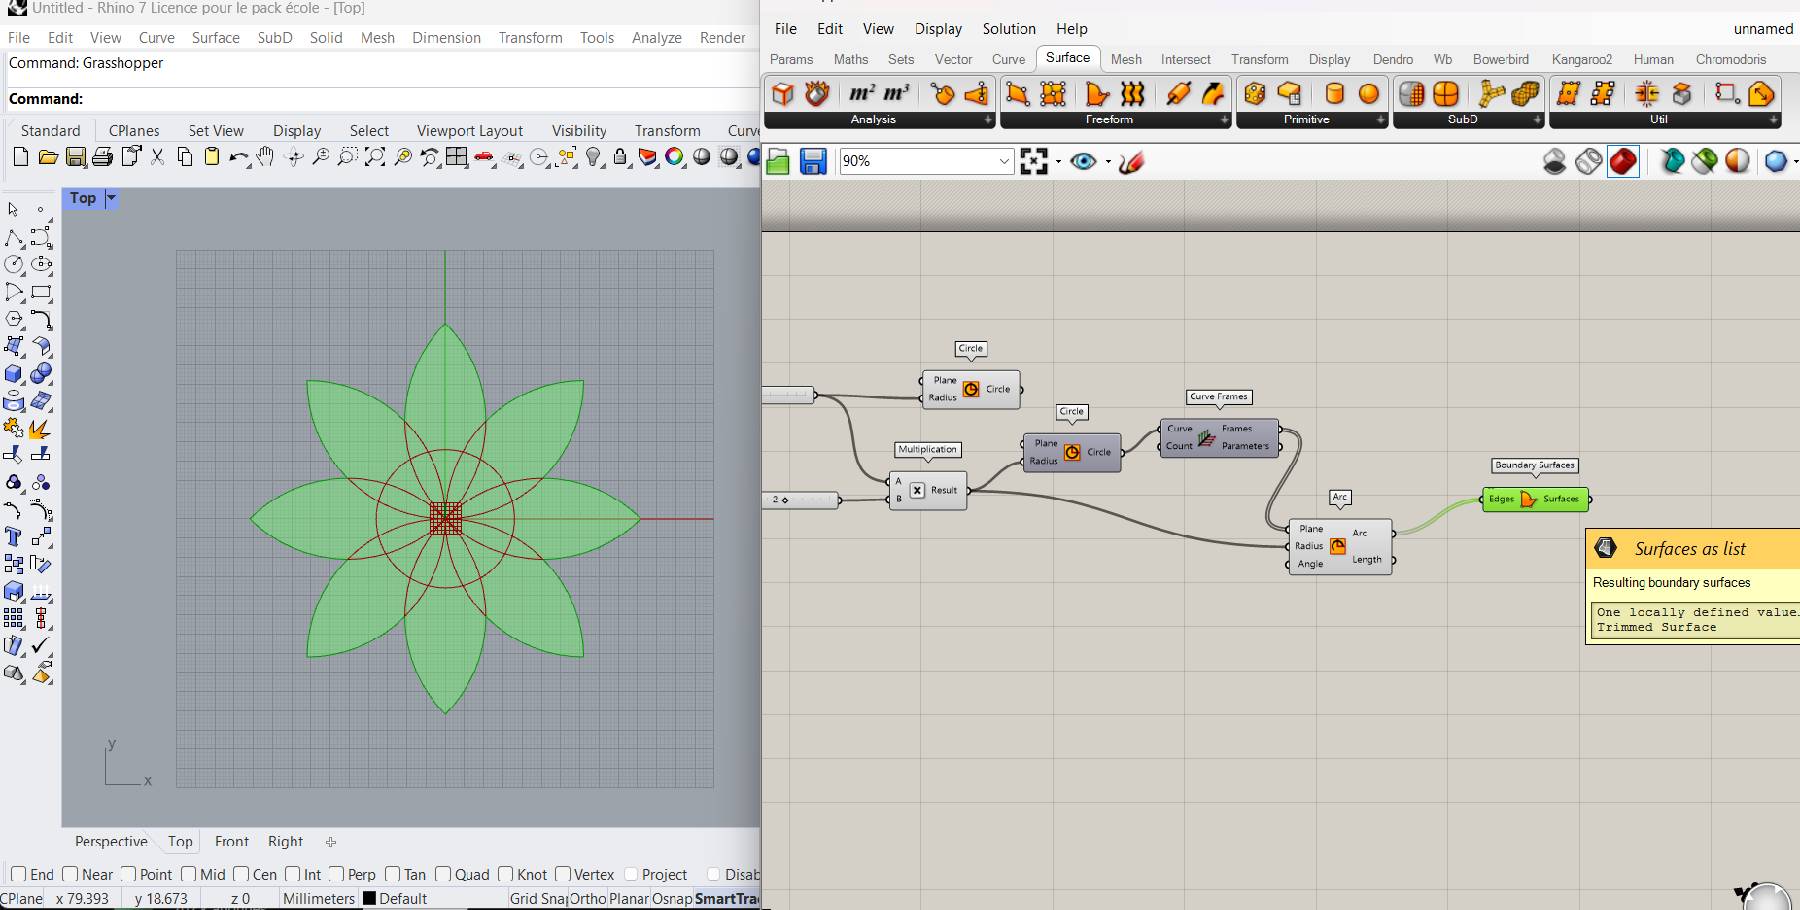
4.Add arcs to the form to create the rosette shape

-
Keep the edges undoing the shape inside
-
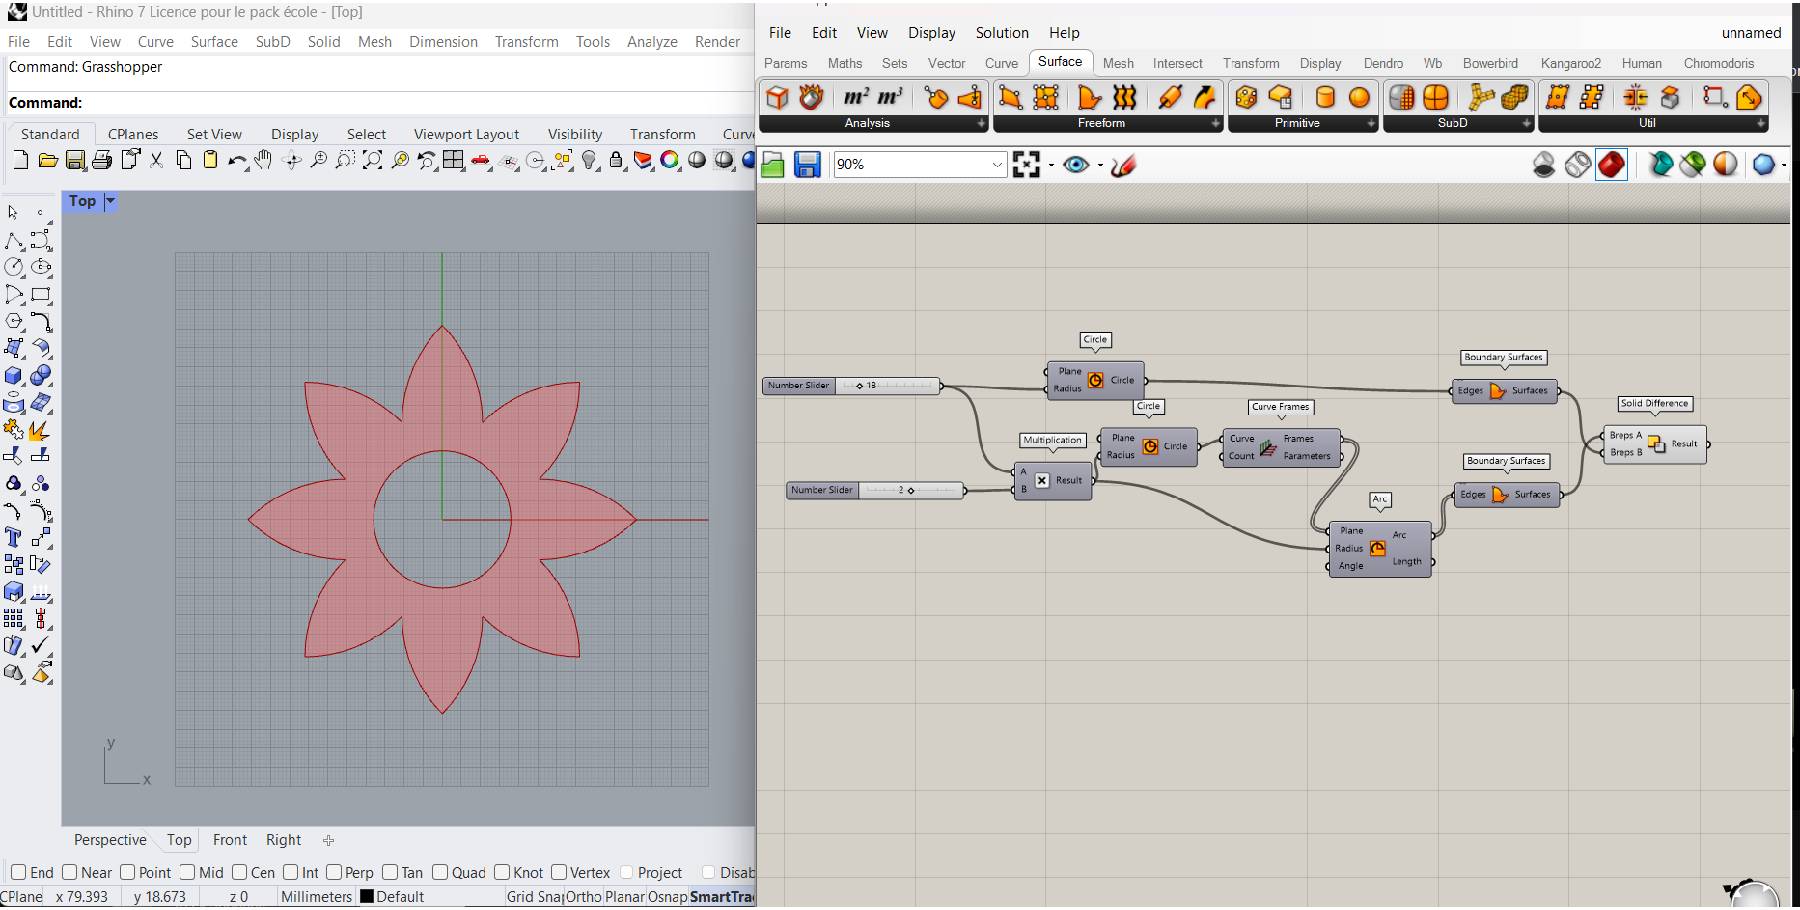
Add Boolean component to hide the shape in the center

-
Differentiate between the two forms to redefined the boundaries of the circles
-
Addition of cylinder following a random plan generated by the "remap numbers" component. The cylinders are closed with "cap holes", in order to have solid shapes when printed.
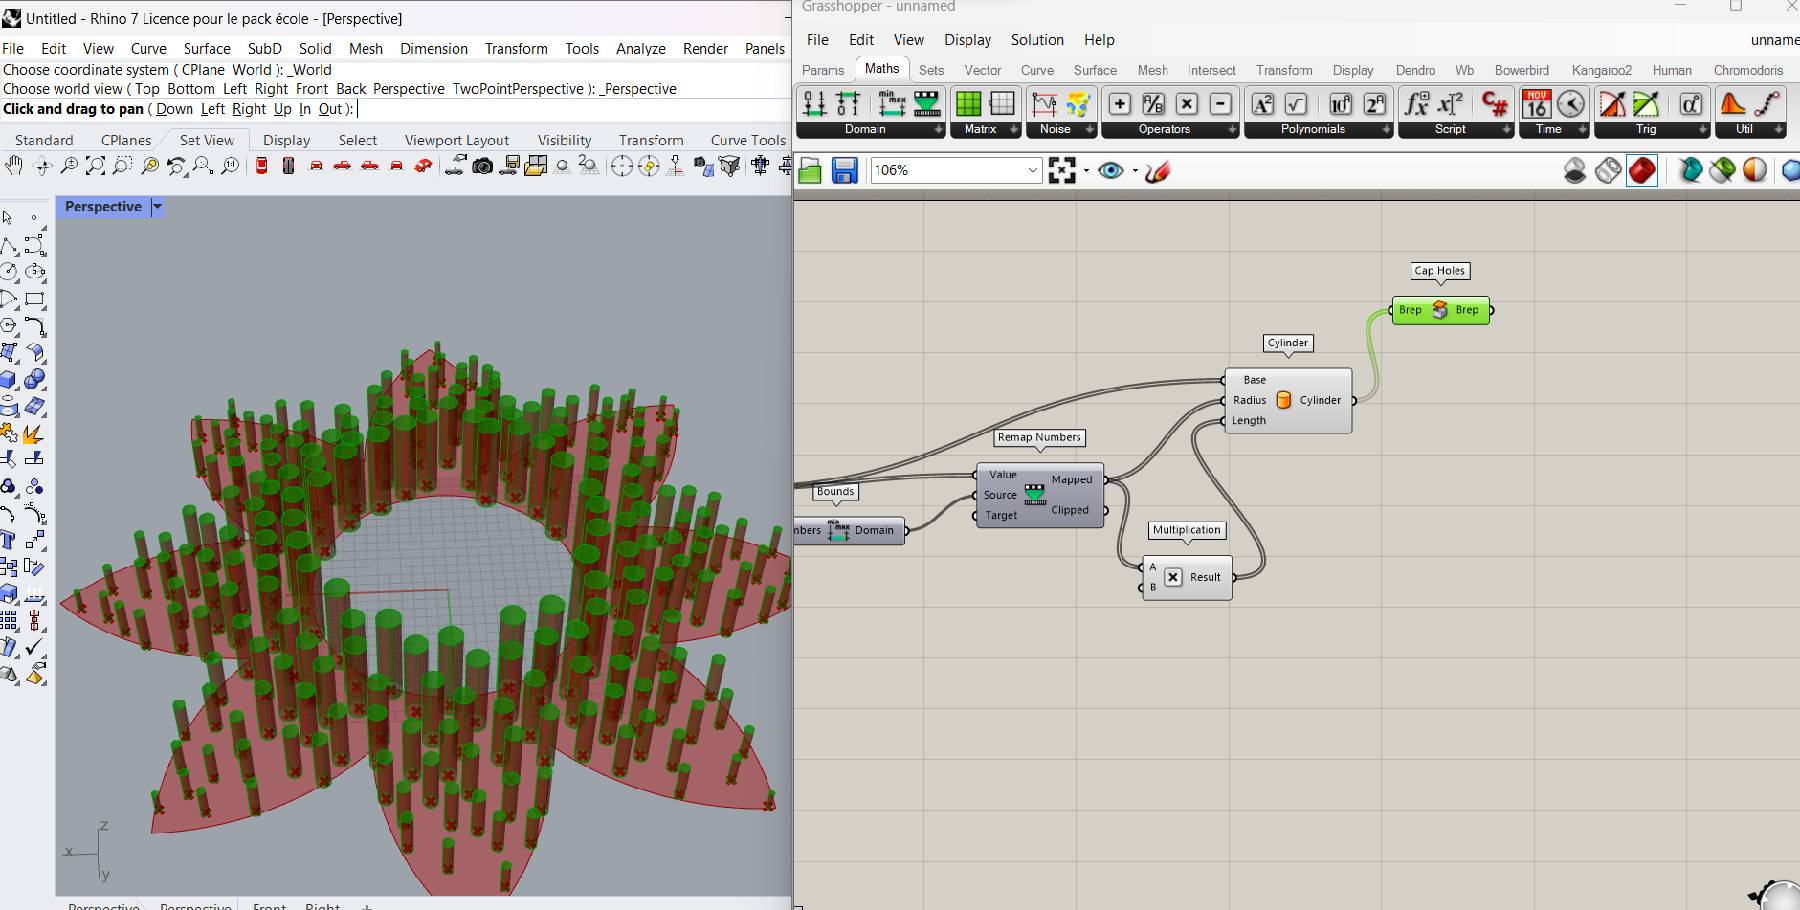
Grasshopper patch
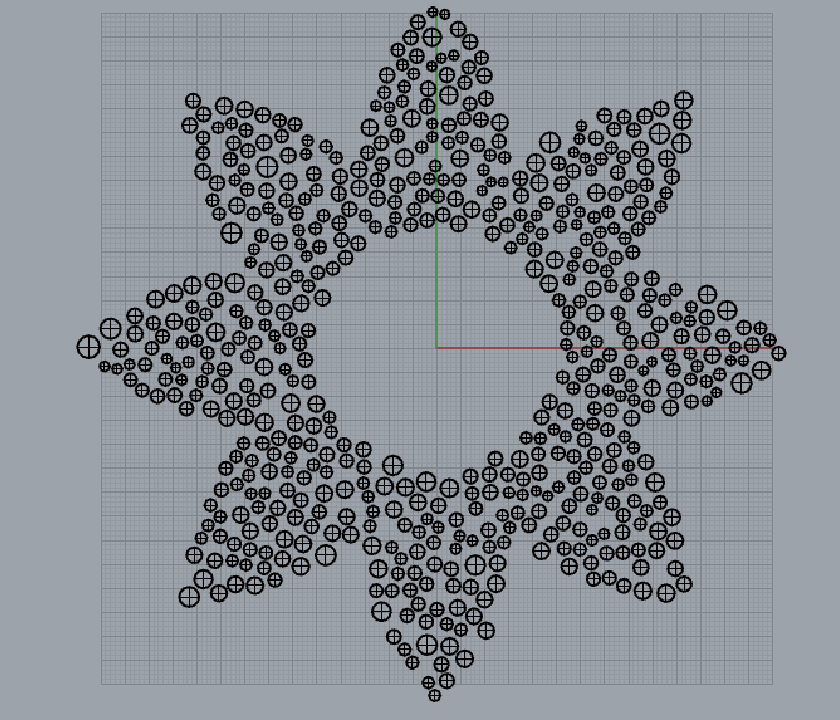
3D model
This test was exceptionnally made with the 3D printer Zortrax.
The nozzle hit the tulle and burned it in several places. The tulle had not been fully attached.
I had to make a raft because the print didn't fit on the board. (see to try without the tulle and with flexible wire)
Step 4: Last test part of urchin
Printing the complete form would take about 1 day and 5 hours. Which was far too long to get a result in the time available.
That's why I selected part of the geometric shape to try out the filament, which changes color with heat.
The STL model was obtained by removing the pattern from the other parts in order to retest with the new cylinder height parameters. I wanted to test to see if the effect would match the visual of Julia Koerner's swatches.
 Screenshot of her lecture
Measures Y=52mm, Z=49mm
3D Model
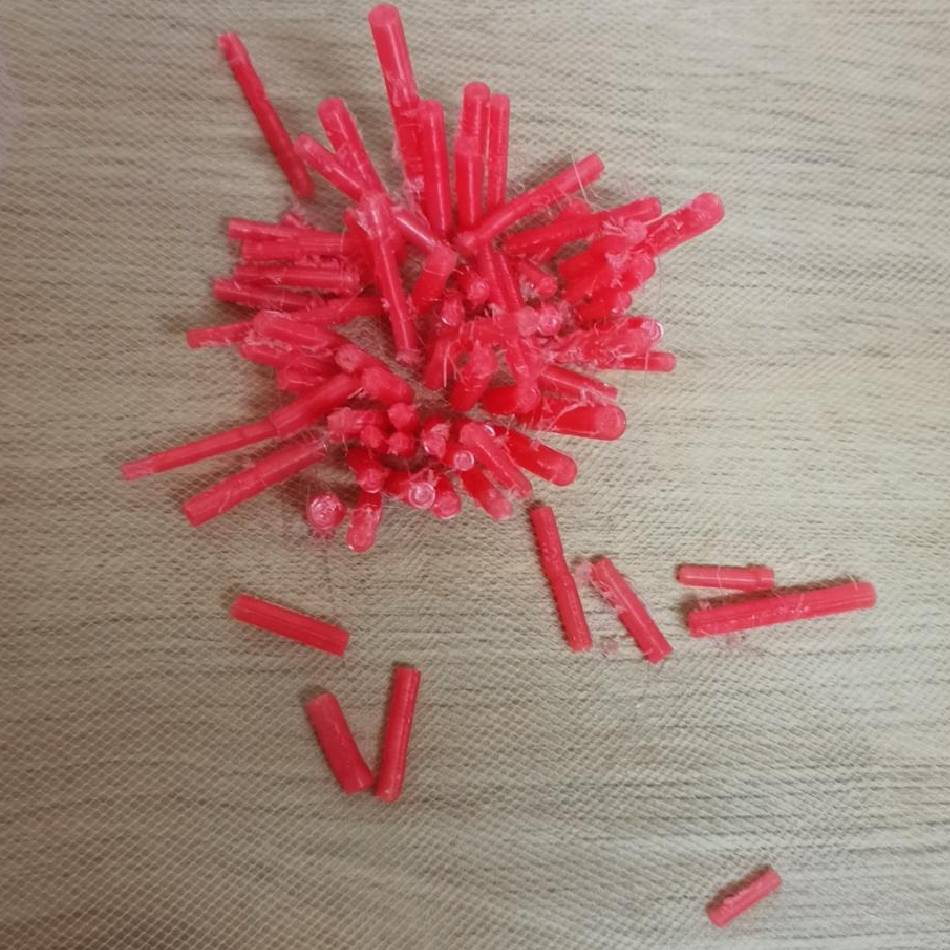
As I enlarged the shape on Cura to have a better rendering, the print took around 2h25 and used 3.55m of filament. I used a PLA which changes color with heat.
When cold, the filament is red. When heated, it turns white.
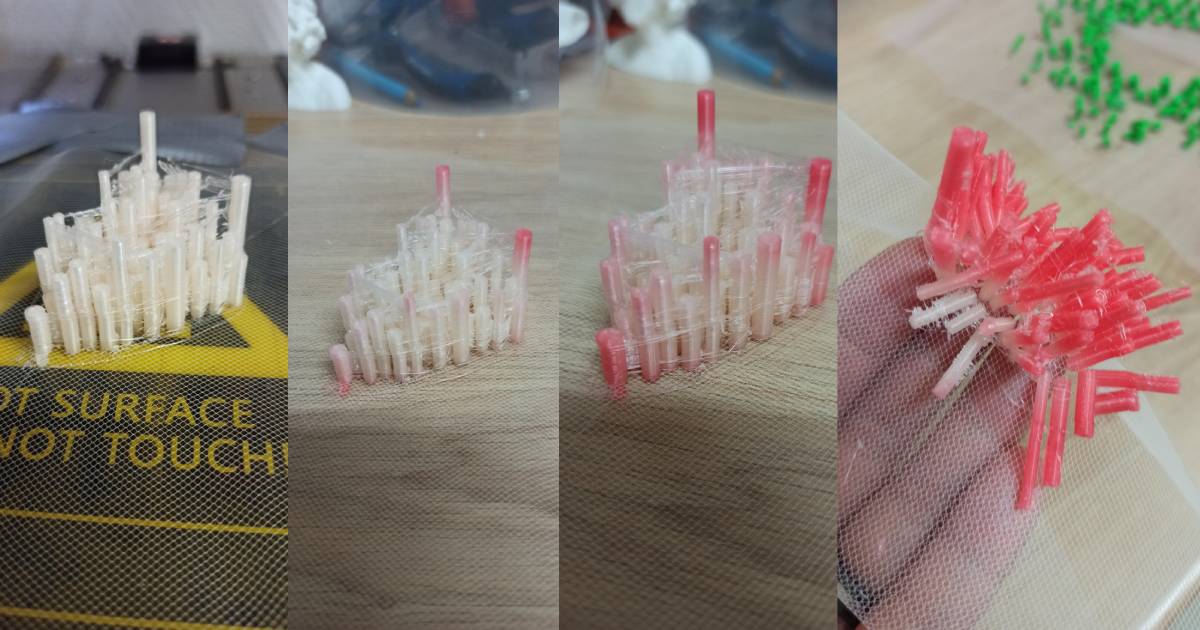 I really like the result but there is still a lot of filament to remove between each cylinder. I would have to retest by spacing the points but keeping the heights random.
🚀 Going further
There was no shortage of inspiration and I wanted to try out lots of things, but I didn't have enough time to do it all. To be continued...
My video playlist of this week
🗂️ Files
Gh file: Test triangle 3D printing
Gh file: Test urchin model 3D
Stl file: Test part of urchin 3D