11. Textile Scaffold
🗓️ 2023_November 28th to December 04th
 alum crystal, mycelium bio-composite, wool composite, linen composite
🥣 Work of the week
I wasn't sure what to make of this week's theme. The Anastasia's lecture gave me a better understanding of the broad outlines of the theme.
The scaffolding principle permits to change the property of the textile:
- to be harder
- as a formwork
- for composite and bio-composite
- like a structure for grownth
Textile, usually considered a simple material, can surprisingly be used as scaffolding thanks to its ability to transform into resistant structures. This versatile material, which combines robust fibers and advanced techniques, offers flexible protection. From protective gear to technical clothing, textile becomes an adaptable shell, ready to meet contemporary challenges with resilience and elegance.
weekly assignment
- Produce 2 techniques of textiles scaffold
- Document the process for CNC milling
- Document the processes from design to prototyping, fabrication,...
Some inspirations
- Lisa Boulton Basque Biodesign center Bilbao 2022-23
- Betiana Pavon FabLab Barcelona 2019-20
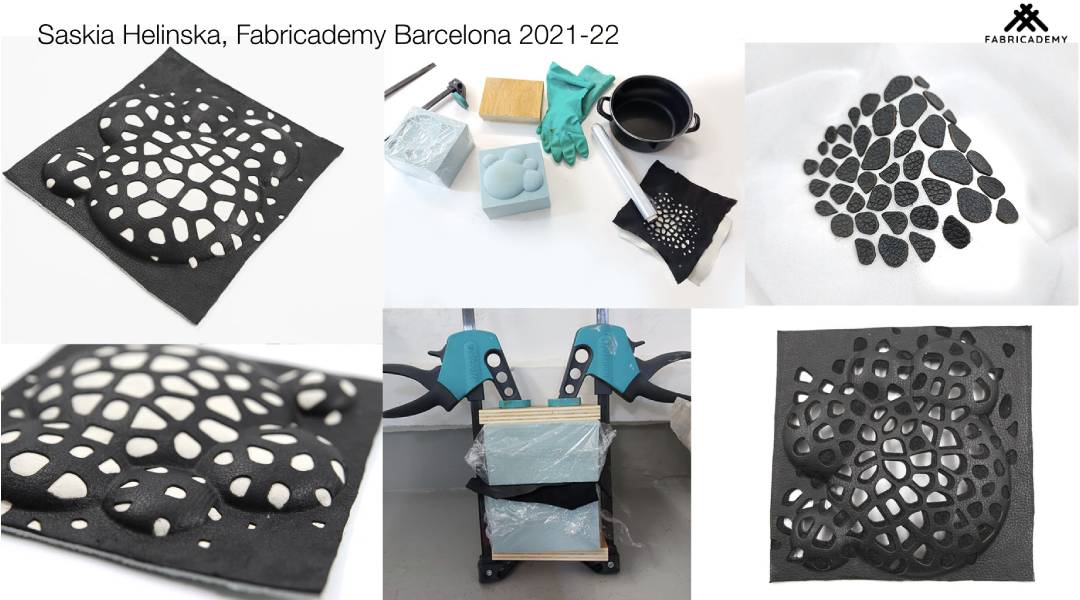
- Saskia Helinska FabLab Barcelona 2021--22
- Dominique Vial TextileLab Lyon 2020-21
📚 References & Inspiration
Textile techniques are at the heart of many advances that affect every aspect of our daily lives. They contribute to the aesthetics, functionality and durability of the products we use, while paving the way for ongoing innovation in fields as varied as fashion, technology and healthcare.
I was fascinated by the structures made by silkworms Pavilion I and II. The multi-disciplinary approach allows Oxman to integrate elements of nature into the manufacturing of new technologies.
The final project (Twist Again) of Dominique Vial, fabricademy 2020 alumnus, is also inspiring.
Saskia Helinksa's work is just as interesting, fabricademy 2022 alumna. She also thought to use the offcuts from her leather cut-outs to complete her molding. The results are very esthetics.
Screenshot from Anastasia's lecture
🧰 Tools
- Pots
- Jars
- Spoon, kitchen scale
- Alum, Copper sulphate
- Plastic gloves
- Coffee filters
- Blender
- Moldes
- Fabric scraps, wool, rope,...
Process and workflow
I first thought about what I wanted to test this week. The crystallization process intrigued me, especially since when testing printing pastes with vegetable dyes, I had mini crystals forming on the sponges that I had left to dry. I also wanted to see what I could do with the mycelium (which I hadn't been able to test in week 6). A workshop is planned during the week to make textile-based paper and another to test the crushed textile from Precious Textile.
Here we go!
Crystallization
How it works ?
Crystallization is the process by which atoms, ions, or molecules arrange themselves in an ordered, repeating pattern to form a crystal structure. This occurs as a result of the cooling or evaporation of a solution, leading to the formation of solid crystals with a well-defined geometric shape.
Diane showed me some tests done by alumni from previous years. The crystals are still mostly whole on the various fabrics and materials. The different tests allow me to see what I can test in my turn.
I have prepared my materials on which I want to grow crystals.
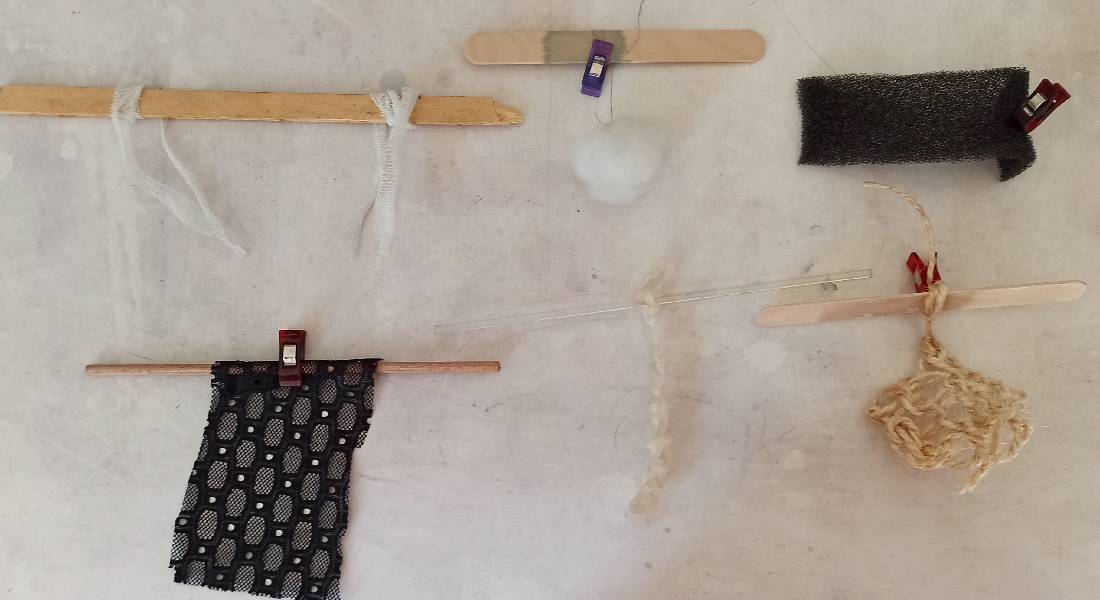
synthetic stuffing ball, lace, tulle, foam, string
Alum Crystals
Alum crystals steps!!
- Boil 1L of water
- Add 400gr of alum and mix until the crystals can no longer dissolve
- Pour the mixture into a pot, filtering it to remove any crystal residue
- Make sure that the support does not touch the walls or the bottom of the pot, to prevent them from growing elsewhere
- Cover the pot to prevent dust from entering
There must have been a background of vegetable dye (madder root?) in the pan that I used to heat the water, which turned orange but this did not influence the color of the crystals.
I followed the recipe made by Florence Moyano for her week's assignements. The drawings are very explicit 1.
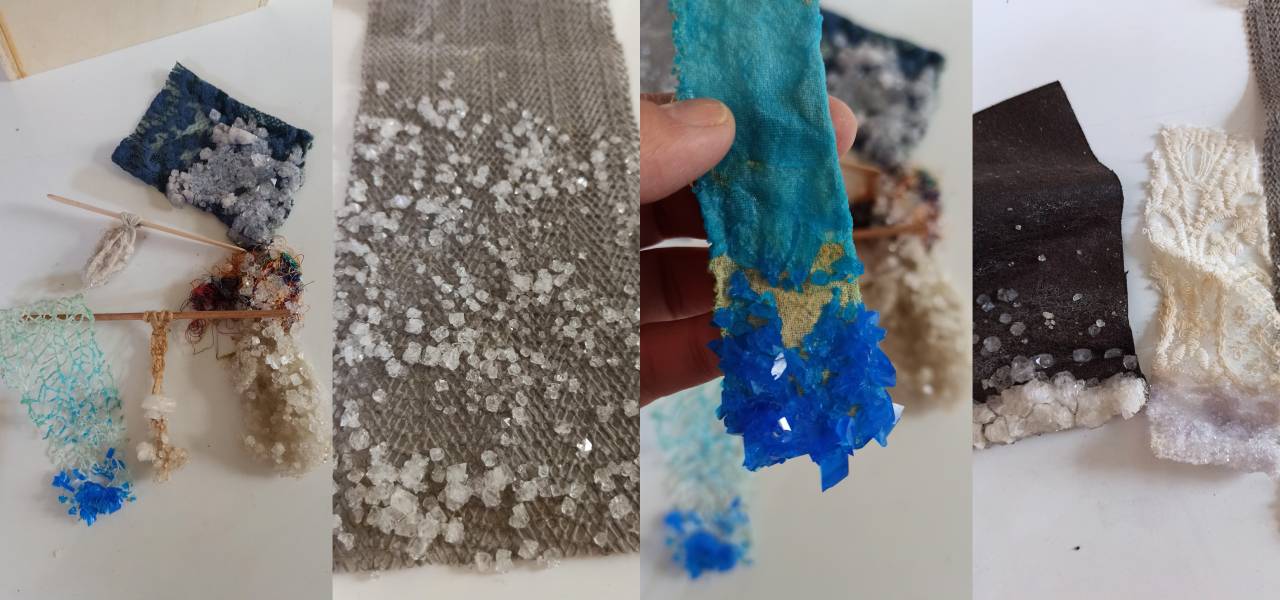
Results
After an hour I already had some crystals on the materials. But I realized that there was also some in the bottom of the pots.
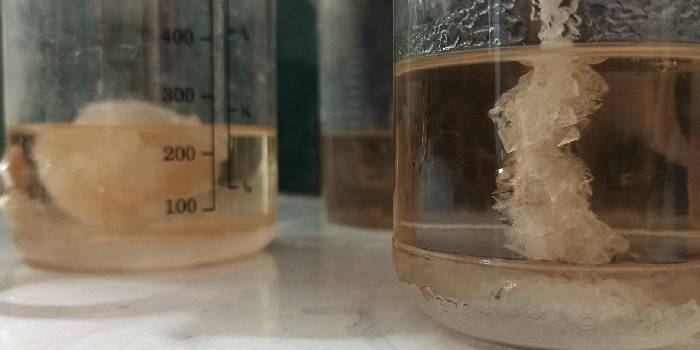
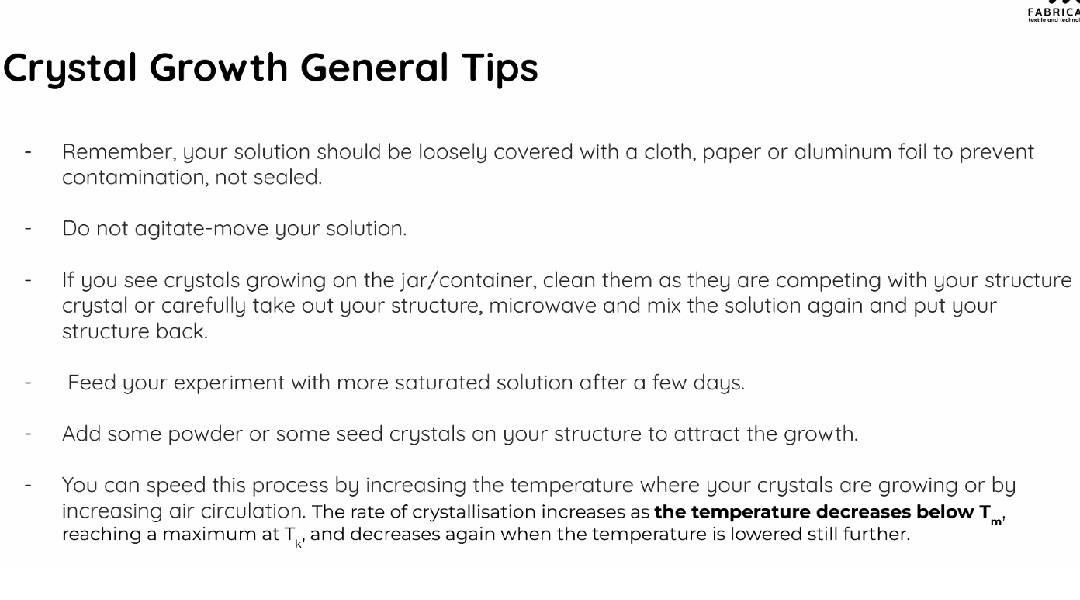
As they should not be left at the bottom to avoid them attracting the crystals clinging to the fabric, I followed the tips on growing crystals that Anastasia showed during the lecture.
I moved the piece of fabric and heated the solution in the microwave to remove the crystals deposited at the bottom of the pot.
 foam, tulle and lace
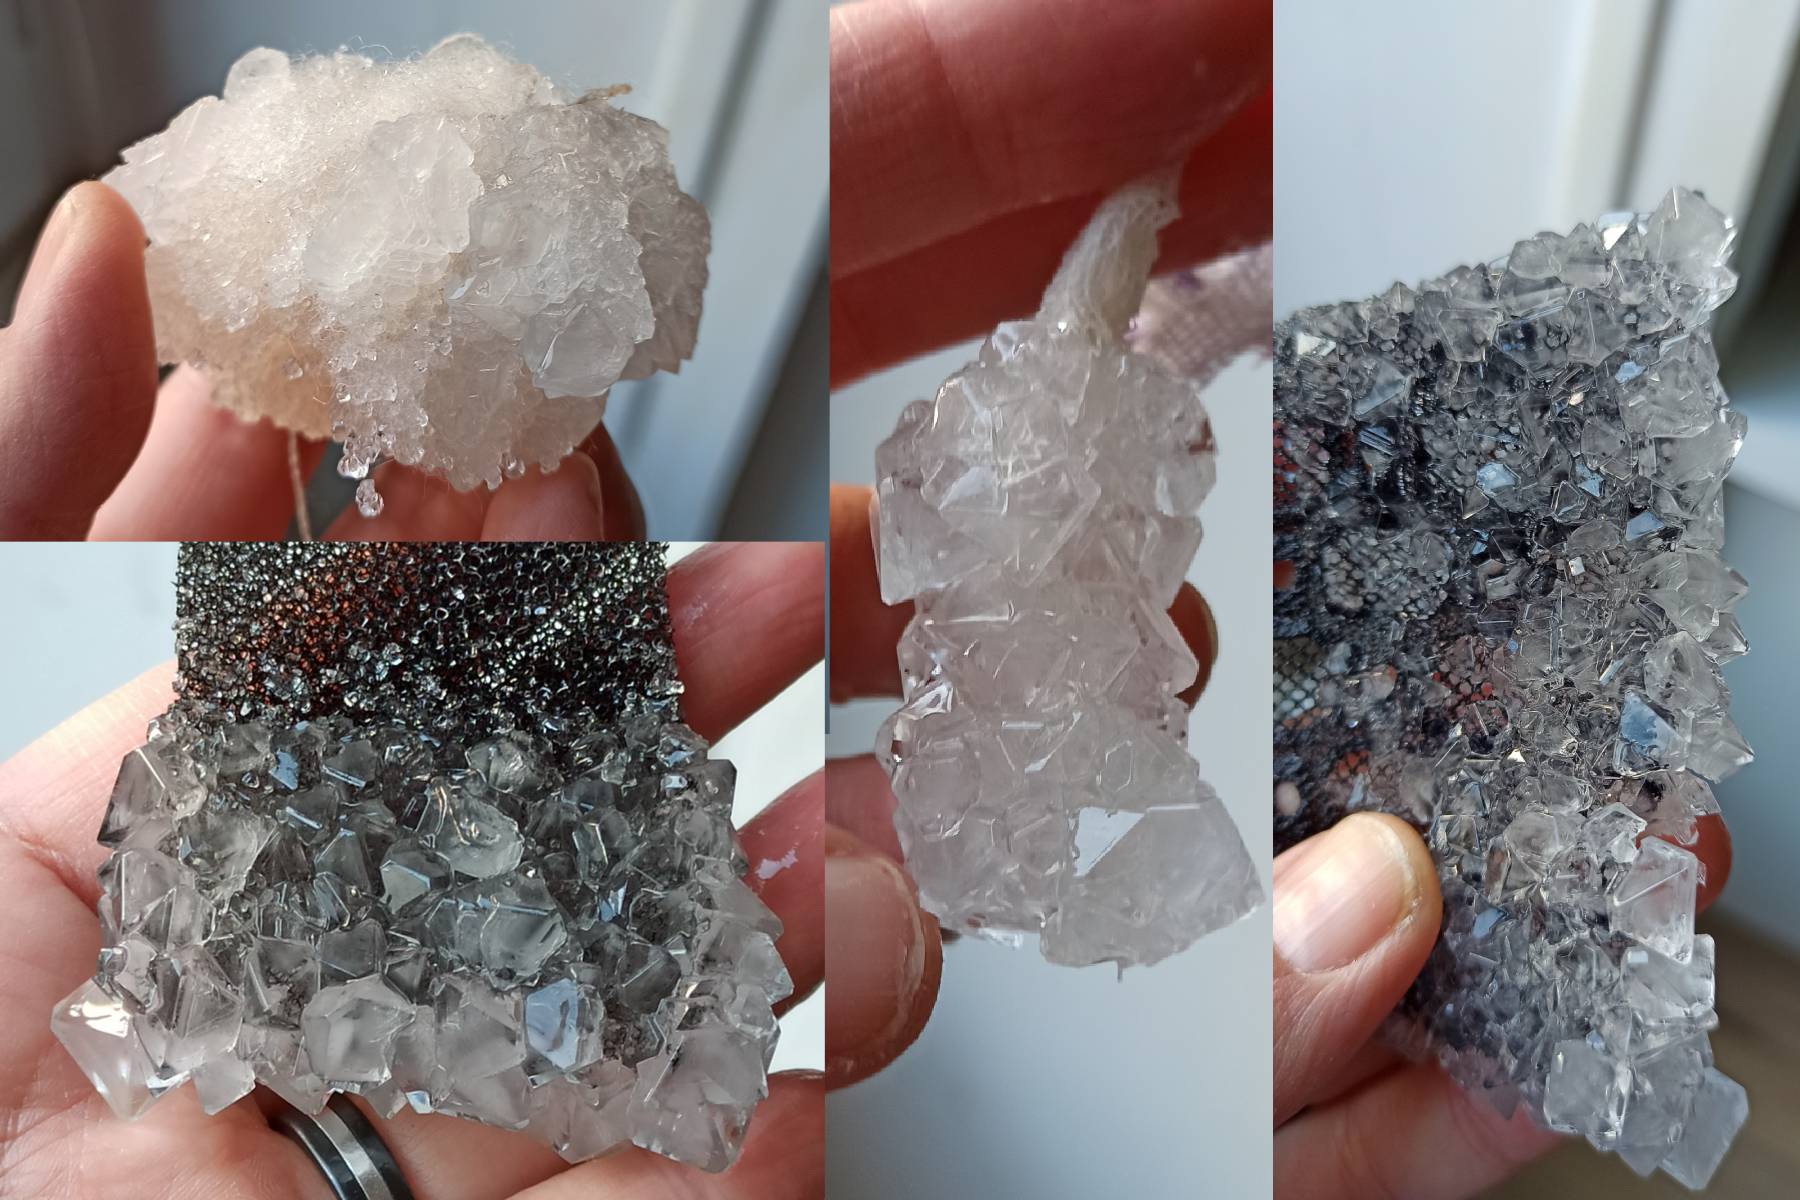
Results week+1
I really like the results on foam and lace. The crystals are neat and well formed.
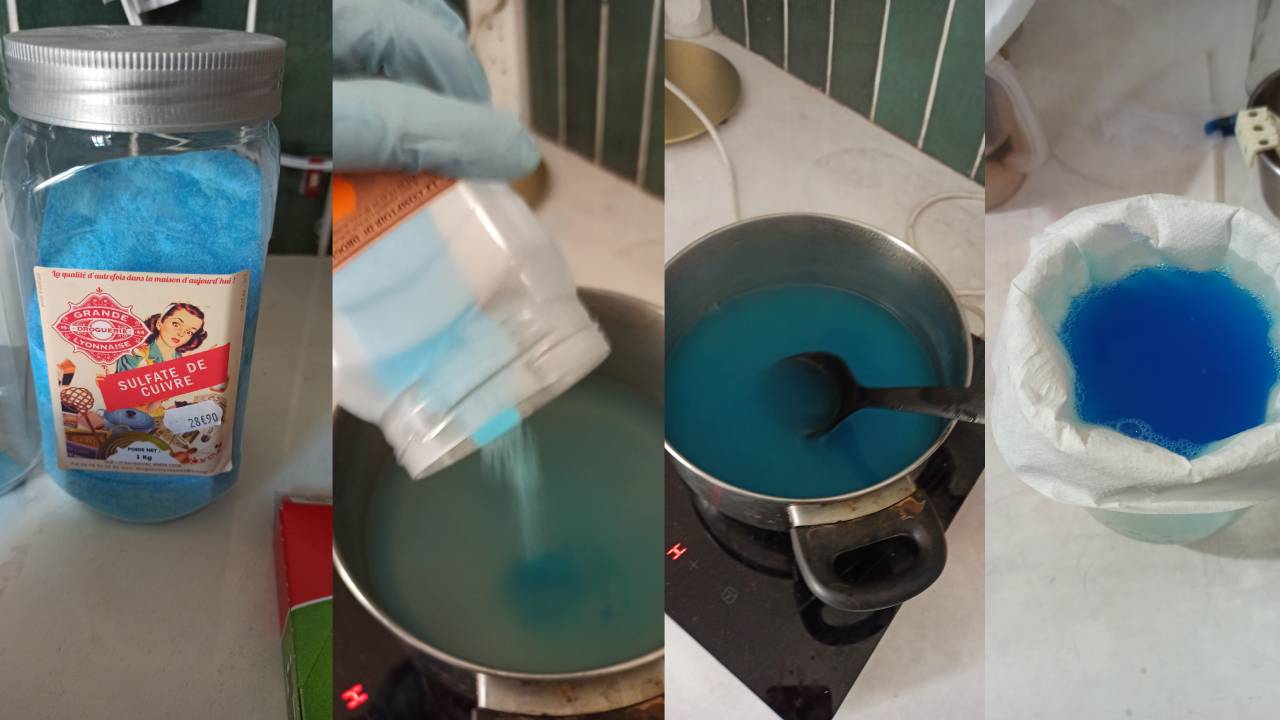
Copper Sulphate Crystals
Second test was made with Copper Sulphate crystals, because I wanted to have colorful crystals.
⚠️ Copper sulfate in its pre-crystallized state is a little bit toxic, making it essential to take safety precautions such as wearing gloves and a mask.
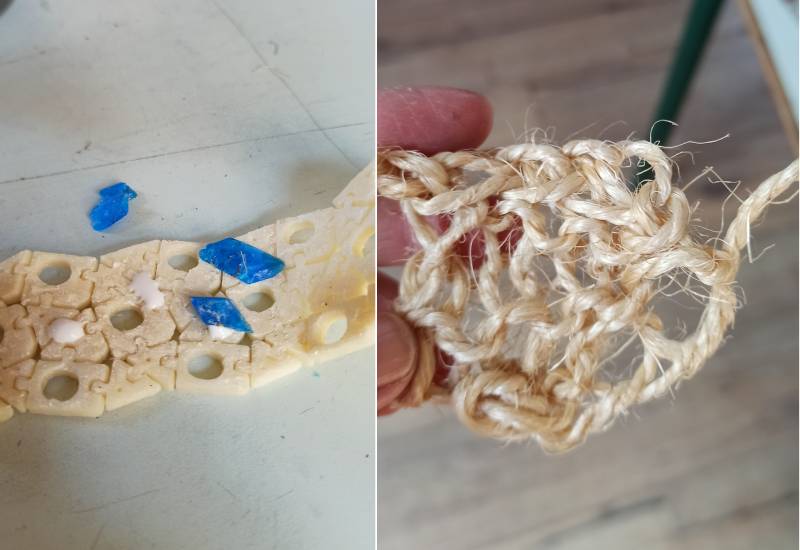
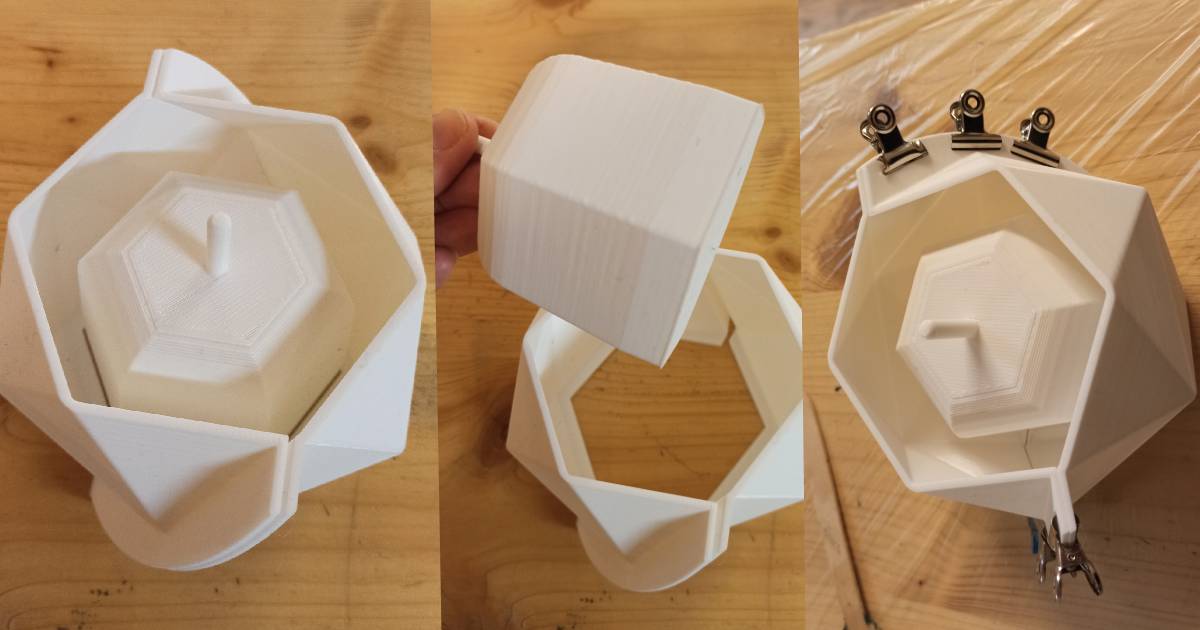
💡To ensure the adherence of crystals to the fabric, I employed a technique involving a "starter" crystal affixed to the 3D-printed bracelet. By doing so, the surrounding crystals naturally develop and grow around this initial point, creating a cohesive and visually appealing crystalline pattern (we'll see the result). I also knitted a piece of string to see how the crystals would attach.
Copper sulphate crystals steps!!
- Boil 750ml of water
- Add copper sulphate little by little until the mixture is no longer homogeneous. I added in the end around 365g of copper sulphate
- Pour the mixture into a pot, filtering it to remove any crystal residue
- Make sure that the support does not touch the walls or the bottom of the pot, to prevent them from growing elsewhere
Results
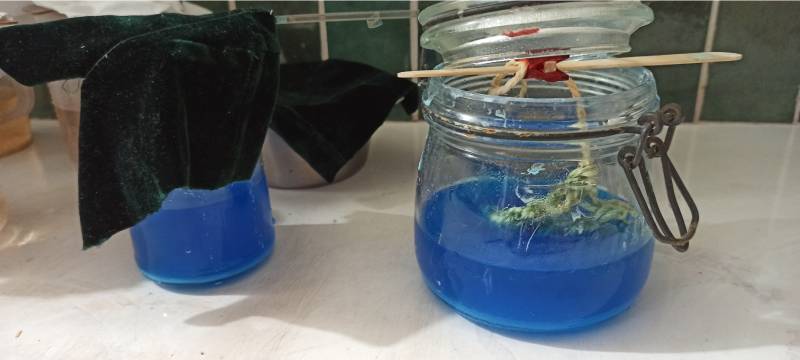
Work in progress...
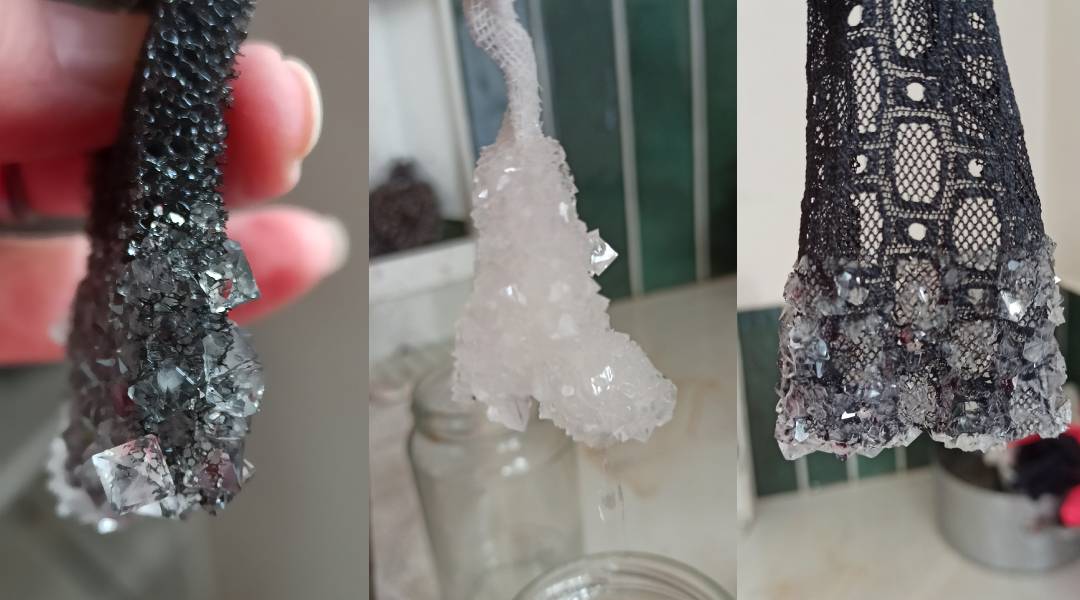
Results week+1
The crystals are smaller than those with alum and began to whiten a little after removing them from the containers.
The "starters" have enabled the crystals to multiply on the 3D-printed bracelet, but the structure remains fragile.

Bio-composite: Mycelium
What is Mycelium?🍄
Mycelium is the root-like structure of fungi, made up of thread-like hyphae. It serves as the fungus's main body, responsible for nutrient absorption and organic matter decomposition. Beyond its biological functions, mycelium has applications in environmental remediation and sustainable products.
Grown bio's article provides a concise explanation of mycelium and its link with mushrooms. The site presents the various uses we can make of their GIY (Grown it yourself) kit.
I was able to use a sachet of mycelium composite wich was kept on the fridge to preserve mycelium. It is a mixture of mycelium with a vegetable fibre base.
Recipe
To make this bio-composite, we followed the instructions of Grown bio.
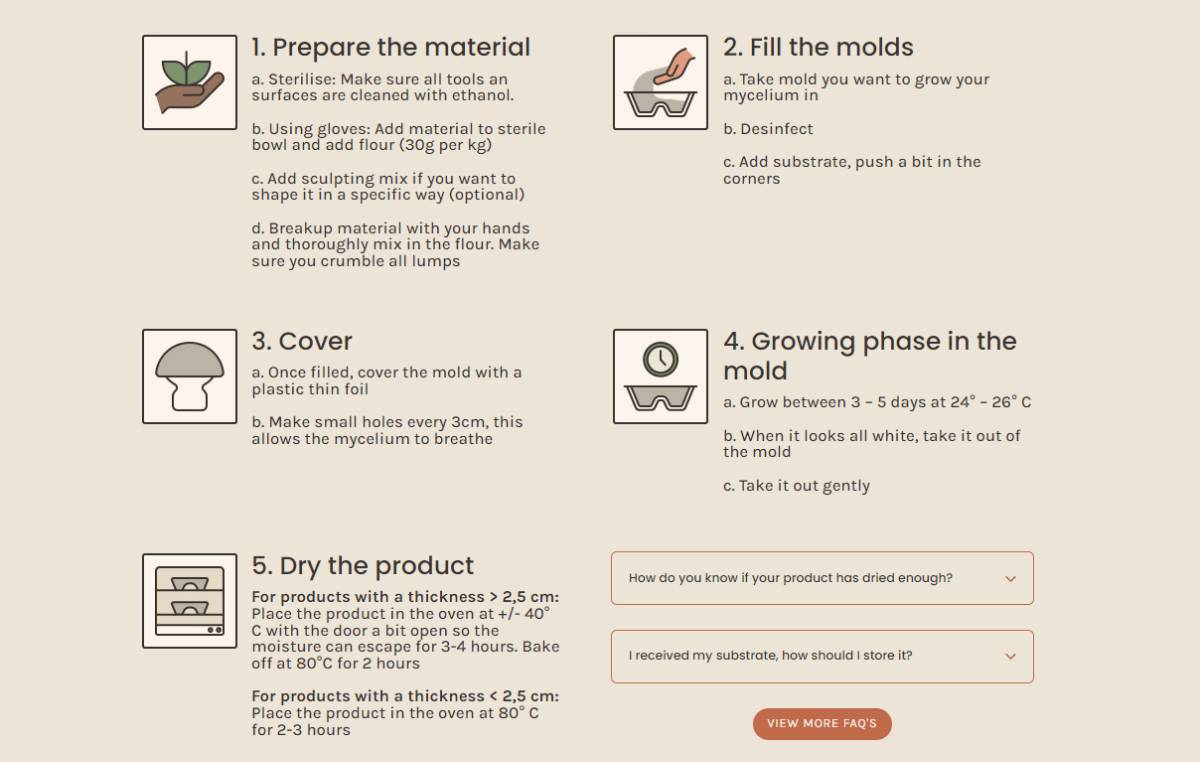
Screenshot of the website
You can find the file at the end2. I also followed the process shown by Amandine Fery during her fabricademy's week.
We cleaned all utensils, salad bowls, gloves and molds with rubbing alcohol to sterilize all surfaces that would come into contact with the mycelium.
We blended the composite before mixing it with flour. After that when the composite seemed sufficiently mixed, we put it into molds.
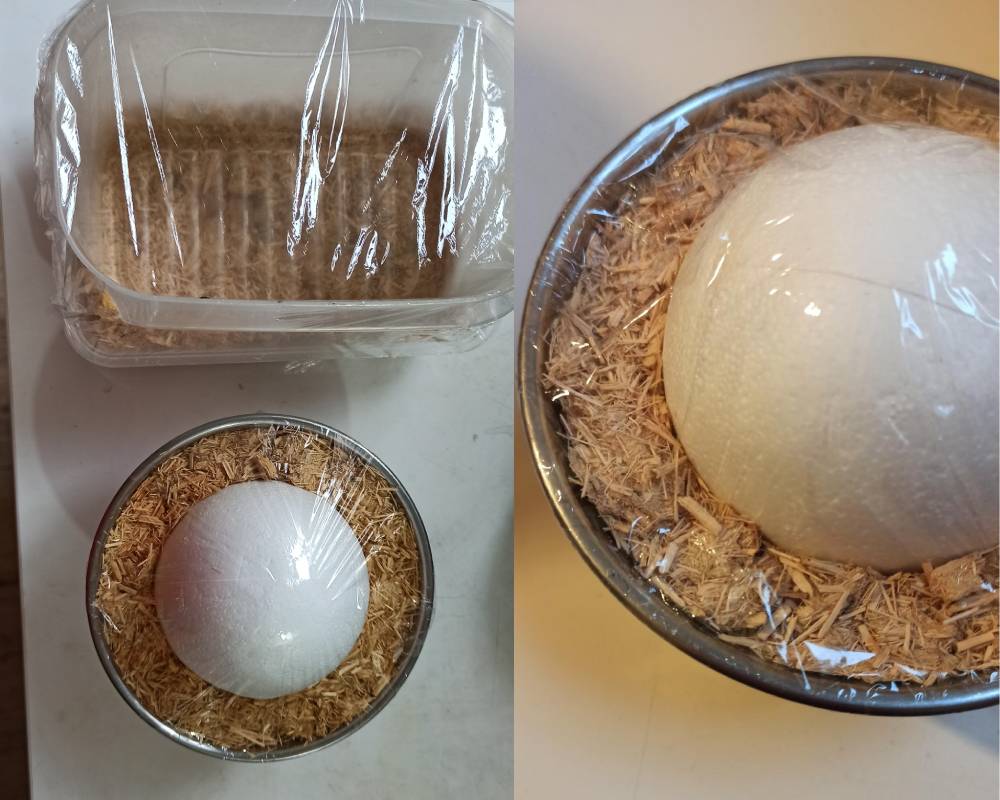
I put the mixture in a bowl with a ball of polystyrene in the center to form the hollow of the mold and Diane put some in a small rectangular plastic container. The whole thing was filmed, with a few holes for ventilation to allow the mycelium to grow and dry.
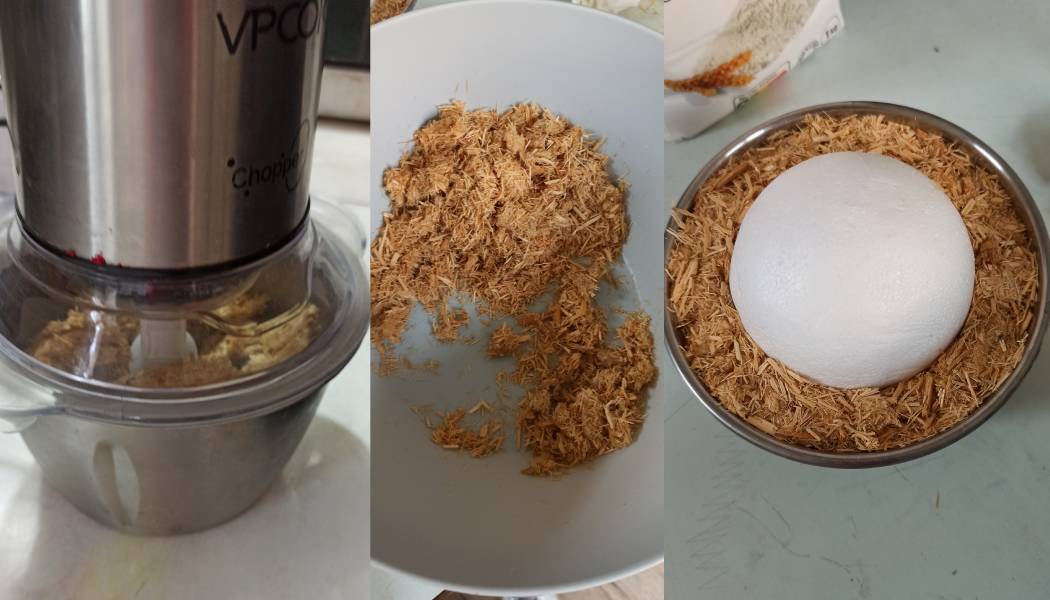
Blending composite, mixing with flour, putting in a mold
Results
Always work in progress after 5 days...
There's a slight difference between the photo on the right, where the composite is still beige, and the photo on the left, where the composite is slightly lighter. I'm going to leave it in the mold until it's completely white, as indicated in the kit guide.
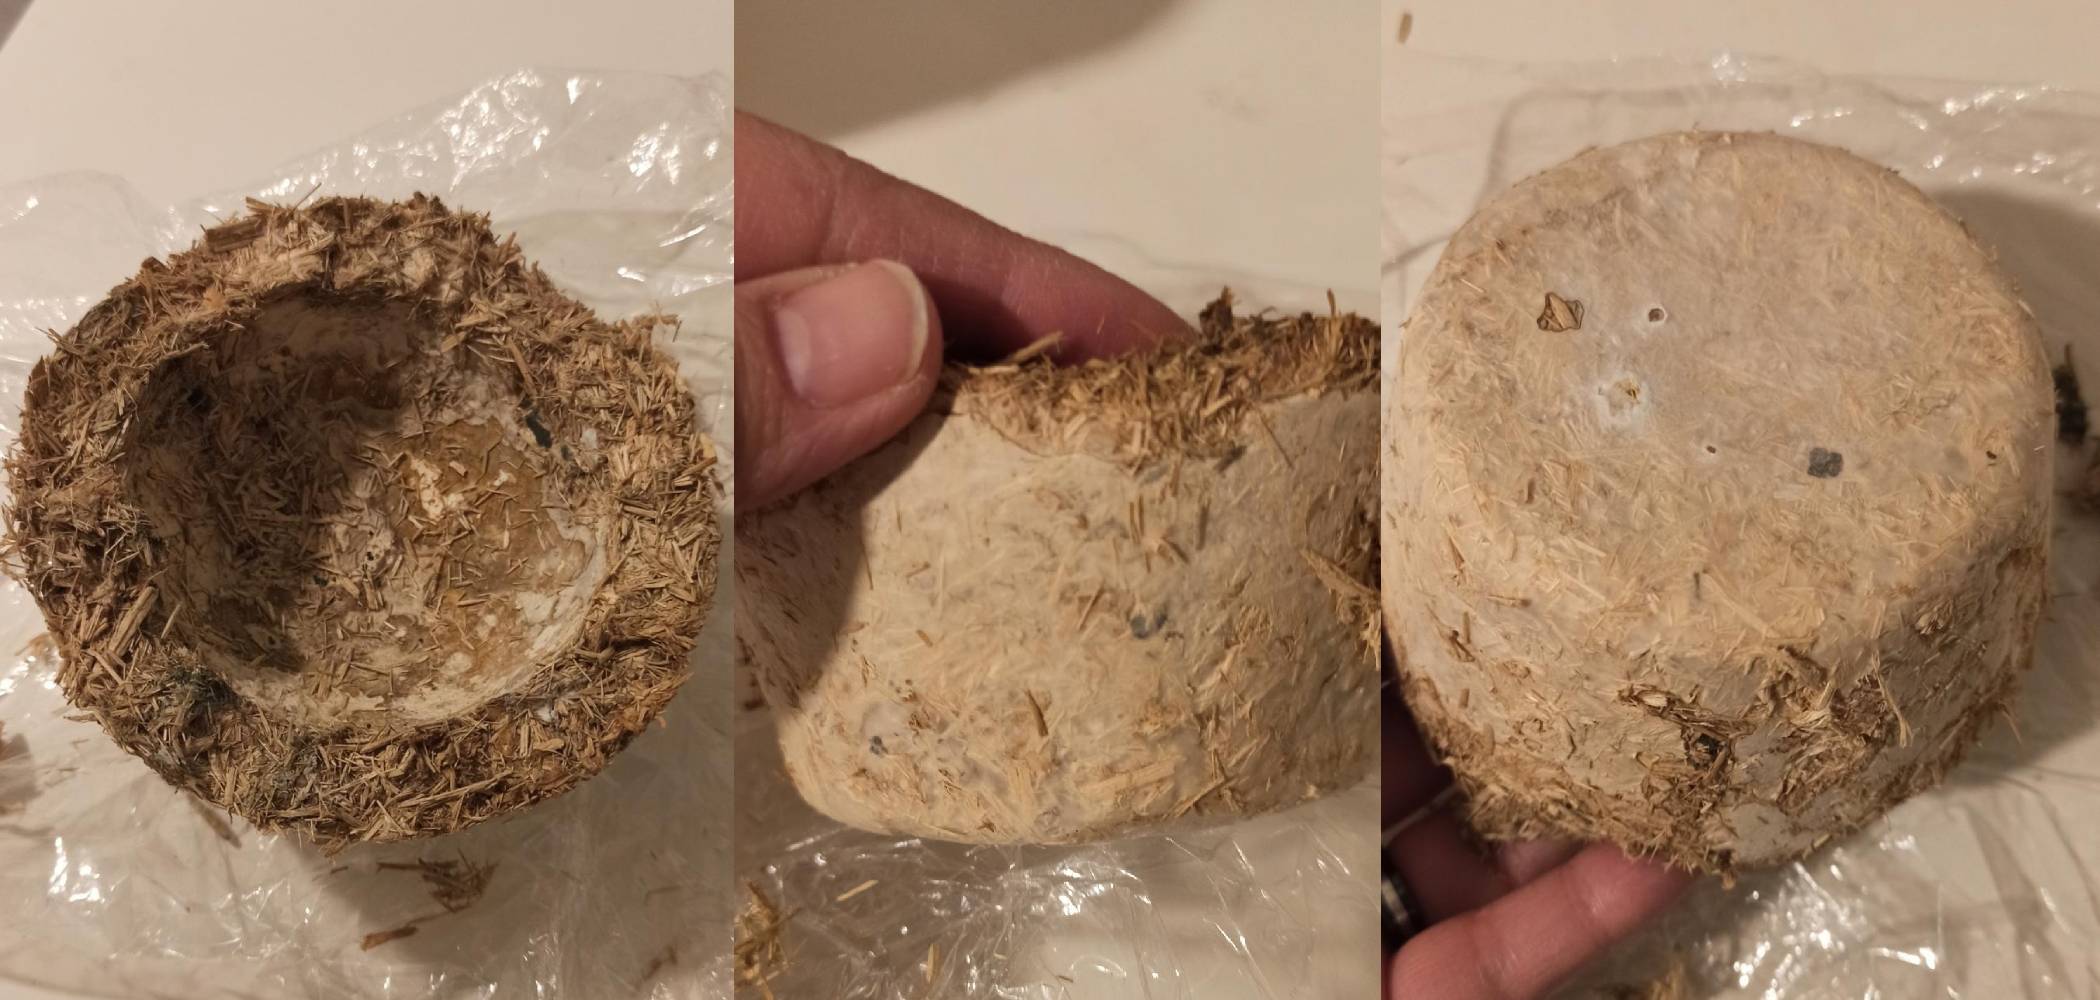
Results month+1
The mycelium has whitened slightly, but the result is not strong enough. There was a little mould on the upper part of the mould, the whole mould is rather fragile and has taken on a more beige than white color.
Textile Composite: Linen, cotton and wool
This week I had the chance to do a workshop with the shredded textile that Pauline uses as part of the Precious Textile project. Initially, the question arose of what to do with the amount of scraps from the prototypes of coworkers at Le Textile Lab over 3 months.
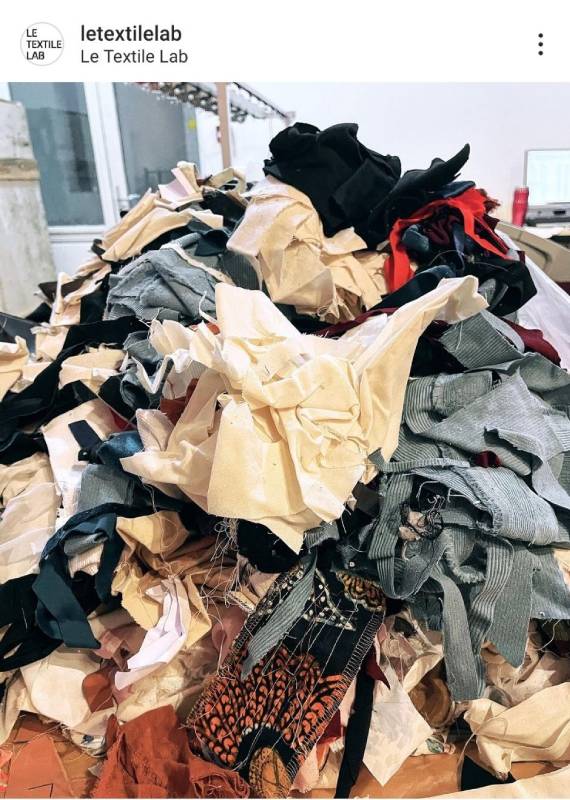
Instagram publication @letextilelab
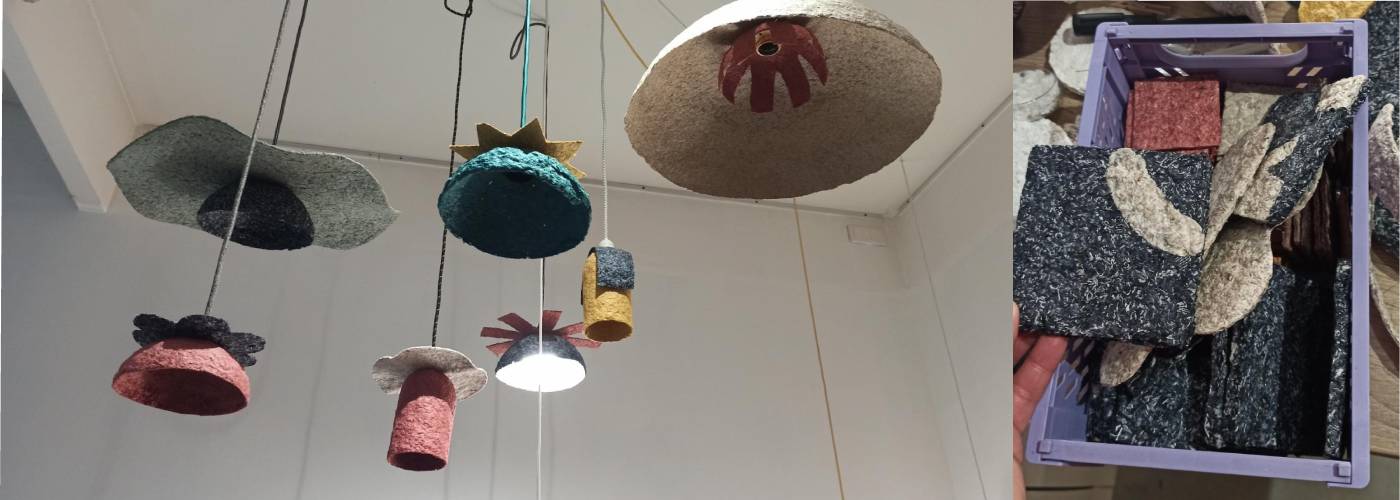
Pauline was inspired by the Precious plastic project which recycles plastic to reuse and transform it. The idea was to convert the plastic shredder into a textile shredder. She used the collection of textile production offcuts to transform them into lighting fixtures or furniture objects for workshops and Textile Lab's creations. The project was also inspired by the final project (Twist Again) of Dominique Vial.
Here an example of the creations which are mounted in the showroom and which will be on view during the party for the 5th anniversary of Le Textile Lab (Happy birthday!!🥳).
One of the founders of La grande collecte, french association in La Rochelle (Nouvelle Aquitaine region) was present to follow the workshop.
This association collects clothing and textiles to raise awareness of recovery, repair and reuse through responsible textile management. La grande collecte is committed to reducing waste and promoting the circular economy.
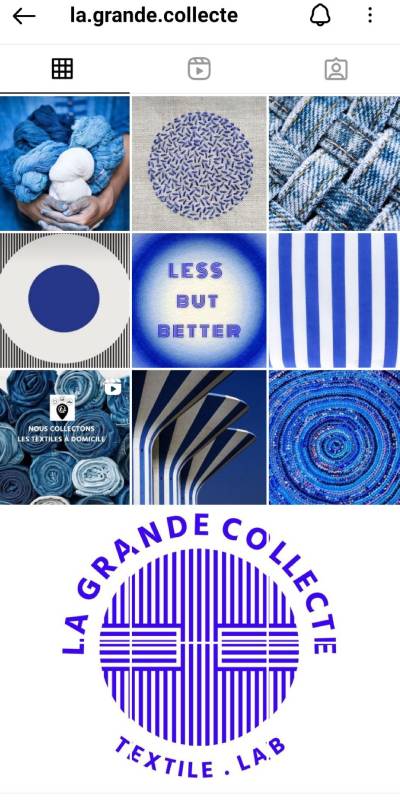
Screenshot Instagram
Process
I used the textile already ground by the textile shredder.
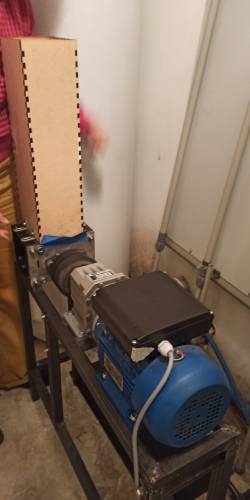
Scraps from the various productions of Le Textile Lab co-workers and several textile production companies are shredded to be transformed into composites. The composite can be molded or placed on a flat surface after having mixed with alginate_see my week 06 for the recipe.
Fabric scraps can be shredded several times depending on the desired result (blending with pieces or "powder" of textile fibers).
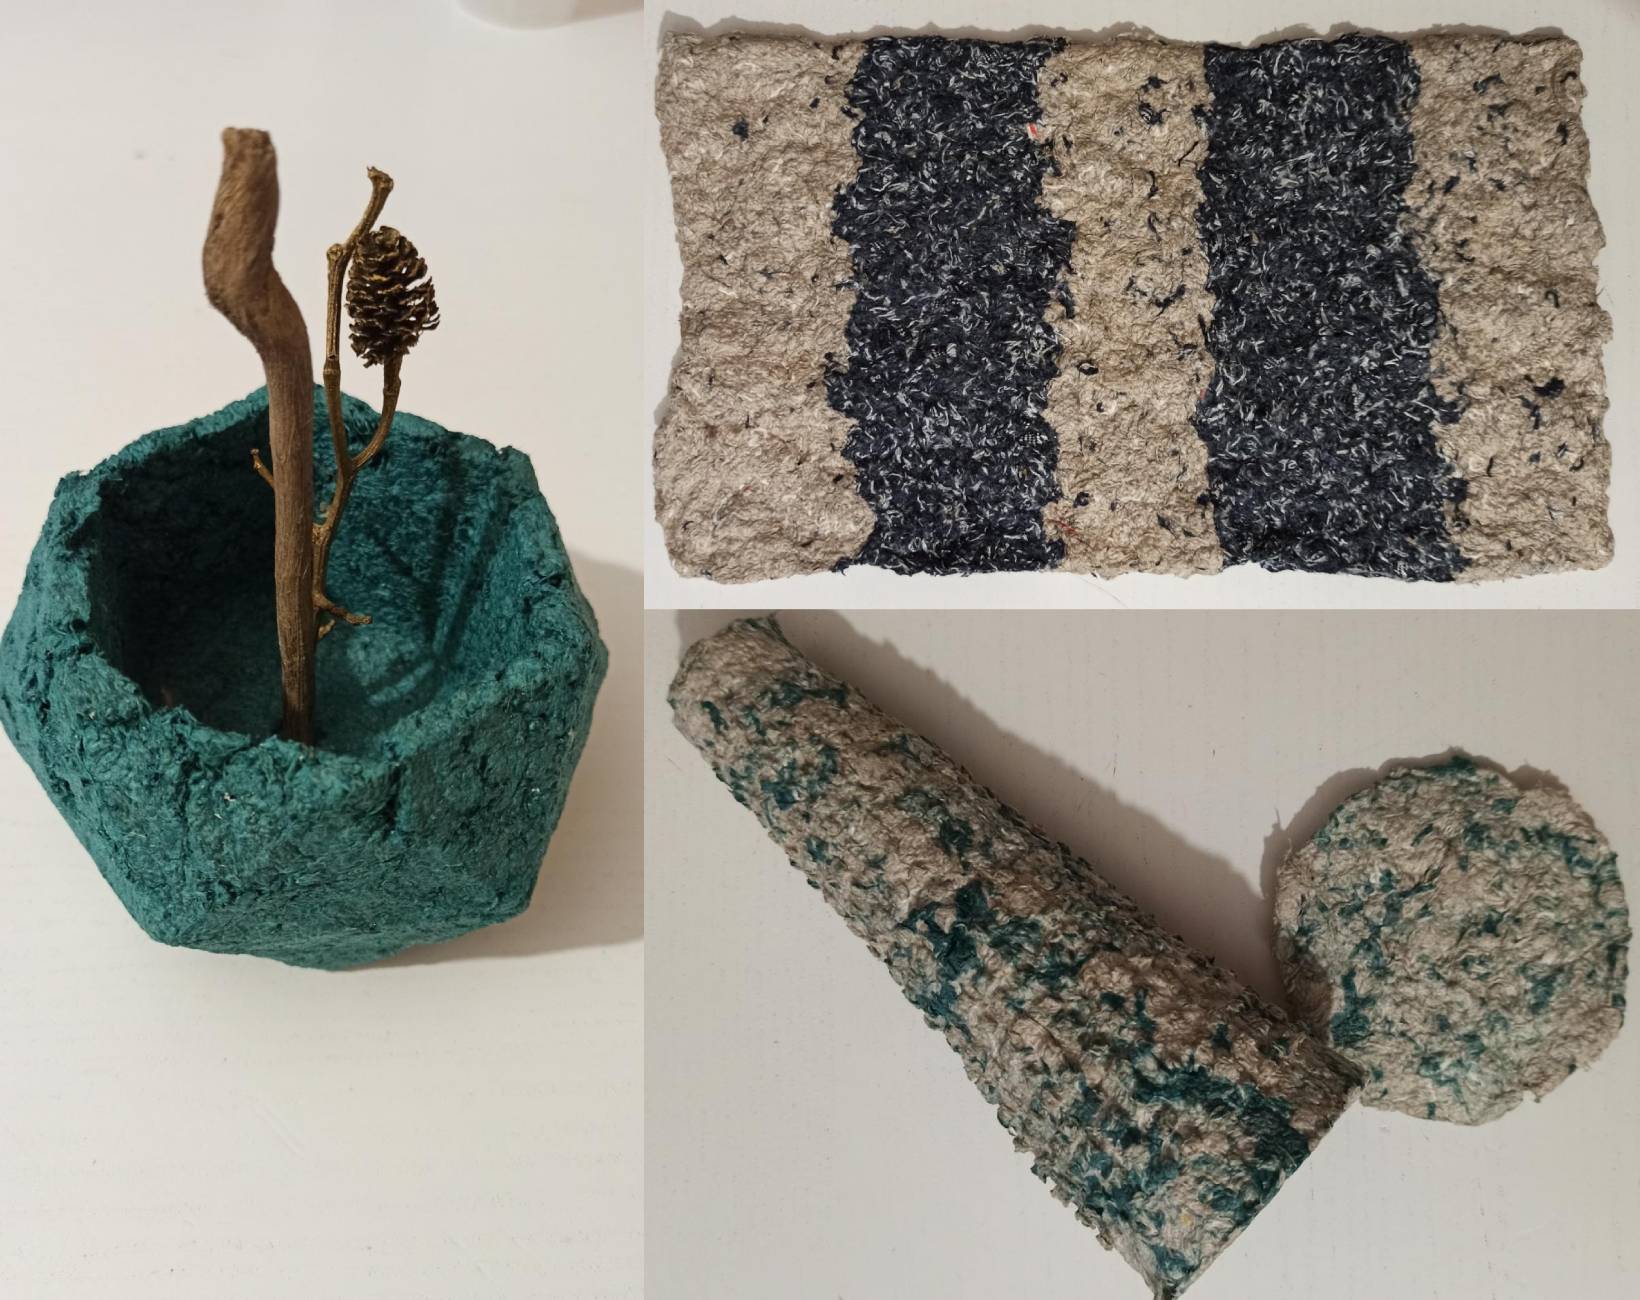
I used 3D print mold - Modern geometric plant pot that Pauline wanted to test for future Precious Textile creations.
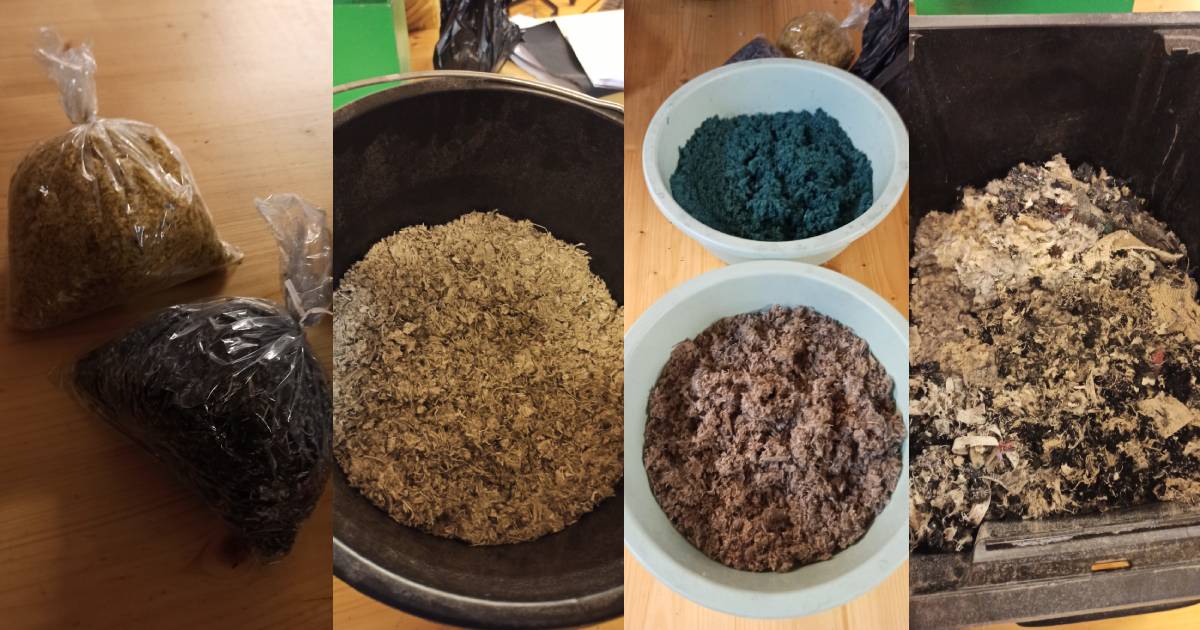
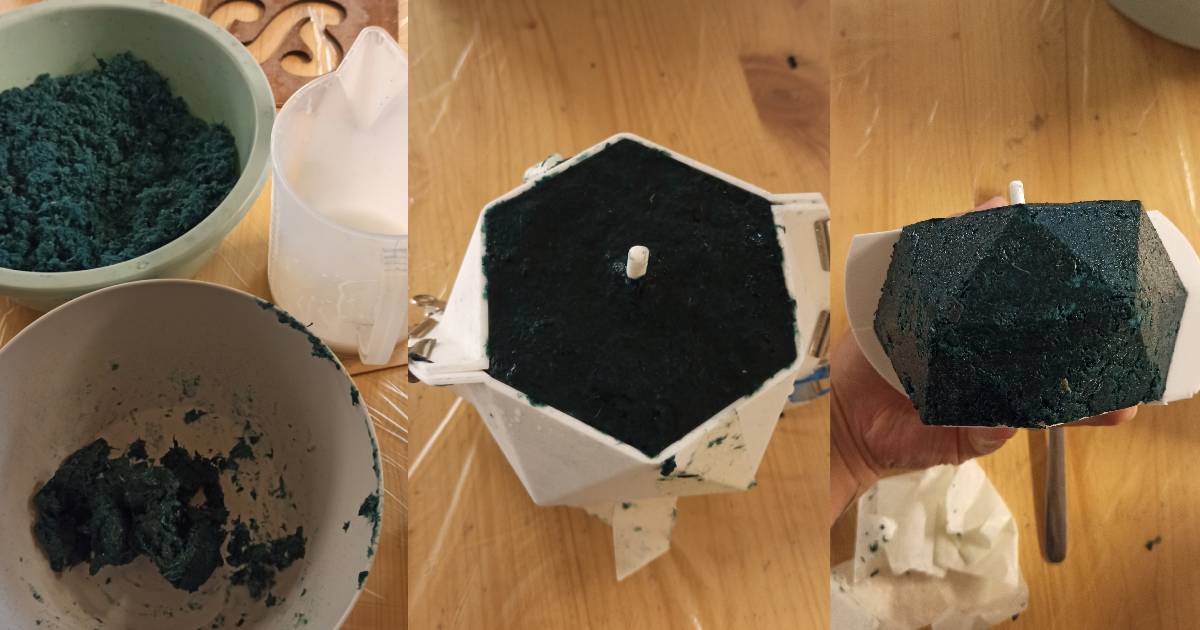
I mixed the green crushed textile (linen) with a little alginate to obtain a pasty but not liquid texture. I then sprayed calcium chloride to allow the alginate to dry in the composite mix.
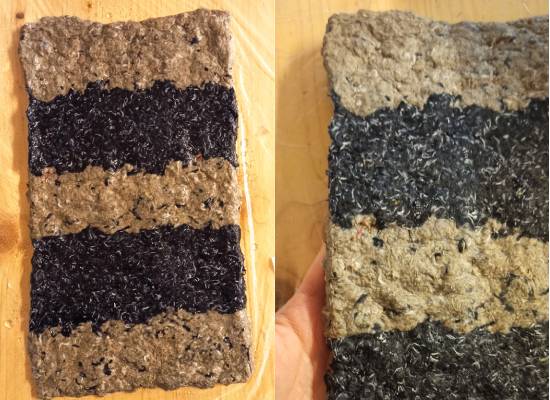
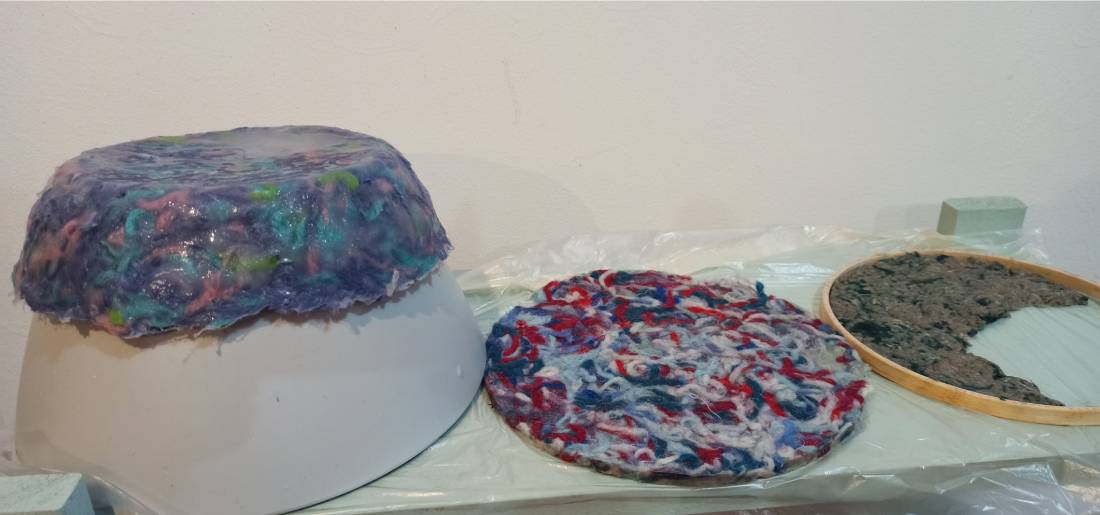
I also made a flat shape with two different colors of cotton (black and grey) so that I could cut shapes into it once dry.
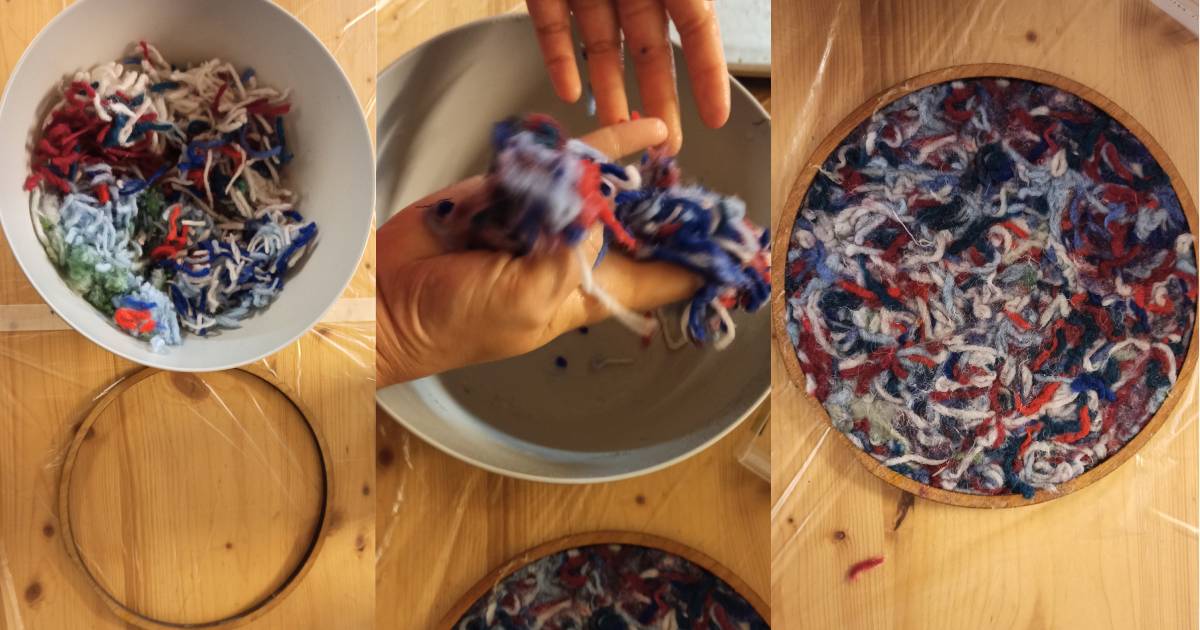
I reused a scrap from the MDF cut-out for my pattern machine as a hoop with wool scraps from the tufting machine.
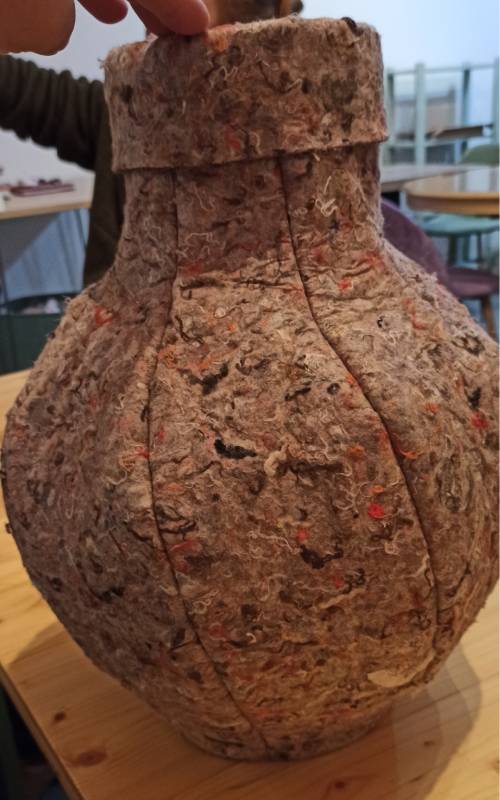
Results
And here are some results of textile composite tests with cotton, linen and wool.
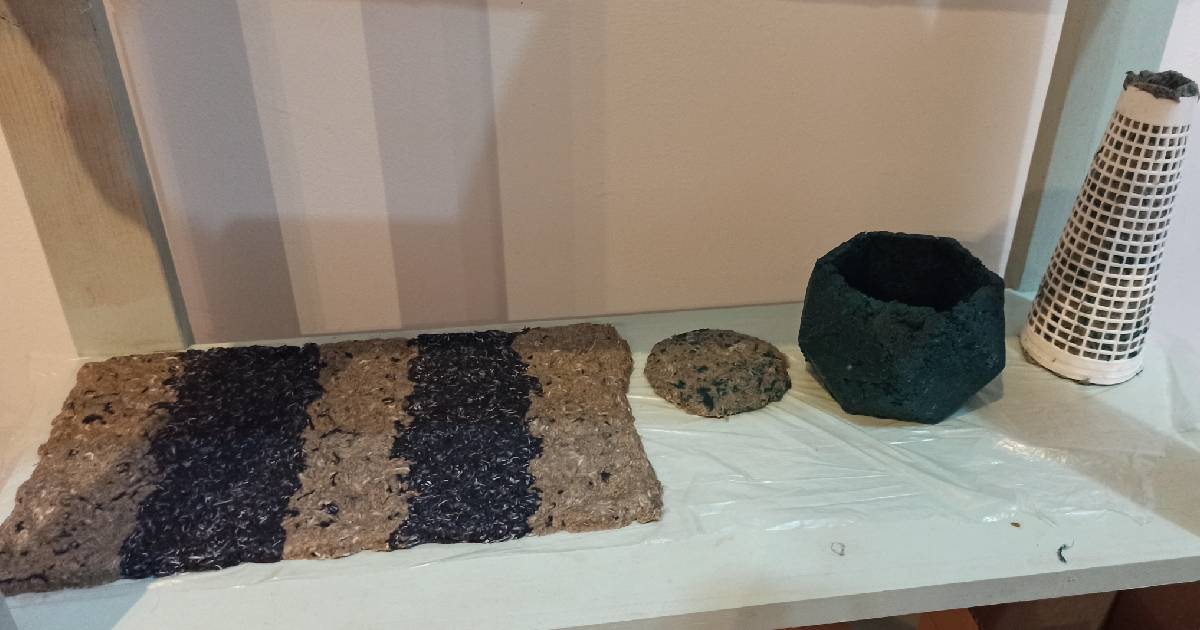
Results week+4
The textile composite has hardened well when dry. The wool is still a little soft.

🤝🏼 Inspirations: Meeting to discuss textile collection, recycling and processing
The following day, I had the opportunity to meet people working for Tremplin. Tremplin is a French association based in Bourg en Bresse (Ain department), which is behind the Textile 360 scheme. The aim of this scheme is to manage locally the processing of used textiles (whether reclaimed, recycled, transformed, etc.) and to avoid exporting this processing abroad. First of all, it creates jobs and then also take into account the environmental issue of reducing textile waste.

Screenshot of the website
Dominique Vial was also on hand to explain his Twist again project and his textile creations, which continues to search for the best combination to use in its "ground textile-plasticizer" mix.
Discussions took place on the different ways of working, and possible collaborations with the same objectives, with the aim of achieving better management of textile waste, now and in the future.
It makes me wonder more about the use and purpose of the clothes I wear, those I've been able to donate, those I've thrown away (incinerated and not reused?), and those I'm going to recycle or transform (the T-shirt becomes a tote bag, the sleeves of a sweater become a stuffed animal, etc.).

🚀 Going further
Diane wanted to show me the model with the vaccum box, but we could no longer find her CNC mold.
Another test step would be to learn how to make my mold with the CNC, which I'd first make on Rhino, and then mold the leather with the vacuum box.
The work of Eliza Strozyk is very inspiring and I would like to test and make some "Wooden textile".
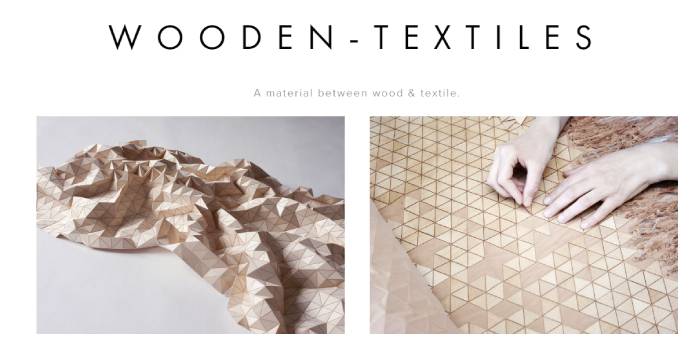
Screenshot of her website
I would also like to do the paper making workshop with textiles. This could not take place because the machine was not delivered on time.
🗂️ Files
-
Crystallisation steps slides from Anastasia's Lecture ↩