9. Soft robotics
🗓️ 2023_November 14th to 21th
What to do this week? 🤔
This week's theme is Soft robotics. I wasn't sure how to orientate my research and the organization for the assignments. The Lecture of Lily Chambers and Adriana Cabrera and the instructions given by Diane helped me a lot. But I didn't know how to integrate testing into a project.
The presentation of Softmodbot by Katrien van Riet was very inspiring. I thought it was a great idea to use silicone, paper and plastic elements to explain the basics of circuits to children.
weekly assignment
- Make soft robotics and develop the pattern for the inflatable
- Experiment with differents materials (silicon, thermovinyl, fabrics, ...)
- Use a circuit to control the inflatable
Some inspirations
📚 References & Inspiration
I found the tutorial made by Adriana Cabrera very helpful and interesting.
I was intrigated by the work of Hye Jun Youn and Ali Shtarbanov about PneuBots1, to test modular inflatable with PVC, published for the workshop "Actuated Materials and Soft Robotics Strategies for Human-Computer Interaction Design'22 Conference, which took place in New Orleans on May 1, 2022.
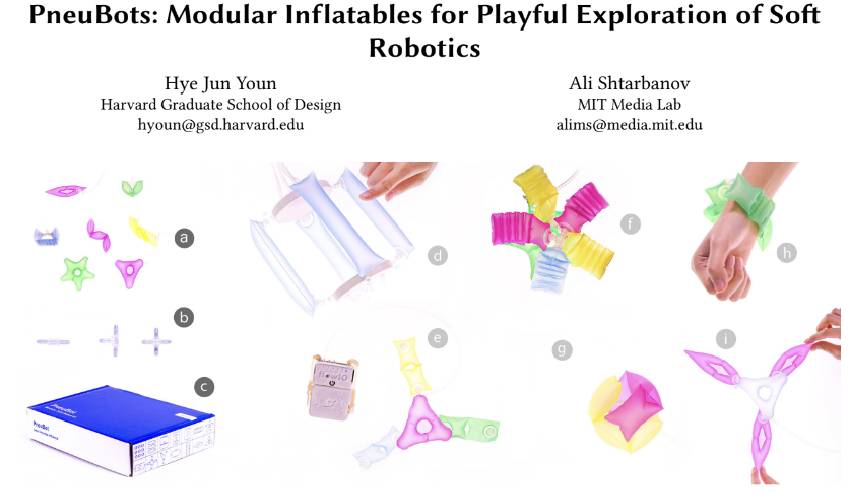
Screenshot from the file
Other inspiration with Theo Jansen who uses the power of the wind on the seashore to move his mobile sculptures, the Standbeests.
The final project of Saskia Helinska is amazing!
🧰 Tools
- Arduino
- Ecoflex™ 00-30 to make platinum-catalyzed silicones
- Thermoadhesive Vinyl
⏳ Process and workflow
Resuming the week's assignments, Diane suggested that I try the silicone and vinyl and inflate them.
Here's how my kitchen, office and living room table look this week.🫣 (I prepared the kombucha leather at the same time, ha ha!)
The Thermo Inflatables
How it works:
The principle consists in putting a layer of baking paper between two layers of heat-sealed fabric or plastic sheets. Where there is baking paper, air can circulate and add volume.

Slide of the Lecture
I found some inspirations with the AeroMorph project form the MIT Media Lab. The thinner the inner cut-outs (or heat-sealed parts), the more marked the fold will be when air passes through.
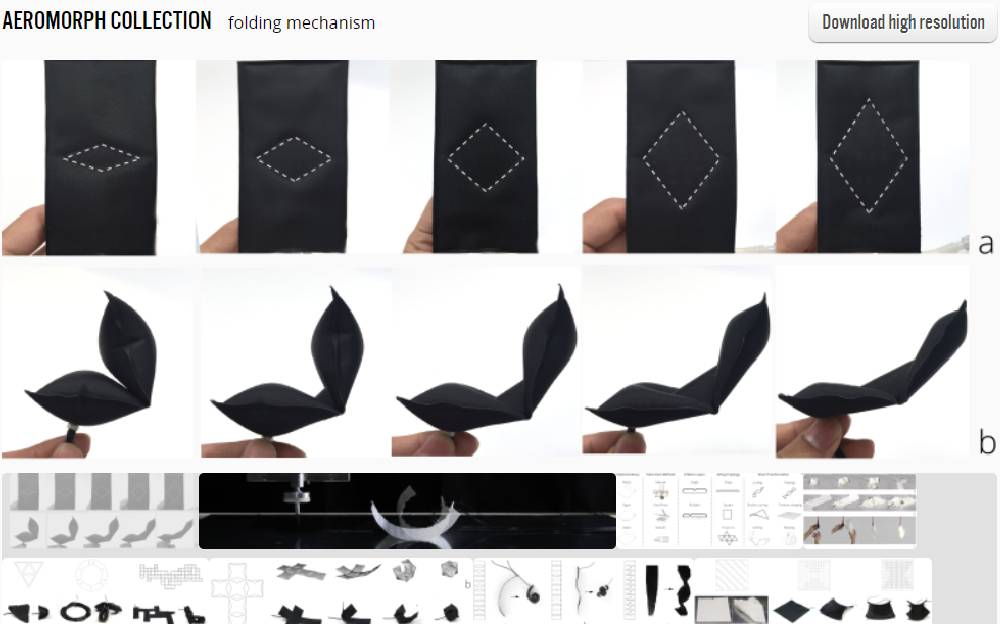
Screenshot of the project's presentation
Test 1 with Thermo vinyl fabric
I had the opportunity (thanks to Diane's mother) to test the cutting machine: ScanNCut SDX1250 Brother, to cut my paper pieces. Diane shows me how it works. The machine can scan the design of the shape to be cut and then cut it. It works better with vinyl than baking paper. I finished the diamond cutouts by hand.
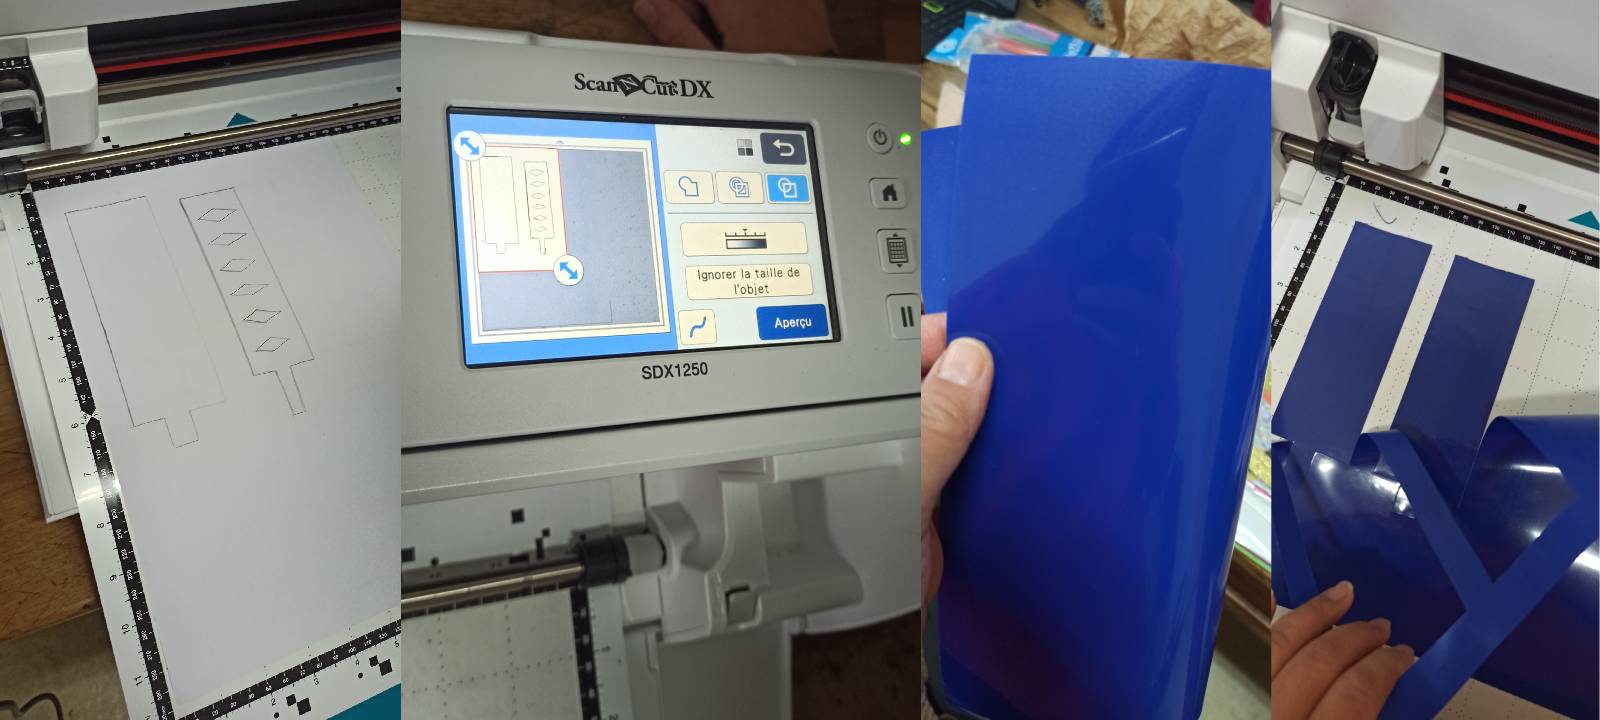
After cutting, I sealed it with an iron on the hottest temperature and peeled it off the plastic part.
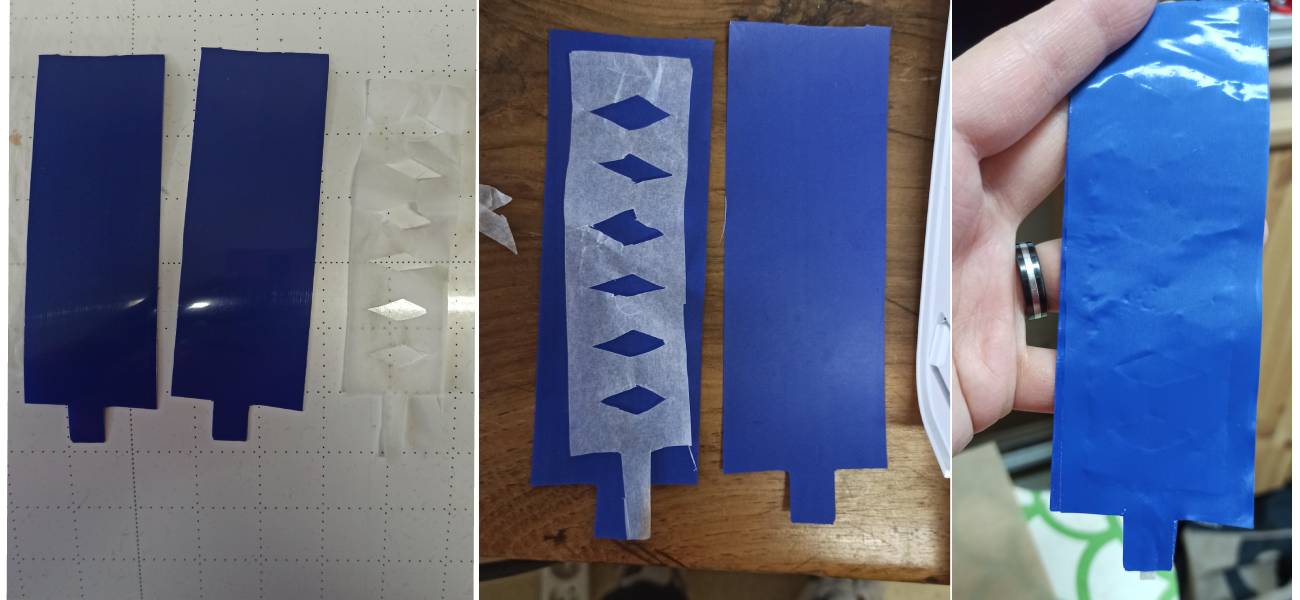
Result
The vinyl inflates well with the manual pump.
Code Example to control the inflatable/soft circuit
I reused the inflatable on/off code presented by Camille, a fabricademy alumna of last year's Textile Lab.
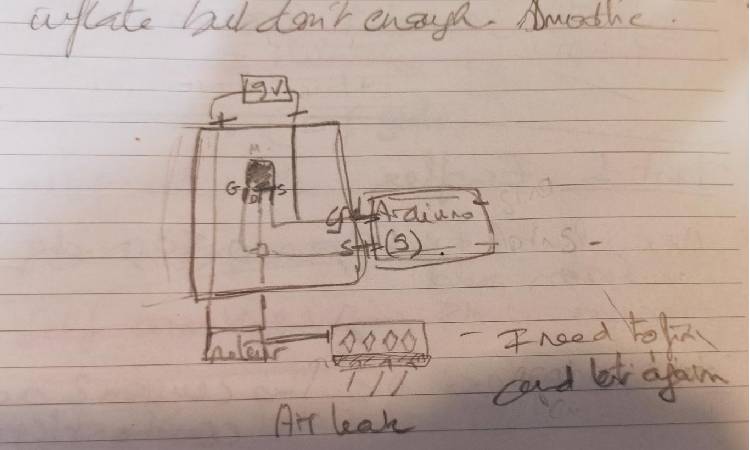
I made a little sketch before testing the code.
    const int AIR_PIN = 9;

    void setup() {

    pinMode(AIR_PIN, OUTPUT);

    }

    void loop() {

    digitalWrite(AIR_PIN, HIGH);
    delay(5000);
    digitalWrite(AIR_PIN, LOW);
    delay(5000);

    }
The vinyl swells less than with the manual pump. There were some air leaks which I tried to seal with self-adhesive vinyl.
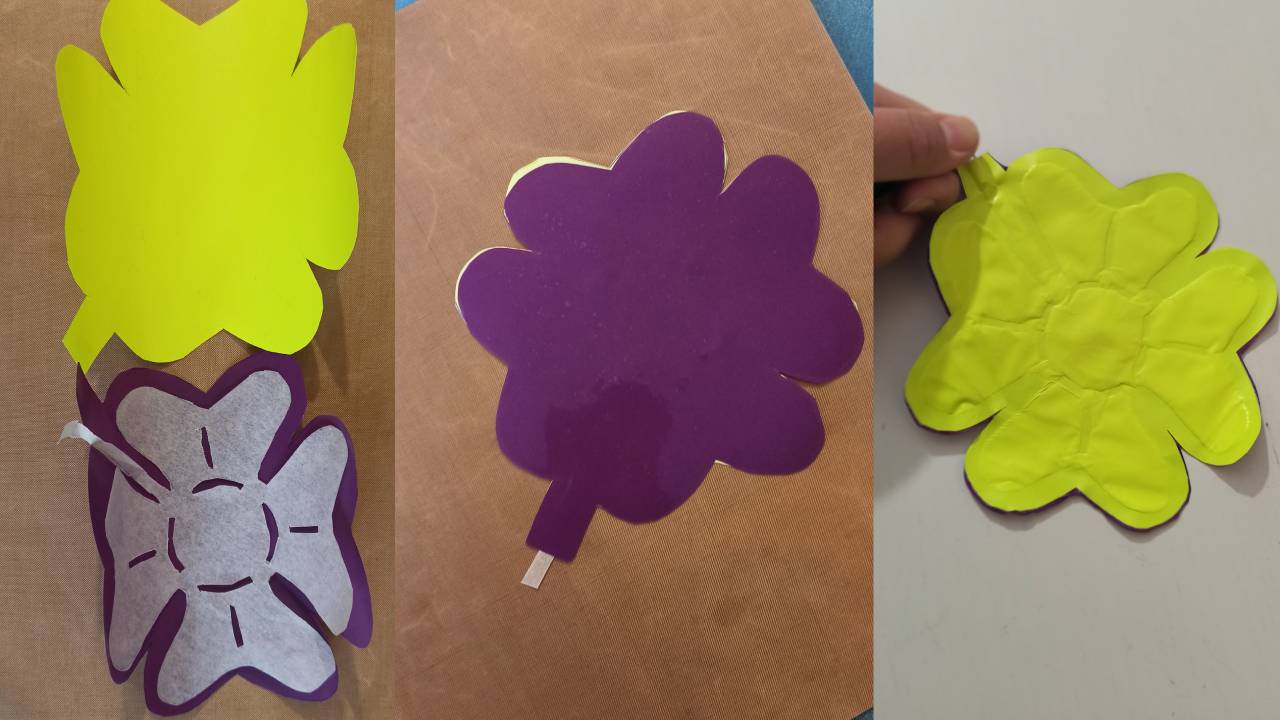
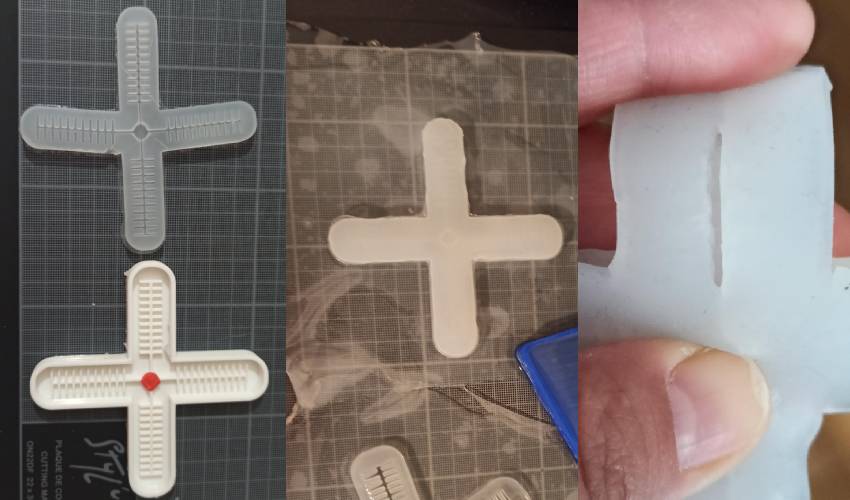
Test 2: Flower vinyl inflatable
I wanted to try some flowers inflatables. I took the clover model (softrobotics made by Adriana Cabrera).
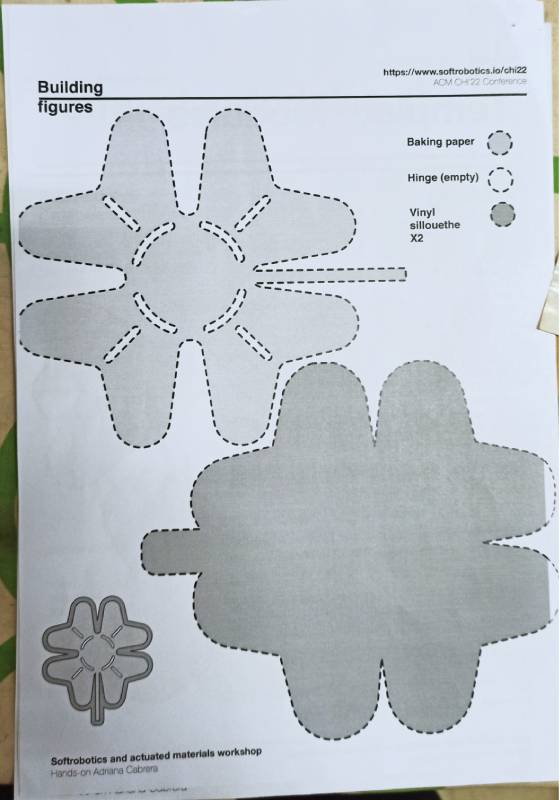
I first cutted the vinyl with the machine and finished it at home.
Result
But my mistake (a beginner's one 🥲), I put a piece of vinyl on the wrong side.... the protective plastic had stuck to the baking paper and the sticky part of the vinyl was all damaged...
It's like when you're sewing and you've sewn one piece right sides together on the other piece of fabric...
That's why I wanted to test with the self-adhesive vinyl that I had at home.
Test 3: Self-adhesive vinyl
The first test with just a sheet of baking paper doesn't let the air through. That's why I cutted 2 pieces in self-adhesive vinyl and 2 pieces in the baking paper so that the air can pass inside.
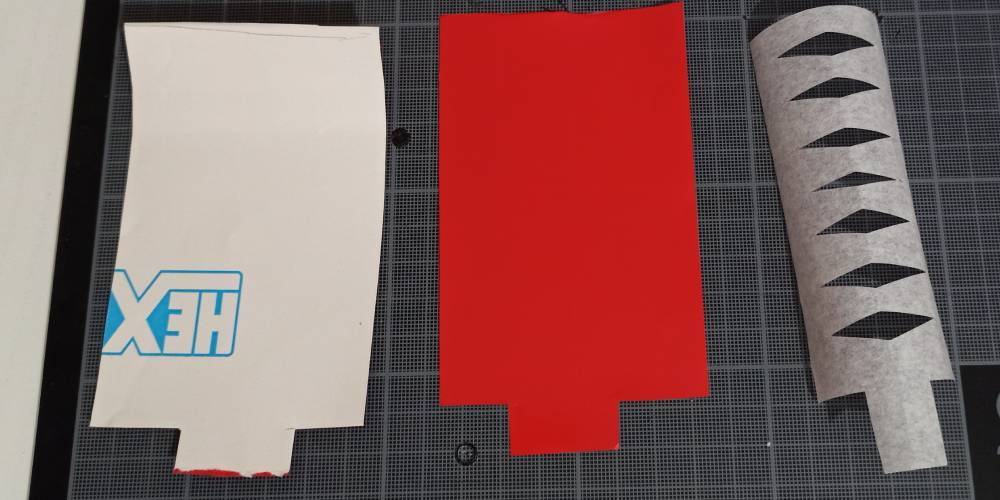
Result
Test failed: the vinyl swells, but the cut-outs peel off under air pressure.
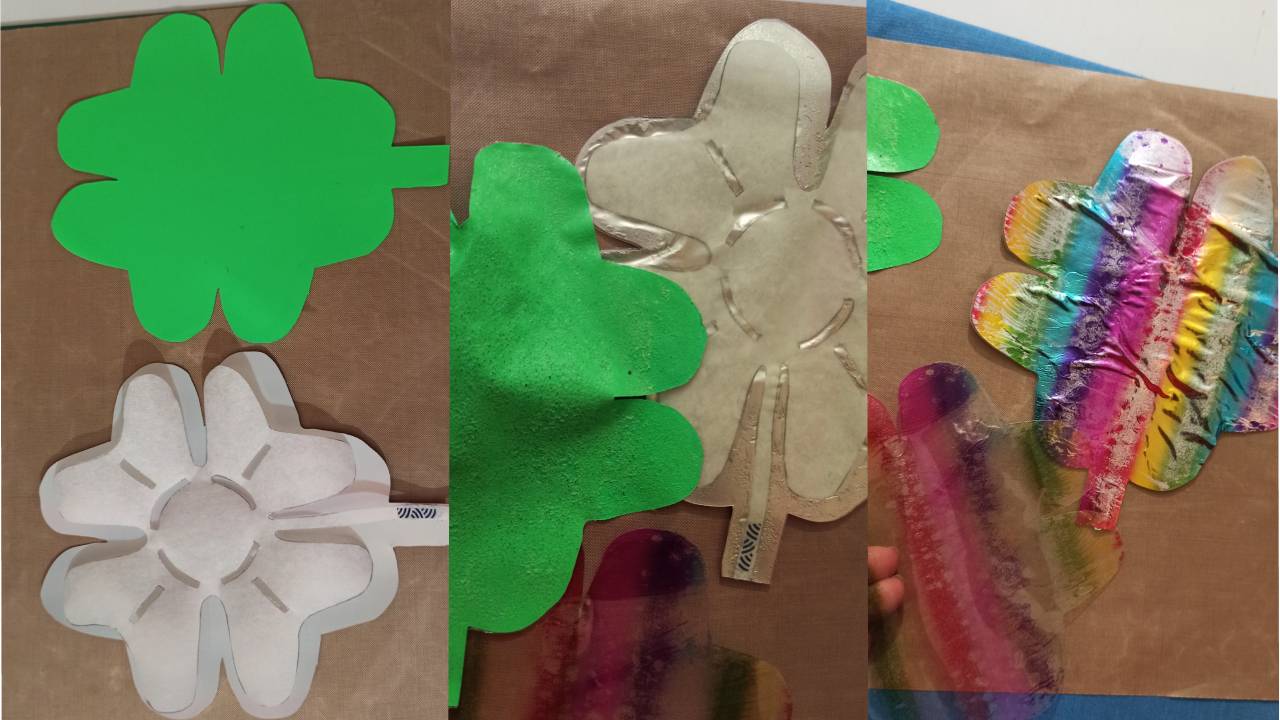
Test 4: Flower test again
I tried again with the Thermo vinyl fabric to make a cloverleaf. I was careful to put the vinyl in place before sealing it with the iron. The folds of the baking paper cutouts are well marked.
Result
It works pretty well!
More vinyl inflatable
The test being conclusive, I wanted a model that swelled more. I used the baking paper model and made smaller cutouts.

Result
The creases are more pronounced when using only the manual pump.
The Silicone Inflatables
Diane was happy because she had finally found the right silicone to test this week. Yeaah!!😁
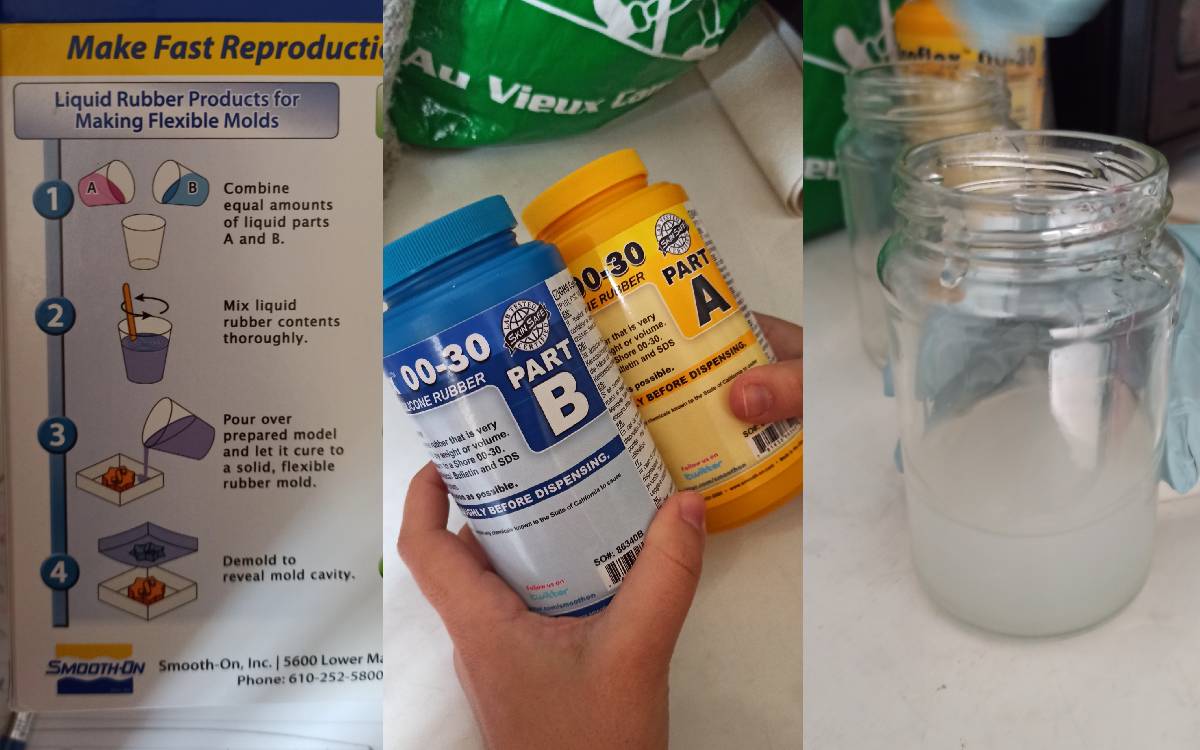
We used Ecoflex™ 00-30 as reference from Smooth-On brand to make inflatable silicone.
Recipe
- Pour equal amounts of liquid parts bottle A and bottle B
- Mix well
- Transfer into the moldes
- Remove bubbles
- Cure during 15 min at 65°C or let it dry during around 4 hours before removing
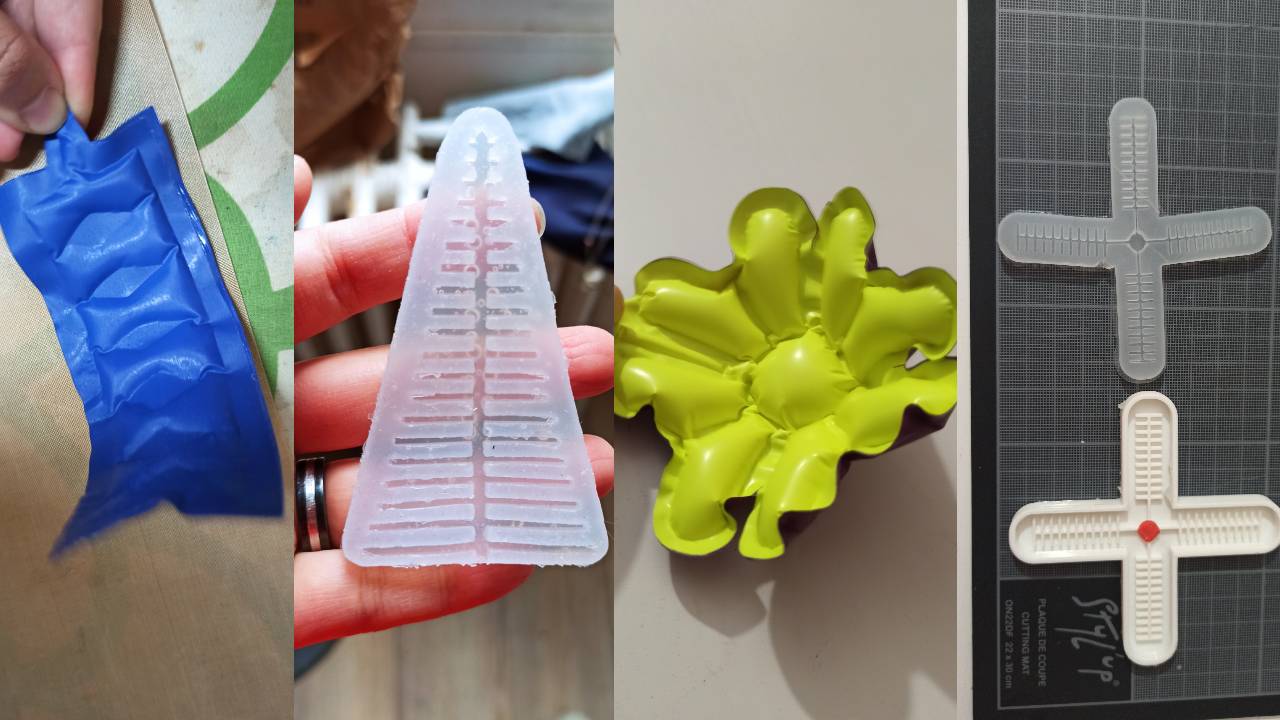
Test 1
Tools: I reused molds made by alumni from previous years.
- The blue triangle mold was made from laser-cut plexiglass. You can find more informations in Adriana Cabrera's presentationSlide 99
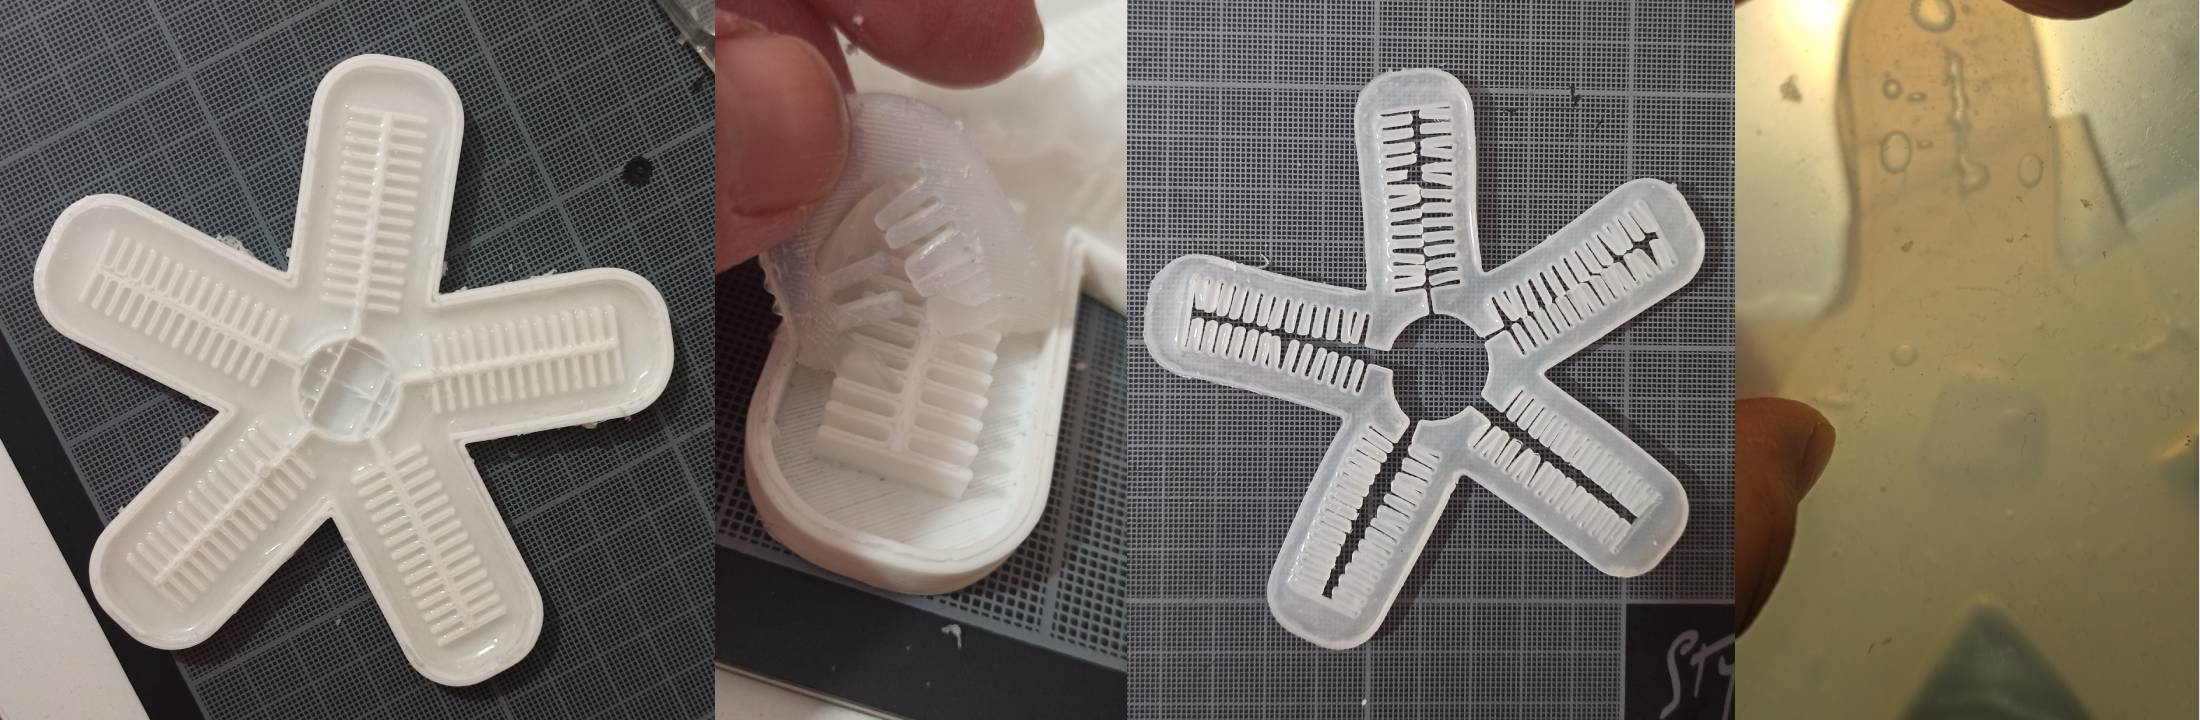
- The white star mold was made from 3D printing (PLA?). We're not entirely sure, but since the baking process takes place at just 65°C, we think it's a safe bet.
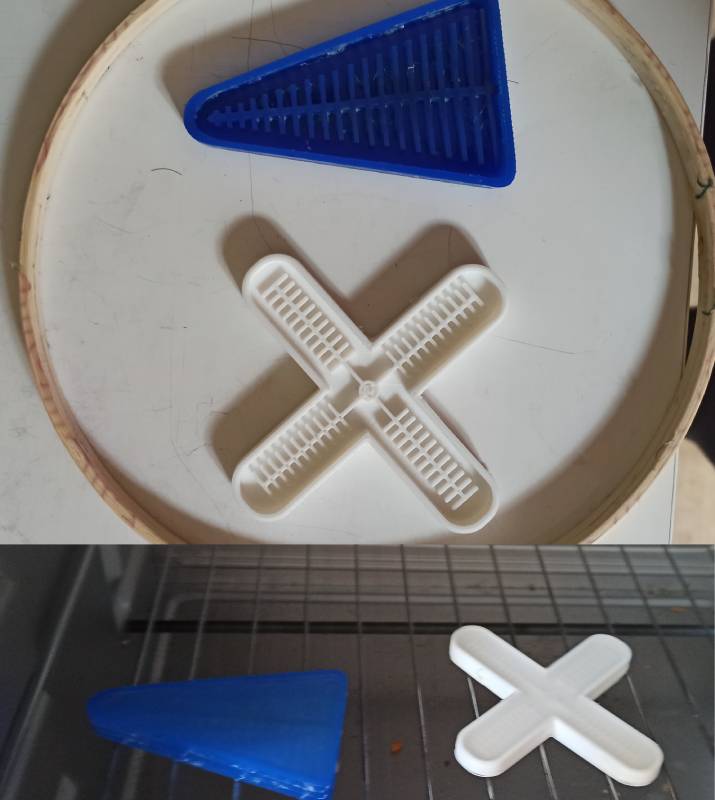
Results
A failed test: the white mold has been deformed by the heat. The silicone wasn't smooth and broke when I tried to unmold it.🫠
But the result is just what we're looking for, with a few holes...
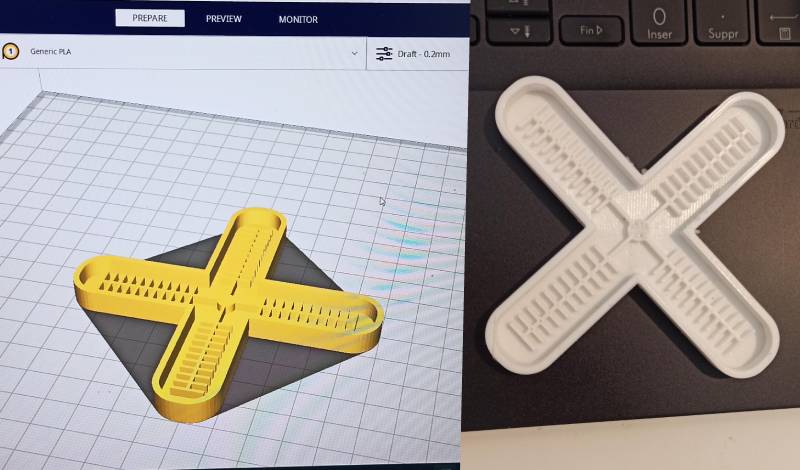
Diane redid the 3D printing to remake a mold that could withstand the baking. Here is the file2
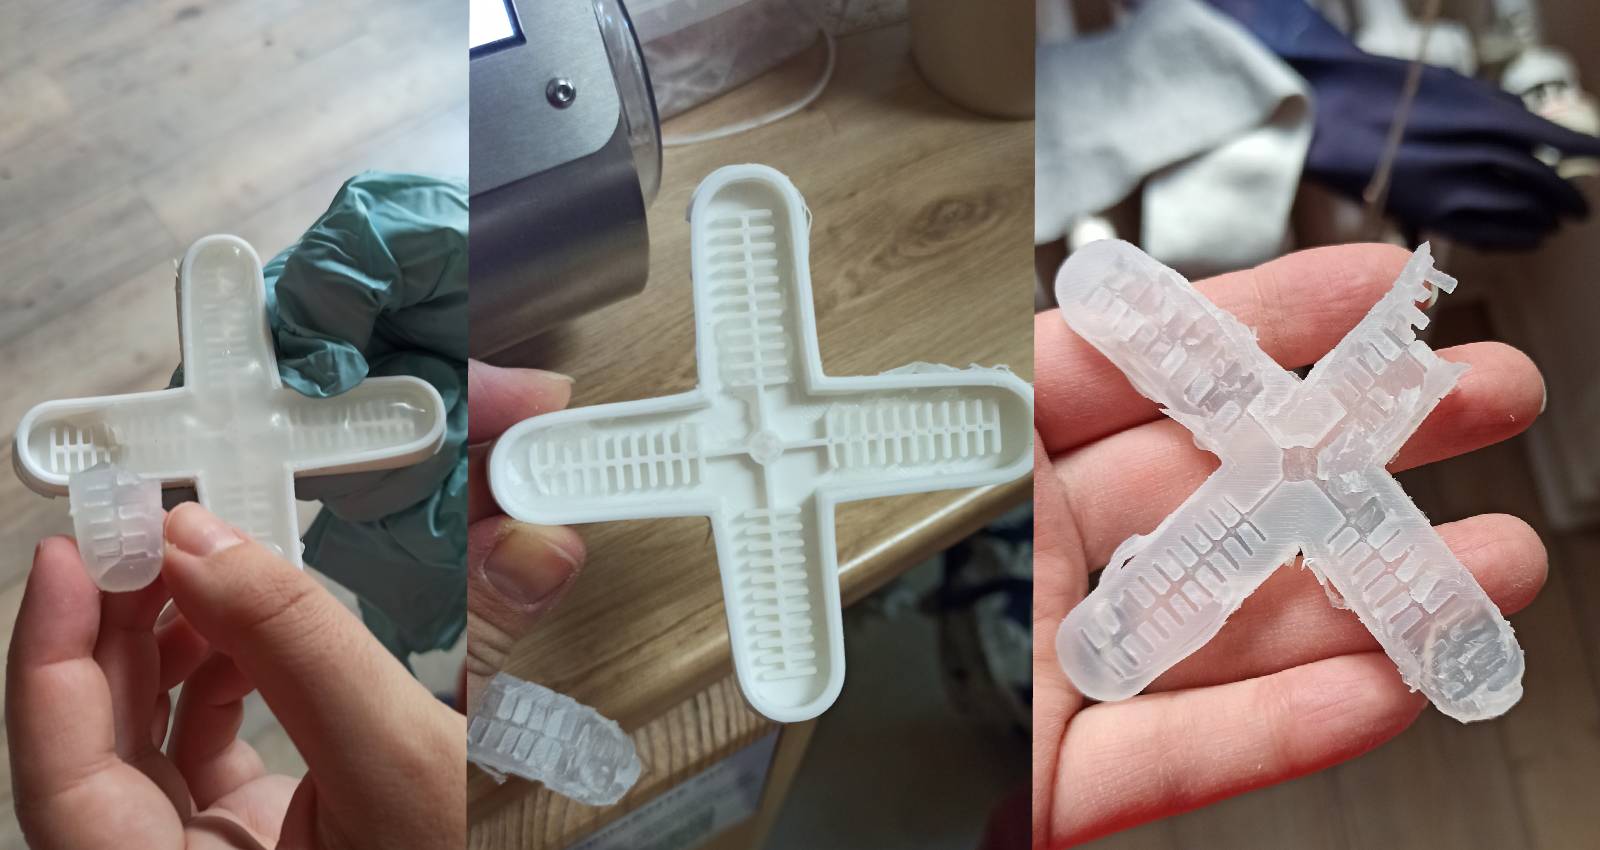
The blue mold worked well and I added a layer of silicone to close the model. But as it cooked, the silicone melted in the gaps, blocking the spaces where air could pass. It didn't inflate everywhere.
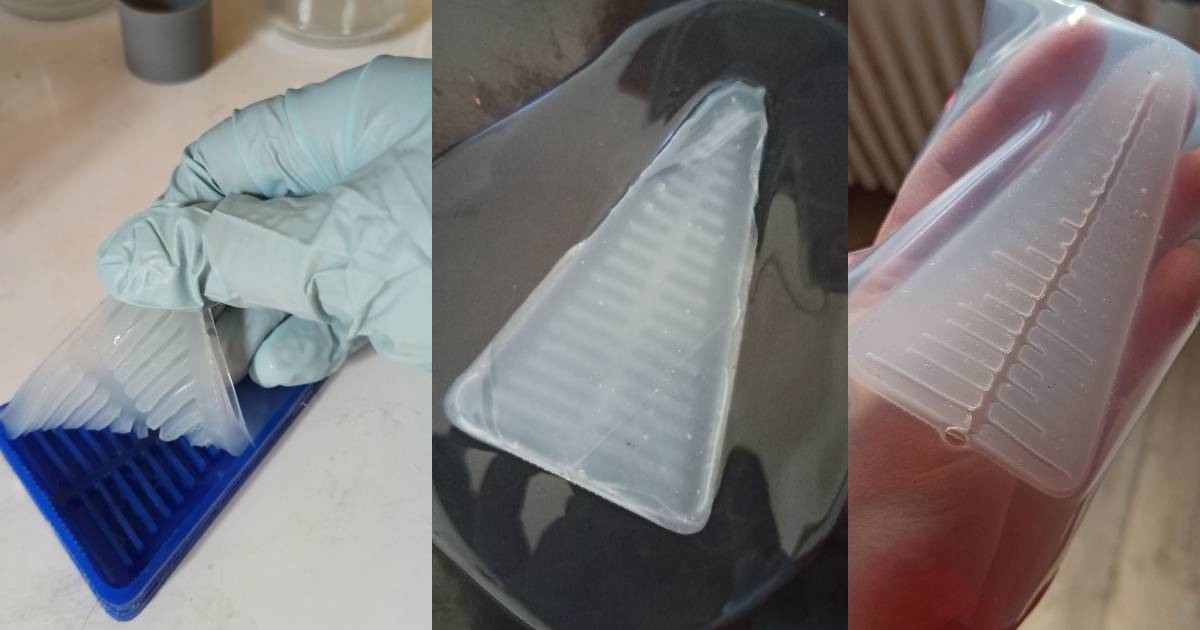
I redid the silicone model to make it inflate correctly.
The swollen parts remind me of jellyfish membranes, with the pattern drawn by the interstices that are sealed by silicone.

The new white mold works well, but after several attempts, the "arm" that swelled the most ended up bursting.
Test 2
I wanted to test something like the Soft Gripper Fabrication Guide3 explain with the Soft robotics tool kits. That's why I reused a 3D mold that hadn't been finished because the file hadn't been fully printed.
With Diane's advice, I molded the internal structure and applied two layers of silicone to close my model. Unfortunately, the liquid silicone clogged most of the gaps. The model cannot be inflated. The air remains trapped in the central circle.
🚀 Going Further
As usual, one week is not enough time to explore everything.🥵
Here are a few additional ideas:
- Some inspiration again with jellyfish
- With inspiration from origami Origami-Inspired Artificial Muscles
- With paper by Open soft machines
- To explore Active Textile made of Thin McKibben Muscles