8. Wearables
🗓️ 2023_November 07th to 13th
🔋Work of the week🪫
This week was an opportunity to continue part of the theme worked on E-textiles, but this time focusing more on the outputs: actuators.
Task weekly assignment
- Create 2 actuor swatches designed for the body
- Create 1 swatch with one input and one output
Some alumni's inspirations!
📚 References & Inspiration
I continue to look at the differents projects tested on Kobakant, like the Kobakant TRAFOPOP LED JACKET, the Kobakant DRESSCODE DRESS SHIRT, on Sparkfun, or by Plusea.
The work of Amanda Ghassaei, an independent engineer and designer based in San Francisco, presents a multitude of equally interesting projects.
🧰 Tools
- Arduino
- Tinkercad for 3D design,circuit creation and programming
- Driver circuit: used with a transistor to amplify the signal. You can find more explanations to create your Driver circuit on Jessica Stanley's assignments
⏳Process and workflow
Lisa Stark's lecture listed the three types of actuator we could test 1:
- visual
- sound
- motion
Emma Pareschi's tutorial allowed us to review the basics with Arduino.
I tested with electromagnet during the tutorial.
<
I first wanted to use what I had printed for Computational Couture, because the filament I'd used changed color with the heat. But it's not enough conductive. I needed to put a lot lot of conductive thread with conductive tape. The 3D printing didn't work well and weren't conductive.😅🥲
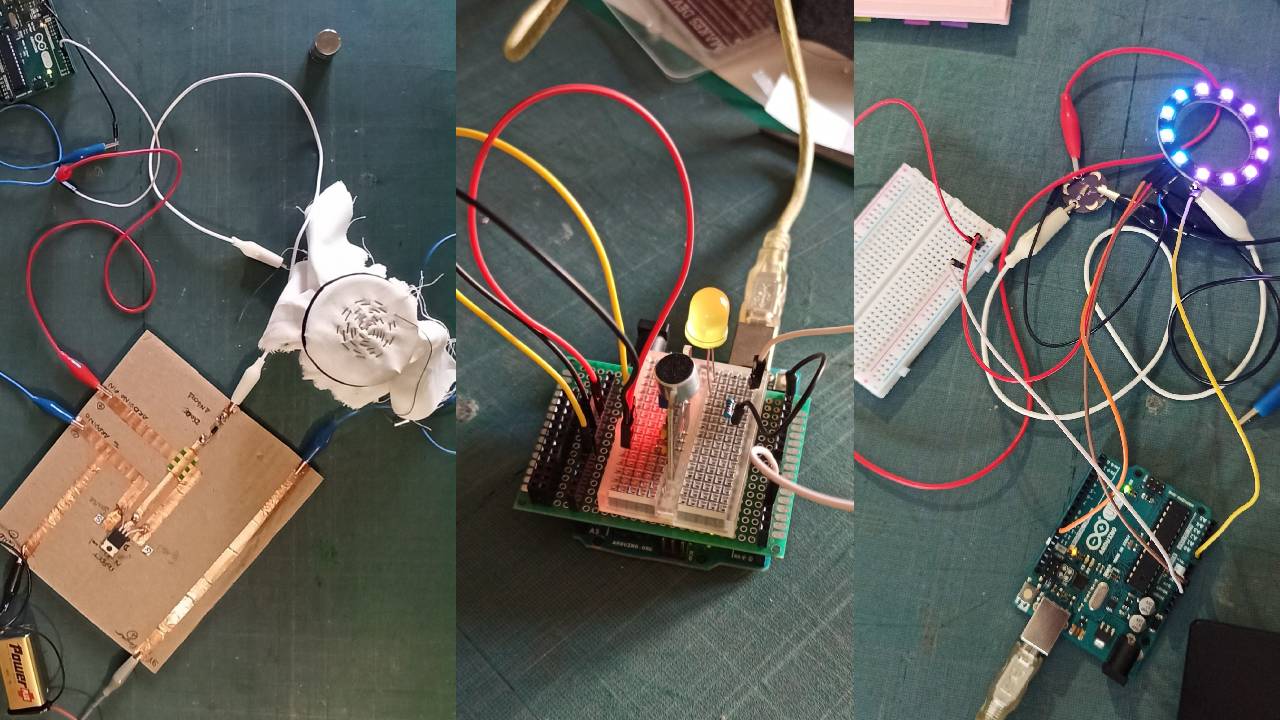
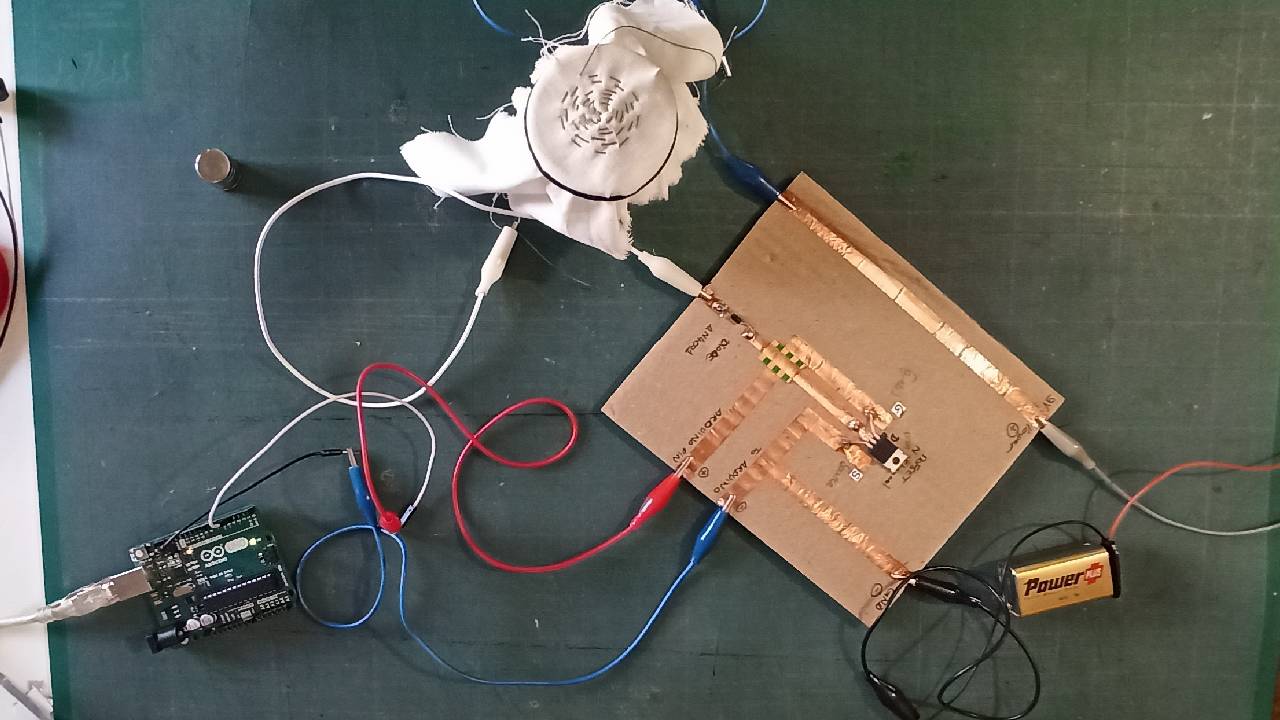
Actuator 1: Fabric speaker
I did the test with the speaker made by Diane for her assignment of the week. It was used with the cardboard to amplify the signal with mosfet.
Code Example
I first tested with the example found on Arduino: toneMelody
// notes in the melody:
int melody[] = {
  262, 196, 196, 220, 196, 0, 247, 262
};

// note durations: 4 = quarter note, 8 = eighth note, etc.:
int noteDurations[] = {
  4, 8, 8, 4, 4, 4, 4, 4
};

void setup() {
  // iterate over the notes of the melody:
  for (int thisNote = 0; thisNote < 8; thisNote++) {

    // to calculate the note duration, take one second divided by the note type.
    //e.g. quarter note = 1000 / 4, eighth note = 1000/8, etc.
    int noteDuration = 1000 / noteDurations[thisNote];
    tone(8, melody[thisNote], noteDuration);

    // to distinguish the notes, set a minimum time between them.
    // the note's duration + 30% seems to work well:
    int pauseBetweenNotes = noteDuration * 1.30;
    delay(pauseBetweenNotes);
    // stop the tone playing:
    noTone(8);
  }
}

void loop() {
  // no need to repeat the melody.
}
I wanted to try with an another sound like Mario Bros Tunes.2 That's why I added the .ino file to the library.
Circuit Example
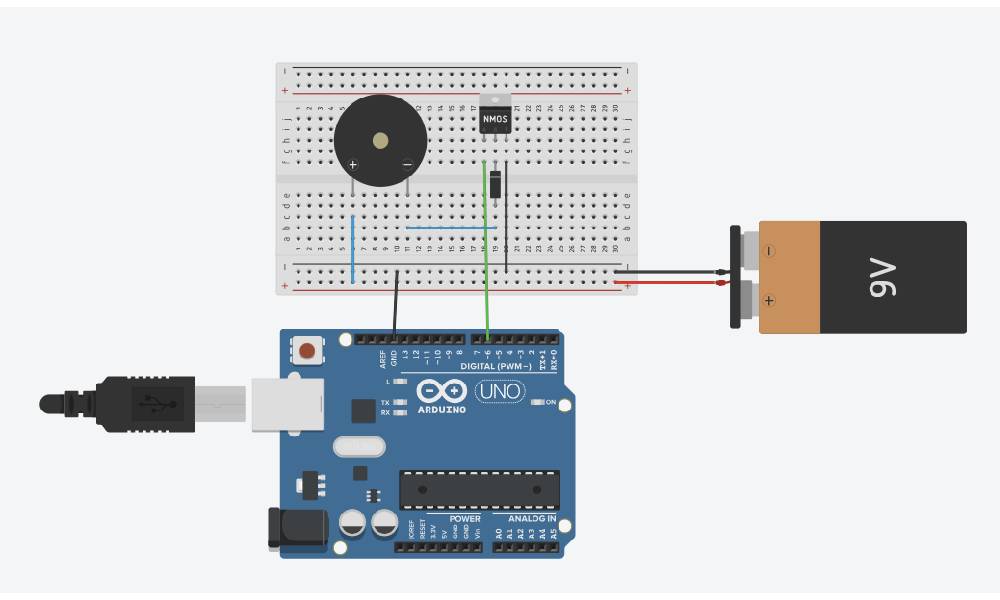
Made with Tinkercad
Results
Video (turn the sound on)
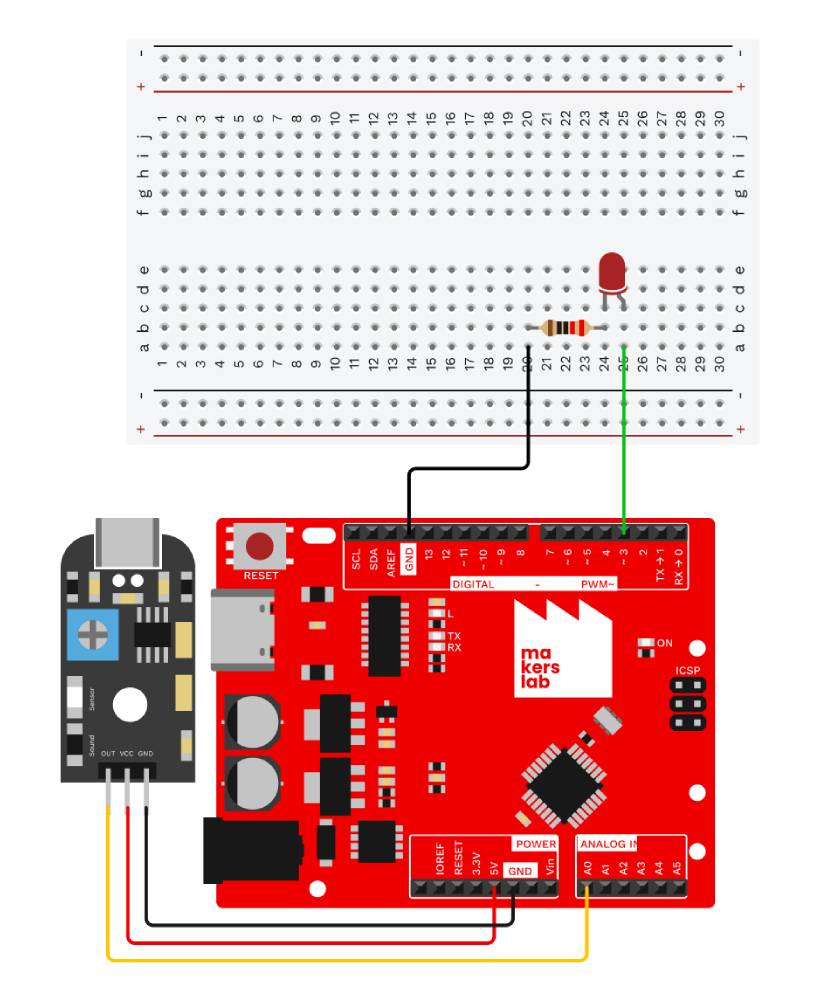
Actuator 2: LED + Microphone
I have a box of electronic equipment made by the Makers'lab of Em Lyon business school.
There is a lot of components to test for actuators.
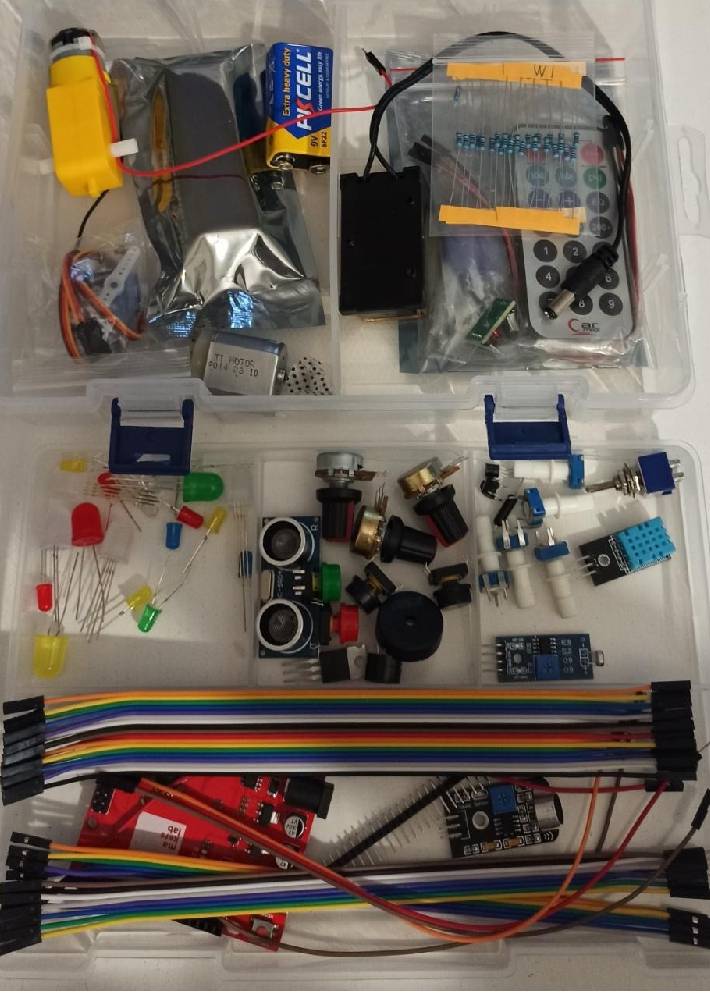
I wanted to test something that modifies the lighting of an LED but other than the light sensor, that's why I chose the microphone.
I used a breadbord connected directly to an Arduino.
Code Example
The code example was reproduced via the link in the Makers'lab kit
// https://makerslabemlyon.notion.site/makers-lab-kit-e97d4362ec7b4a35887fe952c7803af7?p=028a89f9aef344cb84a200b7182198b2&pm=c

//------------------MICROPHONE WIRING------------------
// OUT -> Analog Pin A0
int mPin = A0;
// VCC -> 5V or 3.3V
// GND -> GND

//------------------LED WIRING------------------
int ledPin = 3;   // The number of the LED pin

//----------------VARIABLES----------------
int convertValue; // Define a variable to save the ADC value
void setup() {
  pinMode(ledPin, OUTPUT);  // Set ledPin into output mode
  Serial.begin(9600);
}

void loop() {
  convertValue = analogRead(mPin);  // Read analog voltage value of A0 port, and save it
  Serial.println(convertValue);
  // Map analog to the 0-255 range, and works as ledPin duty cycle setting
  analogWrite(ledPin, map(convertValue, 0, 400, 0, 255));
}
Circuit example
Results
whithout noise/with noise
Video (turn the sound on: with an extract of the BTS 😆)
Actuator 3: Light with Neopixel ring
I also wanted to use components of the Lilypad Developpement Board. Why not continue what I did for E-textiles week?
I first tested the tutorial: How to attach Lilypad light Sensor to a Lilypad Arduino.
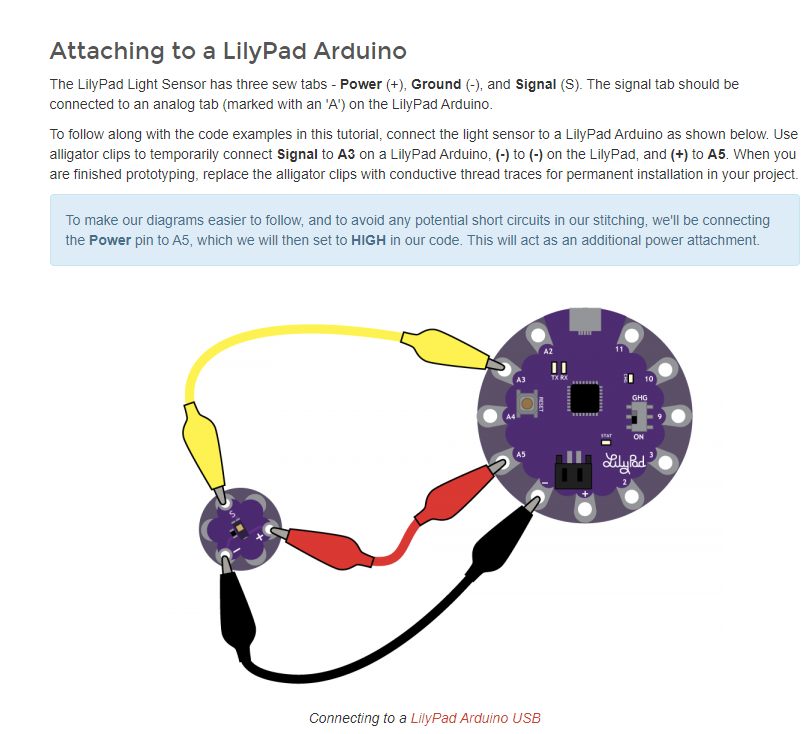
Screenshot from Sparkfun website
I tried the code3 given by the Makers'lab kit.
Circuit example

Made with Tinkercad
Code Example
I modified it to obtain a different pattern with the LEDs.
//----------------LIBRARIES----------------
// adafruit neopixel library
// find out more about library here: https://adafruit.github.io/Adafruit_NeoPixel/html/class_adafruit___neo_pixel.html
#include <Adafruit_NeoPixel.h>

//------------------WIRING------------------
// 5V -> 3.3V or 5V
// GND -> GND
// DI -> Digital pin 11
#define LED_PIN  11

//----------------VARIABLES----------------
// number of LEDs
#define LED_COUNT  12
// NeoPixel luminosity, 0 (min) to 255 (max)
#define BRIGHTNESS 20

// ----------OBJECTS DECLARATION-----------
// Declare neopixel Ring
Adafruit_NeoPixel ring(LED_COUNT, LED_PIN, NEO_GRB + NEO_KHZ800);
// Argument 1 = number of led
// Argument 2 = Pin
// Argument 3 = Pixel type

//This is how to declare var using RGB space for led ring
uint32_t red = ring.Color(255, 0, 0);
uint32_t purple = ring.Color(130, 0, 180);
uint32_t lightBlue = ring.Color(30, 30, 150);
void setup() {

 // INITIALIZE NeoPixel ring object (REQUIRED)
 ring.begin();

 // Set BRIGHTNESS to about 1/10 (max = 255)
 ring.setBrightness(BRIGHTNESS);

}
void loop() {

 // Set all pixel colors to 'off'
 ring.clear();

 // Light a single led with a variable
 ring.setPixelColor(0, red);   // switch on led 1 in red (first led is 0)

 // Light multiple leds with for loop
 for(int i = 1; i < ring.numPixels(); i++){
  ring.setPixelColor(i, purple);
 }

 ring.show();            // display modifications
 delay(1000);

 hulaHoop(lightBlue, 100);

 turnColor(red, purple, 200);
}

// ------ Additional functions -------

void hulaHoop(uint32_t colorToDisplay, int speedForAnimation){
 for(int j = 0; j < ring.numPixels(); j++){
  ring.setPixelColor(j, colorToDisplay);
  ring.show();
  delay(speedForAnimation);
 }
}

void turnColor(uint32_t backgroundColorToDisplay, uint32_t colorToDisplay, int speedForAnimation){
 for(int j = 1; j < ring.numPixels()-1; j++){
  ring.setPixelColor(j-1, backgroundColorToDisplay);
  ring.setPixelColor(j, colorToDisplay);
  ring.setPixelColor(j+1, colorToDisplay);
  ring.show();
  delay(speedForAnimation);
 }
}
Results
This is the first result with the colors test.
How to make a super glove!
Another test was made to obtain a HulaHoop Red Light!
Code example
void setup() {
  // INITIALIZE NeoPixel ring object (REQUIRED)
  ring.begin();

  // Set BRIGHTNESS to about 1/10 (max = 255)
  ring.setBrightness(BRIGHTNESS);

  Serial.begin(9600);

  startTime = millis();
}

void loop() {
  int light = analogRead(lightPin);
  Serial.println(light);

  if(light <= 1) {
    int speed = map(millis() - startTime, 0, 4000, 100, 10);
    speed = constrain(speed, 10, 100);
    if(speed > 10) {
      loader(red, speed);
    }
    else {
      // de i = 0 à i = 11, on met la led à l'index i en rouge
      for(int i = 0; i < ring.numPixels(); i++){
        ring.setPixelColor(i, red);
      }
      ring.show();
      delay(5000);
    }
  }
  else {
    ring.clear();
    ring.show();
    startTime = millis();
  }
}

// ------ Additional functions -------

void hulaHoop(uint32_t colorToDisplay, int speedForAnimation){
 for(int j = 0; j < ring.numPixels(); j++){
  ring.setPixelColor(j, colorToDisplay);
  ring.show();
  delay(speedForAnimation);
 }
}

void randomHulaHoop(int speedForAnimation){
 for(int j = 0; j < ring.numPixels(); j++){
  ring.setPixelColor(j, ring.Color(random(255), random(255), random(255)));
  ring.show();
  delay(speedForAnimation);
 }
}

void loader(uint32_t colorToDisplay, int speedForAnimation) {
  ring.clear();
  //int index = (millis() / speedForAnimation) % ring.numPixels();
  ring.setPixelColor(index, colorToDisplay);
  ring.setPixelColor((index + 6) % ring.numPixels() , colorToDisplay);
  ring.show();

  index = (index + 1) % ring.numPixels();
  delay(speedForAnimation);
}
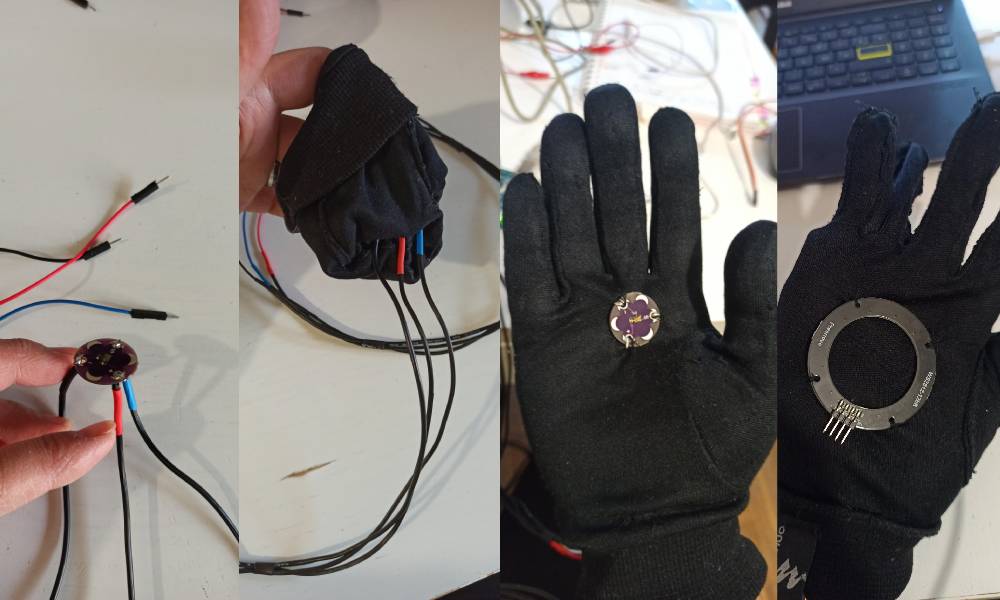
Sewing steps
I needed to sew the Lilypad light sensor and the Neopixel ring on the glove.
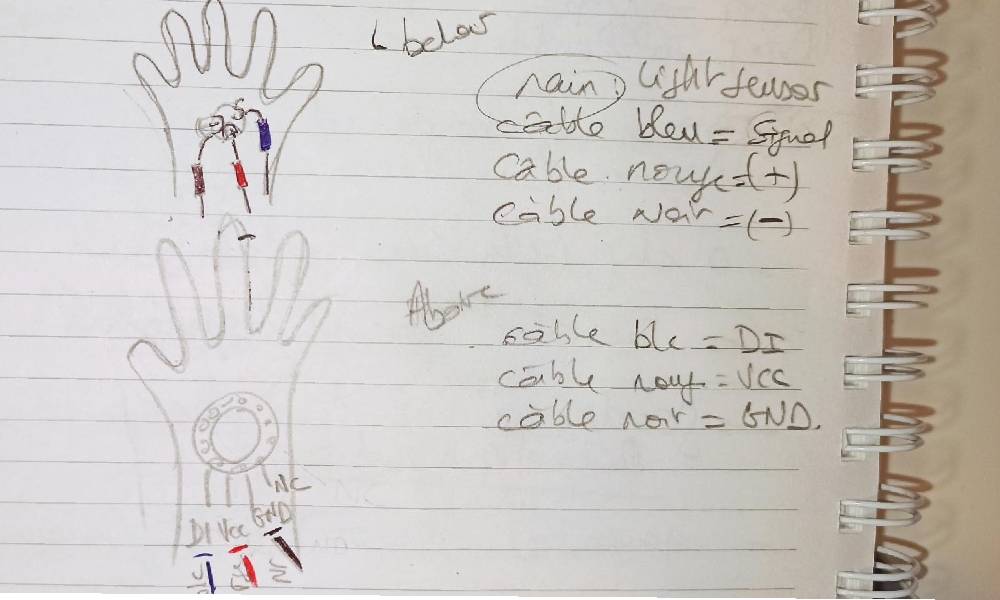
First, I prepared the cables so as to have enough length to put the arduino further up a jacket sleeve, for example. The male-male jumper was soldered and assembled, then plugged into each component.
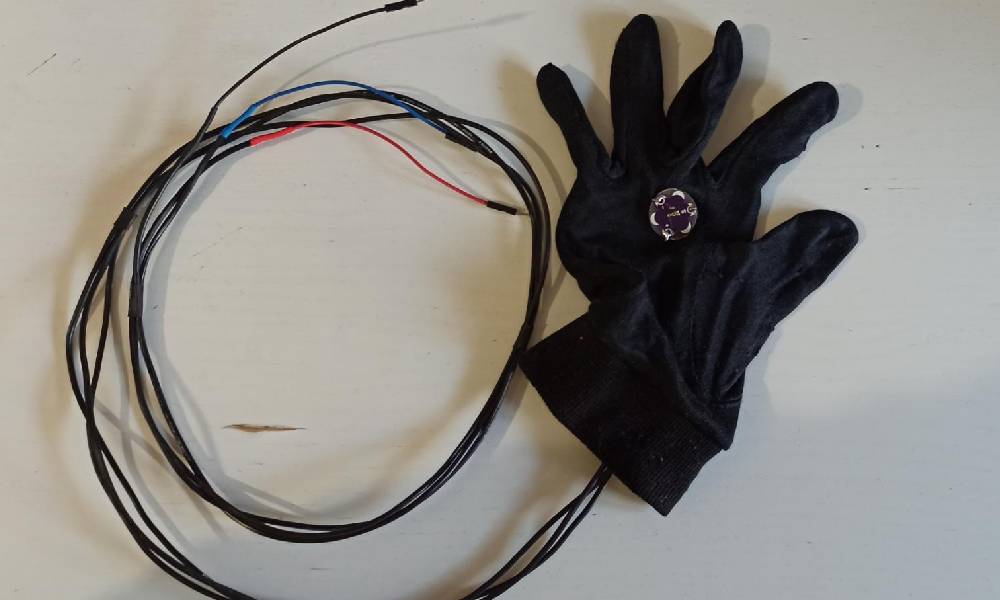
Video: Final result with glove
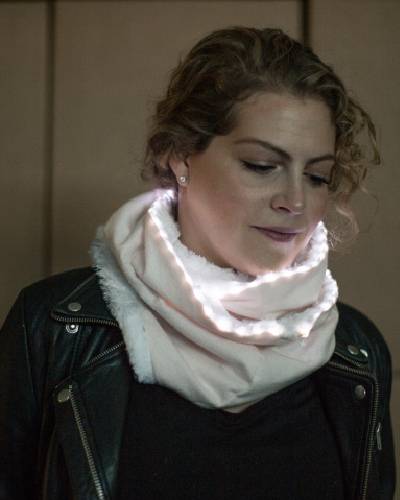
🚀 Going further
To complete the test with the neopixel ring glove, I'd like to make the luminous scarf as presented by Sparkfun. The idea is to create clothes that light up in the evening, at night, to be more conspicuous as a pedestrian or cyclist at this time of year when night comes early (around 5pm in France).
Screenshot from Sparkfun website
An other reference to read with this french book: Wearables, Smart Textiles & Smart Apparel(english version available).
More informations for Neopixel with Adafruit NeoPixel Überguide