02 Process
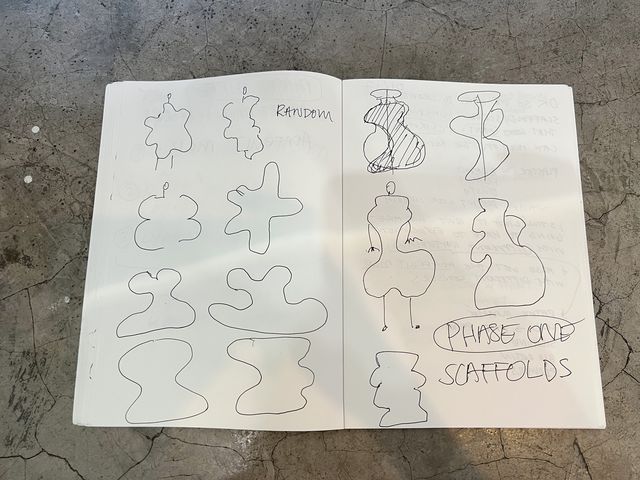
PART ONE: SCAFFOLDS


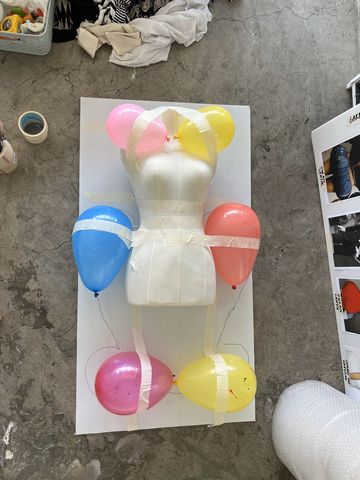
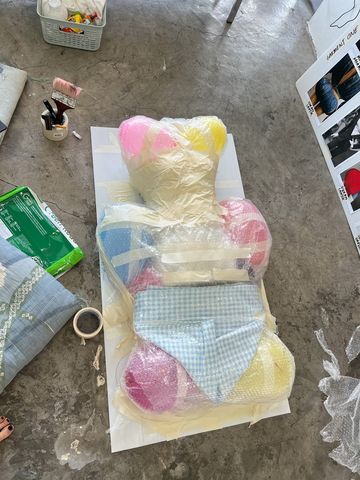
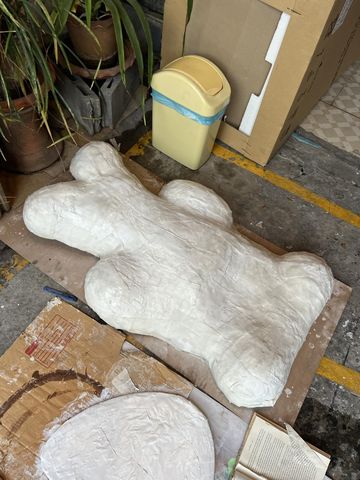
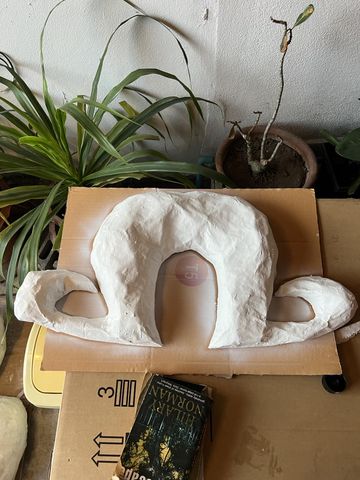
gummy bear dress
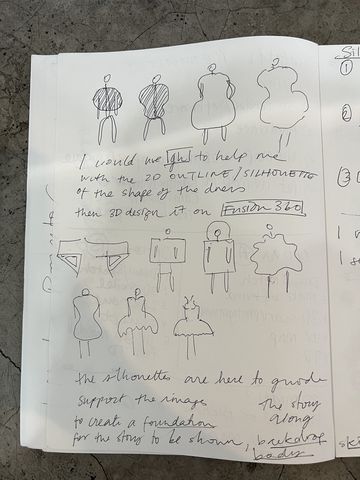
**Ideation & sketches**
**Design & Fabrication**
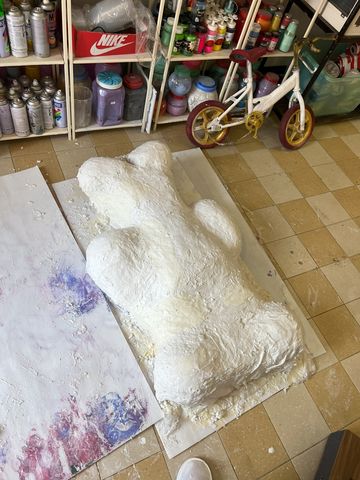

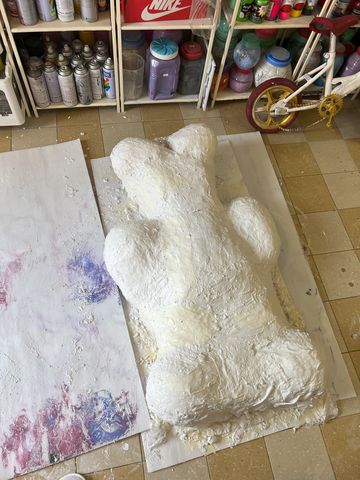
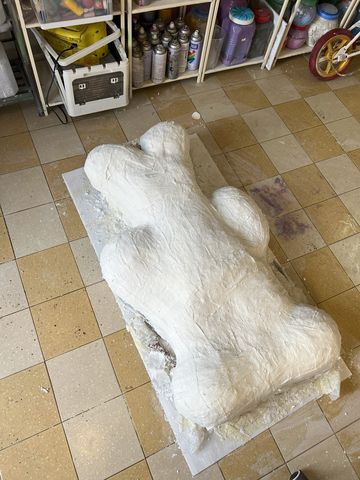
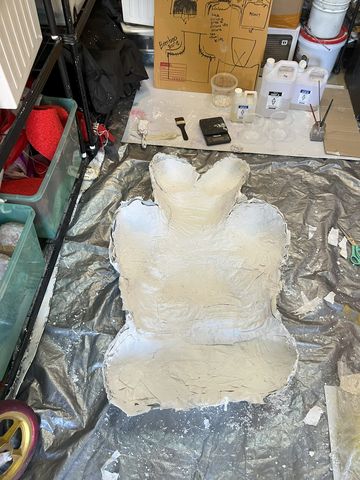
**results**
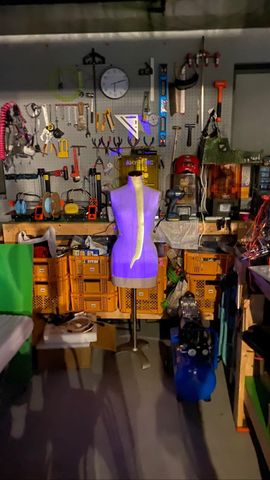
also see my week 11 assignment to see my experiments with the same materials to create a scaffold using a mannequin as a mold
[[ pic of garment being worn ]]
.... to be continued
**refelections**
- plaster is very messy to work with. the layers of plaster didn't dry out evenly, some of the first layer fabric dipped into plaster were still wet even when the top layer dried. very crumbly and broke apart easily leaving very big piles of plaster crumbs.
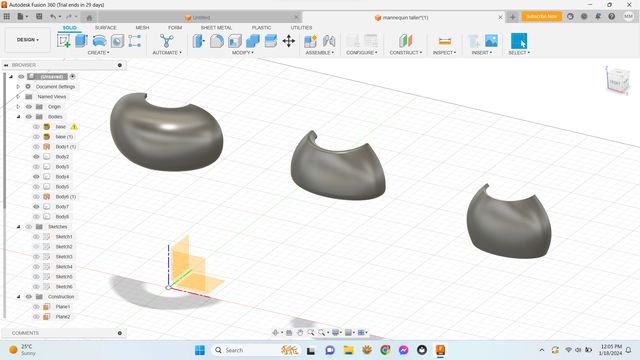
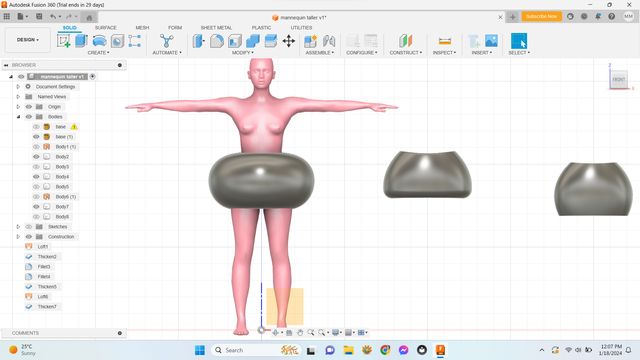
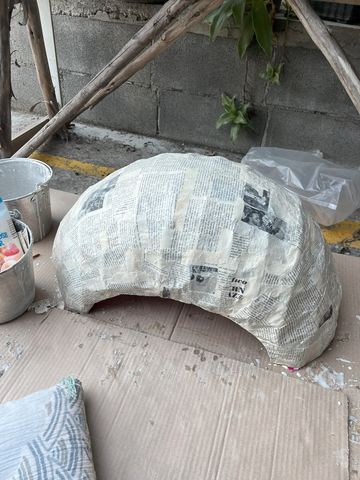
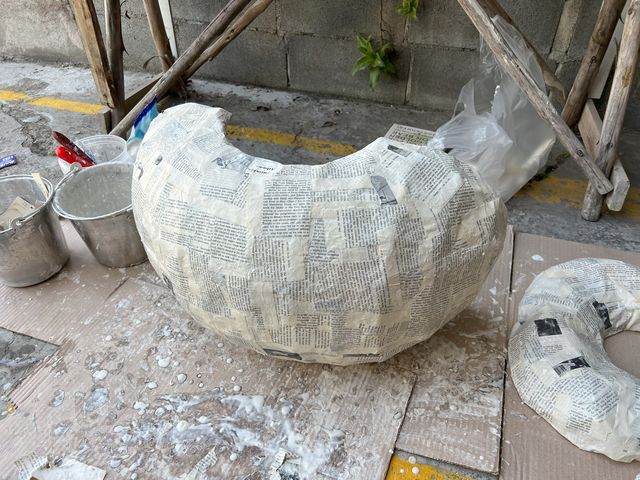
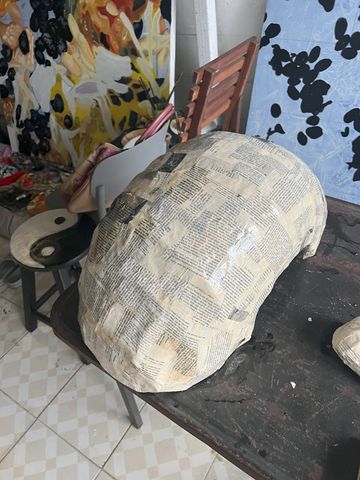
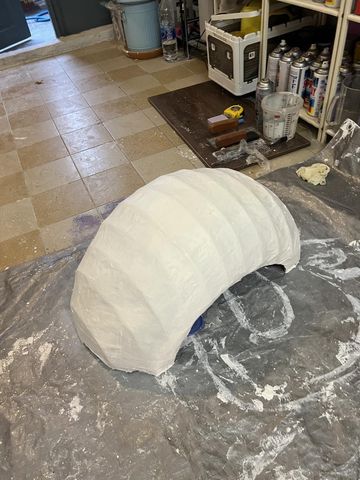
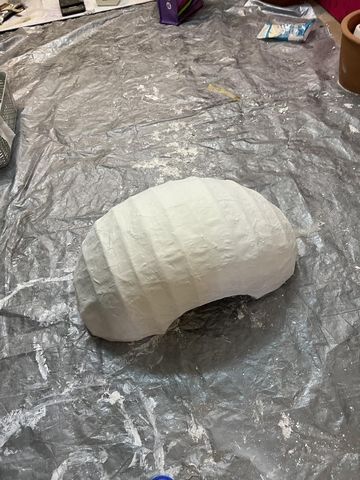
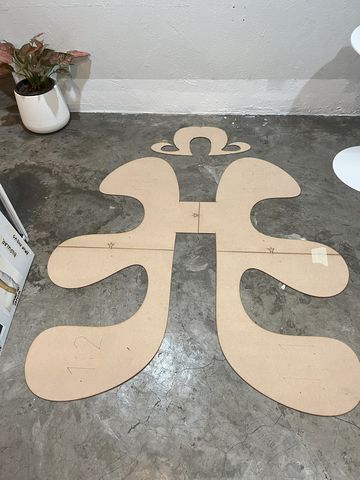
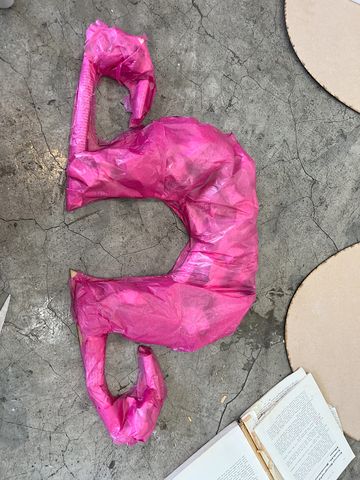
orbital skirt
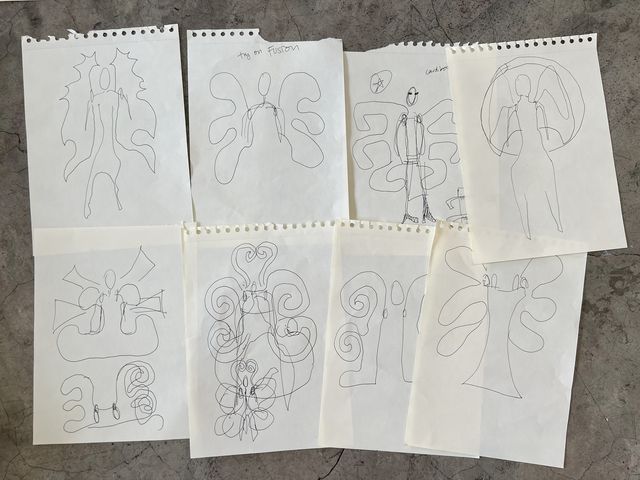
**Ideation & sketches**

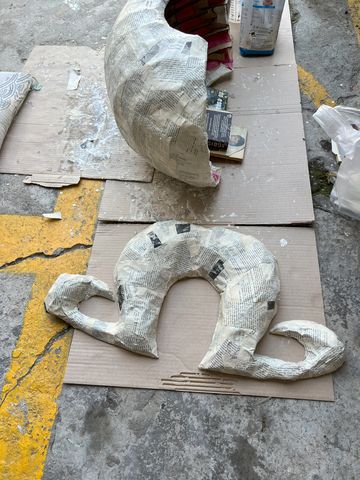
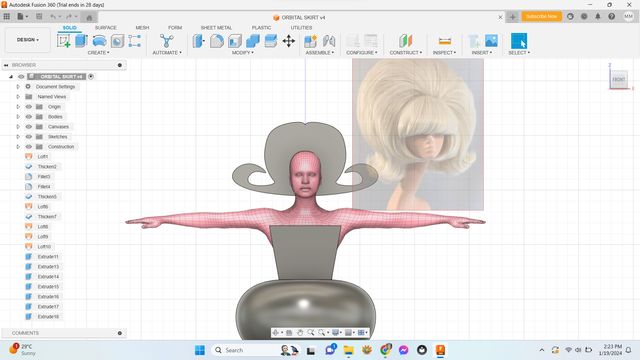
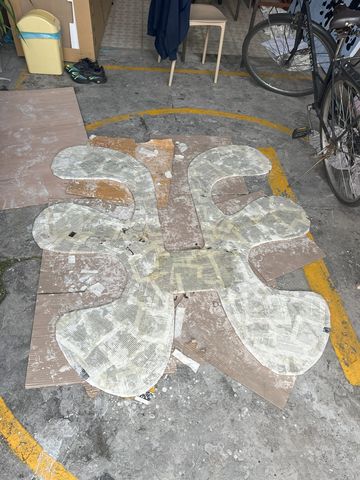
**Design & Fabrication**

1. design on fusion
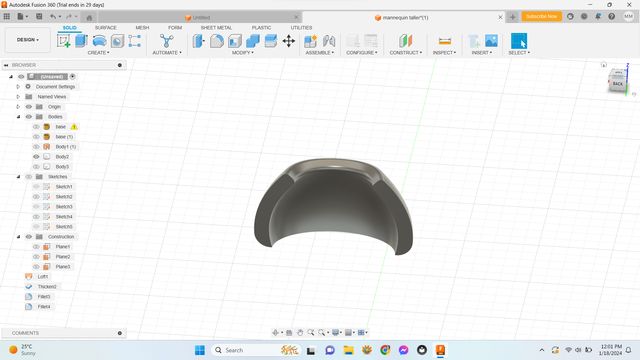
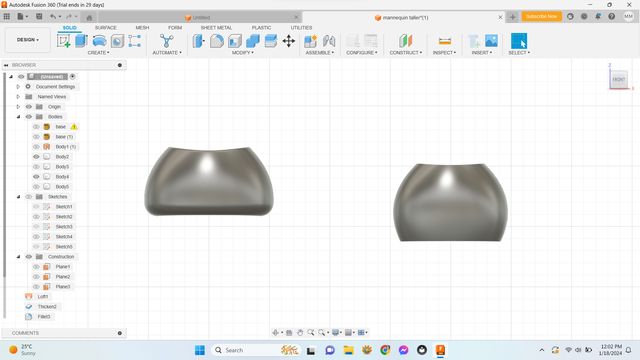
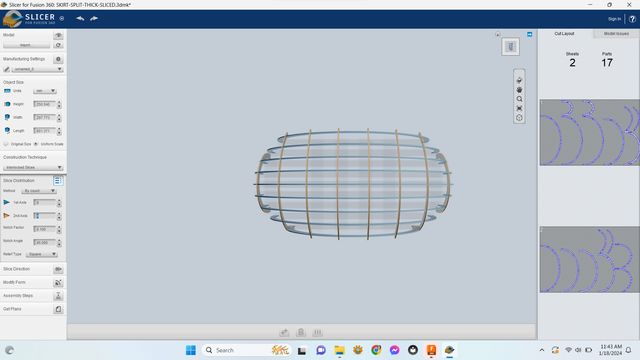
2. export as .stl and bring over to Slicer for Fusion
interlocked slices
2.5mm mdf
3. laser cut and assemble
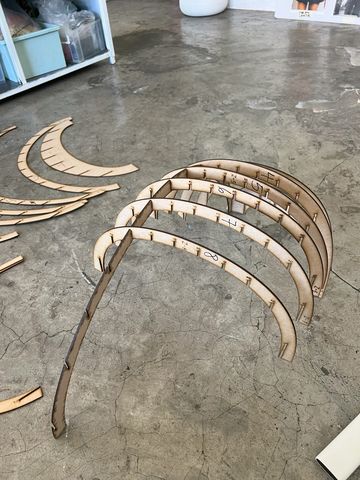
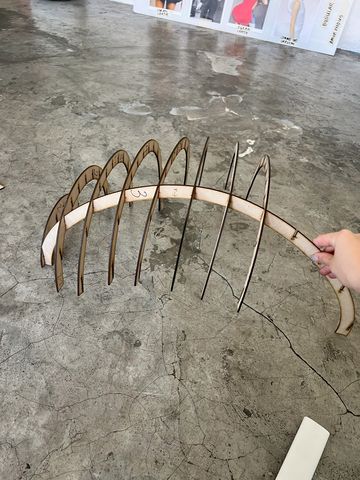
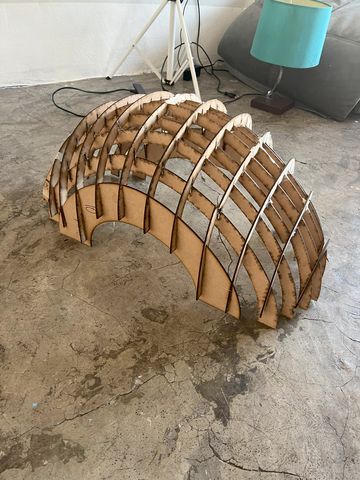
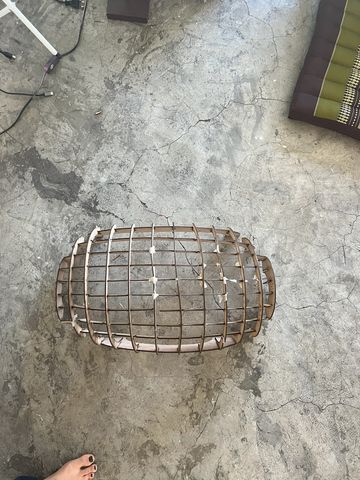
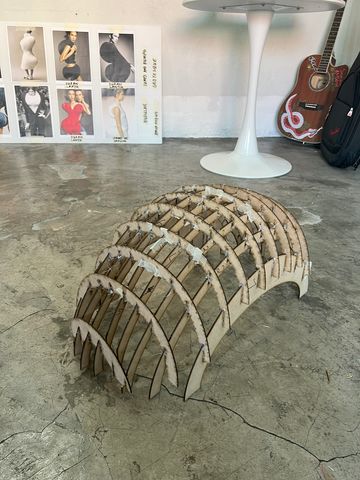
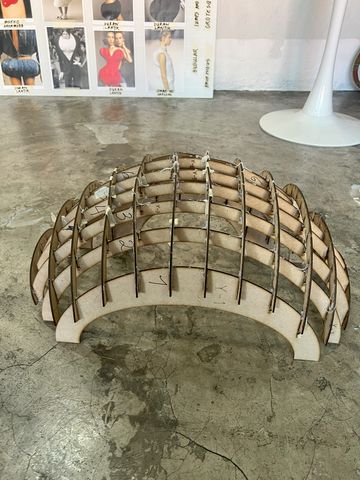
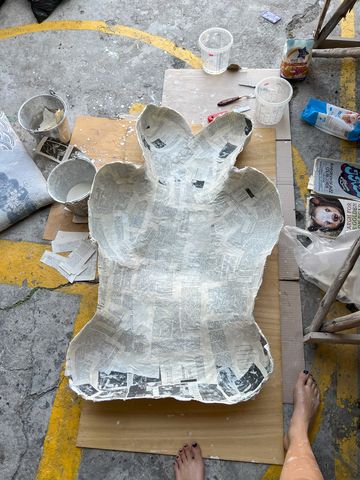
4. start to fill in holes
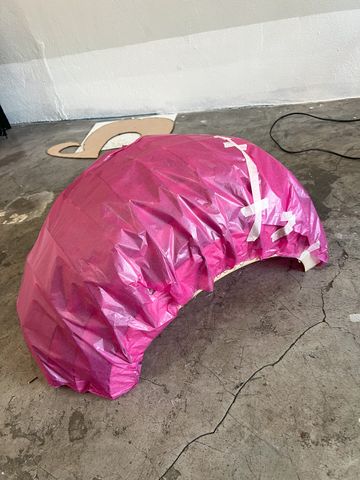
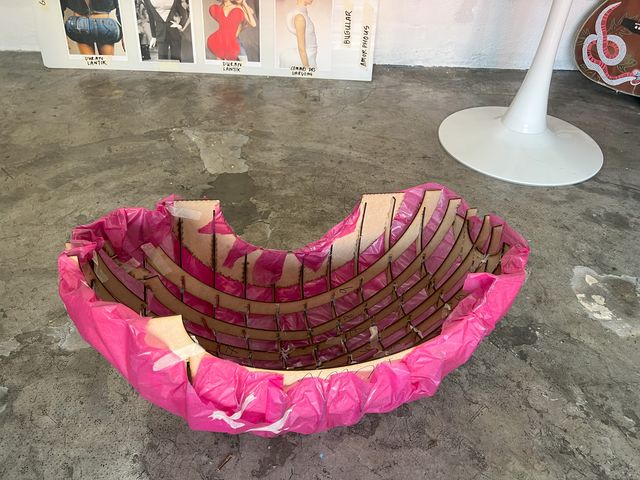
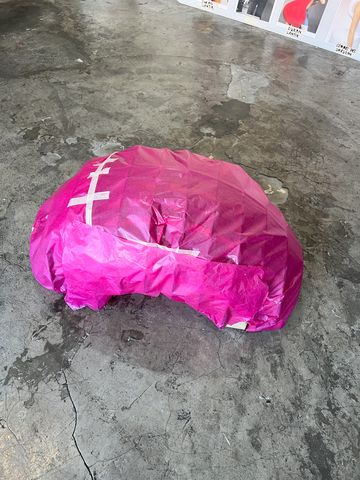

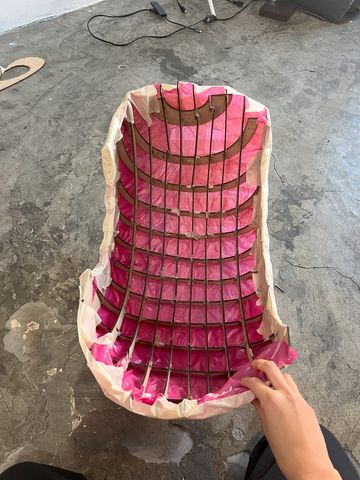
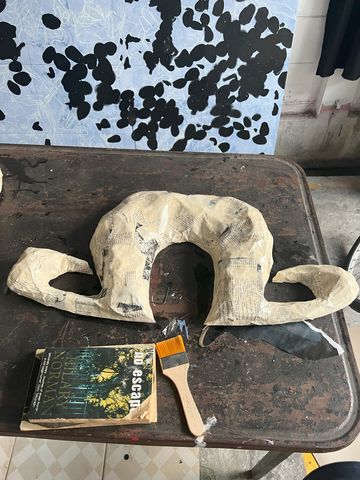
5. paper mache
**results**
[[ pic of garment being worn ]]
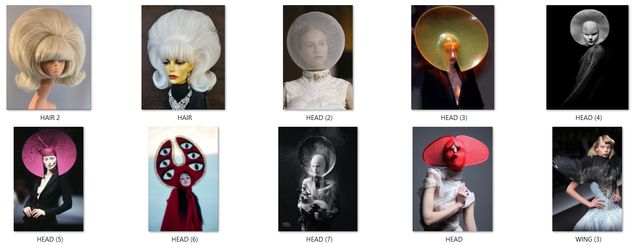
hair wig
**Ideation & sketches**
**Design & Fabrication**
**results**
[[ pic of garment being worn ]]
wing
**Ideation & sketches**
**Design & Fabrication**
**results**
[[ pic of garment being worn ]]
PART TWO: TD IMAGERY
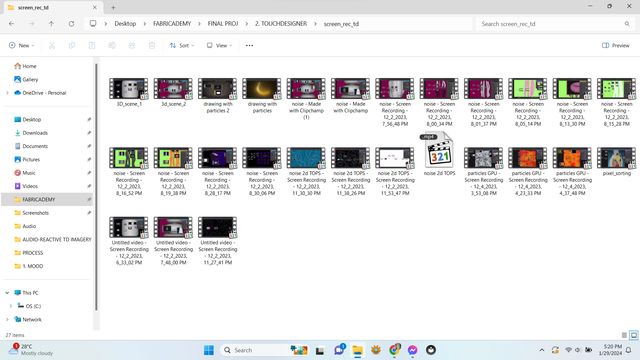
spiral one: learning touch designer
to start my journey with TouchDesigner, I did a crashcourse on the software by watching these introduction tutorials to TD by these creators:
TouchDesigner Beginner Course Youtube Playlists
Then i started to experiment with more artistic tutorials in TD. Here is a Youtube playlist I curated: (it also includes a lot of other videos on TD)
Art Tutorials TD
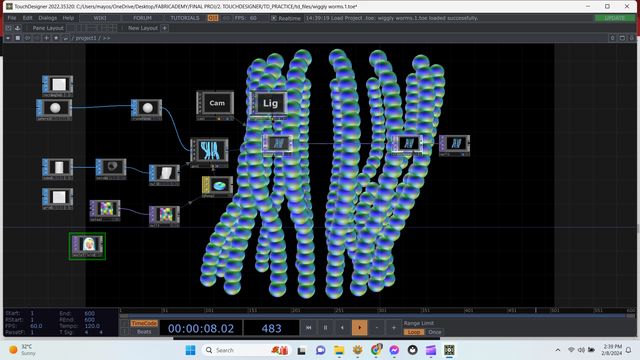


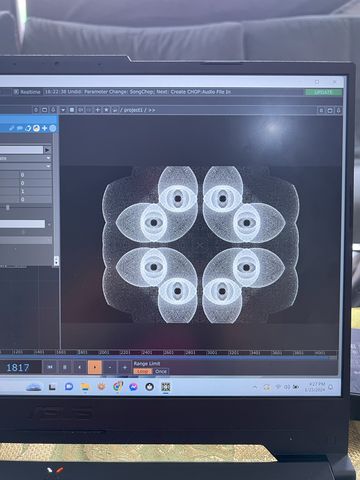
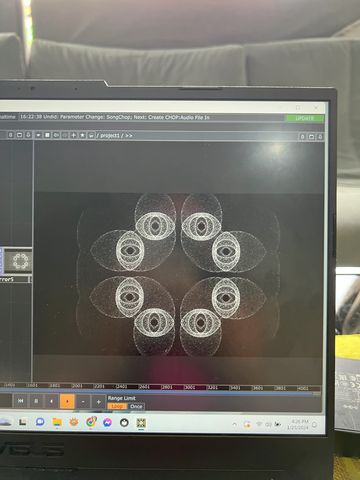


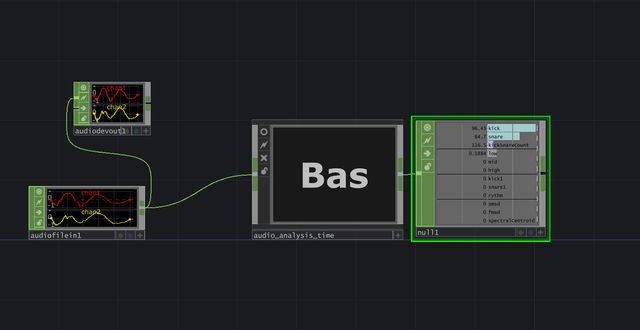
spiral two: audio-reactive visuals
the second part to my TouchDesigner work was to incorporate some audio-reactive nodes. i learned how to do this with the help of youtube tutorials. i've included some links below.
here is an example of an audioreactive Video:
the basic set up to making animations audio-reactive looks something like this:
Youtube Tutorials for Audio-reactive Visuals
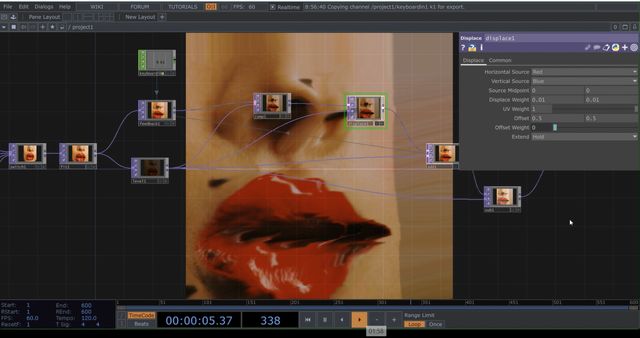
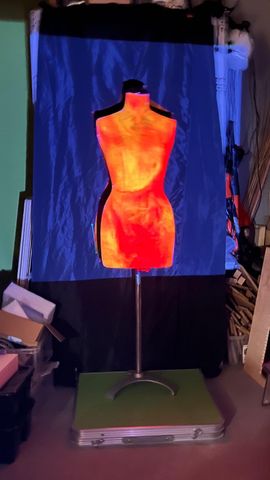
spiral three: kantan mapping
Practicing kantan mapping:
My first experiment with kantan mapping actually started early in October when Rico scheduled a zoom call with his friend Kurumi, professional projection mapper. She taught me how to do a basic animation and use kantan mapping to fix the animation a shape to be projected. We came up with the idea to project the image onto a mannequin -- and this is also when I started to come up with the idea for my final project.


Kantan Mapping Tutorials
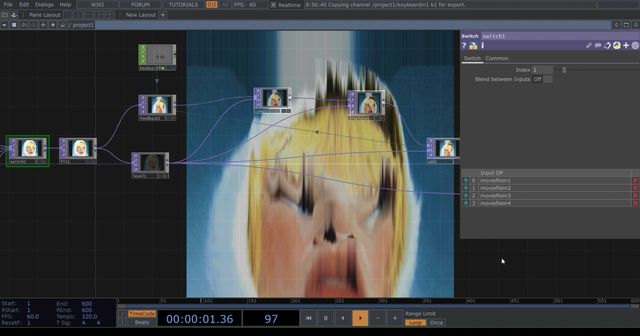
spiral four: real-time tracking
This is the last spiral of TouchDesigner that I experimented with to achieve projection on moving objects. So far, kantan mapping has enabled me to project onto a specific shape/object that does not move. But because I would like my model wearing the scaffold to be more liberated in her movements, I needed to learn a way to track the motion/movements of the model, enabling her to move freely backwards and forwards, side to side.
There were many tutorials that included the Kinect sensor, however, I managed to also find tutorials that would not need a Kinect, and instead just use my Laptop Webcam already available to me.
Here are some examples of the real-time tracking projections:
Real-time tracking experiment.
Real-time tracking Tutorials
- Directional Motion Detection and Tracking using Webcam in TouchDesigne
- Hand tracking using media pipe
- Easy person detection with blob tracking
- Body tracking with No Kinect
- Interactive Particles
- Nvidia Body Track CHOP
- Kinect Azure Point Cloud in TouchDesigner Tutorial
- Body Tracking with No Kinect in TouchDesigner 2022
- Face, Hand, Pose Tracking & More in TouchDesigner with @MediaPipe GPU Plugin
I mainly focused on this tutorial where I used Particles GPU to track my body movements with a webcam. Here are some of my results experimenting with this method:
PART THREE: ELECTRONICS
spiral one: set up
I knew i would need at least three aspects to create my circuit:
1. an input sensor: heart rate, microphone, or body temperature sensor
2. a microcontroller unit such as an arduino uno
3. an output = projected animations
I need the following
- Projector
- Screen (Scaffolds)
- Animation (Touch Designer)
- MCU (arduino uno, ESP32, XIAO ESP32-C3)
- Microphone sensor
- Computer
- Speakers
here a draft of my ideation for embedding electronics into my garment:
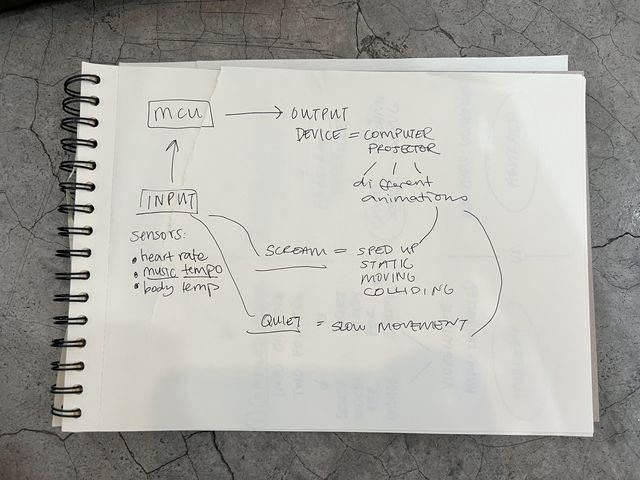
I also came up with the idea during this phase that I wanted to trigger different animations with my voice.
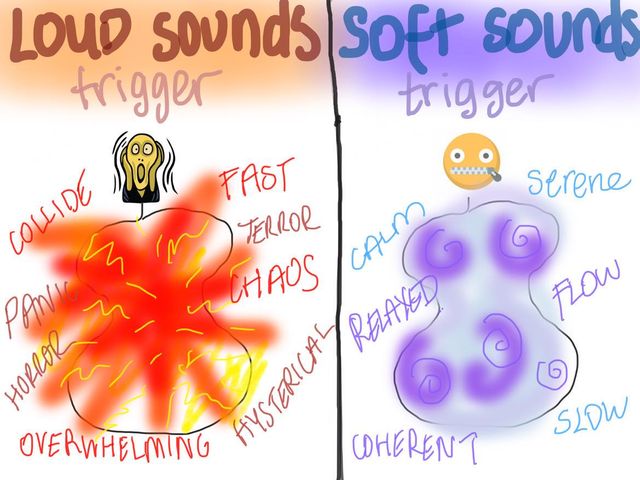
I thought it would be fun to make screams my trigger. When I scream into the microphone, the mcu would inform TouchDesigner to play chaotic animations to mirror the scream. Adversely, when I'm quiet and the mcu does not register a loud sound, it contiously informs the computer to play serene, calm animations.
a second draft of my circuit:

sketch of microphone sensor generating different outputs:
spiral two: test microphone sensor
Goals:
- connect microphone sensor to Arduino IDE
- get code to blink LED when sound frequency is triggered
- get serial monitor to work
- send serial data to TD
- use microphone sensor to trigger different animations in TD

To do this I created a circuit with a microphone sensor, breadboard, a red LED, jumper wires, and an Arduino Uno.
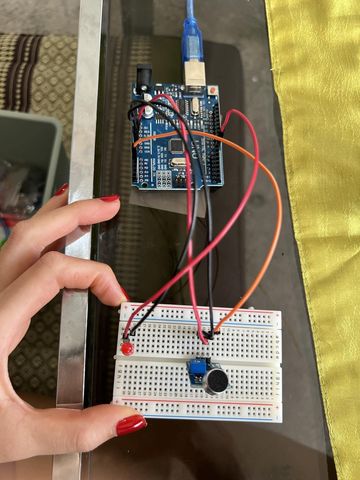
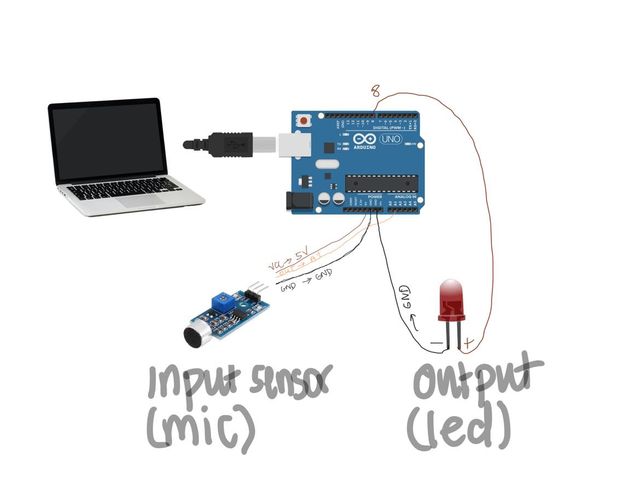
Then I used the Arduino IDE to insert a code and upload it to the Arduino Uno. My code can be found in my Deliverables page (see left side of website)...
I wanted my code to have an INPUT sensor = the microphone sensor. And an OUTPUT sensor = the LED. And then I wanted the mcu to Read the values of the INPUT sensor and have a threshold where it would signal to the LED port and have it blink on for 1 second. I choose my threshold to be 800 baud out of 1023 baud.
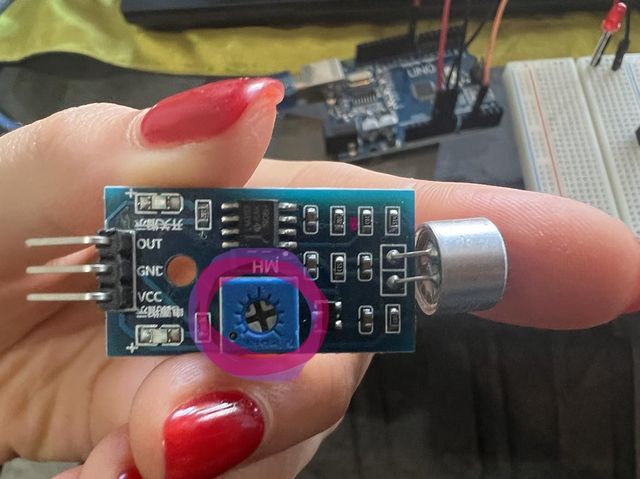
I also was playing around with the microphone sensitivity by turning the knob in the blue box on the microphone sensor. When I turned it to the right it was HIGHLY sensitive and would catch onto every sound frequency, when i turned it to the left it was LESS sensitive and could barely pick up my speech.
Finally, i wanted to make sure my serial monitor works and that it would print the Values of the microphone sensor -- this is the data I will eventually transmit to TouchDesigner to control which animations get projected.
spiral three: test xiao esp32c3 board
Goals:
- Test that each xiao board is functioning properly.
- Run the generic blink code on each of the TX and RX ESP32 boards to blink an LED.
- Get 2 ESP32 boards to communicate wirelessly using the ESP NOW protocol.
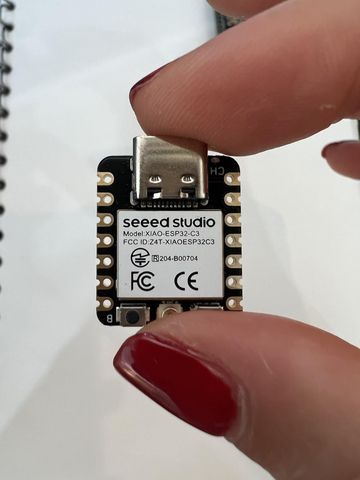
After research on which MCUs to use, I am choosing to work with the xiao esp32c3 board, which has bluetooth capabilities, so that one can be connected to the computer for projections (RX, receiver) and the other can be attached to the garment along with the microphone sensor (TX, transmitter).
Boards:
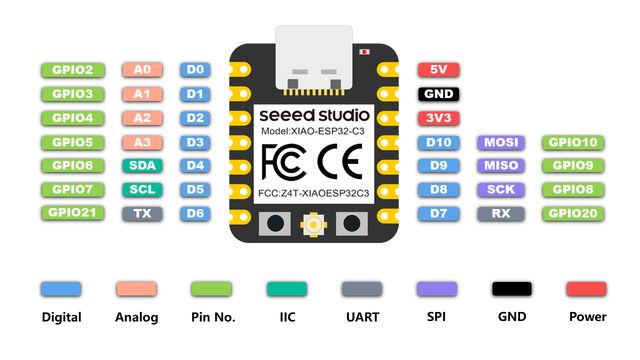
1. XIAO ESP32C3
Step 1: Prepare Arduino IDE for Xiaos
I am following this link. I open Arduino IDE then click on File > Preferences and paste the link below to be able to install the ESP32 Board in Arduino IDE boards library.
https://raw.githubusercontent.com/espressif/arduino-esp32/gh-pages/package_esp32_index.json
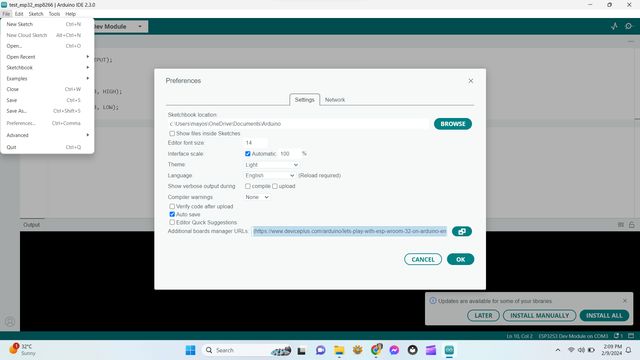
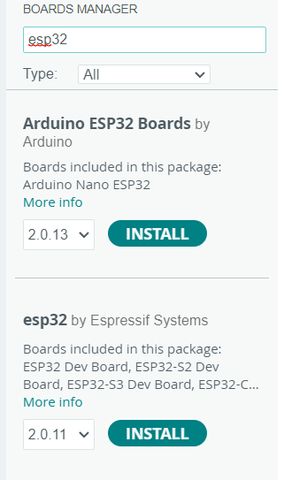
Then I go to Boards Manager and install the ESP32 board by Espressif Systems
I go back to Arduino IDE and choose my Board and Port in Tools
Board: XIAO_ESP32C3 Port: For me it is COM6 but could be different for you
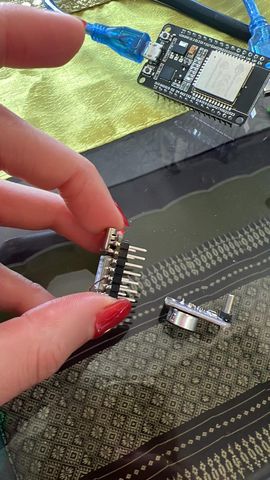
Step 2: Solder pins onto XIAO boards:
Step 3: Test LED Program on xiao boards
To do this: positive leg of LED to Xiao ESP32C3's D10 pin and negative leg thru a 470ohm resistor to GND
Use the following code to see if the Xiao board can signal the LED to blink.
// define led according to pin diagram
int led = D10;

void setup() {
  // initialize digital pin led as an output
  pinMode(led, OUTPUT);
}

void loop() {
  digitalWrite(led, HIGH);   // turn the LED on
  delay(1000);               // wait for a second
  digitalWrite(led, LOW);    // turn the LED off
  delay(1000);               // wait for a second
}
Repeat for the second xiao.
spiral four: communication between the two boards
Communication Between two ESP32 mcus
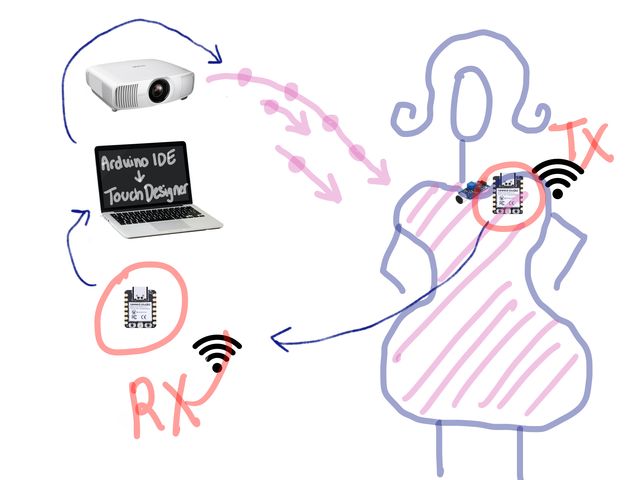
TX, Transmitter: Microphone sensor and Xiao on Garment
RX, Receiver: ESP32 connected to Computer Arduino IDE and TD
The two boards will communivate via a program called ESP-NOW. Tutorial above.
I will end up running 3 pieces of code...
1. Configuring and uploading the Transmitter Code to the TX board
2. Running the Mac Address code on the RX board > to get it's unique wireless communication ID
3. Configuring and uploading the Receiver Code to the RX board
These are codes just to test whether the two xiao boards can communicate with each other. It does not include the data from the microphone sensor. The next spiral will include code for the microphone sensor.
First Code
// Transmitter Code

#include <esp_now.h>
#include <WiFi.h>

#define Channel 1 // TX and RX must be on same channel

esp_now_peer_info_t slave; // stores info about slave, incl MAC Address

uint8_t data = 0; // initial data sent...unsigned integer...250 bytes or less

void setup() {
  Serial.begin(115200);

  pinMode(buttonPin, INPUT);

  WiFi.mode(WIFI_STA); // set TX mode as Wifi Station
  esp_now_init();
  esp_now_register_send_cb(OnDataSent); // run Call-back function called OnDataSent
  ScanForSlave(); // find slave MAC address at specific SSID
  esp_now_add_peer(&slave); // point to stored slave data...based on discovered MAC address
 }

void loop() {
  esp_now_send(slave.peer_addr, &data, sizeof(data)); // send to slave address, data, data length
  data++;
  delay(3000);

  int state = digitalRead(buttonPin);
}

void ScanForSlave(){
int8_t scanResults = WiFi.scanNetworks();

for (int i = 0; i < scanResults; ++i){
  String SSID = WiFi.SSID(i);
  String BSSIDstr = WiFi.BSSIDstr(i);


  if (SSID.indexOf("RX") == 0){ // Looks for matching network name
    int mac[6];
    if (6 == sscanf(BSSIDstr.c_str(), "%x:%x:%x:%x:%x:%x", &mac[0], &mac[1], &mac[2], &mac[3], &mac[4], &mac[5])){
      for (int ii = 0; ii < 6; ++ii){
        slave.peer_addr[ii] = (uint8_t) mac[ii];
      }
    }

    slave.channel = Channel;
    slave.encrypt = 0;
    break;
  }
 }
}

void OnDataSent(const uint8_t *mac_addr, esp_now_send_status_t status){
  Serial.print("I sent my data >  ");
  Serial.println(data);
}
Second Code
Plug the RX board into your computer and upload this code. Then go to serial monitor and copy the digits like this:
//Get MAC Address Code

#include "WiFi.h"

void setup()
{
  Serial.begin(115200);
  WiFi.mode(WIFI_MODE_STA);
  Serial.println(WiFi.macAddress());
}

void loop(){}
Open your serial monitor.
this is what i got in the last line: this is the MAC address for the RX board: I will need these digits for when I want the TX to send information wirelessly to my RX (in the next spiral):
15:08:56.975 -> 34:85:18:03:77:7C
Third Code
// Receiver Code

#include <esp_now.h>
#include <WiFi.h>

#define Channel 1 // same channel as TX

uint8_t newData;

void setup() {
  Serial.begin(115200);

  WiFi.mode(WIFI_AP); // set wifi to AP mode
  WiFi.softAP("RX_1", "RX_1_Password", Channel, 0); // SSID that TX can recognize

  esp_now_init();
  esp_now_register_recv_cb(OnDataRecv);
}

void loop() {
  Serial.print("I did this to data >> ");
  Serial.println(newData * 5); //making use of incoming data
  delay(3000);
}

void OnDataRecv(const uint8_t *mac_addr, const uint8_t *data, int data_len){
  Serial.print("I just received >> ");
  Serial.println(*data);
  memcpy(&newData, data, sizeof(newData)); //copy data from membory (memory copy) for use in loop
}
Now that I've tested that the TX and RX Xiao boards can communicate with one another, I want the TX to transmit microphone sensor data to the RX.
spiral five: test microphone sensor with TX+RX
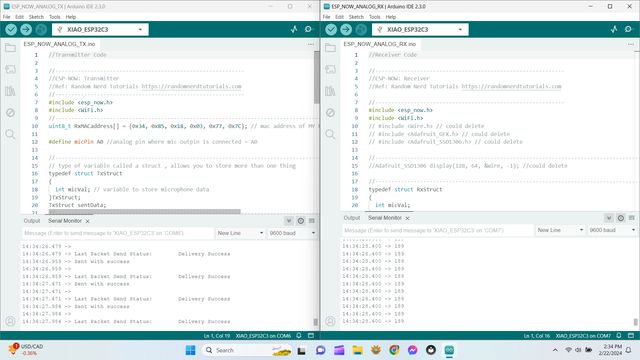
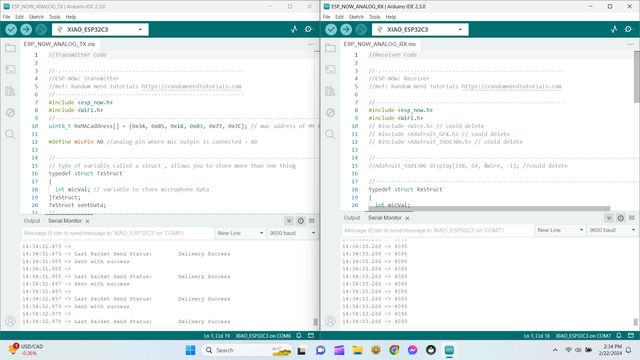
TX code
In this code I will insert my RX board's MAC address
the line that says "uint8_t RxMACaddress[] = {0x34, 0x85, 0x18, 0x03, 0x77, 0x7C};" is where those digits go
//Transmitter Code

//-----------------------------------------------------------
//ESP-NOW: Transmitter
//Ref: Random Nerd Tutorials https://randomnerdtutorials.com
//-----------------------------------------------------------
#include <esp_now.h>
#include <WiFi.h>
//-------------------------------------------------------------------------------------
uint8_t RxMACaddress[] = {0x34, 0x85, 0x18, 0x03, 0x77, 0x7C}; // mac address of MY RX, []= array of variables

#define micPin A0 //analog pin where mic outpin is connected = A0

//-------------------------------------------------------------------------------------
// type of variable called a struct , allows you to store more than one thing
typedef struct TxStruct
{
  int micVal; // variable to store microphone data
}TxStruct;
TxStruct sentData;
//-------------------------------------------------------------------------------------
void OnDataSent(const uint8_t *mac_addr, esp_now_send_status_t status) //dont mess lines 22-26
{
  Serial.print("\r\nLast Packet Send Status:\t");
  Serial.println(status == ESP_NOW_SEND_SUCCESS ? "Delivery Success" : "Delivery Fail");
}
//======================================================================================
void setup()
{
  Serial.begin(9600);
  WiFi.mode(WIFI_STA);
  //------------------------------------------------------------------------------------
  if(esp_now_init() != ESP_OK)
  {
    Serial.println("Error initializing ESP-NOW");
    return;
  }
  //-------------------------------------------------------------------------------------
  esp_now_register_send_cb(OnDataSent);
  //-------------------------------------------------------------------------------------
  esp_now_peer_info_t minaRX; // name of my receiver
  memcpy(minaRX.peer_addr, RxMACaddress, 6);
  minaRX.channel = 0;  // lines 43-49 dont mess
  minaRX.encrypt = false;
  //-------------------------------------------------------------------------------------
  if(esp_now_add_peer(&minaRX) != ESP_OK)
  {
    Serial.println("Failed to add peer");
    return;
  }
}
//======================================================================================
void loop()
{
  sentData.micVal = analogRead(micPin);
  //-------------------------------------------------------------------------------------
  esp_err_t result = esp_now_send(RxMACaddress, (uint8_t *) &sentData, sizeof(sentData)); // lines 57- end dont mess
  //-------------------------------------------------------------------------------------
  if (result == ESP_OK) Serial.println("Sent with success");
  else Serial.println("Error sending the data");
  //-------------------------------------------------------------------------------------
  delay(500);
}
RX code
//Receiver Code

//-----------------------------------------------------------
//ESP-NOW: Receiver
//Ref: Random Nerd Tutorials https://randomnerdtutorials.com

//-----------------------------------------------------------
#include <esp_now.h>
#include <WiFi.h>
// #include <Wire.h> // could delete
// #include <Adafruit_GFX.h> // could delete
// #include <Adafruit_SSD1306.h> // could delete

//-------------------------------------------------------------------------------------
//Adafruit_SSD1306 display(128, 64, &Wire, -1); //could delete

//-------------------------------------------------------------------------------------
typedef struct RxStruct
{
  int micVal;
}RxStruct;
RxStruct receivedData;
//-------------------------------------------------------------------------------------
void OnDataRecv(const uint8_t * mac, const uint8_t *incomingData, int len)
{
  memcpy(&receivedData, incomingData, sizeof(receivedData)); //new command, copying data from memory and assigning to variable called receivedData
}
//======================================================================================
void setup()
{
  Serial.begin(9600);
  // if (!display.begin(SSD1306_SWITCHCAPVCC, 0x3C))
  // {
  //   Serial.println(F("SSD1306 allocation failed"));
  //   for (;;); // Don't proceed, loop forever
  // }
  // display.clearDisplay();

  //-------------------------------------------------------------------------------------
  WiFi.mode(WIFI_STA);
  if (esp_now_init() != ESP_OK) //40-47 dont mess
  {
    Serial.println("Error initializing ESP-NOW");
    return;
  }
  esp_now_register_recv_cb(OnDataRecv);
}

//======================================================================================
void loop() // custom code
{
  // display.setTextColor(WHITE); display.clearDisplay();
  // display.setTextSize(2); display.setCursor(20,0); display.print("ESP-NOW");
  // display.setCursor(10,18); display.print("POT Value");
  // display.setTextSize(3); display.setCursor(25,42); display.print(receivedData.potVal);
  // display.display();
  //int val = map(receivedData.micVal, 4095, 0, 0, 1000);
  Serial.println(receivedData.micVal);
}
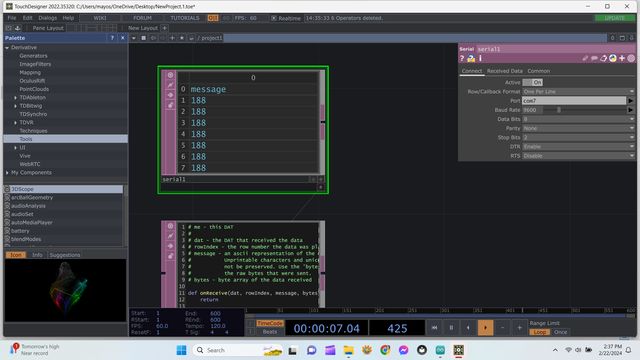
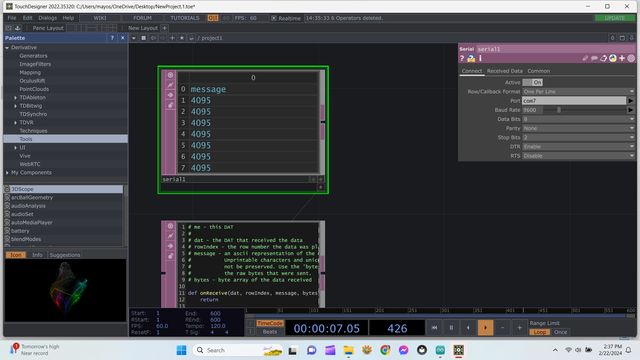
wireless connection
Incoming data to TD.
Testing wireless connection from separate rooms
PART FOUR: SERIAL DATA AND SCREAM-REACTIVE VISUALS
Once i've managed to transfer my microphone sensor data from Arduino IDE to TD, I can start playing around with this data in TouchDesigner to trigger different animations.
It is essentially the same practice as creating audio-reactive visuals but instead of inserting a song or beat, it would take the live incoming data from the microphone sensor and trigger different animations depending on the threshold of the data.
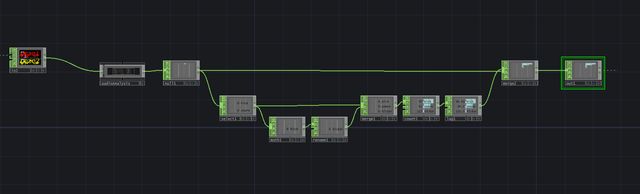
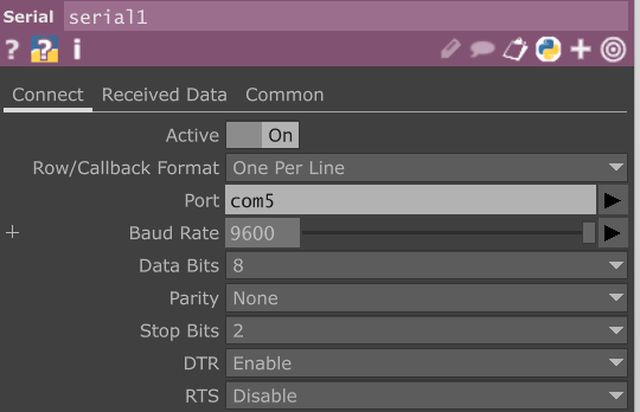
spiral one: transfer serial data
Step 1: Drag a DAT Serial Node into your workscreen.
Step 2: Select Port and Baud Rate
Step 3: Select a column (I select the last one to work with)
Step 4: Turn DAT into CHOP
For a more thorough run-through, watch one of the youtube tutorials I've linked below...
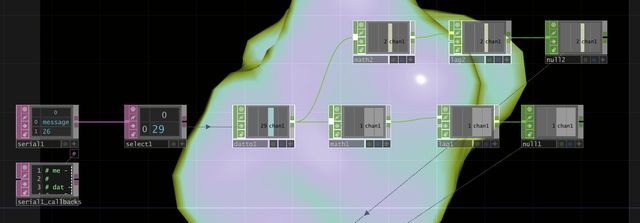
spiral two: chop reference serial data in animation
Arduino IDE to TD
PART FIVE: NARRATIVE


story-board
Mentoring notes
Mentors in all sessions may share with you their comments, notes, advise, projects and technical equipment to check out. This is good place to share those, so that you can find them later on when you need them the most!
30/01
- Look for color recognition software - highly reactive - where it projects only onto this color
- Research Kinect motion sensor
- Research OSC iphone apps - Open Sound Control