7. Computational Couture
This week totally flew under the radar for me. I didn't expect to get so absorbed with the possibilities that digital design has the ability to advance. Prior to this week, I was still grasping at the romantic notion of making crafts with my bare hands.. But this week really solidified my new found love for CAD (Computer Aided Design). I look forward to the countless more hours I'll spend watching Rhino/Grasshopper tutorials on youtube... that is until my free 90-day liscence expires... (Then I'll move onto Blender :P)
There is an element to digital design that goes beyond anything the human hand can achieve on its own. Parametric Design is one of the key notions we explored this week.
More importantly, 3D and digital fabrication has a huge impact on our practices that involve physical material, especially in the fashion industry.
- Digital fabrication and digital fashion design drastically reduces the waste that go into landfills as a result of using less fabric, designing with parameters, allowing garments to solely exist on a digital plane, etc.
The intro to this Blender tutorial (3 minutes) does a really great job of synthesizing the different catalysts for the rise of digital fashion. The one that struck me the most was
- "The broader realization by fashion houses that they don't have to operate within the strict confines of physical materials anymore, given the rise of more hybridized methods of self-expression Such as... filters and editing apps, as well as virtual merch and wearables for online games... (apparently a "cash cow").
Watch the video to explore more reasons why and how digital fashion is playing a hand in evolving the fashion industry.
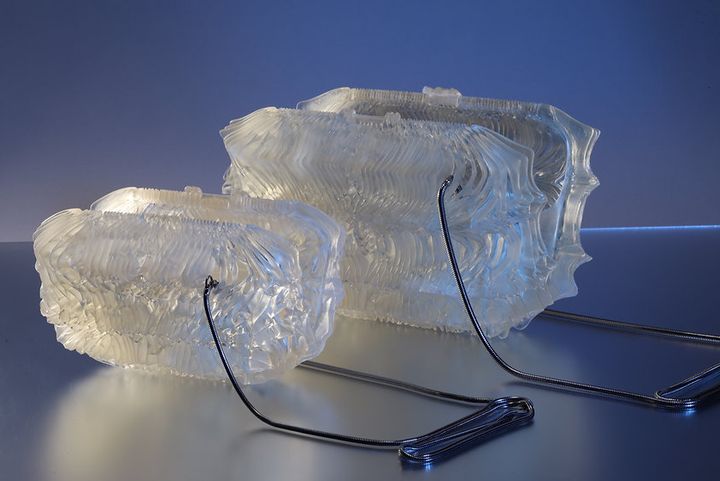
Julia Koerner, our speaker for this week, delivered a fascinating lecture on her company's pojects that span areas of architecture, fashion, and product design, which include her clutch that is not only digitally rendered but also 3D printed using resin technology made of plant-based material.
While you can explore Computational Couture on many softwares, Rhino and Grasshopper are very appealing to many designers due to the lack of programming it requires us to do. In fact, we don't need to write any code at all. Grasshopper is an "algorithmic modeling plugin" (for Rhino) that uses a "visual programming language" developed by David Rutten. It is a parametric design tool. This means designing with PARAMETERS. It involves an ALGORITHMIC process as opposed to direct manipulation.
To be very transparent, Rhino and Grasshopper were immensely challenging for me to get the hang of and I still have a long, arduous way to go.
get inspired!
Check out and research alumni pages to better understand how to document and get inspired
This is a list provided by Fabricademy that I found really helpful:
- Dinesh Kumar
- Margret Guttormsdottir
- Ala Janbek
- Laura Civetti Barcelona 2019-20_
- Sara Alvarez TextileLab Amsterdam 2020-21_
- Loes Bogers TextileLab Amsterdam 2019-20_
- Batoul Rashdan Techworks Amman 2021-22_
- Haneem Jaafreh Techworks Amman 2021-22_
- Louise Massacrier Lyon TextileLab 2021-22
- Kate Reed
Tutorials
-
Grasshopper Tutorials by Founder David Rutten Really helpful for first time users like myself.
-
Parametric House Youtube Channel They have endless videos of free tutorials for Rhino and Grasshopper, for beginners to advanced users.
-
My Youtube Playlist of Rhino/Grasshopper Tutorials. I've compiled a couple of videos that have interested me into figuring out how Rhino/Grasshopper works. Hopefully some of these are useful to you as well!
Tools
References & Inspiration
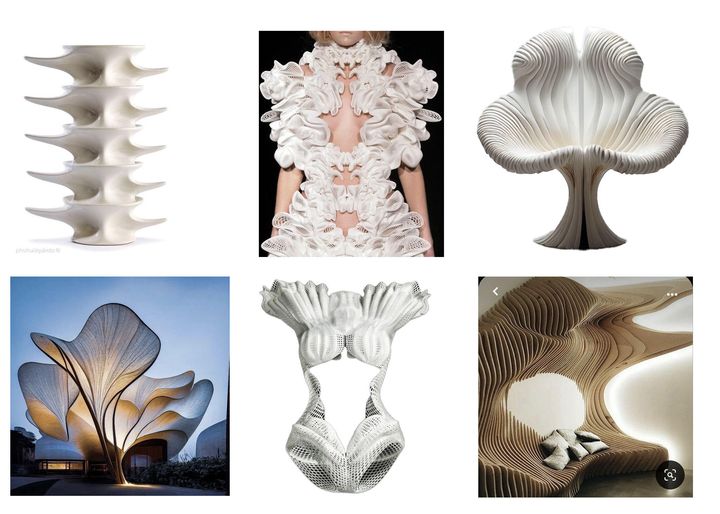
Parametric designs applied in architecture, furniture, and fashion. Photos from Pinterest.
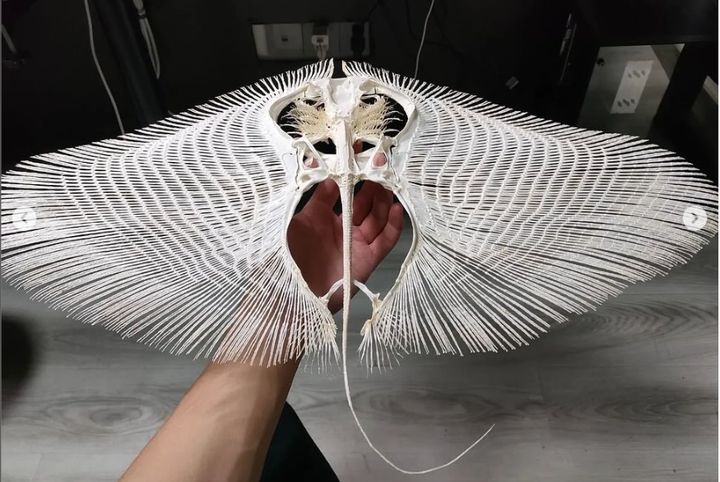
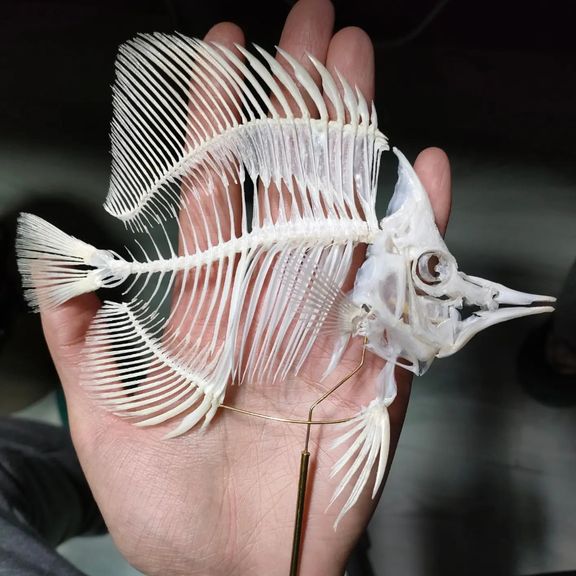
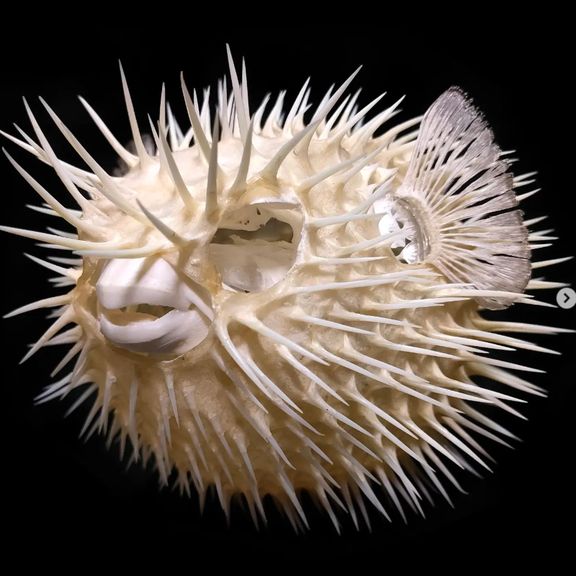
In Nature :) Images by artist Steven Chen, fish skull and skeleton collector.
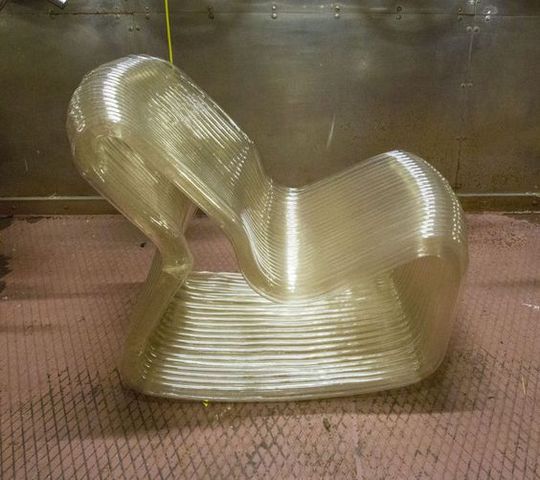 Not Only Hollow Chair by Dirk van der Kooij
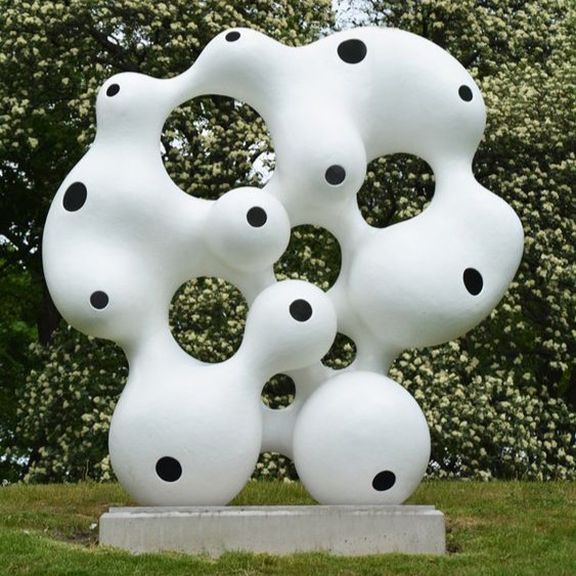
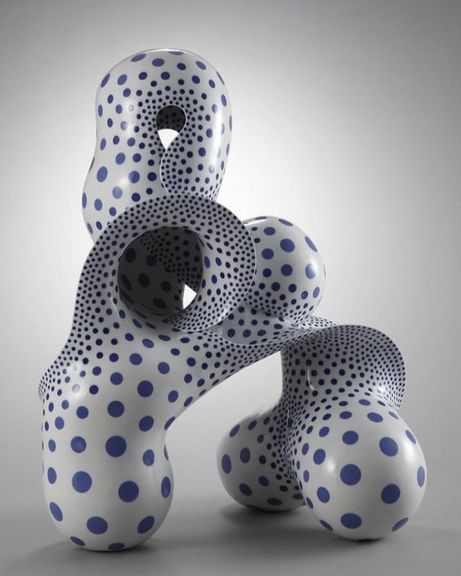
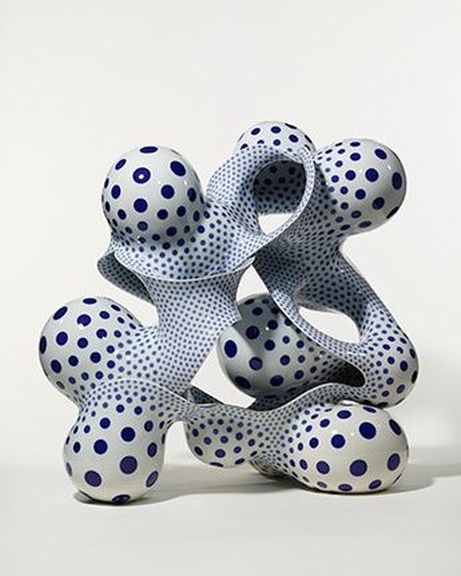
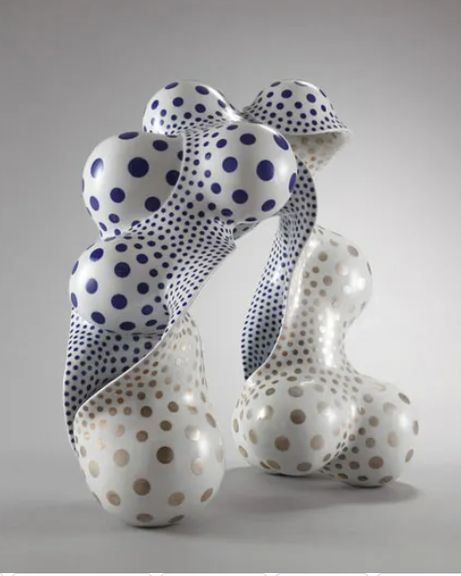
Because I'm a big lover of sculpture, here are three sculpture artists I discovered this week who have brought me inspiration and joy in their work. Not to mention their immaculate incorporation of biomorphic shapes:


Watch Harumi Nakashima, born 1950 in Giro, Japan, speak on his philosophy.
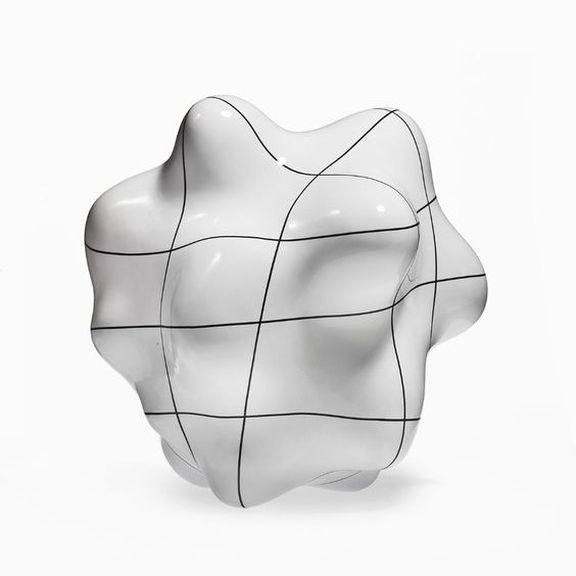
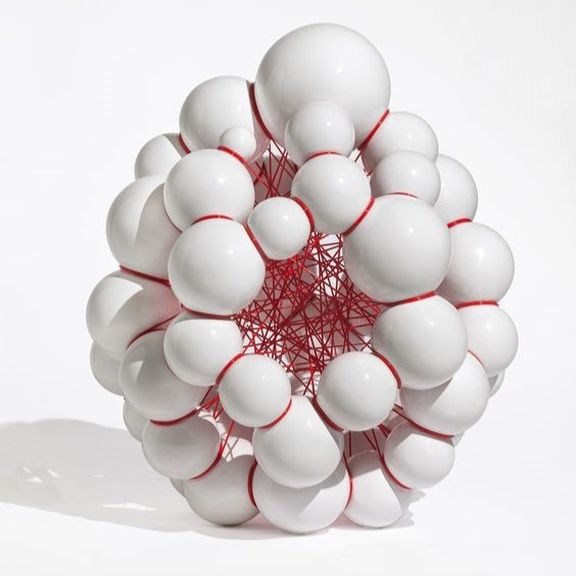
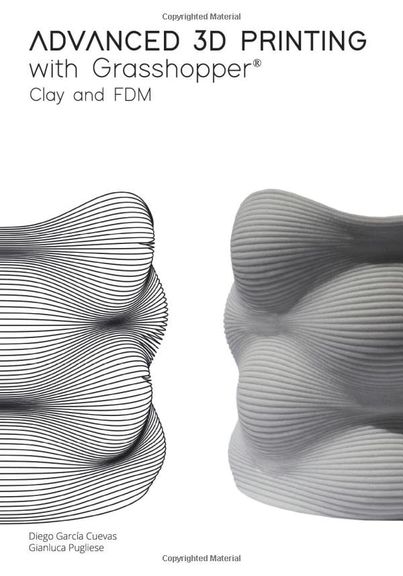 This is a book that provides gorgeous examples of 3D clay printing with Parametric designs.
My Experiments with Rhino/Grasshopper
This week, I basically tried out A BUNCH of different Grasshopper "Recipes" to help me understand the software and play around with controlling different parameters in the design. It was like learning how to cook!
1. Bubblegum Grid
2D GRID DISTORTION
To start off this week on Rhino and Grasshopper, I wanted to follow some easy 2D tutorials. While I didn't manage to recreate this recipe, which integrates Polar Array, a point which makes the pattern react to the point attractor, I did end up with a nice tessellation pattern that had parameters I could control to create many different 2D patterns.
This was another fun example of 2D grid distortion. Try this recipe out for yourself!
3D GRID DISTORTION
Another mediocre attempt. This one was following a 3D grid distortion tutorial. You can try this recipe yourself.
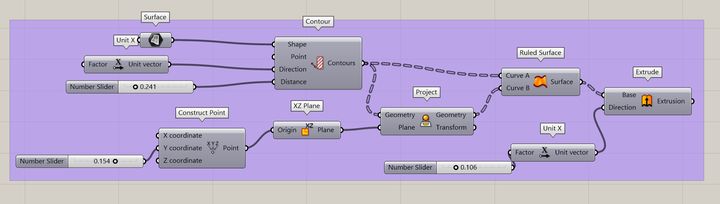
BUBBLE GUM TABLE
I used this recipe to shape a plane into a table. I was hoping for the extrusions that became the legs would create more of a cavity on the table surface that would function as slots to put fruits or candy in.
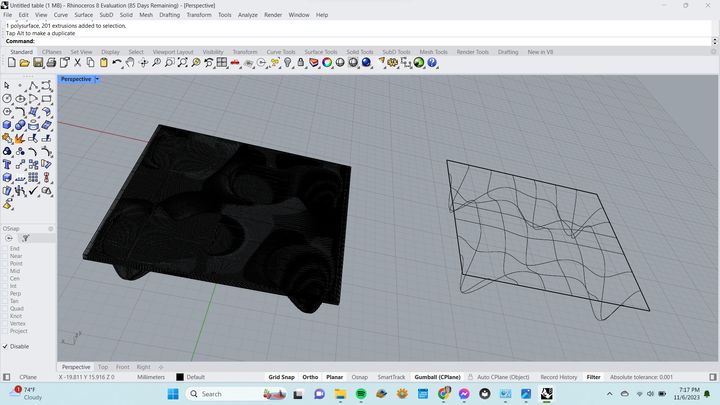
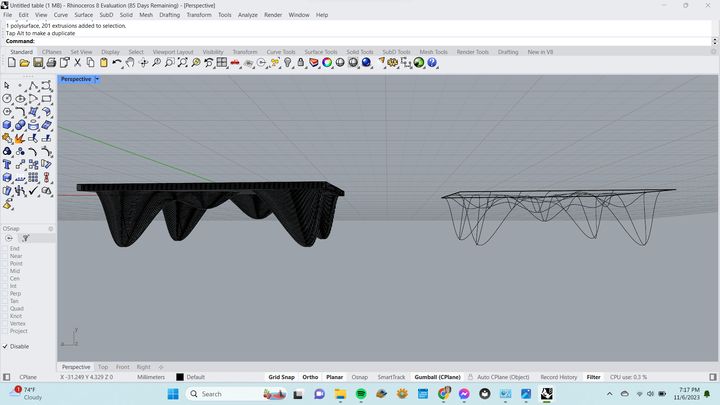
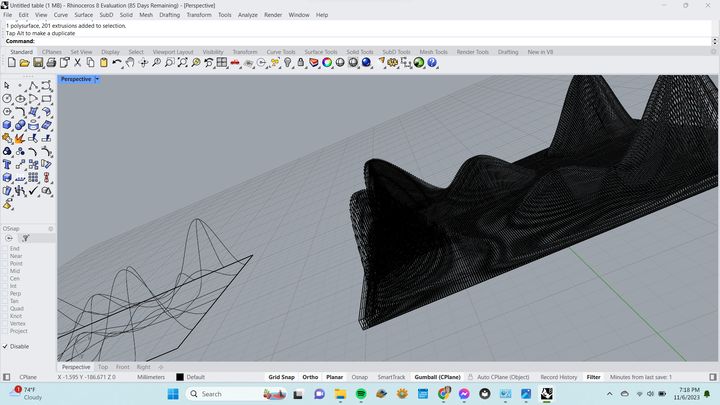
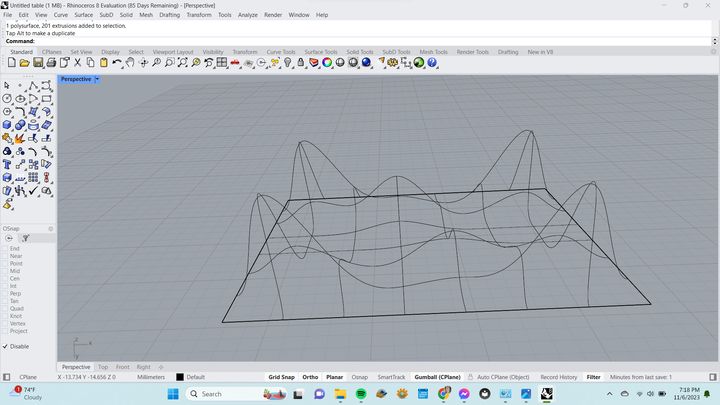
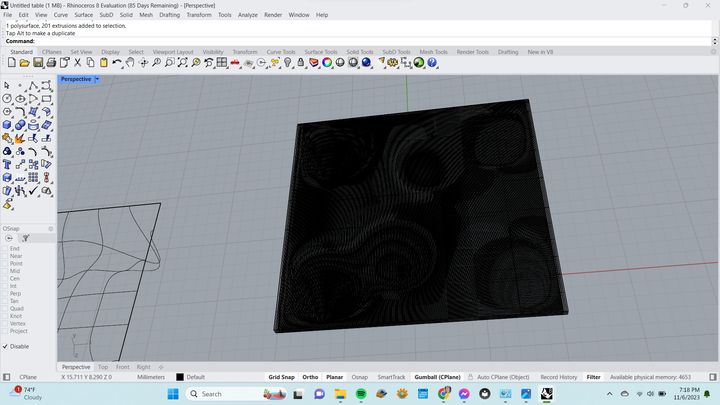
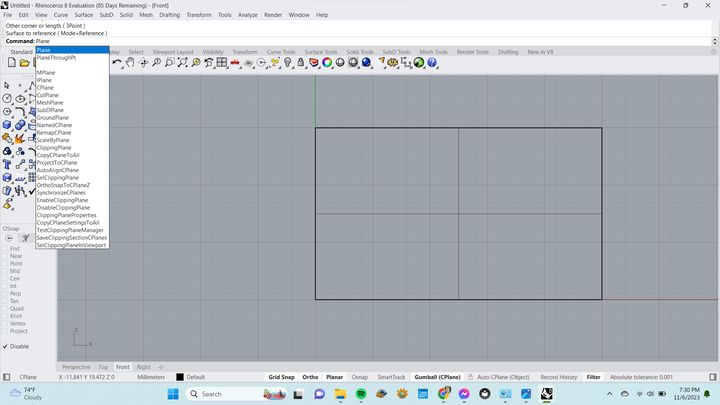
Start off in Rhino > Create Plane by writing Plane into your command panel Then open Grasshopper > input nodes
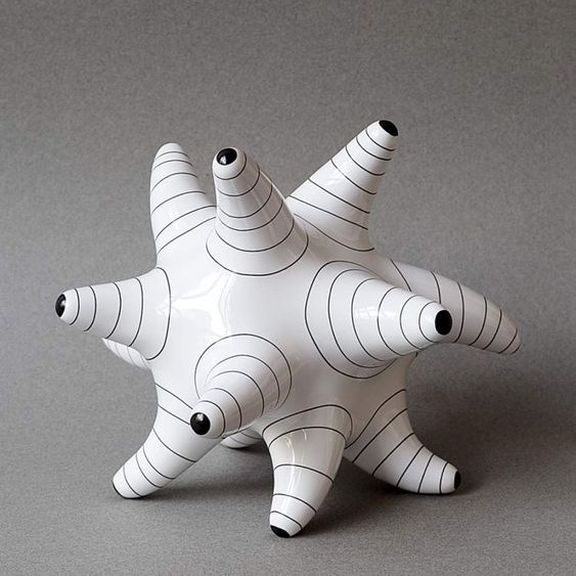
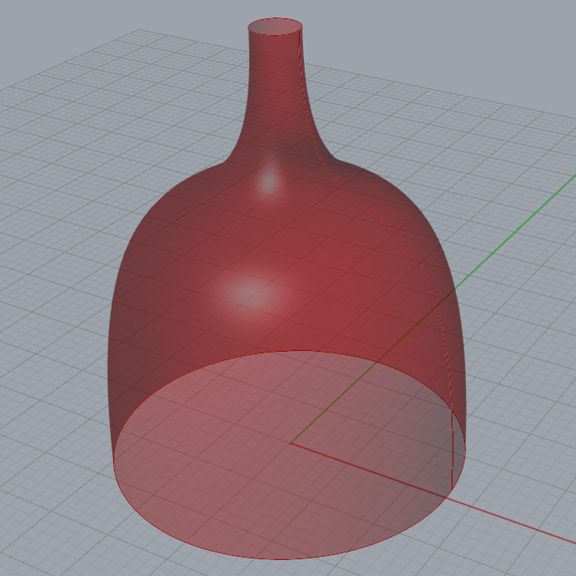
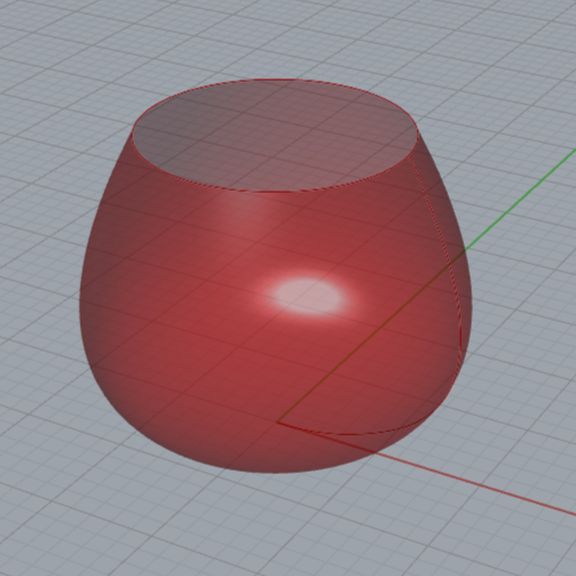
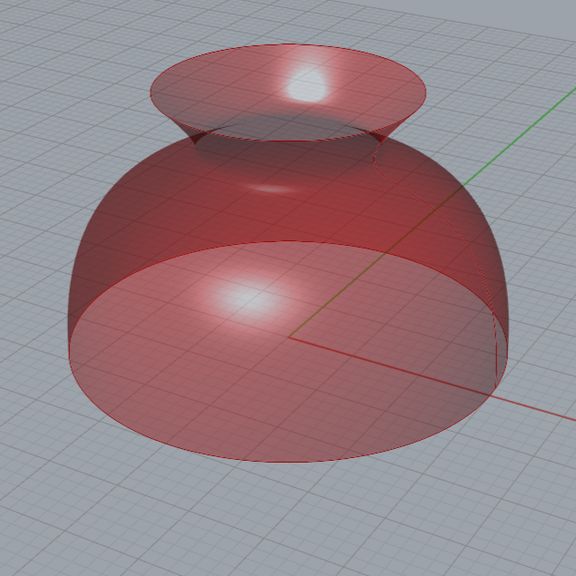
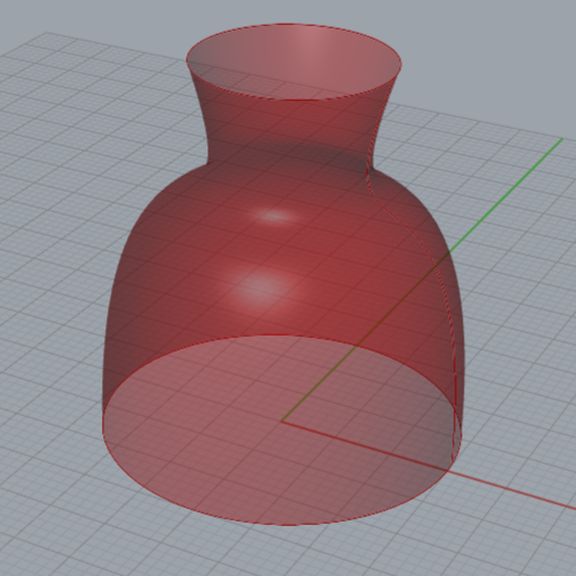
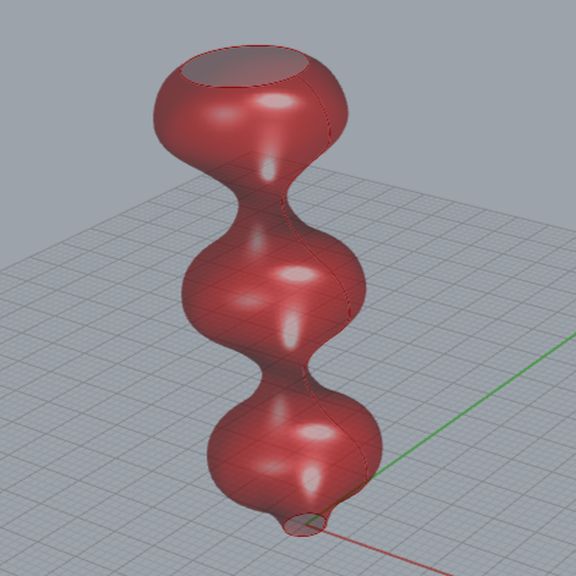
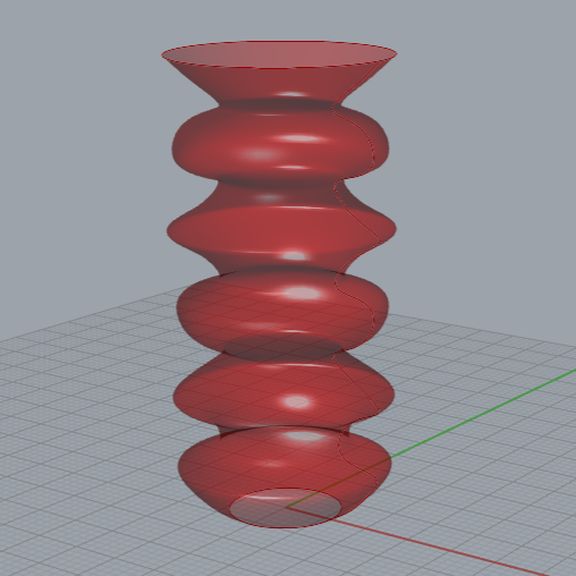
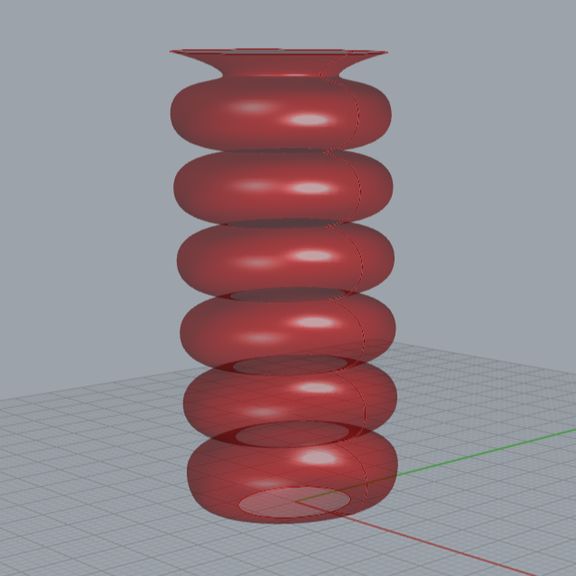
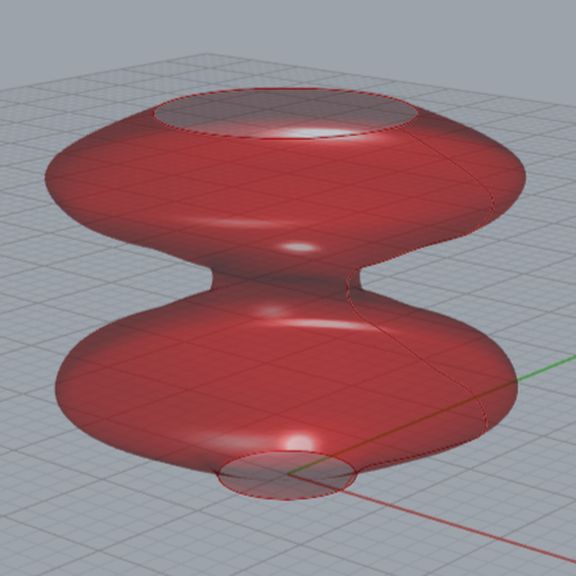
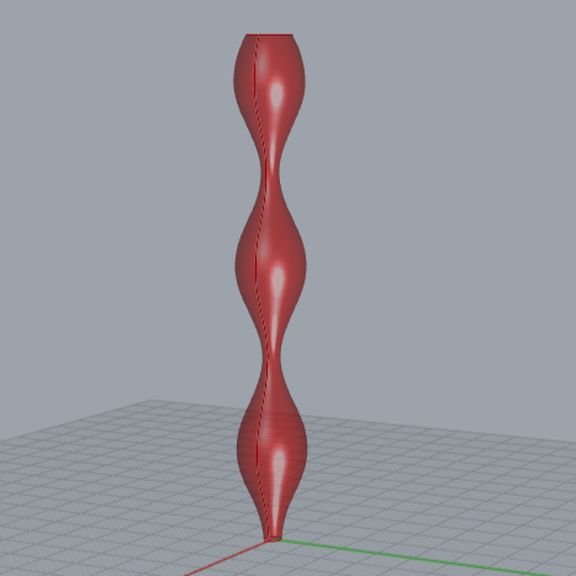
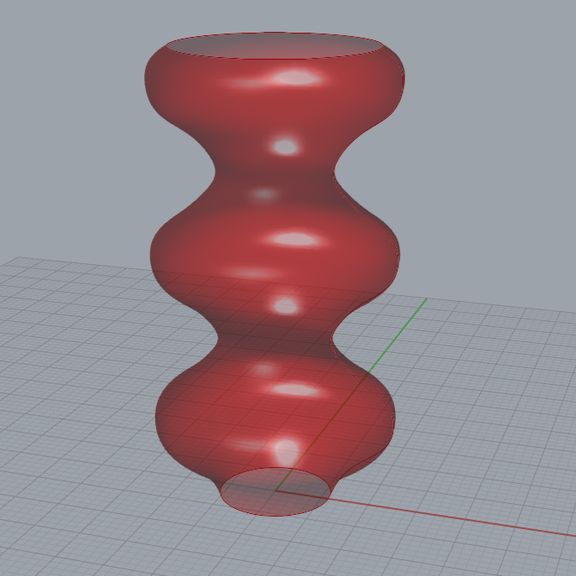
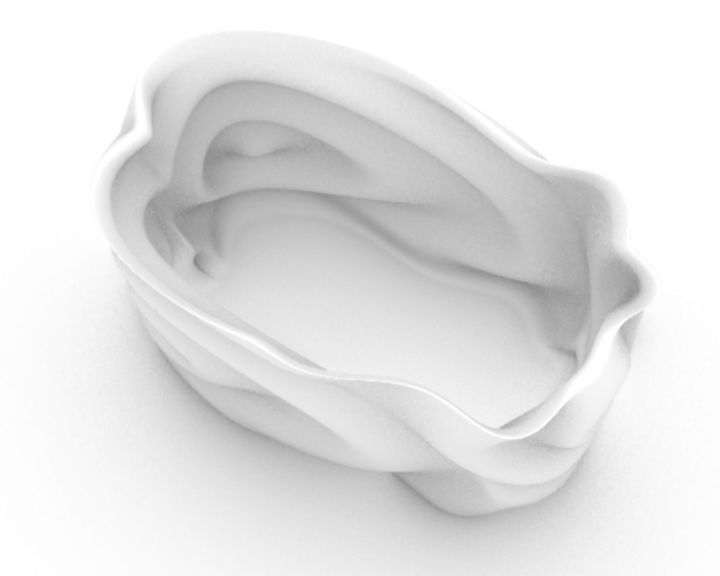
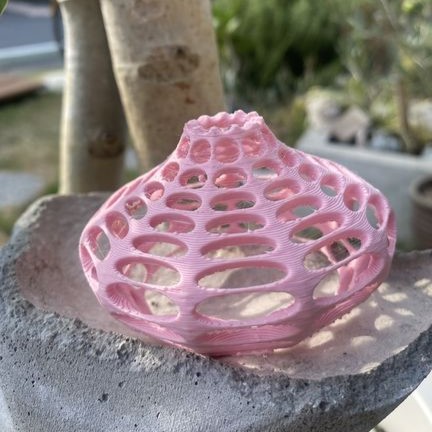
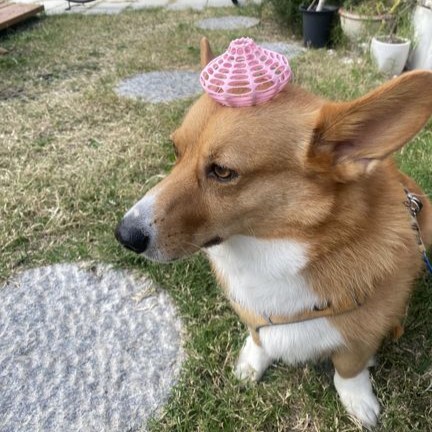
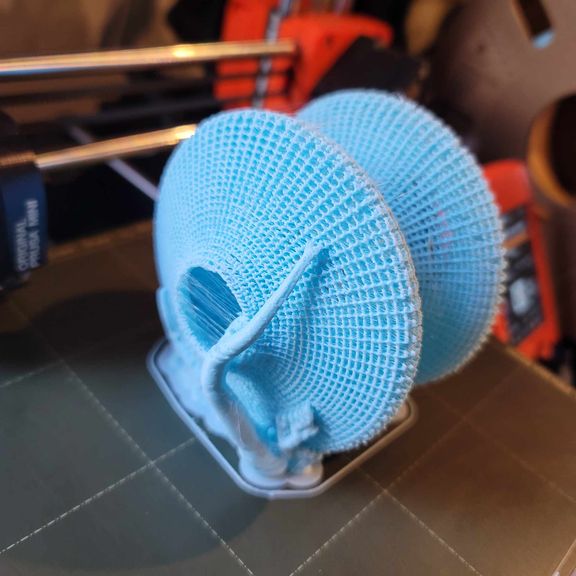
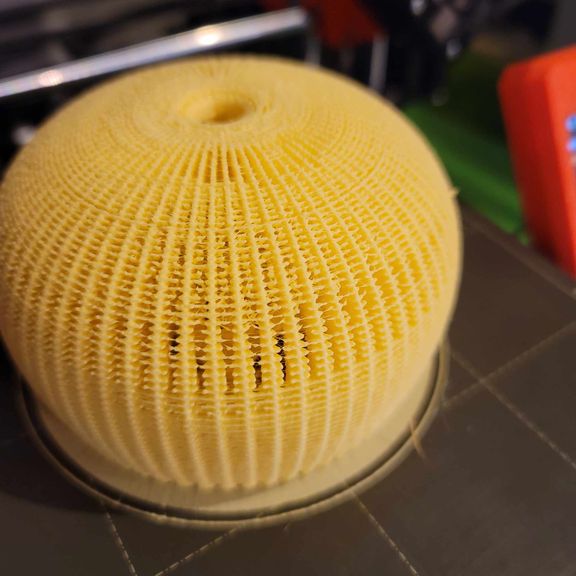
2. Sea Urchins
My trial with the Voronoi Lampshades Recipe
Make sure to download Weaverbird plug-in for this recipe.
With the Graph Mapper node, I was able to just tweak the values and create dozens of different shapes with the same algorithym. Side note: you can see the profile shape of the vase/lampshade from the graph!
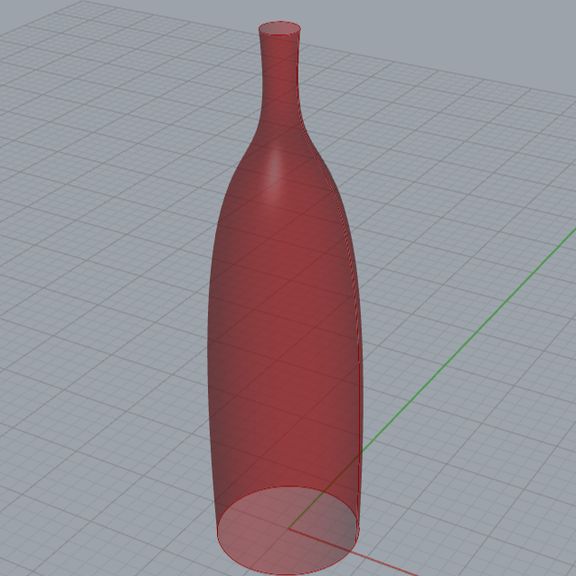

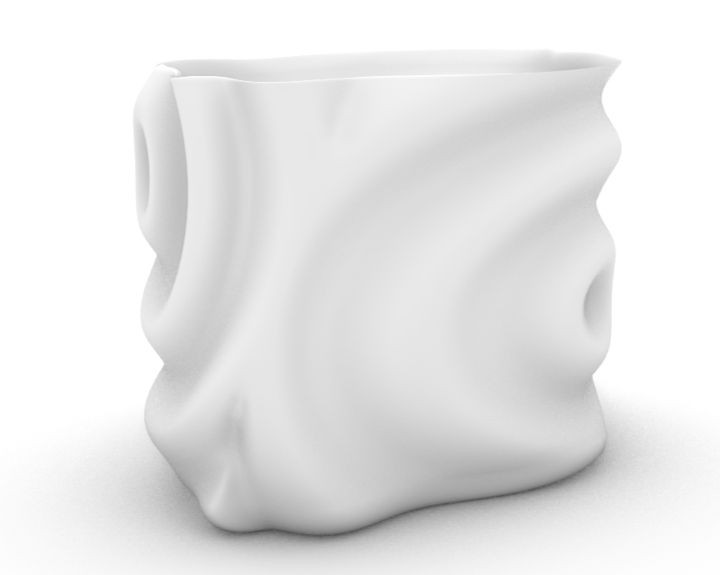
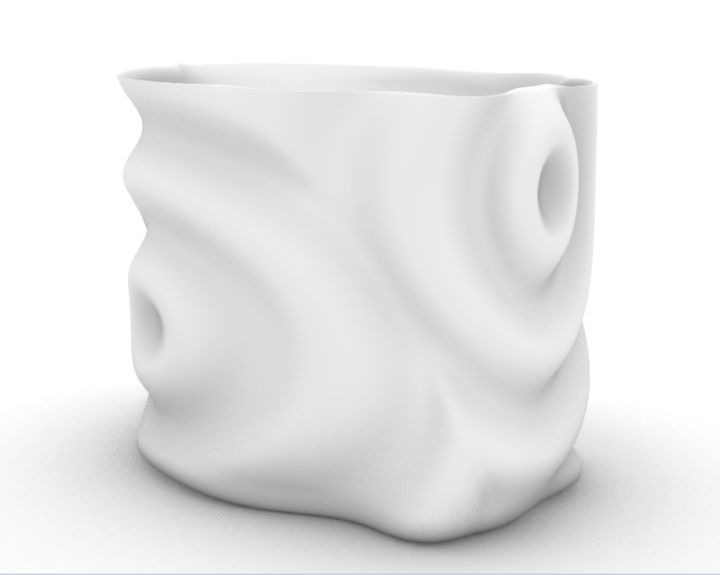
3. Raindrop Vase
Key Features for this Design:
Unroll Surface
Flow Surface
Followed this recipe for this beautiful Vase to create a pattern that looks a lot like Raindrops.
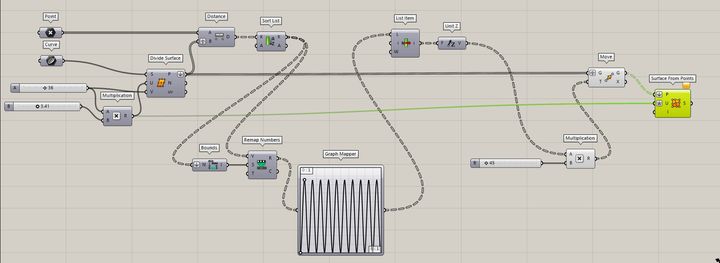
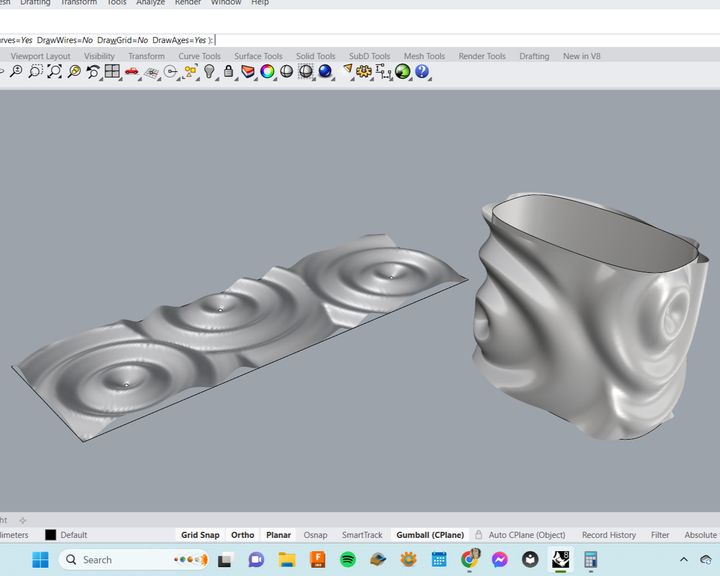
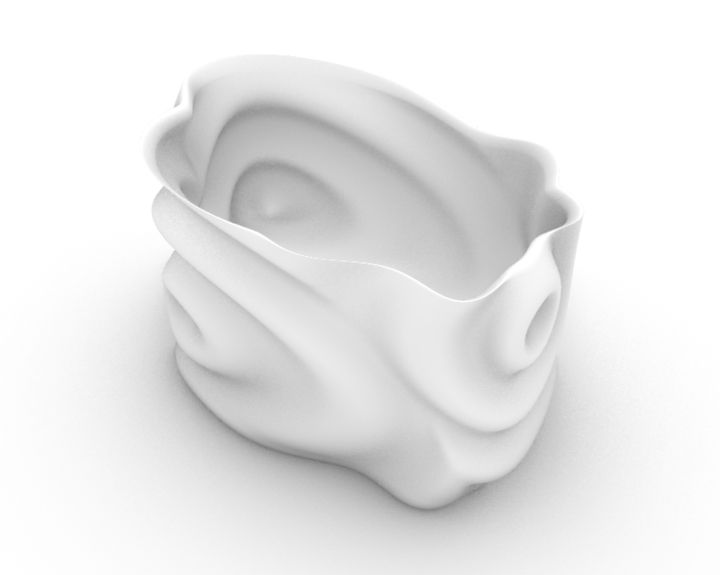
Can't wait to try printing this with a 3D Clay Printer!
4. Tape Worm Dress
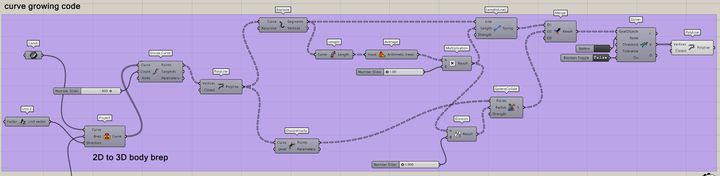
From this week's Grasshopper Tutorial, I learned that there was a way to design a pattern right onto a 3D surface, like a mannequin.
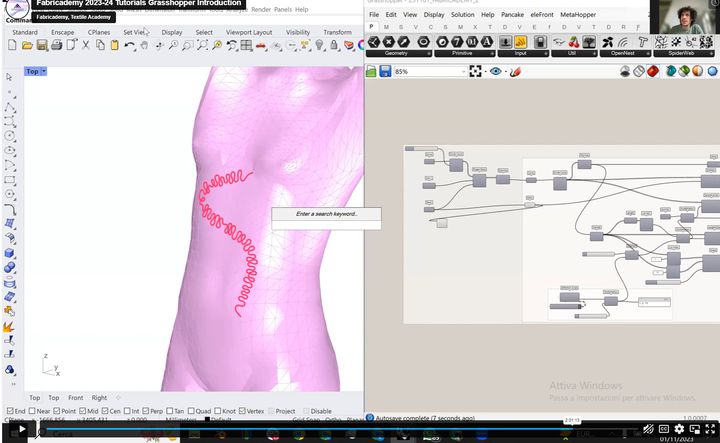
This is an example of a Growth Curve pattern, where you add points to a curve and add a parameter to each point so that it continues to grow and change the pattern.
At first I was so overwhelmed by the amount of components this design would require. But seeing Fabricademy alumni Diane Wakim's attempt instilled some courage in me. I really admire how she was able to extract the pattern as its own surface/mesh in the end. (Spoil alert: I didn't get that far).
Diane Wakim mentioned that she was inspired by this video uploaded by Daniel Piker, who was inspired by this video which shows 15 different variations of one computational growth process**, which is further based on a process created for a series of 3D printed wearables in cooperation with Prof. Neri Oxman from the MIT Media Lab. I can't help but want to join in on the dialogue, so I attempted to try this myself. I wanted to include this video to show the beauty of this experiment:
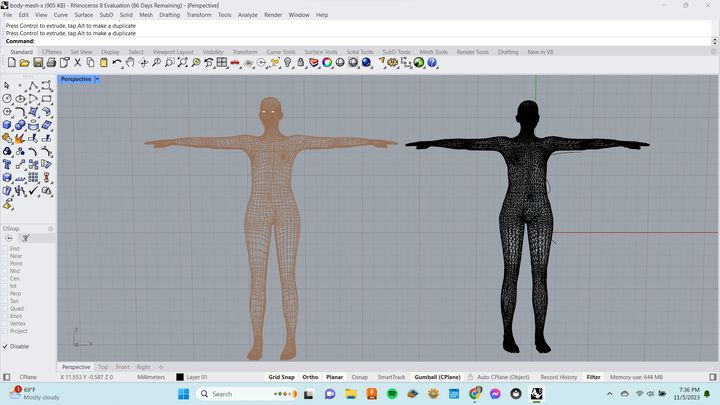
I started with watching this tutorial. I've only started it and have yet to finish it, as it's quite long and complex, but here are some images of my process.
First, I imported into Rhino a MakeHuman obj to use as my 3D surface. I had a some trouble with this step already, as the body turned out to be a Mesh instead of a Surface. So I tried to turn the mesh into a surface (not sure if this is necessary, but it was the most productive way I could think of that would allow me to move forward).
Extra step: I went into blender to smooth out the surface of my model before inputting it into Rhino.
The recipe I used:
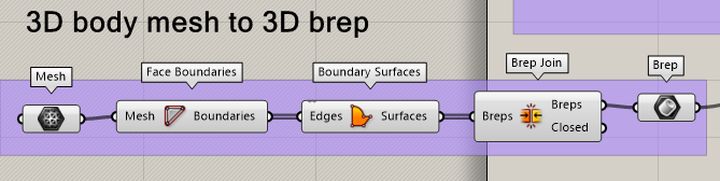
Which I connected to this Recipe for the Curve Growth:
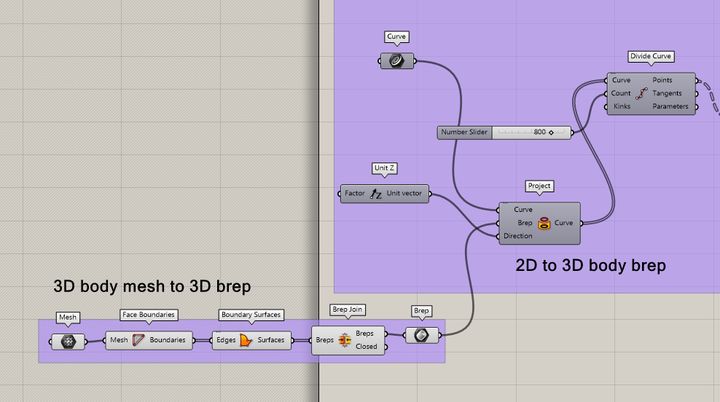
Final Result:
I named this attempt Tape Worm Dress because the shape of my curve looks a bit like a worm crawling on the body.
Growth curve (not projected onto 3D surface).
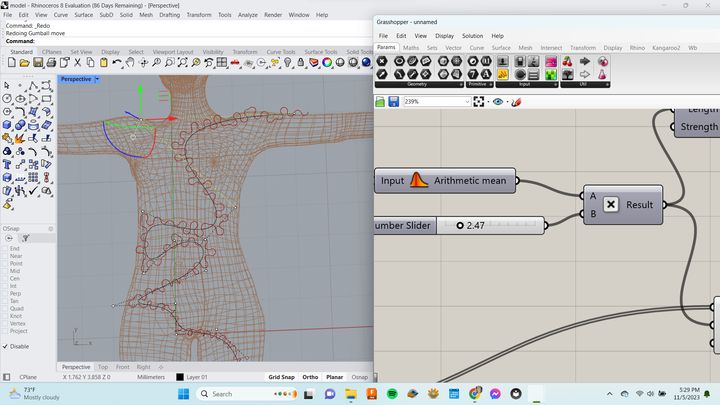
First part is the Growth Curve not projected onto the body. Second half of the video is the growth curve projected onto the body. There are a lot more steps I need to complete before I can achieve something like Diane Wakim or Daniel Pike did.
Also worth checking out is Parametric's House example of Parametric Clothing (this tutorial isn't free but it's worth to mention the possibilities of creating patterns on bodies).
5. Chainmail mini-skirt
I loved Alessia Pasquini's ideation for this week's assignment.
She experimented with 3D printing Chainmail. I attached the vimeo of her sample.
She used this sample that you can download for free.
I wanted to test out using this sample as well and roll it onto a a surface. I made this shape by using the Loft command.
Blender
Blender is completely Free!
While I focused more on learning Grasshopper this week, due to it's convenience in creating parametric designs, Blender is another great software for Computational Couture (making garments digitally).
My teacher Rico created this masterpiece on Blender

While I made a potato sack garment for my beautiful model, Lope.
Here is a video of me playing around with some parameters for the dress:
Rico's Blender tutorial (that doesn't show us at all how to create his beautiful design) * side-eye *.
3D Printing
Clay 3D printing
While I didn't find time to start on the 3D clay printing process, this is the next thing I'd love to play with in the realm of digital fabrication. To explore more authentic designs, I will try to synthesize my knowledge of creating this Surface Flow Vase where I unrolled a surface, created a parametric pattern on it, then rolled it back onto a surface to create a beautiful 3D object with other parametric designs, with the help of Youtube Tutorials.
Check back in in a week or so to see some of my results!