9. Textile Scaffold
This week we went through a range of different techniques:
1) Composites
2) Leather molding
3) Fabric formwork
4) Crystalization
5) Wood + Textiles
6) Digital and biological fabrication
7) CNC milling
Most of them was based on the idea of shaping material from a mold form.
Research
The concept of molding garments instead of stitching is not new, it have traditionally been done in 3D felting, shoemaking as well as millinery but there is also few interesting new experiments worth mentioning:
Design and mold making
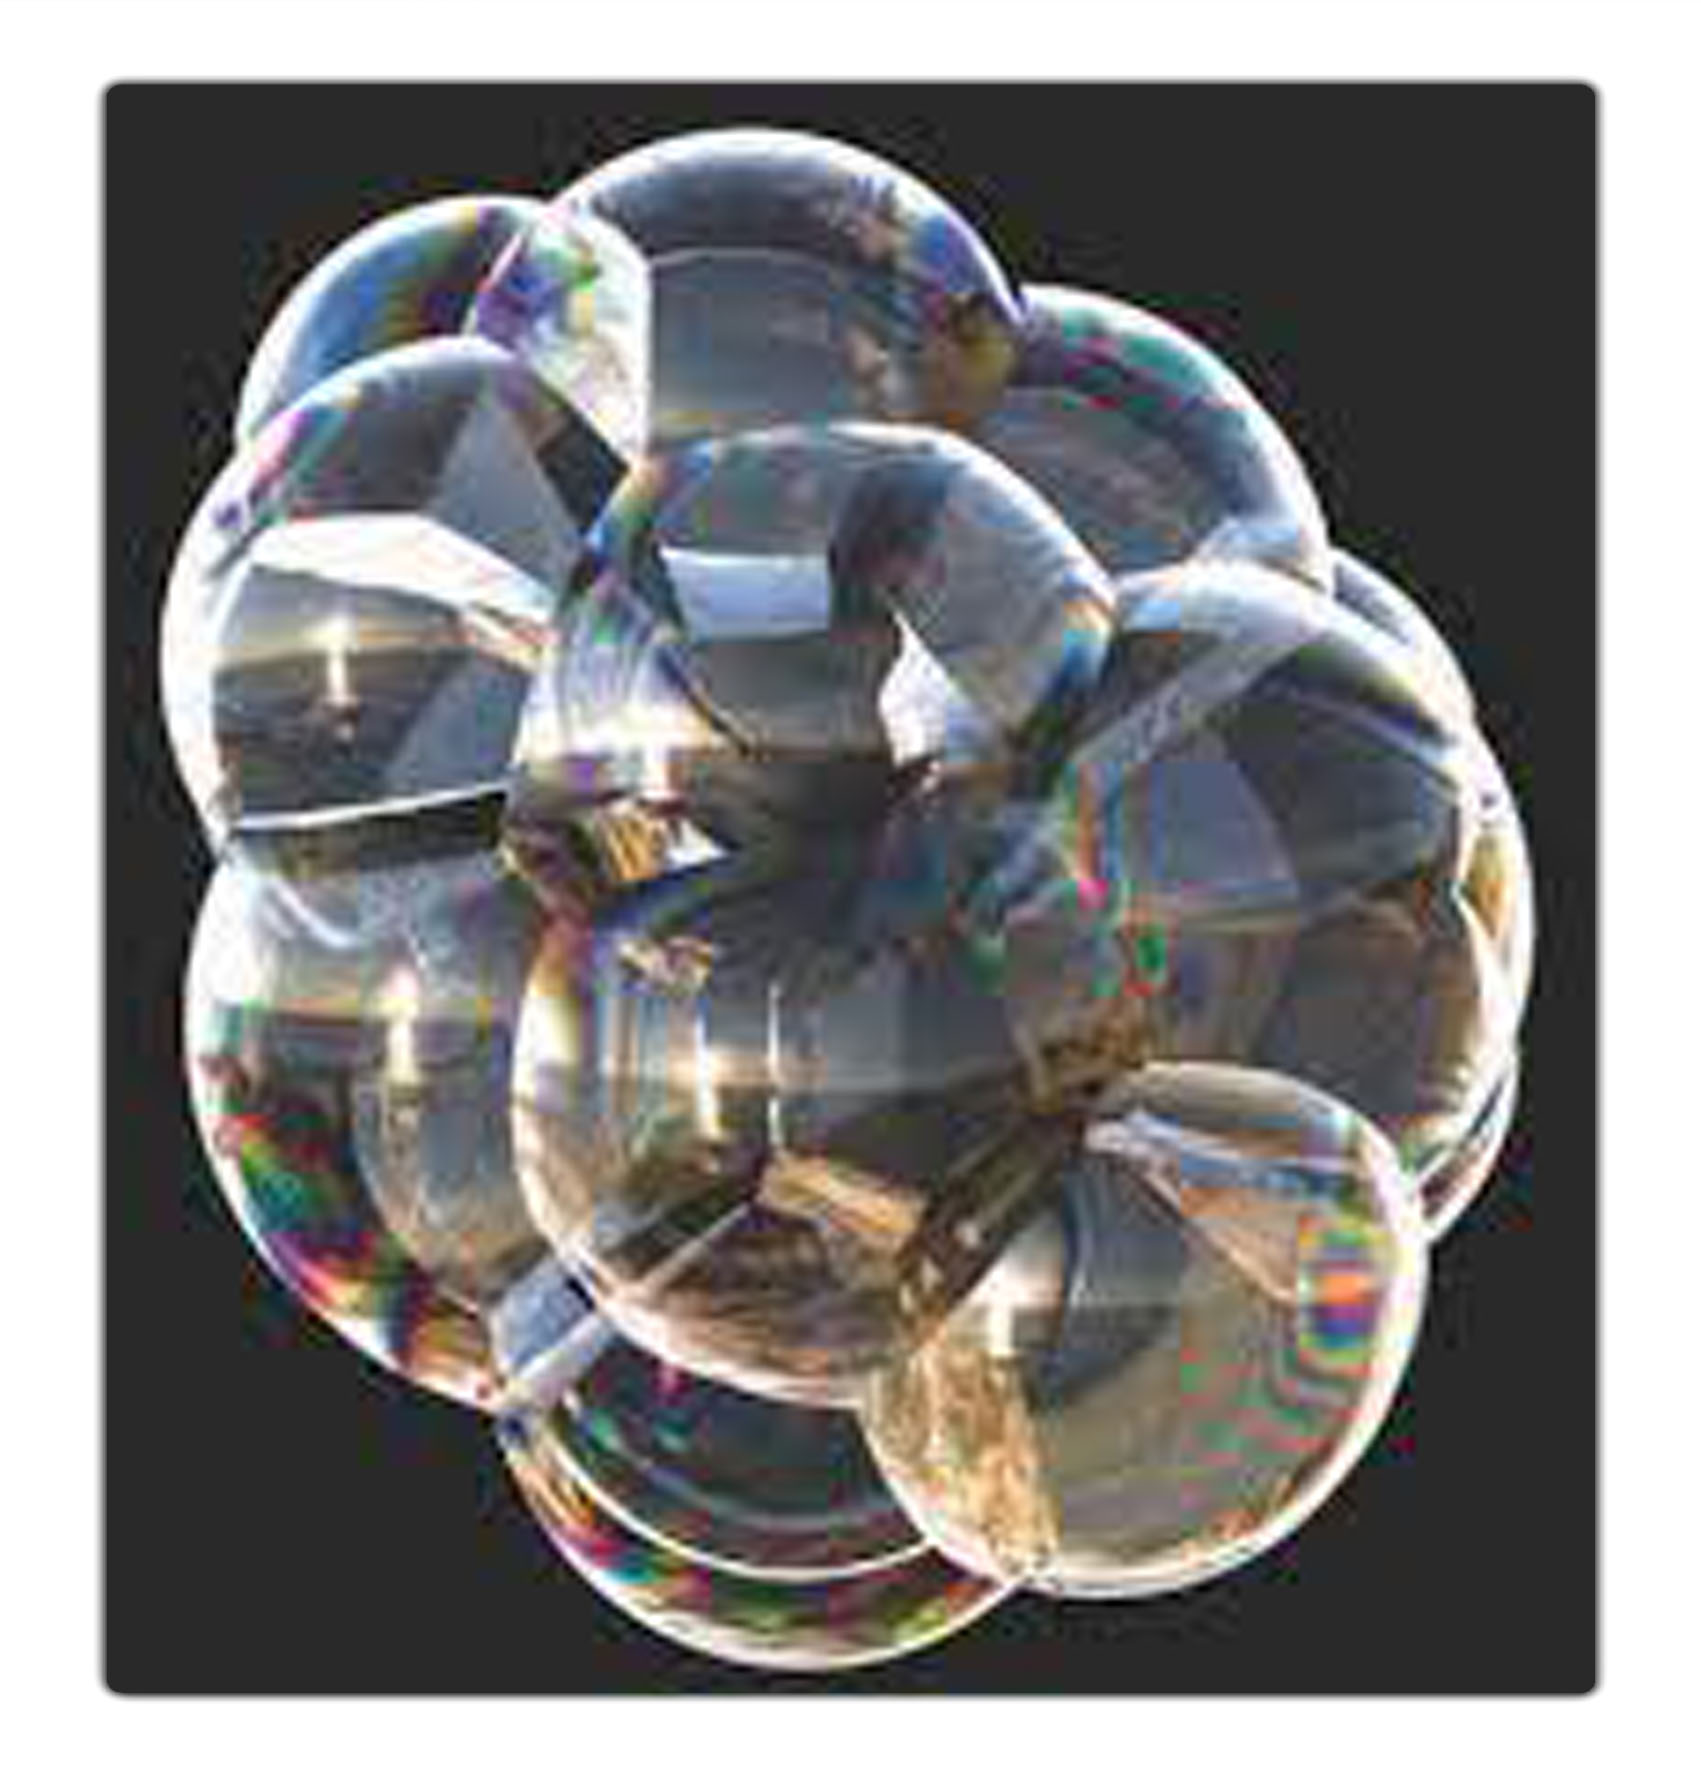
Inspired by the bubble structure I designed my mold in Rhinoceros and used RhinoCAMM, (a plugin for Rhino) for preparing the file for milling.
Rhino:
For the design process, I used the bubble pic as a reference and simply started to build bubble shapes using subD spheres that I joined together using “Boolean union”.
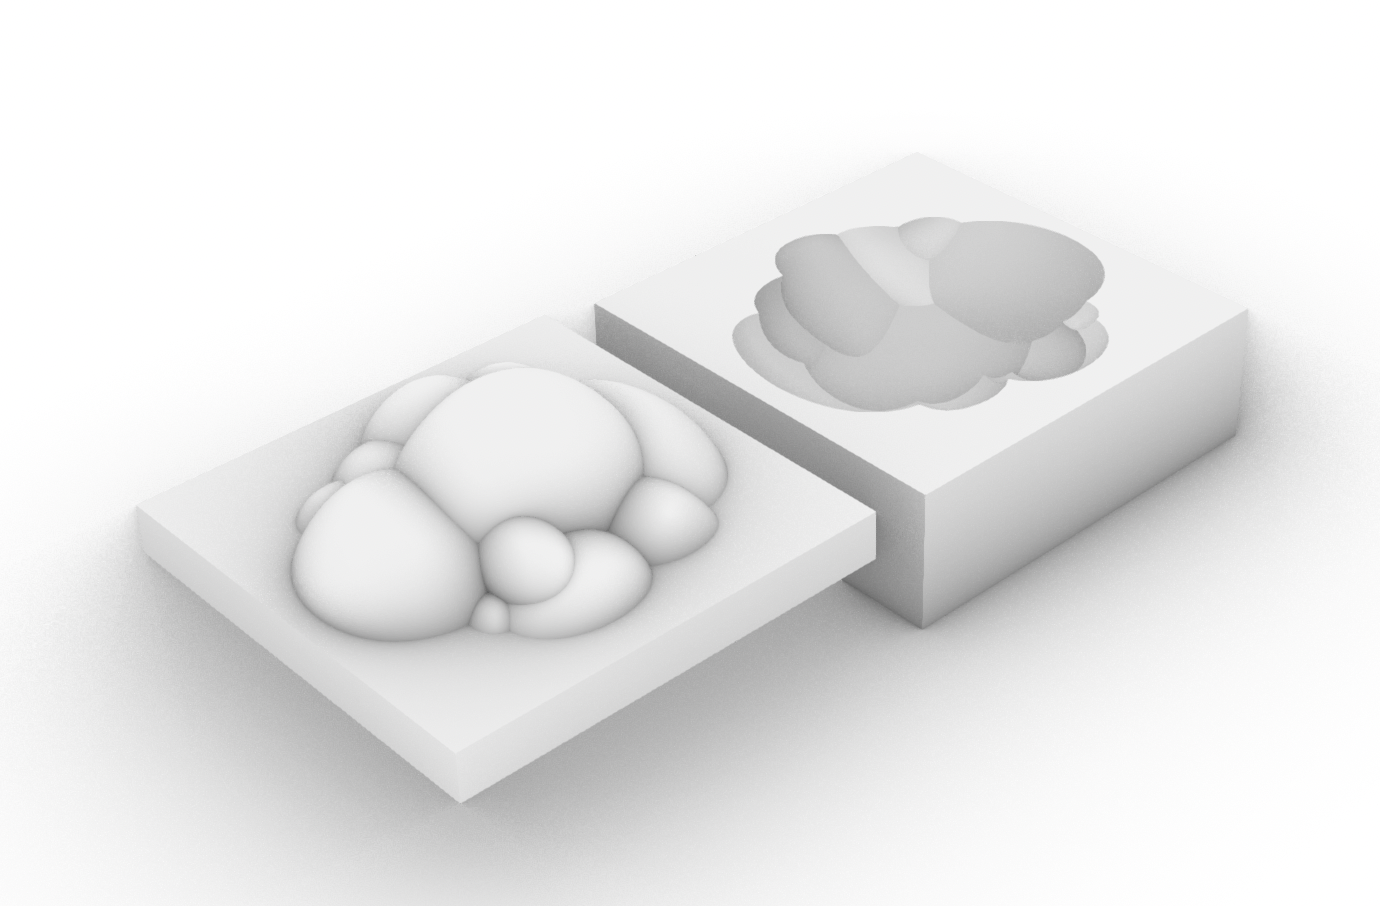
-When I was happy with the 3D shape, I once again used the command “Boolean union” to join the geometry with the base rectangle
-I used “Boolean difference” to cut out the negative space from a second “block”.
-“offset surface” (1mm) to create a slight gap between the two mold parts to give space for the leather to fit.

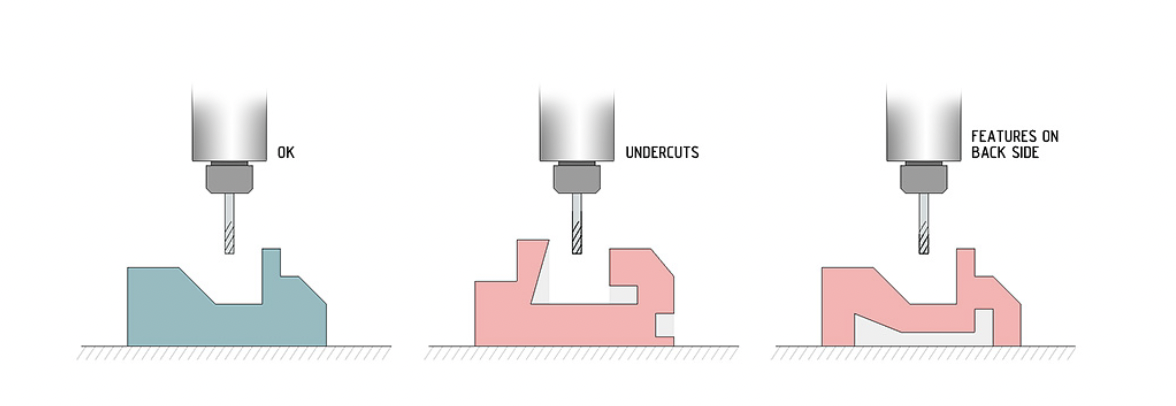
When designing molds it is important to keep in mind few things related to the CNC milling process.
CNC is a 3 axis process much like FDM printing and laser cutting, this means we can not have any undercuts or designs on the backside of the design since the drill head want be able to reach it.
Prepare file:
1) Create a bounding box for your design
2) Place the upper end of the design on point xyz 0
3) Create a “box stock” with the dimensions of the material you are using
5) Insert the parameters for horizontal finishing
6) Select operation "3 axis advanced" (if your milling machine works in 3 axis)
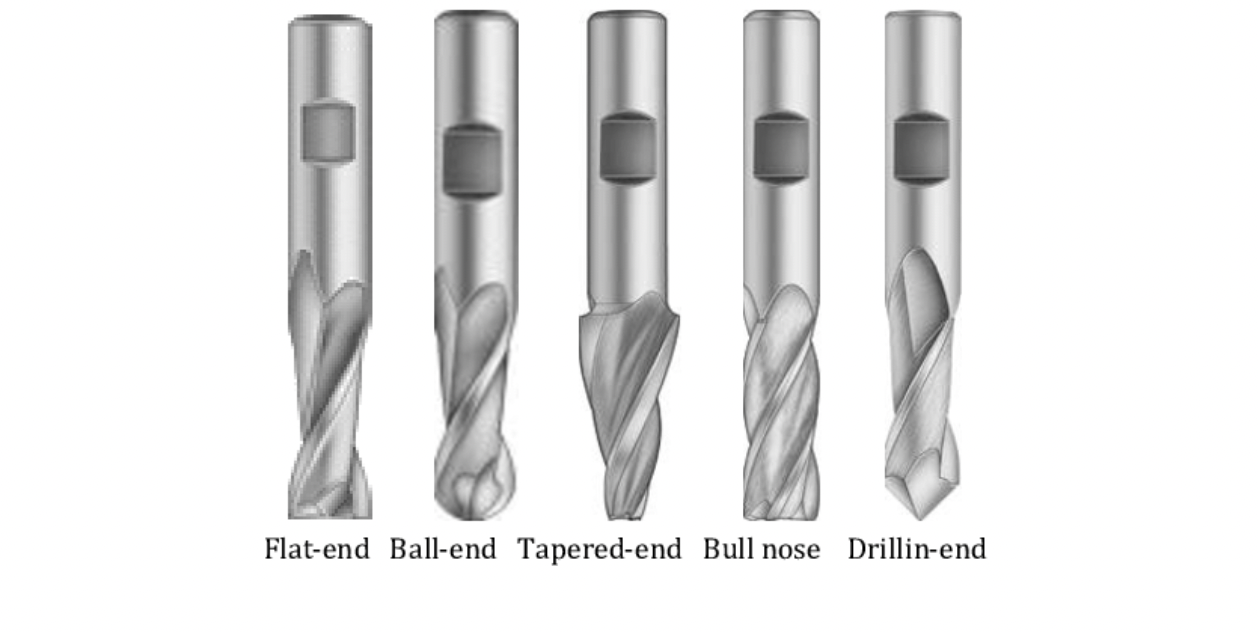
7) Create a “tool” with all the information of the drilling head you are using, it is advised to use a bigger tool for your roughing process and smaller for finishing ( I used a 1.2 cm ball-end tool for both processes)
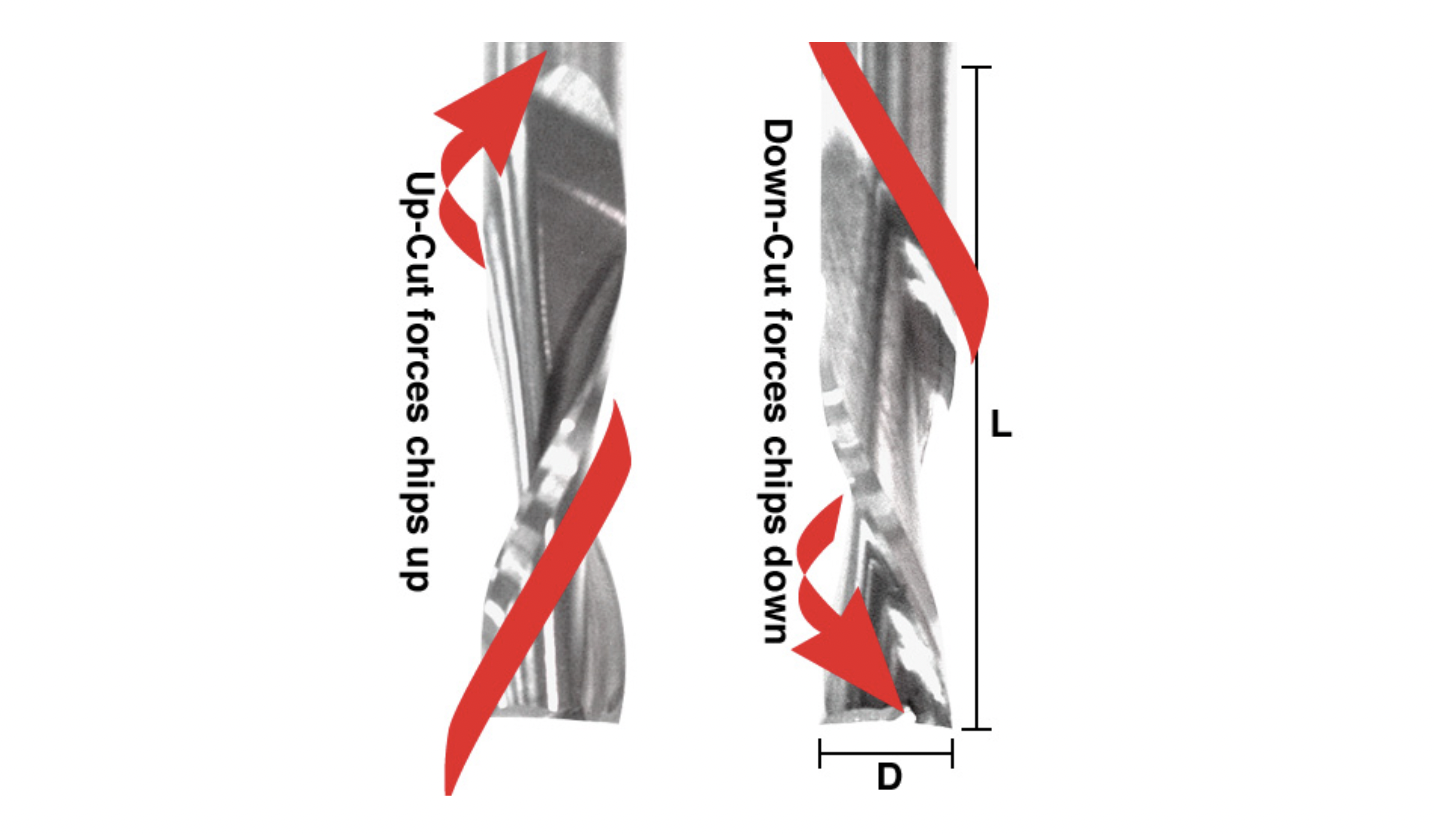
8) Select if you are using a up-cut or down-cut tool (this will be dependent on the material you are milling
9) Decide cut levels (I used 4mm for roughing and 2mm for finishing)
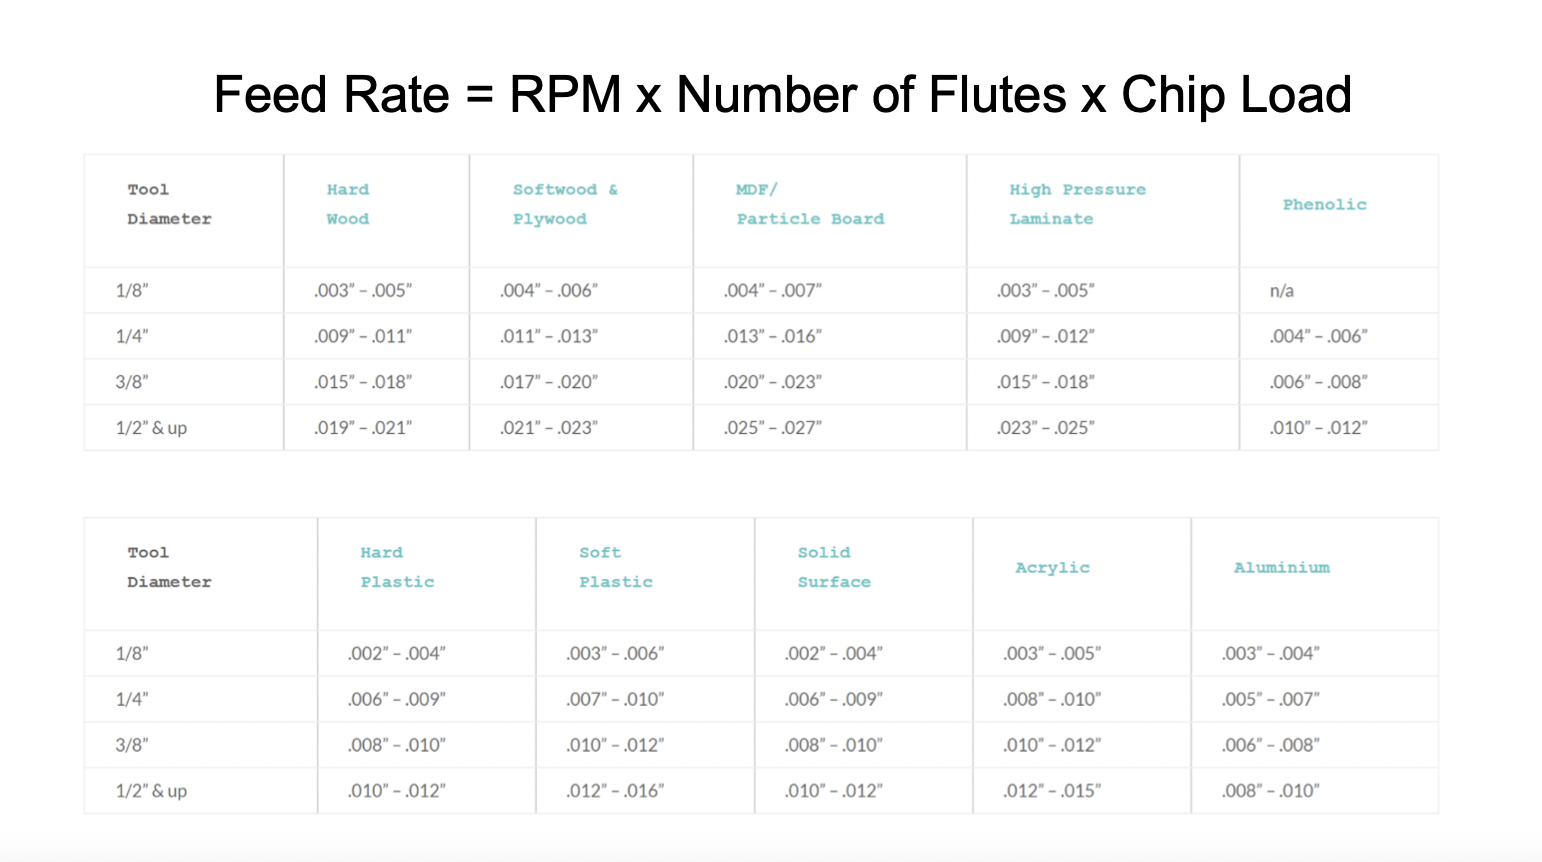
10) Decide speed: I used 1800 but it is dependent on material, you can use the Chip-load calculation as reference
11) Select "simulate to end" to see there is no problem with the cutting plan
12) Export G-code
You can find more detailed information of the process here
My RhinoCAM settings:
Rough and finishing cut:
• Set the stock to 0
• Step over distance 25 (15 for finishing)
• Set speed to 18000
• Tool: 12mm up cut
Profiling:
• Go to 2 1/2 profiling
• Depth: 100mm (The thickness of the foam)
• Use bridge to keep it attached in a small section
CNC-milling
The milling process is quite straight forward however it is important to be careful since it is a powerful machine:
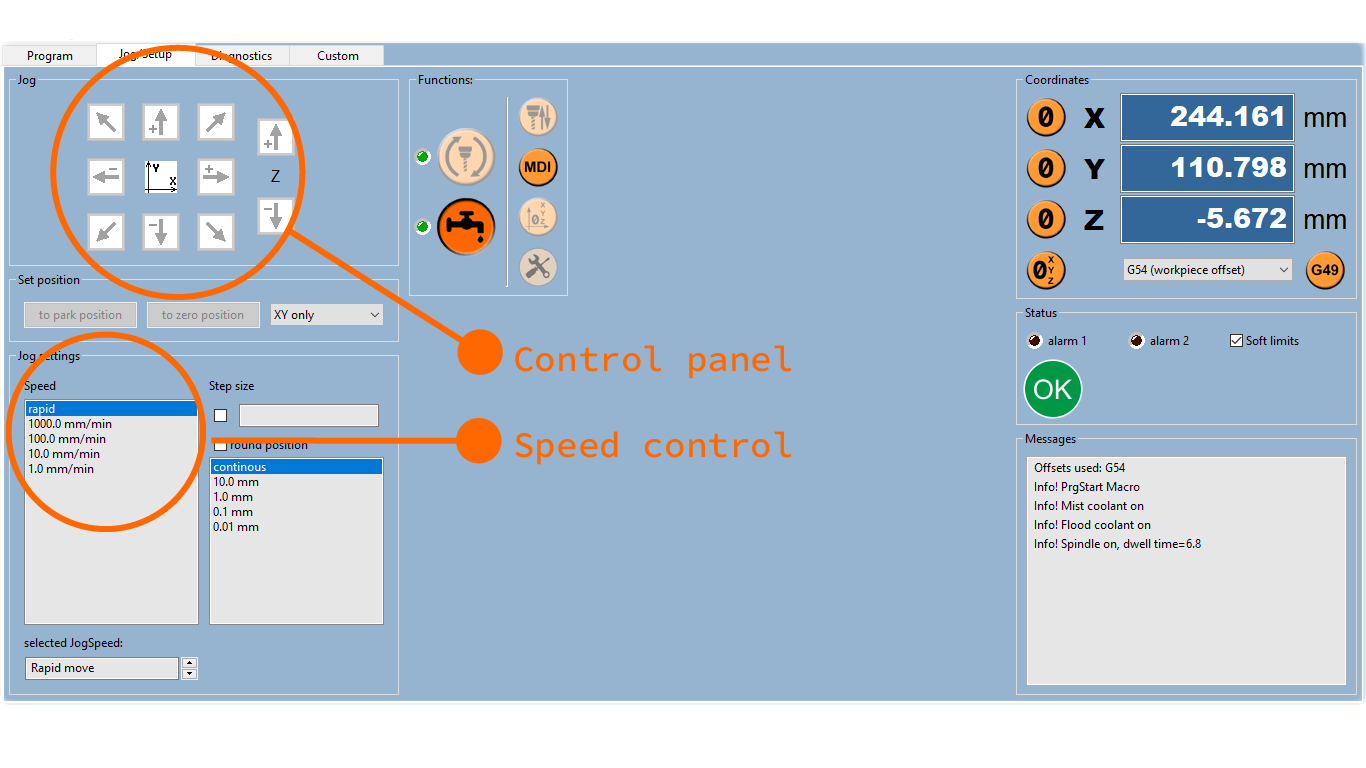
software interface
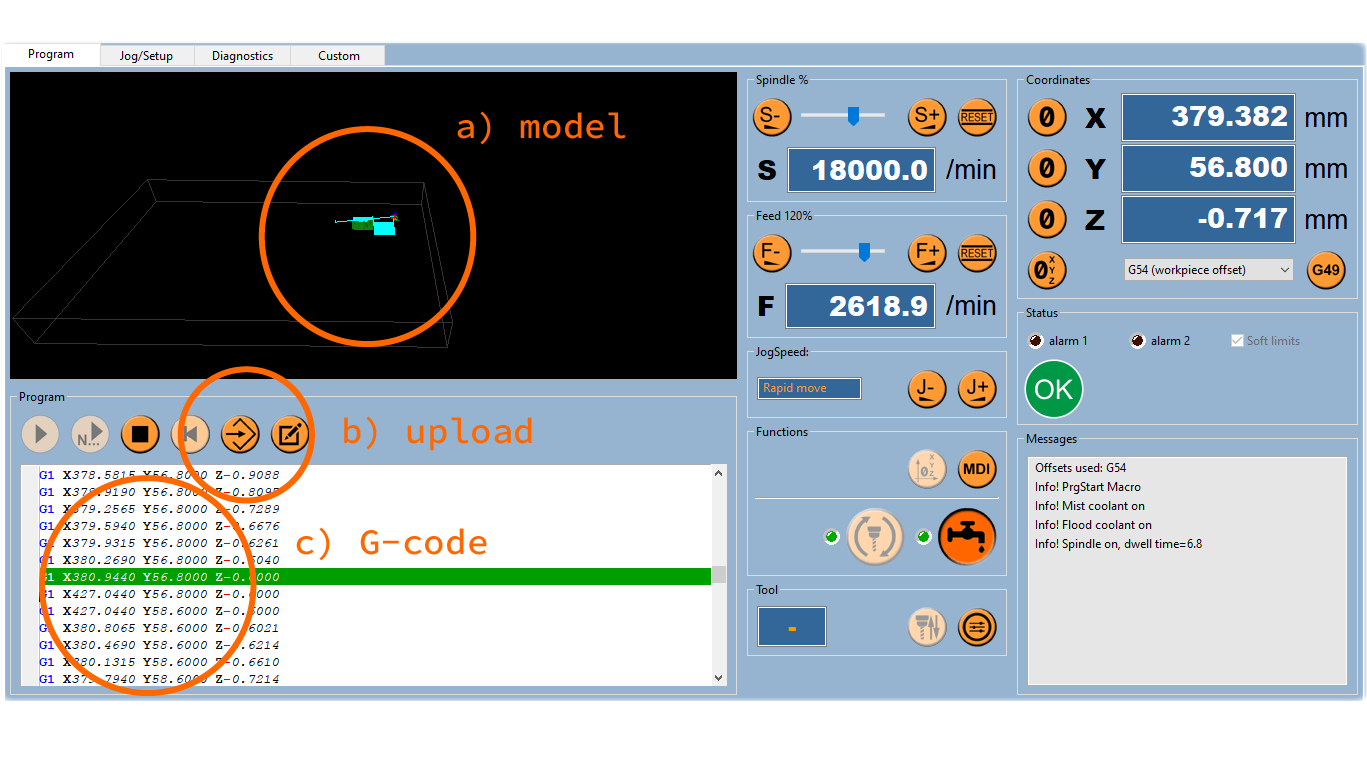
software interface
1) Secure the foam board with 4 pieces of wood one of each side of the board, you can screw them on slightly slanted to avoid that the board will not “jump” during cutting
2) Turn on the machine
3) Set xy axis on the corner of the foamboard using control panel
4) Set z axis by slowly moving the tool down until it touches the board
5) Upload G-code
6) Turn on air exhaustion
7) Put on protection glasses and use earplugs
8) Press print
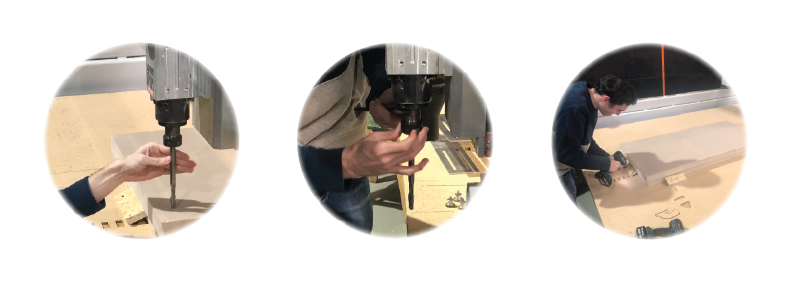
left: roughing, right: finishing process
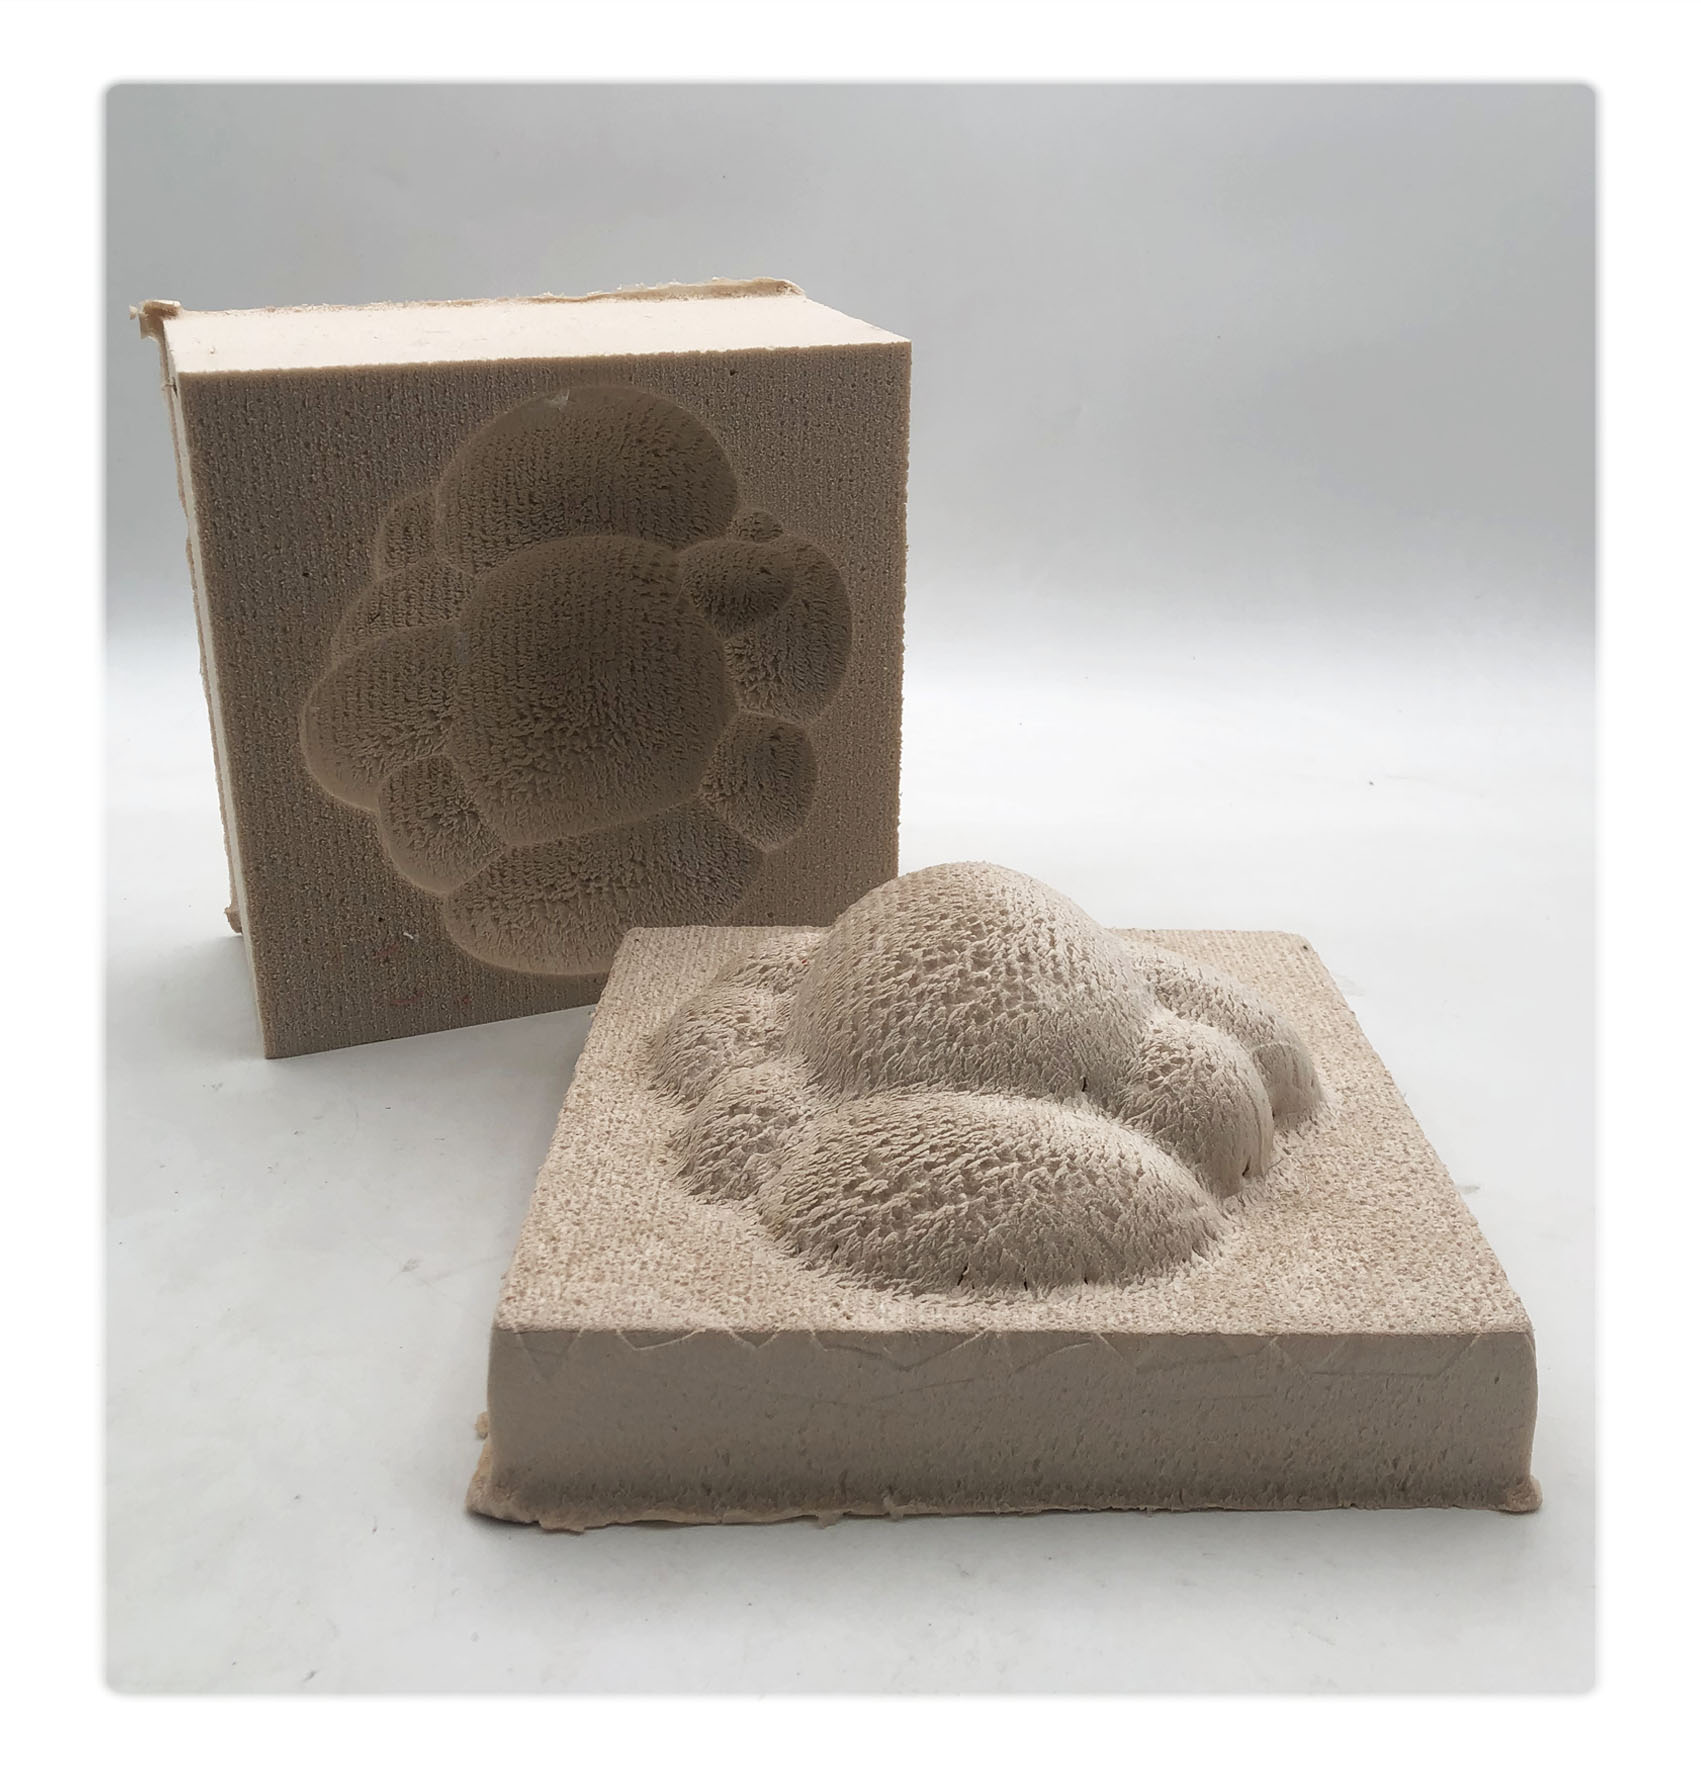
Conclusion:
Overall the design came out very well, I lost some of the sharp edges on the positive half because of the rounded tool head. For better edges I should have used a smaller tool during the finishing process and possible even a tapered-end tool
Molding
Thermoforming :
The thermoforming process is using heat and vacuum pressure to shape plastic sheets, it is a common and cost-effective technique for many of our everyday products.
I did few experiments with PETG plastic and EVA form
1) Place the sheets inside the frame
2) Ad some Vaseline to the mold (for easier demolding)
3) Heat the plastic until it starts bulging (2-3 min)
4) Turn on the vacuum machine
5) Press the plastic sheet over the mold
6) demold
left: PETG right: EVA foam

Use vaseline on the mold, first tryout broken during demolding
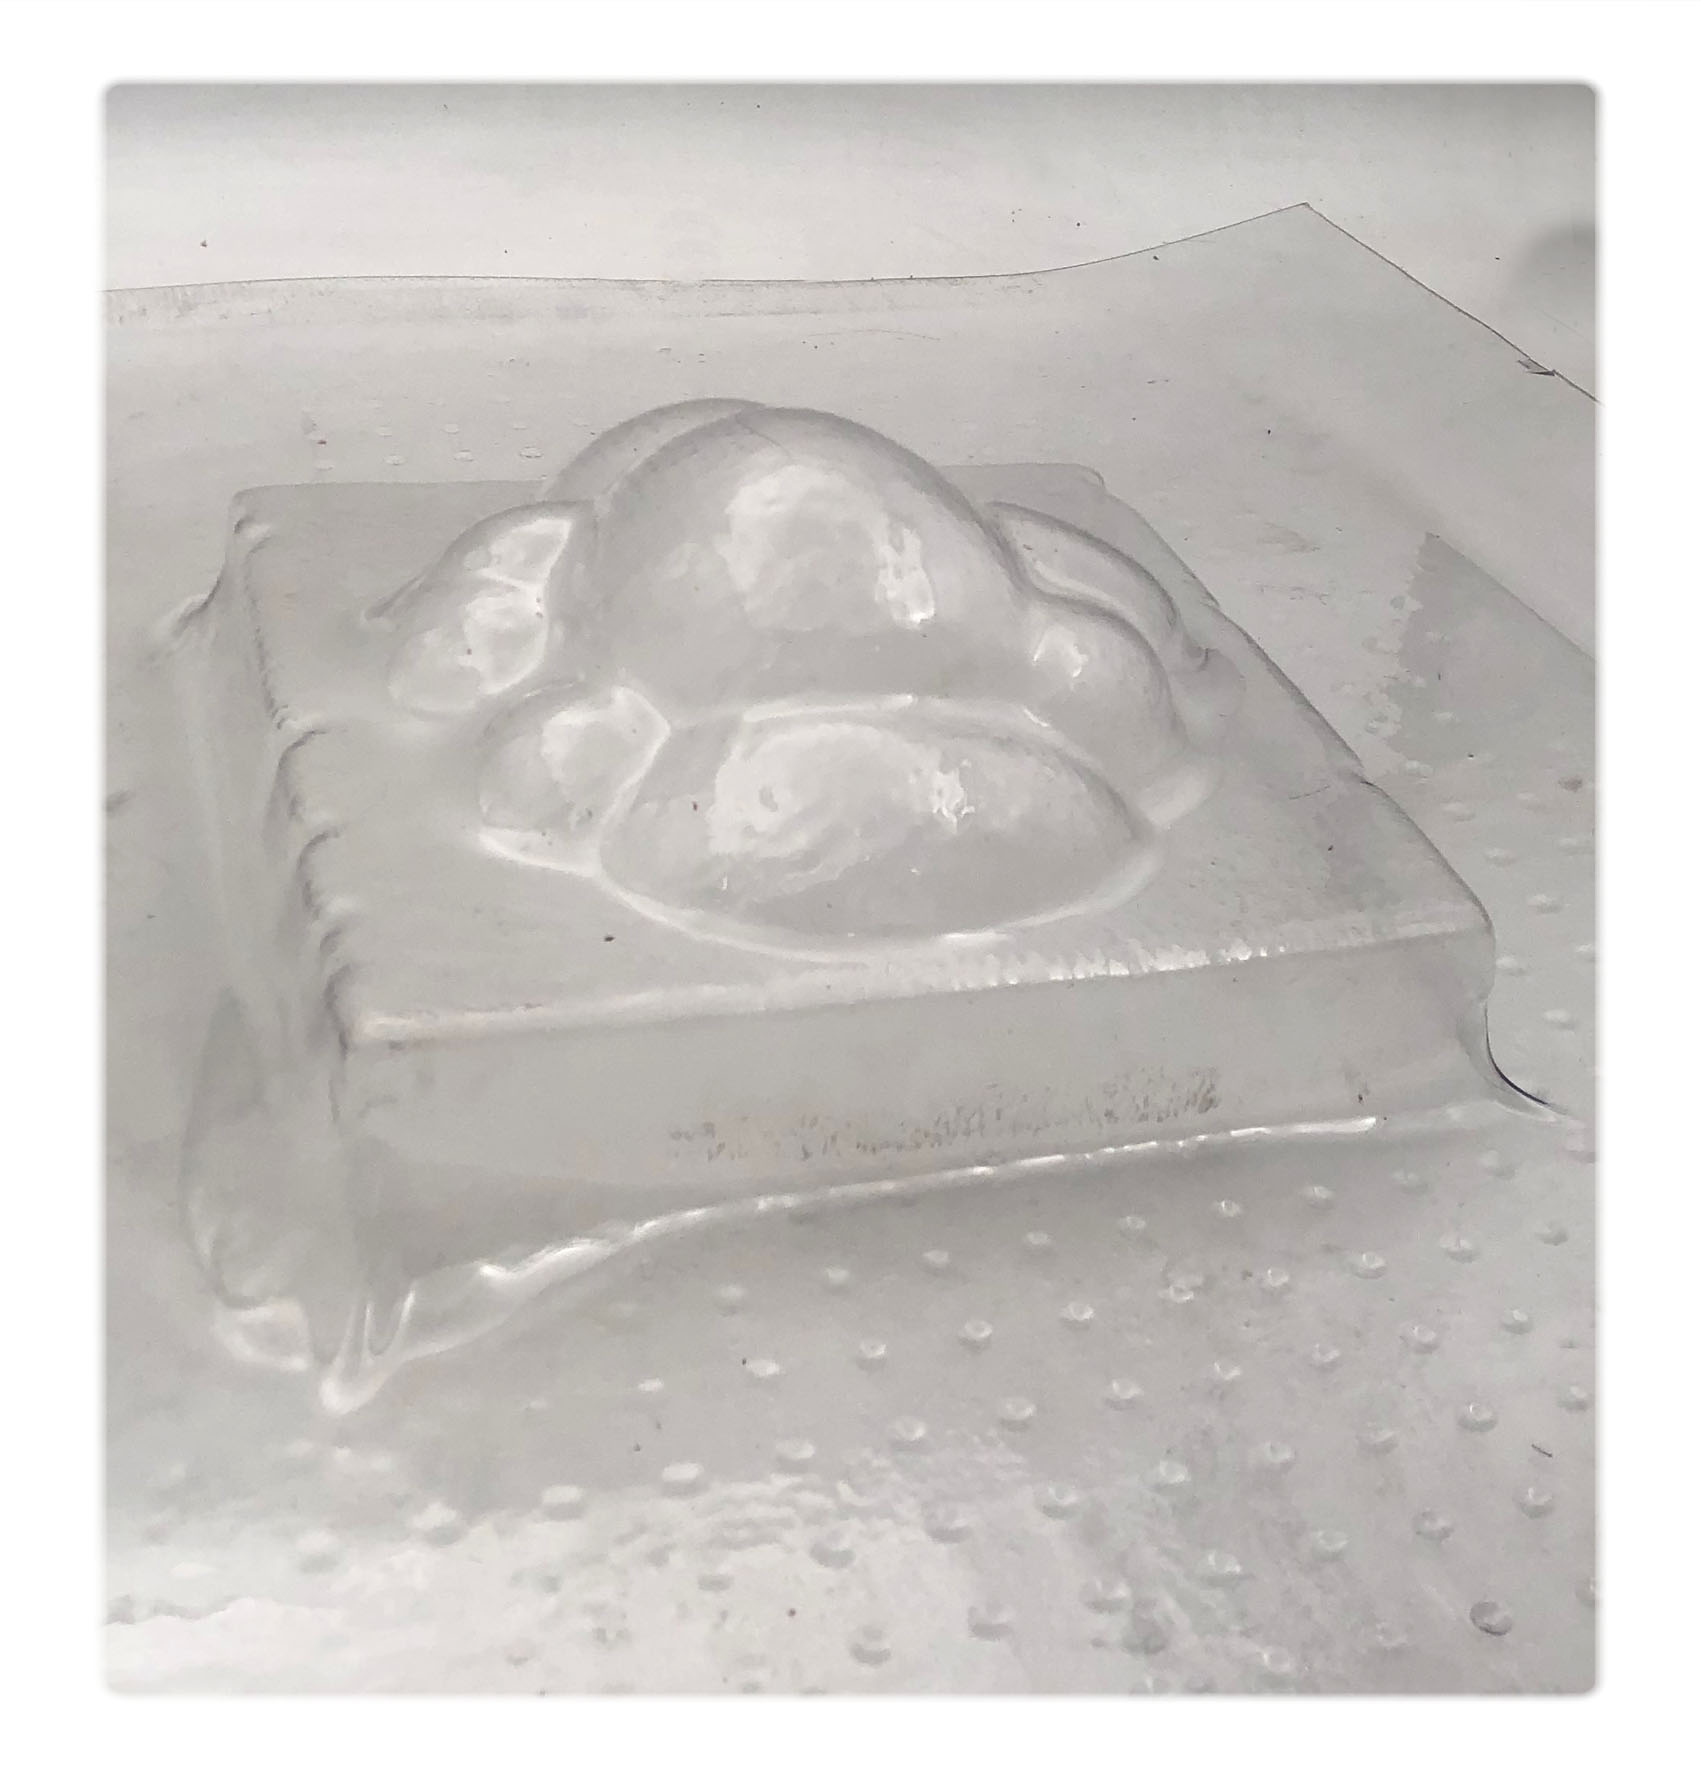
second tryout PETG 1 mm
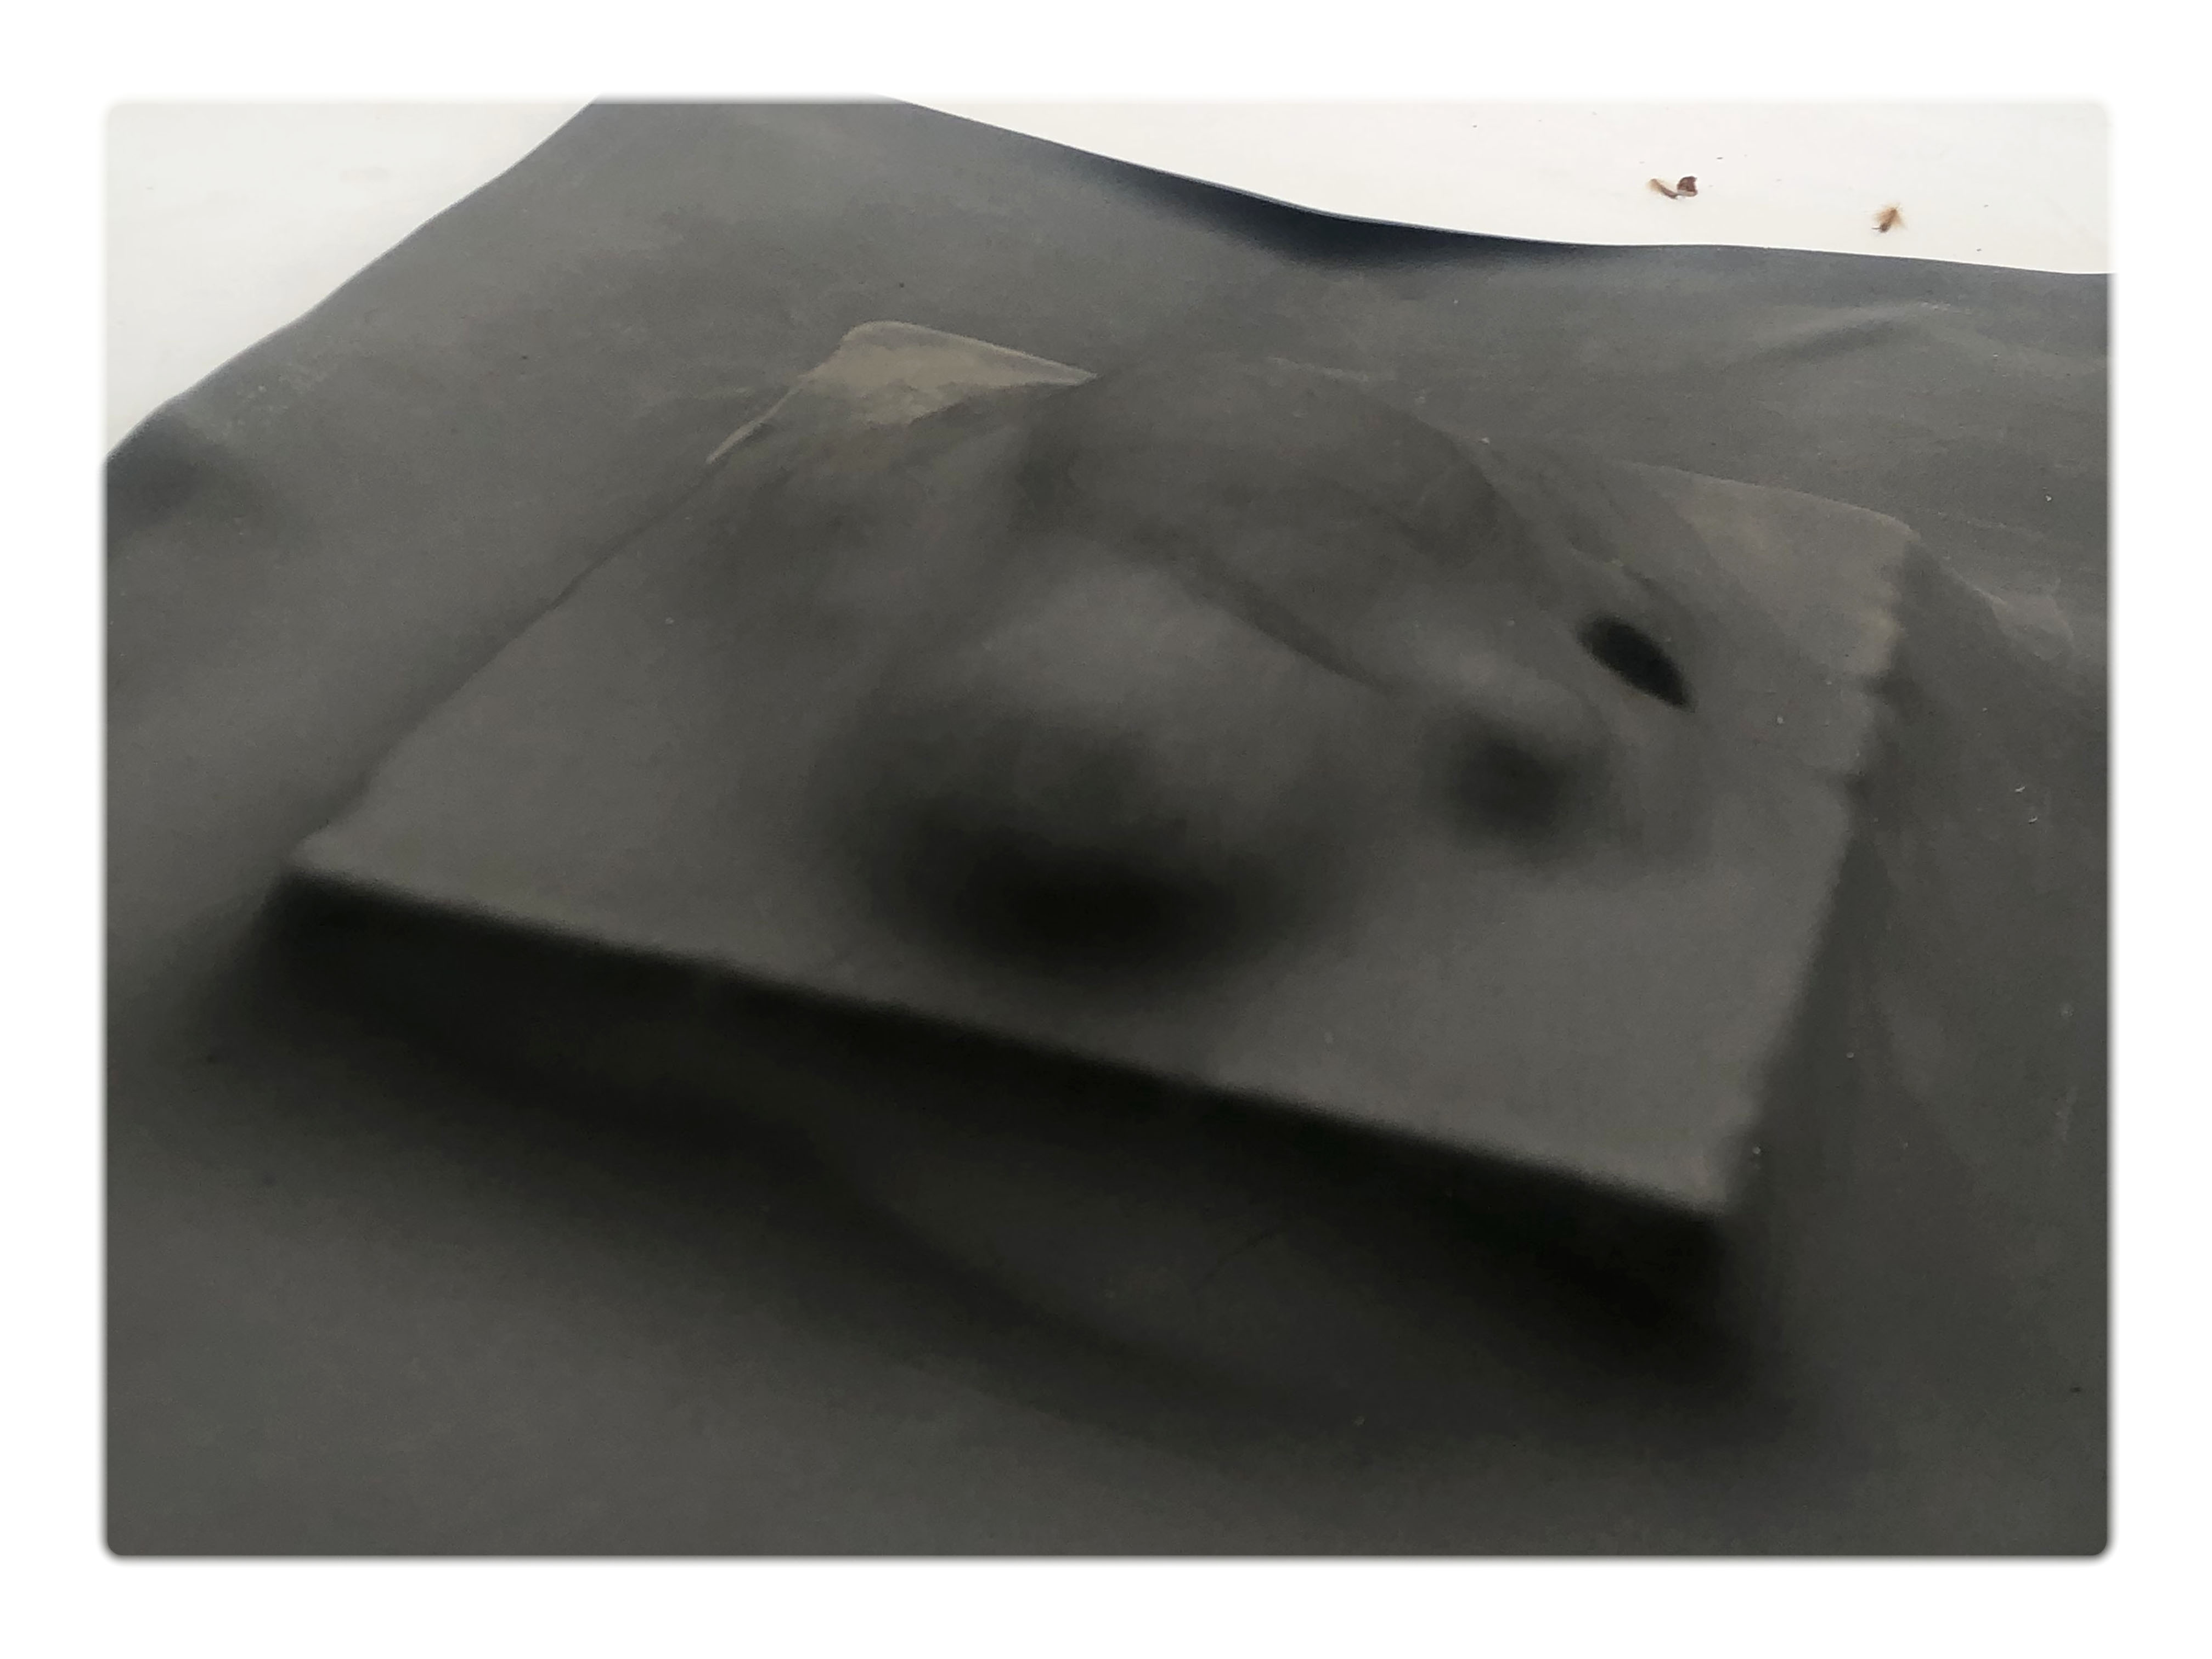
EVA foam 3mm
Conclusion:
The PETG sheets was very easy to mold and gave a detailed imprint. The EVA form was slightly harder to stretch and wasn’t giving as good details. It might be a good idea to heat both sides of the foam for a more even heat distrubution.
Agaragar thermoforming:
Since Agaragar is melting at 80 degree I had the idea I could make bioplastic sheets for thermoforming in the same way as the PETG sheets
Since I used a small sheet for my initial experiment I couldn’t use the vacuum machine instead I used a handgun to heat the sheet.
Initially the sheet was bulging in the same way as with PETG sheets but when pressed onto the mold it couldn’t stretch out as much
Some shape remained after demolding, however not much
* 20 gr Glycerin
* 10 gr Agar agar
* 300 ml Water
* Warm up water to max 80C
* Add your plasticizer
* Add your polymer
* simmer for 30 min
Conclusion:
More experiments with bigger sheets will be needed to see if this is a feasible technique for Agaragar. Using less or no glycerin might also help the plastic to hold shape better.
Leather molding:
We used an large vacuum molder to mold the leather onto the cast
process
1) Cut the strips 15 mm
2) Soak in water for 10 min
3) dump in simmering water for 2 min
4) Weave the stripes around the shape using pins to hold them in place while gently stretching the stripes
5) Place the mold inside a plastic bag to avoid water entering the machine
6) Turn on the vacuum
7) Gently rub the mold to ensure a tight seal
8) Leave for 6-7 hours
9) Leave to dry
 final sample
Conclusion:
I lost some of the details of the bubbles in the design, maybe a tighter weave pattern would give a better-defined shape, however overall, it worked quite well.
The pins left clear marks on the leather
Alginate composite molding:
Then I made a rather unsuccessful molding experiment with Sodium Alginate
1) Mix the ingrediencies according to recipe
2) Cover the mold with cling film
3) Spray the mold with calcium chloride
4) Push the alginate mixture towards the edges of the mold
5) Spray again with calcium chloride
6) Leave to dry
sample A: dryed flat
sample B: dryed in mold
* 6 gr Sodium alginate
* 30 gr Agar agar
* 300 ml Water
*   Mix polymer, plasticizer, liquid and filler  with a hand blender
*   Let the mixture stand for 3-4 hours to remove air-bubbles from the mixture (or use a vacuum pump)
*   Dissolve calcium carbonate in water
Conclusion:
The alginate loses a lot of water during the drying process causing it to lose its shape, other bioplastics might be better suited for this process.
The process worked better for flat sheets (sample A) since it didnt effect the shape so badly
Agaragar composite molding:
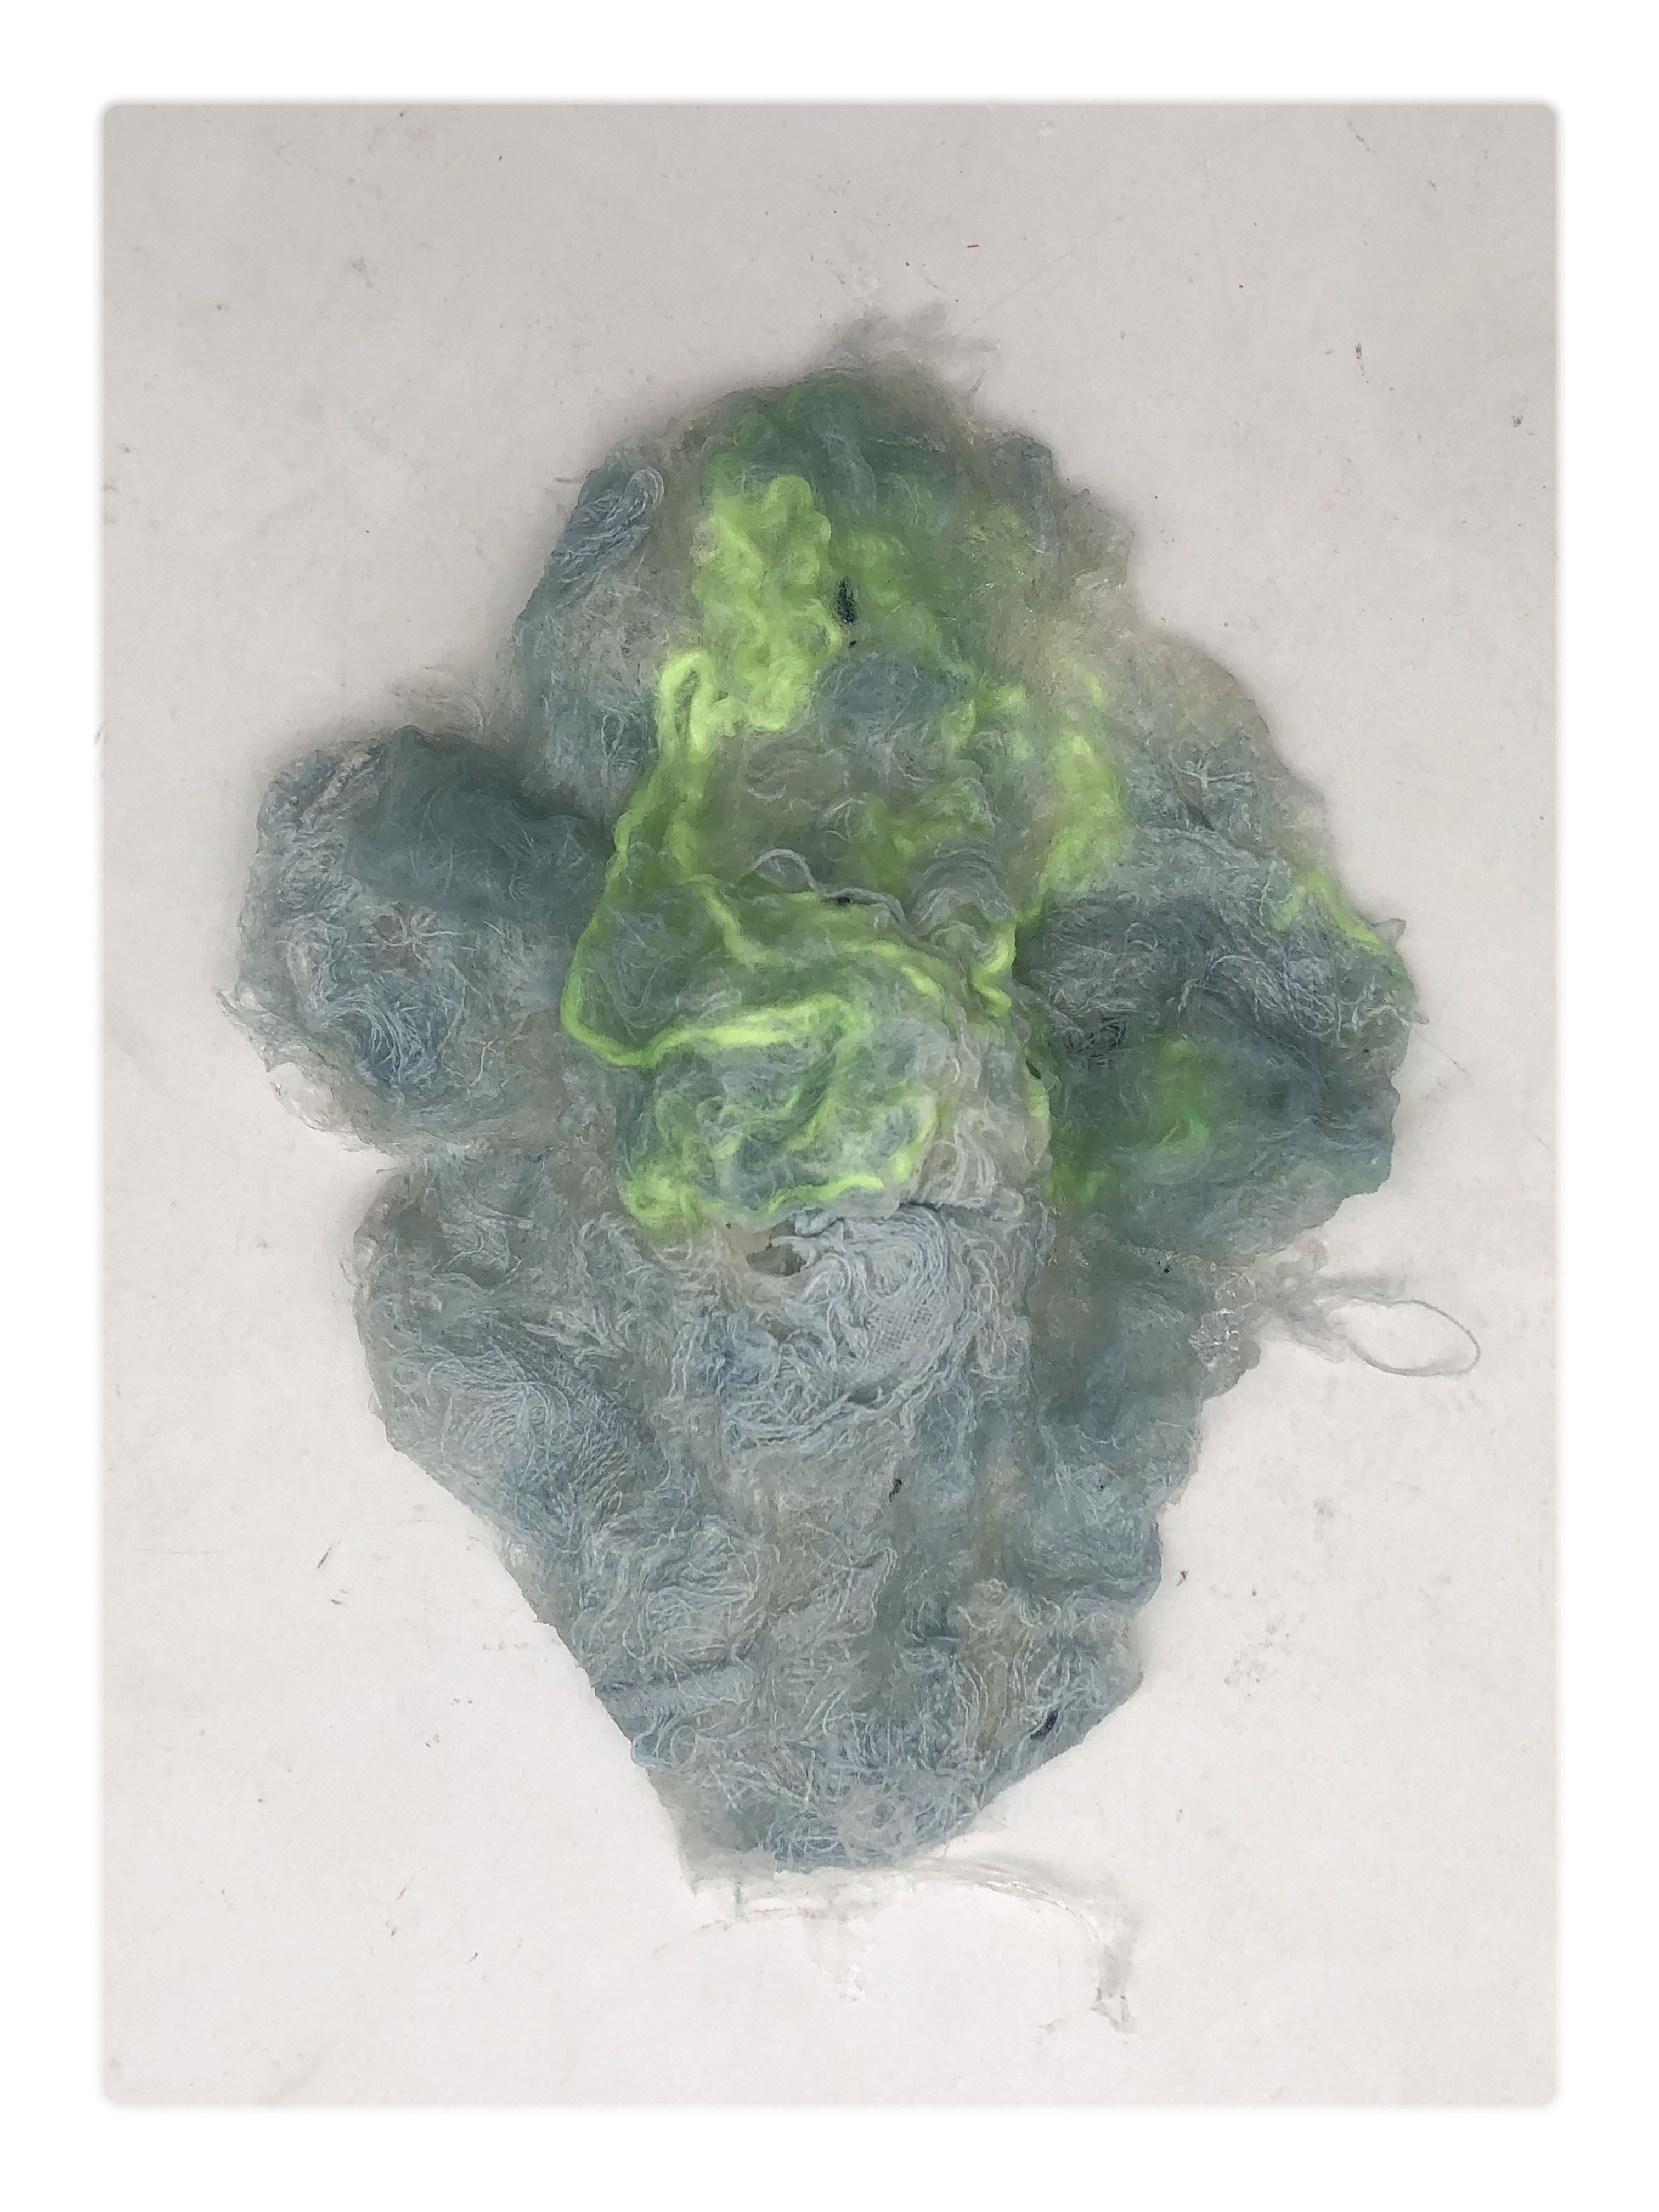
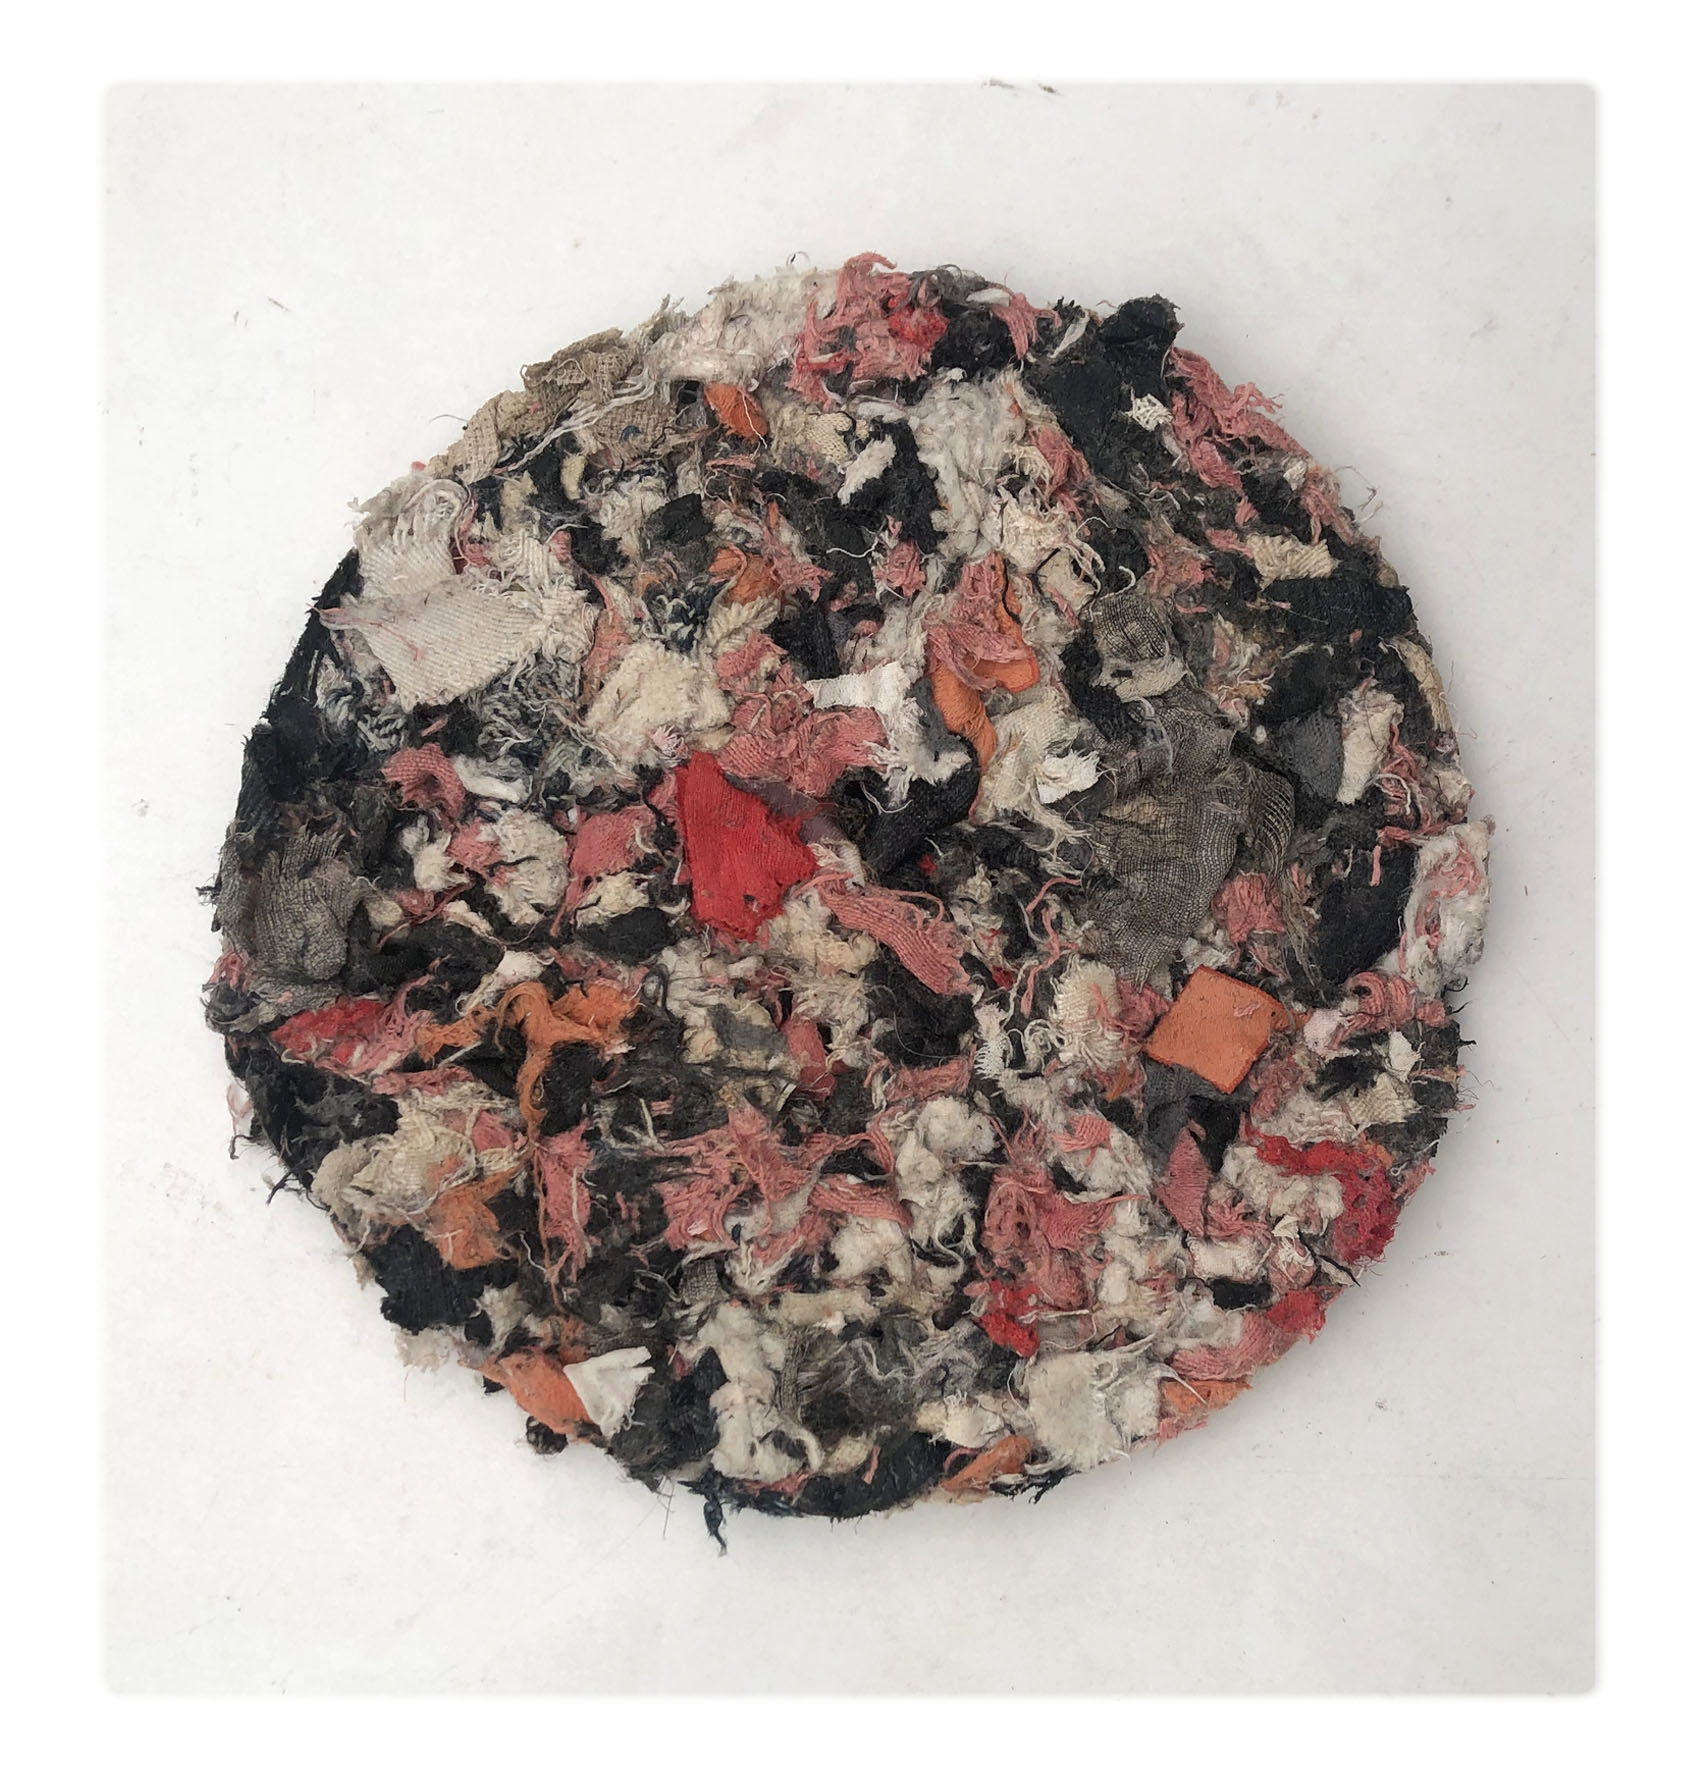
I also did two simple composites with leftover fabric scraps
a) In a embroidered hoop
b) In a double sided 3D printd mold form that was pressing the material together
sample A

sample B
* 20 gr Glycerin
* 10 gr Agar agar
* 300 ml Water
* Handful of fabric scraps
* Warm up water to max 80C
* Add your plasticizer
* Add your polymer
* simmer for 30 min
* mix in the fabric scraps
* Pour the mixture into the form
Conclusion:
Both samples had quite a weak tensile strengh. Sample B was slighly better since it was molded under hard pressure.
The closed mold for sample B also made the drying process much slower
Mycelium molding:
I used my PETG mold to make a mycelium cast, using the ecovative diy kit
1) create mixture according to reciepe (see bellow)
2) fill out the mold with the mixture, press it to edges
3) wrap the mold in cling-film and poke some holes
4) let it grow 1 week
5) If you want smooth white finish of your mycelium piece you should demold it after a week and let it continue to grow for another week.
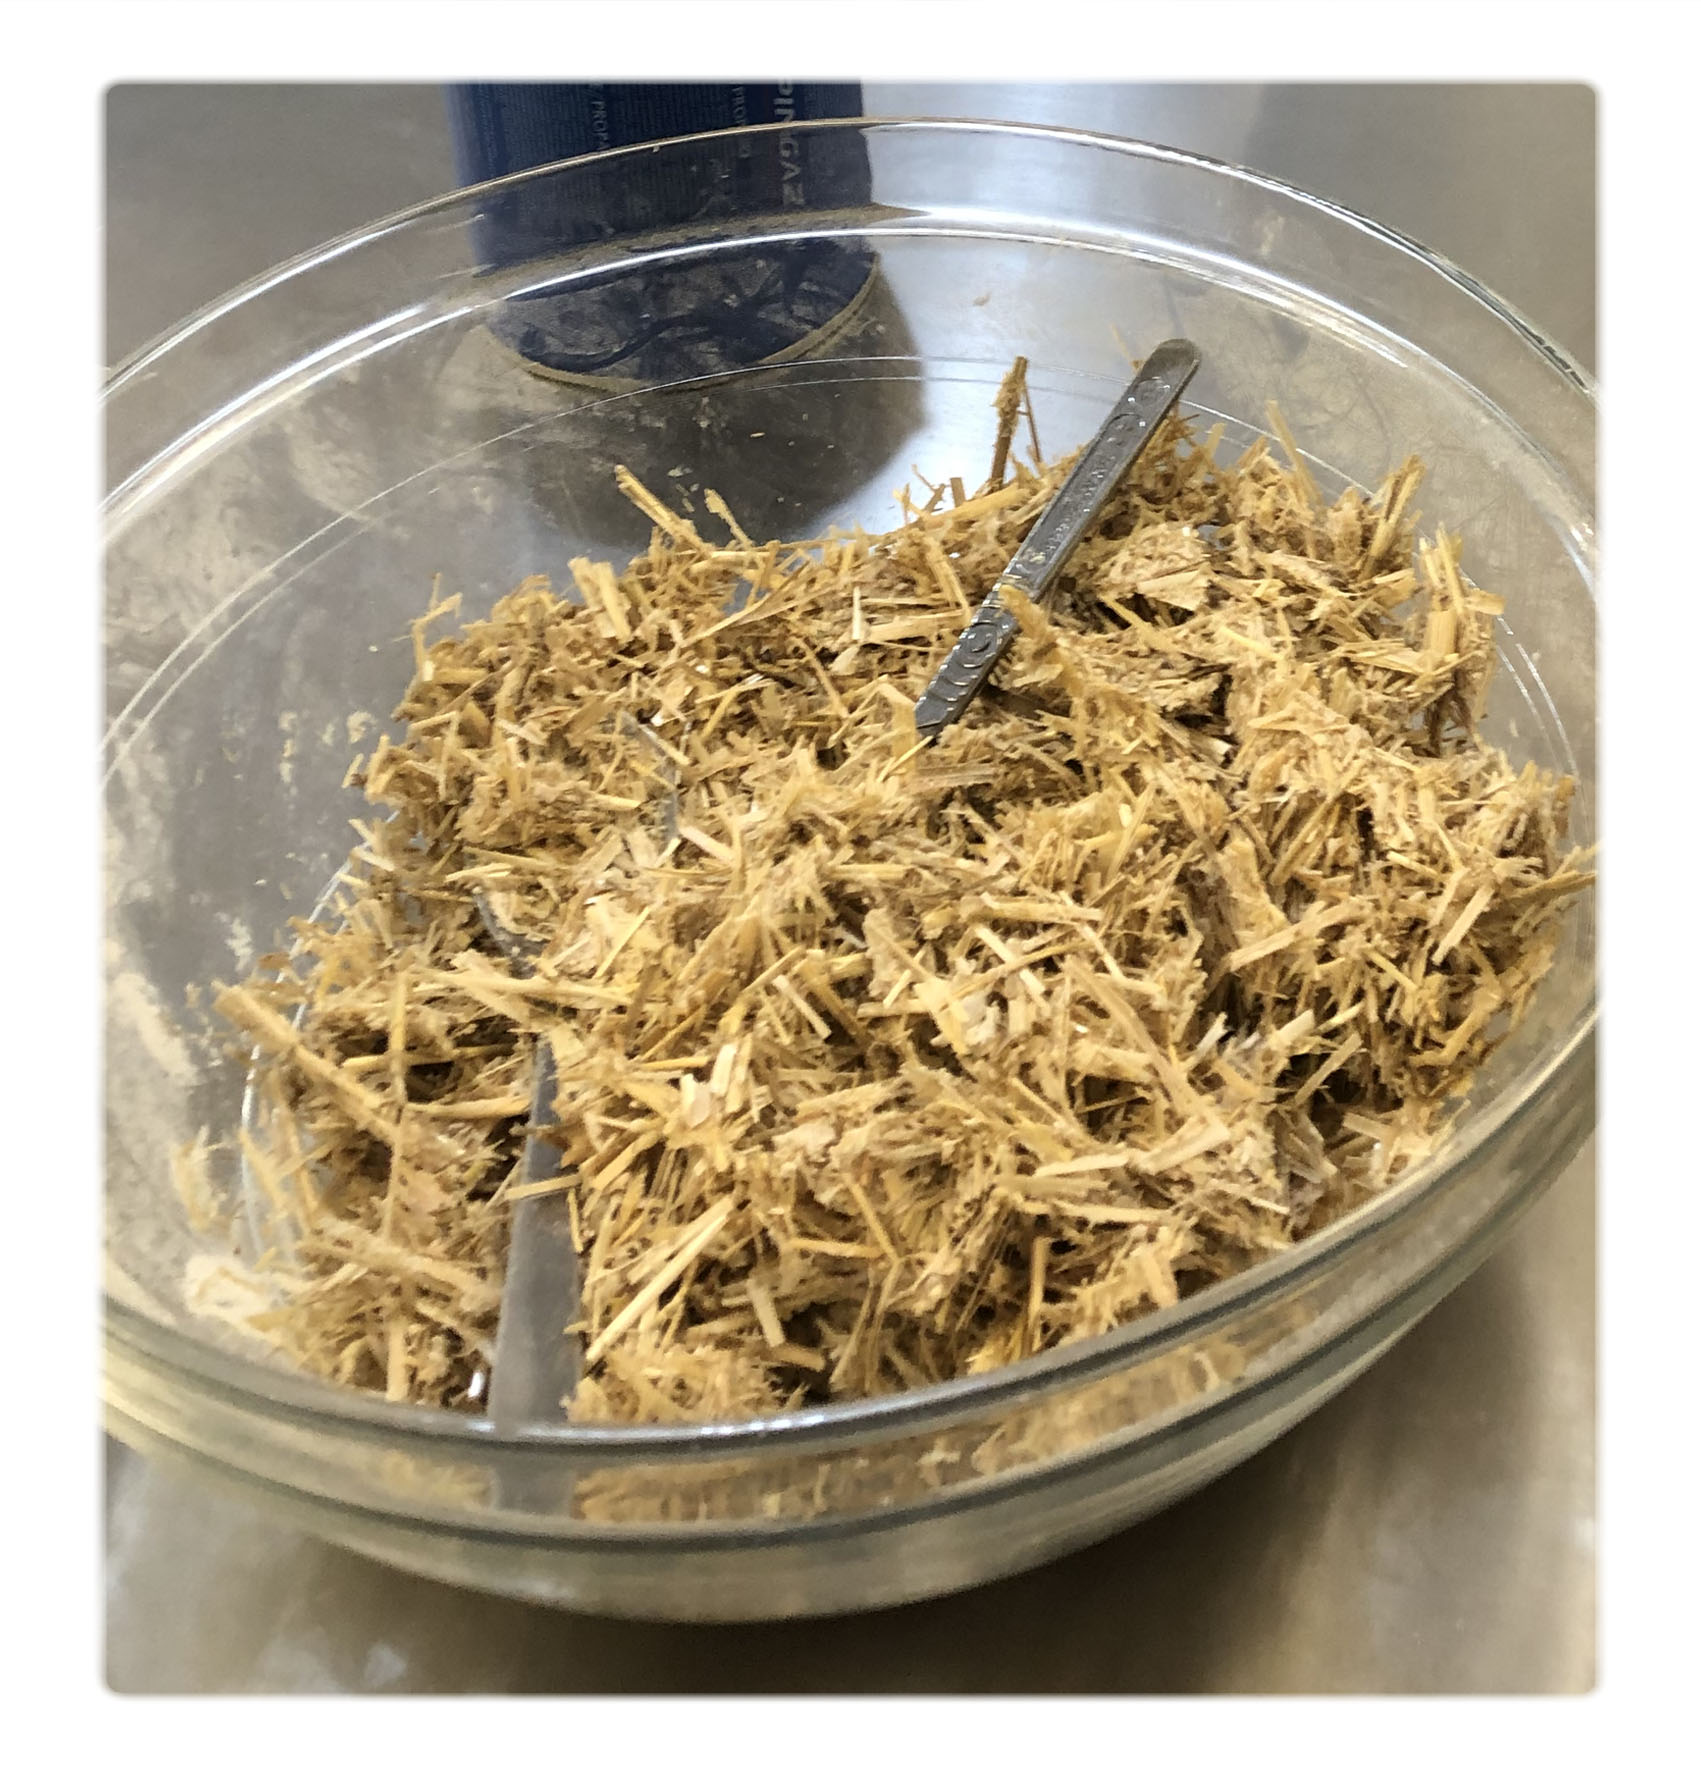
mixture
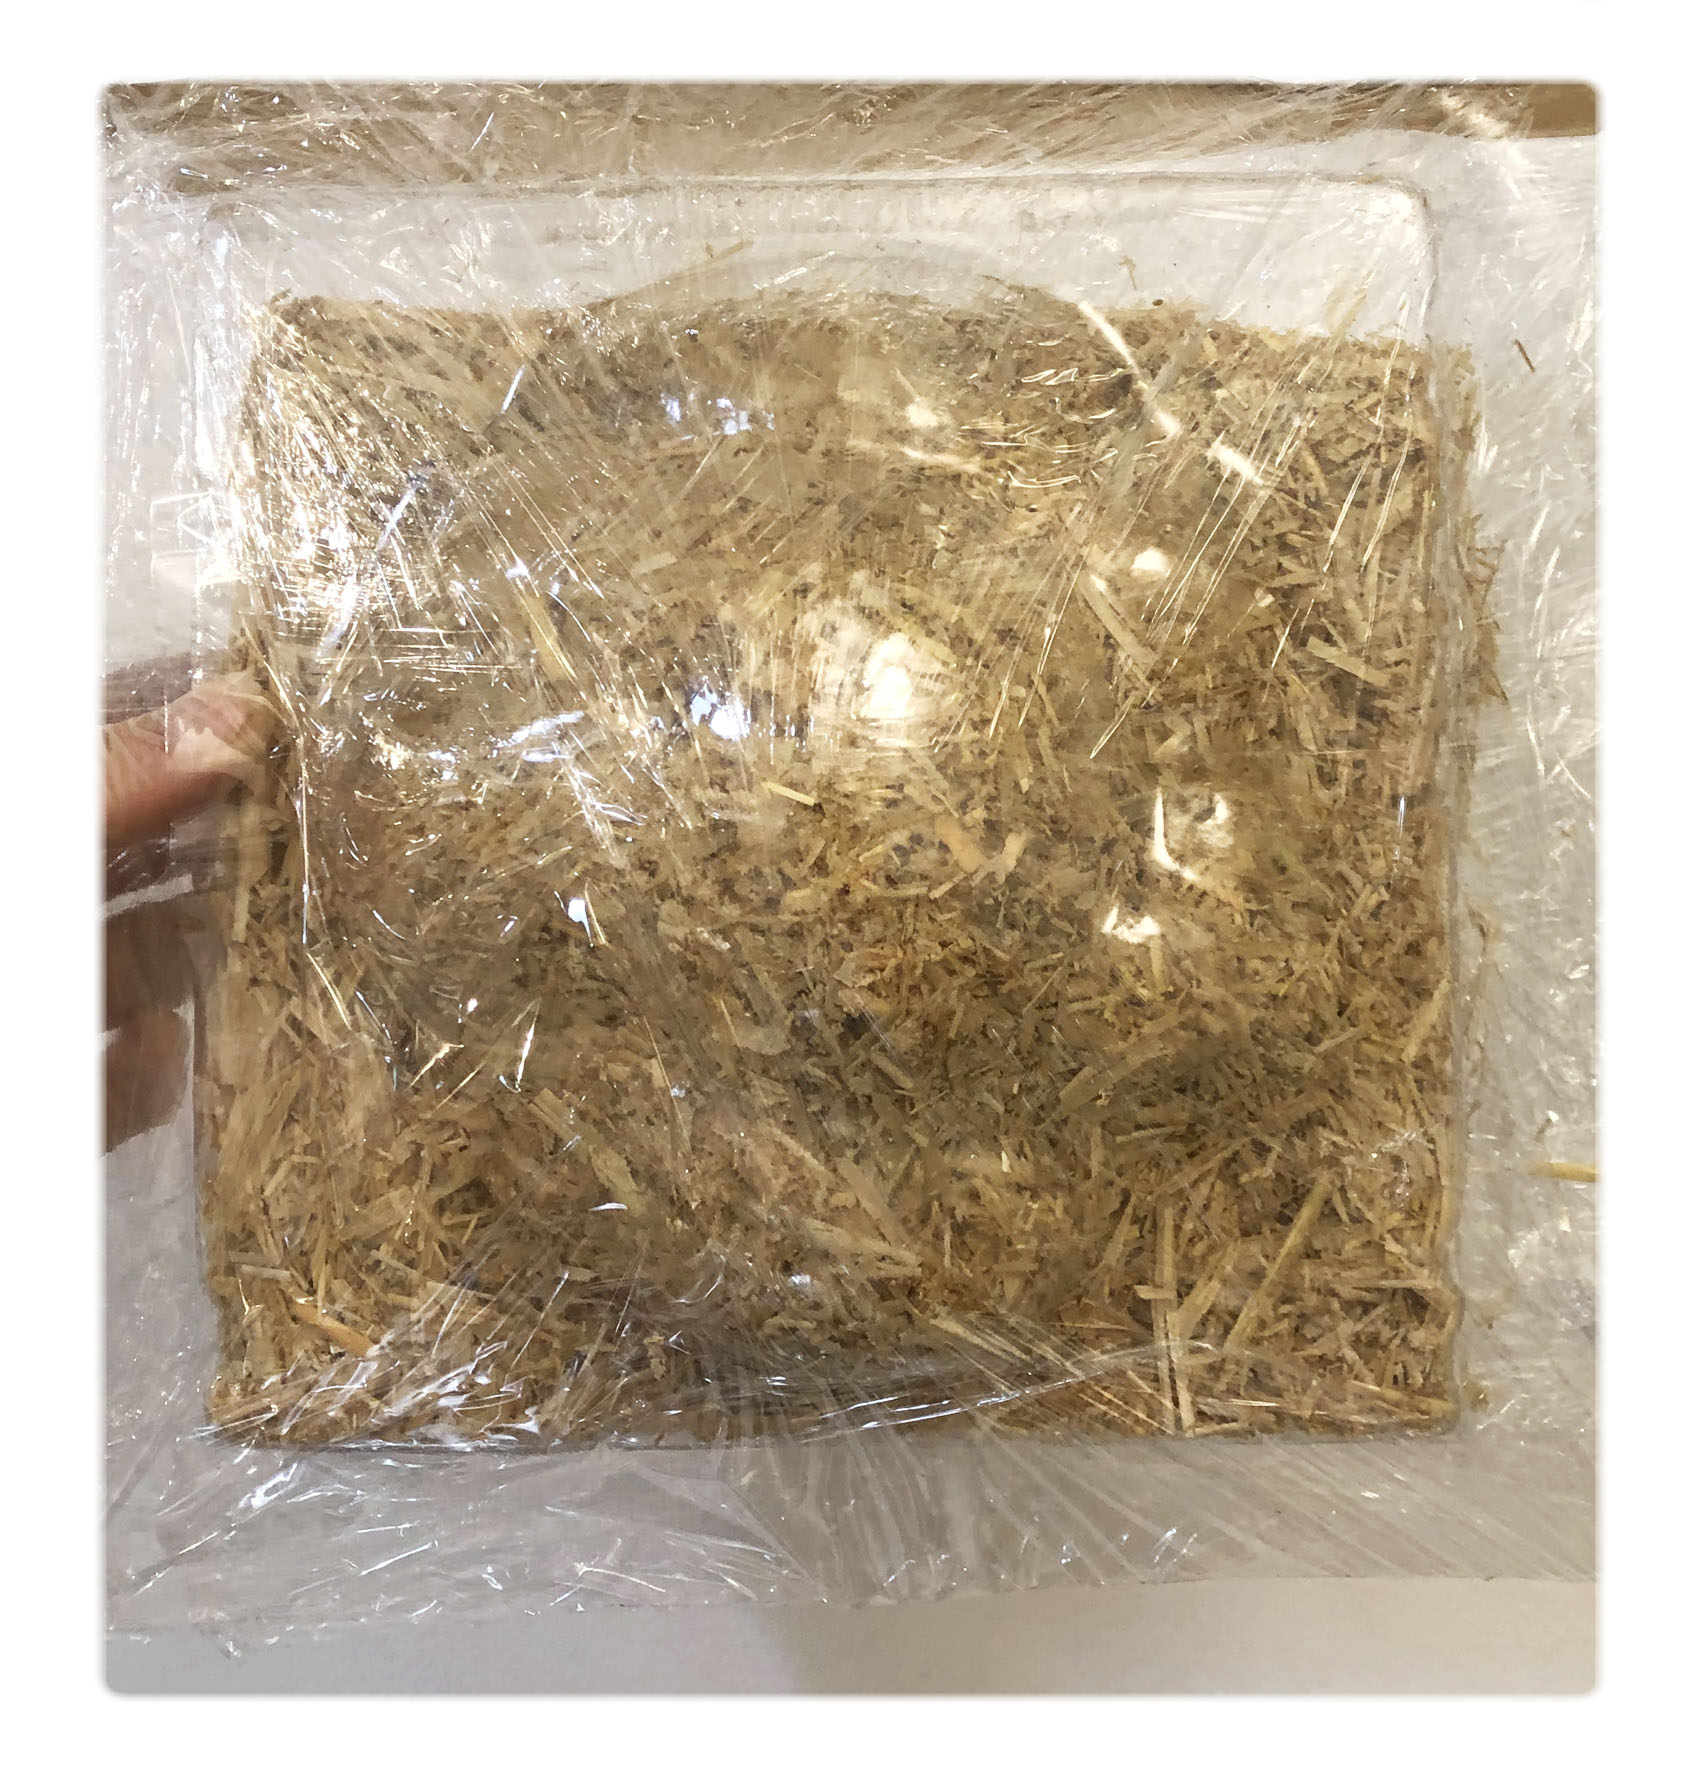
mold
* Substrate amount dependent on size of your piece
* 60% WOS (weight of substrate) of sculpting mix
* Water
* Mother mycelium block
* Bowl
* Plastic wrap
* Alcohol, gloves, mask
* Mold
* Measure out your substrate in grams - measure 60% of that amount of sculpting mix
* Add those two toegther with some water and mix untl it is chunky and pasty
* In a sterile environment, take a piece from your "mother" mycelium block and add it to the mix
* Prep your mold by covering it in sterile plastic wrap or sterilizing it well
* Press your mix into the mold and cover the entire thing with plastic wrap
* Poke some holes with a needle to allow some air flow
* Poke some holes with a needle to allow some air flow
* Leave it in a clean place and wait for it to grow
Conclusion:
The piece is still growing so need to wait and see for the result.