02. Digital bodies
1. References & Inspiration
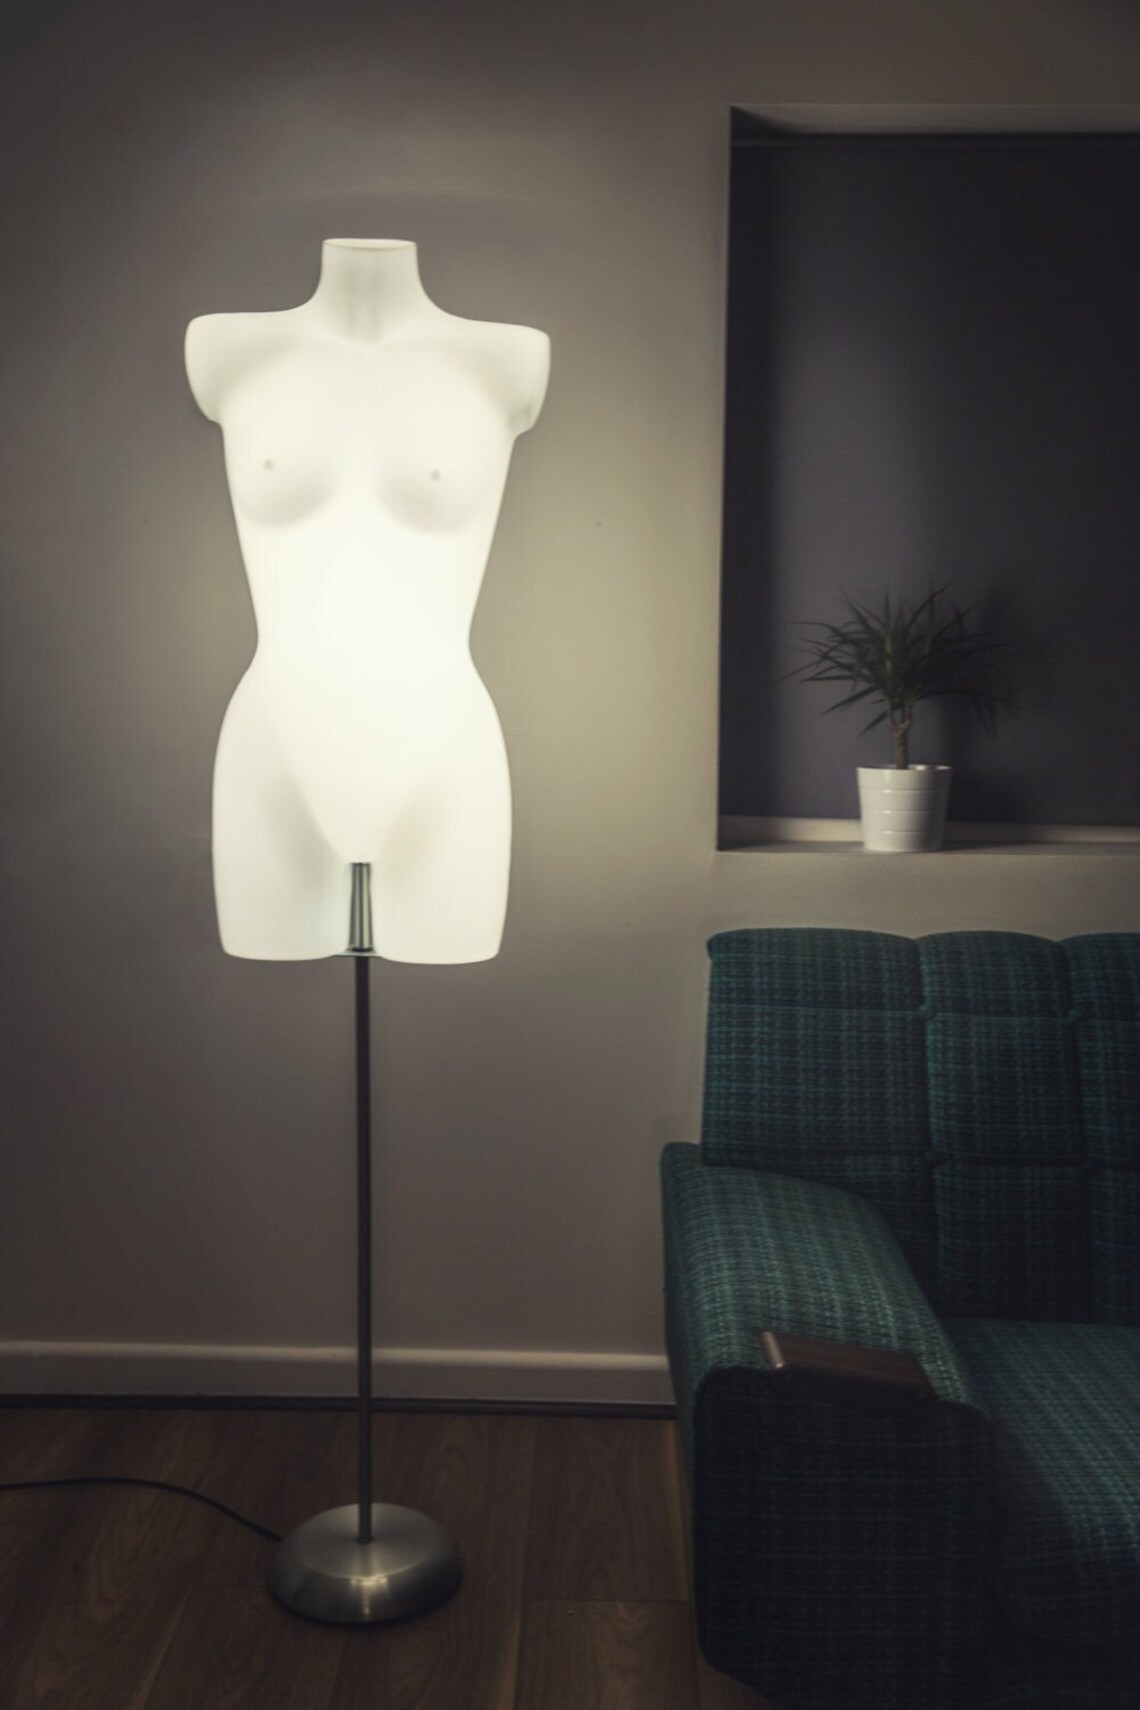
I drew inspiration from the idea of transforming a simple object like a mannequin into a versatile item, such as a decorative element or a piece of furniture, and so on. The project was conceived with the aim of crafting a distinctive and captivating addition to living spaces. Furthermore, Lumaquin lamps not only serve their primary purpose, which is to provide lighting akin to that of a traditional floor lamp, but they also contribute an element of personality to any room they illuminate. Bringing a Lumaquin lamp into your home is akin to welcoming a new family member—one who has the power to infuse a space with radiance. These life-sized Lumaquin lamps emit a brightness level comparable to standard floor lamps, all while utilizing energy-efficient LED technology, which minimizes power consumption and ensures an exceptionally long lifespan. Some customers enjoy accessorizing their lamps to reflect their unique style, while others prefer to leave them in their natural, unadorned state.
Tools
Trotec Speedy400 Slicer For Fusion 360
Photoshop
Rhino
3d Model with MakeHuman
3D Scanning
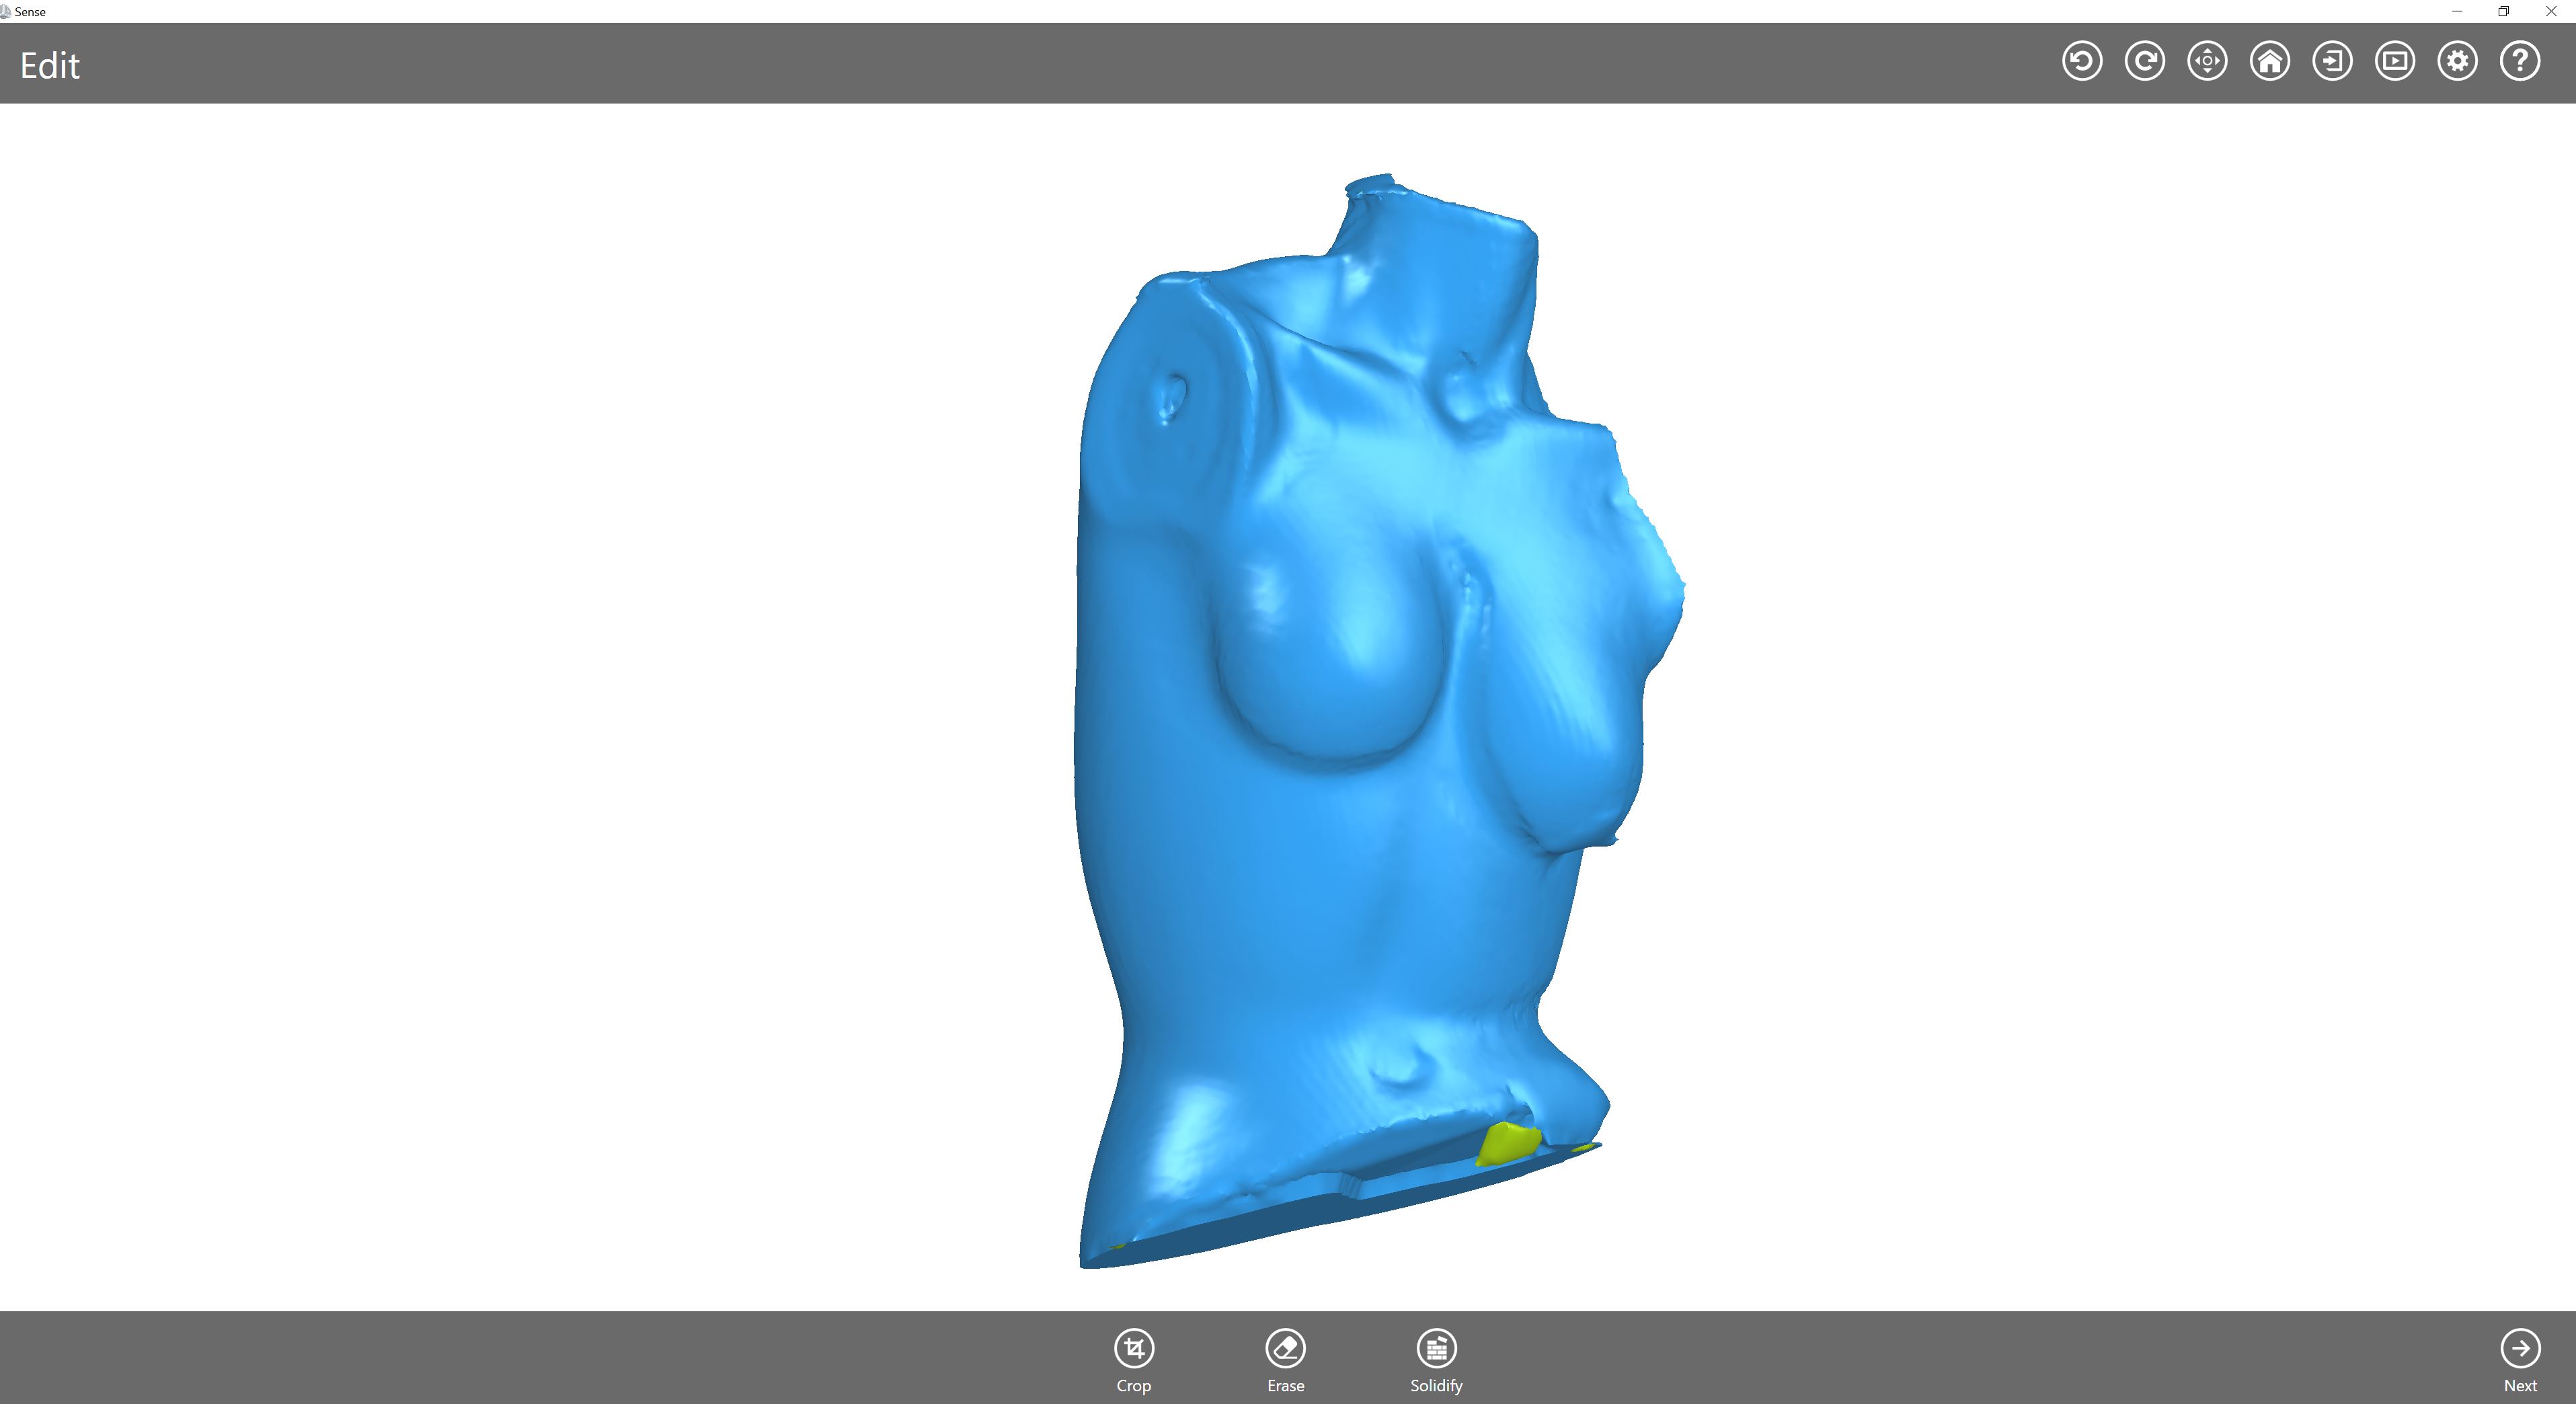
In Sense software, calibration ensures scanner accuracy. After object setup, the scan captures geometry and surface details in real-time. The software creates an editable 3D mesh with texture mapping for color preservation. Users can export the model in different formats for design or 3D printing. My collaboration with colleagues involved hands-on experience in modifying and exporting scan data.
### Step 1
> Setup: Prepare the object for 3D scanning [3D SENSE scanner ](https://support.3dsystems.com/s/article/Sense-Scanner?language=en_US) by positioning it in the scanner's view with proper lighting, and simultaneously calibrate the scanner to ensure accurate measurements.
{ width=600 }
### Step 2
Scanning: Capture surface data to generate a 3D mesh.Using the tools to edit and refine the 3D model, addressing any imperfections or enhancing details.
### Step 3
Export: Save the finalized 3D model in a suitable file format (e.g., STL, OBJ) for use in various applications such as 3D printing, design, or animation.

2. Cocept
Luminaform Mannequin a versatile concept that merges a mannequin, ornamental element, lamp, and furniture into one elegant piece. The project's concept aims to create a unique and attention-grabbing addition to living spaces. Its minimalist design showcases fashion, while adjustable LED lighting creates a captivating ambiance. Crafted from quality materials and customizable, it's a functional and artistic addition to any space.

3. Steps
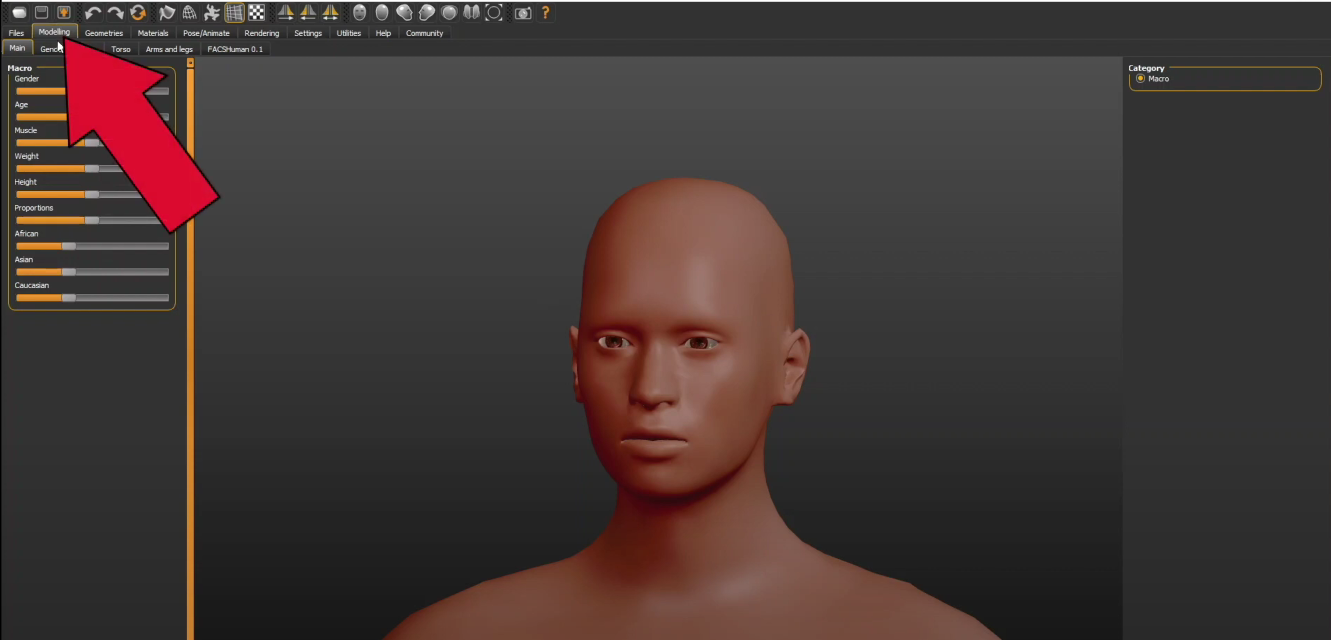
Step 1 (Modeling using MakeHuman)
Starting the creation of my mannequin figure in MakeHuman, where a wide range of character design features can be adjusted within the modeling tab.
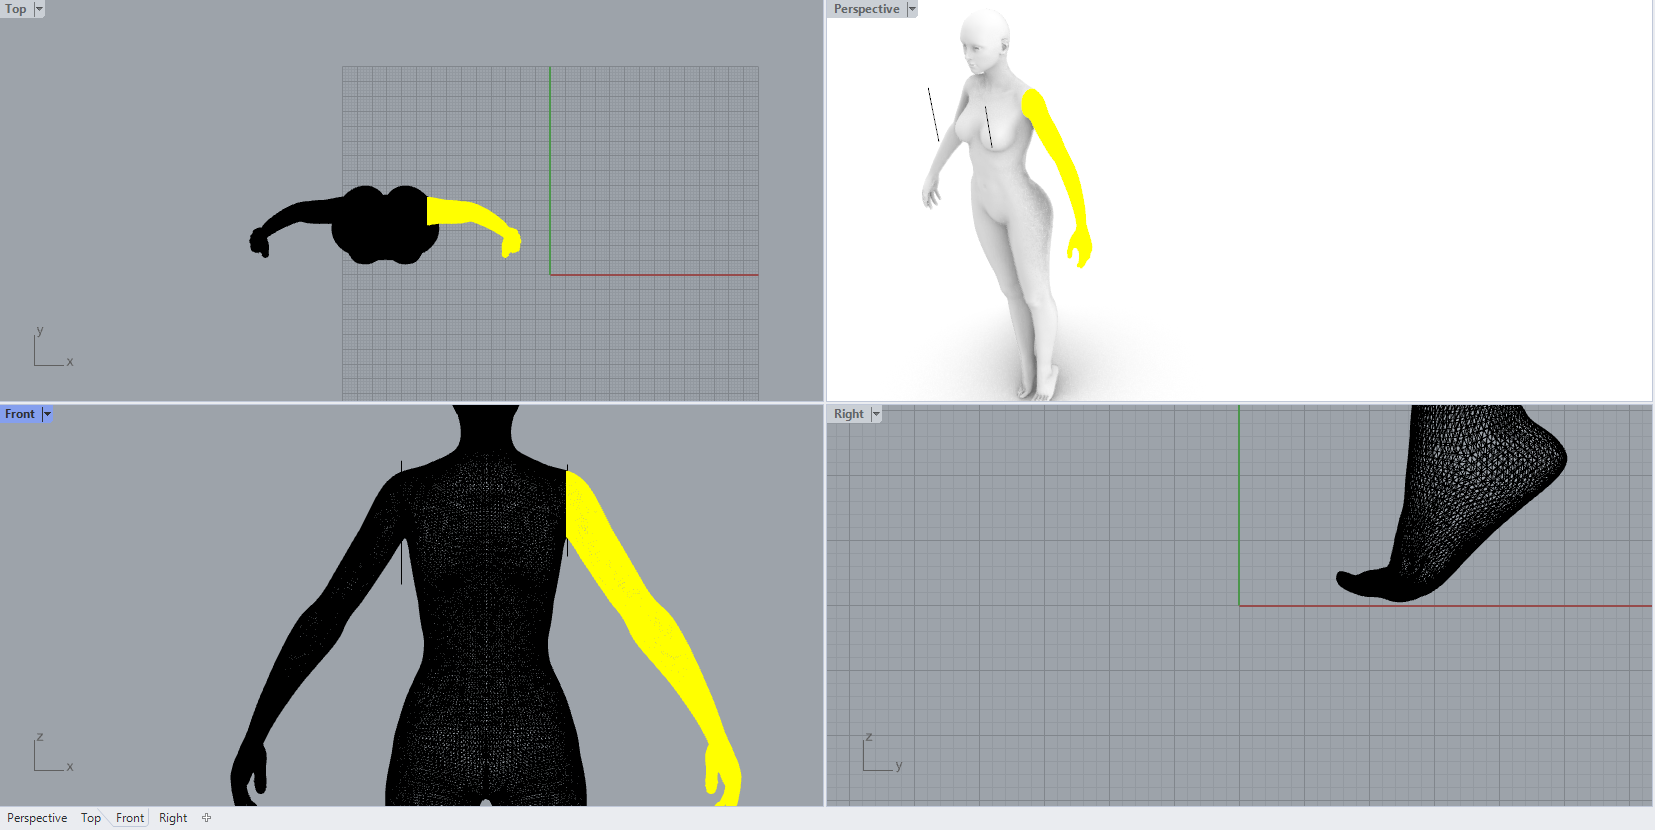
Step 2 (Customizing Mannequin Figure in Rhino)
I made modifications to my mannequin's human figure after exporting it as an STL file from MakeHuman and importing it into Rhino, tailoring it to match my specific adjustments and preferences. Using the 'Split Mesh' command to eliminate undesirable sections of the mannequin before proceeding with the export.

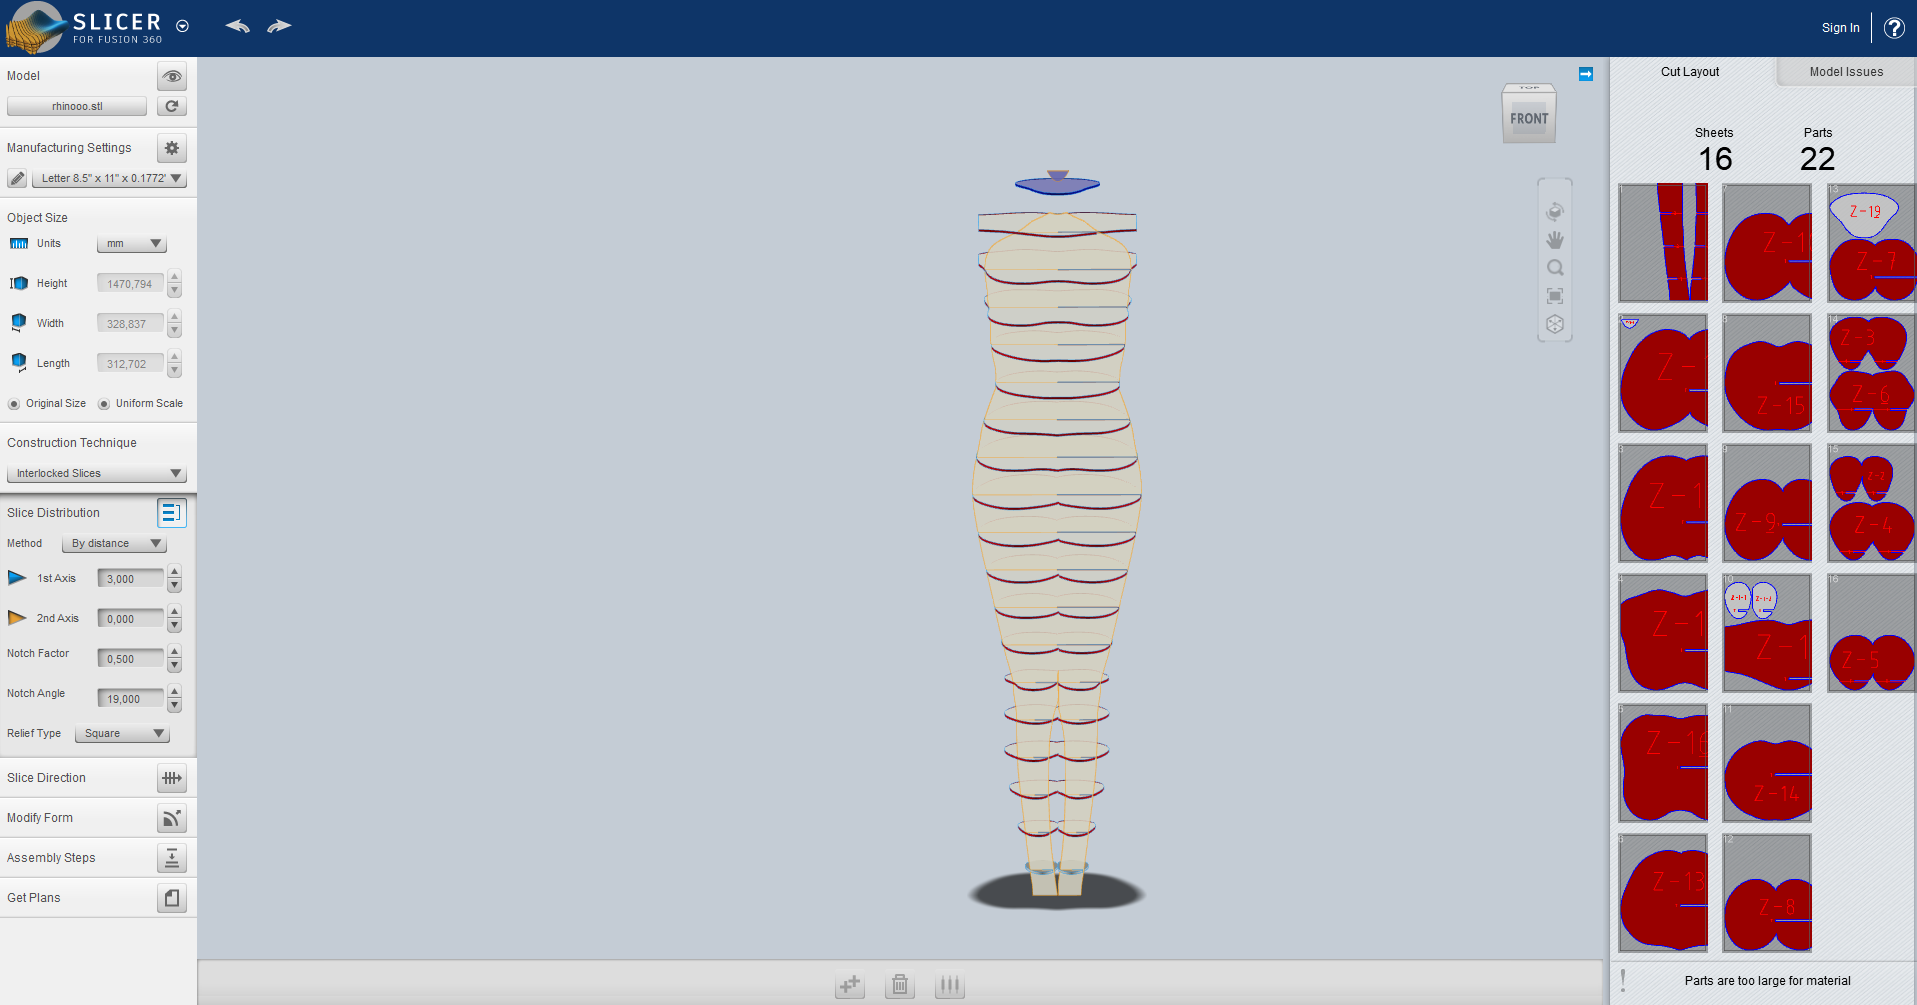
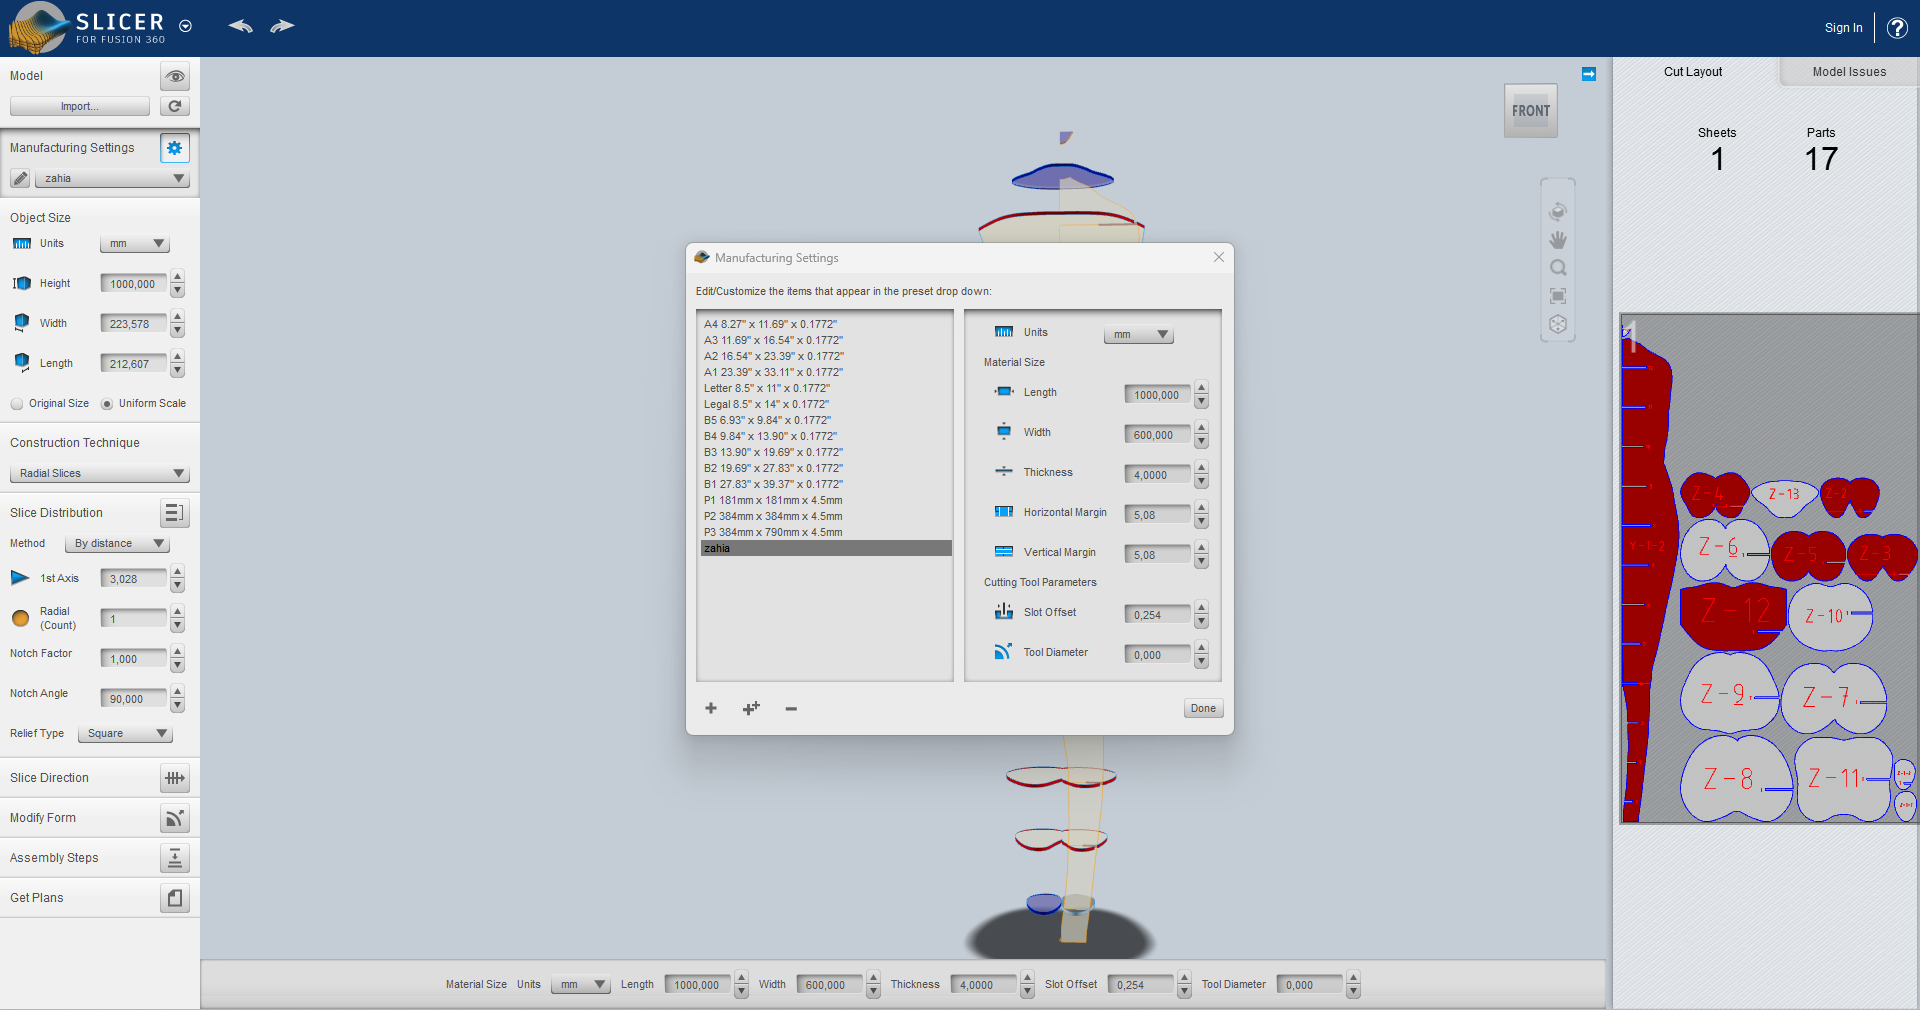
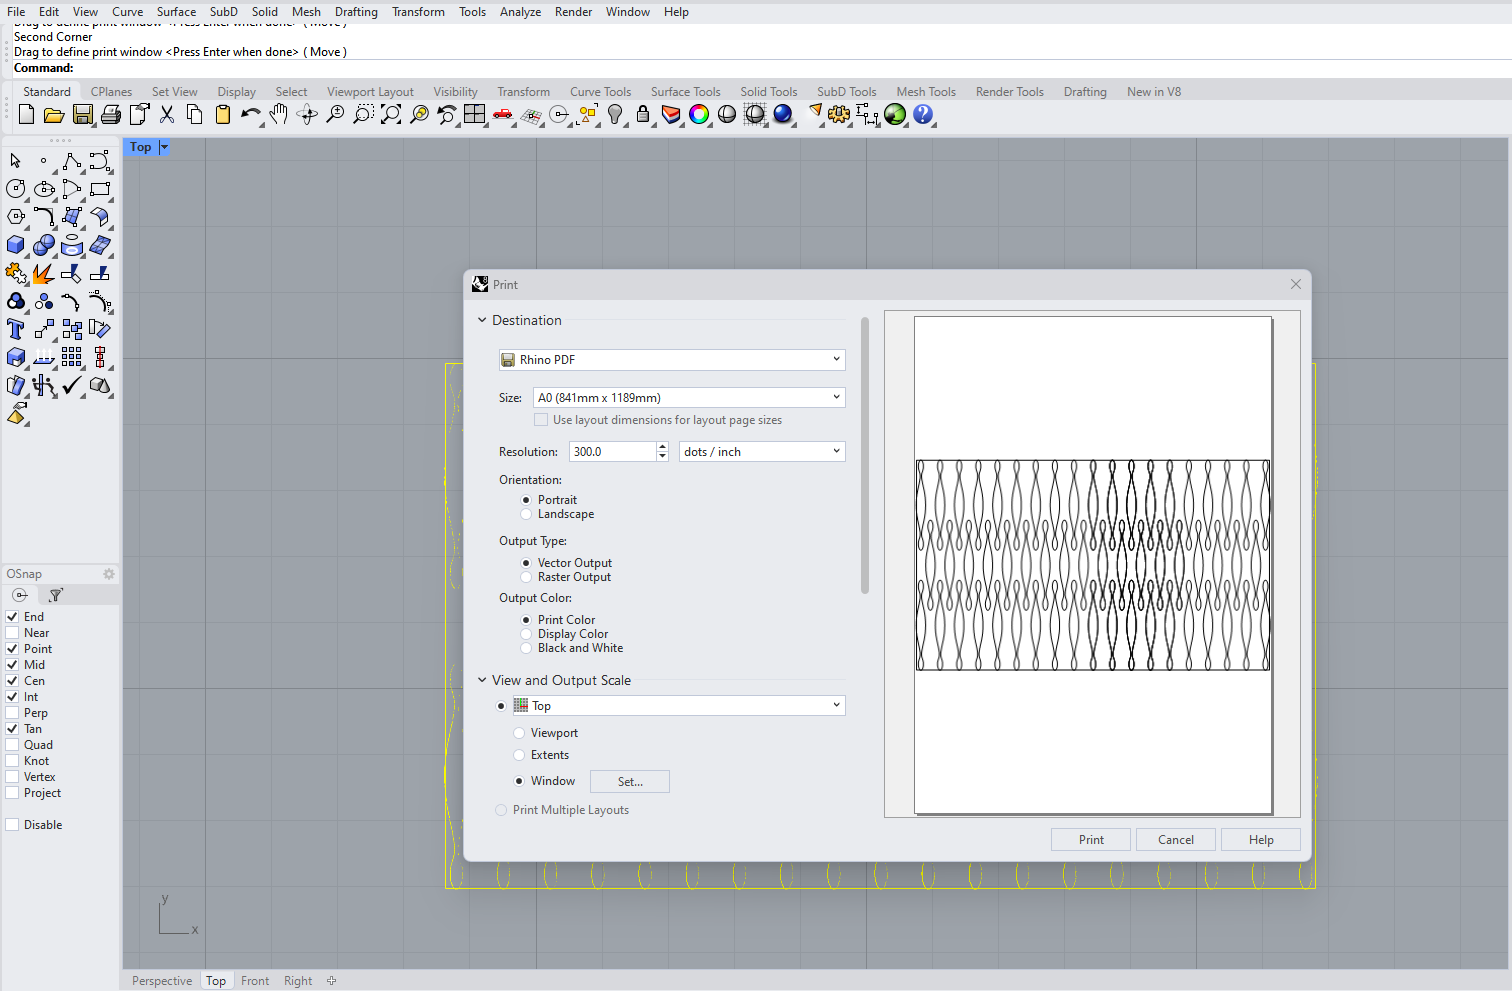
Step 3 (Fine-Tuning Design Parameters in Slicer for Fusion)
I imported the human figure as an OBJ file into Slicer for Fusion, where I fine-tuned the scale, sheet size, material thickness, and customized the slicing design to align with my desired design concept.
I adjust the length and width to align with the laser cut machine bed dimensions of 1000 by 600 cm, as well as configuring the thickness, line thickness, colors, etc.
Step 4 (Refinement and Optimization in Rhino)
Subsequent to exporting the sheets as DXF files from Slicer, I imported them into Rhino for the final adjustments and design refinements.
Reassembling the parts to minimize board waste and incorporating duplicated components to align with the design concept.

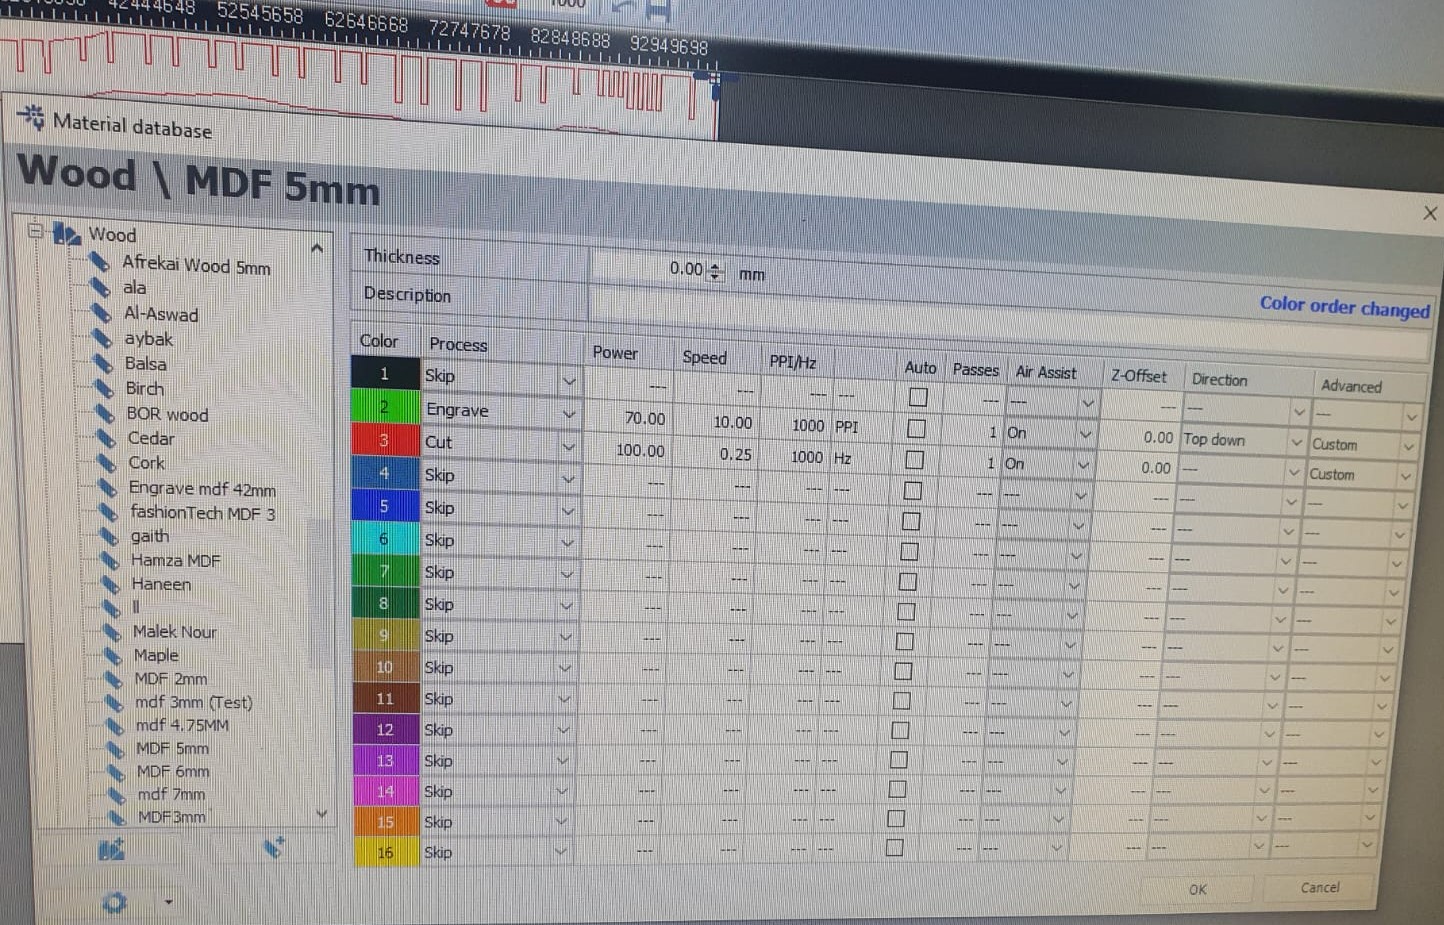
Step 5 (Material Database Integration and Parameter Adjustment)
Transferring the correct data into the material database after modifying colors, along with their associated color parameters, processing settings, speed, and power settings.
Step 6 (Focusing and Calibration for Precision Cutting)
In laser cutting Trotec Speedy400, focusing the machine is essential for precise cuts. This involves adjusting the focal point to ensure optimal energy delivery onto the material, resulting in clean and accurate results.

Step 7 (Material Verification and Laser Cutting Preparation)
Verifying the material type and its thickness to proceed with the laser cutting process.


Details
- Material Type: MDF wood
- Thickness: 4mm
- Number of Boards Used: 2
- Timme ≈ 40 minutes approximately 40 minutes to cut one board
- Assembly time: Around 30 minutes
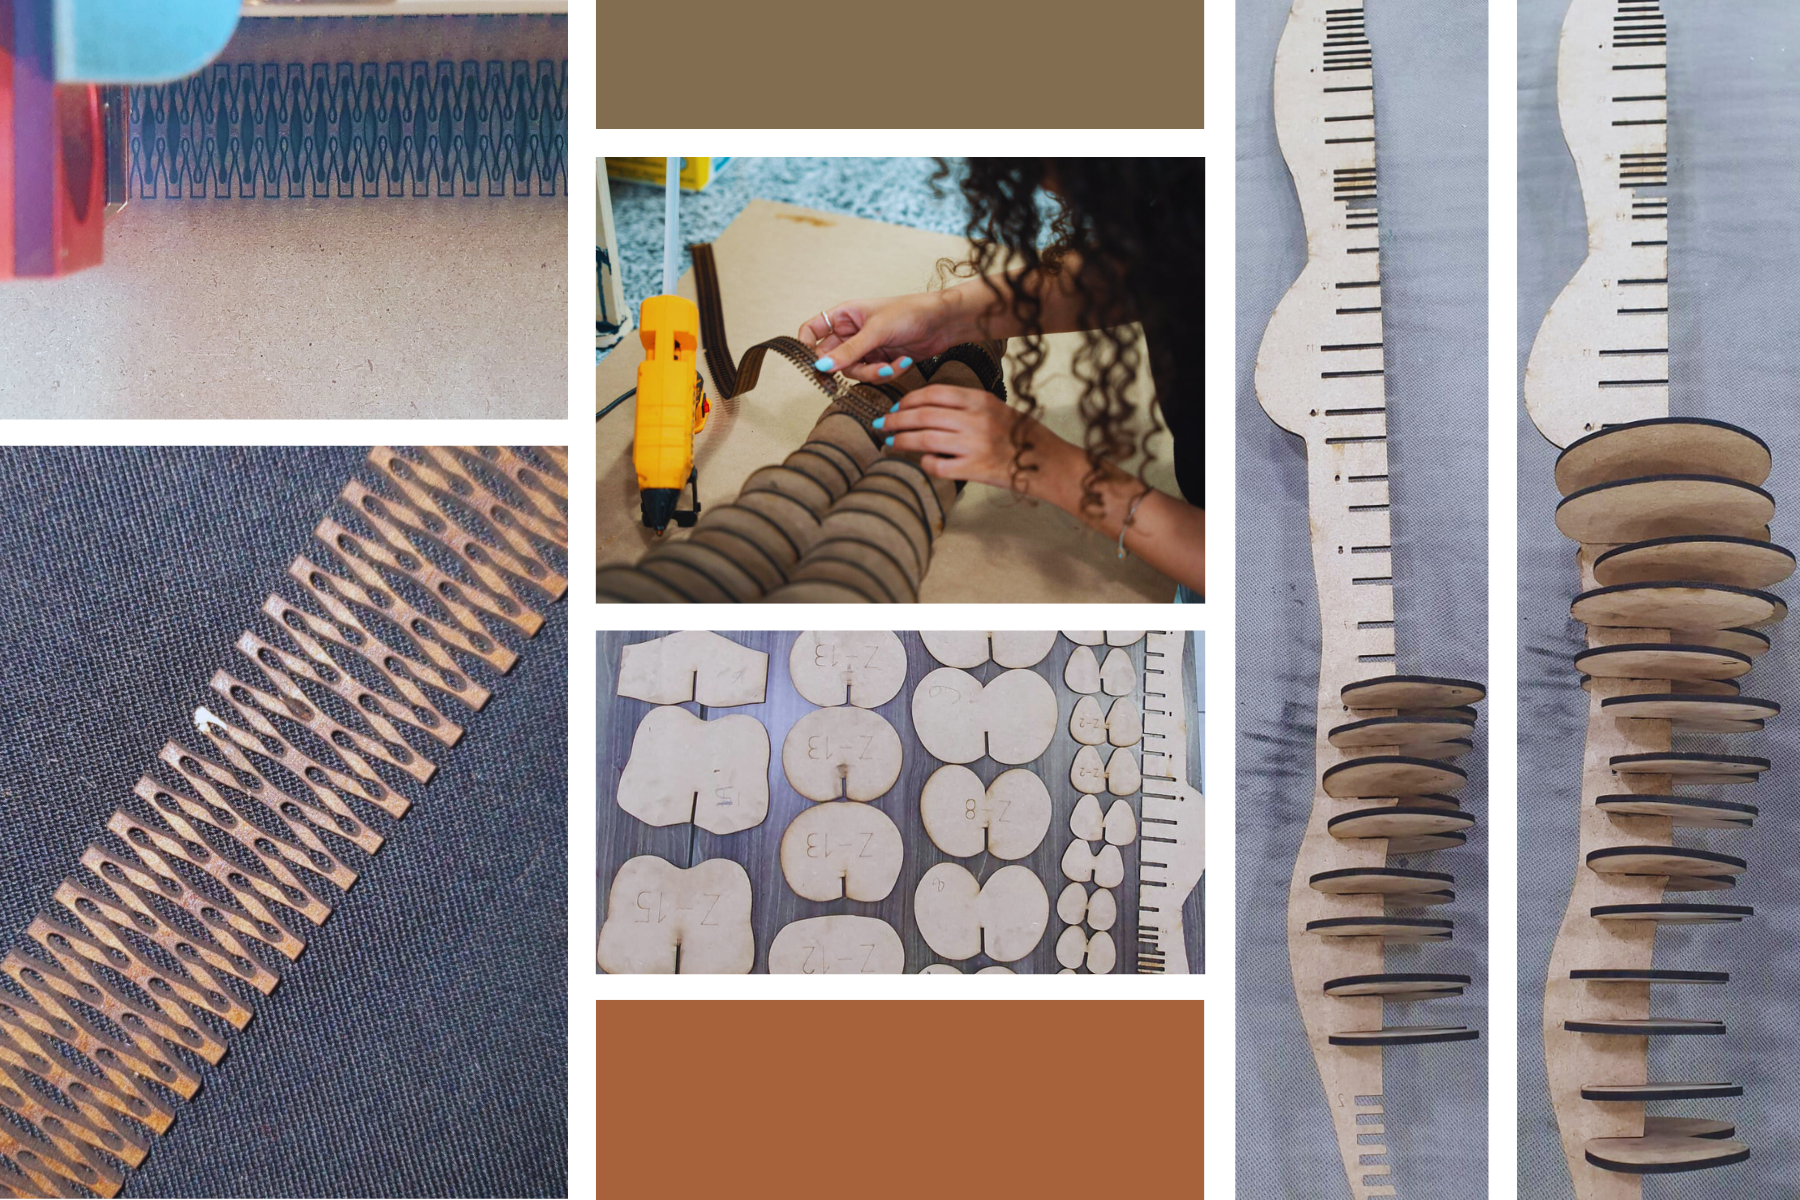
4. Testing & living hinges
Conducting tests on wood to optimize the interlocking mechanism between female and male pieces by experimenting with various settings, particularly focusing on the kerf, to determine the most effective configuration.

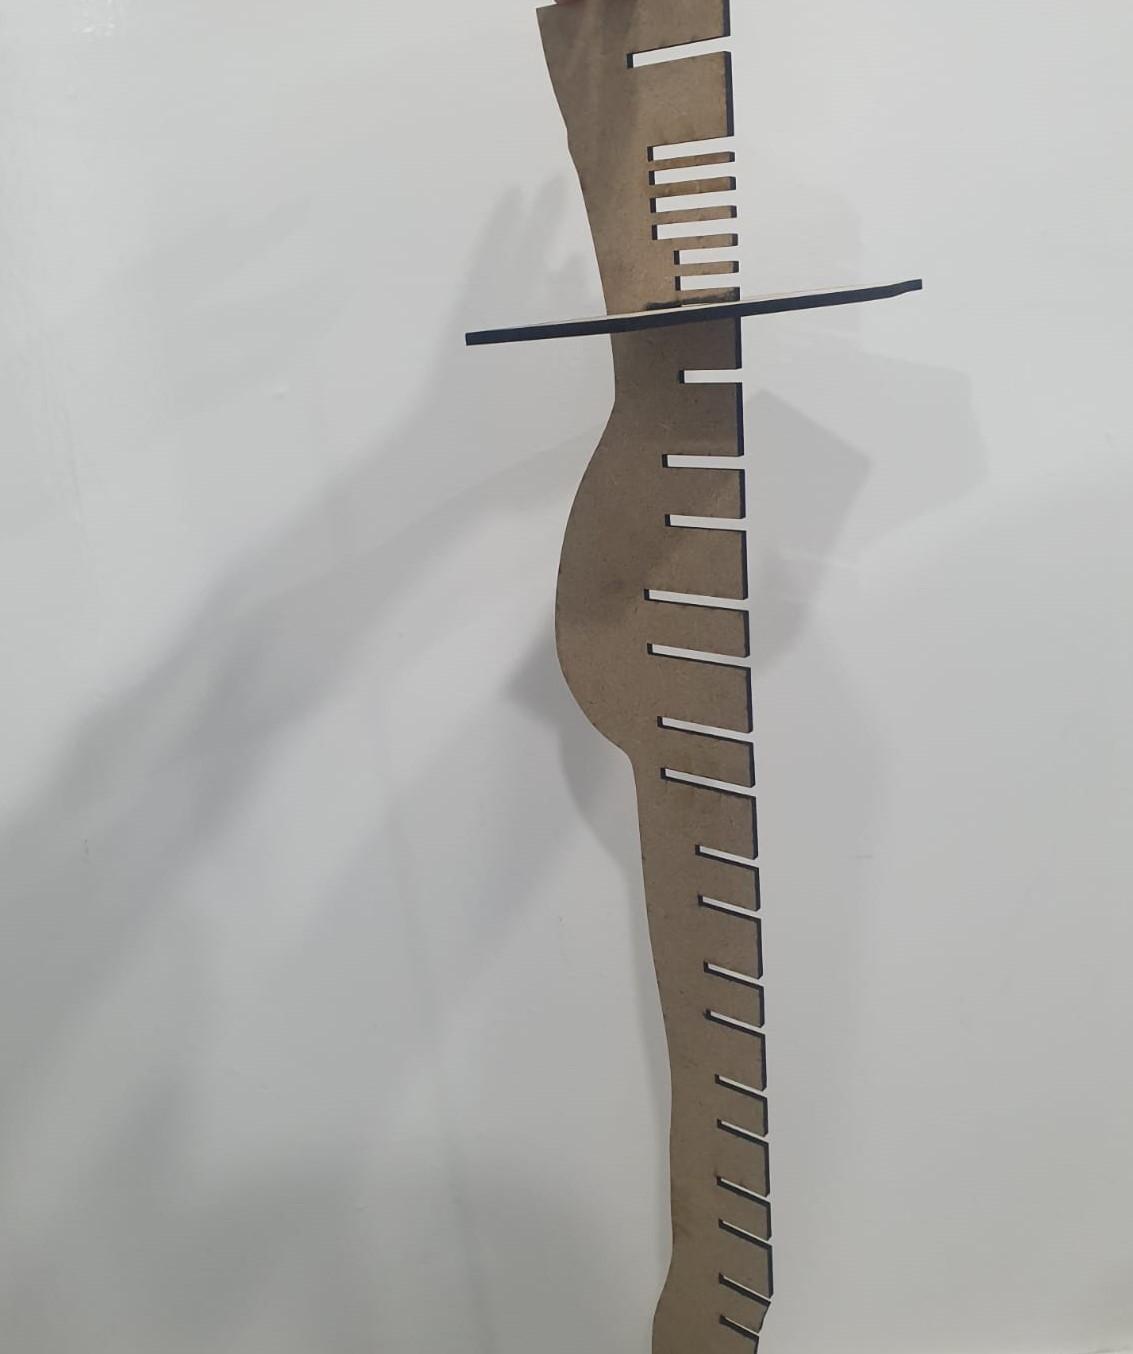
living hinges
¶This technique enables the bending of flat and rigid materials by cutting long, thin strips on the surface without fully separating them. Each small strip retains the ability to rotate slightly. Cumulatively, these rotations contribute to a more pronounced bend in the overall material. The process shares similarities with kerf bending.

The rationale behind this pattern is to distribute torsional stress more evenly. Sharp corners often act as weak points under stress, and rounding them helps distribute the stress more uniformly.
5. Process and workflow
The process was highly enjoyable, despite encountering errors and mistakes. There's no better way to learn than through one's own mistakes—a valuable part of the learning journey. I can confidently say that I now possess a much greater level of confidence in utilizing the laser cutting machine and converting physical objects into 3D digital formats.
The project involved several phases, such as testing, assembling components, choosing the right materials, and using a 3D SENSE scanner machine for body scans.
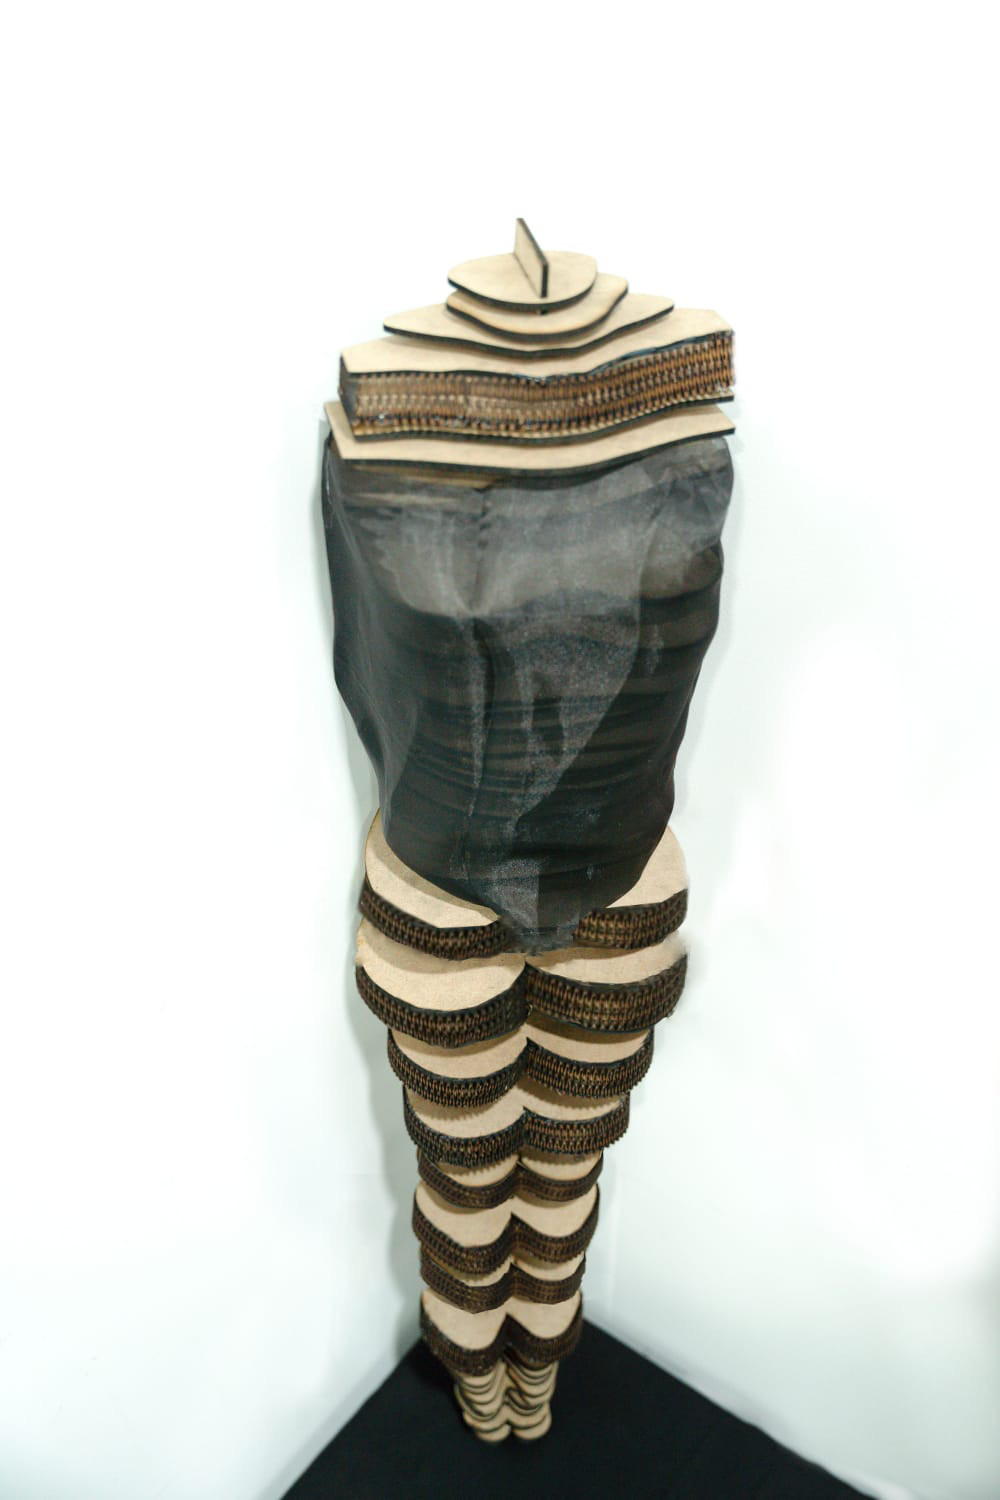
Dimensions of the mannequin are as follows:
- Height: 100 cm (1 meter)
- Width: 50 cm
7. Fabrication files
-
file Laser cut sheets1 ↩
-
file Laser cut sheets2 ↩