06. BioFabricating Materials
This week's biomaterials assignment provided a thought-provoking experience. The assignment brought its own set of challenges. The diversity of biomaterial samples and ideas inspired me to explore innovative approaches while maintaining a strong focus on sustainability.
Tools
Process and workflow
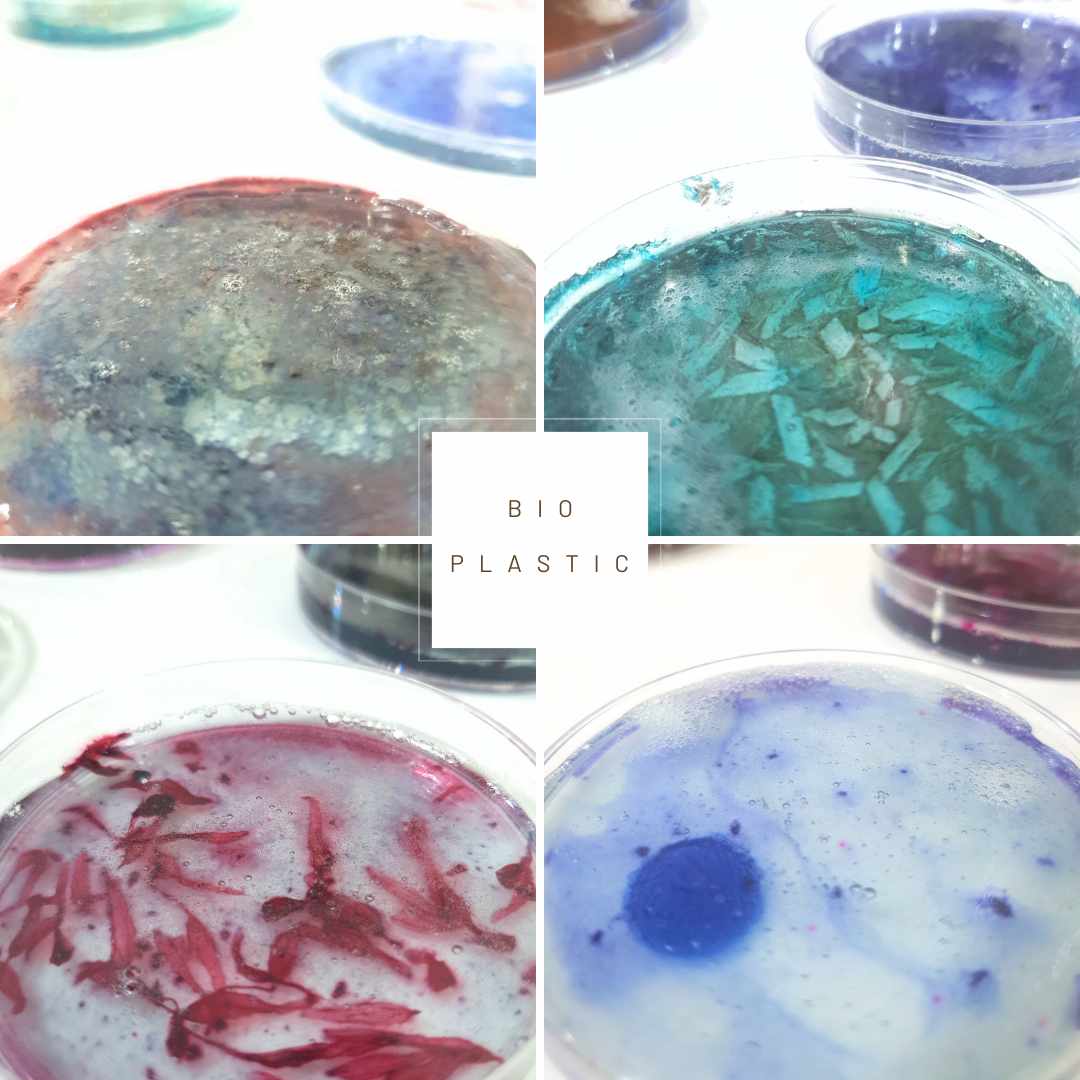
1. Bio-Plastics
- I began by crafting Gelatine Bio-Plastics, which involved combining a mixture of Alginate, Gelatine, water, and a dye bath with Indigo. To create a smaller batch, I halved the recipe.

Bio-Plastic
- The mixture should be brought to a boil at 100 degrees. Subsequently, all the components should be combined and stirred until they attain a smooth texture, a process that typically spans 5 to 10 minutes.
 * 20 gr Gelatine
 * 3.5 gr Glycerin
 * 100 ml water/dye bath
Bio-Resin
- To prepare this mixture, start by thoroughly combining all the components at 60 degrees until a smooth consistency is achieved. Afterward, proceed to boil the mixture at 100 degrees for 5 to 10 minutes.
    * 20 gr Gelatine
    * 3.5 gr Glycerin
    * 100 ml water/dye bath

| Hardness | Strength | Hardening time | Shrinkage | Temperature Stability |
|---|---|---|---|---|
| High | Medium | Medium | Low | Suitable for high-temperature |
Casting
- I used a petri dish for casting agar bioplastics during my biomaterials experiment.
Drying Process
* I allowed it to dry slowly at room temperature for 24 hours to ensure proper curing and preservation of the intricate pattern.
Steps
Step 1
- Heat the water (dyebath) in a pot on your stove.
Step 2
- Incorporate your plasticizer; remember, the greater the amount of glycerine, the more flexible the material will become.
Step 3
- Add the gelatine.
Step 4
- Stir the mixture until it becomes smooth, and then let it simmer for 10-15 minutes.
Step 5
- Pour the mixture onto your chosen surface and allow it to dry in a dry environment.

2. Agar Bio-Plastics
- Agar, a polysaccharide derived from red algae, is a key component in creating Agar Bioplastic. This bioplastic is produced by combining water, glycerine, and agar-agar powder, resulting in a mixture of Agar, Glycerol, and Water.
??? quote "Agar Bio-Plastic"
* To create this mixture, start by thoroughly blending all the components until a smooth consistency is achieved. Subsequently, bring the mixture to a boil at 100 degrees, and the duration of boiling may vary (between 10 to 15 minutes) depending on the volume of water used.
* 2 gr Agar
* 6 gr Glycerin
* 100 ml water/dye bath
| Hardness | Strength | Hardening time | Shrinkage | Temperature Stability | Texture |
|---|---|---|---|---|---|
| Medium | Medium | Medium | Low | limitations in heat resistance | gel-like texture |
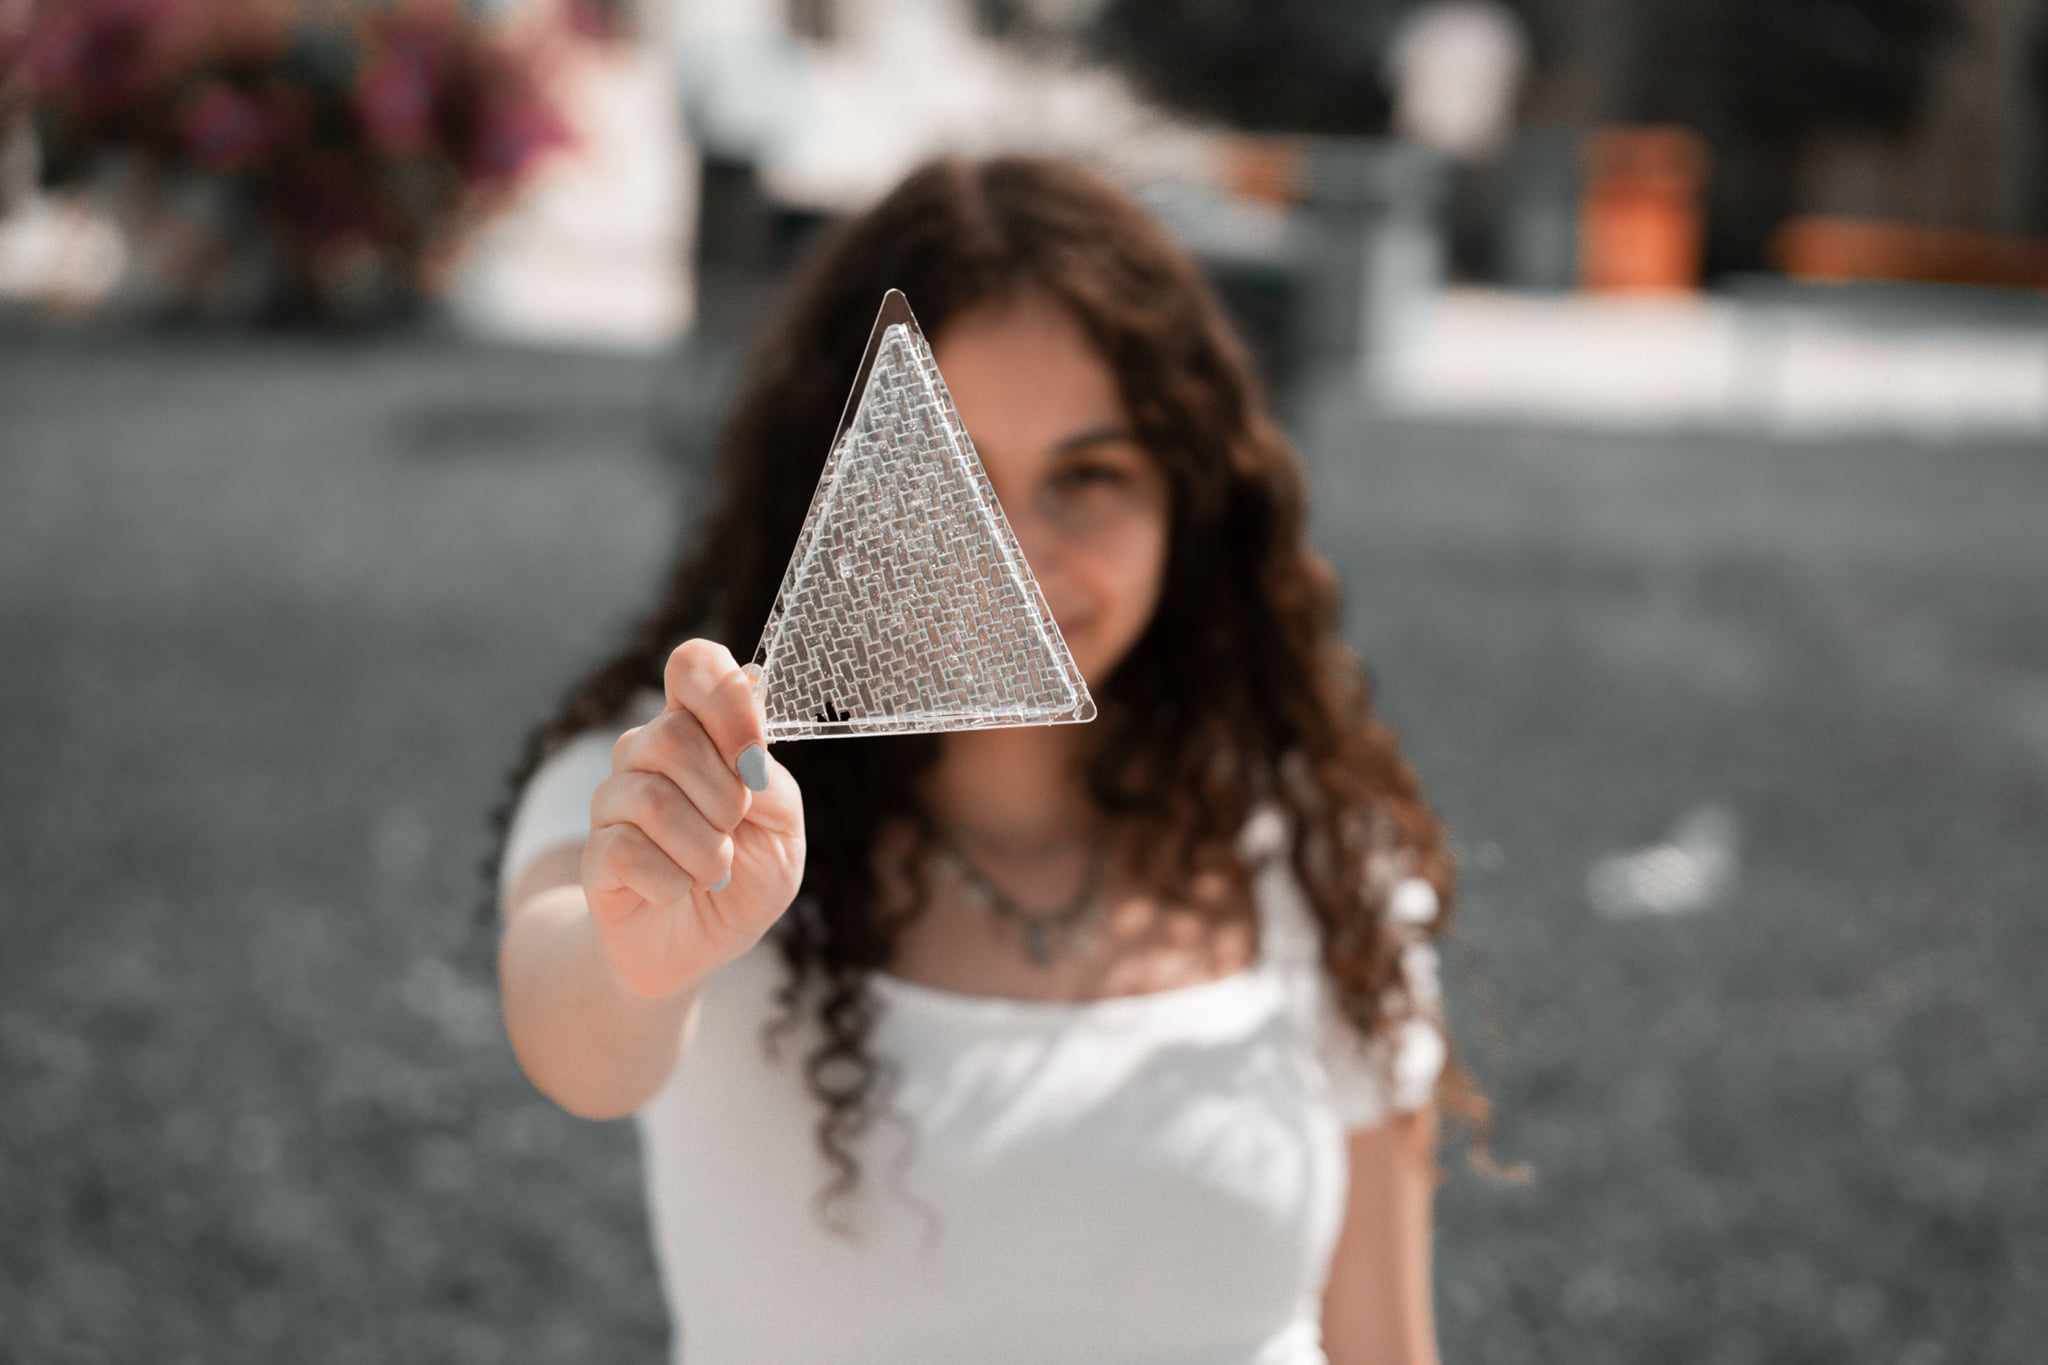
??? quote "Casting"

    * I used a triangular-shaped acrylic mold and placed a patterned sheet underneath to capture the intricate pattern of the bio-resin during casting.
??? quote "Drying Process"

    * I allowed it to dry slowly at room temperature for 24 hours to ensure proper curing and preservation of the intricate pattern.
Steps
Step 1
- Heat the water (dyebath) in a pot on your stove and then introduce your plasticizer, glycerine.
Step 2
- Add your polymer (Agar).
Step 3
- Gently stir the mixture to ensure that the Agar dissolves into the glycerine.
Step 4
- Stir the mixture until it reaches a smooth consistency, and then let it simmer for 10-15 minutes. As it thickens to a syrup-like texture, you can introduce your desired colors and carefully pour the mixture into molds.
Step 5
- Pour the mixture onto your selected surface or into molds, and allow it to dry in a dry room.


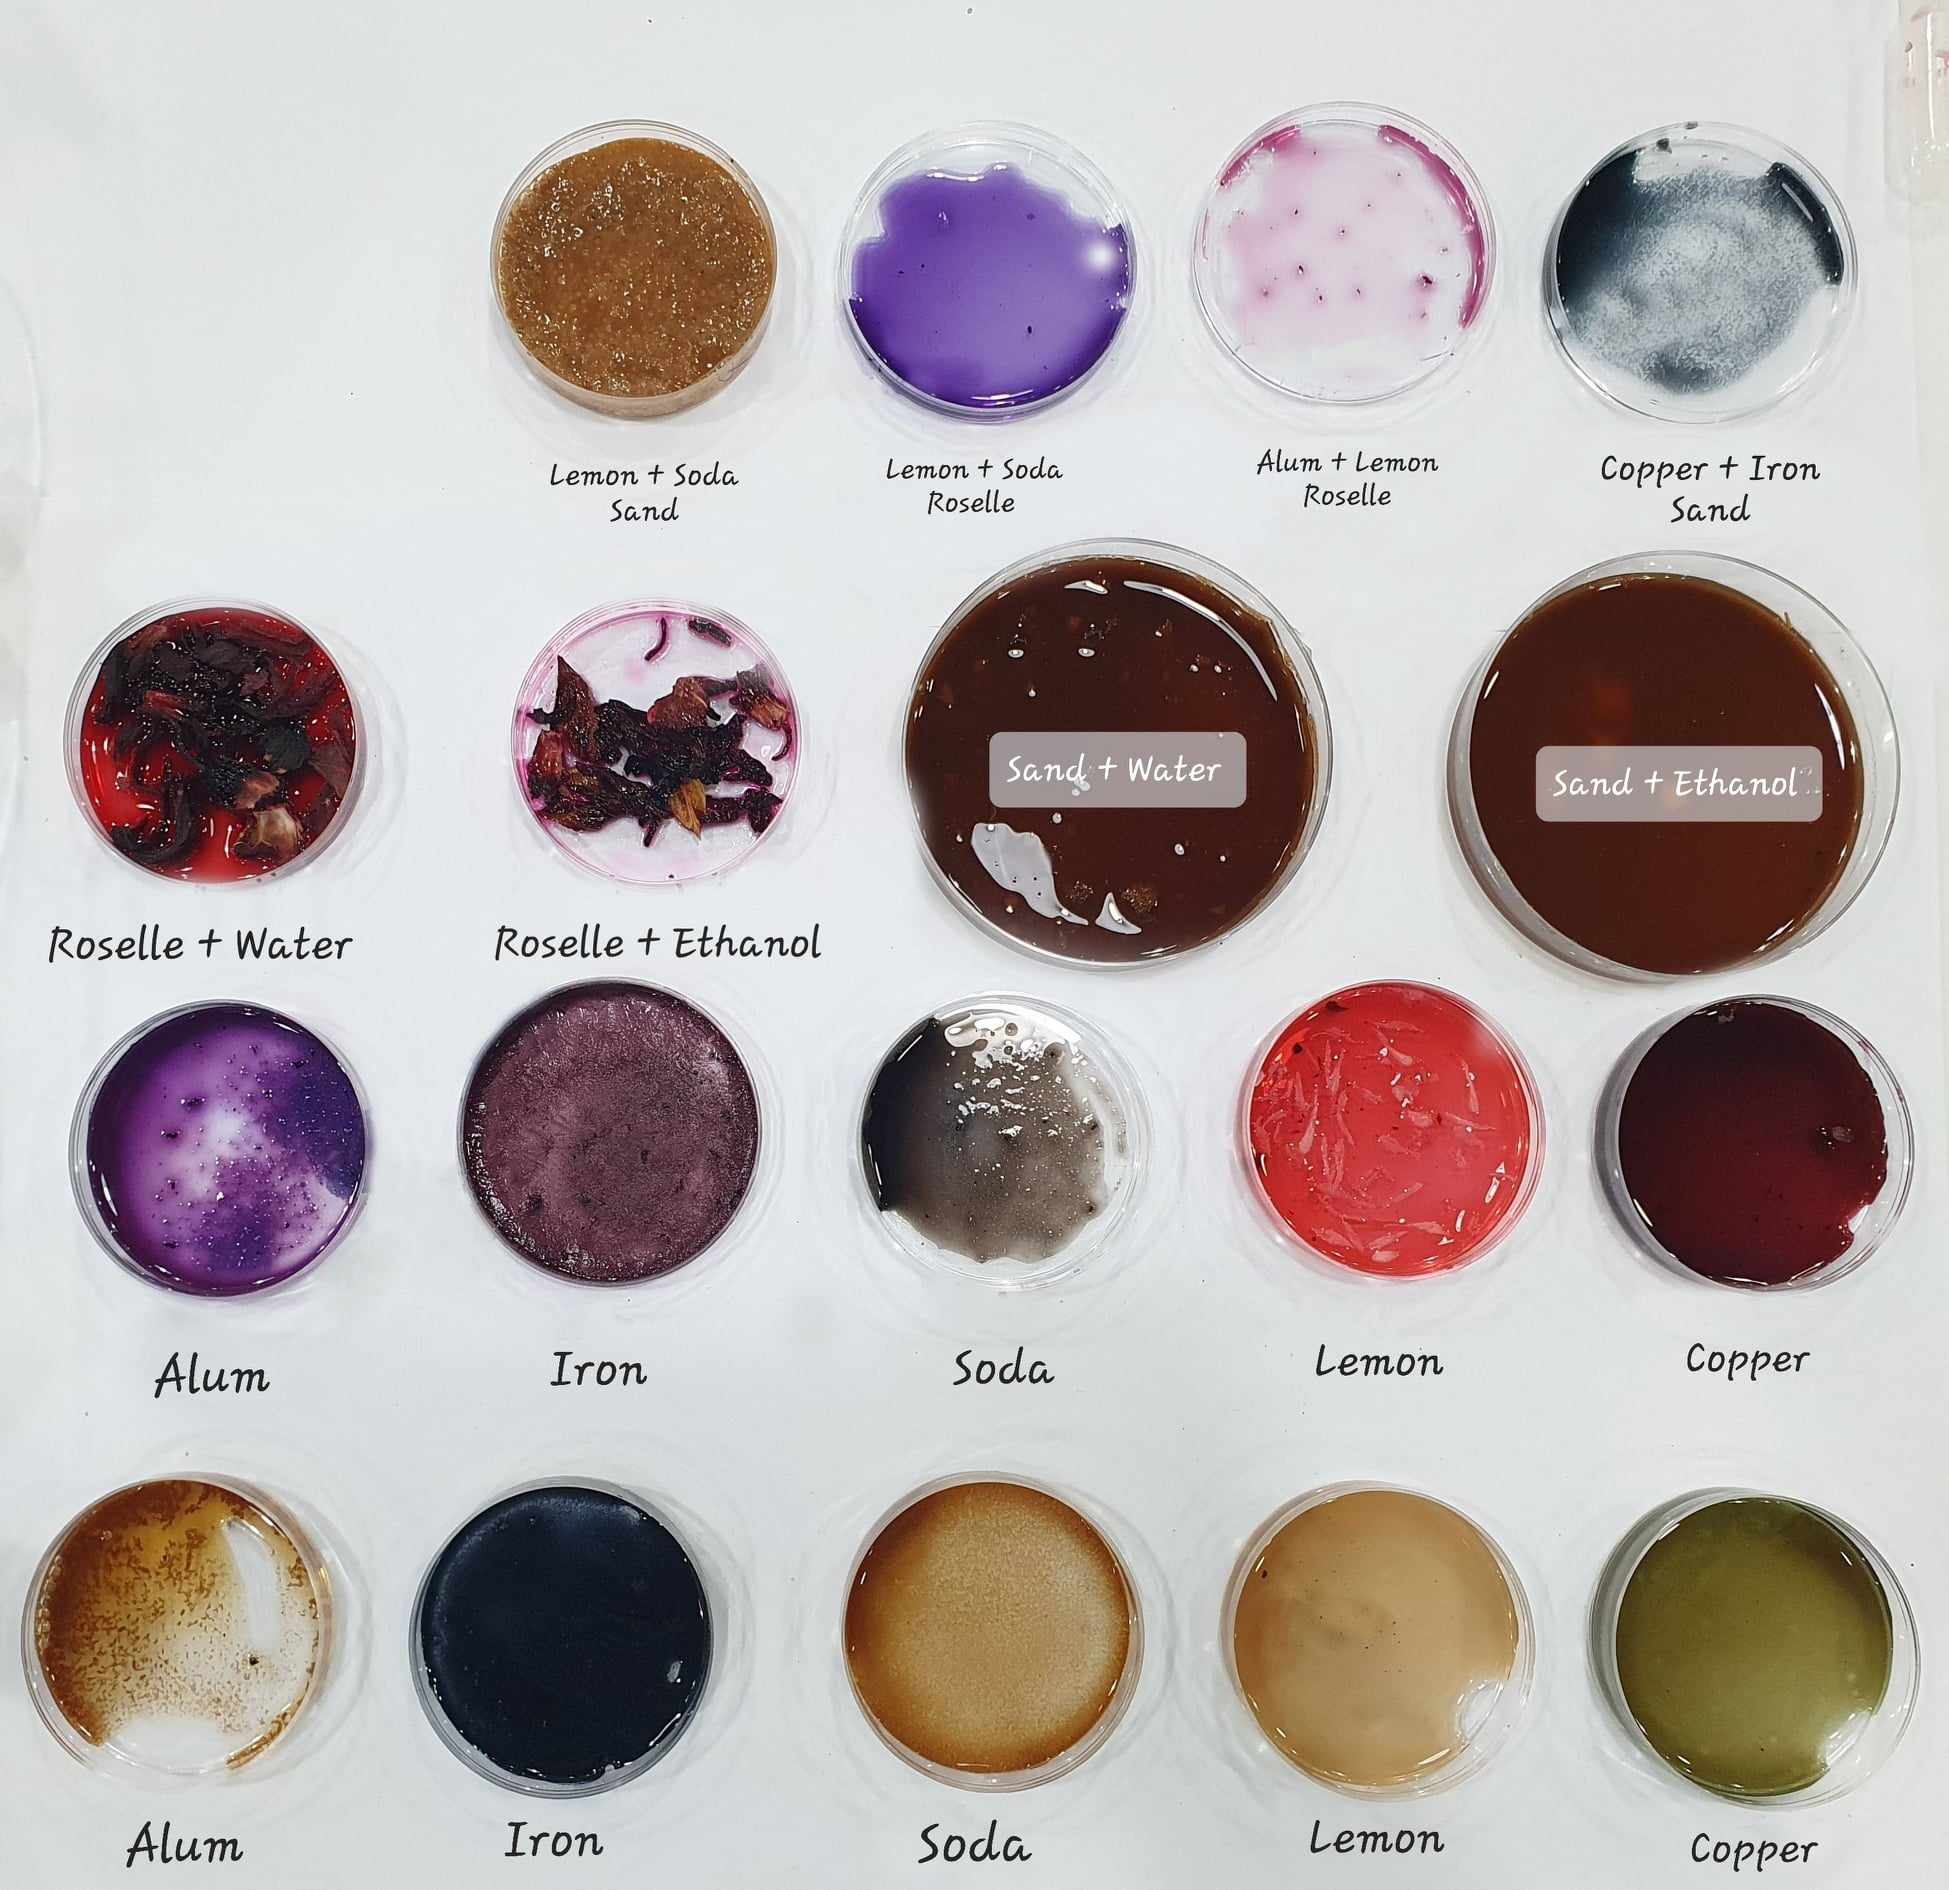
The used bio dyes
* In the illustration below, you can see that some of the patches were immersed in the remaining bio dyes within the petri dishes.
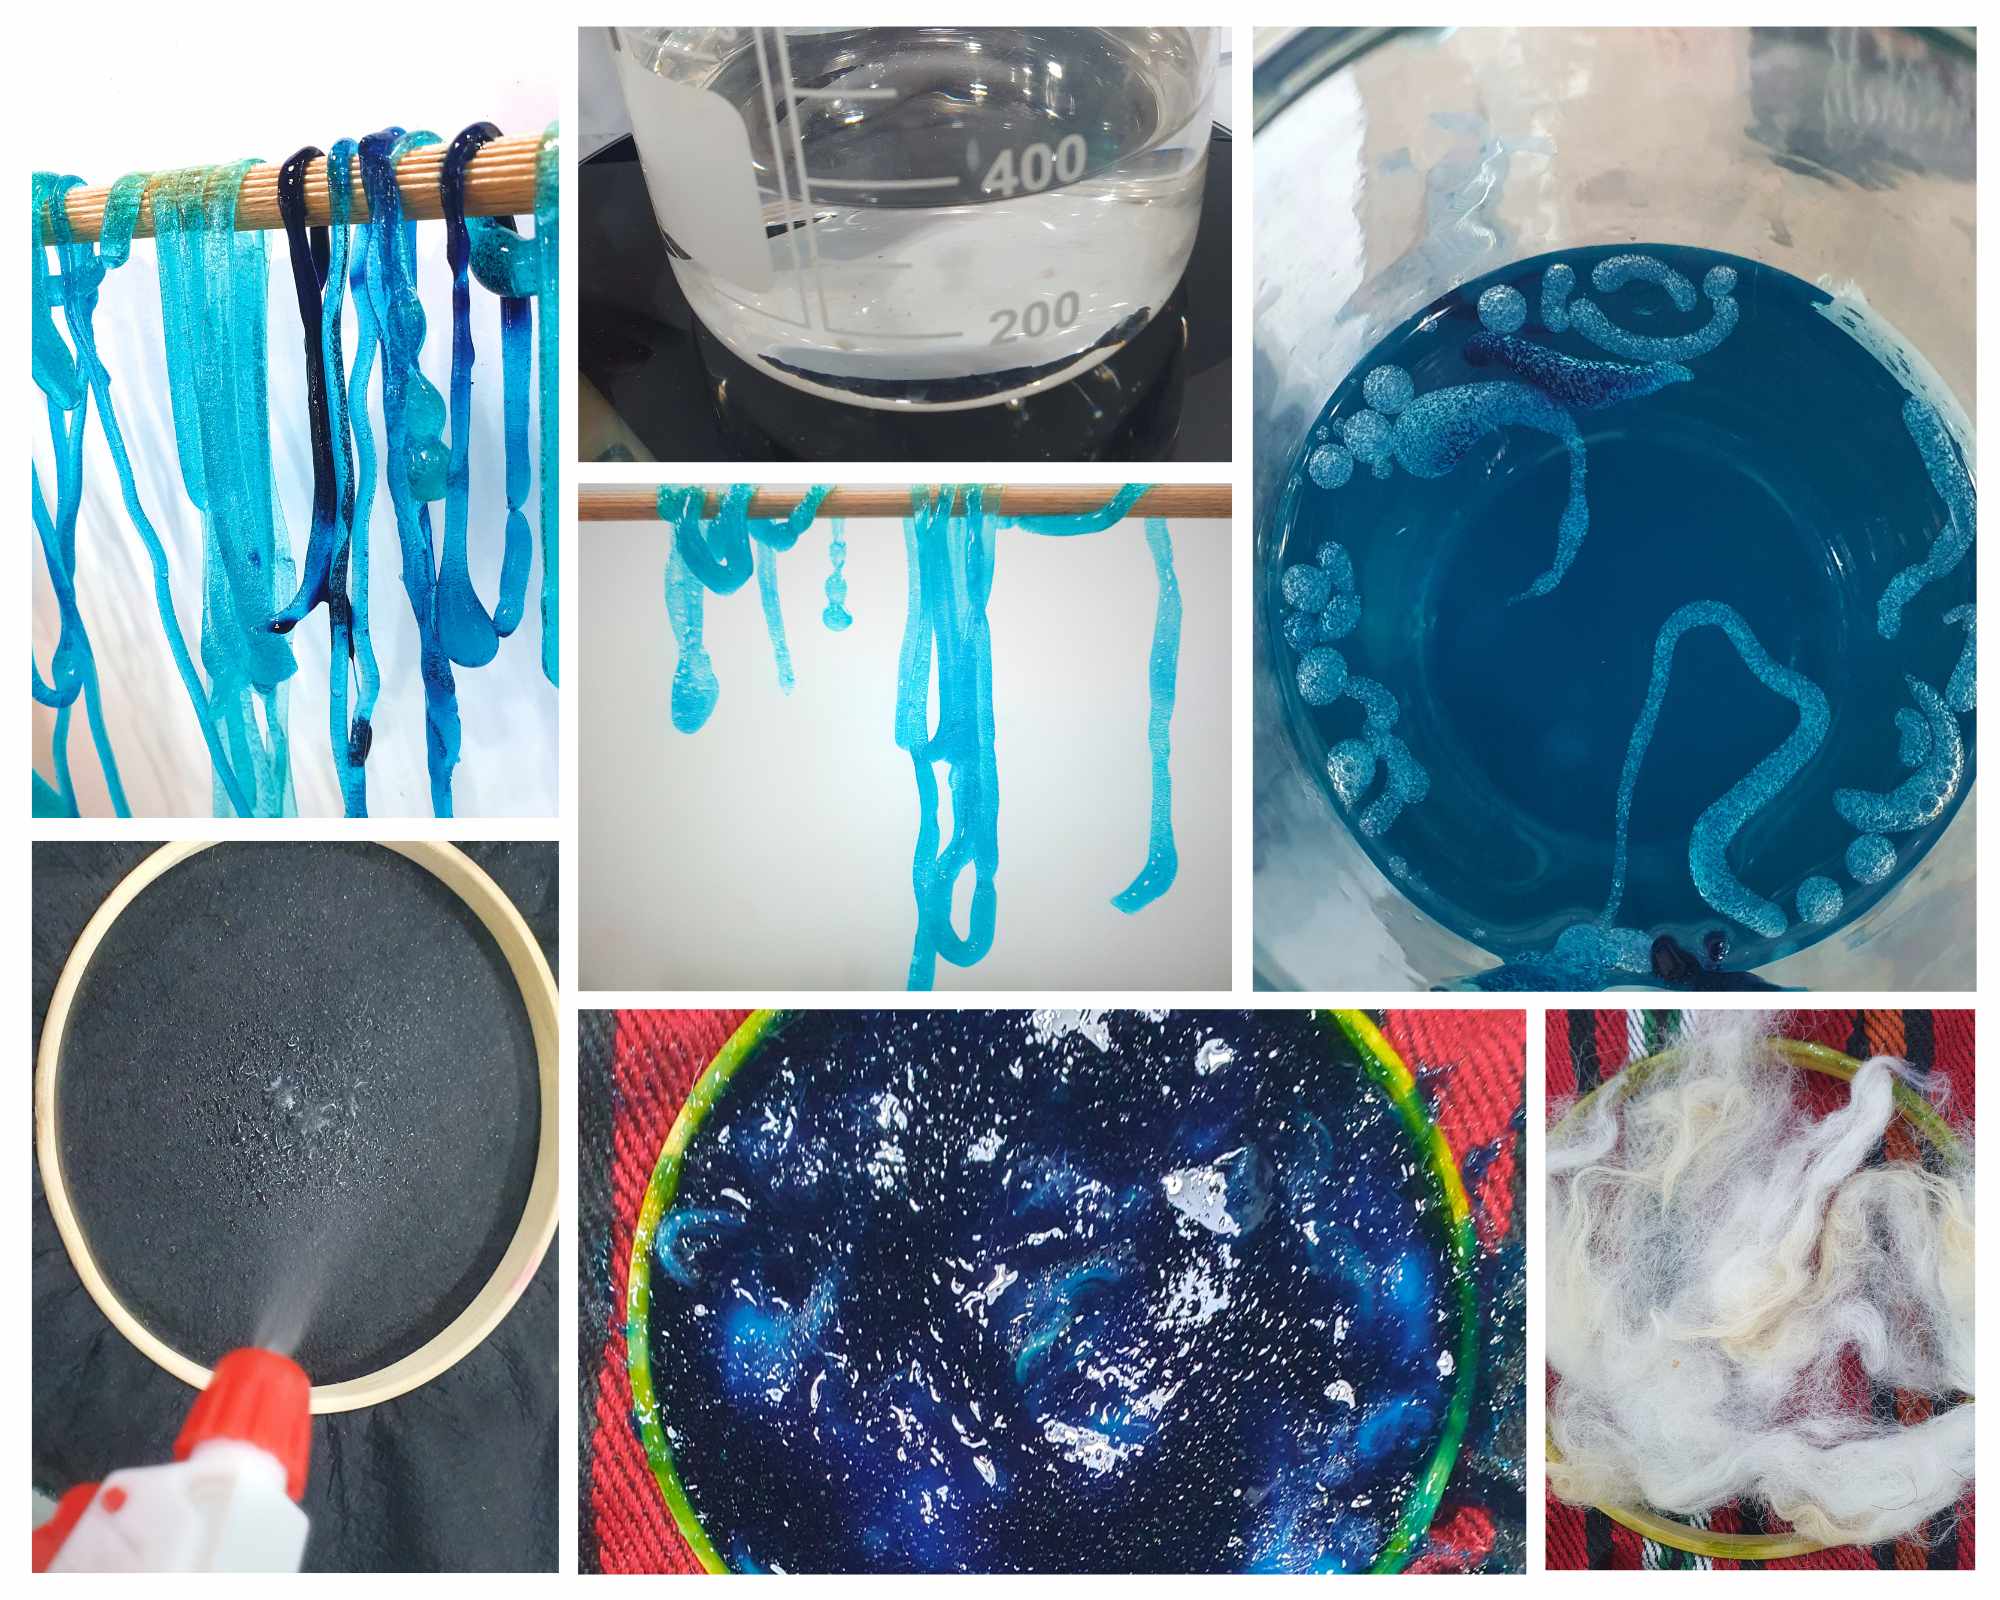
3. Alginate
- Alginate is known for its remarkable water resistance and is created by combining Sodium alginate from brown algae with Calcium chloride hydrates. The resulting gels can withstand high temperatures, up to 150ᵒC, without melting.
- Prepare this mixture a day in advance to allow the bubbles to dissipate, and ensure you do so in a meticulously clean environment.

- 4 gr Alginate
- 10 gr Glycerin
- 200 ml Water
- Food colorants
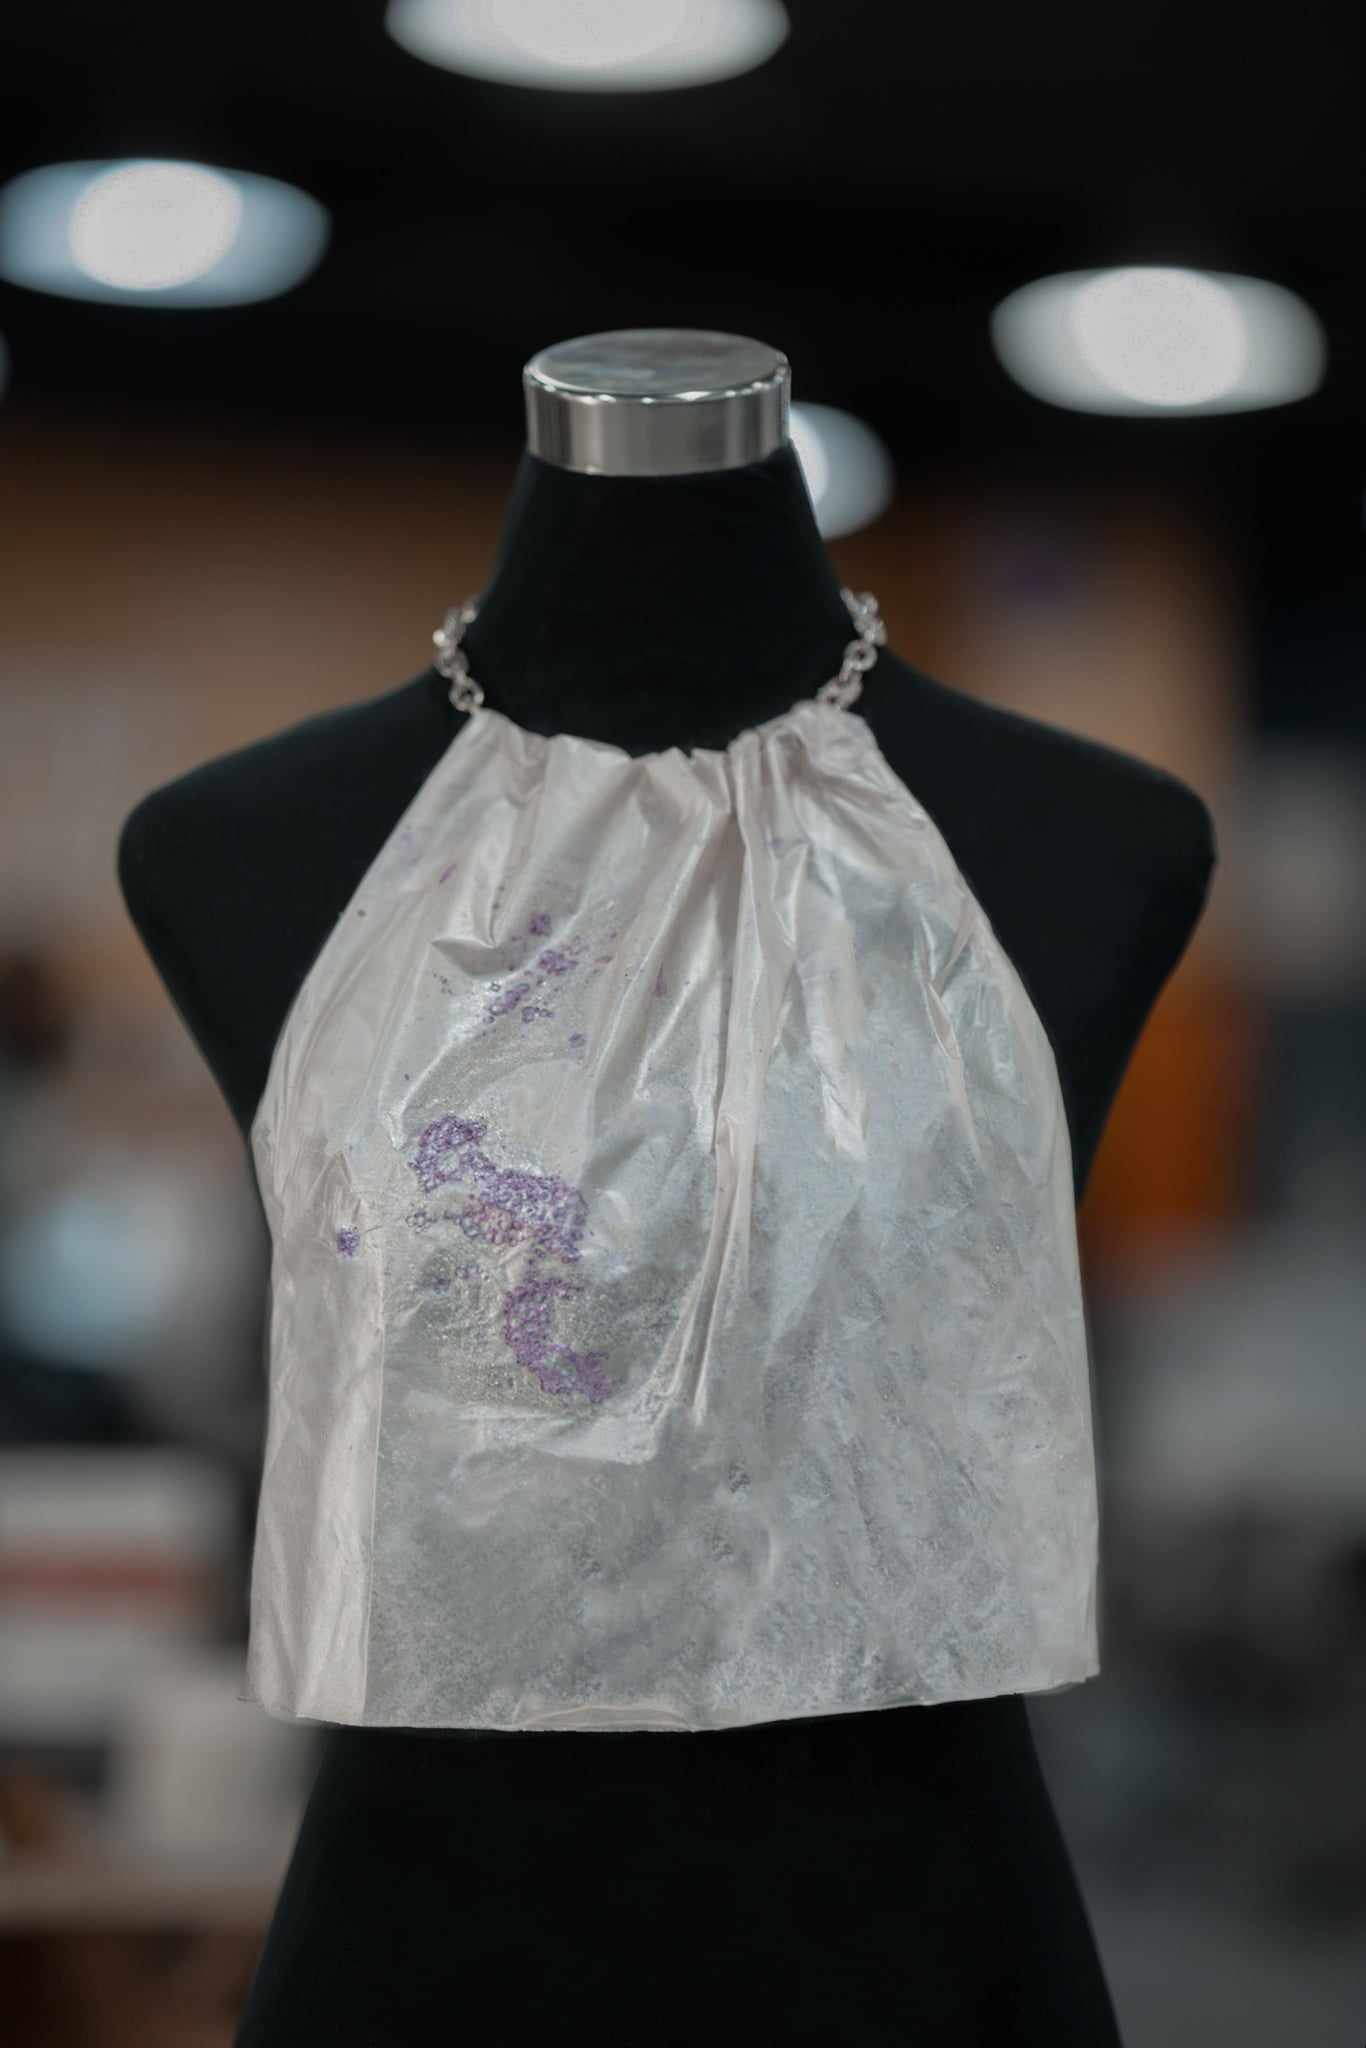
Casting
- laying a woven fabric over the a circular mold and pouring the Alginate onto it, allowing the material to seep into the fabric's fibers.
Drying Process
- I allowed it to dry slowly at room temperature for 48 hours to ensure proper curing.
Steps
Step 1
- Begin by measuring the ingredients, then blend them thoroughly in a mixer. To eliminate any trapped bubbles, allow the mixture to rest overnight.
Step 2
- Allow it to rest overnight. The following day, it will be ready for use. You can then cast the alginate mixture onto your chosen surface or mold, keeping in mind that the material will shrink significantly. If you're applying it to a waterproof fabric or an uneven surface, consider spraying calcium chloride hydrate before application. This will expedite the process and make removal easier.
Step 3
- Arrange wool in the mold as needed.
- Create a calcium chloride bath by dissolving calcium chloride in water; this bath serves to solidify the sodium alginate. Extrude the sodium alginate solution into the bath to produce yards.
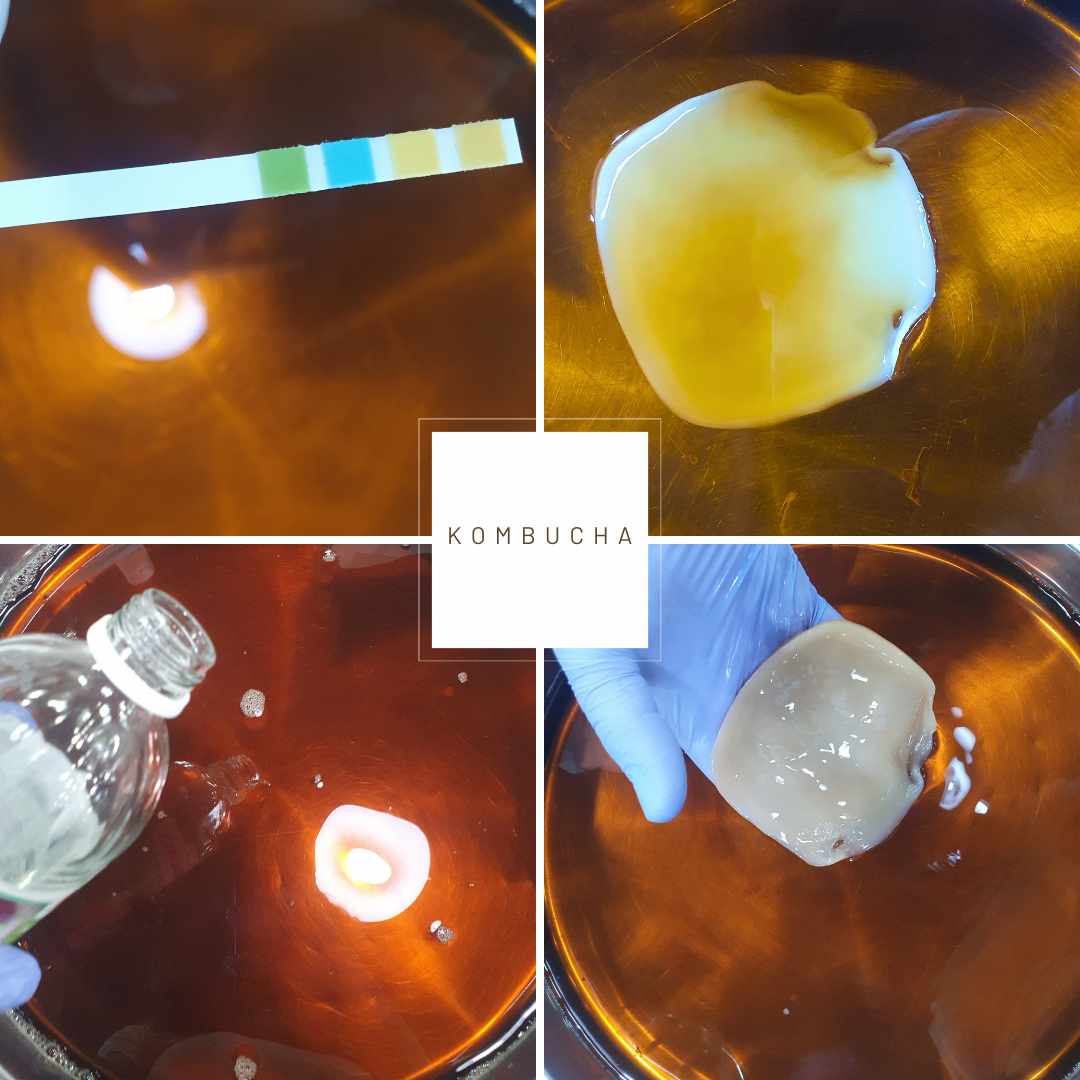
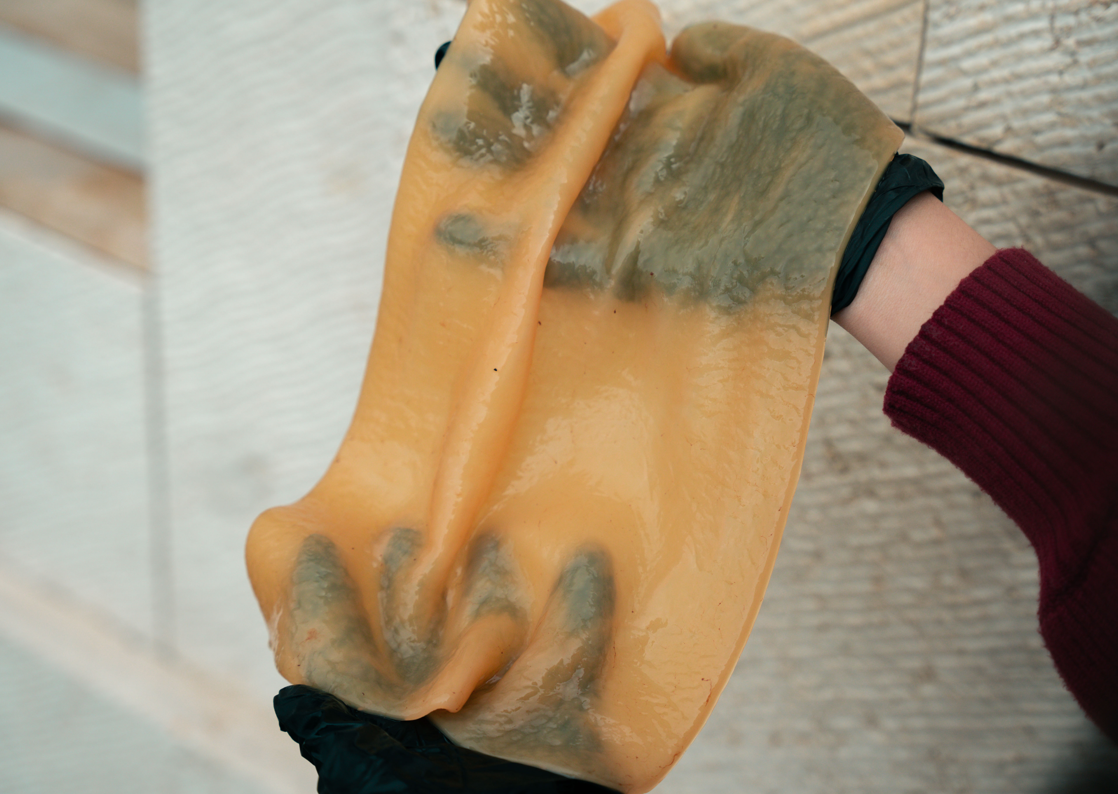
4. Kombucha
- The process of creating bacteria cellulose leather involves fermenting a tea solution with a SCOBY (Symbiotic Culture Of Bacteria and Yeast) to produce a sustainable and biodegradable alternative to traditional leather.
Tools & Materials
* Plastic Container, Clean Cotton Cloth, Rubber Band, pH Strips, Tea, Water, Vinegar and Kombucha SCOBY
Recipe
1 liter of water
1.5 to 3 grams of tea (black tea was used, but any tea can be used depending on the desired color)
100 grams of sugar
0 to 100 ml of vinegar (depending on the pH of the liquid)
A small amount of SCOBY solution
SCOBY mother with a diameter of 10 cm
Steps
Step 1
- Prepare Kombucha Tea: Start by brewing a batch of sweet tea using black or green tea and sugar. Allow the tea to cool to room temperature.
Step 2
- Add Kombucha Culture: Introduce a kombucha SCOBY (Symbiotic Culture Of Bacteria and Yeast) to the sweet tea. The SCOBY is essential for fermenting the tea and creating the cellulose bacteria. Check Kombucha pH with a strip, aiming for 2.5-3.5. Compare to the chart or use a pH meter for accuracy.
Step 3
- Fermentation: Cover the container with a clean cloth or paper towel and secure it with a rubber band. Place the container in a warm, dark area to ferment for 1-2 weeks. During this time, the SCOBY will grow and form a solid layer.
Step 4
- Check Fermentation Progress: After a period, it has grown in size and thickness.
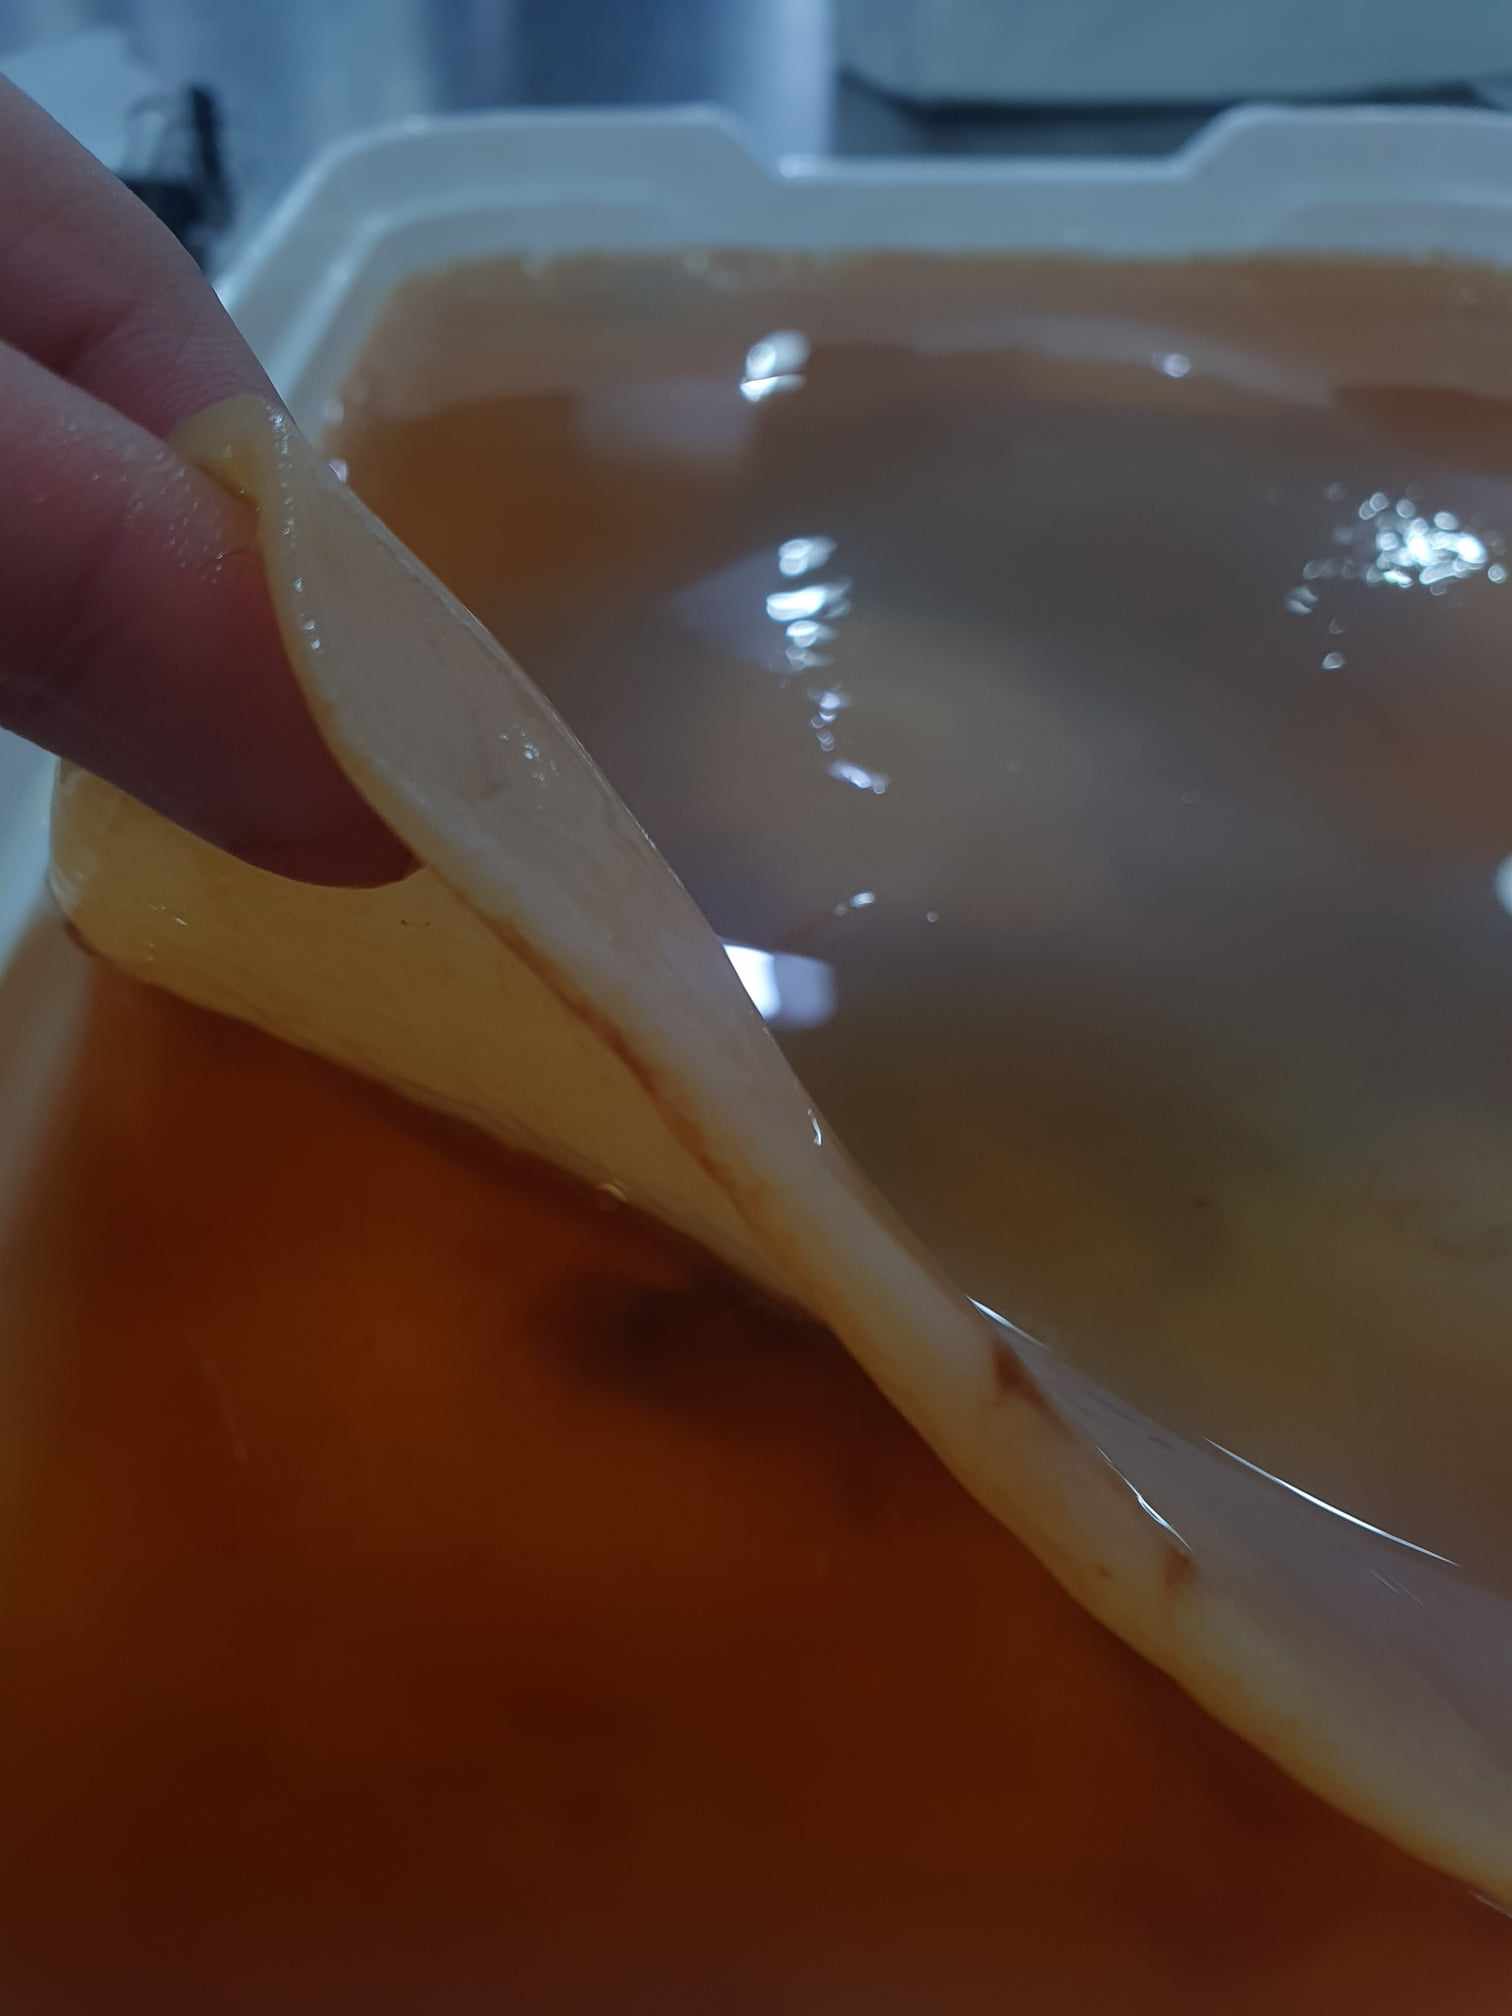
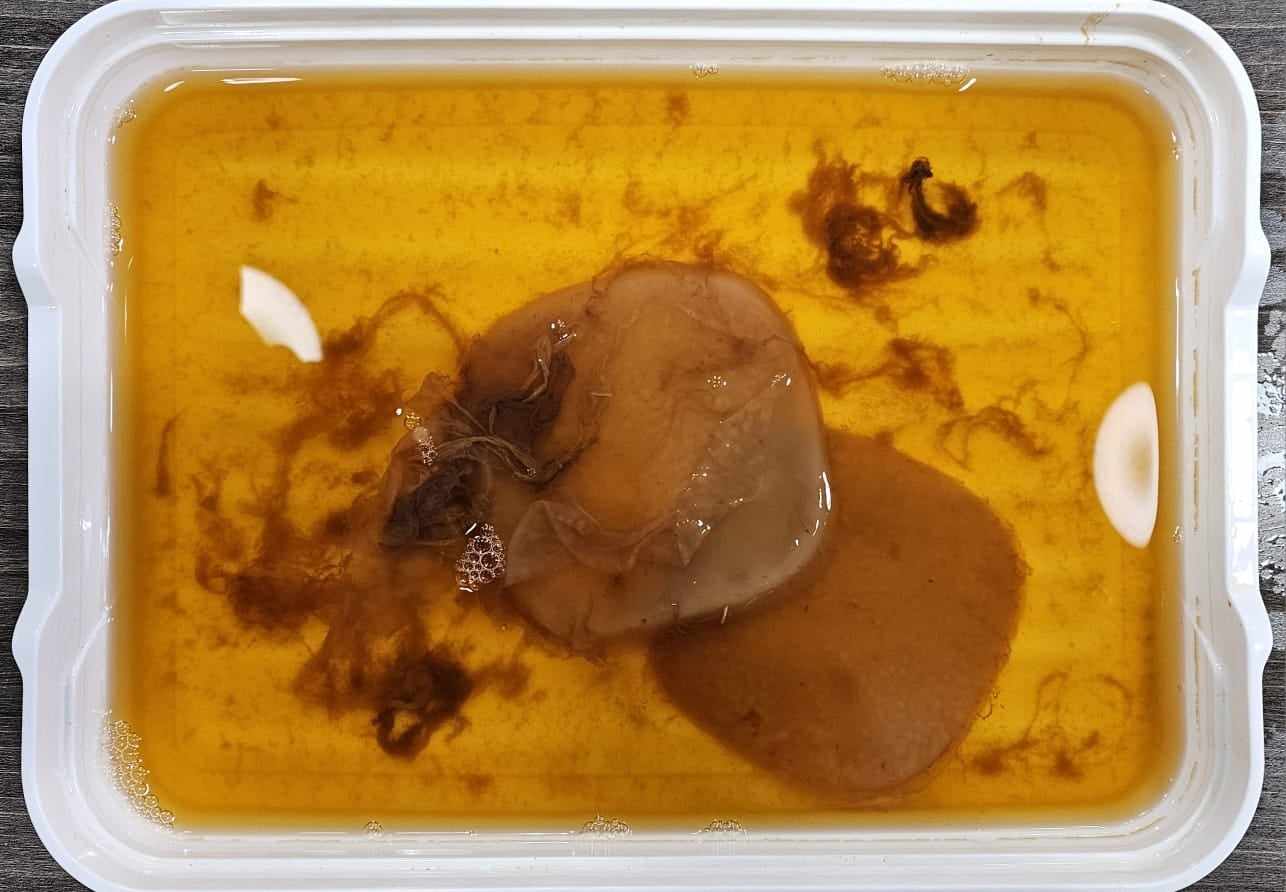
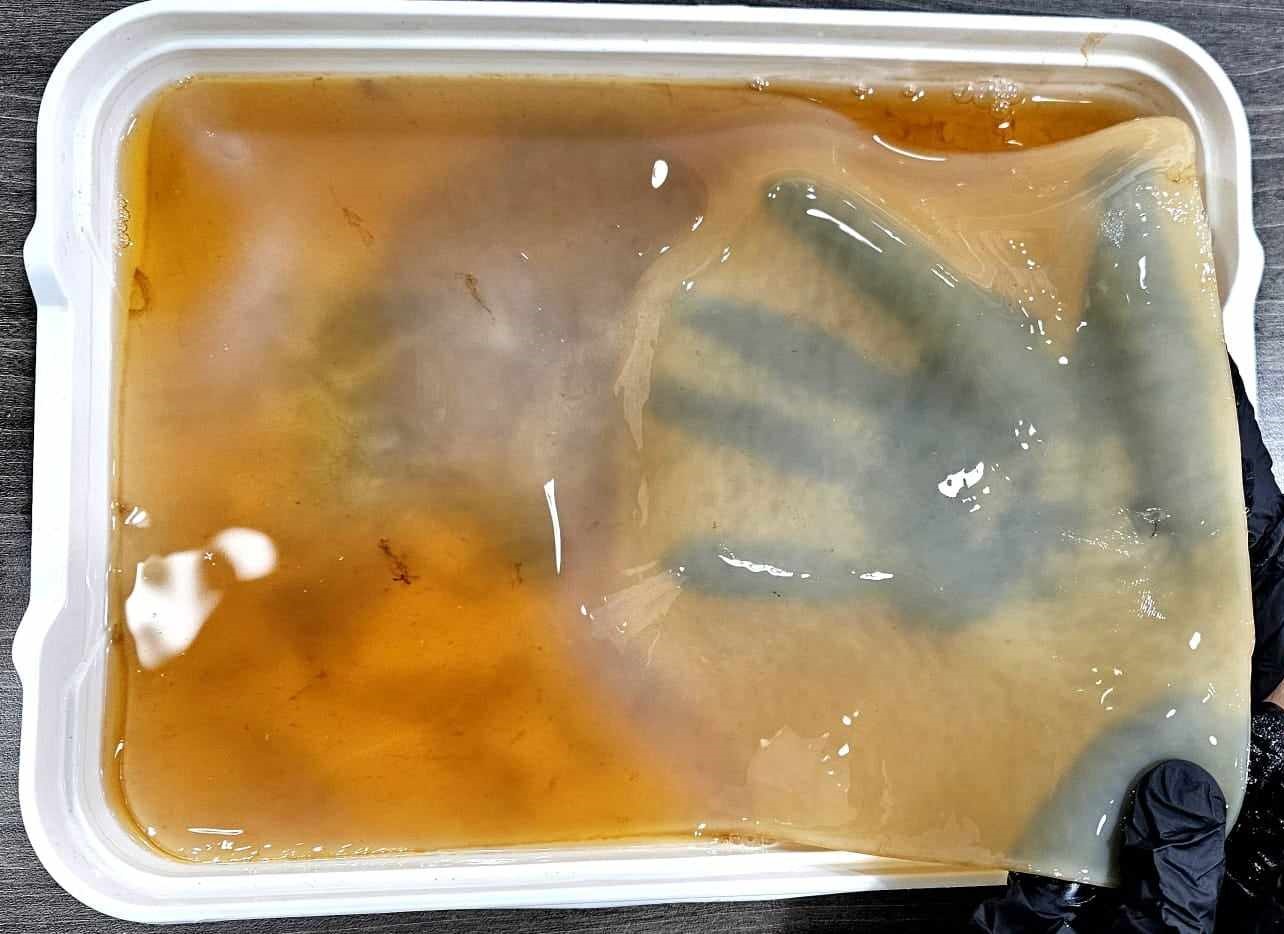
- After a 40-day period, I harvested the bacteria cellulose and rinsed the sheet with water only. It was then dried outside.
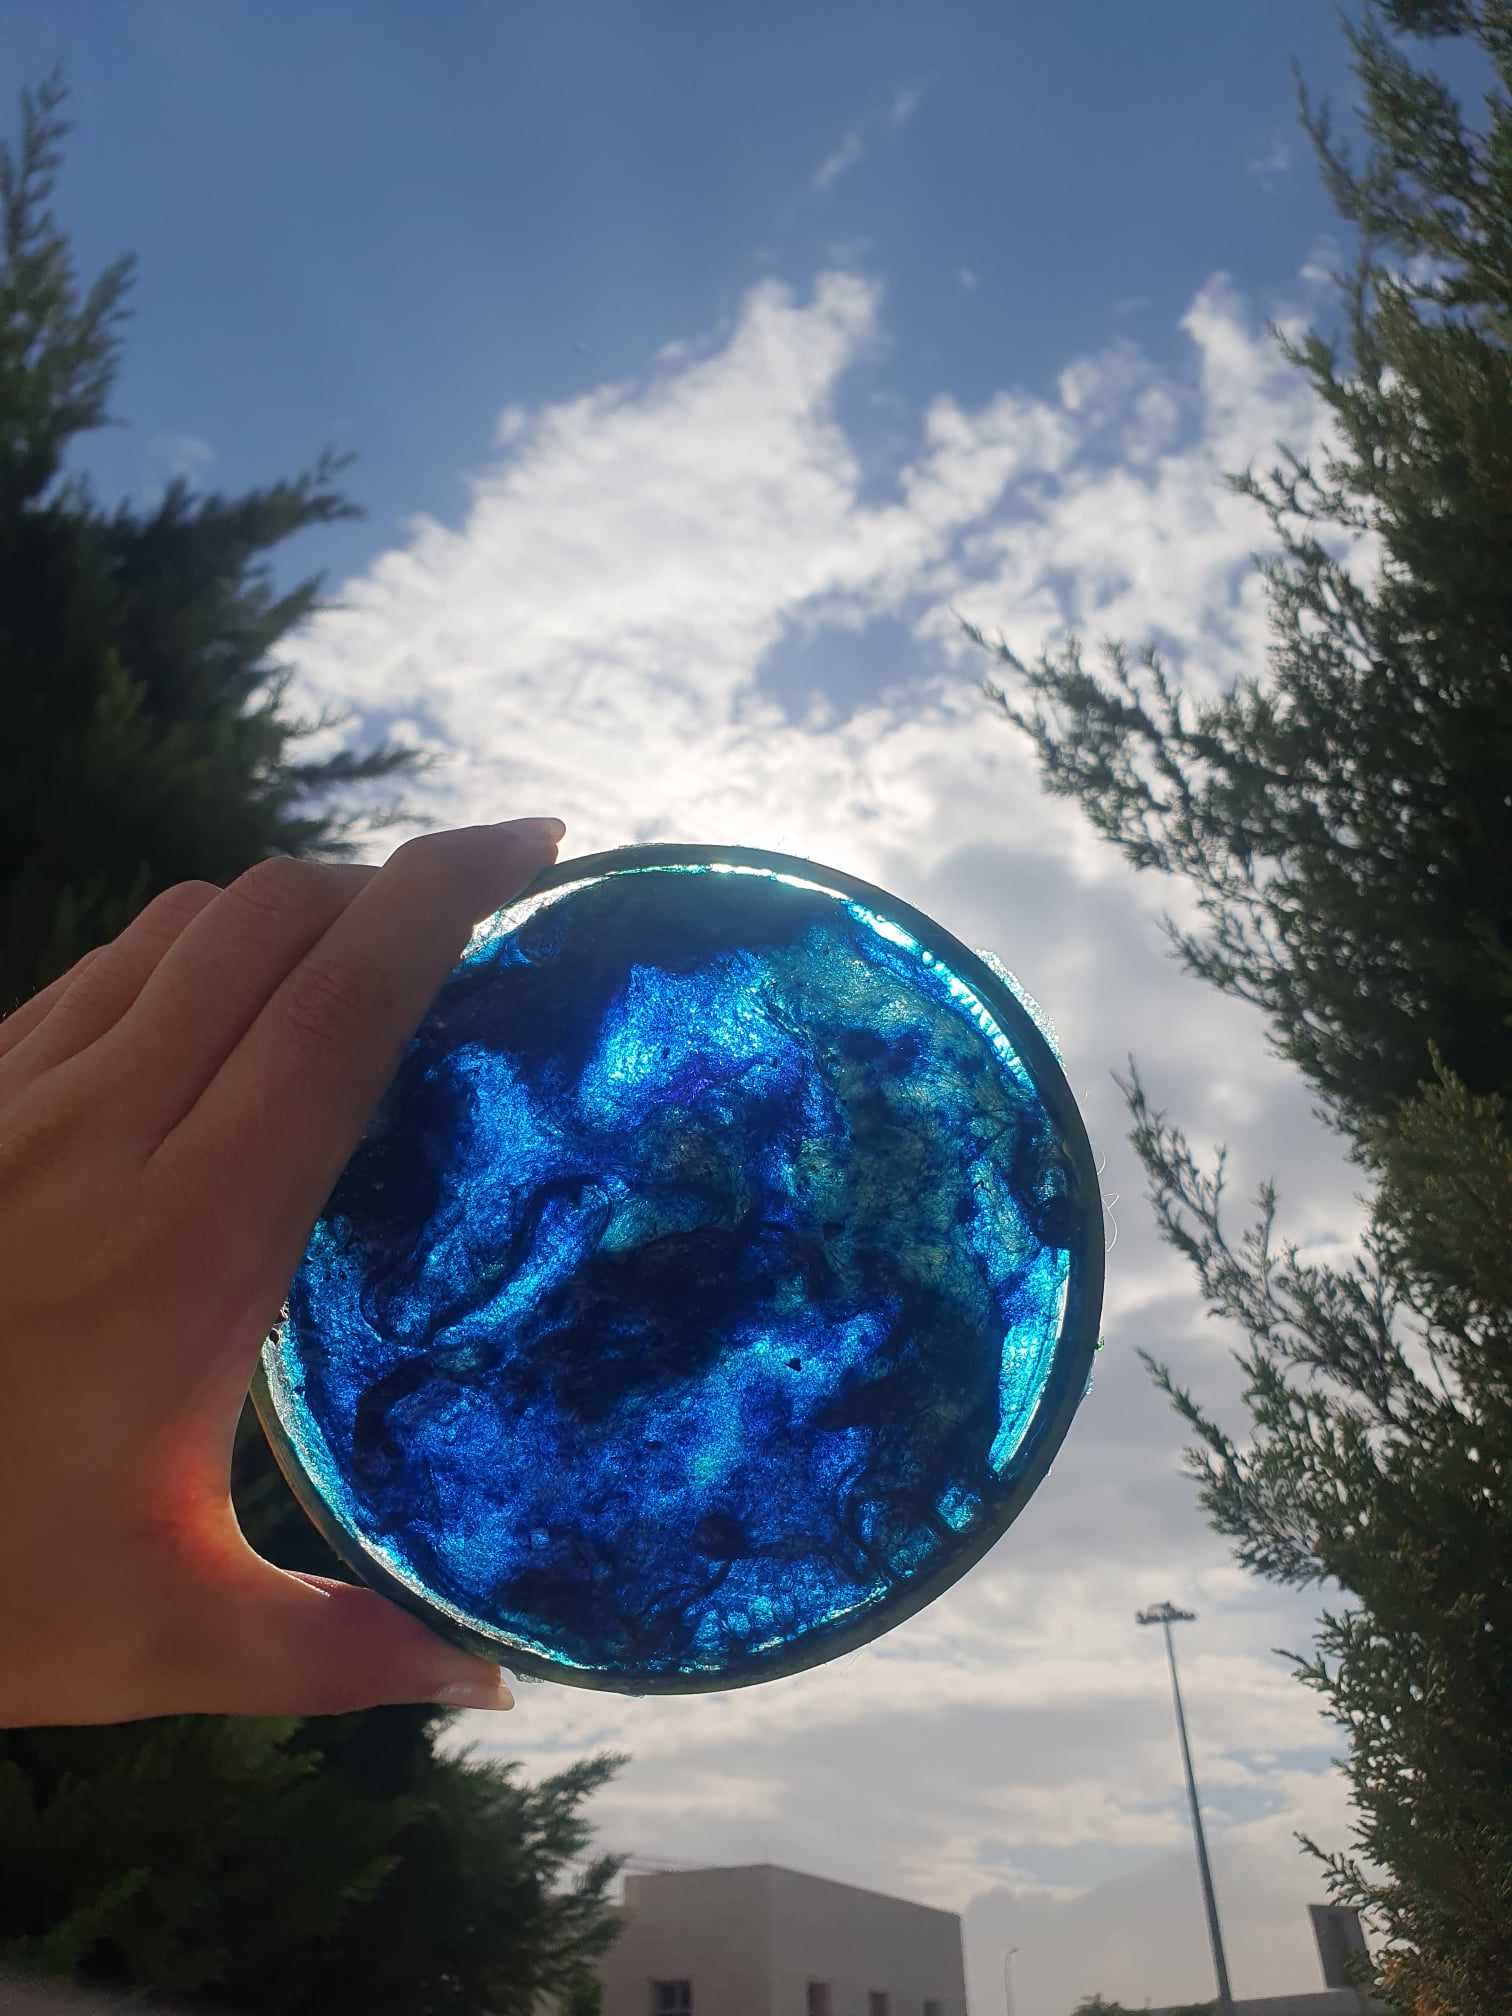
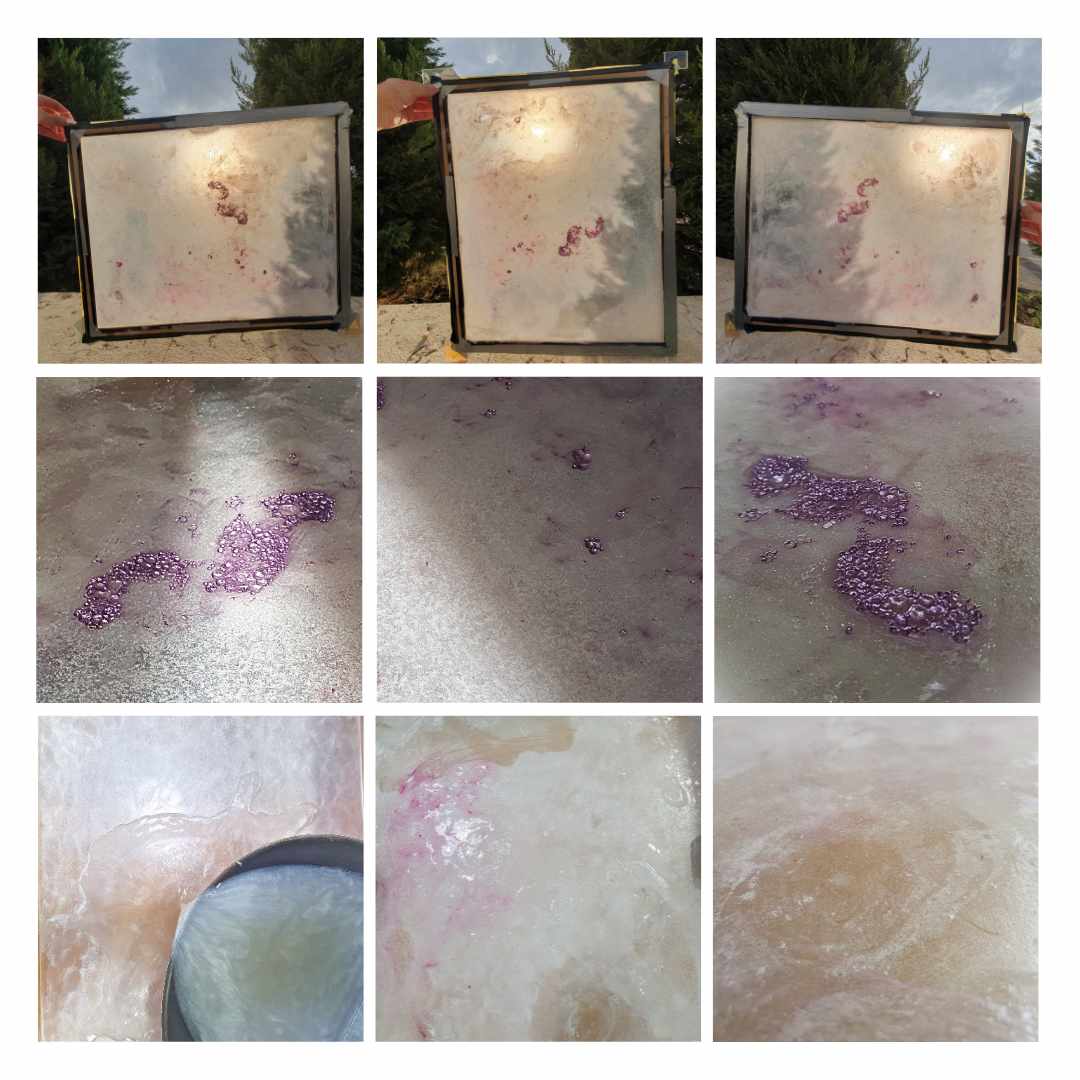
shimmering-glittering Bioplastic
- Rather than relying on petroleum-based plastics (microplastic particles), my goal was to create a method for crafting shimmering-glittering textiles from Luster dust.
Luster dust
- Luster dust is typically extracted from non-toxic, food-grade materials, such as mica powder (a naturally occurring mineral found in rocks all over the world) , which is a natural mineral often used in cosmetics and food decoration. It can create a shiny, metallic, or pearl-like appearance when applied to various surfaces, including food items and crafts.
- This approach aligns with the growing awareness of the need for environmentally friendly alternatives. This innovation not only caters to the demand for aesthetically pleasing, shimmering materials but also emphasizes the importance of responsible material sourcing and consumption.
- Particularly cellulose extracted from trees, enhancing the eco-friendly shimmer of luster dust from mica powder, introducing a sustainable alternative to conventional glitter.
- As awareness of environmental concerns continues to rise, embracing sustainable glittering bioplastic sends a powerful message about the possibility of eco-friendly material choices in industries ranging from fashion and others while still embracing creativity and innovation.
* 7 gr Polymer Agar
* 16 gr Plasticizer Glycerine
* 200 ml Solvent Water
* 1 gr Dust Powder
* Pot
* Stove
* Scale
* DIY Moulds


* I used the remaining casting material to pour into a small silicone rose mold.