07. Computational Couture
Research & Ideation
This week, my main focus centers on design, textiles, and 3D printing. My key objectives for the week include becoming creating diverse 3D printed textile prototypes. The use of textiles in architecture has a rich history dating back to the earliest days of human construction. Nomadic tribes leveraged the tensile strength, flexibility, and adaptability of textiles to construct their initial shelters.
I have always been intrigued by the potential of integrating textiles into the built environment as an intelligent and sustainable solution. Among the many fascinating possibilities, the concept of self-shaping textiles has particularly piqued my interest.
3S Printing
3D printing is a manufacturing process that creates objects layer by layer from digital designs. It allows for the production of complex shapes and geometries that would be difficult or impossible to achieve with traditional manufacturing methods.
export from Rhino
From Rhino, we typically export the 3D model file in a format that is compatible with 3D printing software, such as .stl (Stereolithography) or .obj (Object). These file formats contain the geometric data of the 3D model, which can then be imported into slicing software for preparation and printing..
Materials for 3D printing
TPU (Thermoplastic Polyurethane) is flexible and elastic, ideal for bendable and resilient applications. PLA (Polylactic Acid) is rigid and brittle compared to TPU, making it suitable for general-purpose 3D printing.
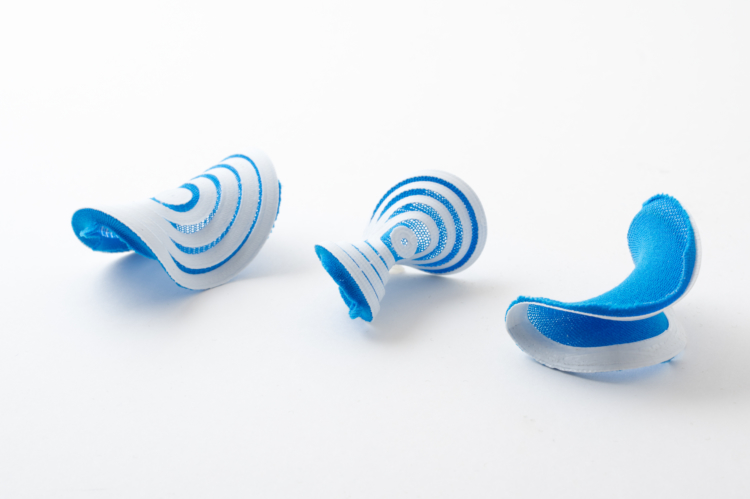
Inspiration & Reference (Self Forming Structures)
The concept of self-forming structures in 3D printing has captivated my interest, driving me to experiment within this innovative field. The process of flattening a 3D model and manipulating it to influence fabric behavior post-printing opens up unique possibilities for dynamic design. This approach challenges traditional notions and motivates exploration within material constraints, inspiring me to explore the intersection of technology, design, and material science for innovative and responsive structures.
Tools
Process and workflow
1. 3D Modeling Software (Rhino3D )

Rhino is a widely-used 3D modeling software known for its versatility and extensive toolset. It excels in NURBS modeling. Its cross-platform availability and strong community support make it a top choice for 3D modeling across various industries.
-
1. Conceptualization
Starting of by a clear idea of what I want to model.
-
2. Model Building and Refinement
Creating the initial structure of my 3D object and then progressively add detail, shaping it into the desired form. This process involves using various modeling tools and techniques to sculpt, modify, and enhance the model until it matched my concept and design vision.
-
3. Testing and Optimization
Ensuring its suitability by checking for errors, proper scaling and mesh optimization.
-
4. File Exporting

- To export your chosen object, do the following:
- Select the object.
- Go to "File" > "Export Selected."
- Choose your file destination.
- In the "Save as type" menu, select "STL (Stereolithography)."
- Name your file and click "Save."
-
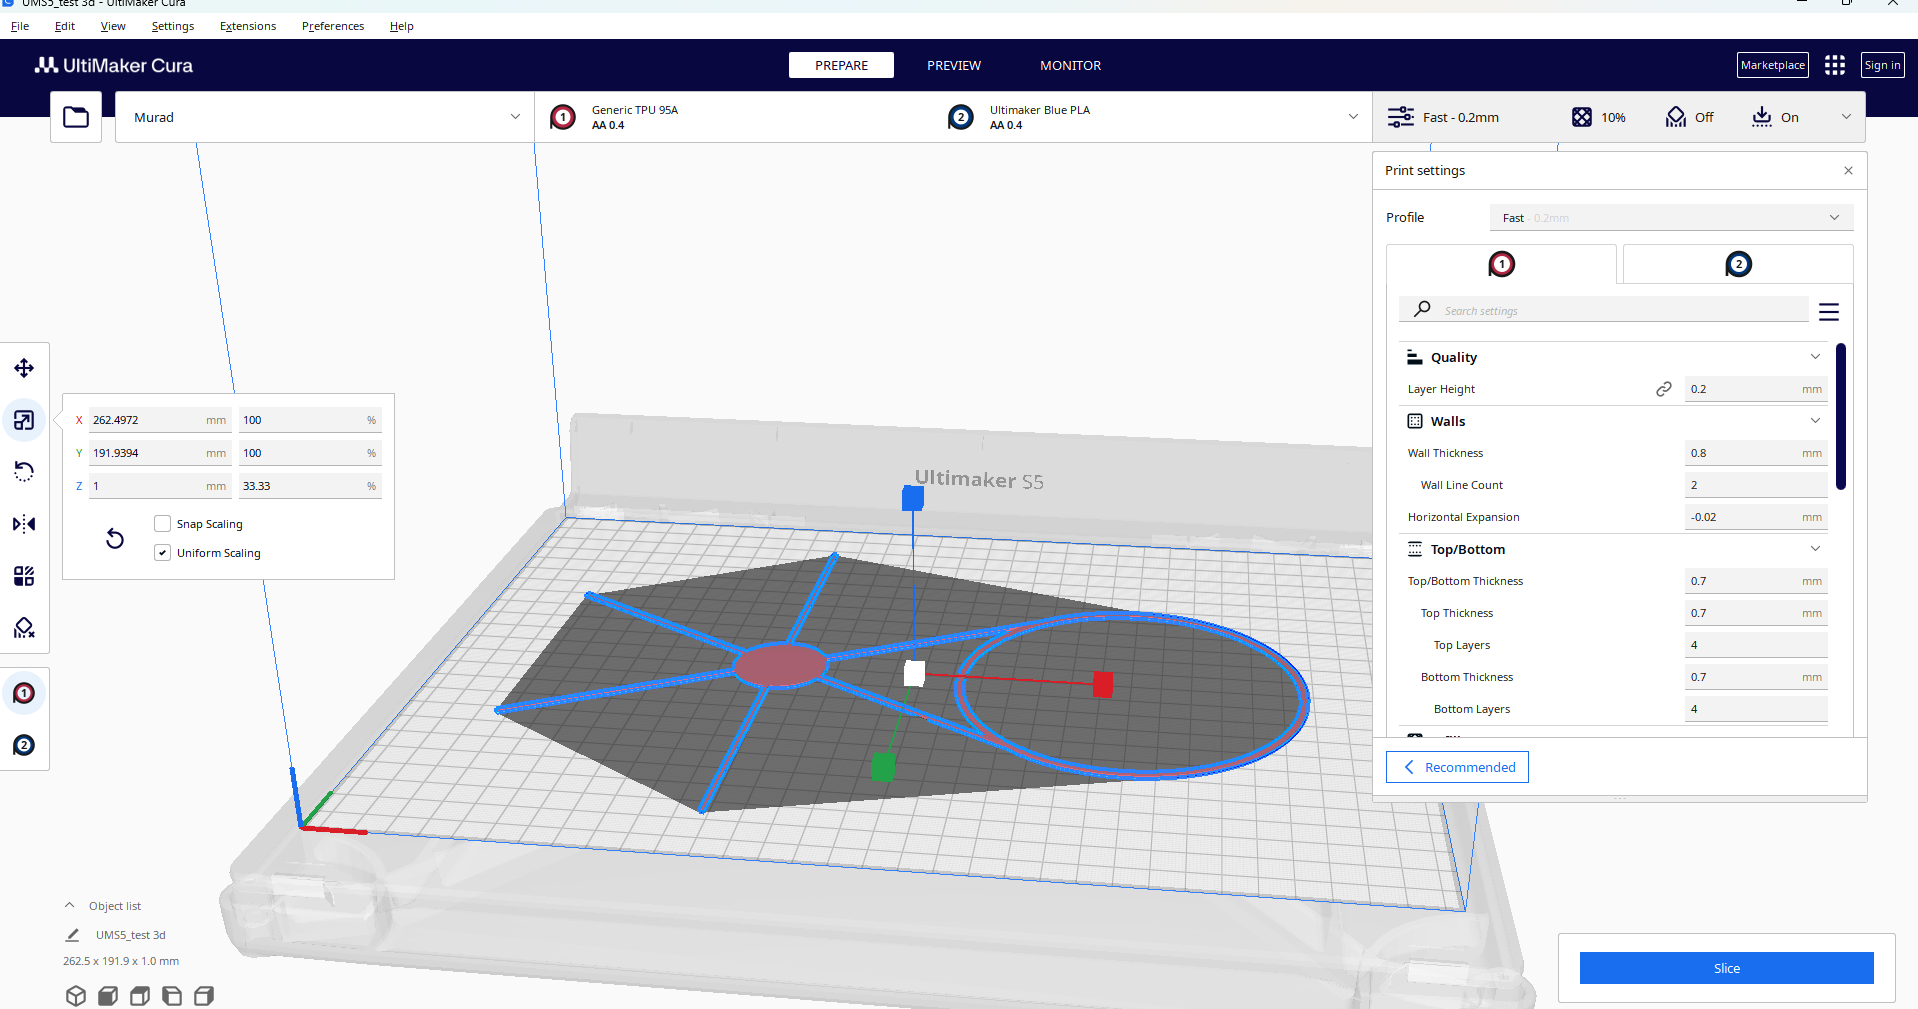
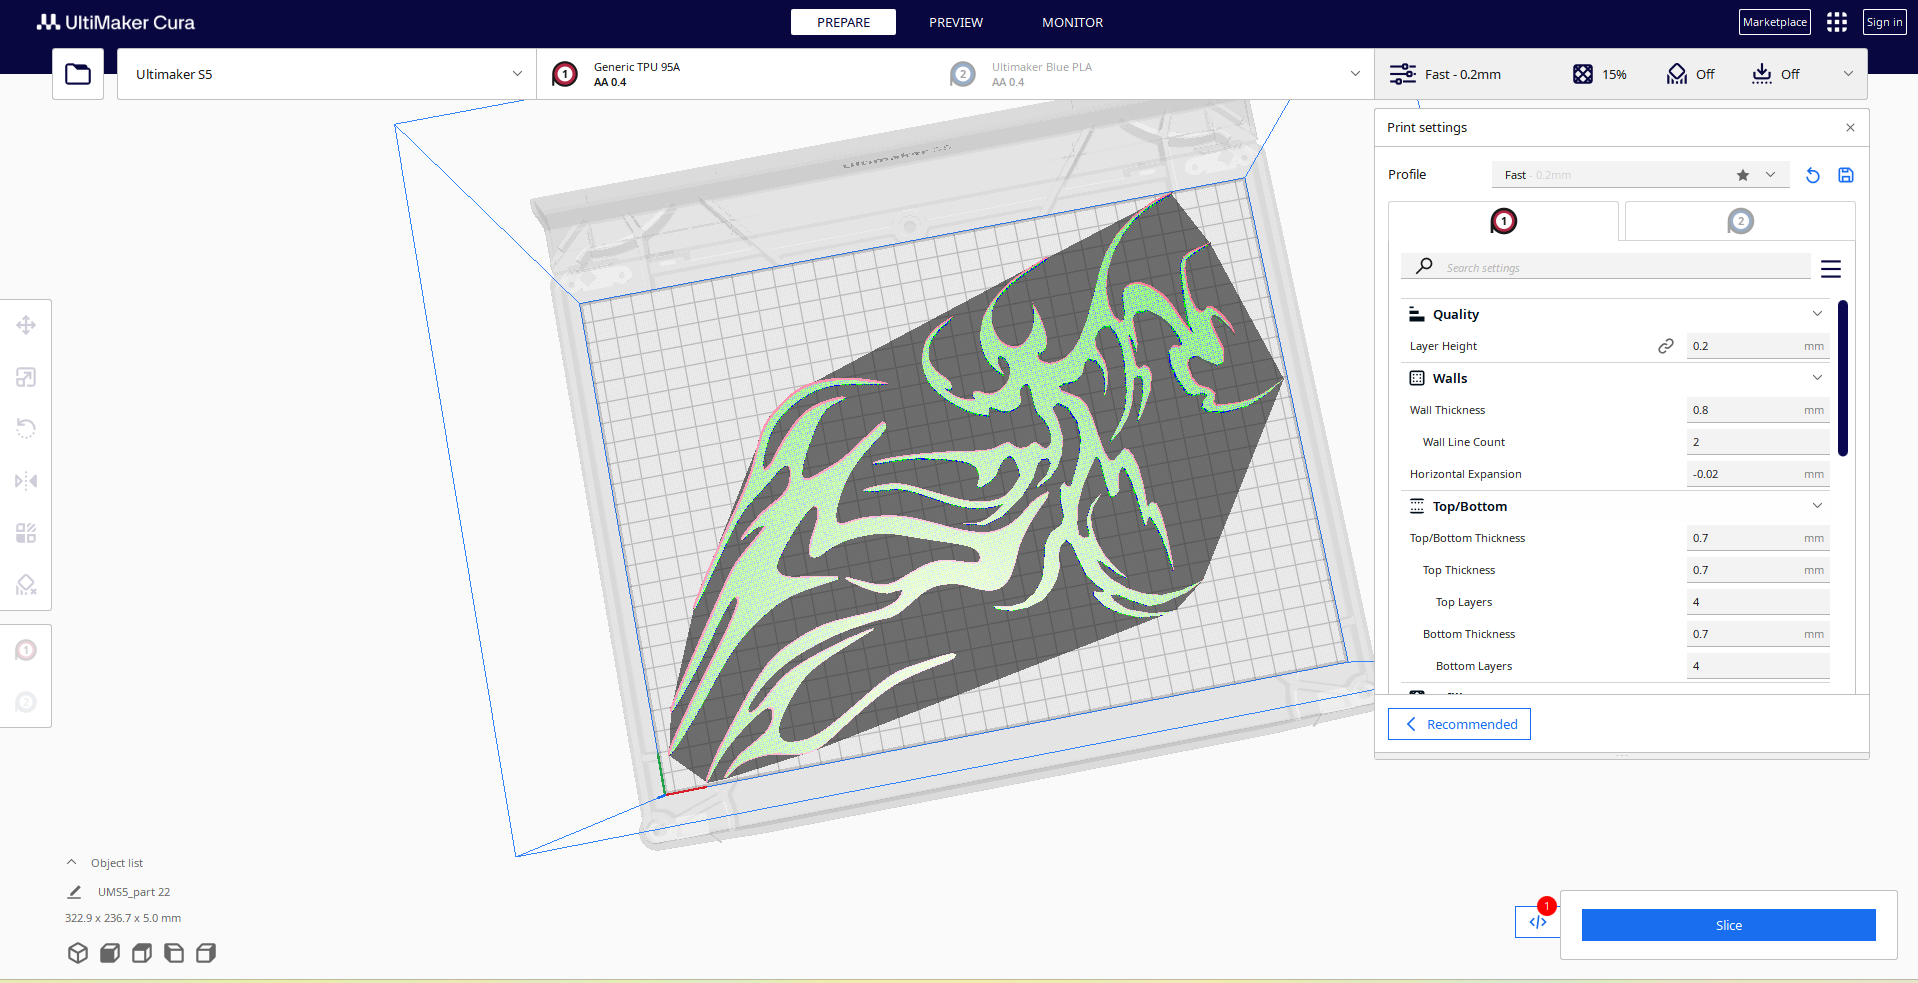
5. Slicing Software (Ultimaker Cura)

Cura is a popular slicing software used in 3D printing. It's essential for converting 3D models into printable instructions (G-code) that 3D printers can understand. Cura offers a user-friendly interface and a range of settings to customize the printing process, making it a widely used tool for 3D printing enthusiasts and professionals.
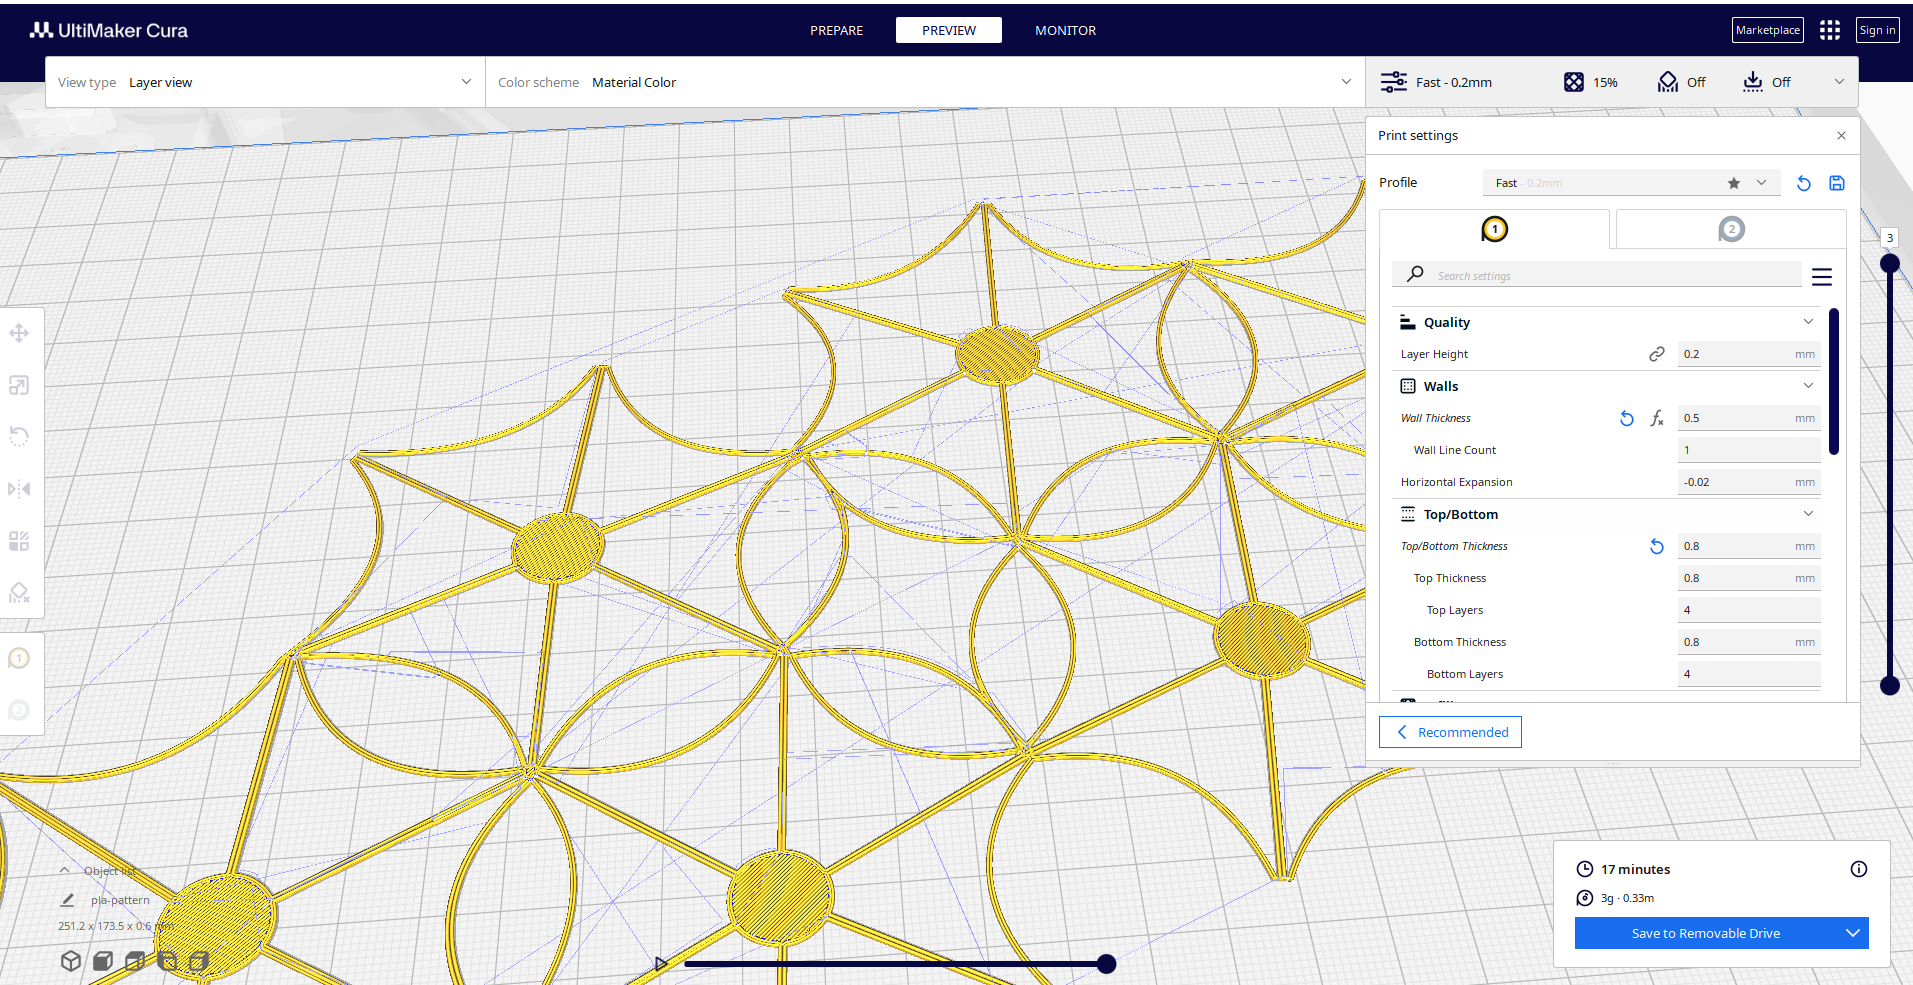
Choose Print Settings:
- Configure print settings, including layer height, print speed, infill density, support structures, and more in the "Print Setup" or "Recommended" settings.
- Customize these settings based on your specific project's requirements.
- Click the "Slice" button to generate the G-code, which contains instructions for your 3D printer. Review the G-code preview to ensure everything looks as expected.

In Cura, navigate to the Extensions menu at the top and select "Post Processing," then choose "Modify G-code." In the "Modify G-code" menu, click on "Add a script" and choose "Pause at Height." Enter the desired height at which you want the printer to pause.
| Material | Layer height | Infill Density | Top Layer Thickness | Bottom Layer Thickness | Build Plate Adhesion Type |
|---|---|---|---|---|---|
| PLA | 0.2 | 10% | 0.8 | 0.8 | none |
| Material | Layer height | Infill Density | Top Layer Thickness | Bottom Layer Thickness | Build Plate Adhesion Type |
|---|---|---|---|---|---|
| TPU | 0.2 | 10% | 0.8 | 0.8 | none |
-
5. Printing

Bed and Nozzle Cleaning:
- Maintaining a clean 3D printing bed and nozzle involves powering off, cooling down, removing bed residue, wiping with isopropyl alcohol, releveling the bed, heating the nozzle, extruding filament, using a cleaning tool, and wiping the hot nozzle.
-
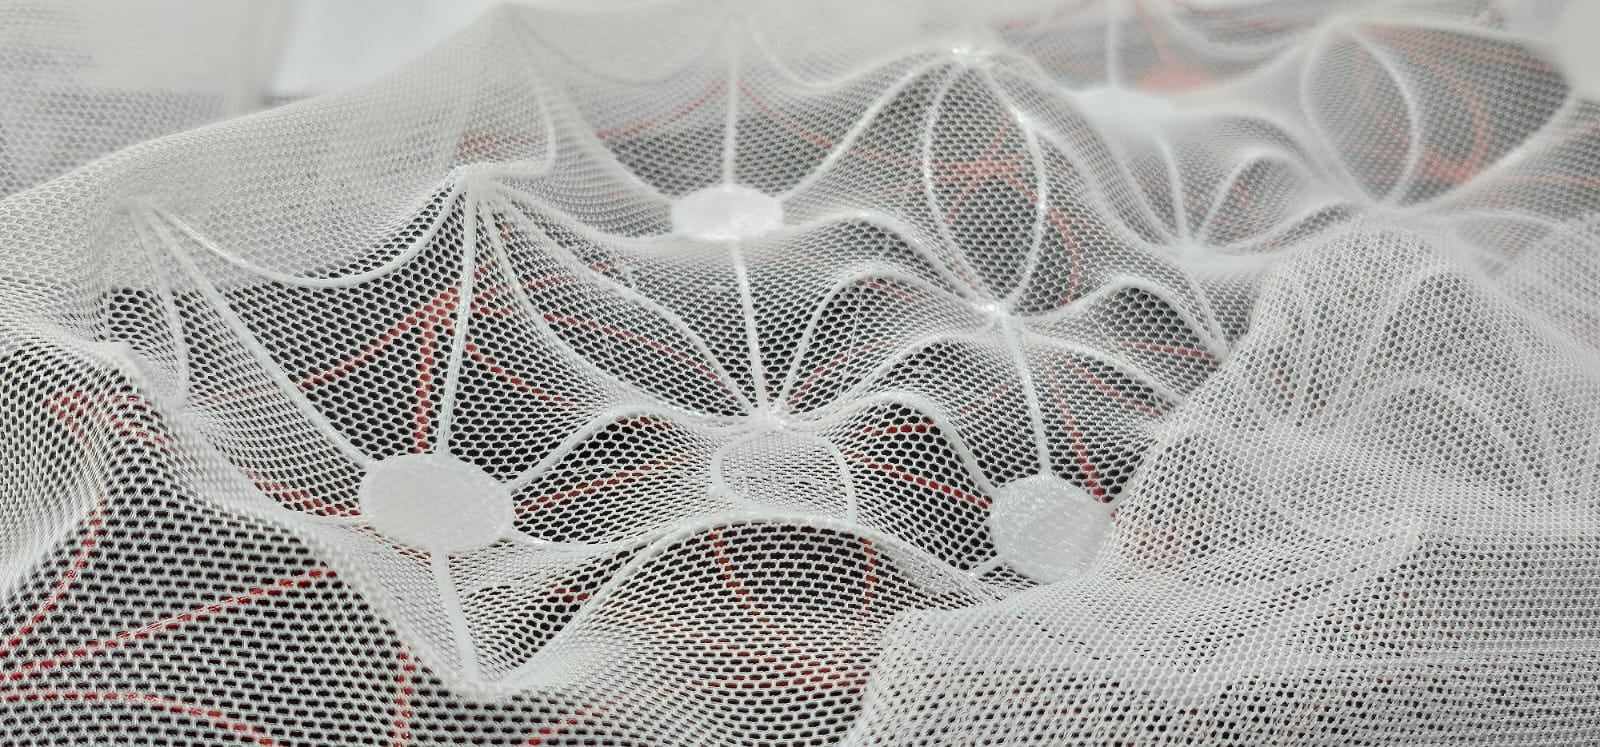
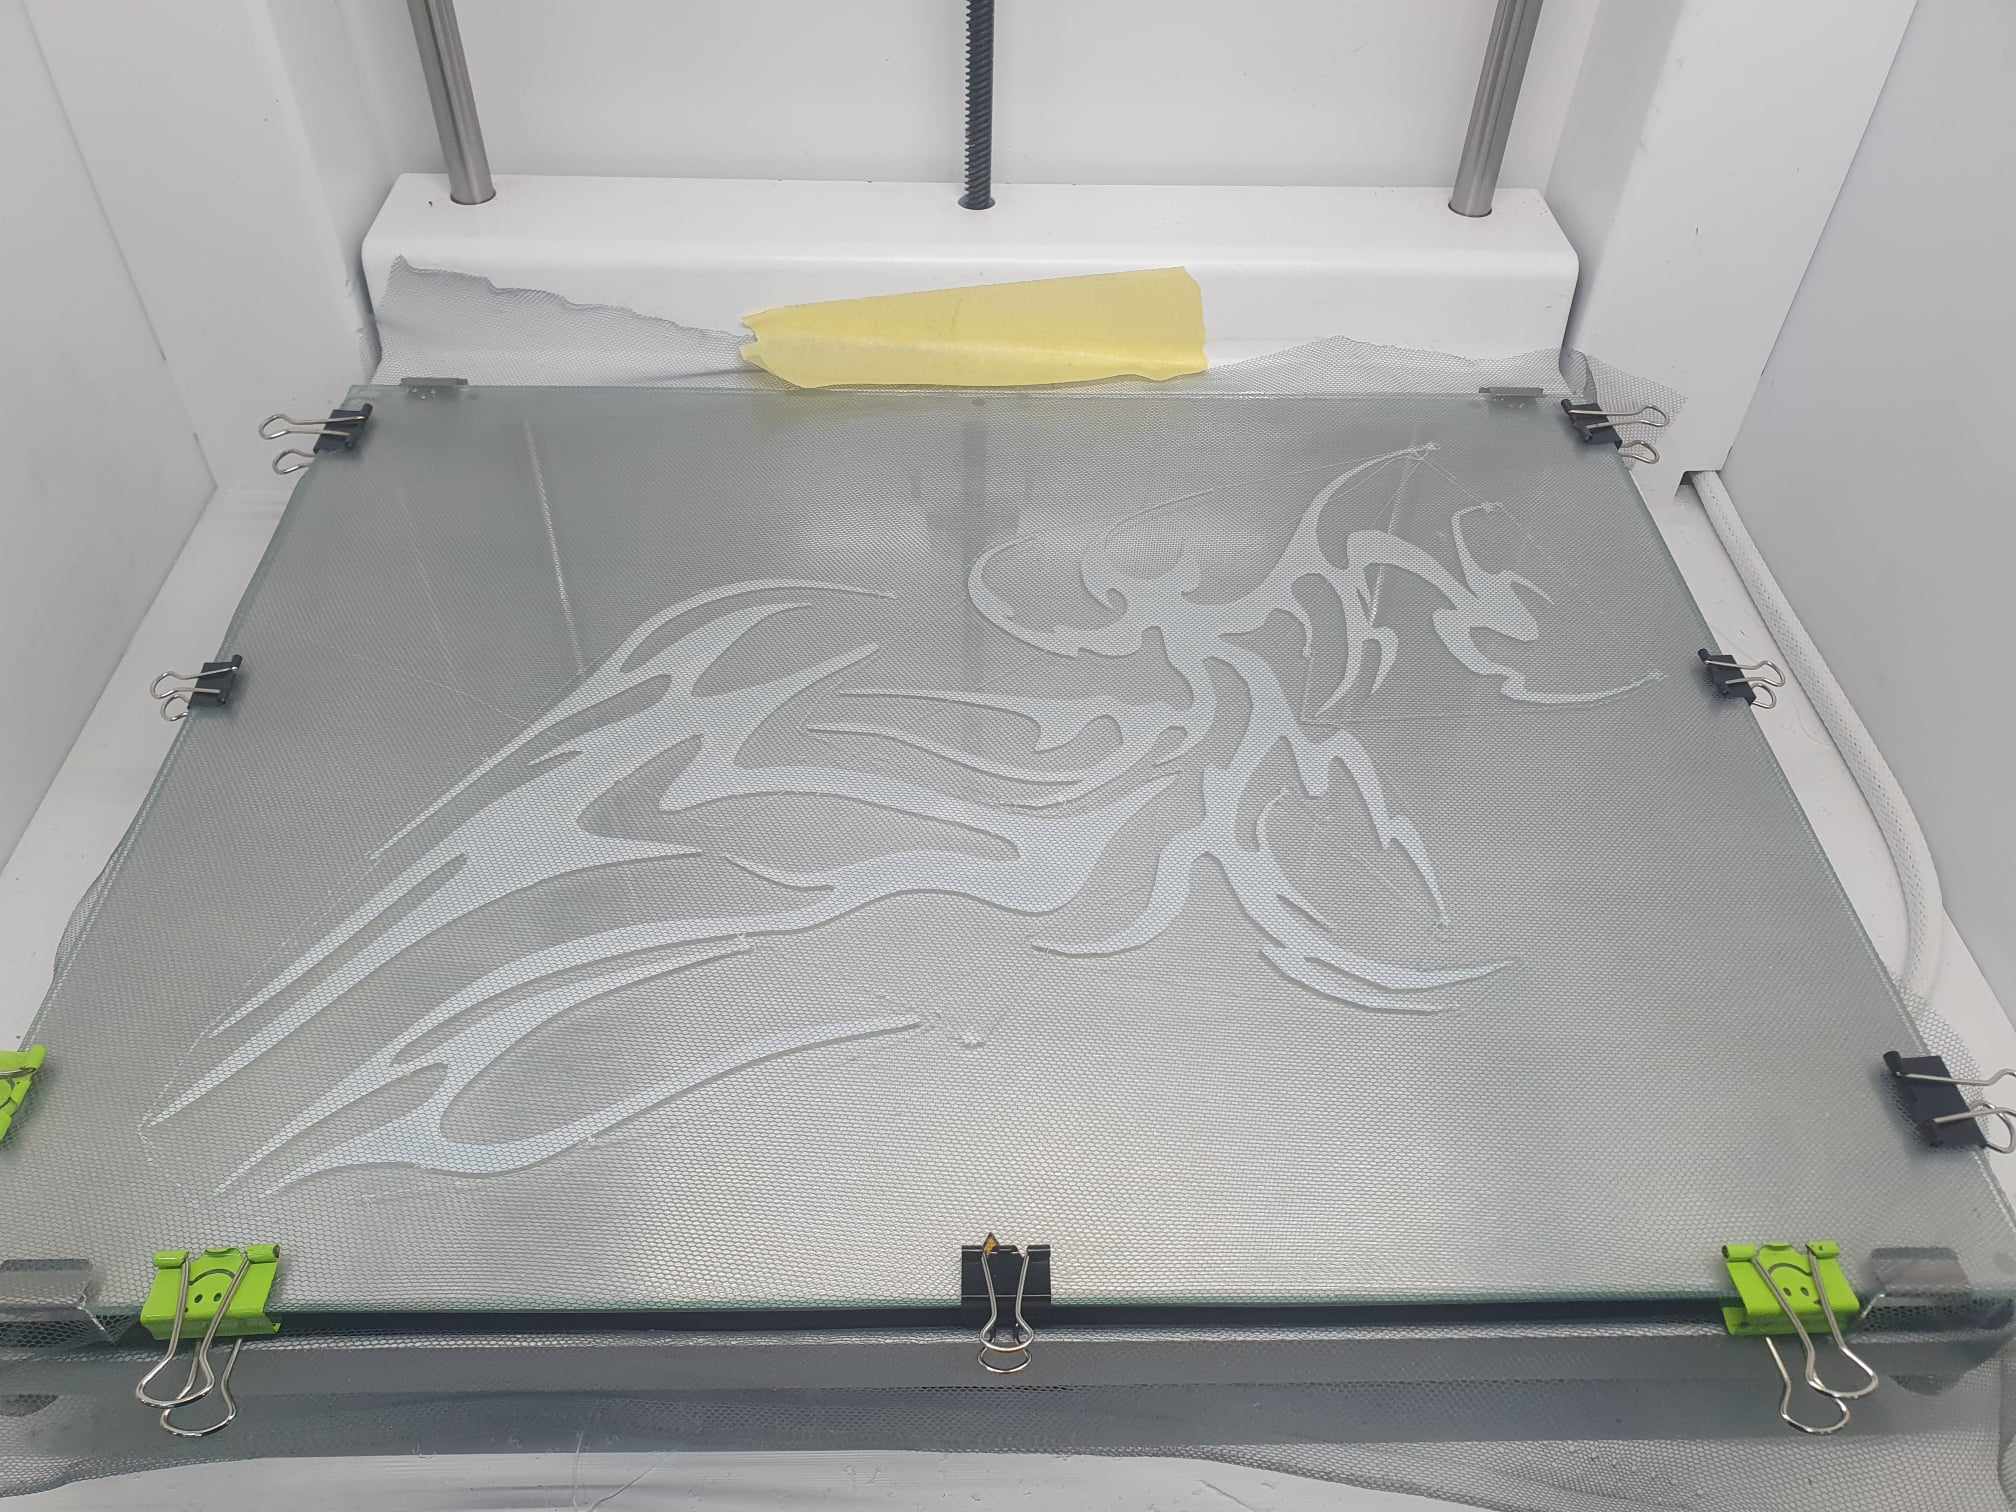
6. Printing and clipping the mesh
Mesh Fabric
Using mesh fabric in 3D printing offers the potential to combine the structural integrity of 3D-printed objects with the flexibility and texture of fabric.

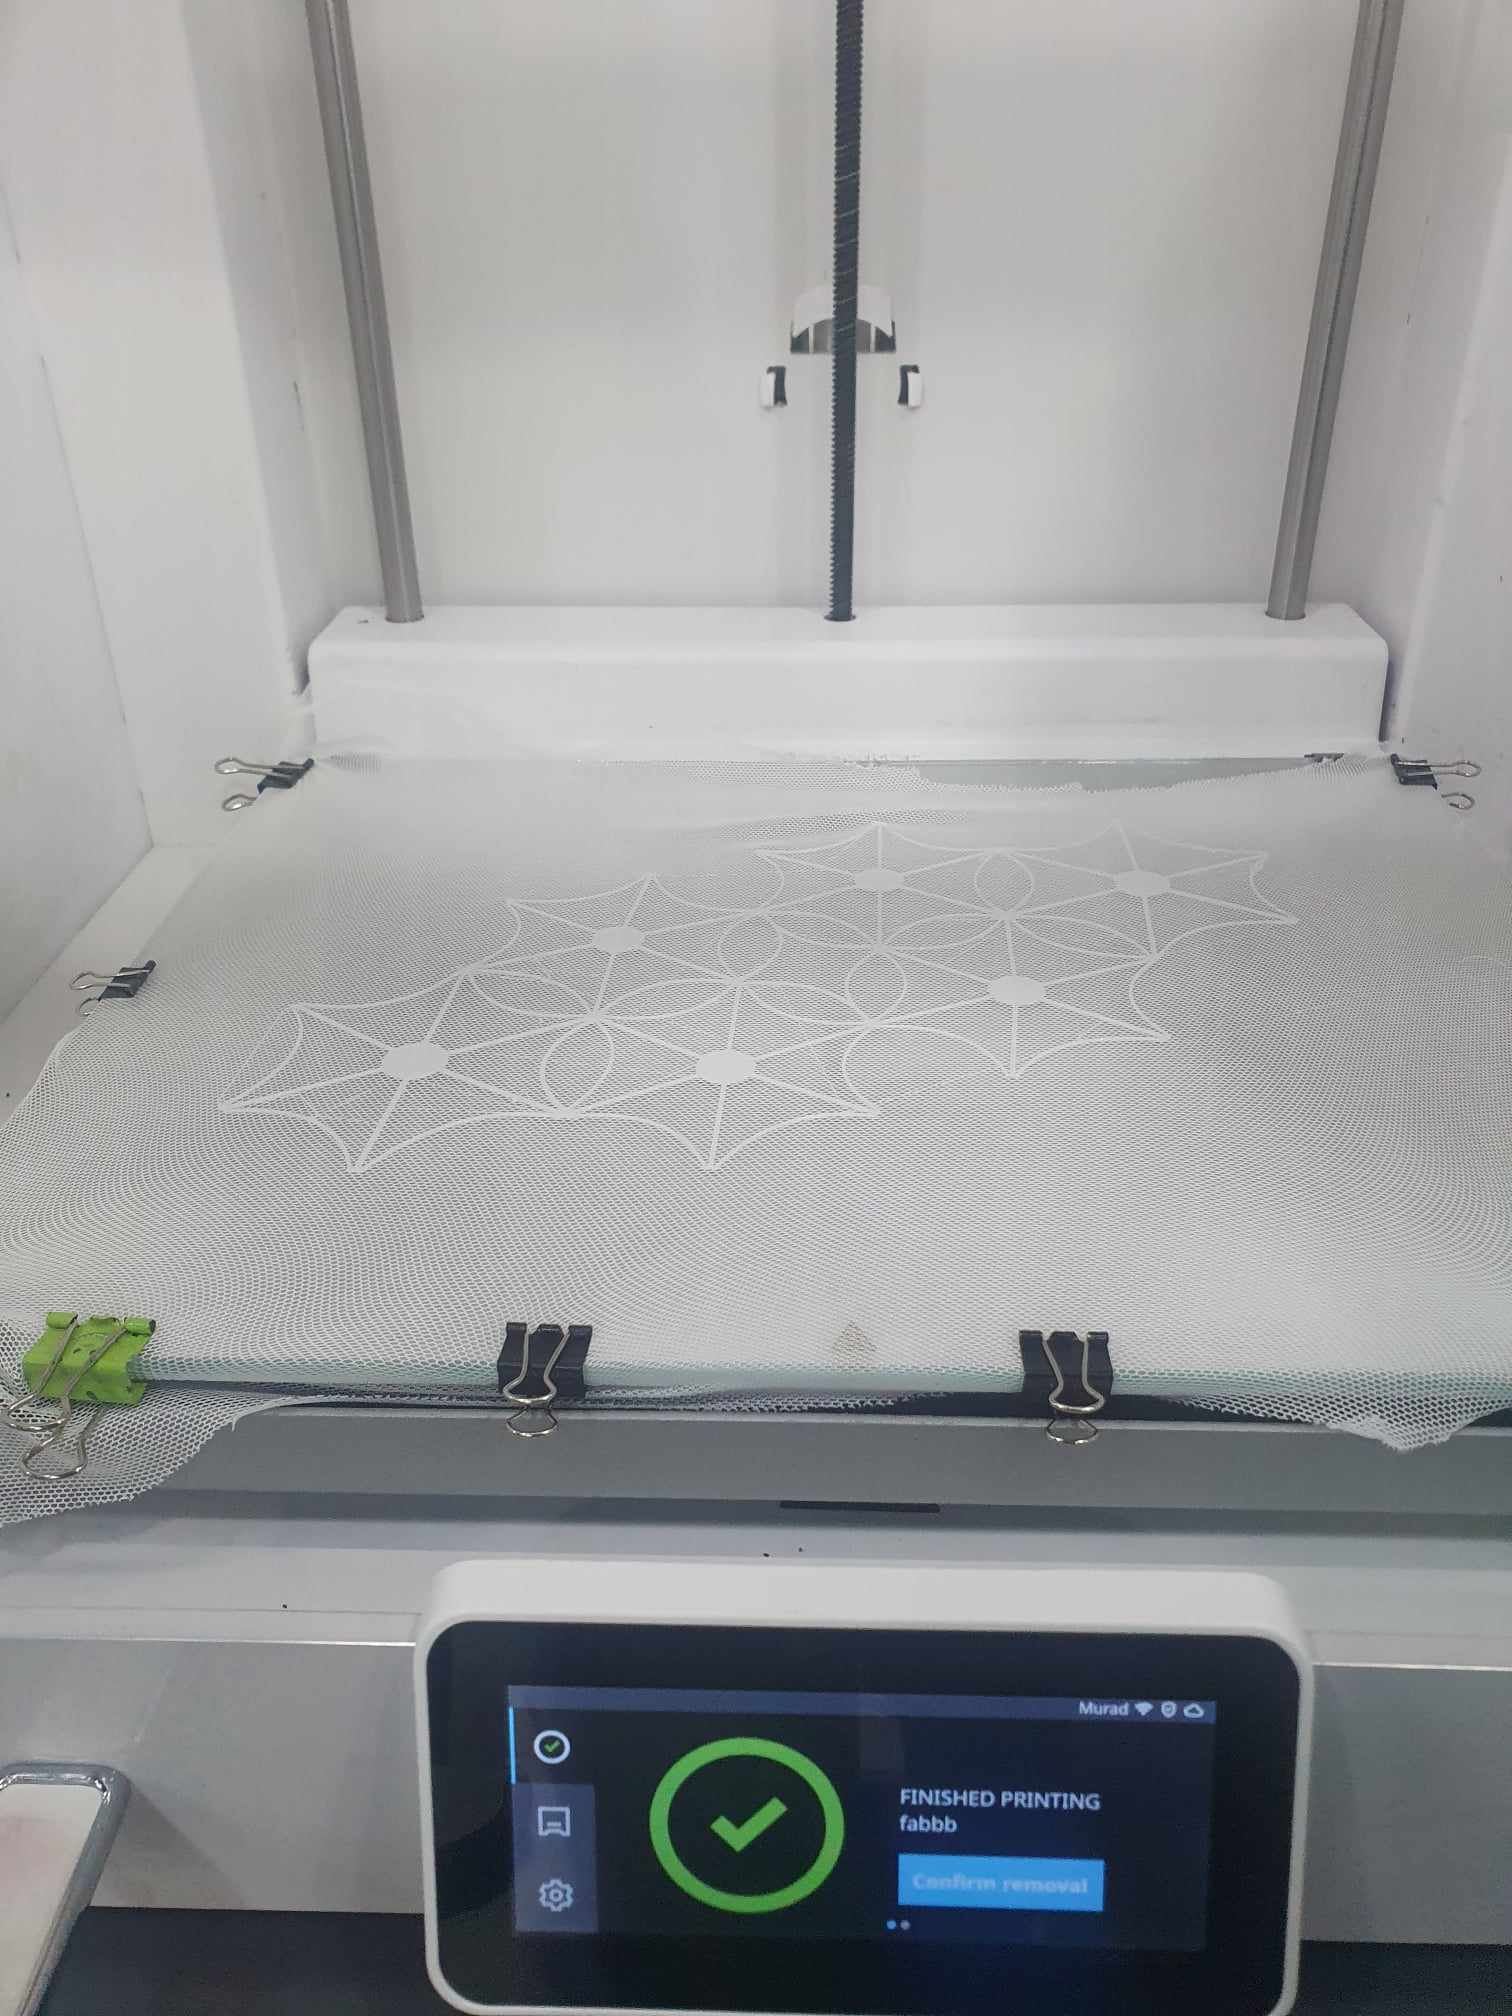
securing the mesh onto the printer bed is important by use clips to prevent movement during printing.
-
5. Remove and Post-Process:
Once the print is complete, carefully remove the 3D printed object from the build platform, and perform any necessary post-processing steps such as removing support structures, sanding, or painting.
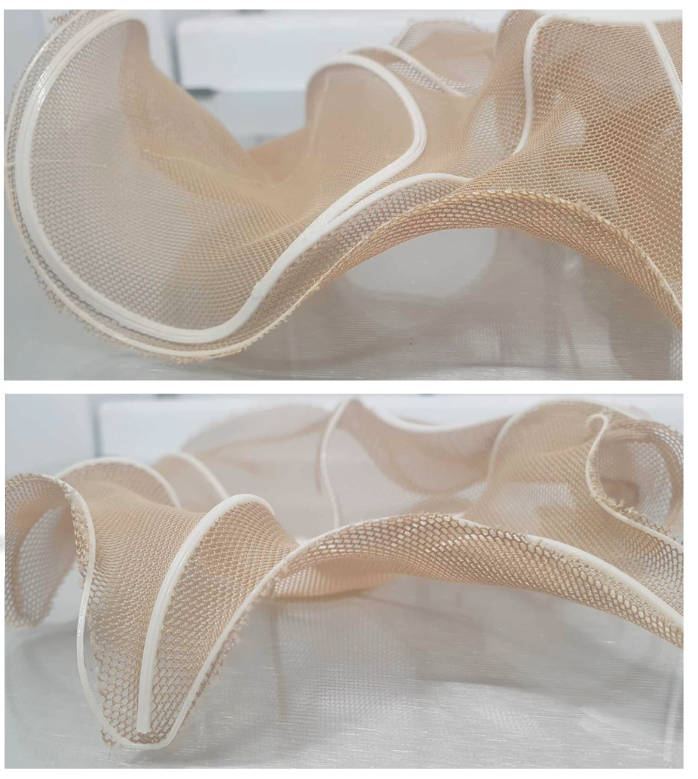
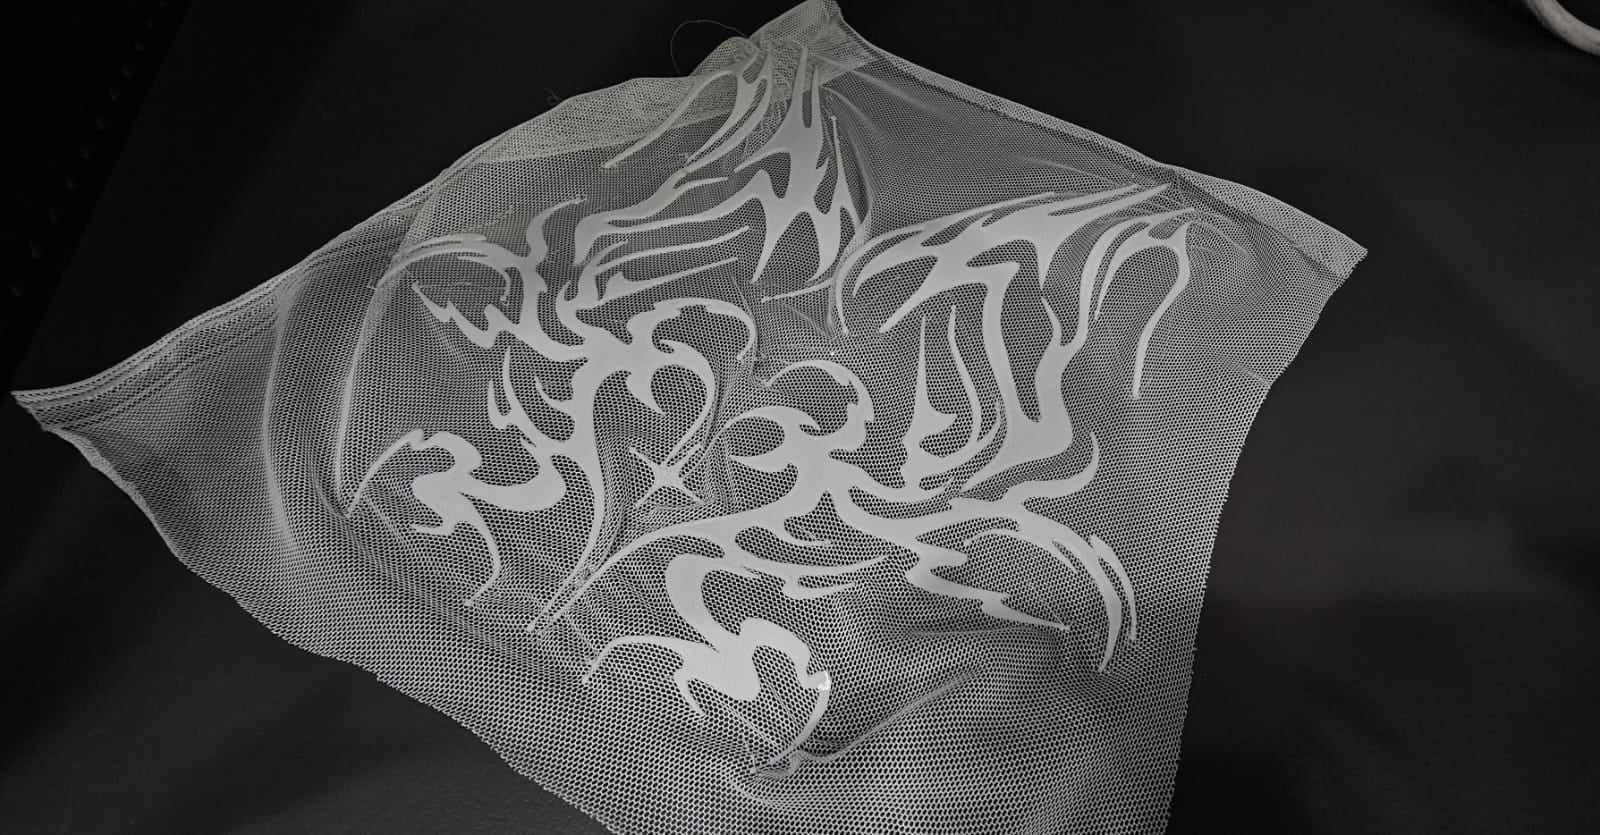
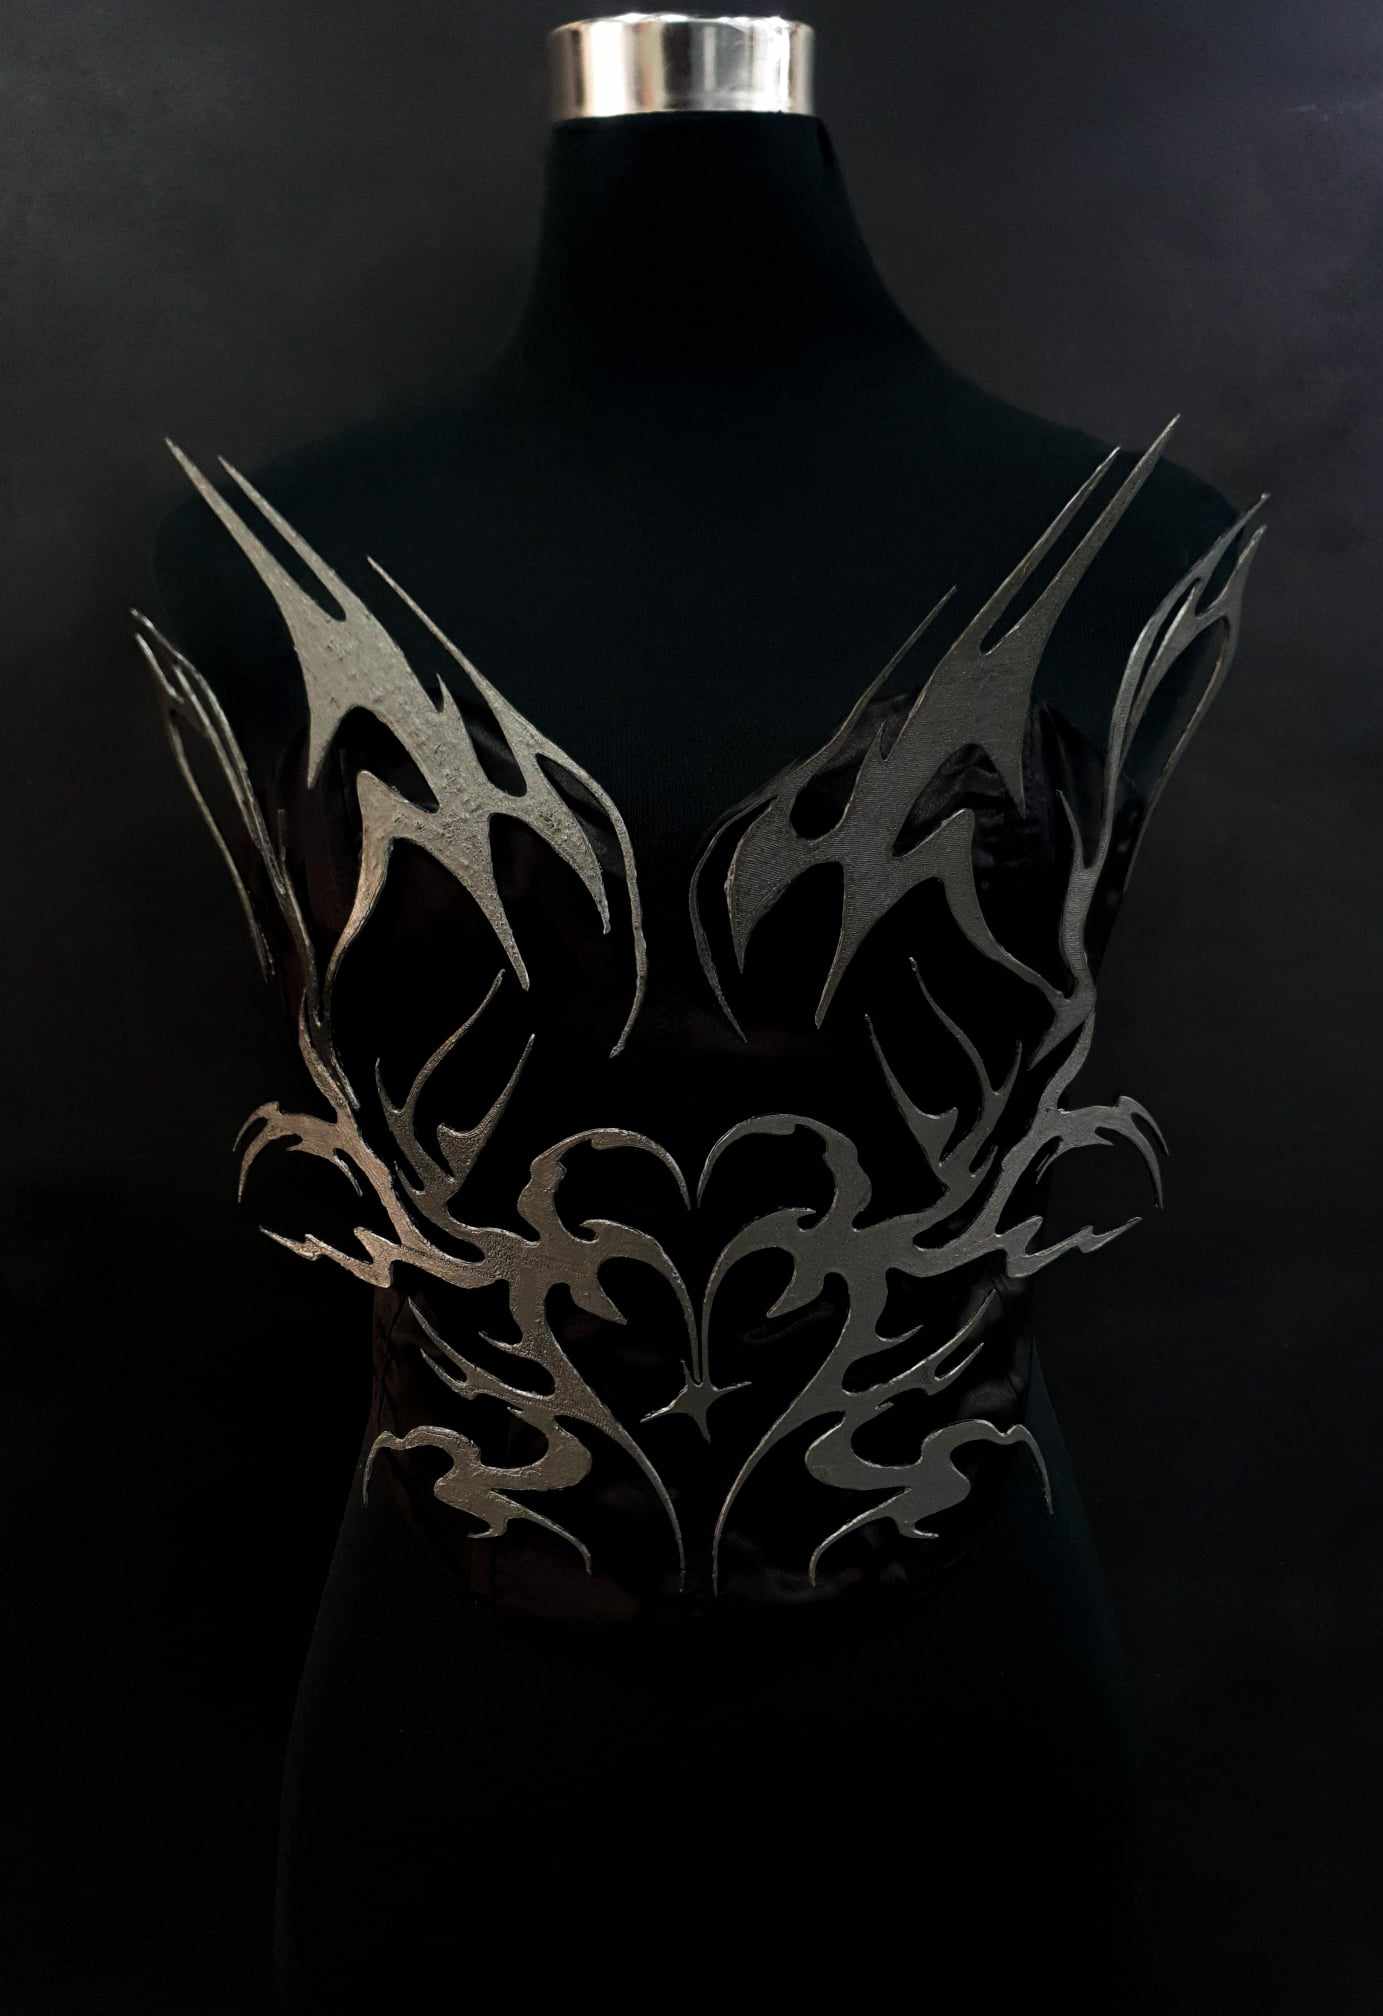
Final Results

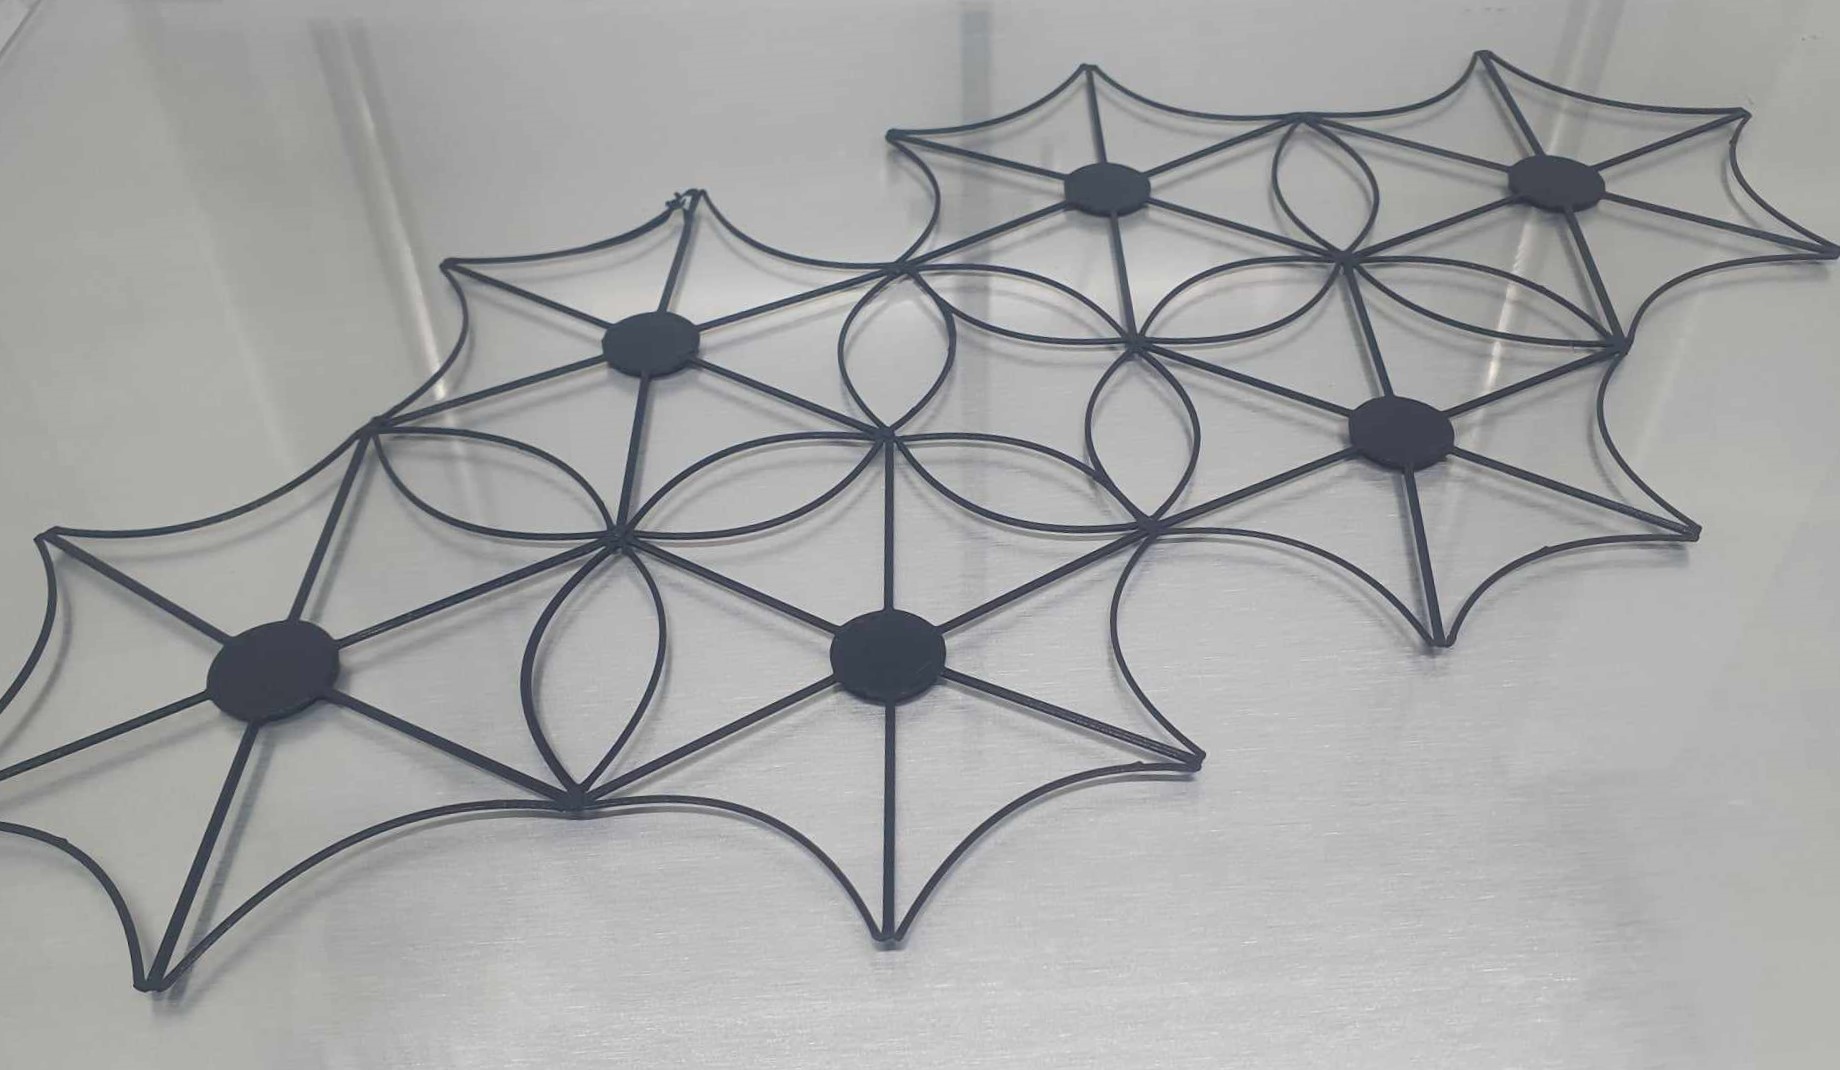

Exploring Three-Dimensional Textile Composites and Investigating the Elastic Properties of Various Materials, such as TPU and PLA.
1st trial and test
Selecting a suitable mesh material that can expand and contract as needed. Material TPU (Thermoplastic Polyurethane) can accommodate the dynamic nature of self-forming structures.

| Material | Layer height | Infill Density | Top Layer Thickness | Bottom Layer Thickness | Build Plate Adhesion Type |
|---|---|---|---|---|---|
| TPU | 0.2 | 10% | 0.8 | 0.8 | none |
3D printing
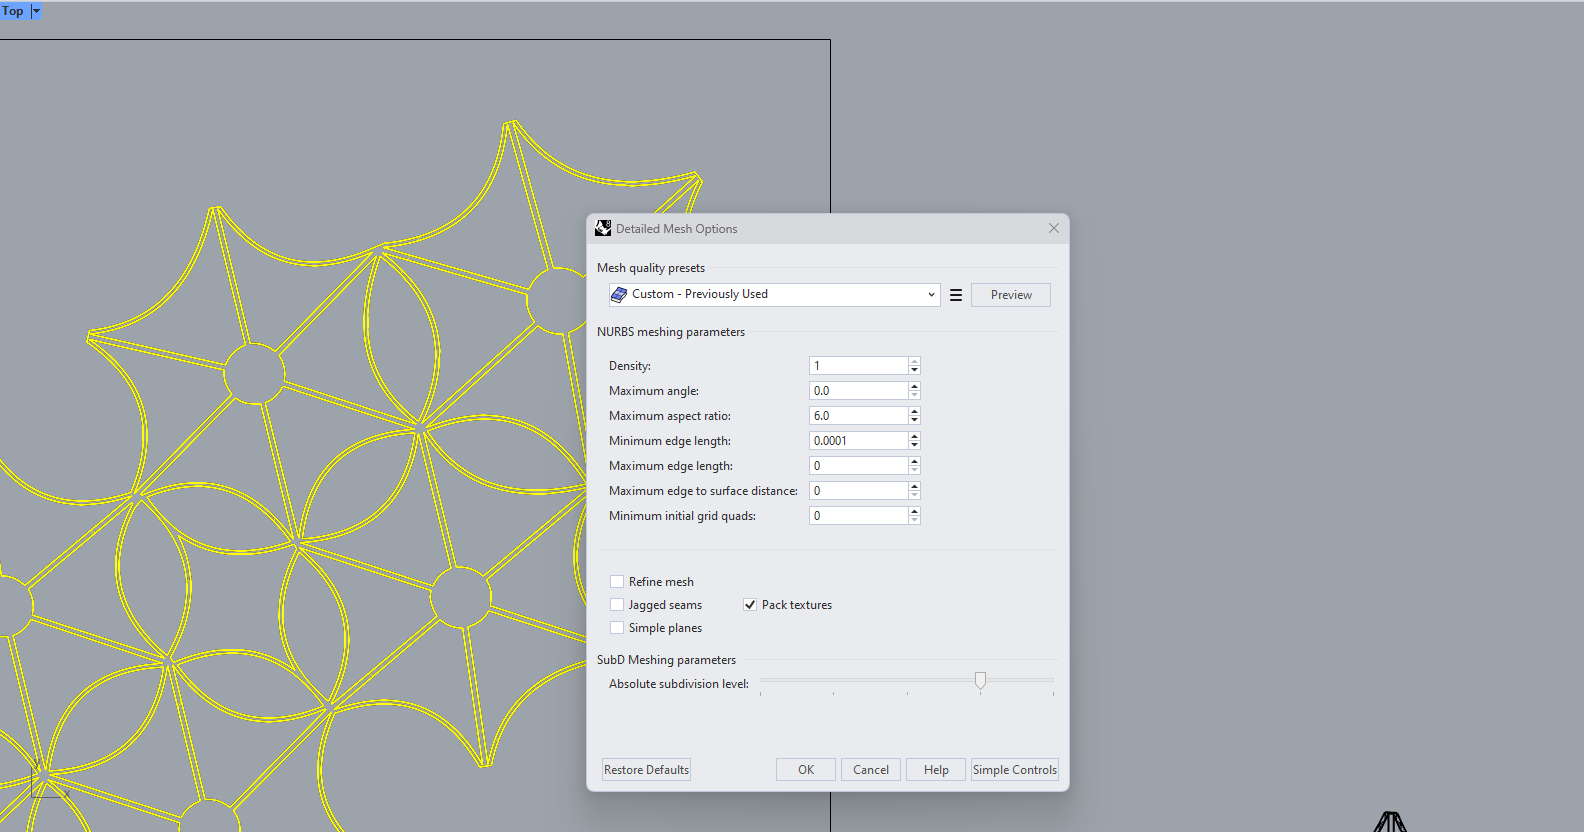
Digital Design Preparation:
Before saving the design for 2D printing, ensure that your 3D mesh is clean and without errors. Use Rhino's built-in tools or third-party mesh repair tools to fix any holes, non-manifold edges, or other issues that might arise during the modeling process. A flawless mesh is crucial for accurate 2D representation.
Open Cura and import the exported STL file. Ensure that the 3D model appears correctly in the Cura workspace. Adjust the orientation and placement of the model on the print bed and defining the material TPU.
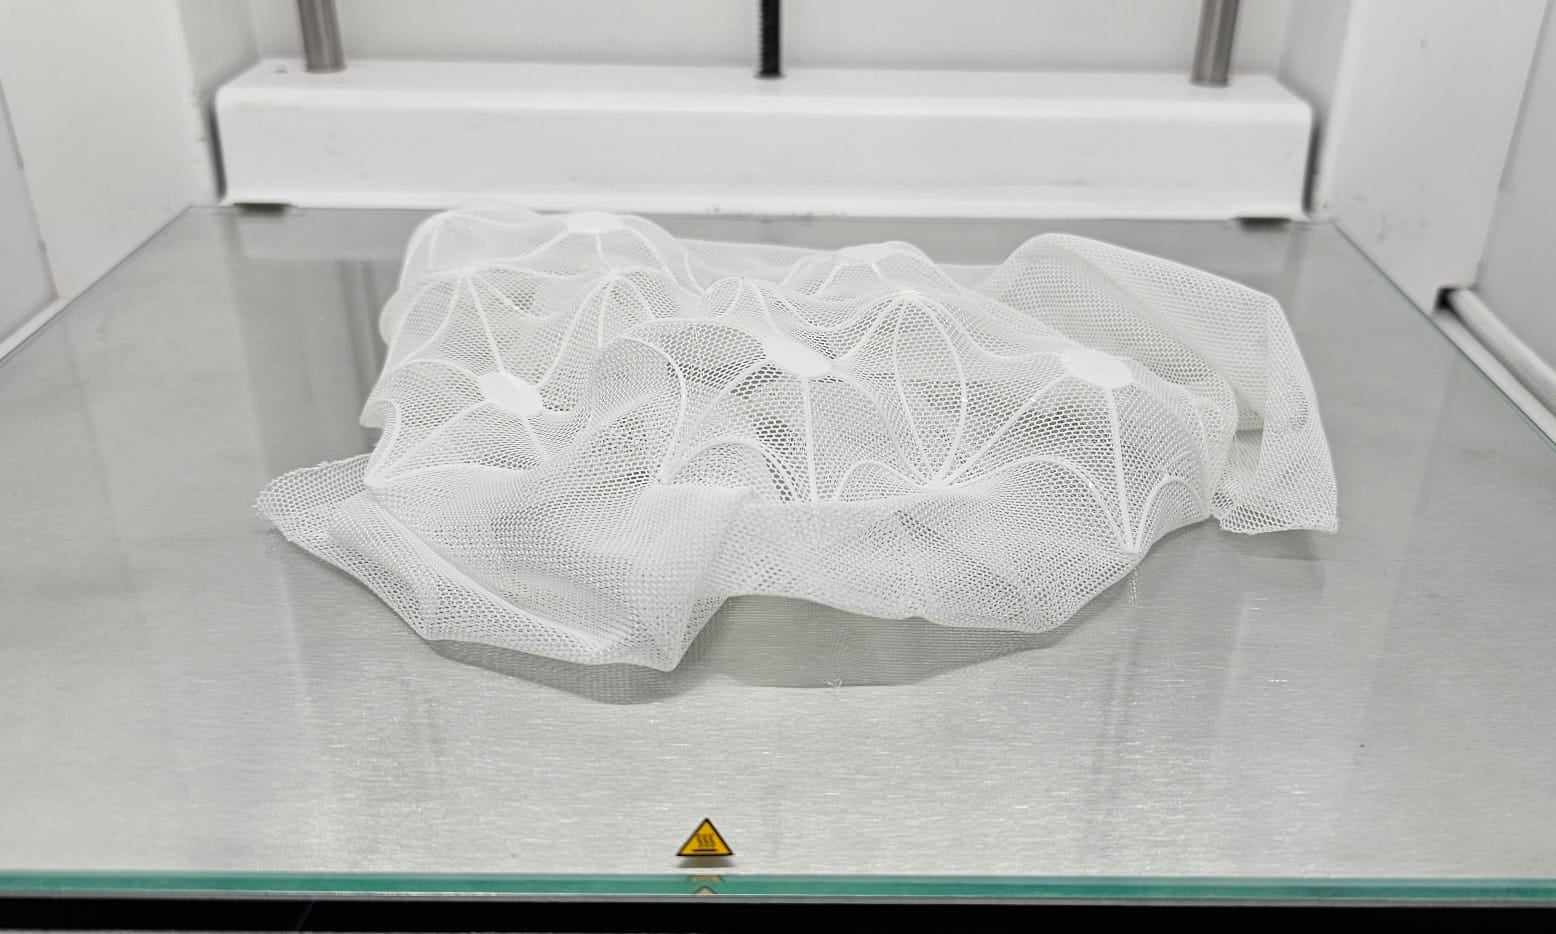
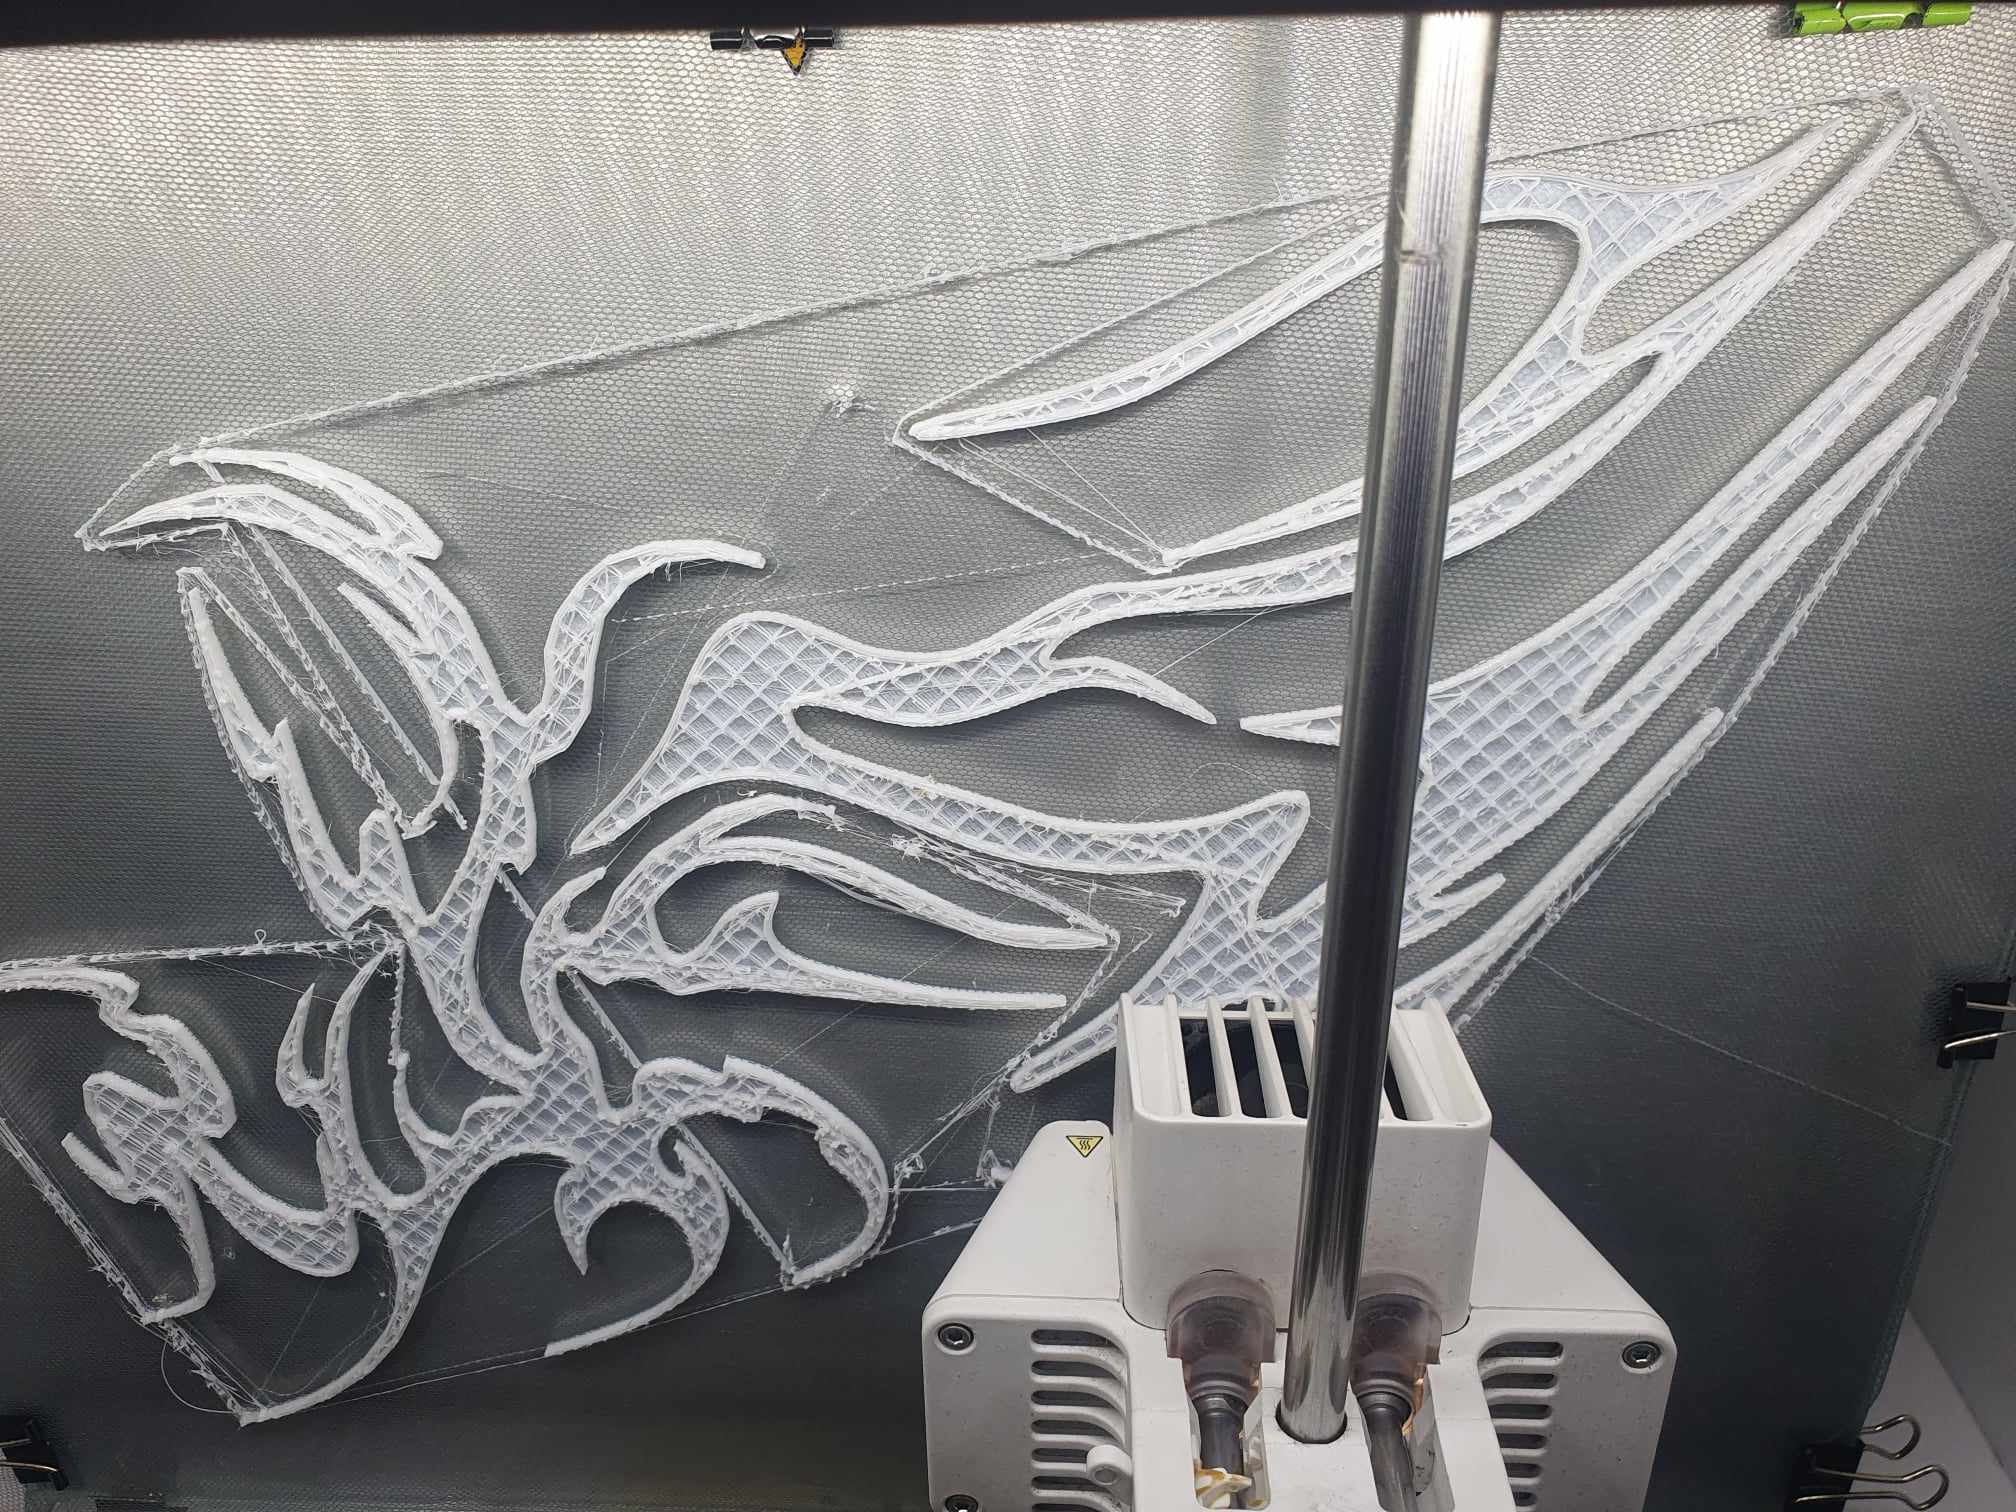
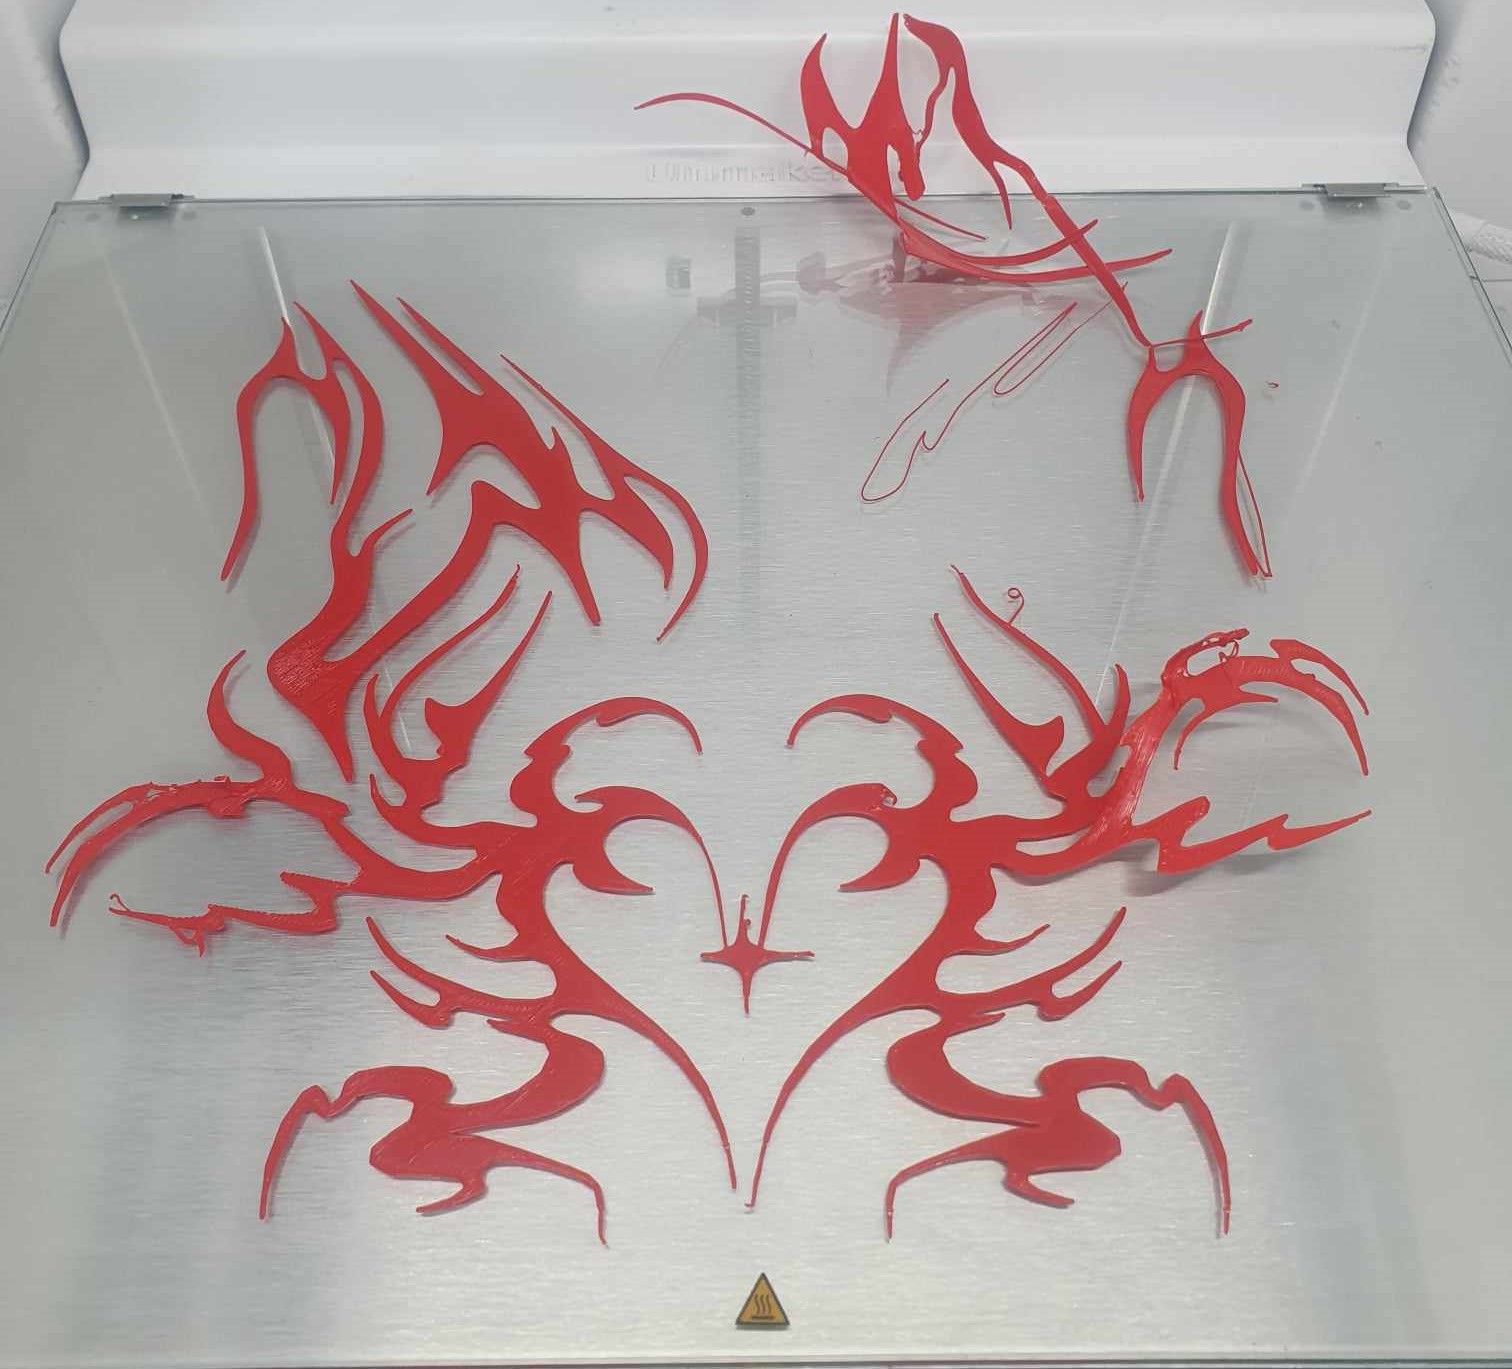
Selecting mesh Fabric and Printing
Printing Process
Final
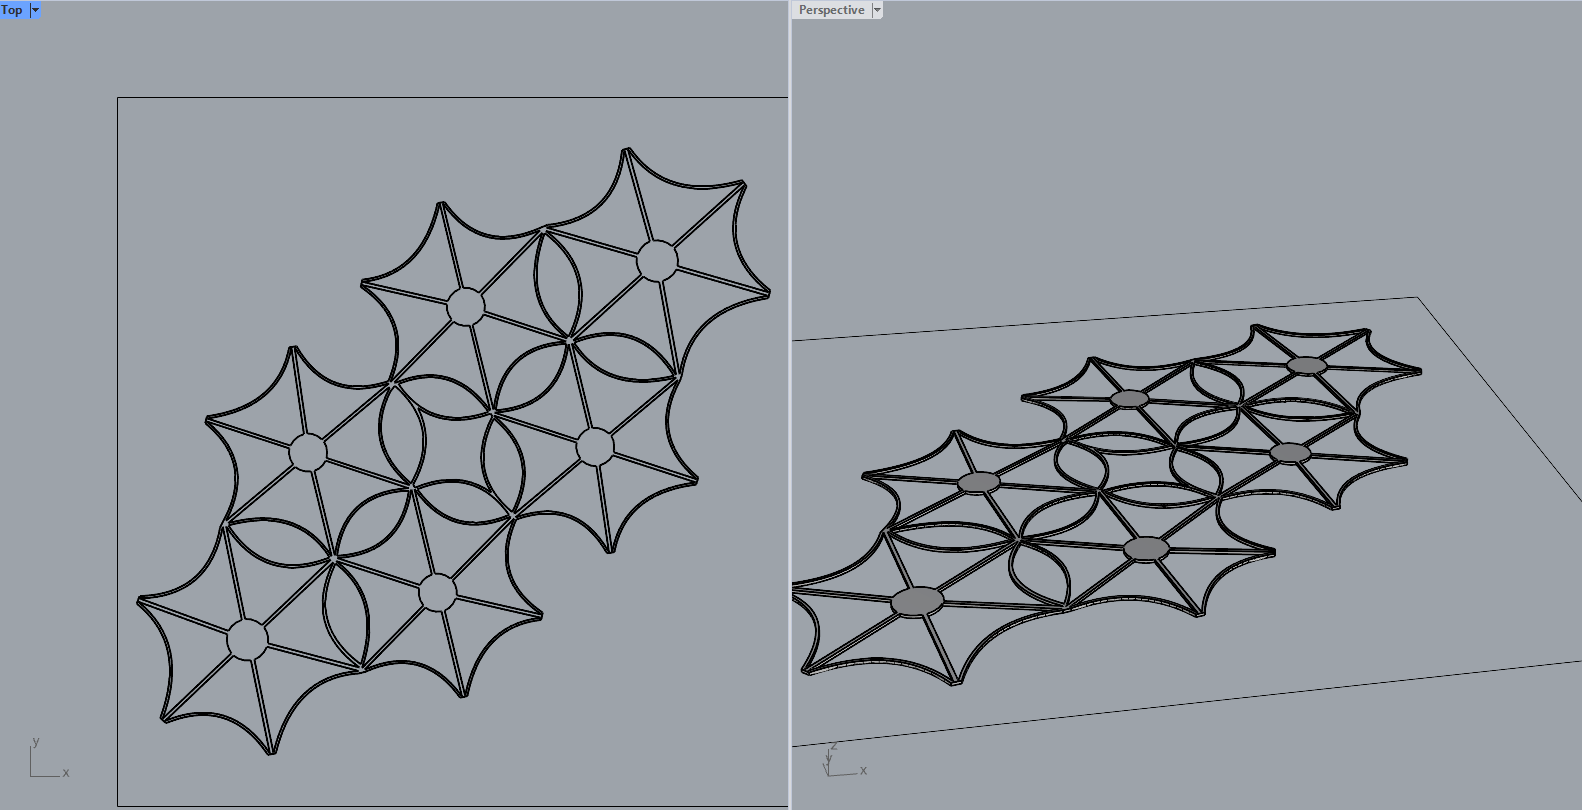
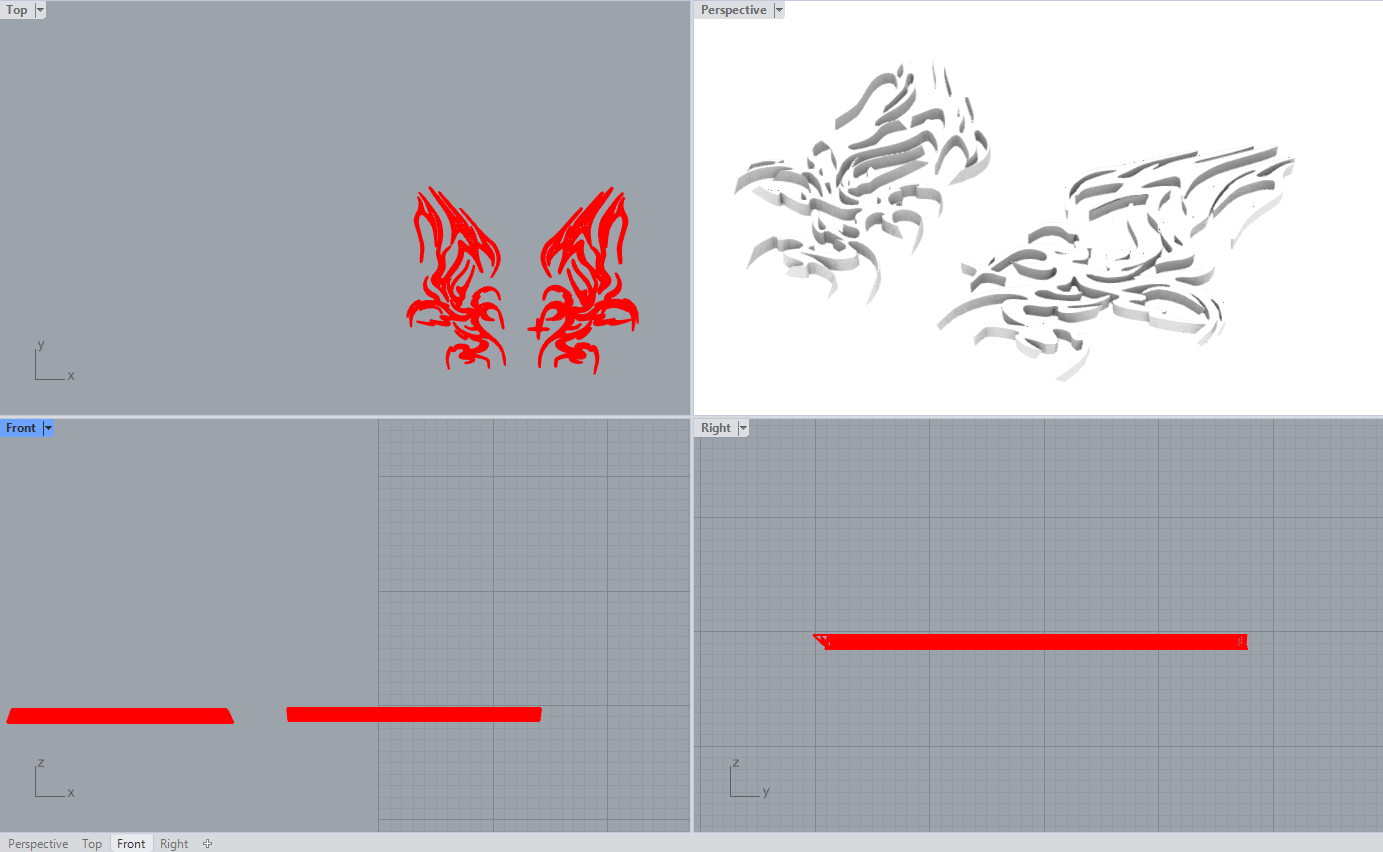
3D Models

Rhino perspective view
---
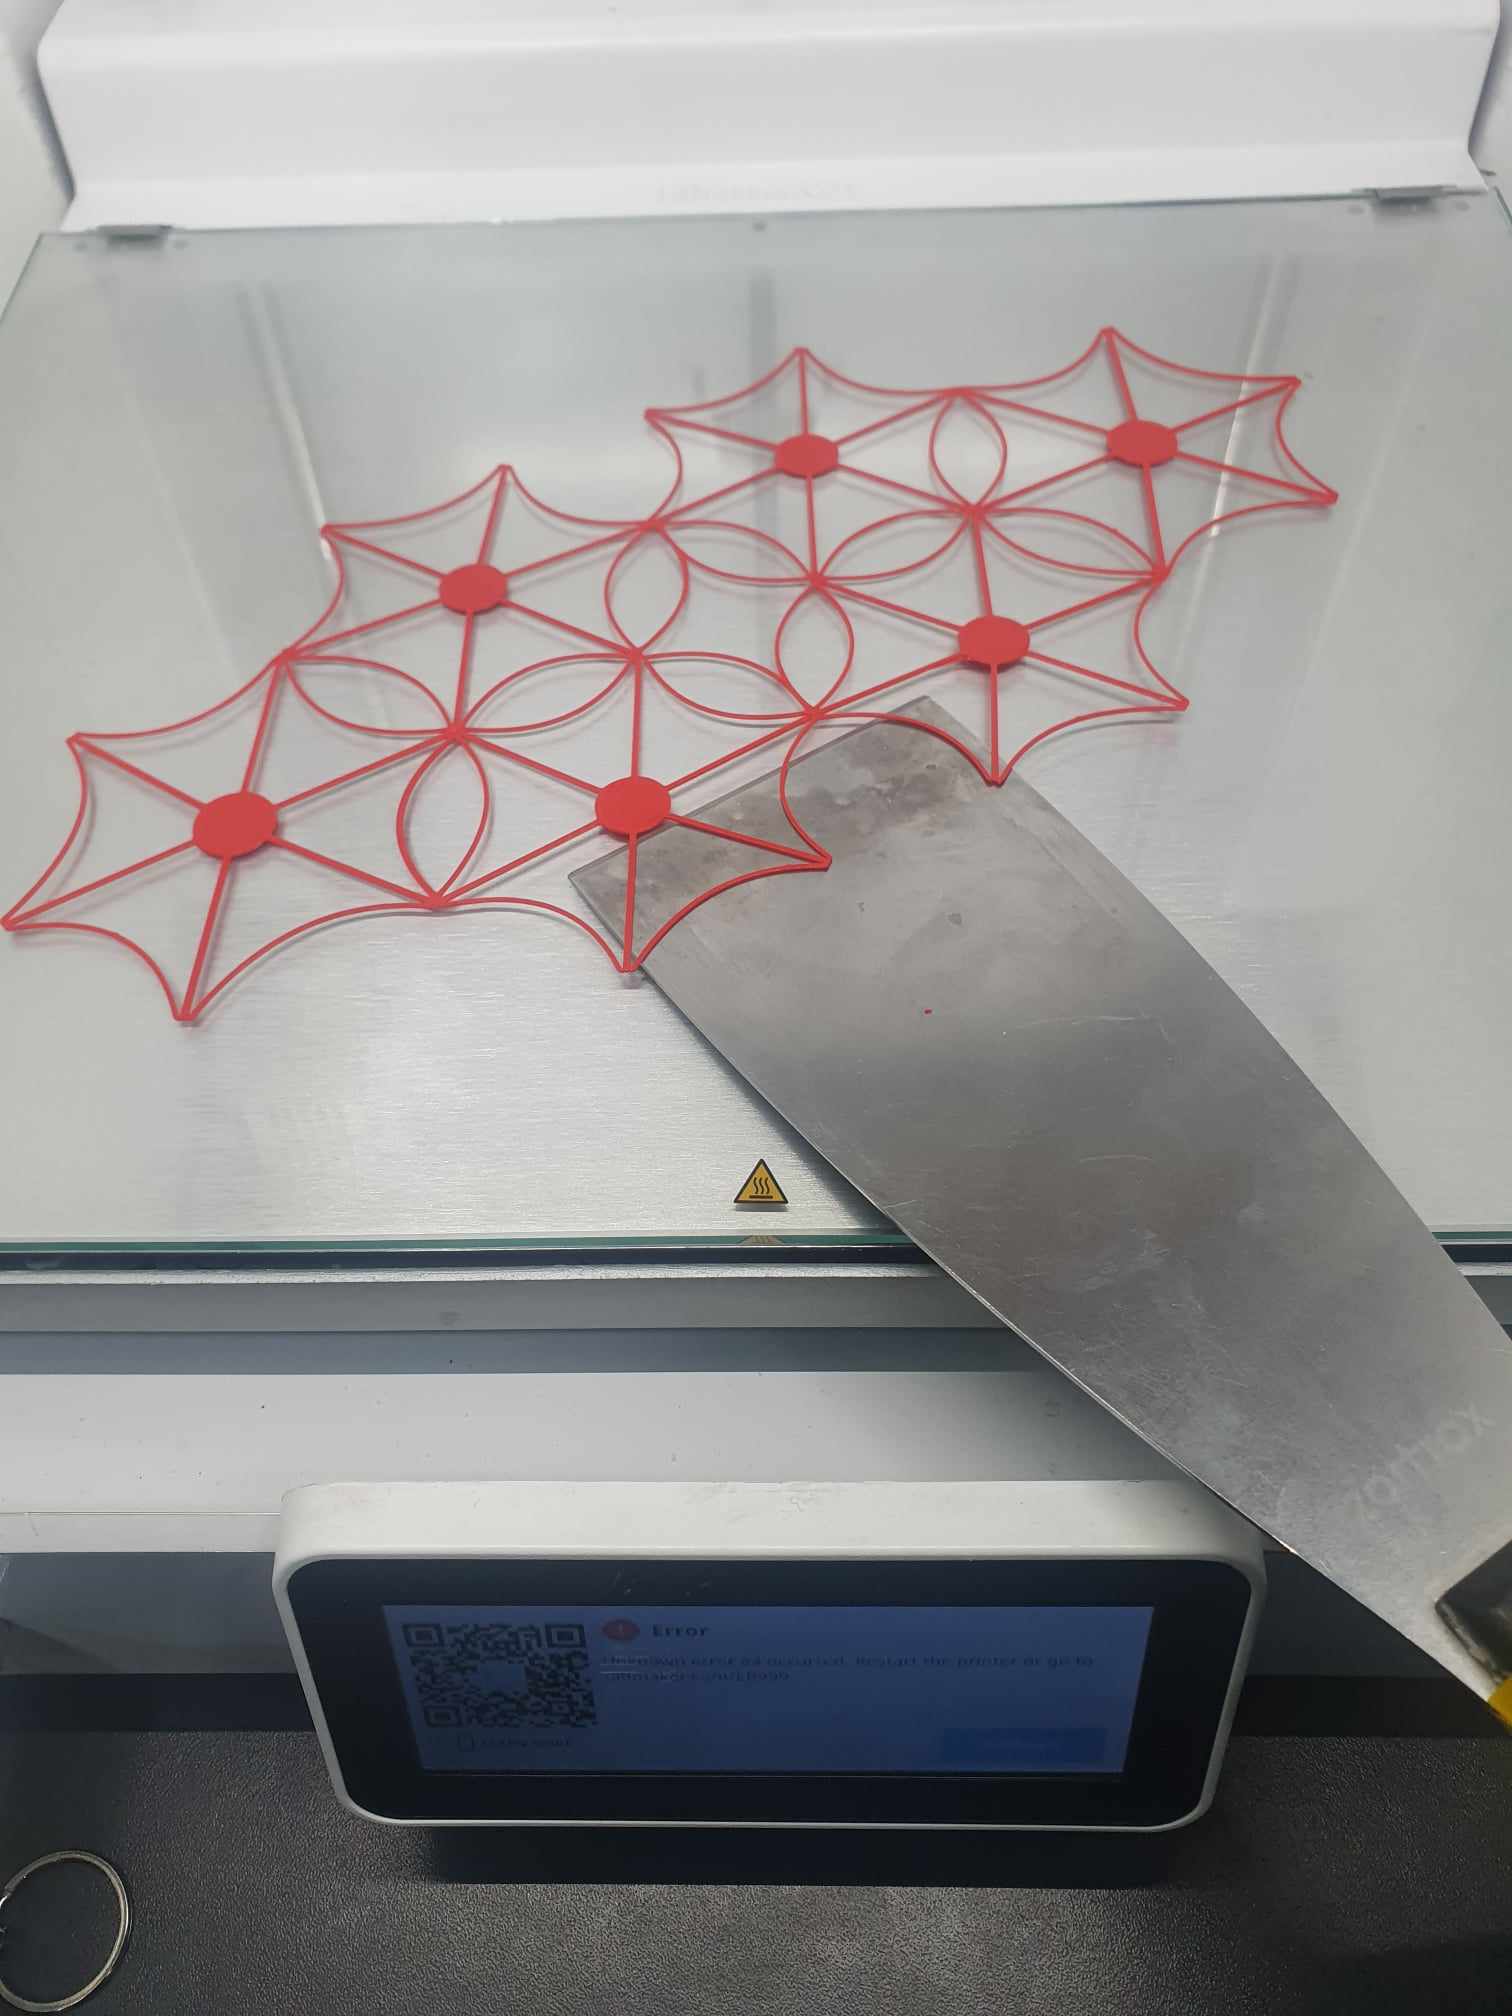
Errors and challenges
Exploring Three-Dimensional Textile Composites and Investigating the Elastic Properties of Various Materials, such as TPU and PLA.

Learning from your own mistakes is crucial. For instance, neglecting to add a brim resulted in the model's warping during printing.
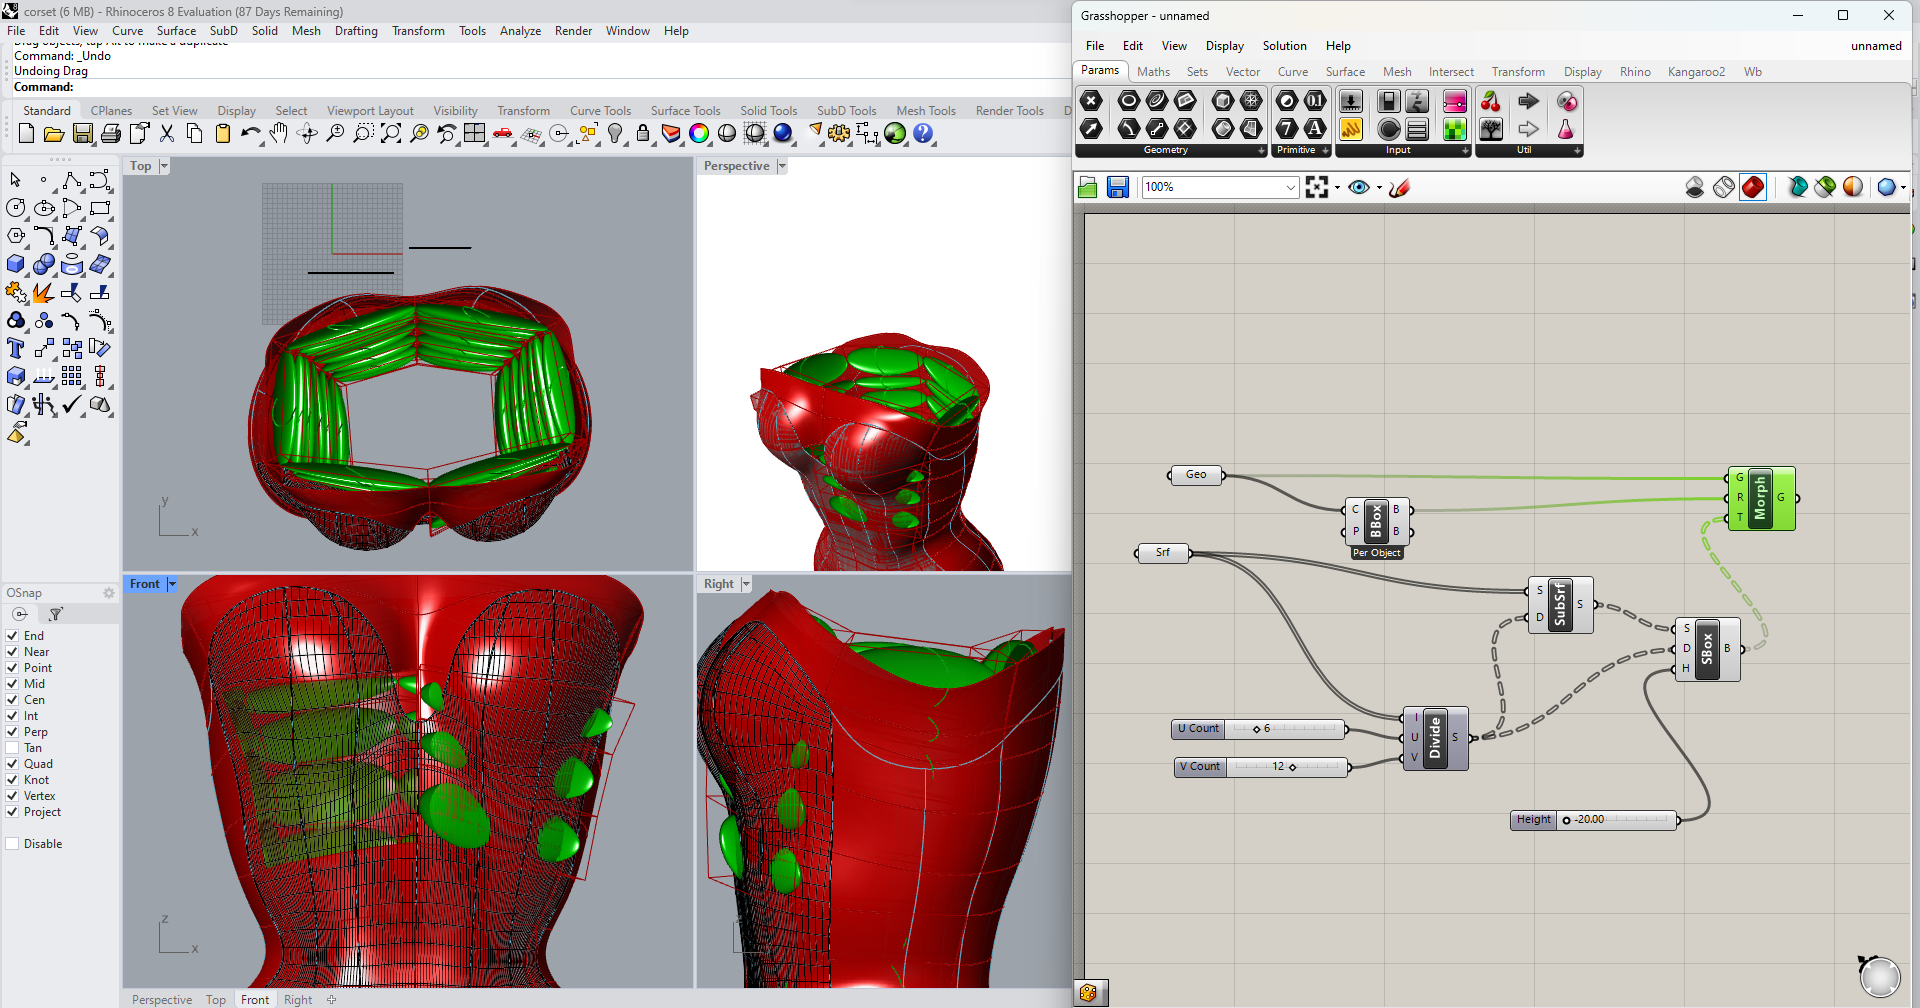
Creating a 3D Bubble Effect Corset with Rhino and Grasshopper
creating a 3D bubble effect corset using Rhino and Grasshopper involves a systematic workflow that seamlessly integrates the strengths of both software. Rhino serves as the primary modeling tool, allowing for the initial development of the corset shape, while Grasshopper, as a visual programming language plugin, introduces parametric design capabilities bubble morph. The application of the morph command within Grasshopper enables the dynamic manipulation of the corset surface, producing the desired bubbly aesthetic.
Fabrication files
-
File: 3d STL pattern ↩