Soft robotics
Final work of the week
Rhino file
I designed all the different things for this week in a single Rhino file. You can have it following this link.
A hand part 1: vinyl
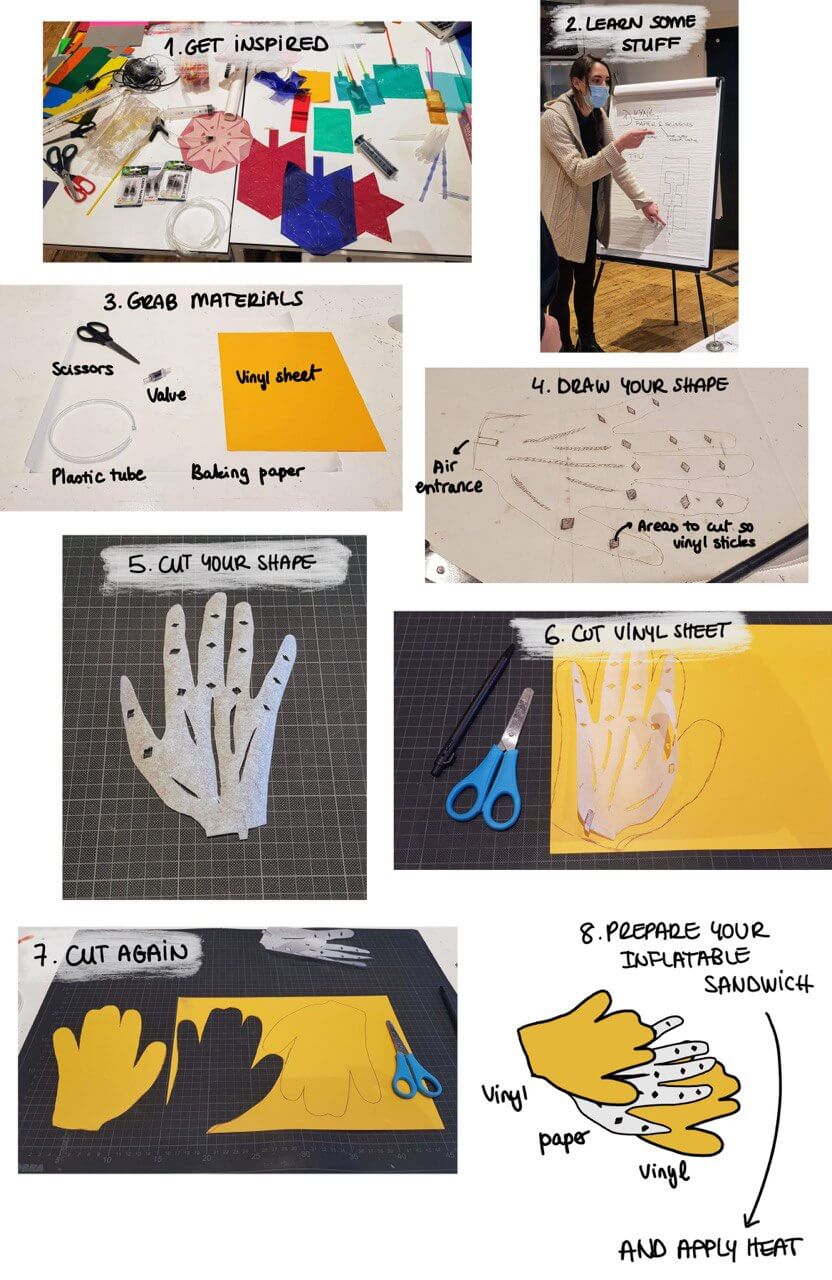
First attempt: making an inflatable by hand using the shape of... my hand.
Missing step
I forgot to add in the steps that the vinyl sheets have a shiny side and a matte side.
- Make a mark (like a small cross) on the matte side
- Remove the plastic foil from the shiny side. It is quite a hassle to get it to unpeel, but try in one of the corners and eventually they will unstick.
- Make sure you put the marked side looking towards the inside of the inflatable sandwich. That is, the side that had the foil will be the outside of your inflatable.
I had issues pressing the yellow vinyl shape I cut because the fingers curled like crazy in the vinyl. So I cut again the hand shape, this time without much detail, in a piece of beige vinyl. That is why the final result is beige instead of yellow.
The end result wasn't as I envisioned because the vinyl didn't stick completely in all the places that I had designed. I think this is for two reasons:
- I made areas that were too thin for the vinyl to stick (in the hand, the lines across the palm). As a result, the main body of the hand inflates like a glove.
- I made the hinges in the fingers too big, leaving little space for the air to flow. As a result, the fingers don't inflate completely, and there's not much action on the hinges.
A hand part 2: TPU
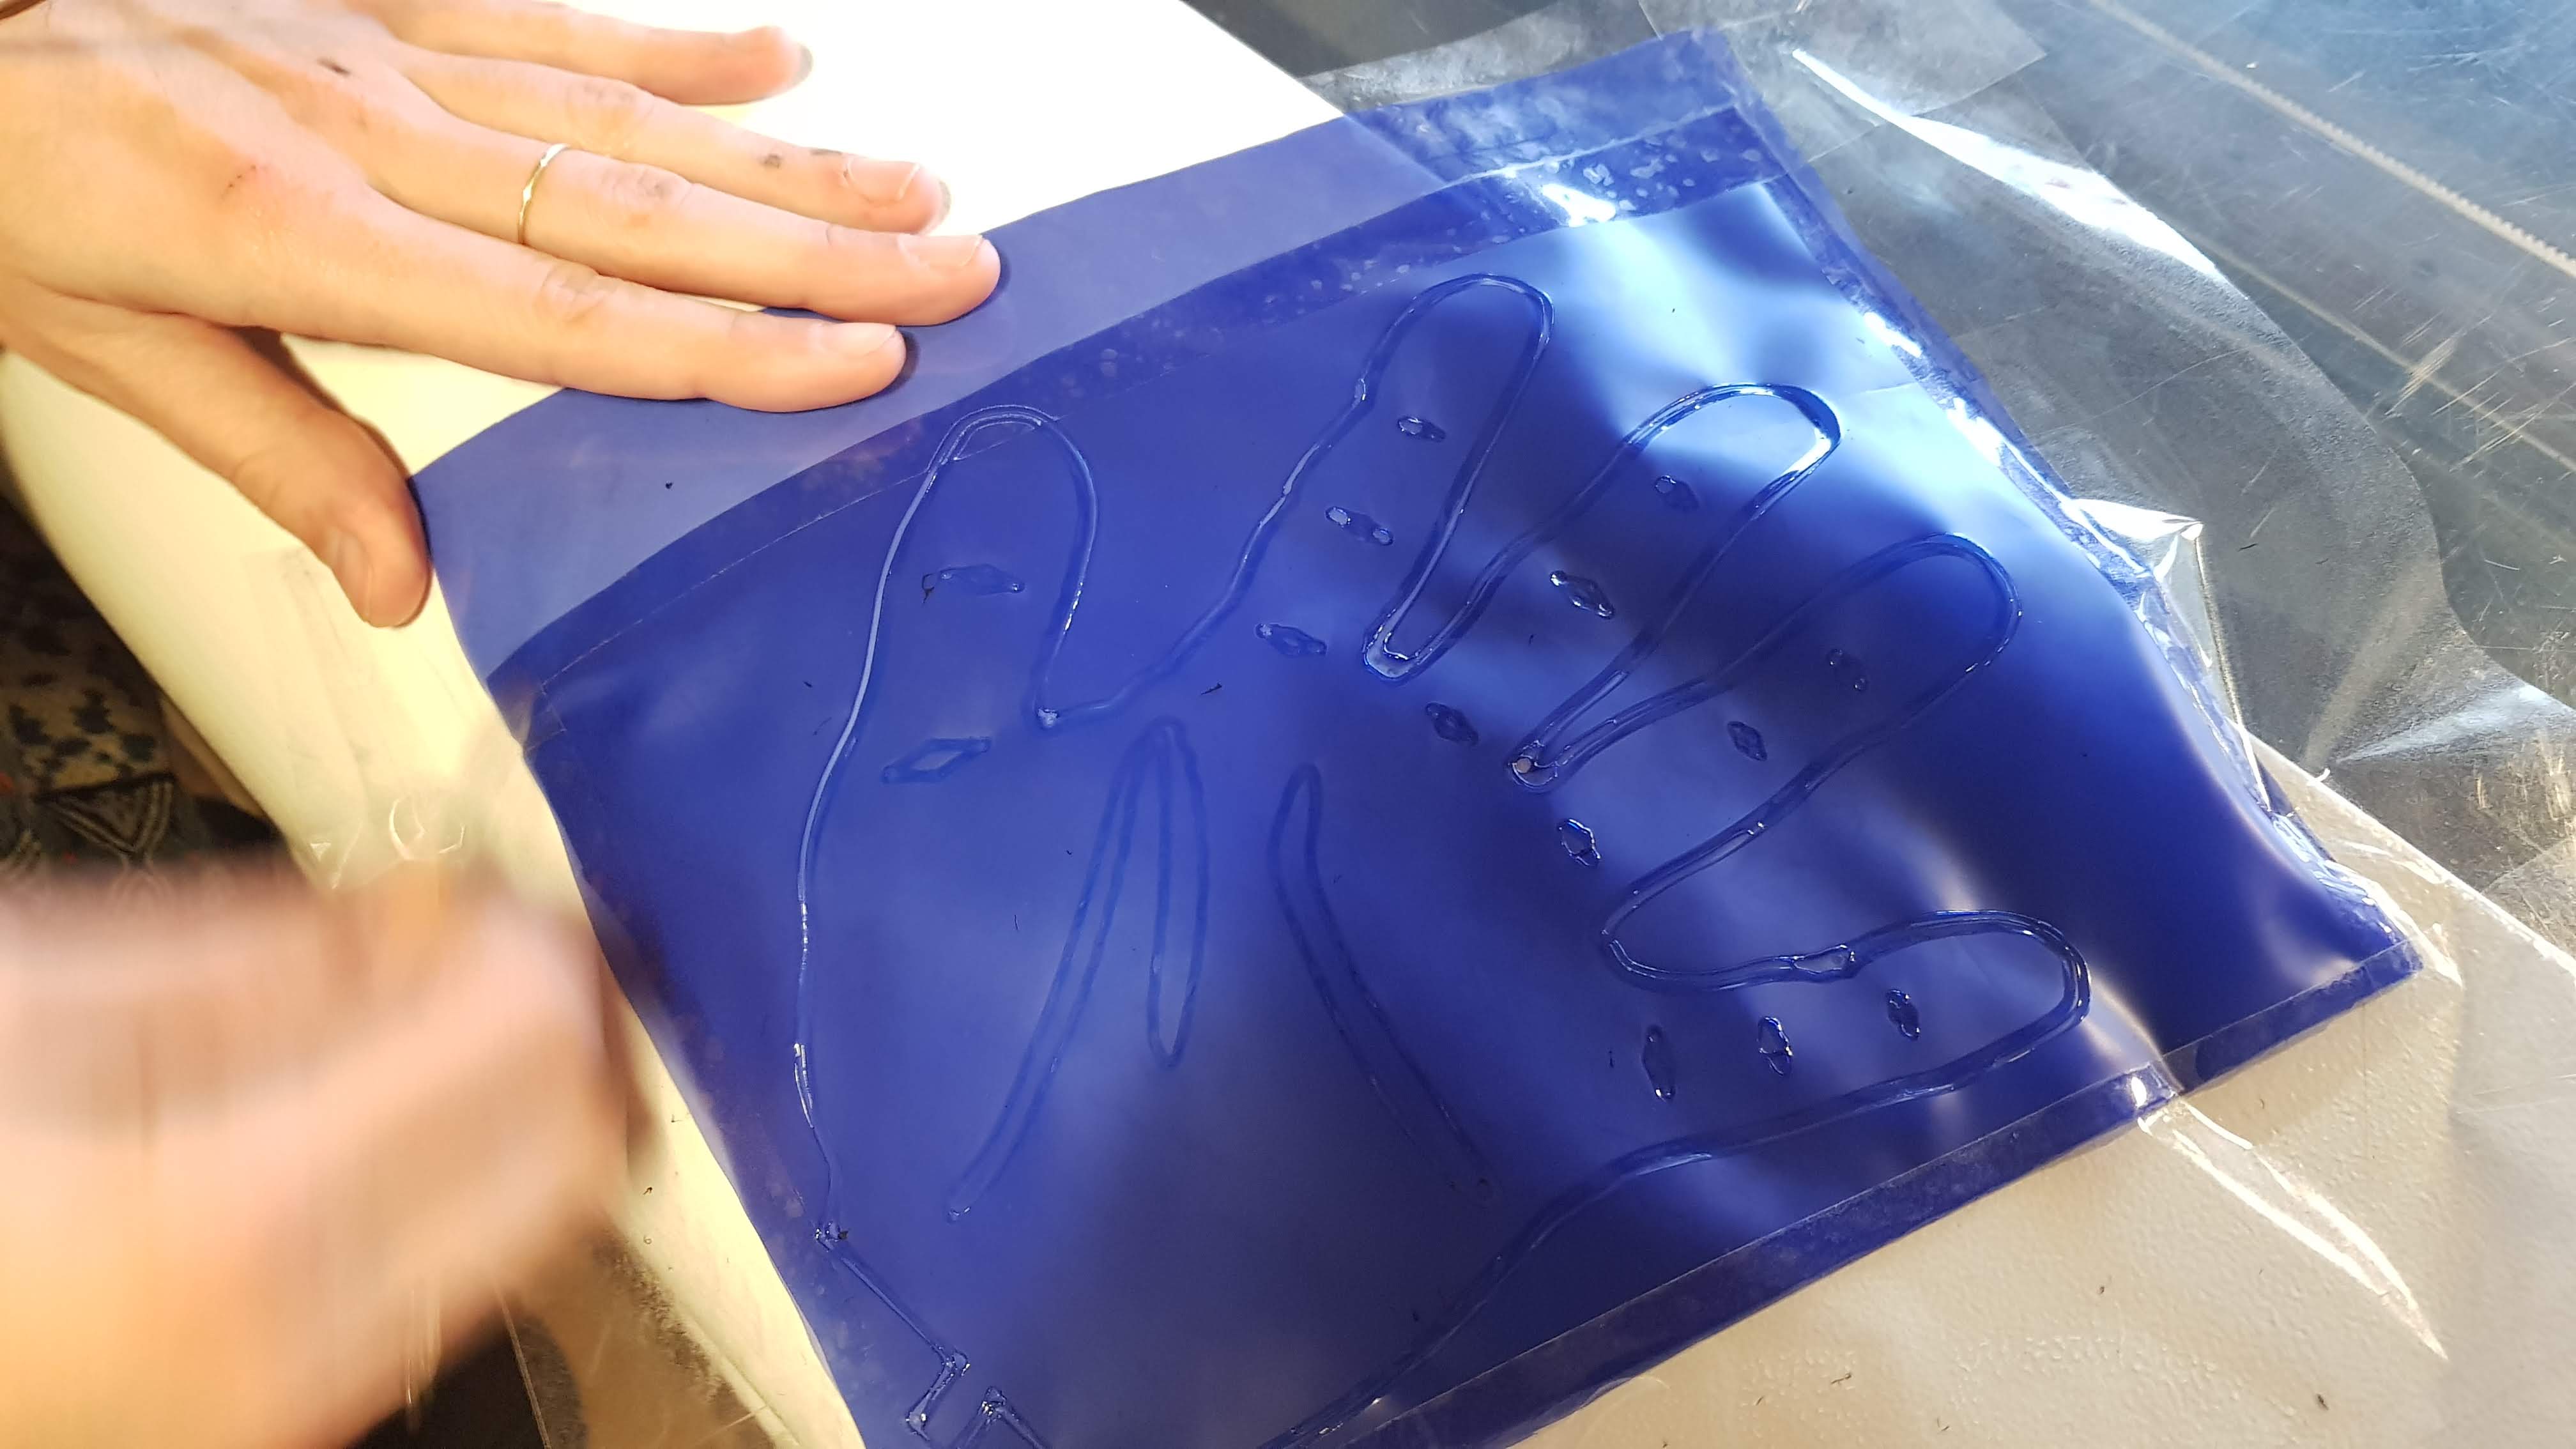
I can be quite stubborn and I liked the idea of making an inflatable hand with hinges on the fingers, so I decided to give it a try with Rhino and the laser cutter.
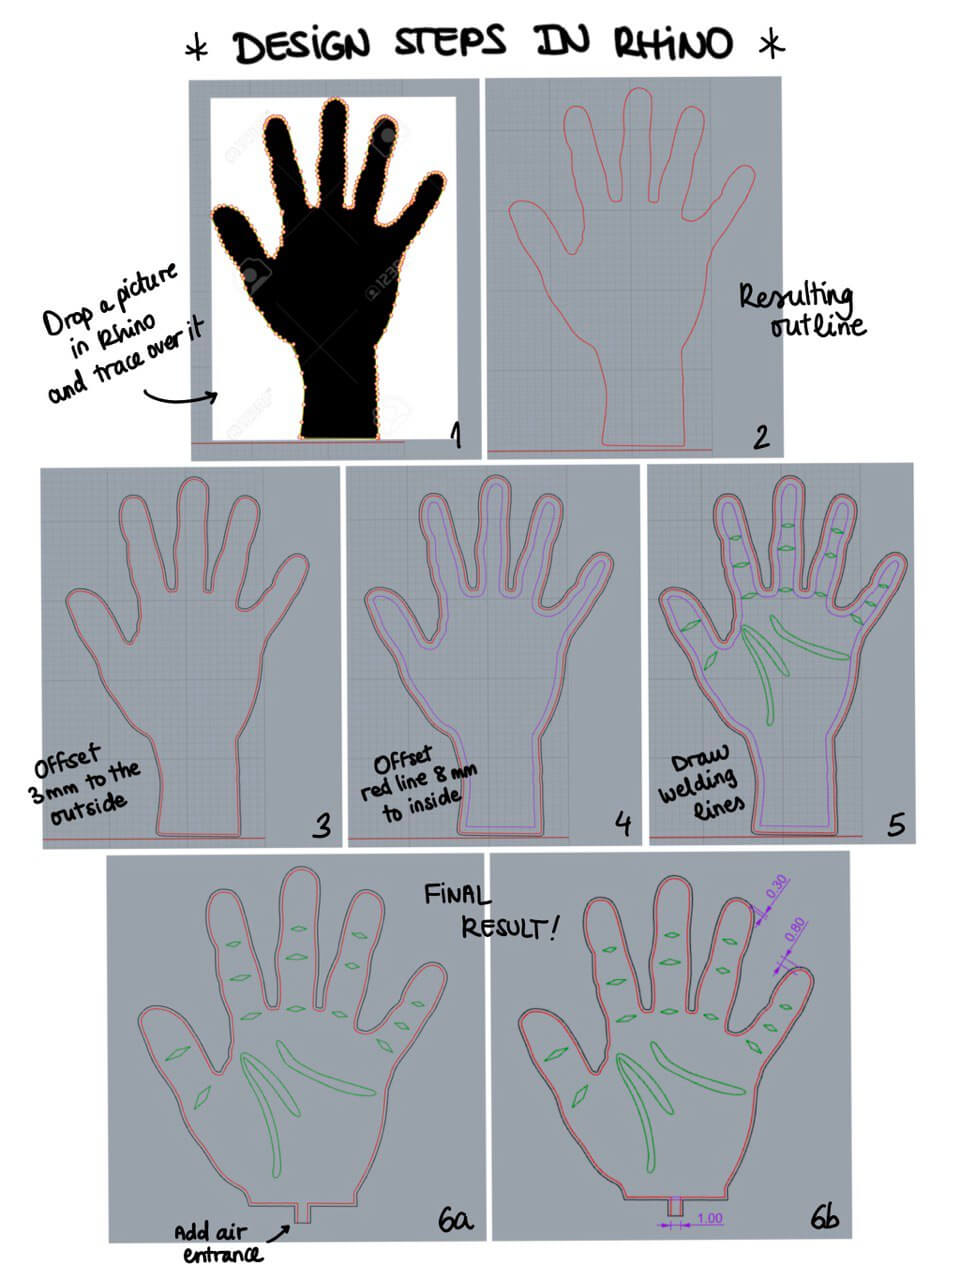
Design in Rhino
The design in Rhino was easy peasy using a reference picture to start.
Laser cutting issues
However, all the easiness during design translated in a plethora of issues during laser cutting. The main difficulty is to find the right settings to weld the TPU sheets together without melting them completely and making a hole. There are more details about this process in this page under the Inflatable construction methods section.
Below you can see the first attempt at laser cutting/welding the design.
A hand part 3: silicone
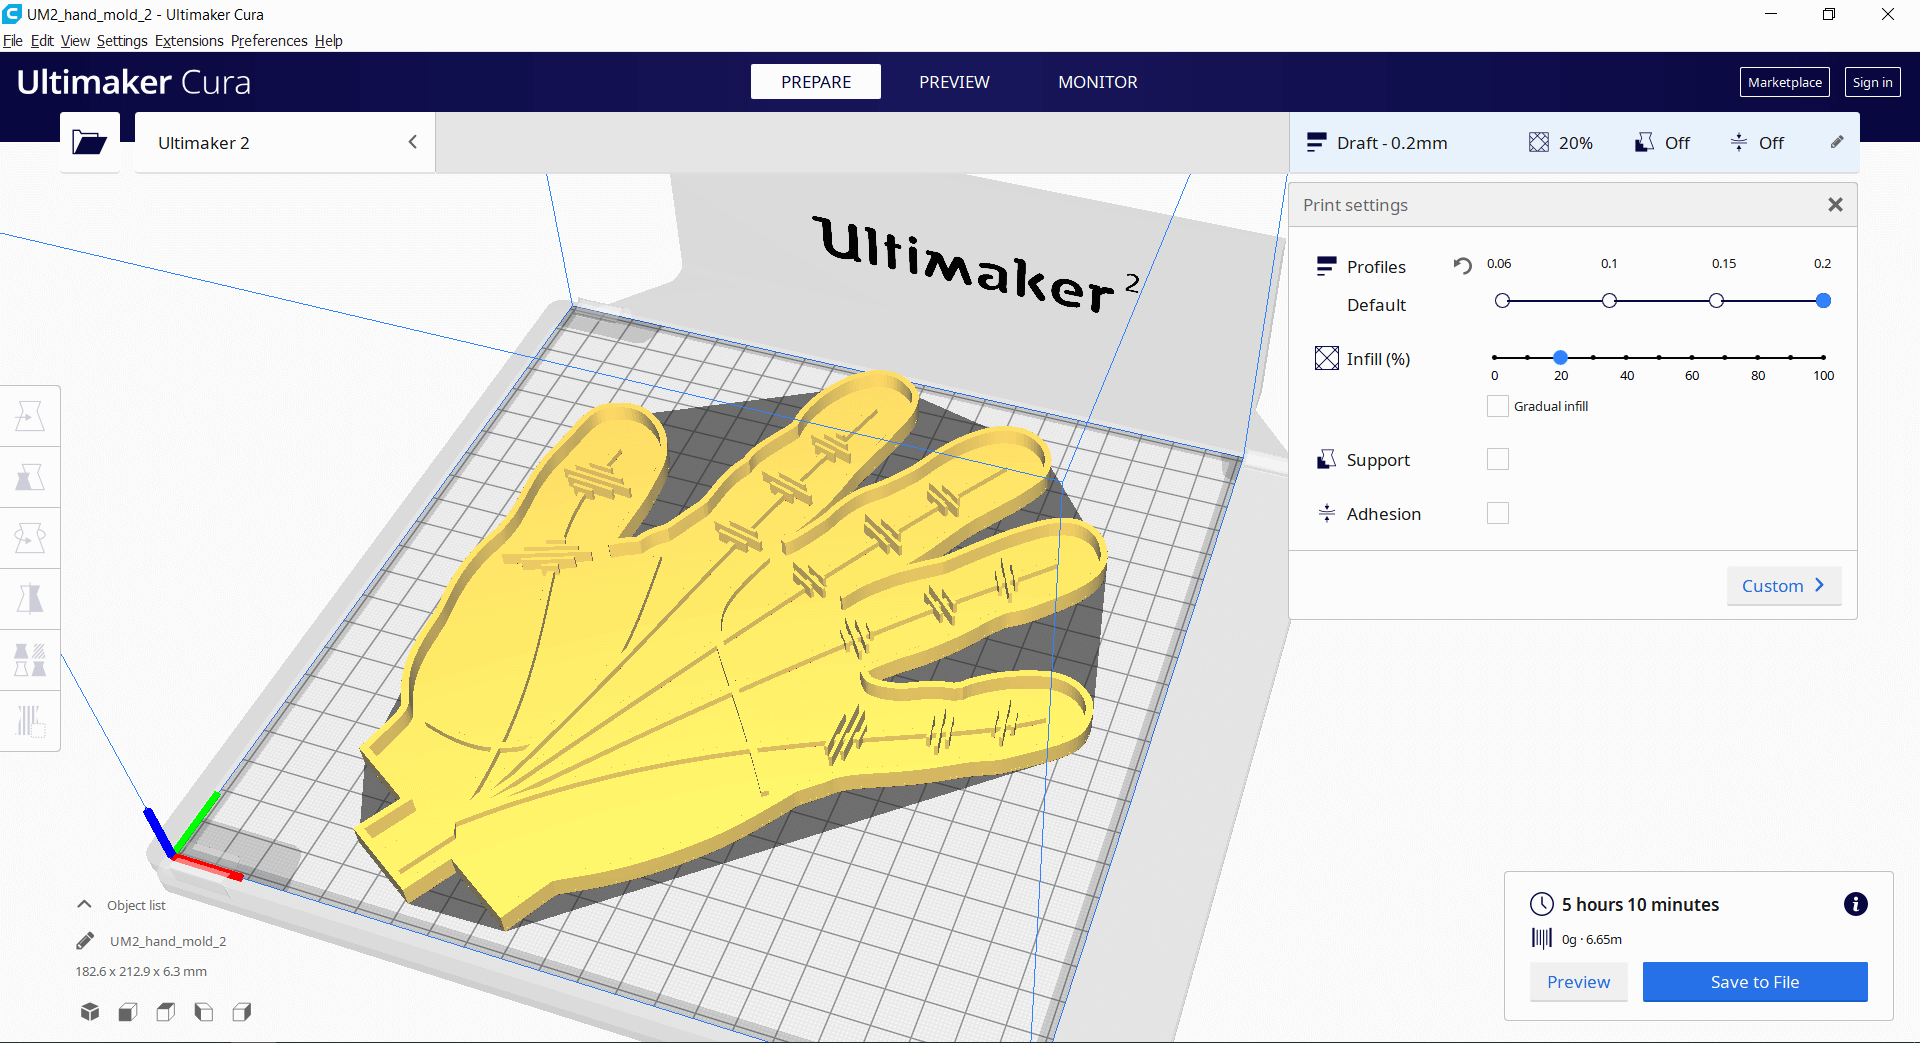
The third method I tried to make the inflatable hand a reality was silicone casting. The design in Rhino took quite a while because I wanted to follow the methods shown in the class slides for silicone actuators. I used as a base the design principles of one of the examples shown in Adriana Cabrera's slides.
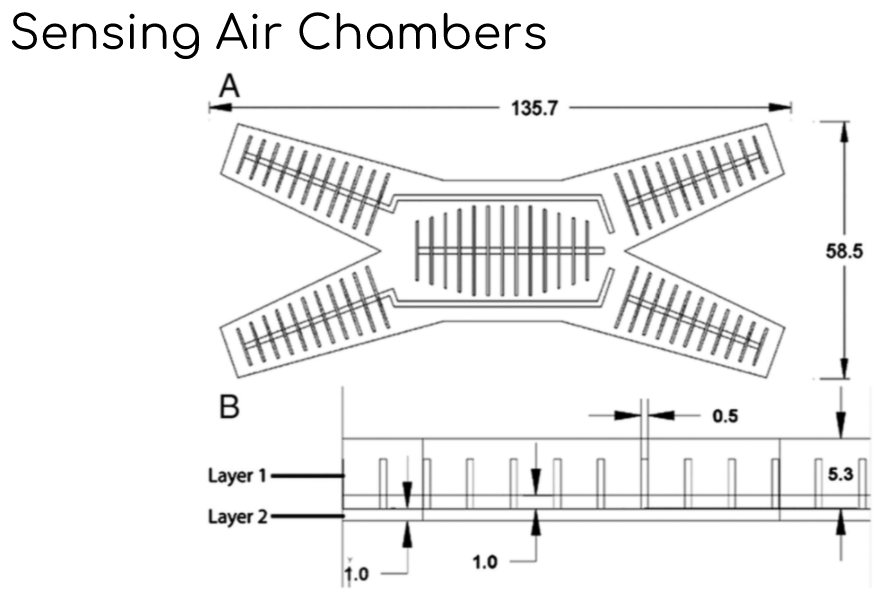
I decided I'd work with the following design constraints:
- Total actuator thickness: 6.3 mm
- Main part: 5.3 mm
- Cap: 1 mm
- Main air channel: 1mm tall x 1mm thick
- Secondary air channels: 3mm tall x 0.5 mm thick
- Minimum distance from air channel to edge of mold: 2mm
I chose those dimensions as I this would work better with my tools (a 3D printer) and with the envisioned design. Also, looking at last year students' documentation the silicone actuators they made had quite big air channels, so it seemed like larger dimensions are also ok.


The idea was to add arrays of air channels where the joints of the fingers are, so when inserting a fluid in the actuator the hand bends in those joints.
Once I had the mold parts in Rhino, I 3D printed them.
What is missing is to cast the silicone, which I couldn't do yet because of the Corona restrictions in the Netherlands. But I'll update the results in this page once I do it.
Inflatable construction methods
This is a summary of the techniques we learnt this week to make inflatable actuators.
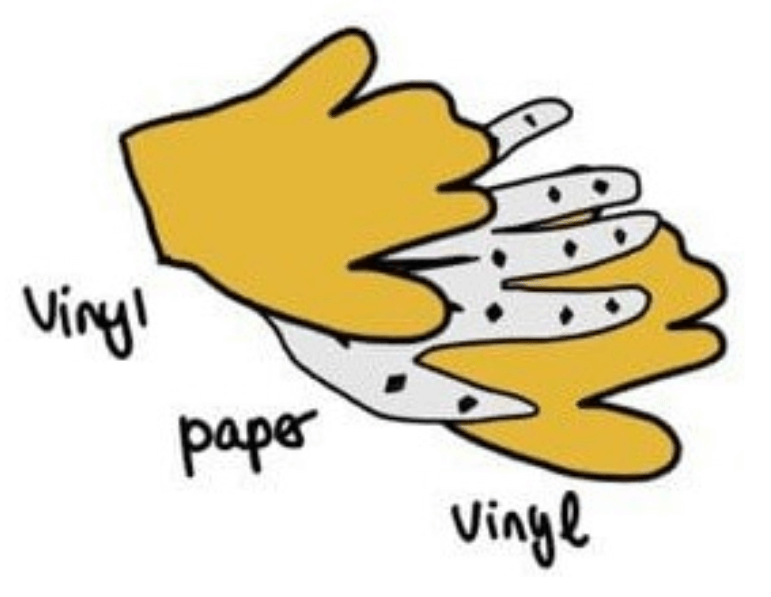
Vinyl + baking paper
The first method we were tought was using vinyl and baking paper. The idea is that you make a sandwich with two outer vinyl sheets with a baking paper sheet in the middle. The baking paper prevents the vinyl sheets from sticking to each other when you apply heat, thus creating a path for air to flow inside the vinyl.
| Step | Description |
|---|---|
| Draw the air paths | Using baking paper, draw the paths for the air to flow. |
| Cut the baking paper | Cut out the air path shape in baking paper. |
| Remove vinyl foil | The vinyl sheets are covered with foil in one of the sides. Make a mark on the side without foil, since this is the side that will be facing inwards in the inflatable. The remove the foil from the other side. |
| Assemble the sandwich | Place the vinyl sheets sandwiching the cut baking paper. |
| Apply heat | Using an iron or a hot press, apply heat to the sandwich (be careful to protect the iron with some baking paper or other material!). The vinyl sheets should stick in the areas where there is no baking paper. |
Lasercut TPU
Design constraints in Rhino
For this technique there are some design constraints to be taken into consideration:
- Distance between outer shape and welding lines: 3mm
- Distance between outer welding and inner weldings: minimum 5mm, recommended 8mm or more.
- Opening for straw to inflate: 1cm
Lasercutter settings
As much as I would like to have a list of settings for the lasercutter, after many attempts and several hours trying, we couldn't find the right settings to weld two pieces of TPU together. What is important to keep in mind is that for cutting the laser has to be on focus, but for welding we actually want the opposite. To achieve welding it is better to have the laser out of focus.
The challenge here is to find the right power and speed settings so the TPU layers are melted together but not completely perforated by the laser. This requires plenty of tests and I'd say a bit of luck. It also helps having really flat sheets of TPE, since it will help the two layers being equally distant from each other across the surface of the inflatable, making the welding process more even.
Silicone mold
To make inflatables with silicone you need to make a casting mold in which the liquid silicone is poured and let to harden. If you want to reuse the molds, the best way is to make it in two parts:
- One part will be the outer shape and the inner channels of the inflatable.
- The other part will be just the outer shape.
By glueing both together (with a brushed layer of silicone) you get a complete inflatable.
Mold design in Rhino
When designing the two mold parts in Rhino it is important consider the fabrication method that is going to be used.
When using laser cut acrylic sheet, the thickness of the acrylic used will influence the dimensions of the air channels of the inflatable, so that should be considered carefully. Another option is to use 3D printing, for which the dimensions of the mold can be as needed for the thickness of the inflatable and de dimensions of the air channels.