Skin electronics
Final work of the week
Unfortunately I couldn't make a practical deliverable for this week due to issues with Corona restrictions. I had some components at home, but couldn't make it work with that. I did all the design and code, but couldn't make it into a real prototype. You can find below all the info.
Inspiration
During this week for some reason it was hard to get inspiration. I'm one who wears little make up usually, so thinking how to adorn my face with LEDs and sensors was quite a challenge. I looked for some inspiration and these looks called my attention:

So something with interpreting tears in a not so moody way seemed inspiring! Perhaps not the jolliest theme for a Christmas party but the heart wants what the heart wants.
I also found this video from Adafruit in which they explain how to use the NeoPixels I had available. Pretty handy!
Design process
First sketch
In general I like simple designs, so this wasn't an exception. My initial idea was to make the eyes the focus of the look, and have tears on one side of the face that would light up subtly when something -like closing my eyes for some time- triggered them.

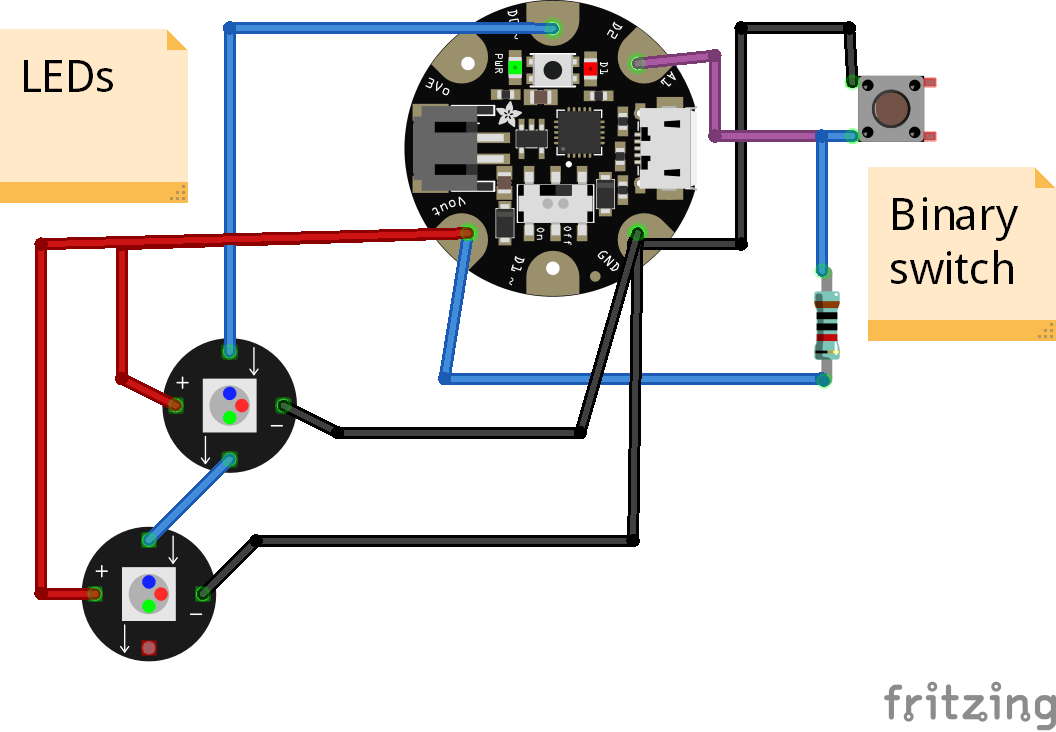
To make this I had available a Gemma board and some NeoPixels along with some other electronic components.
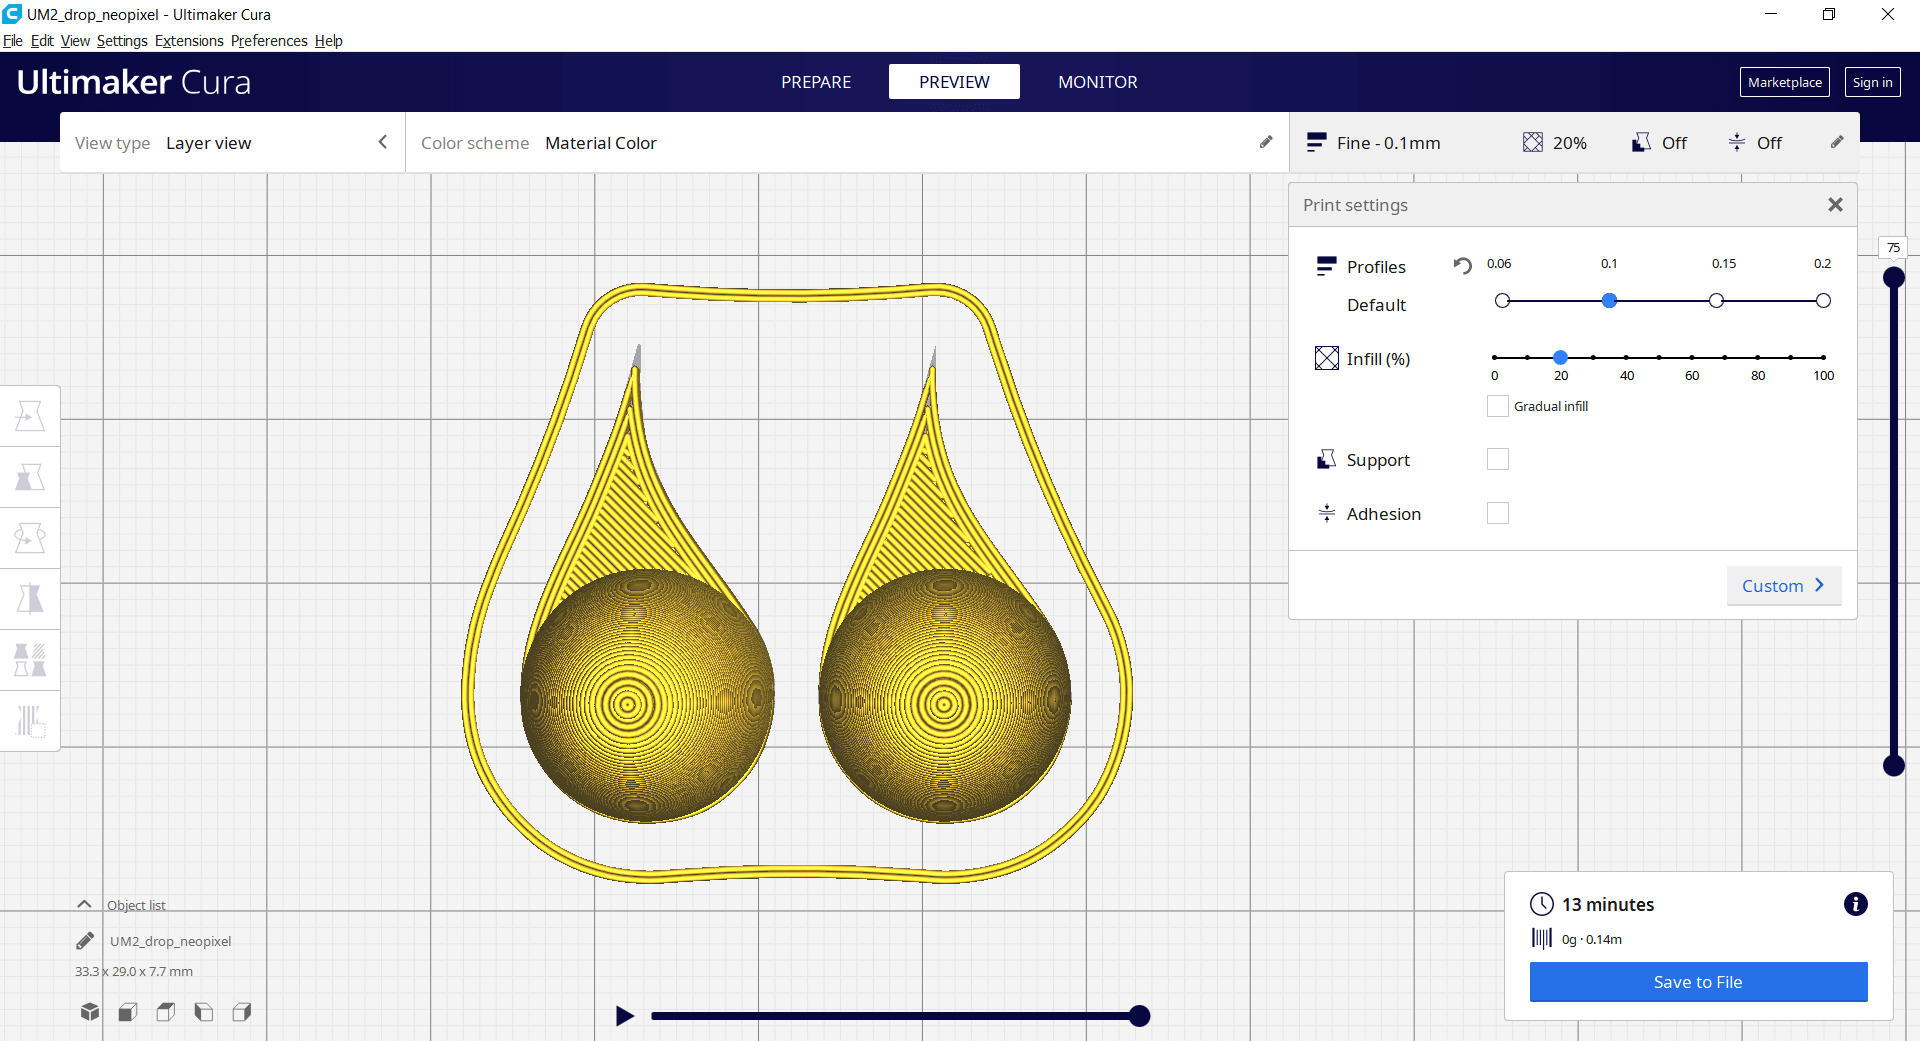
3D printed tears
I wanted the electronics to be hidden, so I designed a simple cover for the LEDs that would conceal their electronic appearance and diffuse the light at the same time. The cover has the shape of a tear and it is made to fit a NeoPixel. There are also pockets in the design to allow for cables to be routed out of the tear.
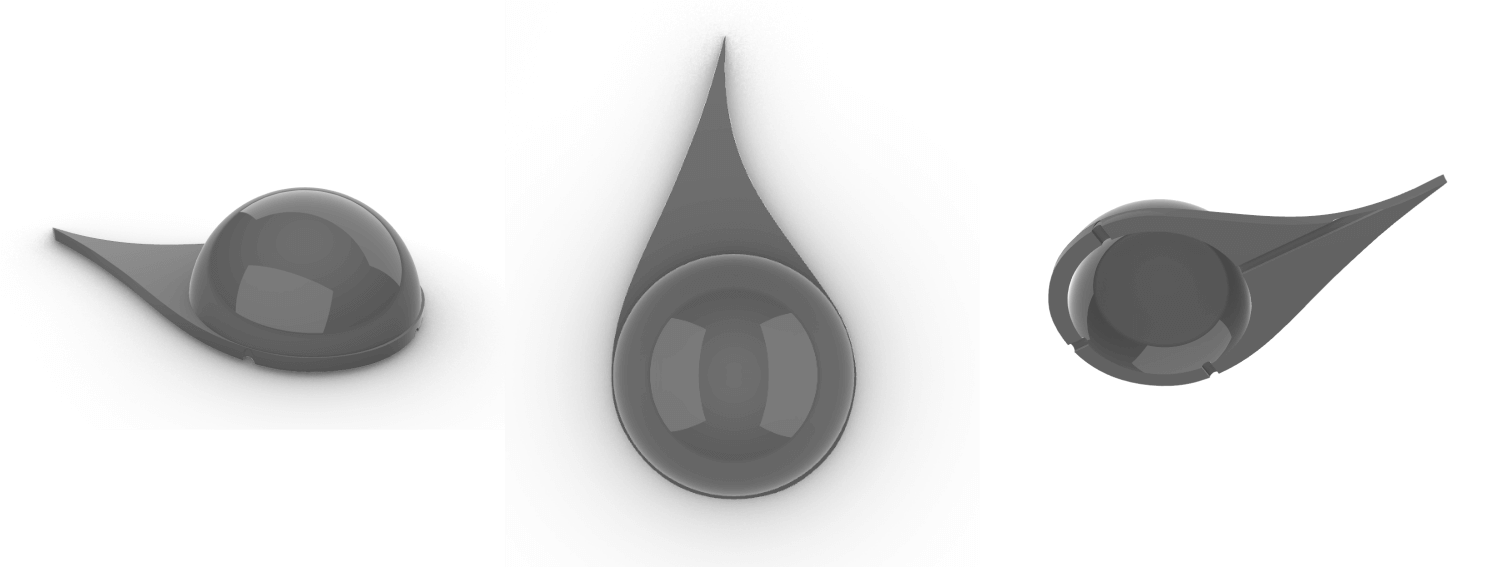
I exported them from Rhino to STL, then put in Cura to slice for the 3D printer. I used silver PLA as material in my Ultimaker 2.
Coding the tears
Next step was to arrange the LED behavior. I wanted to have a fade in fade out effect instead of a harsh on/off. Also, I wanted to first have the top tear lit, then the bottom one. Using the Adafruit example code for Neopixel and some snippets posted around forums, I got the desired behavior.
However, I had plenty of issues with the Gemma board because it wasn't recognized by the computer and couldn't be programmed. I looked online and asked around for possible root causes and I found that this is quite a common problem and yet no clear solution. So even though I spent hours trying to debug and find what was going wrong, I didn't manage to make it work. That's unfortunate, but at least I have a piece of code ready to try when/if I manage to get the Gemma working!
Click to see the full Arduino sketch
// Based on different codes // Adafruit NeoPixel example code // https://forums.adafruit.com/viewtopic.php?f=47&t=148380 // https://forums.adafruit.com/viewtopic.php?t=41143
include 
ifdef AVR
include // Required for 16 MHz Adafruit Trinket
endif
// Which pin on the Arduino is connected to the NeoPixels? // On a Trinket or Gemma we suggest changing this to 1:
define LED_PIN 6
// How many NeoPixels are attached to the Arduino?
define LED_COUNT 2
// Declare our NeoPixel strip object: Adafruit_NeoPixel strip(LED_COUNT, LED_PIN, NEO_GRB + NEO_KHZ800); // Argument 1 = Number of pixels in NeoPixel strip // Argument 2 = Arduino pin number (most are valid) // Argument 3 = Pixel type flags, add together as needed: // NEO_KHZ800 800 KHz bitstream (most NeoPixel products w/WS2812 LEDs) // NEO_KHZ400 400 KHz (classic 'v1' (not v2) FLORA pixels, WS2811 drivers) // NEO_GRB Pixels are wired for GRB bitstream (most NeoPixel products) // NEO_RGB Pixels are wired for RGB bitstream (v1 FLORA pixels, not v2) // NEO_RGBW Pixels are wired for RGBW bitstream (NeoPixel RGBW products)
void setup() { strip.begin(); // INITIALIZE NeoPixel strip object (REQUIRED) strip.show(); // Turn OFF all pixels ASAP strip.setBrightness(50); // Set BRIGHTNESS to about 1/5 (max = 255) }
void loop() {
for(int i=0; i<strip.numPixels(); i++) {
    strip.setBrightness(200);
    strip.setPixelColor(i, 0,0,127);
    strip.show();
    delay(1000);
    strip.setBrightness(0);
    strip.show();
    delay(1000);
}
}
// Some functions of our own for creating animated effects -----------------
// Fill strip pixels one after another with a color. Strip is NOT cleared // first; anything there will be covered pixel by pixel. Pass in color // (as a single 'packed' 32-bit value, which you can get by calling // strip.Color(red, green, blue) as shown in the loop() function above), // and a delay time (in milliseconds) between pixels. void colorWipe(uint32_t color, int wait) { for(int i=0; i<strip.numPixels(); i++) { // For each pixel in strip... strip.setPixelColor(i, color); // Set pixel's color (in RAM) strip.show(); // Update strip to match delay(wait); // Pause for a moment } }
// Theater-marquee-style chasing lights. Pass in a color (32-bit value, // a la strip.Color(r,g,b) as mentioned above), and a delay time (in ms) // between frames. void theaterChase(uint32_t color, int wait) { for(int a=0; a<10; a++) { // Repeat 10 times... for(int b=0; b<3; b++) { // 'b' counts from 0 to 2... strip.clear(); // Set all pixels in RAM to 0 (off) // 'c' counts up from 'b' to end of strip in steps of 3... for(int c=b; c<strip.numPixels(); c += 3) { strip.setPixelColor(c, color); // Set pixel 'c' to value 'color' } strip.show(); // Update strip with new contents delay(wait); // Pause for a moment } } }
// Rainbow cycle along whole strip. Pass delay time (in ms) between frames. void rainbow(int wait) { // Hue of first pixel runs 5 complete loops through the color wheel. // Color wheel has a range of 65536 but it's OK if we roll over, so // just count from 0 to 565536. Adding 256 to firstPixelHue each time // means we'll make 565536/256 = 1280 passes through this outer loop: for(long firstPixelHue = 0; firstPixelHue < 5*65536; firstPixelHue += 256) { for(int i=0; i<strip.numPixels(); i++) { // For each pixel in strip... // Offset pixel hue by an amount to make one full revolution of the // color wheel (range of 65536) along the length of the strip // (strip.numPixels() steps): int pixelHue = firstPixelHue + (i * 65536L / strip.numPixels()); // strip.ColorHSV() can take 1 or 3 arguments: a hue (0 to 65535) or // optionally add saturation and value (brightness) (each 0 to 255). // Here we're using just the single-argument hue variant. The result // is passed through strip.gamma32() to provide 'truer' colors // before assigning to each pixel: strip.setPixelColor(i, strip.gamma32(strip.ColorHSV(pixelHue))); } strip.show(); // Update strip with new contents delay(wait); // Pause for a moment } }
// Rainbow-enhanced theater marquee. Pass delay time (in ms) between frames.
void theaterChaseRainbow(int wait) {
int firstPixelHue = 0; // First pixel starts at red (hue 0)
for(int a=0; a<30; a++) { // Repeat 30 times...
for(int b=0; b<3; b++) { // 'b' counts from 0 to 2...
strip.clear(); // Set all pixels in RAM to 0 (off)
// 'c' counts up from 'b' to end of strip in increments of 3...
for(int c=b; c
void fadeIn(int t) { //fade in 0% -> 100% (t millisec) for(int brightness = 0; brightness <= 255; brightness++) { strip.setBrightness(brightness); strip.show(); delay(t / 255); // divide t milliseconds by the number or brightness steps } }
void fadeOut(int t){ //fade out 100% -> 0% (t millisec) for(int brightness = 255; brightness >= 0; brightness--) { strip.setBrightness(brightness); strip.show(); delay(t / 255); // divide t milliseconds by the number or brightness steps } }
Putting the circuit together
This is the circuit I had in mind for the project. It is quite straightforward. However, since I couldn't program the Gemma board, it didn't make sense to put it together.
Attaching to skin and hair
For this I was thinking of hiding the battery in my hair using hair ties and having the Gemma board somewhat closer to my face, like behind one of my ears taped with fabric tape. Then the cables could be routed using the shortest path from there to my cheeks and concealed with some make up.
For the tears, I thought of using fabric tape or double sided tape on the back side of the tears and Neopixels so it would be concealed.