2. Digital bodies
This week I am very excited to start.
Because these tools will help me become a more efficient designer and be able to visualize the human body in other ways and take them to another dimension at work.
I will also show you the way I have to carry out the assigments and handle them with my work.
I work in 3 different places and how I manage the time and be able to carry out the process of being in classes and being able to start my final project.
When Anastasia showed us all the tools and ways to create and digitize the human body, I was really surprised and on my return on the train I was able to see and download some of the apps and see some small tutorials or reviews and I started to see what the best way and what else suits my way of designing and what I want to do.
This week Assignments
Inspiration
Platform | Daisy Collingridge - Behind The Scenes Screening, Unit Gallery. 2021
Trailer Pieles Eduardo Casanova from Eduardo Casanova on Vimeo.
Scanning 3D
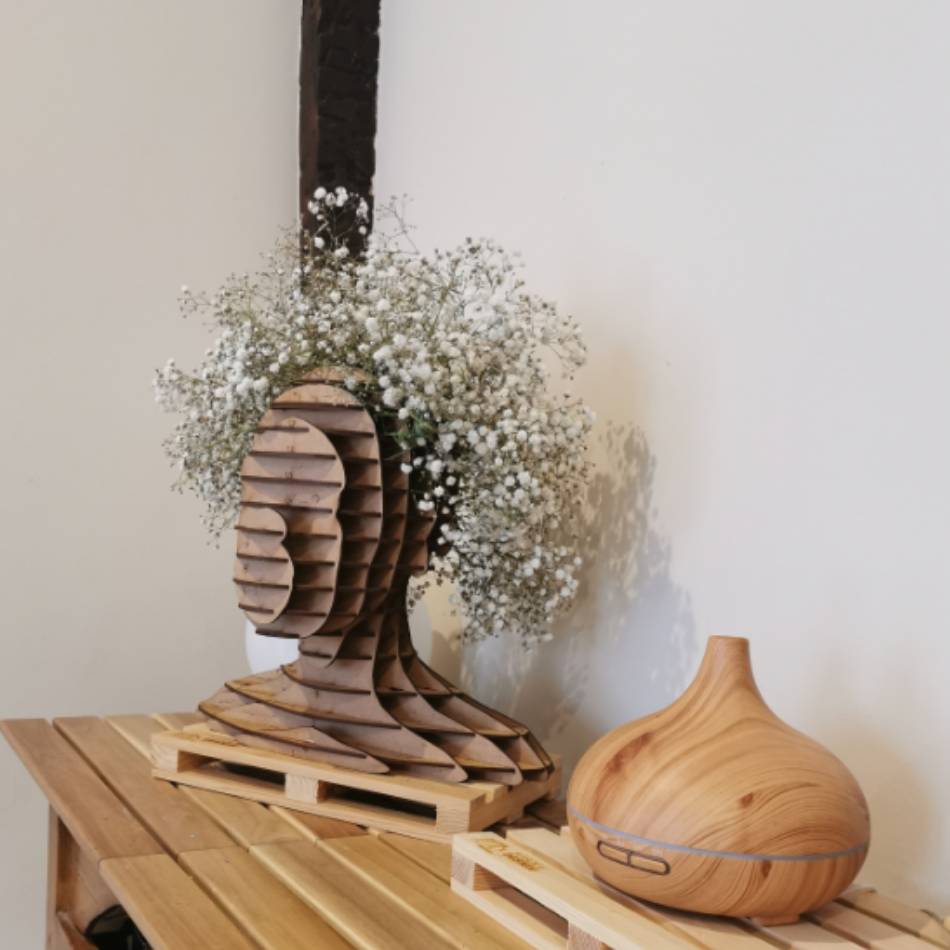
For the 3D scan I have used a doll that I have taken for reference and inspiration
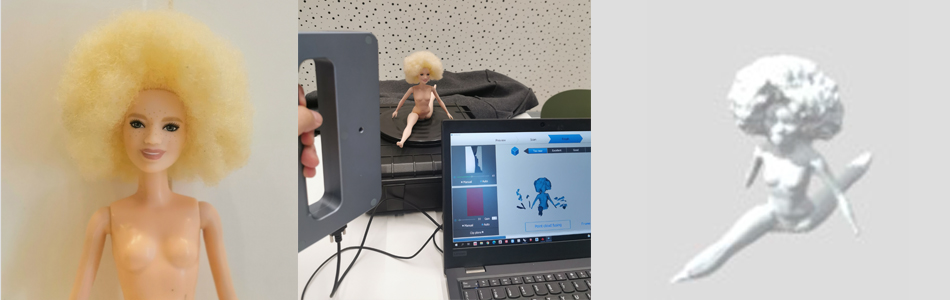
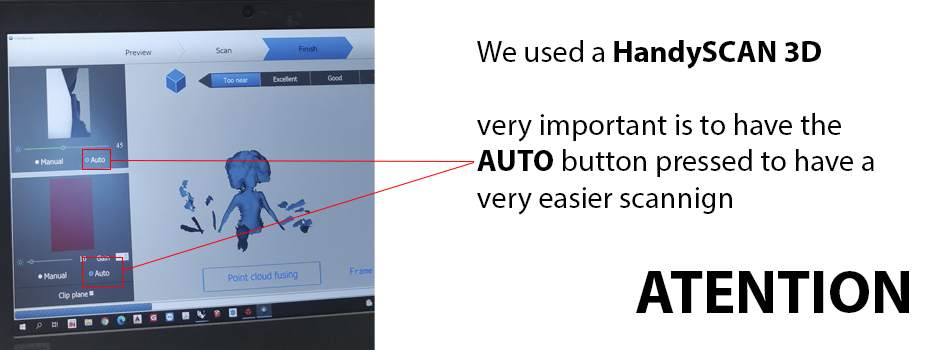
for the 3D sacanning I use 2 diferents: In the Basque Biodesign Center we use the handyscan 3D and I used at home the AQtone app to scan Amalur
Mobile free app on the sony xperia Z4
Manipulation of the scanning and MakeHuman
after saving my avatar from makehuman, I have to transfer it to rhinoceros for a bust treatment. you can saved as .stl and oppened on Rhinoceros The makeHuman avatar
Rhinoceros
After I got the doll from MakeHuman I transform to a bust using MeshTrim
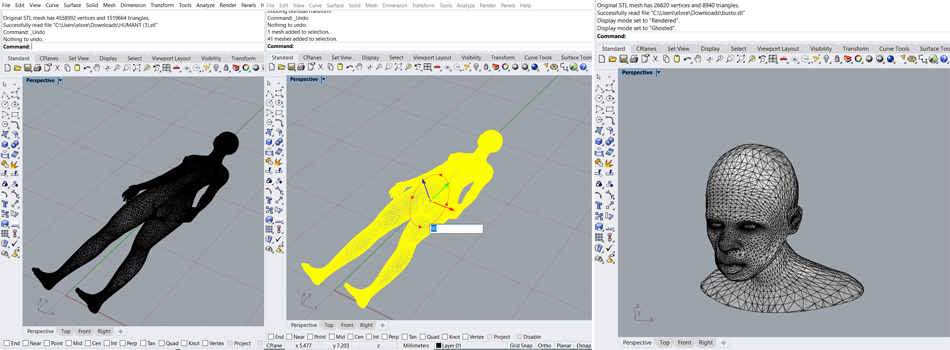
I used the comands:
POLILINE
MESHTRIM
MESH TO NURB
CAP
EXPORT
.STL
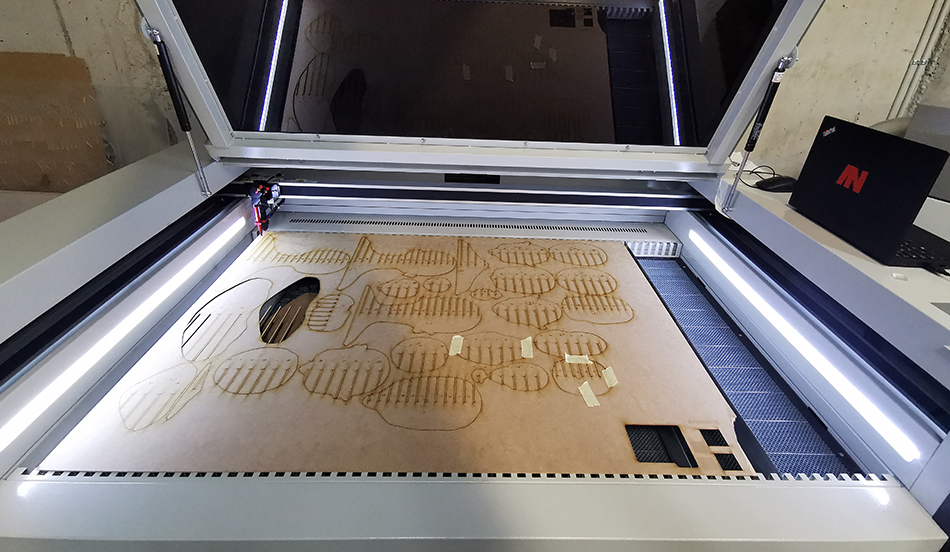
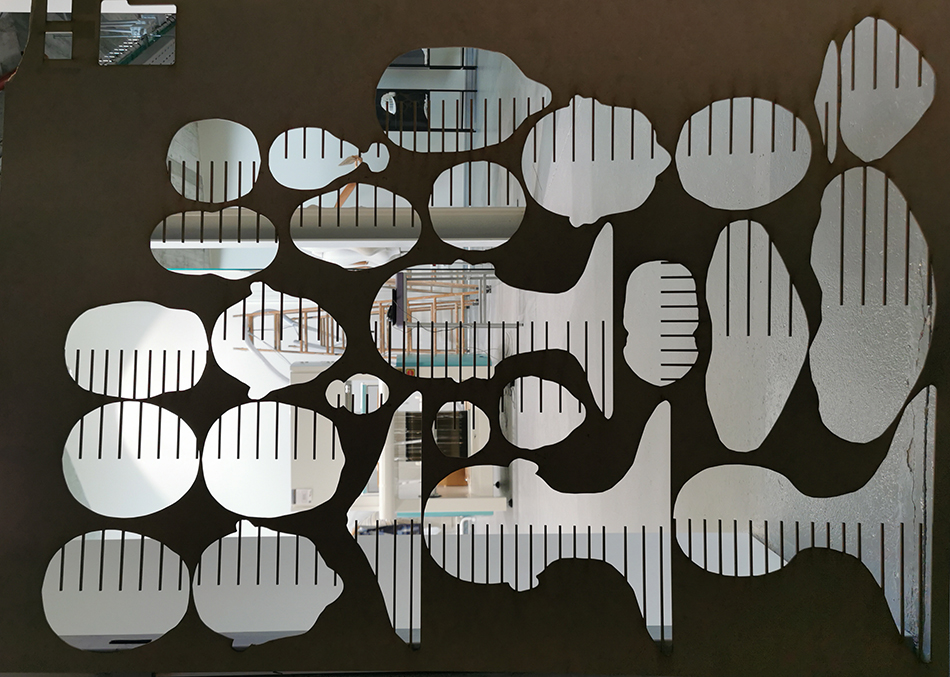
Slicer for fusion 360
To treat the .stl file and prepare it for the laser cutter, the first thing will appear a window where you can choose the name of the file in the location of the computer but it is important to see that the file is imported in the Z position and it will be positioned correctly at the base of the work table Then when it goes up to the work table, check the size if it is the right one, continue to the next step, otherwise you can change the dimensions of the bust. Then choose the way you want to cut the bust to assemble it.
I have used interlocked slicer.
The first axis I put 20 layers The second axis I have put 10 layers
Then checking that all the parameters are correct and that I have selected the dimension of the plate where we will cut the pieces, it can be recorded and prepared to pass it to the laser cutter.
[The bust file in slicer](
Laser Cutting
Material: Carboard
Thickness: 3 mm

CUT
Speed: 35
Min. power: 70
Max. power: 74

ENGRAVE
Speed: 800
Min. power: 25
Max. power: 35
Papering laser cut program
Ensambling the bust
Amalur