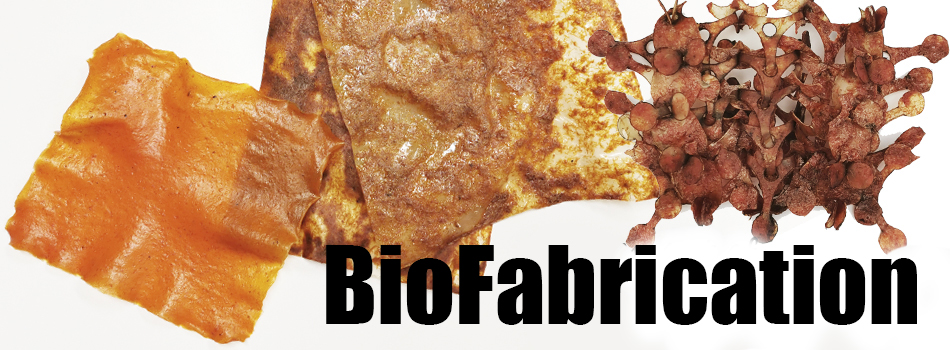
6. BioFabricating Materials
Many initiatives and companies and experiments come to mind with biomanufacturing. It is a viable alternative to plastics derived from peroleo and also a way of reusing masses that for others would be waste, for a Biomanufacturer it would be the beginning of a new world. I like this project that I am going to show you a lot since it briefly shows the entire process from the collection, processing, biomanufacturing, use and recycling of the product.
As if it were things of fate, chance assigned me the carrots in Biochromes and with the resulting biomass I have discovered the great properties of the carrot and all the possibilities it could offer. It all started when I showed him this biomass as a plasticine of a super nice color that I found after extracting the ink that I used. So we dehydrated it and saved it for this week and I'm very excited to explore this biomass and turn it into a bioplastic.
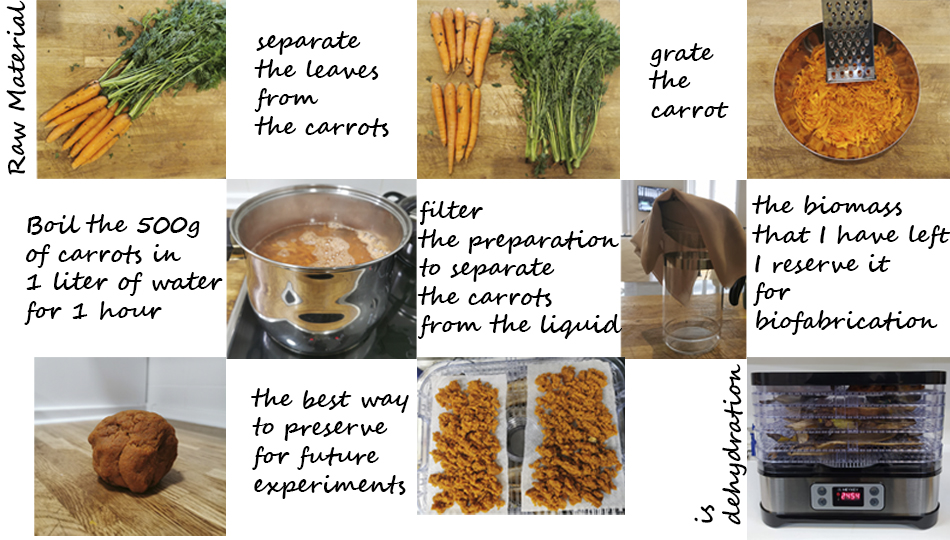 This is the biomass and how I obtained it
When I got home for the weekend, I started trying to make bioplastics. First, I followed the recipes as they appeared to me in the different documentations that I found.
So I had an idea of how they worked and the different densities of the material, in this part I used the exact unmodified recipes to see if I could replicate the materials they had made in the past.
First of all I tested them without the biomass and then I added the biomass to see the differences and how they resisted and thus be able to see the differences and how I could improve those recipes and create something more similar to what I want and be able to find uses for those bioplastics.
The Experimentation
I have replicated the recipes of Ana Bejarano from Los Andes university
I have tried four recipes and will explain them right away:
Gelatine
For me it was the easiest and I knew perfectly how it was going to turn out so I tried it first to warm up.
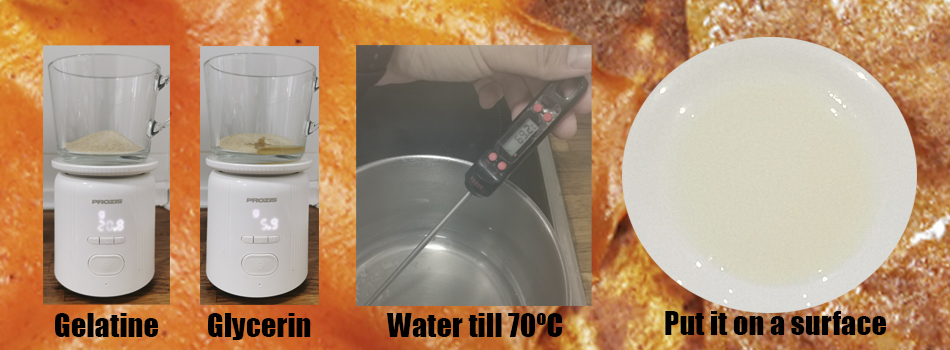
An easy-to-use surface that we have several are glass dishes. It is quite useful for creating a surface that is the same size to see if they shrink and how much they shrink and it is quite easy to remove from such smooth materials.
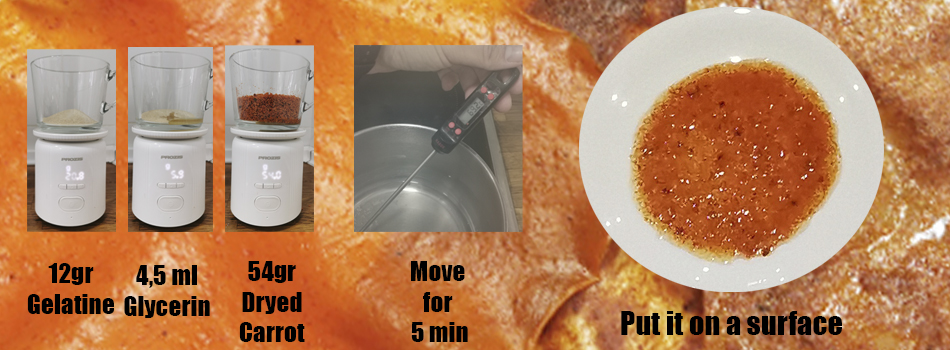
I have added the same amount of water for the biomass just for testing.
Igredients:
54 ml of water
12gr of gelatin
4.5 glycerin
54gr Biomass (optional)
Process:
1. In a saucepan add the water and the gelatin. Stir until the lumps formed by the gelatin dissolve.
2. Put the pot over low / medium heat and add the glycerin.
3. Stir constantly at a temperature of 70ºC or until it has a thick consistency (5 minutes approximately).
4. Pour the mixture into the mold.
5 Let dry on a clean and level surface to achieve a sheet of the same thickness, at least 48 hours.

Properties:
Transparency: X X X X X
Opacity: X
Elasticity: X
Smell: X
Flexibility: X X
Stamina: X X X X X
Mustiness:
Agar
I really wanted to try agar as it is a vegan way of making these bioplastics.
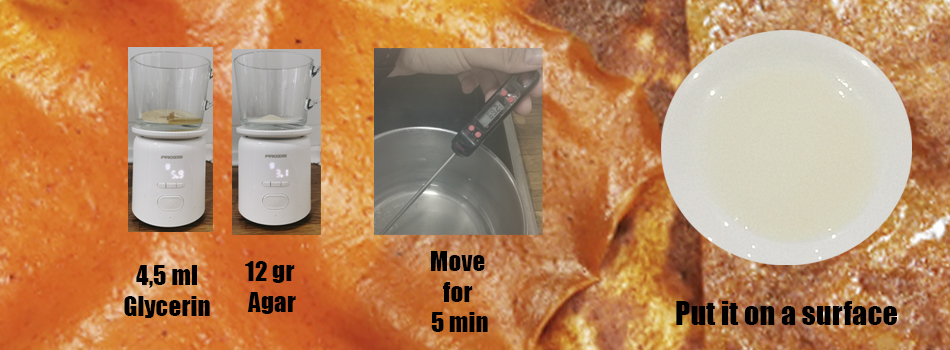
Is a litte bit harder to work with agar than gelatine but still a very easy recipe to follow.
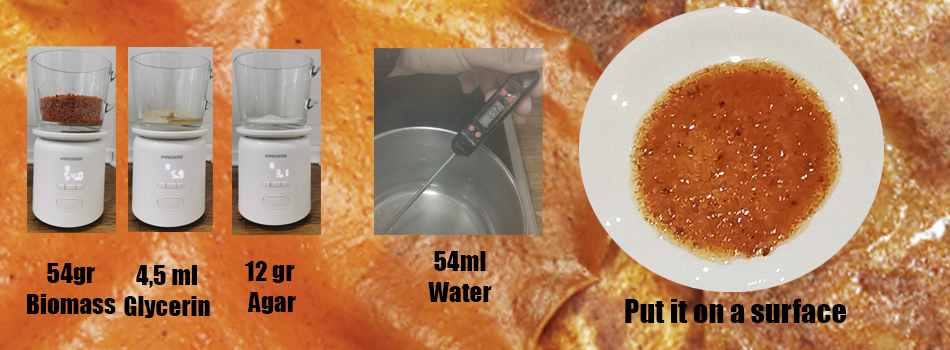
I didn't like much the results I probably have to try another recipe
Igredients:
54 ml of Water
12gr of Agar
4.5 glycerin
54gr Biomass (optional)
Process:
1. In a saucepan add the water and the agar. Stir until the lumps formed by the agar dissolve.
2. Put the pot over low / medium heat and add the glycerin.
3. Stir constantly at a temperature of 70ºC or until it has a thick consistency (5 minutes approximately).
4. Pour the mixture into the mold.
5 Let dry on a clean and level surface to achieve a sheet of the same thickness, at least 48 hours.

Properties:
Transparency: X X
Opacity: X X X
Elasticity: X
Smell: X
Flexibility: X X
Stamina: X
Mustiness: X
Gelatine with Agar
With this combination I did not know what to expect since the recipe with only gelatin I liked a lot and the recipe with only Agar I did not like at all, so I did not know what to expect with the union of the two. I did not know if the structure of the gelatin and its beauty would predominate or the ugliest part of the recipe with agar.
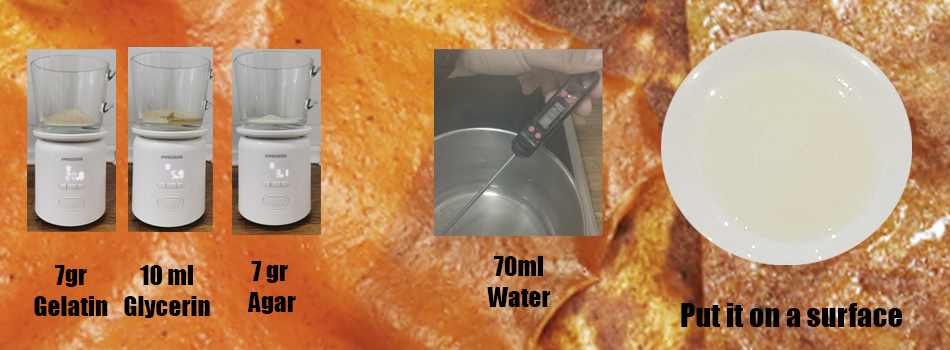
when I was mixing it looks better than just agar so far so I was happy with that alredy
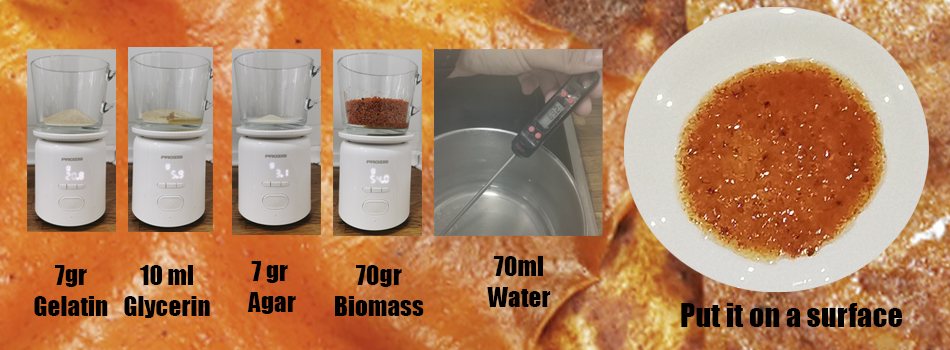
When I add the biomass it was a litter harder to mix but be patient.
Igredients:
70 ml of Water
7gr of Agar
7gr of Gelatine
10 of Glycerin
70gr Biomass (optional)
Process:
1. In a saucepan add the water, the agar and the Gelatine. Stir until the lumps formed by the agar dissolve.
2. Put the pot over low / medium heat and add the glycerin.
3. Stir constantly at a temperature of 70ºC or until it has a thick consistency (5 minutes approximately).
4. Pour the mixture into the mold.
5 Let dry on a clean and level surface to achieve a sheet of the same thickness, at least 48 hours.

Properties:
Transparency: X X X
Opacity: X X
Elasticity: X X X
Smell: X
Flexibility: X X X X
Stamina: X
Mustiness: X
Biofoil Agar with Gelatin
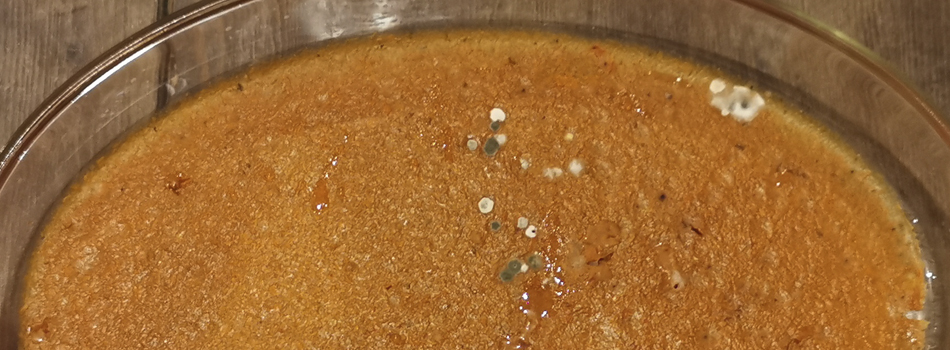
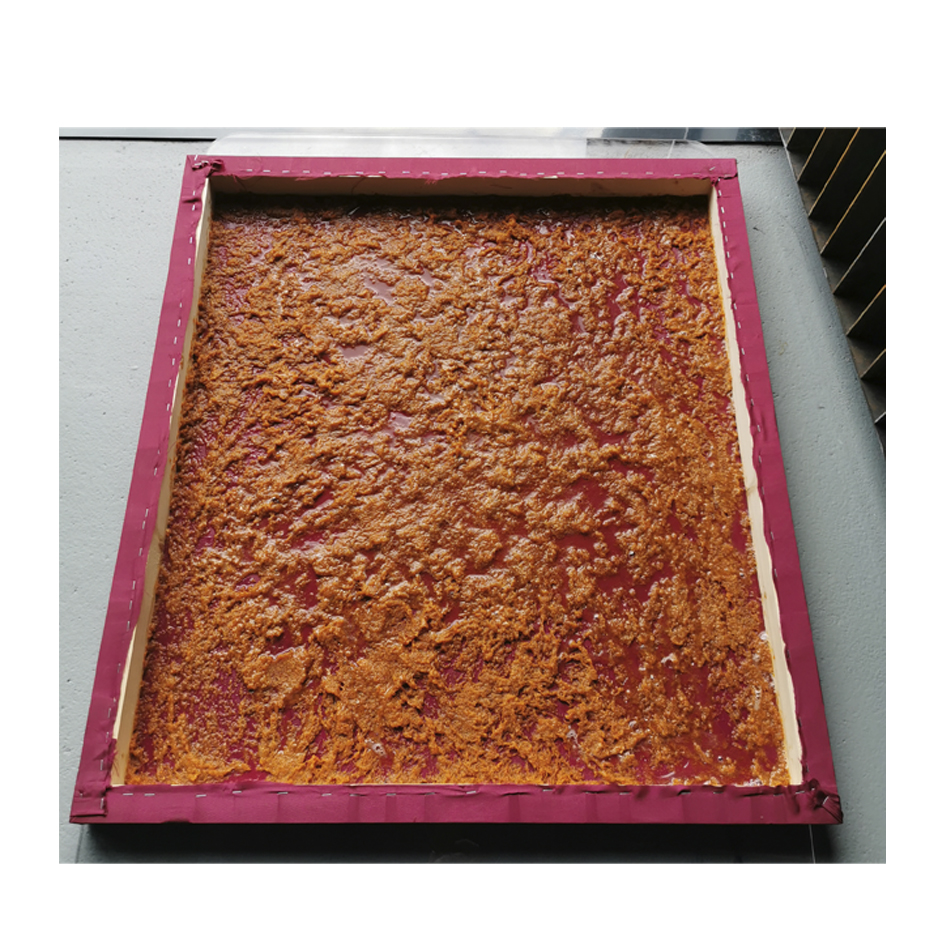
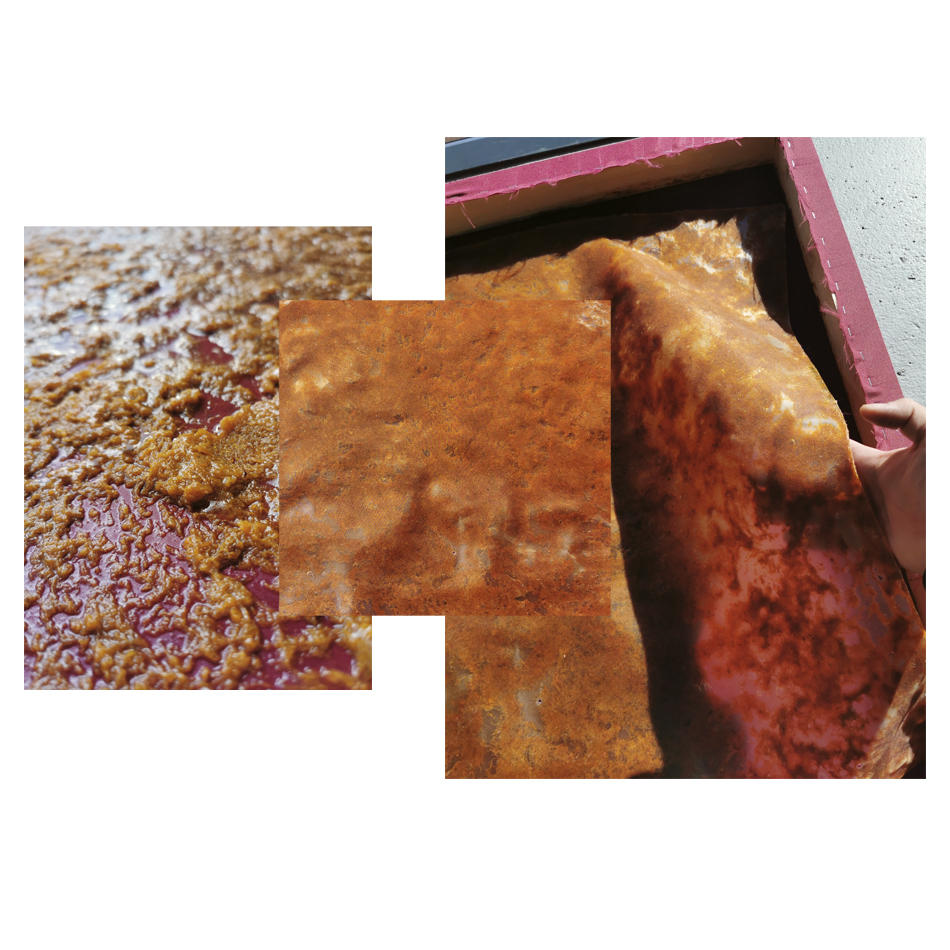
Since the previous experiment with the mixture of gelatin and agar went so well, I wanted to test on a larger scale so I tried a new recipe, in which they mix the ingredients with more water and less product because one thing that I realized It was that if I scaled the recipe that I had liked, I would spend a lot of gelatin and agar and although it is fine in just one test my thought is to work on a larger scale to create a design with these new materials.
I wanted this recipe to work but from the first day it started doing strange things, like supplying disgusting liquid and a microuniverse with all the mold began to emerge.
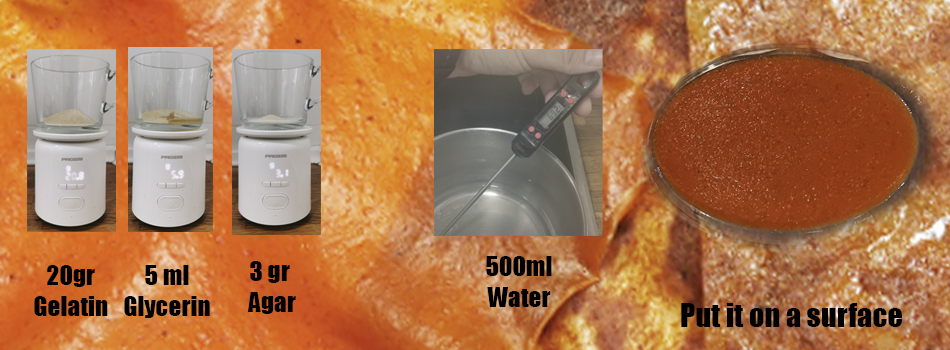
Igredients:
500 ml of Water
3gr of Agar
20gr of Gelatine
5ml of Glycerin
250gr Biomass (optional)
Process:
1. In a saucepan add the water, the agar and the Gelatine. Stir until the lumps formed by the agar dissolve.
2. Put the pot over low / medium heat and add the glycerin.
3. Stir constantly at a temperature of 70ºC or until it has a thick consistency (10 minutes approximately).
4. Pour the mixture into the mold.
5 Let dry on a clean and level surface to achieve a sheet of the same thickness, at least 48 hours.

Properties:
Transparency: X X X X X
Opacity: X X X X
Elasticity: X X X
Smell: X
Flexibility: X X X X
Stamina: X
Mustiness: X X X X X
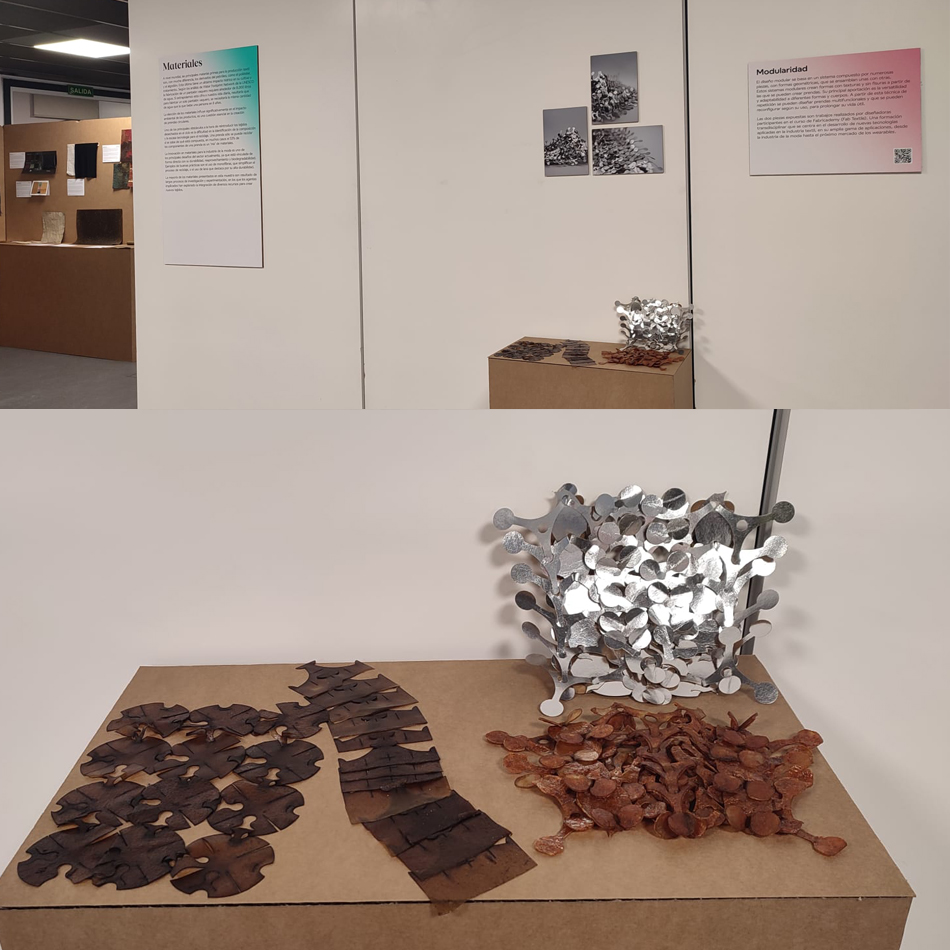
The Exhibition
It has been an honor to be able to send my work for an exhibition in Madrid. They have asked me to be able to create the modules that I made in Circular Fashion and cut and assemble them with the biomaterial that I made, so I got to it and the first thing was to decide the recipe that was best for laser cutting and that has enough resistance to assemble them without break. They had to be quite sturdy since the module has small holes where it has to insert and hold larger pieces.
So I escalated the recipe first, the one for just Gelatin. Why did i use this one? It seemed to me that it was the most resistant and stable and although the agar would have given it a texture more like natural skin, I did not want to risk since I did not have much time to make that large amount or experience in making such a large piece of bioplastic
It is quite strong, very resistant and although if I tell you the truth, it is too strong and it did not seem to me that it looks good and has a very very strong smell and I did not know where to put it because the smell was very strong and in Bilbao it is always raining so keep it outside it was not an option.
The next step was to cut it with a laser to create the module and use the parameters of a thick leather as it seemed
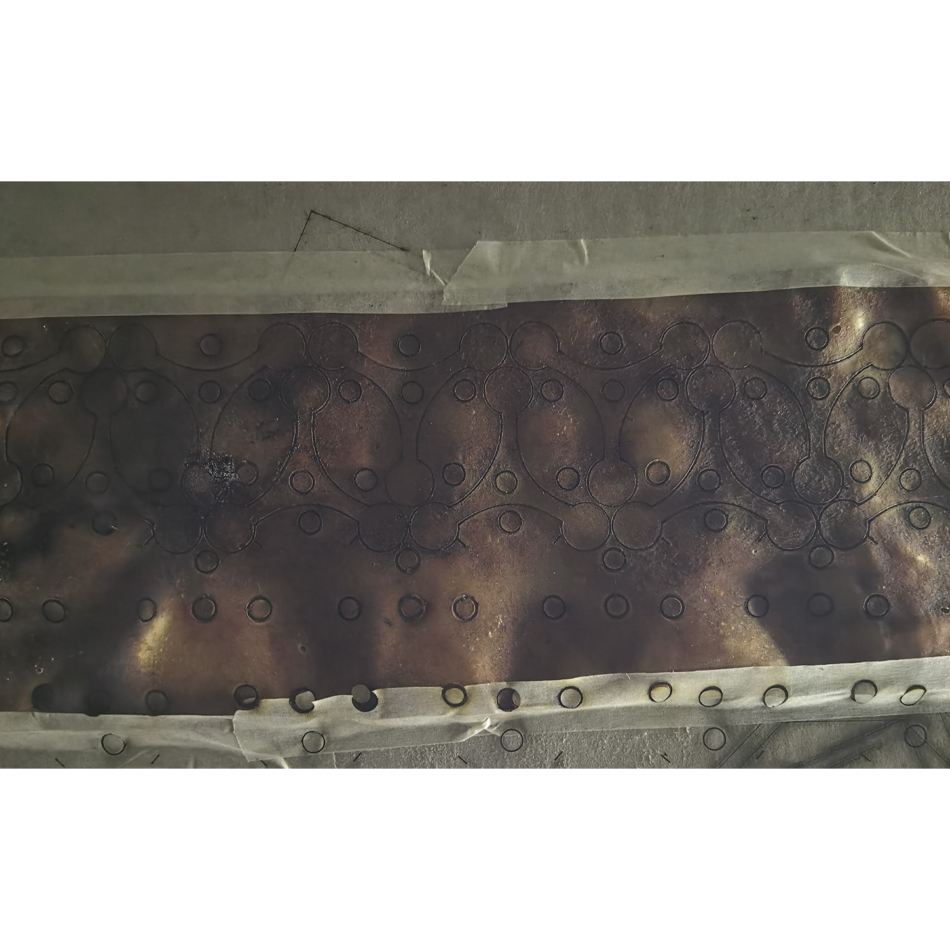 When I thought that the bad smell was overcome and that being dry would be better, the laser revived everything again and it was even worse since having irregular areas some small parts burned them and it was even worse.
But in the end everything was fine since after adjusting it with masking tape nothing moved from its place and it worked perfectly.
When I thought that the bad smell was overcome and that being dry would be better, the laser revived everything again and it was even worse since having irregular areas some small parts burned them and it was even worse.
But in the end everything was fine since after adjusting it with masking tape nothing moved from its place and it worked perfectly.
Thickness: 1mm
Material: leather thick
CUT:
Speed: 60
Minimum power: 50
Maximum Power: 53
ENGRAVE:
Speed: 800
Minimum power: 25
Maximum Power: 25
It was quite easy to assemble since the material was quite resistant and it is very difficult to break it.
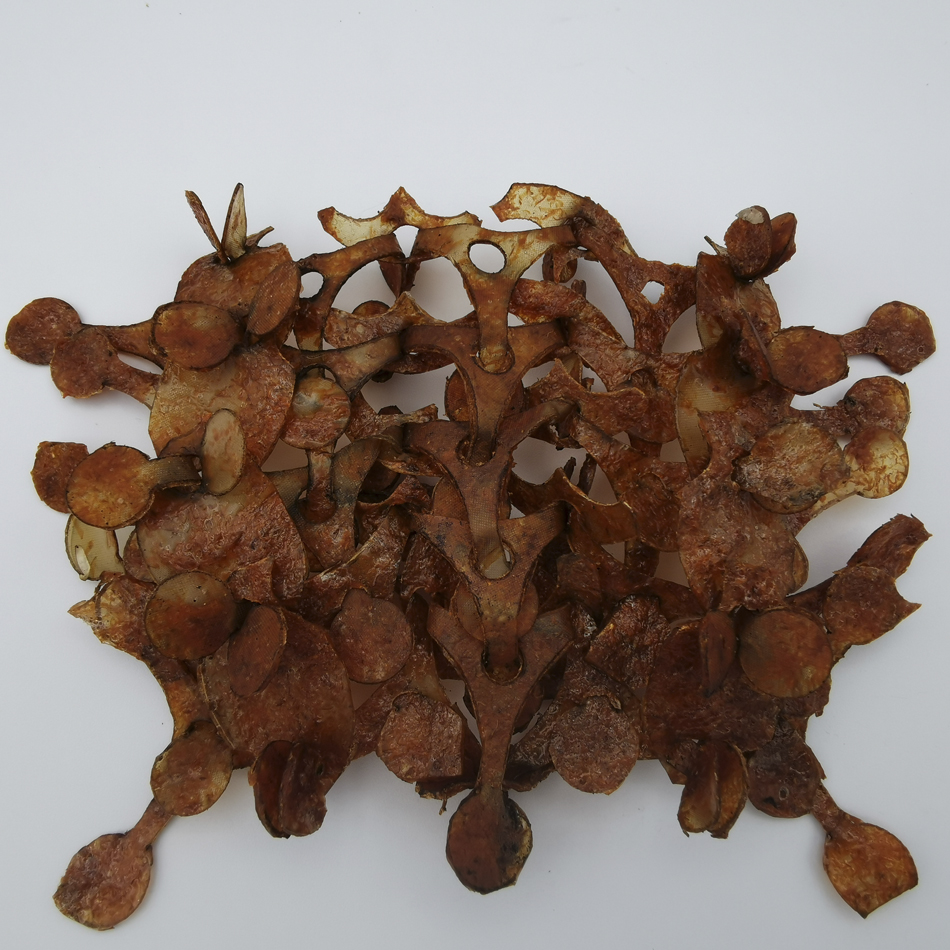
I have had the honor of sharing a space with Elsa Gil and her modules made with Banana skin.
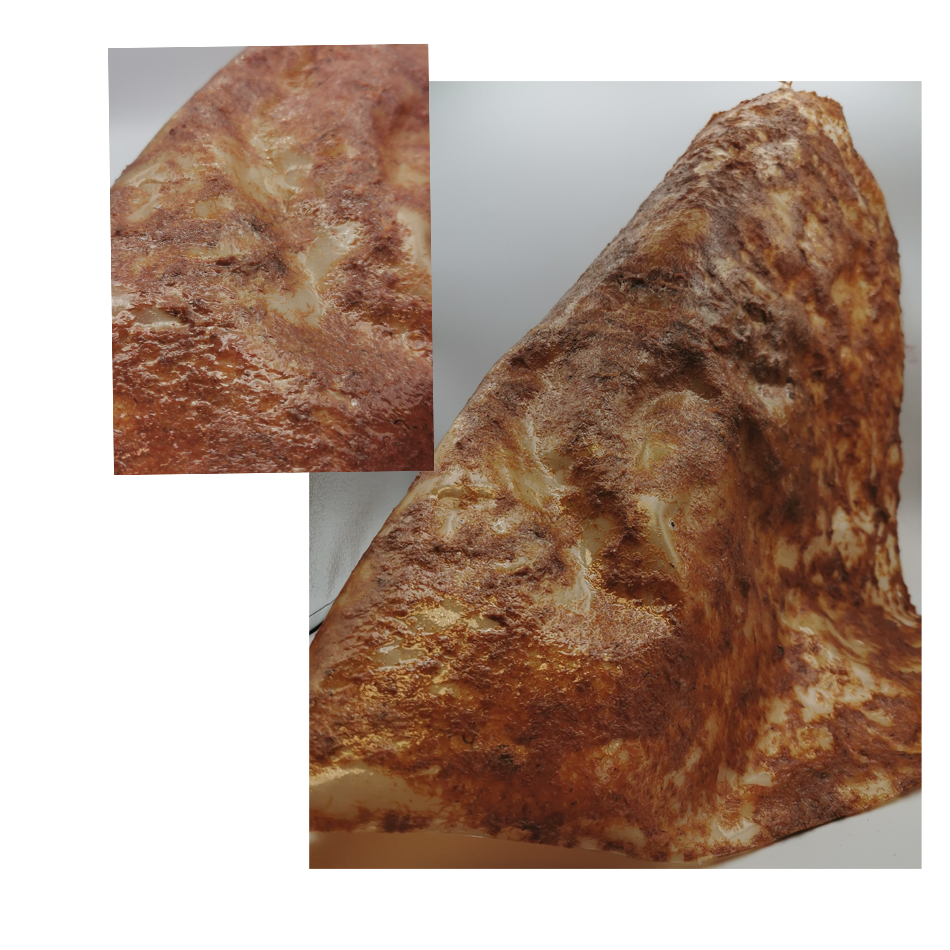
Igredients:
1080ml of water
212gr of gelatin
81ml glycerin
1100gr Dryed Carrot Biomass
Process:
1. In a saucepan add the water and the gelatin. Stir until the lumps formed by the gelatin dissolve.
2. Put the pot over low / medium heat and add the glycerin.
3. Stir constantly at a temperature of 70ºC or until it has a thick consistency (5 minutes approximately).
4. Pour the mixture into the mold.
5 Let dry on a clean and level surface to achieve a sheet of the same thickness, at least 72 hours.

Properties:
Transparency: X X
Opacity: X X
Elasticity: X
Smell: X X X X X
Flexibility: X
Stamina: X X X X X
Mustiness:
Things to improve
-
The quantities have to improve to have an economically viable material.
-
The preparation time; One of the things that caught my attention and that there is room for improvement is the biomass processing time.
-
Better integration of biomass in bioplastic.
-
Although I have put it last, this is something quite important to improve and that is the smell. It must be a more pleasant smell so that it is something viable and to be able to make products with them.
My own Recipe
Thinking about the improvements that I want to achieve and the first thing I wanted to improve is the processing time of the biomass and that I do not have to dehydrate it to conserve it since large amounts of electricity and time are used. And I have devised a way that is to cook the carrot with water, then I liquefy it all together and so I can have it in the fridge, but at that moment I put a preservative that is used in the natural cosmetics industry and That helps it to last much longer in storage and then the chances of mold growing are much lower.
In the second point has been the time and doing it this way eliminated the dehydration time and the rehydration which helps to have a faster preparation time and also helps to save water, and electricity.
To improve the integration of the biomass with the rest of the products by having that kind of cream when adding the other ingredients is a clearer and more uniform way
To improve the smell, I have tried several amounts and have found the perfect balance in which you smell like carrots without interfering with the properties of the bioplastic.
Igredients:

200 ml Biomass Cream
40 gr of gelatin
18 ml glycerin

Process:
1. Put the carrots in a pot for each 100gr of biomass 200ml of water and cook until they soften, then let it cool and blend until it becomes a liquid cream.
2. Put the pot over low / medium heat and add the glycerin and the gelatin.
3. Stir constantly at a temperature of 70ºC or until it has a thick consistency (5 minutes approximately).
4. Pour the mixture into the mold.
5 Let dry on a clean and level surface to achieve a sheet of the same thickness, at least 72 hours.

Properties:

Transparency: X X
Opacity: X X
Elasticity: X X
Smell: 0
Flexibility: X X
Stamina: X X X X X
Mustiness: 0