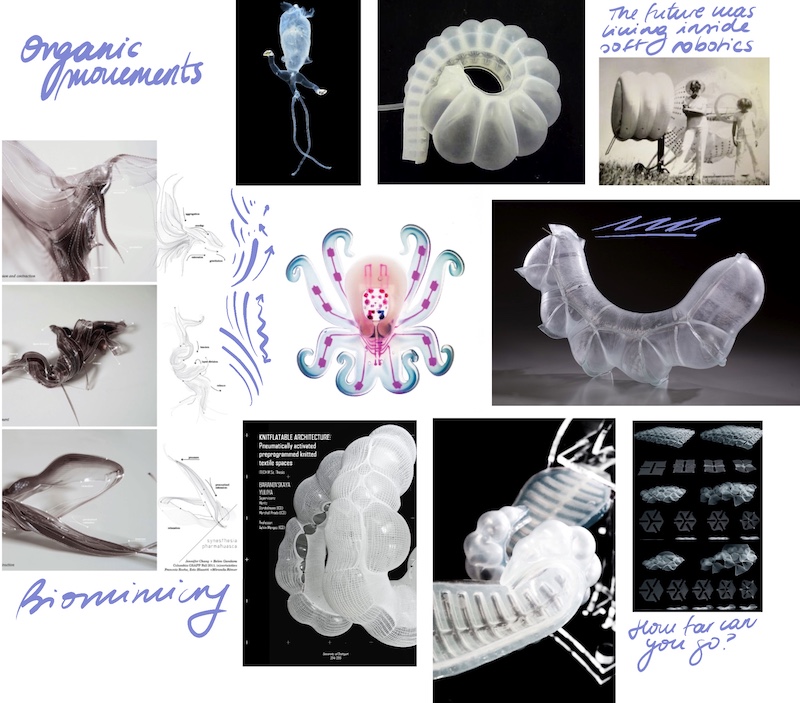
12. Soft Robotics
BLOW AND I'LL TWIST
During this week we had the pleasure of having amazing lectures and tutorials by Lilly Chambers and Adriana Cabrera.
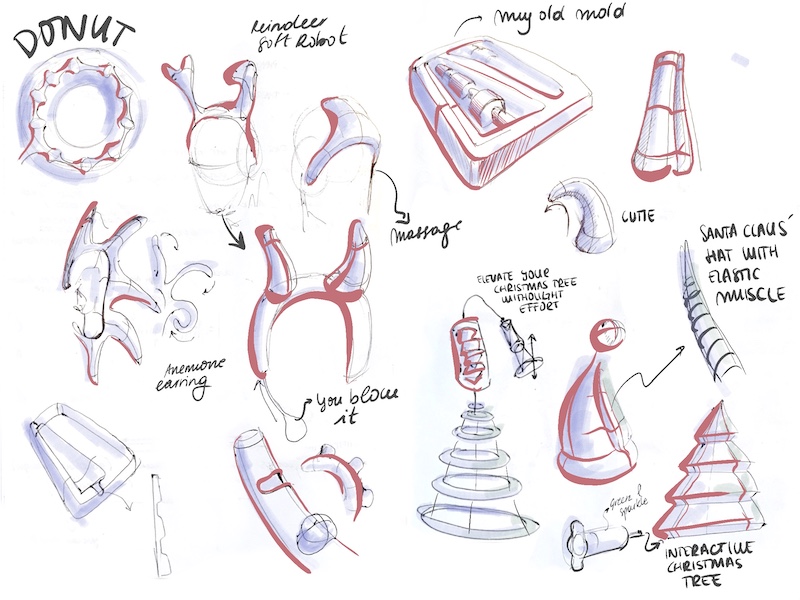
Soft sketches are my passion and joining it with a Christmas vibe, my sketches went crazy.
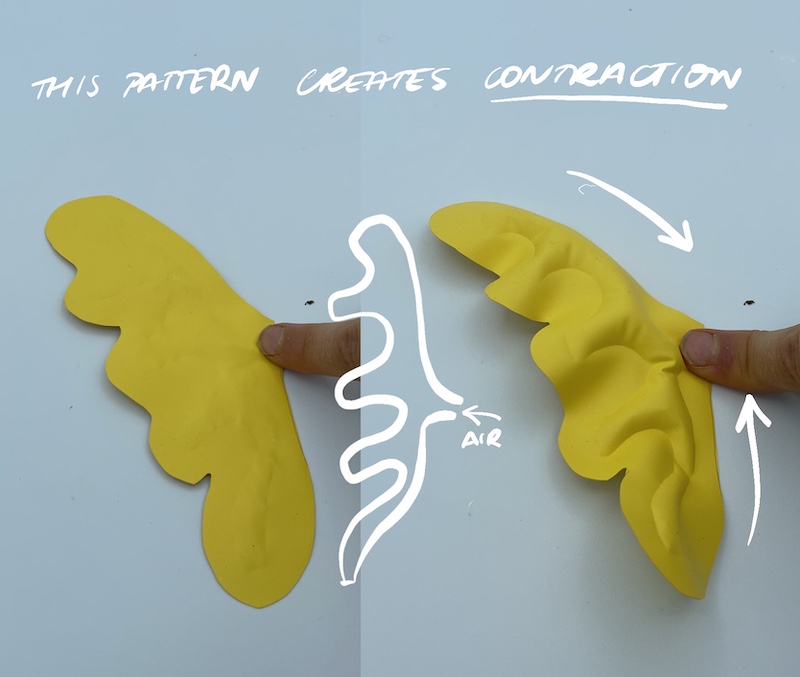
VINIL SOFT ACTUATORS
This was the first time in touch with making blowing moving structures with two dimensional materials. I knew the basis of soft robotics as I had some previous experience. Nevertheless this process is much easier and quicker than the silicone one.
Workflow:
- First you need to draw the skeleton in baking paper. Make sure to join the main parts properly (with >a thick path) and to leave a space where the tube can enter. You can draw it longer to make sure it goes >across the vinyl.
- Then cut two pieces of vinyl, don’t hesitate in the space as you want to make sure it’ll be glued.
- Piece the mate faces together and in between the skeleton. Make sure to place the skeleton in the >right position so the tube’s space is going outside.
- The heat power can be either an iron or a heat pressing machine. It’s better to be careful and not leave >it too much time as it can melt very easily if it reachs a certain temperature. (I used the iron and leave >it on the vinyl for 10 seconds the first, two times, until I saw the two layers where glued).
- After cooling, remove the plastic layers from the outsides.
- Separate the layers where the tube space where drawn and insert a tube according to the size of your air >pump.
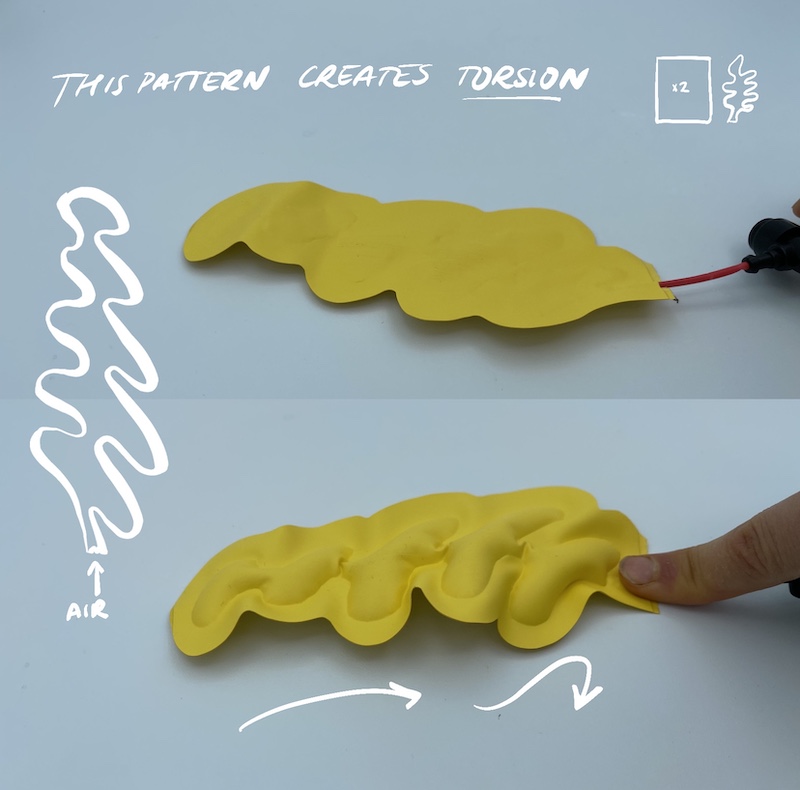
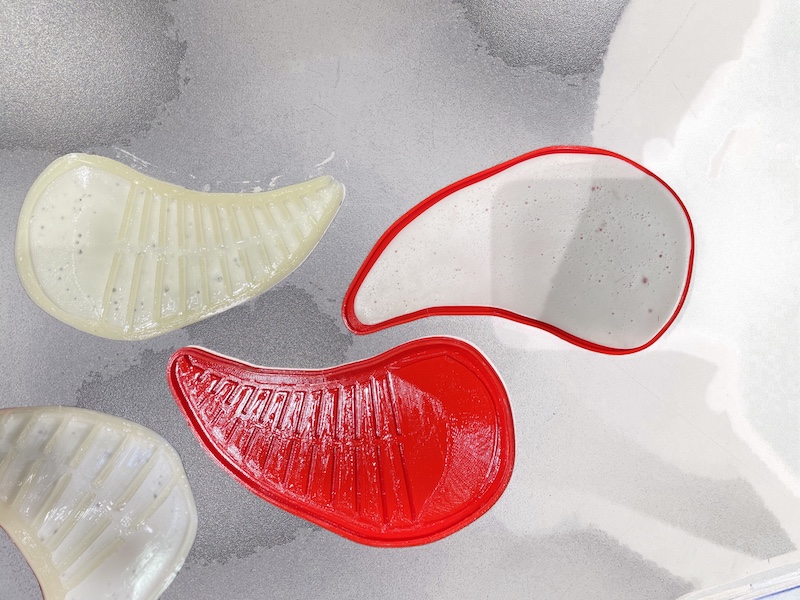
- Start blowing and see the differences between the patterns. Does it contracts? Does it rotate?
PREVIOUS WORK IN SOFT ROBOTICS
Objective:
To achieve organic and fluid movements; and greater structural strength as it is not composed of rigid >components.
How:
By applying biomimetic processes, they managed to establish the pattern for generating exoskeletons. Using >silicone as a flexible and shock-absorbing material; and introducing pressurised air.

BIO-SILICONE SOFT ROBOTICS
I was proud of myself because my previous experience with soft robots was quite good, and even thought it was all self-taught. However some of the problems that I had in process of making them, were solved by Adriana. She explained us the difference for casting and 3D, as this alterates very much the interaction or even the performance.
Working with silicone can be frustrating because with a bubble in the wrong place can damage the whole robot and make it useless. The bad thing about silicone is that you can’t reuse it. So in order to make sure there are no bubbles in your structure, you can use an (air pump??) or if you just want to test and reuse the materials you can cook some bio silicone made by gelatin or Agar Agar.
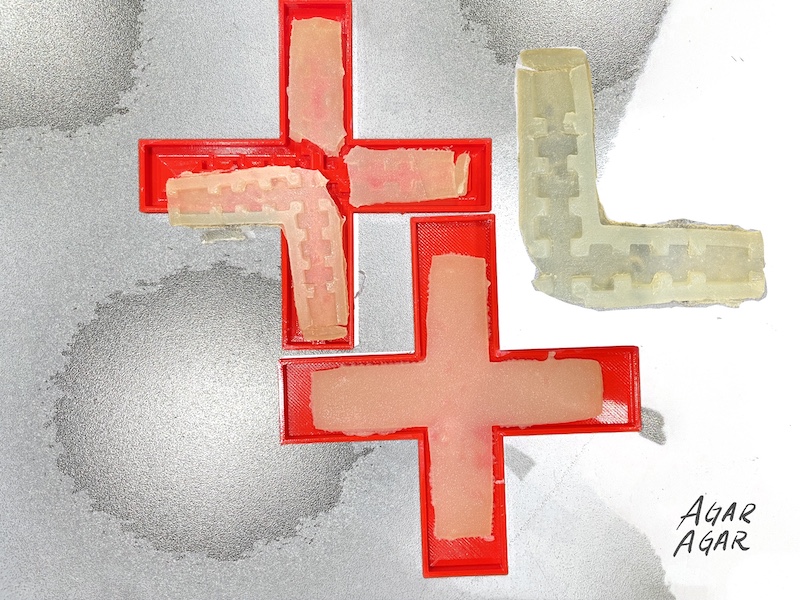
We tried to replicate the already made molds that we had at the BDC, in order to anaylize the differences that other materials can create in the robots. We tested the gelatin bio-silicone (recipe from Adriana and Lilly Chambers) and another one made with Agar-Agar. The results were not ideal for me, specially the Agar one. I believe we didn't choose a correct recipe for that one because it shrinked a lot and broke.
Results when dried (Up: gelatine. Down: Agar-Agar)

MAKING MY ICRE-CREAM MOLD
During this week we had flods in BDC so after a long weekend, we were sent home :(. So I had a lot of time to design the mold during Adriana's tutorial and for sketching :) Not everything was bad.
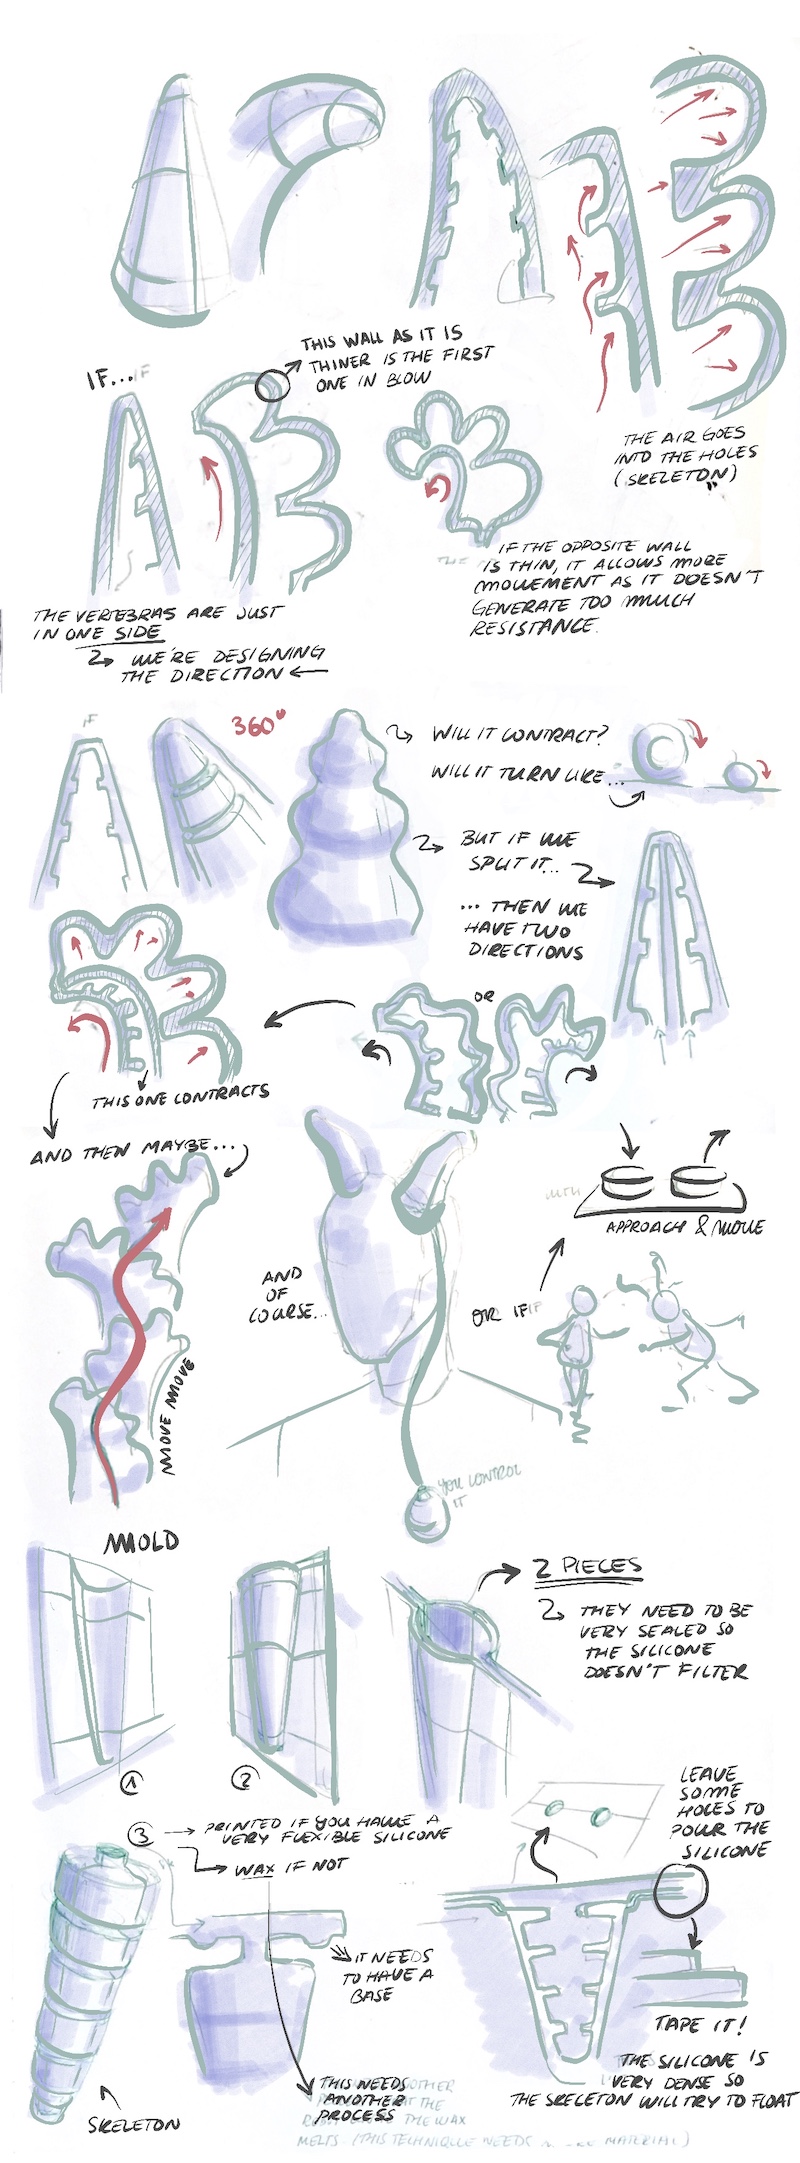
I decided to sketch the workflow that takes while designing and working with soft robotics, as we need to understand the interaction of the skeleton in the main body.
The mold was made in Rhino from the beggining based on the previous file that I had from last year. I wanted to optimize it and improve it since I had a lot of difficulties in the first approach to soft robotics.
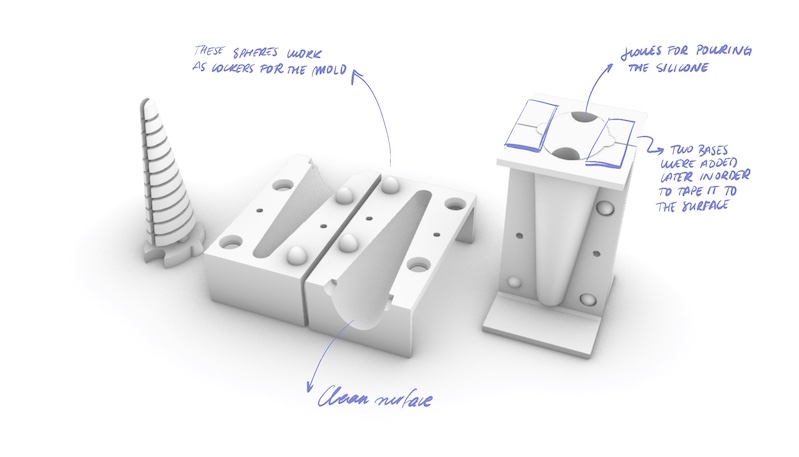
I made two different cones, that can interchage in order to achieve different movements. One is a uniform cone (with its ribs), and the other one is divided in two squeletons, so there can be two air supplies and with that, two directions. The main requirement while doing this type of molds is making sure there is a proper offset between the surface of the body and the skeleton. It needs to be thick enough to be resilient, but not too much so it doesn't generate too much resistance.
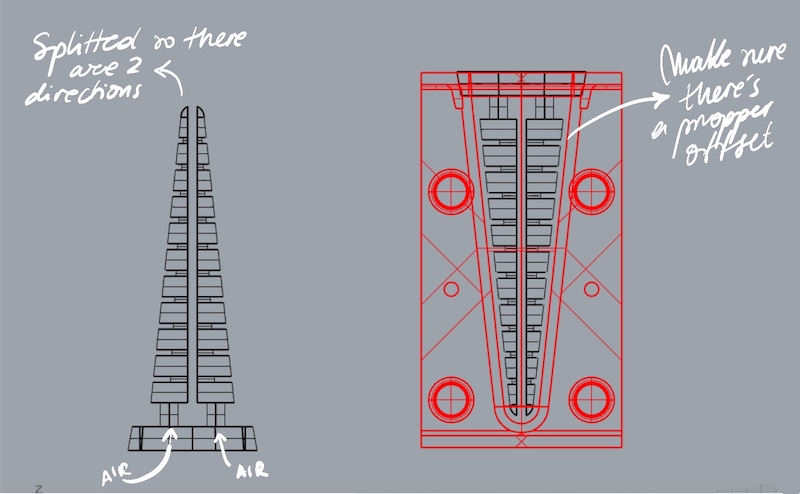
The 3 parts were 3d printted separetly (in case something goes wrong just one piece is unuseful). The skeleton was splitted in two as the printter wasn't the most adecuate for this piece. The perfect one would have been a resin 3d printter (SLA, stereolithography printing). Ours would have generated a lot of supports and as the skeleton is very little and the surface needs to be as precise as possible, these supports would have alterate the final result of the robot.
Once the pieces were printted, I realized that I didn't add some offsets so the main body mold (2 parts) didn't interlock perfectly. This is an issue that will be solved in the dowloadable file as there is enough space between the parts where the silicone can filter (and that is no good). For this try I just filled the spaces with clay.
The ratio of EcoFlex silicone was 1:1. They were mixed carefully but we also used a vacuum to remove the bubbles and to be as precised as possible. The mix was poured into the mod through the holes created in the base of the skeleton, which was taped to the other part just to make sure it didn't float. Wait as long as possible to demold it, but a minimum of 4 hours. Once the time is over, is time to separate the parts carefully, specially the inside skeleton where the silicone can be stickier.
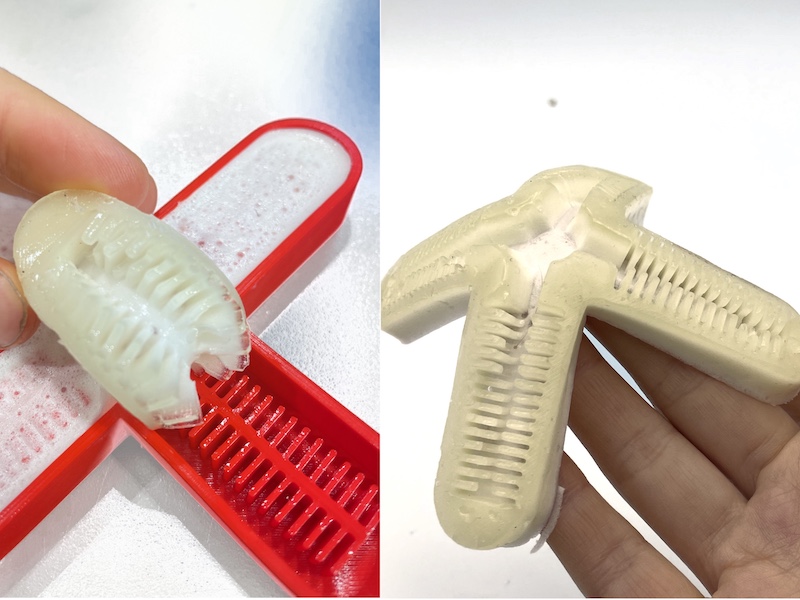
The neck of the skeleton was very thin to take the mold out without harming the robot (another development to make at the digital object), so I did another try where I made it thickier and worked so much better. The second robot wasn't break so the blowing worked!! The next development would be trying to print the splitted skeleton so we can play with two different directions.
Here's the video of the process and result:
DOWNLOADABLE FILES
In this Drive folder you can find all the downloadble files:Soft robotics
Useful links
- Carolina Delgado, alumni, with her soft robot using the biomimicry in leaves.