08. Wearables
HOW ABOUT ACTING
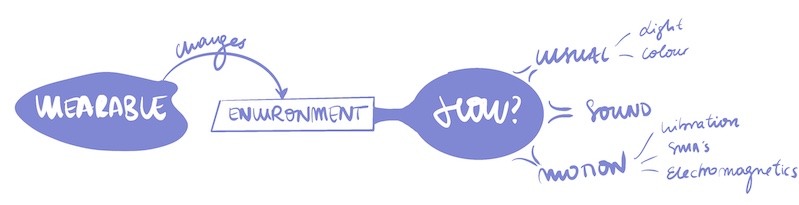
During this week we learnt how to make actuators. These are the components that modifies the environment while the sensor from E-textiles' week read the environment. I created one of my mind maps to sum up crucial points from the lecture:
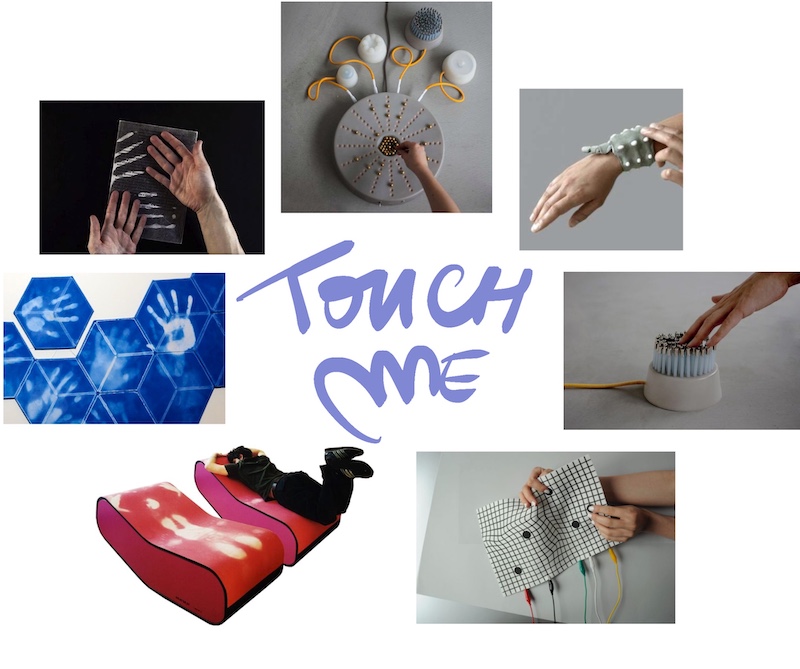
During Liza's lecture we were encourage to focus into two types of actuators and really dig in those, as each of them has a lot of information and components to learn and know how to work with. Altought my initial thoughts (as you can see in the moodboard) were about touch, I was really moved about the SMAs projects and the thermochromic inks.
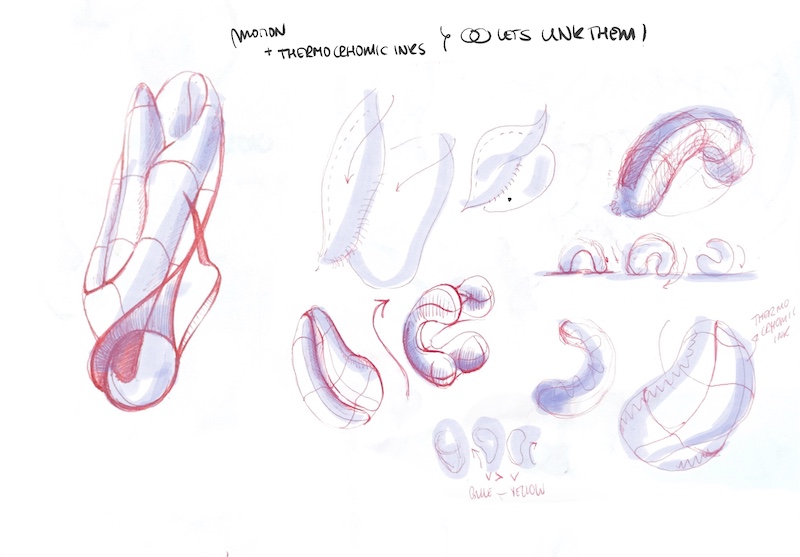
MOVEMENT INSPIRATION
Shape memory polymer (...so cool...)
Jie Qi
Moving anemones sketches :)
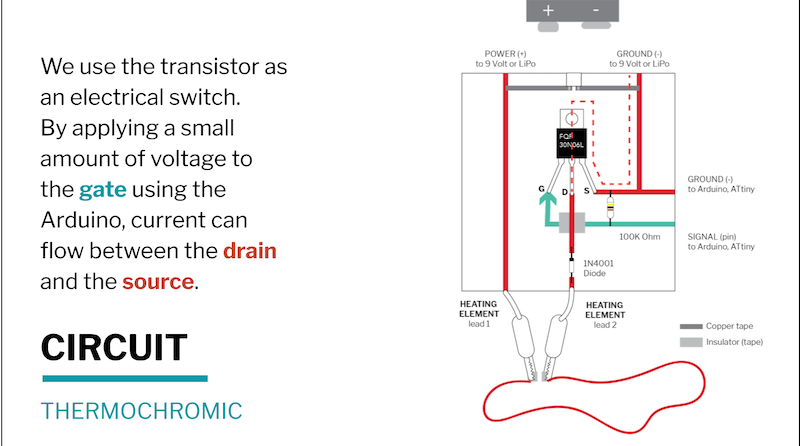
MOSFET CIRCUIT
First of all we did all together a MOSFET circuit so we could follow the tutorial in the afternoon. I explained the team that transistors are truly our bestfriends in electronics as it allows us to control the Voltage in our circuits; and I show them the water analogy so they could see its function more graphically
As the copper tape is kind of expensive we made sure since the beggining that our transistor circuit was clear and that the tape didn't overlap with each other.
We followed this two alumni documentation in order to make it: - Beatriz Sandini, in 'Transistor'. - Jessica Stanley, in 'Preparing to use actuators: Mosfet Circuit'.
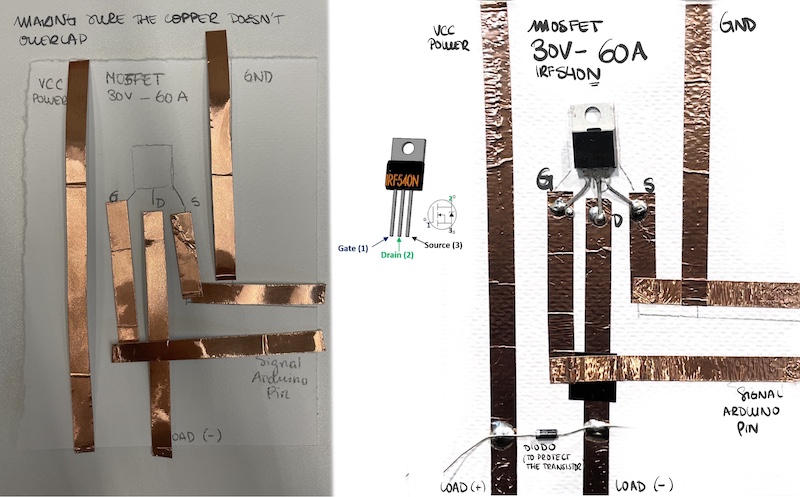
After reciving more MOSFETS, I test them with the diodo comand. I followed the next tutorial in order to test them correctly because I had no idea: Vetco electronics.
SMAs AMEBA
The first time I get to play with Shape Memory Alloys (SMA) was during my UTOP-Textile workshop in innovative textiles. We learnt how they're being used in more technical fields and our work there was to bring this material into the day-to-day world. At the end my team and I didn't chose this material to work with, so when I saw the chance in Fabricademy to experiment the possibilities of the SMA I was so excited!
First of all I looked for Alumni projects around this material. I found very useful:
FOTOS PROYECTOS
- Amaya De Yavorsky, alumni. She has a really good documentation.
- Betiana Pavon I really like her work and connection with the SMA's.
- Kobakant on how to sew SMA's threads.
- Kobakant on SMA smoking swatch sample.
The SMA that we had was already trained and it wasn't a very useful one, so I needed to re-train it in order to use its "deformation" in my swatch. I followed the Kobakant tutorial on Shape Memory Alloy training.
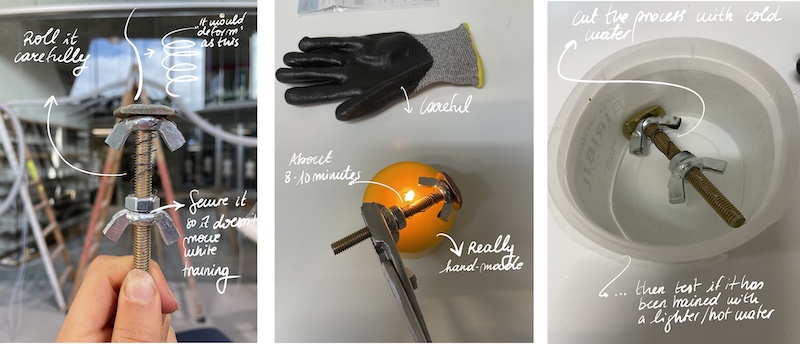
I didn't test it with warm water, I did it with a lighter and it worked! However I believe I forced too much the material while rolling because the wire broke in two.
I decided to do my first prototype in paper so I could see how it can be sewn and attached to another material. I used a normal yarn and din't tied it too closed or hard because I wanted the material to move more freedom and to be able to take it out. I test the movement connecting the wire direclty to a batterie through cocodriles. This test gives a lot of power to the material and it makes the movement quiker but be sure not to burn the paper or fabric you're using.
The second test was adding the other piece of SMA along the Anemone. I connected it with a conductive thread to the end of the other wire. When I tested the movement with the batterie I could appreciate that the movement was slower as the length increased. This means that the longer the circuit the more power you need.
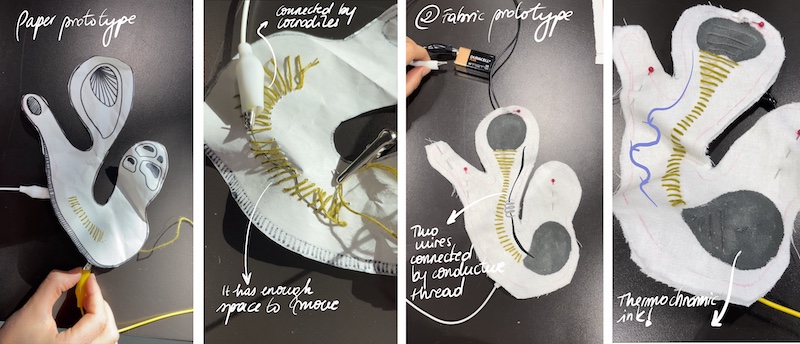
As paper isn't the best material to work many times with movement, I changed it for cotton. I cut two layers as it was very thin. I used the same technique at sewing the SMA to the fabric. The movement was smoother and more satisfying.
After testing directly with the batterie (9V), it was time to programm it with Arduino and connect it to the MOSFET circuit.
This is a basic code just to see how the material stops deforming as we're oppening the circuit through the transistor:
void setup() {
pinMode(8, OUTPUT);
}

void loop() {
  digitalWrite(8, HIGH);   // On - contract the flexinol
  delay(3000);                       // wait for 2 second
  digitalWrite(8, LOW);    // Off - let the flexinol relax
  delay(2000);                       // wait for 4 seconds
}
Then I wanted to control de deformation of the actuator by a digital sensor. I used Marisa's button and I modified Emma Parechi's code:
/*
Emma Pareschi 2020
I count the times the push button is pressed
*/

// this constant won't change:
int  sw_pin = 2;    // the pin that the pushbutton is attached to
int counter_reset = 2; //variable to reset the counter

int Ameve = 8; //pin of the led

// Variables will change:
int counter = 0;   // counter for the number of button presses
int sw_status = 0;         // current state of the button
int last_sw_status = 1;     // previous state of the button

void setup() {
  // initialize input and output pins:
  pinMode(sw_pin, INPUT_PULLUP);
  pinMode(Ameve, OUTPUT);

  // initialize serial communication:
  Serial.begin(9600);
}

void loop() {

  // read the pushbutton input pin:
  sw_status = digitalRead(sw_pin);

  // compare the switch status to its previous state
  if (sw_status != last_sw_status) {
    if(sw_status == HIGH){     //if the status is HIGH, the switch was relaised
      counter = counter + 1;   //increase the counter of 1 unit
    }
    // Delay a little bit to avoid bouncing
    delay(50);
  }

  Serial.print("Counter: ");  //print on Serial monitor the counter value
  Serial.println(counter);

  last_sw_status = sw_status;   //set the last status

  if (counter == counter_reset){
    counter = 0;
    }

  if (counter == 0){             //if the counter is ZERO
    digitalWrite(Ameve, LOW);  //Led if off
  } else {                        //otherwise (if it is 1)
    digitalWrite(Ameve, HIGH);
  }
}
The conclusion after this experimentation is that as many components you use, you'll need more power. Because I just used a 9V batterie and I could see the time difference in the movement.
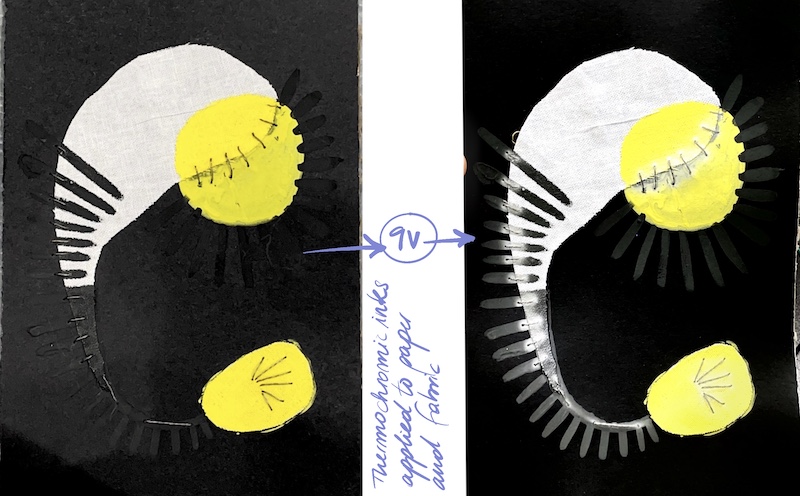
THERMOCHROMIC INKS
Their main caractheristic is that they change become colorless while the temperature increases. They can be mixed with other materials and applied in different fabrics.
I wanted to test the thermochromic inks in different materials and make a painting with them. I used paper and fabric and connected them with conductive thread. I found very useful Liza Stark's website.
My thoughts around this experimentation is that in order to make it chage completly I'd need more power and take in mind that the conductive thread is the one heated so the pattern you create with it, is going to be the one printed. It doesn't expand that much around.
Useful links
-
Jessica Stanley for explaining every step of electronics and programming.
-
Beatriz Sandini really good documentation.
-
Wearable X as an example on how approaching wearables to a purpose: