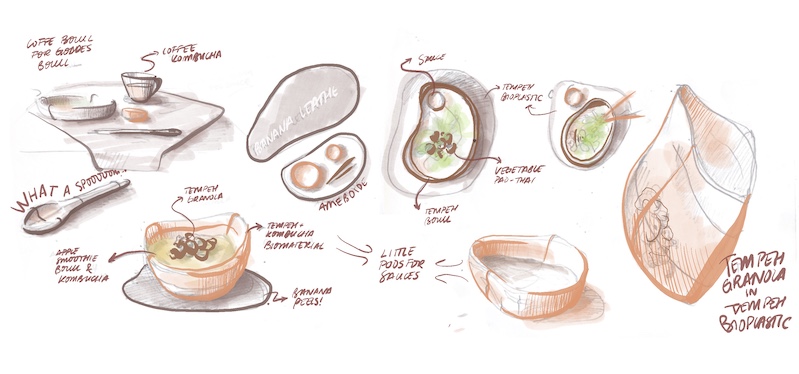
WHY WASTE OUR WASTE?
A circular and regenerative way of using those fails from the food experimentation, because...not all the tests are yummy to eat. An opportunity to revalue the materia to make menage
FAILED TEMPEH AND SCOBY
Tempeh has been one of the most important ingredients in this experimentation. Once you have all the right cooking times for the legumes (because there are not the same as if you were going to eat them directly) there are many fails. Fails in tempeh mean that they're too acid, the mycellium didn't grow properly or at all; there was and overheating or that the legumes broke and were too humid. These facts are more common than I thought and create a lot of food waste when they happen. That's why I become with the idea of using them as a powerful new biomaterial.
As I'm also growing kombucha, mixing the tempeh with the SCOBY was the ideal join. The objective for experiment with this combination was to obtain kitchenware, such as bowls, that had enough water and grease resistance. This propperties are given by the SCOBY, and the tempeh gives the color, texture and rigidity.
First of all I processed the tempeh with enough vinegar to kill possible fungi, until it is a mouldable dough. As the legumes were already cooked it is very easy to process them: it's like an hummus. The SCOBY needs to be processed too but without adding any water.
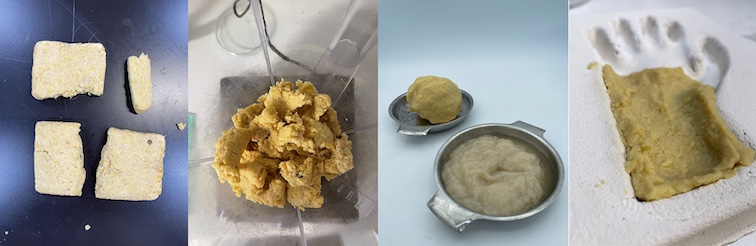
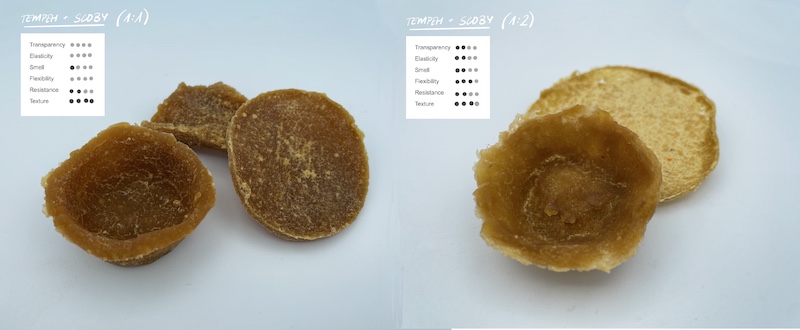
The first experiment was with lentil tempeh and I tested two different ratios of Tempeh and Kombucha: 1:1 and 1:2. I mixed the elements with the processor and let it dry in different materials: alum bowl, plaster and fabric. At the beginning I let it dry at the sun, but as the dehydrator was on, I used it so the composite didn't get mould. After one day they were dried.
The main difference between them were the elasticity: the tests with more proportion of SCOBY were more flexible. I really liked how the material reacted with the plaster, as this one helped a lot in the drying.
Good points for this biomaterial:
- Quick dry
- Easy to mold
- Records the textures from the molds
- Doesn't shrink as much as the SCOBY alone
- The colors are very earthy
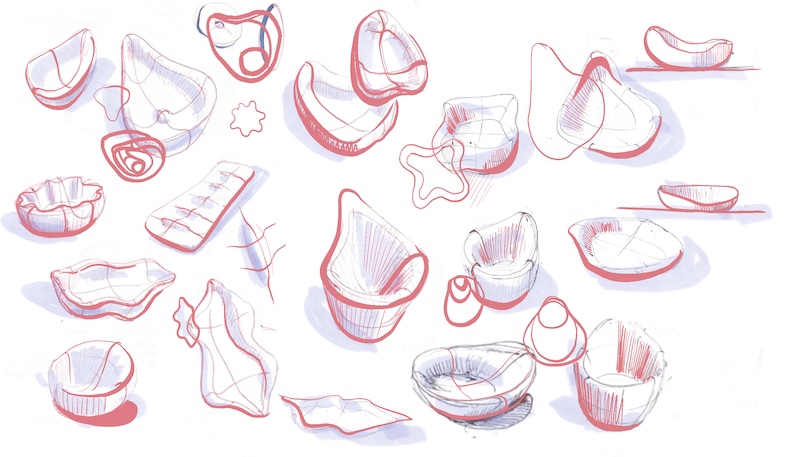
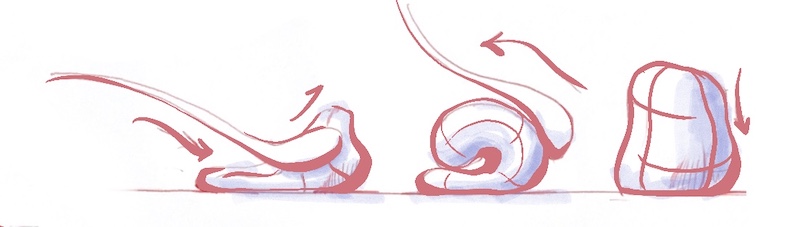
As with the female wood mold the material was working very good, I designed more complex molds (See "tools and ingredients"). I tried pouring the wet material as I've been doing since the beggining but as it was much bigger it was always cracking. I believe this was because of a thickness difference. So I changed the workflow for bigger surfaces, adding a step:
On a wood surface, I placed a synthetic cloth and then pour the material. With the help of a spatula, I rolled out the mass to create a layer of 50 mm. I left it dry overnight until the edges dried and the material has shrinked in thickness. At this point I could remove the layer from the wood helping me with the fabrics in between, and placed it on the mold. I left the fabric on the outside in order to try to humidify the outside surface, so the dry time of both of them (interior and outside) were more similiar. I let the material dry completely on the mold.
This biomaterial tends to shrink, so very coplex shapes maybe will break as a smooth curve could turn into a very close one. So just keep in mind that this material needs clean an simple surves and surfaces.
Machining tests
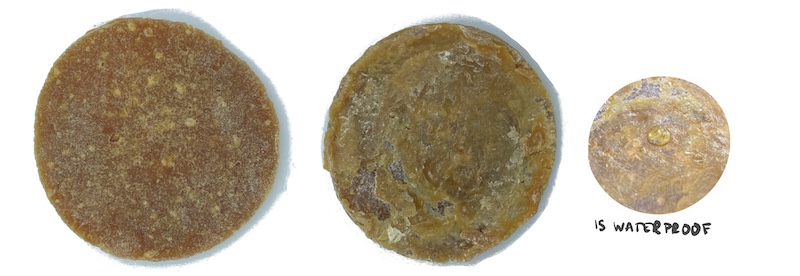
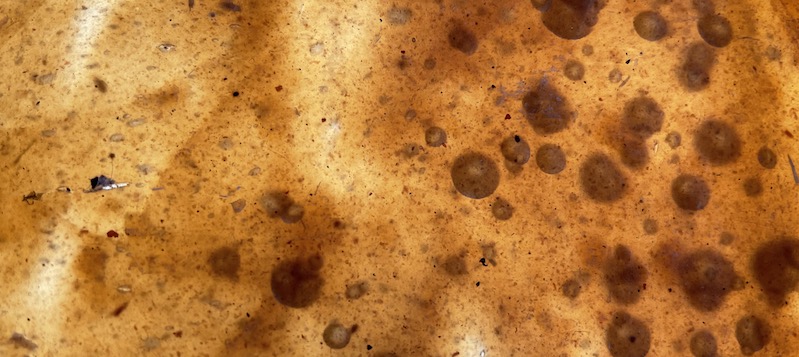
The raw results were very pleasant, but we found the texture a little too granulated to make the material waterproof enough. So I sanded it making it very smooth and homegeneus and on the other side I poured some wax on it as this is already test it to be waterproof.
I found that the sand technique was enough as the dishes that I was planning to serven in them were not that humid or hot, so its own water resistance property was enough. All the following plates and bowls were sanded.
For cleaning them, a humid fabric is enough to remove the oils or sauces that can be left. Although a higher use of water makes the surface softer and humid, what made me thing that this material could not be used immediately after cleaning. An organic soap will be used in the next experiment to test wether the material is resistat to it and more quantity of water.
Reusability
Thanks to the high potential of SCOBY I thought that I could refabricate the piece. The material was breaking continuously with the new organic molds as the surfaces were bigger. It was a pitty to throw them away as the SCOBY is a biomaterial with so much potential but slow in growing...so I couldn't waste so much value.
The rehydration of the SCOBY is one of the most important properties of the biomaterial as it allows it to interact with other processes. So I decided that I would use the first tests to try and it worked! I could reuse the material in the same way!!
The process would be: breaking the material into little pieces and pour enough water to cover them. Let the material absorb it until it becomes, all over again, into that slimy texture. In case there are still hard parts, add more water and help yourself with a fork to smash it. Once there’s no more hard pieces, process this mixture with a hand blender and remove the excess of water if any. Repeat the process of molding and drying explained previously.
Conclusion
Watch the full process of the Tempeh and SCOBY biomaterial:
COFFEE GROUNDS BIOCOMPOSITE

Coffee grounds are a very common waste that we can find everywhere. In this project coffee grounds are used in making Coffee kombucha, as a way of revaluing them; but as they are used just to infuse the water, they become a waste all over again. That’s why I found the opportunity of making this menage collection with a coffee biocomposite. I asked adele for a recipe to start with based on the properties that I works like to achieve. She gave me one for a hard biocomposite based on the chemical reaction of the glycerin, vinegar, starch and sodium carbonate. The coffee grounds act as a filler.
The proportions were changed a little bit from Adele's recipe based on how the material was responding. The original recipe was with orange peel pulp so for coffee grounds there must be more liquid. And instead of using oil I put glycerin.
Updated recipe based from Adele's:
- 25 gr coffee grounds
- 45 ml water
- 50 grs corn starch
- 2 grs Sodium bicarbonate-
- 30 ml Apple vinegar
- 2 teaspoons glycerin
I first mixed separatelythe dry and wet ingredients (as baking). The wet ones were placed in a pot on a stove and when mixed, I poured the dry batch. There would be a chemical reaction between the sodium bicoarbonate and the vinegar, but you just need to stir it until the starch has thicken enough. The result must look like a dought that doesn't stick to your fingers. It needs to be kneaded as clay.
Once I got the consistency I could feel that it was totally moldable and even 3d printable. I tested these two options of interacting with the material: one flatten and placed in the wood mold; and three other one with a syringe. This test is used to see if the material can be a good candidate for 3d printing. The composite acted really good: there was a continuous flow, didn’t break, there was a difference between the layers but they glued to each other. After some hours the little tests dried and they were surprisingly hard and resistant. The molded ones were too! So I put a lot of hope in this material.
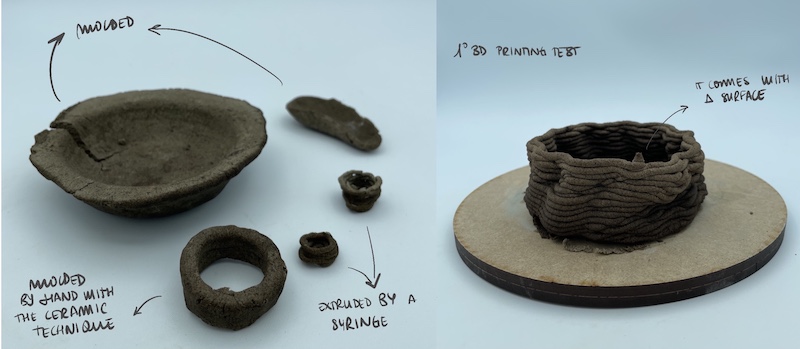
I went to ask Julian, our fab lab manager, if he saw any possibility for printing it, and he said let’s do it! So in order to have the right consistency we did the material together.
3D printting
The first 3D printing test was amazing as we didn't expect the material to flow that good. After 3 pieces we stopped and let it dry in order to see how the material will interact once dry. I was a little impatient and I moved the pieces a lot, so some of the bases broke because of this. However this was interesting to see how the the material was very quickly to dry on the surface but took way longer for the inside. The pieces that worked better were the hand-molded ones and the 3d printed one that has a very thick wall.
After the first tests, I was ready to design my own bowls in Grasshopper. You can find more information about this process in Tools and ingredients.
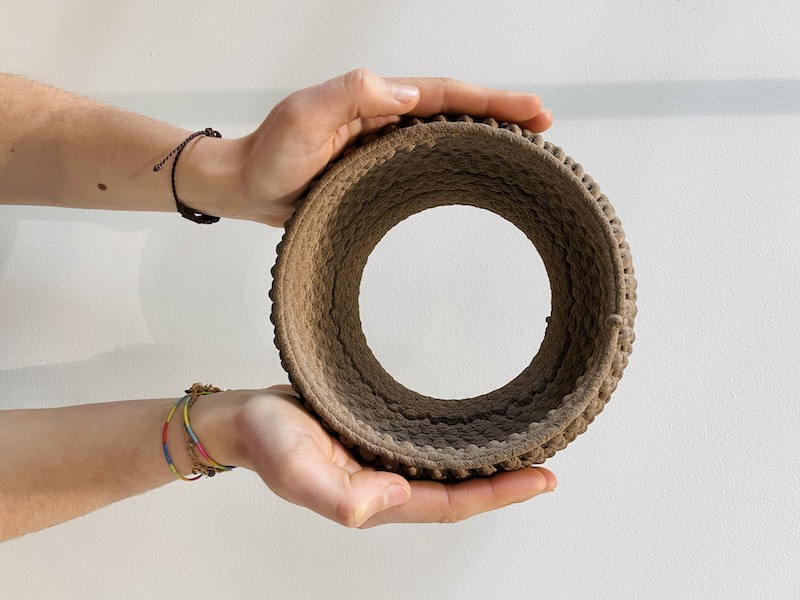
In the second batch for 3d printing we worked so much fluently with the material. We poured more cornstartch instead of coffee to make it harder and dryer. The base was done separetly so the extrusor could go inside and stick the material into it. After drying the base broke but it was attached to the walls as wanted. After several days the contraction continued and the spaces in between closed almost completly.
I tried sealing the pieces by pouring some fresh biocomposite, but what I found that worked best was by doing the next step: waterproofing with soya wax.
Make it waterproof
As I want this material for making bowls, I needed to make it waterproof so the humidity doesn't go inside. I made a test on what could happen if some water penetrates, and it made the layers separate. So making it waterproof is a must. I tried pouring melted wax but I don't really like the contrast of colors that it creates, and either the texture that leaves because of the fast drying. So I tried pouring alginate and curing it with the solution of calcium chloride and it worked super good. Moreover it is trasnparent so the texture from the coffee can be seen, it just gives a more mate appearance.
Conclusion
Watch the full process of the coffee grounds biocomposite
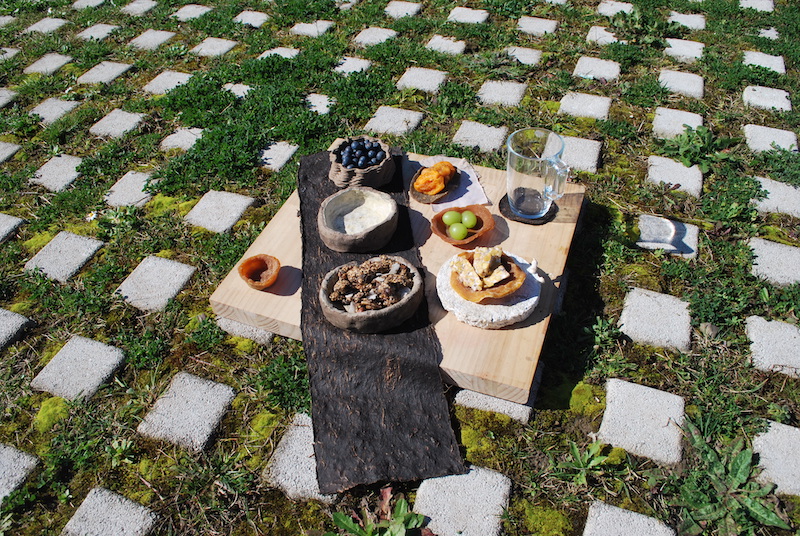
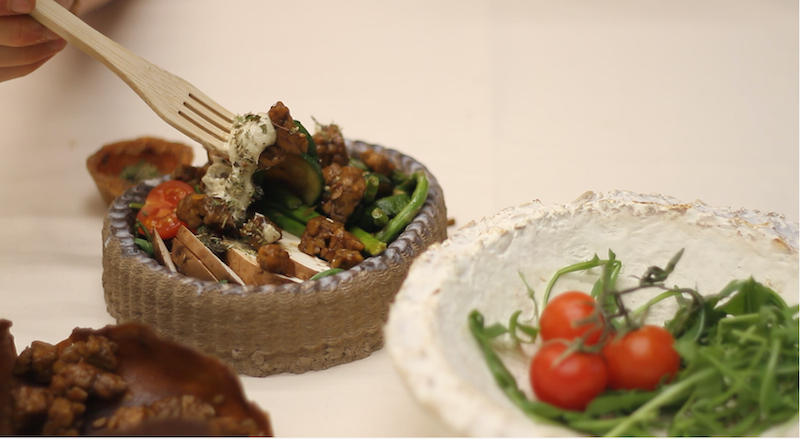
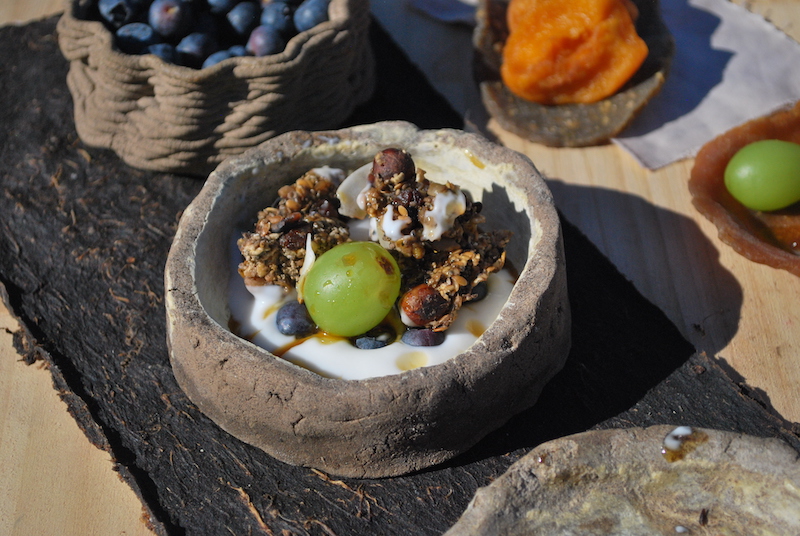
The same menage will be designed to be coherent both in the shape and material with the food that is going to carry.