4. Biochromes
Research and inspiration
When it comes to inspiration on colours and inks, it’s really hard to choose just a few. Colour is an essential part of my life. Knowing what colours are, how we see or don’t see them, how much a different lighting changes them, … it’s only a few thing that made me fall in love with photography and the chemistry and physics involved.
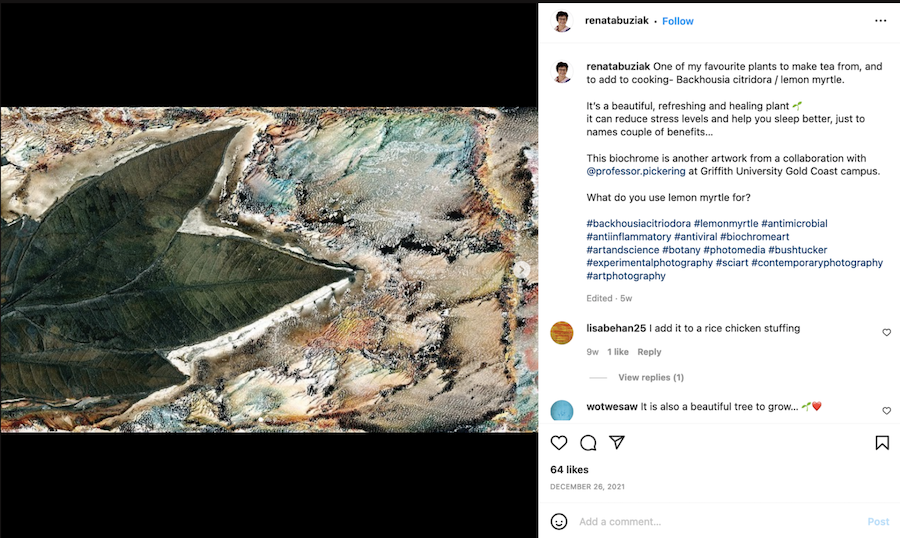
Photography and biochromes go hand in hand. I’ve been following the work of Renata Buziak for a long time, willing to try and recreate some in due time. She uses decaying plant materials to create beautiful pieces of art.
Last year my boyfriend backed the kickstarter project of Joumana Medlej and this turned into a very good reference guide for making wild inks and paints.
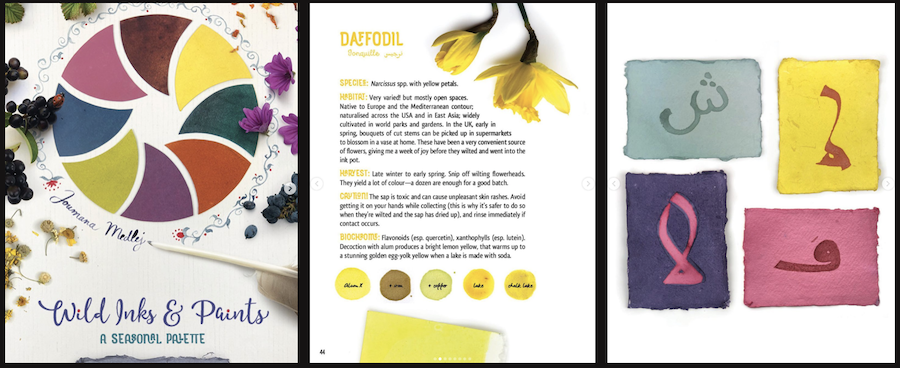
I’m eagerly waiting for her first book to arrive on paints and pigments from the Middle-East!
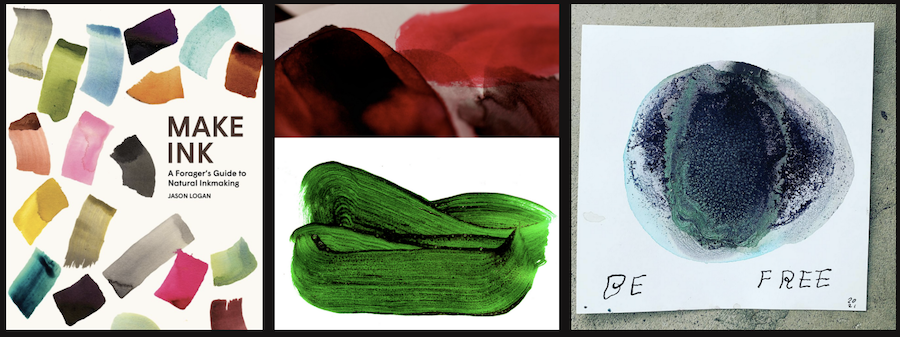
And of course, there’s Jason Logan who wrote the wonderful Make Ink book. If you want to make inks, this is a great reference. He has the most simply yet beautiful way of documenting the inks by transforming them into great pieces full of life. I cannot stop looking at them.
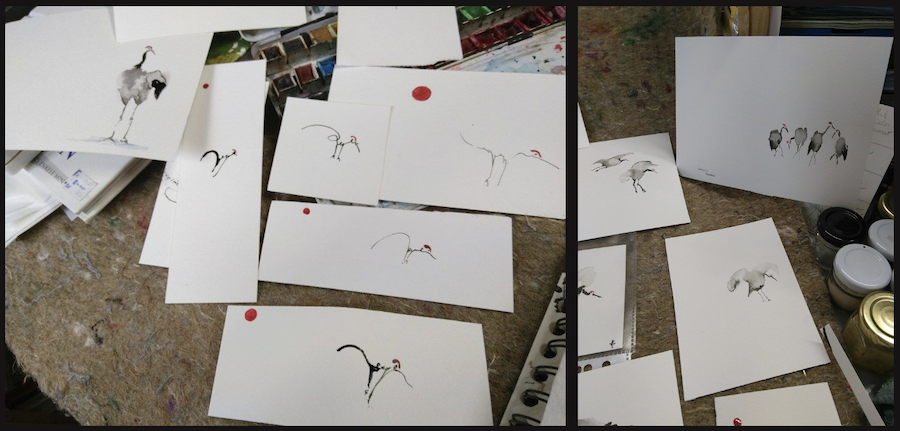
But the one person who cannot be overlooked is the person I’ve know the longest: my beloved mother. We’ve been in love with watercolours for as long as I can remember. We share the same love for aquarel, ink and a bit of a messy workspace ;-). Here’s some of her work which I love the most: cranes in all their shapes and sizes. Aren't they beautiful? She’s a daily inspiration and most definitely when it comes to making inks as she’s most eager to try them out :-)
Camomile in the dye
I’ve always been interested in the science behind colours, but this is the first time I’m truly taking it one step further than simply experimenting because it’s fun. Based on the recipes found in my books and from Ceciilya I’m ready to dive in!
Day 1: prepare the dye bath
I’ve found different methods of making dye baths, some use a combination of mordant and dying, some mordant the textiles beforehand, some but in all in one big glass jar and leave it out in the sun.
I’m curious to try all of them, but for now I’m sticking to the basic recipe I found by Jenny Dean (yet another great inspiration!).
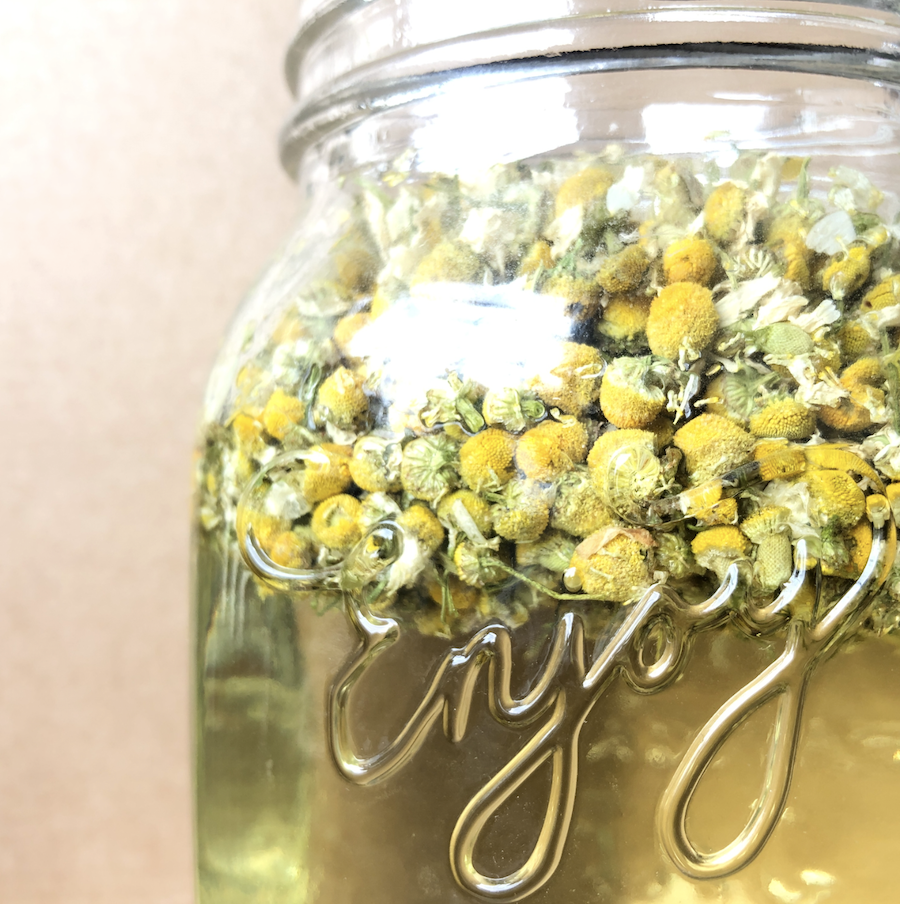
For the first dyeing experience I wanted to work with something I have readily available at home: camomile. Camomile is actually a common name referring to all daisy-like flowers from the family of Asteraceae. We mostly use only two species to make our infused drinks. It’s one of these two I will use for dyeing.
Because camomile is super yellow and bright, I decided to pre-soak my dye bath by simply putting the camomile in a glass jar with one liter of water and let it sit there for a day.
Day two: prepare you fabrics
With all the different methods, it’s easy to get lost in translation when it comes to mordanting your fabrics. A good base for me is to:
- make sure they’re clean
- make sure to not squeese them too hard, otherwise the fibers break down
- simmer vegetable fibers with washing soda for at least two hours
As I’m going for the basic dye bath, I’m also mordanting my fibers beforehand and let them sit for roughly a day. I’m making to mordant baths: one with alum and one with iron sulfate. Both contain the same amount of fabrics and mordant.
I’m mordanting 300 grams of fibers for each bath, so this means the following for the mordant baths:
- 150 grams of fibers
- 8 grams of mordant crystals
- 1,5 liter of hot water
Simply add the mordant crystals to hot water until they dissolve, stir well. Add your clean fibers to the jar, pour in the mordant bath and let it sit for at least 12 hours.

Keep an eye out for the fibers in the iron bath as they might dissolve, if that happens: take them out and rinse them thoroughly. With this step done, they are ready for dyeing. Exciting, no?
Day 3: bath the fabrics
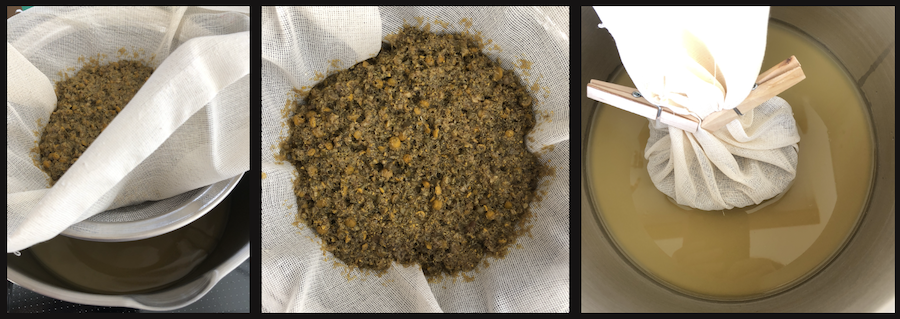
With the preparations done and after the nice cup of coffee, it’s time to start the dyeing. I’m using a hot process and keeping the camomile in the dye bath using a cheese cloth. To make this a not so messy process I’m using a sieve to strain the liquid in the pot with a cheese cloth in between, simply taking it out afterwards and keeping it closed with two clothespins and putting it in the pot. Time to add another liter of water, can be hot as it needs to get to simmering temperature anyway.
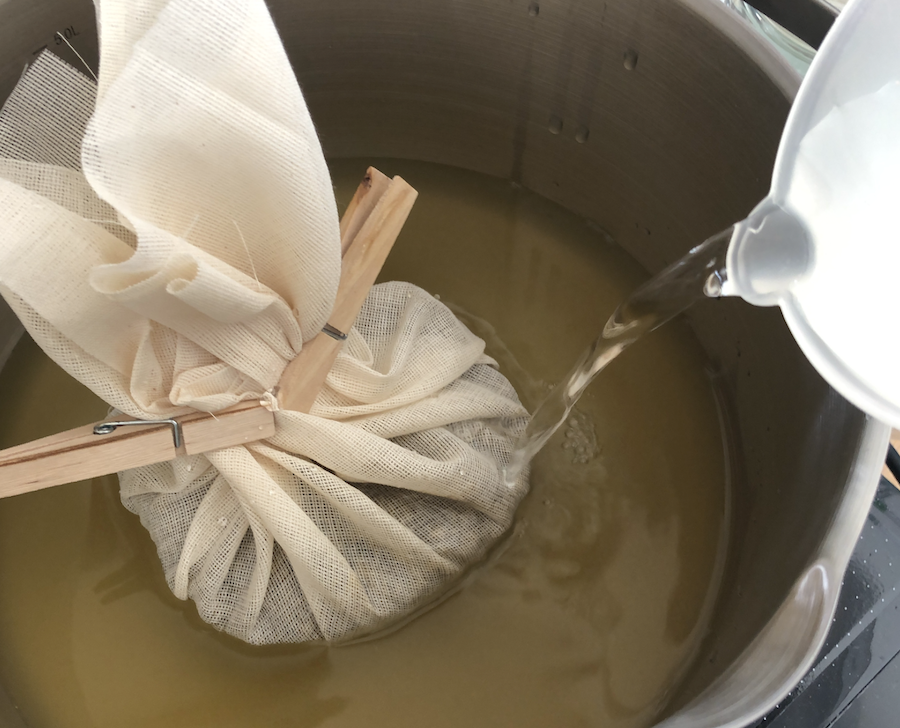
Leave it to simmer for an hour, this will allow you to gain as much colour as possible from the camomile. In the meantime, I would suggest to make yourself a lovely cup of coffee and do some research on the next colouring bath you most definitely will want to make 🙂
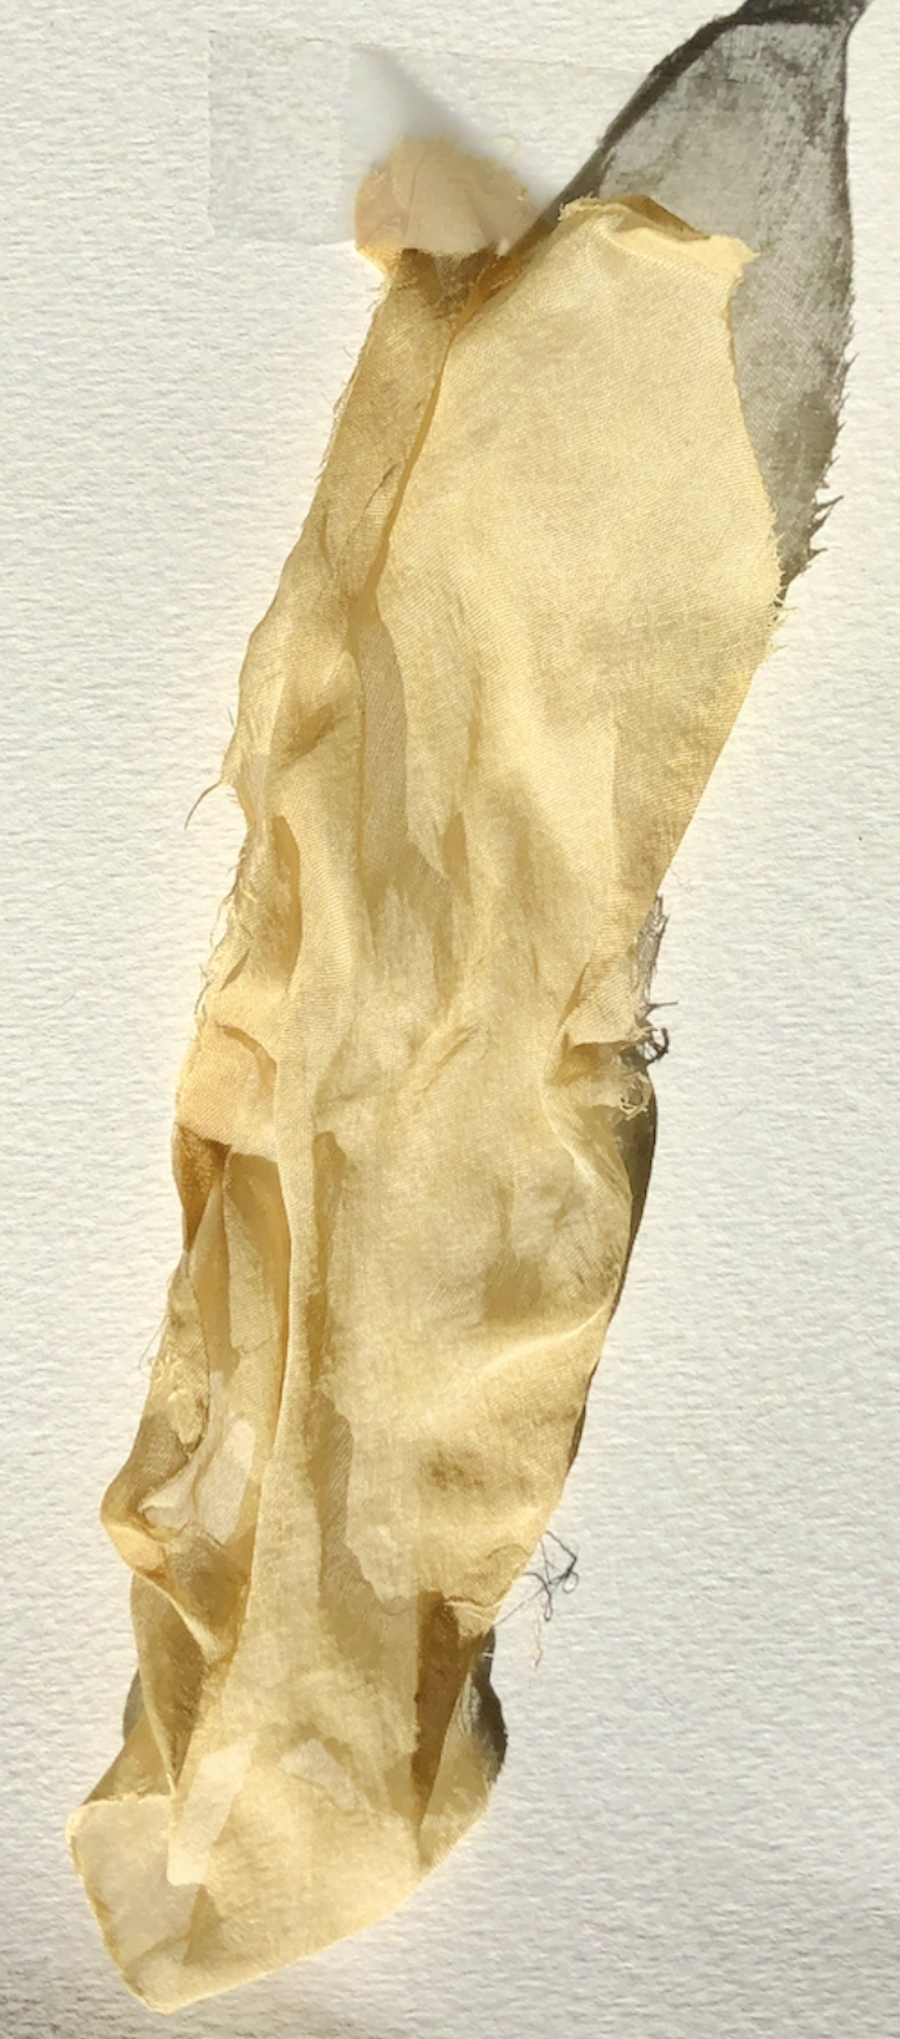
After an hour, it’s time to add your fibers. I went with the alum fibers first as camomile is rather light in colour. The wait however isn’t over yet, simply reset your timer as these need to simmer for yet another hour. Relax, it’s totally worth it!
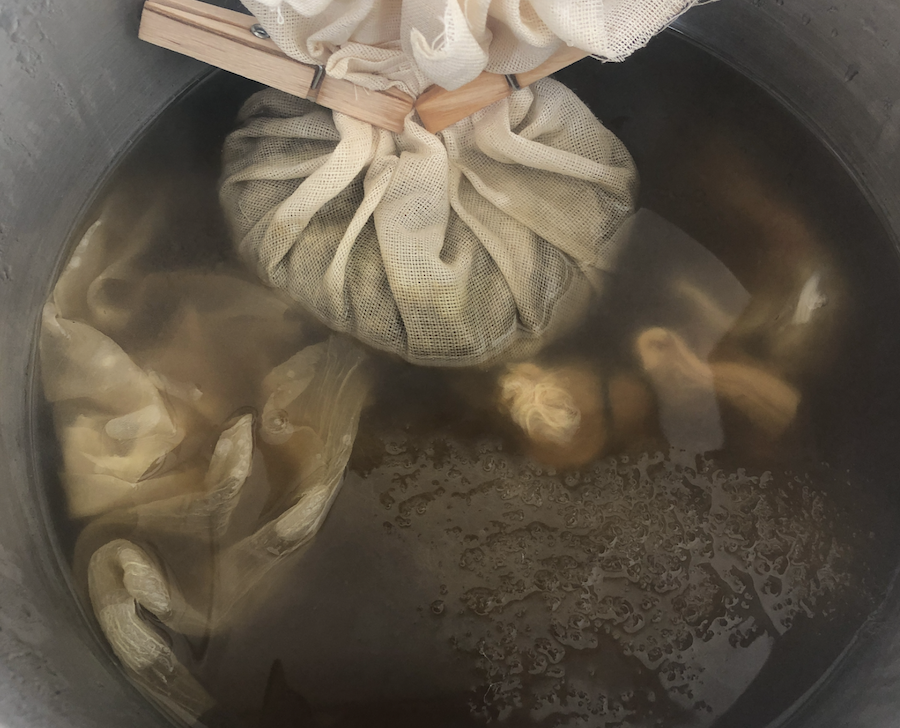
After your timer rings, take out the fabrics and rinse them until your water is clear. Your fibers should now have a beautiful yellow colour :-)
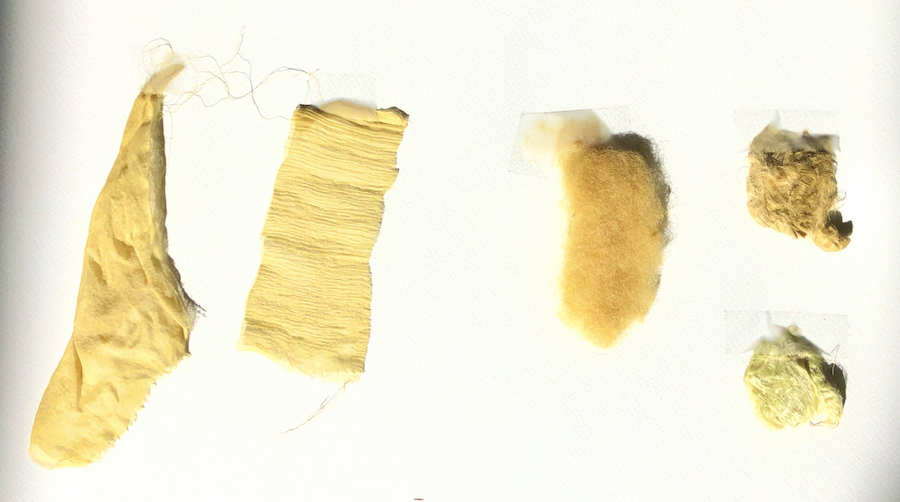
From left to right: plant based silk, silk, wool, soy lont and bamboo lont fibers
But we’re not done yet… Let’s see what other colours we can achieve…
Modifying your dye bath
One of the most interesting about working with natural dyes is that they change colour depending on the pH-value of the bath. You can measure the pH-value by using litmus paper.
Divide your fabrics to match the amount you need for each modifier. I did two tests (and an extra with a little leftover).
Adding the fibers to a vinegar bath gave me a more brownish yellow…
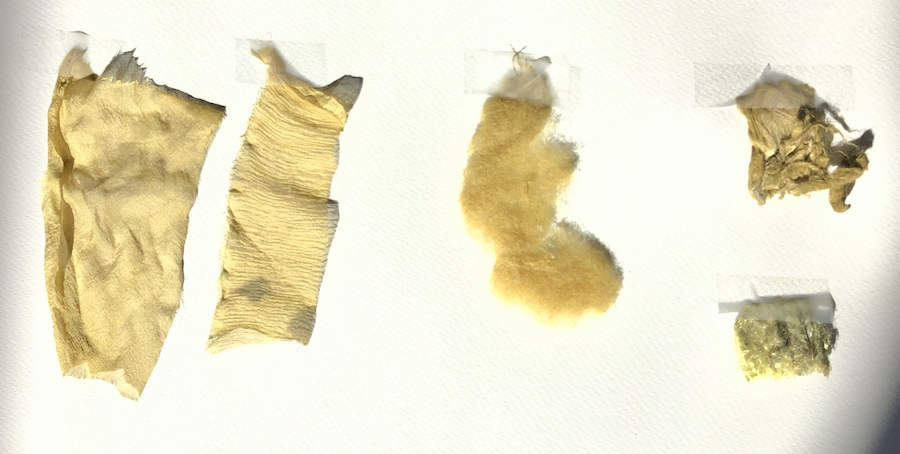
Adding them to an iron bath gave me a beautiful green!
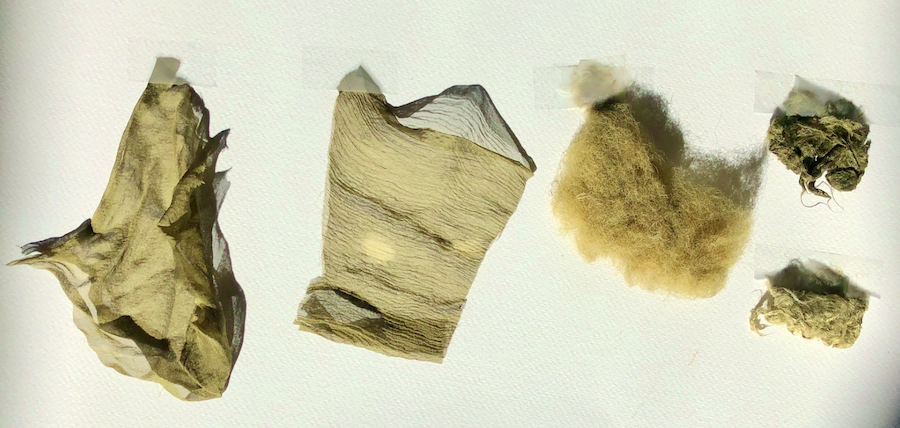
And using tartaric acid, I got a light sepia.
This was a lot of fun and I learned so much about natural dyeing. Curious to find out how water changes dye baths I’m out to collect some salty sea water :-)
But what to do with our leftover dye bath? Make ink of course!
Ink your camomile
I have a beautiful leftover dye bath that is bright yellow and makes me dream about sunny days up ahead. Good to have it in a bottle :-)
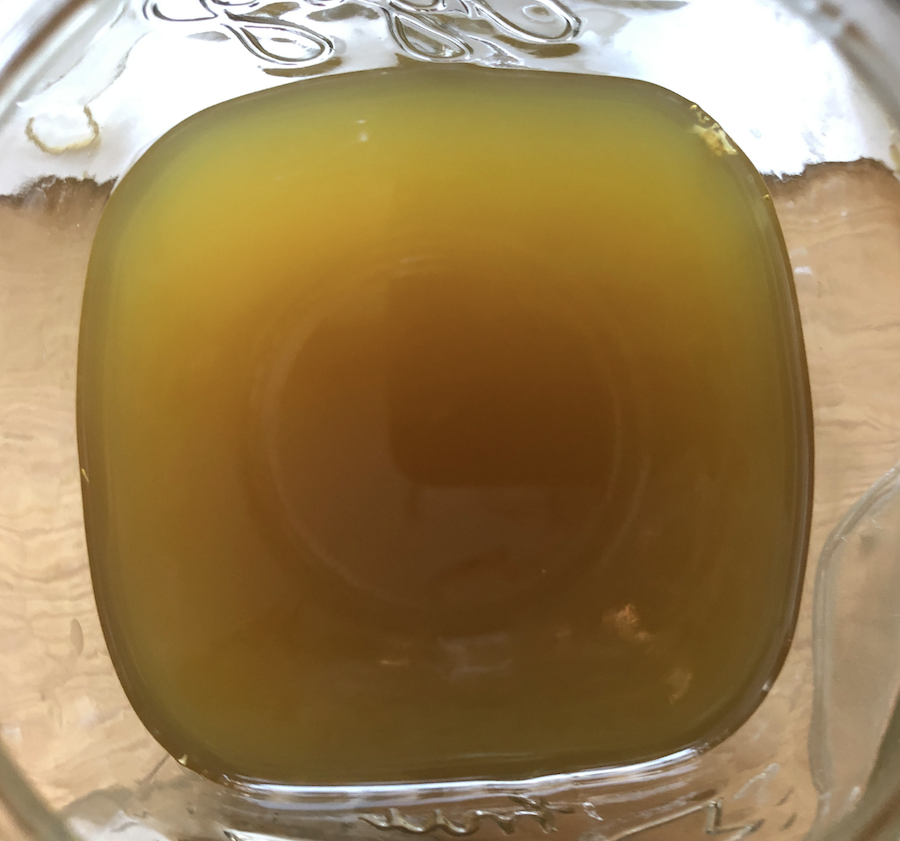
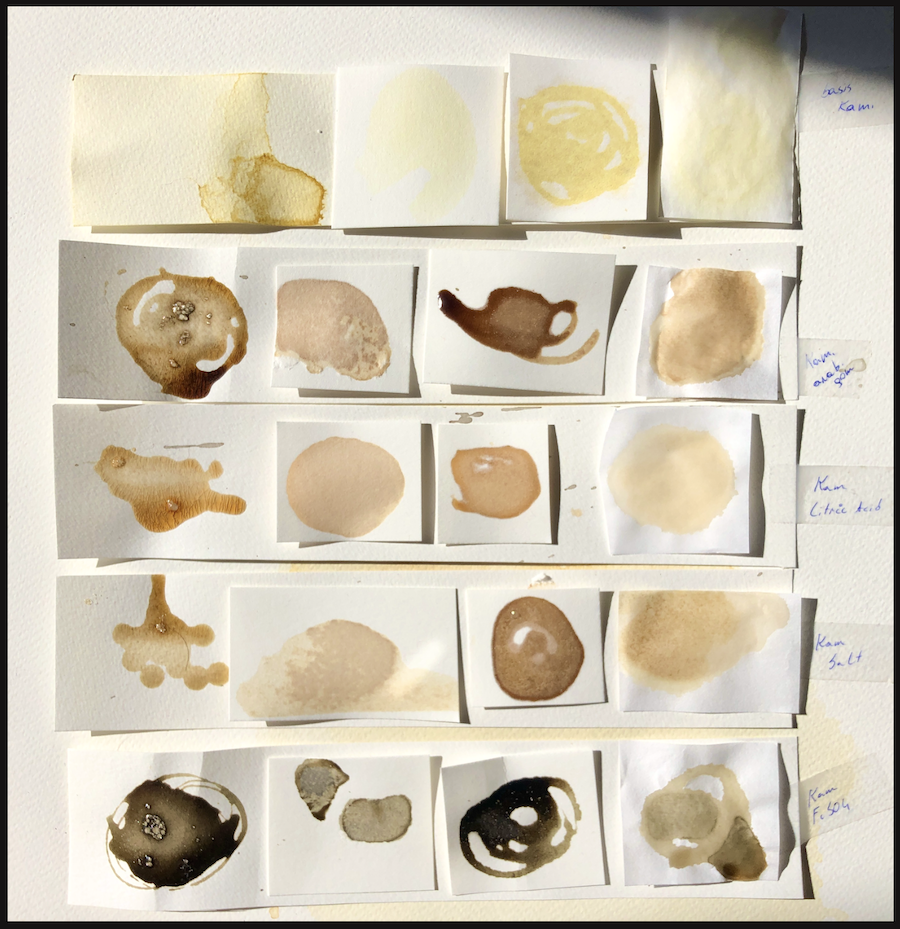
I divided the dye bath in different smaller jars, adding different additives and modifiers in order to change the colours and a clove as well as gum arabic to preserve them and make them a little bit sticky to use on paper.
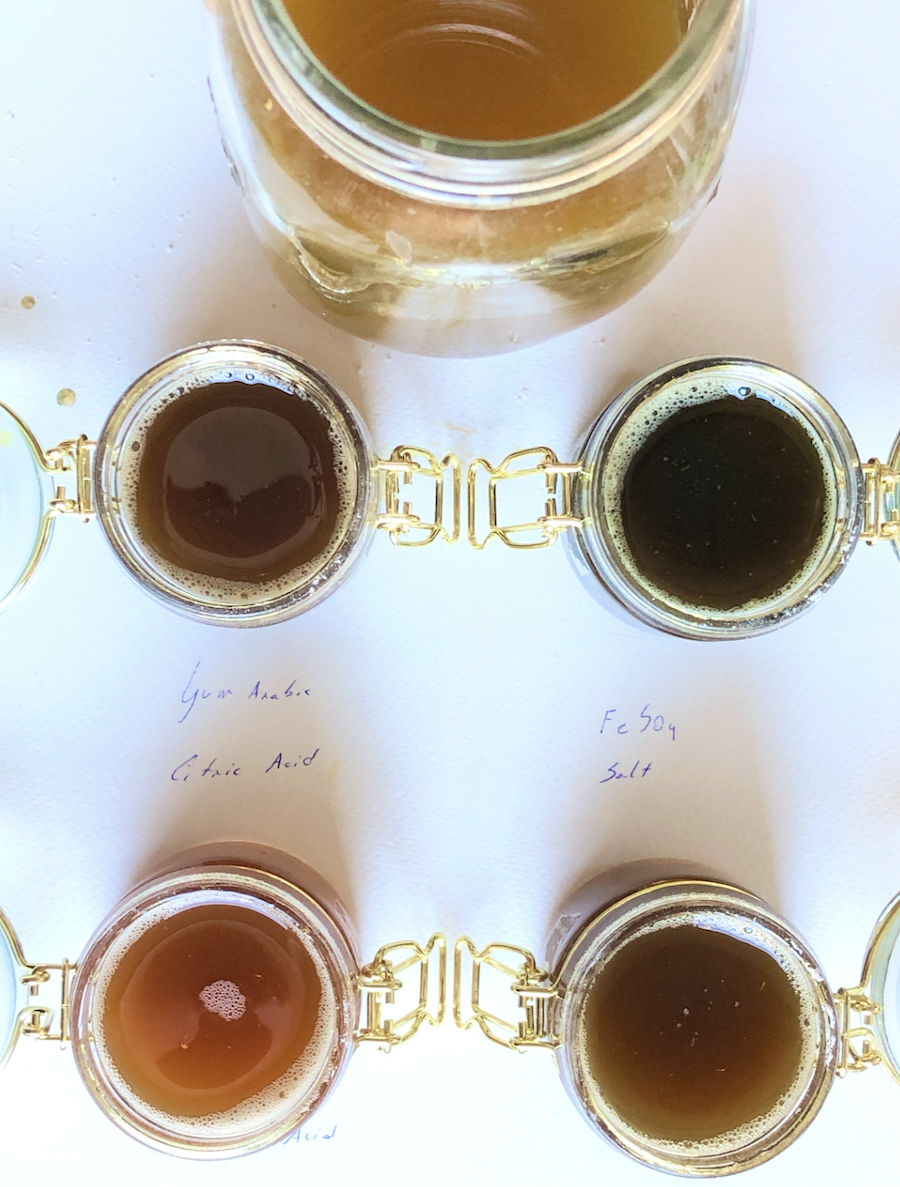
Making tests with ink is probably the best part of making them. I love colour swatches and keep them in my note books forever. I love how they change with light or preserve in the dark. Very curious to find out how these will change over time.
Aren’t they beautiful?
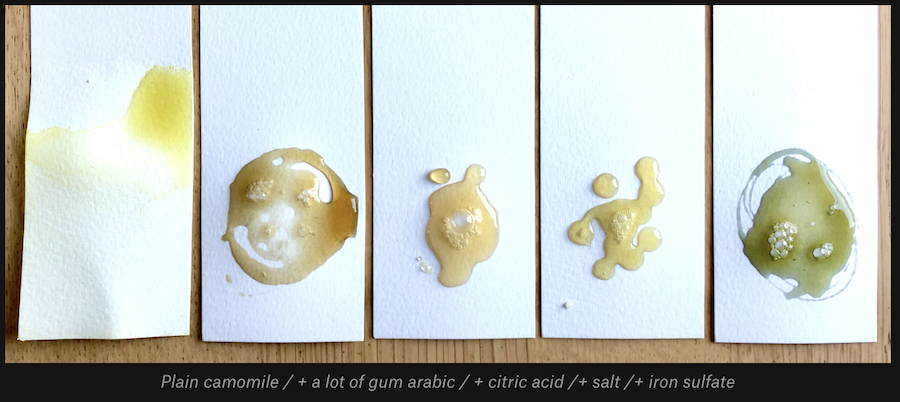
A few days later on different types of paper. I will never get bored looking at these :-)
I still have some dye bath leftover, for the moment I’m preserving it with cloves. But the goal is to try and make some camomile pigment as well. All in due time.
This assignment truly opened up a whole new world for me. I absolutely fell in love with dyes and the world looks even more interesting now. Working with colour has always been a passion, thanks for adding to it! ❤