6. Biofabricating materials
Research and inspiration
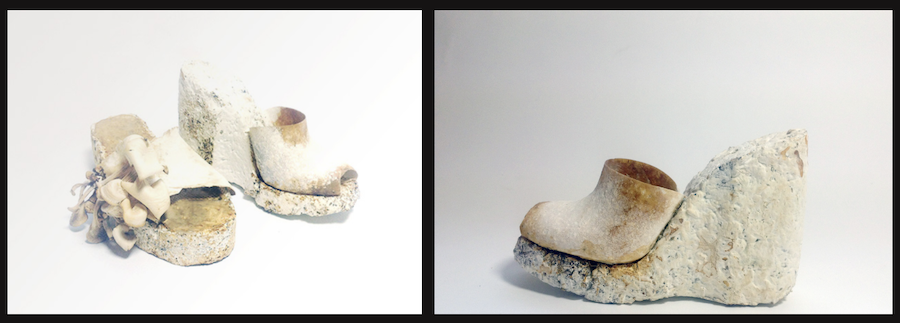
Looking close to home, I believe one of the first times I was introduced to using biomaterials as a source was when Kristel Peters presented her work during a lecture at the Ghent Design Museum.
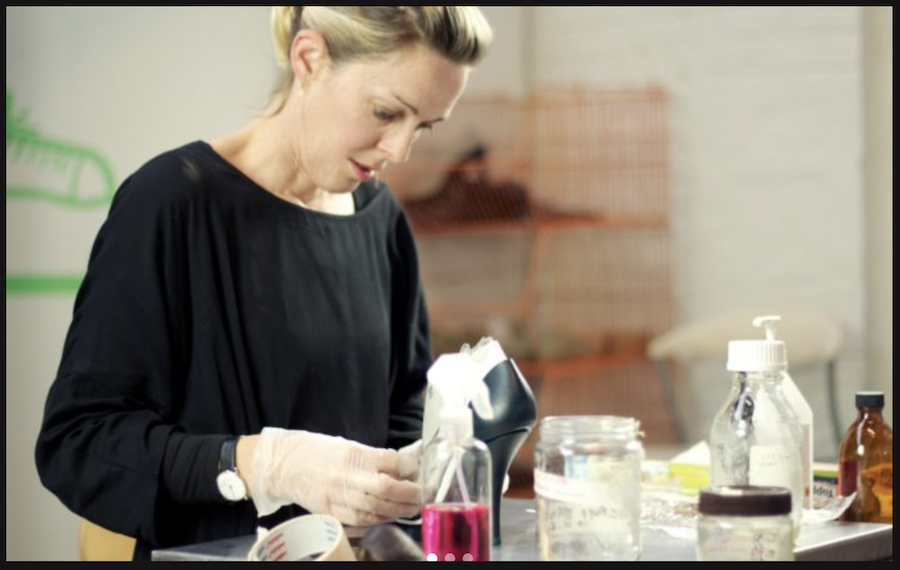
Kristal is a shoe designer who focuses on sustainability. She uses circular economy models and looks for new materials with a low to no impact.
She grows shoes using mycelium. Don’t they look amazing?
But there’s also Alice. “Alice is a statement against and a potential solution for this immense waste created by fast fashion. In Upper 7, Alice wears an upper-coat made out of barkcloth. BARK CLOTH® **is the bast that comes from the Mutuba fig tree. The material or the cloth is manufactured from one single tree which produces a new annual bark and there is not added of additives – can, of course, this perfect product can be composted after use without leaving the only harmful substances.”
Wow!
Be sure to check her work!
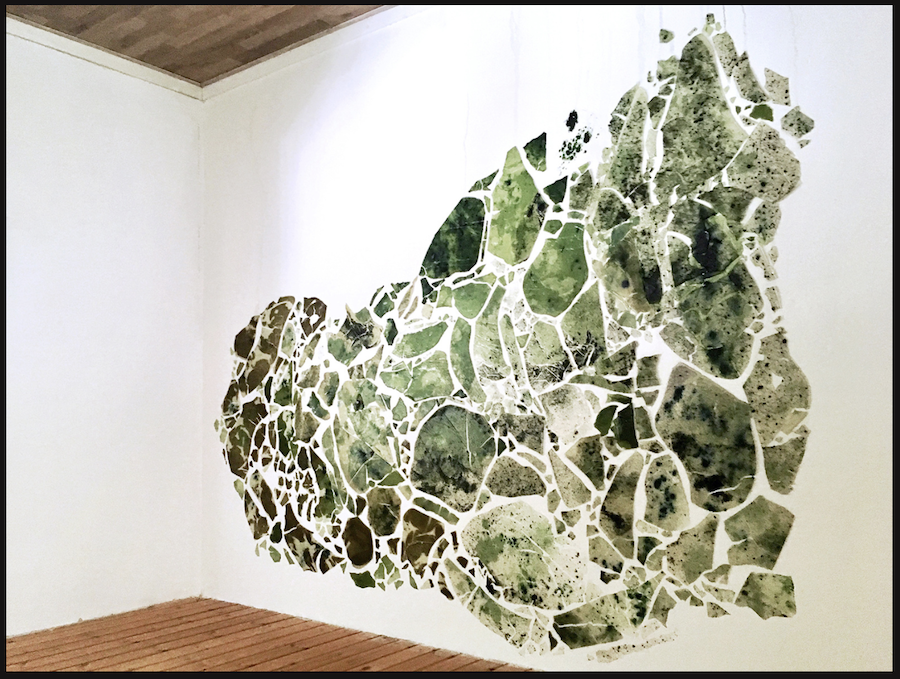
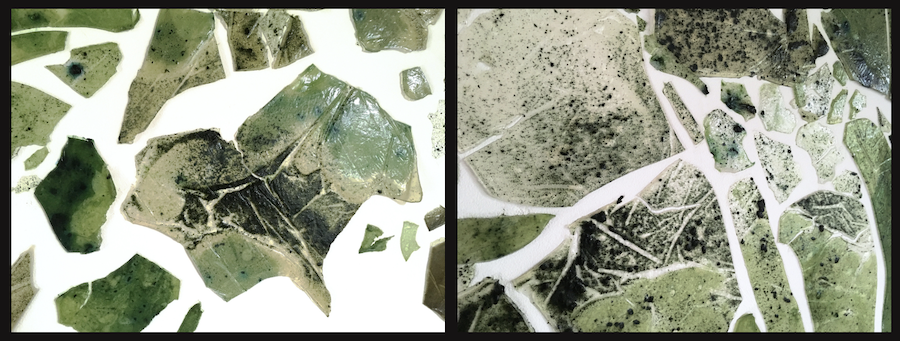
Another artist who I think does amazing work with biomaterials, is Charlotte Gautier van Tour. Amongst other things, she makes big installations all over the world and allows the biomaterials to set in the space. They change over time while drying. This works is called Top View. I love it!
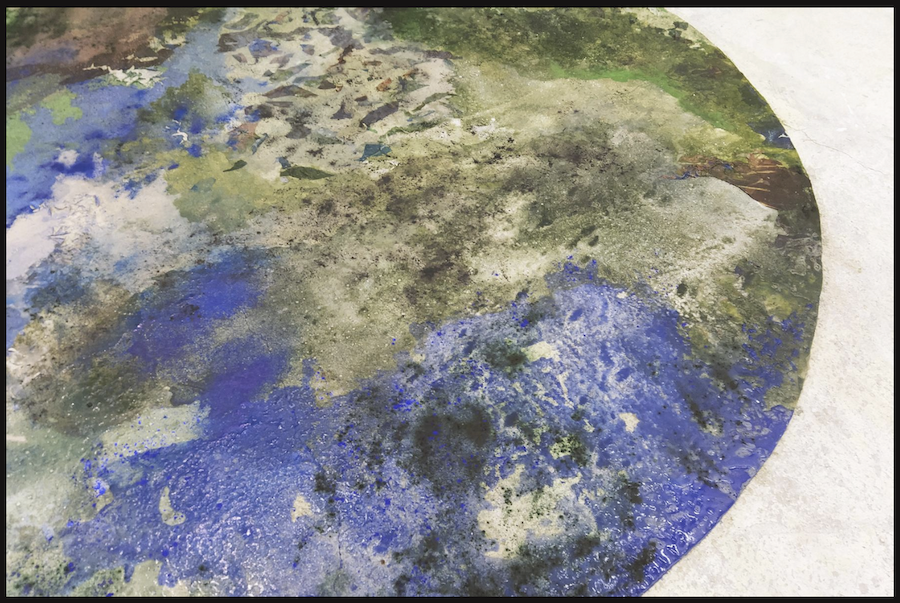
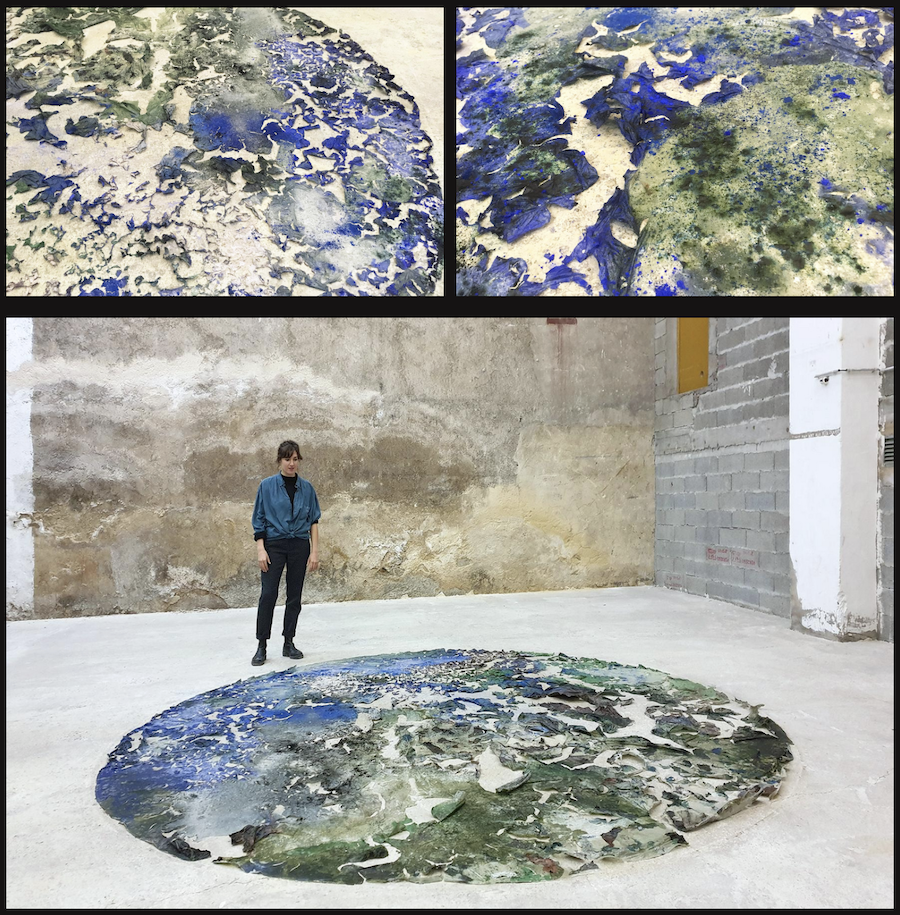
Land of water is based on a map of The Netherlands. Can you tell? It’s a beautiful work of art, based on agar agar and spiruline. I cannot stop looking at it 🙂
Biomaterials in the mix
By now I have decided it will be a good idea to work with coffee as base material for my final project. It only makes sense to look into finalising my stamp bases during the biofabricating assignment.
During Fab Academy I already started experimenting a little bit with coffee and agar agar.
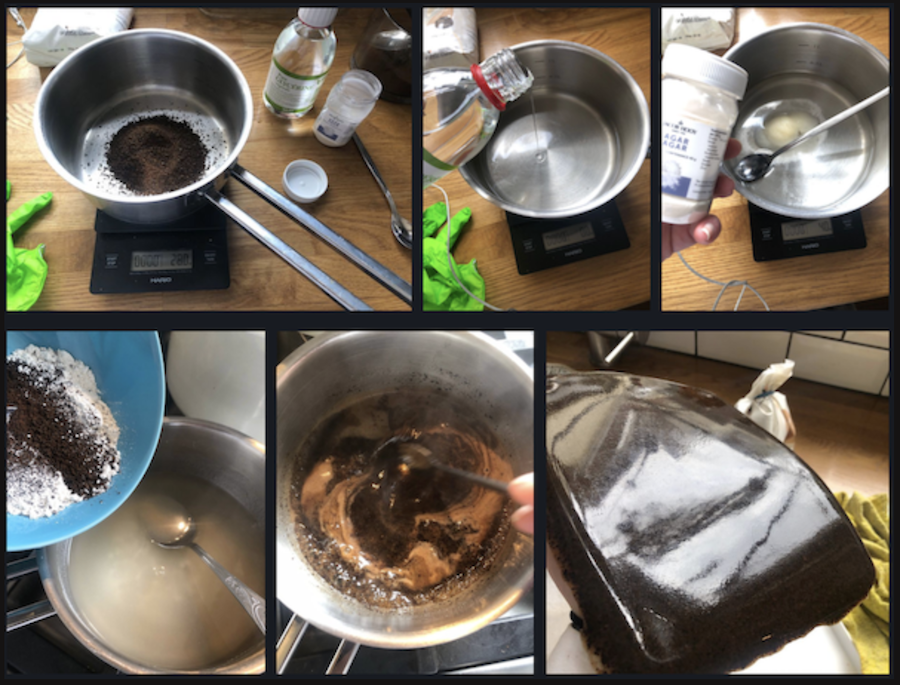
I used the following recipe:
- 160 g water
- 8 g agar agar
- 22 g glycerine (with Bush running in the back of my head)
- 34 g finely ground coffee
- 6 g white thin clay
Steps:
- Boil the water
- Add the glycerine and agar agar
- Once it boils, put in the coffee and clay
- Leave it boil for a good five minutes, stirring your heart out (otherwise it sticks)
- Pour it in a container (I used a glass one to have a smooth surface)
- Leave it for about five minutes
- Take it out of the container (otherwise it stays moist and moulds tend to form)
- Leave it to dry for a couple of days
It left me with some fine results, but not perfect. The coffee I used was not ground finely enough, so the texture was a bit rough. Not having perfect results from the start is great, that only means I can keep experimenting 🙂
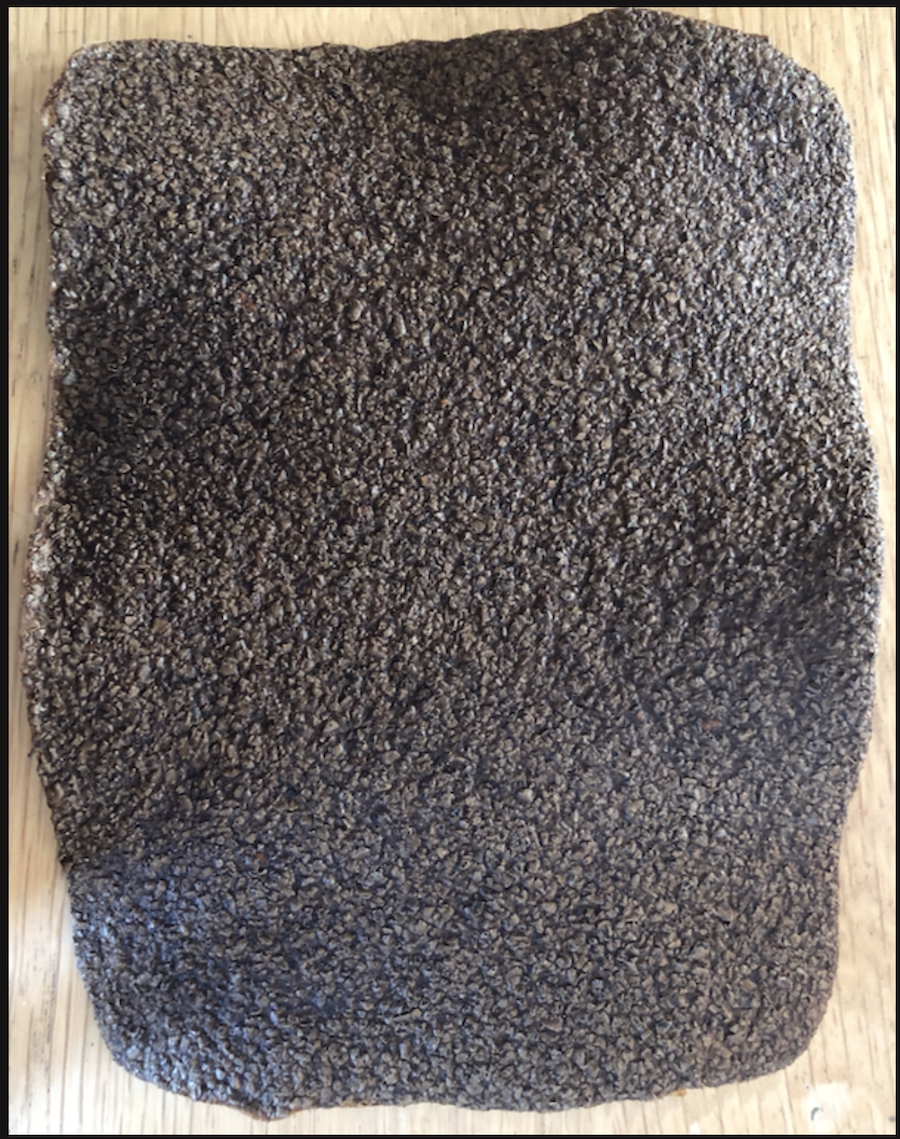
We did put a piece in the laser cutter to engrave. A robot, of course.. cute, no?

I did 3 rounds of test, first I recreated the result from Fab Academy.
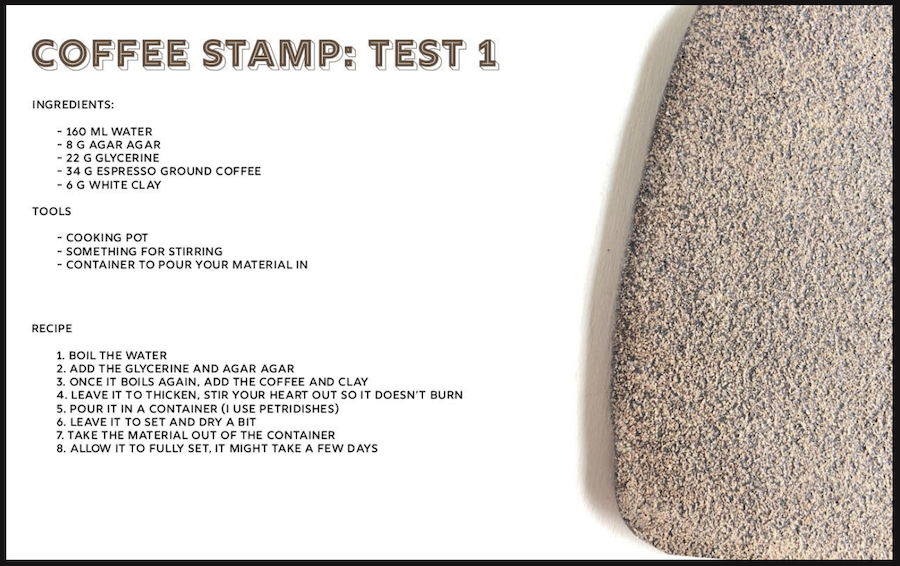
This was a good test, the material sets nicely. It’s a bit flexible but not too much. Perfect for laser cutting! But… not for using the cutting tools when creating stamps by hand. It needs to be a but more sturdy.
For the next test I decided to make the material smaller, but thicker and whisk it as Anastacia suggested.
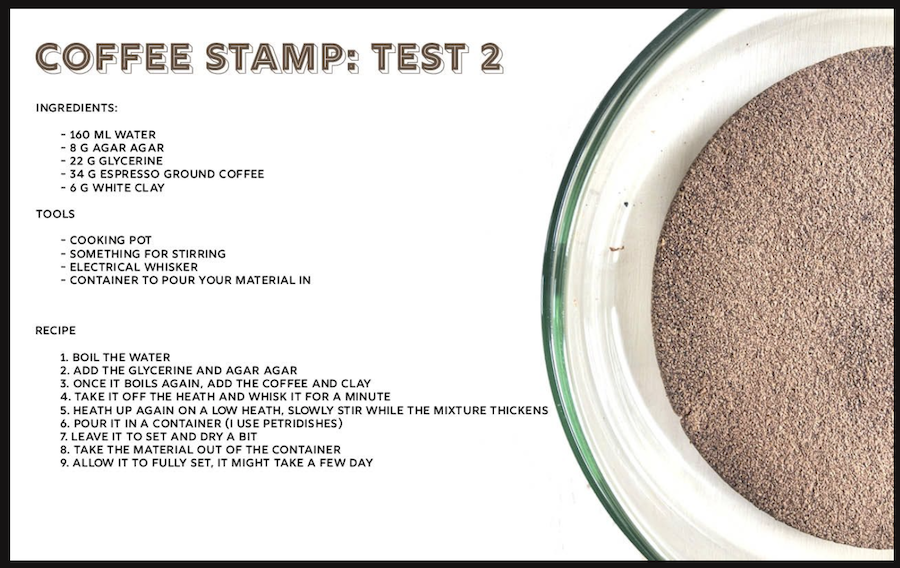
While this gave me a beautiful material: it’s hard enough, but still a bit soft. It has a lovely texture too and did I mention they smell like coffee? (Bonus, no?!) When dried completely, the whisking appears to have the coffee ground floating to the outer edges which means it’s crumbling.
So, time for another test. This time I’m not whisking, but blending.
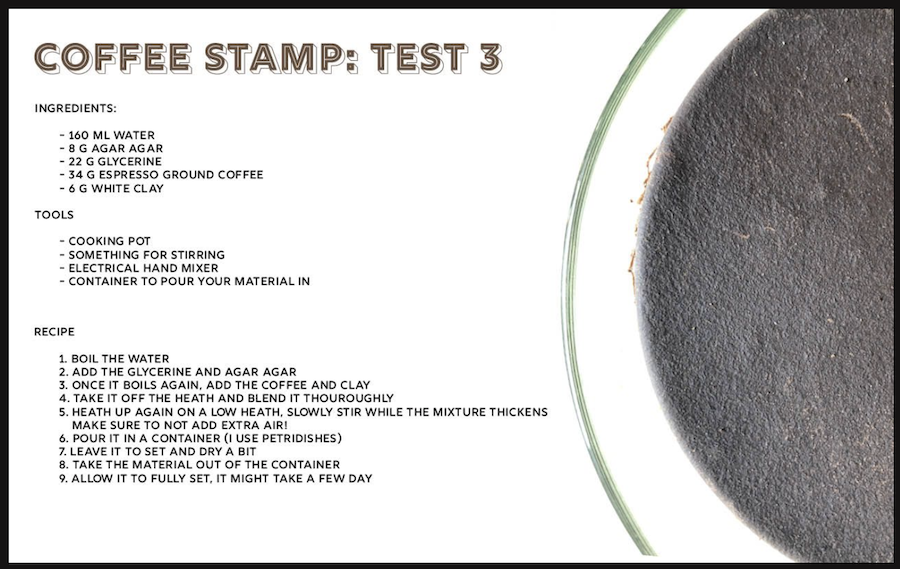
Blending does the trick for me! This material is very similar to linoleum or sturdy rubber which you would normally use for cutting stamps by hand.
We threw a piece in the laser cutter, of course, to make a stamp for Esther from Het koffiepand, who has been providing me with waste 🙂. It came out great too!

Now I only need to plan when I will make a batch of these beauties to use for the final project 🙂
Grow your own
For the growing assignment I decided to try and create a coffee kombucha using (fresh, of course) coffee waste and a scoby I got from a colleague.
The steps for creating coffee kombucha are similar to the ones for creating tea kombucha. I found a recipe here and tweaked it just a bit.
What do you need?
- coffee: I used 180g of ground coffee
- coffee: to drink, because making 3L of coffee takes up quite a bit of time :-)
- coffee maker and filters, I used the chemex
- 6 filters
- 3 liters of hot water (not boiling! 93°C is perfect)
- 1 cup of sugar
- a big glass jar, cleaned and sterilised
- a piece of cheesecloth and a rubber band
- a scale
- a scoby and a few spoons of kombucha
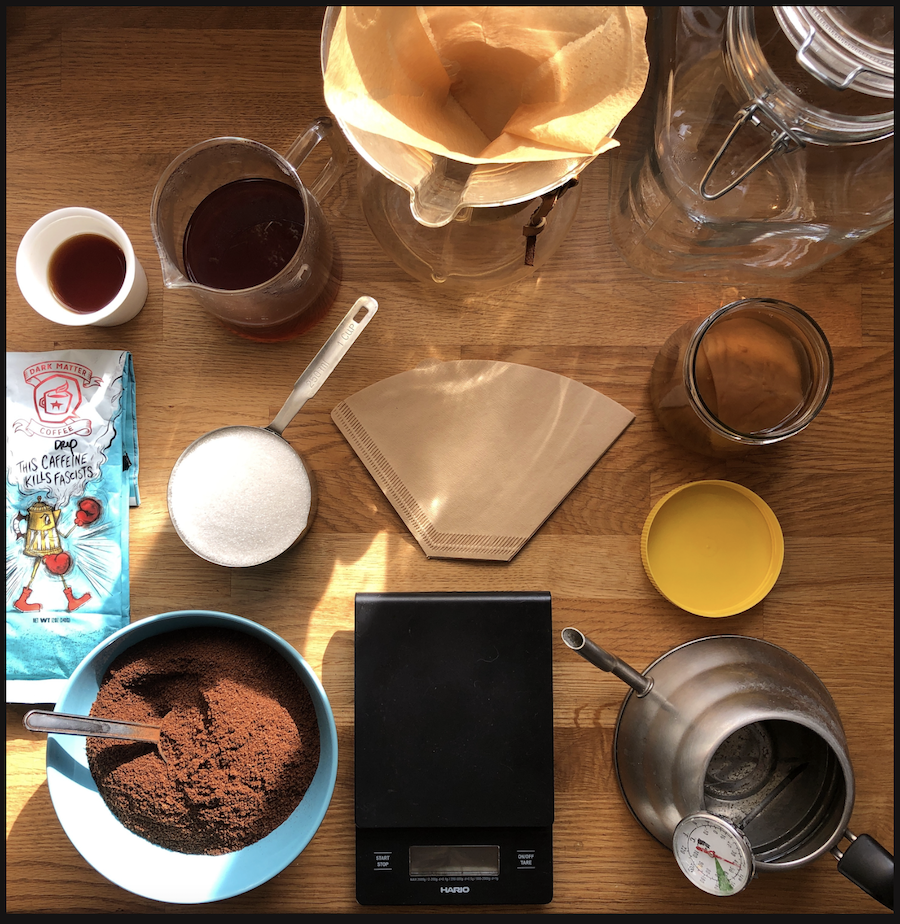
My recipe:
- Make 3 liters of coffee (I did 6 times 500ml, it is not recommended to make more in one time. Than again, I’m a bit of a coffee nerd)
- Pour your coffee in the glass jar
- add 1 cup sugar to the hot coffee and stir it in
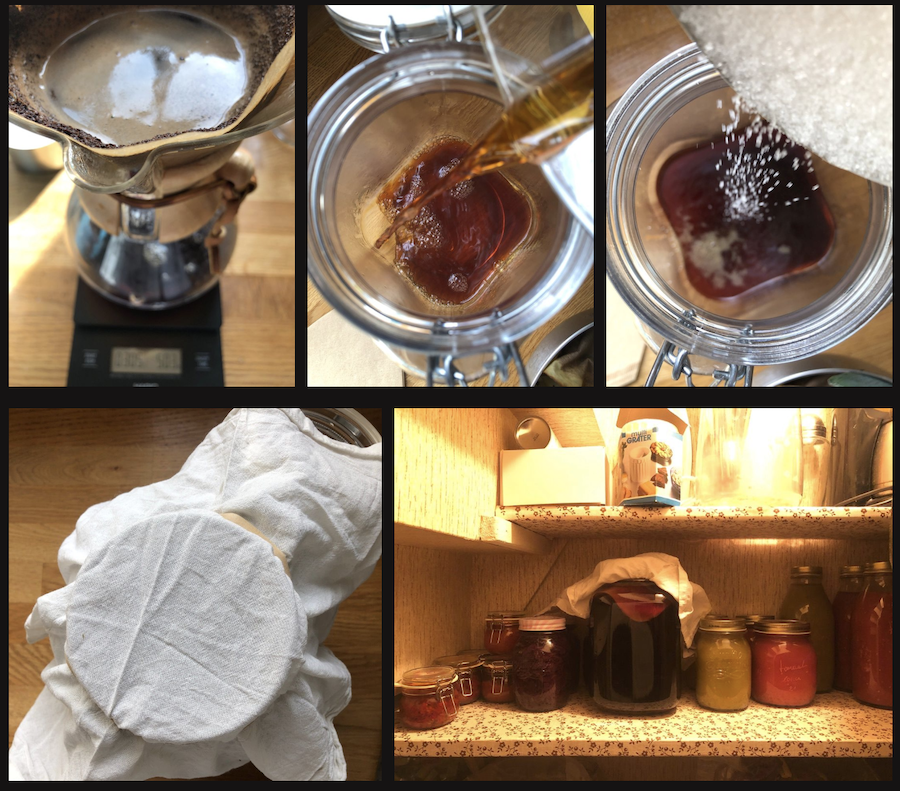
- leave your coffee to cool down (otherwise your scoby will be killed in an instant)
- once it’s cooled down, add your scoby (don’t be afraid 🙂 ) and a few spoons of the kombucha it came in
- add a piece of cheesecloth to the top and secure it with a rubber band
- put it somewhere dark but warm for 6 days, try it on day 3 and add more sugar or syrup if needed
After roughly 6 days your kombucha is ready. You can take out the scoby and use it for your project or you can save it by putting it in a bowl of kombucha in the fridge until you’re ready to make a new batch. I’m keeping this one because I want to let it grow some more and make some more kombucha as well.
I took out the scoby, sieved the kombucha and divided the mixture to smaller sterilised glass bottles. Leaving the bottles in the fridge will stop the fermentation, however the taste will continu to change over the next few days.
The coffee will make the scoby pretty dark. Very curious to see where this experiment will end :-) For now it’s drinking kombucha, which is perfect!

And of course, give away some of your kombucha if you’re planning to grow the scoby further. You will make a lot and drinking it all by yourself is boring, no?
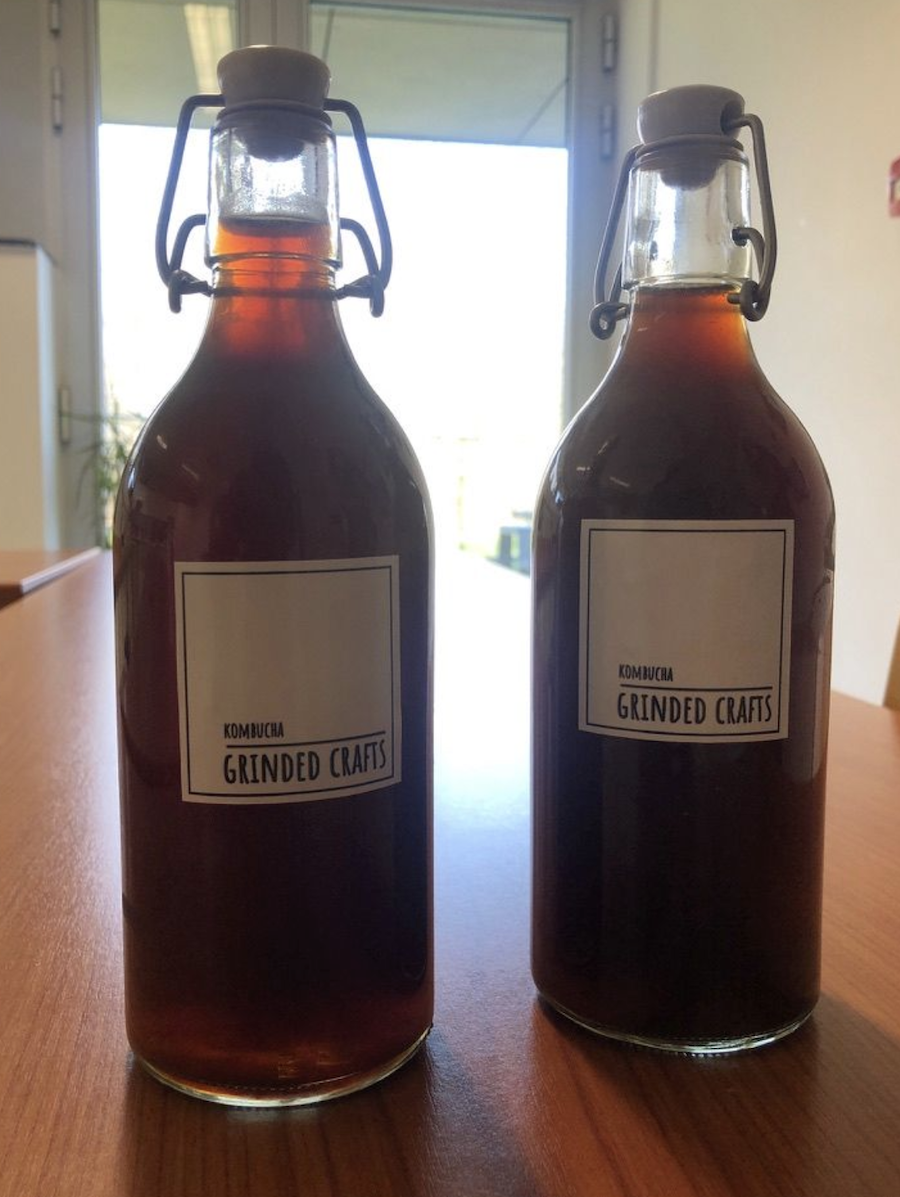
Enjoy!