9. Textile as scaffold
So, while the assignment asks for a 3D-milled object I’m reluctant to do so. The reason: what I’m making doesn’t require to go through the milling process. It would take too long and it wouldn’t have any added value.
I did design a piece in 3D, of course. Two actually. One for making a holder for the stamps and another to grow crystals on.
Crystallisation
Research and inspiration
The inspiration for this assignment came naturally when following the lesson by Anastasia. As you know by now music is an inspiration and this will never fade. I immediately started humming The Doors with The crystal ship Despite what was once believed, the song has nothing to do with drugs but is about a heartbroken Jim Morrison.
Time to make this visual with a fragile ship.
3D-design
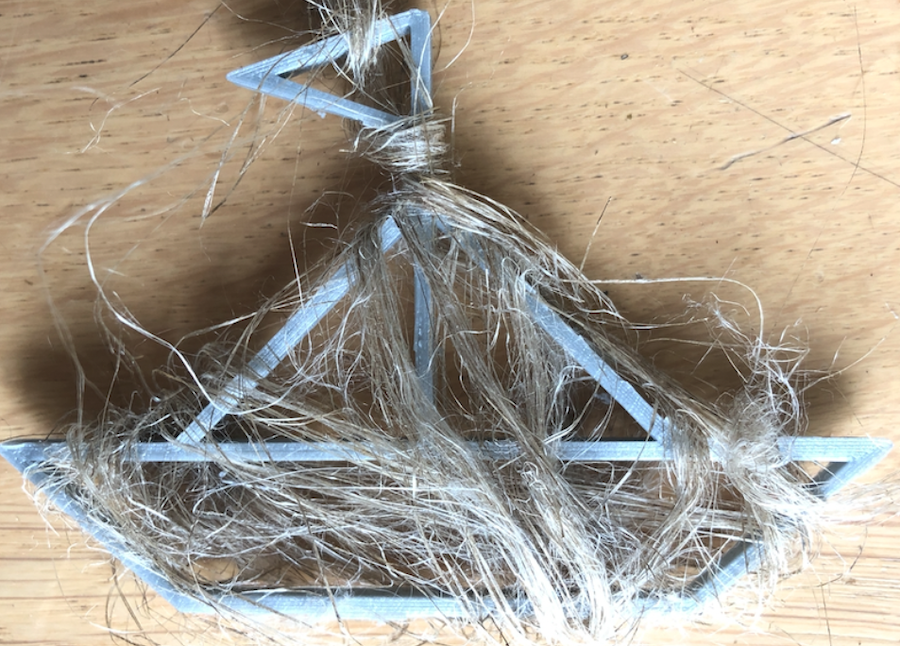
Using Tinkercad I made a little origami ship. It a very simple drawing made of different small blocks, grouped into one.
After drawing, you export the file and open it in your gcode generator, in my case I use Cura as I’m printing on an Ultimaker 3D-printer. Upon loading the object is placed on the building plate.

If you want to use the standard settings, simply press slice and a gcode is generated for you. You can save the gcode to a file or if you insert the SD-card from the printer you can save it to the SD-card. I always save to the SD-card and rename the file using whatever printer I’m using as a prefix, in this case that would leave me with “UM2GO_…..”. This is because a gcode is printer specific and in the lab we used to use the SD-cards for different printers. Just a precaution to know whether we could print the file on an event or during a workshop as an example.
With the print done, I decided to use some flax linen as a wrap. I draped it loosely over the print. This linen will act as the base for the crystals to grow on.
Grow your crystals
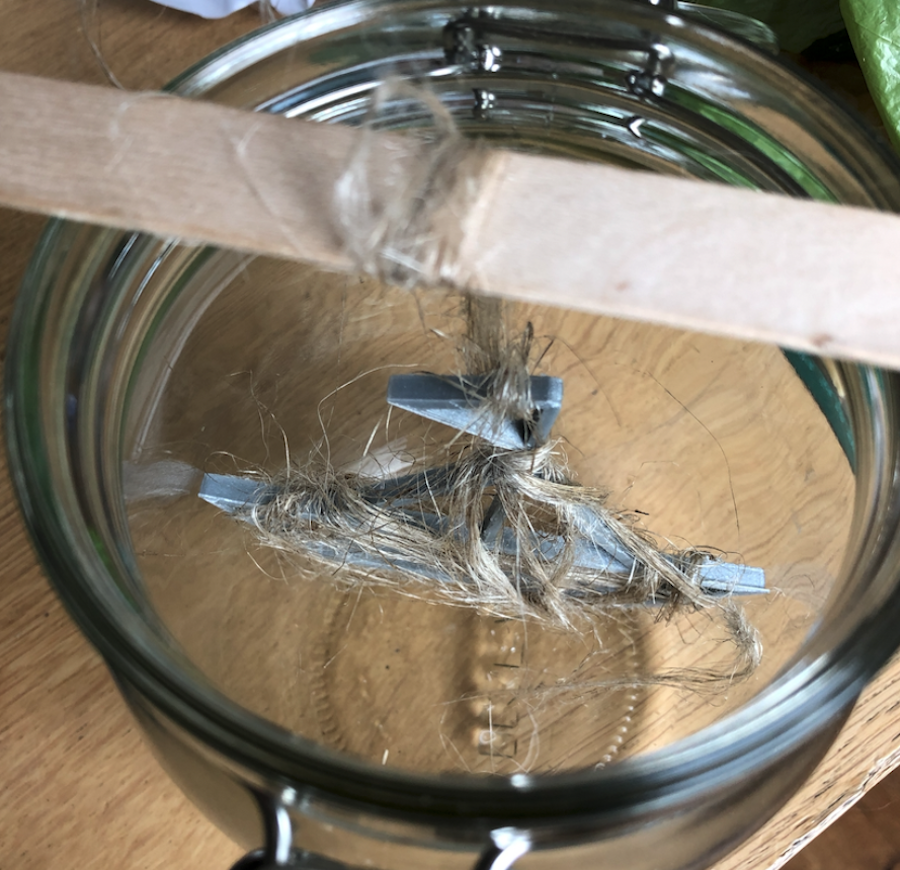
I placed the boat in a glass jar, using the linen and a little stick to keep it in place. The bottom of the boat is at the bottom of the jar, this will allow for the crystals to grow on the boat.
Growing crystals is easy peasy. Really. You can use salt, sugar, borax, … basically: every crystal. (Please be aware some are toxic!) In my case I’m going for alum crystals and I want to try and make them glow in the dark.
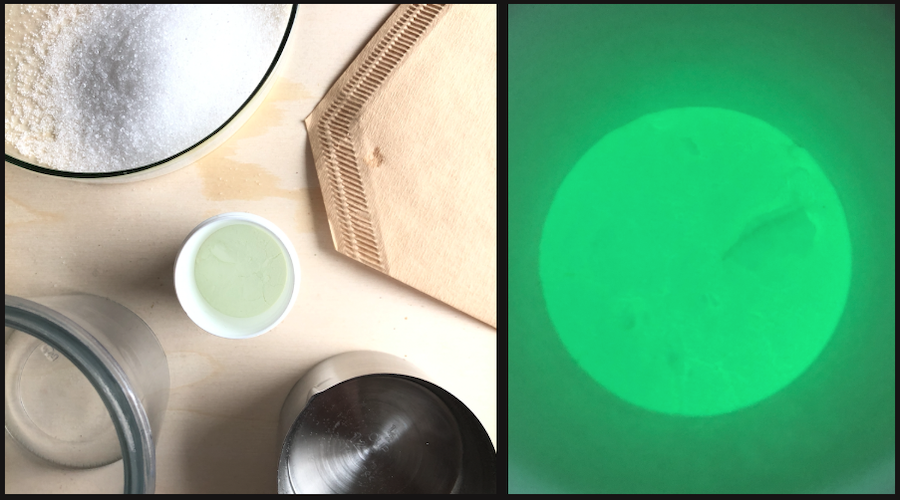
Necessities:
- 2 spoons of alum
- 1 cup of hot water
- some glow in the dark pigment
- coffee filter to cover your jar
- something to stir
- another jar or measuring cup
The steps are also easy peasy.
Pot the water in the jar (not the jar you want to grow your crystals in) and slowly stir in the alum, bit by bit. When the alum stops dissolving, stop adding. (You might not need the full 2 spoons.) Add very little of the GITD pigment, you don’t need a lot to make things grow.
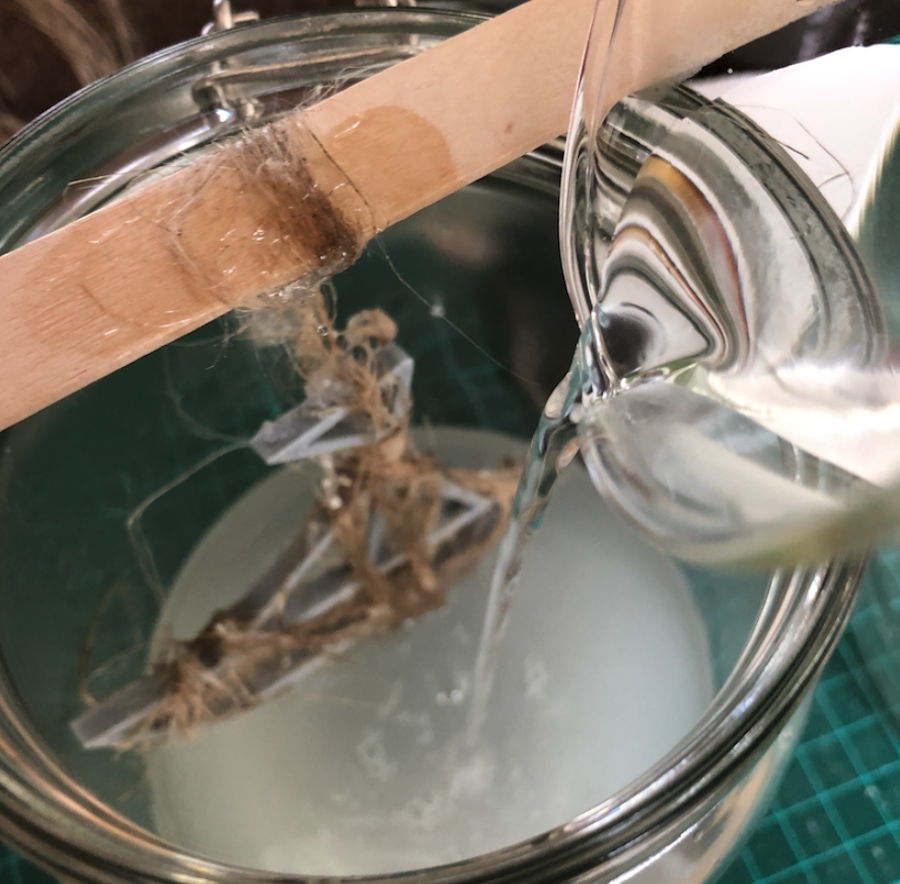
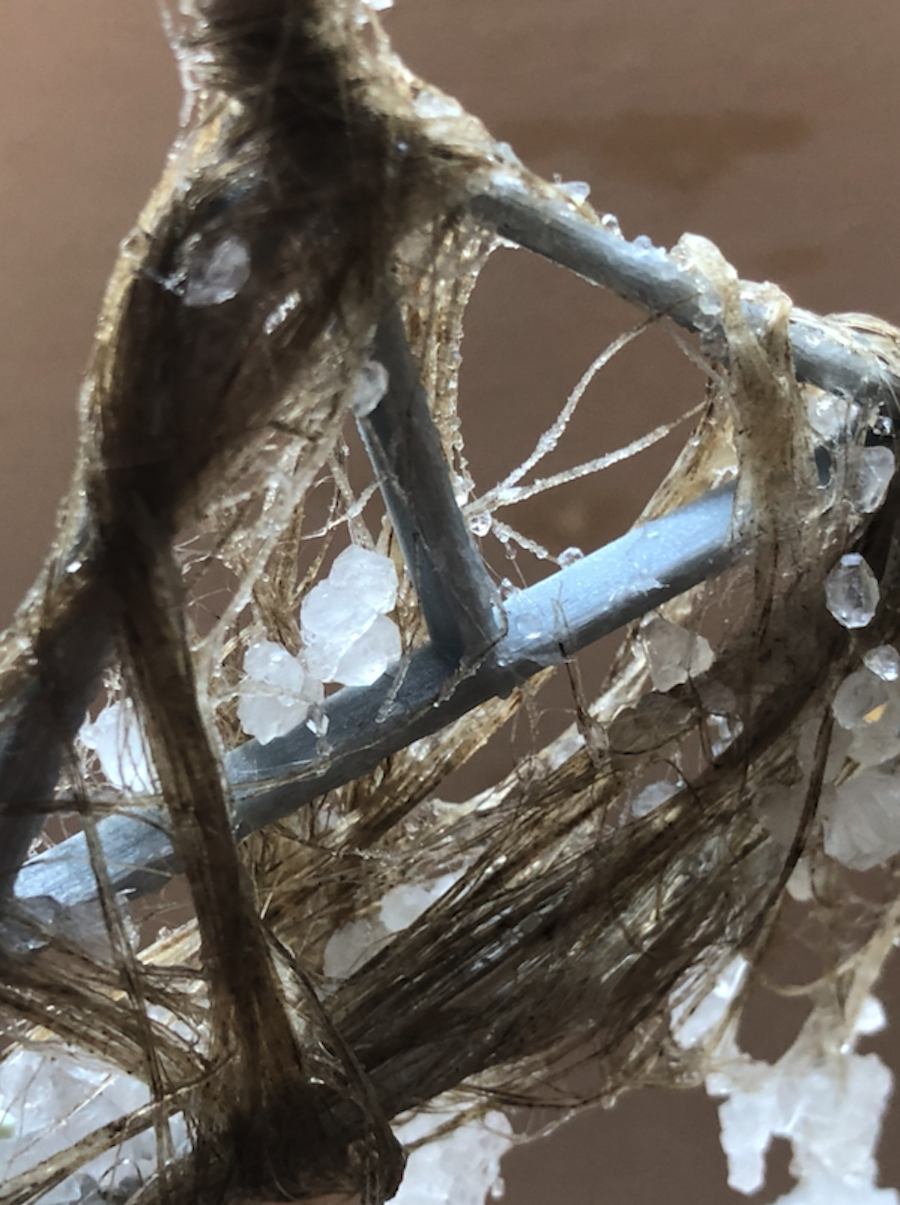
That’s it, you’re ready to grow crystals. Poor the mixture in the glass jar with the boat (or other structure you want to use) and set it aside. Don’t disturb it, or the crystals will break out of anger ;-) Just wait and watch them grow!

And wait some more… Tada: The Crystal Ship!
Biocomposites: resin & coffee (of course)
Another material I’ve been eager to work with, is resin. I have some pine resin (of colophonium) at hand and of course, loads of dried coffee ground. I’ve also been willing to make a handle for the coffee stamps. So, combining these gives me purpose (yey!).
Coffee ground as a filler
Lot's of projects use fabric or plastic waste as a filler, I'm going with coffee ground. For my coffee ground is a fiber as any other. Research showed that a cup of the black good contains more fibers than one might think, be it in a soluble form. Coffee beans were already knows to be high in fiber, so it makes it perfect to use as a base for yarns, fabrics and hence composites.
Singtex even uses it to give fabric different kinds of characteristics by using nano coffee grounds as a filler in their yarns. It makes the fabric stand out when it comes to water dispersion, the coffee grounds absorb odours and they reflect UV!
Coalatree melts down coffee grounds together with recycled plastic bottles in order to create fibers and fabrics for their shirts and trousers. Each shirt they make contains the equivalent of 3 cups of coffee to ten plastic bottles. Recycle away guys!
Using nano coffee particles instead of microplastic is also beneficial for our environment. So, what's not to love about coffee?!
I'm not there yet when it comes to yarns and fabrics, but hopefully one day I will be able to create some of my own. For now I'm sticking with composites, so let's start at the beginning.
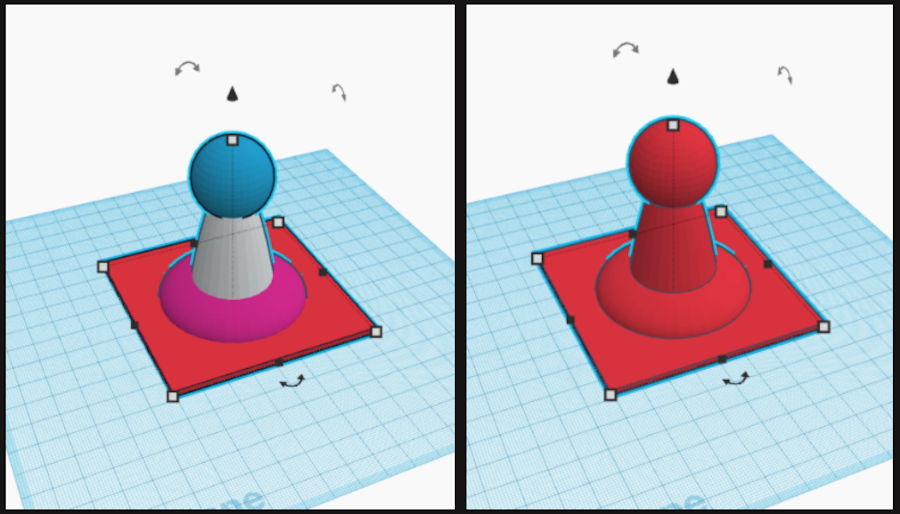
Designing the handle
Using Tinkercad I designed the handle. I use Tinkercad a lot for easy 3D-design as I find it very intuitive and straightforward without unnecessary options like Fusion360 (to name one).
As you can see the design is made from different pieces. To be able to print te design, everything needs to be grouped. Upon grouping them to one object the colour should become one solid colour.
After finishing the drawing, export it and generate your gcode for your printer. Start your print, make some coffee and do something useful for a couple of hours.
The result would be this:
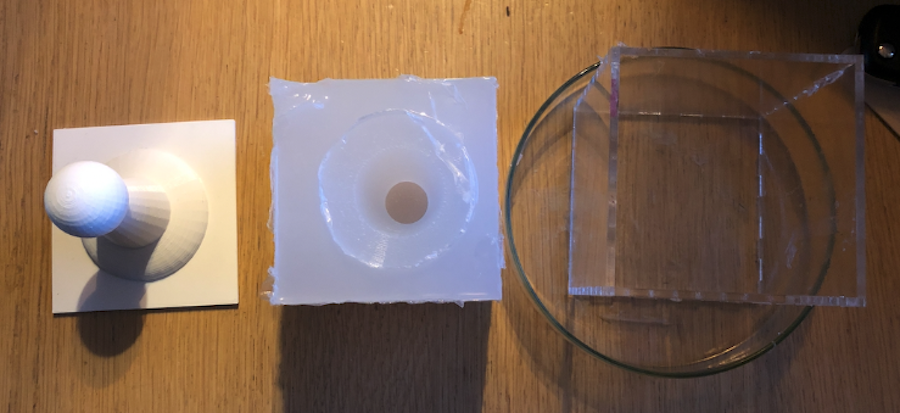
Great, no? Well, no… My goal isn’t the print. I will use the print as a base to make a silicone mould to use for casting my resin composite. So a couple of more steps to go!
Silicone casting the handle
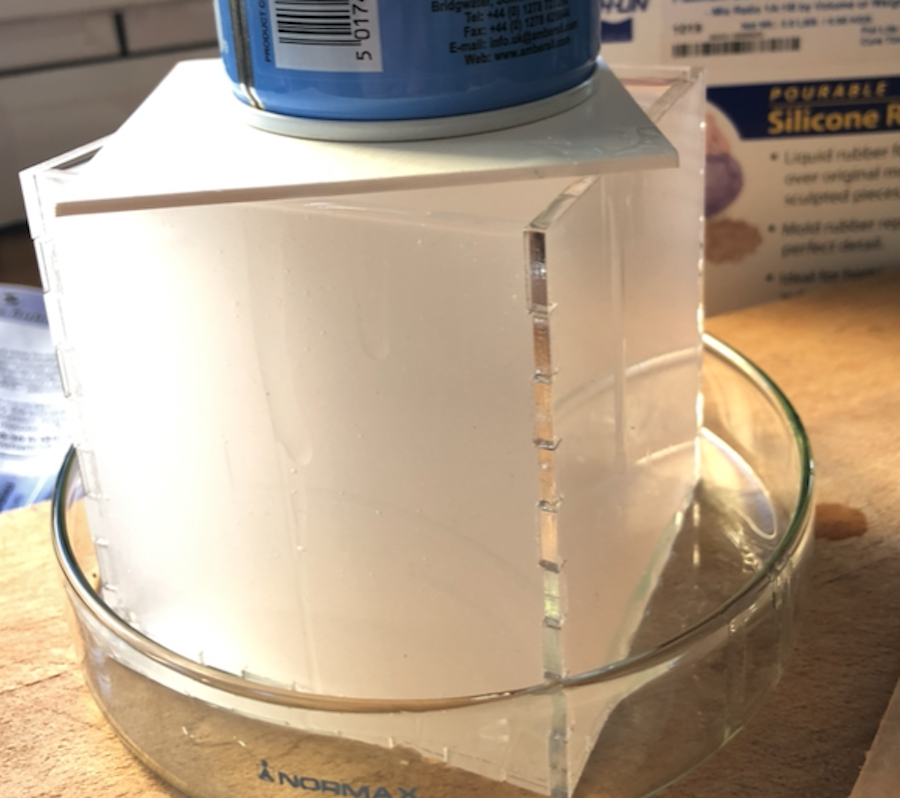
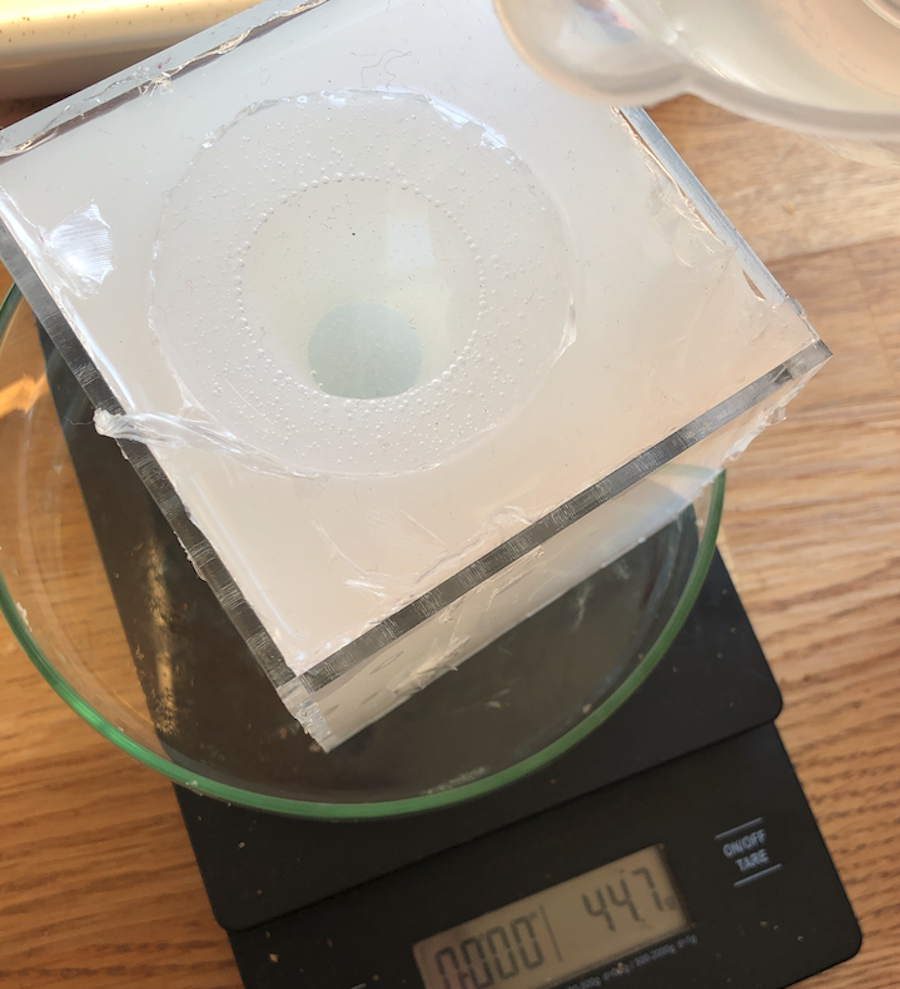
The base plate I added to the print, was an anticipation to the mould making. I made a plexi box in which I will cast the silicone, the base plate rests on top off the box and this helps to keep the print in place and make the de-moulding easier.
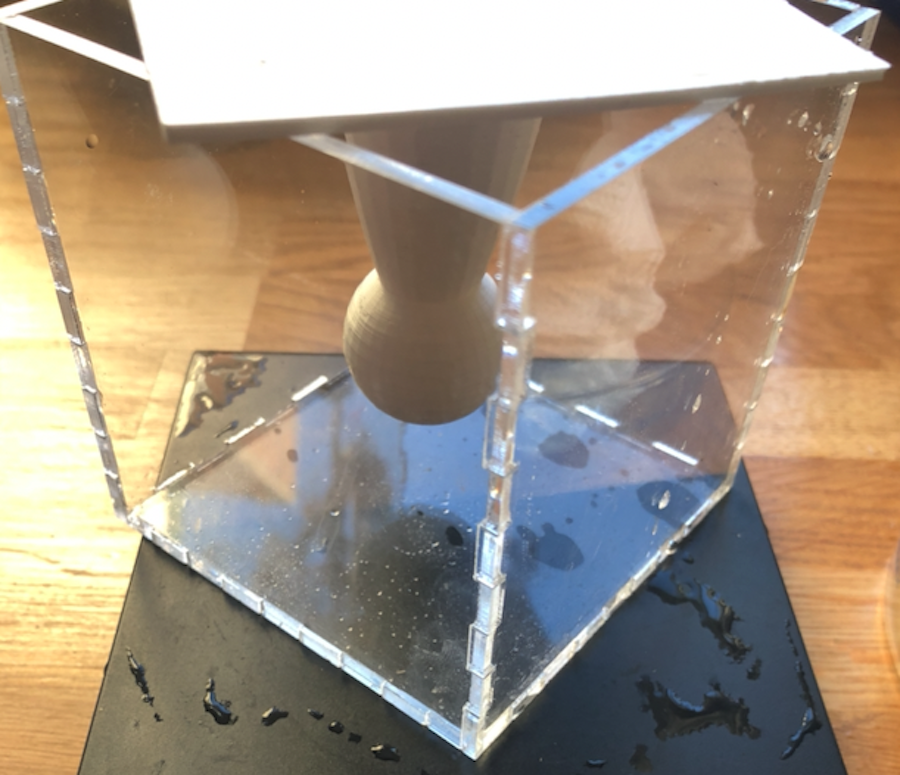
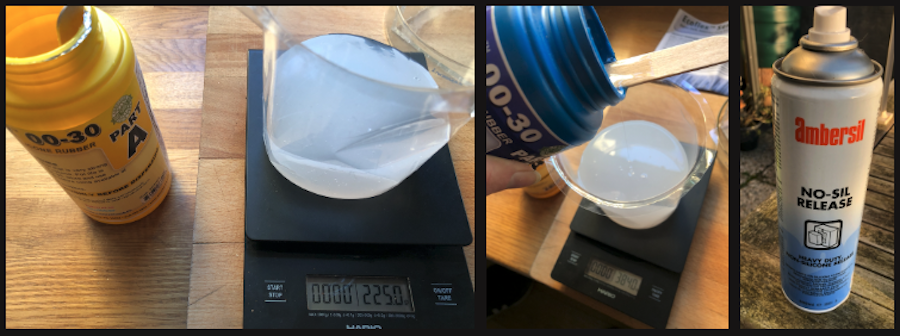
First step when making a silicone mould: measure! I added water to the box and measured the amount: 450ml of water. I always work 1 to 1, so I need to make 450 ml of silicone.
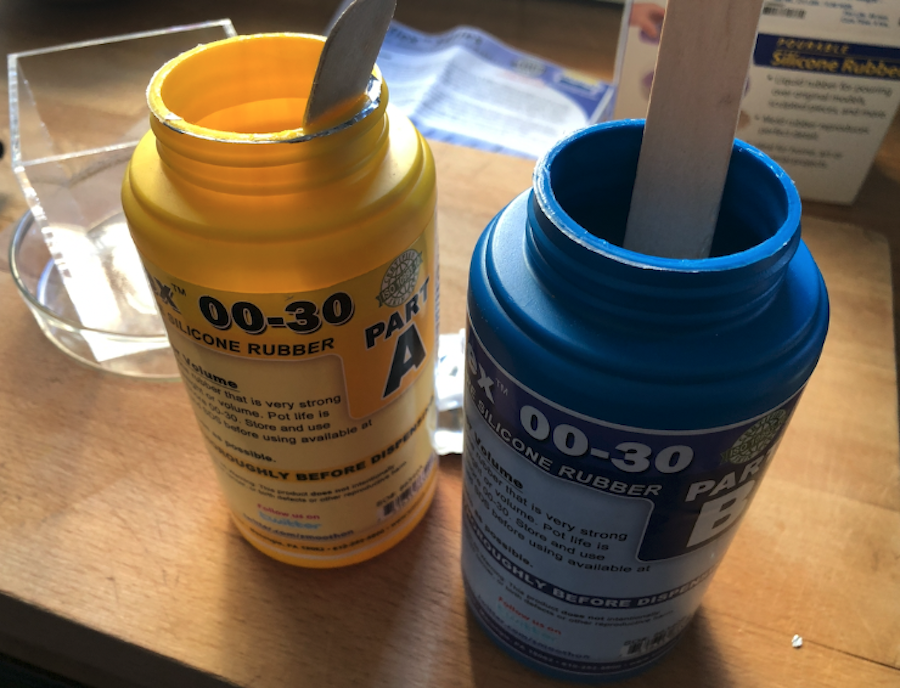
For this mould I will use a silicone rubber that’s not super flexible, yet not to sturdy either. It consists of a part A and a part B. They need to be mixed, starting with component A and then adding component B (makes sense, no?).
To make sure the de-moulding goes smooth, I sprayed the plexi box as well as the 3D-printed handle with a release spray. Mix your silicone by gently stirring, not whipping as you don’t want to add air bubbles to your mixture.
Next up: casting! I would recommend to cast slowly and from great heights with a slow stream of silicone. Having a higher drop releases the trapped air bubbles and will give you a smoother result. In my case I used the release spray for pressure.
Check the documentation of your silicone for the curing time. In my case this was 4 hours. Make sure not to rush it, when de-moulding too quickly your mould will be runny and you might not be able to use it.
With the mould in place, it’s finally time to make some resin :)
Resin time!
Same as before, you want to know how much you need so you don’t have too little or too much material. I added water to the mould and measured it on a scale. (1 gram of water equals 1 ml of water, simple 🙂 )
This means that I would need about 45 grams of biocomposite. I based my experiment on the cork recipe from Alexandre Micheloud.
I figured cork and coffee would act in the same way, so I added about 1/4 of the weight of the resin in coffee.
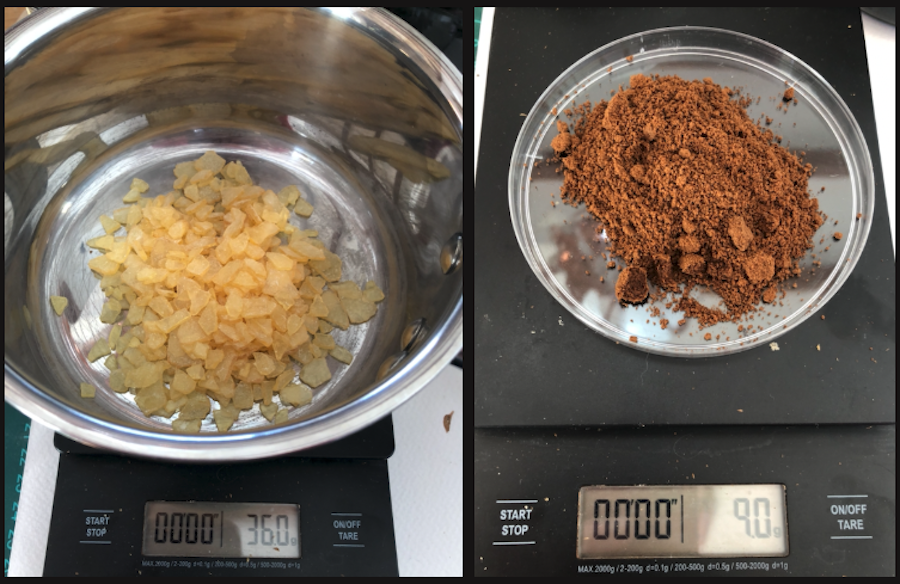
In my case I used the following:
- 36 grams of colophonium
- 9 grams of used espresso coffee ground
I followed these steps after measuring:
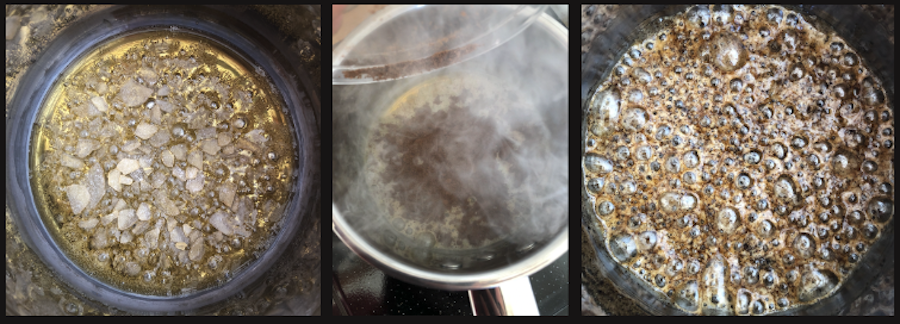
- Put the resin on the stove and slowly heath it up.
- Wait for the pine resin to melt down and become clear (no more bubbles!)
- Add the coffee ground and stir it in gently until you have a smooth mixture (be aware: there will be smoke and it doesn’t smell like coffee 😞 )
- Quickly cast your composite in the silicone mould (it hardens quickly once the heath is gone) and watch the air bubbles escape
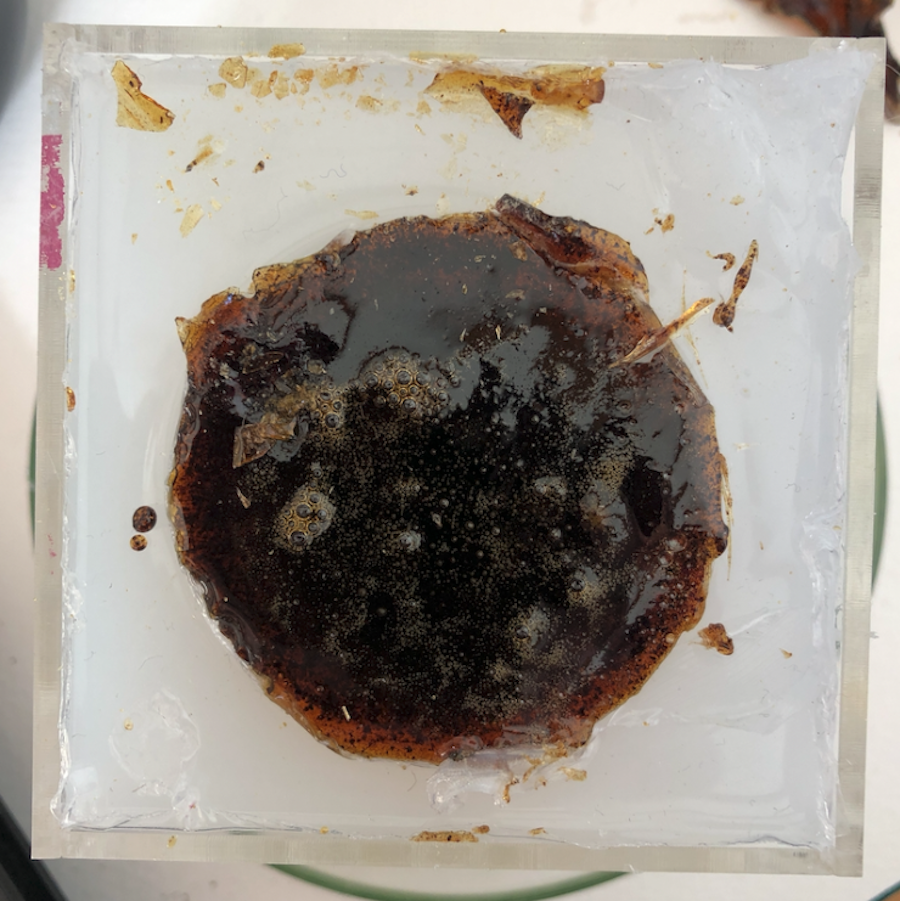
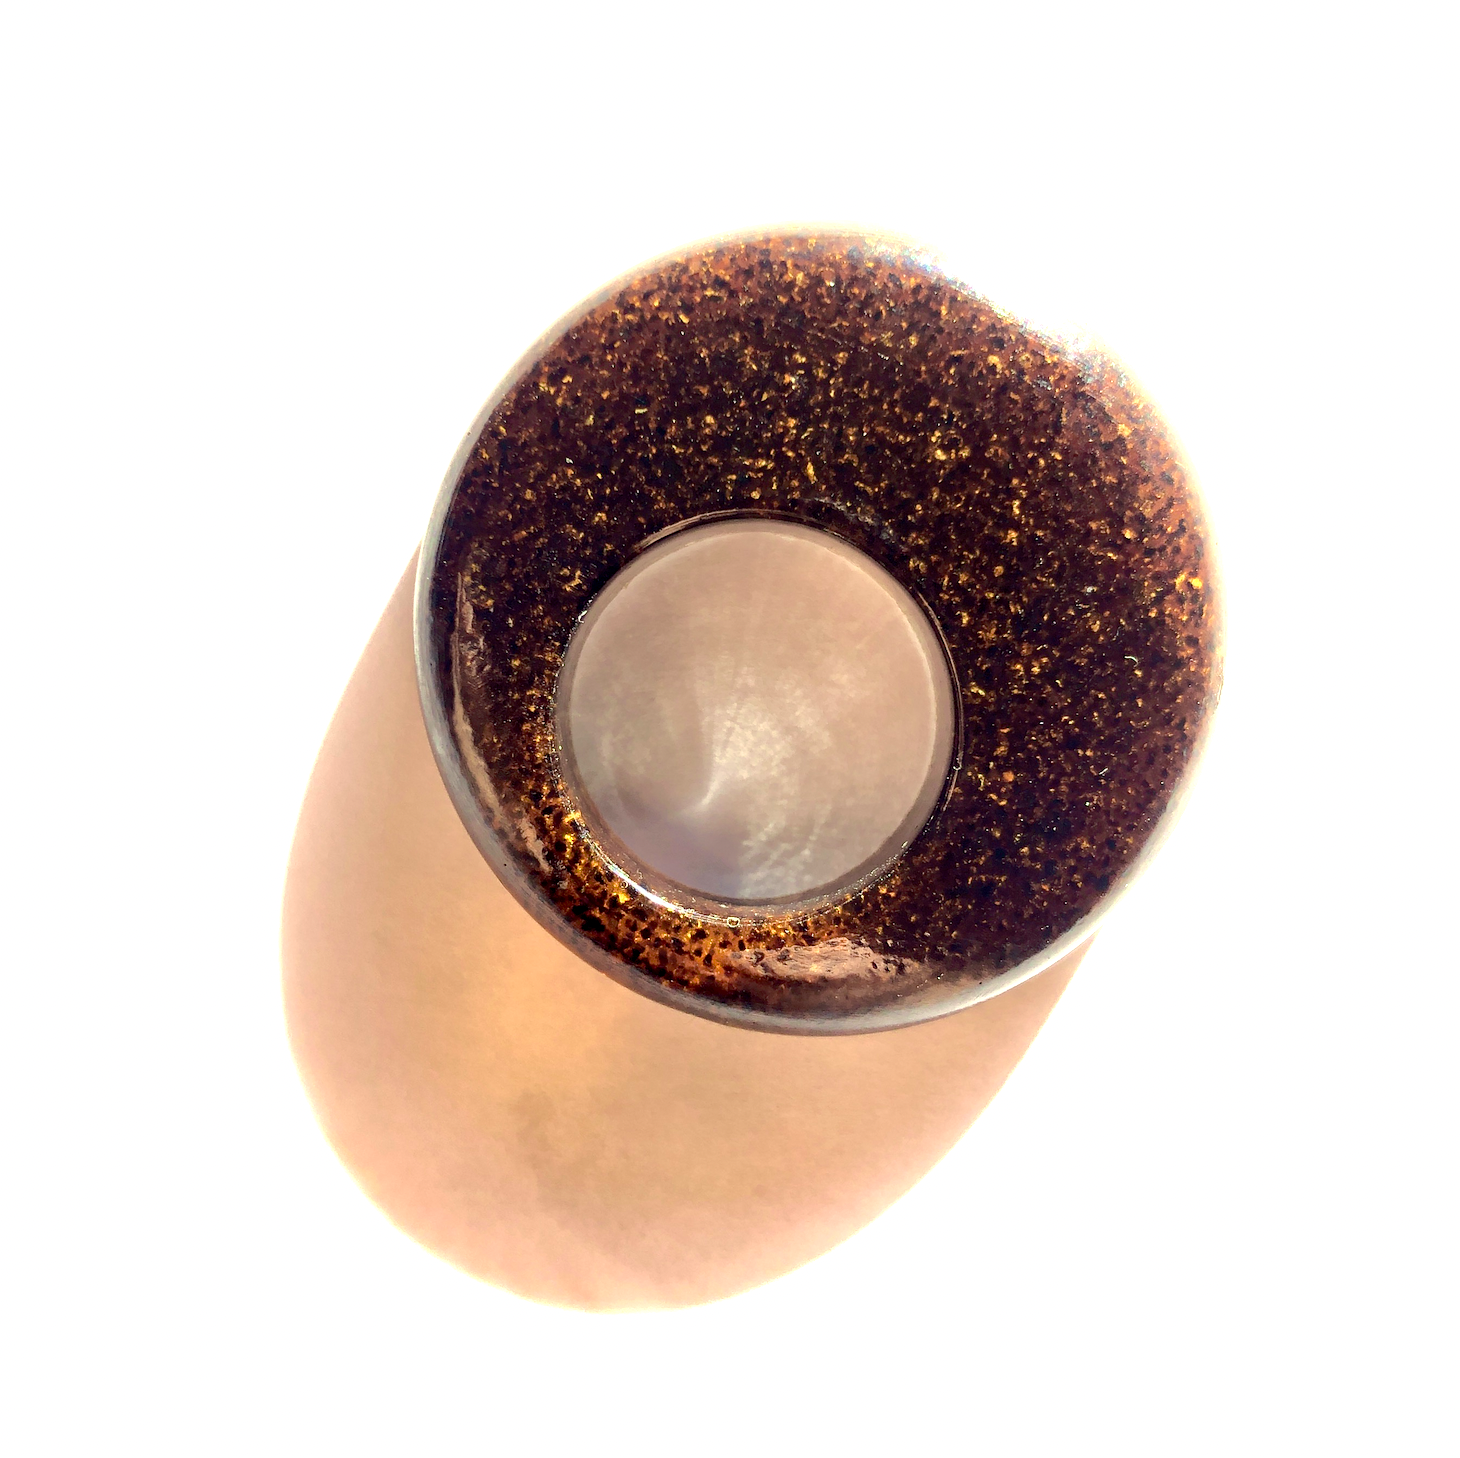
It hardens pretty quickly, I took it out after a little over two hours. It looks amazing!

Coffee jewelry
Of course, I made a bit too much resin. Typical (and a good example of me being way too excited :-)). So I'm reusing a mould I made last year to make some coffee resin jewelry. Would be nice if this worked out, no?
I forgot to take a lot of pictures as it wasn't my intention to use this for my documentation, but the results are pretty and I really love the ring!