Coffeexploration: recipes for coffee crafts
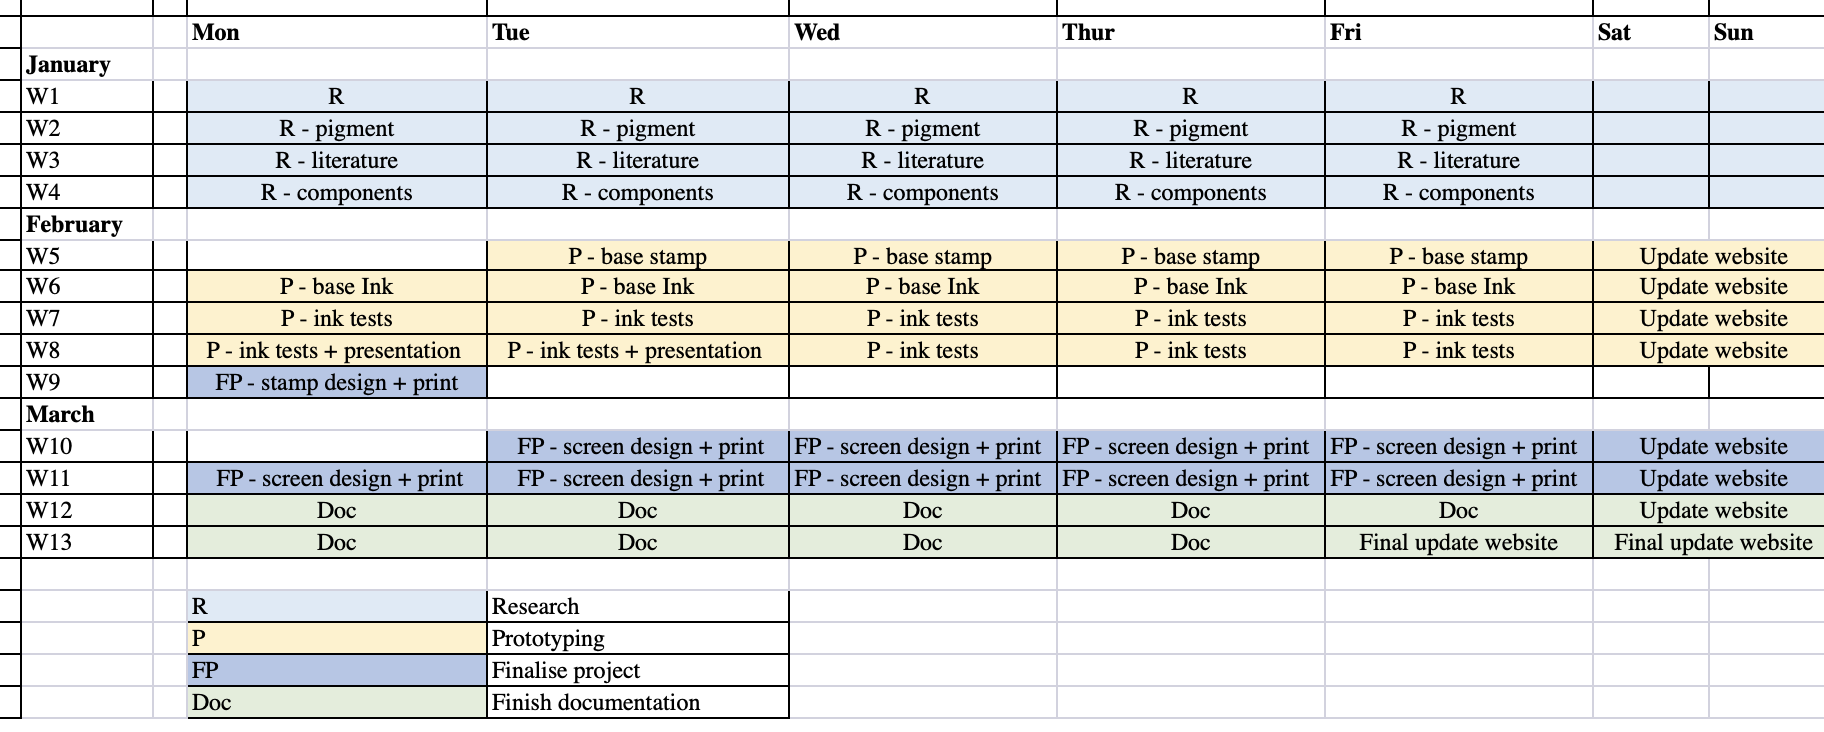
With the goals set out, time to drink coffee… uuuuh no, to get crafting! (With coffee at hand, of course :-))
I made a timetable, but let’s be honest an excel file isn’t all that pretty in between the slides. So you can find it here.
Coffee as a resource
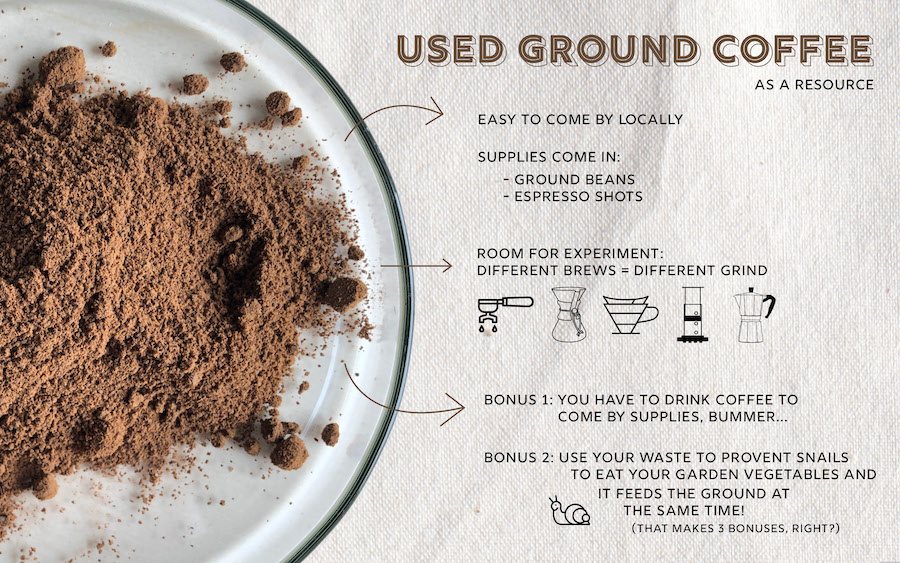
Exploring all the coffee!
No making without a proper playlist.
Headphones on and let’s craft the grinds :-)
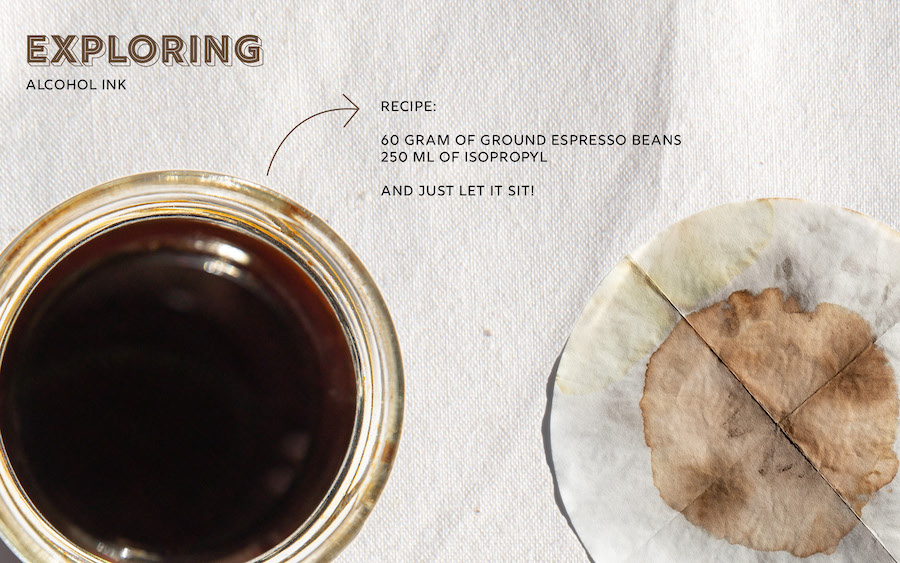
Alcohol coffee ink (for your markers!)
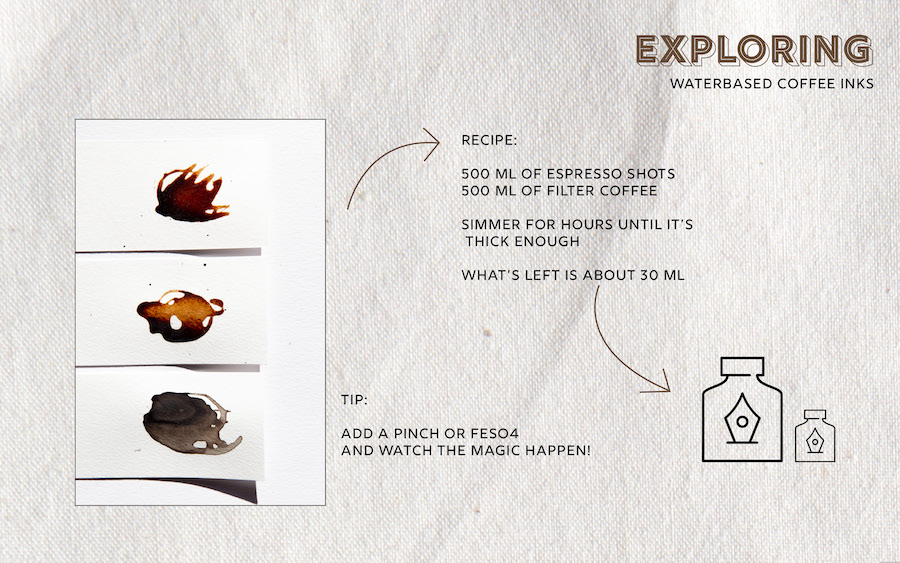
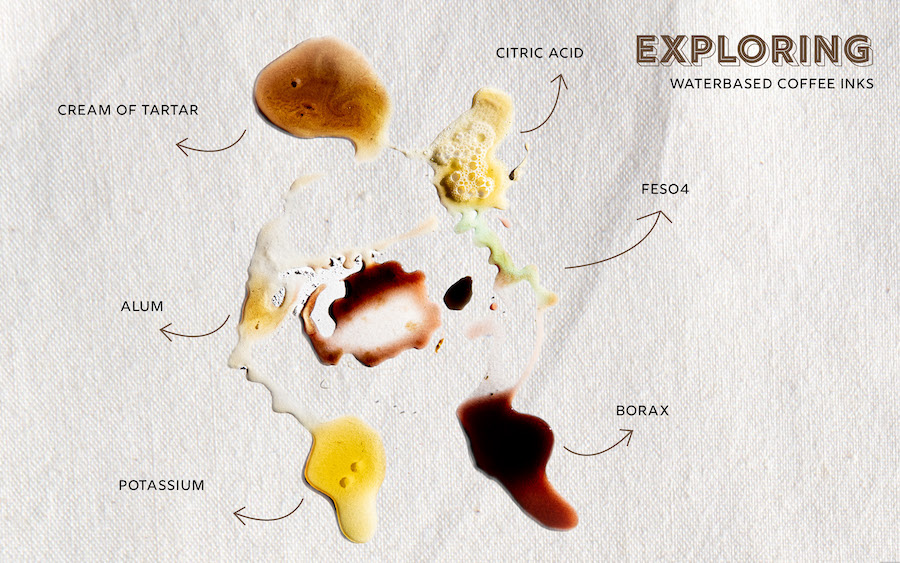
Waterbased coffee ink (for water colouring)
To keep your ink from moulding, add a clover or drops of essential oil made from clover. You could also thicken the ink with arabic gum and leave it to dry. This way you can create water colouring blocks in (half) pans that you can use whenever you want.
Because I was super curious about how the colour change when adding modifiers, I made a first coffee ink stain. Isn’t it beautiful? I love it!
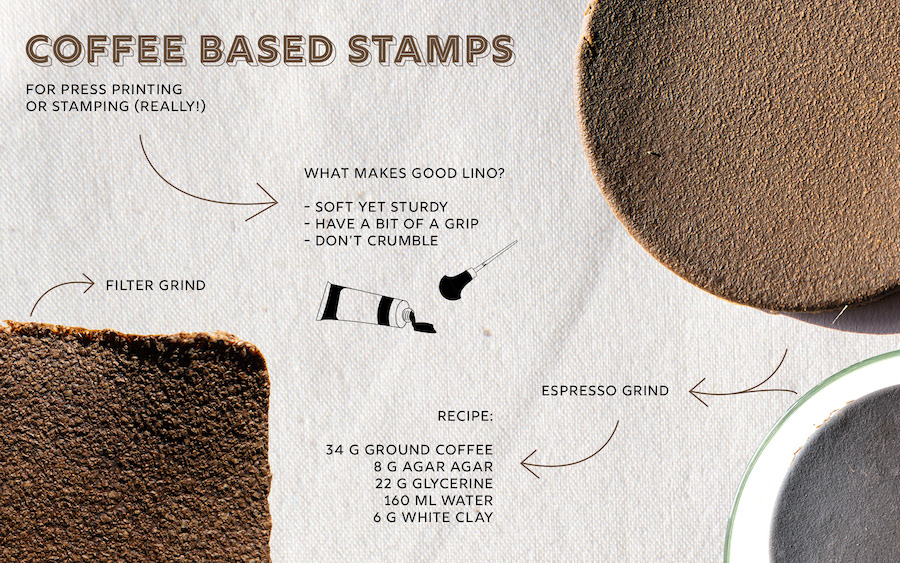
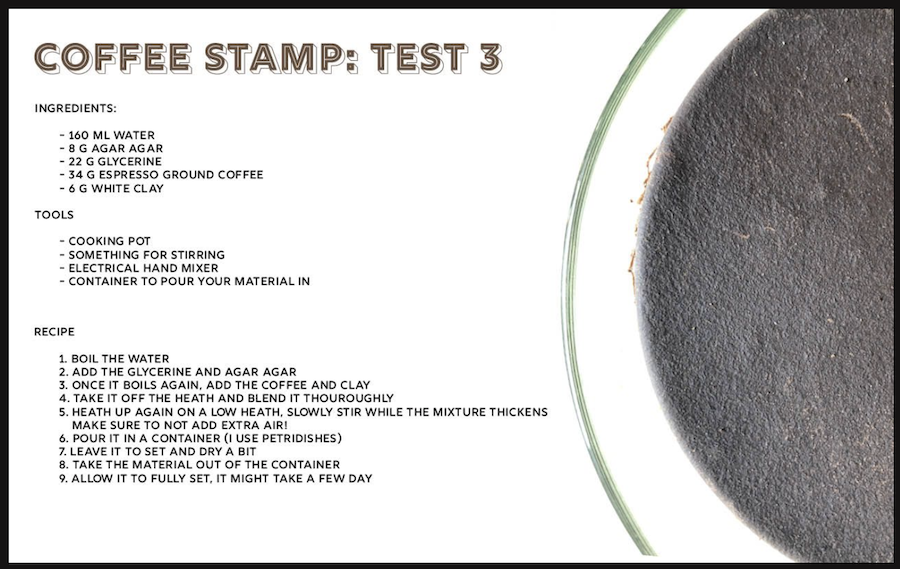
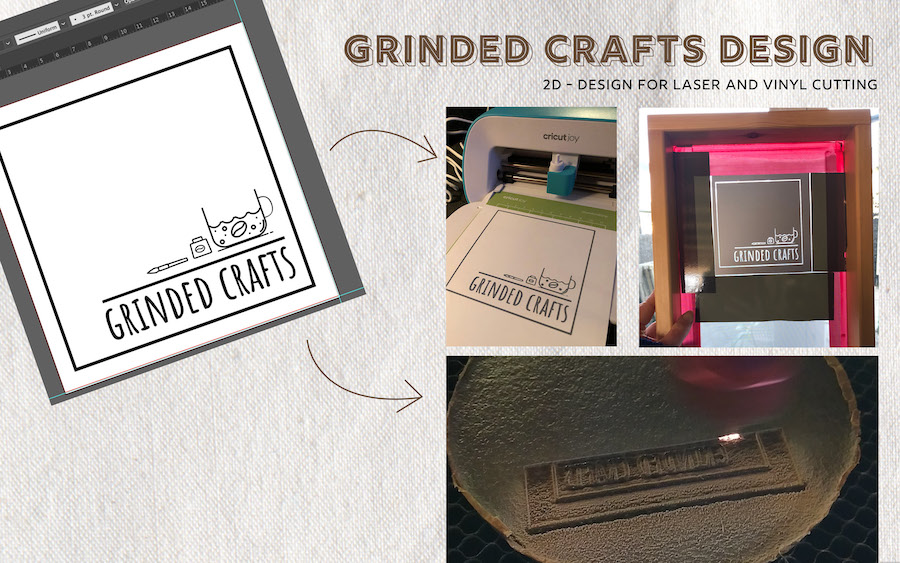
Coffee bio plastic
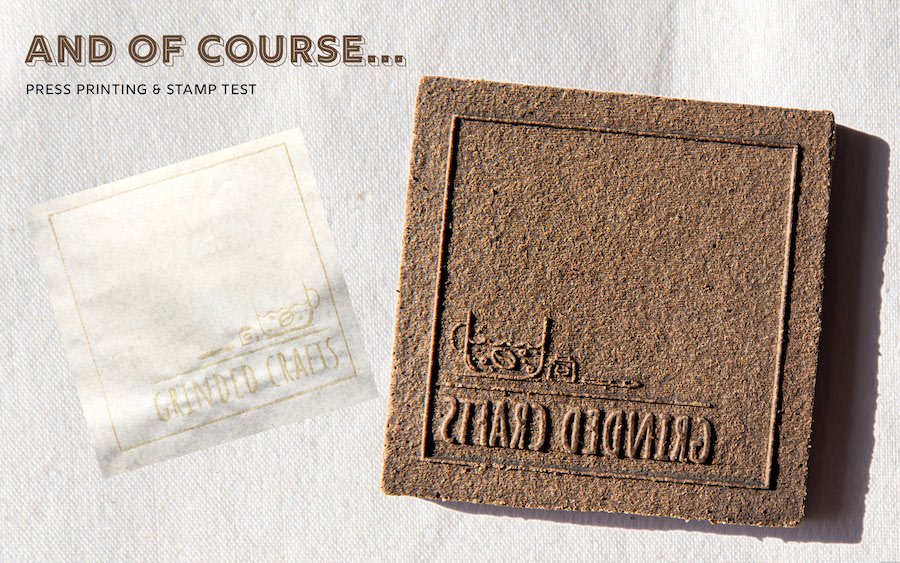
The coffee stamps is a project that started as an exploration while building the Pink-to-matic. The Fabricademy is the perfect stage to build on it and to finalise the exploration part.
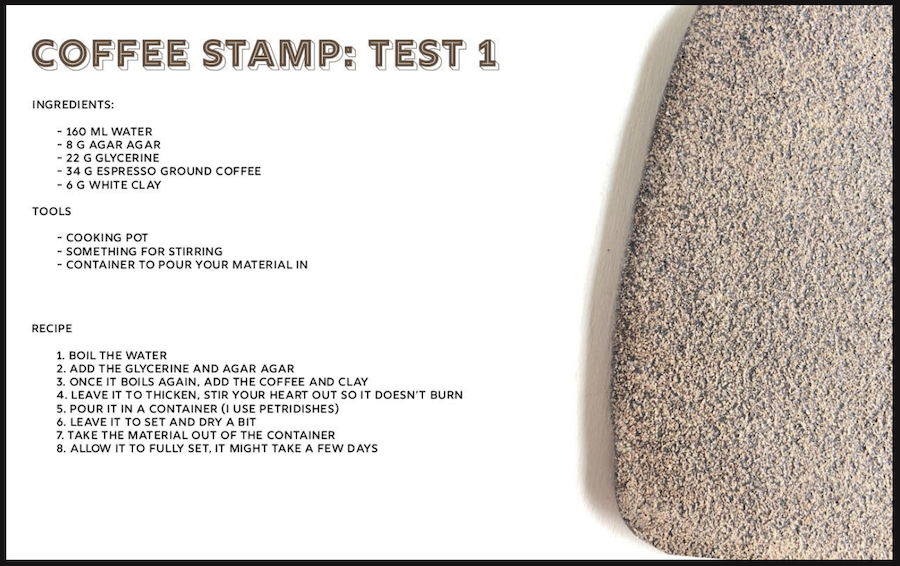
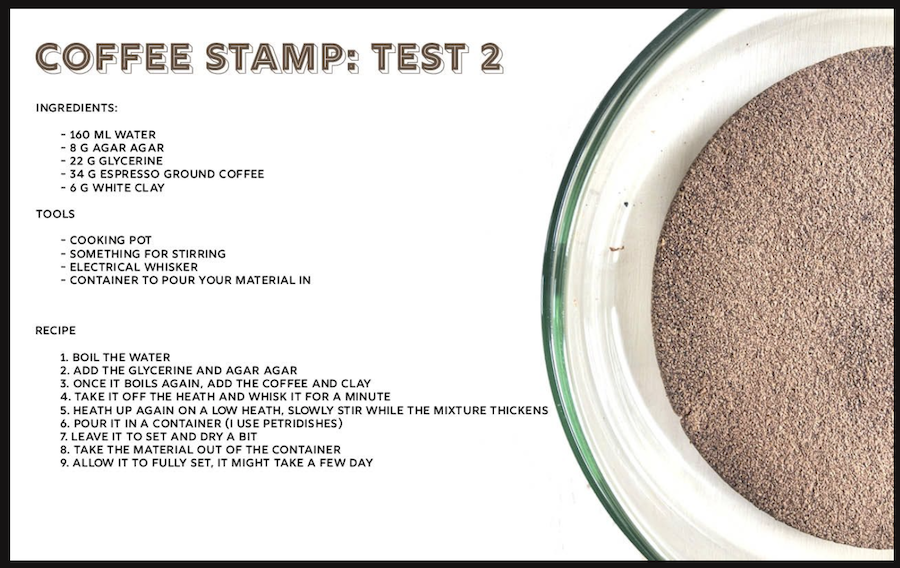
I tested a couple of methods, all of them give a really good plastic. The last one is perfect for carving stamps by hand. All three recipes can be used for engraving stamps using the laser cutter. I have yet to try with a milling machine, but if I make an educated guess the results would be very similar to engraving.
Dying with coffee
No pigment making without a dye bath. It would be a shame not to test how one could dye fabric with coffee and skip to the pigment extraction. So I threw in a bunch of fabric.
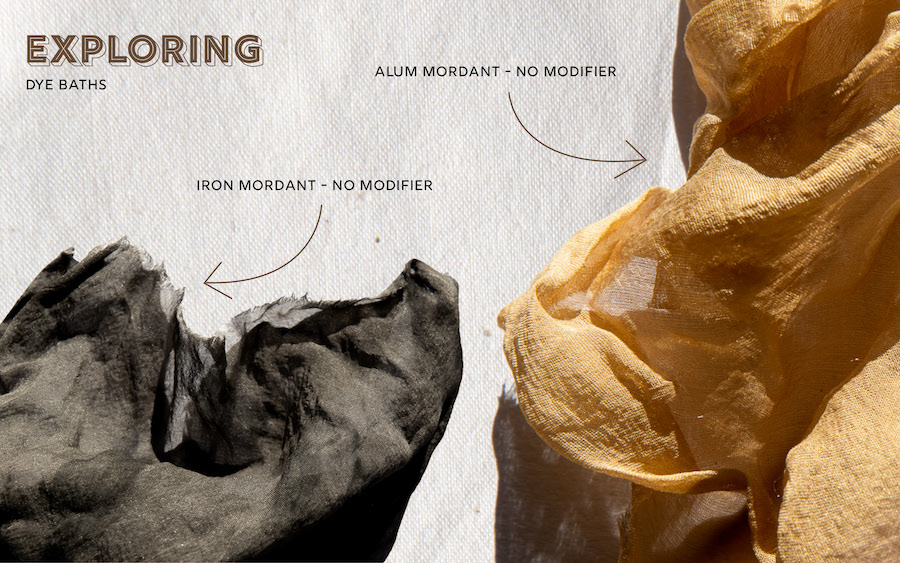
Mordant solutions
I use a standard solution which I have at hand in my cabinet. One with alum and one with iron crystals. The easiest solution for me, is using 10ml of water with 1g of crystals. Simply boil the water and dissolve the crystals while sturing. The solution can be stored (label it properly!!) and used when you want to mordant your fabrics. The go to for mordanting is 10ml of the solution per 1g of fibers. Easy peasy, right?
Coffee dye bath
For the dye bath, I used 150g of ground coffee per 1L of water. The coffee was contained in a cheese cloth and put in a big cooking pot with the water. To make sure I got as much colour out of it, I simmered it for 1 hour first before adding the mordanted fabrics to the water.
After one hour, I got some really pretty colours :-)
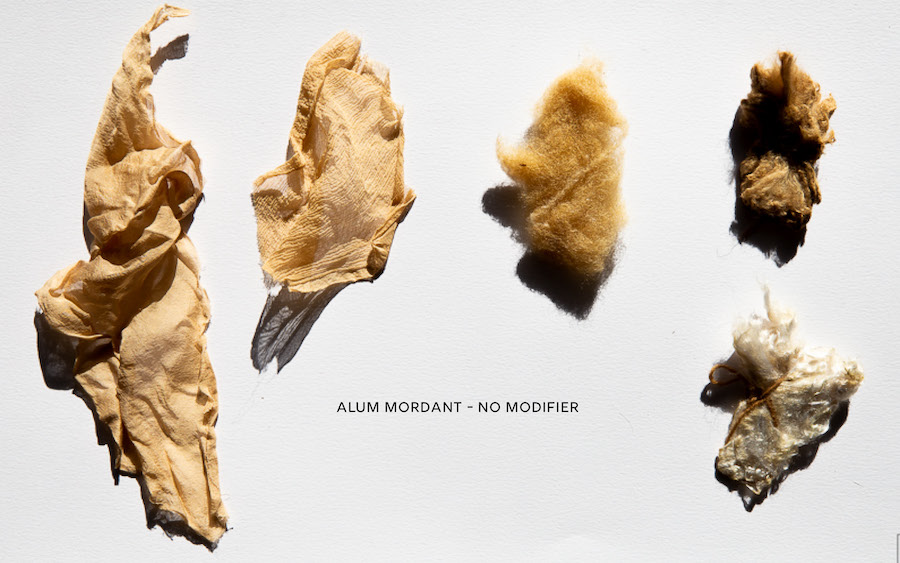
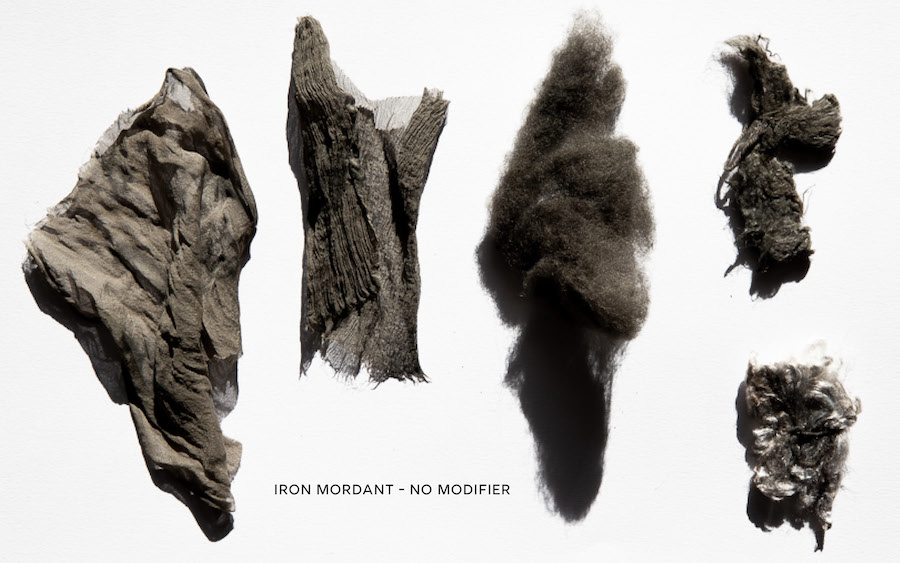
In the future I most definitely want to dye some more, and use modifiers as well to change the colours, but for now I have to focus and make pigment for my printing ink :-)
Coffee lake pigment extraction
Having finished dyeing, it was time to see whether a pigment could be extracted from the leftover dye bath.
I created a couple of batches, leaving me with different coloured pigments. The steps are pretty simple.
In a first glass jar, mix 25g of alum in 250ml of hot water. In a second jar, mix 25g of soda ash in 250ml of hot water. Make sure both are wel stirred and dissolved.
Your dye bath should be in a high cooking pot as a volcano will erupt when you pour in the mixtures 🙂 Tip: I cooked mine in big pot, leaving me with enough room in the cooking pot itself. Nevertheless I secured it in a rubber tug. Then you will first add the alum to the dye bath and then the soda ash. Watch the magic happen!
The next step is to patiently wait while the mixture shifts and the components separate. First time I would suggest to do the process in a glass jar so you can see when the process stops. Once the process is done, you need to pour the mixture through a paper filter (the same you use for coffee ;-)). This will take a while as it will run through very slowly. And you will have to wait even longer as the pigment needs to dry completely in order to store it in a glass container.
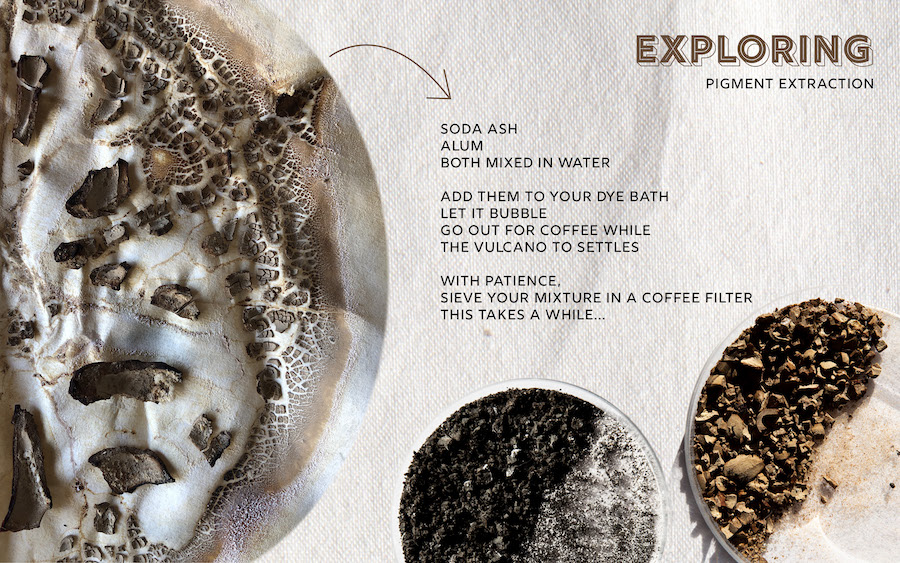
Thankfully you can use the wet pigment to make ink as well. As I made a huge batch of pigment, this is a relieve because it would probably still be drying by now ;-)
Coffee (screen) printing ink
Having a pigment, it’s time for the real ink making! Super excited (to say the least).
I’m only making what I’m going to use, so I have everything at hand to print on fabrics and paper right after the ink is made.
The ink making doesn’t ask for a lot of special skills, just patience. And arm muscles ;-)
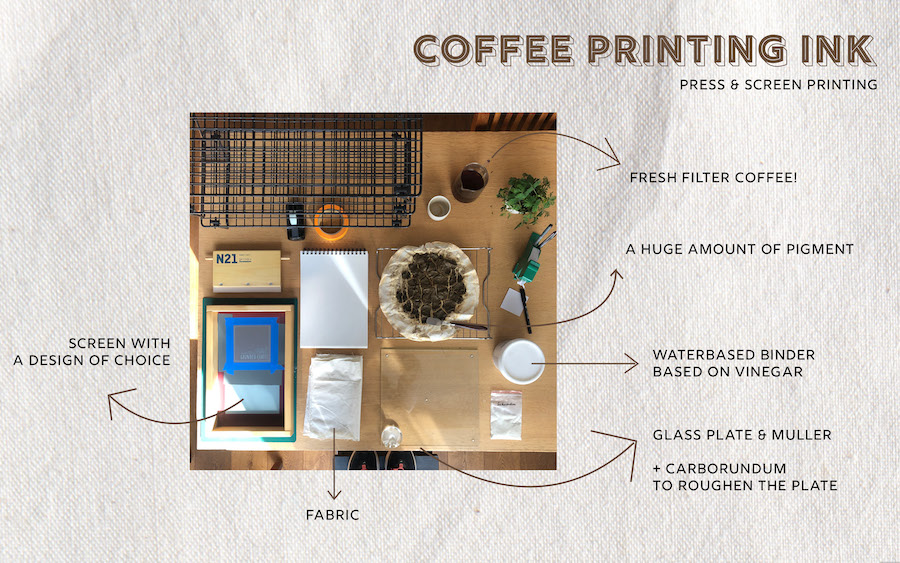
First you will want to roughen your glass plate with some carborundum. This will allow for the pigment and binder to fasten quicker due to the grinding process. After roughening the plate, it’s a matter of adding the proportions you think you will need. I made this ink with one part binder and one part pigment. Time to mulle and print away :-)
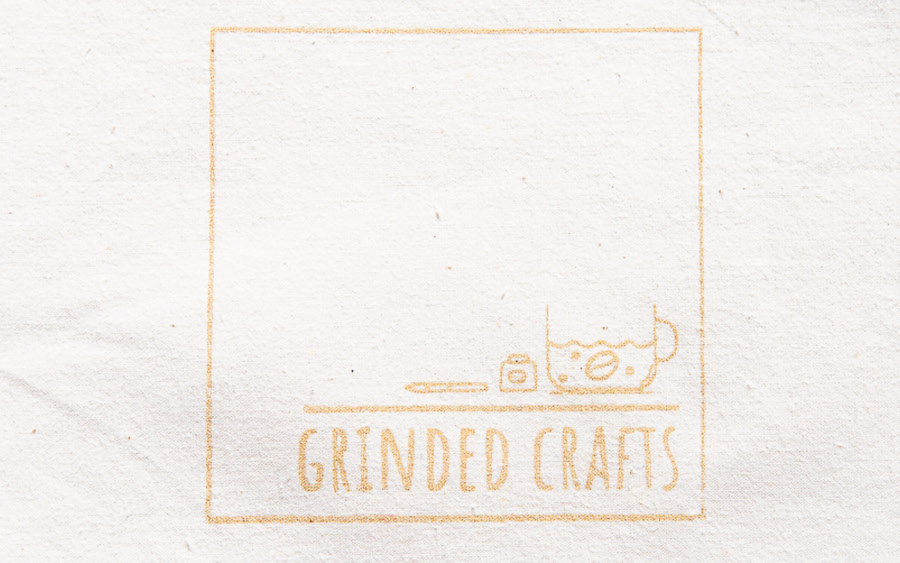
This is the result after fixation and washing. Lovely, right?
Some more coffee crafts
And that’s not even all. During previous weeks I made some resin and kombucha too!
You can find the resin here and the kombucha here.
License
I choose to work with a Attribution-NonCommercial-ShareAlike 4.0 International (CC BY-NC-SA 4.0)

In long, this means the following:
This is a human-readable summary of (and not a substitute for) the license. Disclaimer.
You are free to:
- Share — copy and redistribute the material in any medium or format
- Adapt — remix, transform, and build upon the material
- The licensor cannot revoke these freedoms as long as you follow the license terms.
Under the following terms:
- Attribution — You must give appropriate credit, provide a link to the license, and indicate if changes were made. You may do so in any reasonable manner, but not in any way that suggests the licensor endorses you or your use.
- NonCommercial — You may not use the material for commercial purposes.
- ShareAlike — If you remix, transform, or build upon the material, you must distribute your contributions under the same license as the original.
- No additional restrictions — You may not apply legal terms or technological measures that legally restrict others from doing anything the license permits.
Notices:
- You do not have to comply with the license for elements of the material in the public domain or where your use is permitted by an applicable exception or limitation.
- No warranties are given. The license may not give you all of the permissions necessary for your intended use. For example, other rights such as publicity, privacy, or moral rights may limit how you use the material.
A big thank you
To Kurt, for the input, help and support. Always. To Nous, for support, input and the food behind the scenes. To Mysa, for being you and all your hair. To Cecilia, Marghe and Beatriz from Waag for the input and help.