2. Digital Bodies
INDEX IMAGE ~ Woman/Venus of Willendorf: Upper Paleolithic female figurine found in 1908 at Willendorf, Austria. Satuette made of oolitic limestone tinted with red ochre pigment dated to circa 28,000–25,000 BCE.
Research & Lecture
This week we are focusing on the body as a canvas and exploring methods to transfer body measurements and geometries between physcal and digital forms. We are introduced to Rhino for 3D modelling, Scanect and Kinect for 3D scanning, and the Lasercutter for computational cutting and engraving, along with a few other programs that accompany these tools.
References & Inspiration
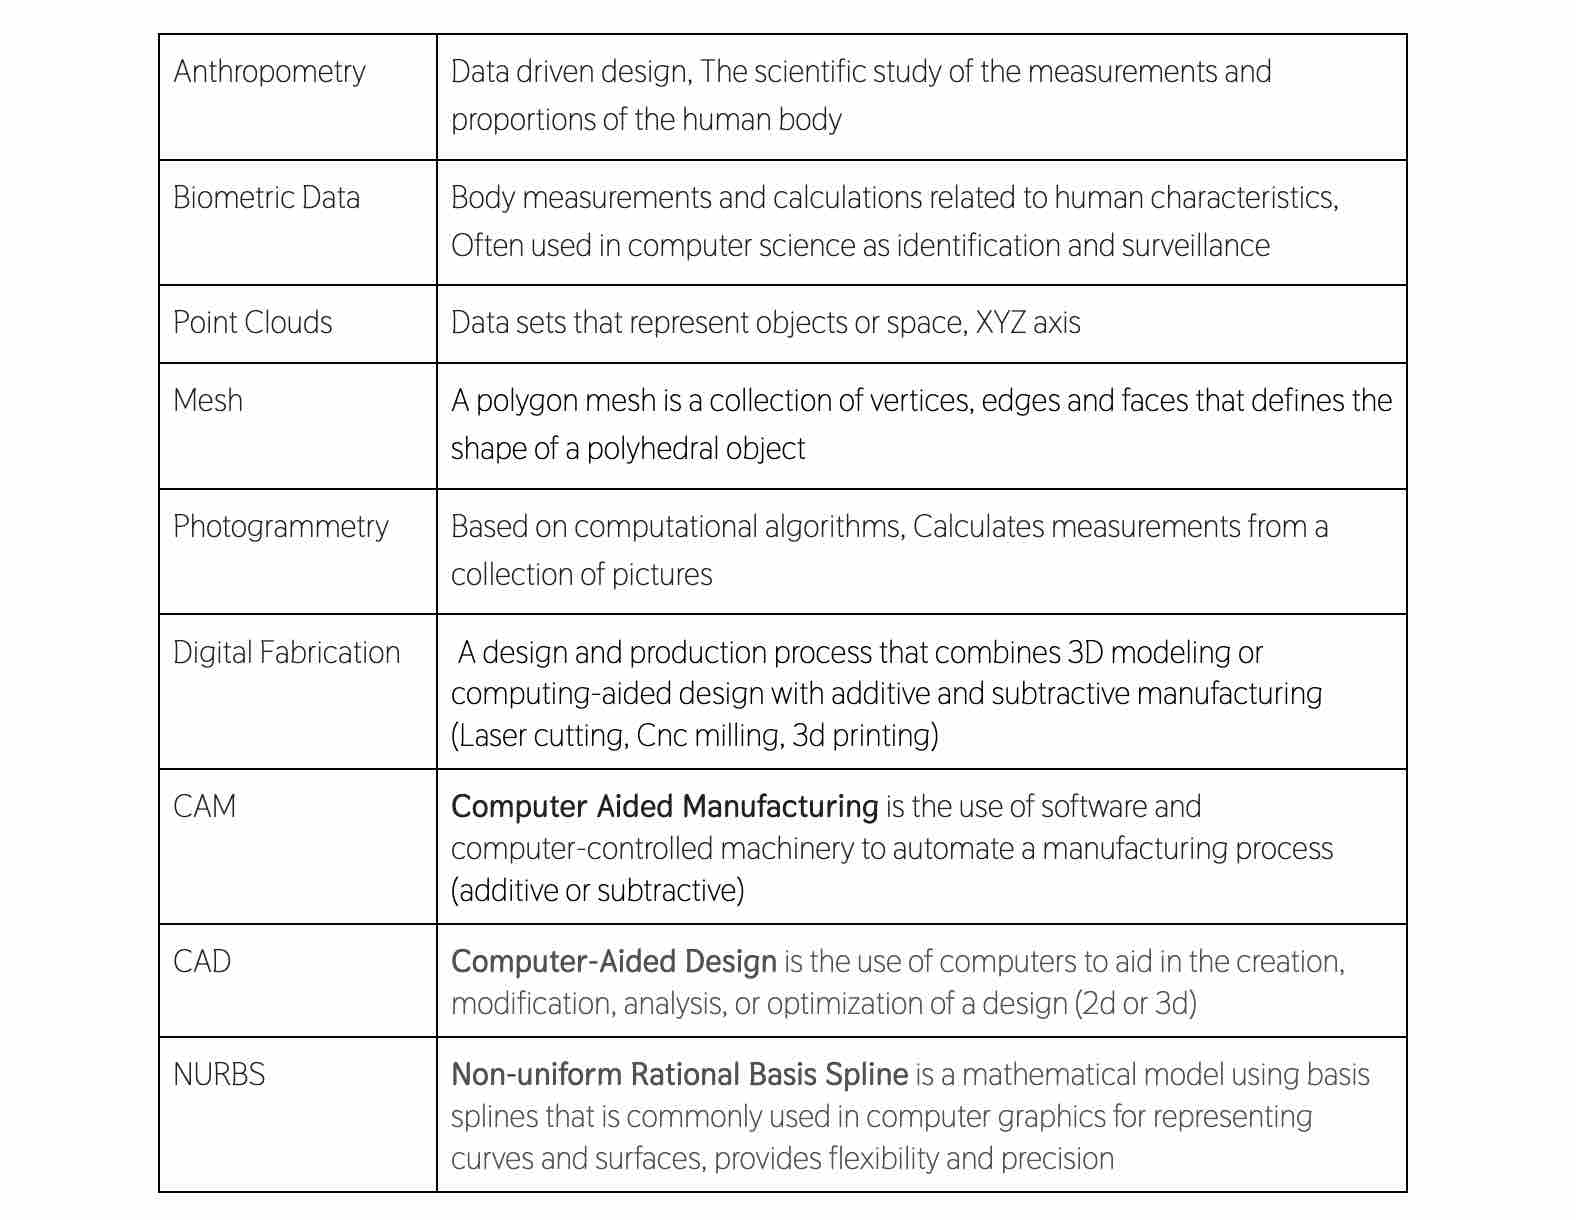
Anna Uddenberg is a swedish artist that “investigates how body culture, spirituality, and self-staging are intertwined with the mediation and production of subjectivity by new technologies and circulation of forms” with lifesize sculptures. In most of her work, female mannequins interact with objects and the environment to comment on sexuality, class, consumerism and performance. (source)
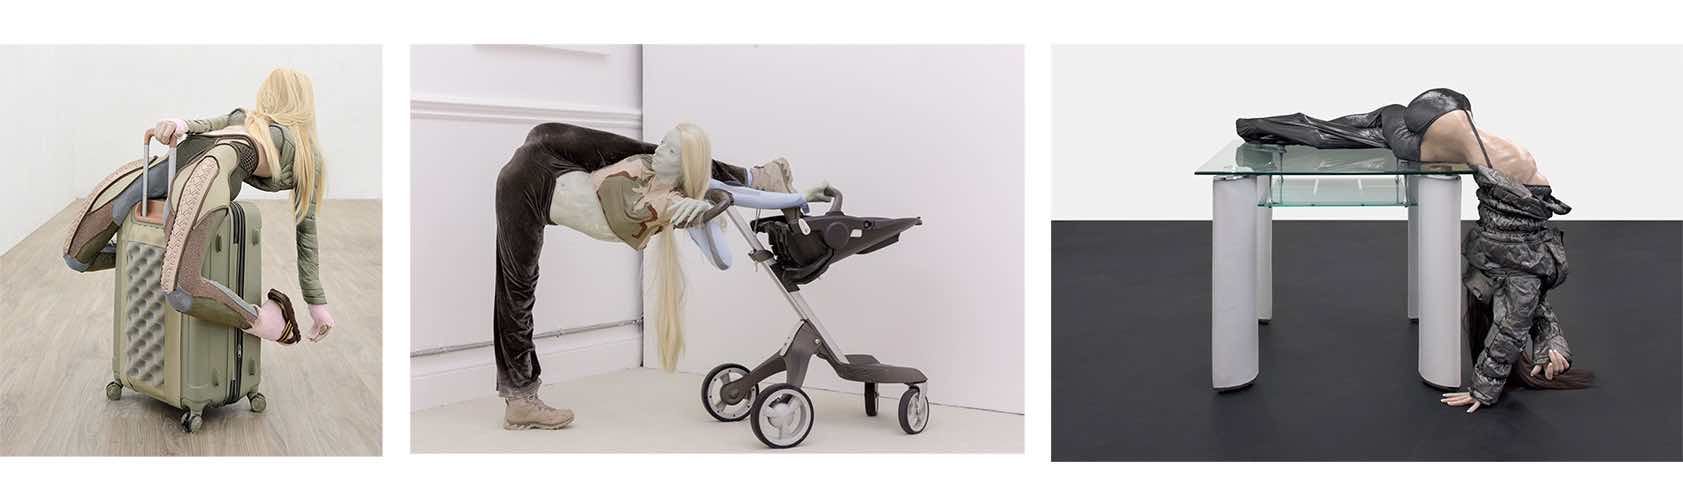
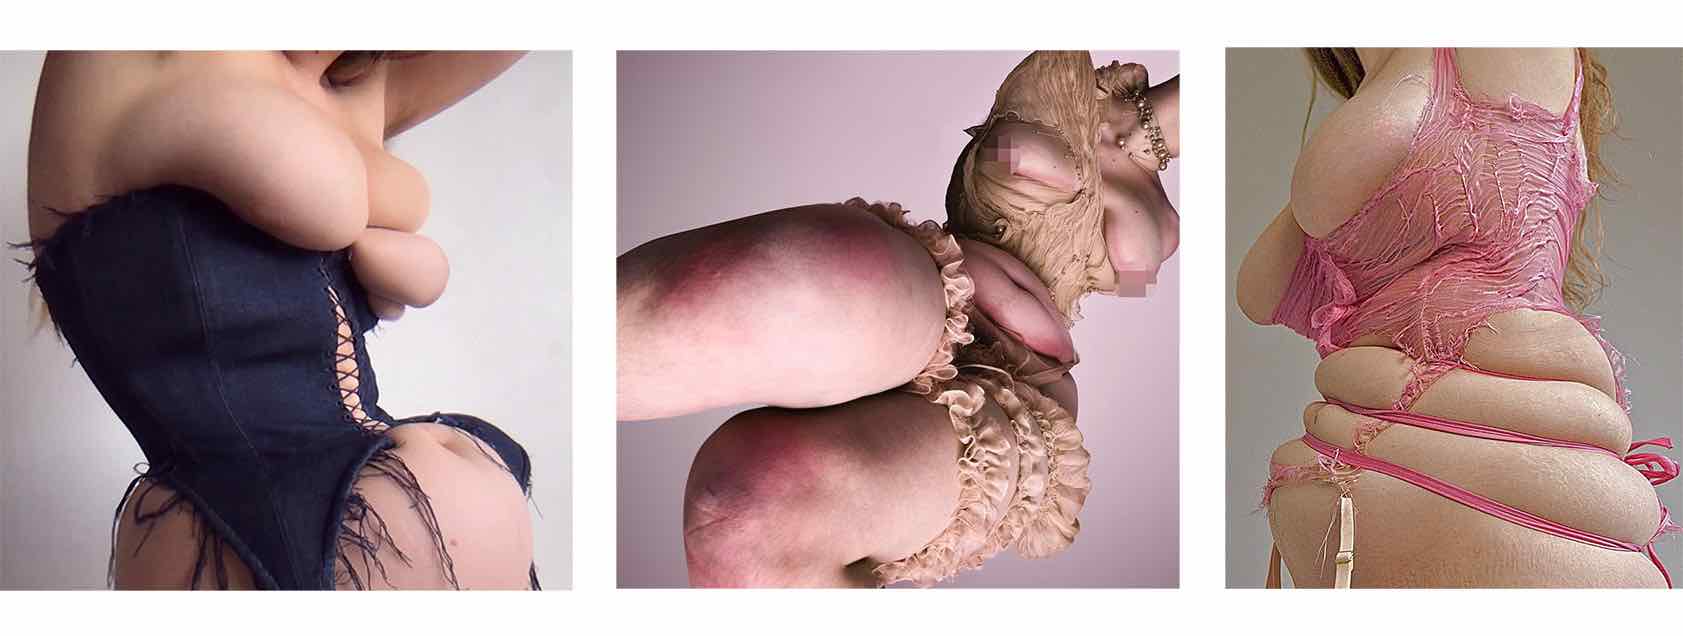
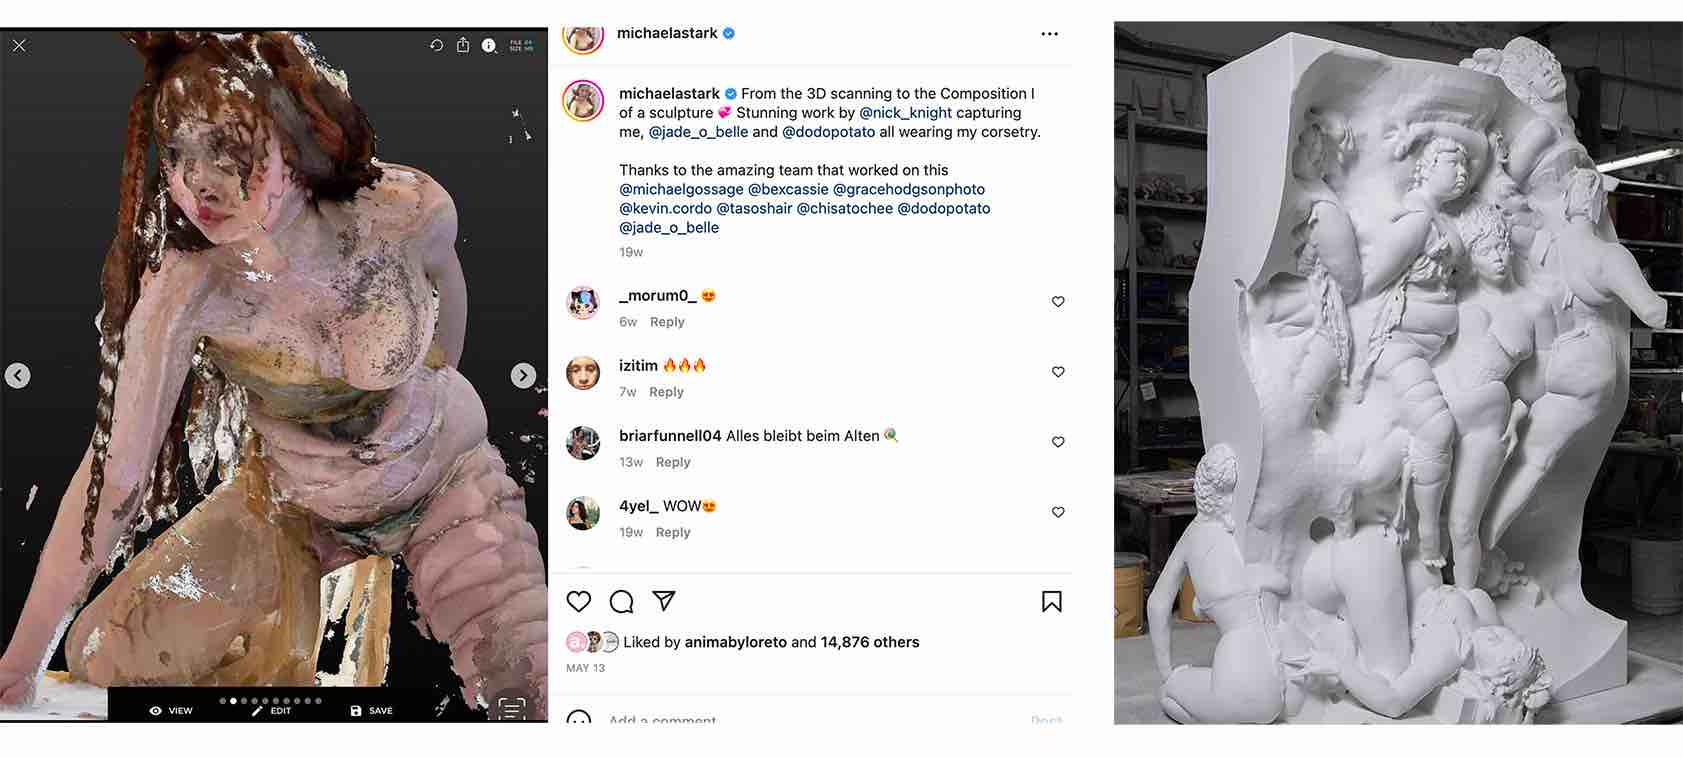
Michela Stark is a British artist that fabricates custom lingerie pieces that are designed to disfigure the traditional female body expectation. Using string and corsetry her body is warped into an interesting landscape, often captured by herself for social media, creating an instagram gallery of subverted shapes. She recently partnered with Nick Knight to transform 3d scans of models’ bodies into a plaster sculpture. This project utilizes the tools we are focusing on this week! (source)
Tools
Process and Workflow
Concept
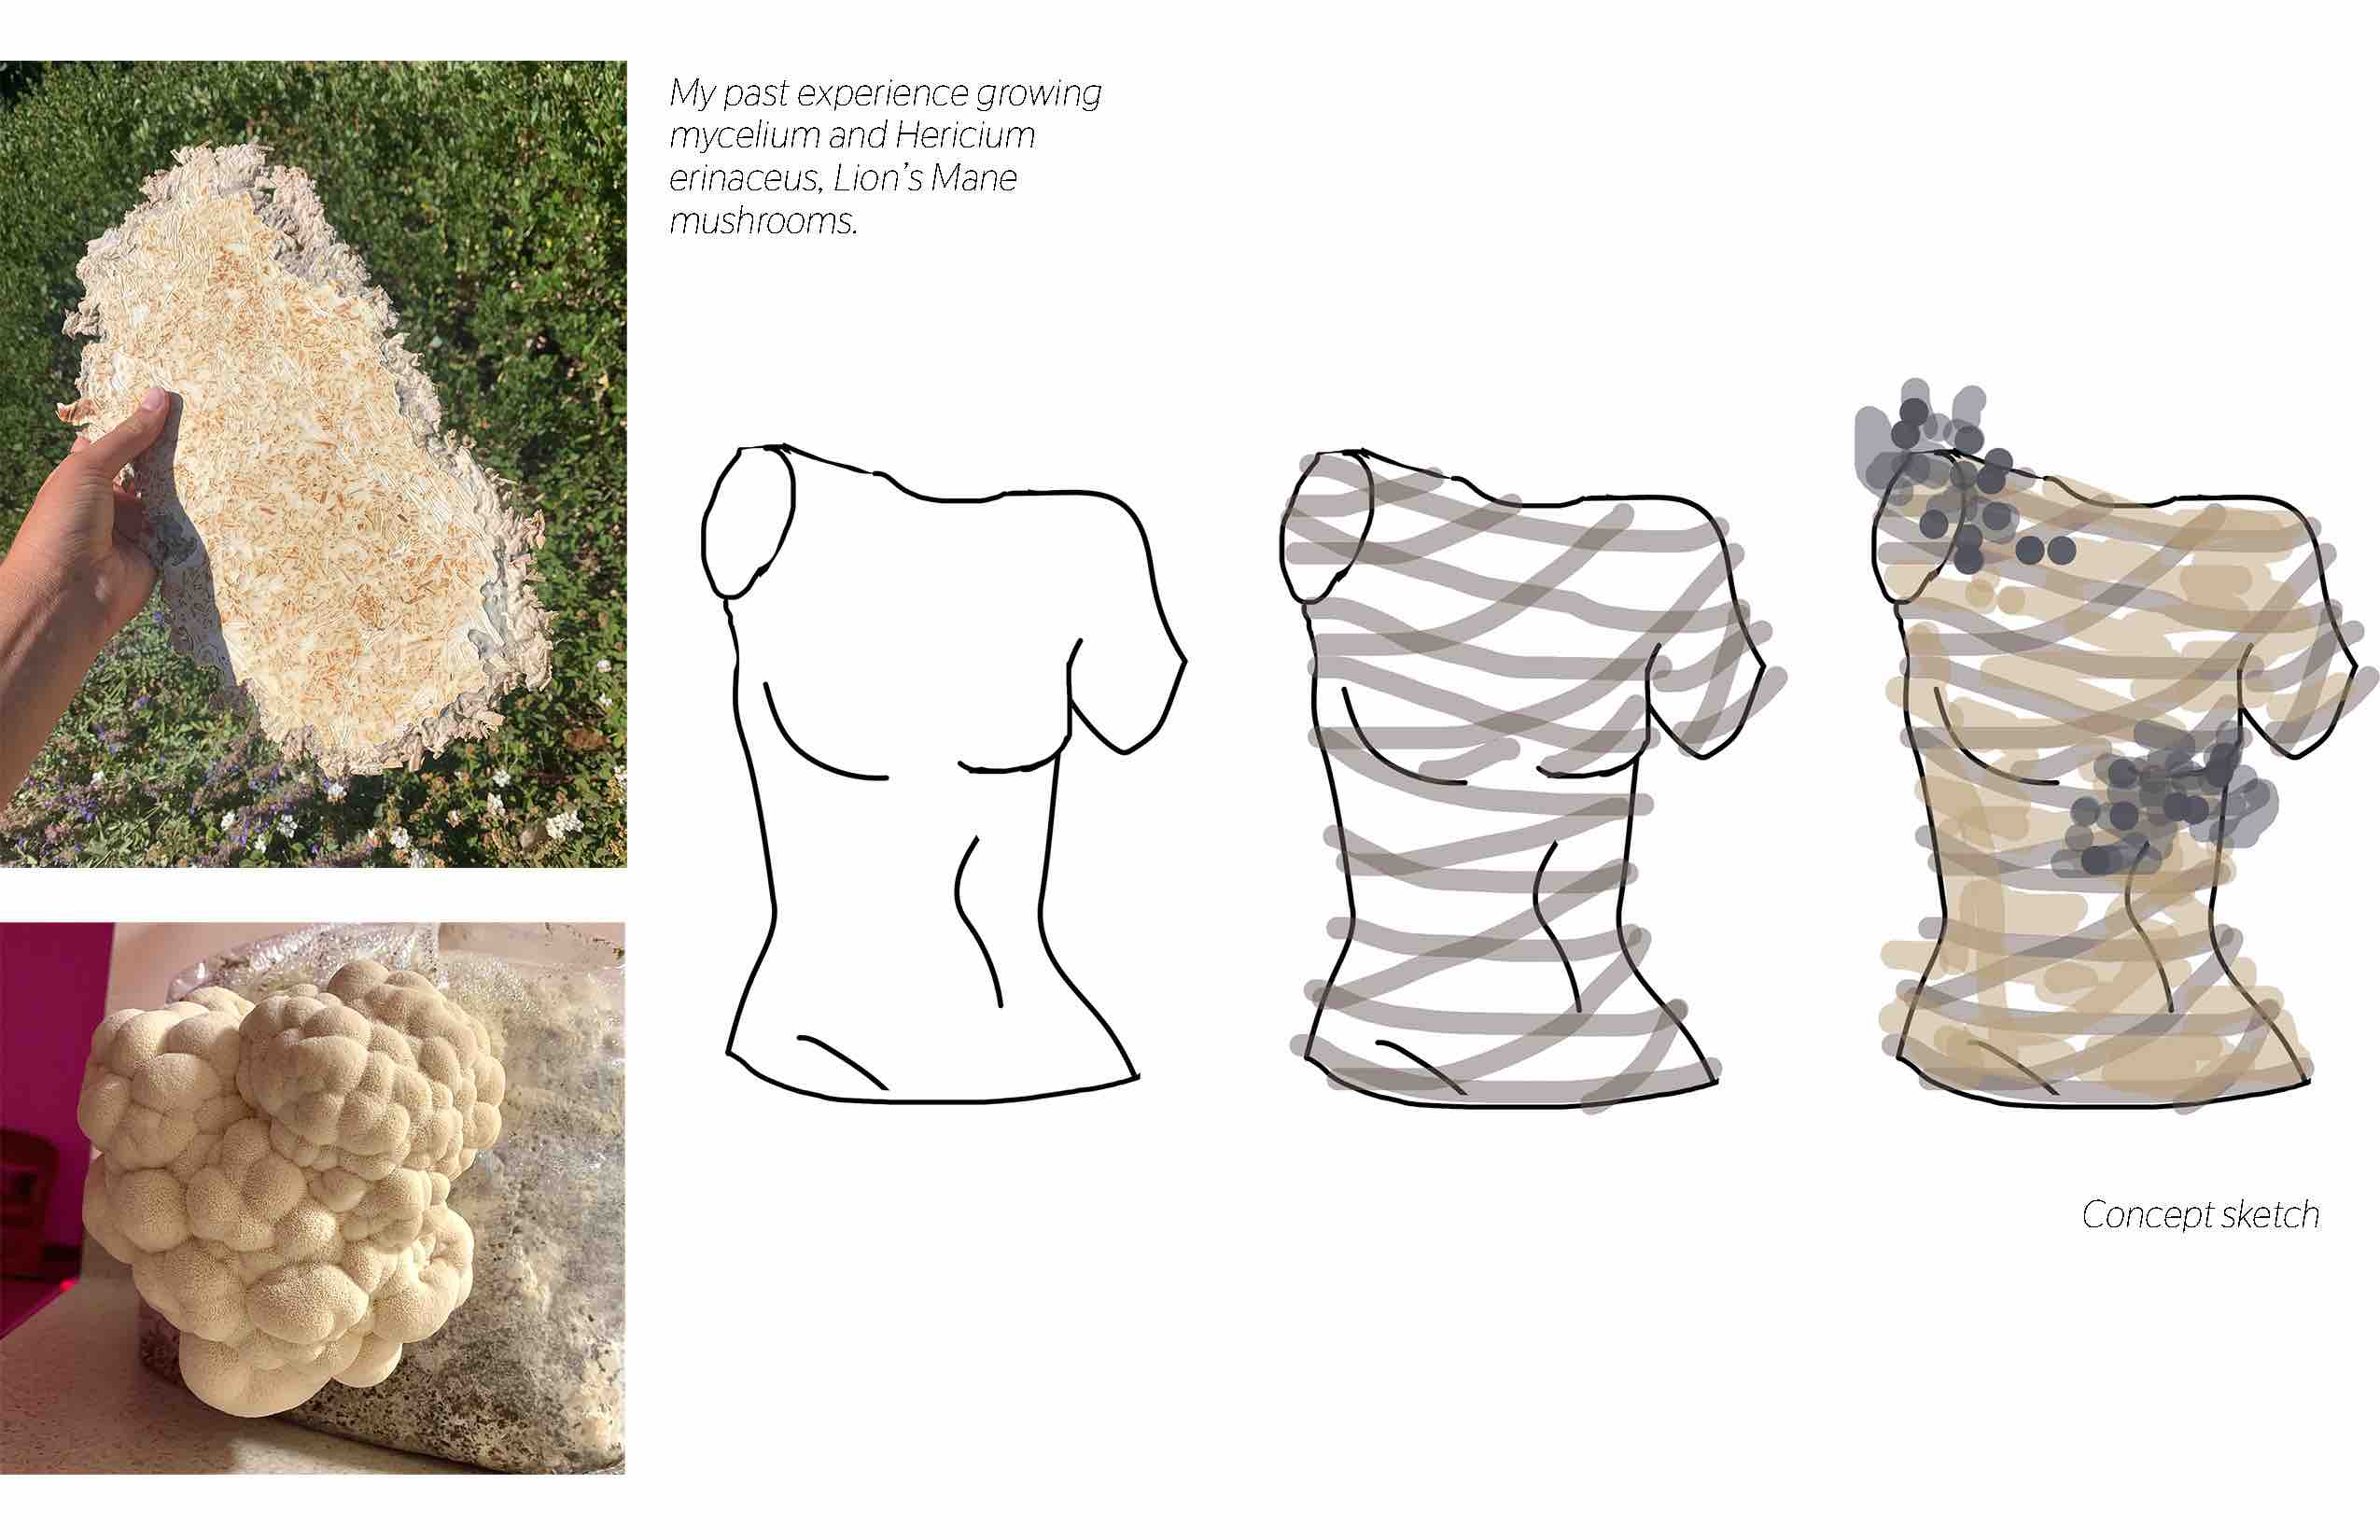
Since most of my work revolves around biomaterials, I wanted to think of a way to connect this mannequin project our future unit with mycelium. At first I was thinking of making a hollow mold in the ‘flat pack’ style assembled mannequin like Arash and Kelly studio Then I could fill that with mycelium substrate later on to make a solid structure. Ana informed me that there is an alumni, Catherine Euale, that filled her intersecting cardboard style model with mycelium substrate as well. I decided to take this approach since I feel more comfortable using Slicer like we practiced.
I am keeping the structure design just a section of the torso to reduce the amount of substrate I would need to use. My dream is to keep the mycelium alive and moist so it has the potential to fruit. It will probably bond to the cardboard, creating a fully integrated and possibly blooming sculpture. Completing a beautiful circle, maybe I could even eat the mushrooms! My body will morph through digital points, interlocking 2d planes that create pockets of potential homes for fungi. If I can eat the fruit, then the species that nourished itself in the caverns of my abstracted ribs can potentially nourish me, redistributing the mushroom's vitamins and chitin in my physical body. It will be interesting to watch the structure evolve and decay overtime as well, eventually it could biodegrade into the earth.
I have a bit of experience growing the material so I’m hoping it will work out this time around.
Inspiration
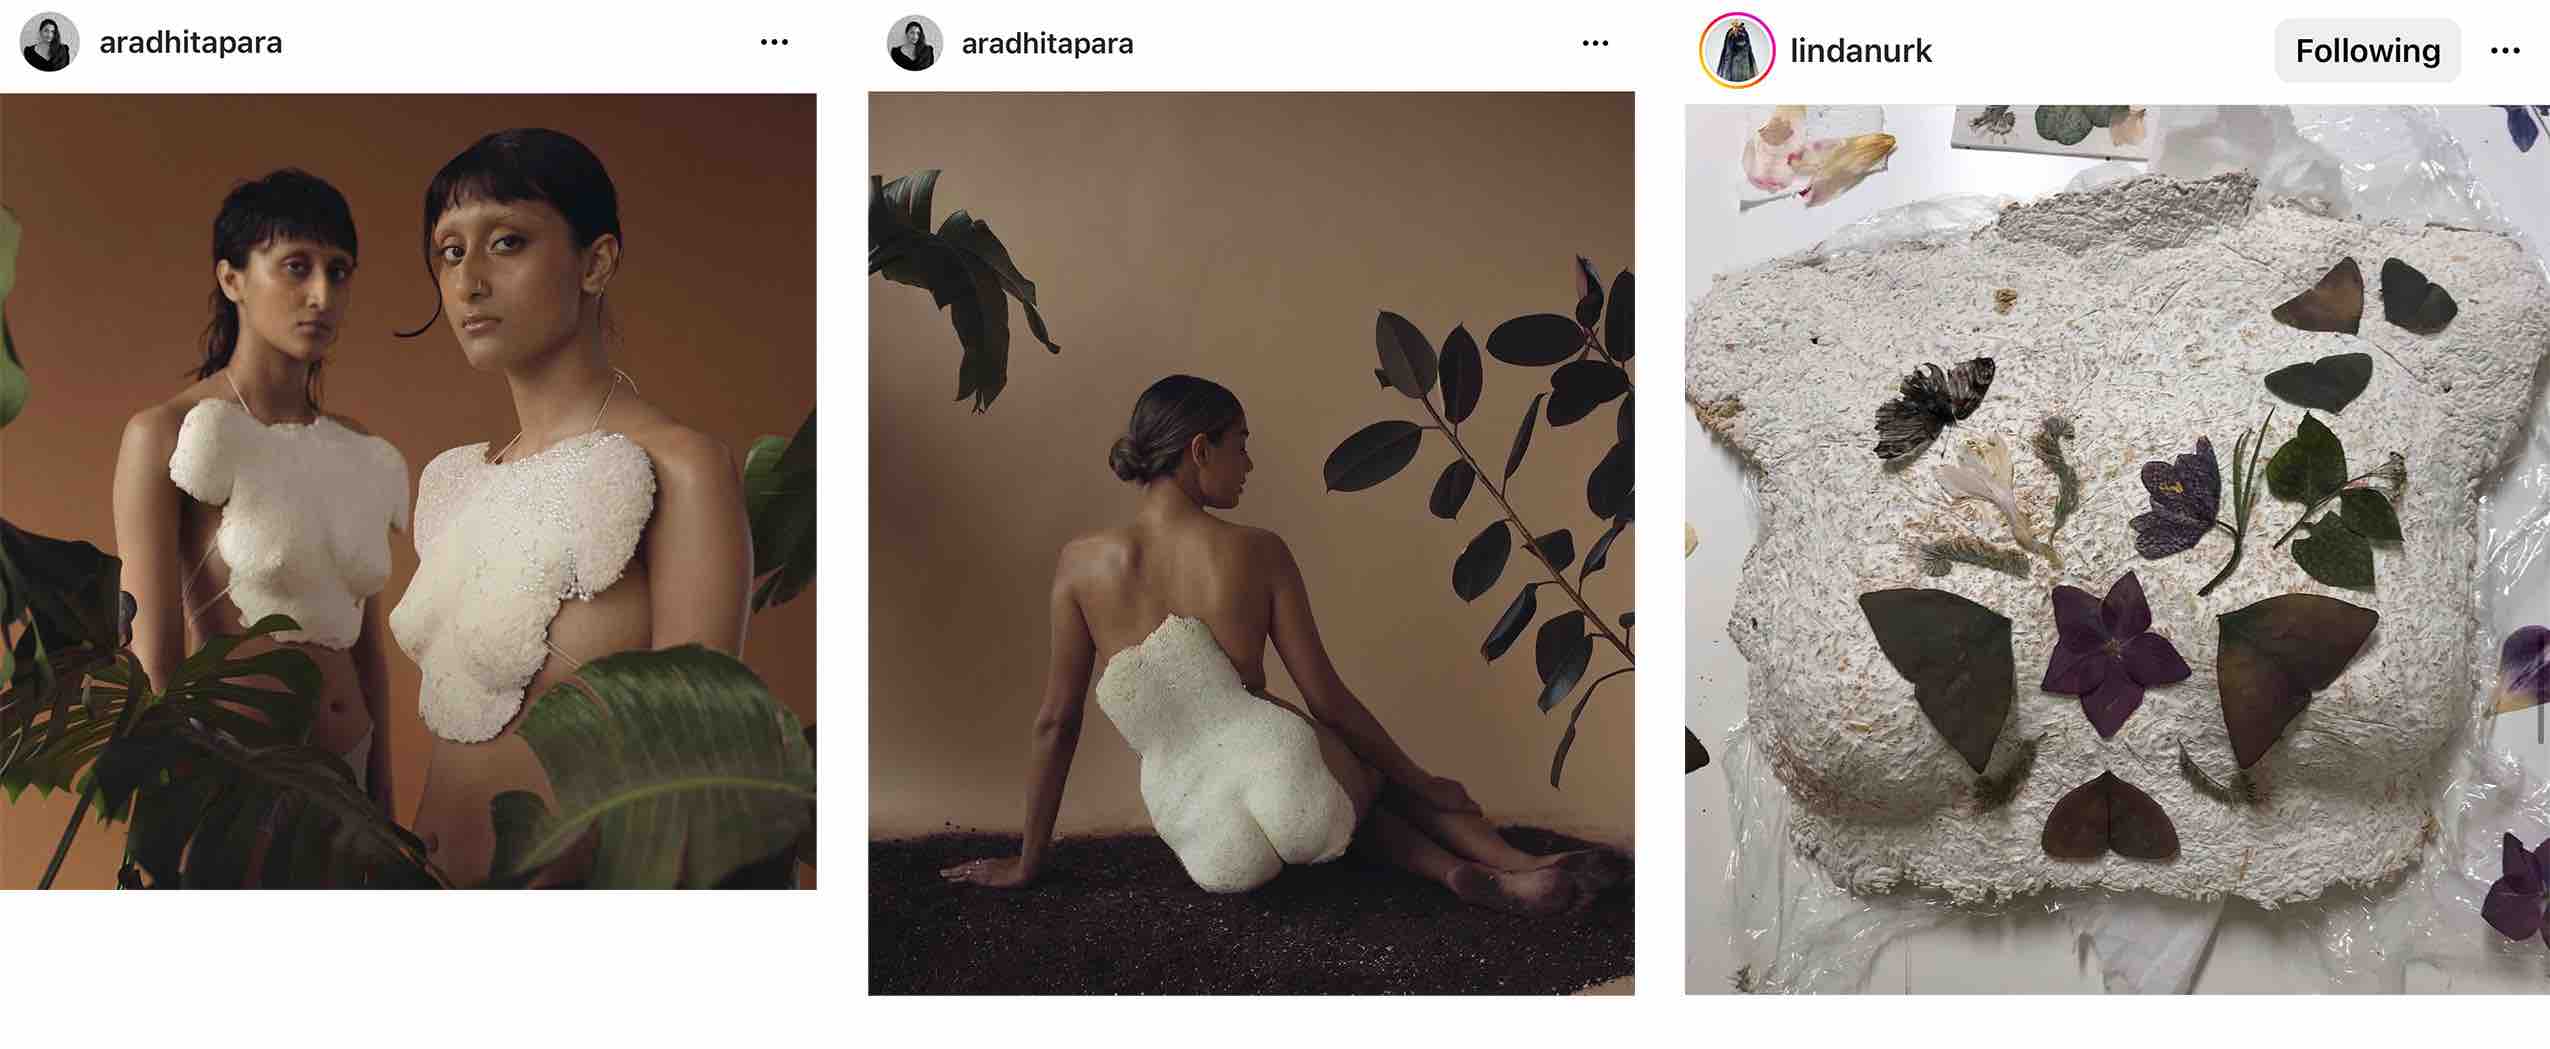
For the design, I am inspired by these interesting mushroom / floral arrangement sculptures by Smallhold, a mushroom farm in NYC and different artists (source). Also these examples of mycelial body casts by my friend Aradhita Parasrampuria and project partner Misha Japanwala for Vogue India, (source) and another by artist Linda Nurk (source)

Step 1 - Magic Weaver and Make Human
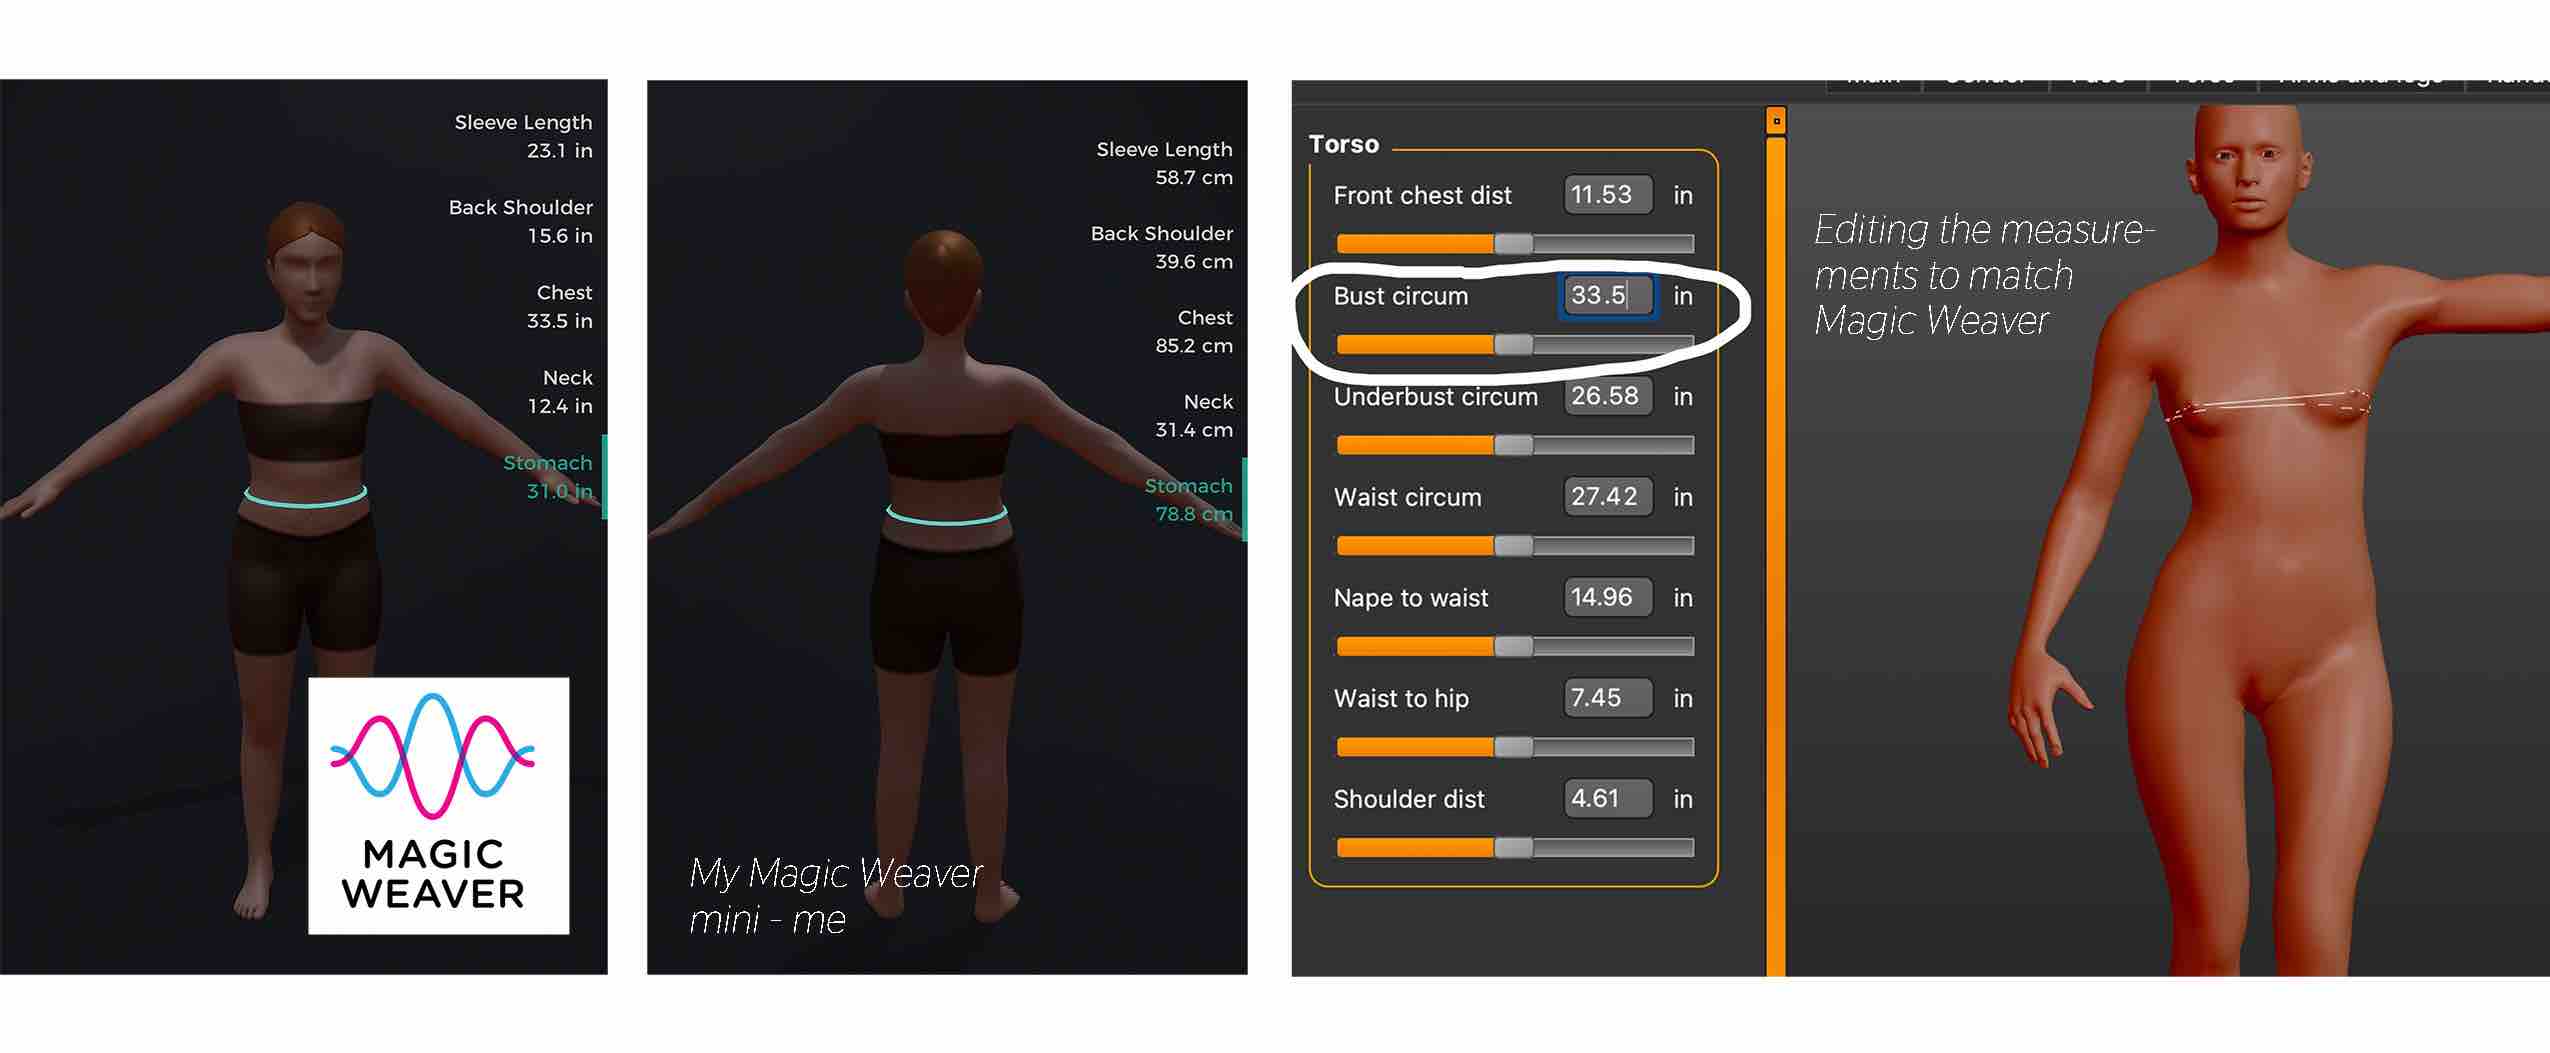
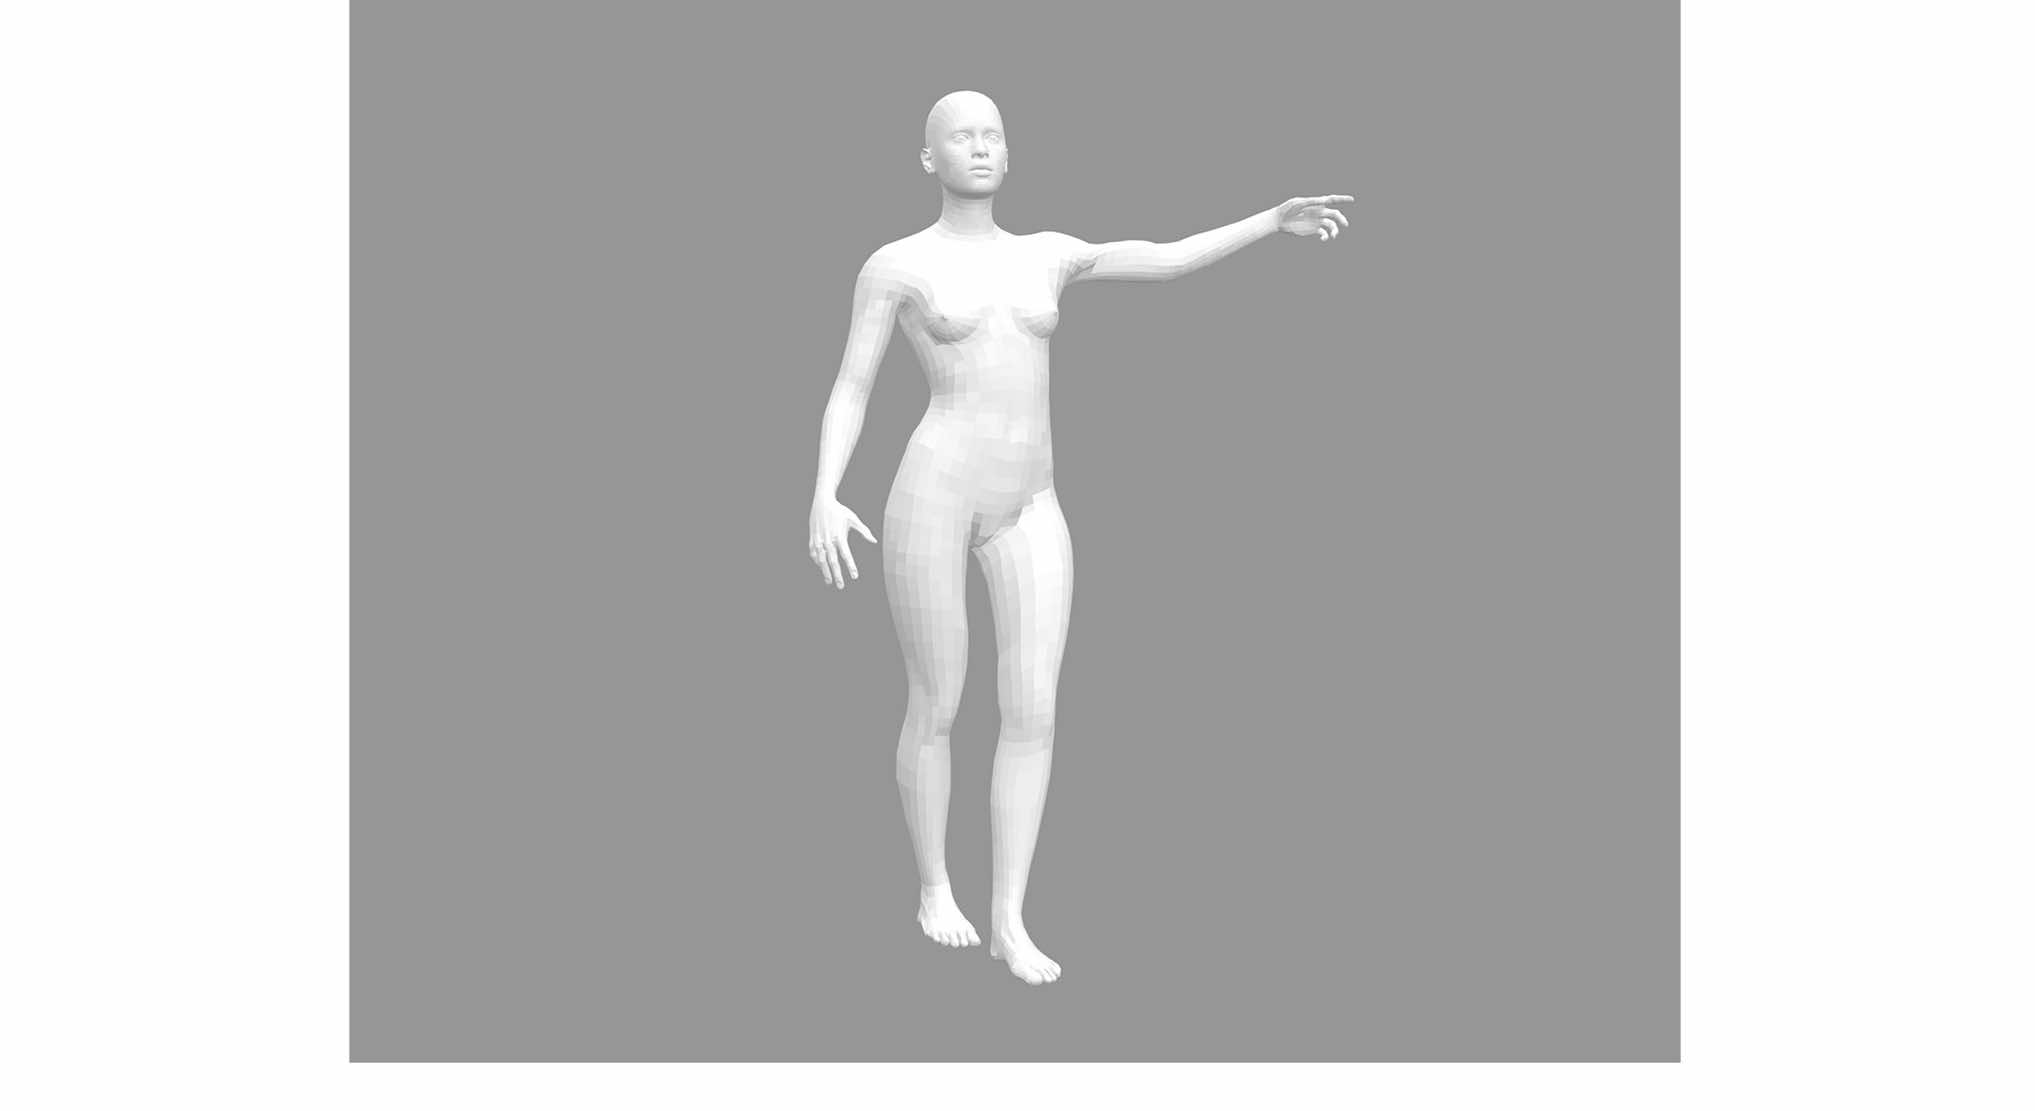
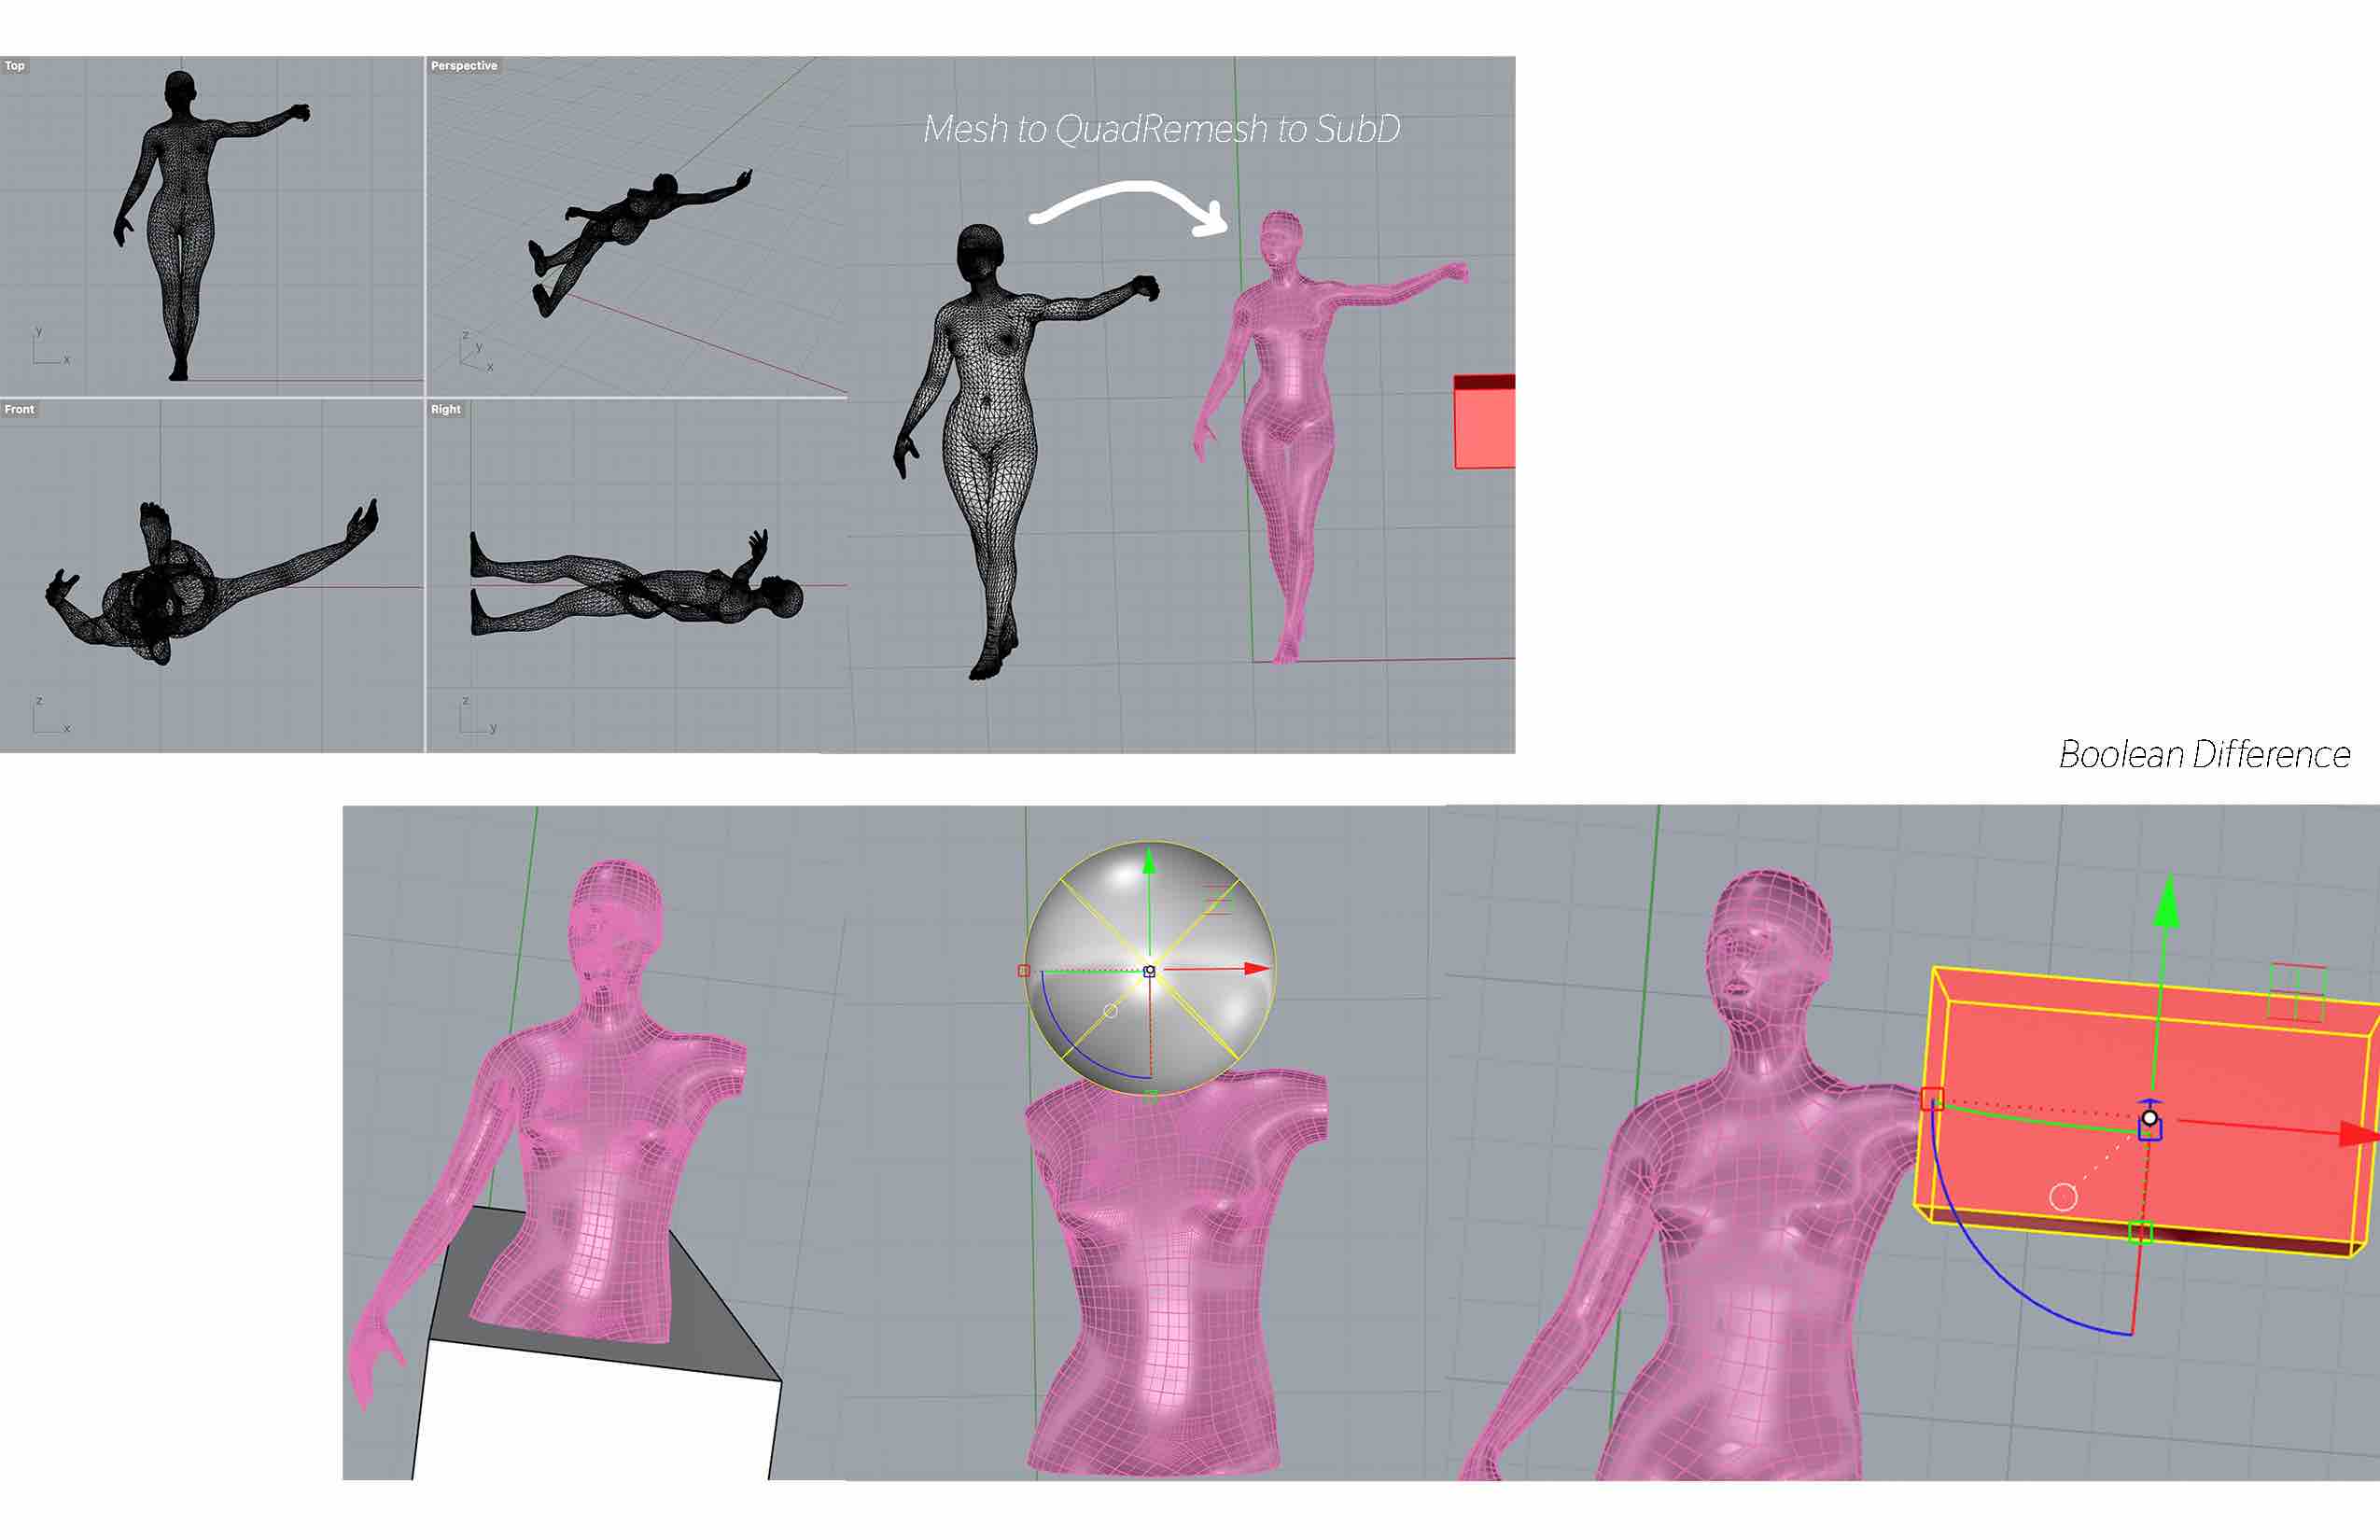
With the quick timeline and my limited (but growing) Rhino skills I decided not to use a 3D body scan to make my structure. I still wanted to make it personal so I used the Magic Weaver app to scan my measurements and then put them into Make Human. The app takes your photos, generates a simple model of you and lists the measurements. I wish they gave more data but that comes with the “partnership version.” I ended up checking with a measuring tape to see how accurate the software is and it was correct! After the customization and posing, I exported my Make Human body as an stl for Rhino.1
Step 2 - Rhino
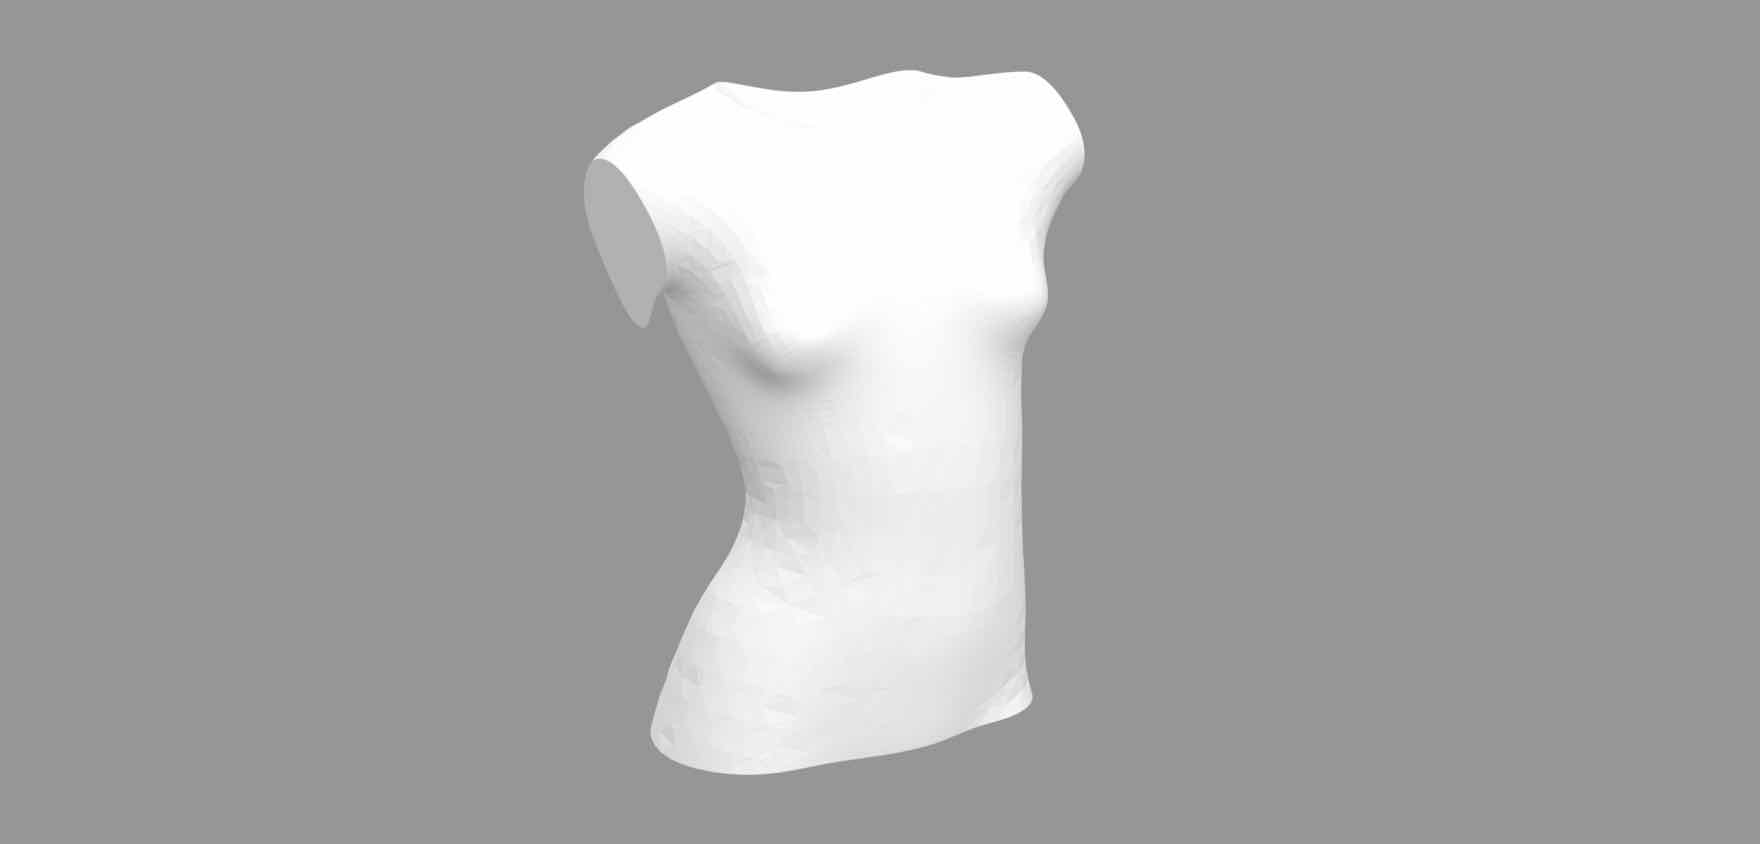
In Rhino, I realized that the mesh shrunk when I exported it so I scaled it back up. I converted it into a QuadRemesh and then a SubD shape so it became a closed solid polysurface. Maybe a strange technique but it was fresh in my mind from the lecture: I used the Boolean Difference command and different shapes to cut out the torso section that I wanted. I exported the final shape as an stl to open with Slicer.
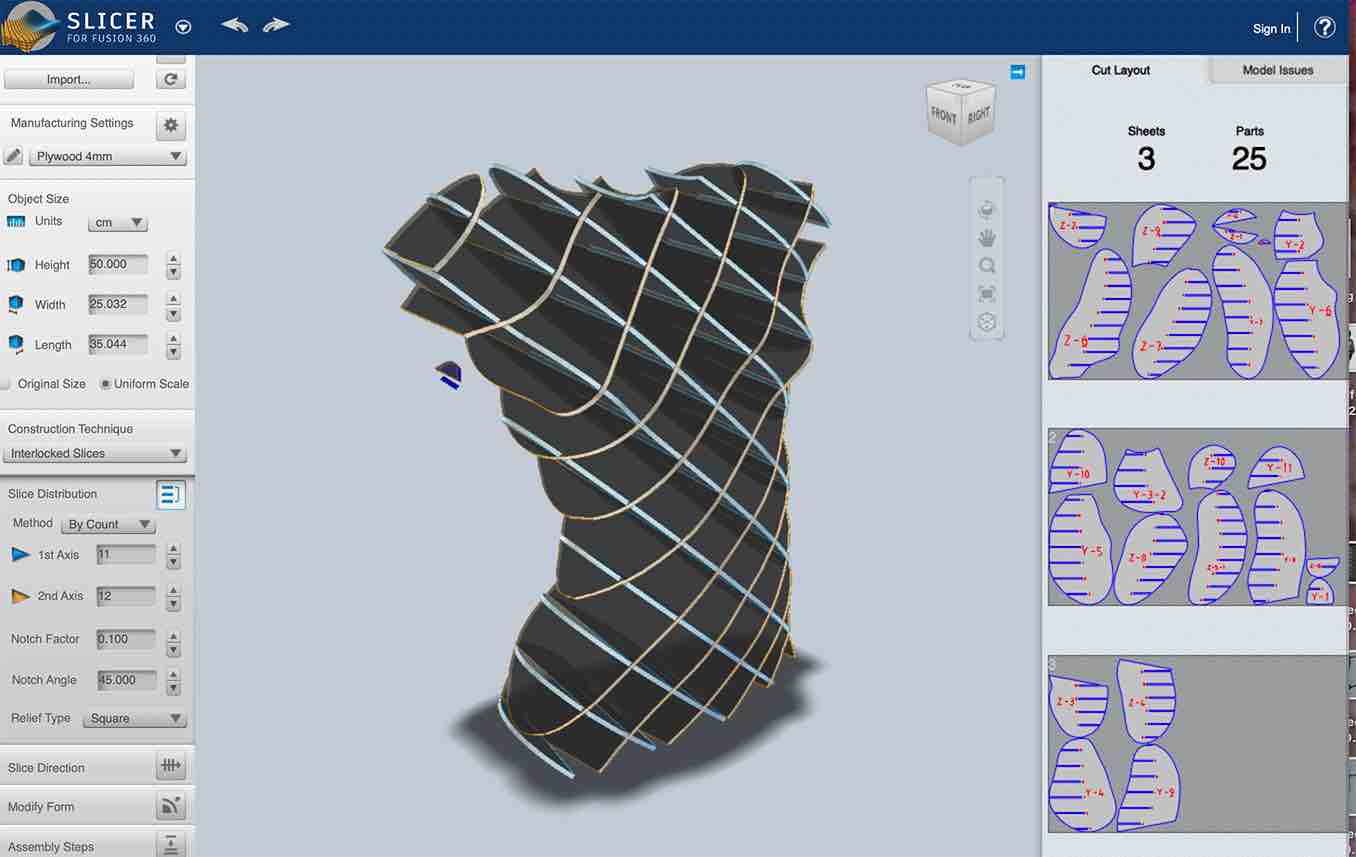
Step 3 - Slicer
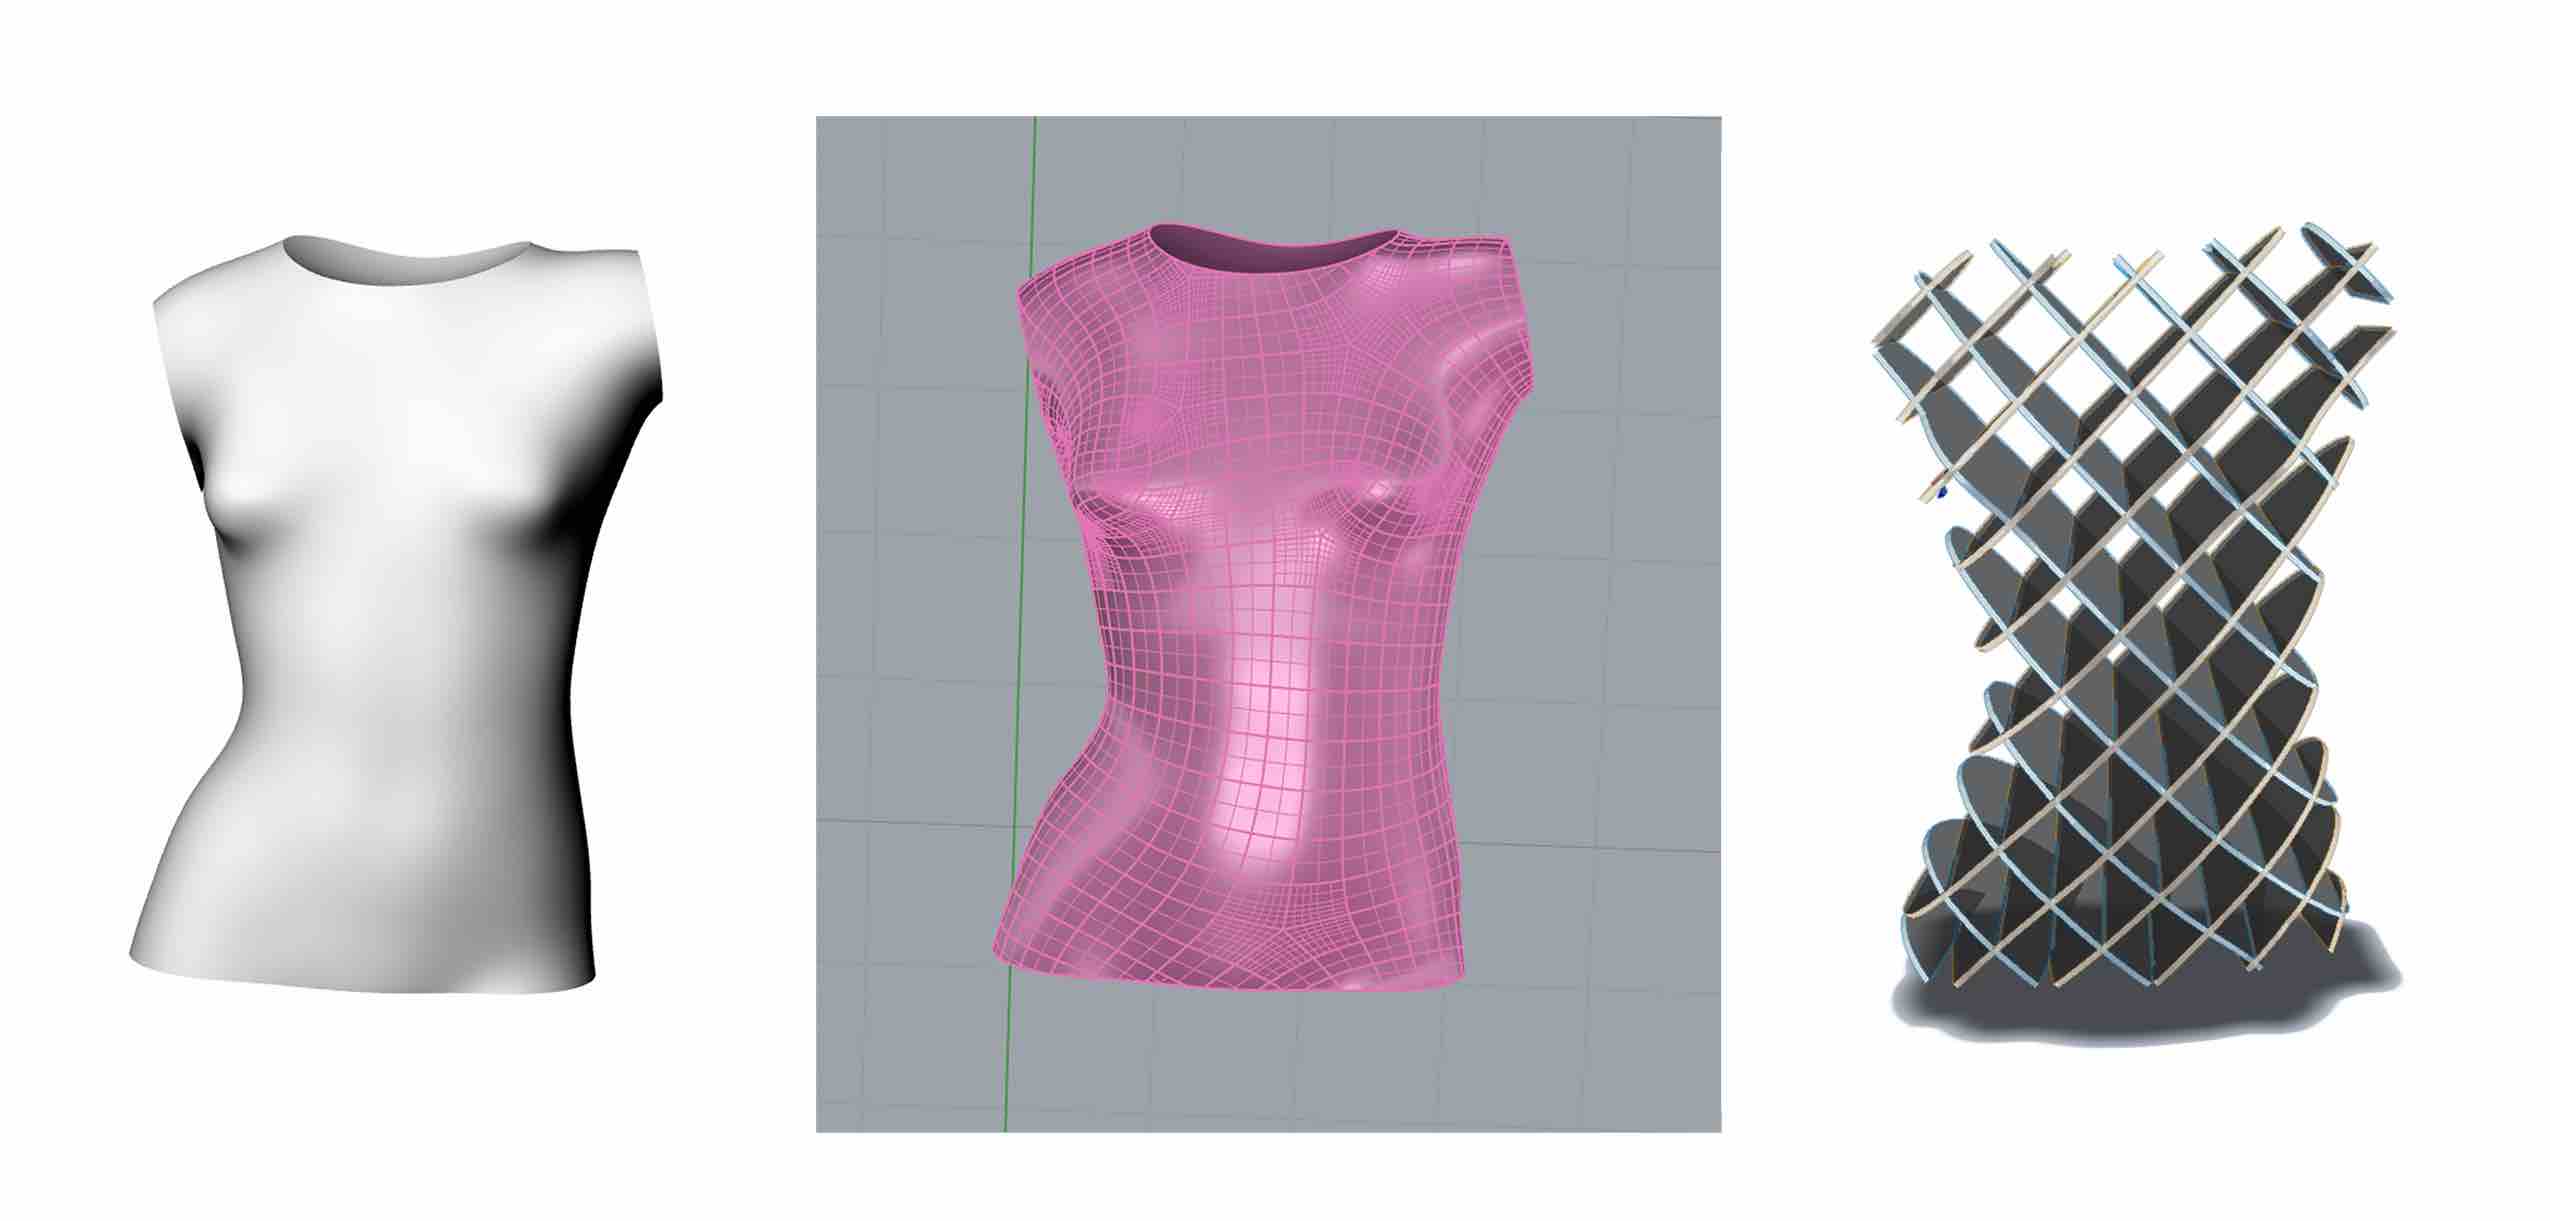
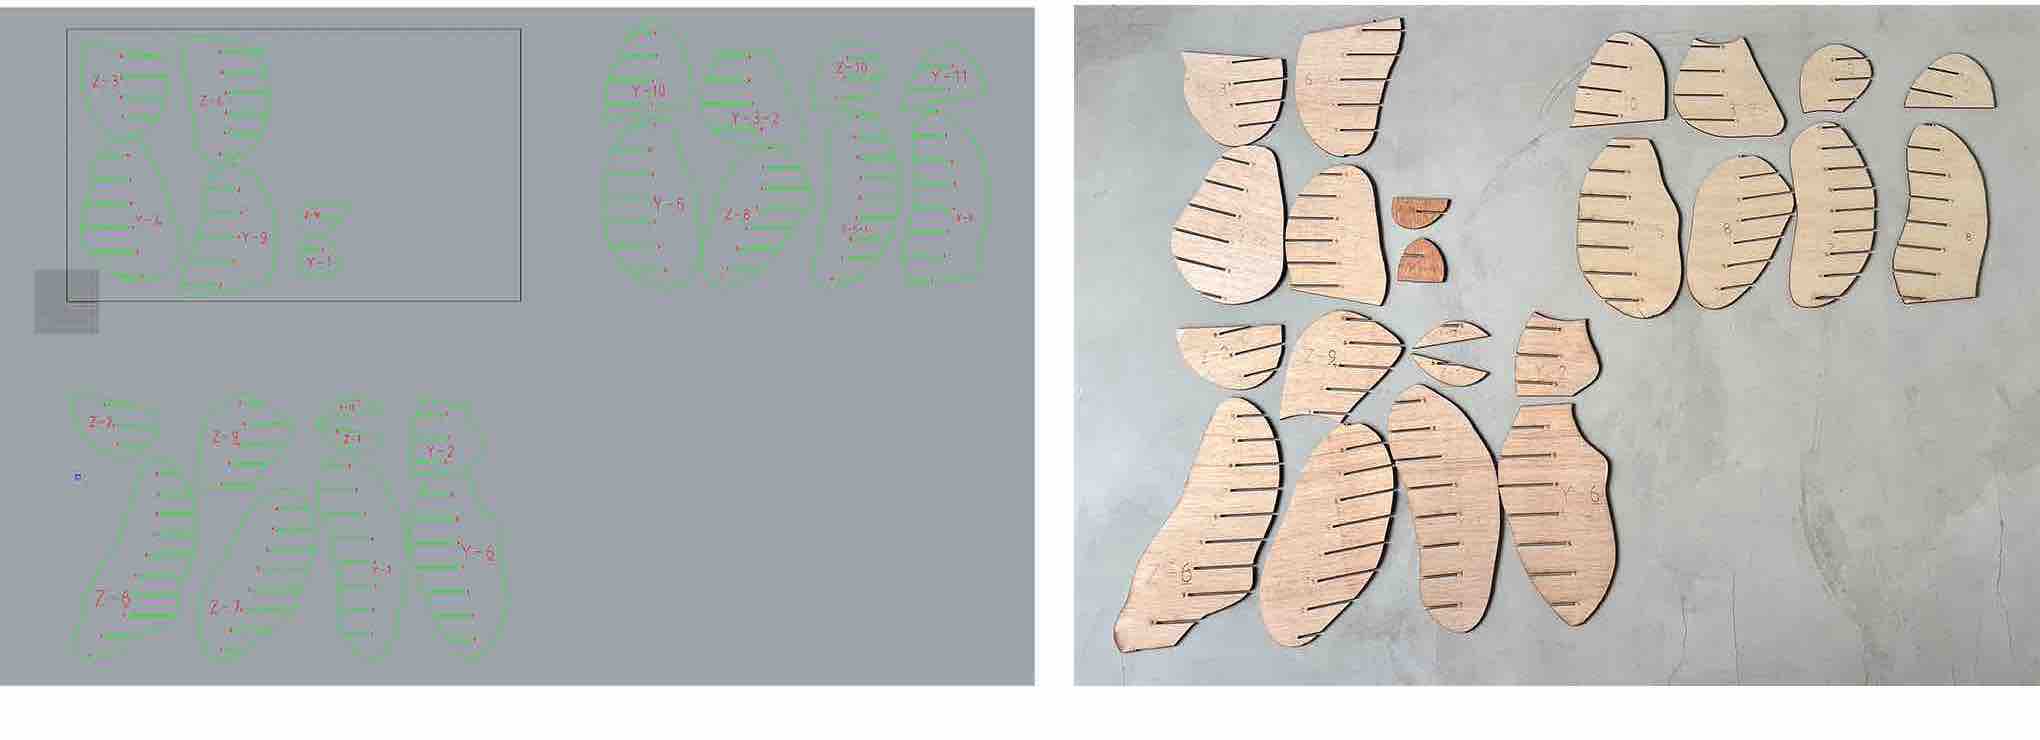
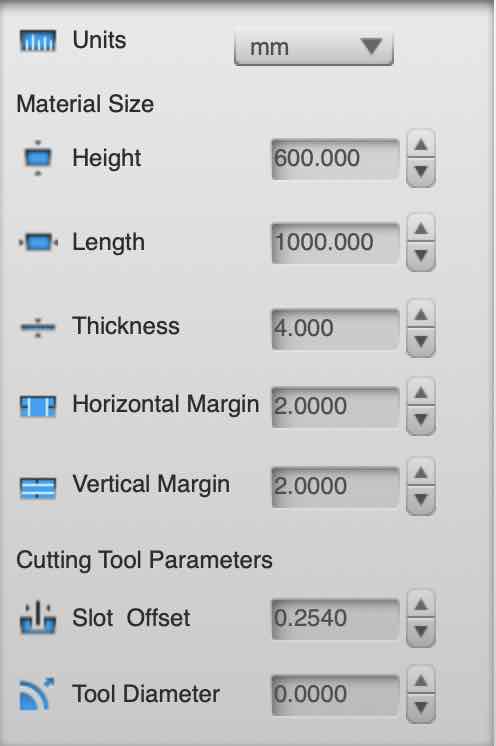 Petra advised me to use plywood instead of cardboard since the mycelium will take a long time to grow and the cardboard may not hold up, especially with humidity. So I sliced my model ater making an edit to accomidate the plywood material. After playing around with the directionality of slices, I decided on an x grid because it looked more dynamic than the square, and would still be able to hold mycellium in the pockets. Here you can see the transition from Rhino to Slicer.
Sheets: 3
Pieces: 25
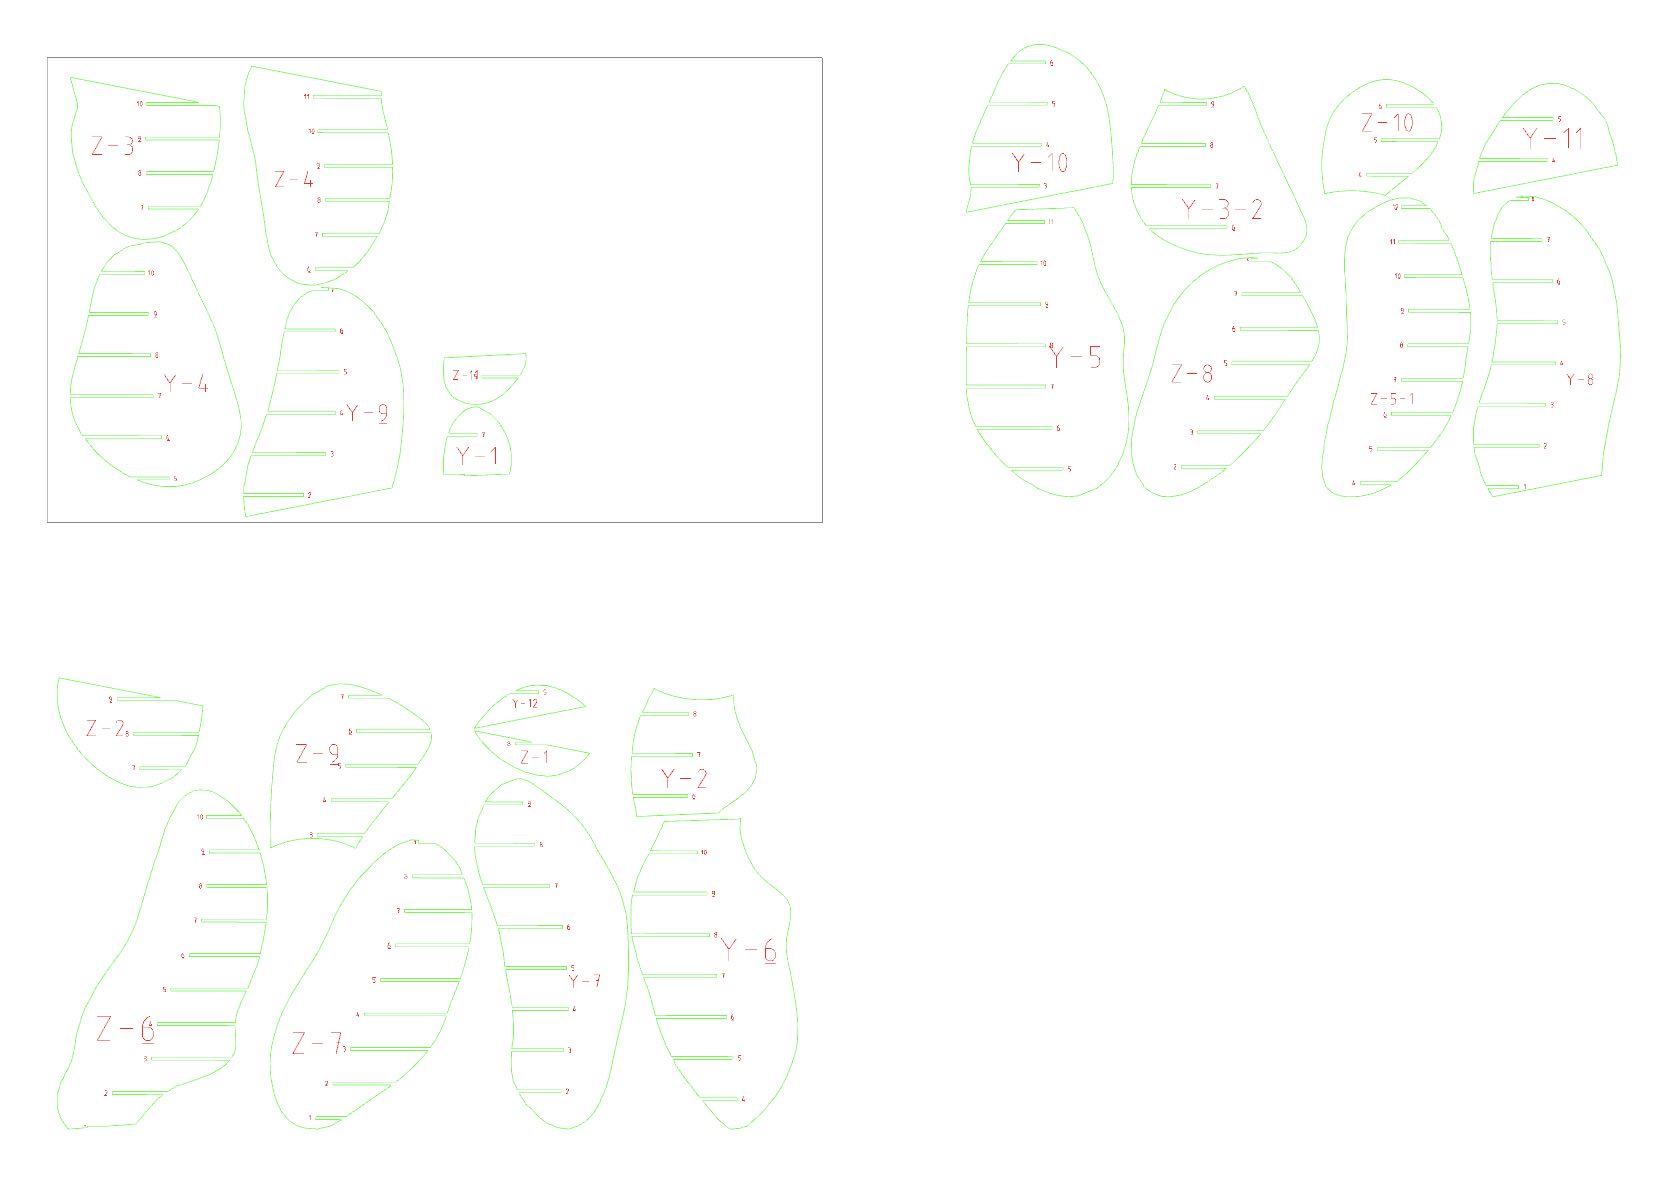
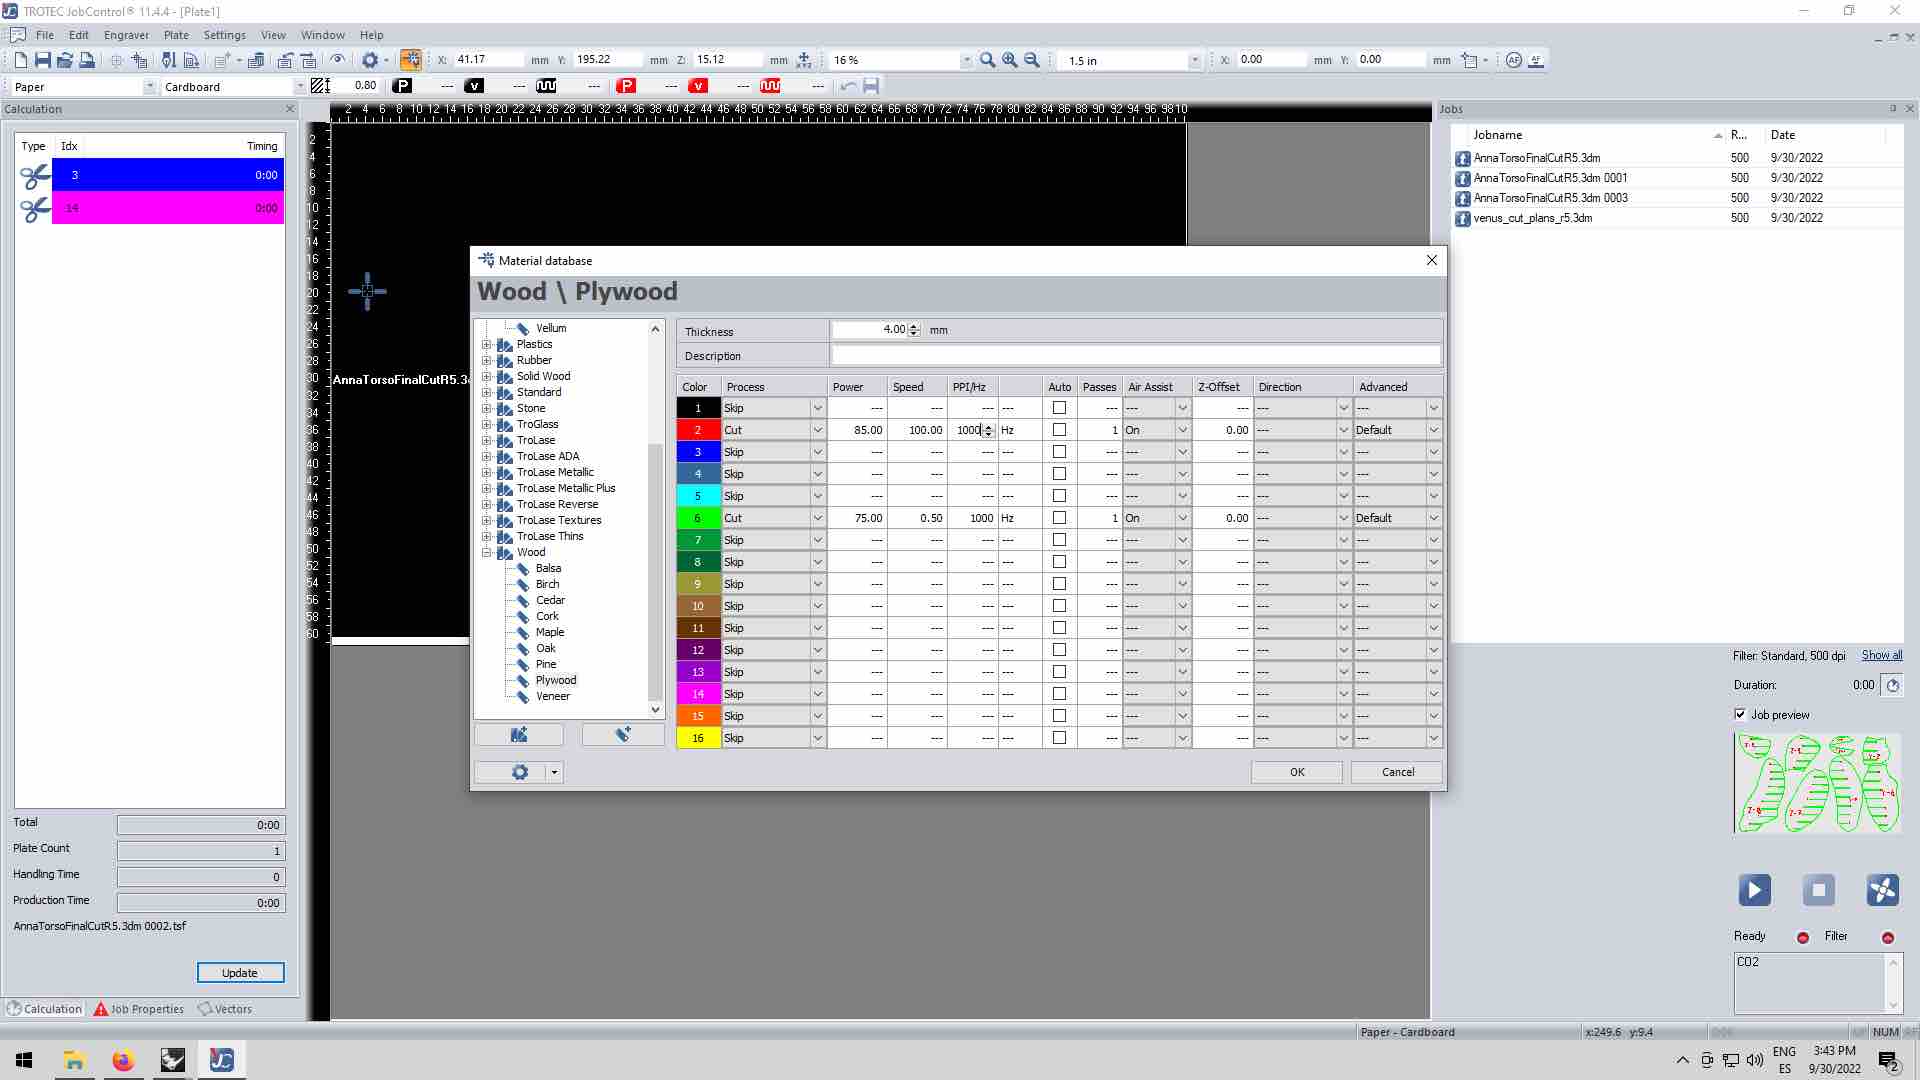
Step 4 - Lasercut
Slicer sends the file as a 3d object so I flattened it on top view with the 2D command. Then I separated the lines and markings into layers and edited the colors to correspond to the laser cutter commands. I used green for cut and red for engrave. I added the file to the IAAC cloud and opened it on the computer connected to the laser cutter Trotec 4000. I sent two of the smallest pieces to be cut to test the connection before cutting the complete file. The connection worked and the settings were fine so I didn't need to make any adjustments, and could keep those two pieces for the final. Here is the final laser cut file2
PLYWOOD 4MM
Engraving: Red P: 85 S: 100
Cut: Green P: 75 S: 0.5
Time ≈ 12mins per sheet
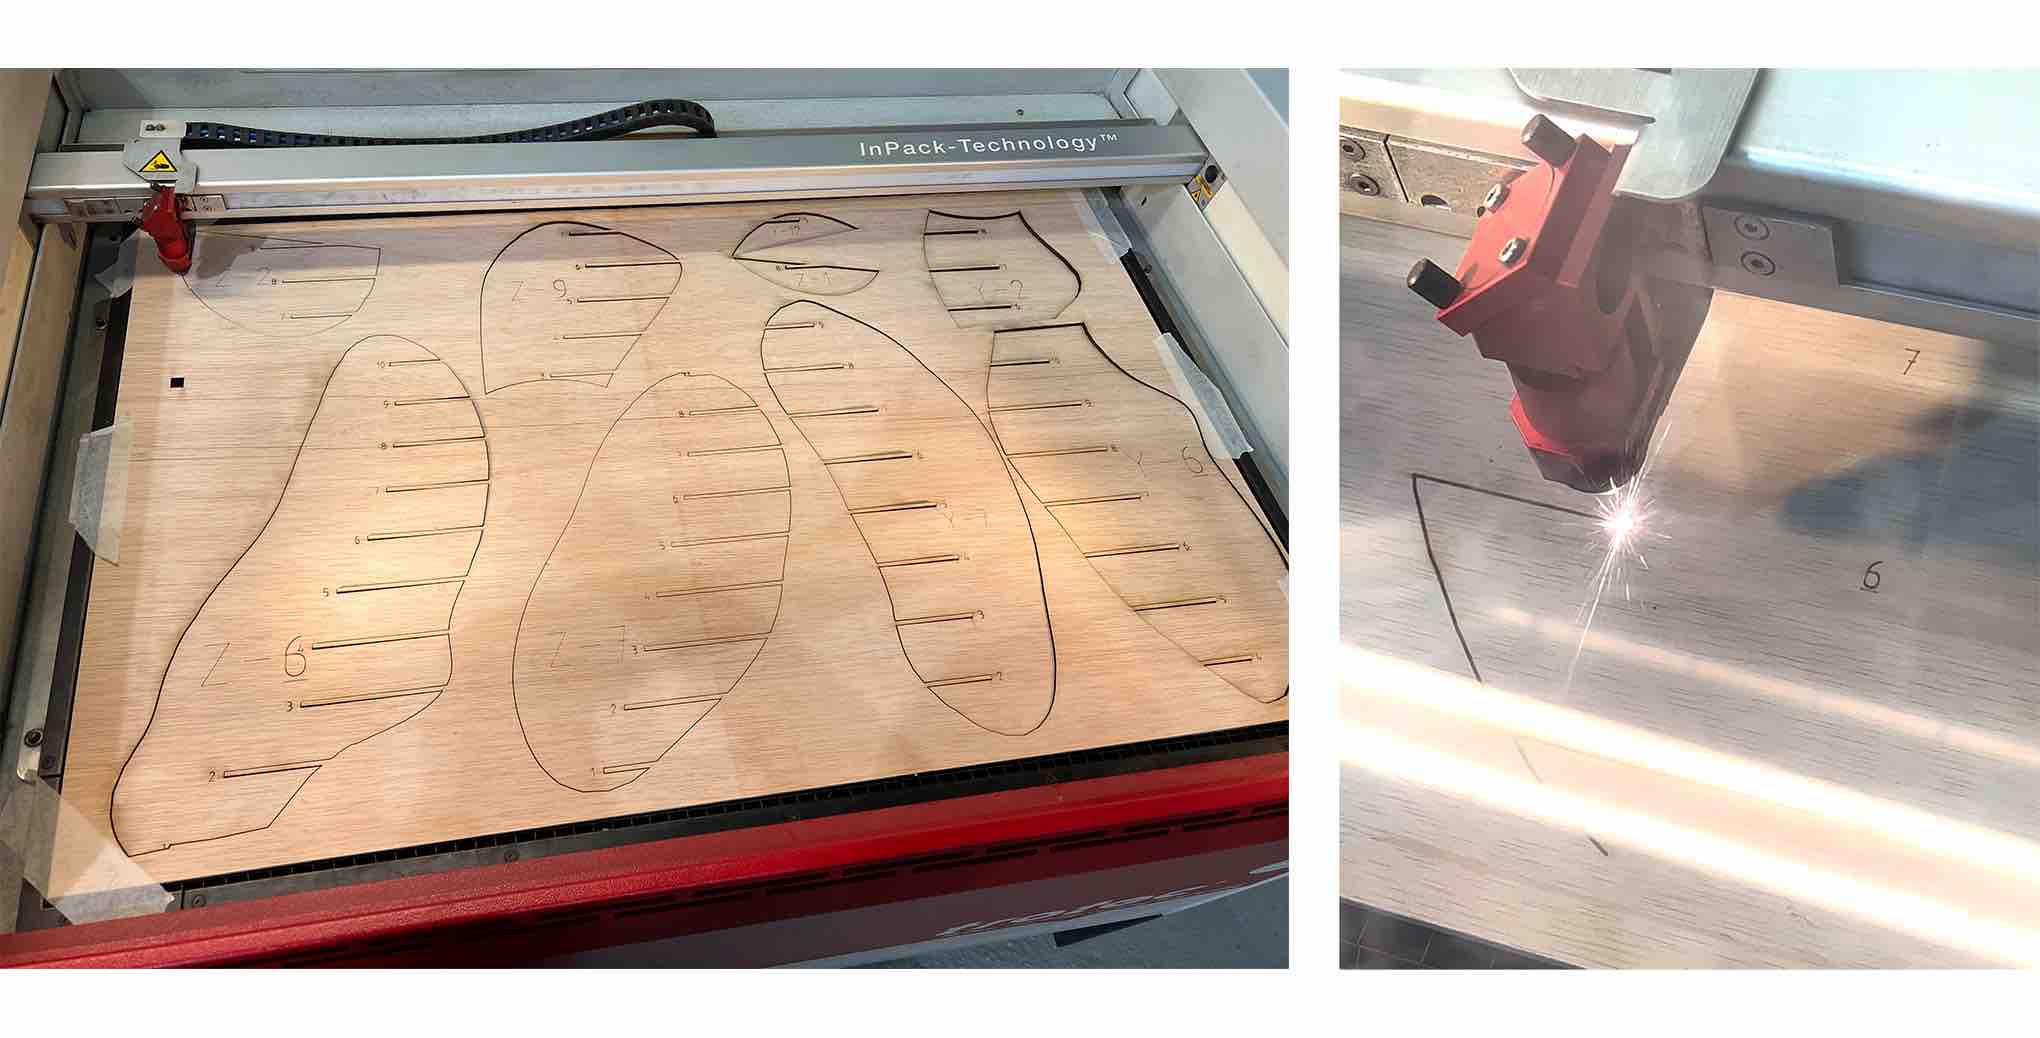
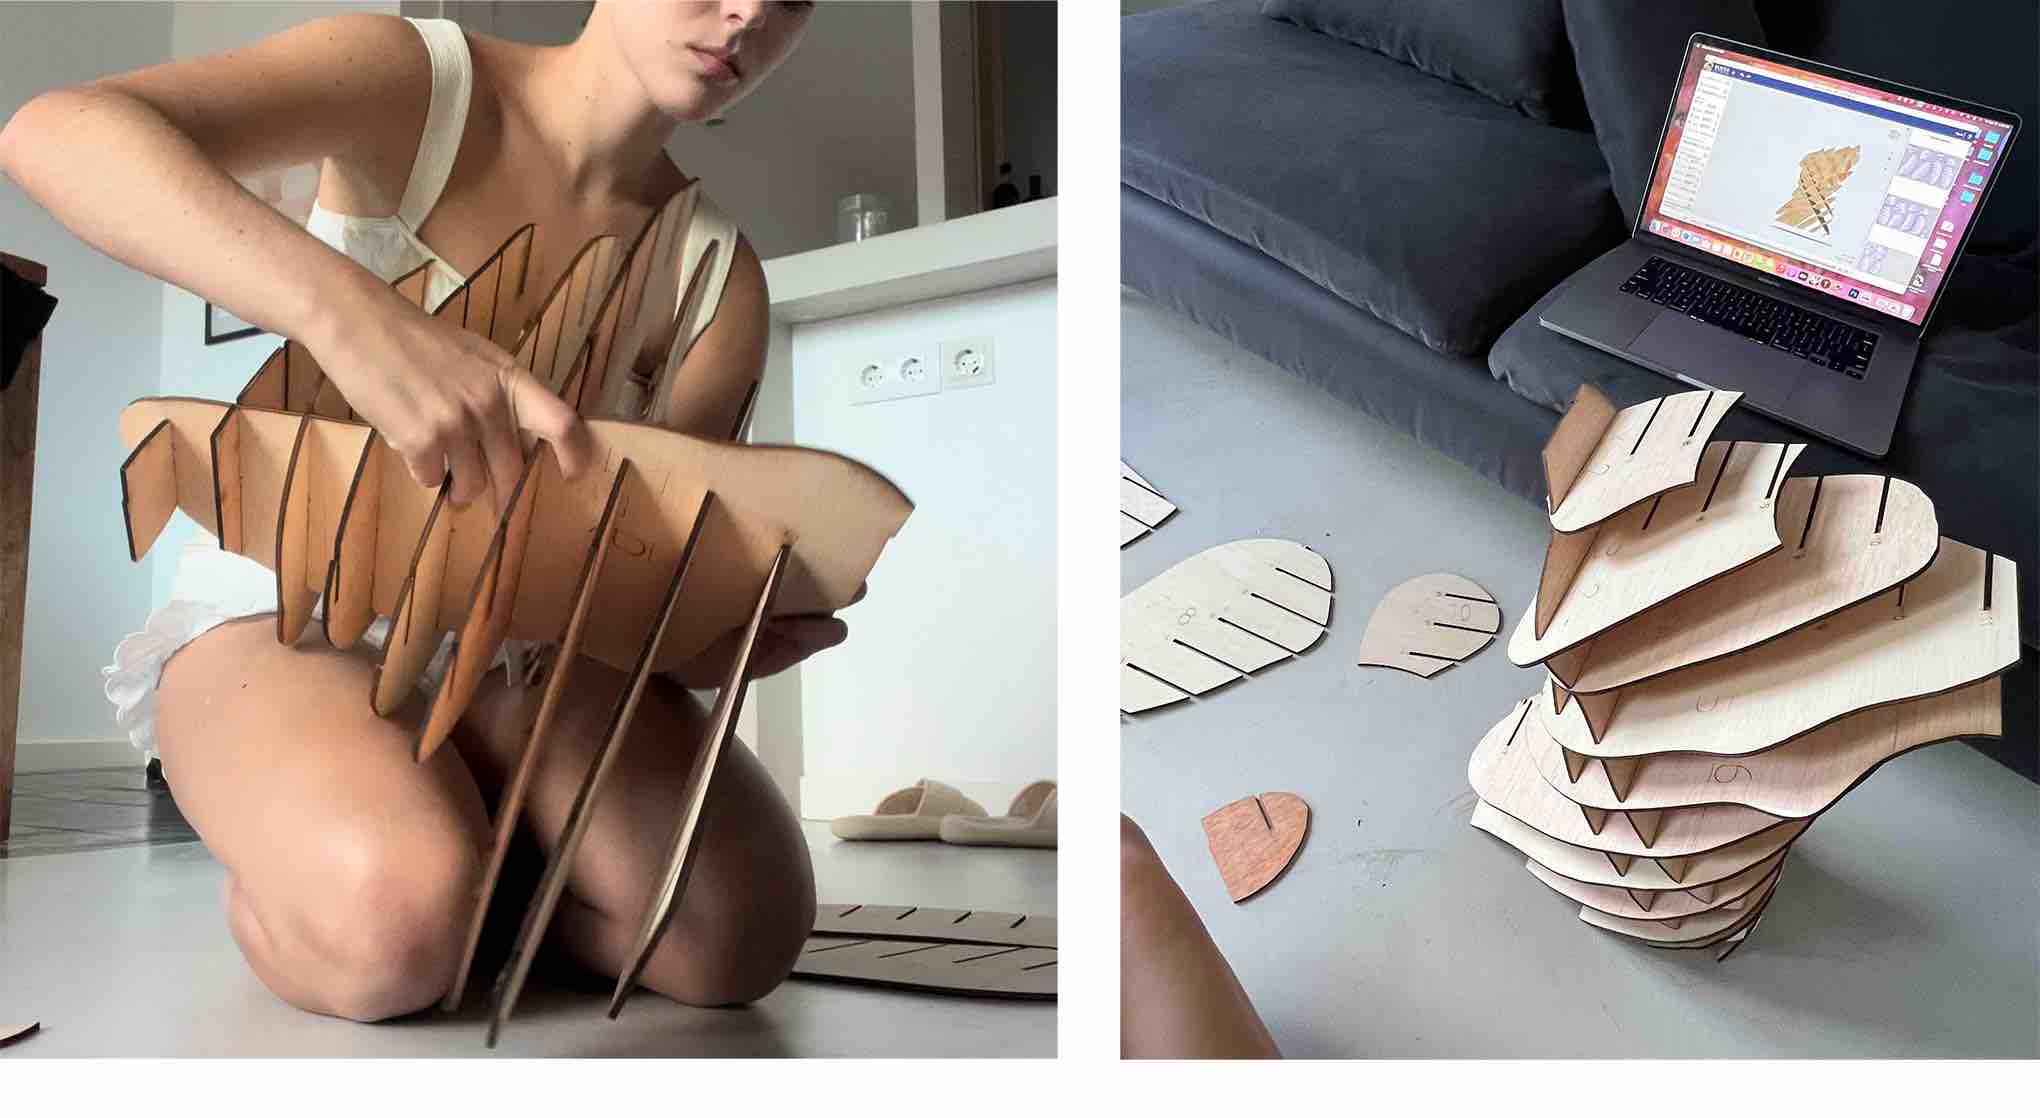
Using plywood, the biggest issue was the curve of the sheets because the height disparity would reduce the laser focus in some areas. This can cause fire and thick cutting lines. Luckily, It did not have much of a negative effect on the final pieces (because the looser junctions were actually easier to put together) but it did result in some cosmetic burn marks.
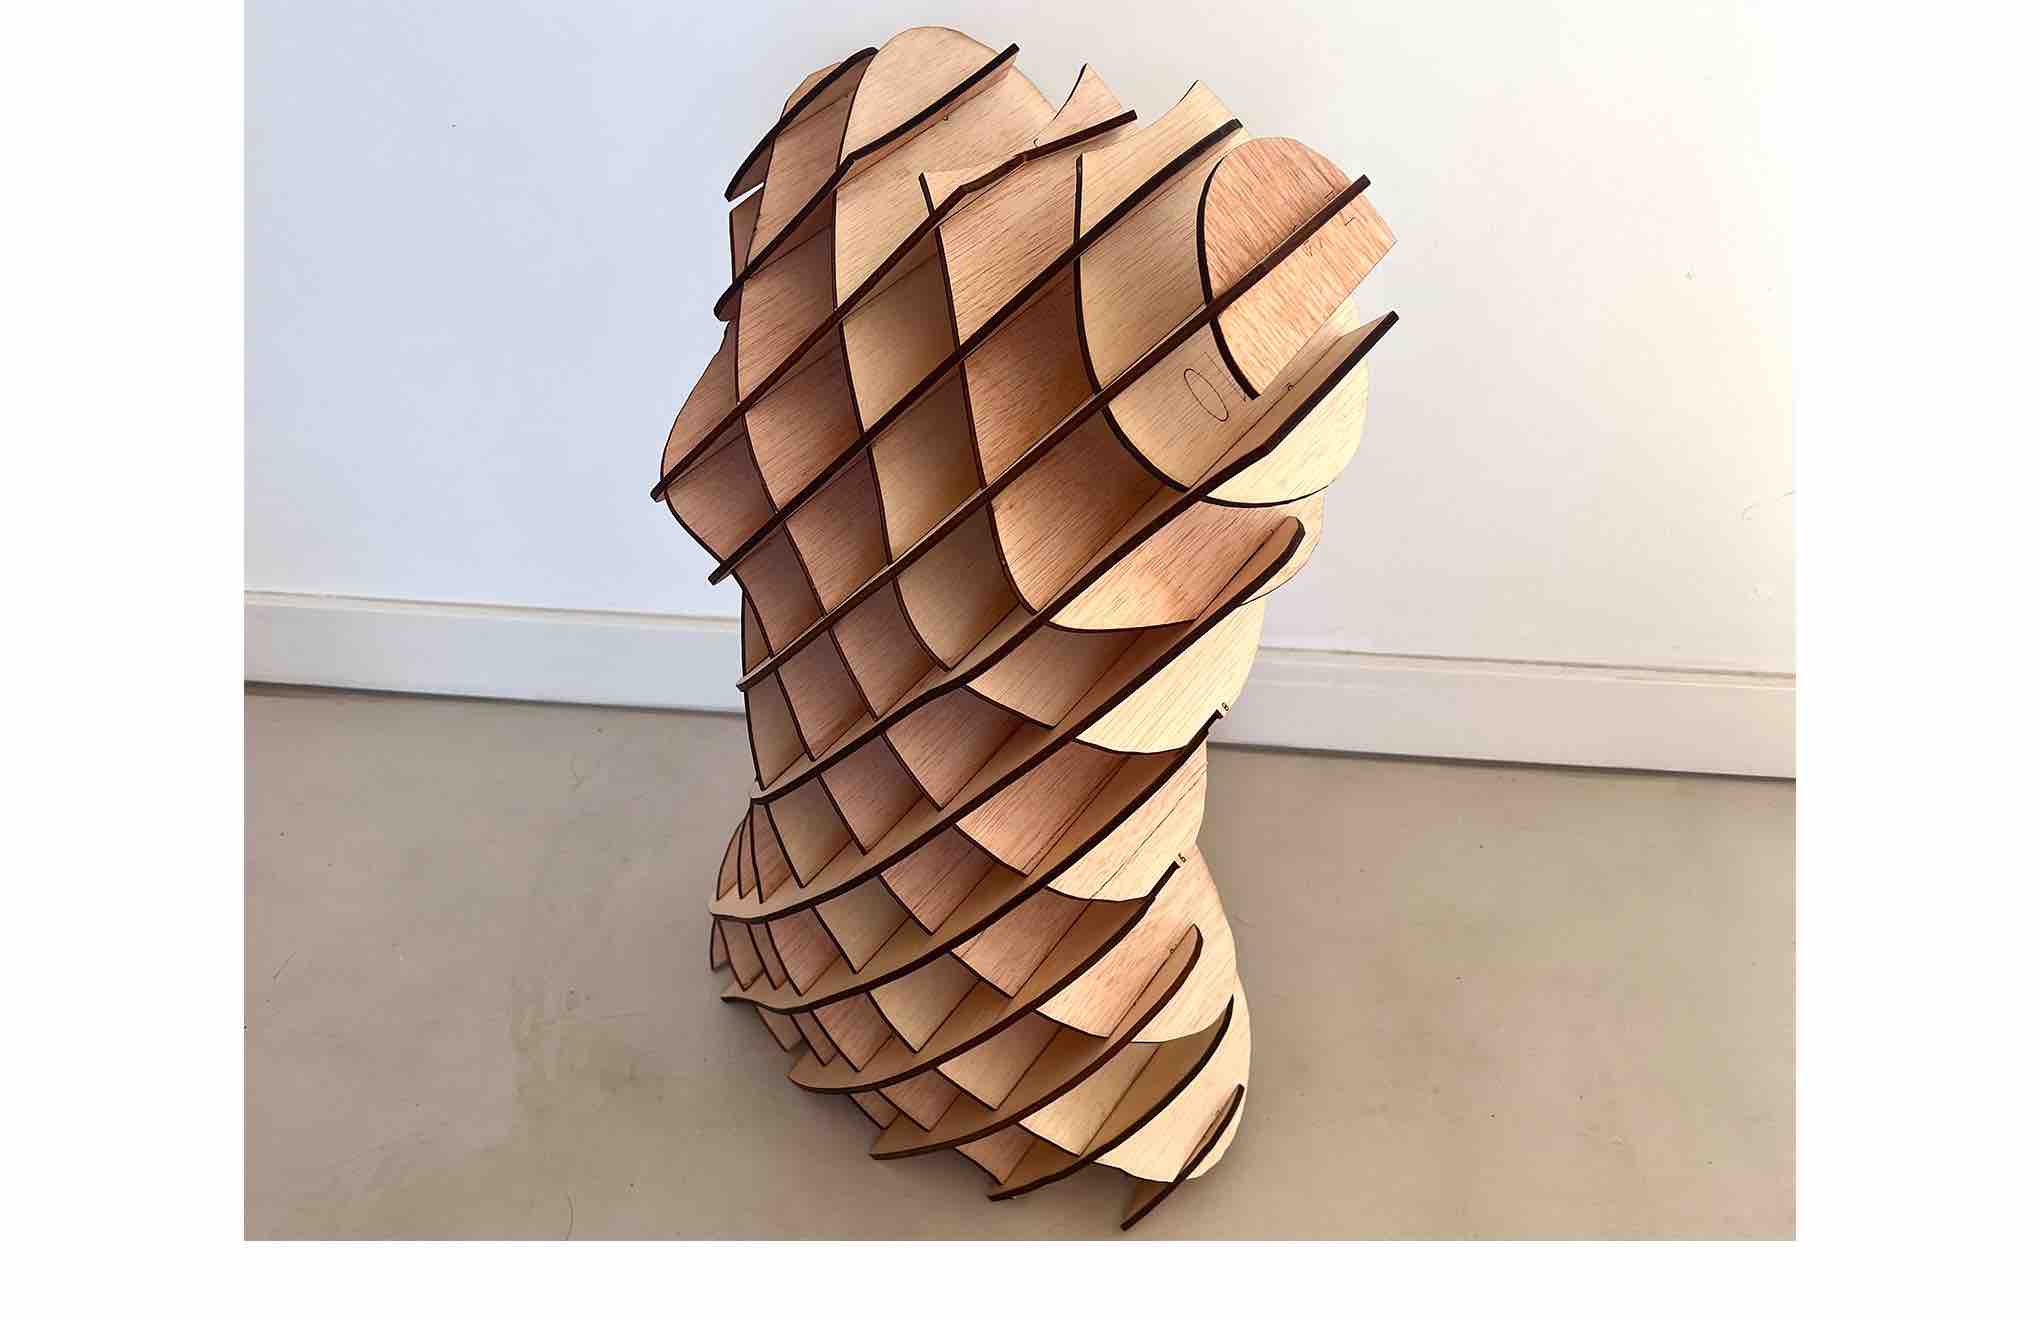
Step 5 - Assembly
Then I used the slicer instructions to assemble the torso. I wish I would have gone slower and been more careful because I made two mistakes and they were so hard to fix because the plywood fit very tightly together. Another note I am taking for the future, it would be nice to hide the number markings on each piece so they aren't seen in the final. Eventually (with a little manhandling) I completed the assembly!
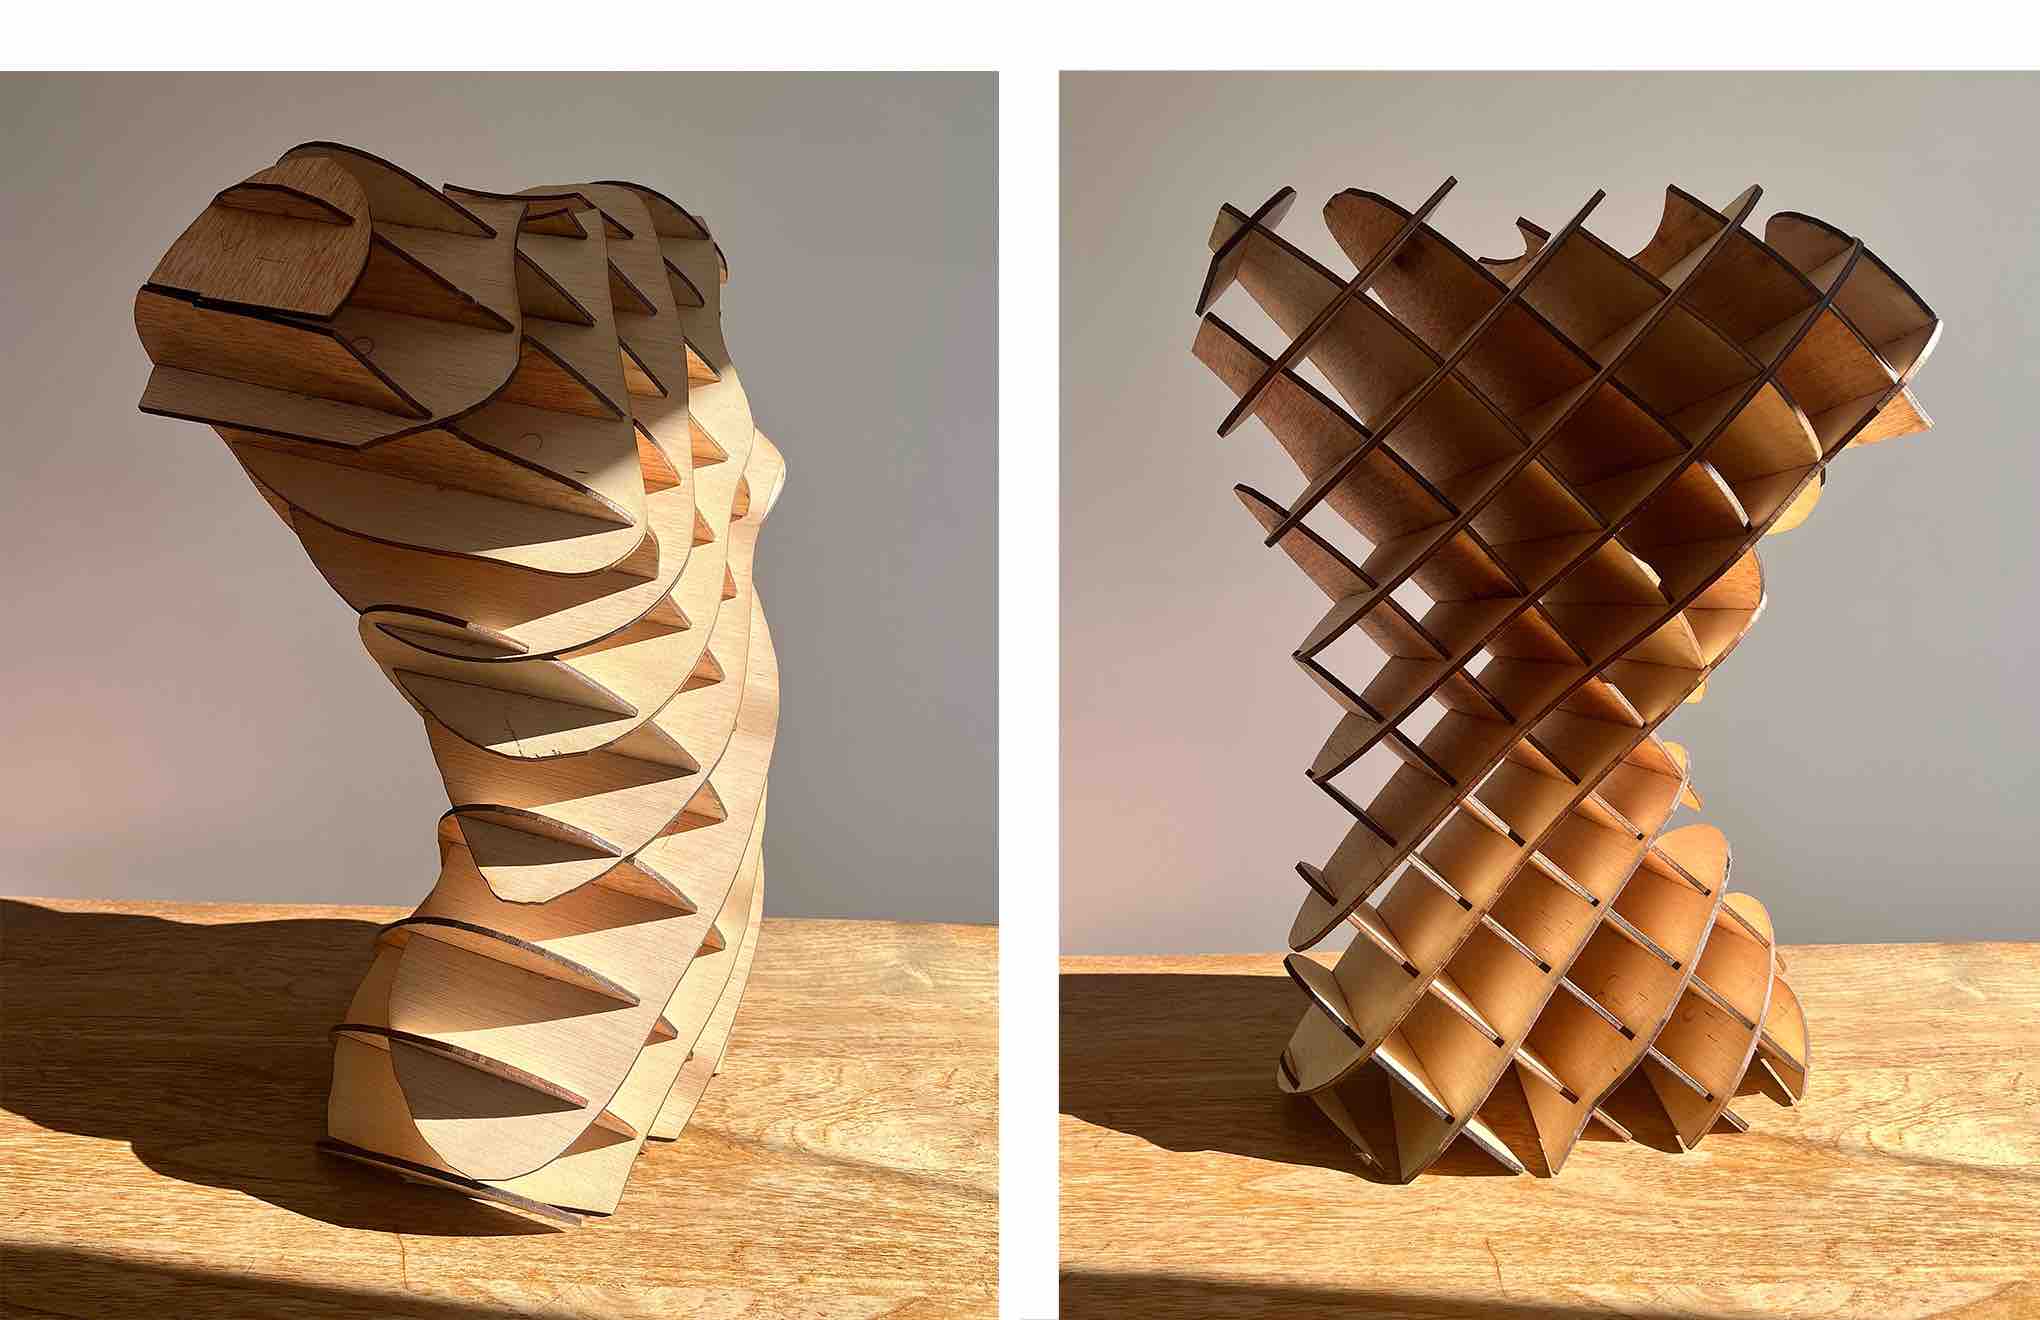
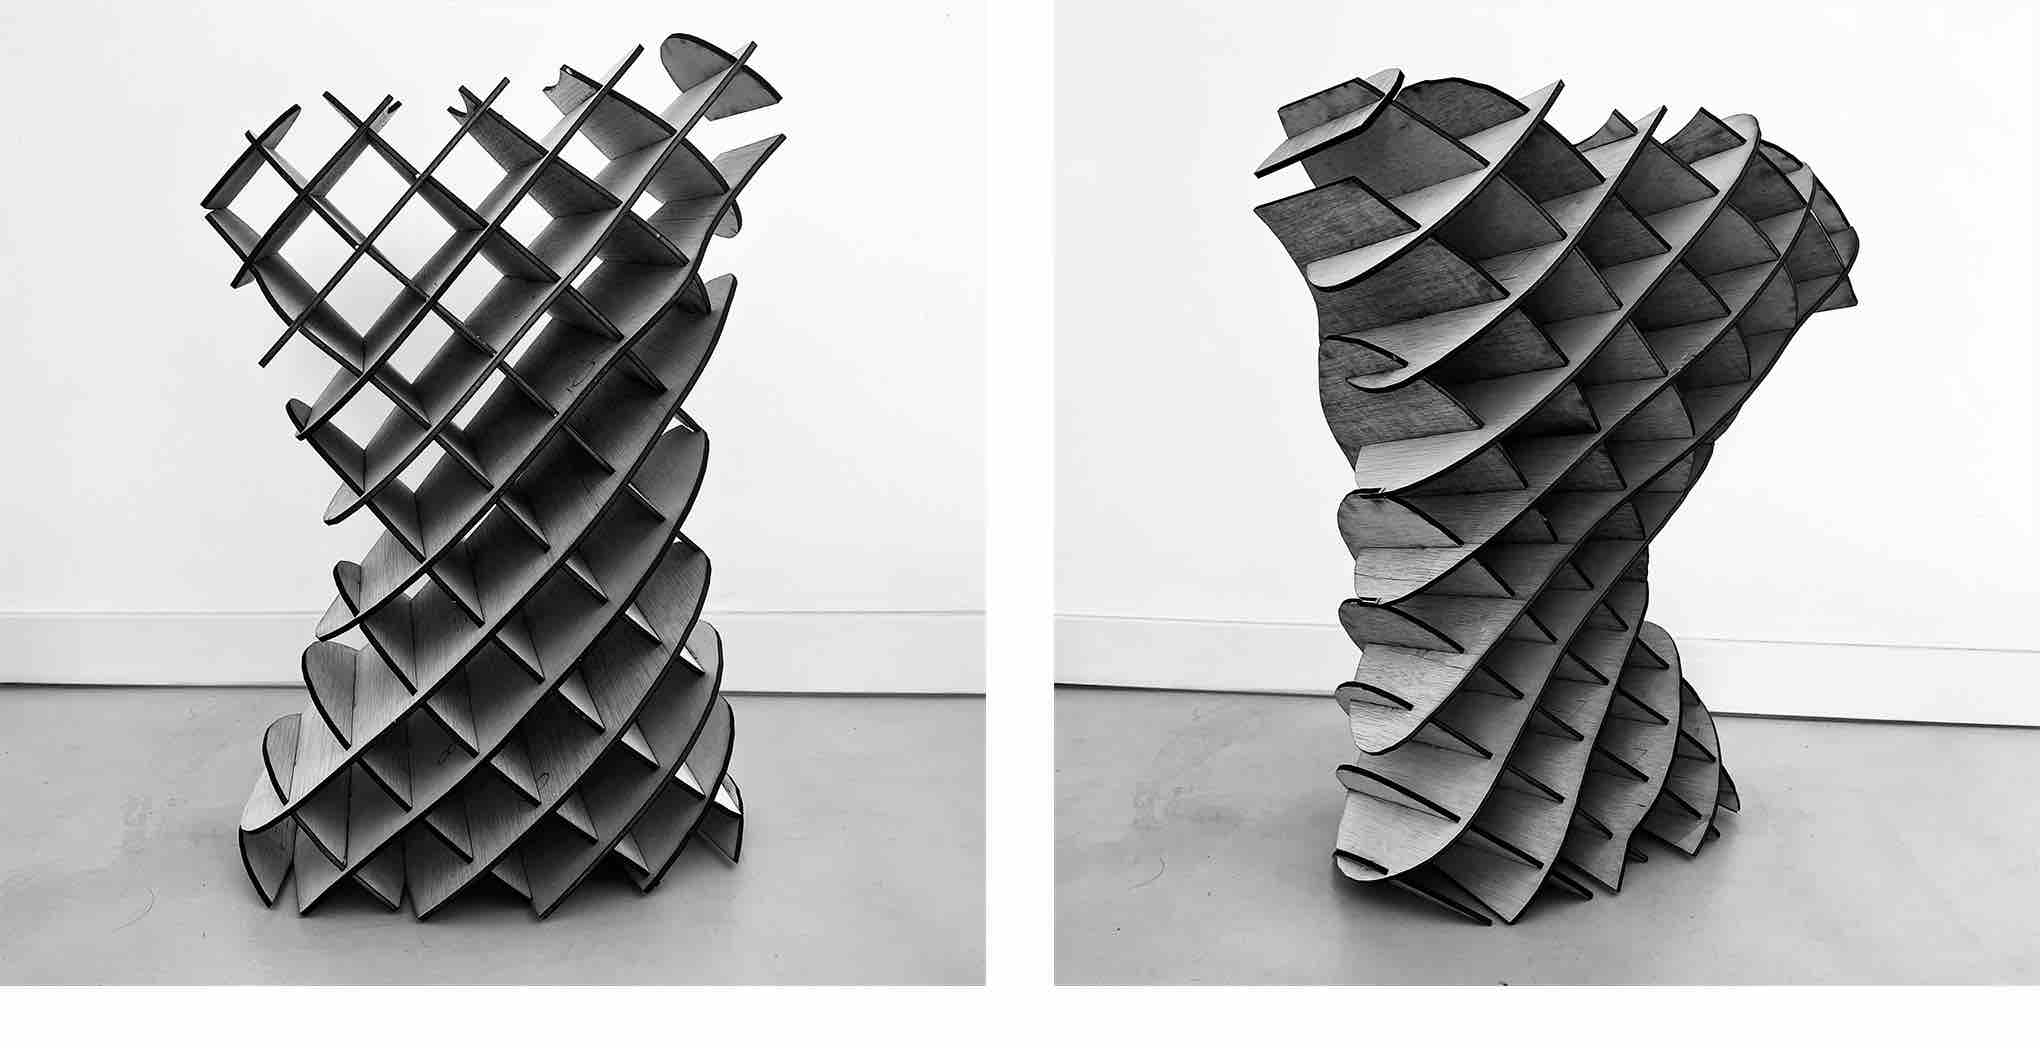
Final Documentation
Future Prototype
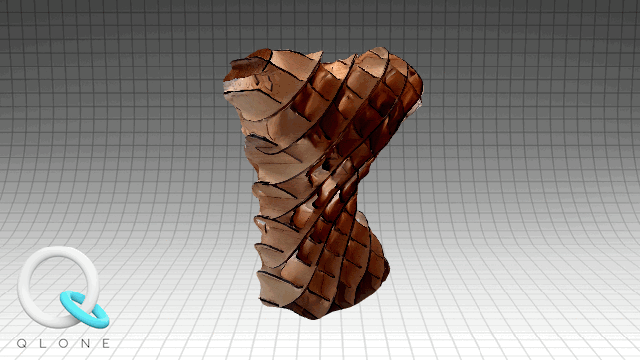
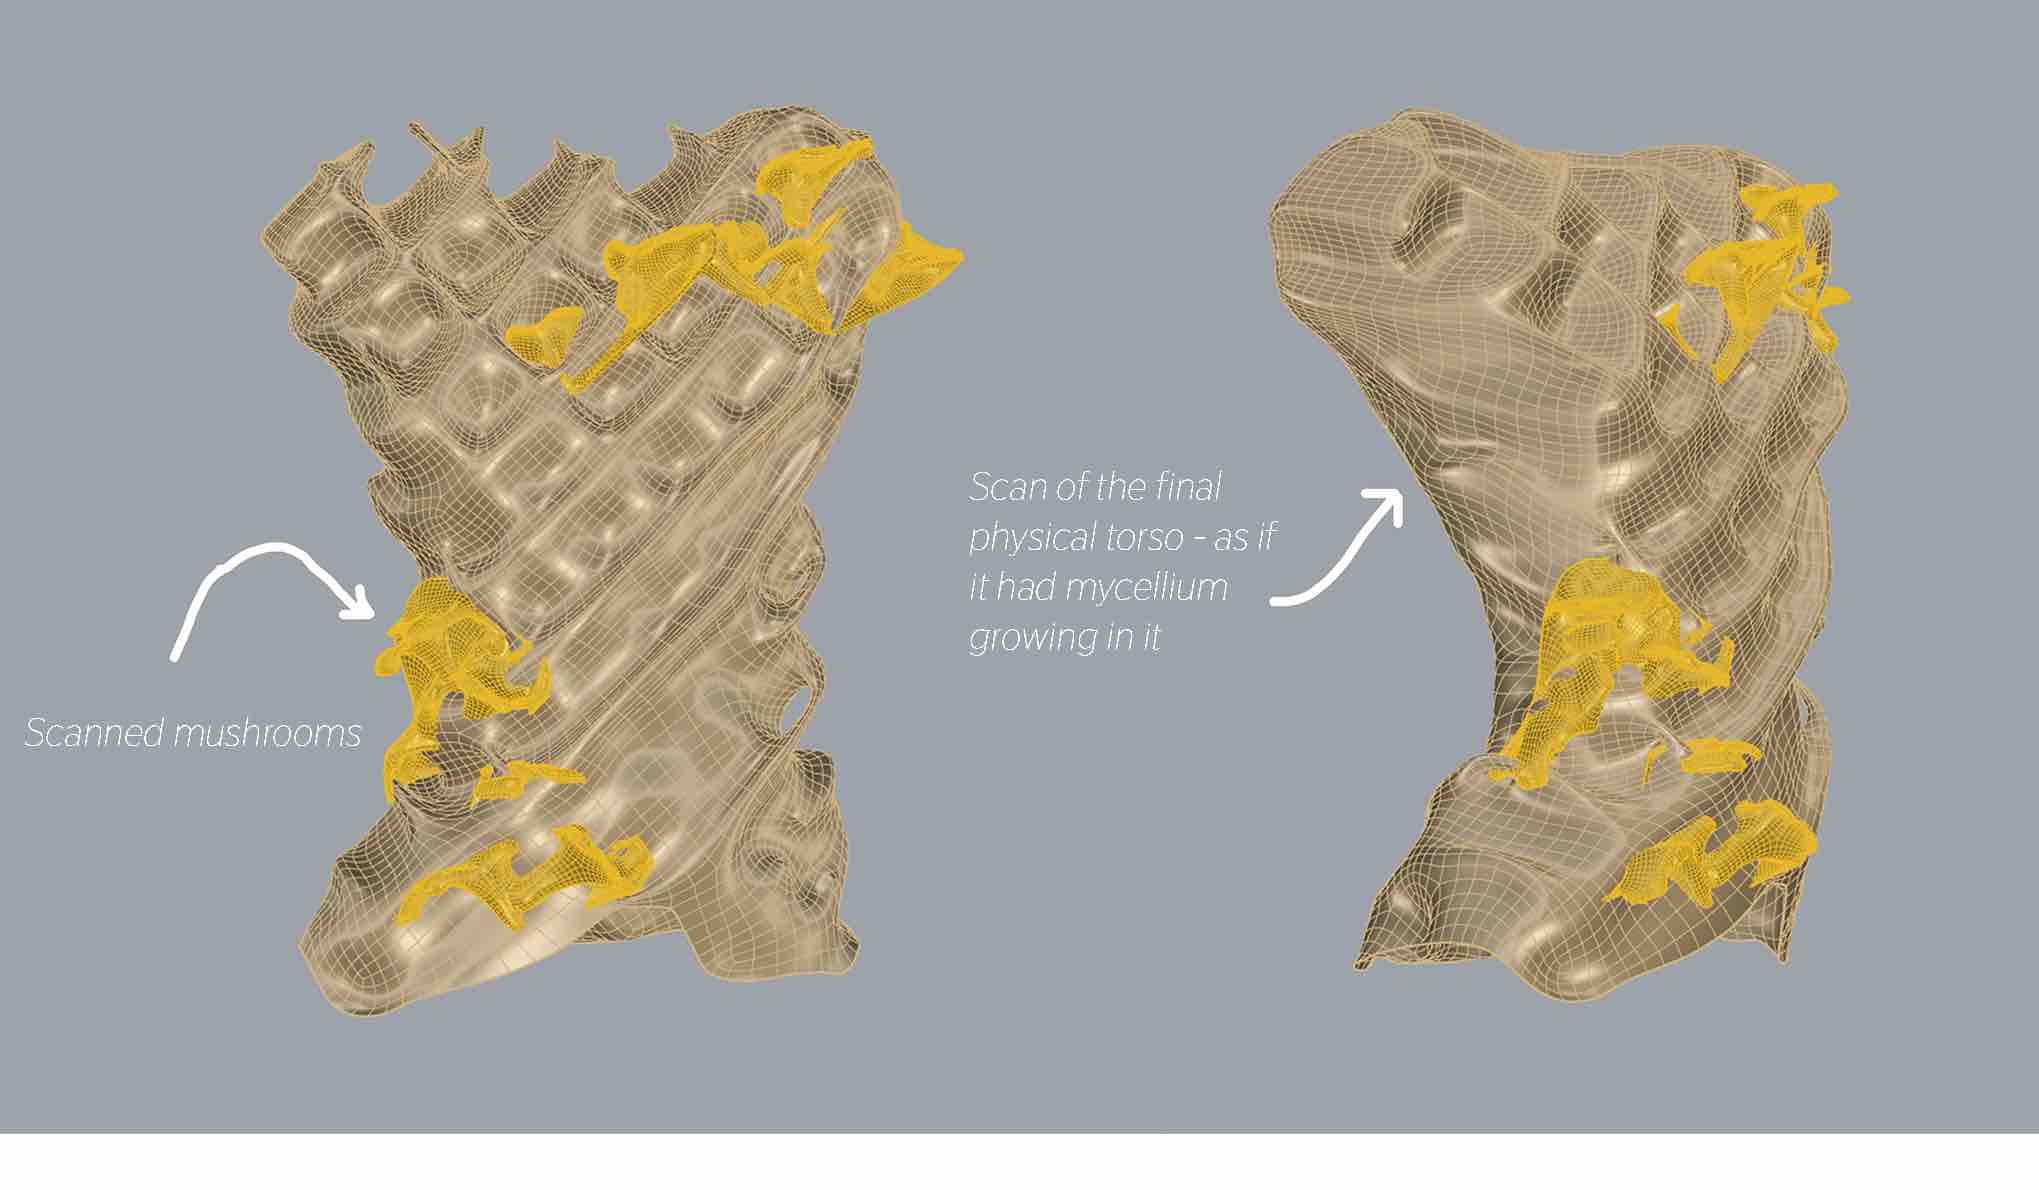
I thought it would be nice to create a 3d model prototype of what the future myco-piece could look like. Using Qlone and Rhino, I created a speculative 3d model.
Step 1 - Qlone
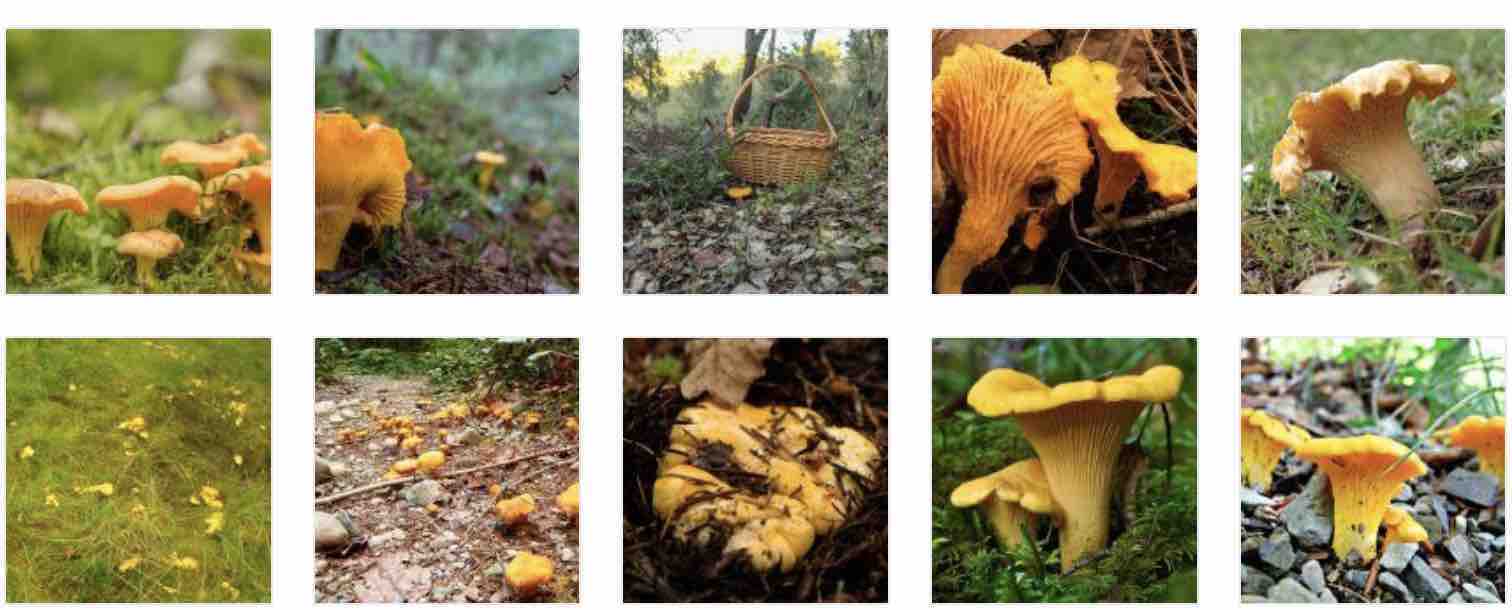
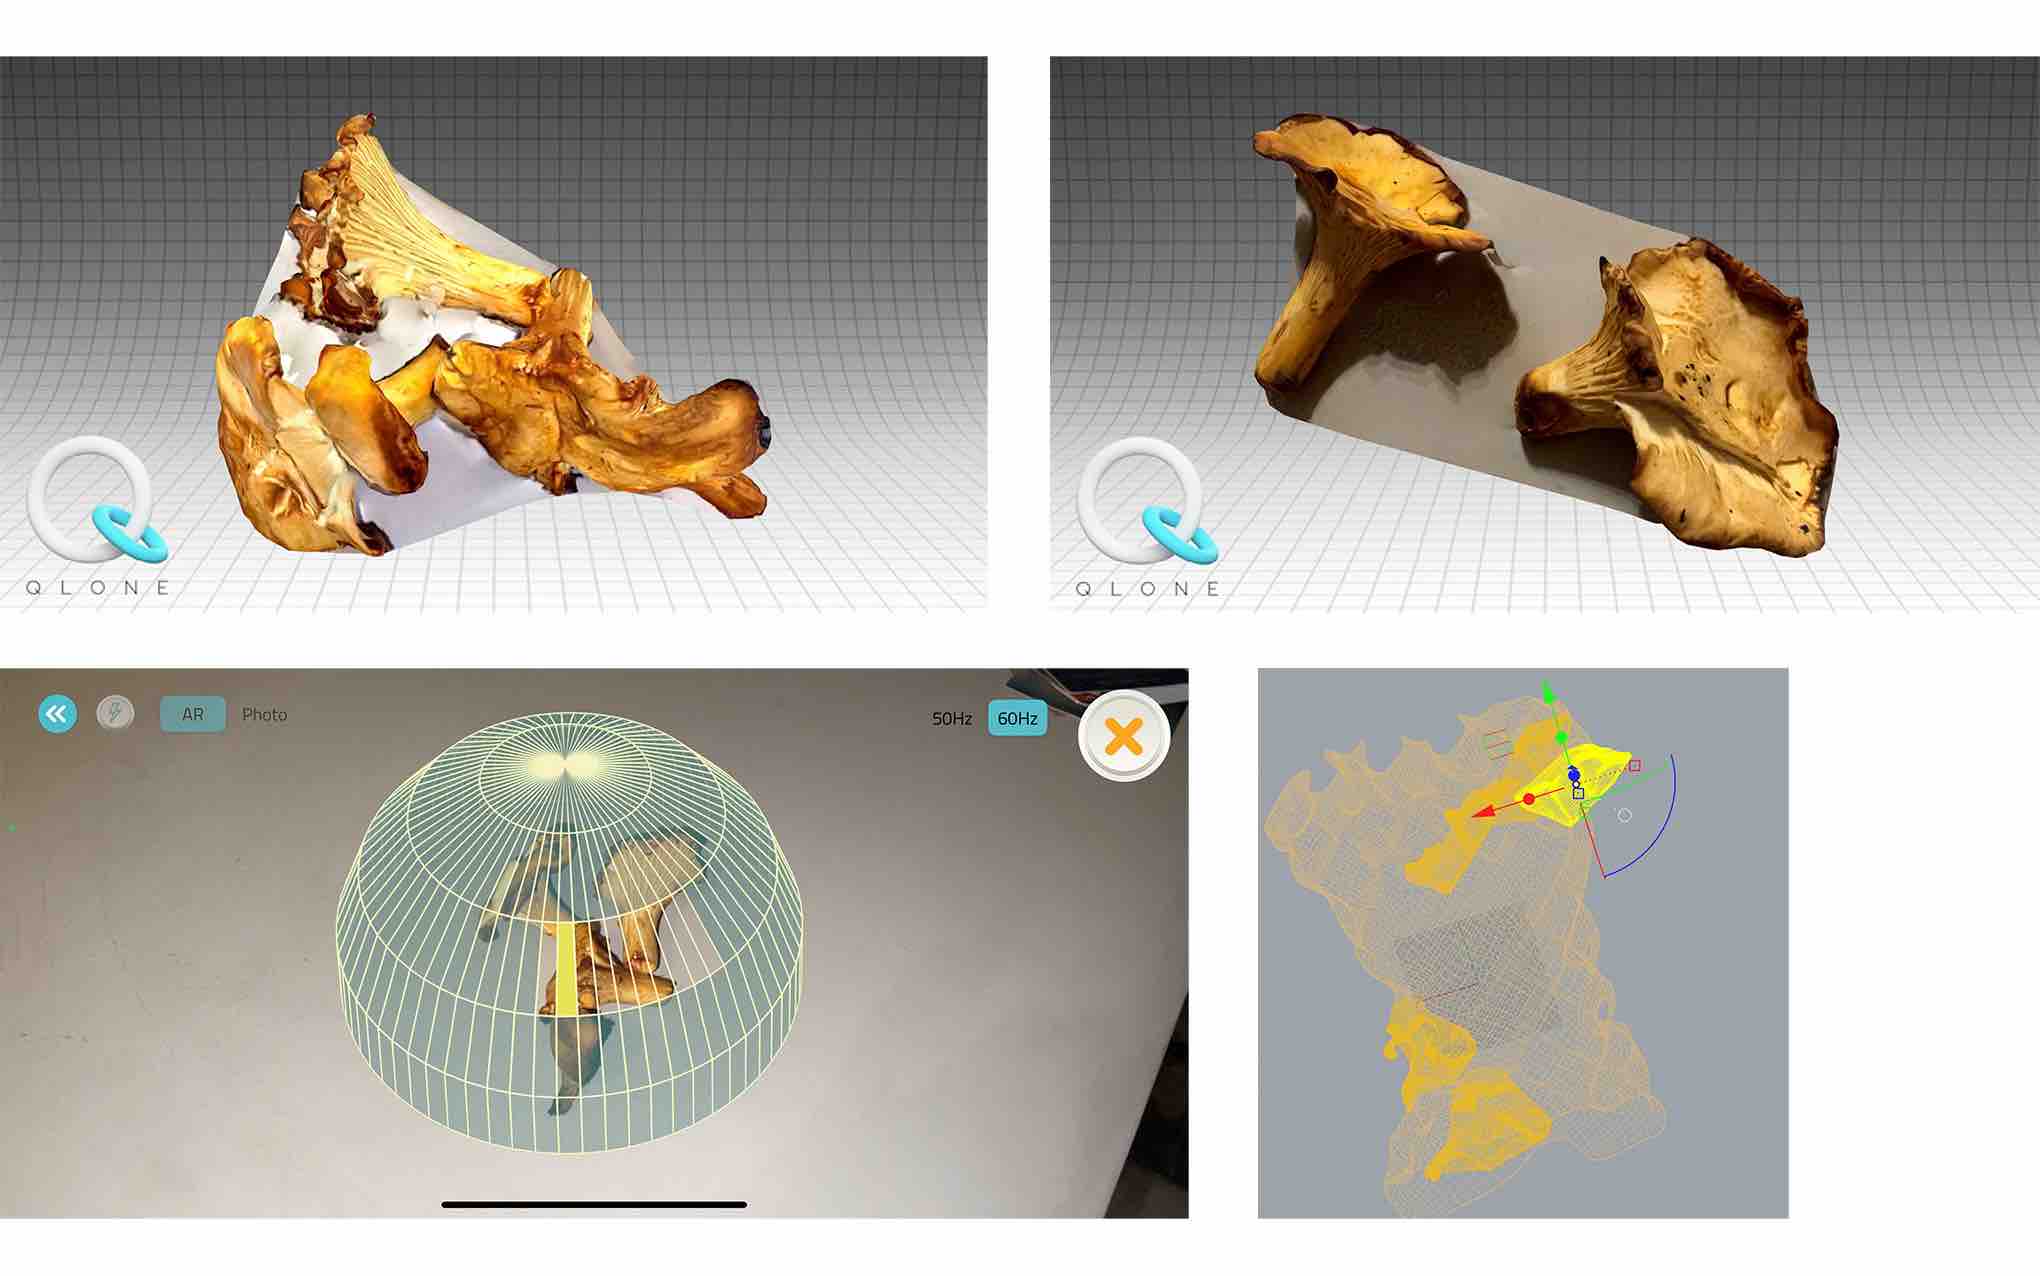
To continue experimentng with some of the technology learned in this week, I used the app Qlone to create a 3d scan of my final piece. I also collected some mushrooms from the store and scanned those as well. I chose Chanterelle / Rossinyol (Cantharellus cibarius) mushrooms because it says they were harvested locally. This kind of mushroom grows in the mountains of Catalonia (learn more). The detail was better than expected but it also captured the table. I should try to put it on a contrasting plate next time.
Step 2 - Rhino
Bringing both of them in to Rhino I configured the shapes togeher using the gumball controls and edited the colors in layers. Here is the final stl3
Fabrication Files
-
File: 3d modelling of mannequin ↩
-
File: Laser cut sheets ↩
-
File: Final Prototype ↩