5. E-textiles
INDEX IMAGE ~ Adafruit Feather
Research
This week we are learning about the conjunction of textiles and electronics with an introduction to soft circuitry and smart fabrics. We are studying how electricity moves and how to measure and control that flow. Our task is to create a creative switch- a break in the circuit with digital (0/off or 1/on) results and sensor - resistance manipulation with analog (range of value) results.
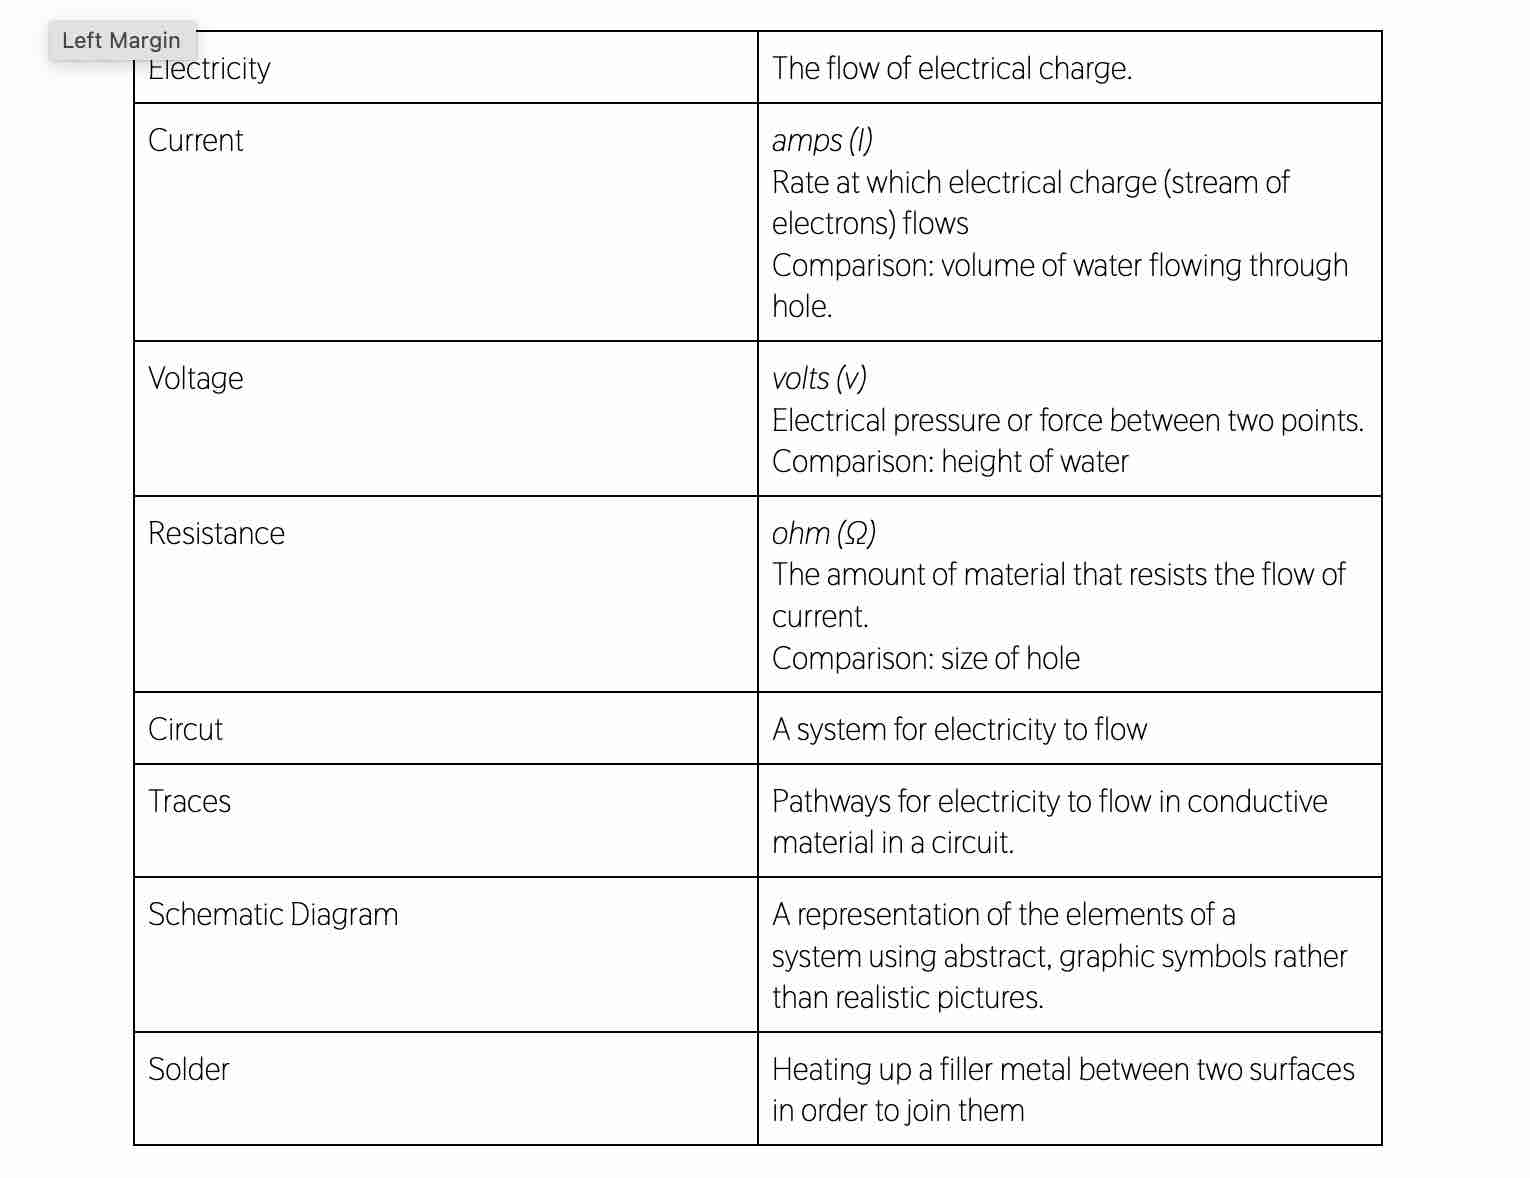
Voltage is Current times Resistance
"The force/power of the energy of the waterfall is equal to the amount of water and
presence or absence of rocks or obstacles in the way"
We learned some basic principles of electricity with Liza Stark:
- Electrons want to flow from a point of greater to lesser electrical energy and take the path of least resistance to the ground (negative energy)
- Electricity flows counterclockwise
- All electrical energy in the circuit must be used (otherwise it will dissipate as heat) (this is why we use resistors to bring down the energy before the circuit is closed)
- Different components play a different role in a circuit
References & Inspiration
Sustainability
Sustainability is always at the front of my mind, that's why most of my experience is with biomaterials and biochromes, rather than something like E textiles. But I am curious if there are ways to make soft circutry more sustainable. While maybe not biodegradable, I started researching ways to address the two main environemntal issues that came up with electonics:
E-waste
E-waste is the toxic waste stream of discarded electronics that is both a waste of resources and has the potential to leach very harmful cheicals into the environment. Most electronics are made with 'planned obsolescence' meaning they are designed to break or slow down and then be thrown away and replaced. The number of waste is growing very fast. Setting up better recycling systems is necessary, but in the meantime, are there ways to tap into these streams and use the resources?
I am inspired by the artist, Alexandra Sipa that takes old wires and cables and fashions them into gorgeous woven textiles. The recycled materials provide interesting form and color through her craftmanship. They elevate and make the pieces unique rather than being a burden to the design.

Extracting Precious Resources
Another problem that comes up with electronics is mining their componants. Reading about these statistics it is clear to see change needs to be made for humanitarian and environmental reasons, as well as the fact that these are finite resources and not reliable long-term, just like fossil fuels.
 In the book Biomemetics for Designers by Veronika Kapsali I read about a Harvard x MIT collaboration project by Allen Chen and Timothy Lu, studying how synthetic biology can be used to alter microbes to produce non living particles like gold nanoparticles and quantum dots (nano semiconducting material particles). They completed some tests with E.coli and invision a future where bacteria could manufacture the elements we need for things like batteries and solar cells. Here is a concept photo for this hybrid bio - electronics.
History
“The first computer was weaving: the binary code, 0101, under over under over”
Victoria Manganiello
“Indigenous female weavers were innovating centuries ago, and during the 19th century, Ada Lovelace, who’s frequently credited as the first computer programmer, was herself inspired by the Jacquard loom, an apparatus that uses punch cards to direct threads in each row of the industrial weaving process.”
Source
This quote by Victoria Manganiello and the analysis speak on her project with Julian Goldman, called “Computer 1.0” that explores the relationship of textiles and technology. It pays respect to weaving as one of the first forms, or basis of of technology. Powered by an Arduino, air and color water are pressed alternatly through tubing that runs through the textile using Goldman's code creating a dynamic, moving pattern.
C O M P U T E R 1.0 from victoria manganiello on Vimeo.
I also enjoyed reading this article, similarly about looms and the Jacquard punch card inspiring coding and technology.
Resources
Tools
Learning Arduino
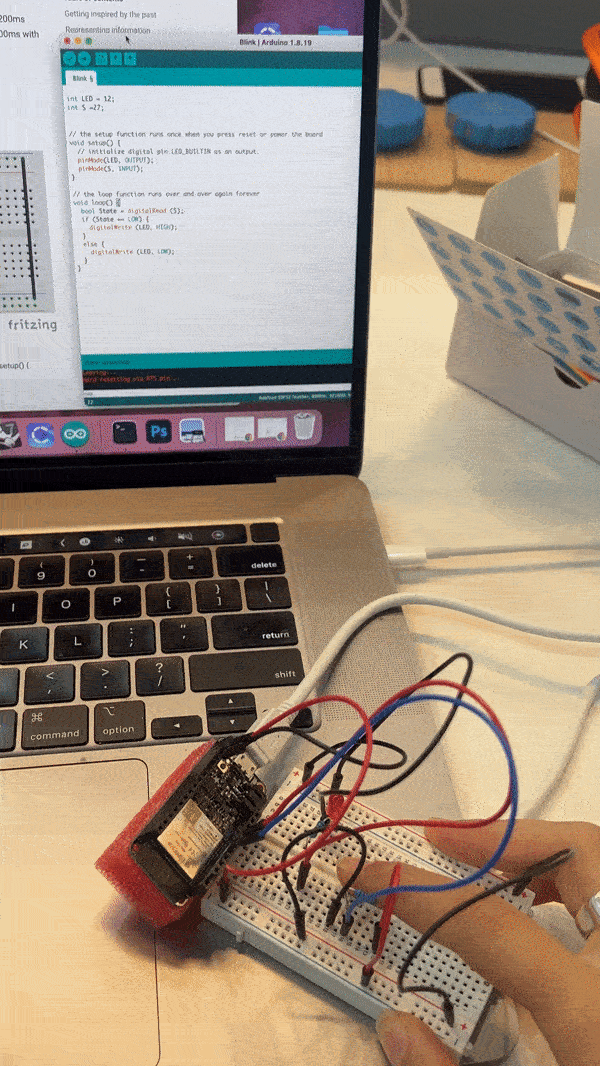
Thanks to Josep and Emma we learned how to use the arduino program to code with the physical board.
- Use file>examples>basic>blink to do a basic test for your circuits.
- There are two main functions that you start with void set up and void loop the first refers to the first run, and the second refers to every run repeating afterwards. You can define more functions as you go, name them, and refer to them in other parts of the code.
- For analog values, replace digitalWrite with analogWrite then change the high or low to a number value. We had to turn on the analog library under sketch>includelibrary before this.
- The mapping function Re-maps a number from one range to another. It's used like:
We set up basic circuits and read the values coming in using the serial moniter
map(value, fromLow, fromHigh, toLow, toHigh)

Calculate the total of a circuit
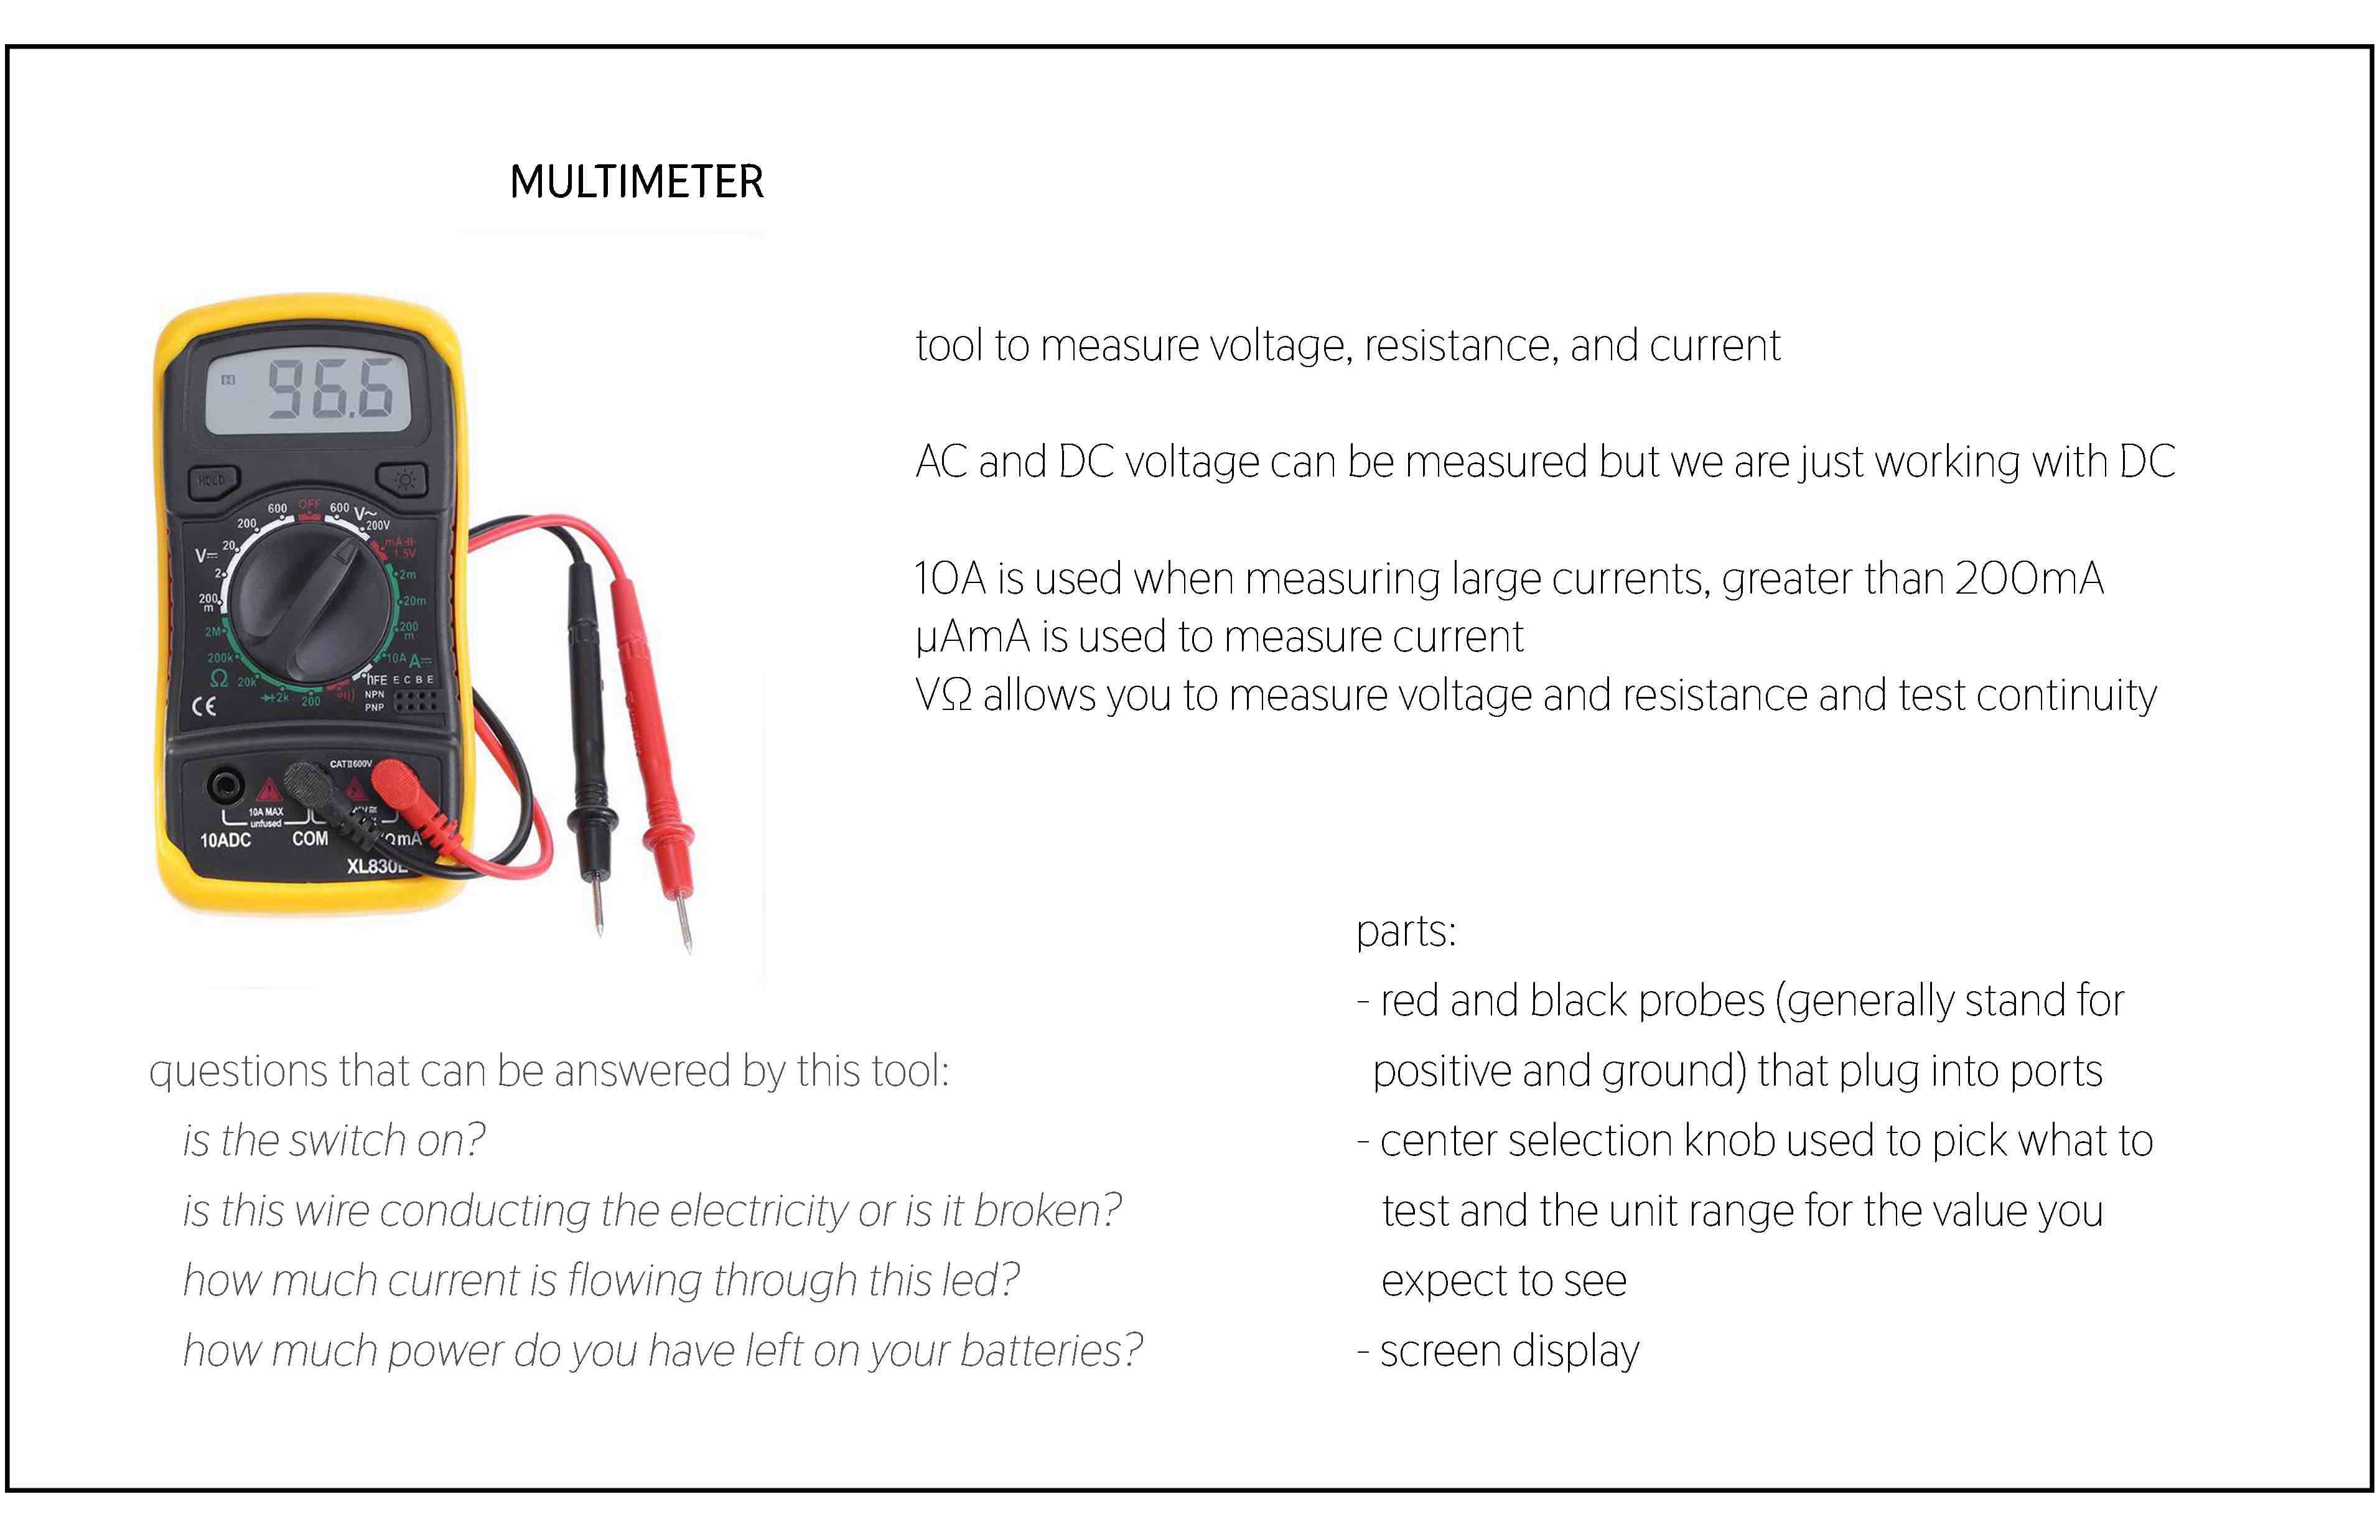
- Take the total voltage using the multimeter
- Find the number for the led lights in spreadsheet for brand (depends on length and current)
- Subtract this number from the total voltage
- The number you get is the voltage for the resistor
- Get everything to base units and put in Ohms equation (second found number over first found number)
- The result is the resistance amount in Ohms
Process and Workflow
Concept
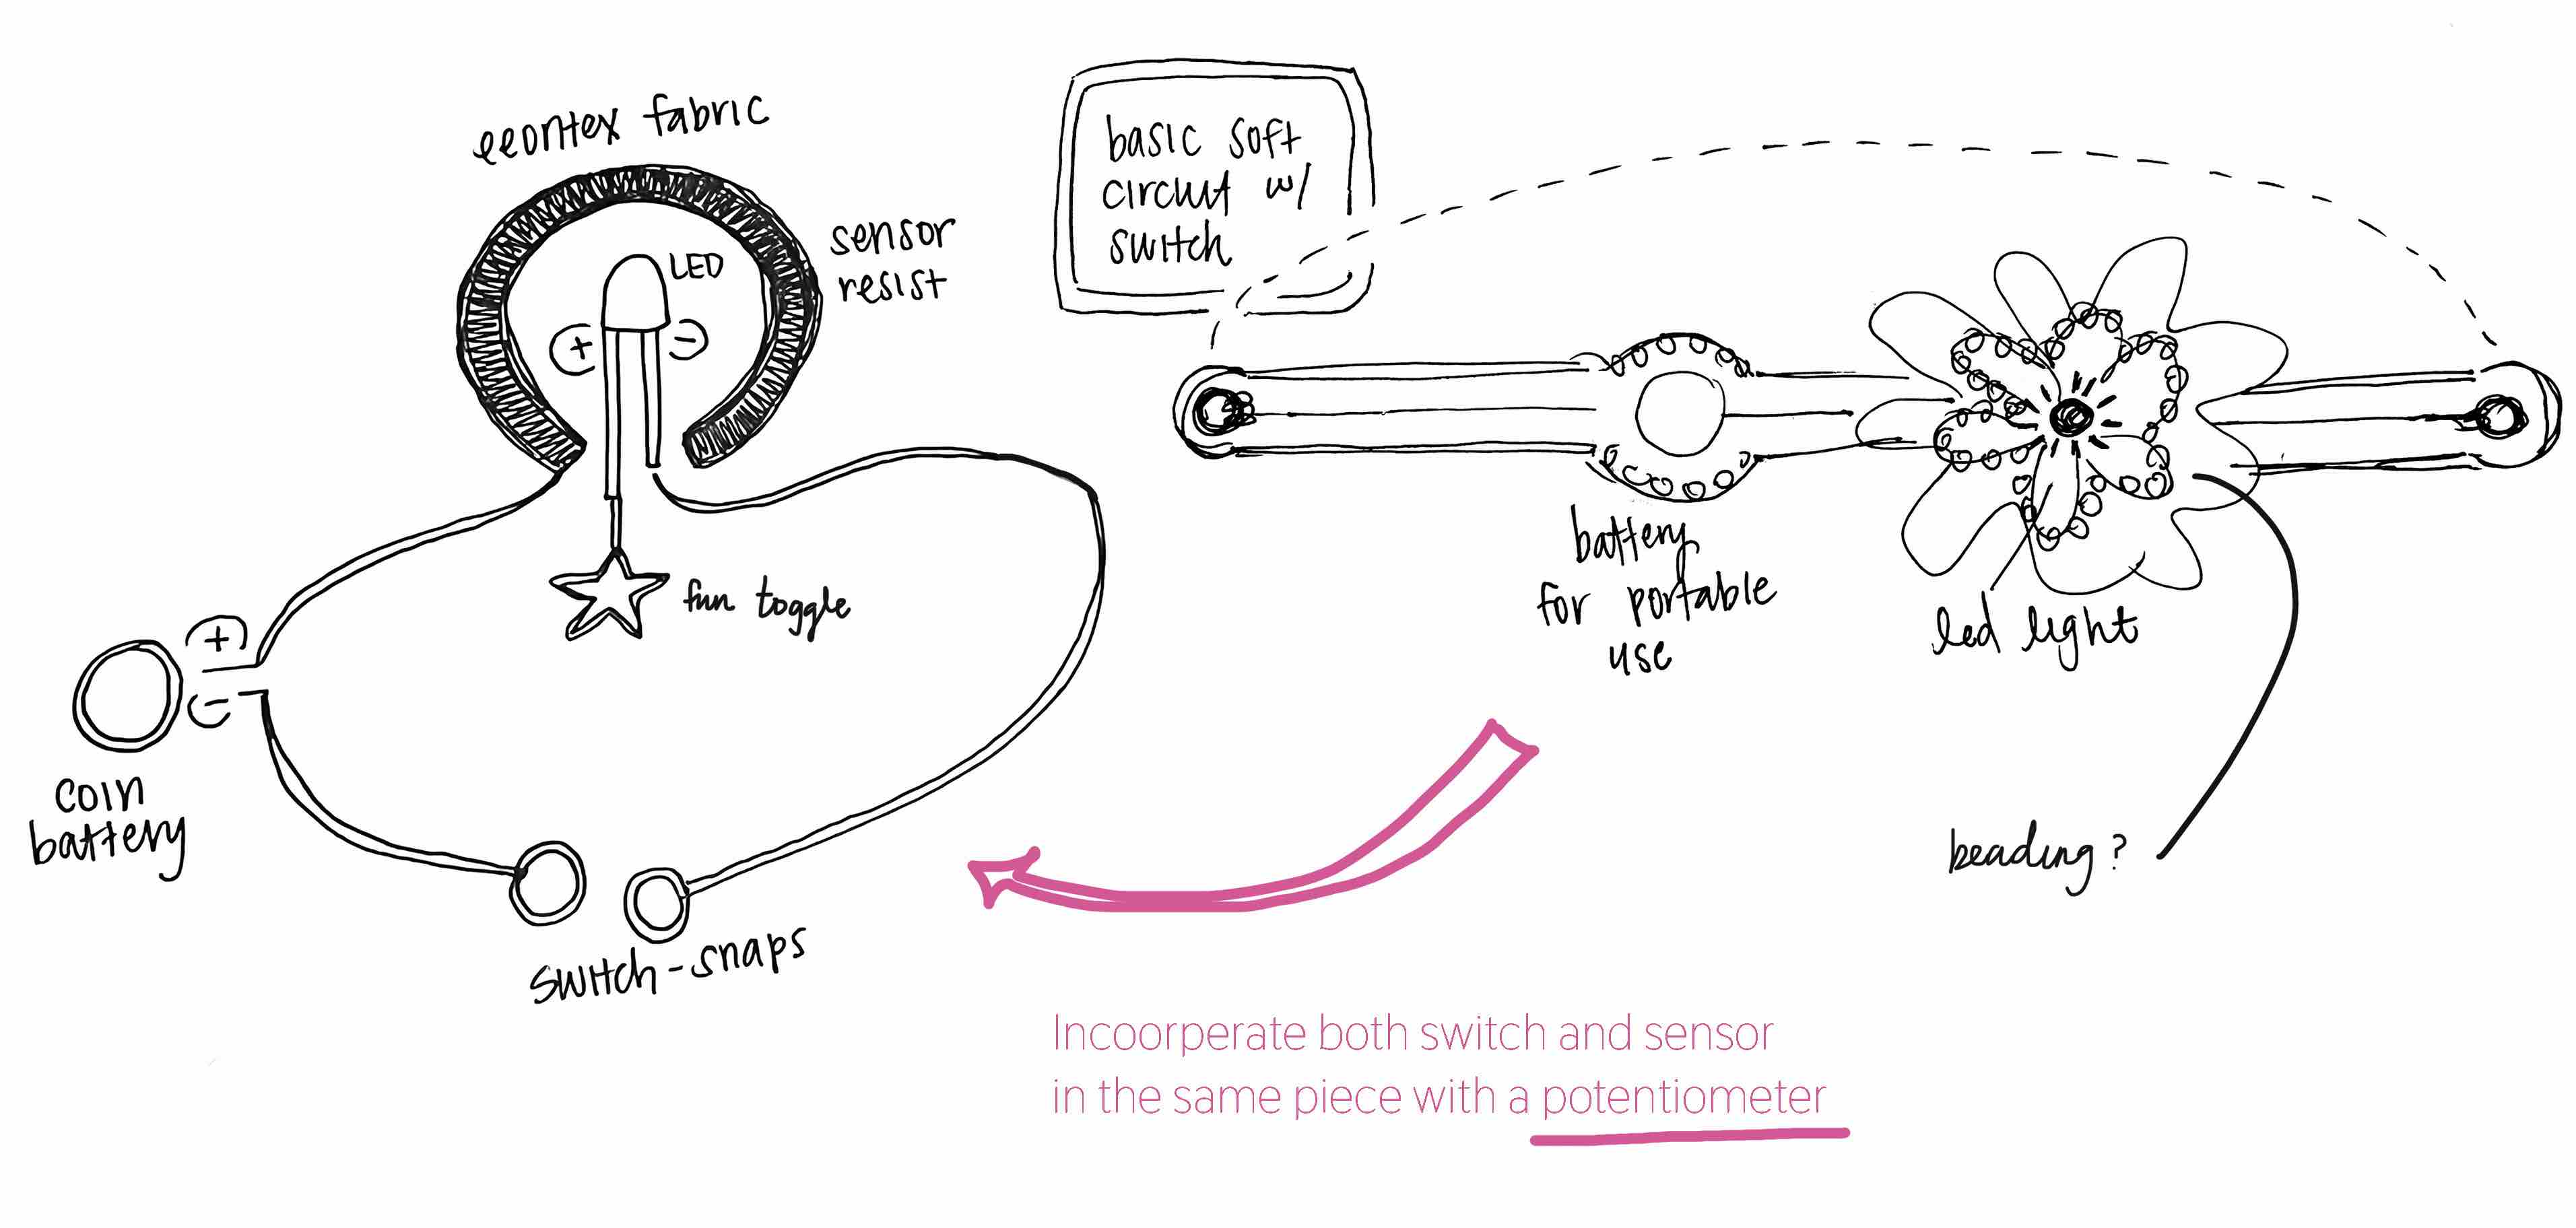
At first I was thinking simply and wanted to create a basic soft circuit in the form of a bracelet or necklace with an led light - centered flower and the switch would be the closing snap clasp. When talking with my teachers we thought it would be interesting to make an accesory with both the clasp switch and some kind of sensor that would effect the light in the flower. We started experimenting with eeontex and making a potentiometer.
The pressure sensor fabric was very inspiring to work with, and made me think about how touch and intimacy can be accentuated or visualized through the textile on one's skin.
Sketches and Tests
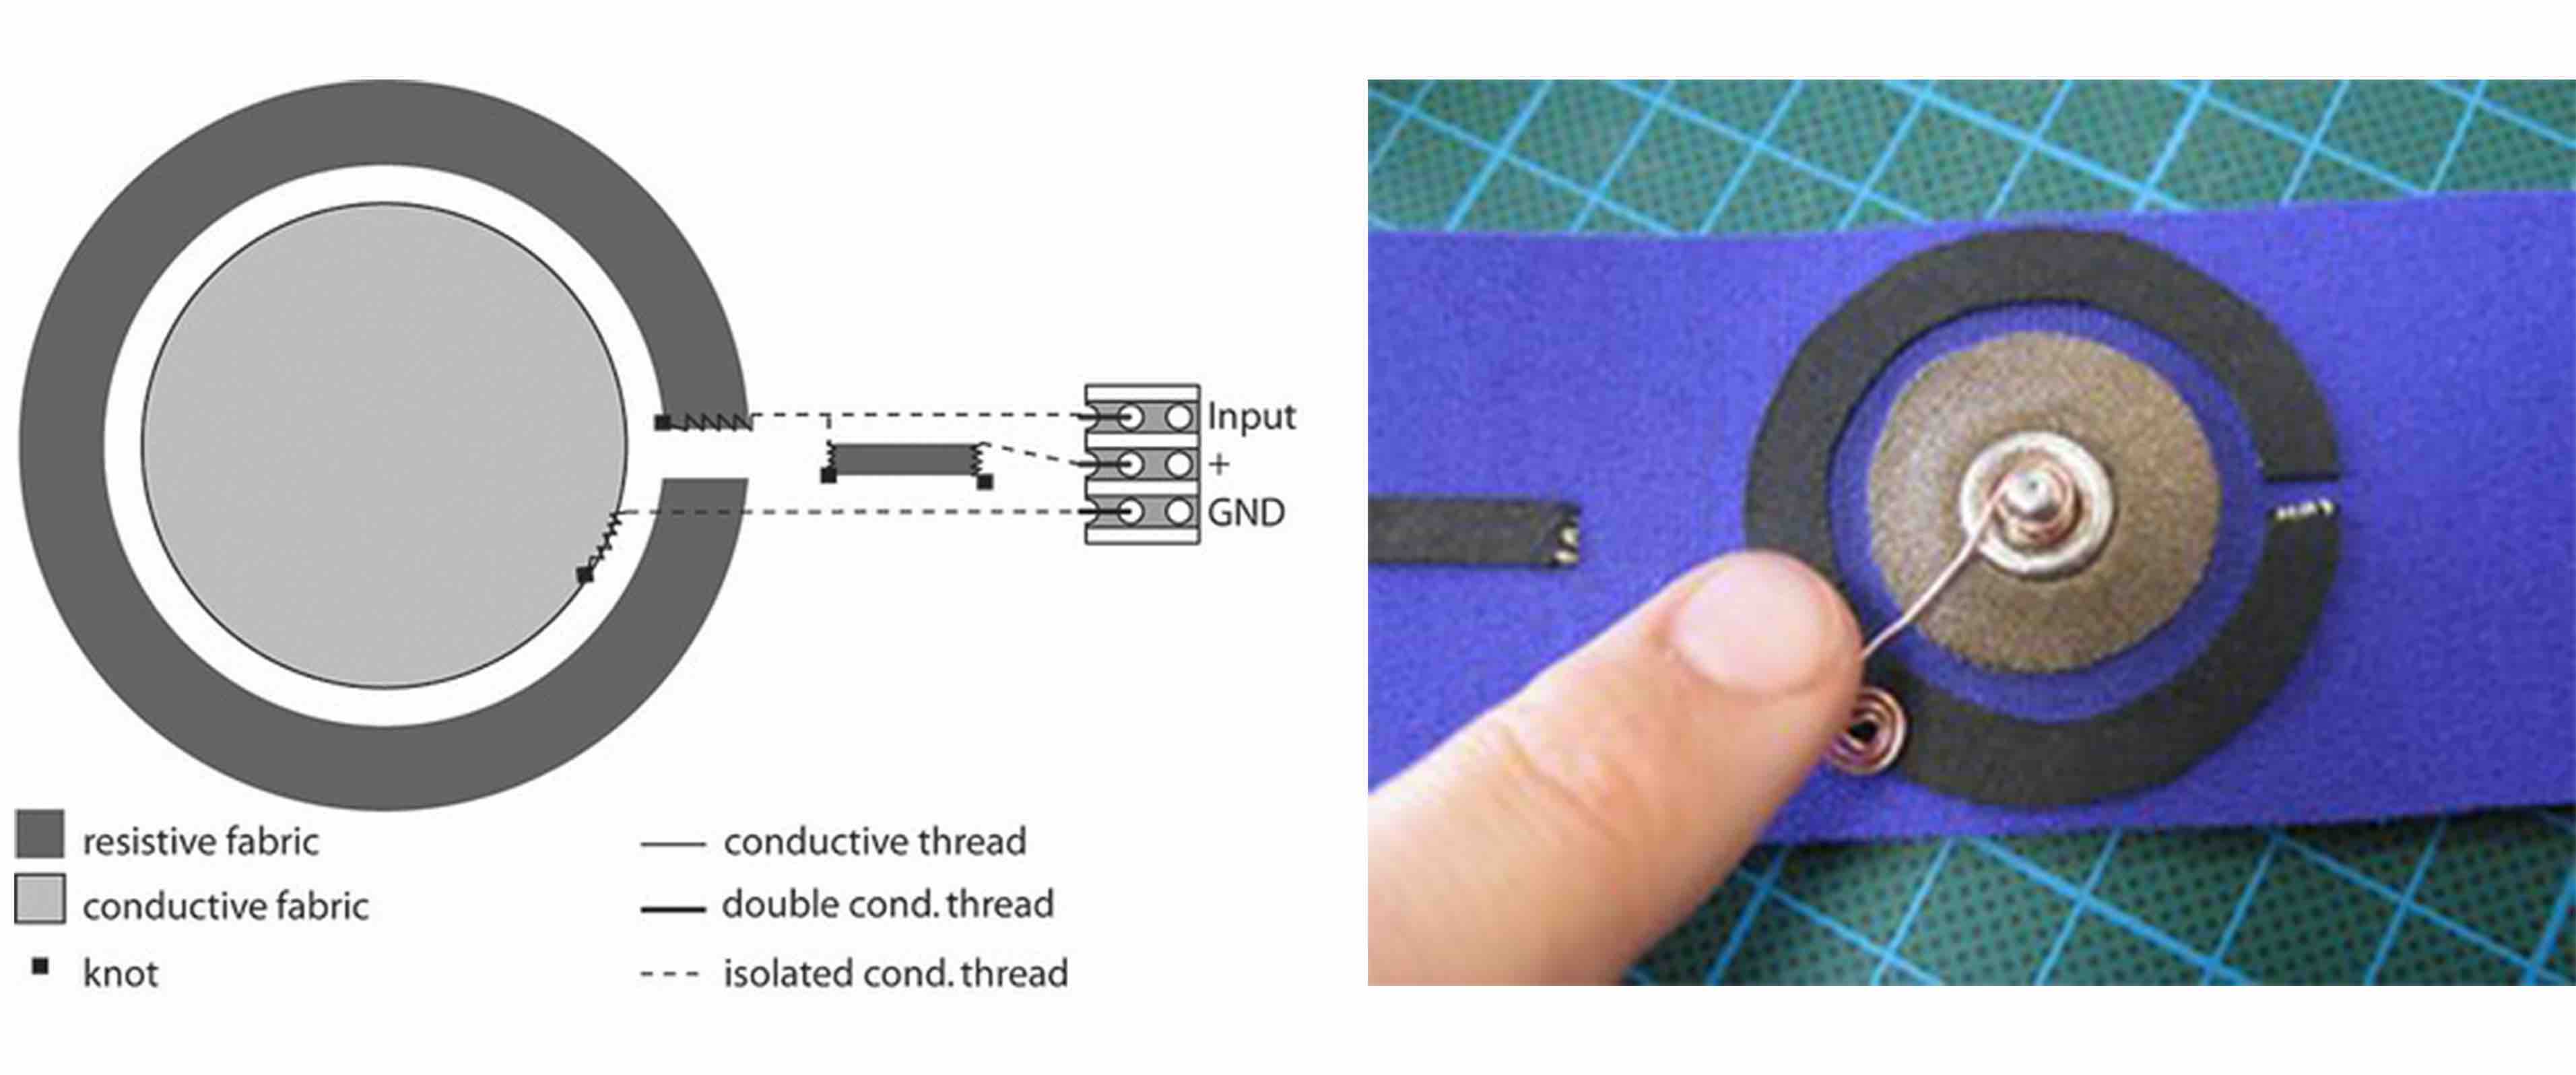
 I used this very helpful documentation to understand how the potentionemter is made and how it functions. Here are two images from that.
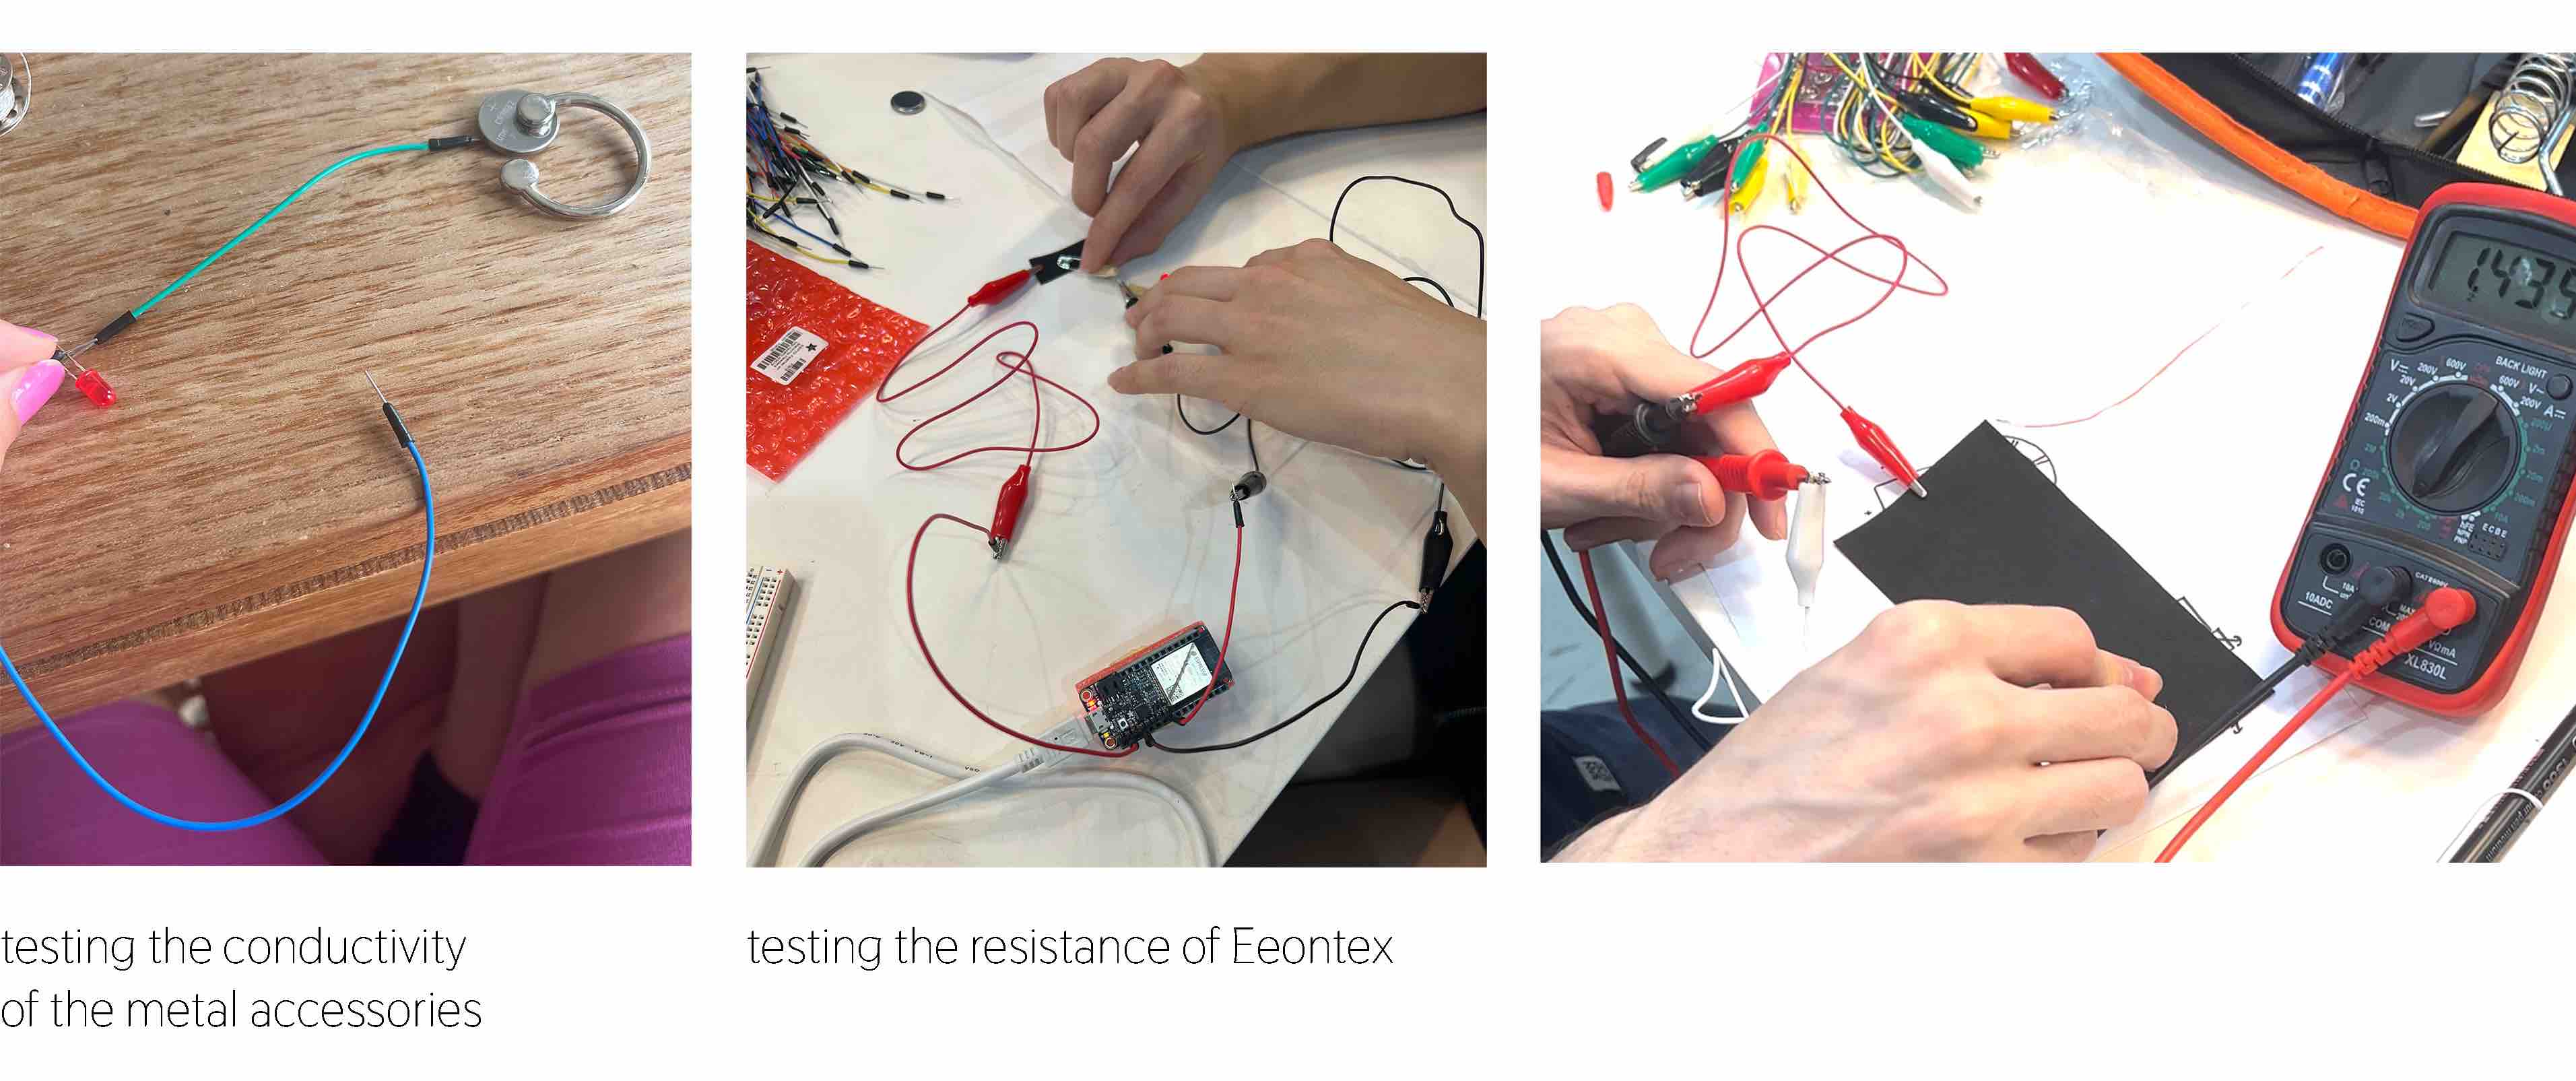
 I gathered some interesting metal jewelry pieces and accesories to work into my designs. Here I tested them first just to make sure the conductivity was ok. I also worked with Ana and Josep to test the fabric and use the multimeter to get an exact read on the resistance caused by the fabric. We saw that while the current dropped slightly by dragging the safty pin (our negative line connector) creating more distance, the fabric responded more strongly to pressure (touching hard or soft). We realized that the potentiomenter needs a voltage divider to function properly, the Eeontex strip needs to be connected to the negative line as well.
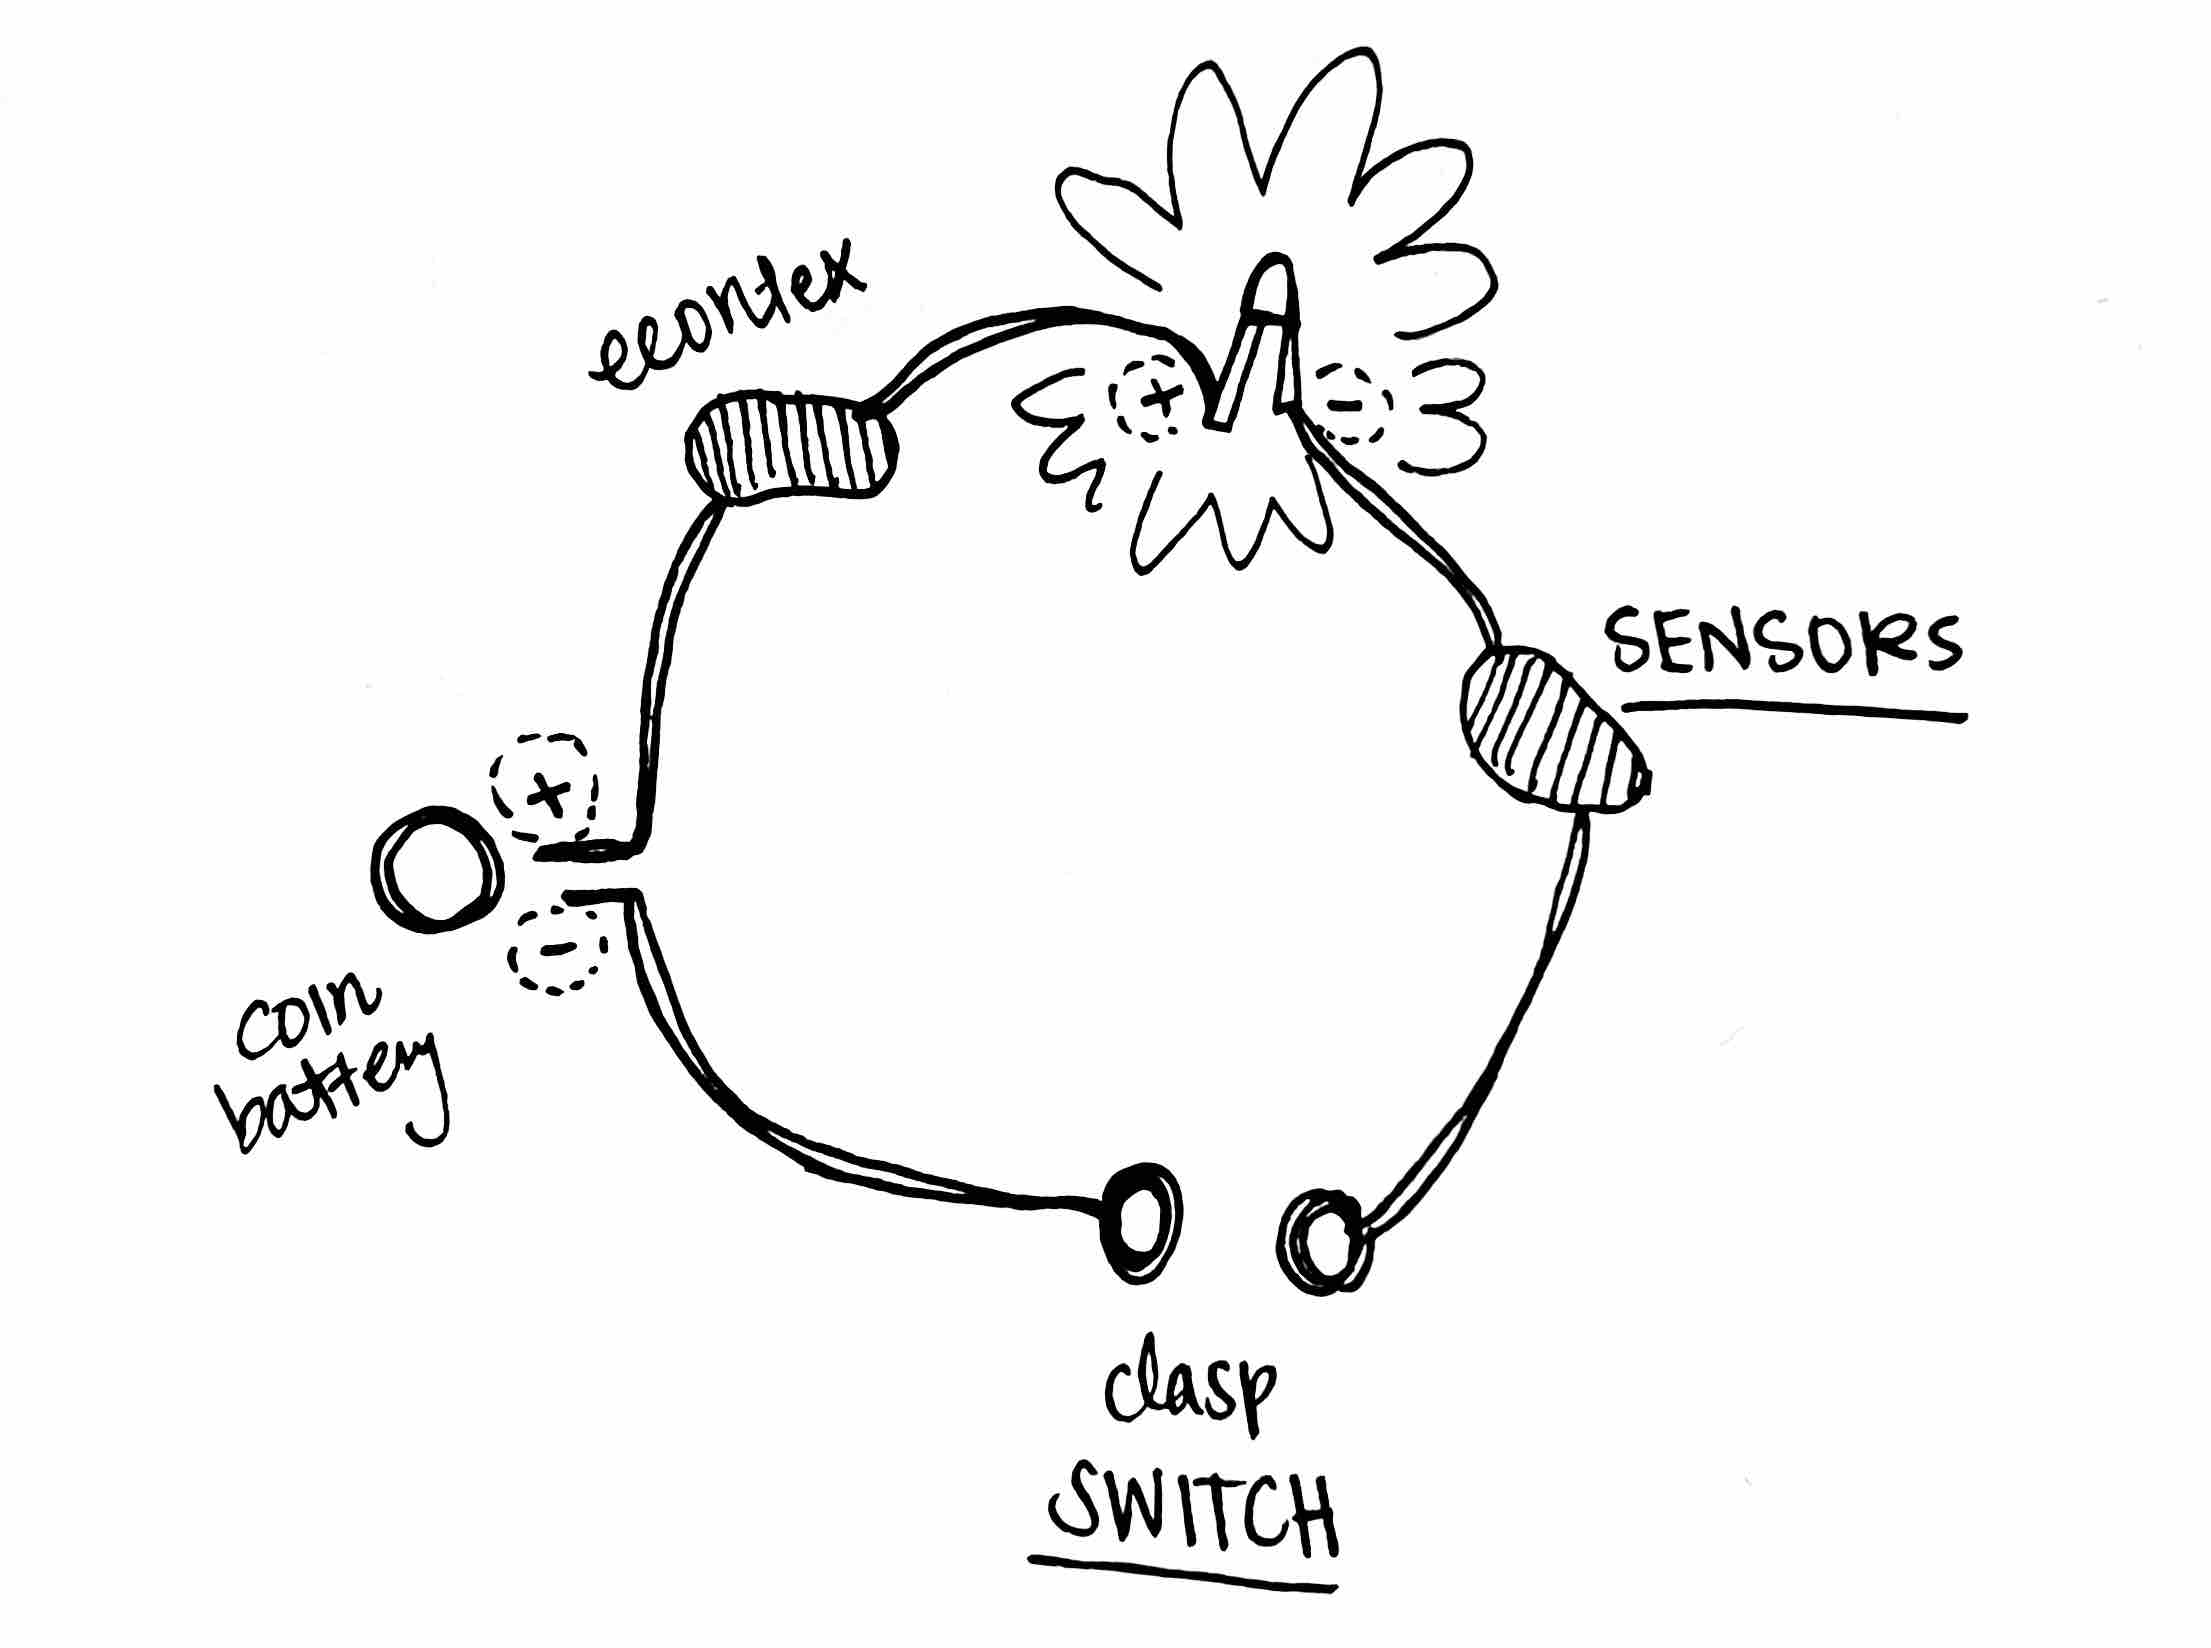
 This is a basic image explaining a voltage divider and my project final circuit looks like this:

Making
SUPPLIES
- beads
- conductive thread and regular thread
- coin battery
- eeontex conductive fabric and any other scrap fabric
- metal accesories
- led light
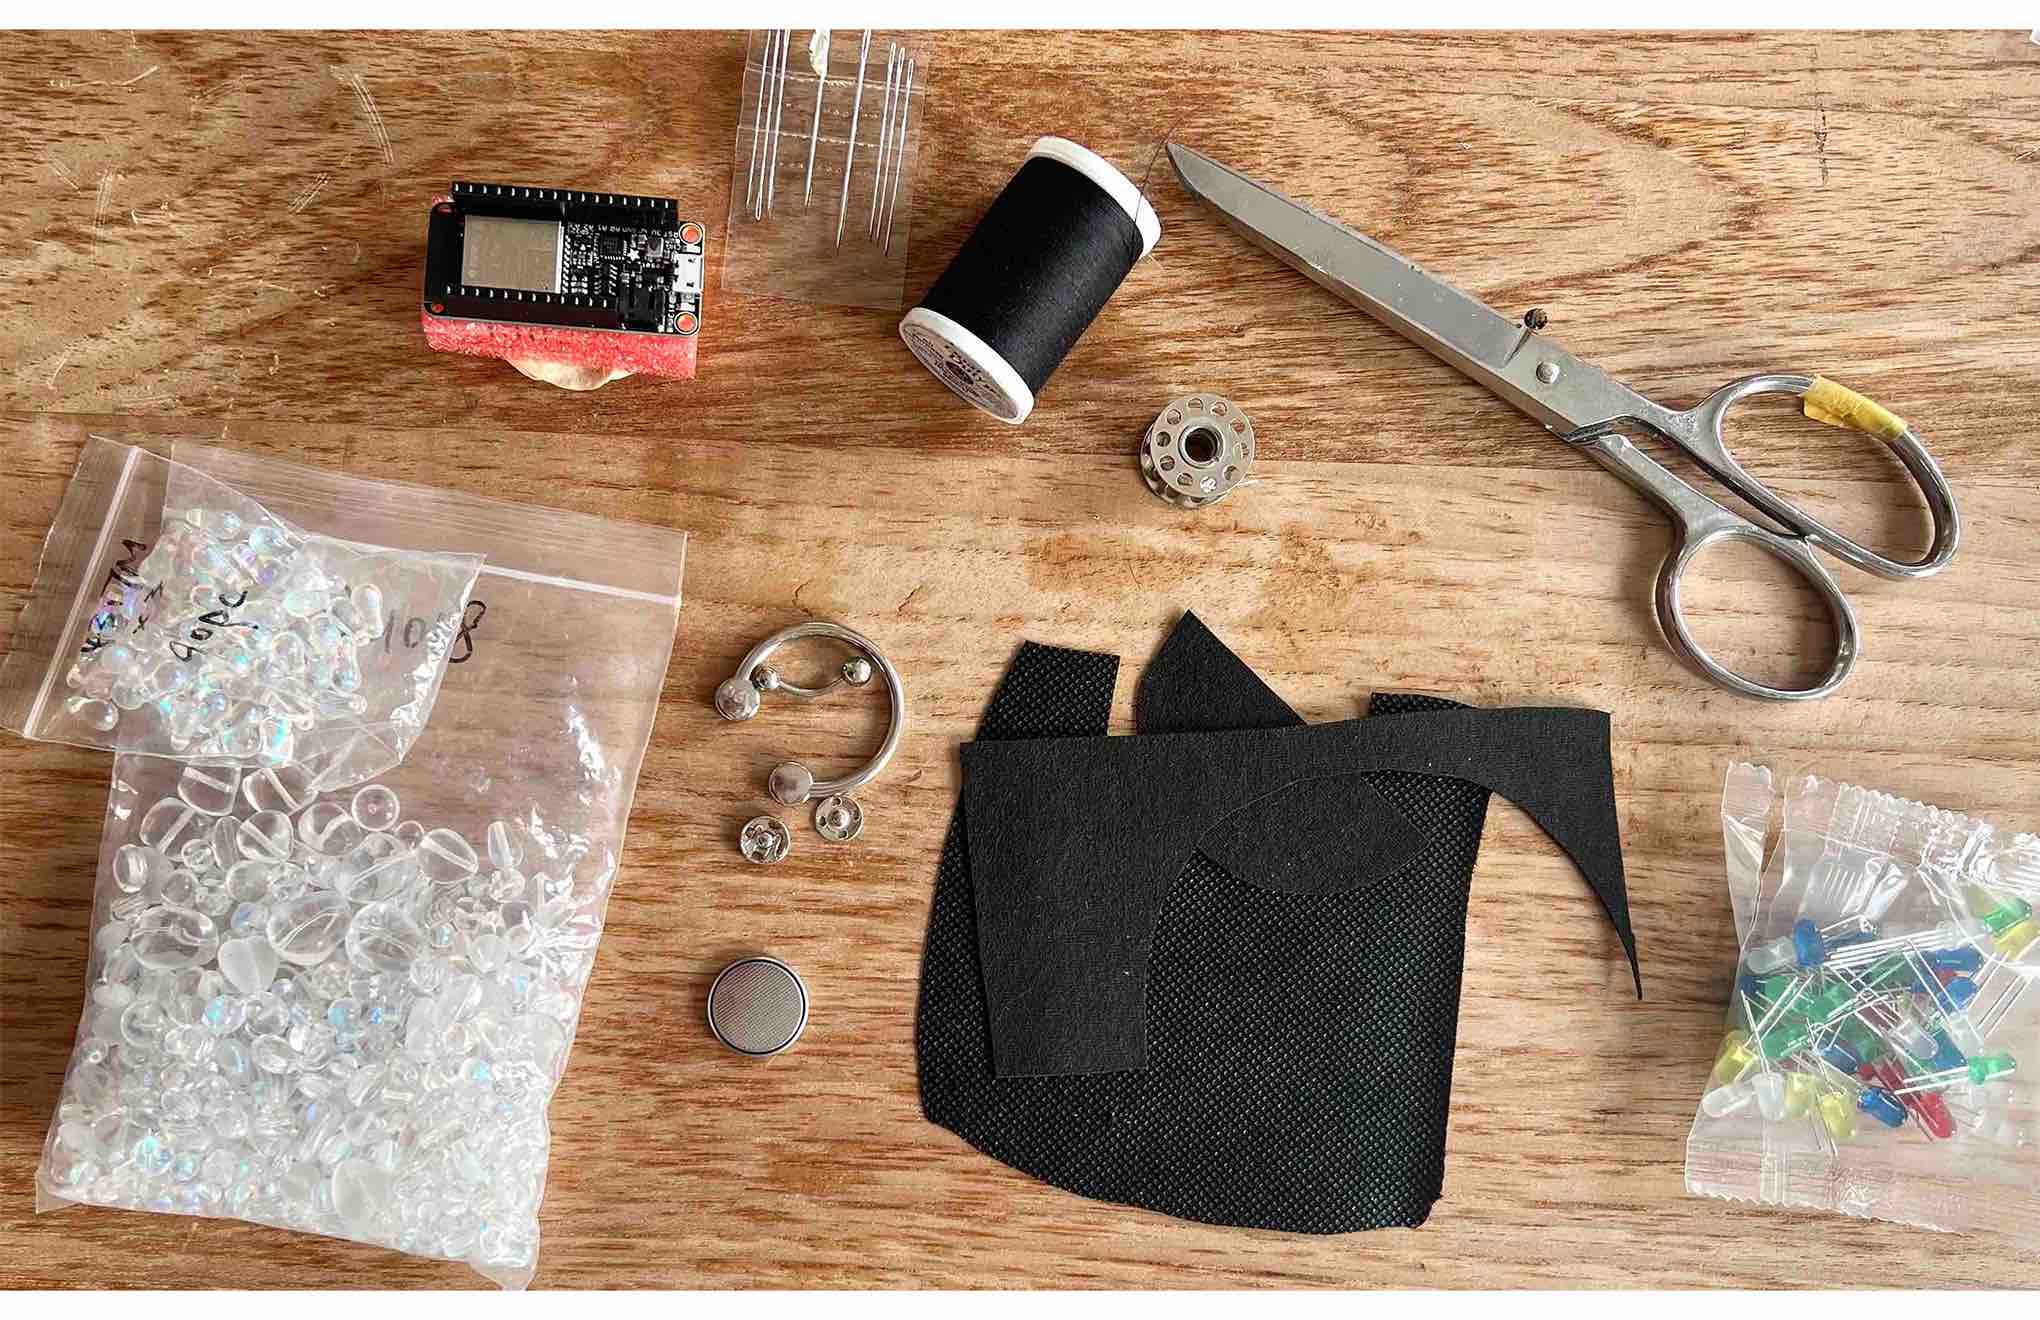
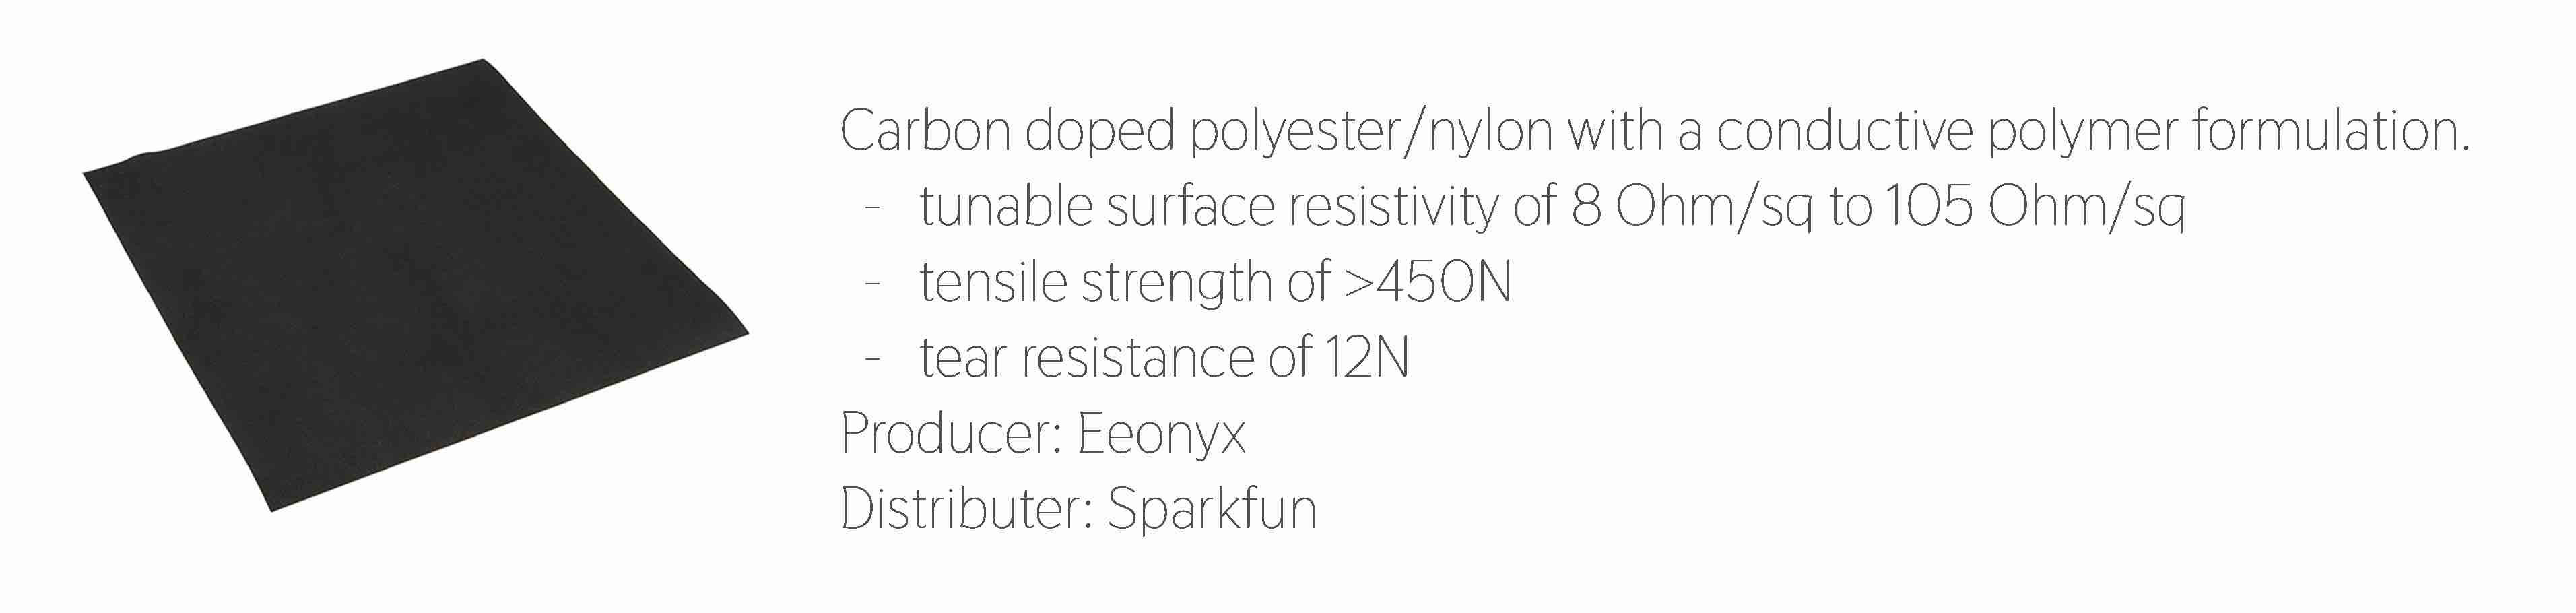
EEONTEX NONWOVEN FABRIC
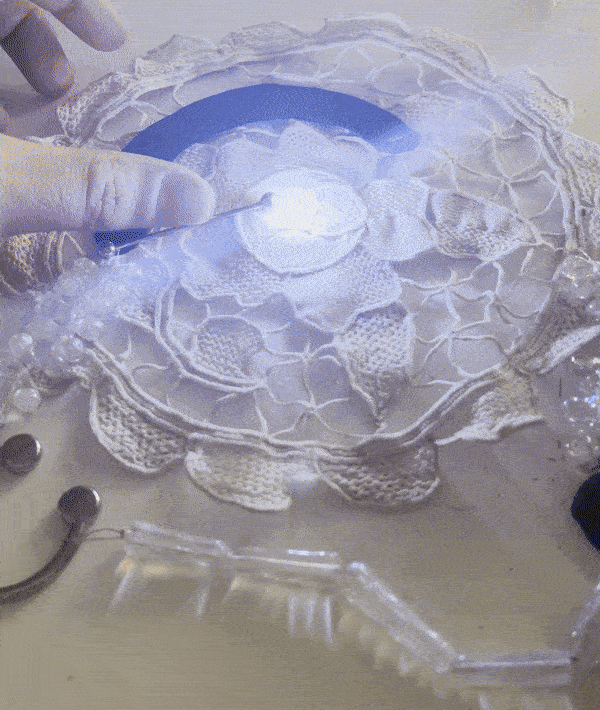
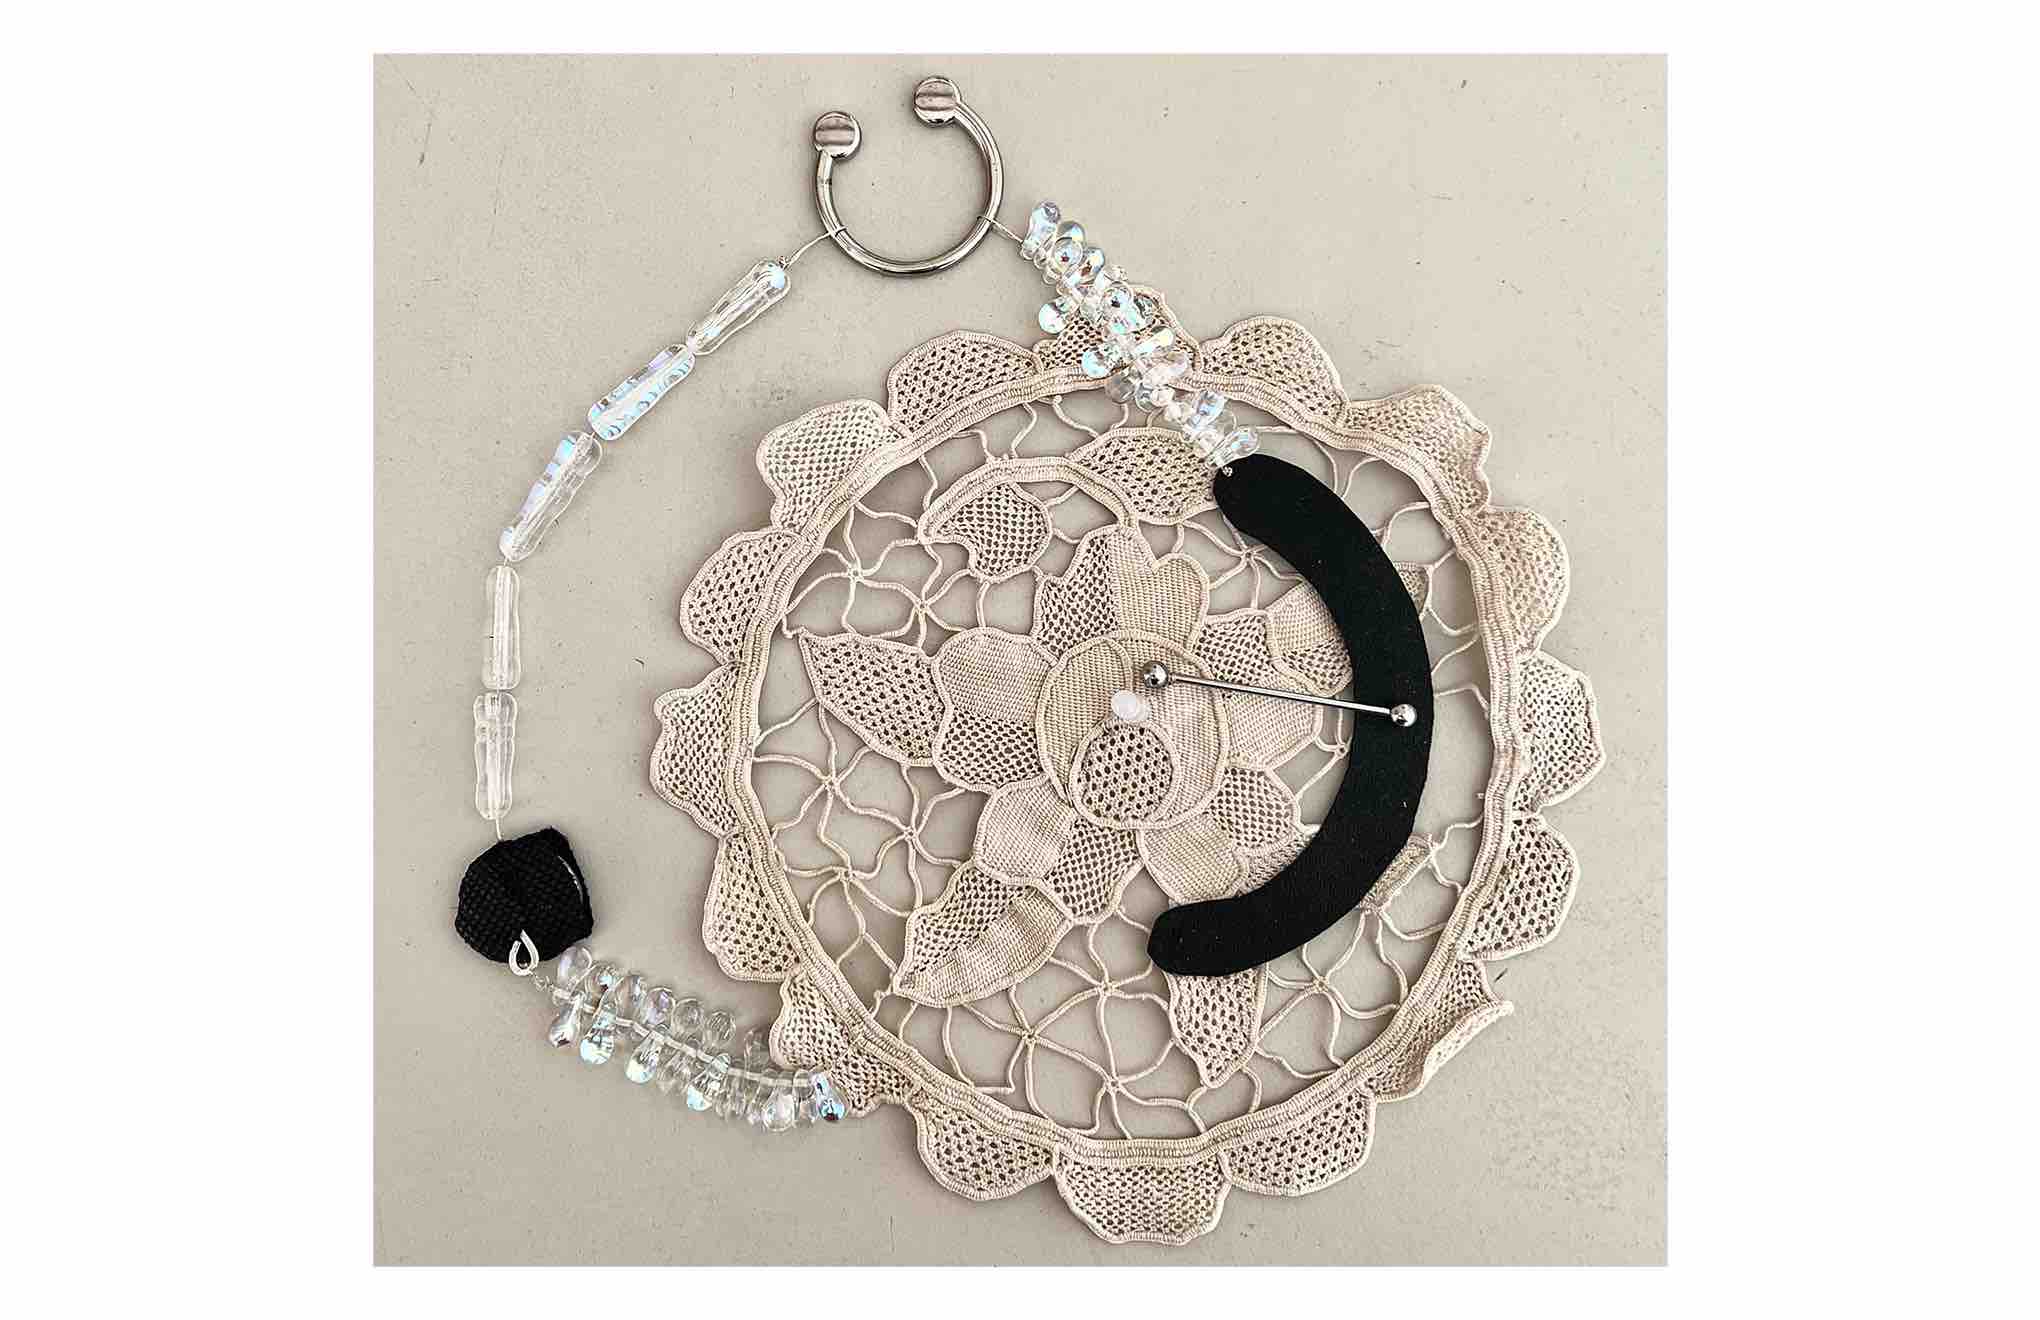
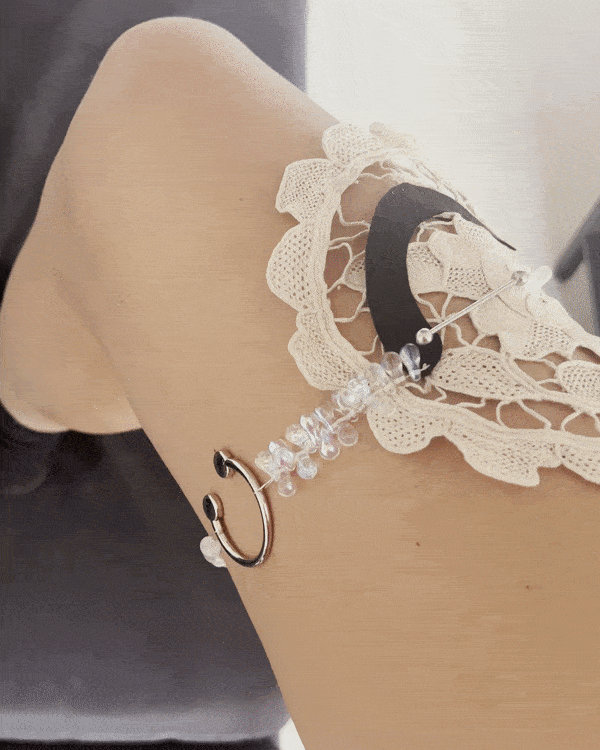
my project adapted along with the materials I was playing around with. I strayed away from a bracelet because I wanted to use the jewelry bar as a toggle on the potentiometer and that made the scale bigger. So I grabbed this doily I had at my house and started working around that. I tested wearing it around my jeg, kind of like a strange garter, you can see this in the results. I was mostly focused on testing different connections and playing with materiality.
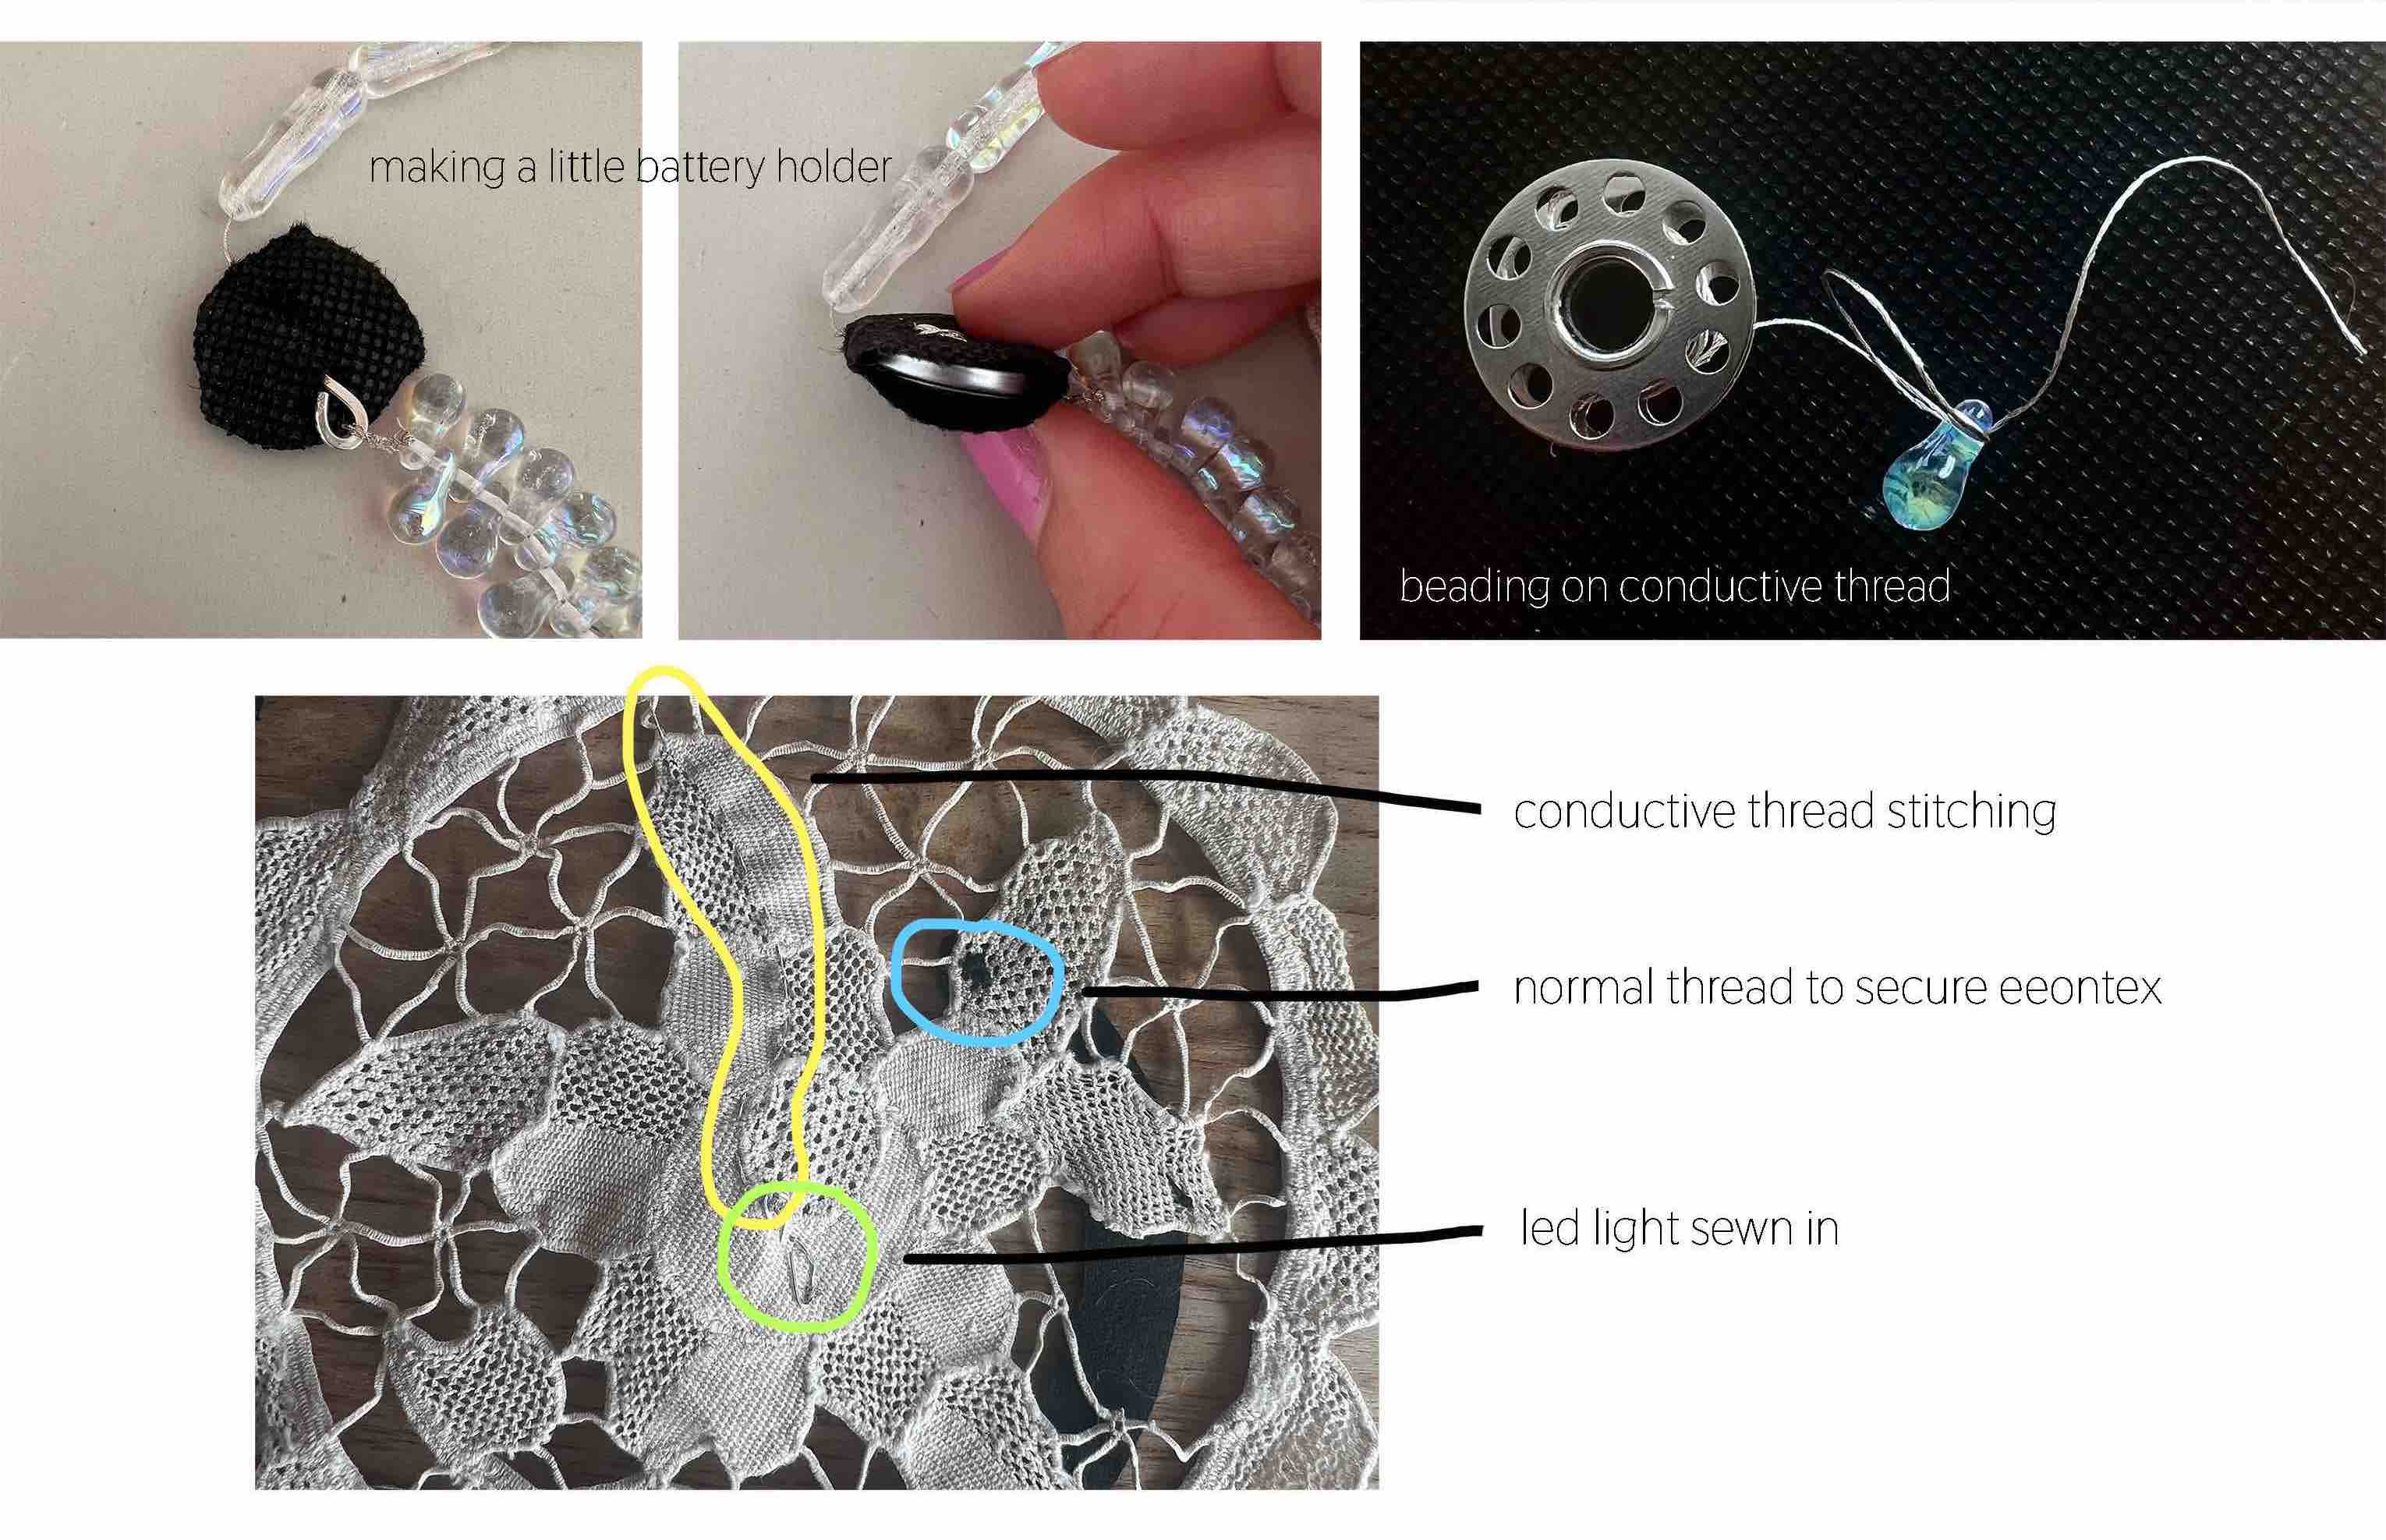
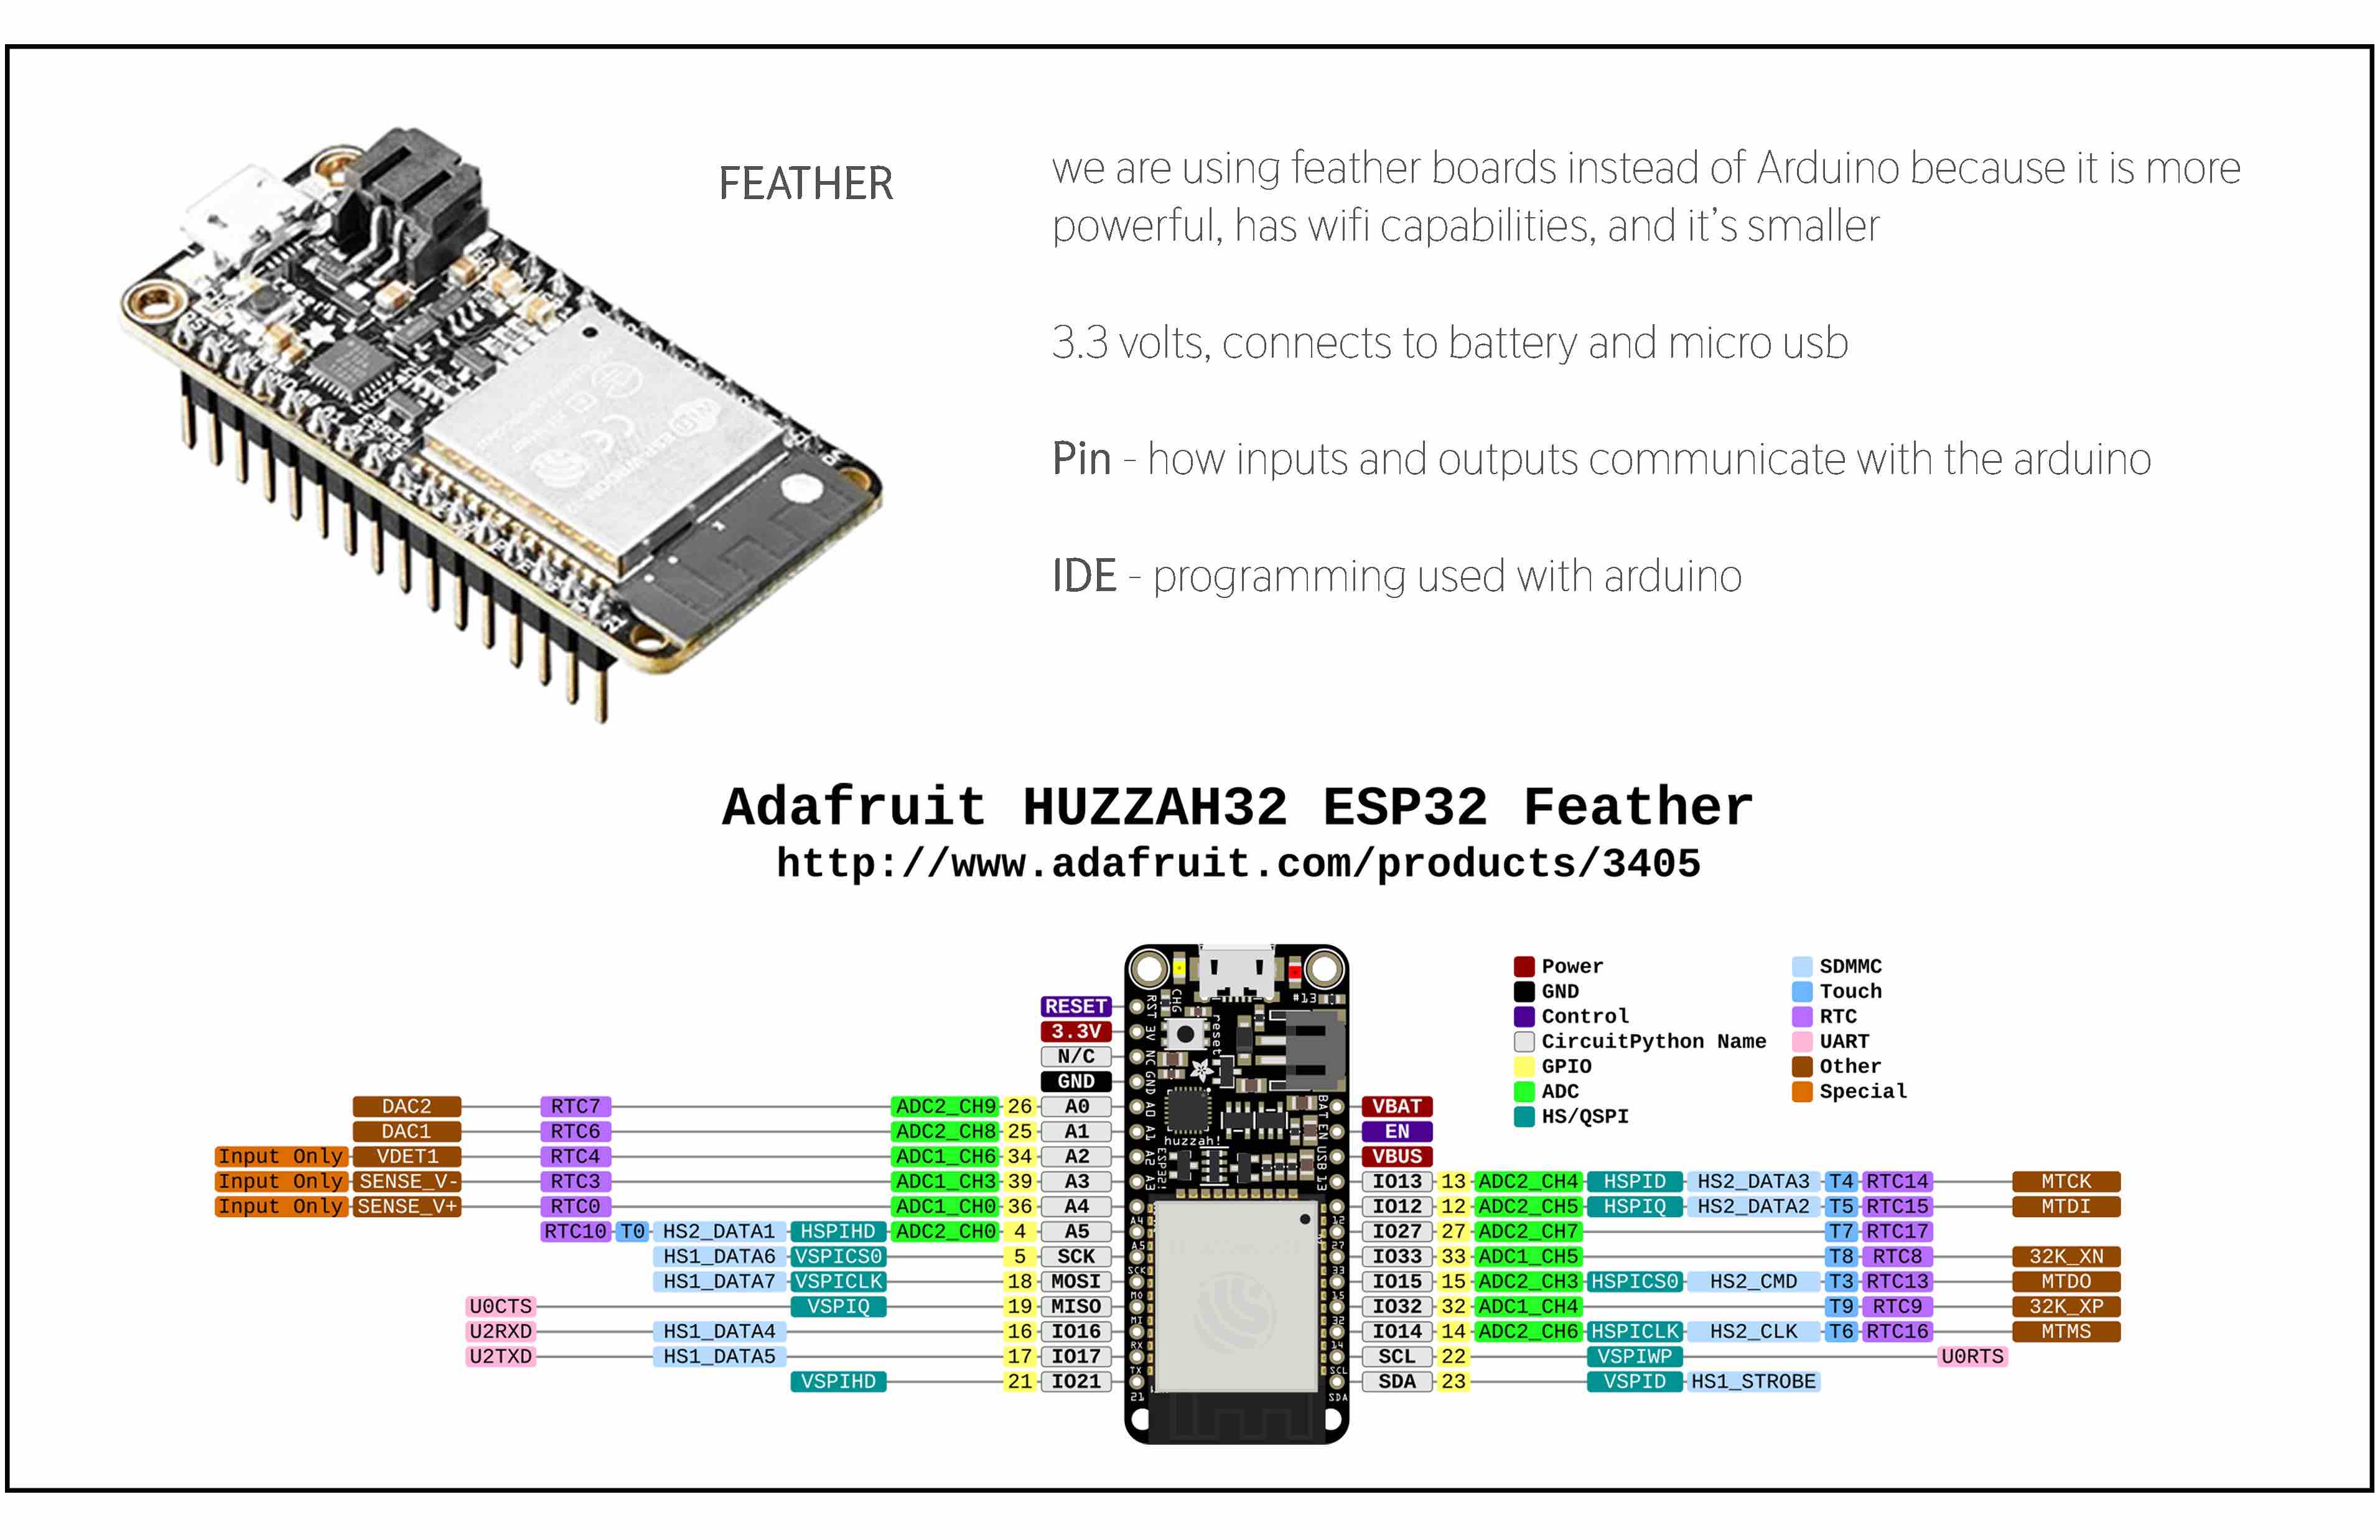
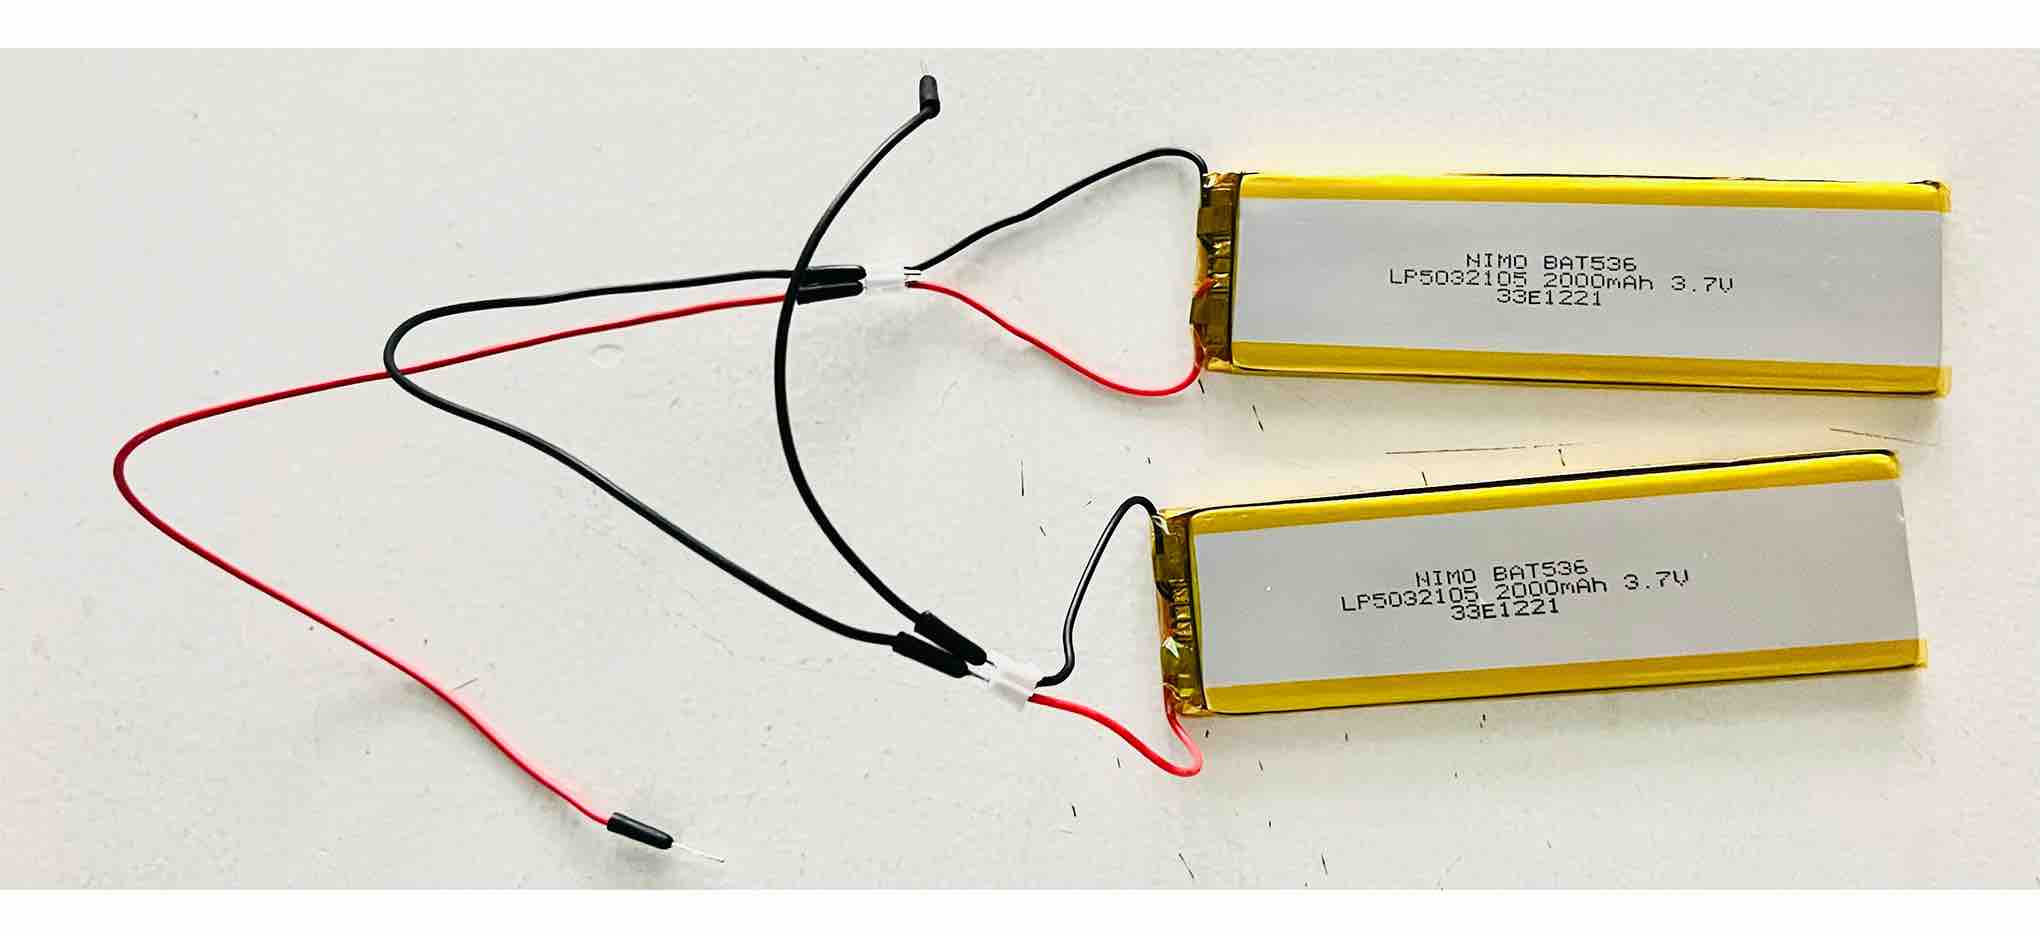
We realized that in order for the potentionemter to work it needs more voltage than just the coin battery (3V) and the feather (3.3V) It started functining well when hooked up to two 3.7V batteries (7.4V in total).
Notes for Best Practice
- When connecting anything to the arduino keep it off power first to avoid a short circuit
- Use nail polish, crochet or make some kind of insulation around your wires so they don’t touch each other
- Always use fabric or hot glue to cover knots and make sure you have no loose ends
Coding
Creating a basic map
int Sensor = A5
int LED = 12
int threshold =

// the setup function runs once when you press reset or power the board
void setup() {
  // initialize digital pin LED_BUILTIN as an output.
  pinMode(Sensor, INPUT);
  pinMode(LED, OUTPUT);
}

// the loop function runs over and over again forever
void loop() {
  int Sensorreading = analogRead(Sensor);
  Serial.print(SensorReading);
  if (SensorReading < threshold) {
    digitalWrite(LED, HIGH);
    Serialprintln("LED ON");
  }
  else {
    digitalWrite(LED,LOW);
    Serial.printlm("LED off");
  }
  delay
Results
Second Design
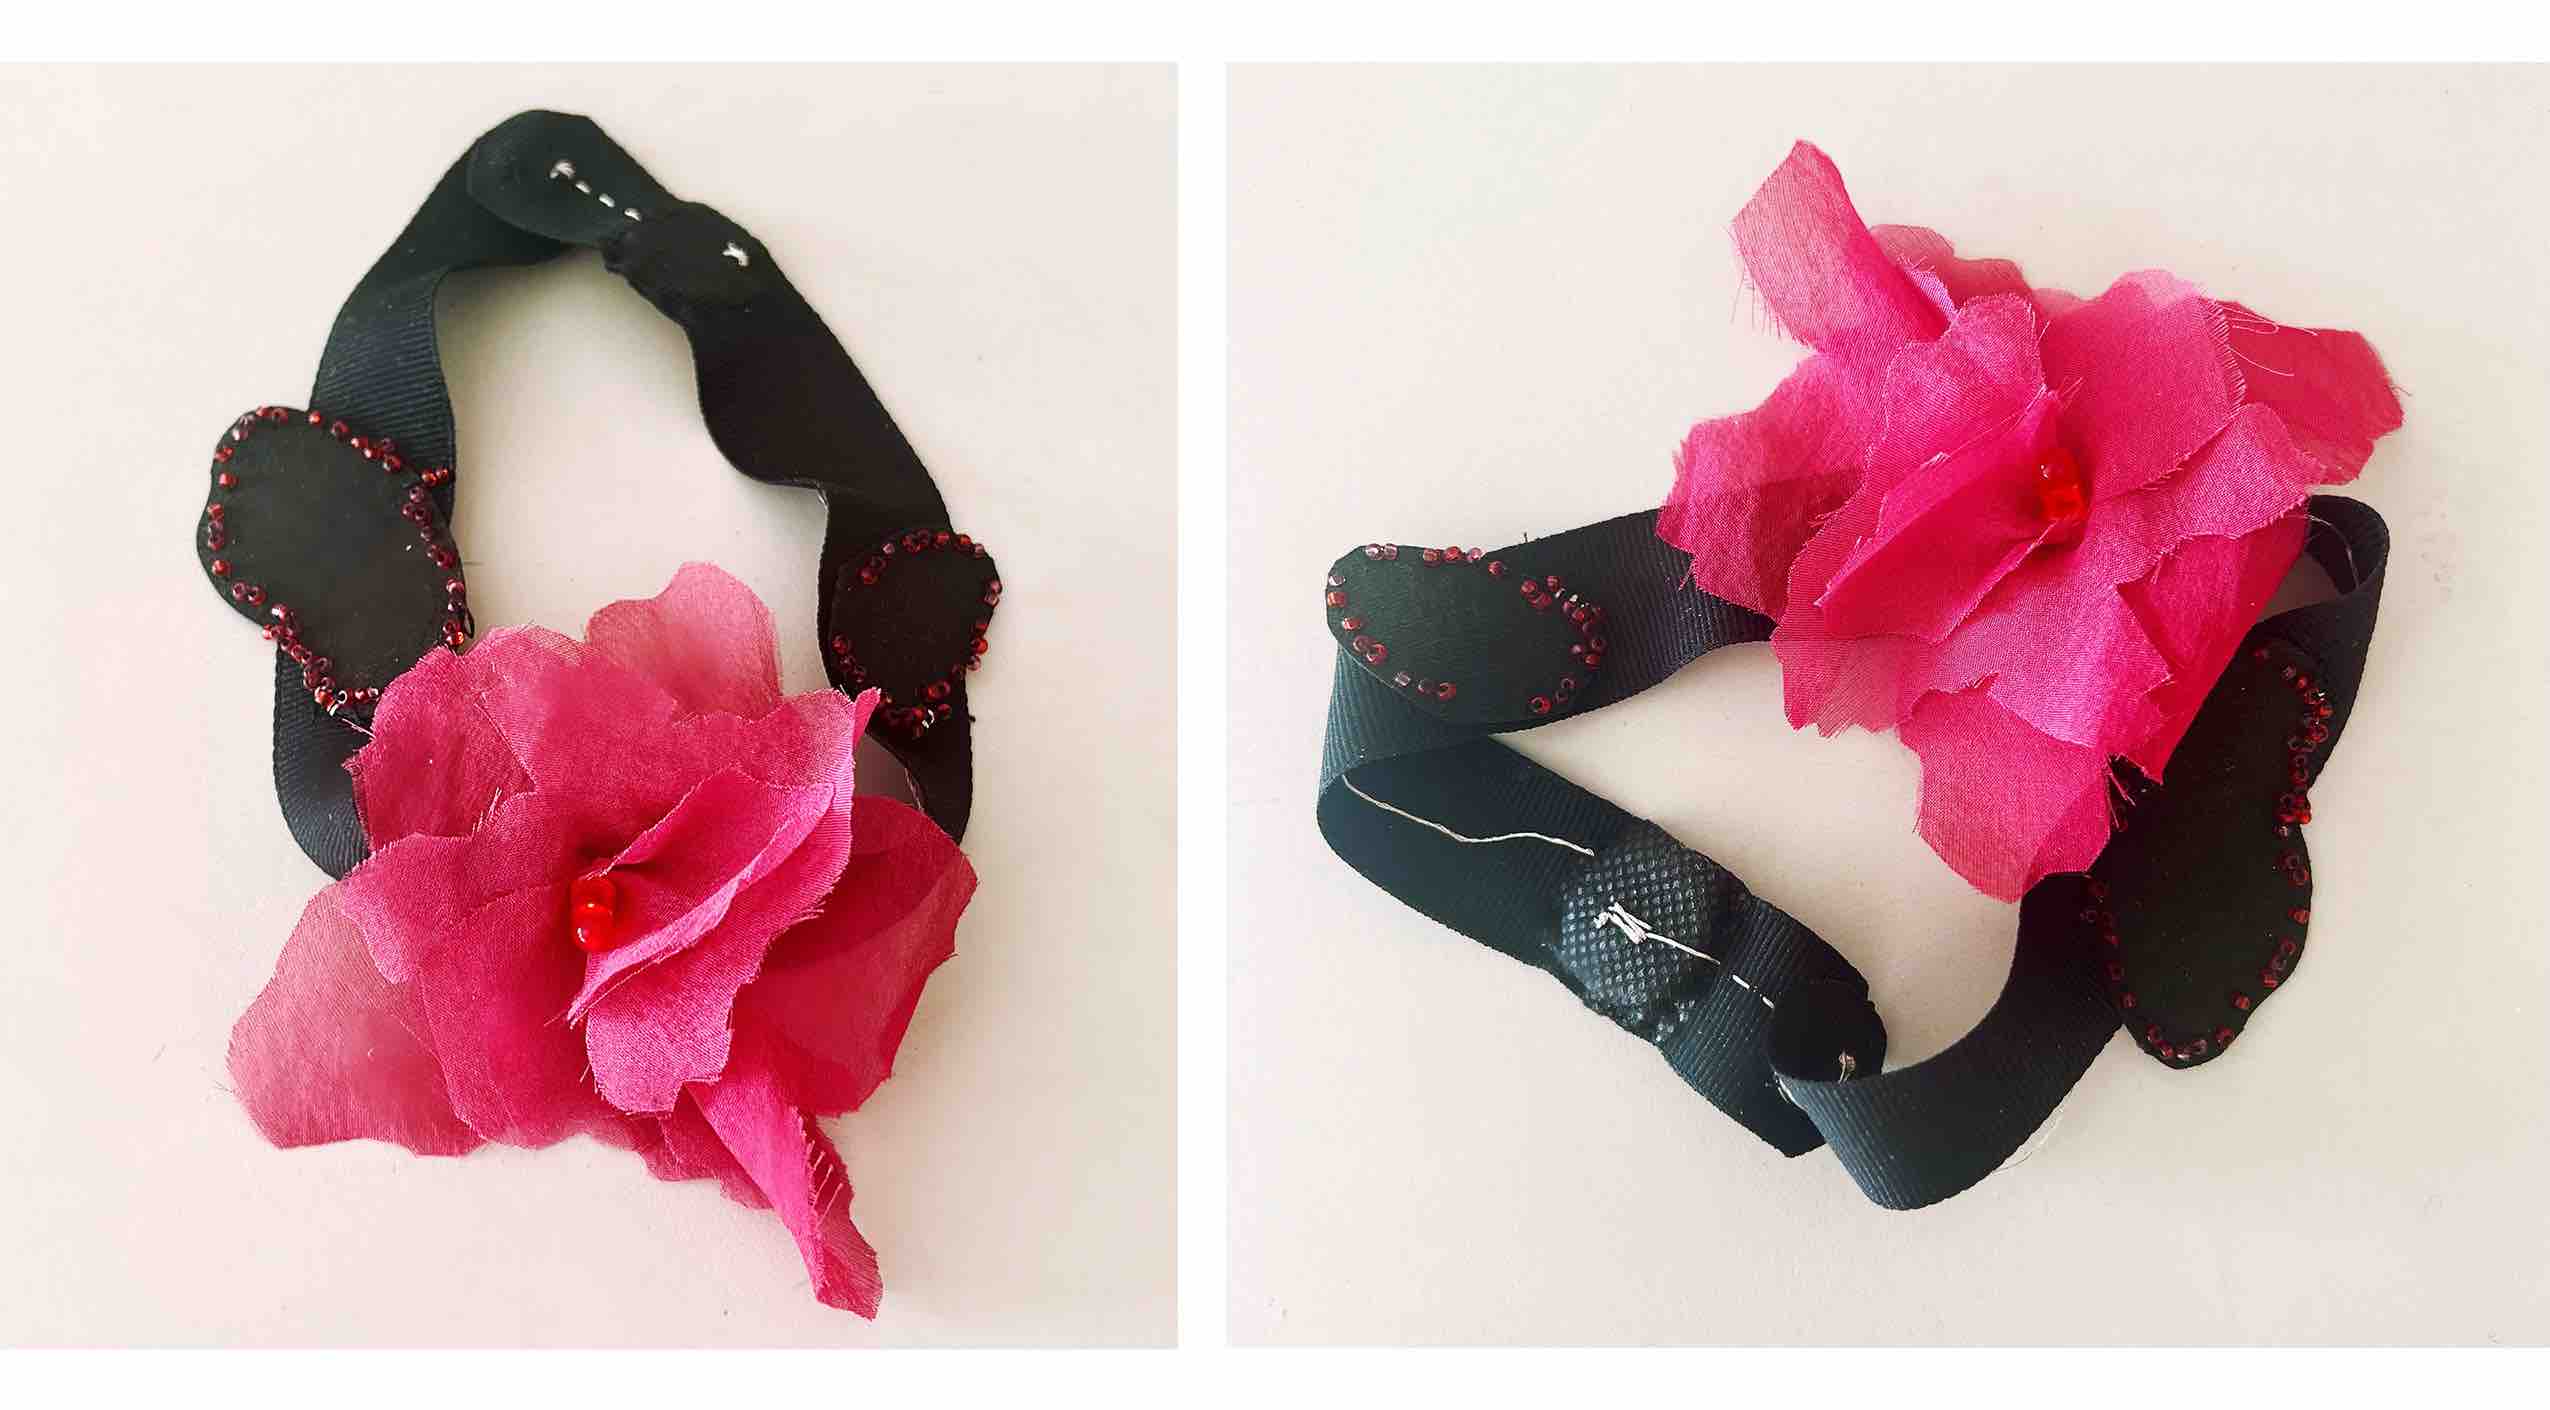
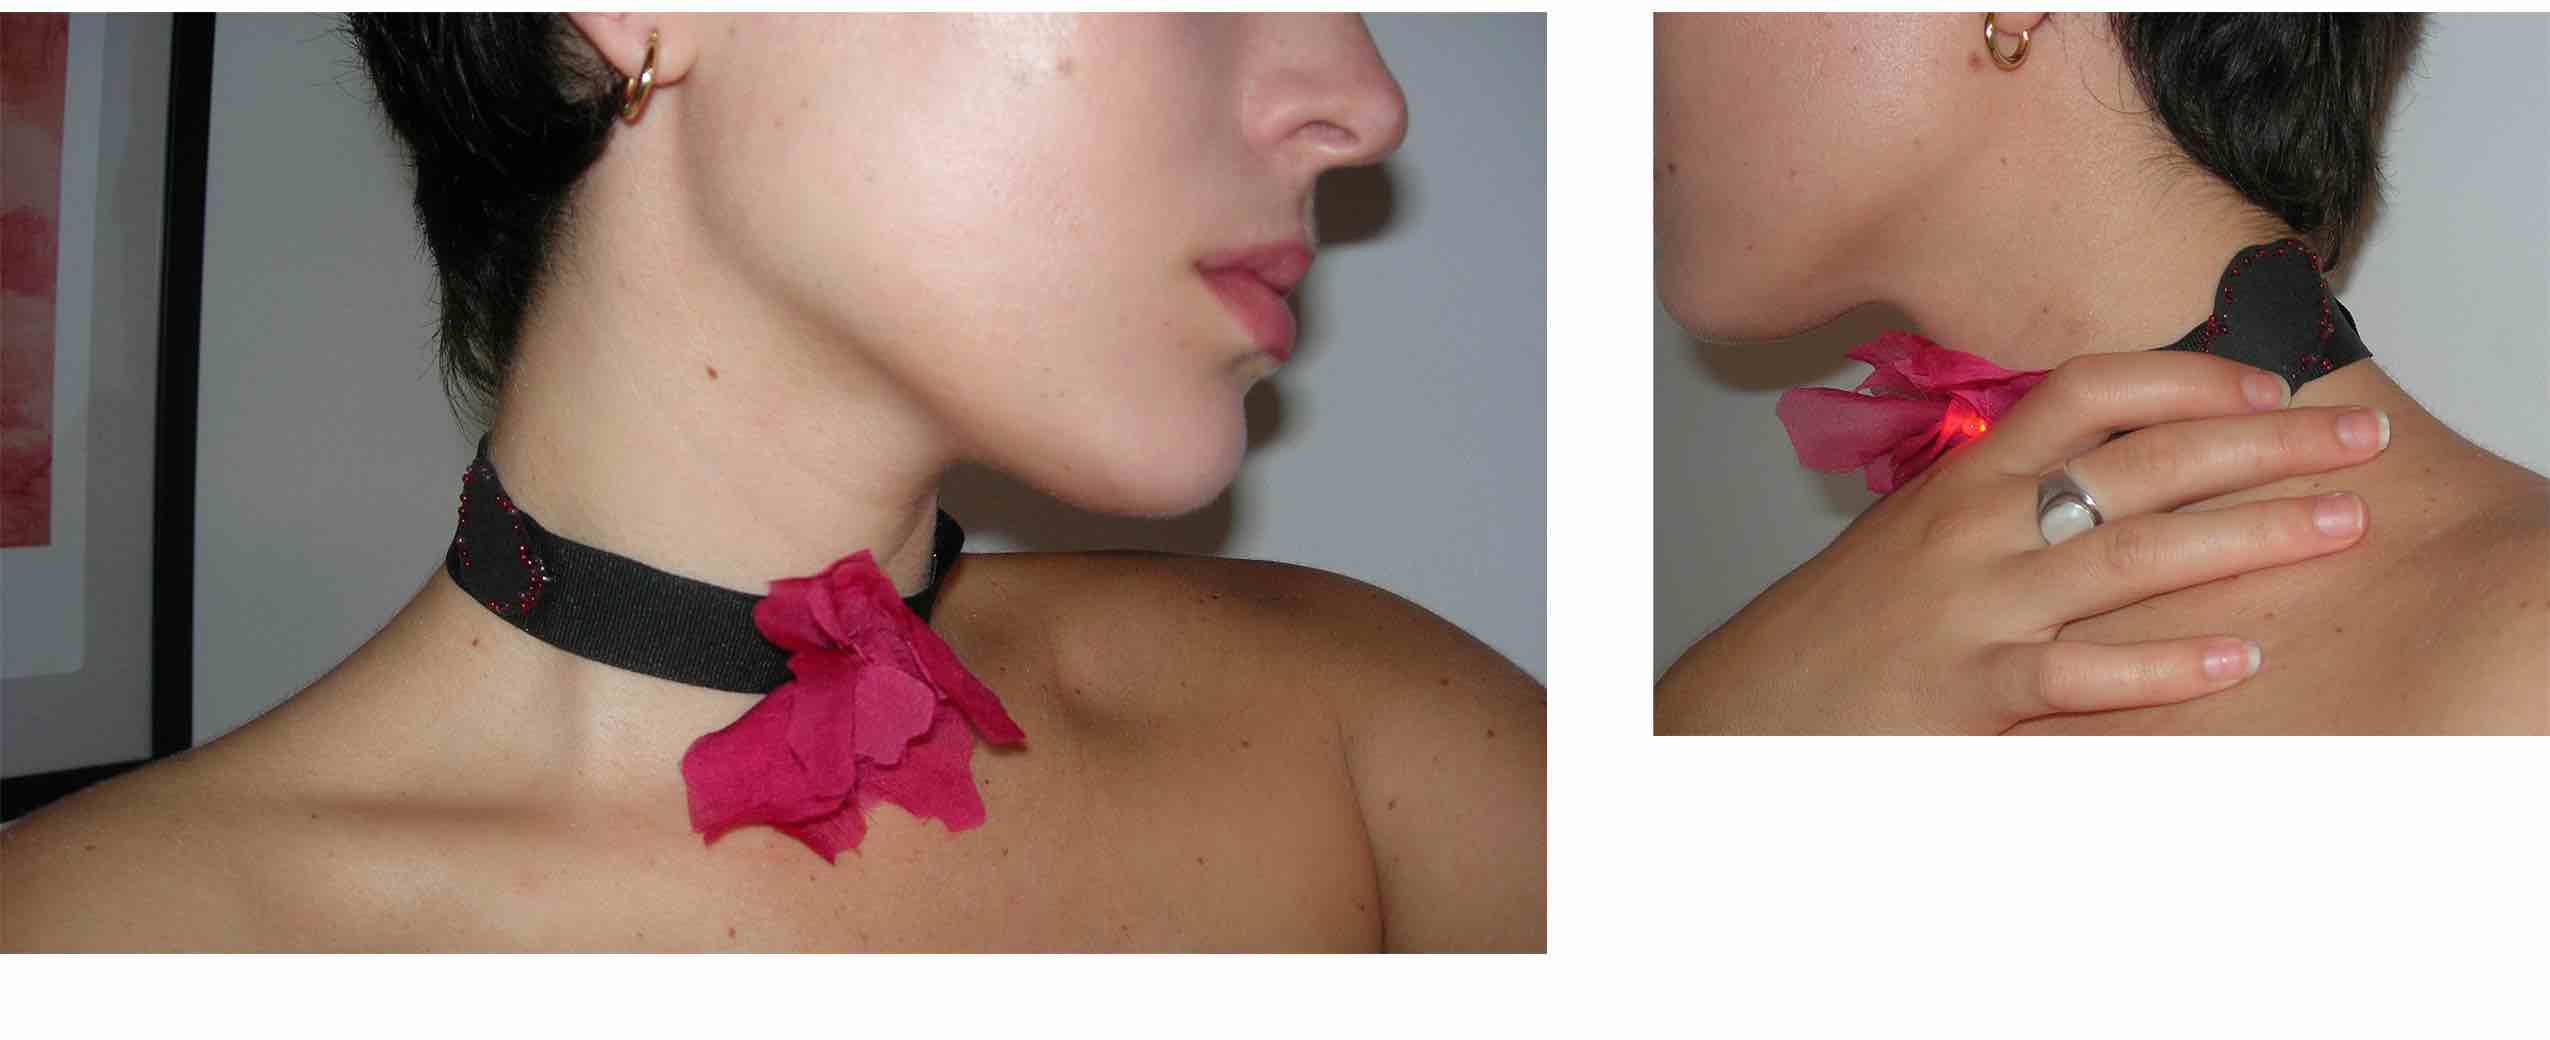
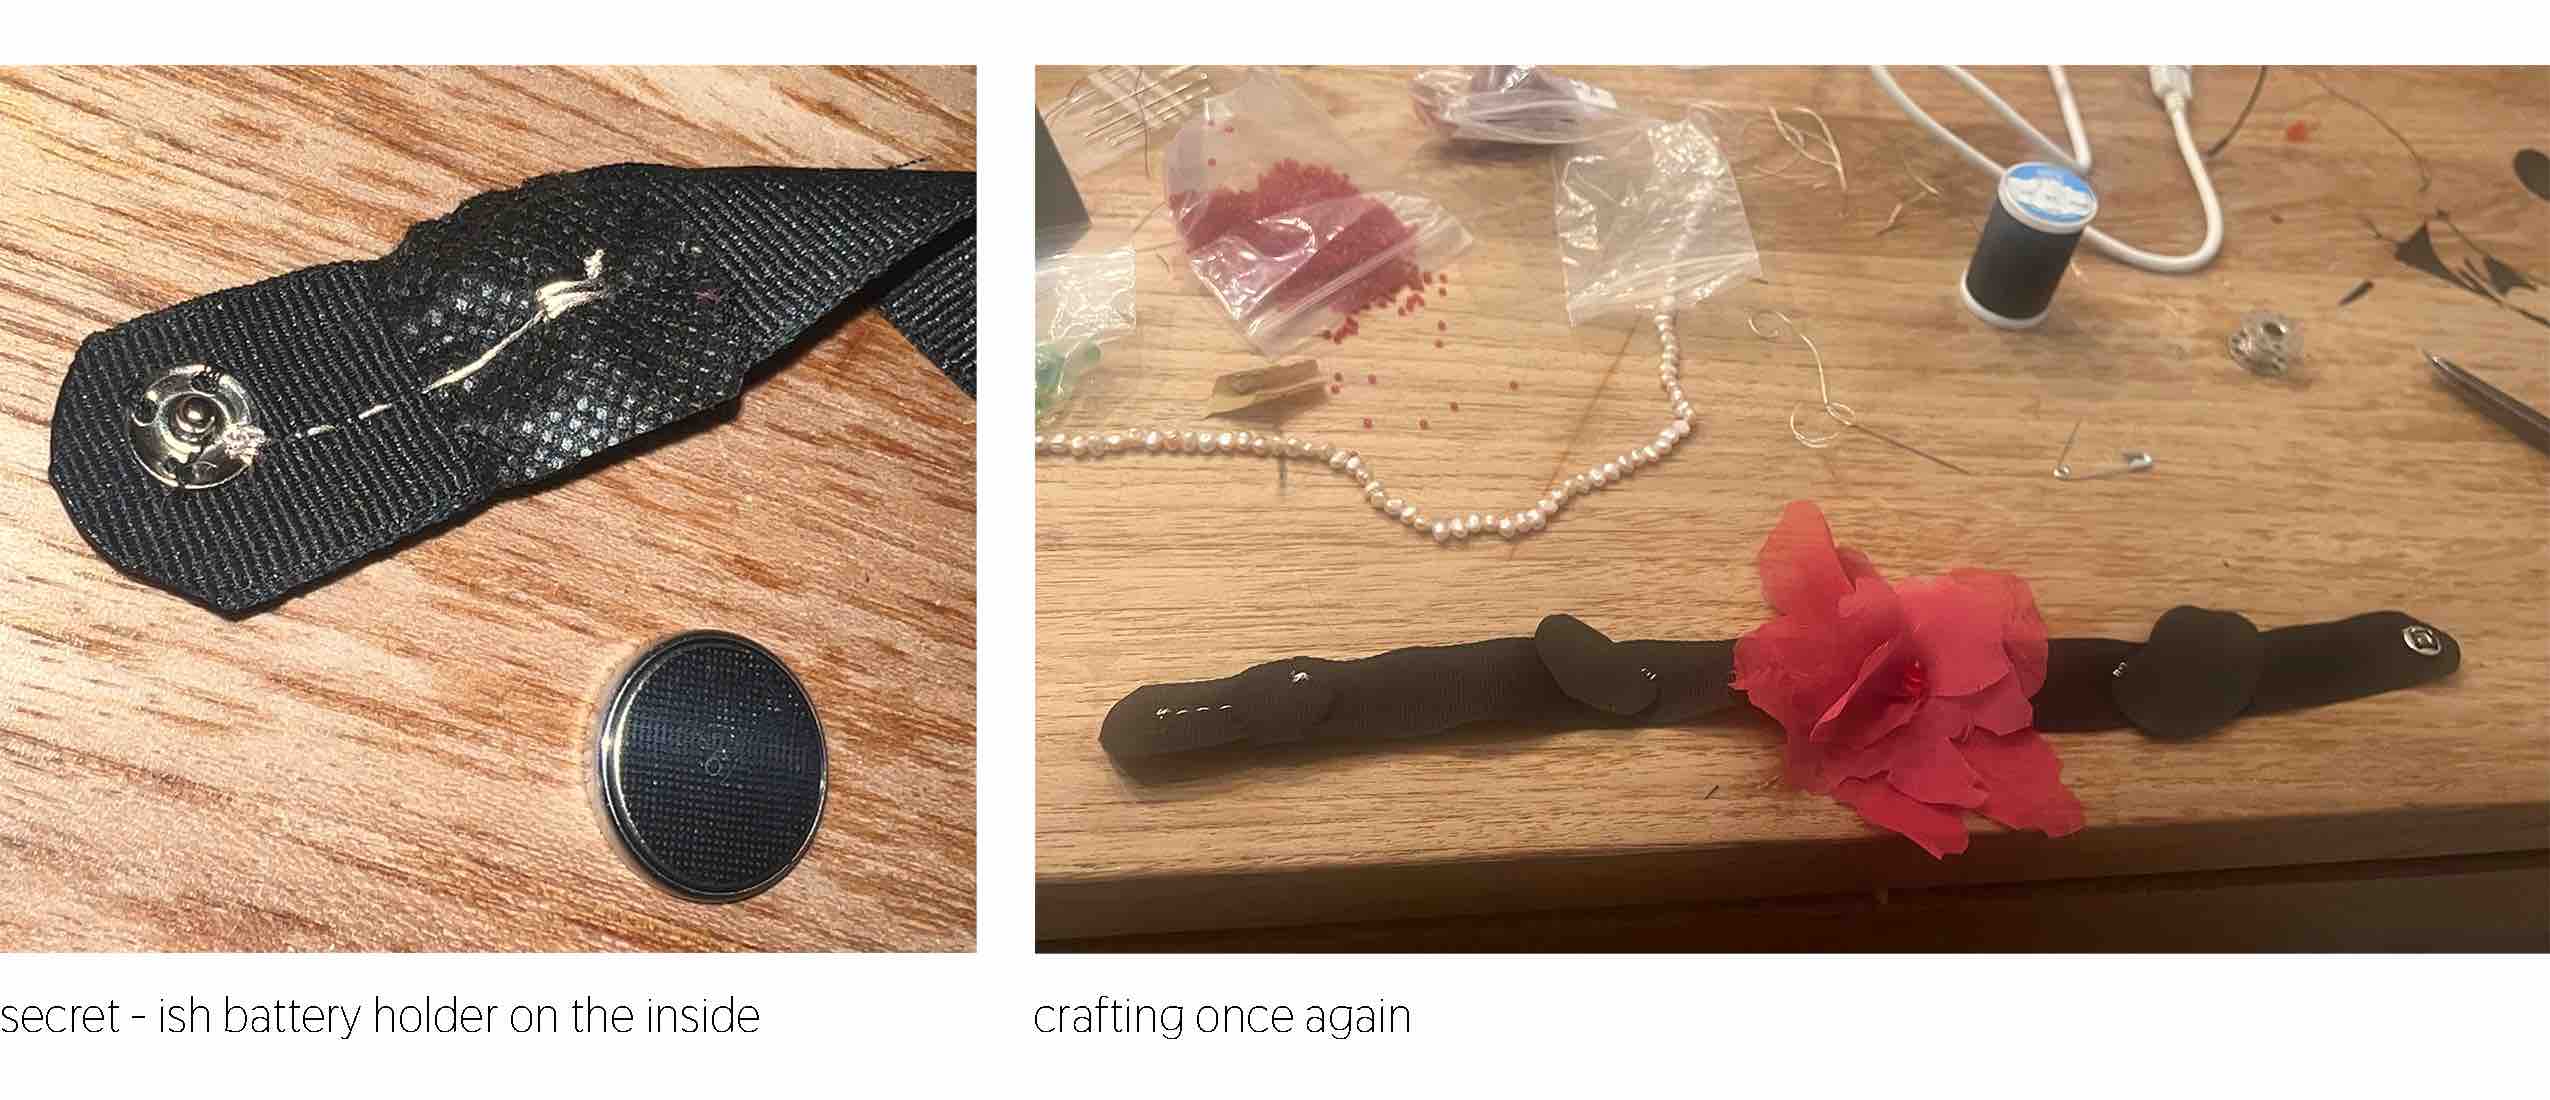
I wanted to continue on the theme of intimacy through pressure sensors and also design a piece with a better clap example so I made another accesory. I used the same Eeontex fabric but added two pressure sensors on each side of the led. I used my origional flower design with some silk dyed with cochineal from last week. The switch is made with metal clasps, the circut runs along a black ribbon using conductive thread and I made a similar portable battery holder.
 I could do a better job with making a lining to hide the conductive thread on the back but I was rushing. Again I had some fun adding beading details. The flower, red colors, and glowing light all represent the the "spark" of romance.
 Here is the schematic diagram for the circuit:

Results