5. E-textiles
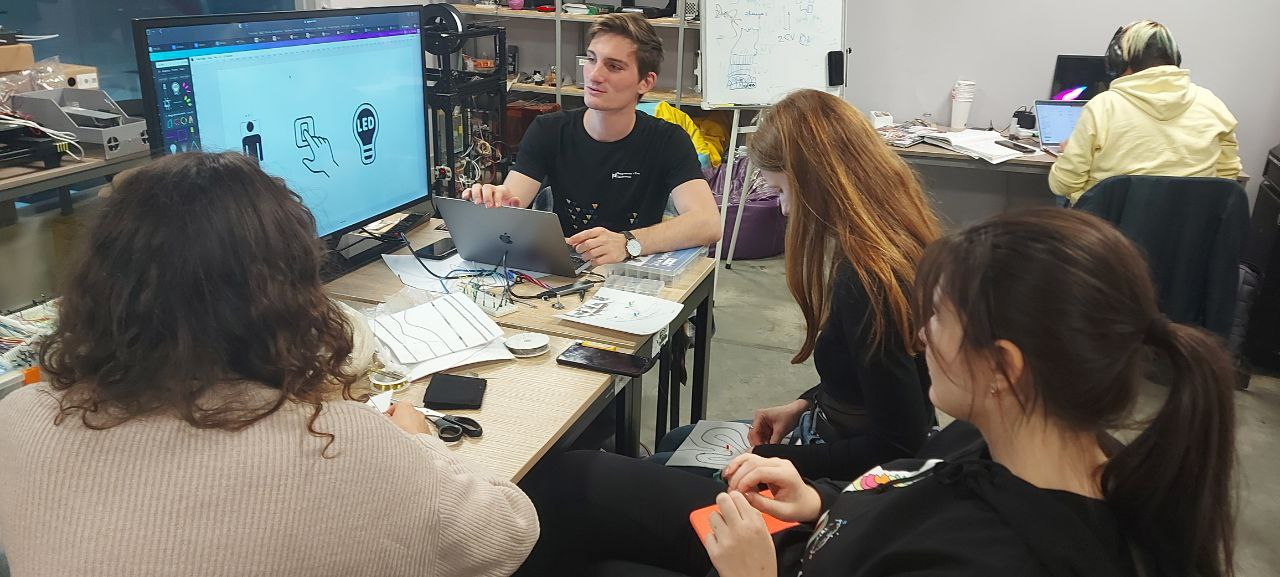
This week is the most bright week so far. Through the E-textile week we were hosted by Microlab, our electronic part of FabLab. Here, with the support of our expert in electronics - Marius Bejenuta we dive into new experience of implementing electronics to textiles.
In this week's lecture, Liza Stark explained all we needed to know about circuits and sensors : how to create them, what tools and materials we need, and how to make connections between hard materials (electrical components, boards) and soft materials (fabric and thread, conductive or not).
Research
We started with basic information we need to know and understand about electricity :
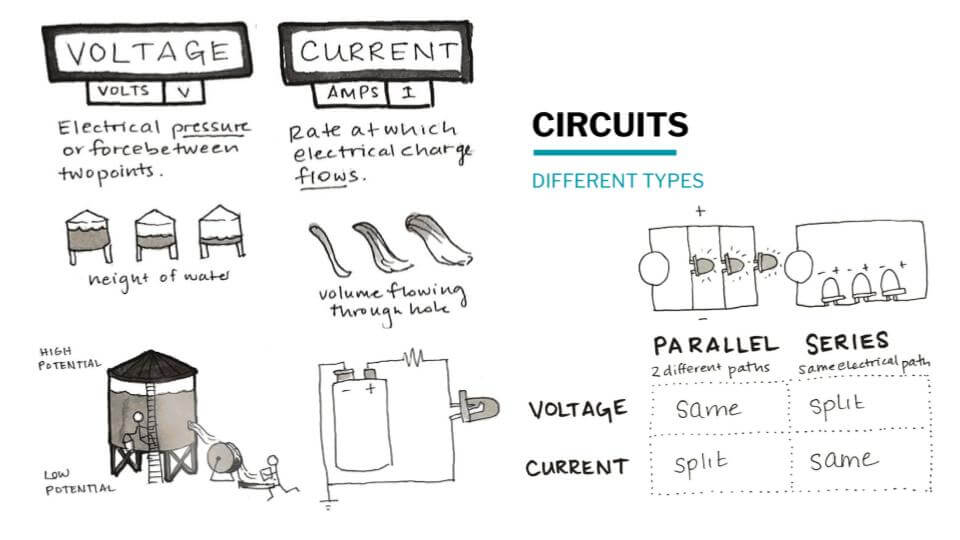
Current : the "flow" of electrons. We mesure the intensity of current : it's the number of electrons/second passing through one point of the circuit. The unity of mesure is Ampere and the symbol I.
Voltage : the electrical pressure, the "force" between two points in the circuit. The unity of mesure is Volt and the symbol is V.
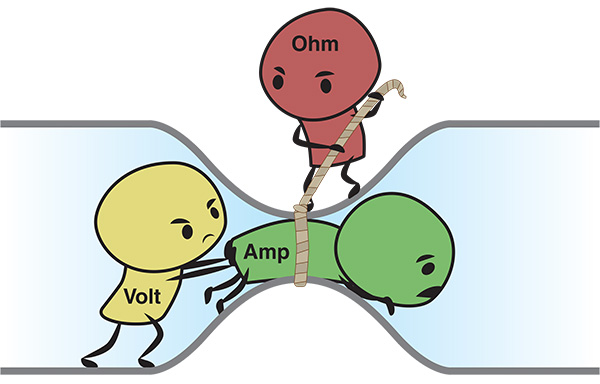
Resistance : an opposition force to the circuit. We add resistor to "balance" the circuit. If we increase the value of the resistor, the intensity of the current decreases. The unity of mesure is Ohm and the symbol is Ω.
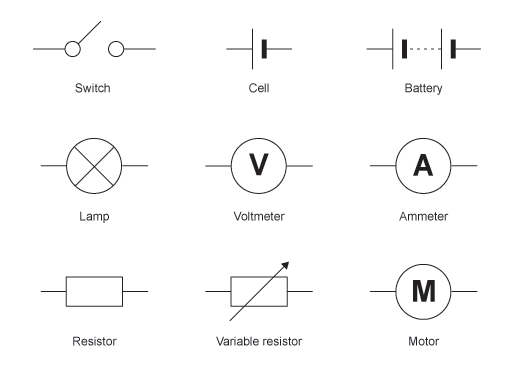
These three components are associated as following :
This is the Ohm law: V = I x R
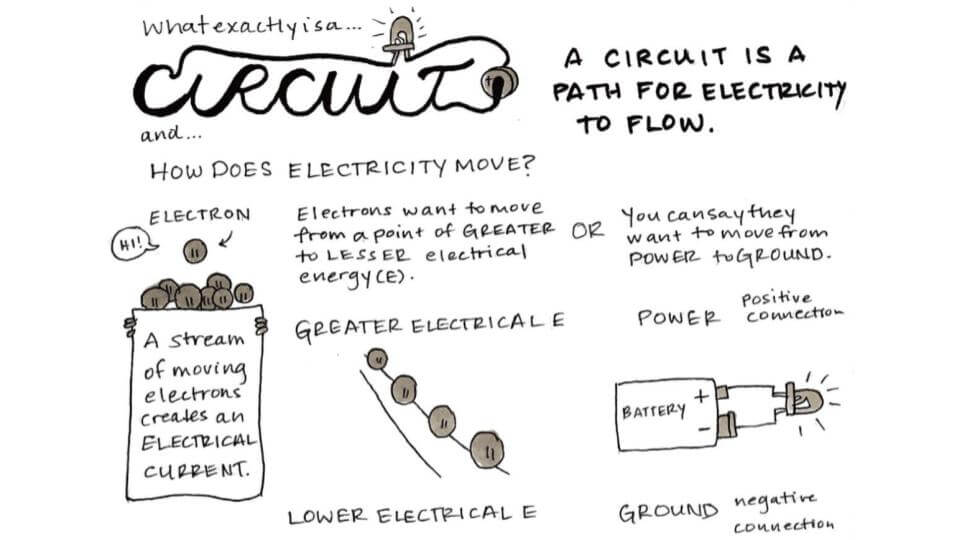
There are still some fun and simple in describing pictures that Liza provided us in her lectures, in order summarise the basic concept:
References & Inspiration
Light is an interesting tool for an artist, and one of the most prominent light artists is Bruce Munro. Over the years, he has demonstrated an uncanny ability to produce intriguing work in traditional surroundings. More importantly, he has come up with several top-notch productions, including his latest creation – Cantus Arcticus .
Another beautiful work is the Field of Light, like a giant surreal camp-side banana, is an alien installation in the midst of nature. And like dry desert seeds lying in wait for the rain, the sculpture’s fibre optic stems lie dormant until darkness falls, and then under a blazing blanket of stars they flower with gentle rhythms of light. ‘Field of Light’ is about the desert as much as the roadside campsites - and like much of Munro’s work is characterised by an almost mystical passion for nature teamed with a robust sense of humour.
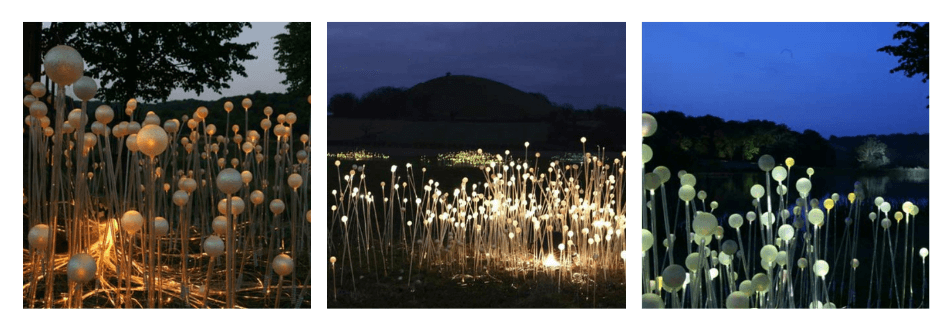 Light has always played a major part in Munro’s life and work, “for me, it is a natural medium to use” he says. It is made of acrylic tubes, through which fibre optic cables run, each topped by an acrylic ball. There is an external projector, and so the stems themselves hold no electric power at all. At the Eden Project, the installation will have 6,000 tubes and cover an area of 60 x 20 meters, using 24, 000 meters of fibre.
Another immersive experience is the High Artic installation.
Inviting visitors to explore a conceptual space interpreting polar regions, High Arctic by United Visual Artists aims to use artistic language to boost awareness of adverse human impact on nature.
"Set in the 2100AD, High Arctic is a monument to an Arctic past which invites us to think about human impact in the Arctic region and contemplate its fragility, its beauty, and its scale," say the artists of their installation on the United Visual Artists website. This multi-sensory piece uses light, sound and sculpture to create a monument to arctic landscapes, suggesting the dire effects of glacier melting.
Fragments of 'The Farewell Glacier', a commissioned poem by Nick Drake, work together with the visual to create an immersive experience. The installation is based on UVA Creative Director Matt Clark's Cape Farewell expedition to Svalbard which he took with Nick Drake in September 2010.
Tools
- Arduino UNO
- Arduino IDE
- Multimeter
- Soldering iron
- Wires
- Sewing machine
- Threads
- Beads
- LEDs
- Conductive Thread
- Velostat
- Sponge
- Resistors
Process and workflow
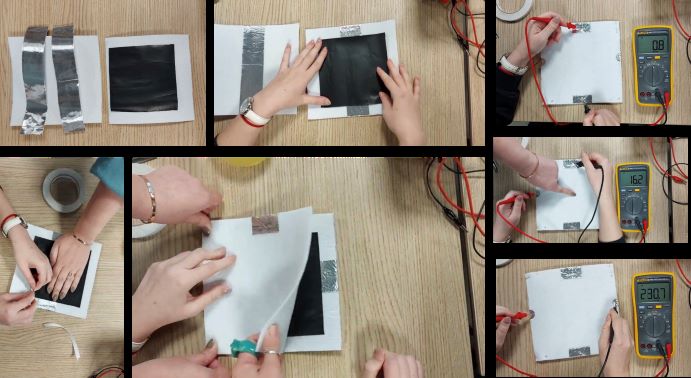
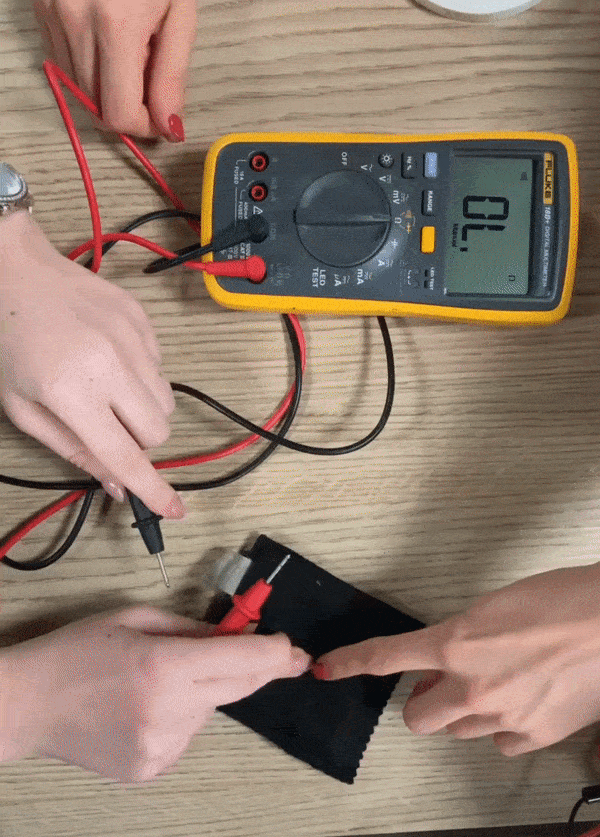
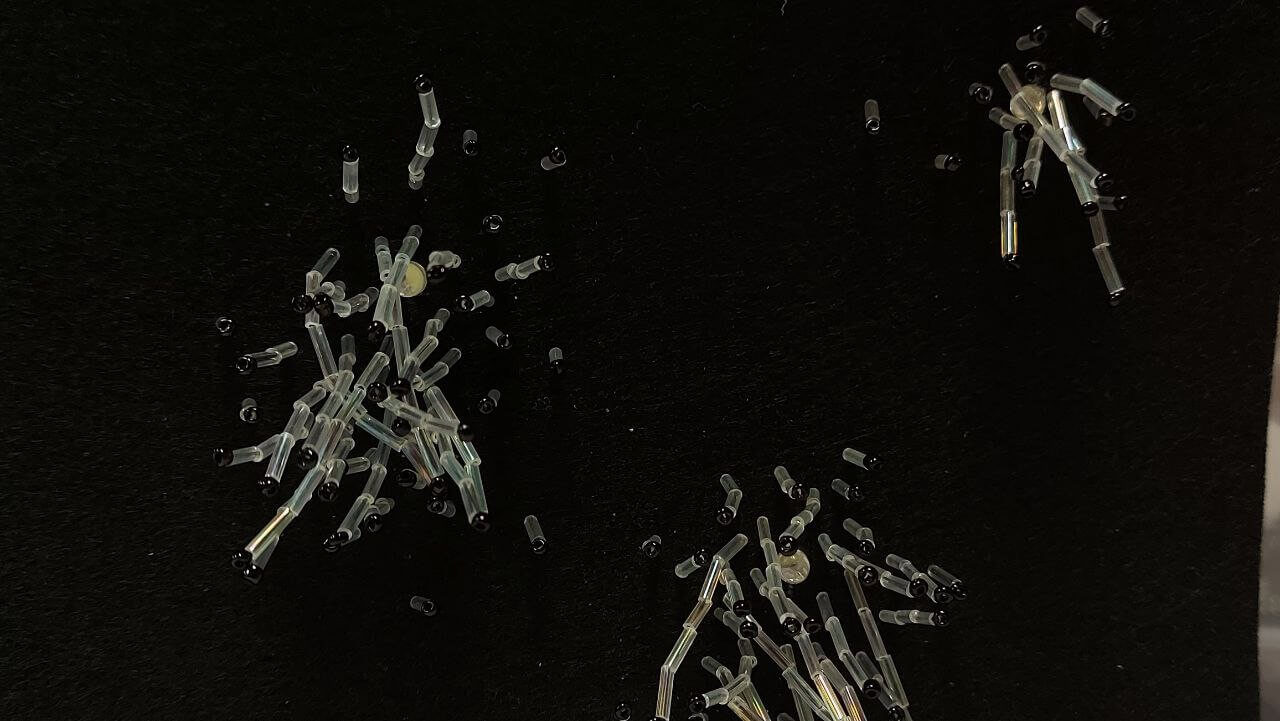
Due to the fact that our conductive thread has been proven not to conduct electricity, we started with the conductivity testing of different types of wire.
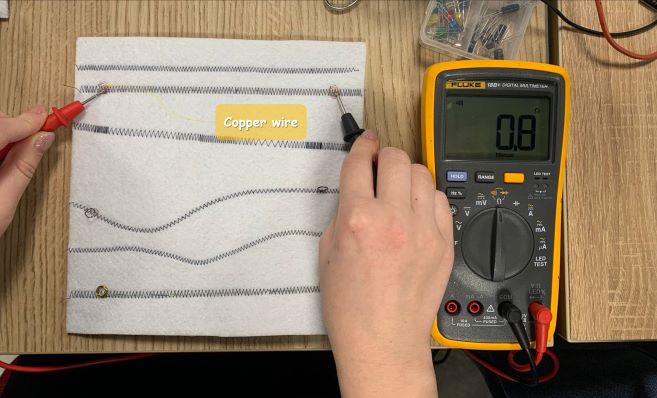
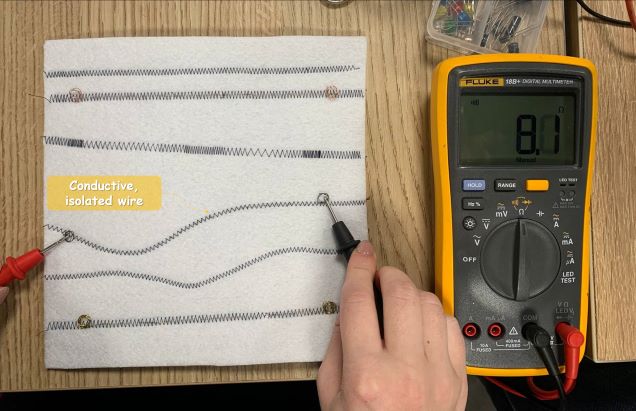
Some of the wires were isolated with a coating. In this case they need to be sanded on the areas that need to be connected. Otherwise the multimeter won't show the conductivity.
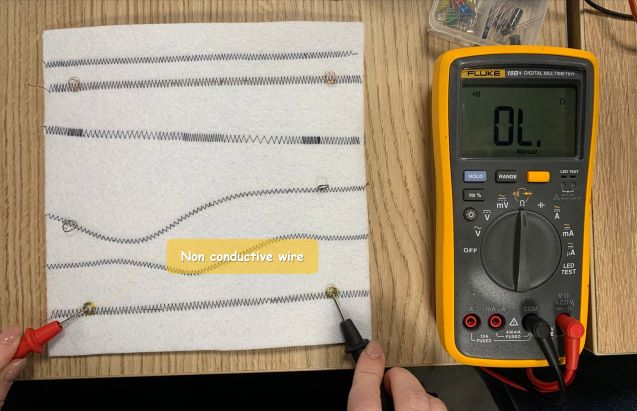
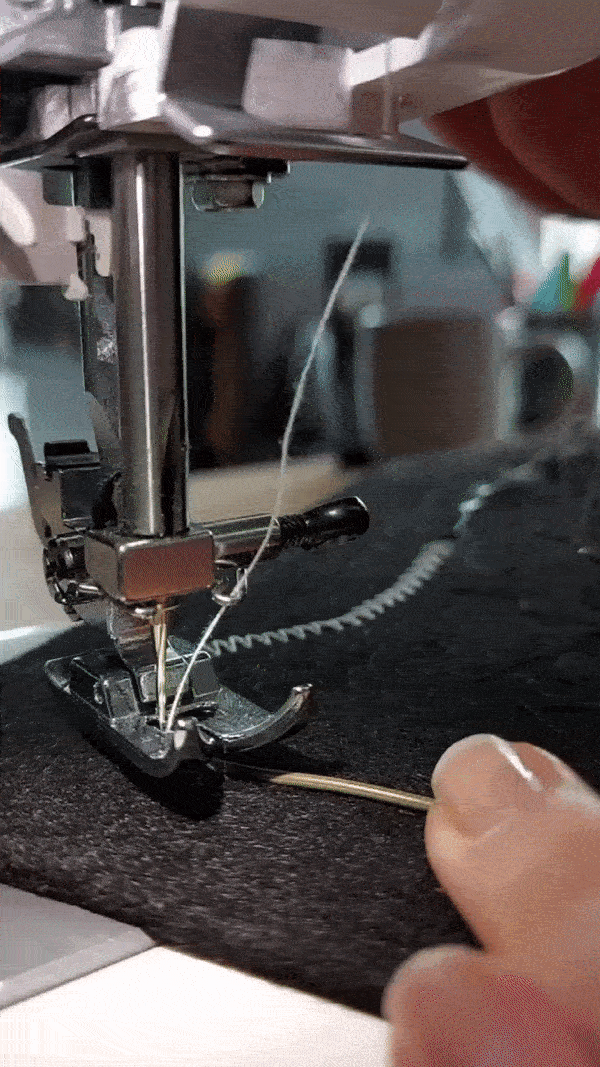
One of the simplest methods of sewing wire onto fabric was to use a zig-zag stitch to keep the wire in the desired position. Also, if you use thread in contrast with the textile, you can get a very interesting effect.
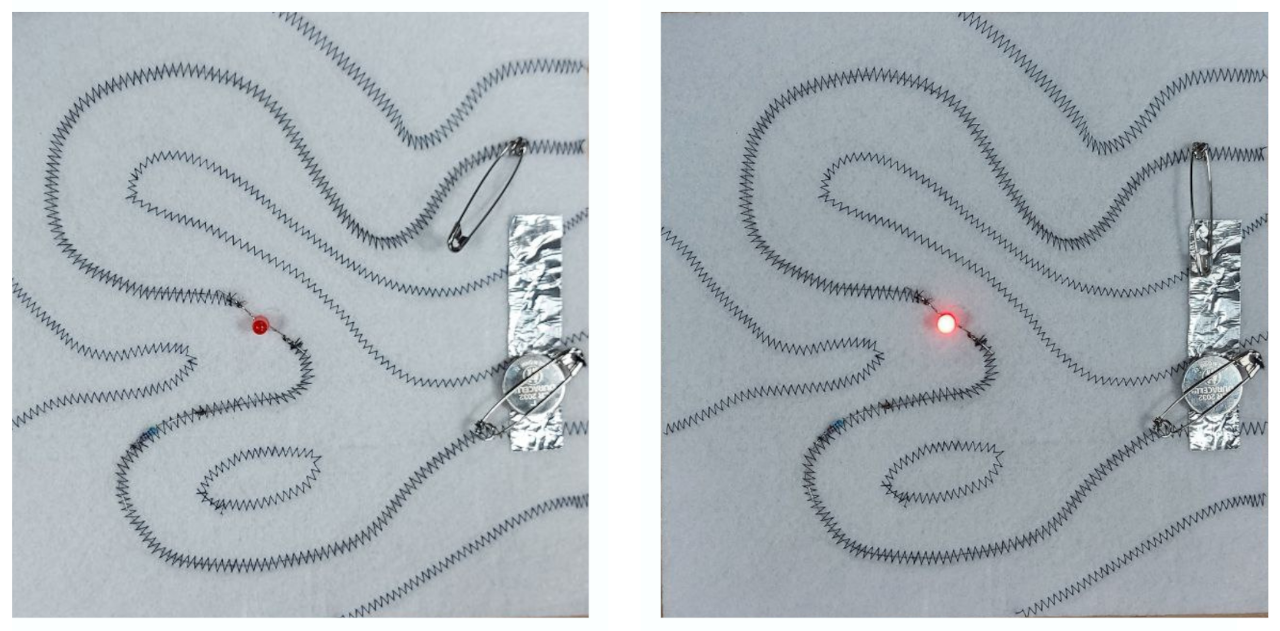
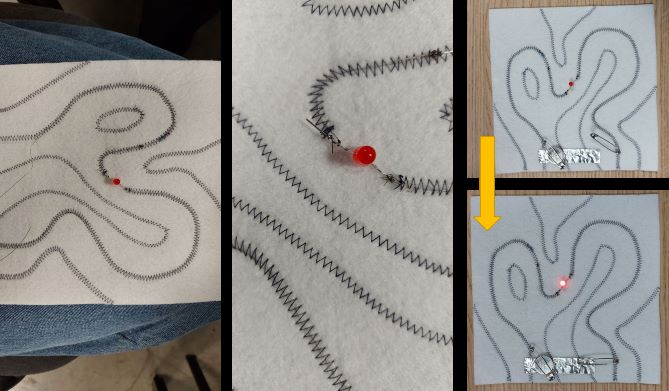
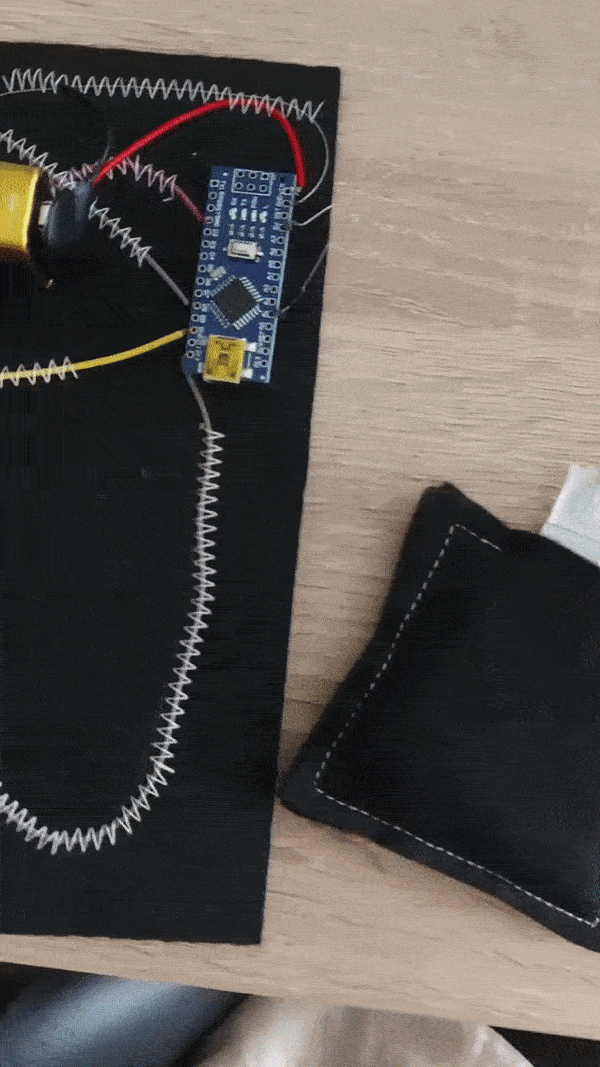
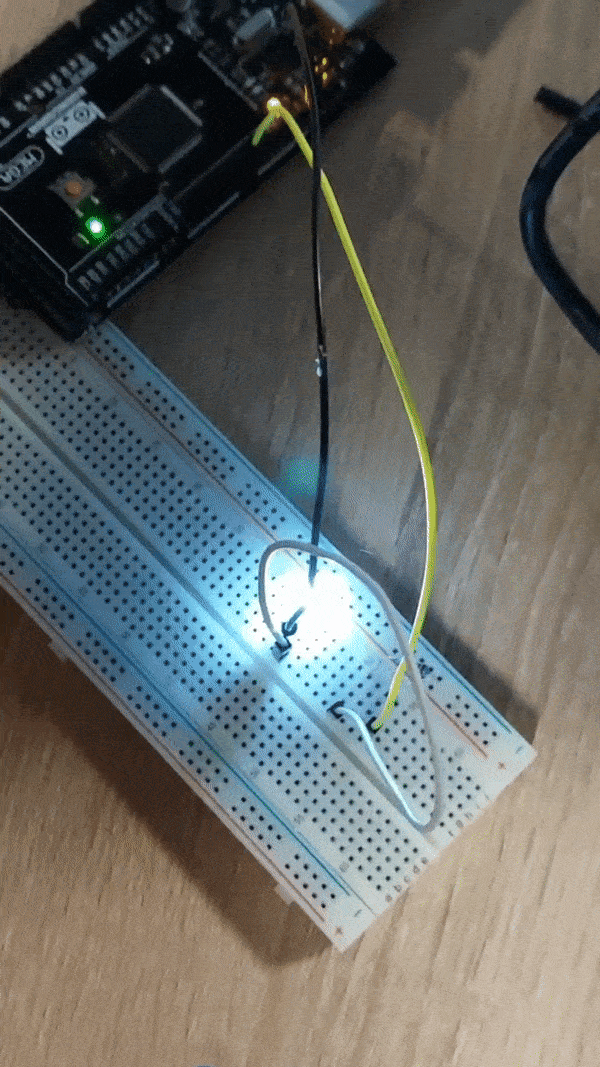
After this, in order to upgrade the simple circuit into a controlable one, we set a connection on the breadboard, to light up a led and connect it to the Arduino. With the help of Marius (our local expert) we wrote the following code.
#define ledPin 7


void setup() {

  // initialize digital pin LED_BUILTIN as an output.
  pinMode(ledPin, OUTPUT);
  pinMode(2,INPUT_PULLUP);
  Serial.begin(9600);


}

// the loop function runs over and over again forever
void loop() {
 if (digitalRead(2) == HIGH);
 {
    digitalWrite(ledPin, HIGH);
    Serial.println(digitalRead(2));
}
else
{
    digitalWrite(ledPin, LOW);
    Serial.println(digitalRead(2));
  }
}
The next steps would be to create a analog sensor.
And a digital sensor.
Individual work
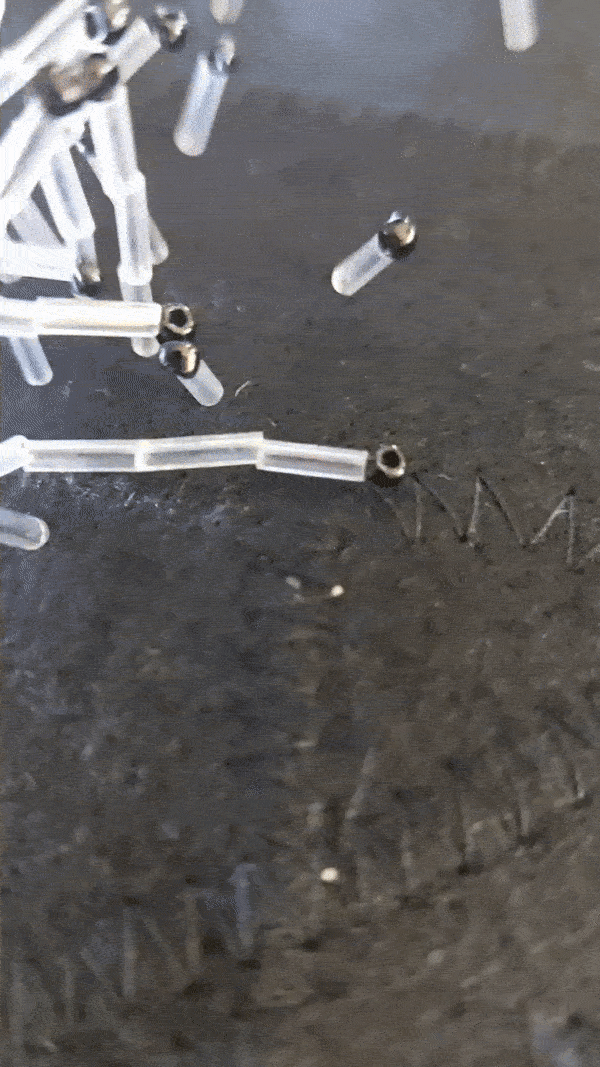
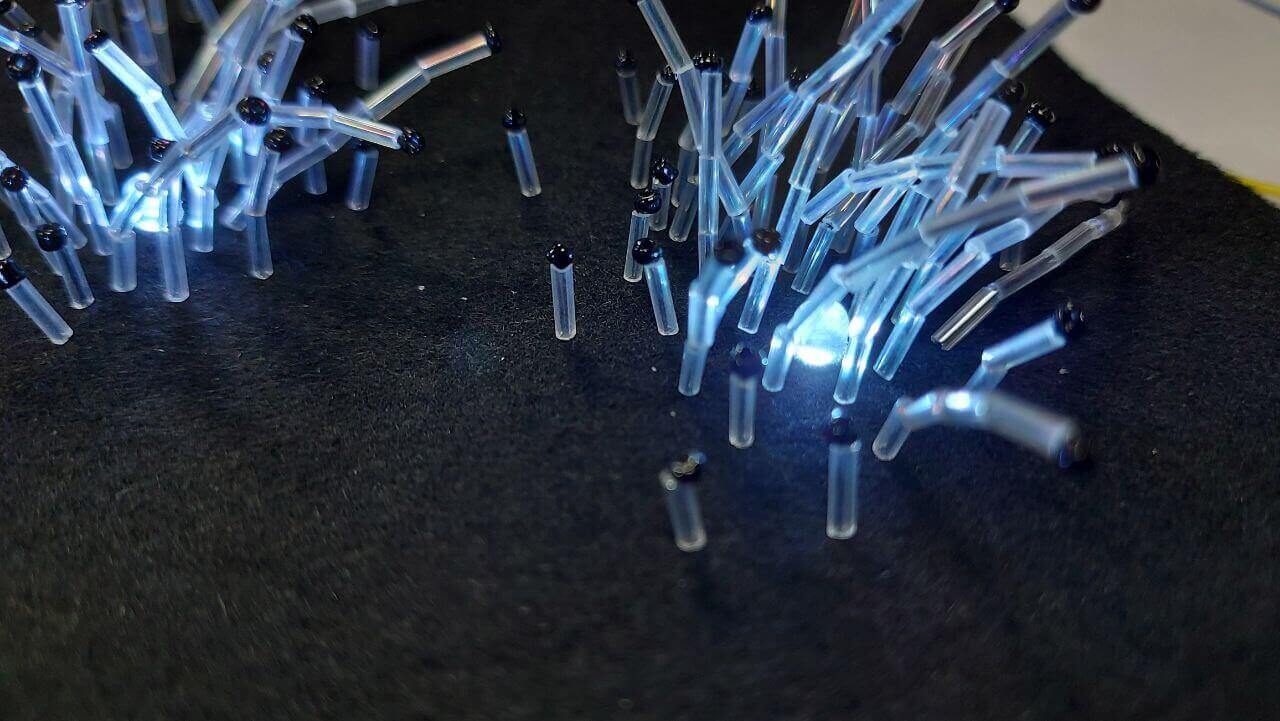
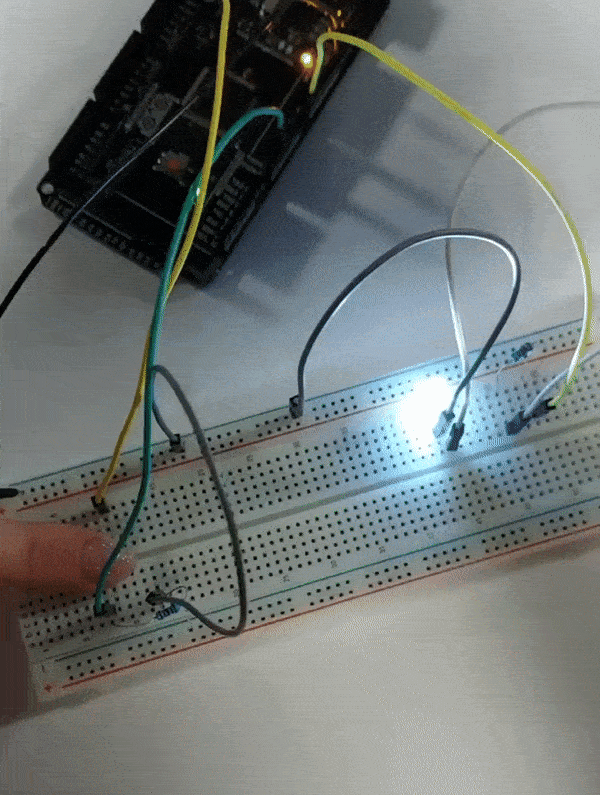
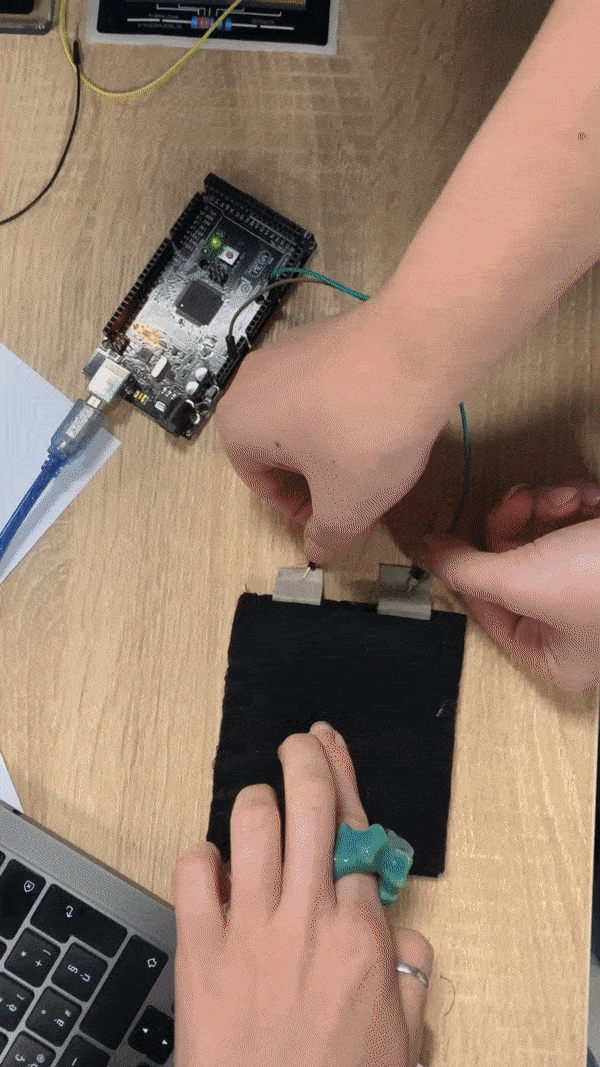
For my individual work I wanted to play with the light and create a glaciar flower effect. I sewed transparent glass beads, with the intention of reflecting the light of the LEDs. These beads create a very pleasant olfactory and tactile sensation. I used 3 LEDs, transistors, wire, a 9V battery, Arduino and a sensor made with Velostat.
Sensor reading from Lena Bannaia on Vimeo.
Code Example
//Declare pins
const int LED_0 = 12;
const int LED_1 = 10;
const int LED_2 = 8;
const int VELO = A1;

const int turn_time = 200;

void setup() {

  pinMode(LED_0, OUTPUT);
  pinMode(LED_1, OUTPUT);
  pinMode(LED_2, OUTPUT);
  pinMode(VELO, INPUT);
  Serial.begin(9600);

}

void loop() {

  int velo_value = analogRead()
  digitalWrite(LED_0, HIGH);
  delay(turn_time);
  digitalWrite(LED_1, HIGH);
  delay(turn_time);
  digitalWrite(LED_2, HIGH);
  delay(turn_time);
  digitalWrite(LED_0, LOW);
  digitalWrite(LED_1, LOW);
  digitalWrite(LED_2, LOW);
  delay(turn_time);

}
Video
Touching experience from Bannaia Elena on Vimeo.
Updates: Code Example
In the meantime, we made some changes to the code and added the sensor. So now, if you press the sensor, the lights come on brighter one after the other, with higher intensity.
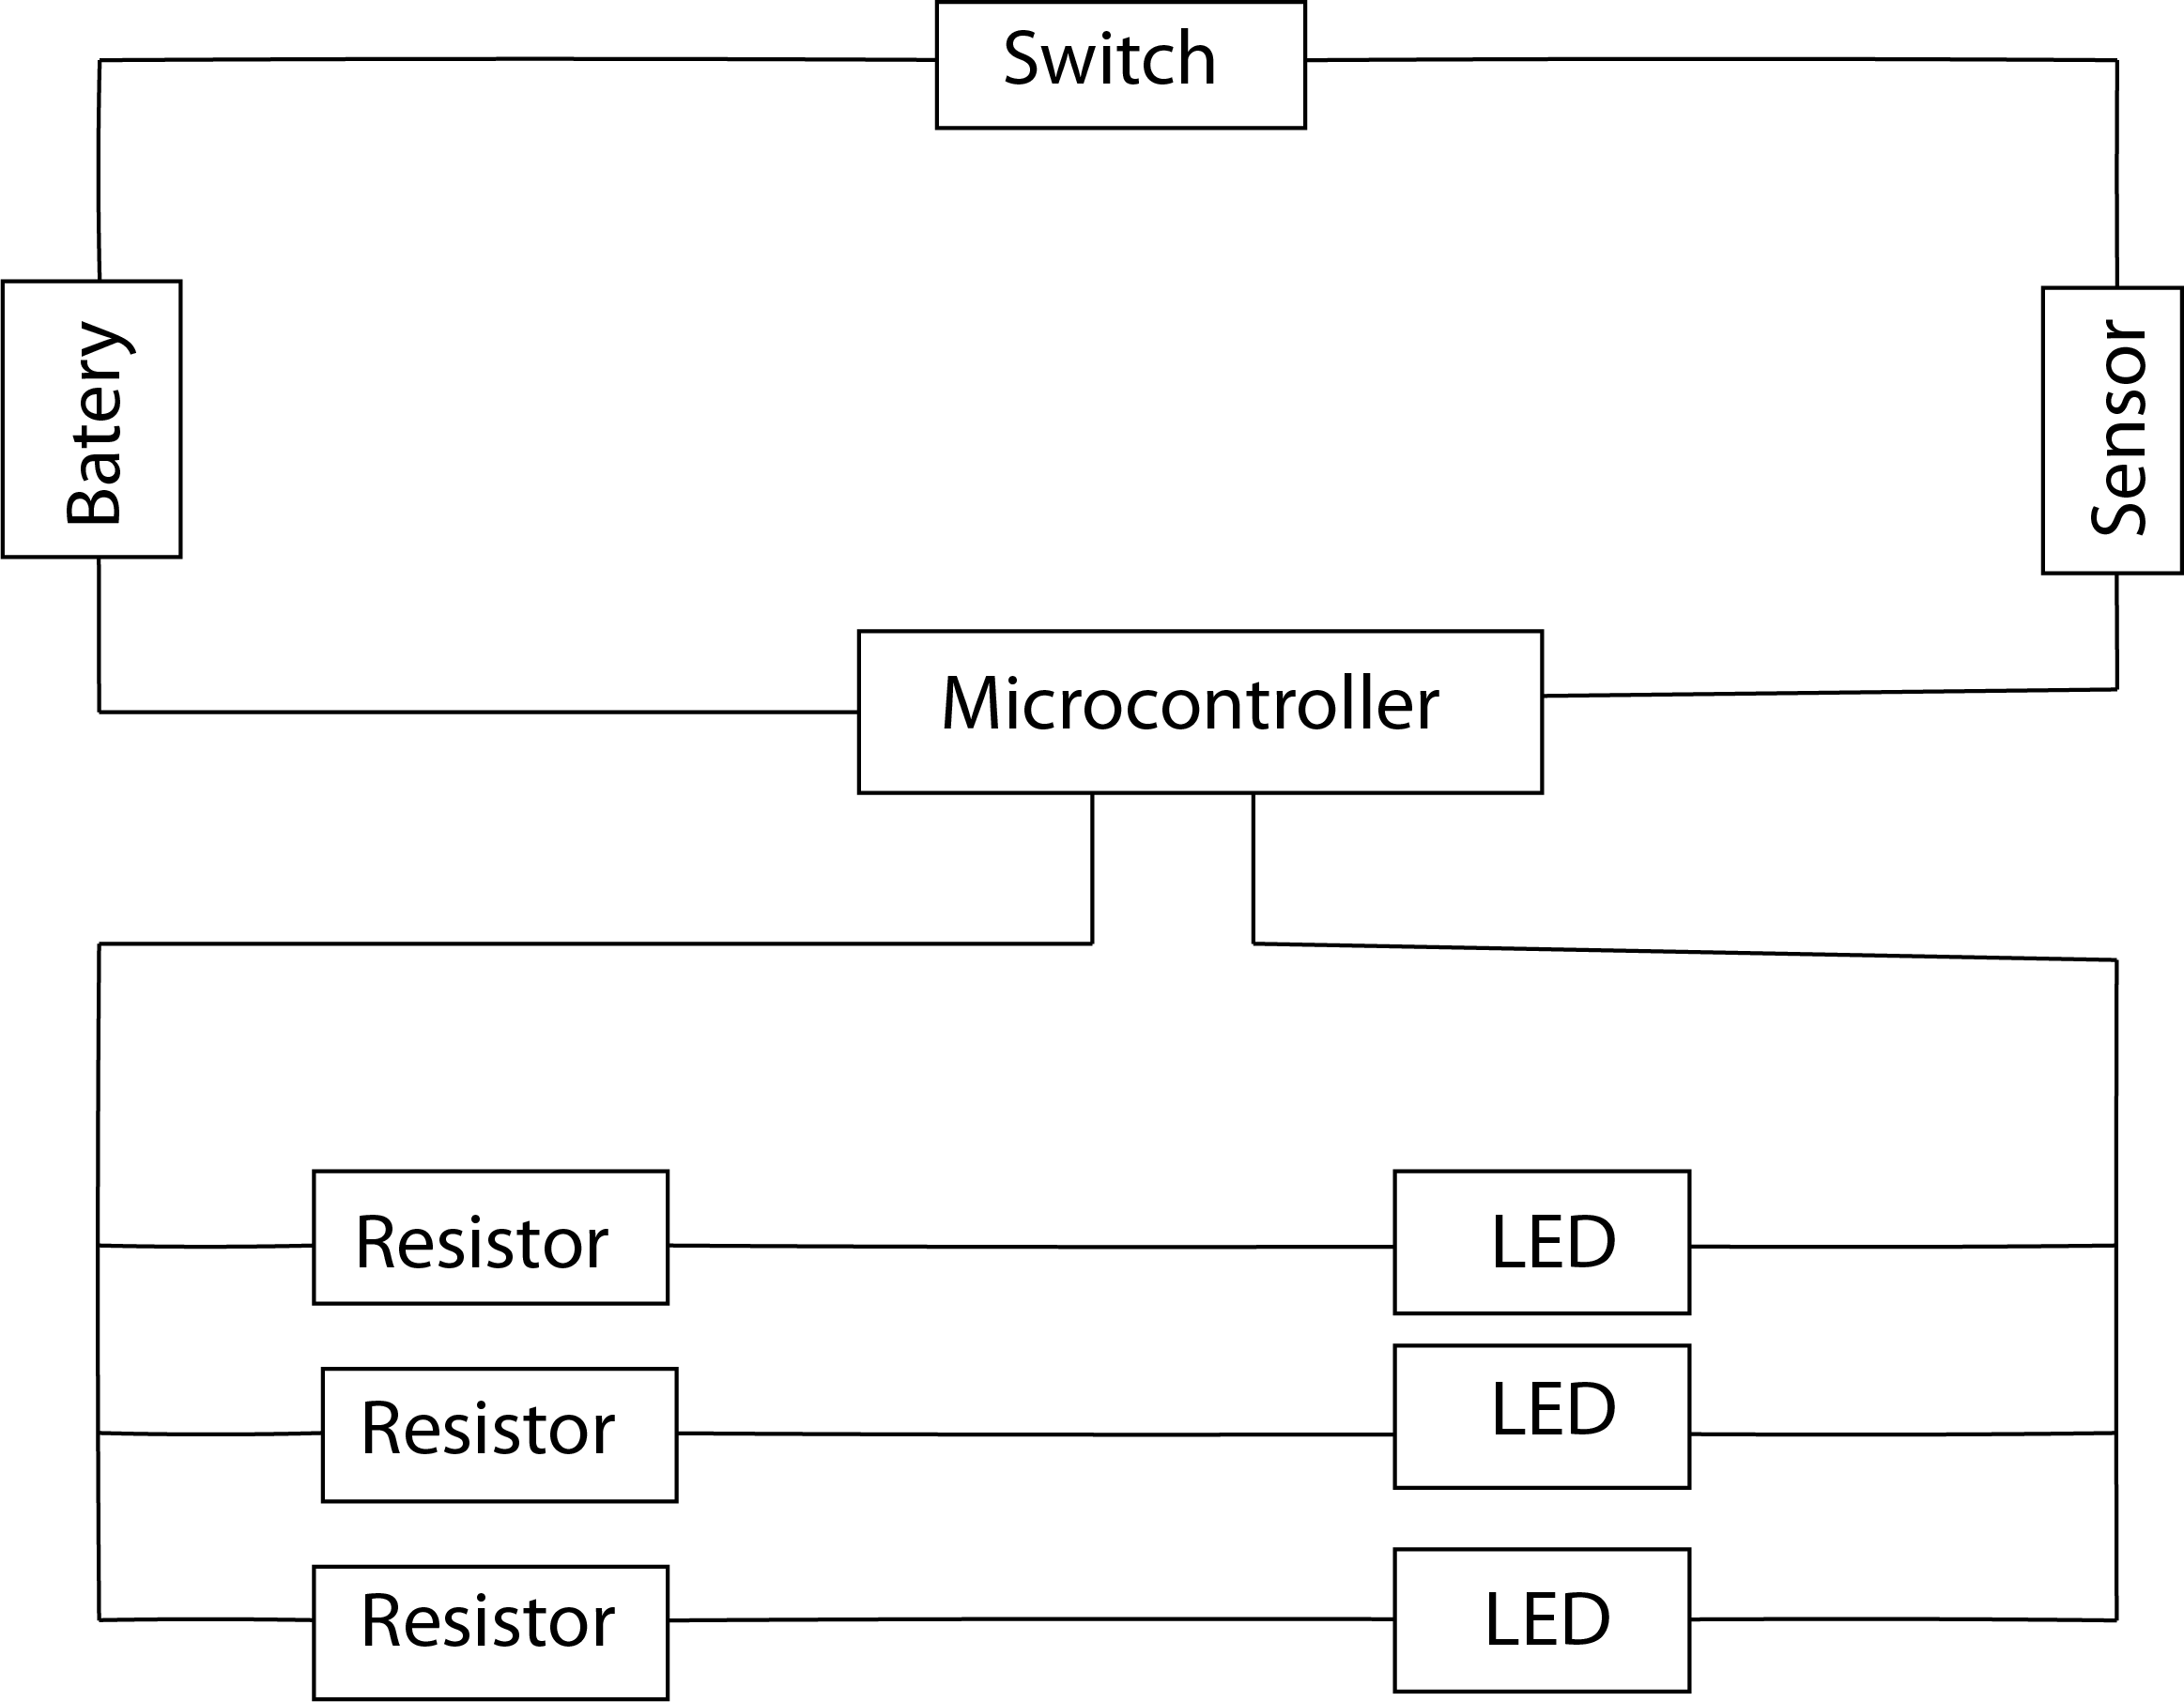
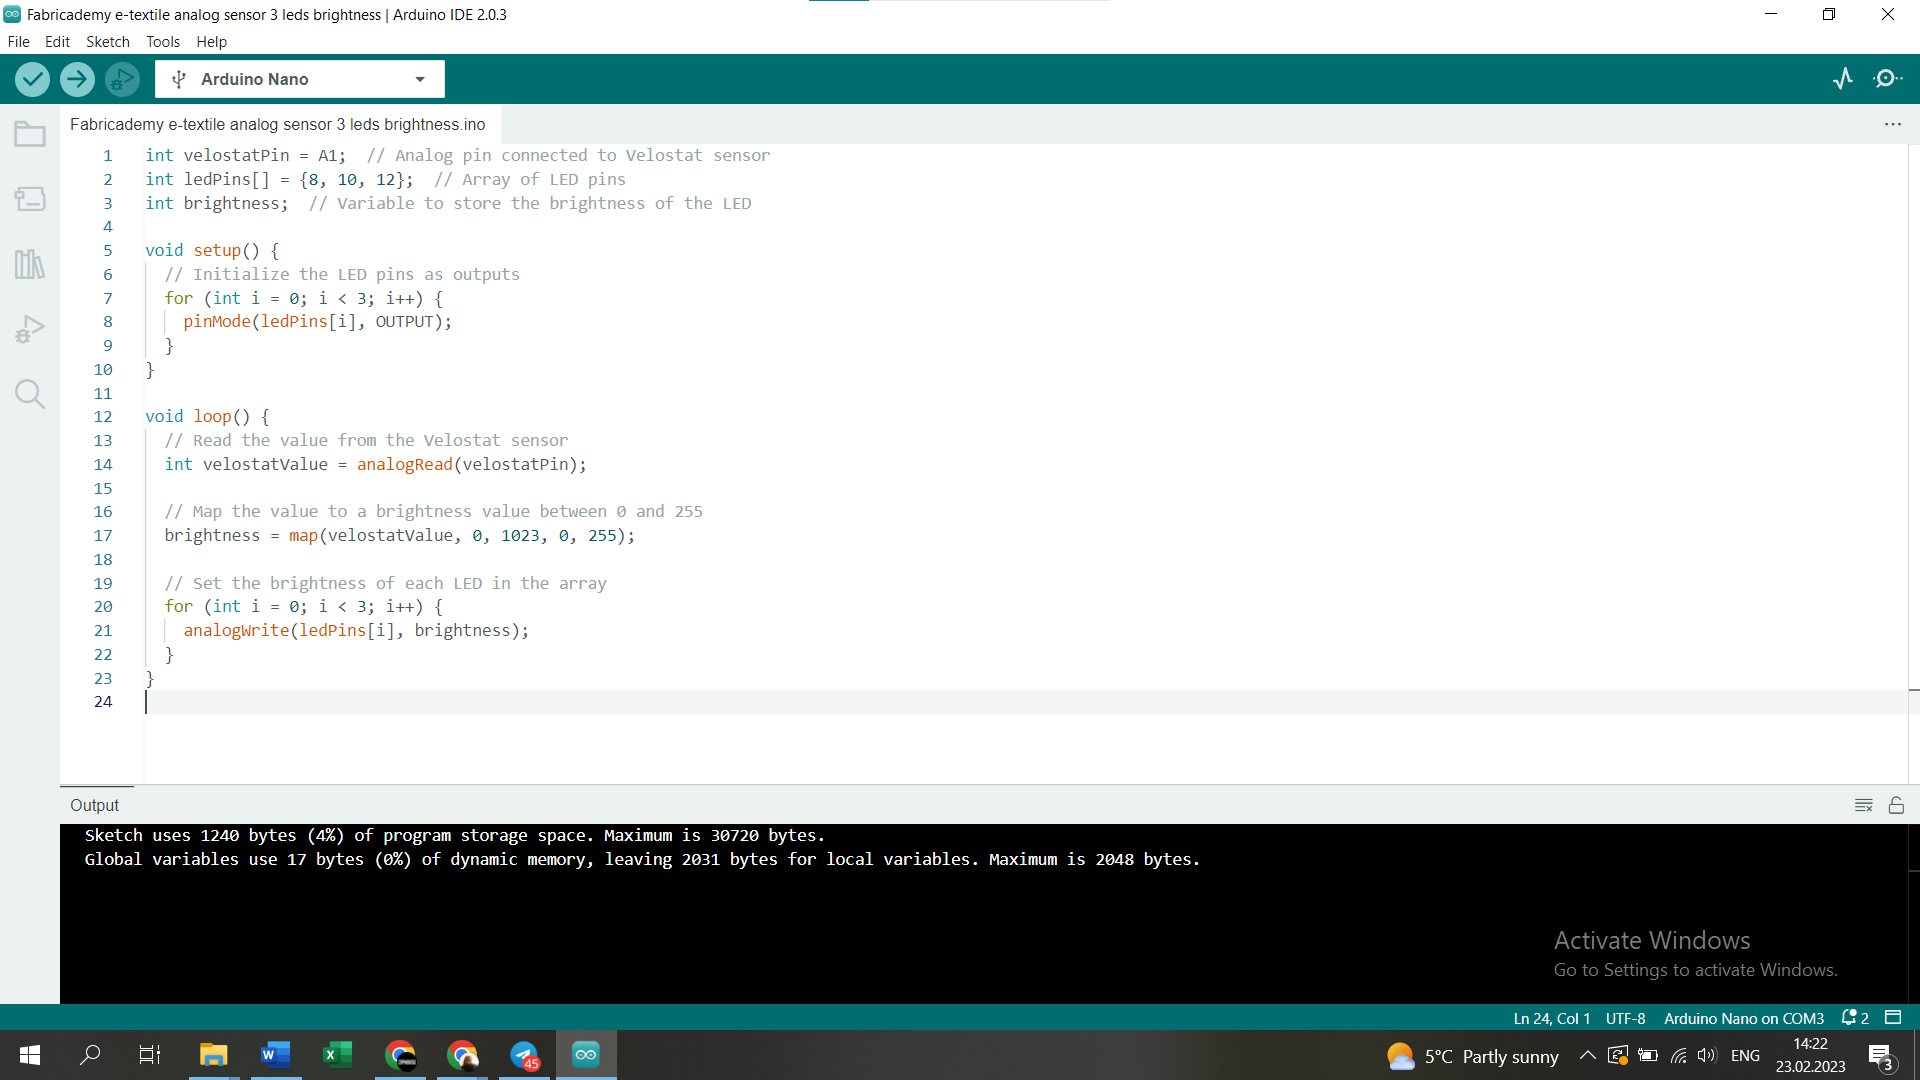
int velostatPin = A1;
int ledPins[] = {8, 10, 12};
int brightness;

void setup() {

  for (int i = 0; i < 3; i++) {
    pinMode(ledPins[i], OUTPUT);
  }

}

void loop() {

  int velostatValue = analogRead(velostatPin);
  brightness = map(velostatValue, 0, 1023, 0, 255);
  for (int i = 0; i < 3; i++) {
    analogWrite(ledPins[i], brightness);
  }
}
Bill of Materials
For creating the sensor I used the following materials:
| Nr | Description | Price | Link | Notes |
|---|---|---|---|---|
| 1 | Velostat | 4.95 $ | https://www.adafruit.com/product/1361 | 1 piece (28cm x 28cm) |
| 2 | Sponge | 1.00 $ | https://metro.zakaz.md/ro/products/null--04841464000726/ | 1 pack |
| 3 | Aluminium tape | 15.00 $ | https://supraten.md/banda-adeziva-aluminiu-50m-50mm-61578-ro | 1 roll |
| 4 | Cotton fabric | 5.70 $ | https://linatextil.com/domashniy-tekstil/ranfors-hlopok/ranfors-hlopok-odnotonnyy-cvet-krasnyy-plotnost-125-gr.-m-5-rnf926-clone/ | 1 meter |

Final Result
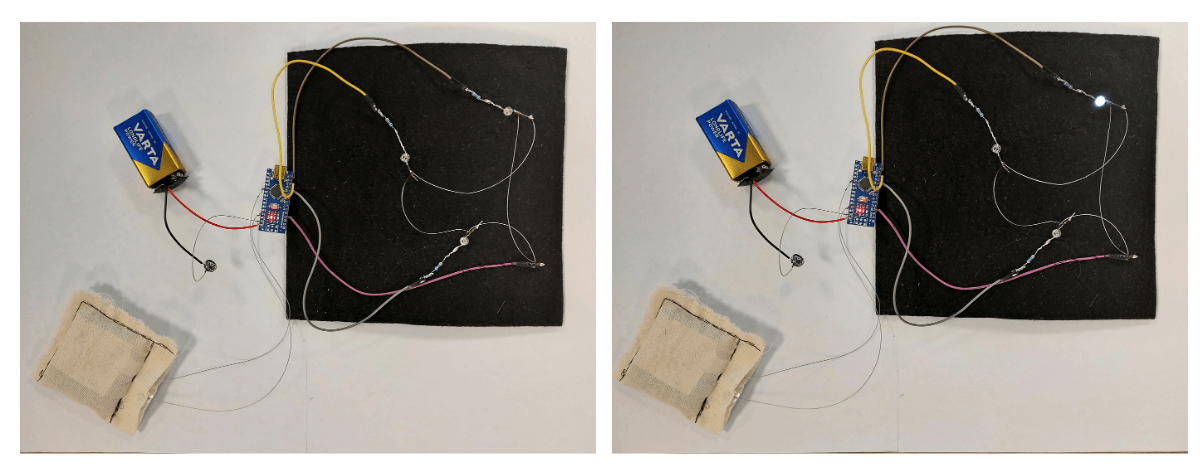
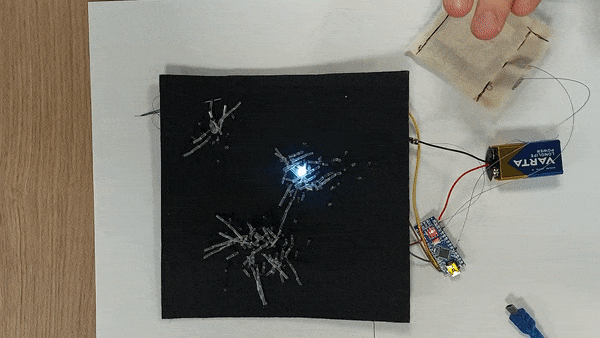
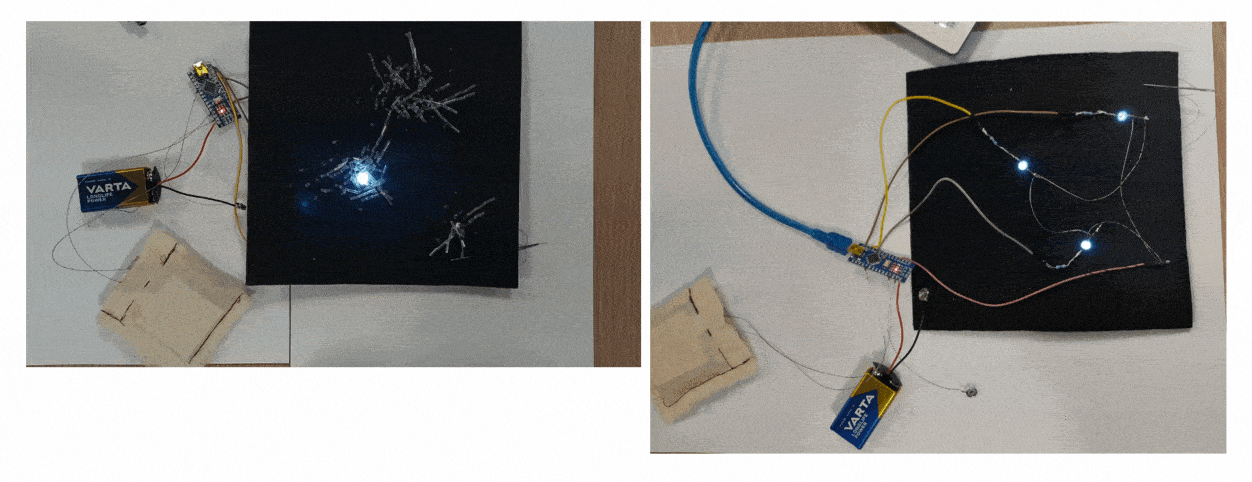
In order to have a circuit embeded in textiles it's advised to use conductive thread. As I was using wires for the conection of this circuit, I made some soft connections and sewed the wires to the fabric with a zig-zag stich.