8. Wearables
Research
This week was the most overwhelming for me for various reasons. I struggled a lot following the courses about coding and electric circuits. However, I still had to create something for this week so I tried to find something I could relate to, and because we didnt have thermochromic ink, I used some thermochromatic fabric.
First of all, I needed to undestand what a Wearable is?
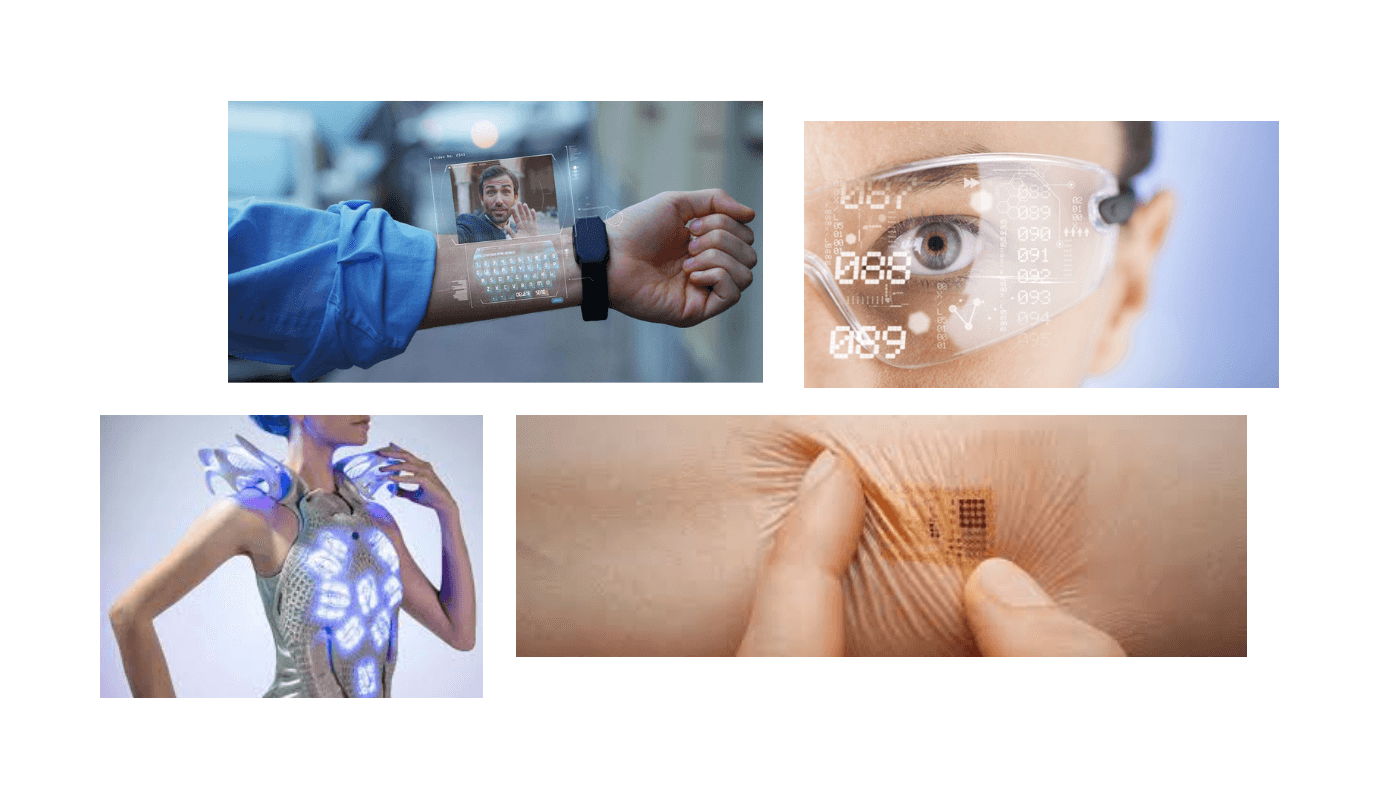
Wearable technology is any kind of electronic device designed to be worn on the user's body. Such devices can take many different forms, including jewelry, accessories, medical devices, and clothing or elements of clothing, or even tattooed on the skin. The devices are hands-free gadgets with practical uses, powered by microprocessors and enhanced with the ability to send and receive data via the Internet.
Examples of Wearable Technology
The past few years have seen rapid development and introduction of wearable technology products adapted for medical and healthcare uses. These include:
-
In Louisville, Kentucky, wearable devices made by AIR Louisville are being used to monitor local air quality, measure pollutants, and identify hotspots for residents with respiratory problems.
-
Cyrcadia Health has developed Cyrcadia Breast Monitor, an intelligent patch that can detect early signs of breast cancer and transmit the information to a lab for analysis.
-
Wearable medical alert monitors are extending greater mobility and independence to the elderly and impaired.
-
Smart tattoos that contain flexible electronic sensors are being developed to monitor heart and brain activity, sleep disorders, and muscle function. While these are temporary, even inks are being explored!
- A smartwatch for people with Parkinson's disease tracks symptoms and transmits the data so that more personalized treatment plans can be developed.
- Smart jewelry. This can include smart rings, wristbands, watches and pins. Smaller wearable devices typically work with a smartphone app for display and interaction. Body-mounted sensors. These sensors are placed on the body to monitor and transmit biological data for healthcare purposes.
- Fitness trackers. These wearables often come in the form of wristbands, straps or headbands that monitor physical activity and vital signs. Trackers may connect wirelessly to an app for data storage, processing and reporting.
- Smart clothing. This type of clothing comes with built-in technology that can perform a variety of tasks including fitness or health monitoring, interacting with phones and other devices and changing fabric characteristics to suit the user's preference, activity or environment. As an example, in 2014, clothing manufacturer Tommy Hilfiger launched clothing that came fitted with solar cells to charge devices.
- Augmented reality (AR) headsets. AR headsets use a real-world setting and integrate digital information into a display of the user's environment in a way that enables interaction with real world and virtual reality.
- VR headsets. VR headsets entirely replace the user environment with digital information and enhance the fictional reality. VR users are controlled by the system.
- AI hearing aids. AI hearing aids can filter out unwanted noises and automatically adapt to provide the best performance in the user's current environment and for their individual hearing needs. Such devices, sometimes referred to as hearables, can also incorporate capabilities such as fitness tracking, audio streaming and translation.
References & Inspiration
Alexander Wang introduces heat-sensitive colour-changing clothing, fall 2014 RTW
"Models dressed in black outfits were gummed up to a giant round turntable that began to rotate releasing heating vents. As the circle started and stopped, the thermo-reactive leather clothes changed colours from orange flashes to bright yellow and blue, or vivid pink depending on the heat exposure. Surprising from Wang who mainly sticks to monochromatic black and white collections."
It really amazes by the innovative textiles and materials which show just how much technology is changing the fashion world!
Kunihiko Morinaga first incorporated fabric with light-dependent color-changing photochromic properties a decade ago and has since regularly returned to the technology, once in collaboration with Fendi. The latest update featured new photochromic hardware—Morinaga said this was the first time he had integrated the technology into faux fur, velvet, lace, knits, jacquards, and satins and added that he had never before been able to create shifting shades of colors like yellow, red and purple.
Pairs of models came out on stage wearing adjacent but not identical garments that were often cut symmetrically to look the same from the front as behind or to have what you would expect the back to look like in front. Two UV-emitting tubes were lowered in front of the models to the slow build of Ravel’s “Boléro.” As the light passed in front of the garments, their color transformed from (mostly) white into vivid tones and patterns, including an Anrealage monogram and polka dots. The models then turned 180 degrees and were zhuzhed again.
Process and workflow
Actuators
An actuator is a component of a machine that is responsible for moving and controlling a mechanism or system. An actuator requires a control device (controlled by control signal) and a source of energy. The control signal is relatively low energy and may be electricvoltage or current. Its main energy source may be an electric current, hydraulic pressure, or pneumatic pressure.
For the week we used 3 types of actuators:
Visual
-
LEDs
-
Neopixels
-
Fiber optics
- Thermochromic ink
Sound
- Textile speaker
Motion
- Shape Memory Alloys
- flip dots
- Vive motors+ haptics
Arduino language
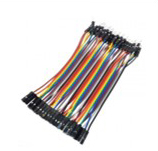
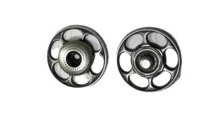
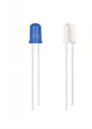
Tools
- LEDs
- Arduino nano
- Wires
- Battery 9V
- Connector to the battery
- Sensors
- Attiny85
- Snaps
- Multimeter
- Soldering iron
- Neopixel stripe
Prototyping Neopixel stripe
We began our experiments as a group study and because we were limited in the tools that we can use to create different swatches, we first try to experiment with the neopixel stripe.
We also connected the analog and digital sensors that were made during the E-textile week.
![]()
![]()
![]()
Neopixel code
#include <FastLED.h>

#define LED_PIN     5
#define NUM_LEDS    50
#define BRIGHTNESS  64
#define LED_TYPE    WS2811
#define COLOR_ORDER GRB
CRGB leds[NUM_LEDS];

#define UPDATES_PER_SECOND 100

// This example shows several ways to set up and use 'palettes' of colors
// with FastLED.
//
// These compact palettes provide an easy way to re-colorize your
// animation on the fly, quickly, easily, and with low overhead.
//
// USING palettes is MUCH simpler in practice than in theory, so first just
// run this sketch, and watch the pretty lights as you then read through
// the code.  Although this sketch has eight (or more) different color schemes,
// the entire sketch compiles down to about 6.5K on AVR.
//
// FastLED provides a few pre-configured color palettes, and makes it
// extremely easy to make up your own color schemes with palettes.
//
// Some notes on the more abstract 'theory and practice' of
// FastLED compact palettes are at the bottom of this file.


CRGBPalette16 currentPalette;
TBlendType    currentBlending;

extern CRGBPalette16 myRedWhiteBluePalette;
extern const TProgmemPalette16 myRedWhiteBluePalette_p PROGMEM;


void setup() {
    delay( 3000 ); // power-up safety delay
    FastLED.addLeds<LED_TYPE, LED_PIN, COLOR_ORDER>(leds, NUM_LEDS).setCorrection( TypicalLEDStrip );
    FastLED.setBrightness(  BRIGHTNESS );

    currentPalette = RainbowColors_p;
    currentBlending = LINEARBLEND;
}


void loop()
{
    ChangePalettePeriodically();

    static uint8_t startIndex = 0;
    startIndex = startIndex + 1; /* motion speed */

    FillLEDsFromPaletteColors( startIndex);

    FastLED.show();
    FastLED.delay(1000 / UPDATES_PER_SECOND);
}

void FillLEDsFromPaletteColors( uint8_t colorIndex)
{
    uint8_t brightness = 255;

    for( int i = 0; i < NUM_LEDS; ++i) {
        leds[i] = ColorFromPalette( currentPalette, colorIndex, brightness, currentBlending);
        colorIndex += 3;
    }
}


// There are several different palettes of colors demonstrated here.
//
// FastLED provides several 'preset' palettes: RainbowColors_p, RainbowStripeColors_p,
// OceanColors_p, CloudColors_p, LavaColors_p, ForestColors_p, and PartyColors_p.
//
// Additionally, you can manually define your own color palettes, or you can write
// code that creates color palettes on the fly.  All are shown here.

void ChangePalettePeriodically()
{
    uint8_t secondHand = (millis() / 1000) % 60;
    static uint8_t lastSecond = 99;

    if( lastSecond != secondHand) {
        lastSecond = secondHand;
        if( secondHand ==  0)  { currentPalette = RainbowColors_p;         currentBlending = LINEARBLEND; }
        if( secondHand == 10)  { currentPalette = RainbowStripeColors_p;   currentBlending = NOBLEND;  }
        if( secondHand == 15)  { currentPalette = RainbowStripeColors_p;   currentBlending = LINEARBLEND; }
        if( secondHand == 20)  { SetupPurpleAndGreenPalette();             currentBlending = LINEARBLEND; }
        if( secondHand == 25)  { SetupTotallyRandomPalette();              currentBlending = LINEARBLEND; }
        if( secondHand == 30)  { SetupBlackAndWhiteStripedPalette();       currentBlending = NOBLEND; }
        if( secondHand == 35)  { SetupBlackAndWhiteStripedPalette();       currentBlending = LINEARBLEND; }
        if( secondHand == 40)  { currentPalette = CloudColors_p;           currentBlending = LINEARBLEND; }
        if( secondHand == 45)  { currentPalette = PartyColors_p;           currentBlending = LINEARBLEND; }
        if( secondHand == 50)  { currentPalette = myRedWhiteBluePalette_p; currentBlending = NOBLEND;  }
        if( secondHand == 55)  { currentPalette = myRedWhiteBluePalette_p; currentBlending = LINEARBLEND; }
    }
}

// This function fills the palette with totally random colors.
void SetupTotallyRandomPalette()
{
    for( int i = 0; i < 16; ++i) {
        currentPalette[i] = CHSV( random8(), 255, random8());
    }
}

// This function sets up a palette of black and white stripes,
// using code.  Since the palette is effectively an array of
// sixteen CRGB colors, the various fill_* functions can be used
// to set them up.
void SetupBlackAndWhiteStripedPalette()
{
    // 'black out' all 16 palette entries...
    fill_solid( currentPalette, 16, CRGB::Black);
    // and set every fourth one to white.
    currentPalette[0] = CRGB::White;
    currentPalette[4] = CRGB::White;
    currentPalette[8] = CRGB::White;
    currentPalette[12] = CRGB::White;

}

// This function sets up a palette of purple and green stripes.
void SetupPurpleAndGreenPalette()
{
    CRGB purple = CHSV( HUE_PURPLE, 255, 255);
    CRGB green  = CHSV( HUE_GREEN, 255, 255);
    CRGB black  = CRGB::Black;

    currentPalette = CRGBPalette16(
                                   green,  green,  black,  black,
                                   purple, purple, black,  black,
                                   green,  green,  black,  black,
                                   purple, purple, black,  black );
}


// This example shows how to set up a static color palette
// which is stored in PROGMEM (flash), which is almost always more
// plentiful than RAM.  A static PROGMEM palette like this
// takes up 64 bytes of flash.
const TProgmemPalette16 myRedWhiteBluePalette_p PROGMEM =
{
    CRGB::Red,
    CRGB::Gray, // 'white' is too bright compared to red and blue
    CRGB::Blue,
    CRGB::Black,

    CRGB::Red,
    CRGB::Gray,
    CRGB::Blue,
    CRGB::Black,

    CRGB::Red,
    CRGB::Red,
    CRGB::Gray,
    CRGB::Gray,
    CRGB::Blue,
    CRGB::Blue,
    CRGB::Black,
    CRGB::Black
};


// Additional notes on FastLED compact palettes:
//
// Normally, in computer graphics, the palette (or "color lookup table")
// has 256 entries, each containing a specific 24-bit RGB color.  You can then
// index into the color palette using a simple 8-bit (one byte) value.
// A 256-entry color palette takes up 768 bytes of RAM, which on Arduino
// is quite possibly "too many" bytes.
//
// FastLED does offer traditional 256-element palettes, for setups that
// can afford the 768-byte cost in RAM.
//
// However, FastLED also offers a compact alternative.  FastLED offers
// palettes that store 16 distinct entries, but can be accessed AS IF
// they actually have 256 entries; this is accomplished by interpolating
// between the 16 explicit entries to create fifteen intermediate palette
// entries between each pair.
//
// So for example, if you set the first two explicit entries of a compact
// palette to Green (0,255,0) and Blue (0,0,255), and then retrieved
// the first sixteen entries from the virtual palette (of 256), you'd get
// Green, followed by a smooth gradient from green-to-blue, and then Blue.
Prototyping Sound
For the sound example we used an arduino uno, a specific code and the digital sensor as the button that starts the music.
You can check Valentina Frunze's documentation for this week to find out more of our group experiments.
Sound code
/*  RickRollCode

    AUTHOR: Rowan Packard
    rowanpackard@gmail.com

    DISCLAIMER: The song "Never Gonna Give You Up" by Rick Astley
    is not the creative property of the author. This code simply
    plays a Piezo buzzer rendition of the song.
*/

#define  a3f    208     // 208 Hz
#define  b3f    233     // 233 Hz
#define  b3     247     // 247 Hz
#define  c4     261     // 261 Hz MIDDLE C
#define  c4s    277     // 277 Hz
#define  e4f    311     // 311 Hz
#define  f4     349     // 349 Hz
#define  a4f    415     // 415 Hz
#define  b4f    466     // 466 Hz
#define  b4     493     // 493 Hz
#define  c5     523     // 523 Hz
#define  c5s    554     // 554 Hz
#define  e5f    622     // 622 Hz
#define  f5     698     // 698 Hz
#define  f5s    740     // 740 Hz
#define  a5f    831     // 831 Hz

#define rest    -1

int piezo = 7; // Connect your piezo buzzer to this pin or change it to match your circuit!
int led = LED_BUILTIN;

volatile int beatlength = 100; // determines tempo
float beatseparationconstant = 0.3;

int threshold;

int a; // part index
int b; // song index
int c; // lyric index

boolean flag;

// Parts 1 and 2 (Intro)

int song1_intro_melody[] =
{c5s, e5f, e5f, f5, a5f, f5s, f5, e5f, c5s, e5f, rest, a4f, a4f};

int song1_intro_rhythmn[] =
{6, 10, 6, 6, 1, 1, 1, 1, 6, 10, 4, 2, 10};

// Parts 3 or 5 (Verse 1)

int song1_verse1_melody[] =
{ rest, c4s, c4s, c4s, c4s, e4f, rest, c4, b3f, a3f,
  rest, b3f, b3f, c4, c4s, a3f, a4f, a4f, e4f,
  rest, b3f, b3f, c4, c4s, b3f, c4s, e4f, rest, c4, b3f, b3f, a3f,
  rest, b3f, b3f, c4, c4s, a3f, a3f, e4f, e4f, e4f, f4, e4f,
  c4s, e4f, f4, c4s, e4f, e4f, e4f, f4, e4f, a3f,
  rest, b3f, c4, c4s, a3f, rest, e4f, f4, e4f
};

int song1_verse1_rhythmn[] =
{ 2, 1, 1, 1, 1, 2, 1, 1, 1, 5,
  1, 1, 1, 1, 3, 1, 2, 1, 5,
  1, 1, 1, 1, 1, 1, 1, 2, 1, 1, 1, 1, 3,
  1, 1, 1, 1, 2, 1, 1, 1, 1, 1, 1, 4,
  5, 1, 1, 1, 1, 1, 1, 1, 2, 2,
  2, 1, 1, 1, 3, 1, 1, 1, 3
};

const char* lyrics_verse1[] =
{ "We're ", "no ", "strangers ", "", "to ", "love ", "", "\r\n",
  "You ", "know ", "the ", "rules ", "and ", "so ", "do ", "I\r\n",
  "A ", "full ", "commitment's ", "", "", "what ", "I'm ", "thinking ", "", "of", "\r\n",
  "You ", "wouldn't ", "", "get ", "this ", "from ", "any ", "", "other ", "", "guy\r\n",
  "I ", "just ", "wanna ", "", "tell ", "you ", "how ", "I'm ", "feeling", "\r\n",
  "Gotta ", "", "make ", "you ", "understand", "", "\r\n"
};

// Parts 4 or 6 (Chorus)

int song1_chorus_melody[] =
{ b4f, b4f, a4f, a4f,
  f5, f5, e5f, b4f, b4f, a4f, a4f, e5f, e5f, c5s, c5, b4f,
  c5s, c5s, c5s, c5s,
  c5s, e5f, c5, b4f, a4f, a4f, a4f, e5f, c5s,
  b4f, b4f, a4f, a4f,
  f5, f5, e5f, b4f, b4f, a4f, a4f, a5f, c5, c5s, c5, b4f,
  c5s, c5s, c5s, c5s,
  c5s, e5f, c5, b4f, a4f, rest, a4f, e5f, c5s, rest
};

int song1_chorus_rhythmn[] =
{ 1, 1, 1, 1,
  3, 3, 6, 1, 1, 1, 1, 3, 3, 3, 1, 2,
  1, 1, 1, 1,
  3, 3, 3, 1, 2, 2, 2, 4, 8,
  1, 1, 1, 1,
  3, 3, 6, 1, 1, 1, 1, 3, 3, 3, 1, 2,
  1, 1, 1, 1,
  3, 3, 3, 1, 2, 2, 2, 4, 8, 4
};

const char* lyrics_chorus[] =
{ "Never ", "", "gonna ", "", "give ", "you ", "up\r\n",
  "Never ", "", "gonna ", "", "let ", "you ", "down", "", "\r\n",
  "Never ", "", "gonna ", "", "run ", "around ", "", "", "", "and ", "desert ", "", "you\r\n",
  "Never ", "", "gonna ", "", "make ", "you ", "cry\r\n",
  "Never ", "", "gonna ", "", "say ", "goodbye ", "", "", "\r\n",
  "Never ", "", "gonna ", "", "tell ", "a ", "lie ", "", "", "and ", "hurt ", "you\r\n"
};

void setup()
{
  pinMode(piezo, OUTPUT);
  pinMode(led, OUTPUT);

  digitalWrite(led, LOW);
  Serial.begin(9600);
  flag = true;
  a = 4;
  b = 0;
  c = 0;
}

void loop()
{


  // play next step in song
  if (flag == true) {
    play();
  }
}
void play() {
  int notelength;
  if (a == 1 || a == 2) {
    // intro
    notelength = beatlength * song1_intro_rhythmn[b];
    if (song1_intro_melody[b] > 0) {
      digitalWrite(led, HIGH);
      tone(piezo, song1_intro_melody[b], notelength);
    }
    b++;
    if (b >= sizeof(song1_intro_melody) / sizeof(int)) {
      a++;
      b = 0;
      c = 0;
    }
  }
  else if (a == 3 || a == 5) {
    // verse
    notelength = beatlength * 2 * song1_verse1_rhythmn[b];
    if (song1_verse1_melody[b] > 0) {
      digitalWrite(led, HIGH);
      Serial.print(lyrics_verse1[c]);
      tone(piezo, song1_verse1_melody[b], notelength);
      c++;
    }
    b++;
    if (b >= sizeof(song1_verse1_melody) / sizeof(int)) {
      a++;
      b = 0;
      c = 0;
    }
  }
  else if (a == 4 || a == 6) {
    // chorus
    notelength = beatlength * song1_chorus_rhythmn[b];
    if (song1_chorus_melody[b] > 0) {
      digitalWrite(led, HIGH);
      Serial.print(lyrics_chorus[c]);
      tone(piezo, song1_chorus_melody[b], notelength);
      c++;
    }
    b++;
    if (b >= sizeof(song1_chorus_melody) / sizeof(int)) {
      Serial.println("");
      a++;
      b = 0;
      c = 0;
    }
  }
  delay(notelength);
  noTone(piezo);
  digitalWrite(led, LOW);
  delay(notelength * beatseparationconstant);
  if (a == 7) { // loop back around to beginning of song
    a = 1;
  }
}
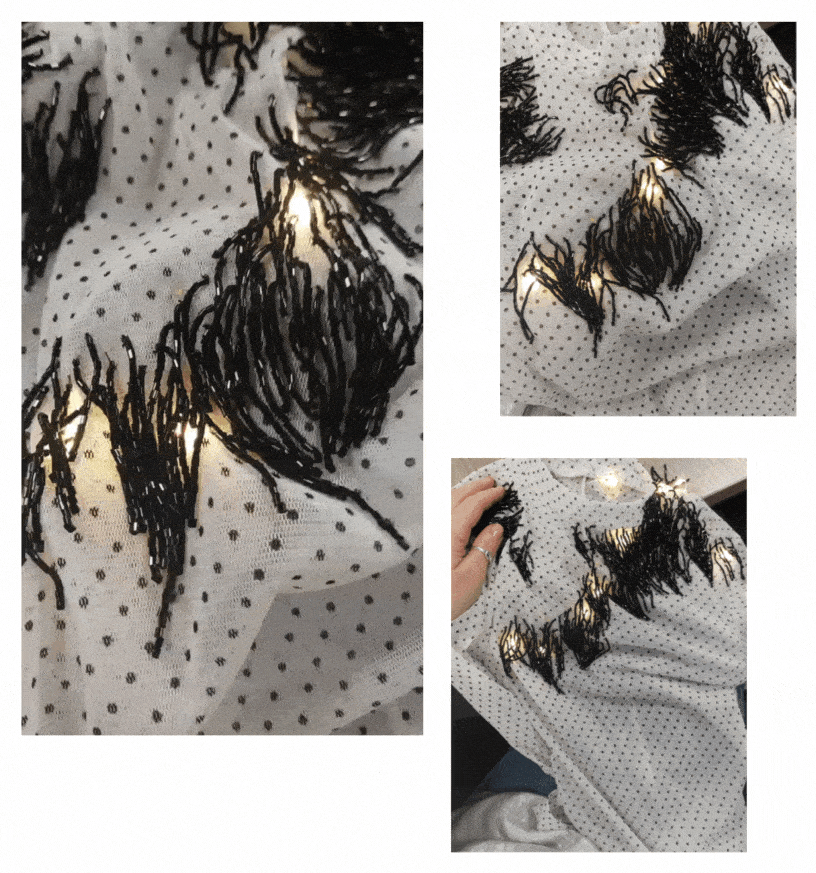
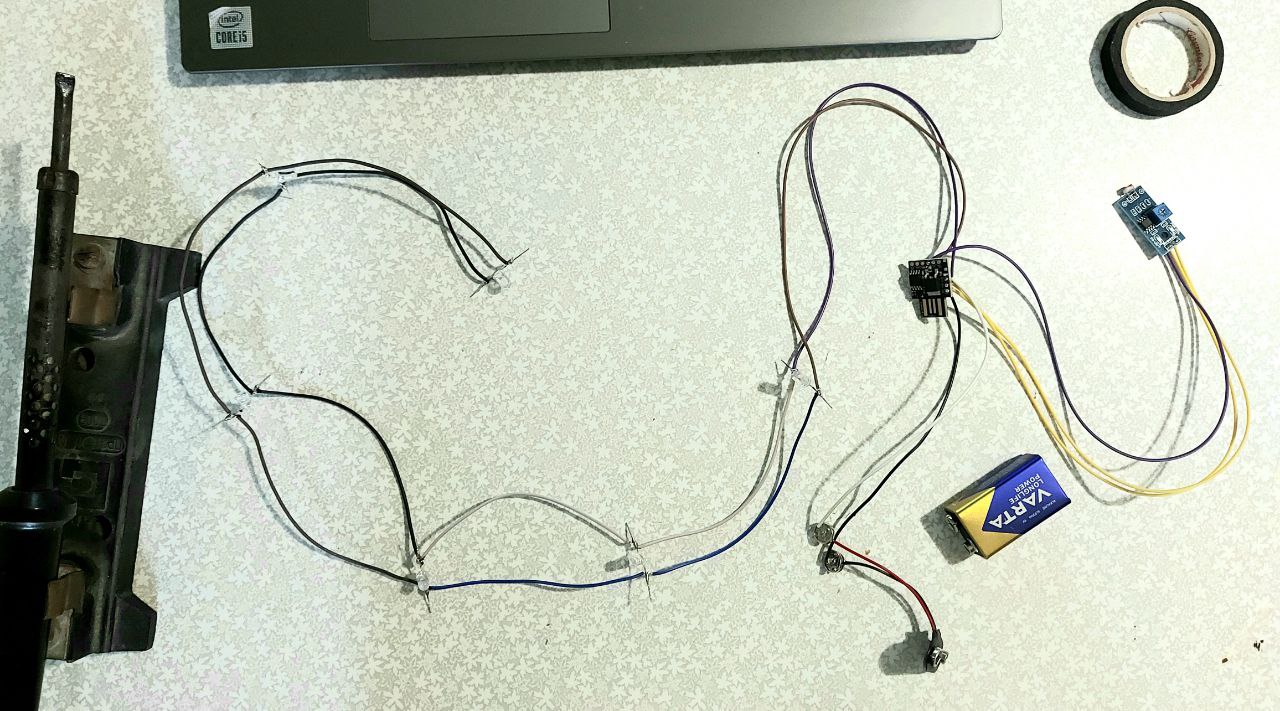
The experiment with light sensor
I have decided to impliment this kind of circuit in my individual work.
The light sensor circuit is a medium complexity circuit. Light sensor circuit is a circuit that turns on the lights when it gets dark around the sensor.
I started by finding the necessary elements.
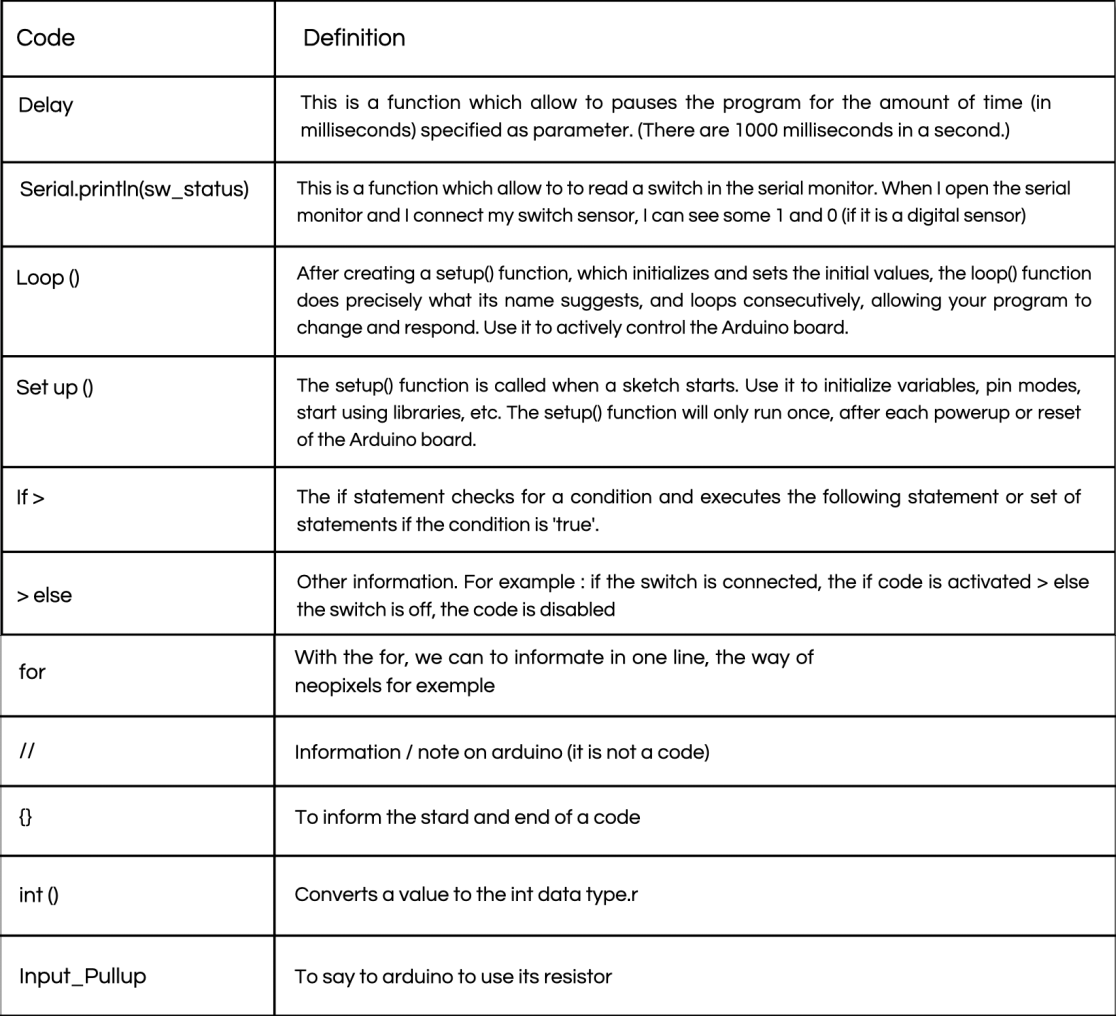
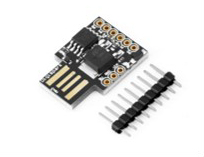
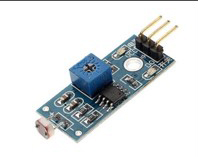
| Photo | Element Name | Quantity needed |
|---|---|---|
 |
ATTINY885 development board | 1 piece |
 |
Light intensity sensor moodule | 1 piece |
 |
Battery 9V | 1 piece |
 |
Connector to the 9V battery | 1 piece |
 |
Wires | several |
 |
Snaps | 2 pairs |
 |
LED pins | 6 pieces |
With the help of Elena Florea-Burduja, I created the circuit and wrote the code. You can find in her documentation for this week some more experiments with the carbon monoxide detection sensor and the light sensor.
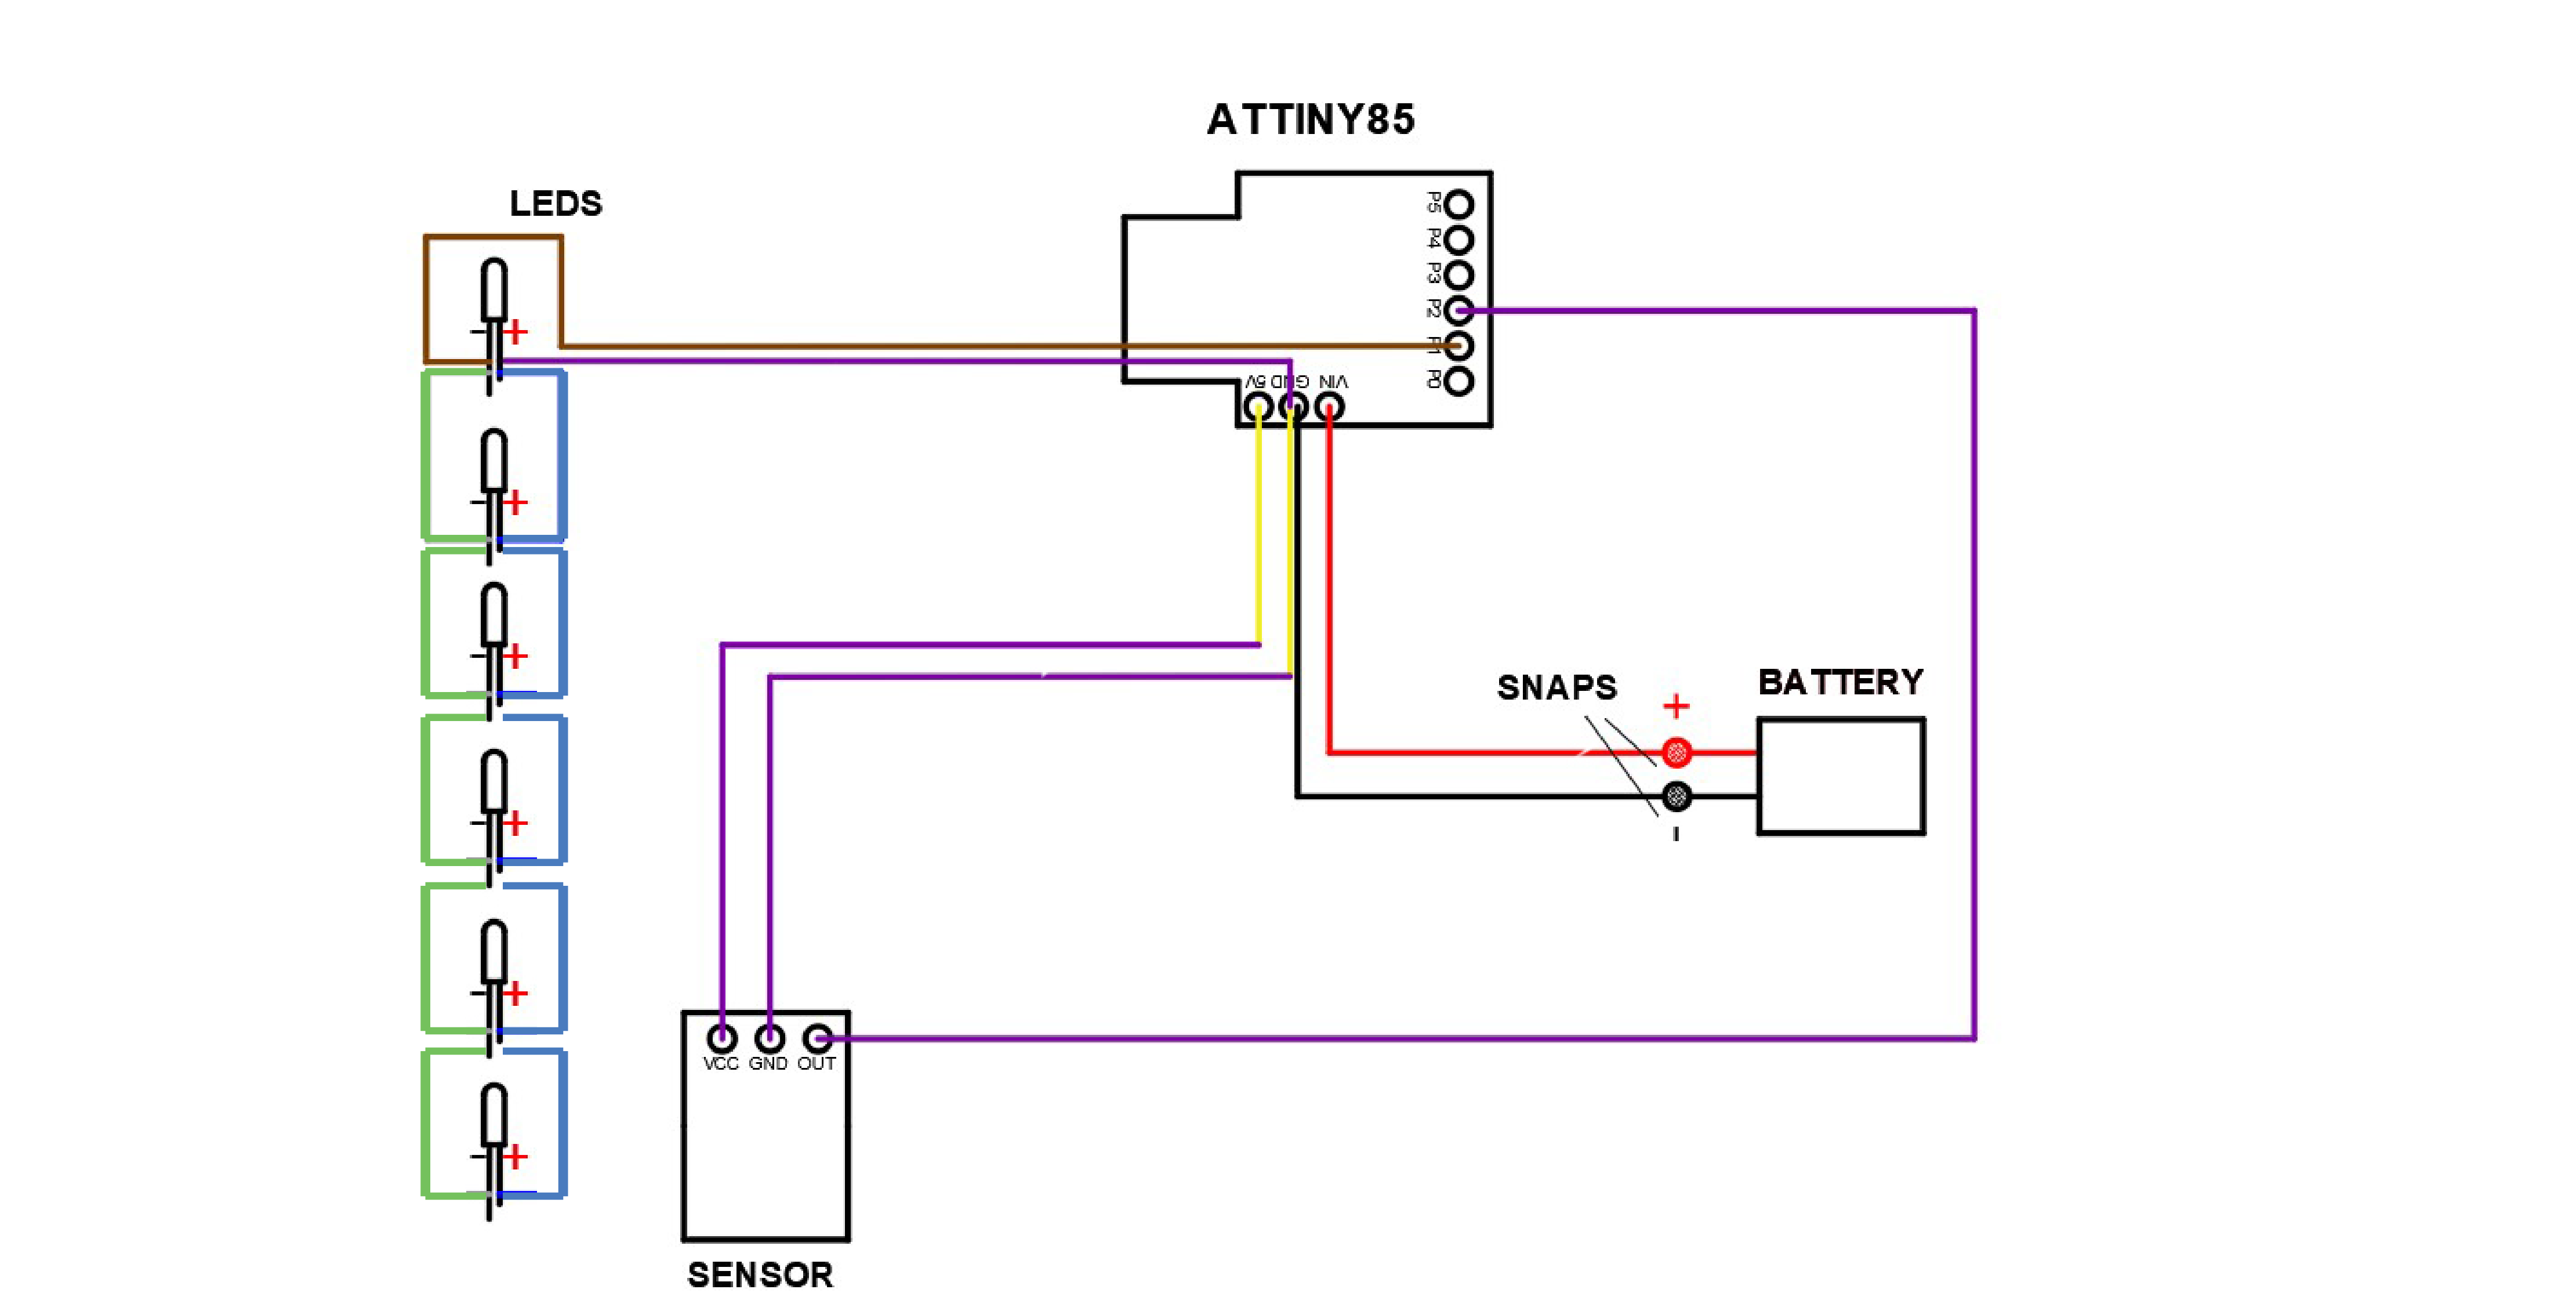
Light sensor code
int Sensor = 2;
int Led = 1;
void setup() {
  pinMode(Led, OUTPUT);
  pinMode(Sensor, INPUT);
}

void loop() {

   if (digitalRead(Sensor) == HIGH) {
      digitalWrite (Led, HIGH);
  }
   if (digitalRead(Sensor) == LOW) {
      digitalWrite (Led, LOW);
  }
}

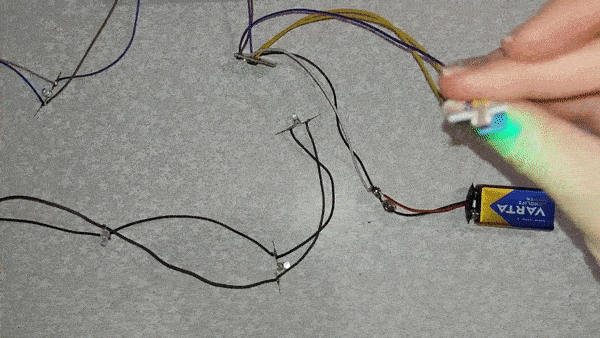
The process of integrating the circuit to the body was quite easy. I inserted the wires through the mesh and just added an extra layer of fabric to secure the battery and bigger components to the back of the body.

When the lights are off and the sensor reacts to the surounding darkness, the LEDs turn bright.
It is a perfect upgrade from a simple body to a party one!