12. Soft robotics
Research and Inspiration
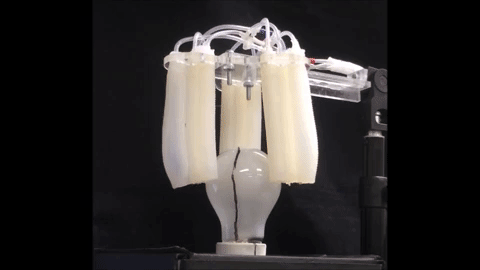
The gripper designed by engineers at the University of California San Diego
During this week's lecture we had a pleasure to meet with Dr. Lily Chambers and Adriana Cabrera who was our tutorial instructor. All the resources she provided gave me so much support and inspiration of what is actually a soft robot and how it can be made.
While watching the tutorials about inflatables, the images reminded me of some mesmerizing works of Craig Green. Though he doesn't use inflatables in his work, the concept of making stuffed garments utilizes a similar mindset in its construction, creating an interesting texture and volume.
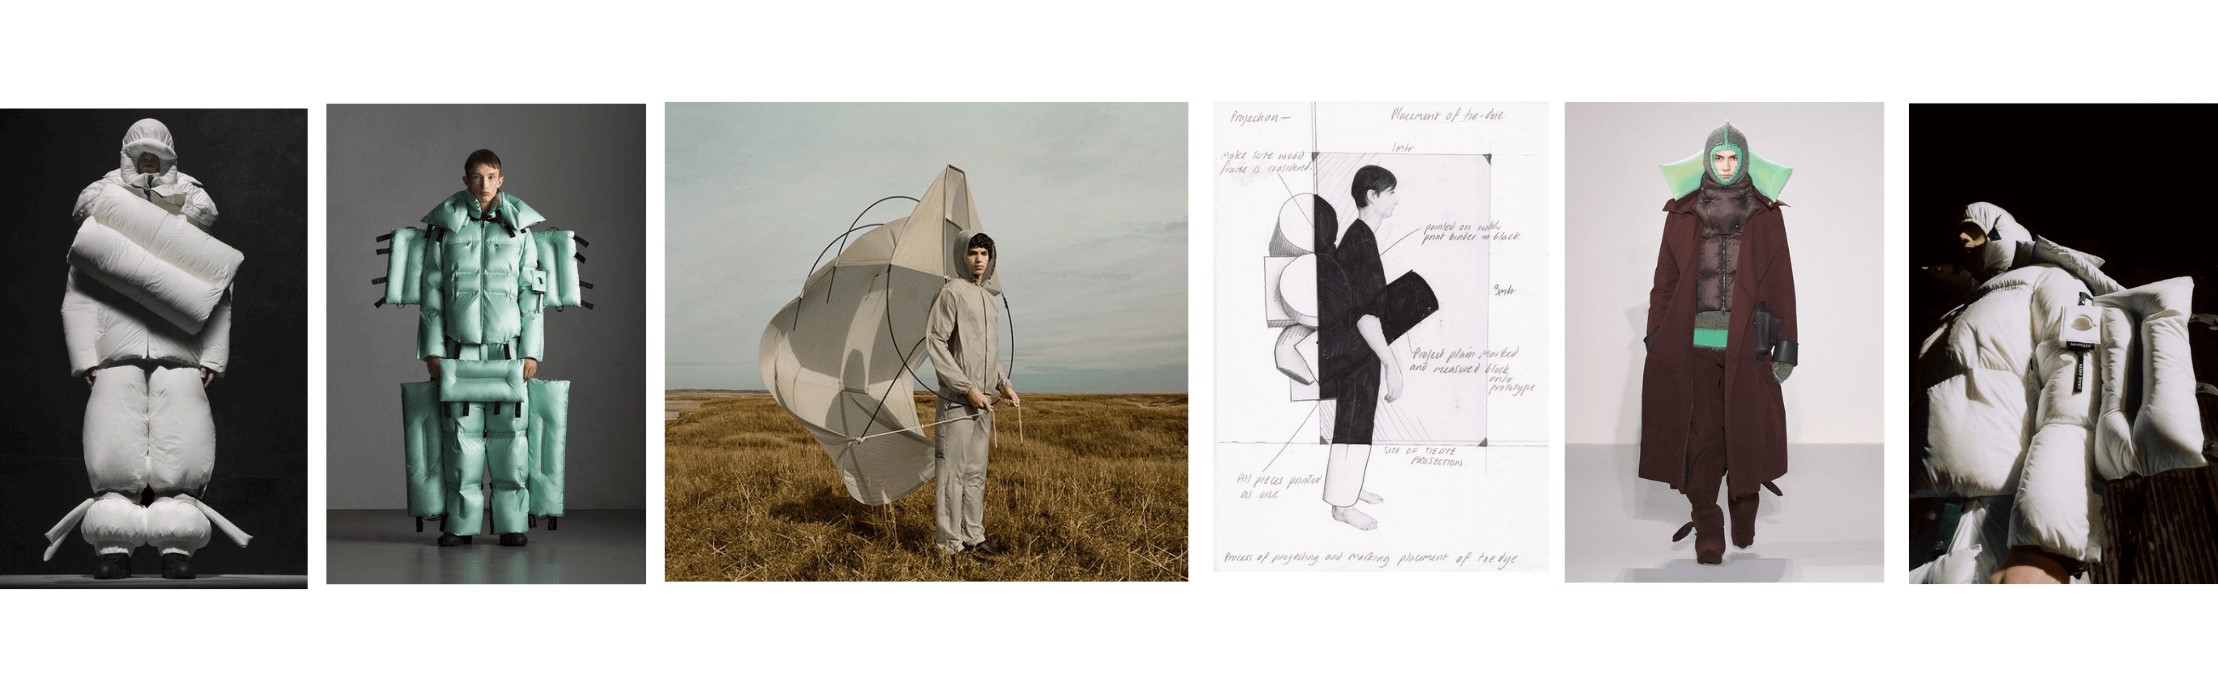 Craig Green's works in collaboration with Moncler
Moncler Genius presents it’s most inflatable collection from London-based designer Craig Green. Staying true to the ever-evolving Genius creative hub, Green celebrates the distortion of volume with his curatorial, utility-inspired approach. Focusing on a dialogue between clothing, body and space, Green’s light modules can be folded, flattened and packed to create shapes that shrink and grow. Taking cues from the properties of down and outerwear approaches, the featherweight material used in the collection’s parkas, jackets and trousers still maintain their protective qualities.
Vinyl Inflatables
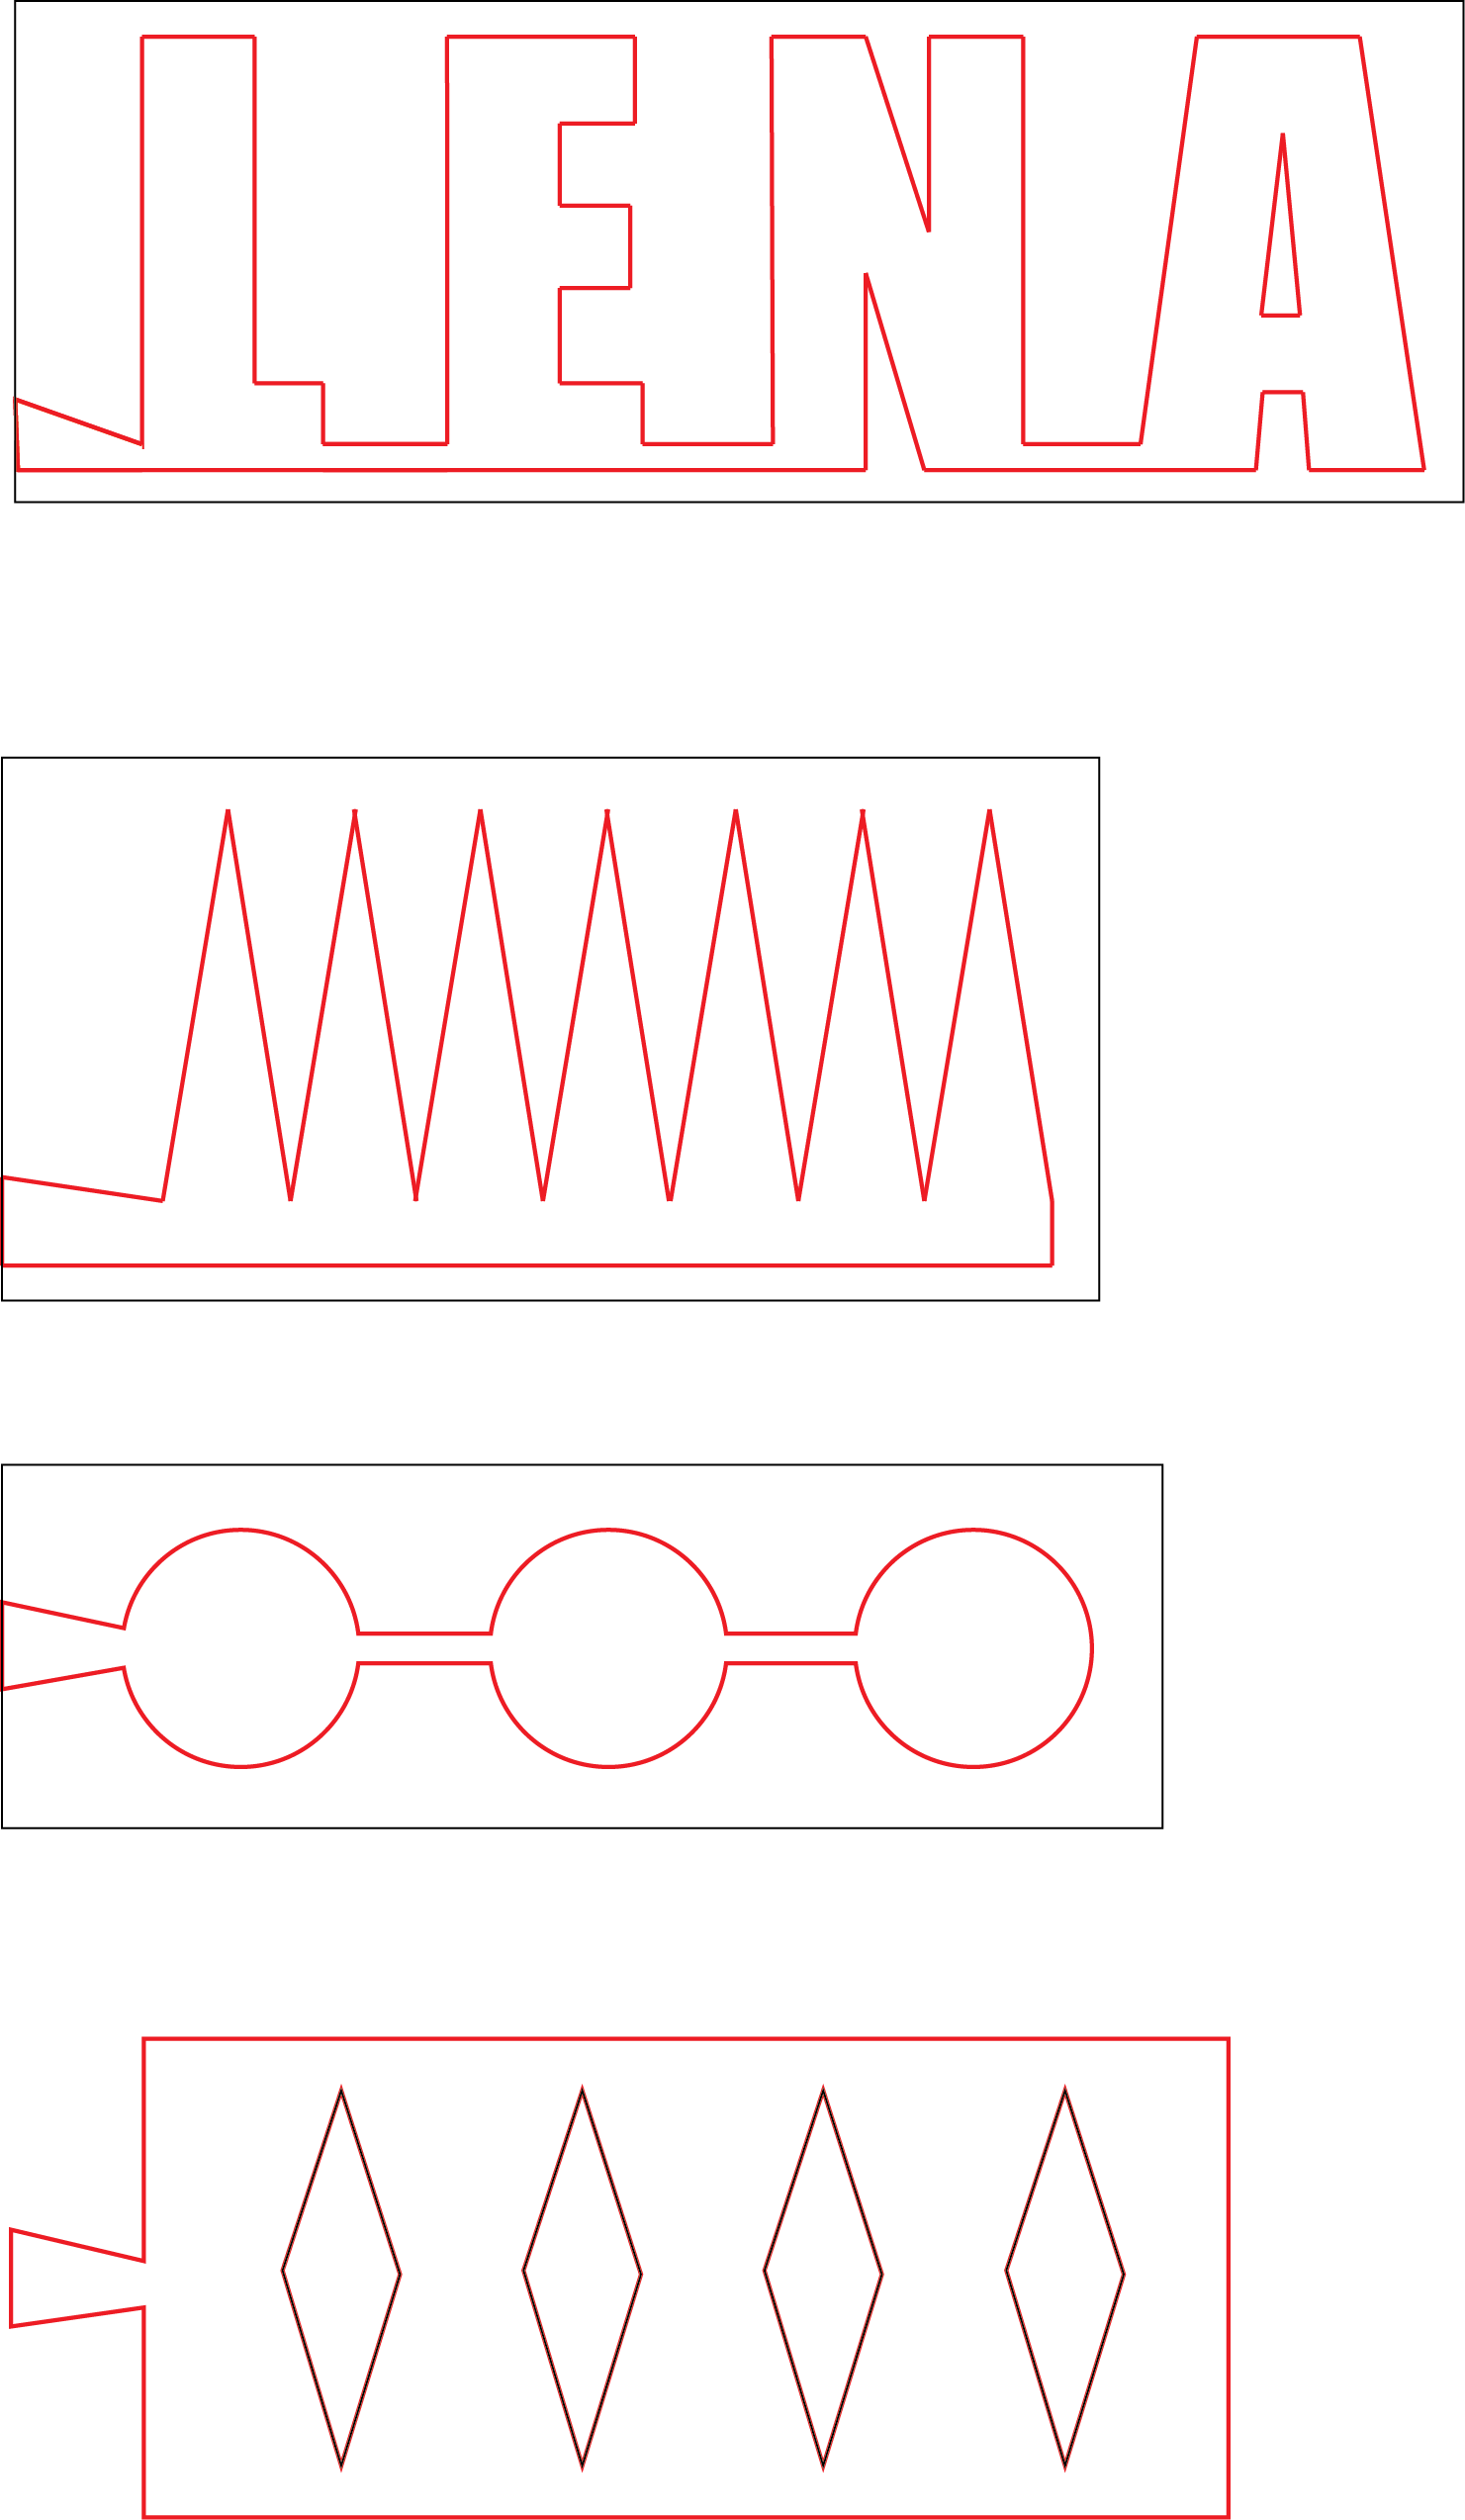
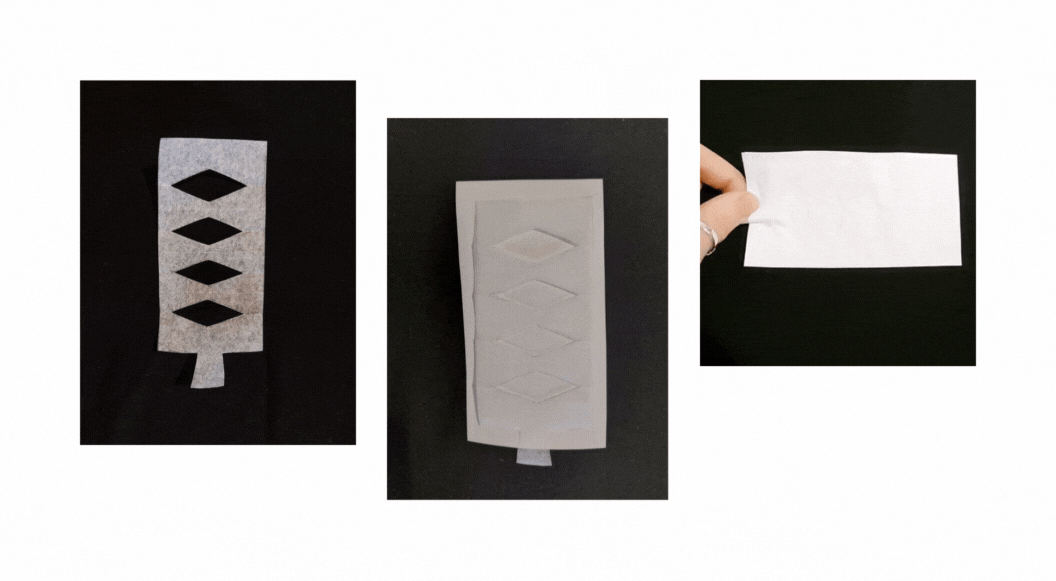
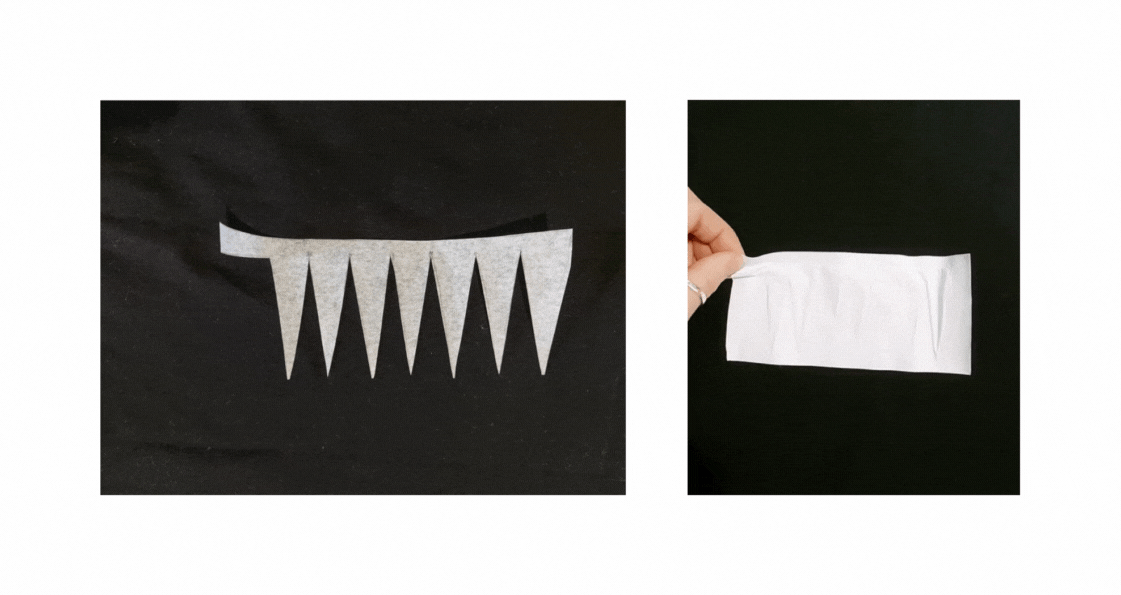
This week was devoted to soft robotics, and in particular an introduction to different inflatable techniques.
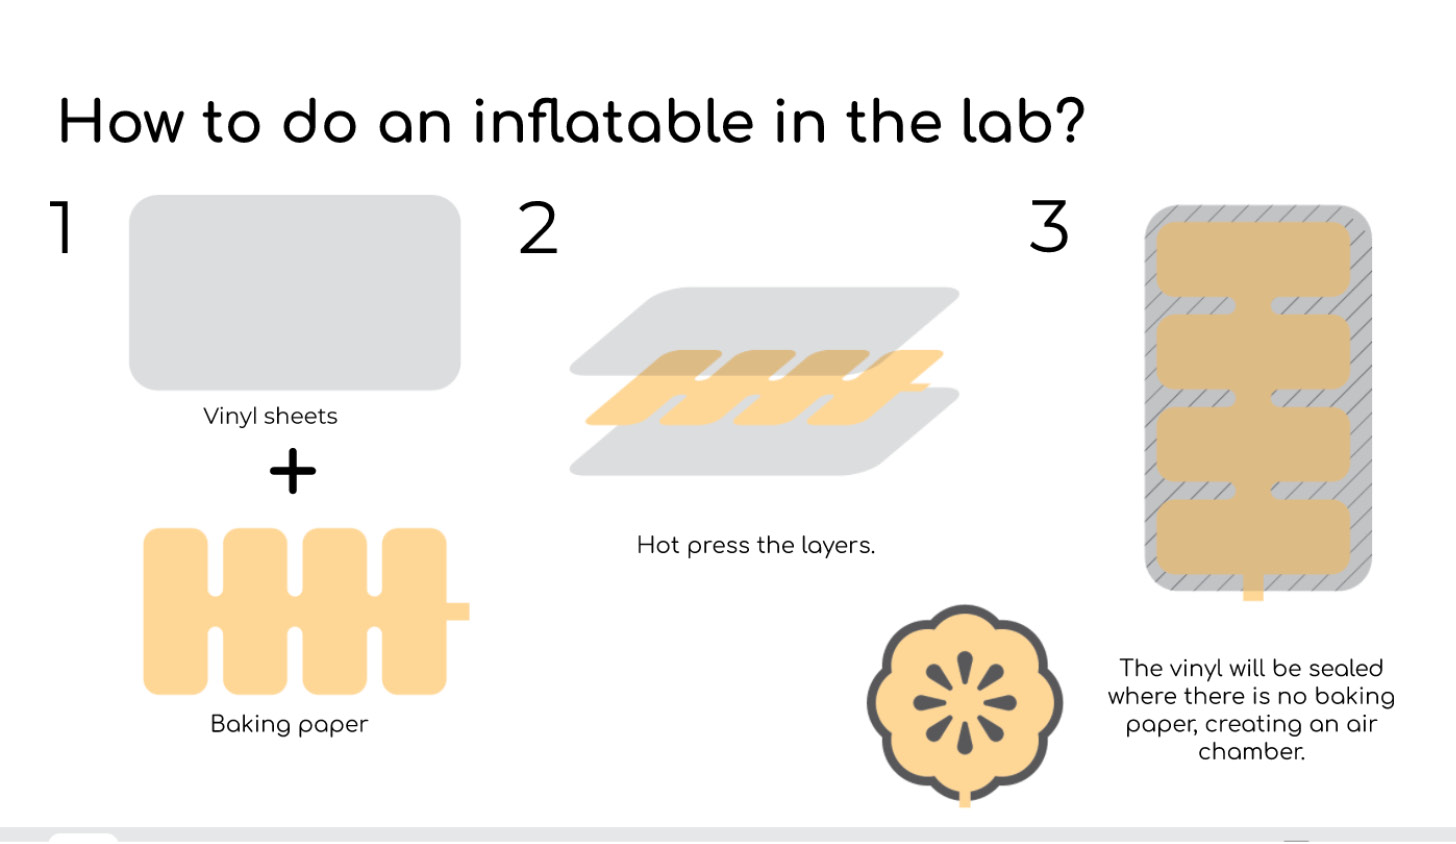
Creating an inflatables from vinyl is actually quite simple:
- cut or lasercut a design from baking paper
- make 2 copies of that shape with the aditional 5 mm
- hand cut out the vinyl following this shapes
- peel vinyl off baking
- sandwich vinyl with shiny side up and down, with the baking paper between
- turn on heat press and set to 150C
- place large sheets of baking paper down on the head press board
- lay your vinyl design down
- place another large sheet of baking paper on top of vinyl
- press down the heat press for 10 seconds
- remove baking paper and vinyl from heat press
- carefully peel vinyl sandwiches off of the baking paper
- cut off sealed nozzel insert
- insert syringe, straw or hand pump tube into nozzel insert
- pump air into form
Materials
- Baking Paper
- Vinyl sheets
- Vinyl Cutter
- Heat Press
- Scissors
- Syringe, straw or Hand Pump
Setting the Vinyl Cutter
We started the work by setting up the vinyl cutter machine. First we read the instruction and installed the app needed for the Silhouette vinyl cutter. After that we started to experiment by cutting different designs for a better understanding of how it works.
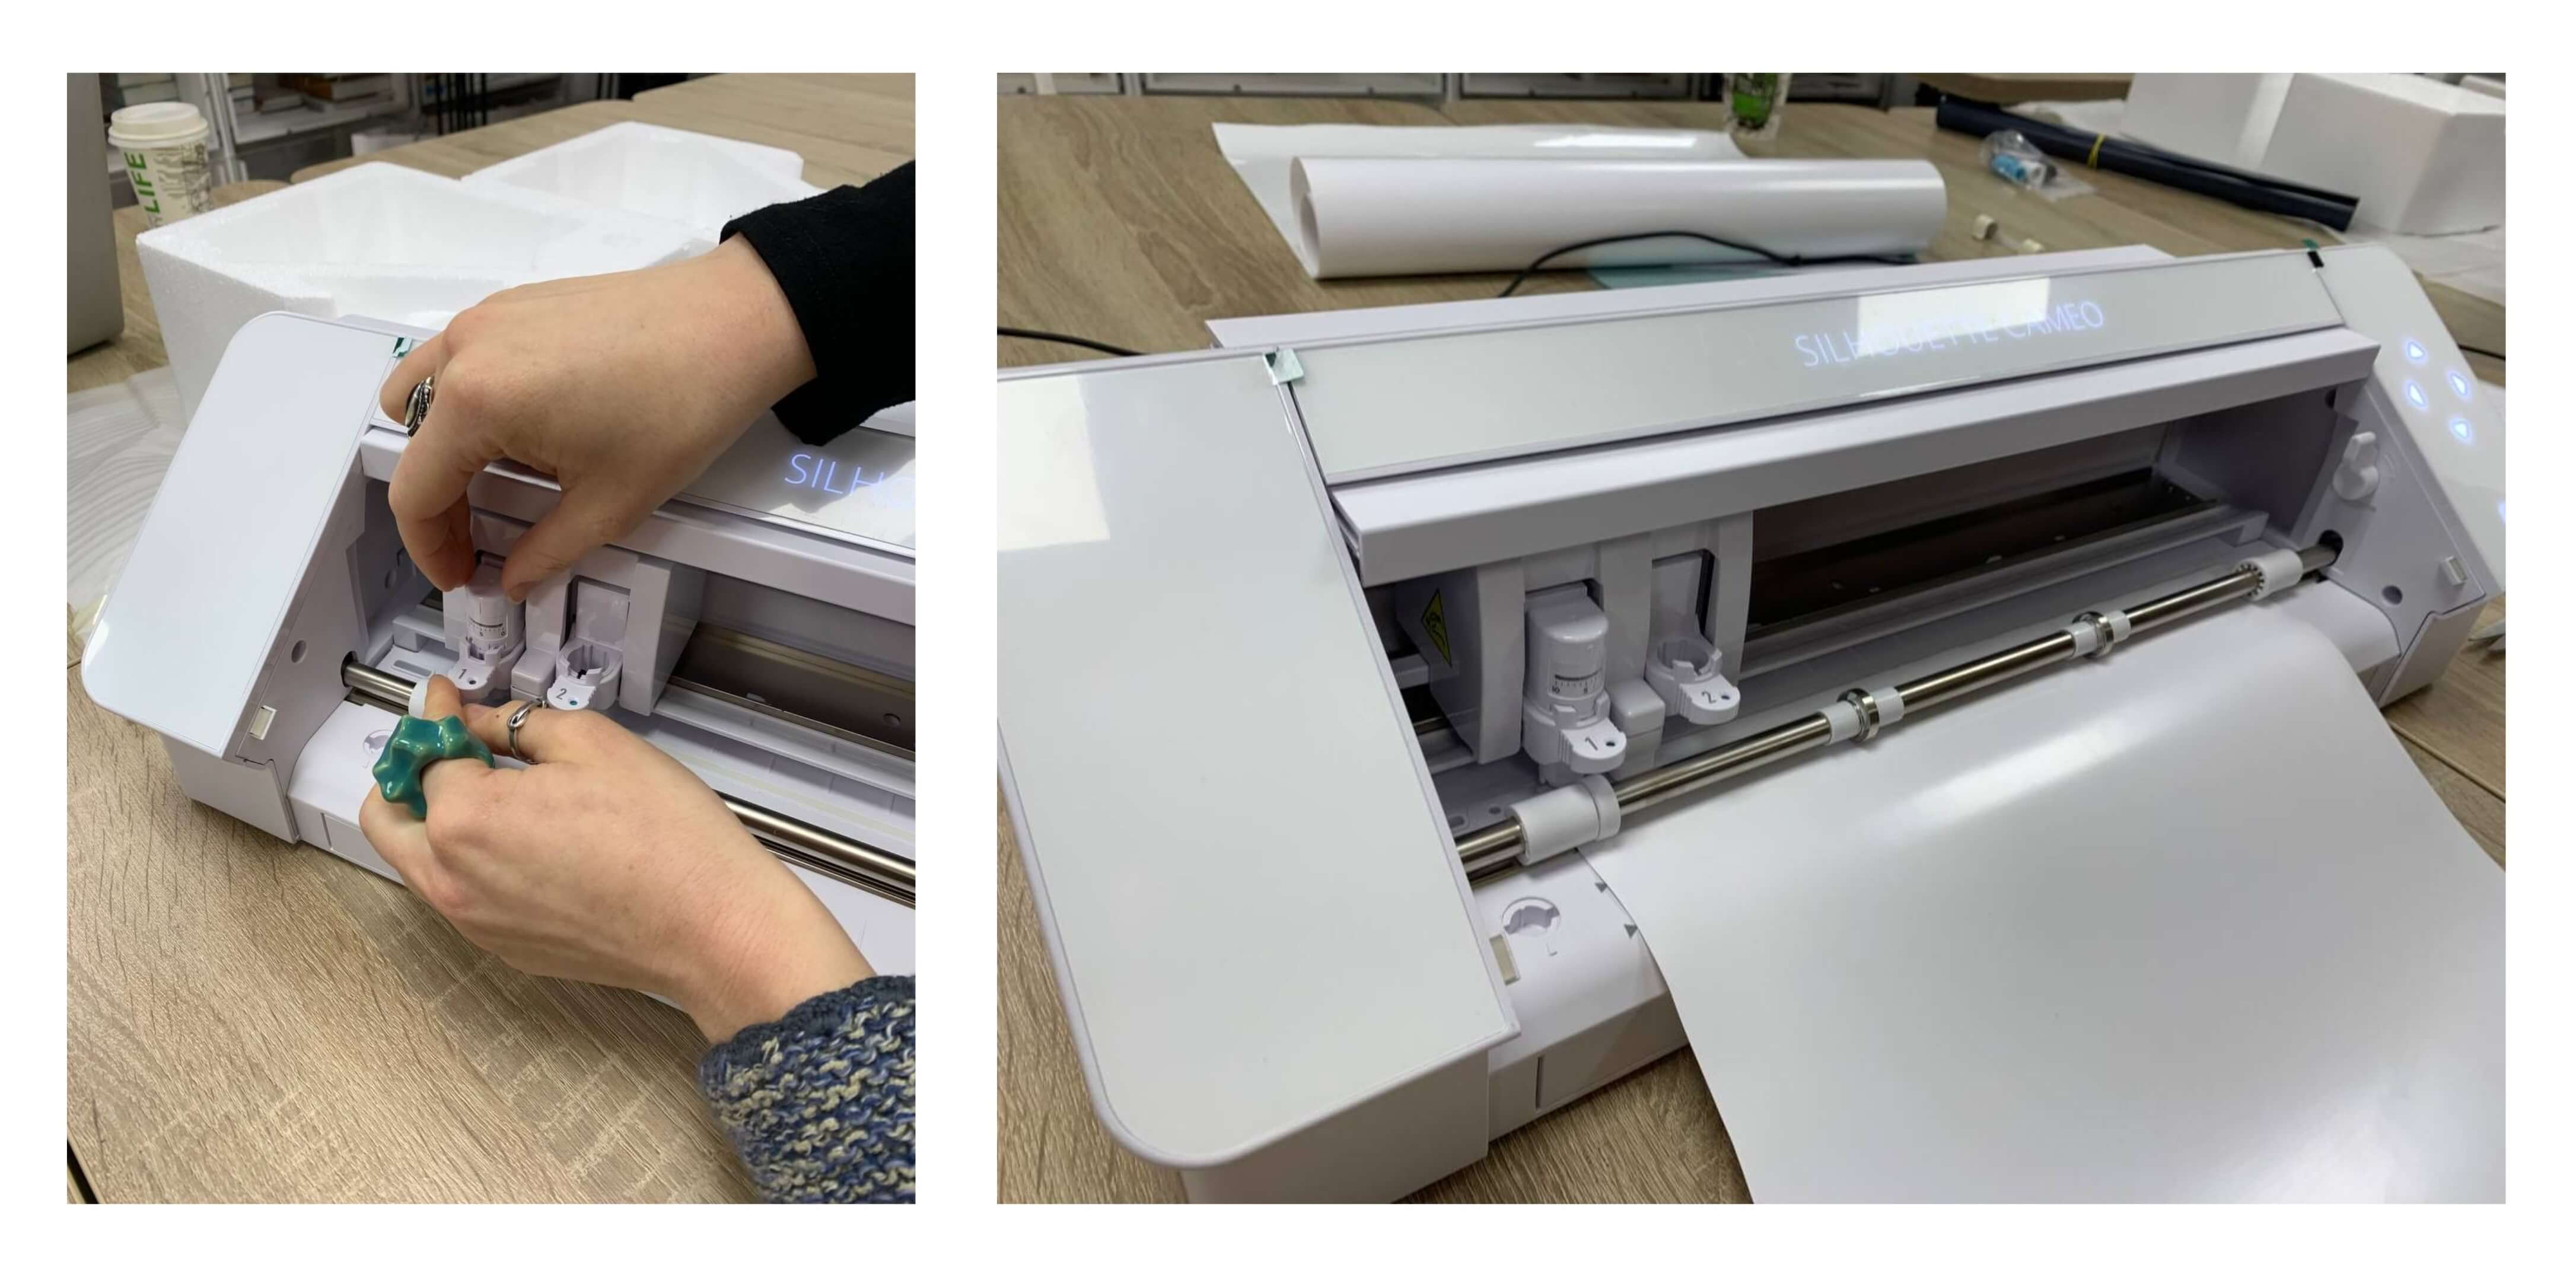 All the setup steps were done by following this link.
Tests
After cutting the patterns1, it's time to glue them together using heat press or iron.
For more inspiration check the page of Saskia Helinska
Silicon Inflatables
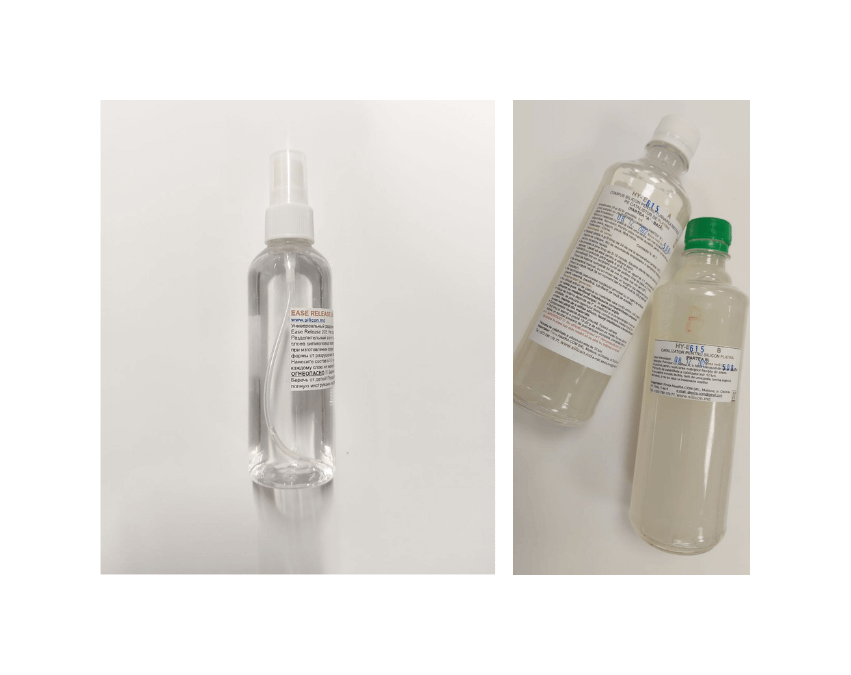
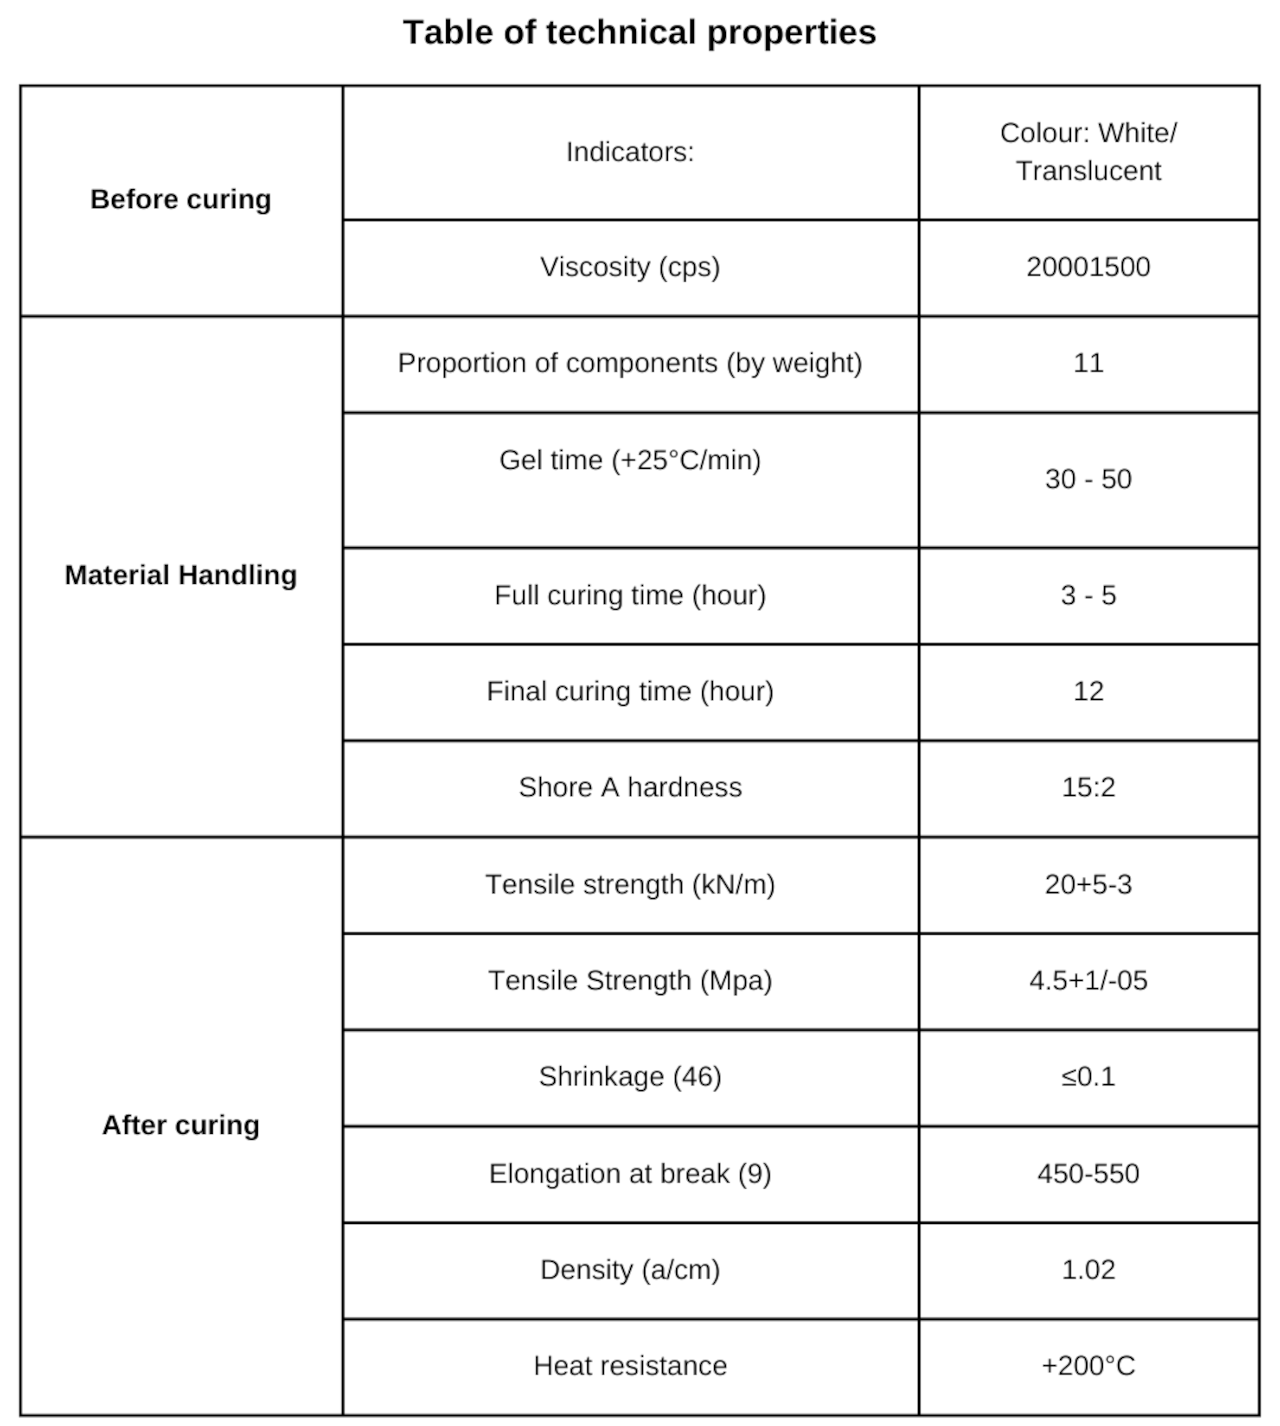
In order to complete this week assignment we used this type of silicone. It's a very flexible titanium based silicone that comes in 2 different components, that should be mixed together and a easy release spray.
Bill of materials
| Nr | Description | Price | Link | Notes |
|---|---|---|---|---|
| 1 | Silicone | 55.80 $ | https://sites.google.com/site/wwwsiliconmd/%D1%81%D0%B8%D0%BB%D0%B8%D0%BA%D0%BE%D0%BD-%D0%B4%D0%BB%D1%8F-%D1%84%D0%BE%D1%80%D0%BC-%D1%83%D0%BA%D1%80%D0%B0%D0%B8%D0%BD%D0%B0 | ordered 0.5 l |
| 2 | Easy release | 14.00 $ | https://sites.google.com/site/wwwsiliconmd/ease-release-205-liquid | ordered 40 g |
| 3 | 3D Printing filament | 28.00 $ | https://www.tekreart.md/product/filament-pla-ender/ | 1 kg |
| 4 | Tubes | 2.00 $ | https://zooroyal.md/ru/shop/%d0%b0%d0%ba%d0%b2%d0%b0%d1%80%d0%b8%d1%83%d0%bc%d0%b8%d1%81%d1%82%d0%b8%d0%ba%d0%b0/aquael-%d0%b0%d1%8d%d1%80%d0%b0%d1%86%d0%b8%d0%be%d0%bd%d0%bd%d0%b0%d1%8f-%d1%82%d1%80%d1%83%d0%b1%d0%ba%d0%b0-airline-3-m/ | 1 piece |
| 5 | USB 5V Low Voltage Small Water Pump | 10.00 $ | https://www.amazon.com/YoJiSa-Submersible-Fountain-Aquarium-Hydroponics/dp/B0919JN5ZW | 1 piece |
| 6 | TIP120, NPN Transistor | 11.90 $ | https://www.amazon.com/TIP120-Darlington-Transistor-Arduino-Diodes/dp/B00FVLGYEY | 10 pieces |
| 7 | Wires | 1.00 $ | https://robotica.md/10-fire-dupont-mama-tata-30cm | 1 pack |
| 8 | Alligator clips | 1.00 $ | https://volta.md/produs/clema-crocodil-rexant-16-0002 | 10 pieces |
| 9 | 2.2K Ohm Resistor | 5.40 $ | https://www.amazon.com/Projects-2-2k-Resistors-Choose-Quantity/dp/B071DZTF2Q | 10 pieces |
| 10 | DC Power Supply 5V | 6.00 $ | https://www.amazon.com/Power-Adapter-100-240V-Transformers-Supply/dp/B08722QC75/ref=sr_1_3?keywords=5%2Bvolt%2Bpower%2Bsupply&qid=1683809486&sr=8-3&th=1 | 1 piece |
| 11 | Arduino ATMega2560 | 21.00 $ | https://www.amazon.com/ELEGOO-ATmega2560-ATMEGA16U2-Arduino-Compliant/dp/B01H4ZDYCE/ref=sr_1_1_sspa?crid=LZCSJRM025H9&keywords=Arduino%2BATMega2560&qid=1683809547&sprefix=arduino%2Batmega2560%2Caps%2C203&sr=8-1-spons&spLa=ZW5jcnlwdGVkUXVhbGlmaWVyPUEyTlFTREVLVUpBOVJGJmVuY3J5cHRlZElkPUEwMDU5MDcxMVMwOEhVVjFTR1BFMyZlbmNyeXB0ZWRBZElkPUEwNDA1MTQ5N1FUR1ZGWVdBMTdJJndpZGdldE5hbWU9c3BfYXRmJmFjdGlvbj1jbGlja1JlZGlyZWN0JmRvTm90TG9nQ2xpY2s9dHJ1ZQ&th=1 | 1 piece |
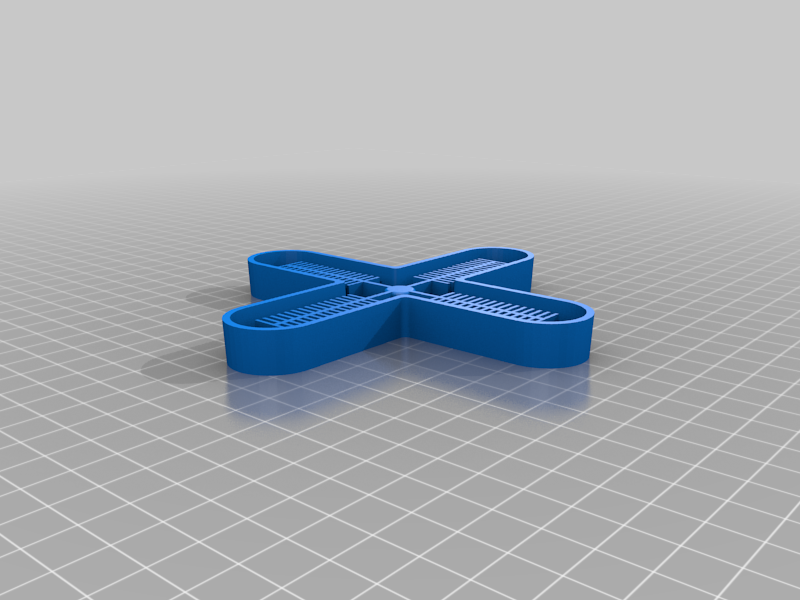
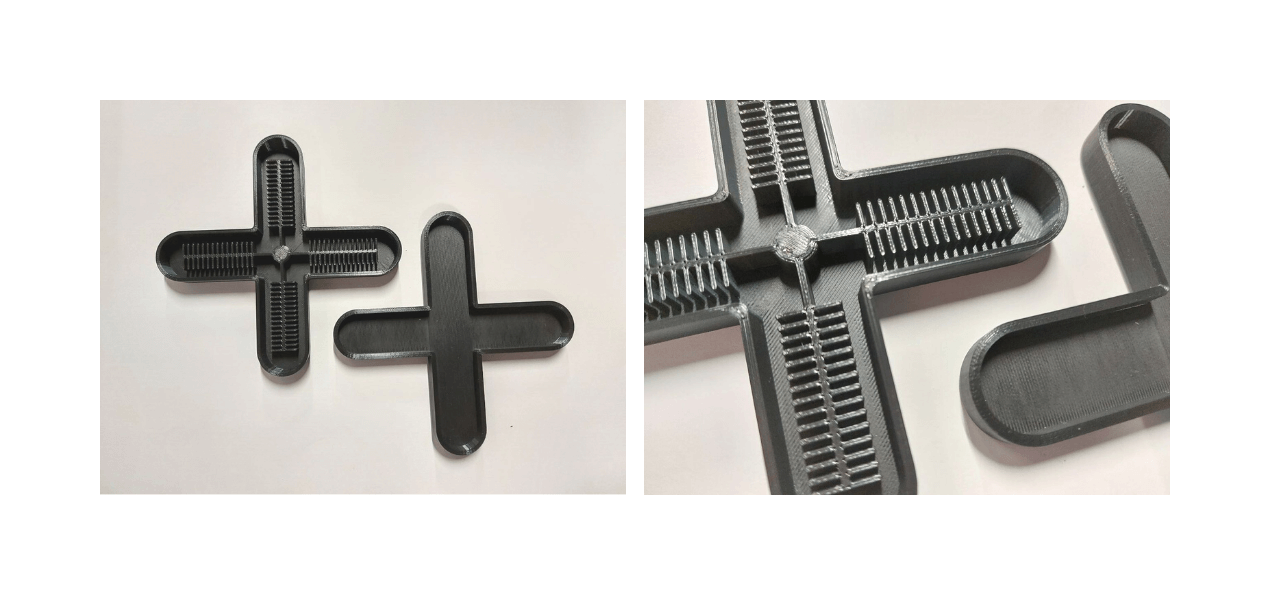
For casting a gripper2, I browse to find the 3D printing molds. This is the most common version of a gripper. I just updated the design with the cover part.
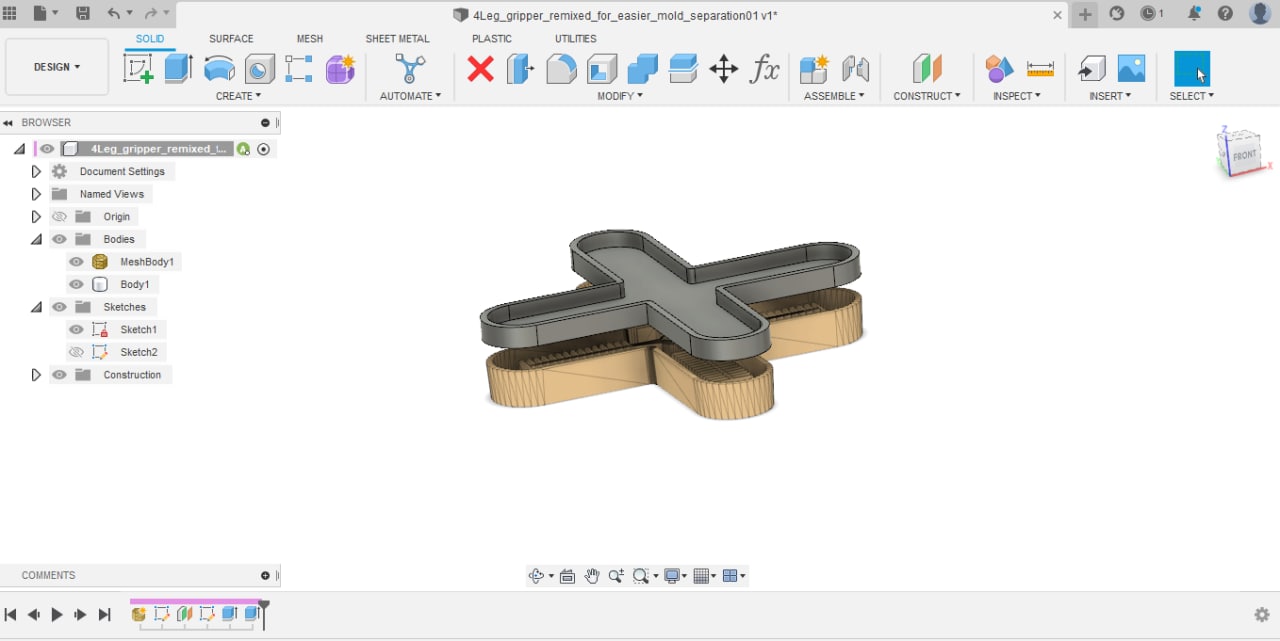
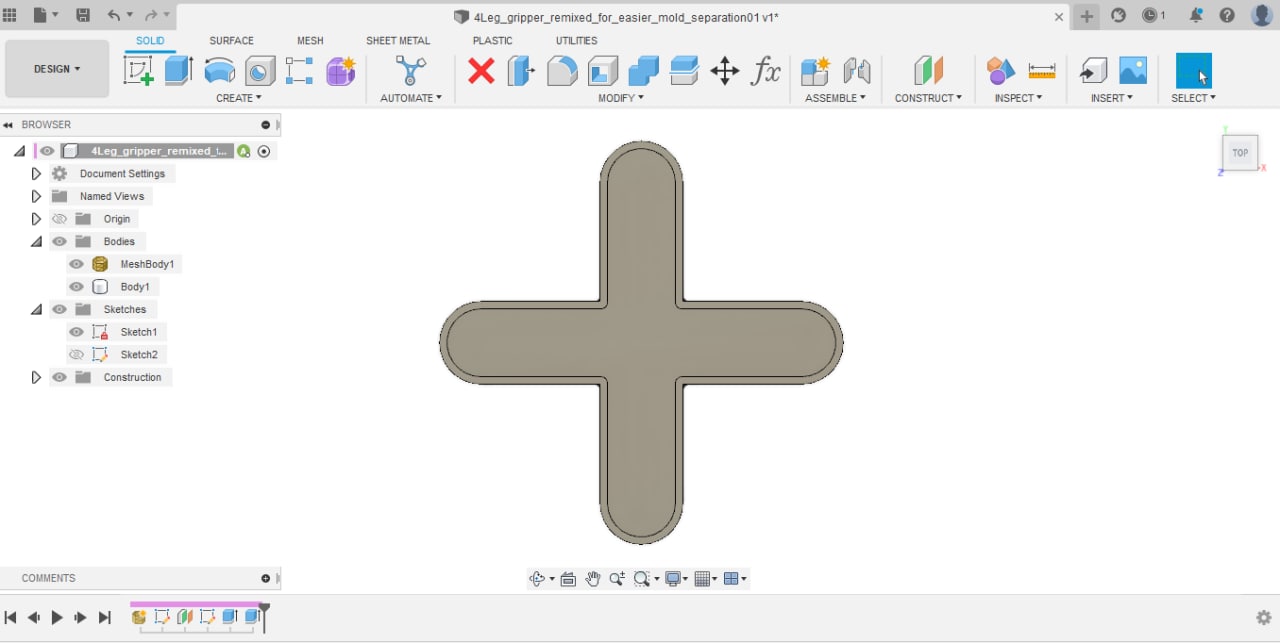
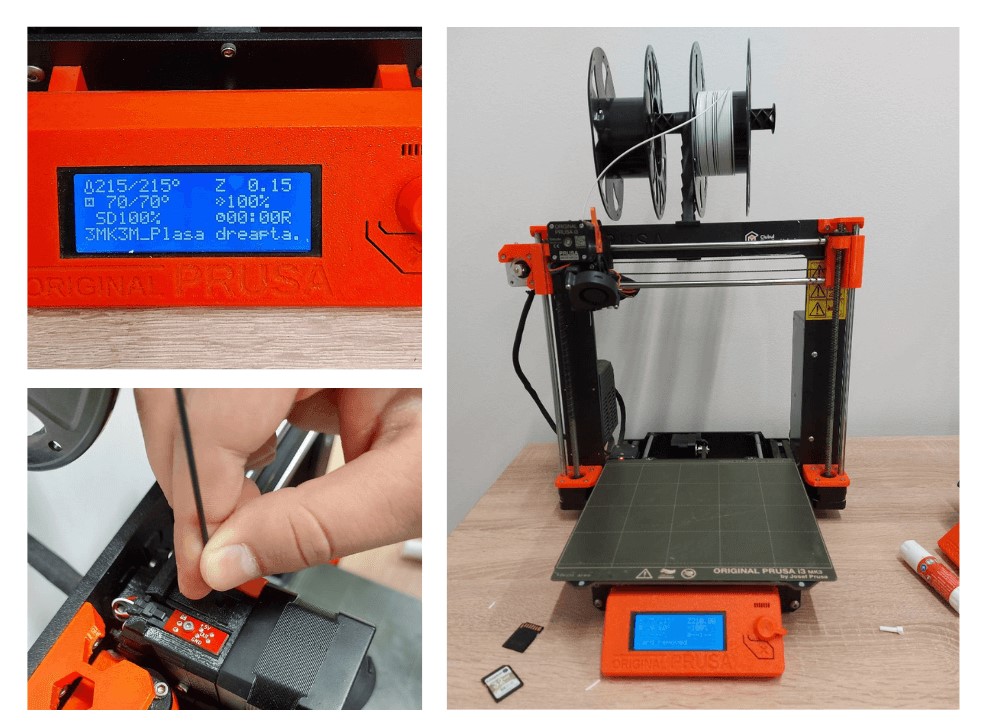
We used the Prusa Slicer in order to prepare the files for printing.
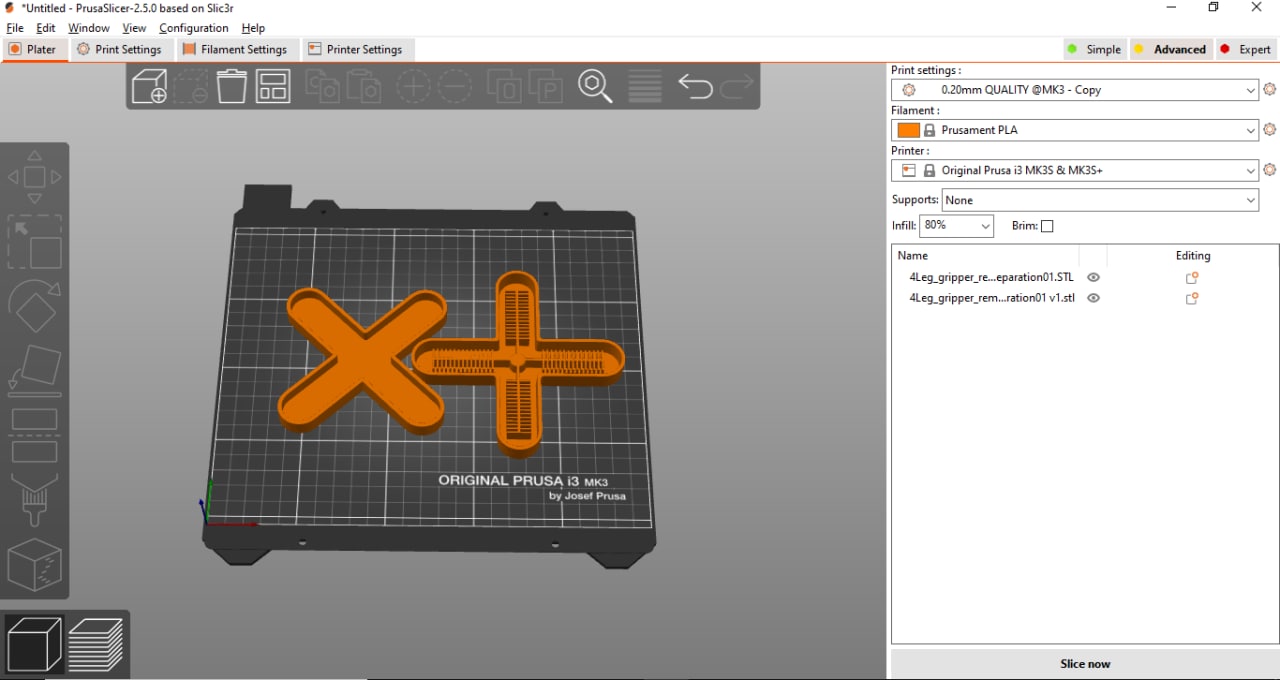
File exported as STL
3D-Print settings:
Material: PLA
Temp: 215
Layer height: 0,2 mm
Speed: 60 mm/s
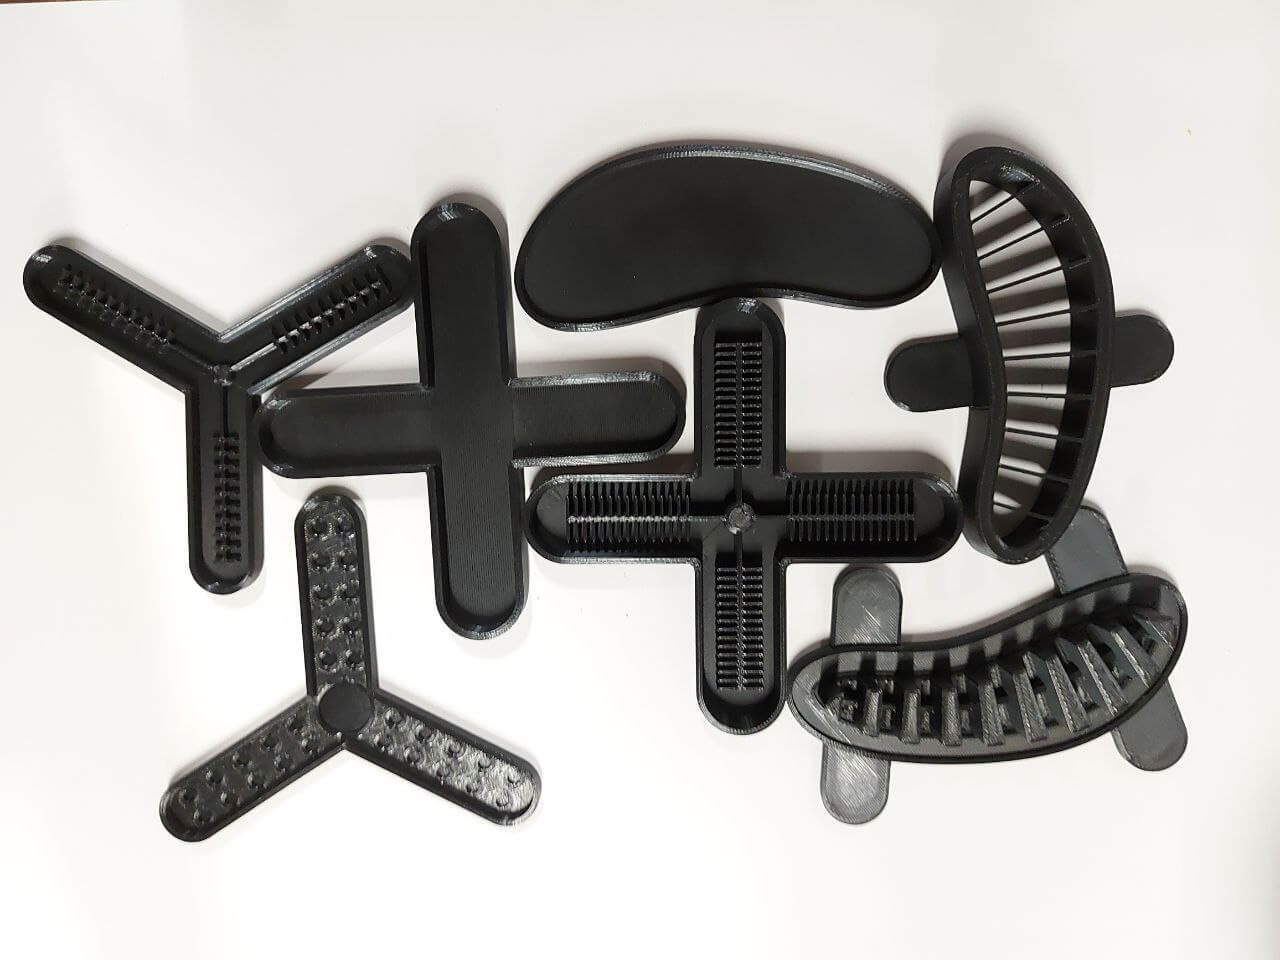 The molds are ready to be casted!
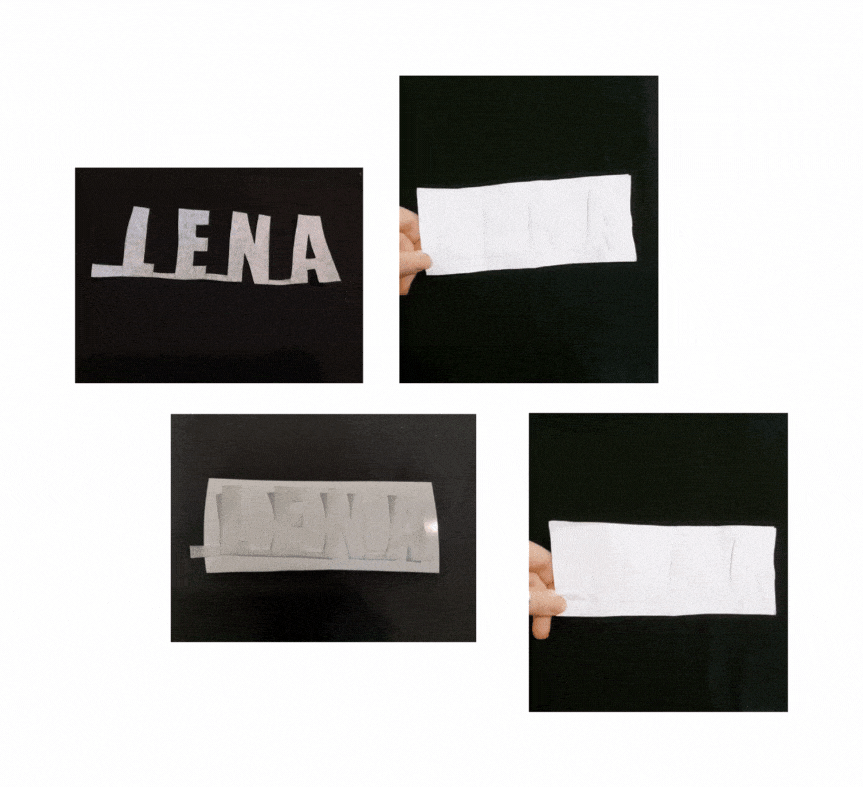
Here are the molds from Elena Florea-Burduja, Aliona Raru and mine. Picture taken while drying the Ease Release solution.
Casting the silicone
There are some steps that need to be followed in order to get the better result:
- Before preparing the silicon, make sure you spray the molds with the Ease Release solution. In our case it was sugested to spray it 3 times, with the 30 minutes interval in order to let them dry. This will ensure an easier removal from the mold.
- Measure the proportion of silicone you want to use in two separate cups. (The ratio should be 1:1)
- Then mix part A and B using a wood stick for about 2 minutes.
- Take your mold and start slowly pouring the silicone into one of the corners.
- To avoid bubbles in the silicone, only pour it on top of the porous silicone.
- Be careful - do it slowly and keep the cup high.
- In order to get rid of air bubbles, it is recommended to be situated in the vacuum chamber.
- Let it dry in a warm and dry room for a minimum of 4 hours.(We left it over night to be sure that the silicon is fully dry)
First we casted the separate details in order to stick them together later. But, seeing the results of my collegues by this method, that didn't work out, I took the principal part and attached to a freshly poured silicone on the plain surface, conecting the tube and leaving it to dry in that way.
This method worked out better!
 Just needed to cut the extra silicone after it was completely dry.
Code Example
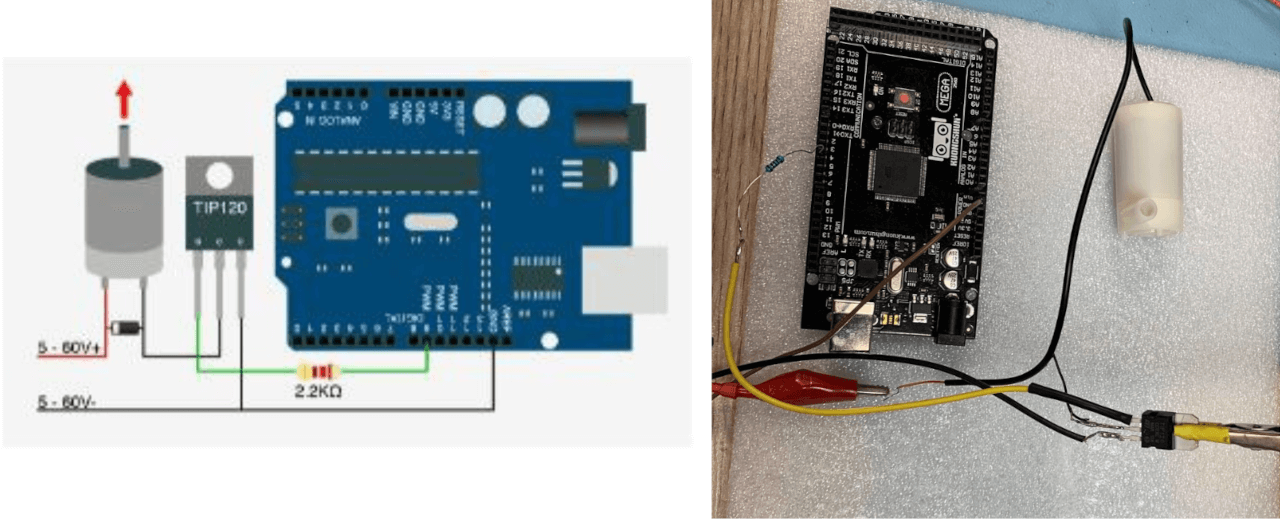
This is the code that was used for the following circuit.
int basePin = 9;      // Pin Connected to the transistor base

void setup() {
  pinMode(basePin, OUTPUT);  // sets the pin as output
}

void loop() {
  digitalWrite(basePin, 200);
}
Results
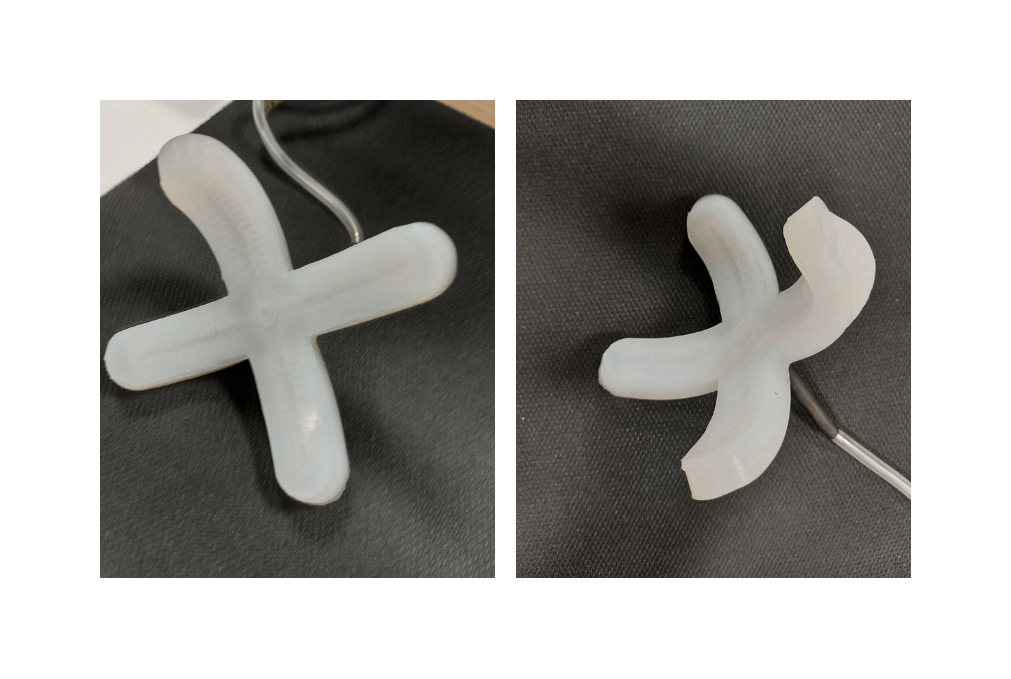
Video
Silicon mold from Bannaia Elena on Vimeo.
Fabrication files
-
File: Inflatables pattern ↩
-
File: Gripper 3D printing mold ↩