Process
As I mentioned, the co-working space at our Hub gathers a collective of young clothing designers which work daily on creating their artistic vision.
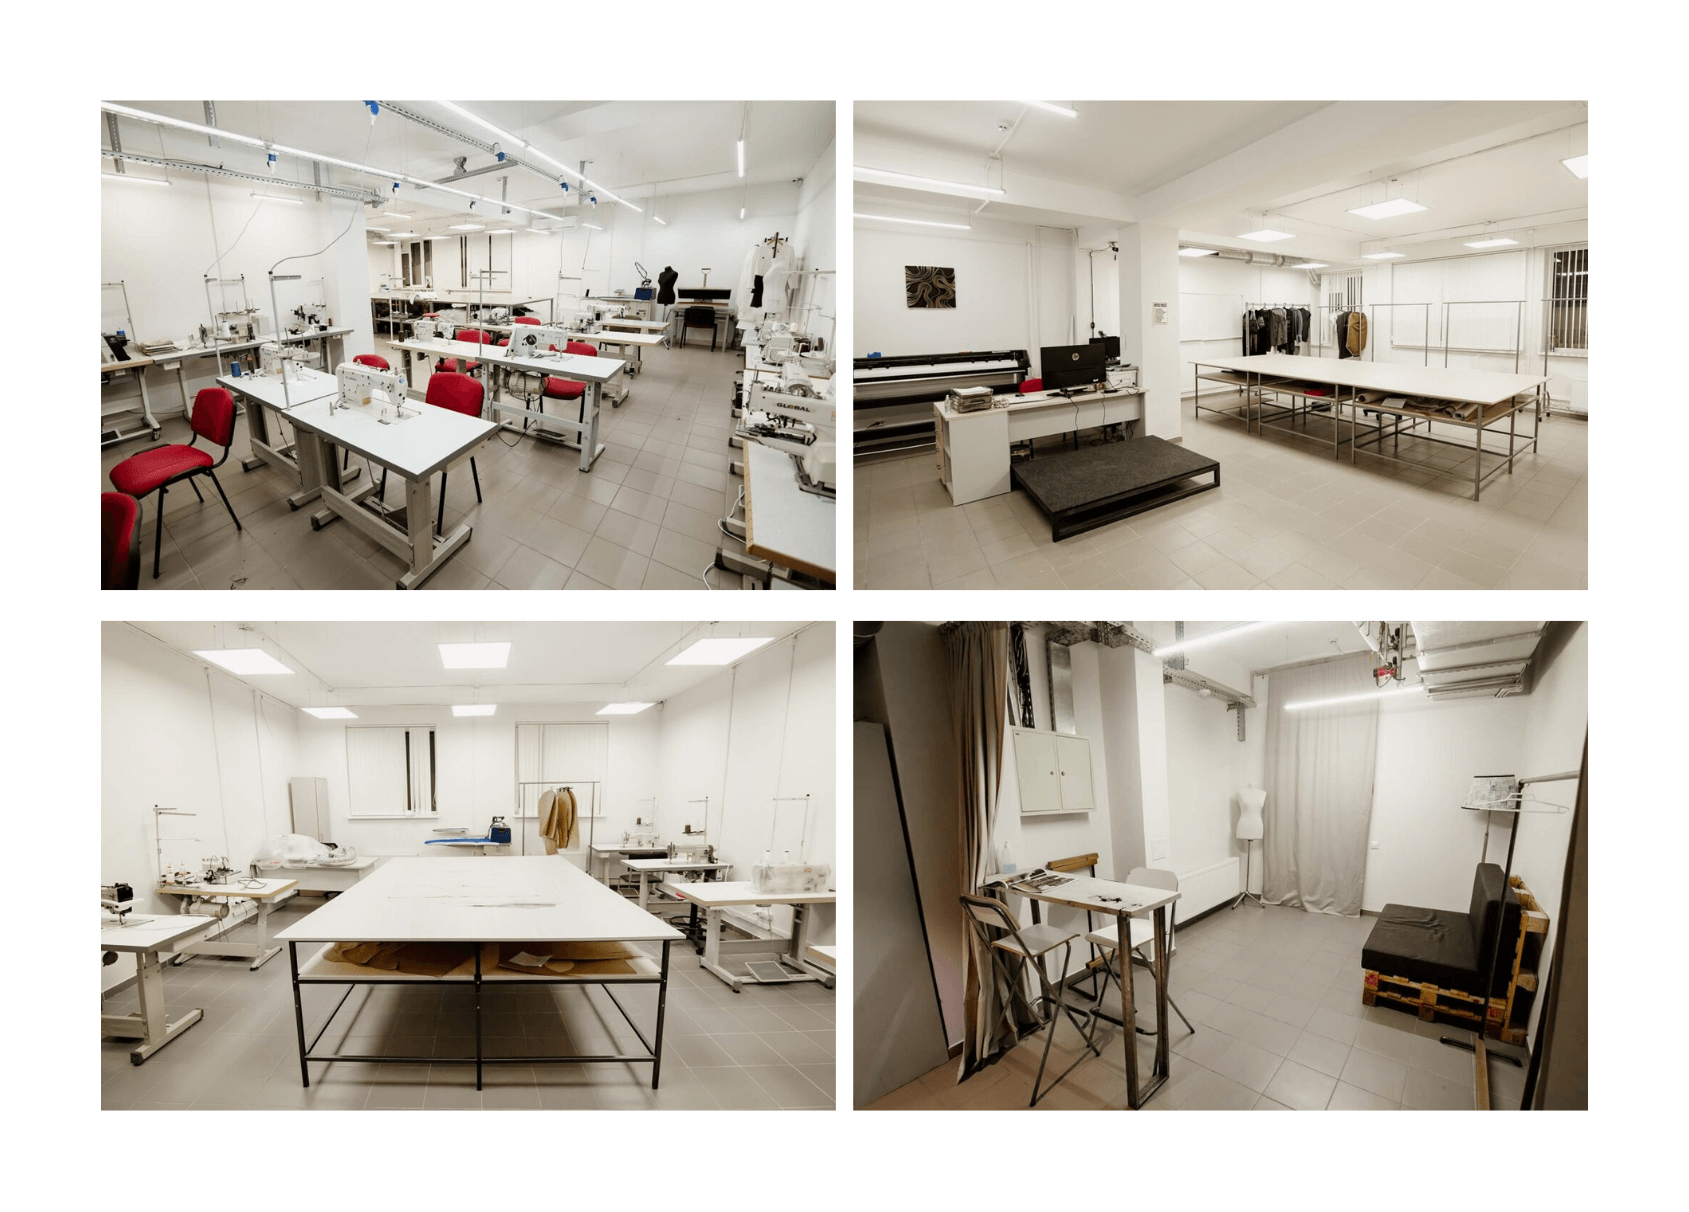 These pictures were taken when everything is clean and tidy, but mostly it is full of working hands and the sound of the sewing machines it's like the hum of bees.
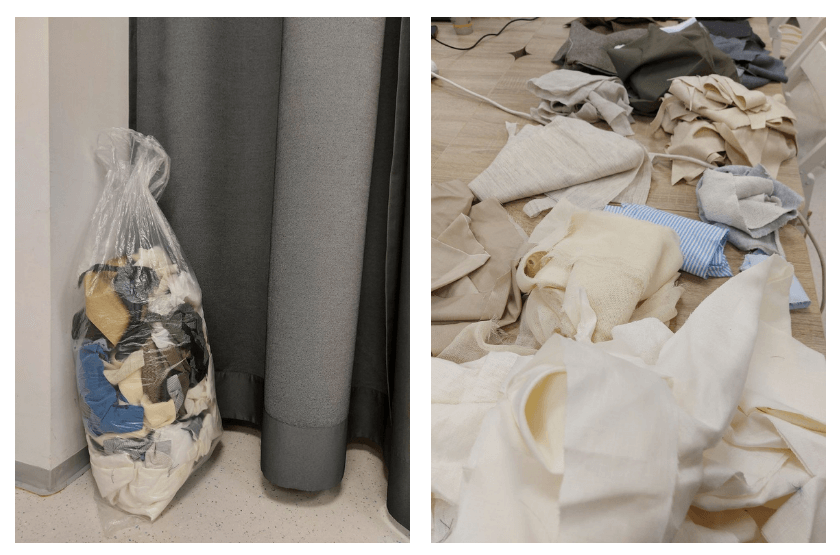
Even if most of them work with natural fabrics, the remnants from their activity still inevitably accumulate and remain unused.
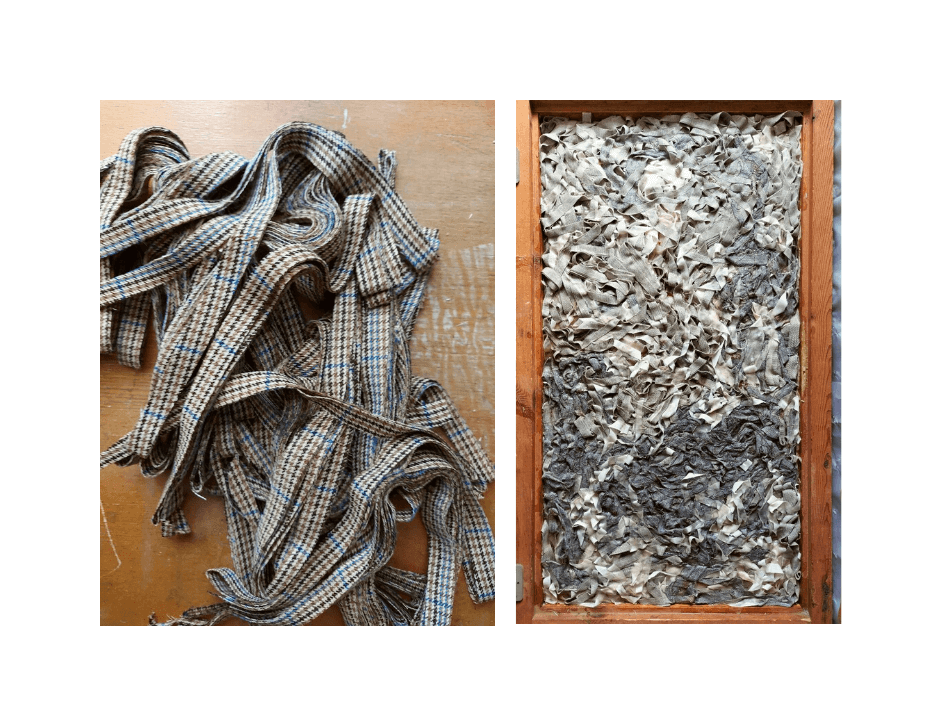
The week began with the sorting of different leftovers by color and composition, that were kindly collected by designers.
Designers

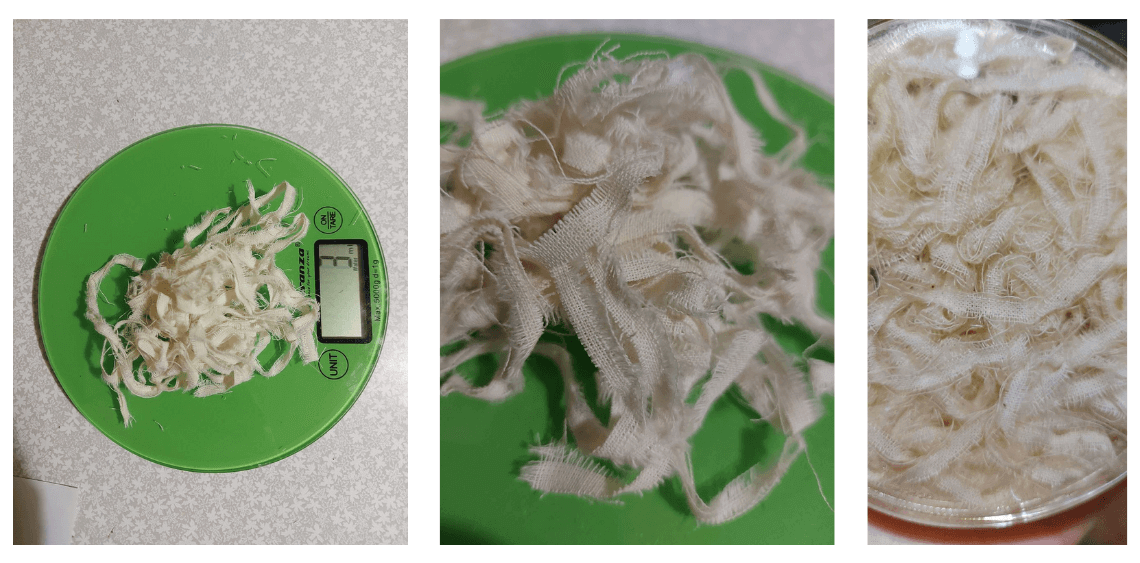
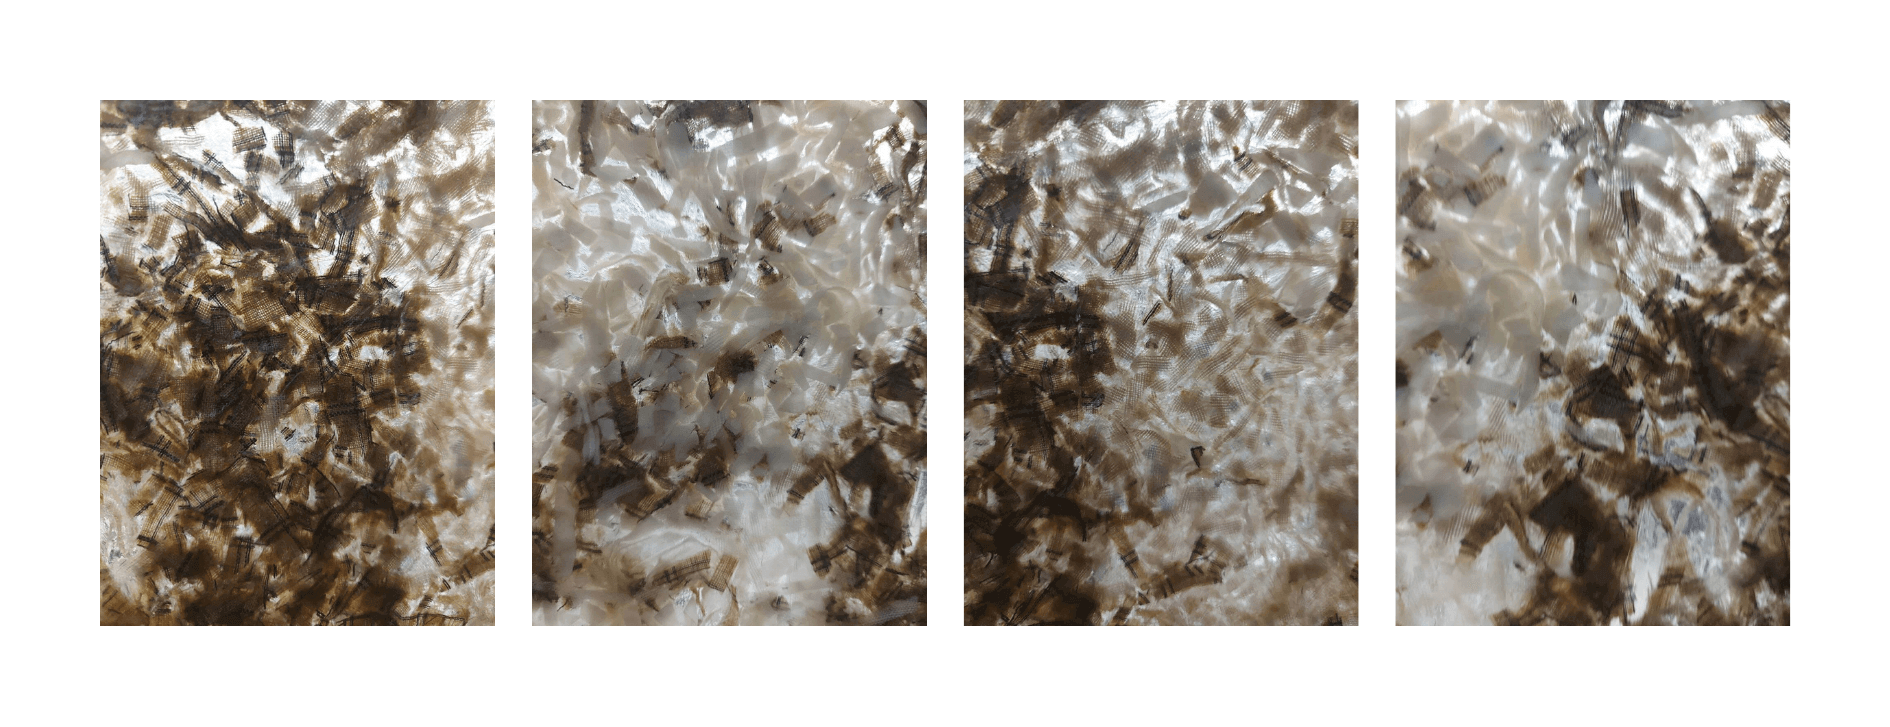
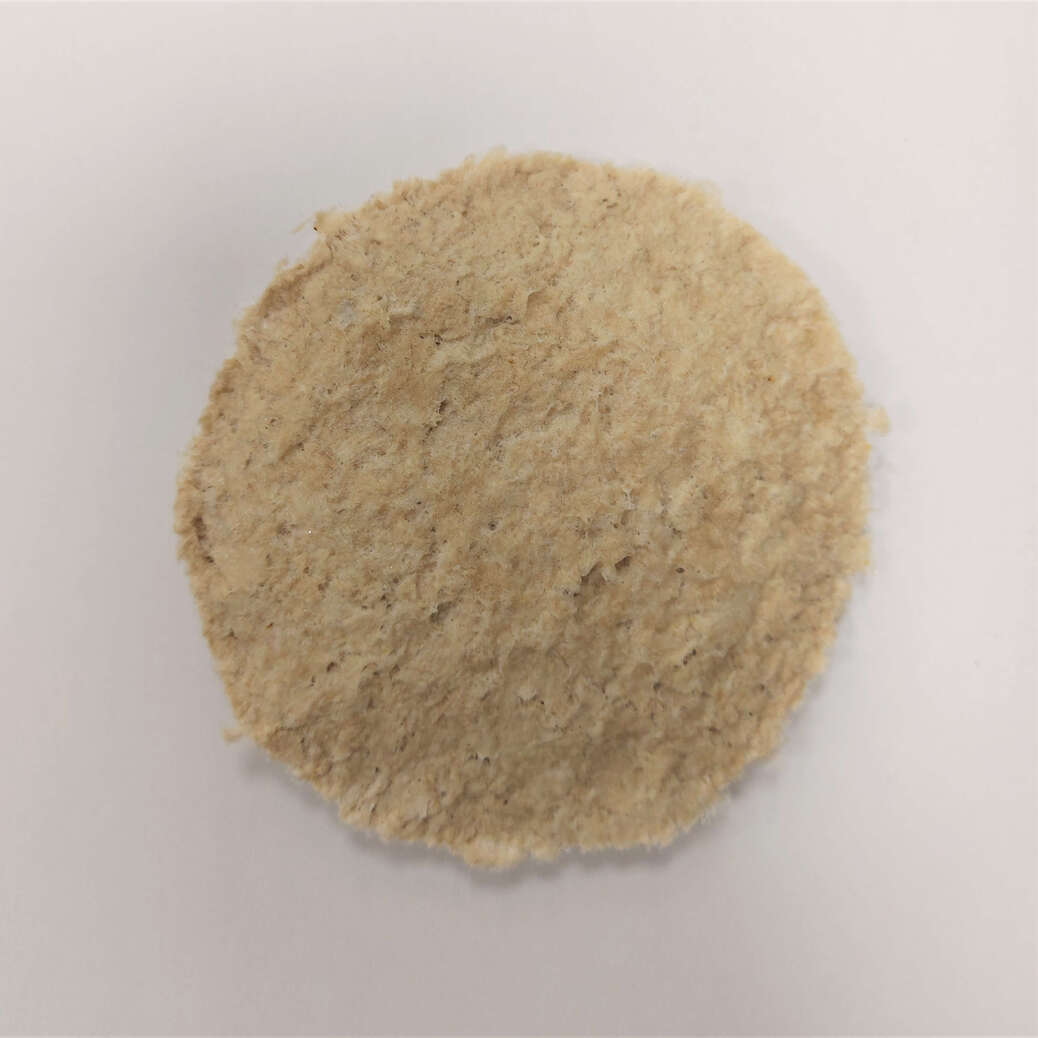
For the first samples I used the beige cotton, trying different types of cutting of the fabric and combining it with different amount of resin.
Here are from a very thin cut (almost powder like) to narrow stripes of fabric, from threads to more big pieces of fabric. The first tests were cut manually with a scissor.
Following the next recipe's proportion I prepared the needed amount of gelatine based bio resin.
* Gelatine 45 gr
* Glycerol 13 gr
* Water 480 ml
* Fabric remnants 15 gr
* Cooker/stove/hotplate
* Measuring Cup
* Cooking pot
* Scale
* Stirring spoon
* Flat surface
* Molds
* Measure all the ingredients.
* In a cooking pot, off heat, mix the gelatin powder and the water. Stir and wait until the mixture thickens like a glue.
* Start to heat the mixture on high heat. Stir time to time but not excessively to avoid additional foam. When the preparation become liquid again, add the glycerin.
* Lower the heat as soon as you start to see a white deposit appearing on the surface of the mixture. Remove gently the foam with a spoon.
* Pour the preparation on a flat surface (in glass, silicone, plastic or varnished wood) with edges delimiting the desired shape. Add the fabric remnants.
* Wait 4/5 days of drying before removing the bioplastic material from its molding surface.
* Remove from the mold.
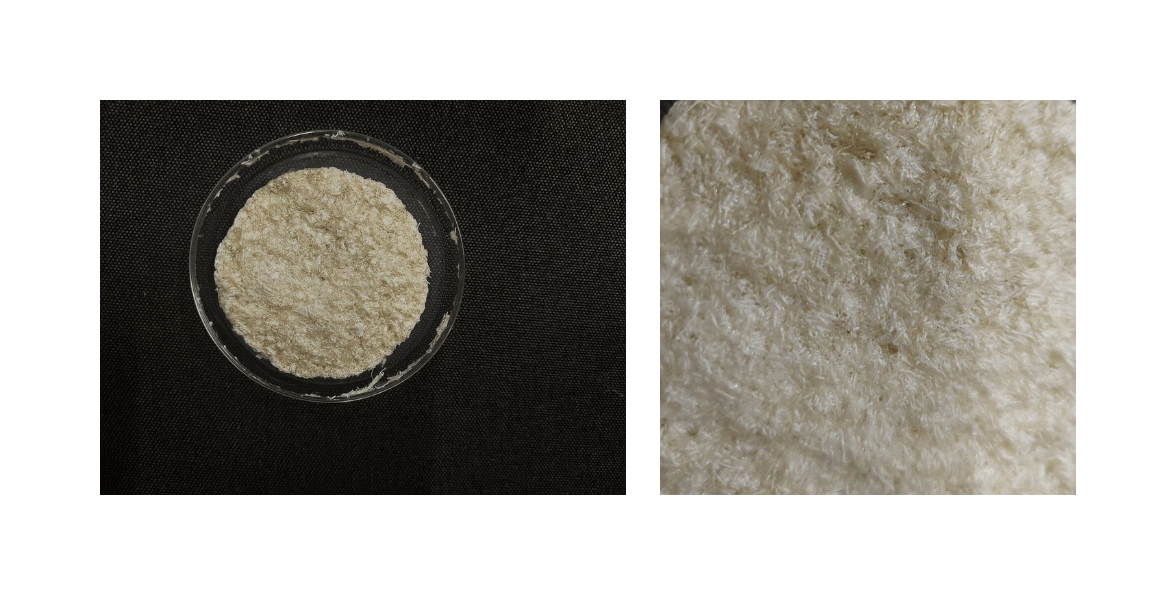
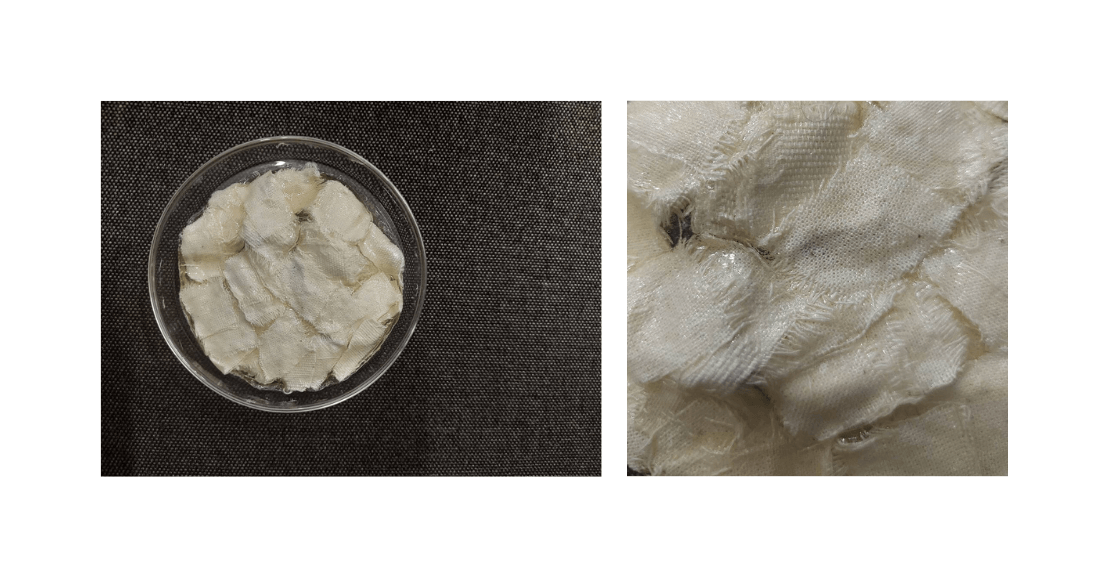
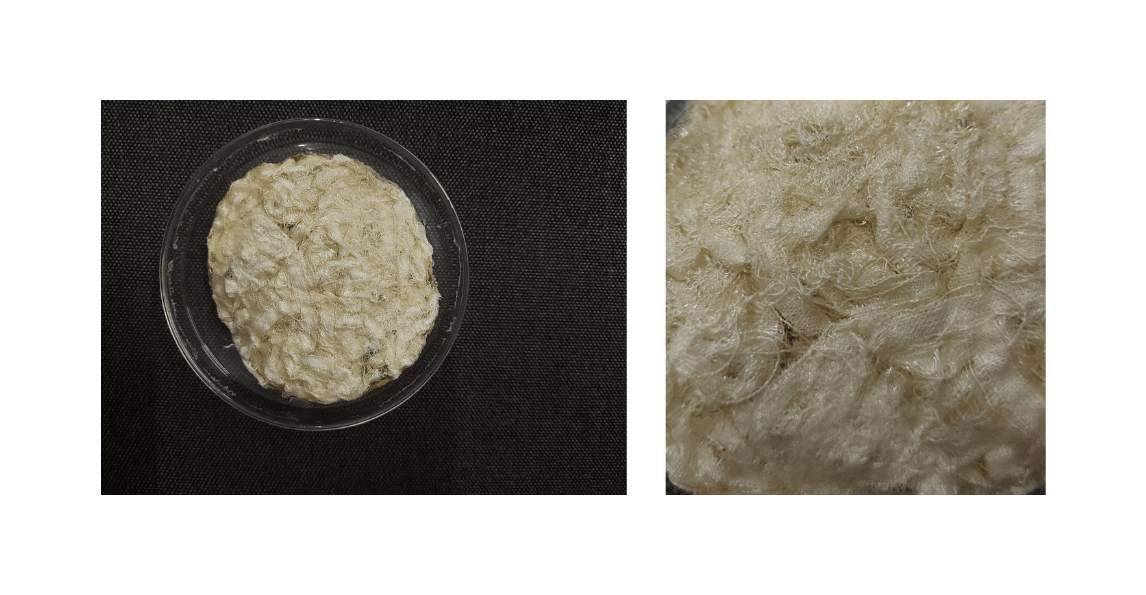
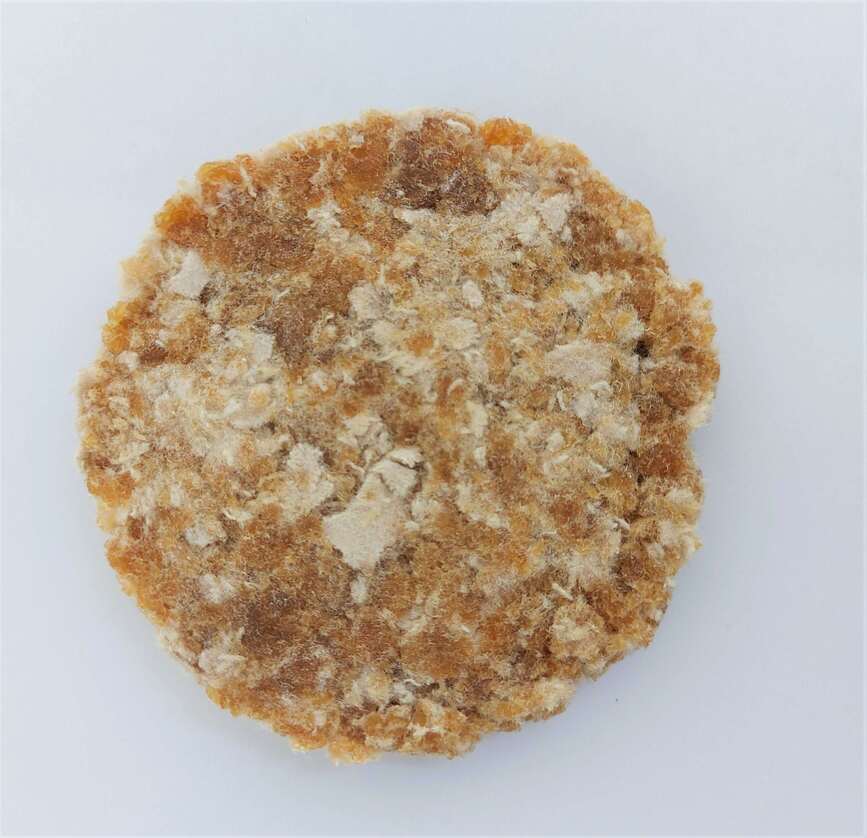
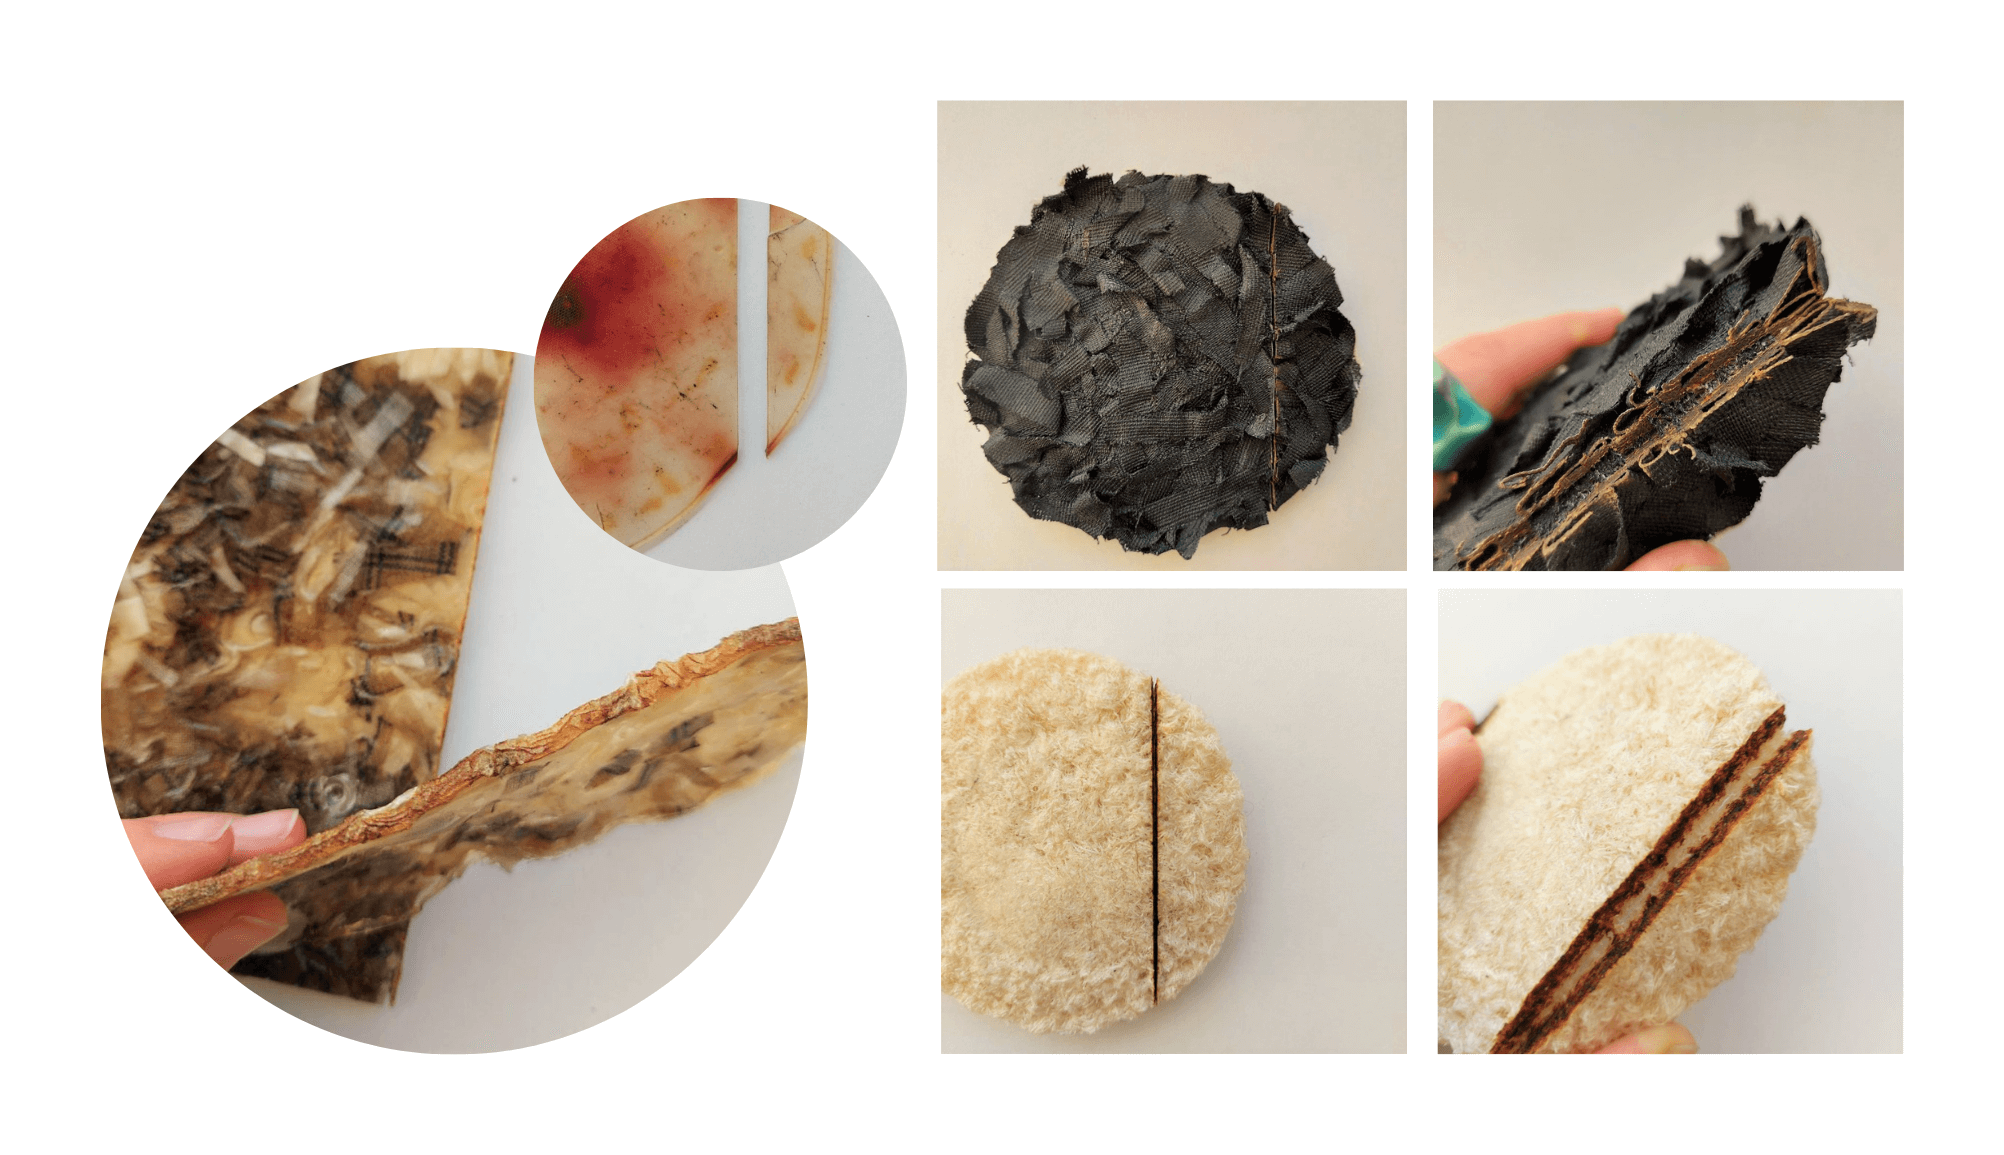
Here you can see the results of the fully dried samples of bio resin combined with fabrics.
Casting a bigger sample
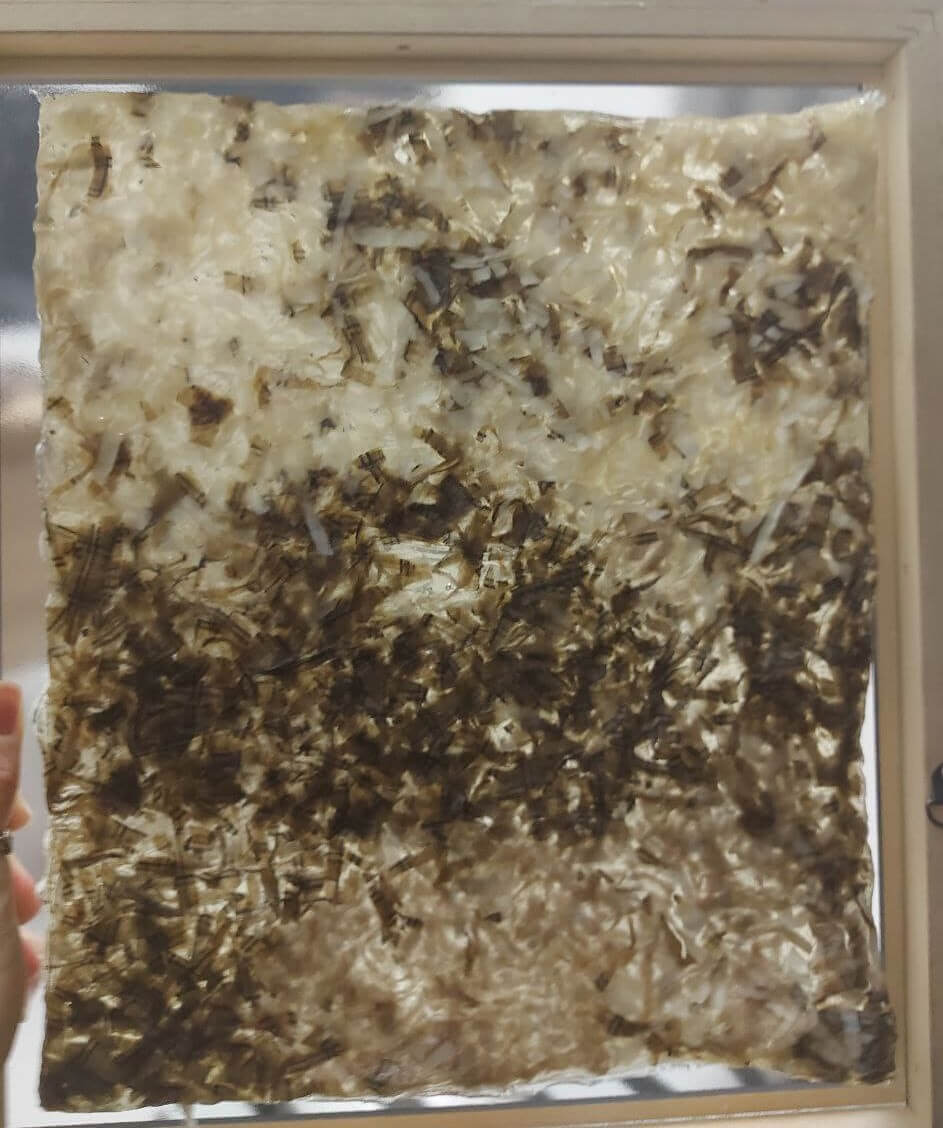
After experiementing with the small bio plastic samples I wanted to cast a bigger piece of bio plastic. I used as a frame a photo frame slightly bigger than A4, that we had in our Hub. It was glass with a wooden border. First, I was afraid that the bioplastic will stick to the frame, so I cover it with a sheet of food foil. The bigger sample was intended for the testing of cutting with the CNC machine and the laser cutter.
- Casting Days: 5
- Dimensions: 310 mm x 270 mm x 15 mm
- Color: White, light beige and light brown linen remnants with transparent gelatine based bio plastic
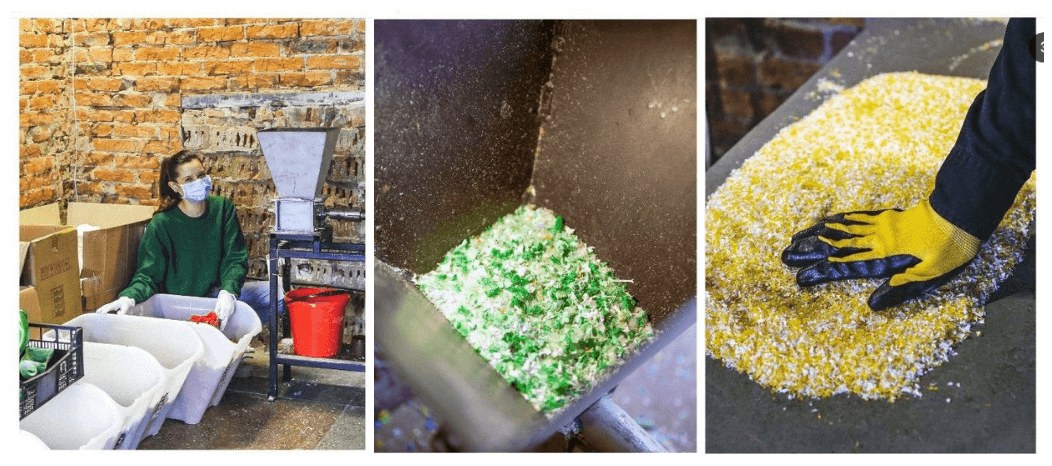
Colaboration with RECYCLINE
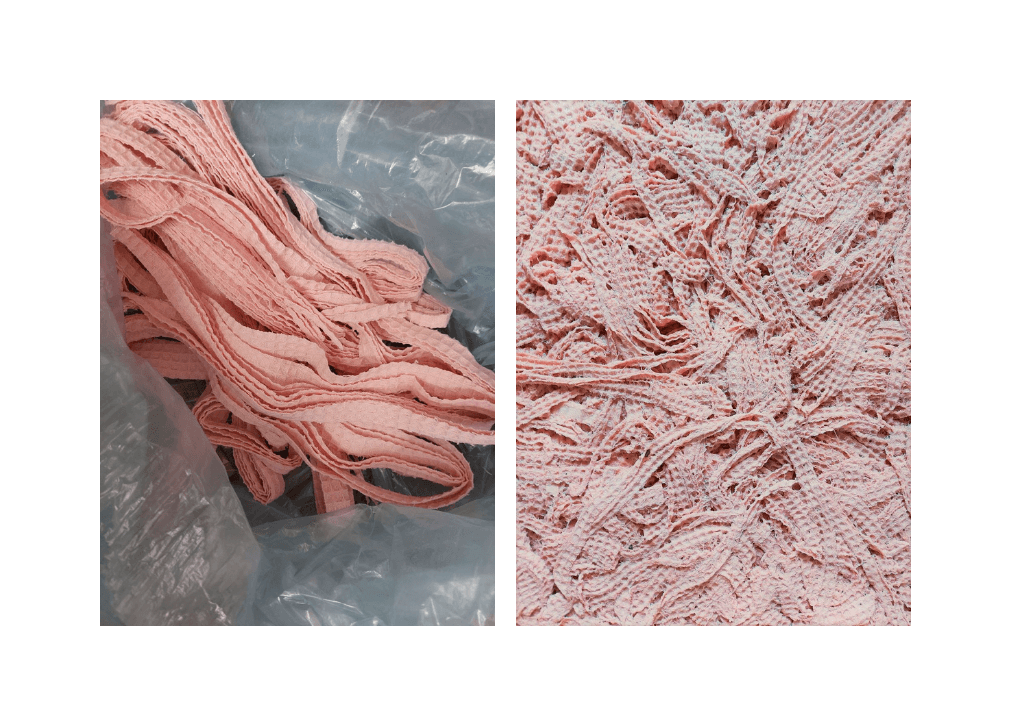
Because I liked more the sample with the powder like thin cut of the fabric, I decided to search help in shreddering the fabric. Thanks to the entusiastic nature of Cristina Tocari from Recycline, we agreed to collaborate and try to shred the textile pieces at her studio.
 Cristina Tocari, founder of Recycline
Recycline is the company that receives and collects plastic waste of two types, type 2 and type 5, which are later transformed into useful products.
Recycline is an impact startup based on Waste2Product technology. In simple terms, they transform plastic from waste into design products through a complex technological process.
"Our impact is achieved through an advanced management of plastic waste, a promising but underdeveloped industry in Moldova. Our mission is to limit as much as possible the spread of plastic waste in nature. To this end we collect this waste from local businesses/community and bring more creativity and efficiency to the recycling term.
Since I knew early on in the project that I will be collaborating with Precious Plastic, it only made sense to go and pay them a visit to better understand the machinery they have, their possibilities, and limitations."
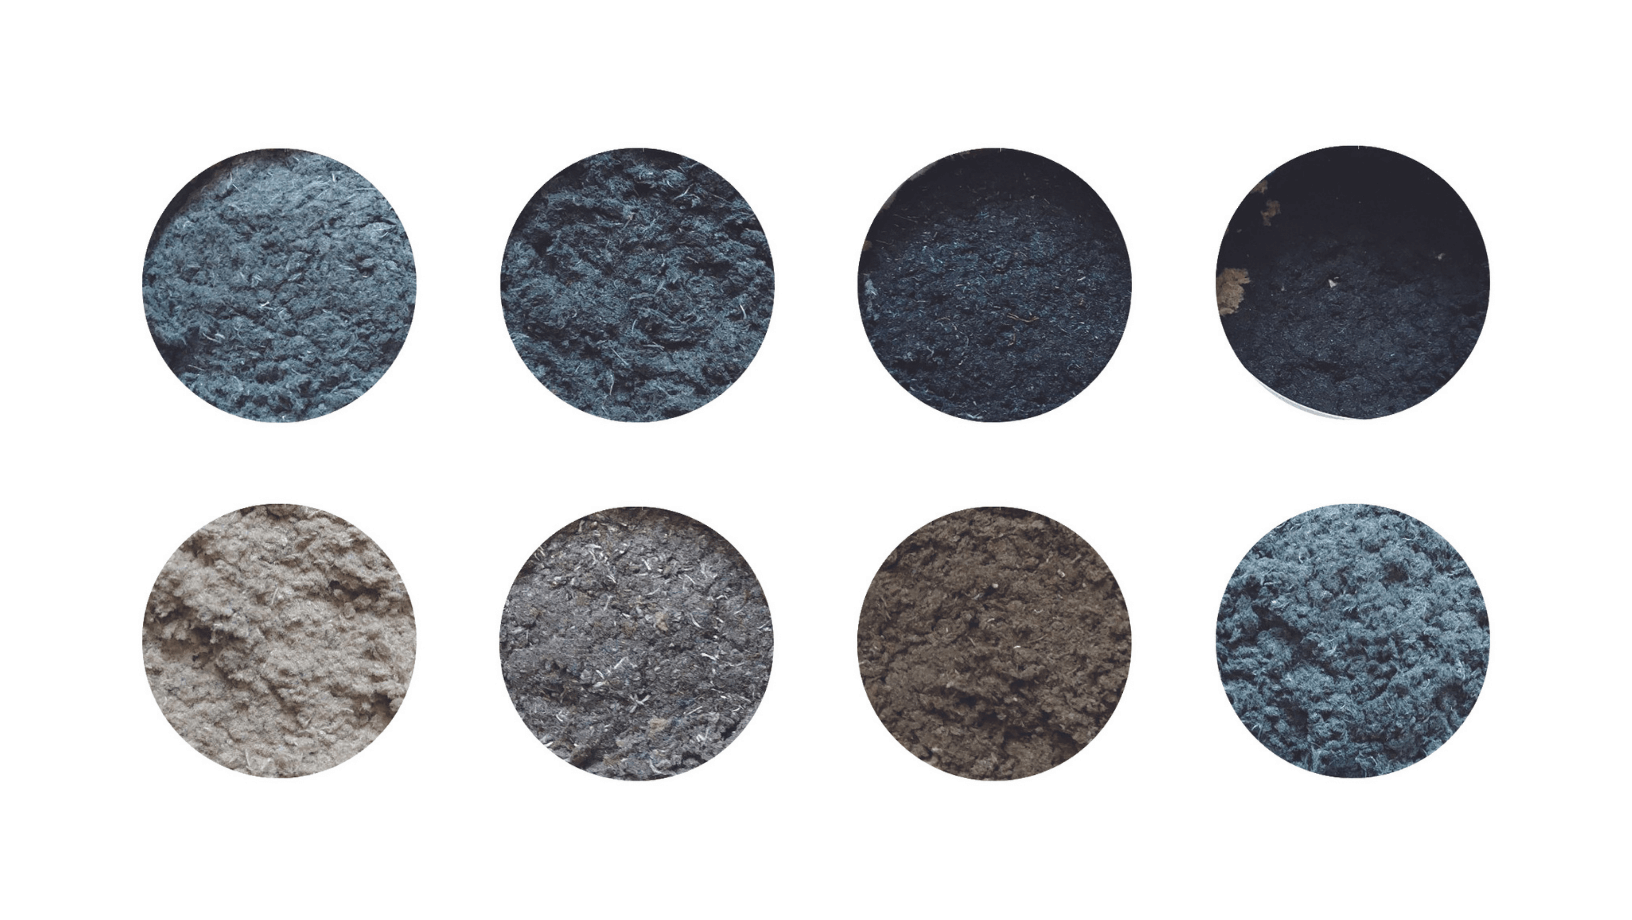
The story of Cristina gave me wings. I tested different types of fabrics to shredder, but mostly it worked well for wool.
Available Machines RECYCLINE
Shredder
The Shredder chops the plastic into small flakes that can be used by the other machines to melt. In my case I will use it to shred textiles in order to get an omogenous look of the biomaterial.
Extrusion
Shredded plastic goes in, gets molten and turns into a string of plastic. You can freestyle and wrap it around a mold or fill up molds. You can also control the speed, amount of plastic among other things. I won't need it.
Heat press
Heat press can be used in order to get plastic sheets of the needed thickness. It can be used to straighten bioplastic plates that are can bent during the drying process.
After casting some more samples and testing their resistance, I decided to cut the remnants in stripes, so there is a need of a smaller amount of bioresin to keep the connection of textiles in the composite.
Still, it was interesting to experiment on shreddering textiles.
One of my inspiration in this area is the FabBrick. Based on the characteristics of the recovered textiles, they design an ecological building material both thermal and acoustic insulator.
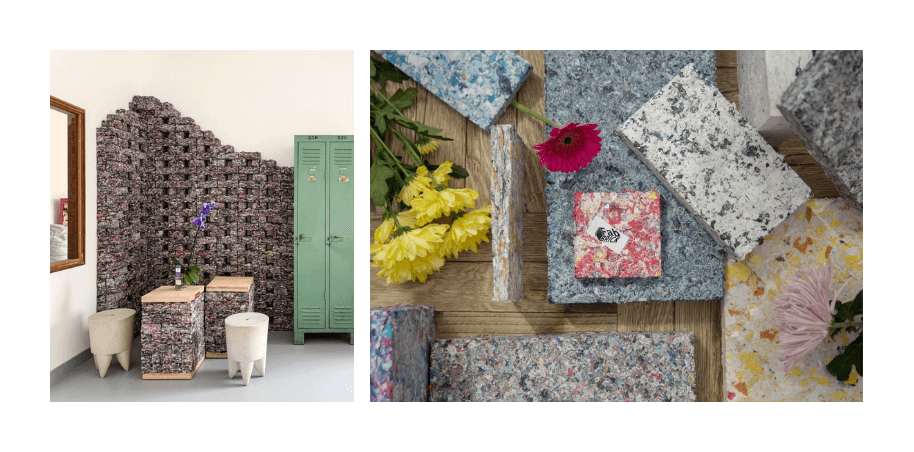
The result is marvelous. But I wanted to focus on another way how I can make modular pieces out of bioresin composite. Also I was attracted to use the laser cutting machine in order to have a precise cut of the details.
In that case I needed a thin sheets of my bio resin composite, so I can cut them and then easily assemble.
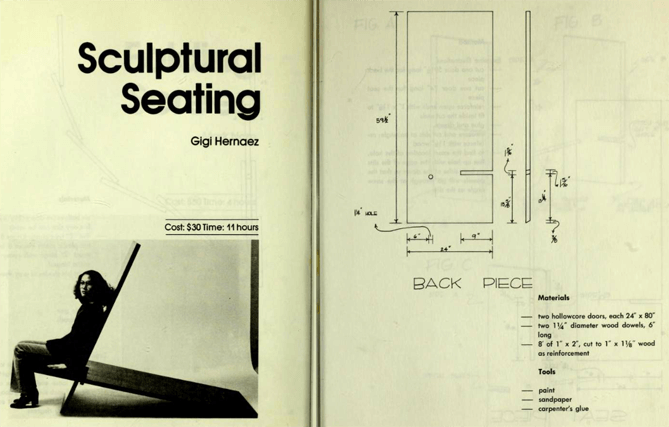 This is one of my inspiration in terms of visual and construction that I wanted to achieve
Bioresin Recipe
-
Gelatine powder - 184 gr
- Functions as the polymeer (so it becomes a solid)
-
Glycerine - 32 gr
- Functions as plasticizer that bonds with the gelatine (makes it flexible).
-
Water - 980 ml/gr
- To dissolve and mix the polymeer and plasticizer
-
A large round coffee filter to absorb froth
* Weigh your ingredients

* Prepare the mold and find a place where you can leave it for a while, ideally near an open window where there's air flow.
*  Bring the water to the boil

* Optional: add natural dye if you wish to use color

* Add the glycerine

* Add the gelatine

* Keep the temperature below 80 degrees celcius while stirring very very slowly and gently to avoid making bubbles.
* Simmer and slowly stir the mixture between 60-80 degrees celcius for at least 20 minutes or up to an hour. Turn it lower when bubbles appear: you don't want the liquid to move. Don't boil it.

* Longer cooking time allows more water to evaporate and will dramatically reduce shrinkage of the casted object. You will get a thicker liquid. To cast larger volumes and solids with this recipe, evaporate a lot of water, until it's very very thick. Sometimes it's worth reheating and melting scraps, they've already dissipated a lot of water and result in nice castings.

* If froth appears on top of your liquid and doesn't go away, you can use a coffee filter to absorb it by covering the surface with it and then taking it off. In cooking this is called a cartouche, you can also make one from kitchen paper. Take a round coffee filter that fits into your pot. Absorb additional froth using some kitchen paper.
* Let the liquid cool for a couple minutes until it gels a little but is still liquid and pourable.

* Cast into the mould slowly to avoid bubbles

* Pour from the middle and hold still, let the liquid distribute itself.

* Put the mould away to dry in a cool place with lots of air flow (like near an open window). A warmer place might speed up the drying process but also allow bacteria to grow faster and can result in fungal growth.

* When using a flexible mould: let it dry without releasing to keep the form as much as possible. The resin will likely shrink and release itself from the mold. If it feels cold to the touch it is still drying. If you are using a rigid mold: release after 4-8 hours and dry flat.
The results of casted samples
Mentoring Session I
These weeks ended with a mentoring session which really helped me pause and relect on the work I have been doing. It also helped me start uploading everything that I have been working on as I have been procrastinating this step.
Feeling pretty good about how these past 2 weeks went. A lot of learning opportunities and big decisions of how I will be moving forward.
What I need to focus on for next week:
- evaluating the tests I have done
- testing out the laser cutting
- begin construction of the molds
- begin the 3D modeling of the final object
- start testing out the connections of shapes
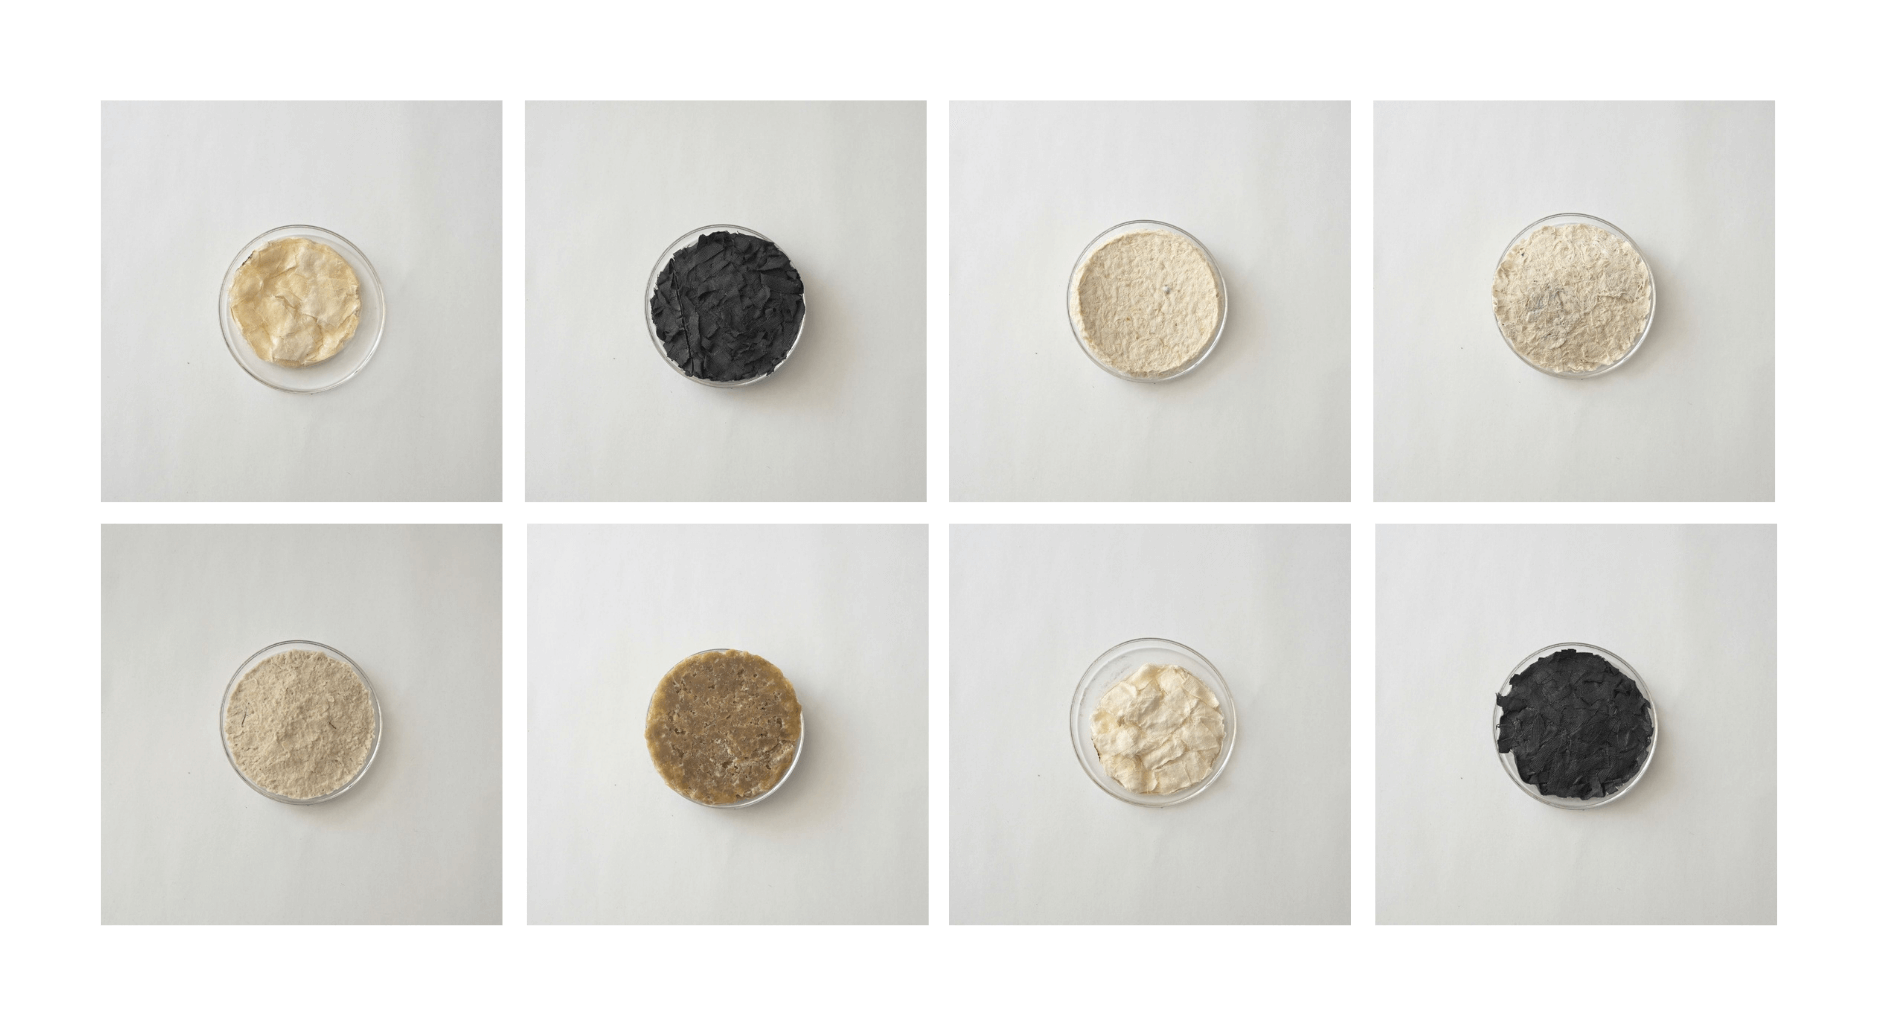
Material research
| Picture | Material name | Material recipe | Textile type/color | Size | Properties |
|---|---|---|---|---|---|
 |
Bioresin | Gelatine/ Glycerine | Cotton/ beige/ pieces | d 100 mm/ h 10 mm | strong, not flexible, curled edges, casting 5 days |
 |
Bioresin | Gelatine/ Glycerine | Cotton/ beige/ strips | d 100 mm/ h 10 mm | strong, not flexible, curled edges, casting 5 days |
 |
Bioresin | Gelatine/ Glycerine | Cotton/ beige/ fibers | d 100 mm/ h 10 mm | strong, not flexible, curled edges, casting 5 days |
 |
Bioresin | Gelatine/ Glycerine | Cotton/ beige/ fibers | d 100 mm/ h 10 mm | strong, not flexible, casting 5 days |
 |
Bioresin | Gelatine/ Glycerine | Cotton/ black/ strips | d 100 mm/ h 10 mm | strong, not flexible, curled edges, casting 5 days |
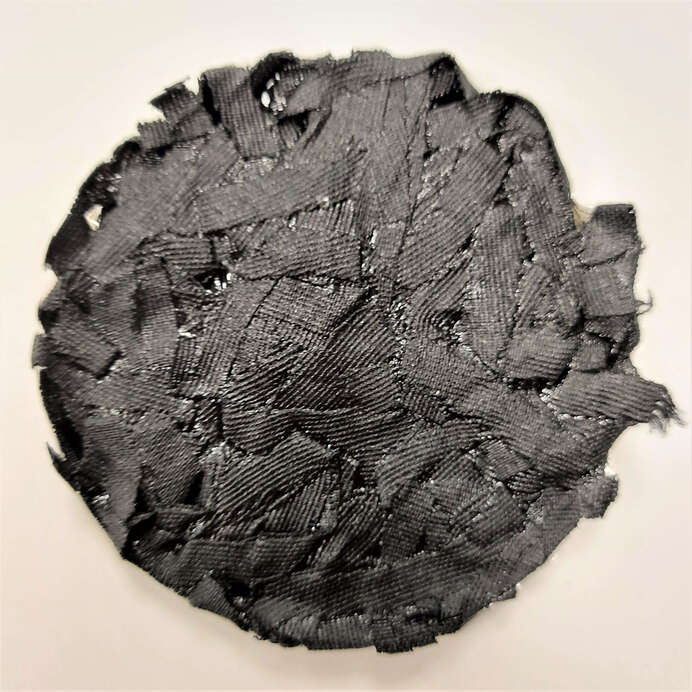 |
Bioresin | Gelatine/ Glycerine | Cotton/ black/ strips | d 100 mm/ h 10 mm | strong, not flexible, casting 5 days |
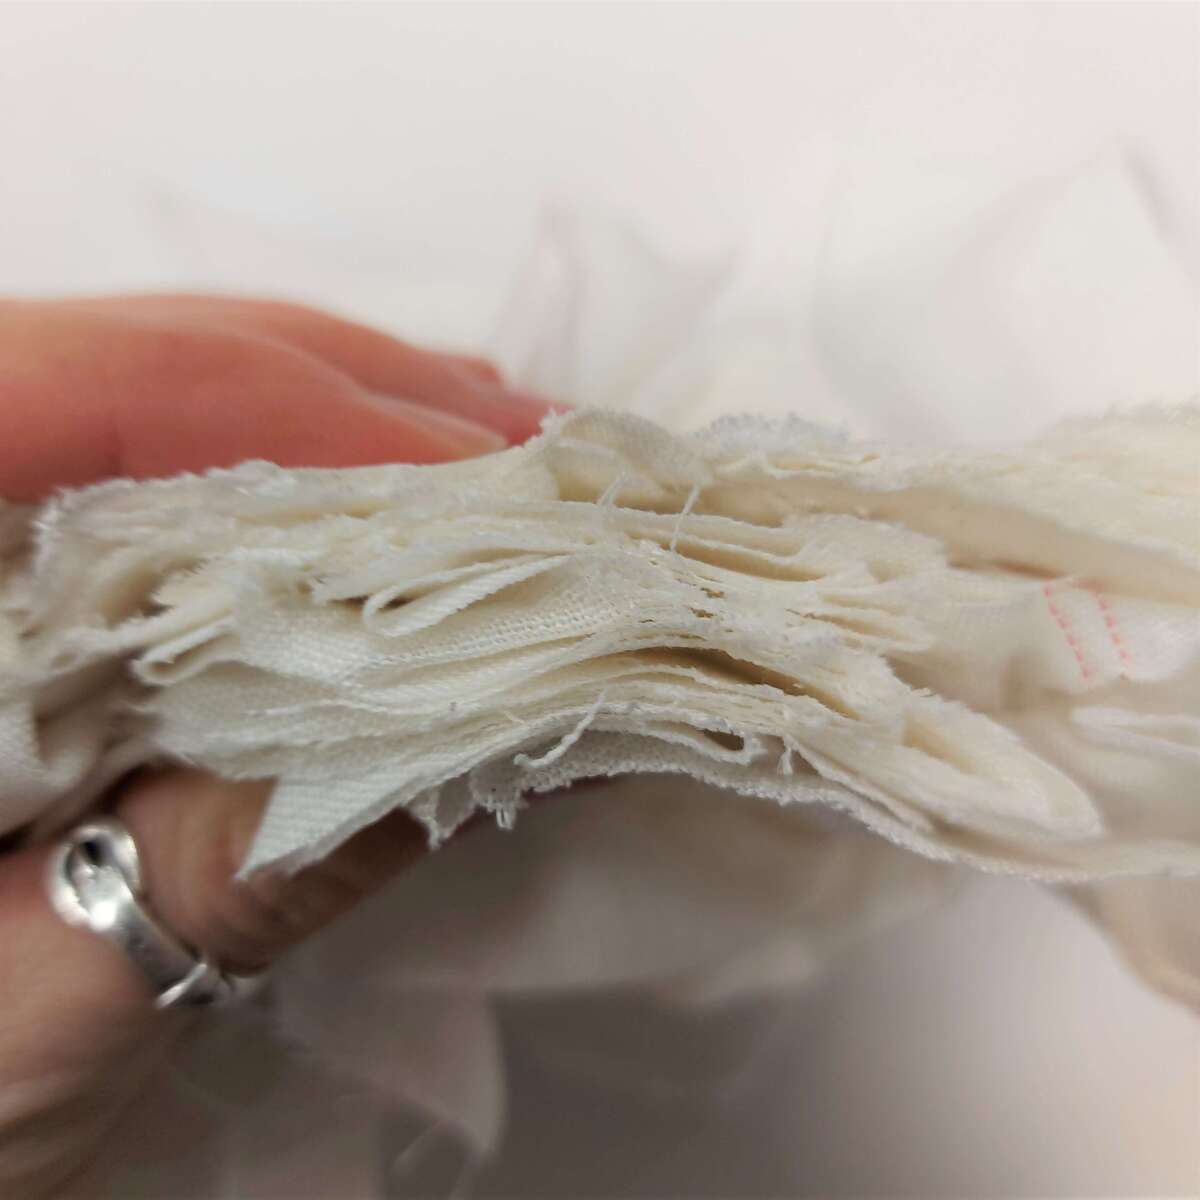 |
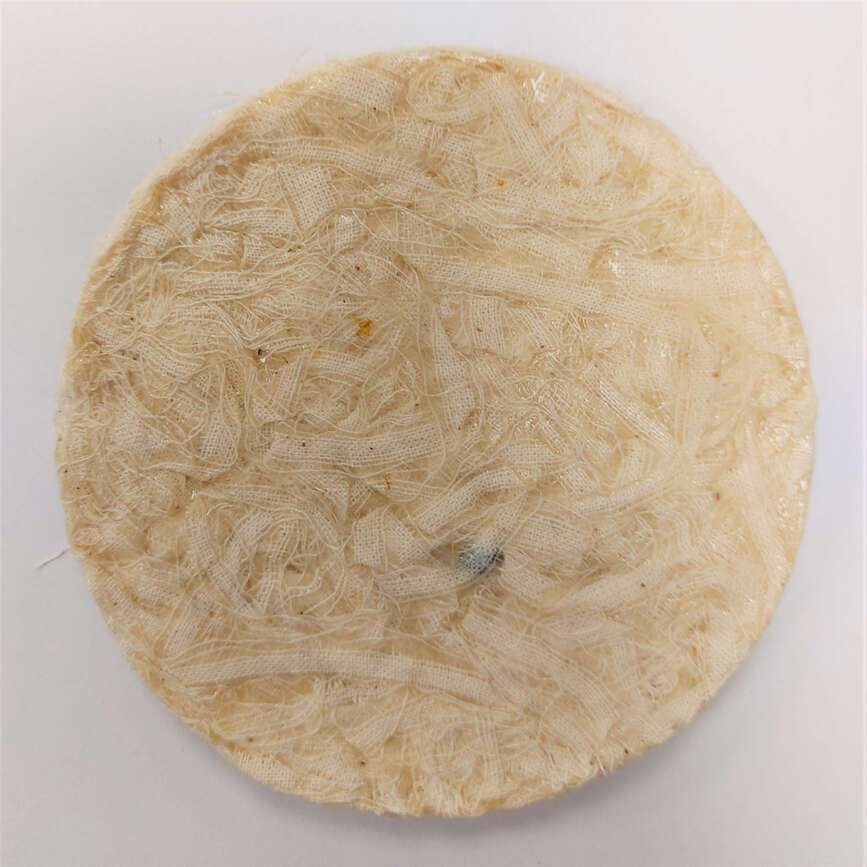
Bioresin | Gelatine/ Glycerine | Linen/ white/ big pieces | d 100 mm/ h 30 mm | more fabric then resin, hard, not so strong, casting 5 days |
 |
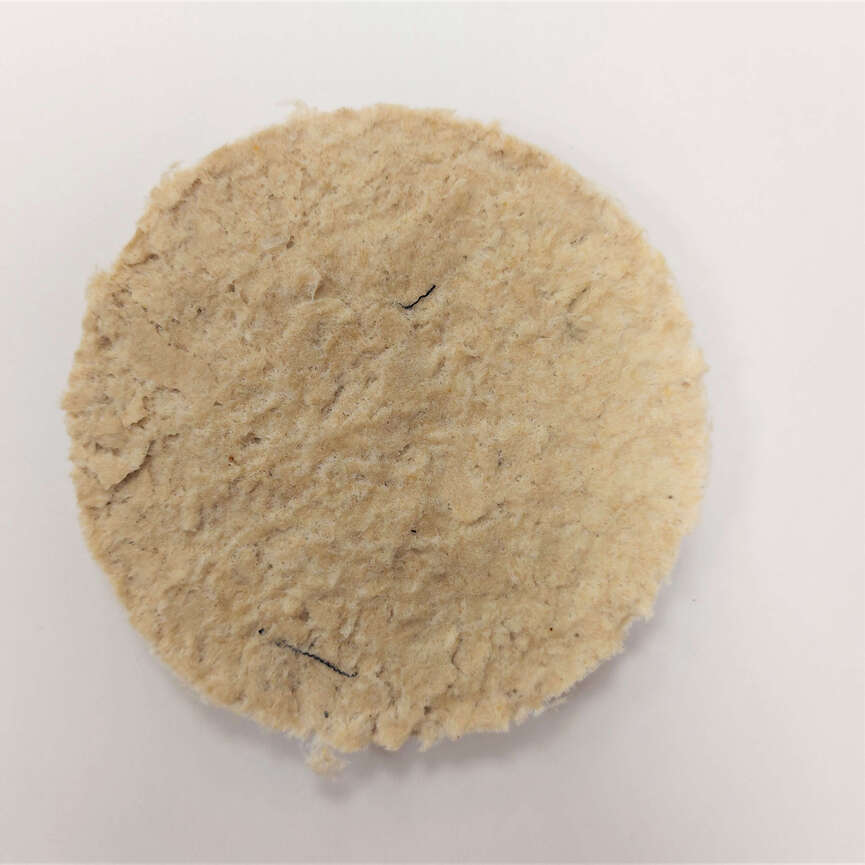
Bioresin | Pine resin/ wax | Wool/ beige/ shreddered | d 100 mm/ h 10 mm | fragile, brittle, not flexible, casting 2 hours |
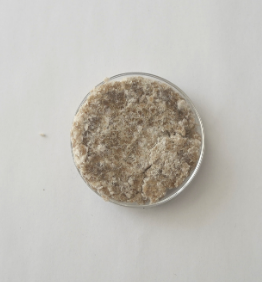 |
Bioresin | Pine resin | Wool/ beige/ shreddered | d 100 mm/ h 20 mm | fragile, brittle, not flexible, casting 2 hours |
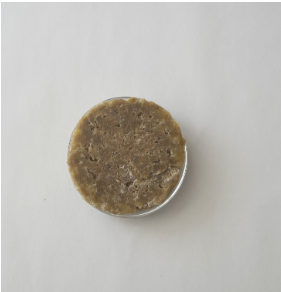 |
Bioresin | Bee wax | Wool/ beige/ shreddered | d 100 mm/ h 10 mm | sticky, brittle, not flexible, casting 2 hours |
After analizing the samples and testing their resistance, I decided to choose the one in which the remnants are cut in stripes, so there is a need of a smaller amount of bioresin to keep the connection of textiles in the composite.
For this I used this type of electrical scisors. The result you can see in the following photos.
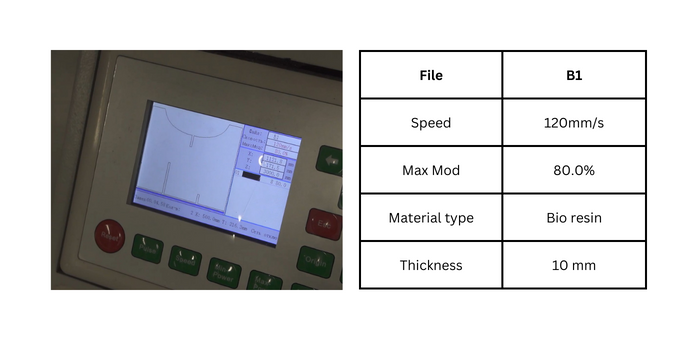
Also, this week I made some tests of the laser cutting machine. Trying to apply different power in order to see the difference in cutting. It worked better with the 80% power. The more thicker was the sheet of bio resin composite, the less would cut the material.
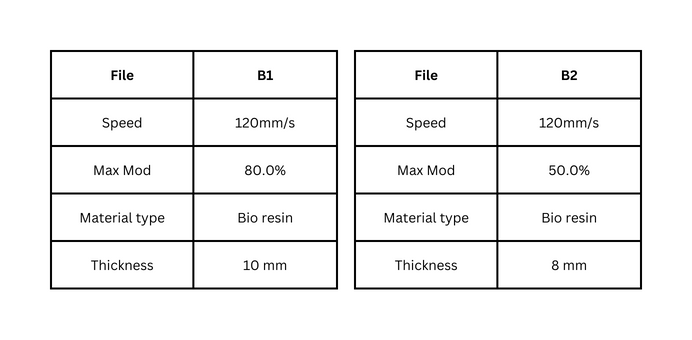
* The sheets need to be flattened in order to laser cut them
* The smell of burning gelatine is not so pleasant
* The sheets may vary in thickness. Prepare yourself to force a little in the parts were laser didn't cut till the end the sheet.
* It's better to grind the edges, otherwise they can be pretty sharp and not comfortable to touch.
Mentoring session II
Feedback from the Pitching Day

Design & Fabrication
When starting to work on the design of the furniture pieces, first of all, I did a research on what was already made in terms of chairs, stools and different types of storage furniture.
I knew from the begining that I want to make a modular furniture and to implement the connections between the modules that we first try out in the week of Digital Bodies.
One of the aspects that I wanted to include in the design of the furniture objects was the possibility of being assembled and disassembled easely. So the storage and transportation of them can also be more facile.
After making several quick sketches and somewhat establishing the desired shape, I decided to make a 3d representation that I can also export to laser cut the product. I chose to use the Blender program because I have worked in it before and because it is a free and open-source 3D computer graphics software tool set that allows anyone to test and to create 3D worlds.
I used several plains with the specified dimensions, which I extruded to a desired thickness (10 mm) and aranged them in a proper shape. Afterwards, in order to cut the intersection between them, I used Boolean tool.
The same way was cut out the space below the pillow, with the Boolean tool. The pillow itself I model out of the cube which I bevel it and shaped by hand to create a more natural look.
You can see a glimpse of cuttingg with Boolean tool in the folllowing video.
The same steps have been followed in creating different designs of the shelfs.
"This step of the process was important because I learnt to draft my own patterns digitally. The first visualisation of this can be seen here, find test-fabrication files for the first prototype of the stool here12"
You can find here3 the 3D visualisation of the furniture.
The 3D visualisation also helped me to understand the amount of sheets that I need for every piece of furniture.
The process of casting the bioresin sheets took a lot of time. The sheets needed to dry for at least 5-7 days.
Every sheet (1200 mm x 600 mm) contained about 4 kg of textile remnants and 8 liters of casting liquid resin.
| Material name | Gelatine amount/sheet | Glycerine amount/sheet | Water/sheet | Cloves/sheet |
|---|---|---|---|---|
| Bioresin | 1536 gr | 256 gr | 8 liters | 8 gr |
After drying very well, I needed to flatten the sheet in order to make possible to laser cut them. In the process of drying the sheets curved a little. In order to flatten them, I used a heat press from Recycline studio. Only when the sheets got uniform I could step to another part - Laser cutting at Fablab.
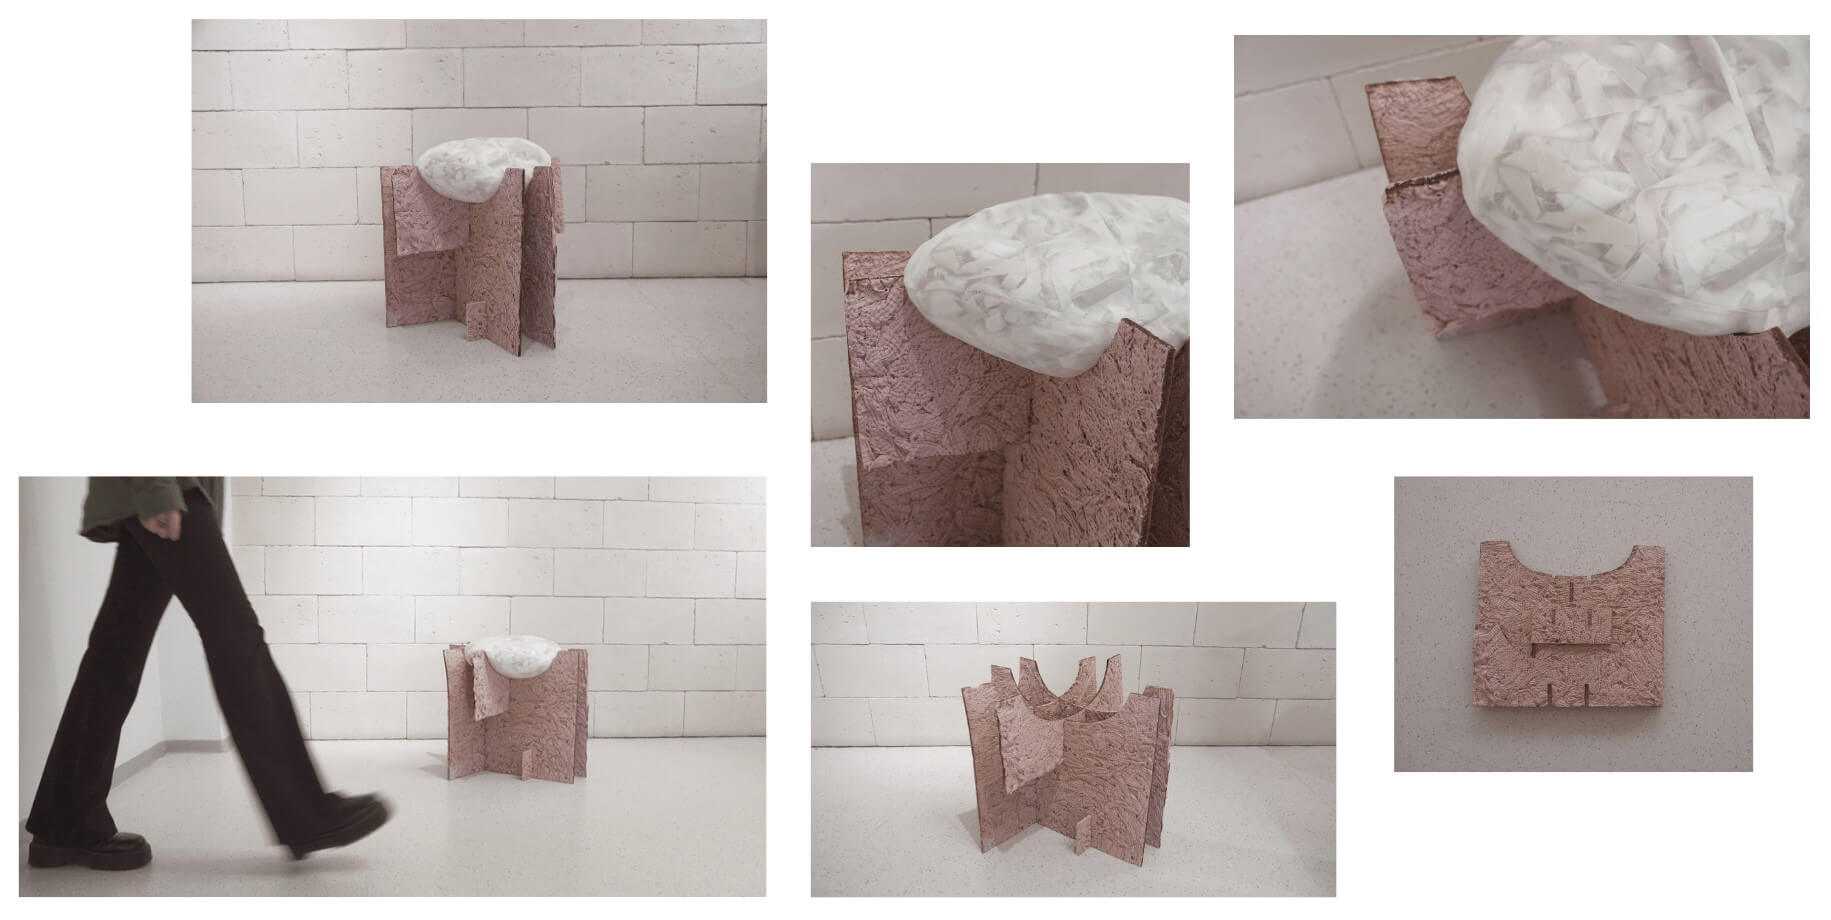
However, the first piece of furniture to cut was the Stool. It needed smaller amount of sheets and because I already had 3 sheets of bio resin composite, mixed with pink cotton stripes, I decided to cut it in one color.
There is nothing left just to assemble the parts!
In order to understand the connection and the assembling steps, I recordered the assembling of the Stool from Blender.
The final touch was to add the soft pillow made of the same textile remnants.
Take your seat and Enjoy!
Half-fabrication files
-
File: Stool patterns EPS ↩
-
File: Stool patterns DXF ↩
-
File: Furniture 3D visualisation ↩