9. Textile Scaffold
This week we are covering a wide range of topics about the relationship of textile and another surface and composites. There were a lot of inspiring exemples of mold making (specifically with leather), mycelium, crystallization, casting in fabric forms and making biocomposites.
One of the bigest inspiration was the work of Elisa Strozyk, where she is pushing the boundaries between 2D and 3D, hard and soft materials, switching meanings and categories.
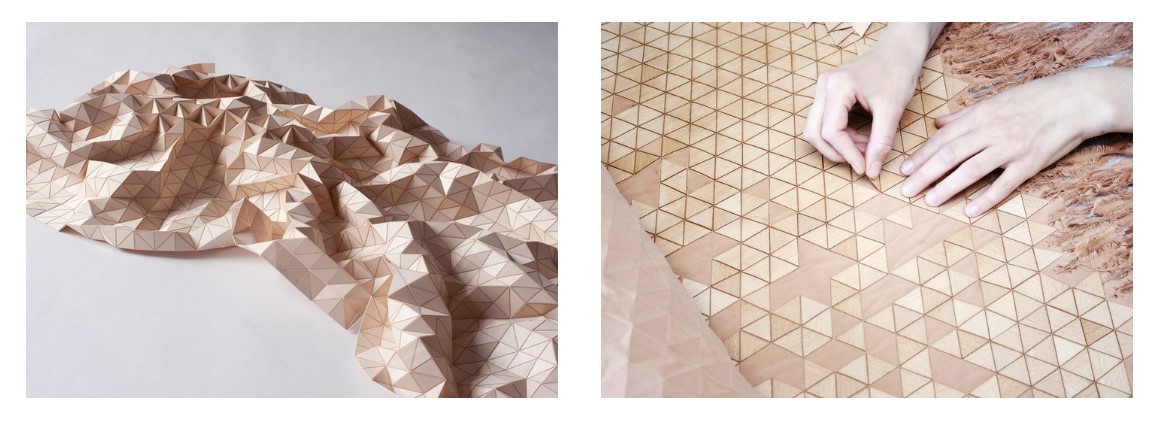
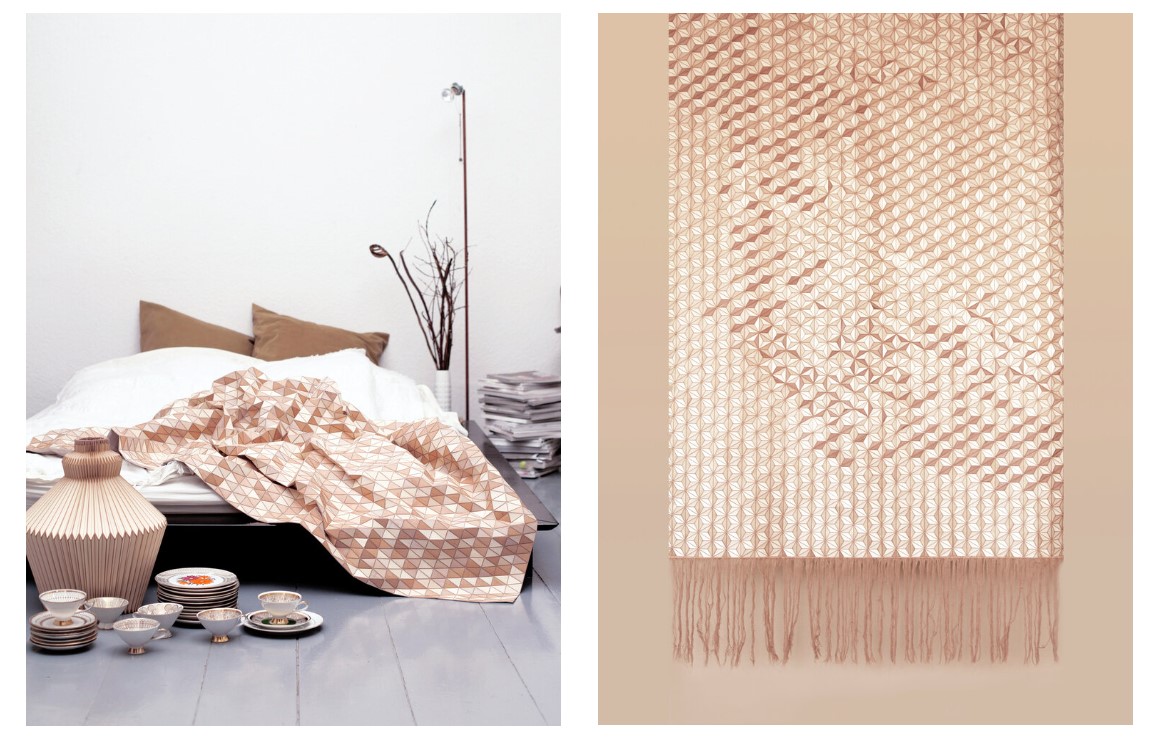
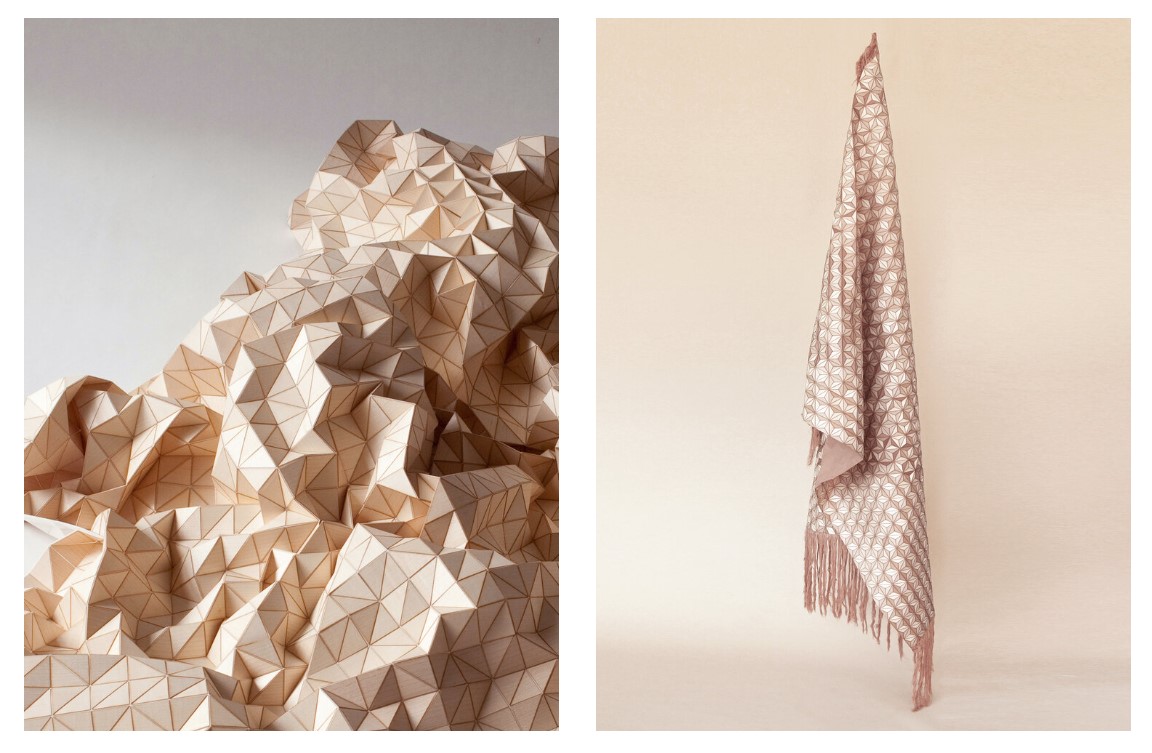
Wooden Textiles convey a new tactile experience. We are used to experience wood as a hard material; we know the feeling of walking across wooden floors, to touch a wooden tabletop or to feel the bark of a tree. But we usually don't experience a wooden surface which can be manipulated by touch. "Wooden Textiles" is a material that is half wood-half textile, between hard and soft, challenging what can be expected from a material or category. It looks and smells familiar but feels strange, as it is able to move and form in unexpected ways.
The processes to transform wood into a flexible wooden surface is its deconstruction into pieces, which are then attached to a textile base. Depending on the geometry and size of the tiles each design shows a different behavior regarding flexibility and mobility.
Research & Inspiration
Each type of tehnique has a lot of inspiration to see. In the following example there is an exploration of leather molding which I like a lot.

Kofta is the independent couture studio specializing in the art of leather craft using futuristic technics. Based in Ukraine since 2010 the studio carry out unique projects and seasonal collections from start to finish, allowing them to be designed, developed and produced in-house. In the last few years, kofta won numerous art&fashion contests (A’Design 2016, Red Dot 2018 to name few) and was exhibited in K11 Gallery in Shanghai for the prestigious “BAGISM” exhibition.
Kofta bags serve as a canvas for expressing creative intentions through properties that they did not initially possess, endowing them with ability to bring aesthetic pleasure, while maintaining functionality.
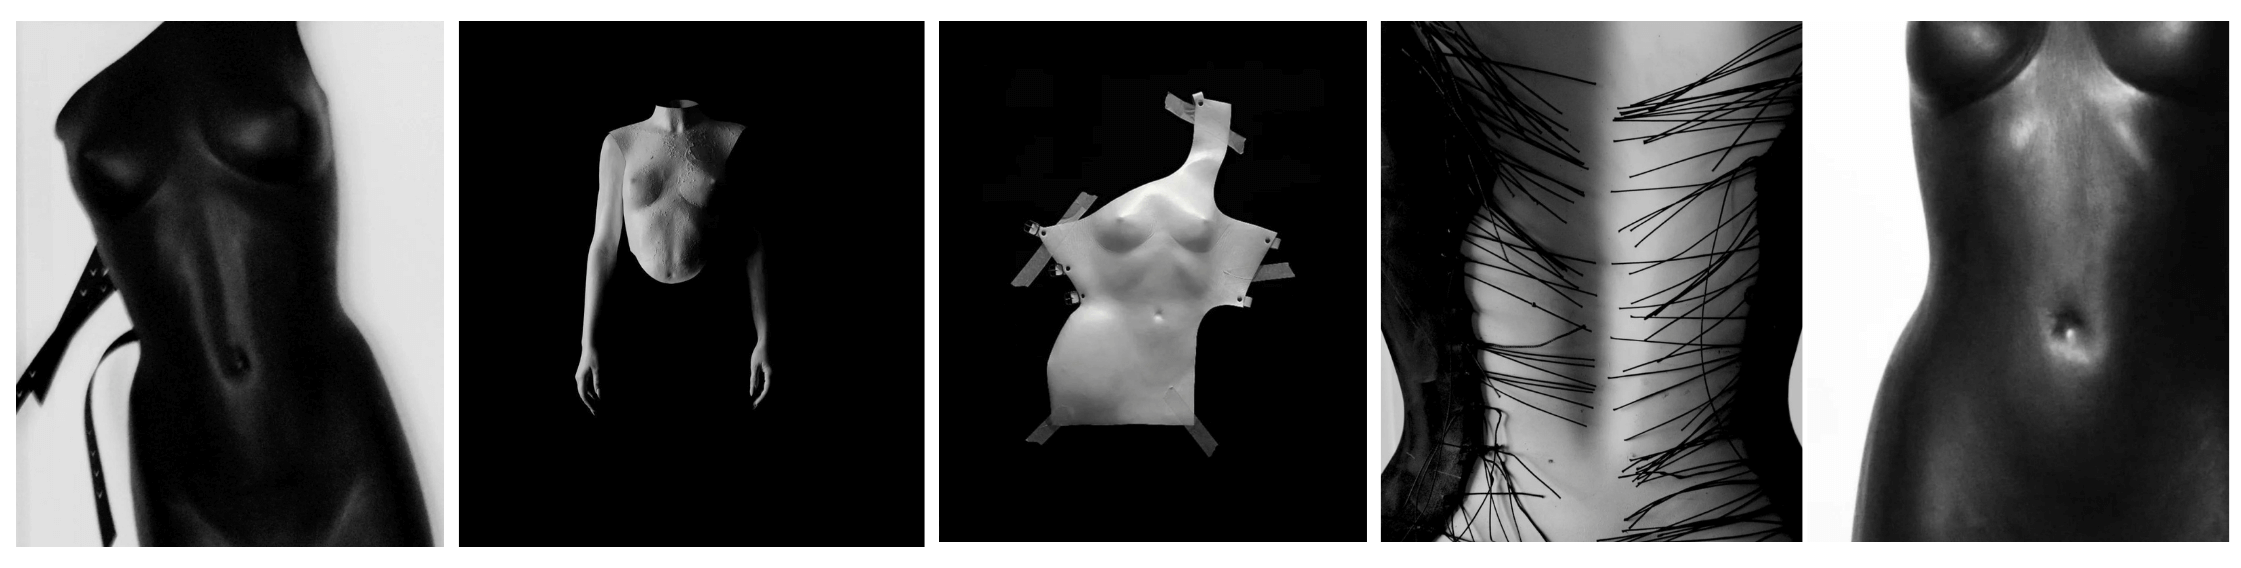
Another marvelous exemple of leather molding is the work of friend of mine. Alexandru Floarea- winner of “Best young designer” title awarded by Elle Magazine (2020).
Alexandru Floarea is a young fashion designer from Iasi, Romania. Showing an attraction to matter, he is always seeking new ways of expression through personal experiments with unconventional materials. Through materiality, composition, color or structure, gives its projects, an aspect of exterior beauty and ugly in concept, expressiveness, originality and an unrepeatable mark.
Tools
- glass jars
- salt
- epsom salt
- cotton lace
- veneer wood
- cotton
- silk
- coins (alluminium)
- Grasshopper
- Adobe Illustrator
- Rhino3D
Process and workflow
Wood and Textile
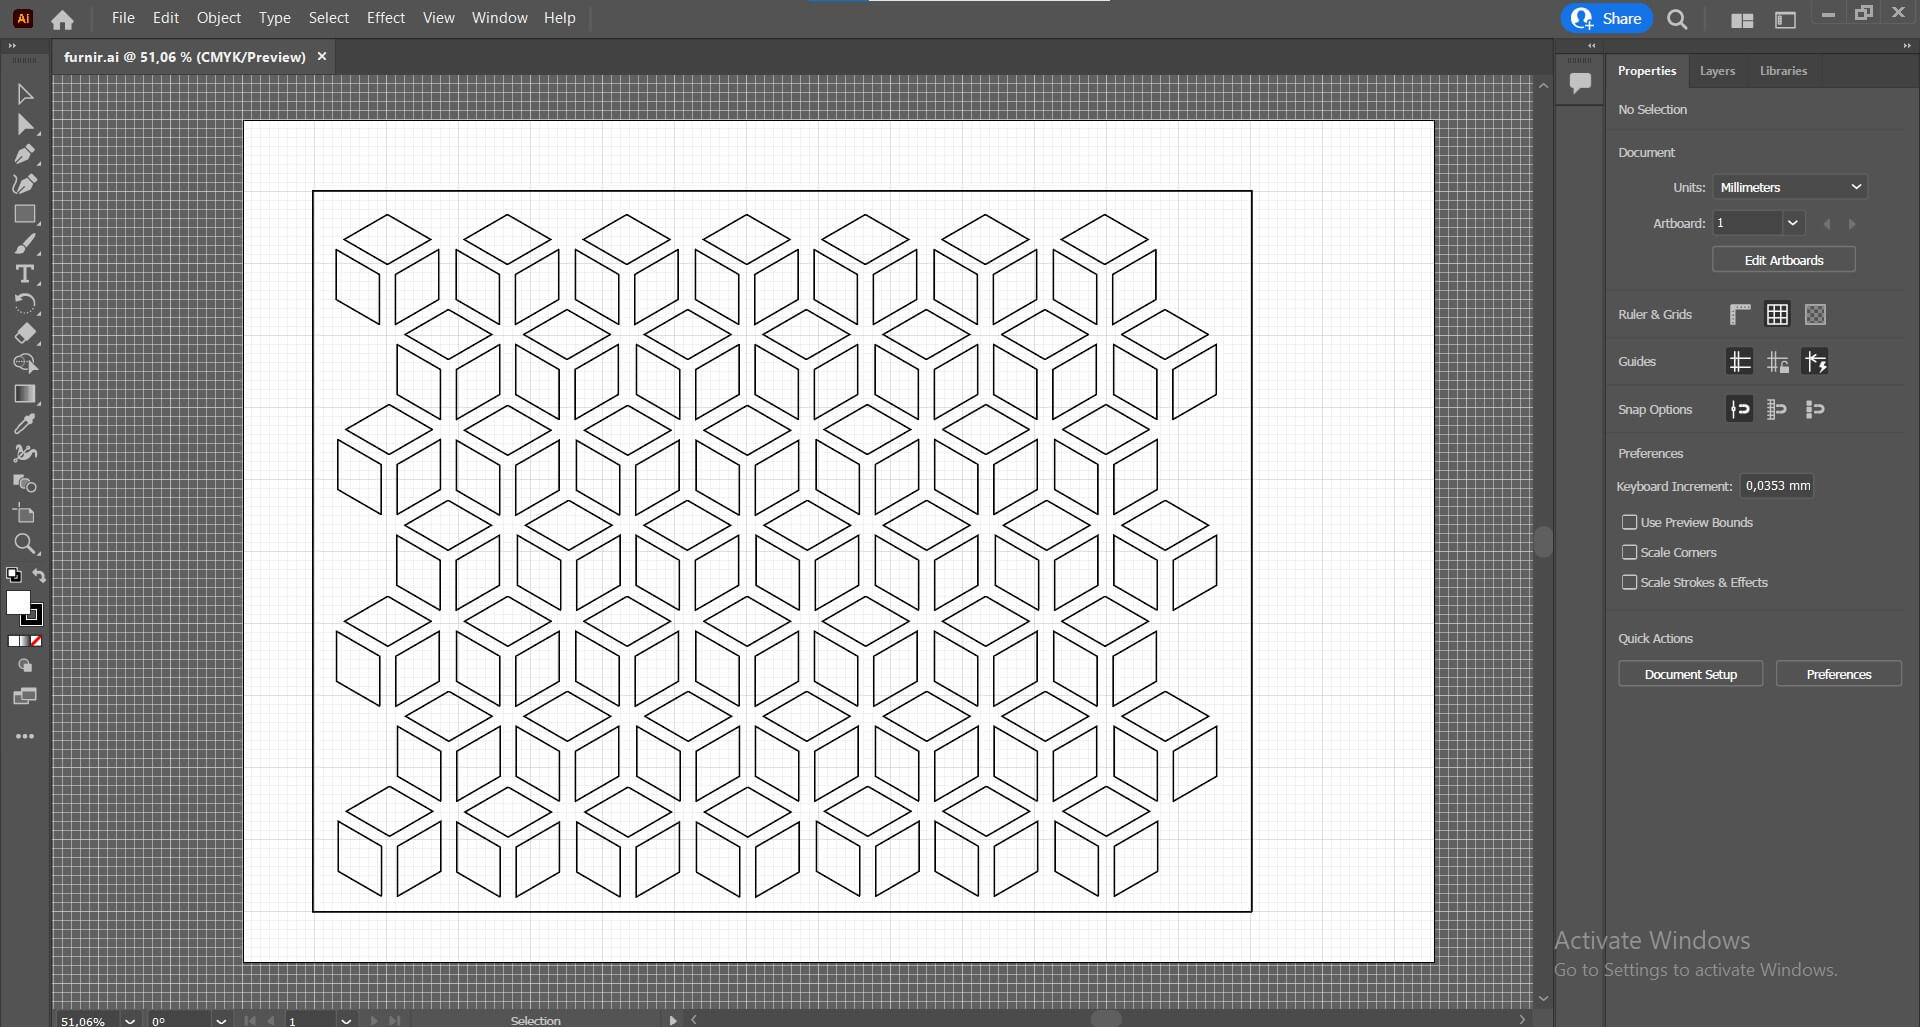
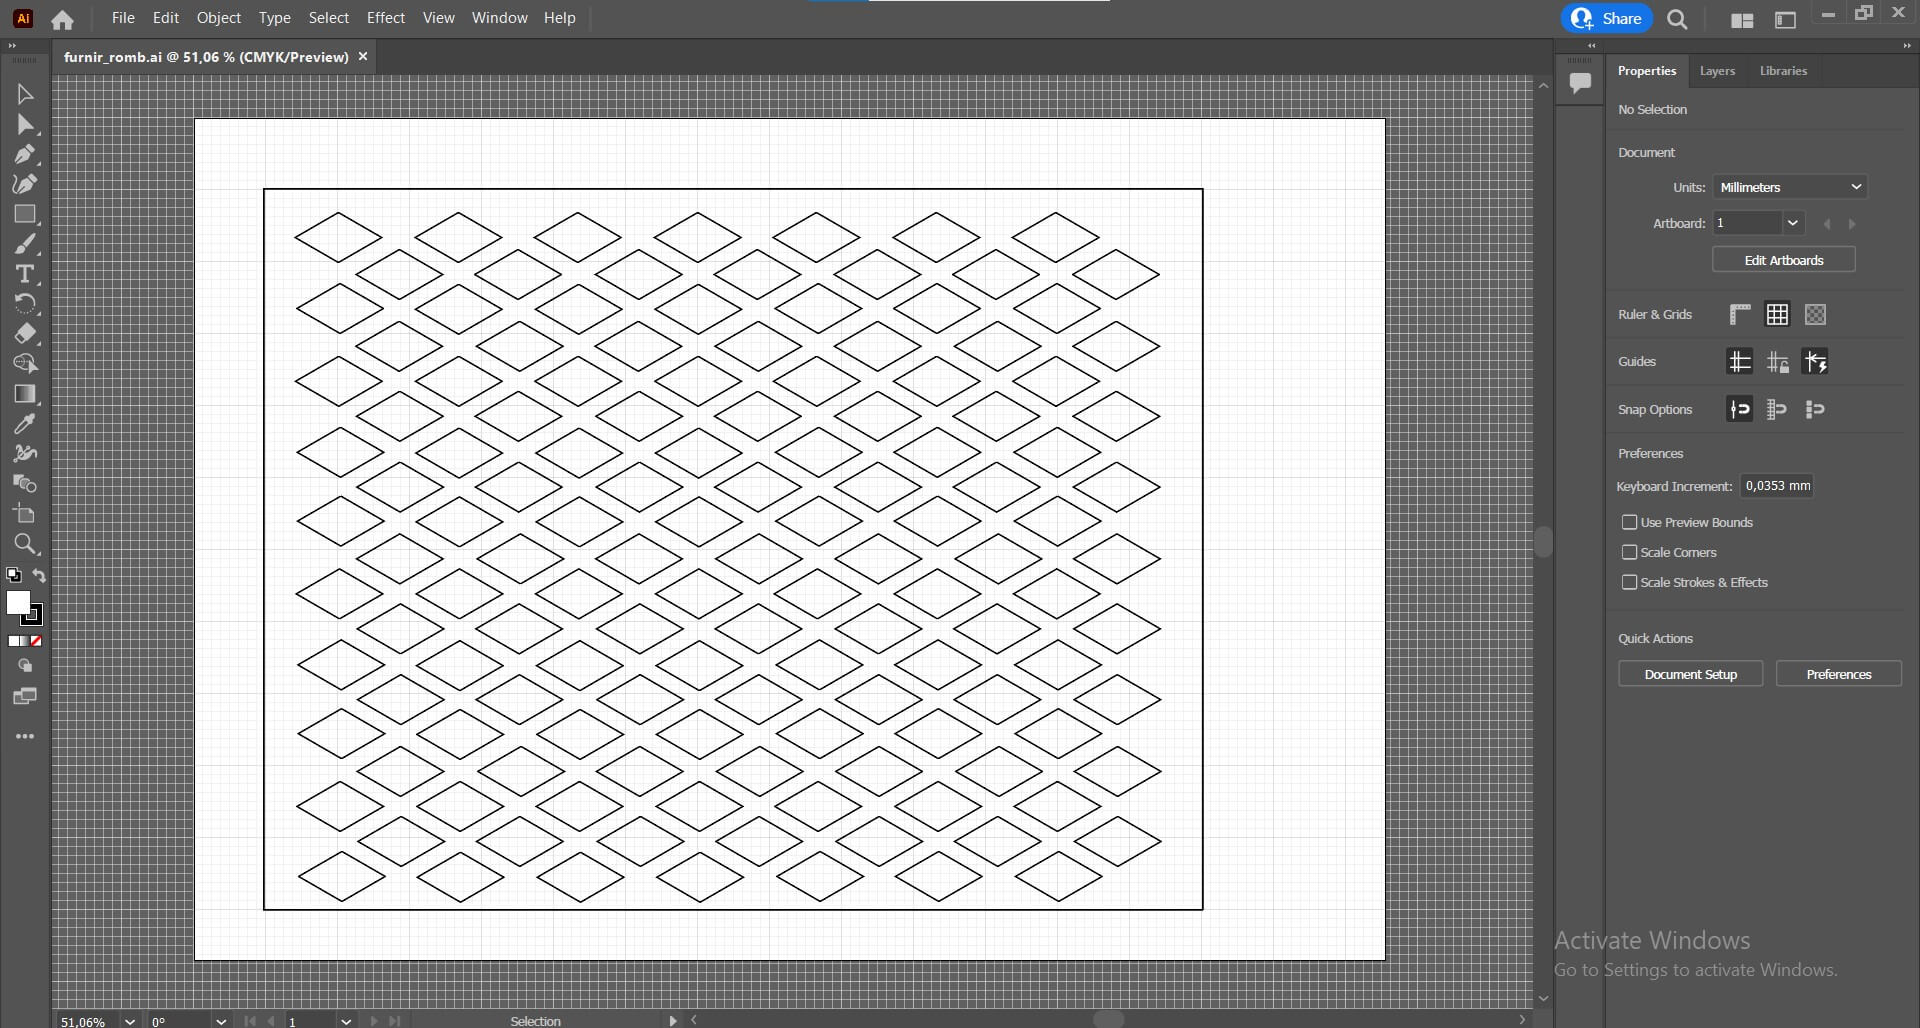
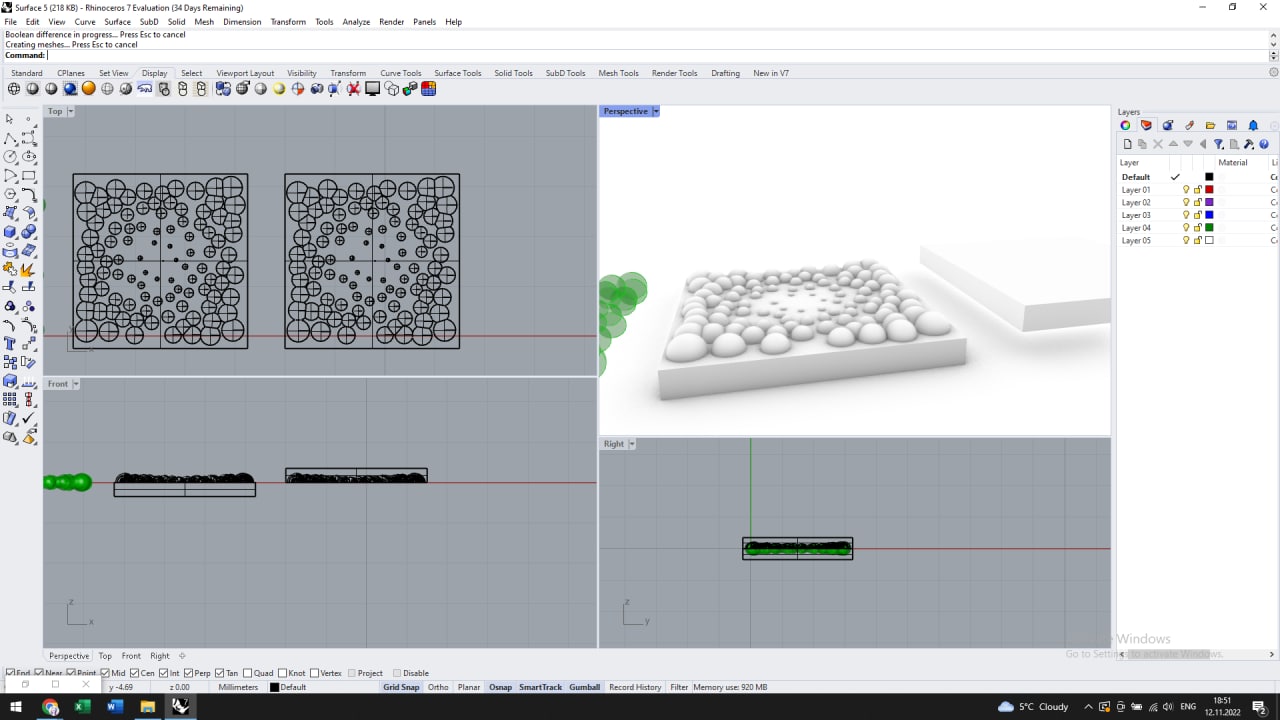
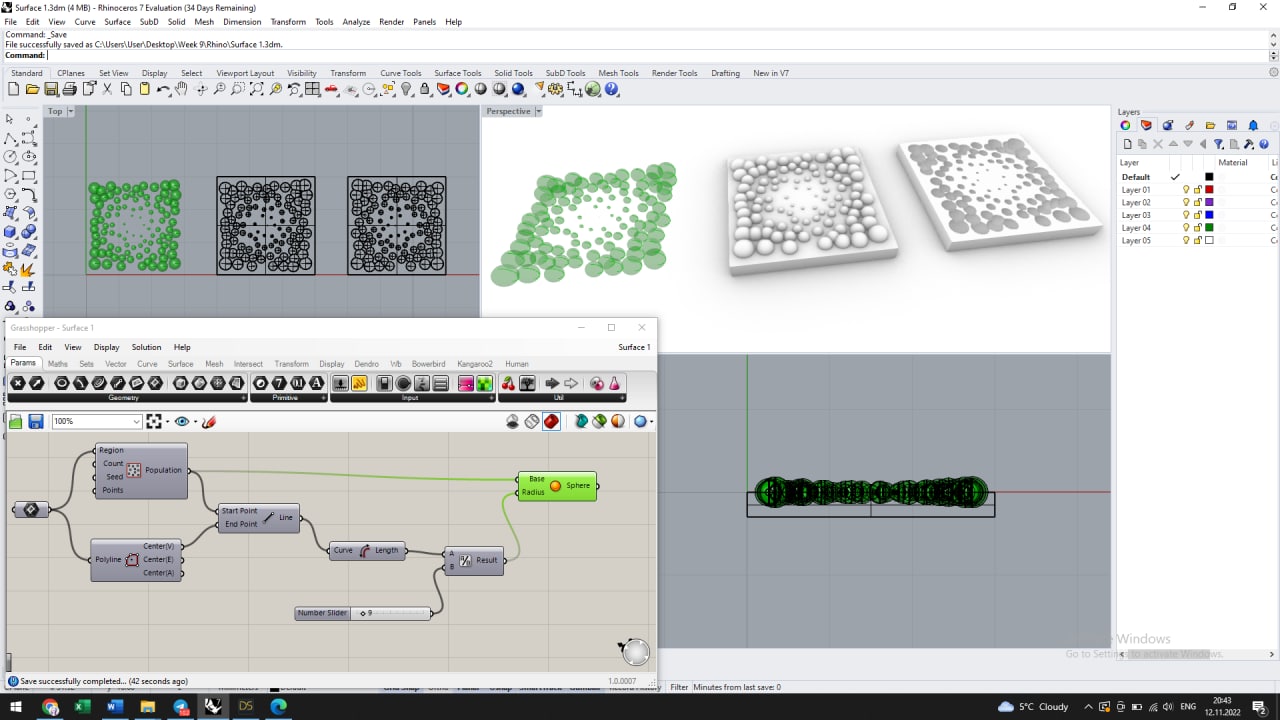
I began by creating some patterns I was going to laser cut. I worked on them with the help of Rhino and the Grasshopper, but I also tried to design with the help of the Illustrator.1 2
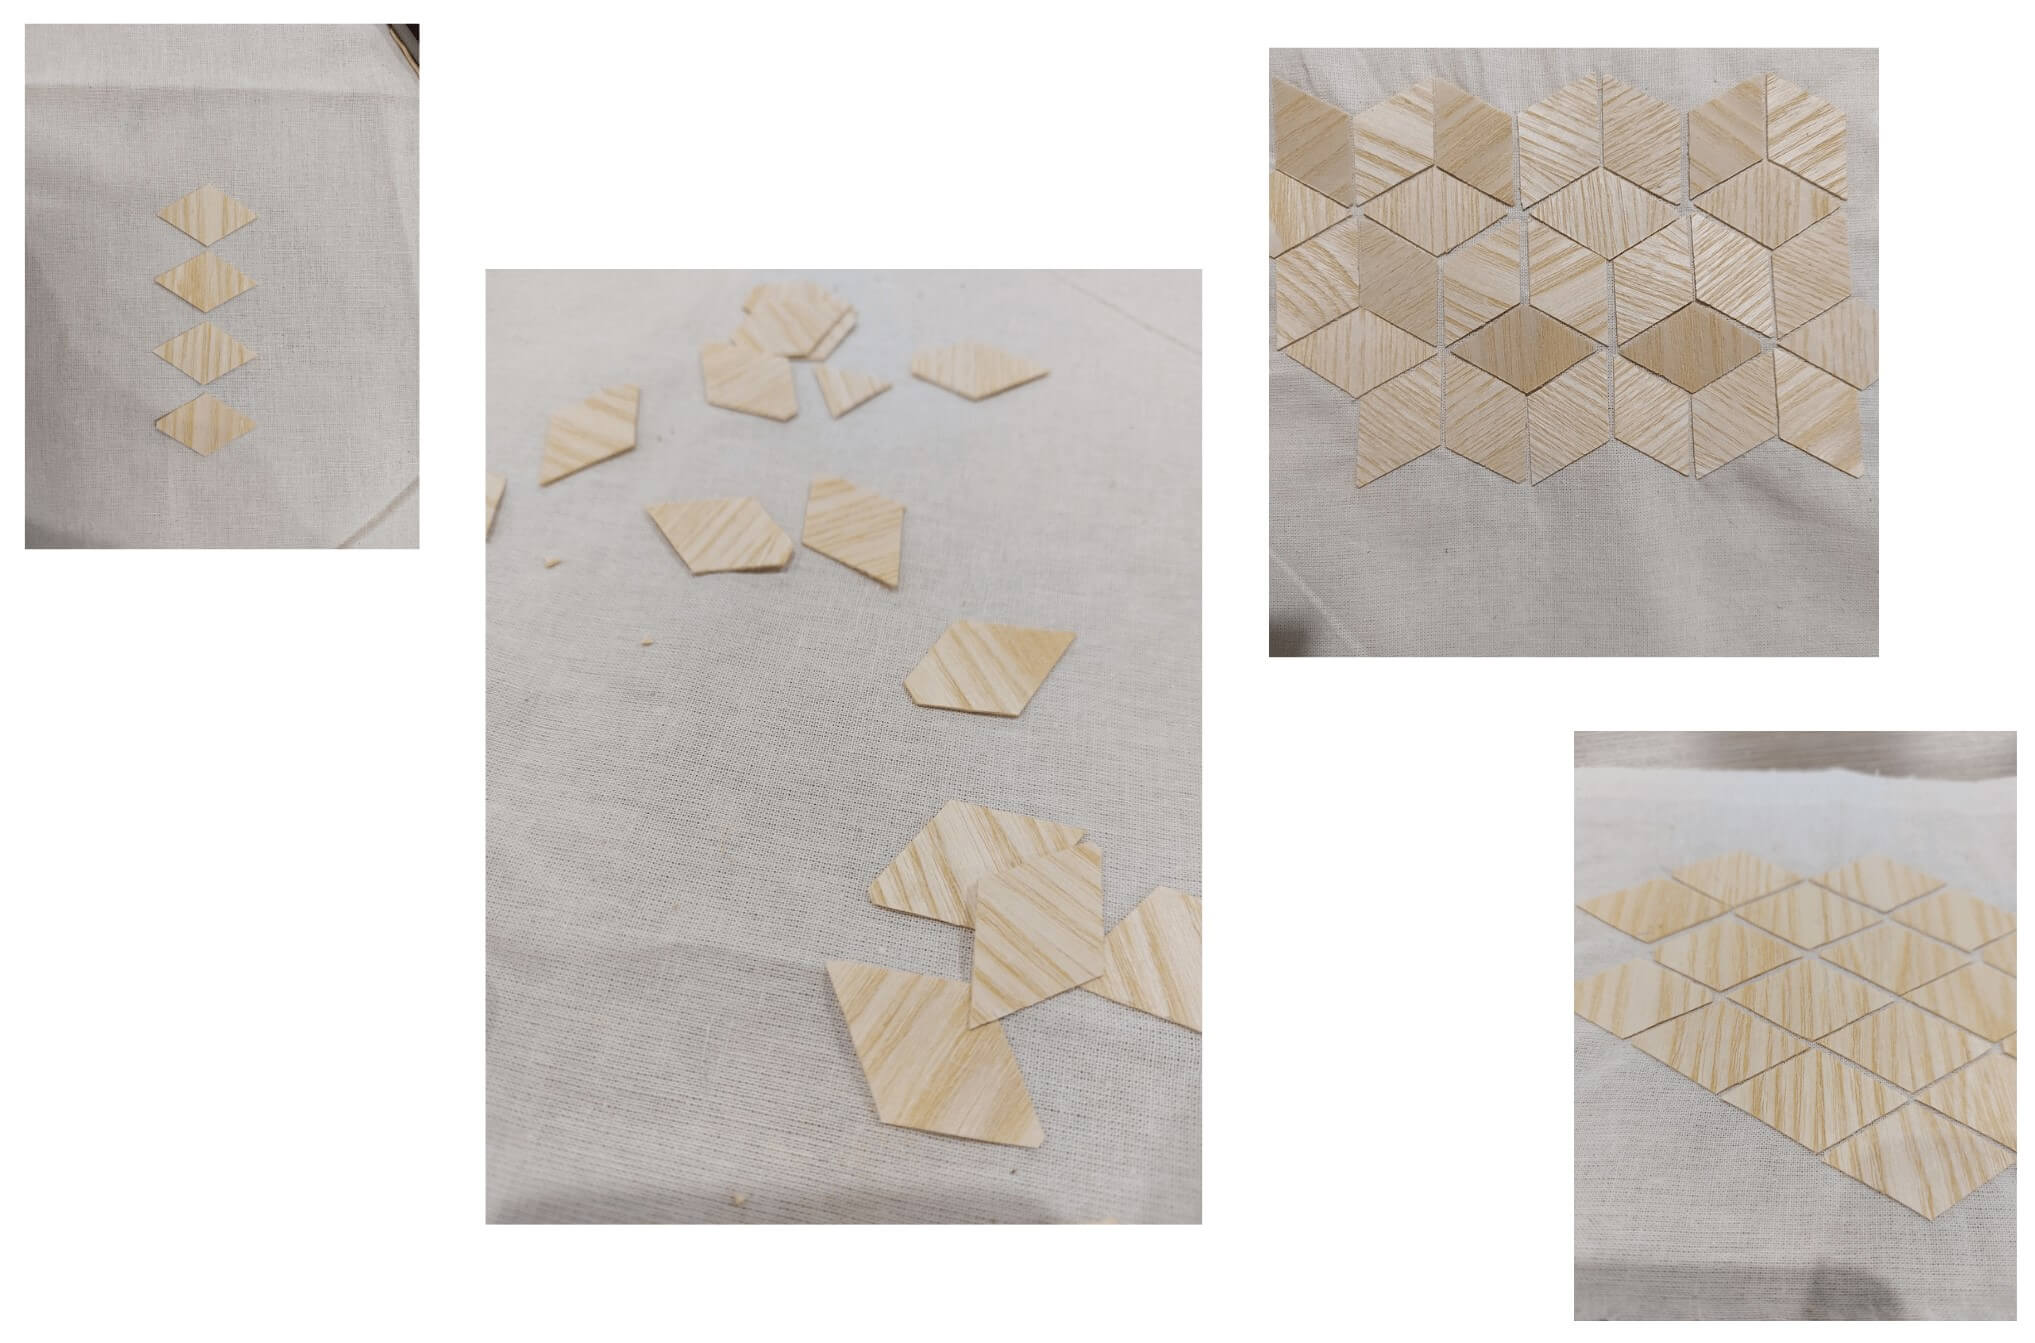
I selected a piece of ash veneer and combined it with cotton fabric.
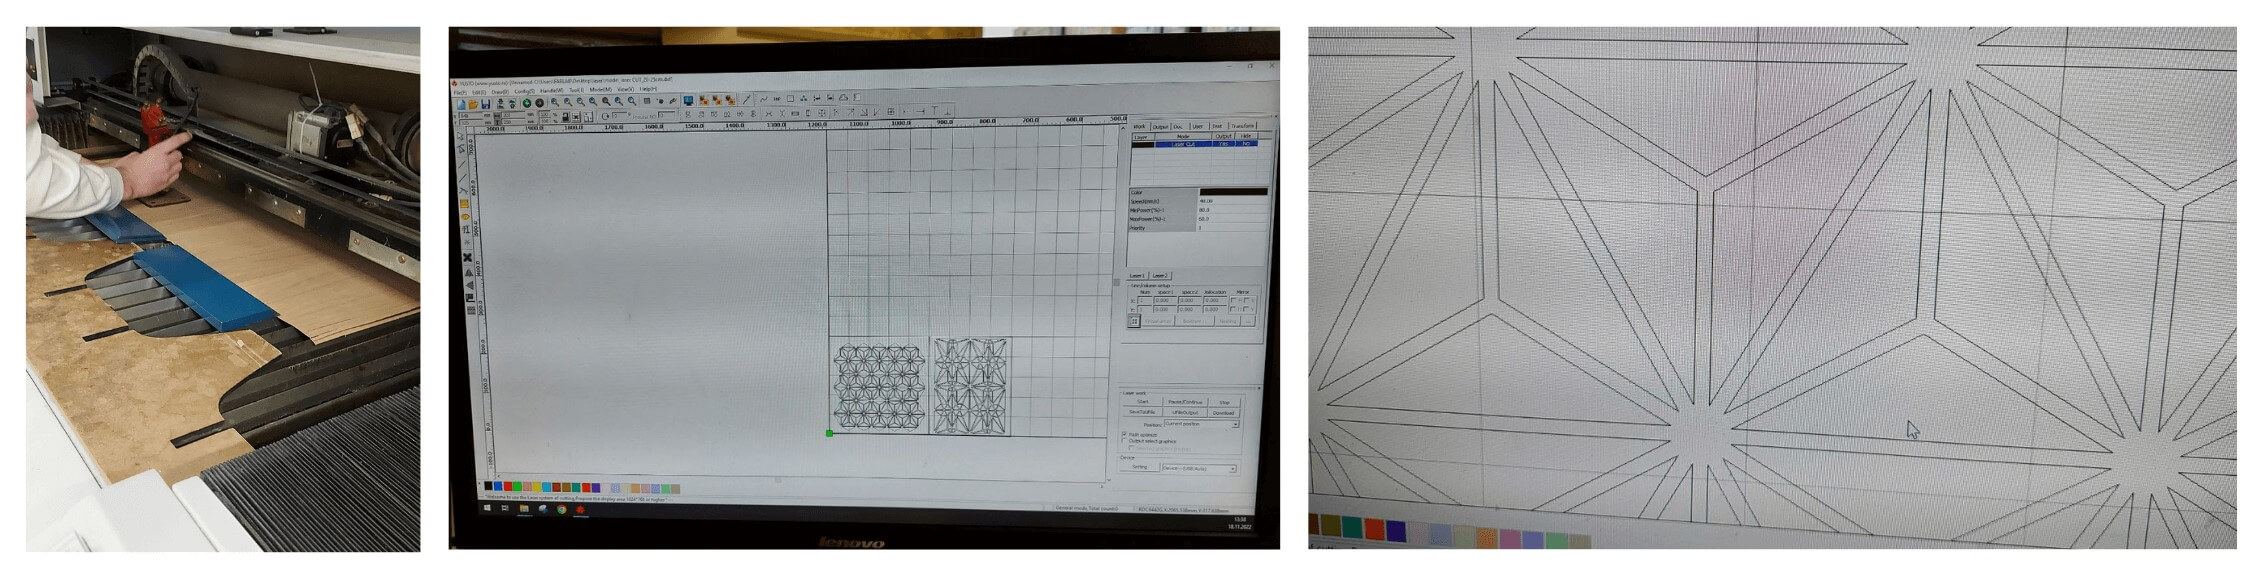 After laser cutting the sheet of veneer the actual fun begin. Some of the cutted pieces broke in the process.
Also, while gluing them on textile some pieces crashed right in my hands.
Tips for the next time
Maybe it will work better if there are 2 sheets of veneer clued in between, to give more thickness to the sheet, and only afterwards to lasercutt it. This would allow the cutting of smaller elements without breaking them and the reduction of waste.
I would also like to try to dye the wood with different shades of bio dyeing and to ebonize it with iron acetate to optain some black wood (in this case the wood needs to have tannin in it, see the following steps for the process).
How to Easily Ebonize Wood
 - Step 1: Take a glass jar with the lid.
 - Step 2: Add the steel wool or iron powder.
 - Step 3: Add vinegar.
 - Step 4: Add lid and shake. Make a hole in the lid for the circulation of air.
 - Step 5: Wait one week.
 - Step 6: Filter the solution.
 - Step 7: Prep wood by sanding.
 - Step 8: Apply stain.
 - Step 9: Sand and recoat.
 - Step 10: Add extra tannins (black tea) for more intense black color.
Crystallization
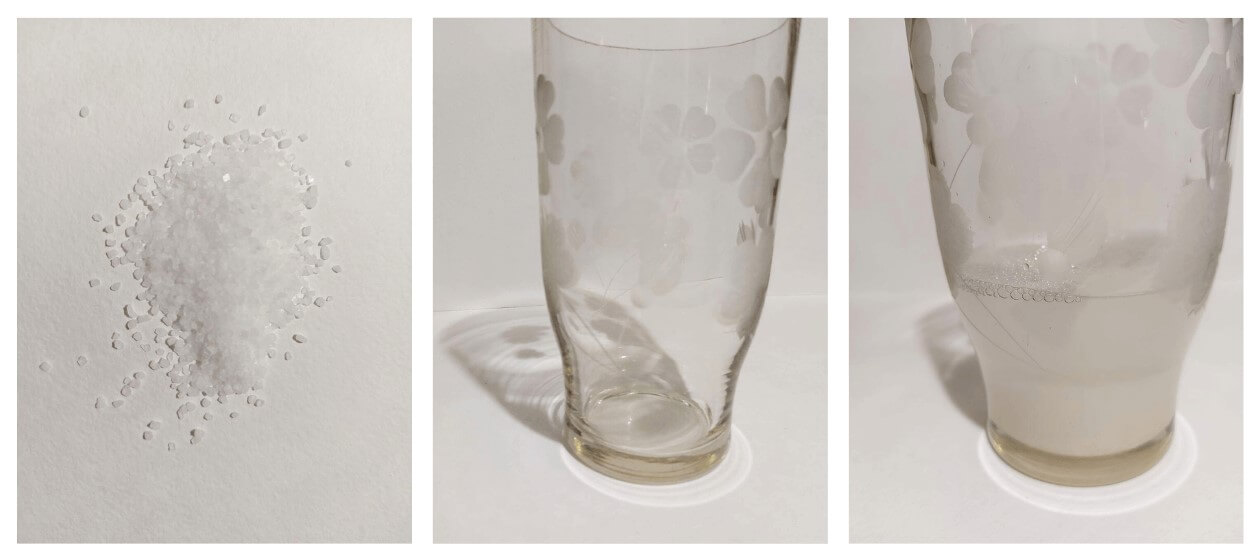
recipe
- Half distilled water (500gr)
- Half salt (500gr)
For my second experiment I used recipe from regular salt.
Process:
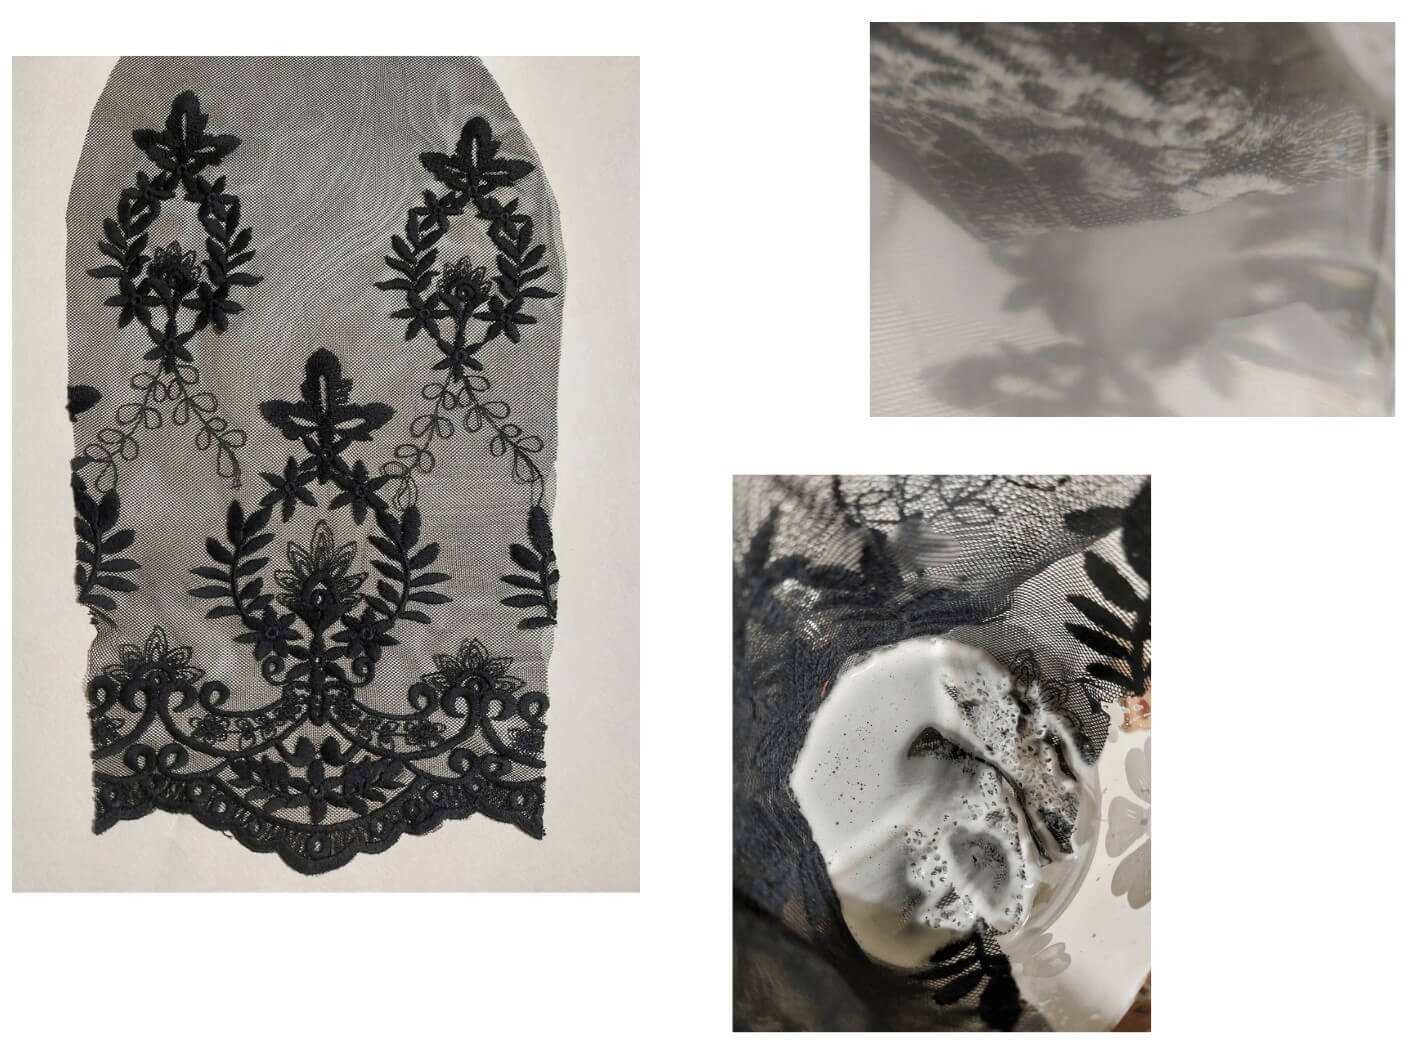
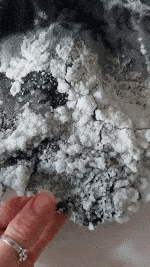
So I started by realizing my recipe by adding 500gr of warm water for 500gr of salt. Then I made sure to dip the fabric I wanted to cover with crystals in the solution. Unfortunately, after 24 hours, still no crystals. There are several possible reasons: there was not enough salt, I did not filter the solution, or it would have been necessary to glue starter crystals beforehand, however I did not.
Somewhat disappointed with the result, I decide to let more days to see if there is a change.
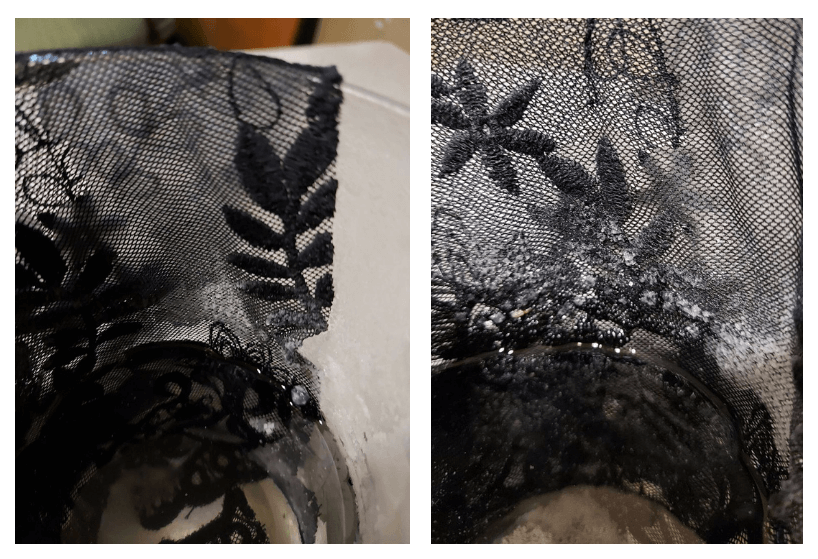 After a little more than 24 hours, I went to see the result, small crystals closed on the places that interested me, I was rather satisfied but the crystals were really small and it seemed to me that they were no longer evolving, I therefore left the fabric more time in order to obtain larger or more numerous crystals.
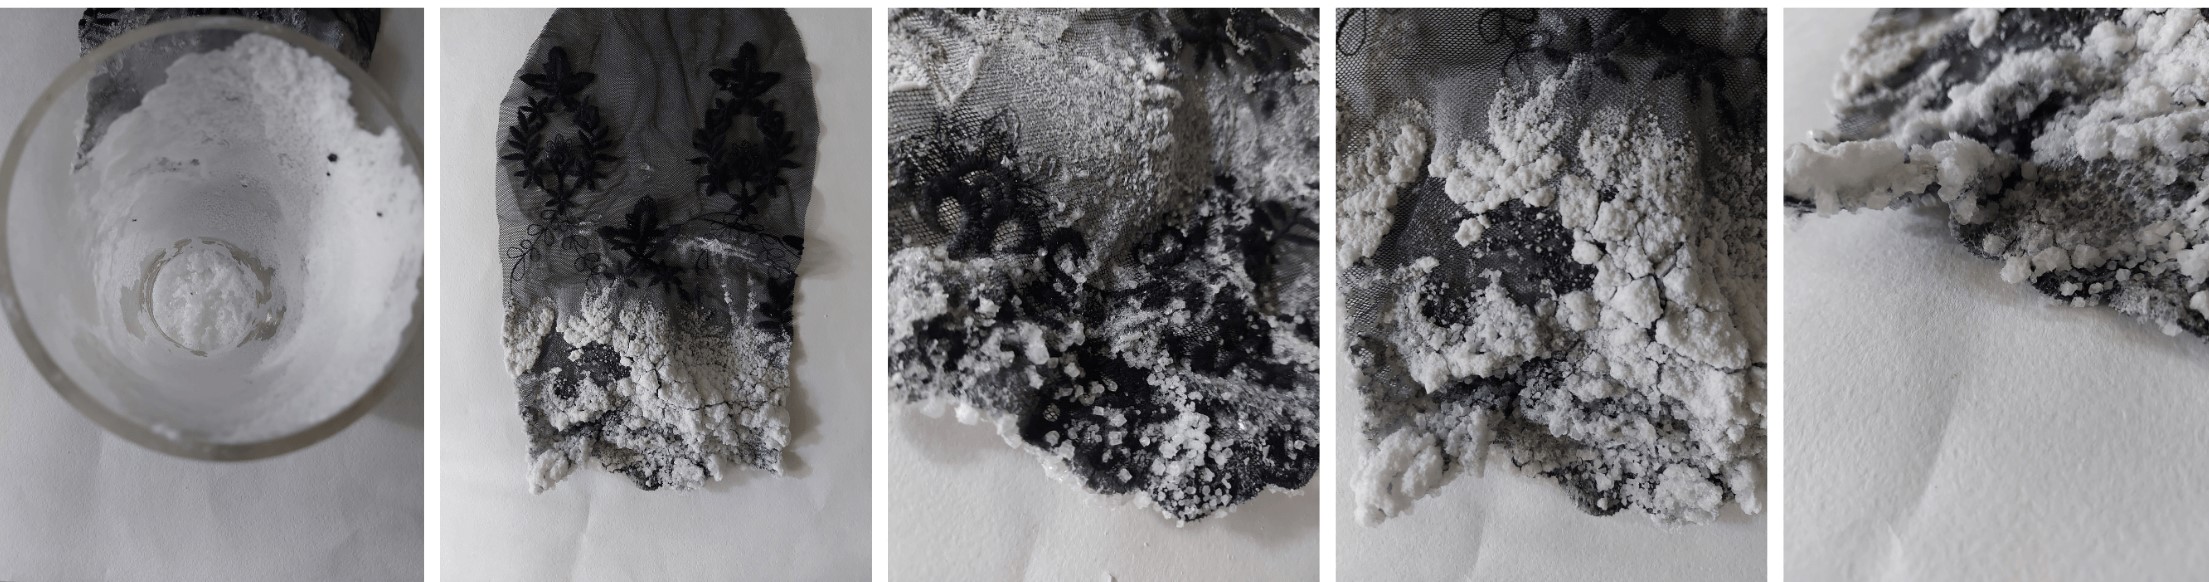
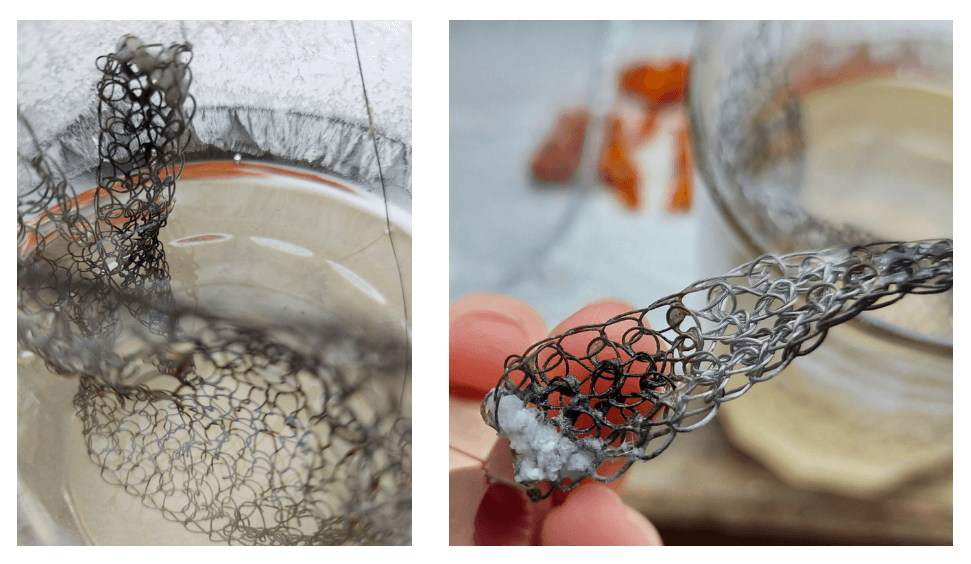
I also tried to grow cristals on other surfaces, I knitted a small piece of wire and covered in the solution. The results are not so satisfying as on fabric.
Need to continue to experiment with other salts in order to optain more defined cristals.
Canadian smocks
Canadian smocks3 are a type of fabric manipulation or hand stitching technique, also sometimes called North American smocks.
There are different techniques to experiment with. Some of the most popular designs with different effects are represented below, and you can find a lot of free tutorials that show how to sew them.
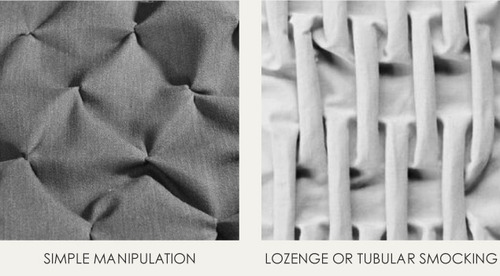
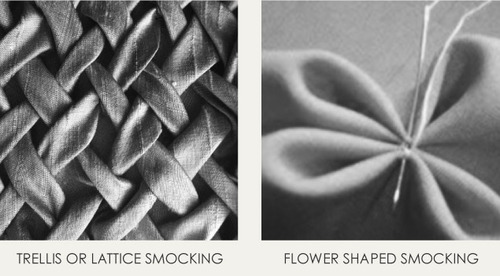
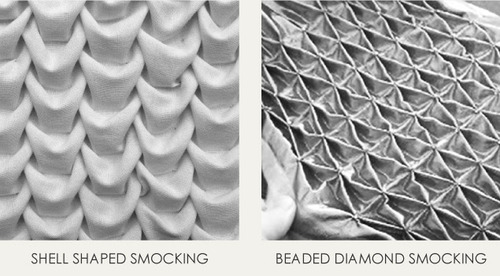
Pictures taken from The cutting class
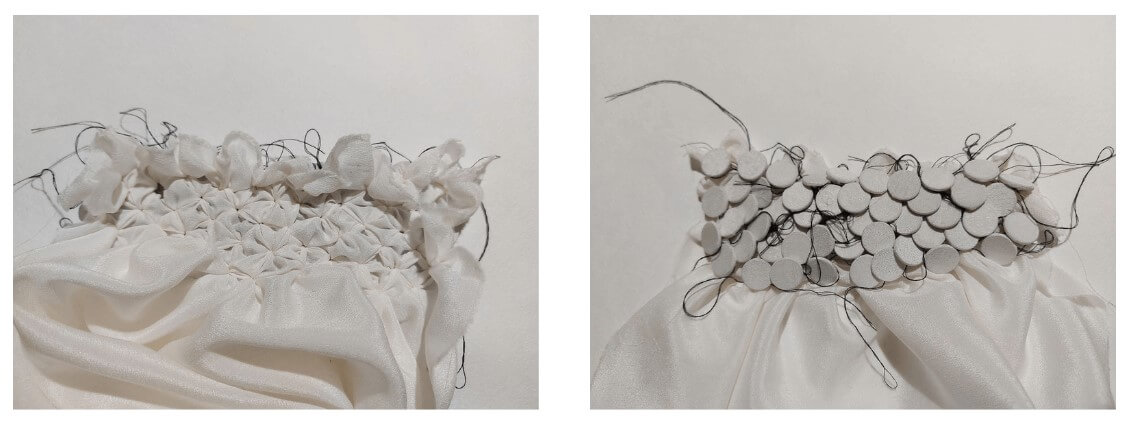
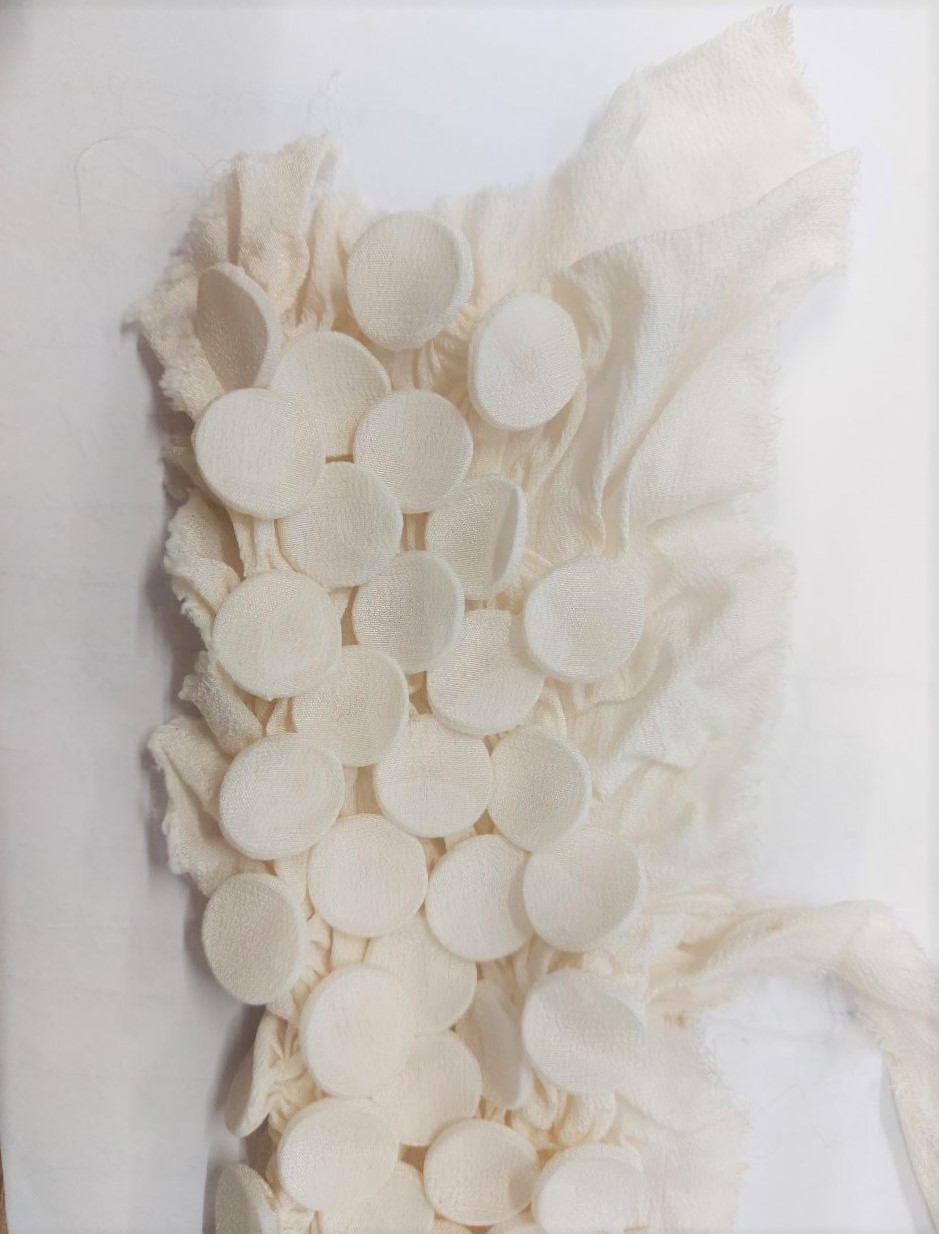
In this case I tied alluminium coins with threads. I chose to tie aluminum coins because they are small and do not leave stains on the fabric you want to make smocks on.
The fabric needs to be boil for about an hour in a salty water. After drying the silk keeps the mushroom like form and becomes very elastic.
I used natural silk for the Smocks. It will work even better with the synthetic one, because the result will stay the same after washing. But I liked the way natural fabric feel and I would definitely want to dye it with natural pigments.
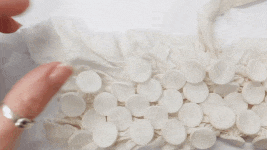
I look forward to experiment in creating a instalation and introduce this technique to it.
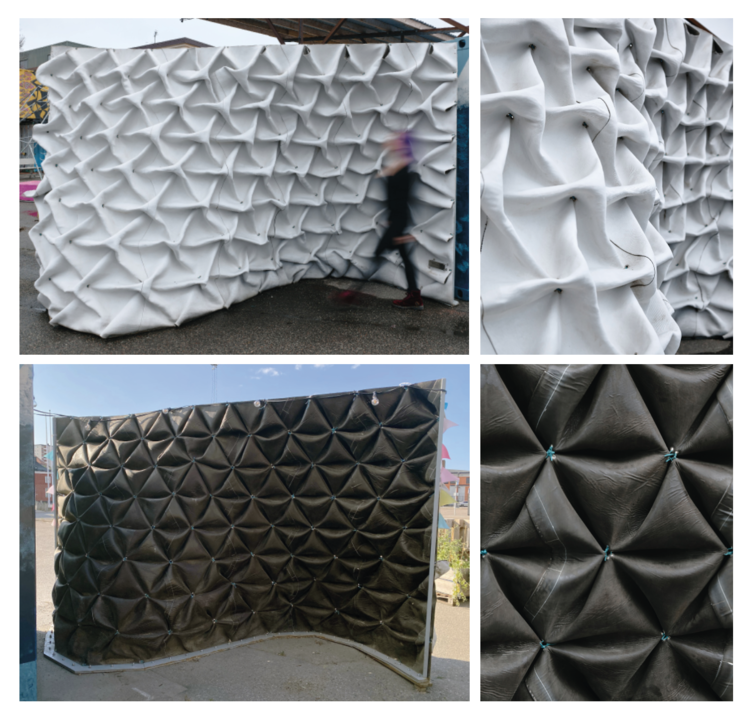
While browsing I found a beautiful work of Annie Locke Scherer called Wall Three. It is a permanent installation at Frihamnstorget in Stockholm, Sweden. Constructed of Concrete Canvas, this wall demonstrates the ability to sustainably fabricate doubly-curved architectural elements from flat sheet material.
The Wall Three demonstrator put into practice all of the learnings gained from previous experiments and investigated the implications of the large-scale fabrication of smocked concrete textiles.
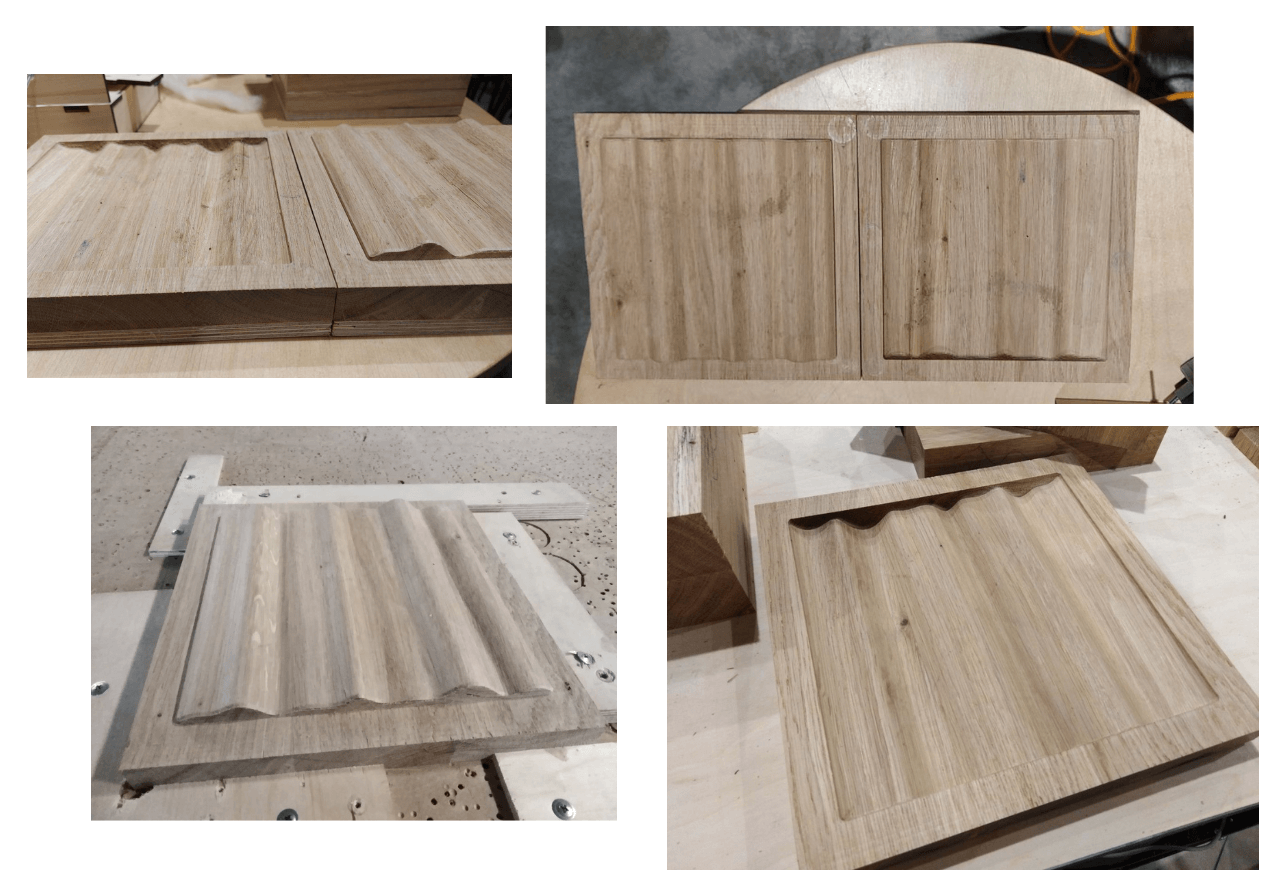
Wood Molds for leather molding
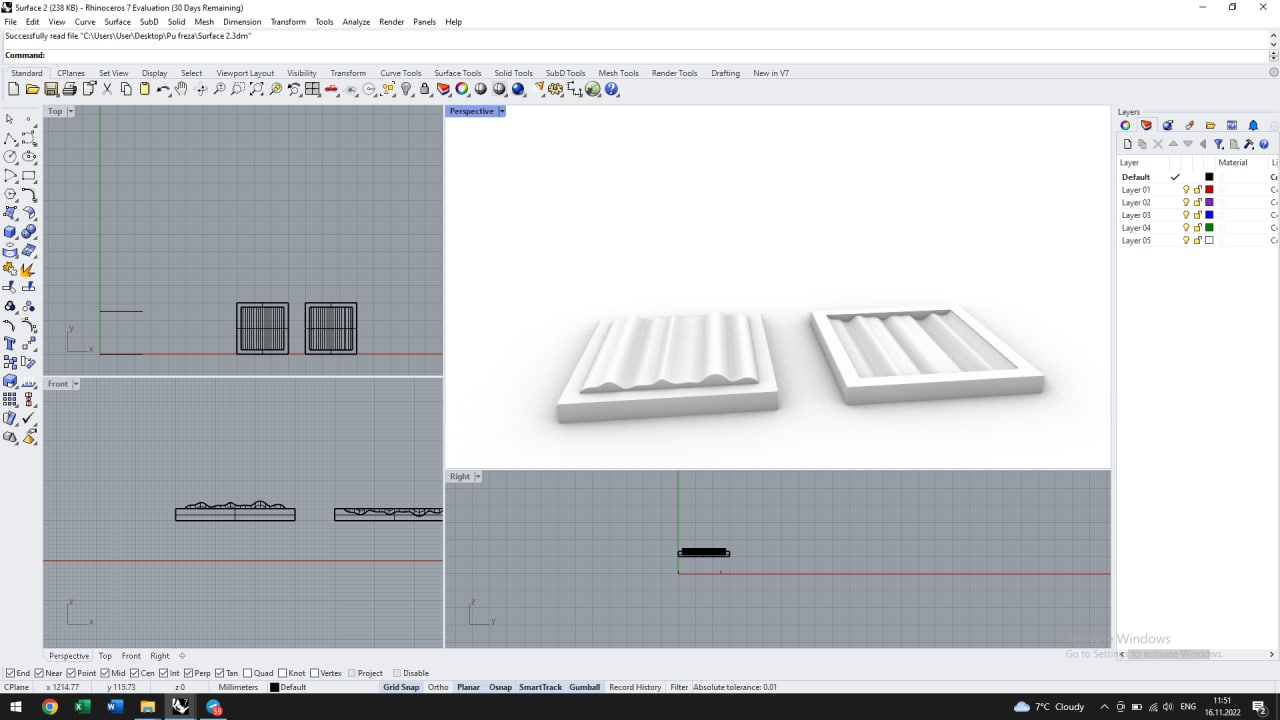
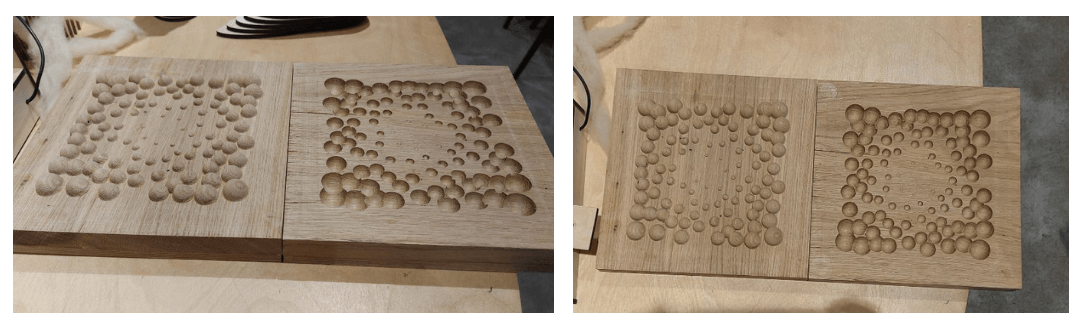
Toghether with Elena Florea-Burduja we played in Rhino and Grasshopper8 9 to create 2 designs of molds. One with more proeminent surface that will mold on 2 axes4 5, and another that will mold on one axe, the wave one 6 7.
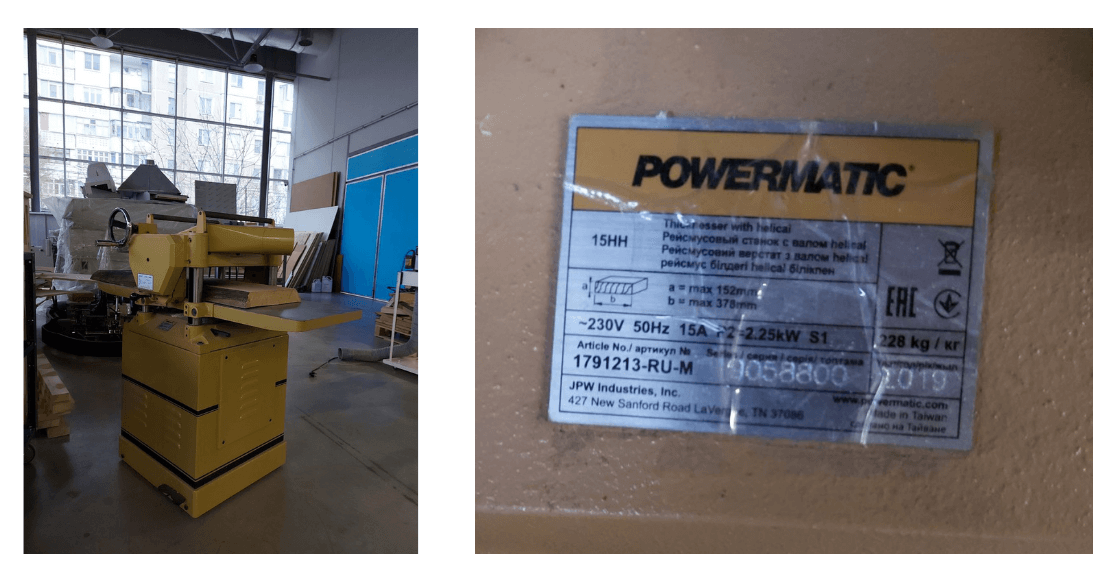
For this part we needed first to understand what are the tools and machineries used in wood work. We decided to create them out of the wood, but you can cut them also from high density foam or plywood.
We had to prepare wood with the help of this machine. It flatters the surface of the wood. We choose oak wood for our molds, the advantages of this type of wood are:
 - durable,
 - long-lasting wood,
 - attractive wood grain.
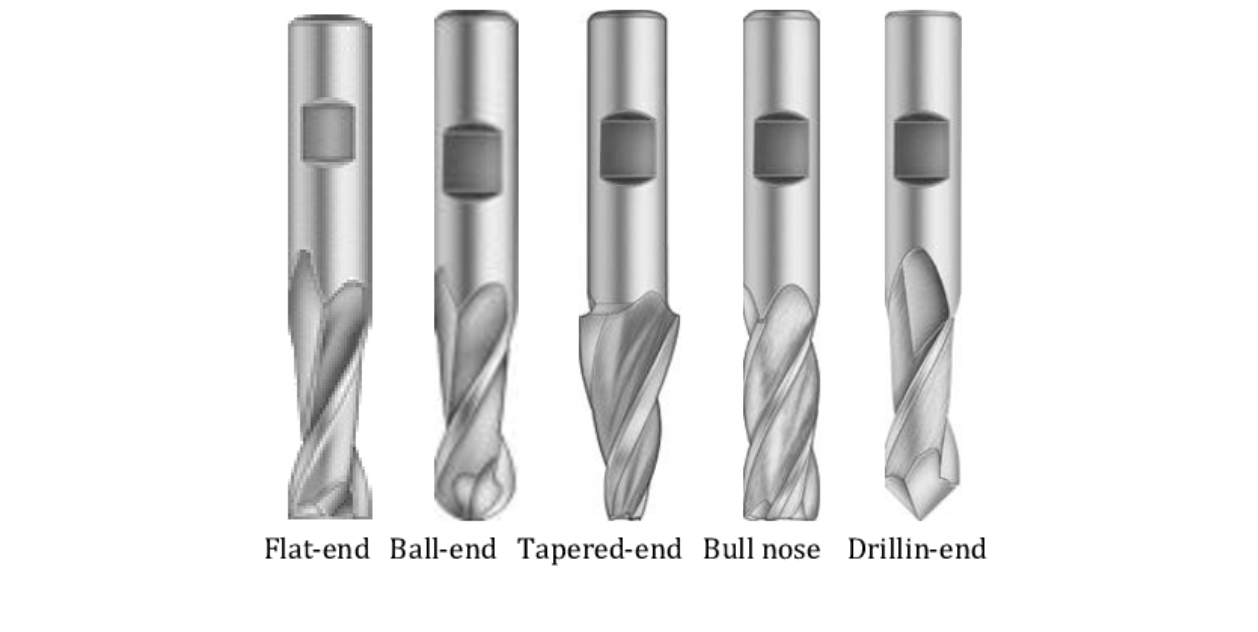
Right before to start cutting at CNC choose with the selection of the drilling head you are going to use, it is advised to use a bigger tool for your roughing process and smaller for finishing.
There are different types of the drilling heads:
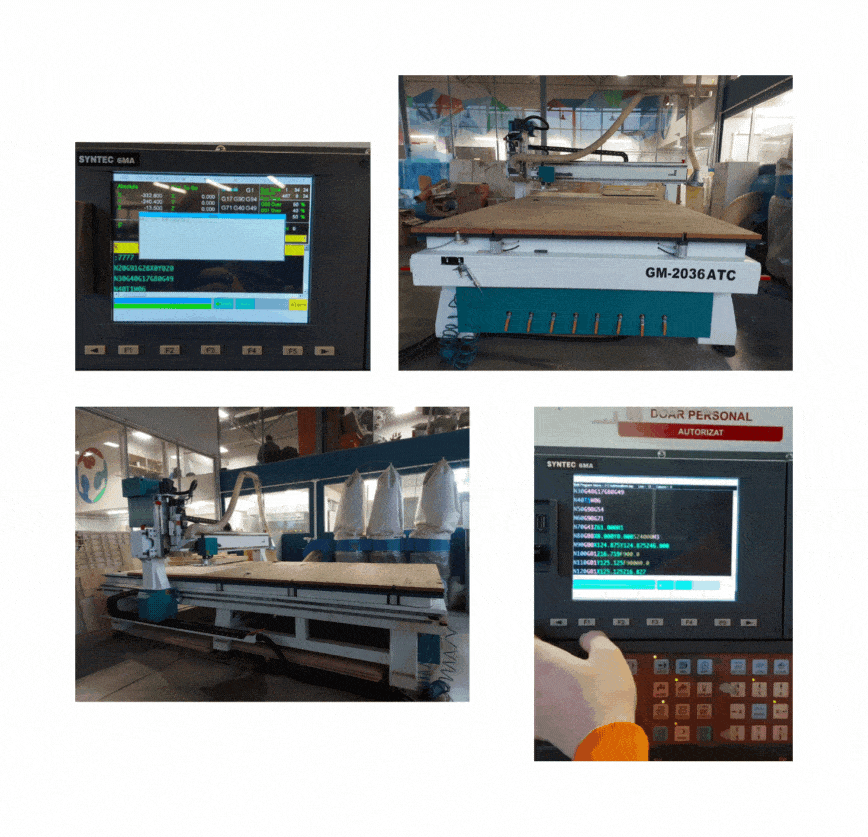
 There are some steps that need to be followed:
 - Secure the foam board with 4 pieces of wood one of each side of the board, you can screw them on slightly slanted to avoid that the board will not “jump” during cutting
 - Turn on the machine
 - Set xy axis on the corner of the foamboard using control panel
 - Set z axis by slowly moving the tool down until it touches the board
 - Upload G-code
 - Turn on air exhaustion
 - Put on protection glasses and use earplugs
 - Press print
The program that we used to send the design to the CNC was Aspire Vectric and SolidCam Software.
Aspire provides a powerful but intuitive software solution for creating and cutting parts on a CNC router. There are tools for 2D design and calculation of 2D toolpaths such as Profiling, Pocketing, and Drilling as well as 2.5D toolpaths including; V-Carving, Prism carving, Moulding Toolpaths, Fluting, The Chamfer Toolpath and even a decorative texturing strategy.
It also has the added 3D design tools which enable you to create your own 3D relief models and machine them with 3D machining strategies. Aspire’s unique 3D modeling tools coupled with the comprehensive set of 2D design and editing tools make it easy to create your own 2D and 3D parts from scratch as well as the ability to import and edit external 2D and 3D data (as we did from Rhino).
Here you can find an article that compare this softwares and see what are their differences.
For a more detailed information about the whole process of creating a mold and leather molding, you can find here
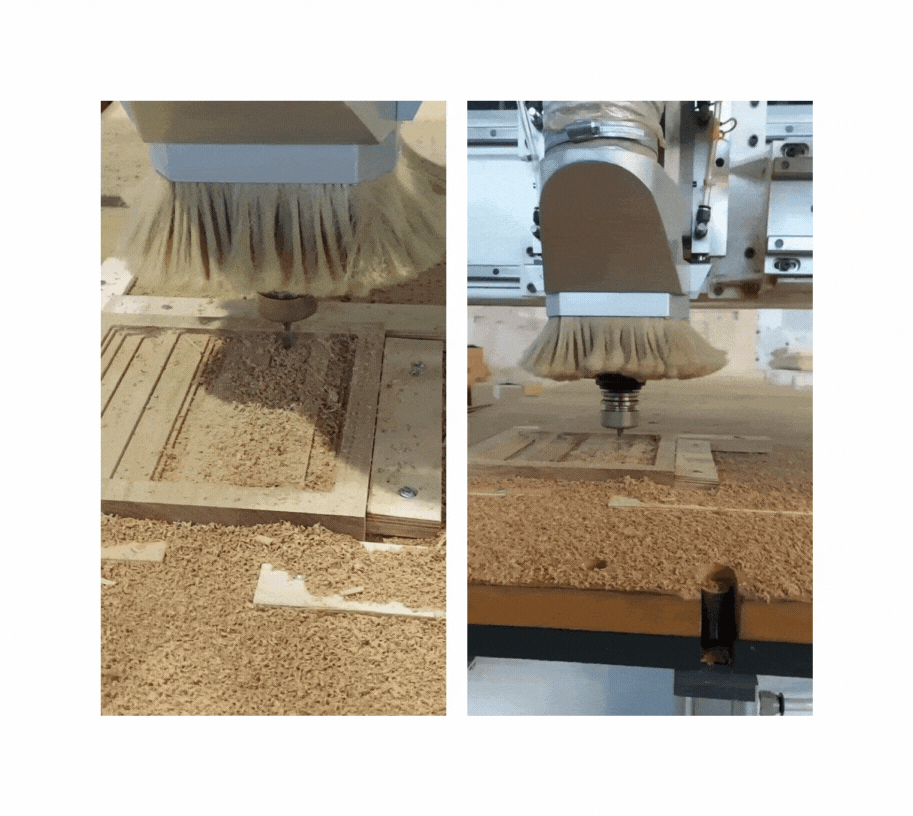
Here are the results. Overall the design came out very well, we lost some of the sharp edges on the positive half because of the rounded tool head. For better edges we should have used a smaller tool during the finishing process.
-
File: Wood&Textile pattern ↩
-
File: Wood&Textile2 pattern ↩
-
File: Canadian smocks pattern ↩
-
File: Surface mom ↩
-
File: Surface dad ↩
-
File: Surface2 mom ↩
-
File: Surface2 dad ↩
-
File: Grasshopper design 1 ↩
-
File: Grasshopper design 2 ↩