02. DIGITAL BODIES
REFERENCES & INSPIRATIONS
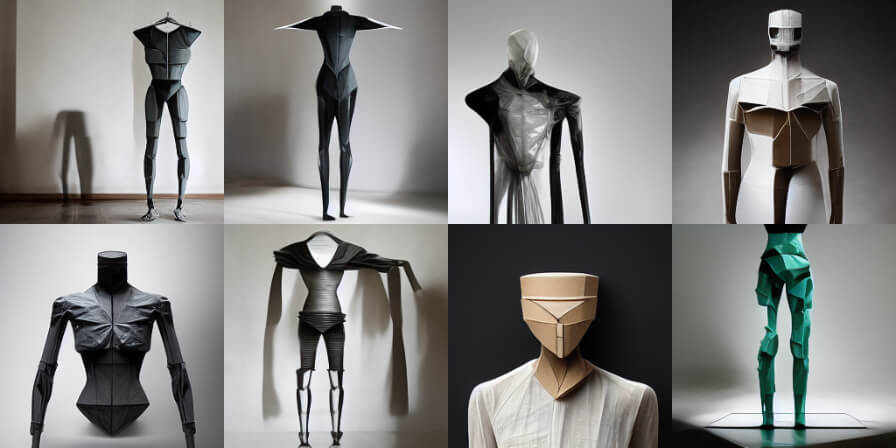
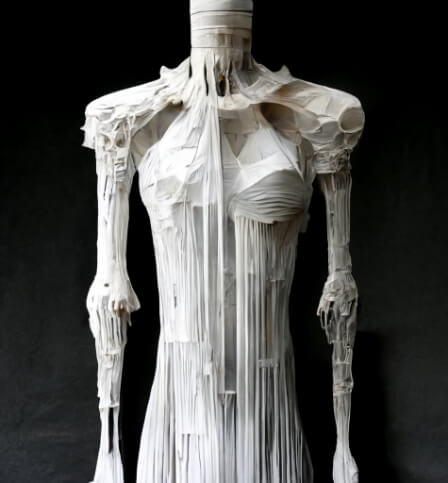
When I was thinking about materials and tools to make a mannequin, I decided to ask the Midjorney AI bot on Discord. With just a few words and steps, the following results were generated.
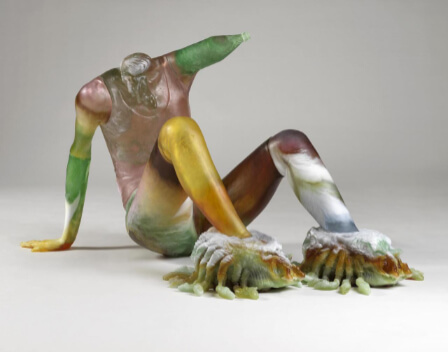
Another inspiring art pieces what I saw at Venice Biennale this autumn was the sculptures by Romanian-American artist Andra Ursuta. The artist scanned her own body, manipulated the model, made into wax molds and eventually cast in glass.
TOOLS
software
- TinyPNG
- 3d scan with Polycam
- Mesh repair with Rhinoceros
- 3d Model with MakeHuman
- Model slicing with Fusion Slicer
- Manual nesting with Affinity Designer
tools and materials
- scissors
- blade knife
- wood glue
- caliper
- 3mm (in reality 2.7mm), 3 layer cardboard
MANNEQUIN
Followed this Diane Wakim tutorial.
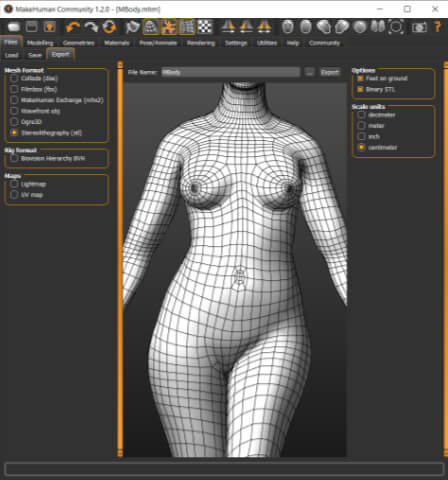
Step 1 / Make Human
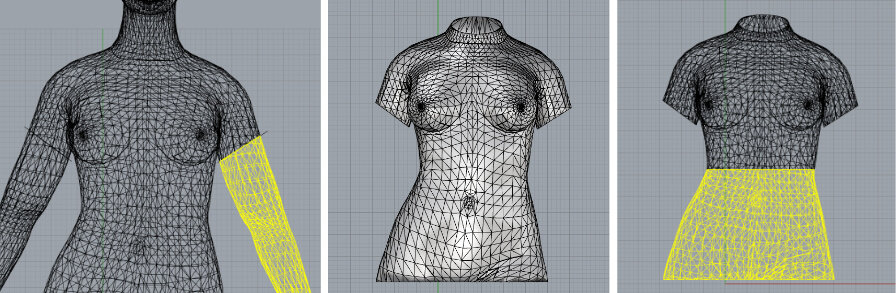
Started by measuring body and entering the data in the Make Human program. Later, I discovered that the .obj file was friendlier than the .stl file to Fusion Slicer, because of the software crashing.
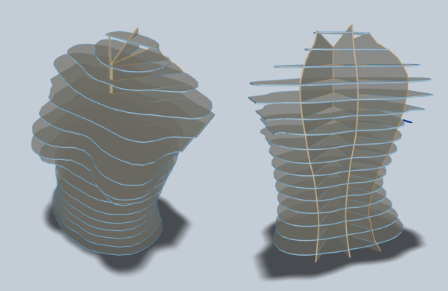
Step 2 / Rhinoceros
Prepared the model 1 for cutting in Rhinoceros software. Since the bed of my laser cutter is 500×300 mm, I had to repeat the trimming of the model several times and go from Rhinoceros to Fusion Slicer back and forward so that the cut parts would fit in the laser bed.
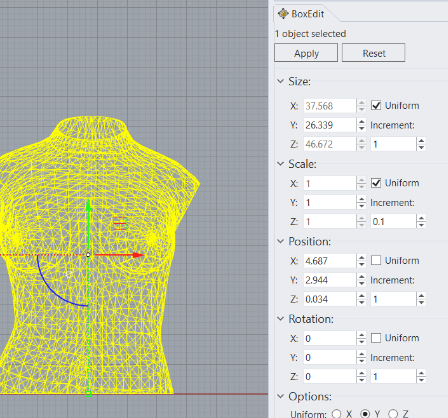
Before I started to slice the model, I found out that Fusion Slicer opens a much smaller object and the way to change the measurement is to check Box edit in Rhinoceros to get the right measurements.
Step 3 / Fusion Slicer
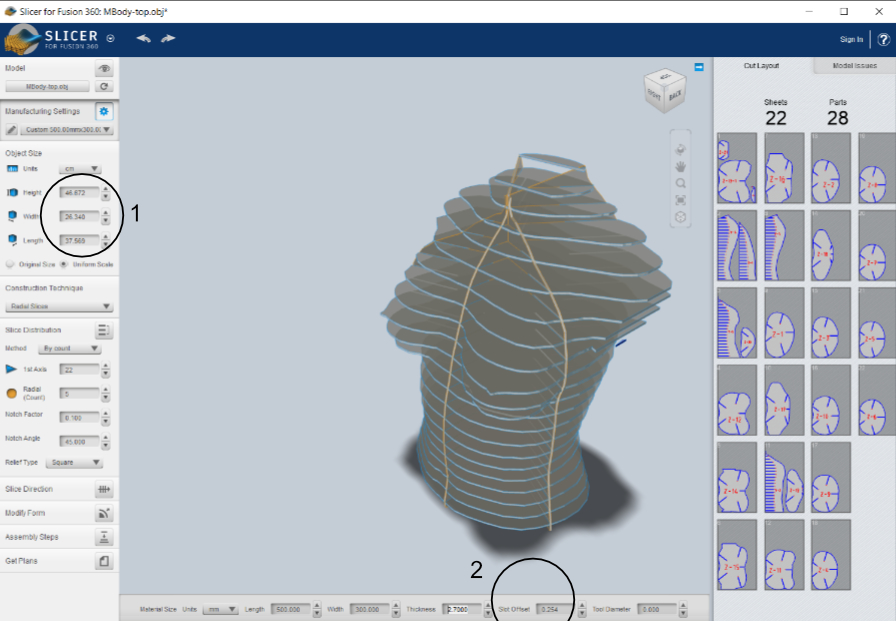
In Fusion Slicer, after importing the .obj file, I changed model size manually (1). Another thing is that the cardboard was described as 3 mm, but when I measured it with a caliper it turned out to be 2.7 mm thick (2). I chose the radial slicing construction technique. Also, each time I changed the slicing properties, I was able to see if sliced parts fits in to an exact 500×300 mm sheet.
Step 4 / Nesting
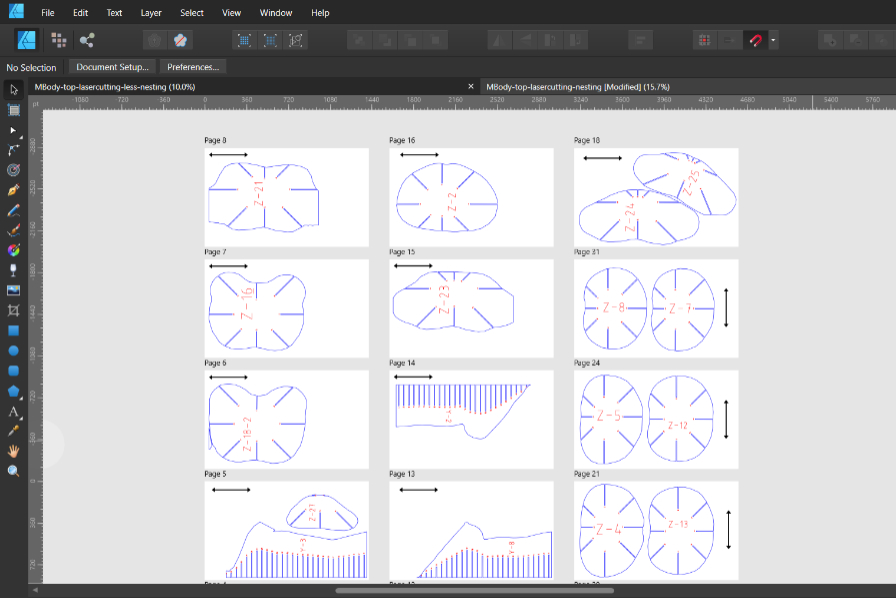
The manual laser cut nesting 2 was created using Affinity Designer. I love Inkscape, especially that program is precise and open source, but in this case I needed the pages to see everything at once and be able to mark the pages. Marking was done because of the need to know the cardboard second layer direction to be sure that part nested correctly.
Step 5 / Assembling
Assembling was fast at first, but I gave up after realizing that other vertical parts don't fit so easy because of too many horizontal layers.
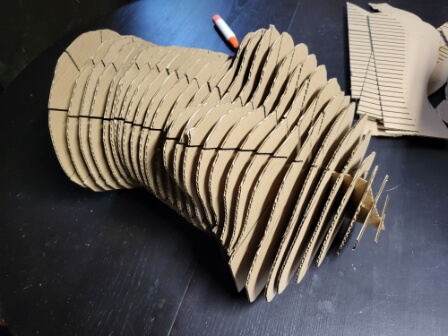
Step 6 / Another try
The plan is to try this one, with less horizontal and vertical layers.
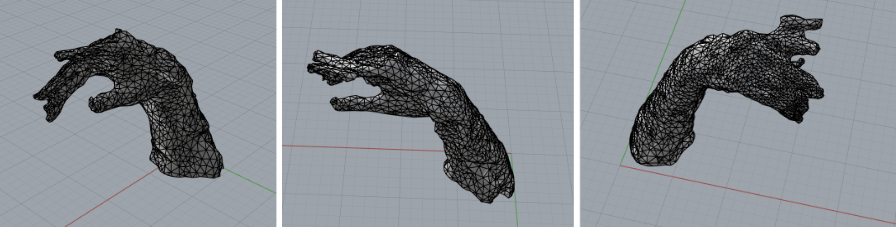
3D SCANNING
Polycam software works on the smartphone and for a 7 euros payment you can download .obj and .stl files online at https://poly.cam personal account. More things to try with this software as it seams more possibilities in it.
After scanning .obj file was manipulated in Rhinoceros. The result was not good enough to make the physical model, but it was an interesting process to try out the 3D scanning.
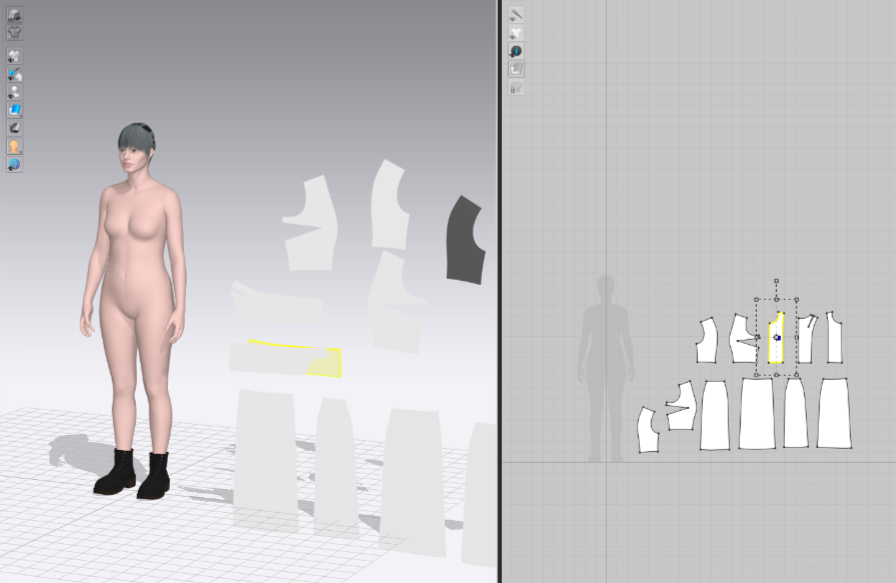
LOOKING FORWARD: Clo3D
Played around with Clo3D software and really liked it. Created my avatar and started to do homework with dress.
FABRICATION FILES
-
File: Laser cut sheets ↩