04. BIOCHROMES
REFERENCES & INSPIRATIONS
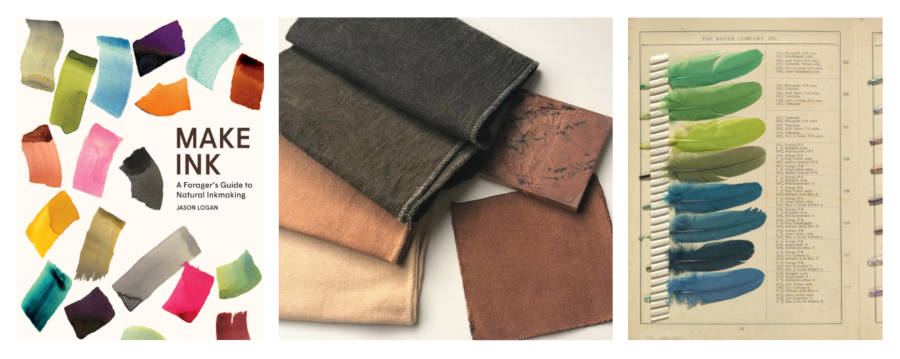
During the lecture, Anastasia mentioned Jason Logan's works and at the end of this week I had the opportunity to look at his book "Make Ink" which impressed me a lot. Also I found the article at "Loop of the Loom" about very meaningful traditional Japanese dye "Kakishibu" which comes from unripe persimmons that have been fermented and aged for more than 2 years. Kakishibu has deep amber color and might be great alternative to synthetic colors because it has many natural, beneficial properties, such as deterring insects and having an anti-mold effect for wood and cloth. Another interesting but not sustanable finding is this Bayer Companys book "Shades on Feathers", just like an idea what you can dye.
Guided by the inspiring works of these Fabricademy students: Beatriz Sandini and Diane Wakim.
FABRICS PREPARATION
tools
- cooking pots
- stirring spoon
- food tongs
- weight
- measuring containers
- mesh strainer
- cooking stove
- glass jars
- rubber gloves
- thermometer
materials: scouring and mordanting
- animal and vegetable fibres
- pH neutral detergent
- sodium carbonate
- cream of tartar
- alum
materials: dyes
- plants
- scoured and mordered fibres
materials: modifying
- sodium carbonate
- vinegar
- iron
- copper
CUTTING AND WEIGHING
Nuria gave us very good advice to laser cut the fabrics. Also, advised to use spray textile glue to secure the fabric to the laser cutter bed.
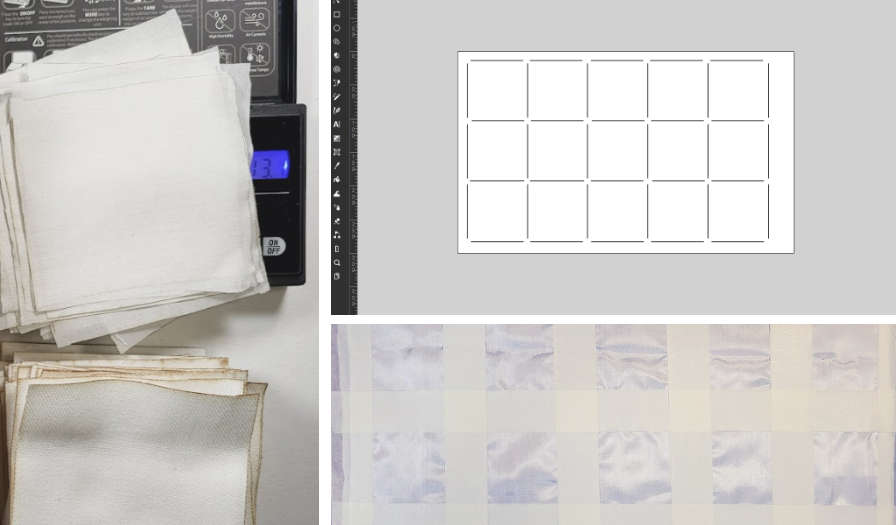
Before weighing, I cut folded fabrics into 90 mm squares. I didn't have textile glue, so I used paper tape and prepared a file with gaps between the squares so that the silk wouldn't fly away. Other fabrics did not require fixing.
Here is the cutting settings for Full Spectrum 45W laser cutter
- Linen: speed 80, power 70, 1 pass, 2 layers
- Cotton: speed 80, power 70, 1 pass, 3 layers
- Silk: speed 100, power 20, 1 pass, 3 layers
- Stretchy wool: speed 100, power 50, 1 pass, 1 layer
Weighed the cut and sorted fabrics: cellulose/vegetable fibres - linen 25 g, densely woven linen 30 g, cotton 124 g, protein/animal fibres - silk 7 g, wool 30 g. Total 216 g of WOF (Weight Of Fiber).
Picture below was taken before the cutting. I did the mistake and started to mordant the vegetable fibres without scouring. So needed to stop and go back.
SCOURING AND MORDANTING
Scouring prepares the fibres for dyeing: opens up the fibres, cleans them by removing all the waxes, pectins to make the textile material hydrophilic or water absorbent. I used pH neutral detergent for animal and sodium carbonate for vegetable fibres.
Mordanting helps the colour to attach to the fibre. It might be iron or copper liqueur, alum powder. In animal fibre's case, the cream of tartar helps to keep the wool shiny and soft.
Before scouring, I pre-washed all the fabrics with a neutral pH soap to clean off the burnt dirt from laser cutting.
In the following steps, cellulose and protein fibres were prepared for dyeing separately.
Recipes are for dry WOF (Weight Of Fiber).
PROTEIN/ANIMAL FIBRES
Animal fibres (silk, wool, alpaca, cashmere, mohair, e.t.c) don't like temperature spikes and tangling. Never boil, better keep them on steam.
SCOURING
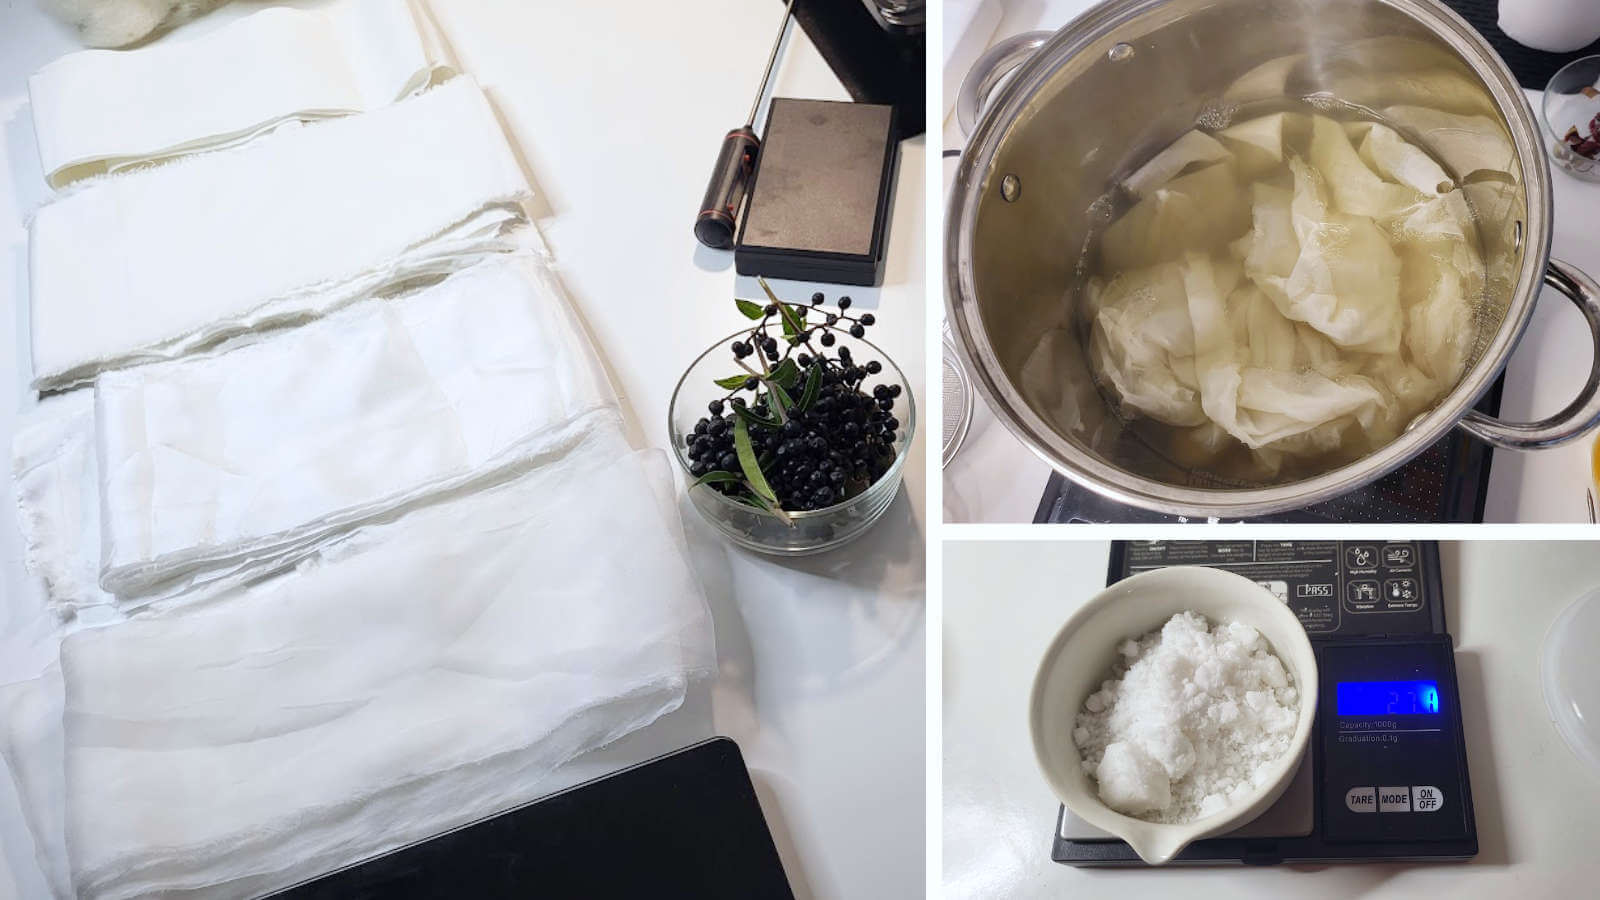
WOF 1% of pH neutral, unscented laundry detergent
- Pre-wet fibres with tap water.
- Dissolve the detergent in the pot with hot water.
- Add the fibres to the pot with dissolved detergent and slowly bring the temperature to 70-80 °C.
- Rotate the fibres gently, not to tangle or felt. Hold at 70-80 °C for 30 minutes.
- Let the water cool. Rinse the fibres in the same temperature water as the fibres.
MORDANTING
WOF 15% of alum, 8% of cream of tartar
- Dissolve the alum in the pot with hot water.
- Add cream of tartar.
- Add scoured and rinsed fibres with warm water.
- Fill up the pot until the fibres are covered with hot water.
- Simmer for an hour at 70-80 °C, measure temperature with a thermometer.
- After an hour, take the fibres out and rinse in warm water.
CELLULOSE/VEGETABLE FIBRES
Cellulose is the main content of vegetable fibre as cotton, linen, hemp, jute, flax, e.t.c.
SCOURING
WOF 2% of sodium carbonate
- Dissolve sodium carbonate in a large stainless steel pot with hot water.
- Add scoured and rinsed fibres.
- Let it simmer for 1 hour.
- Drain out the water and refill the pot with clean water.
- Simmer it again for another hour.
MORDANTING
WOF 15% of alum
- Dissolve the alum in the pot with hot water.
- Add scoured and rinsed with water fibres.
- Fill up the pot until the fibres are covered with hot water.
- Boil for an hour and let it simmer through the night.
- Next day, simmer it again for 1 h.
DYEING
Since this was my first attempt at biochromia, I wanted to try a few different plants. Admittedly, this caused quite a bit of chaos and I couldn't track down some of the options I got. Then I remembered Nuria's advice to start with one plant. It is also important to mark the obtained results.
BUCKTHORN | Rhamnus cathartica
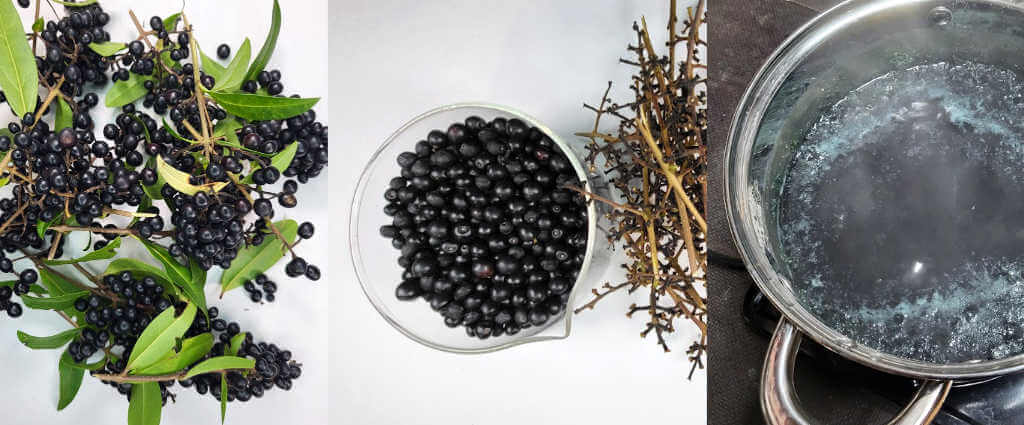
Found the berries of Buckthorn on my way to the Fab Lab. September/November is their season, however, I noticed that the berries were not yet fully ripe. First, I weighed the cleaned berries. Since I cut the fabrics into equal squares and weighed each type separately, it was easy to calculate the approximate weight per piece.
RECIPE
Ratio 1:2 (1 part of the fibres, 2 parts of the berries)
- Wash the berries with cold water and weight them.
- Fill up the pot until the berries are covered with water.
- Put to boil with the lid on.
- After 15 min. mash the berries to release the colour.
- Boil for another 30 min.
- Strain the berries through a sieve lined with a muslin cloth.
- Add fibres to the buckthorn dye and leave for 6 h.
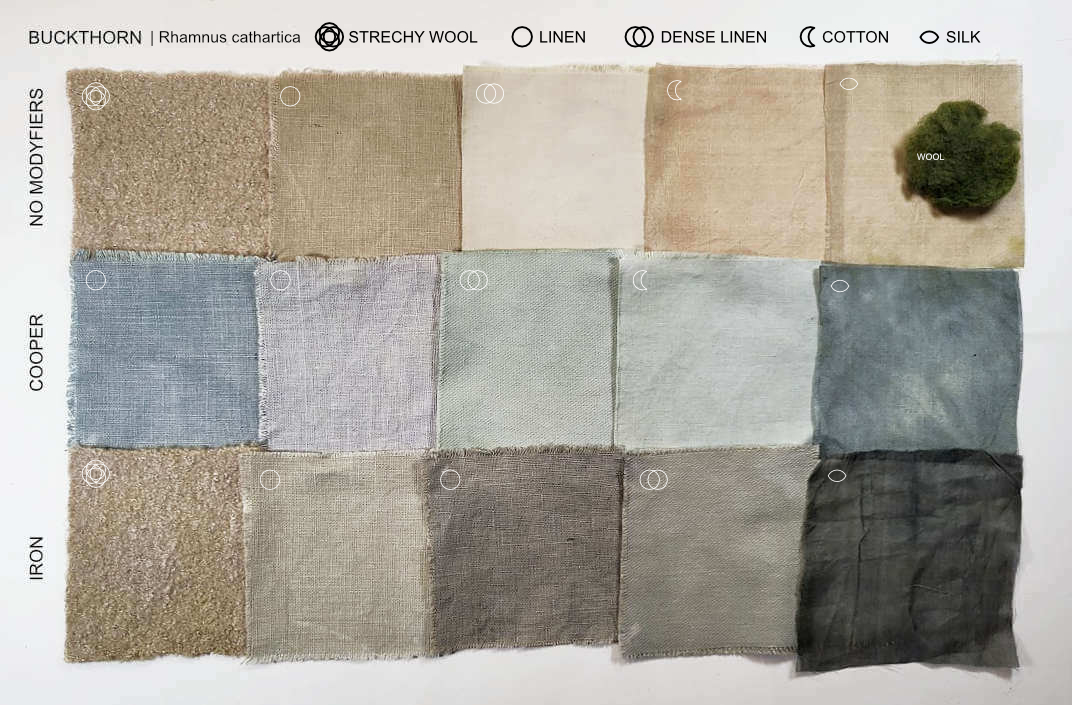
Modifying
Cooper and iron were used to modify. As I used the powder, 5 % solutions of each were made.
BLACK CHOKEBERRY | Aronia melanocarpa
As Buckthorn, I found Aronia berries on the way, we have a lot of them here.
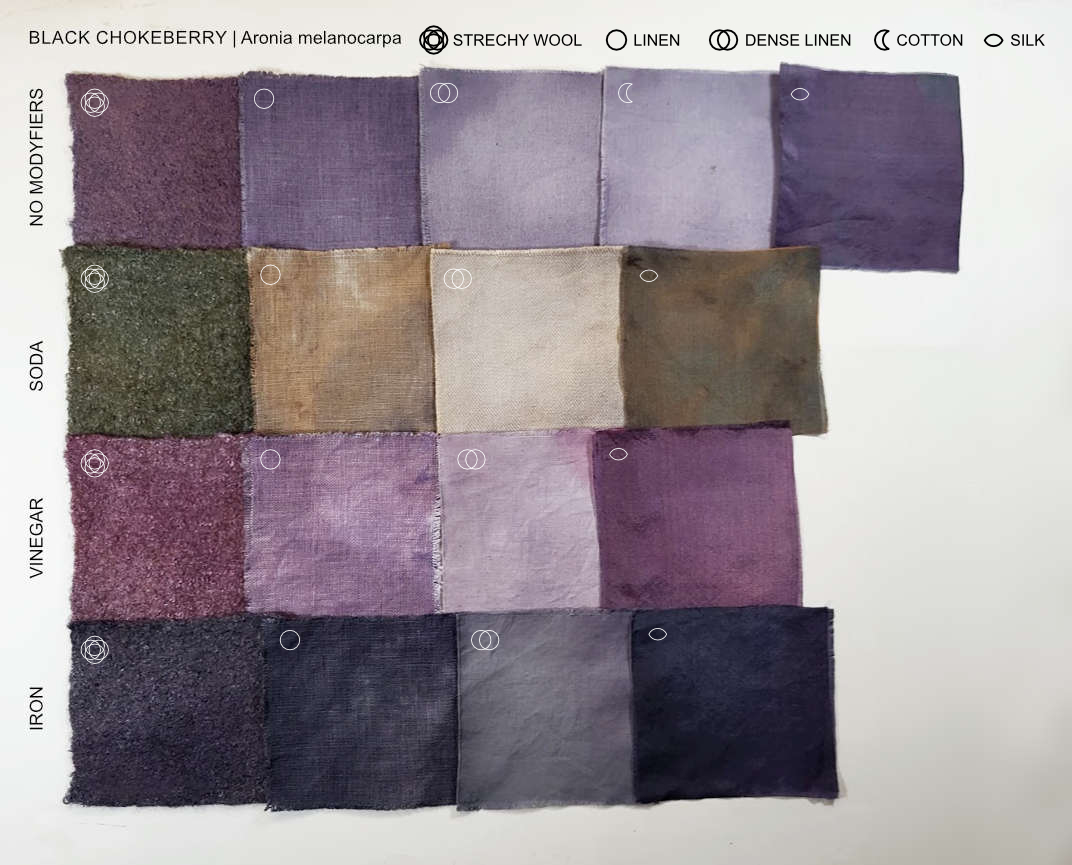
Black chokeberry dye recipe
The recipe is the same as for Buckthorn.
HIBISCUS | Hibiscus syriacus
I tried to make the dye as bright as possible and add less water, but I simered the dye for too long, about 30 minutes and because of that lost the pink shade. So in this recipe I put later researched description.
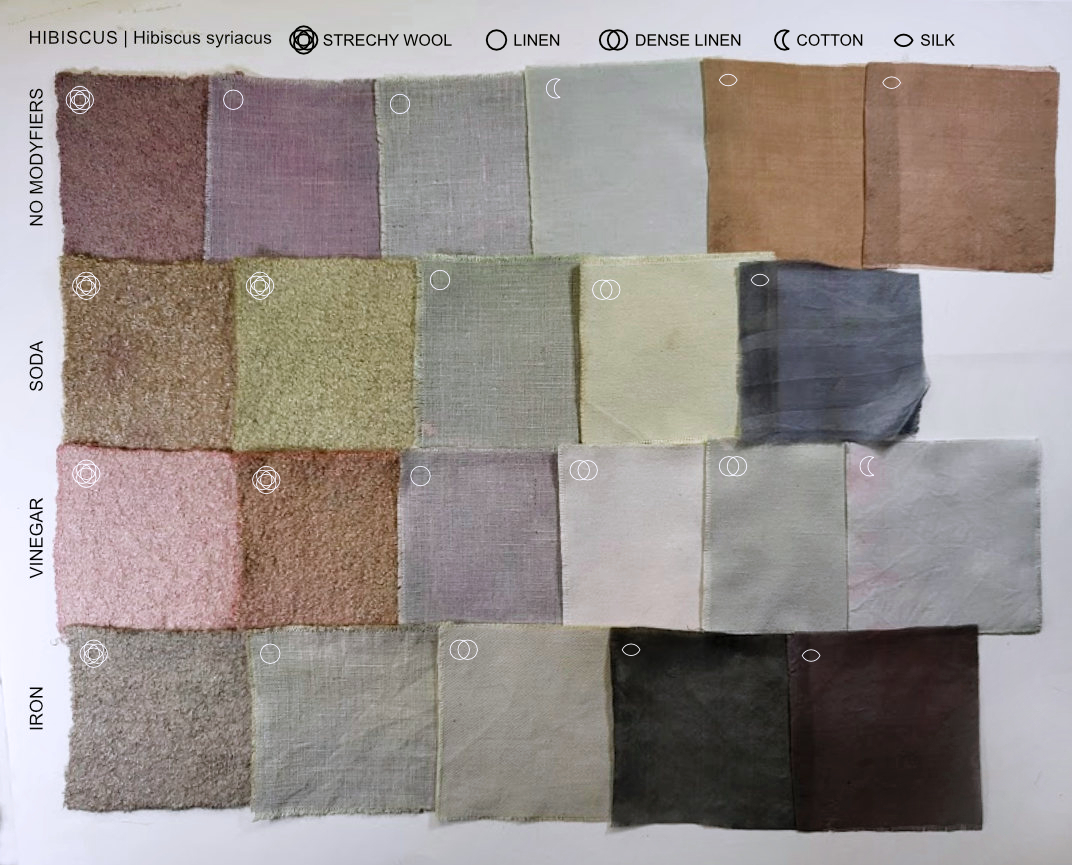
RECIPE
- Fill up the pot with hot water until the dried hibiscus leaves are covered.
- Simer for 10 minutes, leave to cool.
- Strain the leaves through a sieve lined with a muslin cloth.
- Add fibres to the hibiscus dye and leave for 2 h.
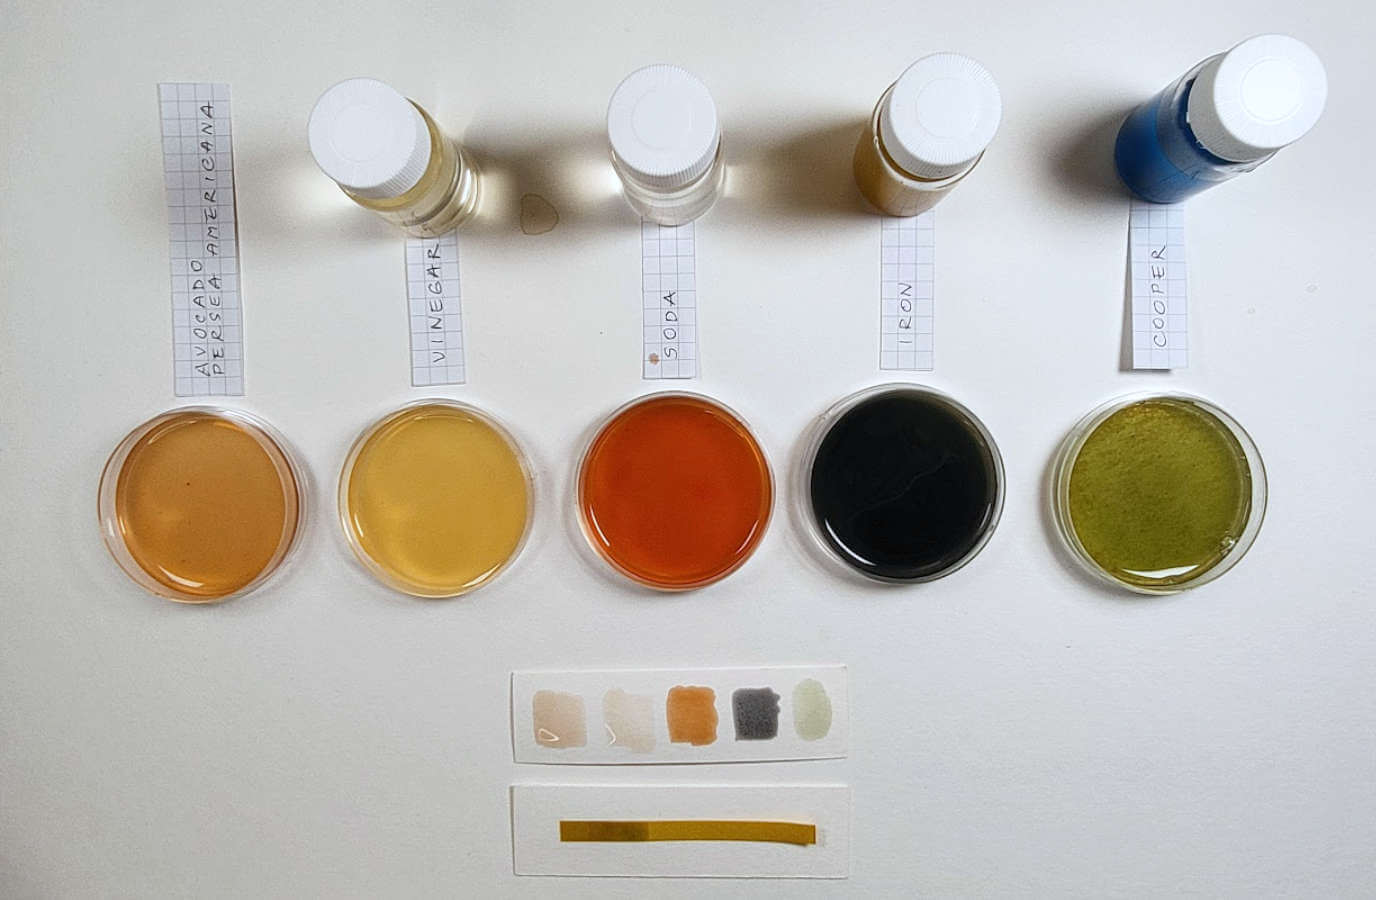
AVOCADO | Persea americana
I used avocado pits (unpeeled) and peels in one dye bath.
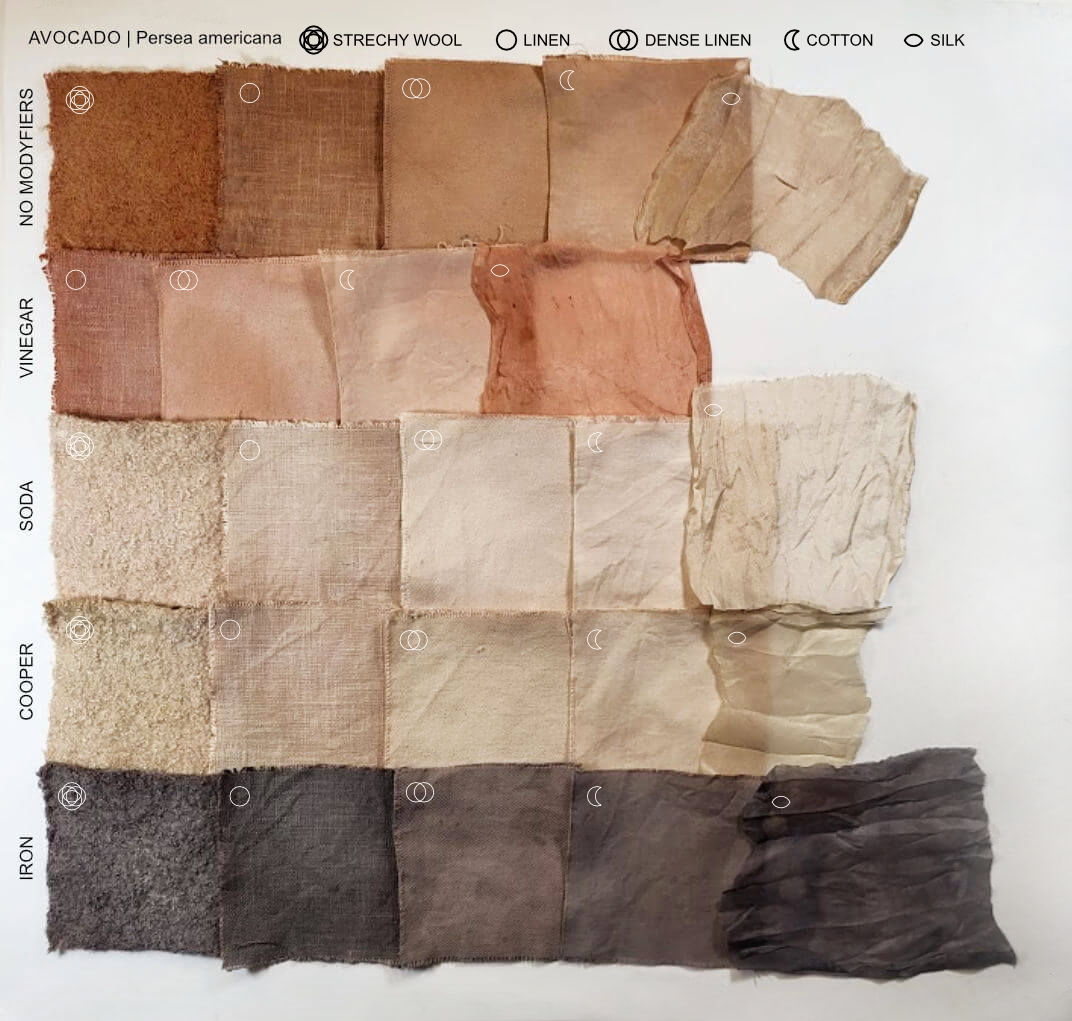
RECIPE
- Fill up the pot with hot water and add avocado pits and peals.
- Put to boil for an hour.
- Add fibres to the avocado dye bath, set the temperature to 80 °C to simmer for 40 min.
- Leave for 2 more hours.
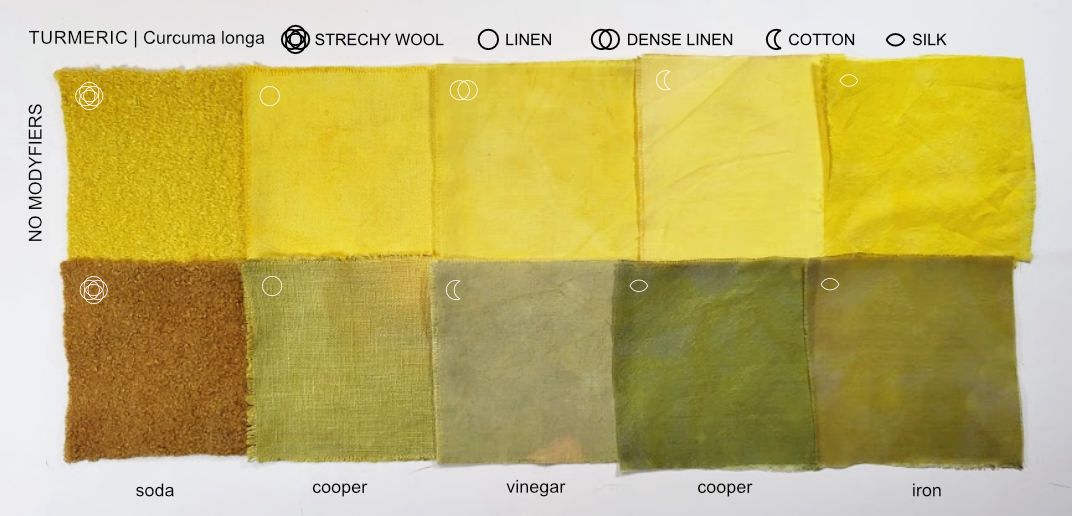
TURMERIC | Curcuma longa
I used turmeric powder from the food store.
- Fill up the pot with hot water and add 3 tbsp. of turmeric powder.
- Put to boil with the lid on and simer for 10 min.
- Strain the dye bath through a coffee filter.
- Add fibres to the turmeric dye bath, set the temperature to 80 °C to simmer for 20 min.
- Leave for 2 more hours.
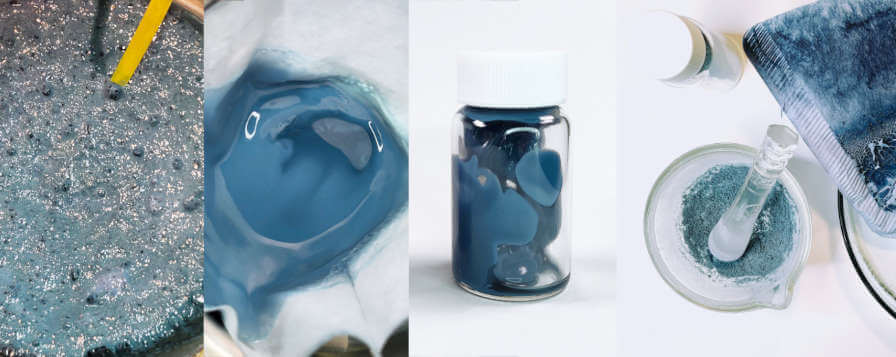
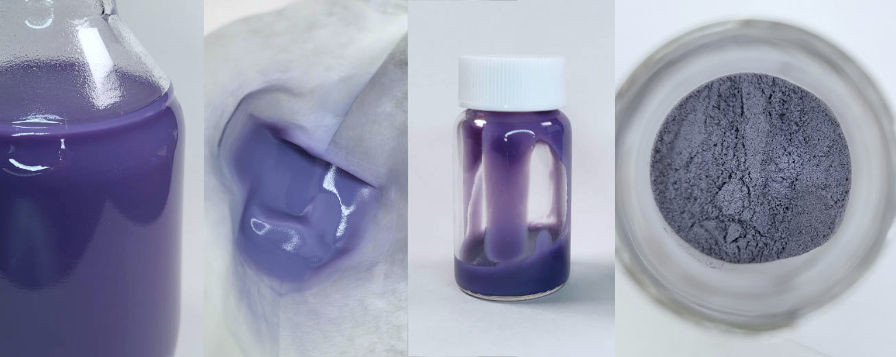
PIGMENTS
I really enjoyed this part making pigments and pigment lakes. Made the pigments from Buckthorn and Hibiscus dyes.
tools
- tall vessel
- whiske
- coffee filters
materials
- sodium carbonate
- alum
- hot water
RECIPE
- Pour the dye in to a tall vessel
- Dissolve 20g of alum in separate glass jar with hot water
- Dissolve 5g of soda in separate glass jar with hot water
- Add the alum liquid to the dye bath
- Add the soda liquid very slowly to the dye bath, to precipitate it
- Watch it rise and whisk it.
- Let the dye sit for a while to separate the phases
- Stir and filter through a coffee filter.
- Let it dry, it might take days.
- Then the pigment is totally dry, grind it in mortar.
I noticed some soda particles in dried pigment and later found the information that you can put the dry pigment in the water to dissolve soda and dry the filtered pigment again.
INKS
MAIN COMPONENTS TO KNOW:
Water, Ethanol, Oil - vehicles suspends the pigment.
Arabic gum - binder glues the dye and the liquid, gives more viscosity.
Salt, Vinegar, Metals - additives - stabilizers, intensifiers, modifiers, preservatives, thickeners.
Dye baths without and with modifiers were used to make the inks. That's why no metals, salt, and vinegar in this tutorial.

materials
- gum arabic
- hot water
- ethanol
- clove essential oil as preservative
I had powdered Gum arabic and made the solution for later use in inks.
GUM ARABIC RECIPE
- The ratio is 1 part gum to 2 parts water.
- Boil water and allow cooling to about 60°C temperature.
- Add the powdered gum, stirring to make sure there are no lumps.
- Continue warming the mixture at 60°C temperature and stirring to dissolve the gum arabic completely.
- Store in the container.
For Gum arabic it might take time to dissolve completely. I found that gum was ready after 2 days.
- If richer colour is desired, dye might be simmered to evaporate extra water.
- 10 parts ink | 1 part Gum arabic | 3 drops essential oil
- or 10 parts ink | 1 part ethanol
VALUABLE LINKS
Fabricademy classes and tutorials
The Maiwa Guide to Natural Dyes