07. COMPUTATIONAL COUTURE
The assignment for this week is to investigate Grasshopper and 3D print the results on different fabrics. Grasshopper's language is completely new to me, and I'll admit that I got a little lost in the middle of the week because I realized that I won't be able to master the language so quickly. Since I want to learn Grasshopper's language over time, I decided to do it at my own pace. I hope to record my steps in created Grasshopper directory.
REFERENCES & INSPIRATIONS
Designer's Issey Miyake pleat works.
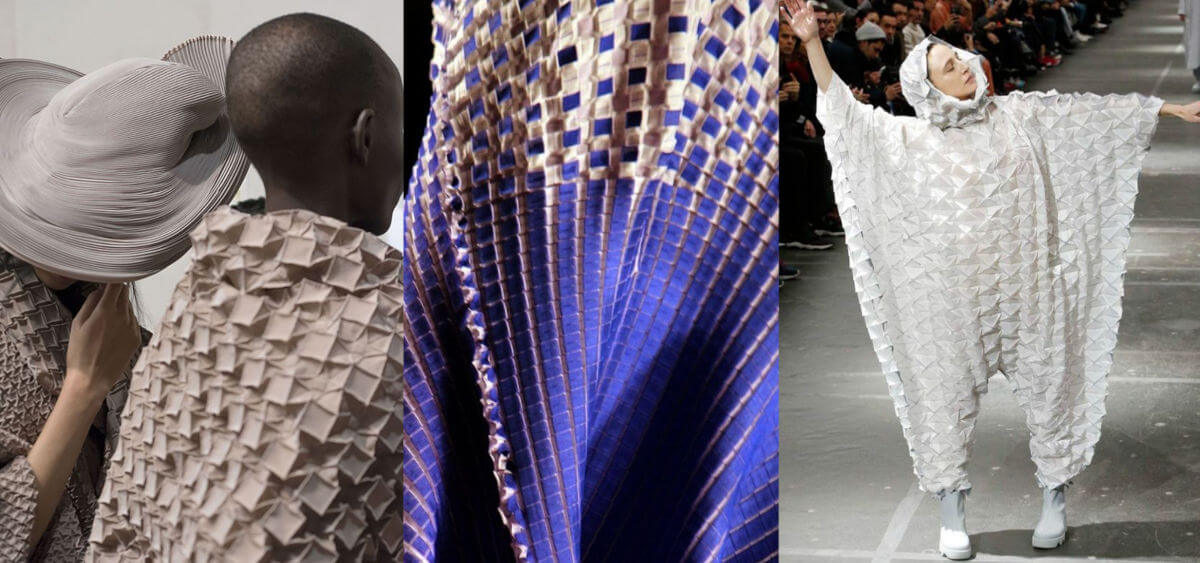
Guided by the inspiring works of these Fabricademy students: Batoul Omar AL-Rashdan, Loes Bogers and Emilia Louisa Pucci.
Also these valuable materials:
- Algorithmic sketchbook by Emily Lucchesi
- 3D PRINTED TEXTILES
- Computational Couture Classes
- This Science vs Magic website where you can turn around computational patterns.
DIRTY PROTOTYPING
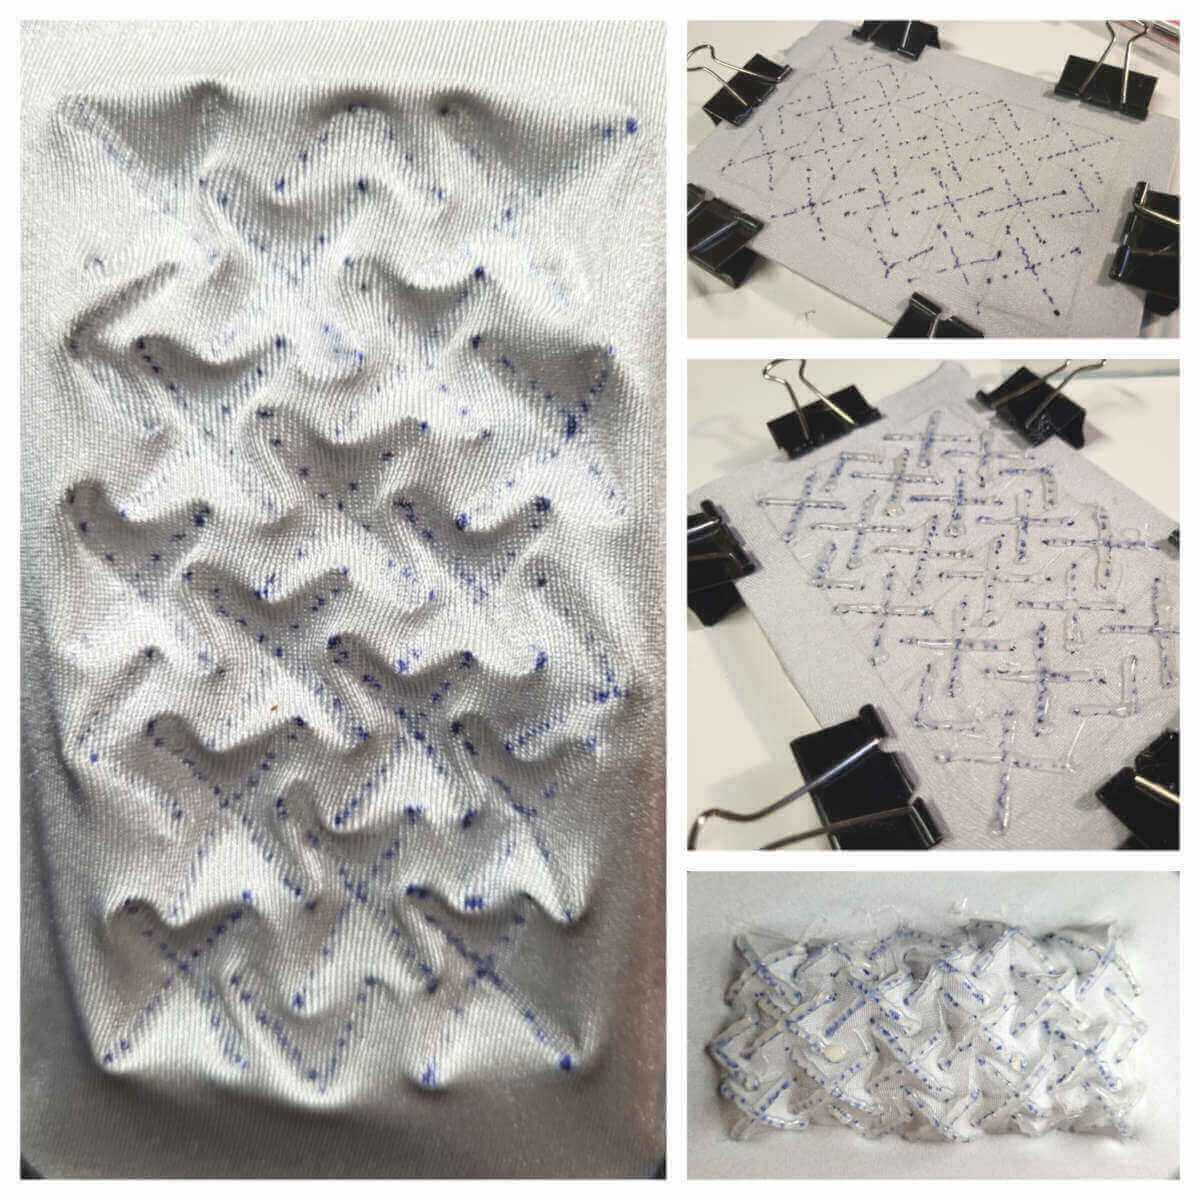
I decided to do some dirty prototyping using lycra fabric and hot glue.
Tools and materials for dirty prototyping
- Lycra fabric
- Hot glue
- Flat peace of 6 mm plexiglass
- Clippers
- Hot glue gun
- Pencil
First attempt was to prototype with a 3D pen, but the one I have is very slow to heat up to the right temperature and short on performance. So I decided to try old good hot glue.
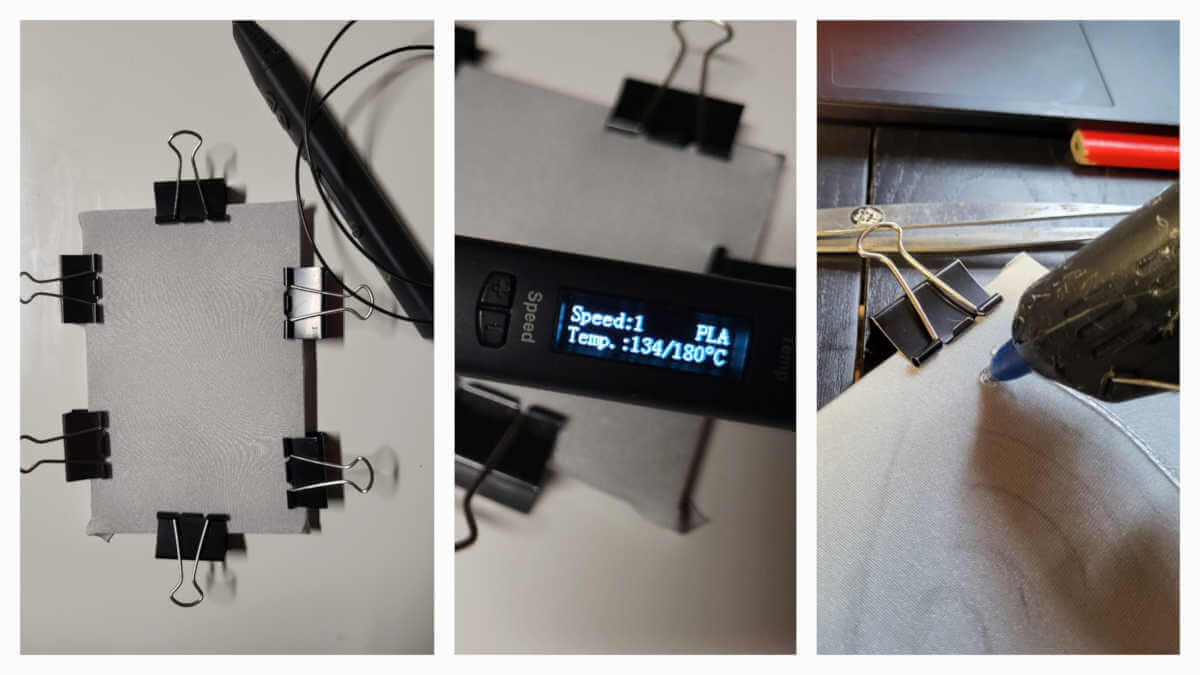
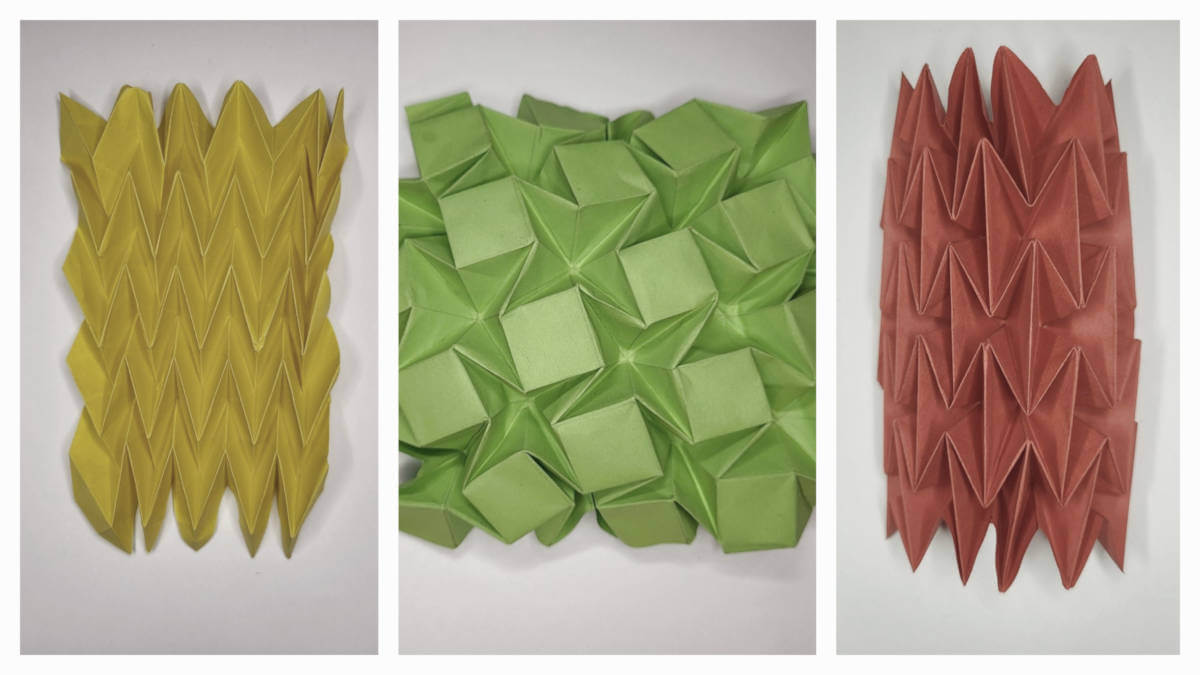
The tessellation “huffman Waterbomb” template downloaded from the Origami Simulator website was used as a cheat sheet to draw the pattern by hand. Then I went a little wild and draw whatever popped into my head on the scraps. It turned out to be quite alien motifs, but it helped me to understand how fabric and flexible plastic would work together.
3D PRINTING
This time I traveled a pretty long way to the understanding that PLA plastic doesn't work with printing on stretchy fabric. In the next step, TPU plastic on lycra fabric worked as expected.
Origami
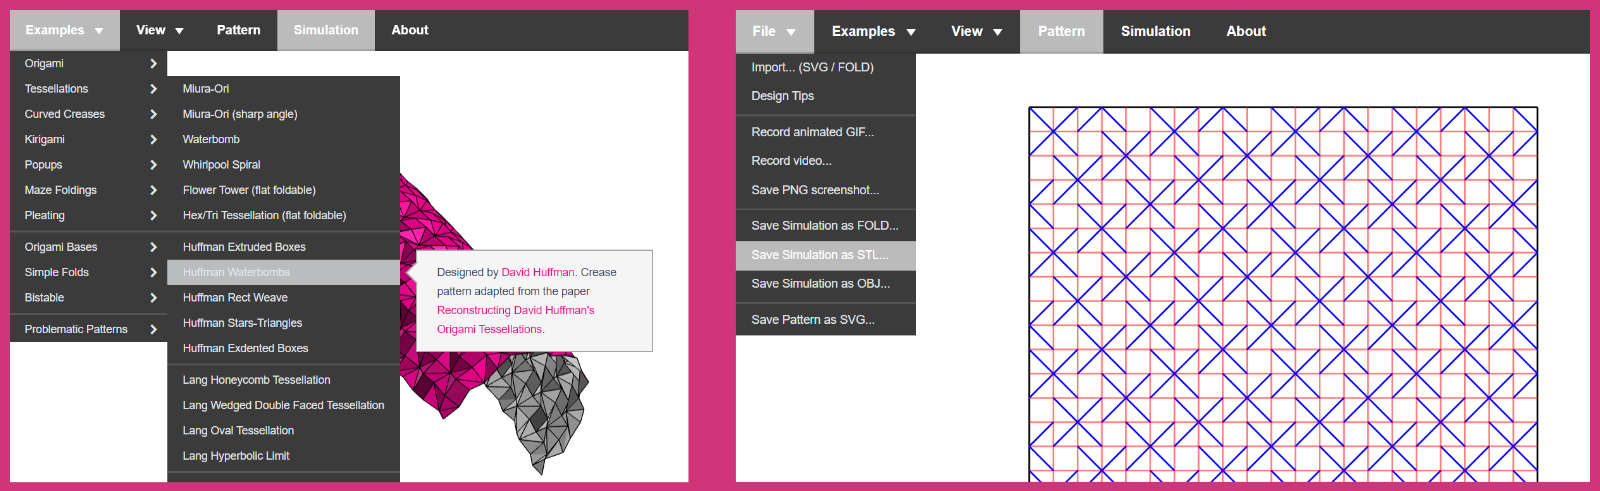
Origami Simulator provides various simulated folds examples and SVG files of the patterns. This app allows you to simulate how any origami crease pattern will fold. Also you can upload your design, made by provided instructions and see errors in the simulator.
I used to try some of the folds with paper and wanted to try them with fabrics realizing that it will behave different than paper.
Fabrication files preparation
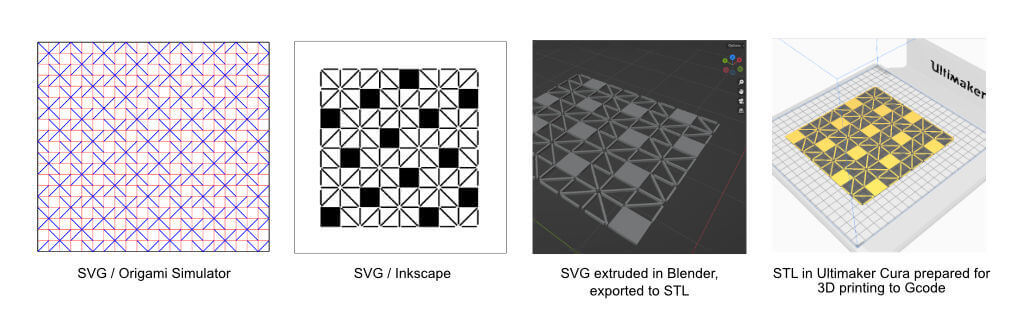
The following steps were required to prepare the files:
Software
STEP 1: Origami Simulator
Fabrication file preparation started from Origami simulator. I chose the Tessellation “huffman Waterbomb” pattern and downloaded the pattern SVG file.
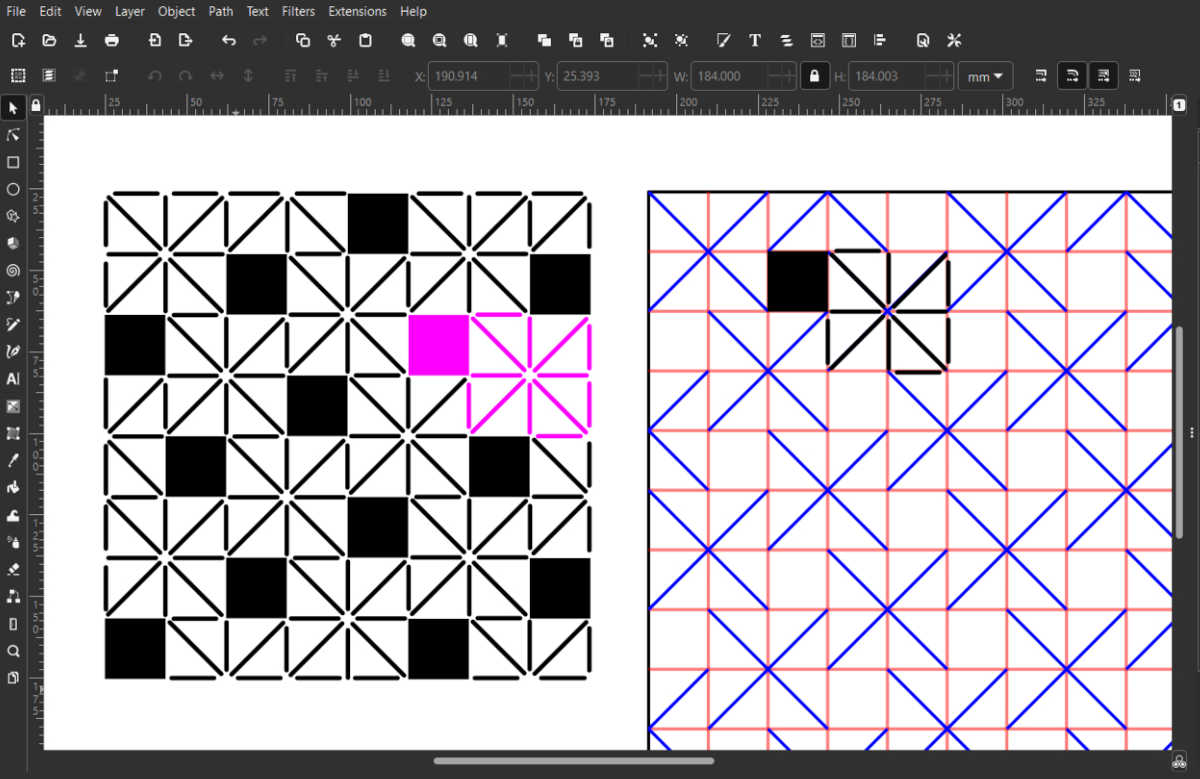
STEP 2: Modification in Inkscape
The Tessellation “huffman Waterbomb” pattern was modified in Inkscape to have 18 mm squares and the gaps between the pattern joints to get the bending effect where needed. Everything was redrawn in Inkscape following the downloaded SVG file. First I drew one segment in size so that the lines would not be too thin to be able to 3D print them. Second, the segment was multiplied on the pattern and extra parts were deleted.
STEP 3: Modification in Blender
Then the prepared SVG1 file was imported into Blender, extruded, and saved as STL2.
STEP 4: Preparation for printing in Cura
In Ultimaker Cura 3D pattern's high was changed to 1 mm and saved to a Gcode file for the following printing.
PLA + lycra + Ultimaker
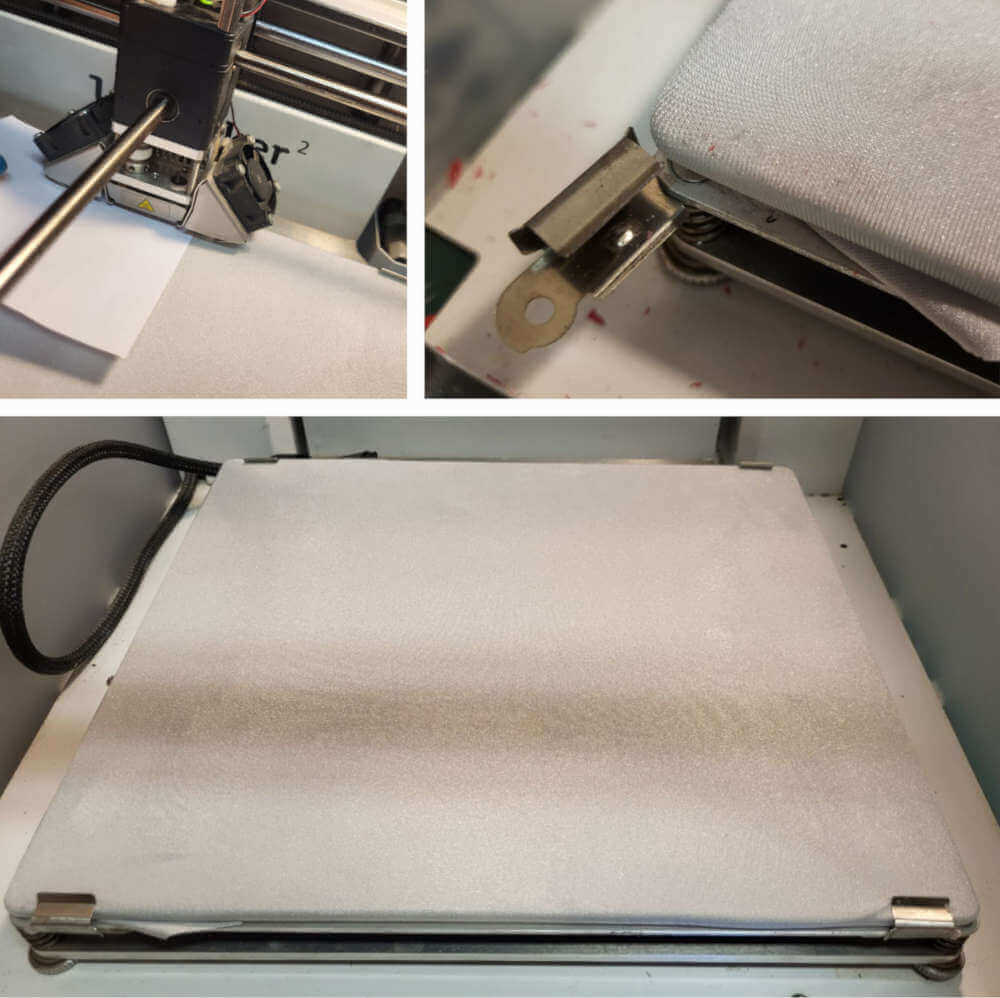
I started from Ultimaker2 machine calibration, which was done with a piece of paper and following 3D printer's instructions. Thirst I thought that to print stretched and fixed to the bed fabric in Ultimaker’s case might be a problem, because clippers just don't fit inside the box. However, Ultimaker’s bed glass can be easily deattached, you just need to open front holders. So it worked out even better, because the glass and bed holders keep the stretched fabric in place.
Tools and materials
- Lycra
- PLA filament
- Double side tape
- Ultimaker2 3D printer
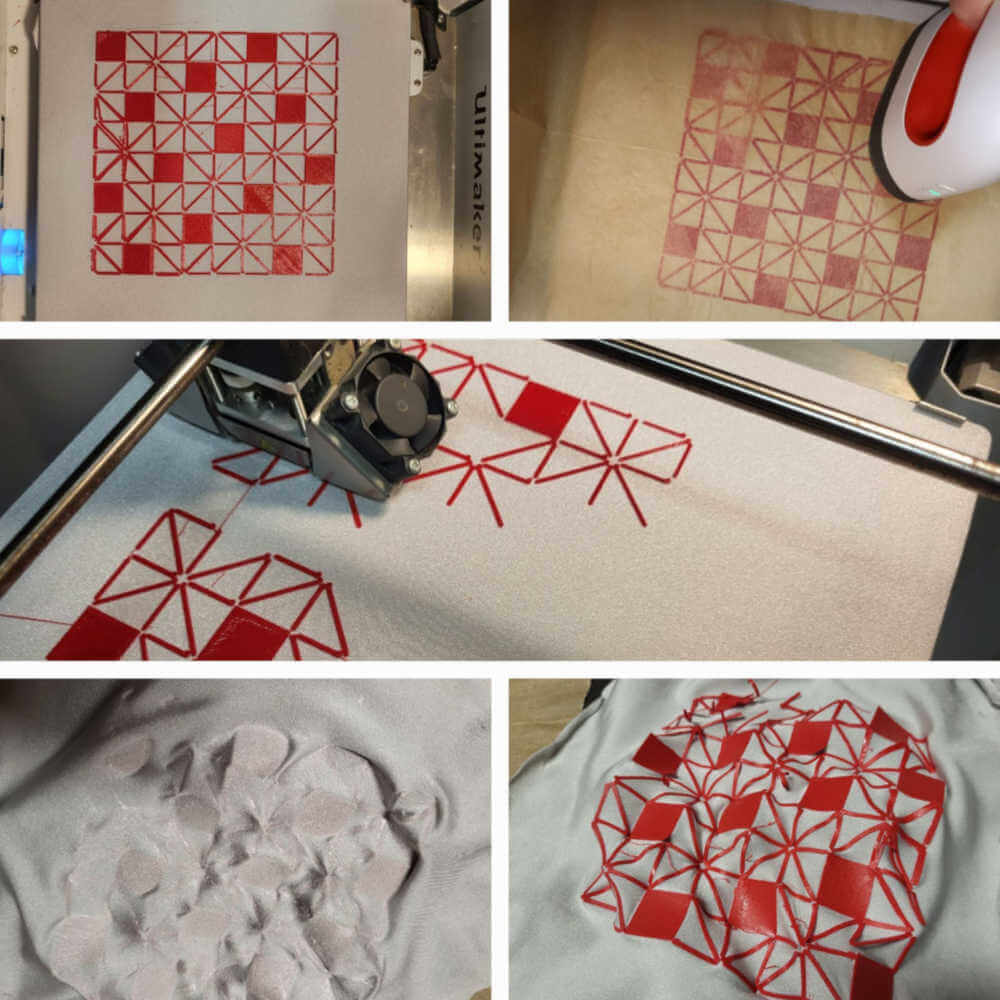
Printing on fabric went pretty smooth, but the compilation of plastic and fabric didn't work. The plastic did not stick to the fabric. I tried to bake it to the fabric with hot press, but that only flattened the plastic and distorted the design.
TPU + lycra + Prusa
Tools and materials
- Lycra fabric
- TPU filament
- Double side tape
- Original Prusa i3 MK3S+ 3D printer
This time I used the Original Prusa i3 MK3S+ printer and TPU / Fiberflex 3D filament to make "Huffman Waterbomb" origami on lycra fabric.
Double side tape holded the fabric very well and Prusa printers magnetic bed added an extra strengh for holding the stretched fabric on place. The folds of the fabric that appeared during fabric fixation on the back of the bed plate were cut with scissors to make the printing calibration more accurate. It also required automatic calibration before printing. This automated calibration process printed a test "snake", which I immediately and carefully peeled off with tweezers.
It is easy to peel off the tape after the printing by heating the bed.

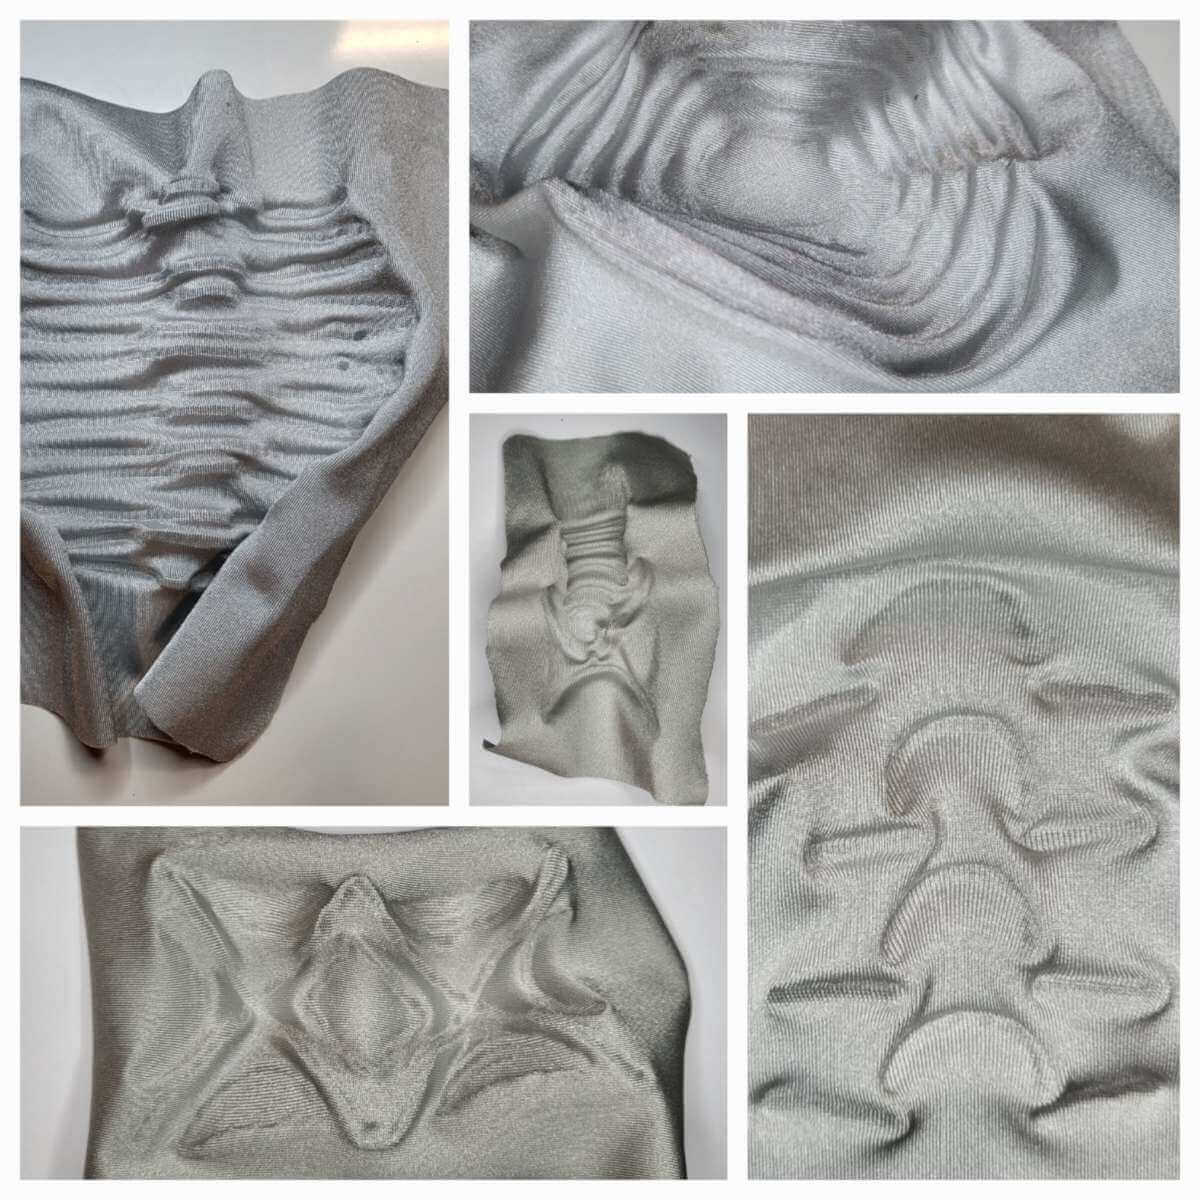
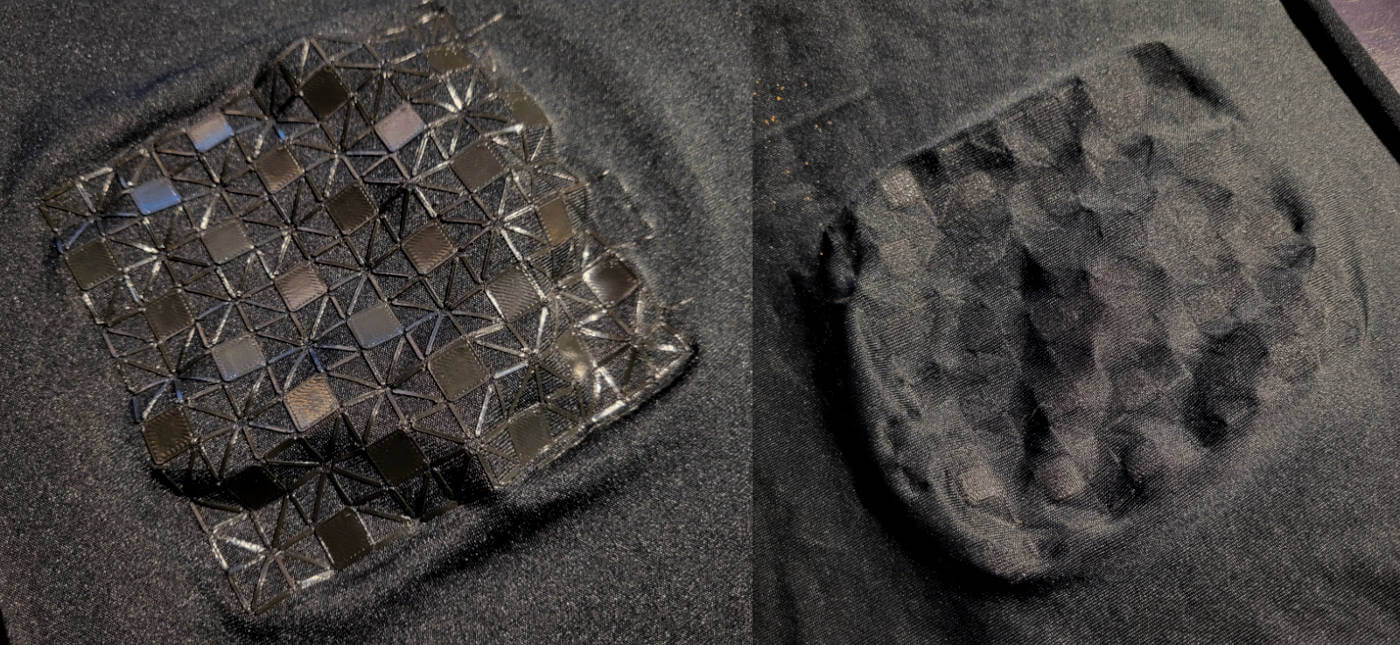
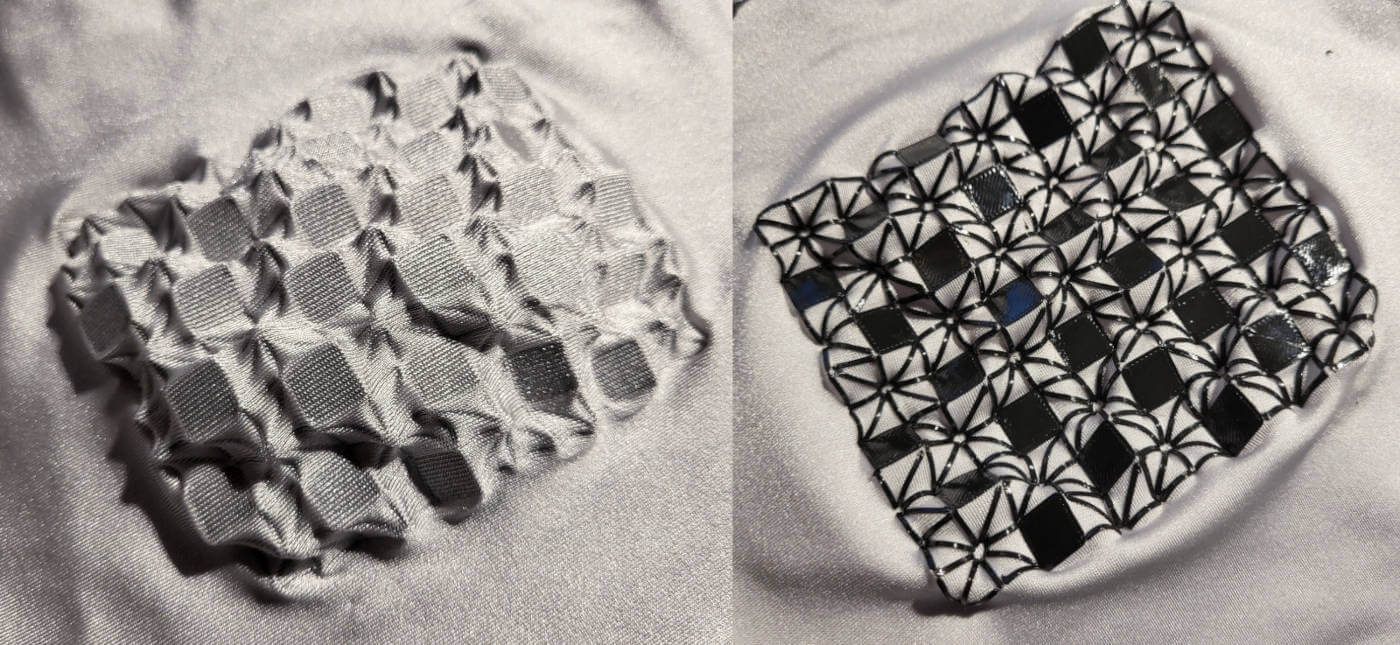
And here is the results of TPU filament printing on lycra fabric.
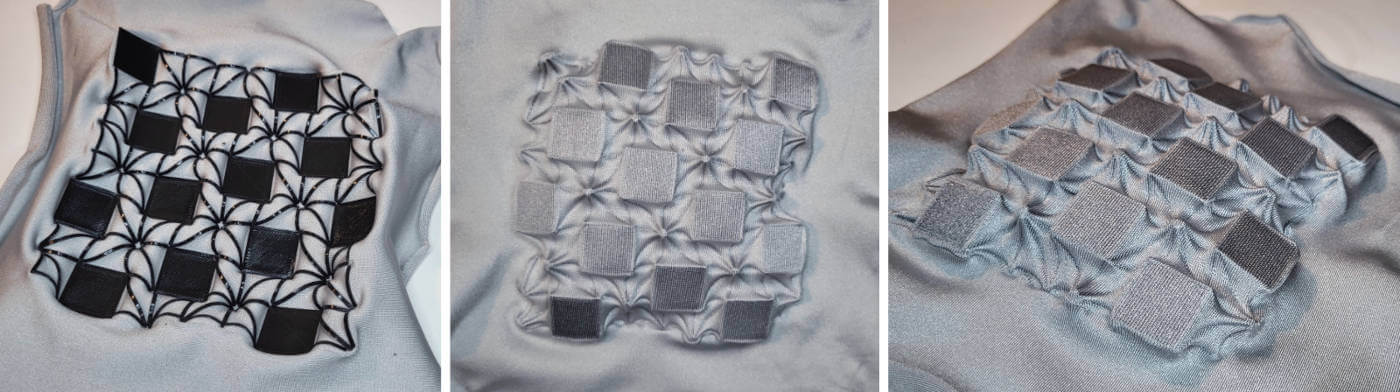
In the next step, the attempt was to make the squares smaller to 10 mm3|4 instead of 18 mm. Thirst used thinner black lycra fabric which didn't work as the fabric didn't shrink back. The next try was made with the same grey lycra fabric and it worked out better, but the result was not the same as with 18 mm squares. I guess that fabric is too dense to print such small parts to get the same effect.
Mandala and Grasshopper
I did some simple exercises with Grasshopper. The thirst one is from Fabricademy class using Image Sampler.
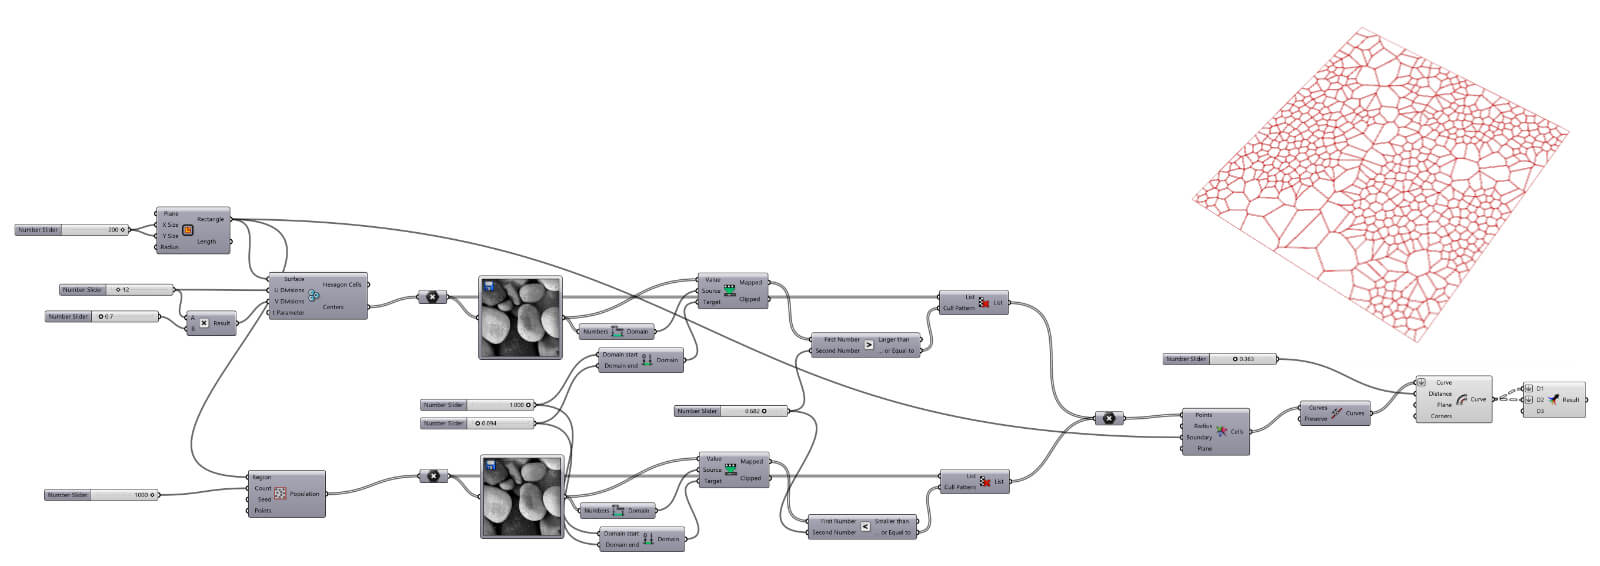
Drawing mandala exercise5|6|7 is pretty easy and time-saving if you want to try 3D printing fast. To make it I used youtube tuttorial by DCO Parametric.

STEP 1: Circle
1. Circle
2. Number Slider 200 → Circle Radius
3. XY Plane → Circle Plane
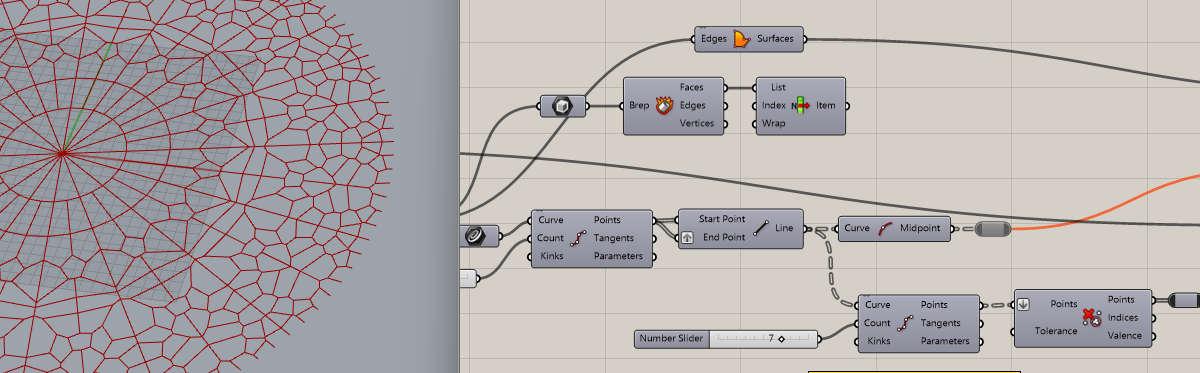
STEP 2: Divide
1. Curve → circle
2. Divide Curve → Curve
3. Number Slider 3 less than 20 → Count
4. 2 point Line → Points, Graph End point
5. Curve Middle → Line output
6. Divide Curve → Curve to Line output
7. Number Slider 10 → Count input
8. Cull Duplicates → Points to Points, Flatten Cull Duplicates Points
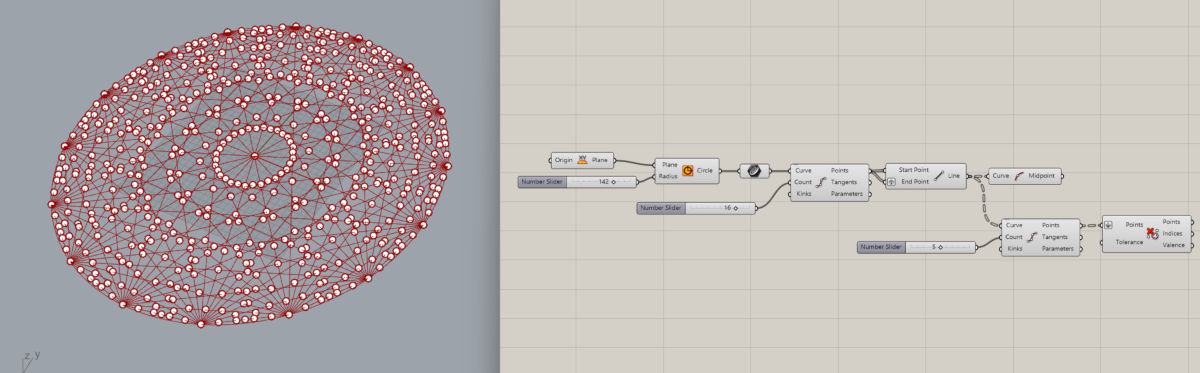
STEP 3: Pattern
1. 2D Voronoi → Curve Midpoint and Cull Duplicates Points outputs holding Shift key to Voronoi Points, Flatten Voronoi Points
2. XY Plane → Voronoi Plane
3. Double-click on the Voronoi Points wires to add Relays and right-click to disable one of them.
STEP 4: Boundary
1. Box → Circle output
2. Deconstruct Brep → Box output
3. List Item → List to Deconstruct Brep Faces output
4. Boundary Surfaces → Circle output to Edges
5. Brep | Curve → Curve to Voronoi Cells output and Brep to Boundary Surfaces output.
6. Preview Off
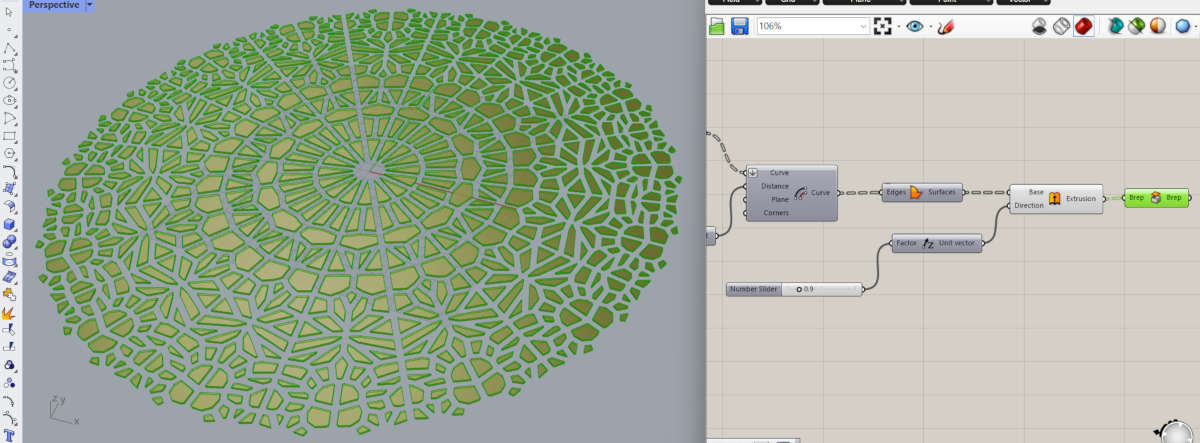
STEP 5: Offset
1. Boundary Surfaces → Edges to Brep | Curve Curves output
2. Offset Curve → Curve to Boundary Surfaces output
3. Number slider 1.5
4. Negative → Value to Number slider output, Result to Offset Curve Distance input
5. Preview Off
STEP 6: Extrude
1. Boundary Surfaces → to Offset Curve ouput
2. Extrusion → Base to Boundary Surfaces output
3. Unit Z → output to Extrusion Direction
4. Number Slider 0.5 less than 3 → to Unit Z input
5. Cap Holes → Brep to Extrusion output
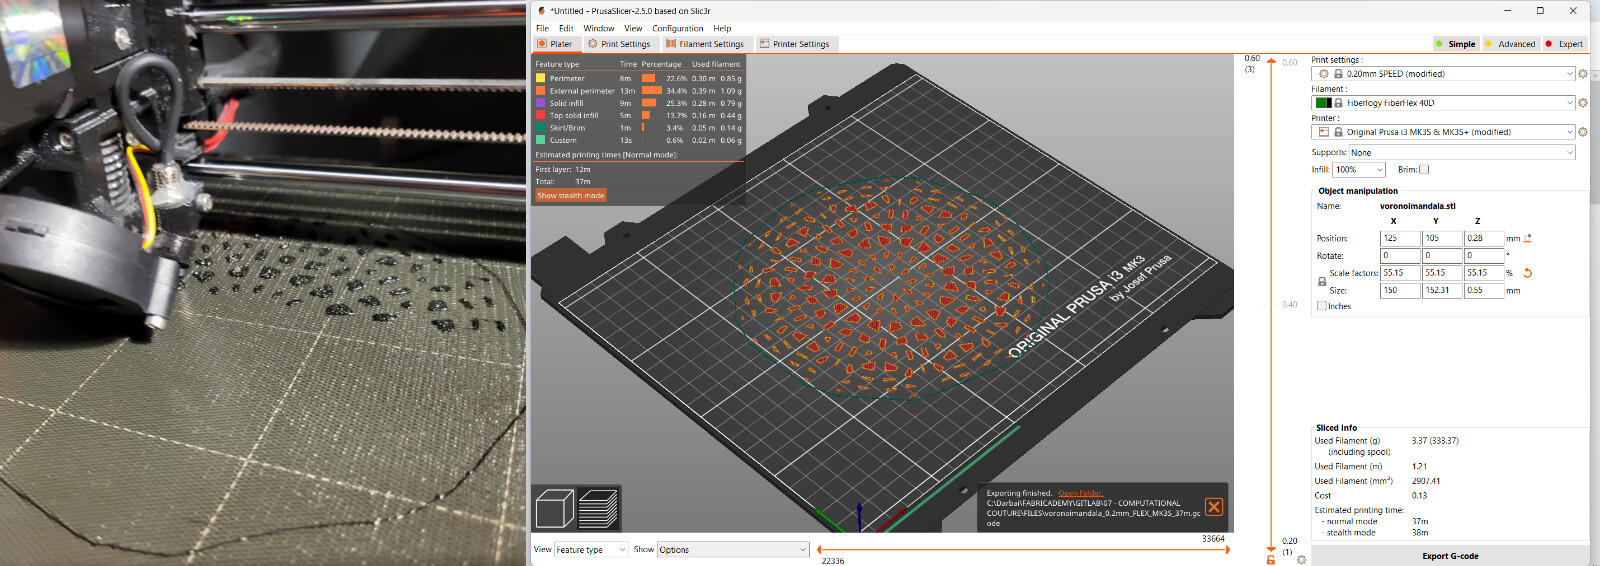
Tools and materials
- Tulle fabric
- TPU filament
- Double side tape
- Original Prusa i3 MK3S+ 3D printer
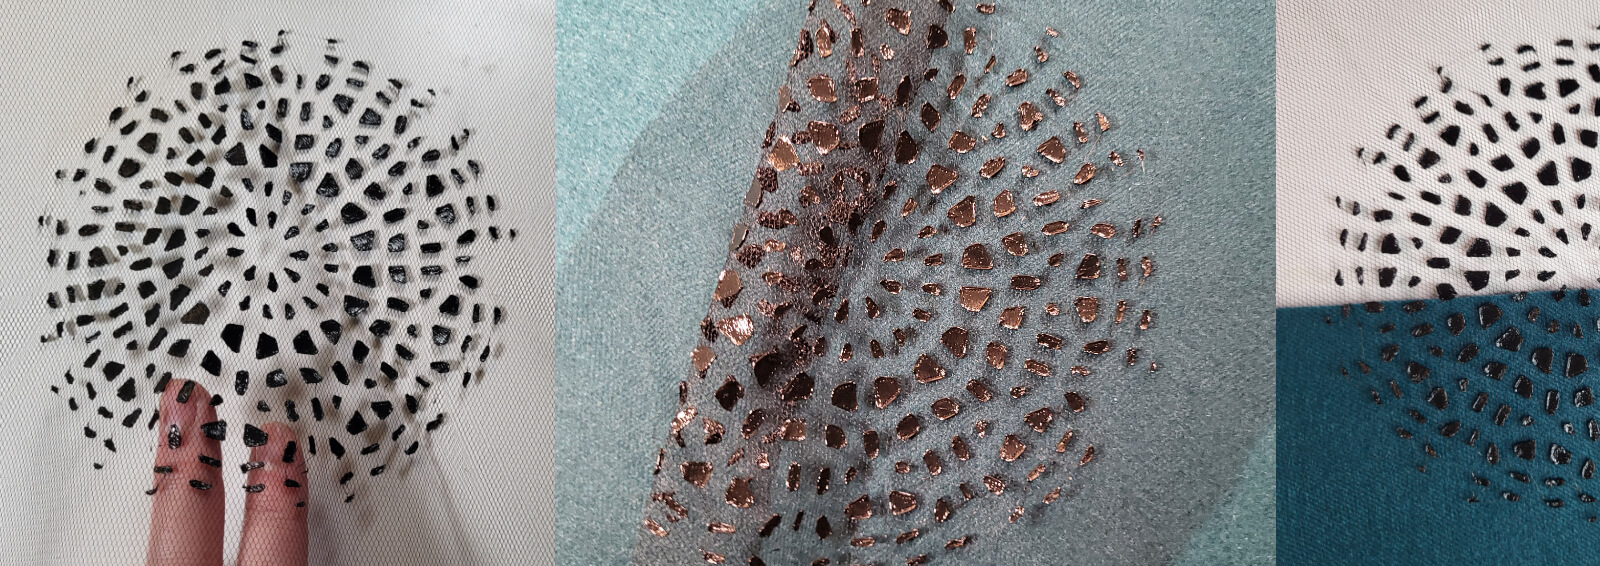
Mandala printed on tulle fabric with TPU plastic. I used the same fabric fixing technique as with Lycra, just this time the printer was calibrated before putting the fabric on the bed. The printing process went very smoothly and fast.
FABRICATION FILES
-
18 mm origami SVG file: huffmanwaterbomb-18mm.svg ↩
-
18 mm origami STL file: huffmanwaterbomb-18mm.stl ↩
-
10 mm origami SVG file: huffmanwaterbomb-10mm.svg ↩
-
10 mm origami STL file: huffmanwaterbomb-10mm.stl ↩
-
Mandala Grasshopper file: mandala.gh ↩
-
Mandala STL file: mandala.stl ↩
-
Mandala Rhino file: mandala.3dm ↩