12. SOFT ROBOTICS
INSPIRATIONS
Inspiring works of Ying Gao - Montreal based fashion designer and professor at University of Quebec in Montreal. These 2 dresses has the ability to metamorphose when one tries to take their picture. Playtime 1 reacts to a camera flash by contracting and becoming blurred as the fabric, activated by light-sensitive sensors, begins to undulate.
INSPIRATIONS FROM NATURE - BIOMIMICRY

Such a plant as Mimosa pudica, Codariocalyx motorius and Venus flytrap seismonastic movements - touching the leaves, or shaking the plant, or slight warming of the leaves, or chemical and electrical stimuli, or subjecting the plant to a lack of water, will cause the leaflets to fold together and the whole leaf to droop downwards temporarily.
Guided by the inspiring works of these Fabricademy students: Laura Caroline and very inspiring final project by Saskia Helinska.
VINYL INFLATABLES
These are the results obtained using heat transfer vinyl.
Before starting to draw the inflatables shapes, I wanted to understand how they work. The article "aeroMorph - Heat-sealing Inflatable Shape-change Materials for Interaction Design" which Adriana pointed out during Soft Robotics lecture helped to go deeper and understand how different 2D shapes transform and act in 3D with the help of blowing air.
The picture below shows how the width/height aspect ratio of the diamond hinge (a) determines the bending angle at full inflation (b).

Handmade
Started by making the shape by hand during the Soft Robotics tutorial on the day 2.
The heat transfer vinyl was kept under the press for too long because it started to melt. Since I had this vinyl for a long time it was impossible to trace where it came from and find the datasheets. So I learned how hot and long to press while testing the small vinyl pieces.
Plottered
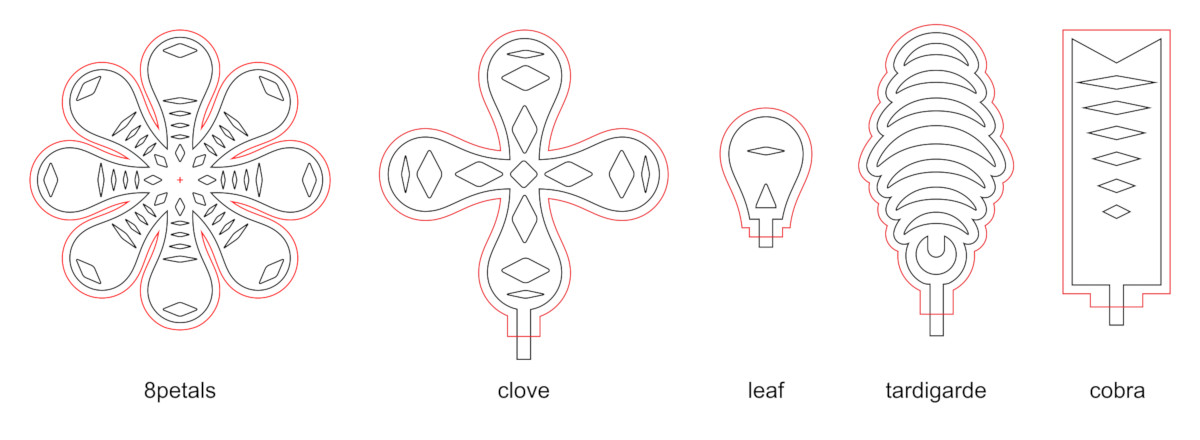
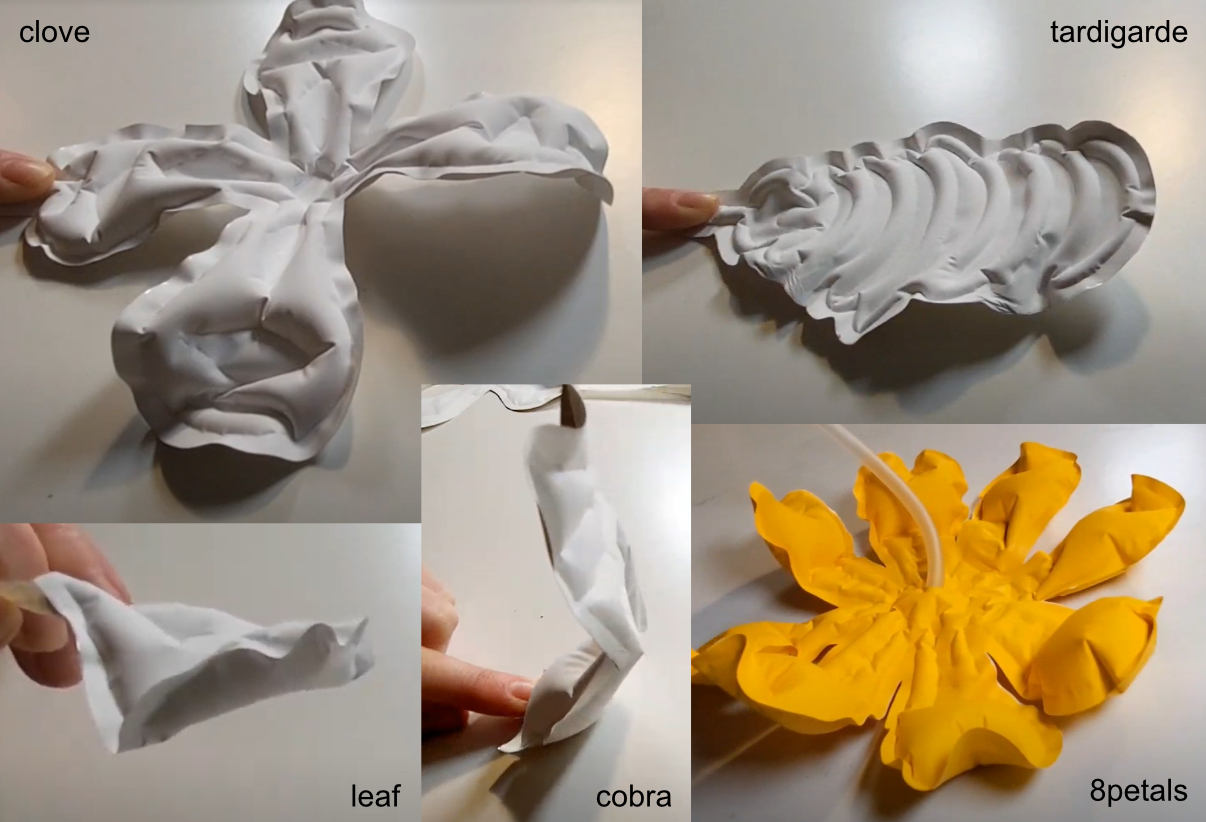
This stage involved experimenting with different shapes that I gave names like 8petals1, clove2, cobra3, leaf4 and tardigarde5. And then watched during transformation if they are matching the names.
Instructions
GENERAL NOTES:
- test heat transfer vinyl with your heat press before making
- test heat transfer vinyl cutting with your plotter before making
- don't forget to mirror one vinyl layer of your design if it is not symmetrical
- for baking paper use a strong grip mat as it is doesn't stick to the mat so easy
tools
- Inkscape
- Cricut Explore Air2 plotter
- StrongGrip Mat (305x305mm)
- Cricut EasyPress Mini
- thick cotton fabric for the ironing base
- tweezers
- scissors
- mini wooden clips
materials
- baking paper
- heat transfer vinyl
- silicone tube (5mm)
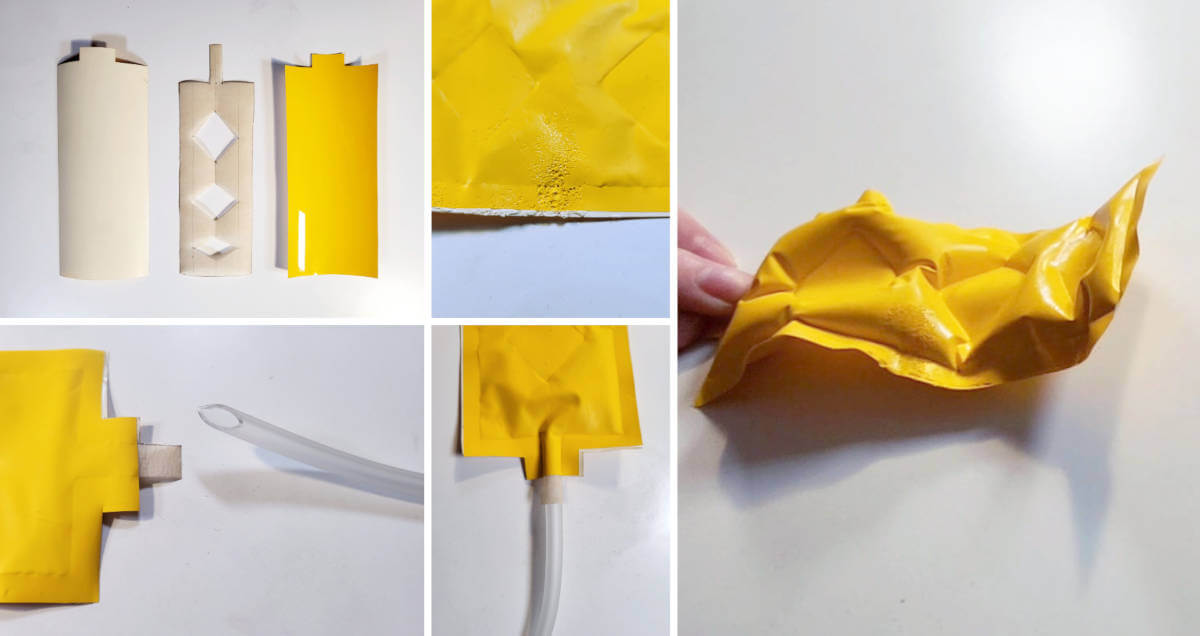
STEP 1
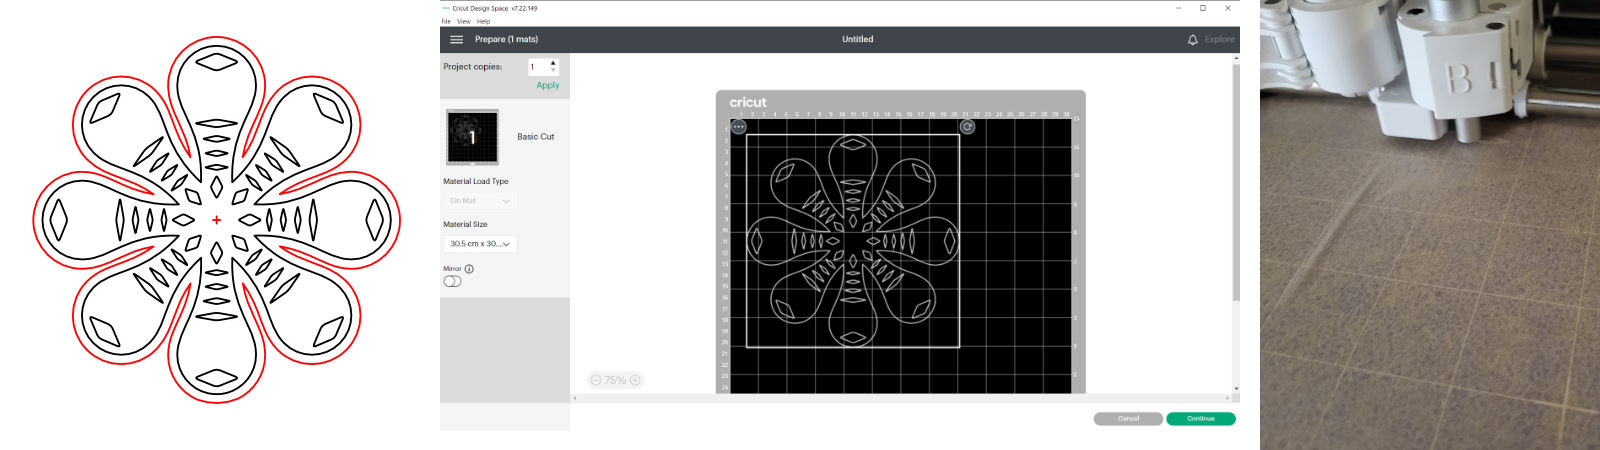
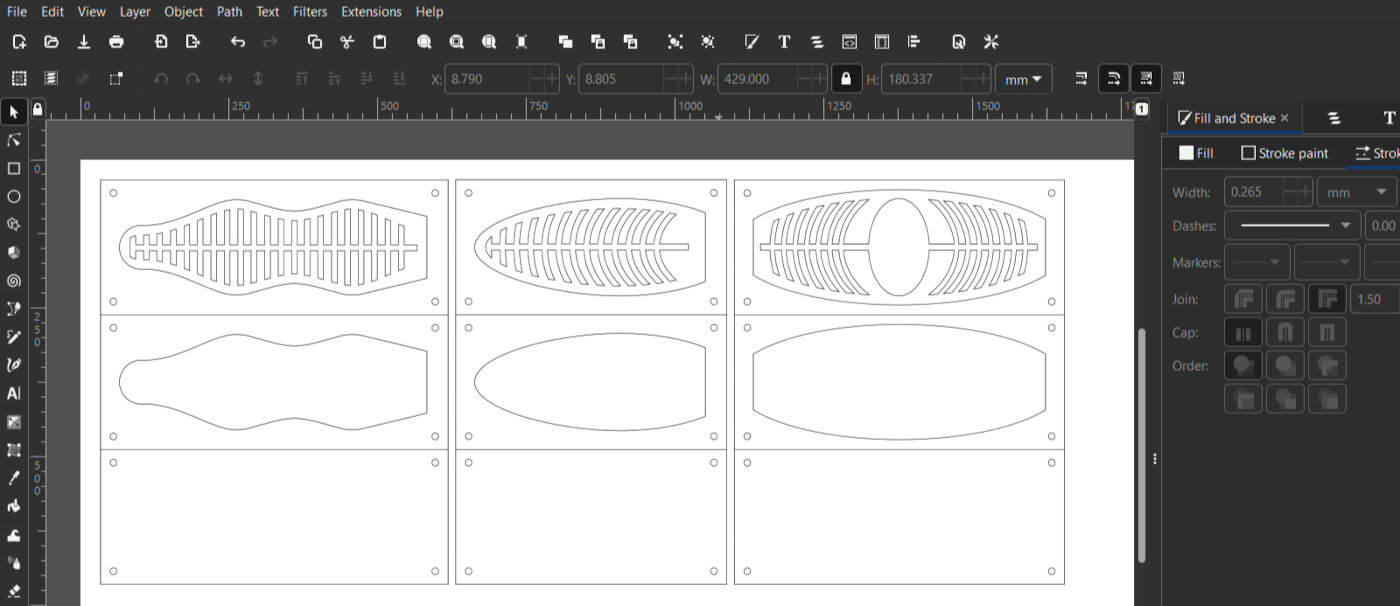
- The files were drawn in Inkscape and cut out with a plotter.
- RED lines indicate heat transfer vinyl and BLACK lines are for the baking paper. Separate them by colours for the individual cut.
- Save the files as SVG if you use the Cricut Design Space software to operate the plotter.
- Make sure that all design lines have the same "clean" colour and stroke width - Cricut Design Space software might not upload the design properly if these settings are not correct.
STEP 2
-
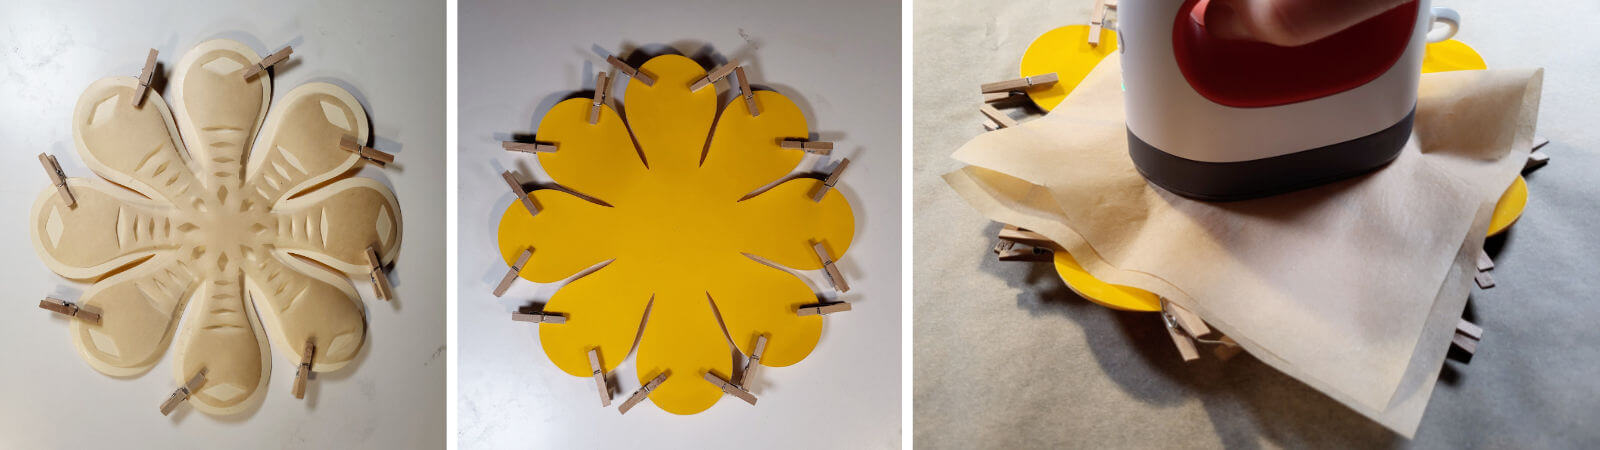
Place the cut pieces on the flat surface and check if they match by size.
-
Vinyl pieces should be 5mm bigger than baking paper peace.
-
Watch vinyl sides. In this case, it was easy to indicate which side goes inside as the outside of the vinyl is bright yellow. Usually "good" side of the vinyl is shiny and has a transparent protective layer that needs to be peeled off after work with the heat press is done.

-
I used mini wooden clips to hold the cut pieces in place.
-
Thirst backing paper was secured to the bottom vinyl peace and later step by step top layer was added reattaching and attaching again each clip.
-
Then all the pieces are secured it is time to use a heat press. As mentioned before, test the material before to know how long to hold the heat press. In this case, it was 8 seconds.
-
Before peeling off the protective layer check if all the parts that have to stick together really hold.
STEP 3
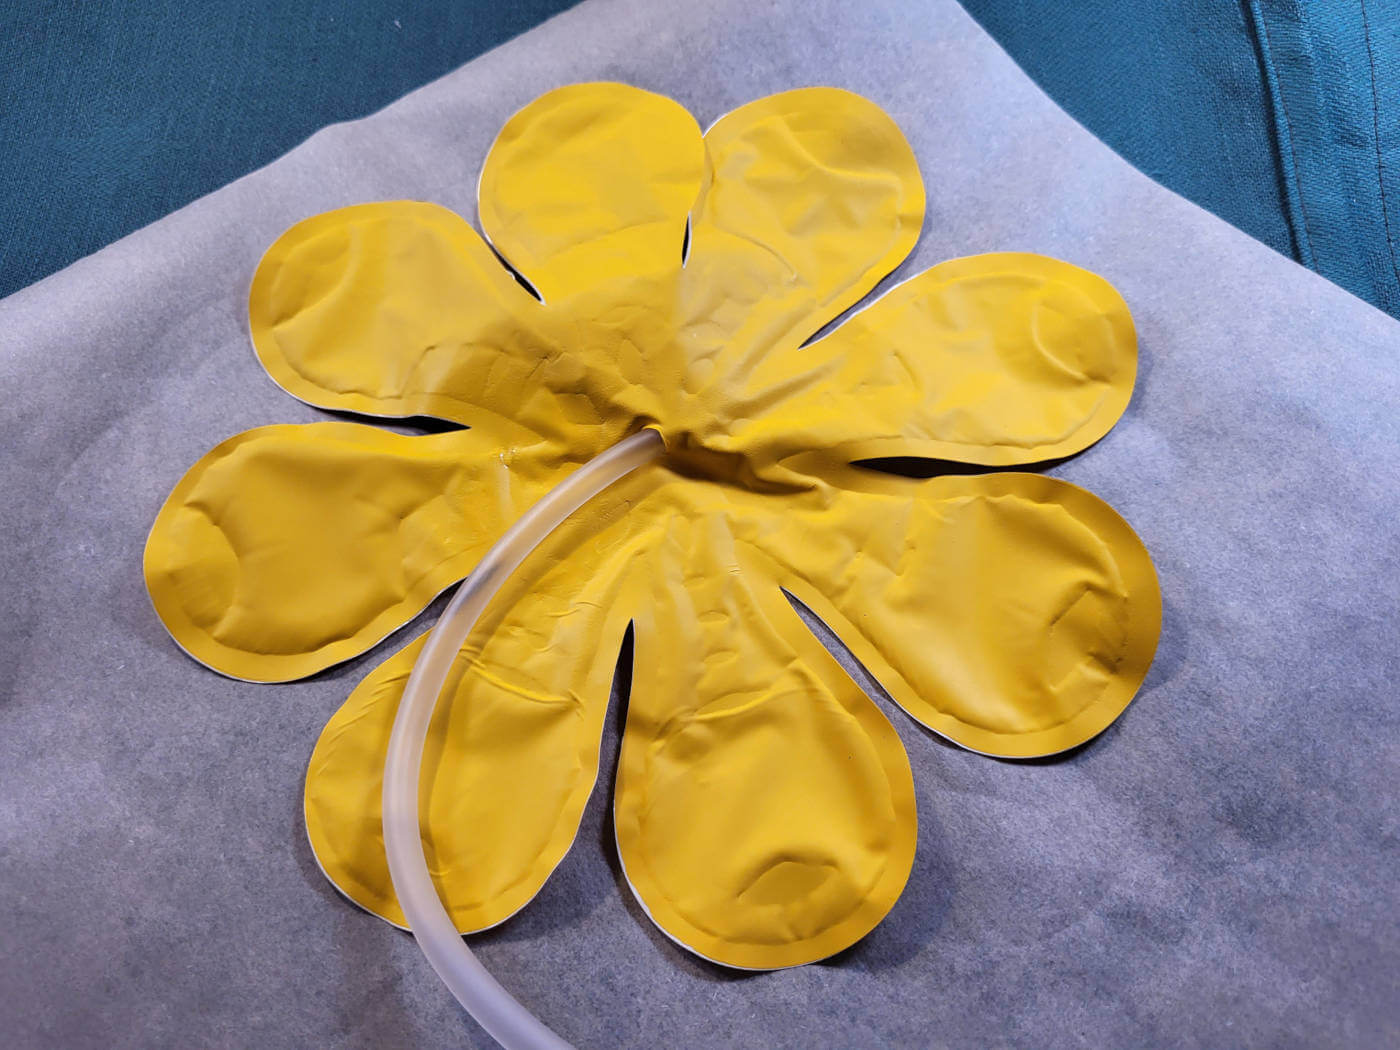
-
Insert the silicone tube into the hole in the middle of the flower and try it by blowing the air.
-
If it doesn’t work and you found the holes you can fix them using the heat press again, just make sure that layer of baking paper is added between the vinyl and the heat press.
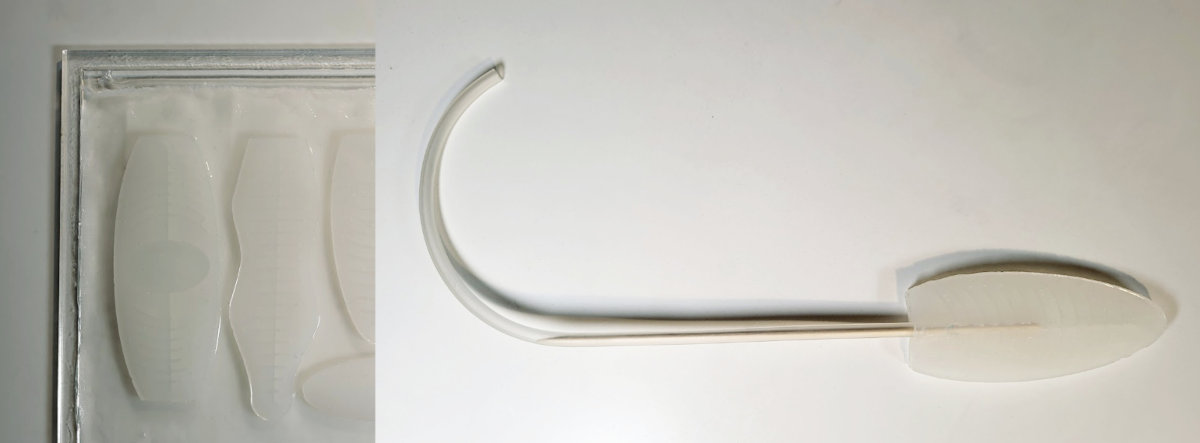
SILICONE INFLATABLES
I followed this Soft Robotics tutorial by Adriana Cabrera.
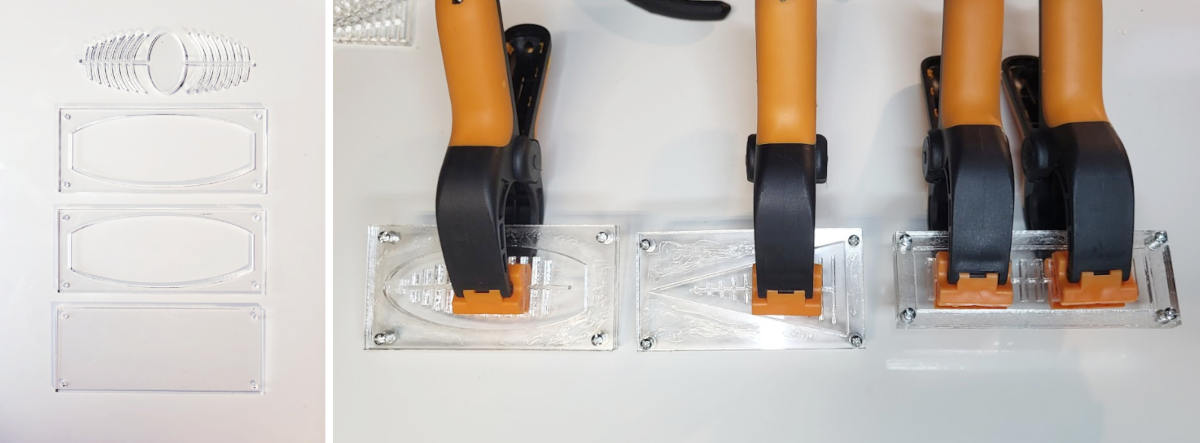
Acrylic molds
I decided to try laser cutted molds to make silicone actuators. Soft Robotics Toolkit instructions are clear and easy to follow. Also, they provide the files to download.
tools
- Inkscape
- Full Spectrum laser cutter
- Small clamps
materials
- Acrylic sheet (3mm thickness)
- Acrylic glue
- M3 bolts (20mm lenght) - 4 for one mold
- M3 nuts - 4 for one mold
STEP 1
Downloaded Soft Robotics Toolkit files were used to know what size and proportions to follow.
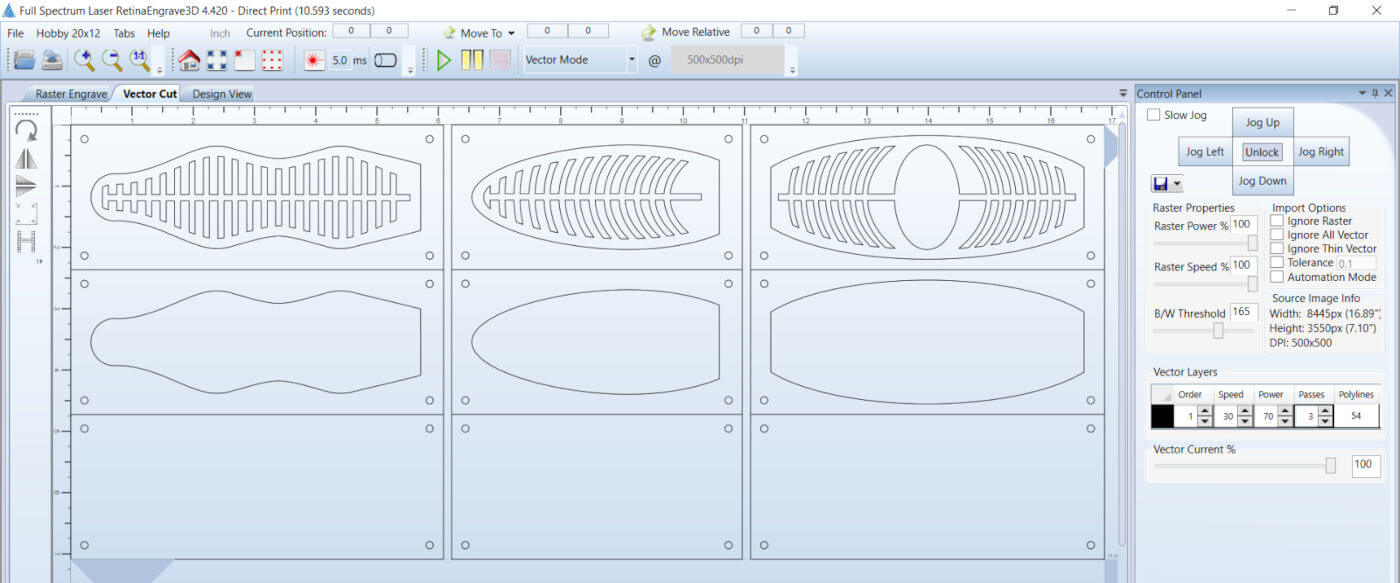
The mold6 shapes were drawn in Inkscape and cuted in 3mm transparent acrylic sheet.
Cutting settings for Full Spectrum 45W laser cutter
- 3mm transparent acrylic: speed 30, power 70, 3 passes
STEP 2
The molds were glued with acrylic glue, fastened with screws, clamped and left to dry for about 20 minutes.
Casting top part
tools
- Inkscape
- Zyle food dryer
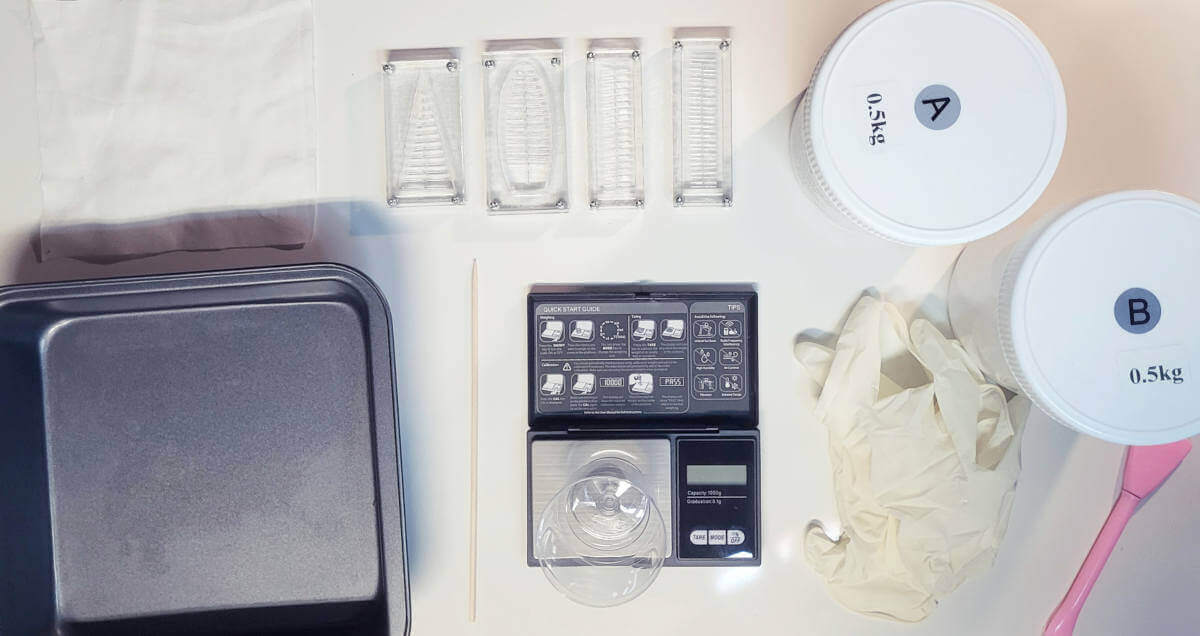
- scales
- plastic containers
- Reusable silicone mixing spatula
- Lab gloves
- Bamboo skewer
materials
- Two-component silicone P05
- Silicone glue
- Non-stretch fabric (in a material that will absorb the liquid silicone, e.g. cotton)
- silicone tube (5mm)
STEPS:
- To prepare the silicone, mix a batch of approx. 20ml of the silicone in a measuring cup. Add equal parts of part A and B using the scales. Mix by stirring vigorously with a stirring stick for 20-30 seconds.
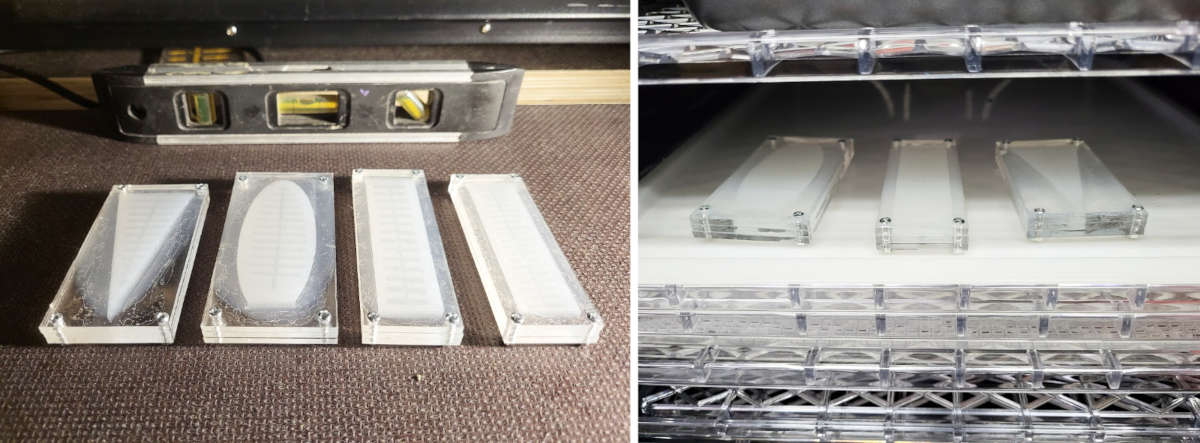
- Stand the molds on a leveled surface to distribute the silicone evenly in the mold. Spirit level helped to be sure that the surface is leveled perfectly.
- Fill the mold just to the top with silicone mix and allow to stand for 5 minutes.
- Tapp the molds to allow air bubbles to rise to the surface so you can "pop" them using a pointed bamboo skewer or toothpick.
- Cure the silicone by placing the mold in the food dryer for 20 minutes at 70°C (or leaving it at room temperature for 4 hours).
- Gently remove the cast part from the mold
Casting bottom part
I made not enough of the silicone mix, so I had to mix another batch. As a result, the silicone did not cure, I guess because the A and B silicone components were calculated not precisely. So I had to repeat this step.
STEPS:
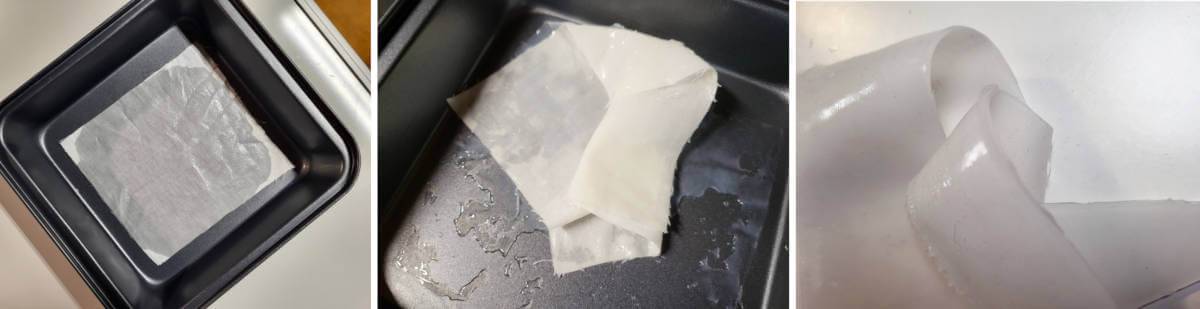
- Place a piece of fabric on a flat non-absorbent surface.
- Pour a small amount of silicone mix onto the fabric surface.
- Used a gloved finger to smear the silicone so that it covers the surface with a 1 mm layer.
- Cure the silicone by placing it in the food dryer for 20 minutes at 70°C (or leaving it at room temperature for 4 hours).
Assembling the parts
STEPS:
- Mix a small batch of silicone and pour a little onto the surface.
- Pour a small amount of silicone mix onto the cured silicone/fabric surface.
- Use a gloved finger to even out the silicone mix to 1 mm thickness.
- Place the silicone actuator top part on the uncured silicone, with the open side facing down and gently press it into contact with the material.
- Press everything down with a heavy plate, I used a thick heavy plastic, but a wooden plate works as well.
- Cure the silicone by placing it in the food dryer for 20 minutes at 70°C. Place it with the pressing plate.
- Once the silicone has cured, cut off the excess fabric along the sides of the actuator with a pair of scissors.
- Poke a small hole with a bamboo skewer inside of the actuator.
- Put the bamboo skewer into the silicone tube, it helps to push the tube into the actuator.
- Add some silicone glue at the end of the silicone tube and attach it to the actuator.
CONTROL WITH ARDUINO
Video bellow shows how followed Electro-pneumatic circuit works. Unfortunately, the air supply turned out to be weak and the vinyl objects reacted less than during the manual blowing method. Silicone objects didn't work either, but I guess because the silicone layers on top and bottom were too thick.
LOOKING FORWARD
Here is the data-sheet of the Platinum P05 silicone what I used:
| Mixing ratio | Viscosity | Hardness | Tensile strength | Tear resistance | Continuity | Shrinkage | Temperature resistance |
|---|---|---|---|---|---|---|---|
| 1:1 | 6000 - 7000 | 05±2 | 2.55 | 25 | 450 | 0.1 | 200-250 |
| parts by weight | cs | Shore A | kgf / c㎡ | N/mm | % | % | ºC degrees |
I will definitely want to remake silicone actuators using the same molds adding thinner layers on the top and the bottom. Also will look for new and original design molds. As for the electronics part, I think the possibilities should be further explored and tested.
FABRICATION FILES
-
Acrylic molds SVG file: acrylicmolds.svg ↩