3. Circular Open Source Fashion
Overview
This week we dove into circular, open source and modular fashion. Let's break these down for a sec:
-
What is a circular fashion economy? Our current fashion industry has been designed to be linear – meaning a straight life line with a beginning and an end: designing → to sourcing and manufacturing → selling to stores → bought by consumers → landfill (with lots of people from all over the world involved at many stages of production). A circular fashion economy makes that line into a loop, designing for the end-of-life of a garment from the beginning, making for a better, healthier industry for people and the planet.
-
What does it mean to be open source? The term open source is often in reference to open source software, types of computer software where the code is open and accessible to its users and can be seen, inspected, and modified. Open source in relation to fashion puts a spotlight on the current industry – which is very closed and secretrative when it comes to fashion houses sharing their designs and patterns – and instead encourages openness, transparency, and accessibility.
-
Modular fashion is an approach to the production of accessories and garments using vector graphic design of bidimensional laser cut modules. They are then interlocked to create complex 3D seamless geometries. Made of small interlocking pieces, modular garments can be adjusted and transformed at any time, allowing for longer use of the garment as it changes form, and thus resulting in less fashion waste.
Research & Inspiration
Our assignment was to create an interlocking and modular garment or accessory using the laser cutter and to document the various stages of the process. Here is a link to my moodboard - I was very interested in creating a garment with some volume.
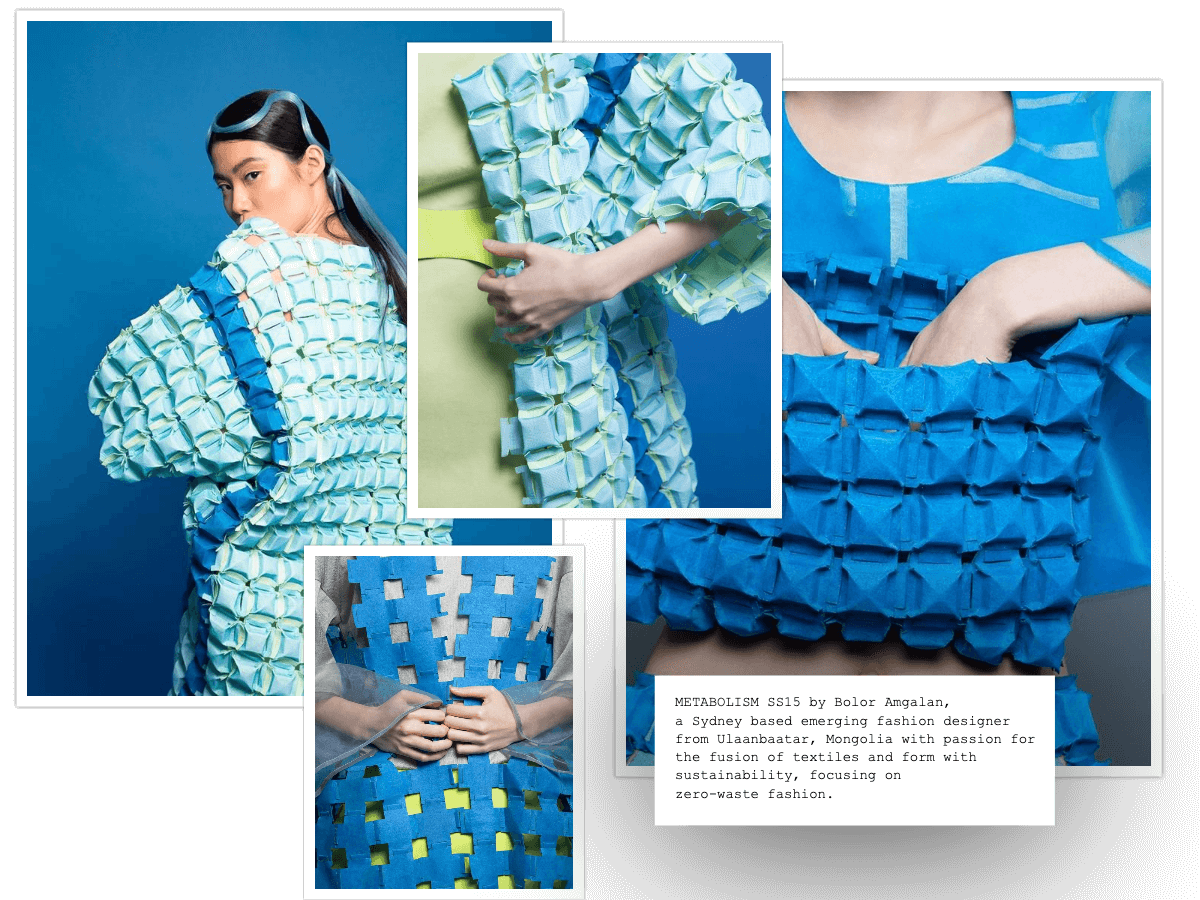
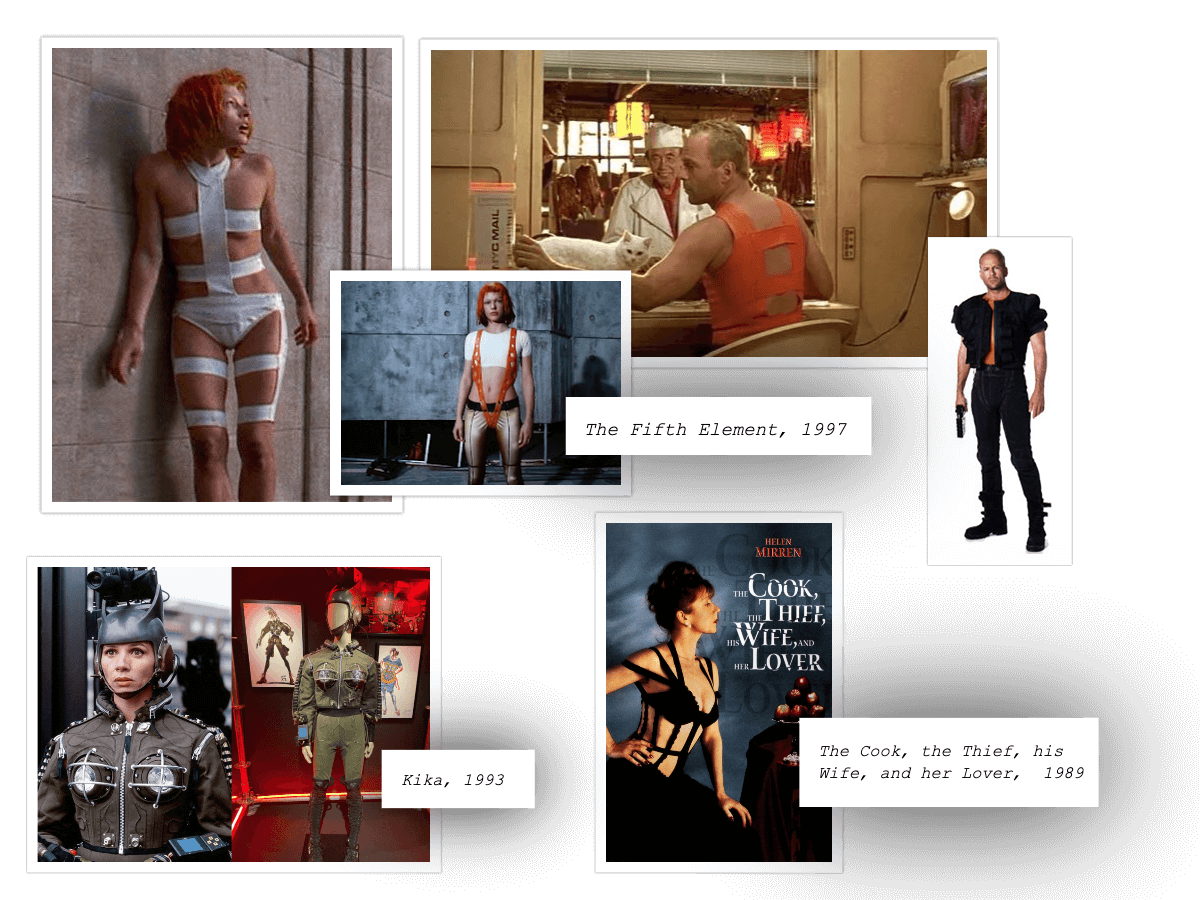
I was really inspired by Bolor Amgalan’s Metabolism SS15 and wanted to create something similar in look and feel. I’ve also been very inspired by the work of Jean Paul Gaultier after we saw his exhibit at the CaxiaForma a few weeks ago and wanted to create a garment that was similar to his style.
Process
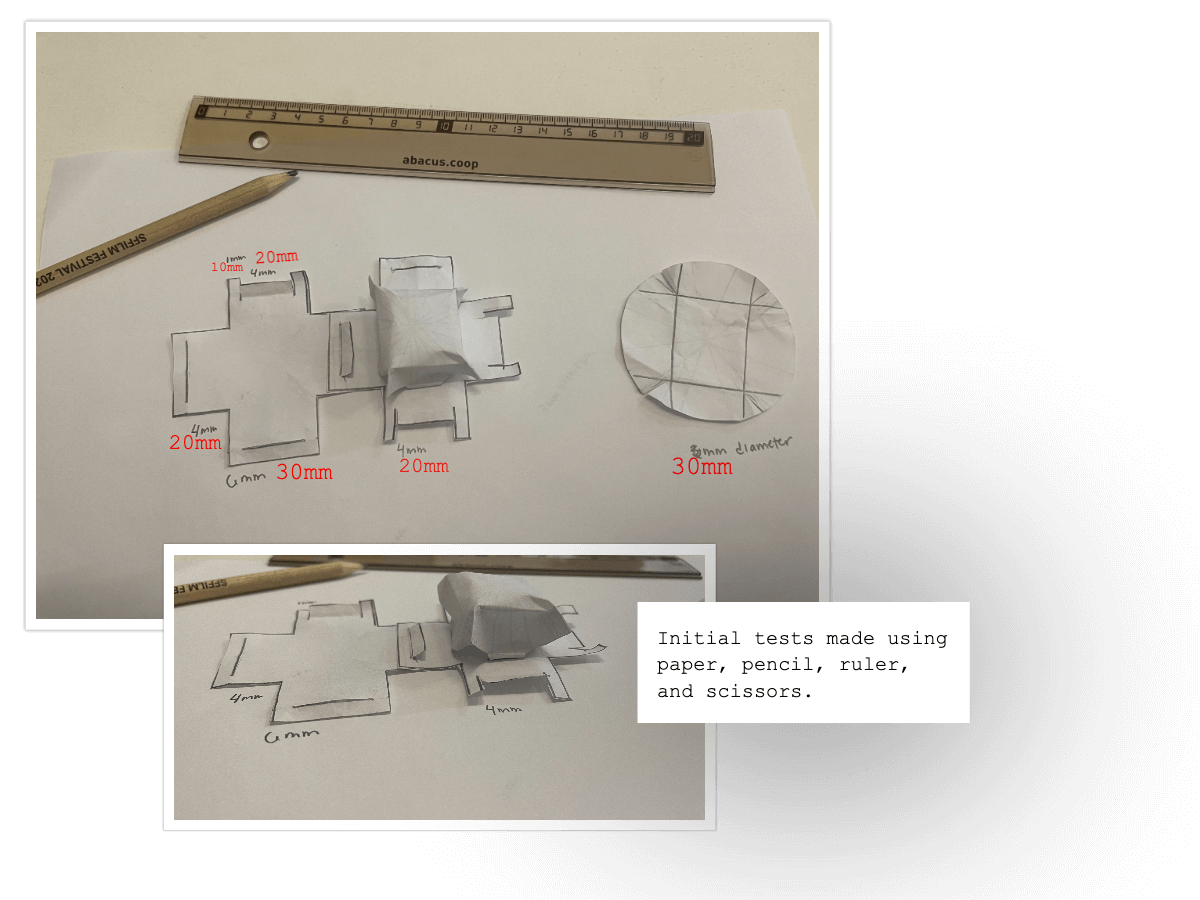
Step 1. Paper Prototypes.
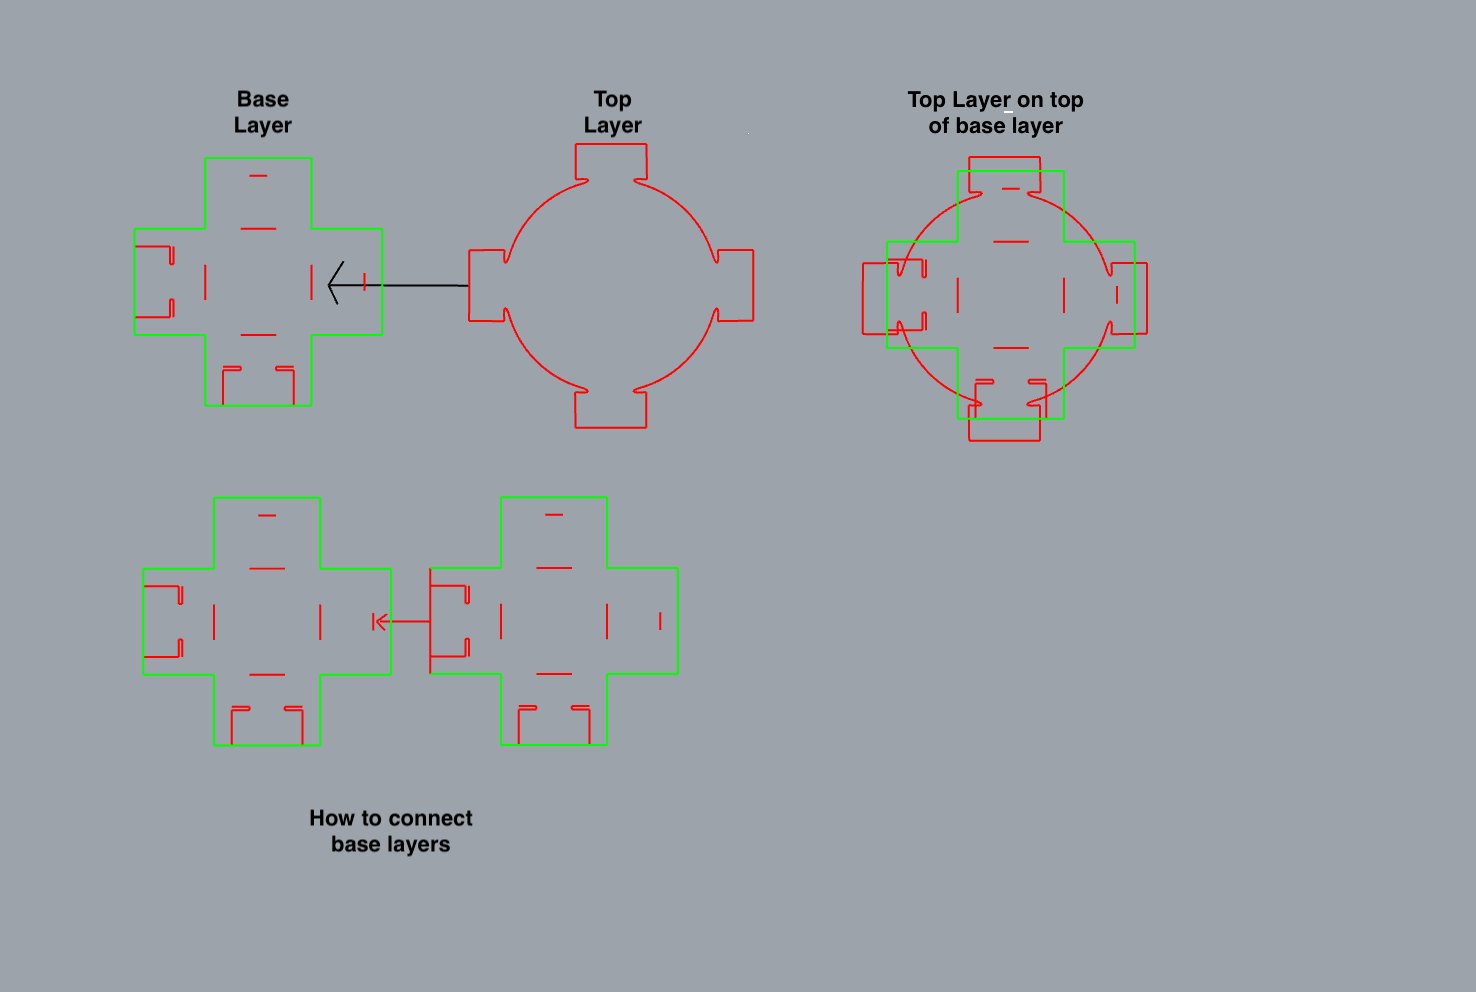
First, I looked very closely at the shapes of Bolar Amgalan’s work and tried to replicate them on paper. I realized that to get that square shape I could use a circle and a tabs around it to connect to a base piece.
Step 2. Creating shapes in Rhino.
I copied my measurements from the paper and created the shapes in Rhino. I’m still getting used to calculating everything in mm so had to resize a couple times.

Step 3. Testing on Fabric.
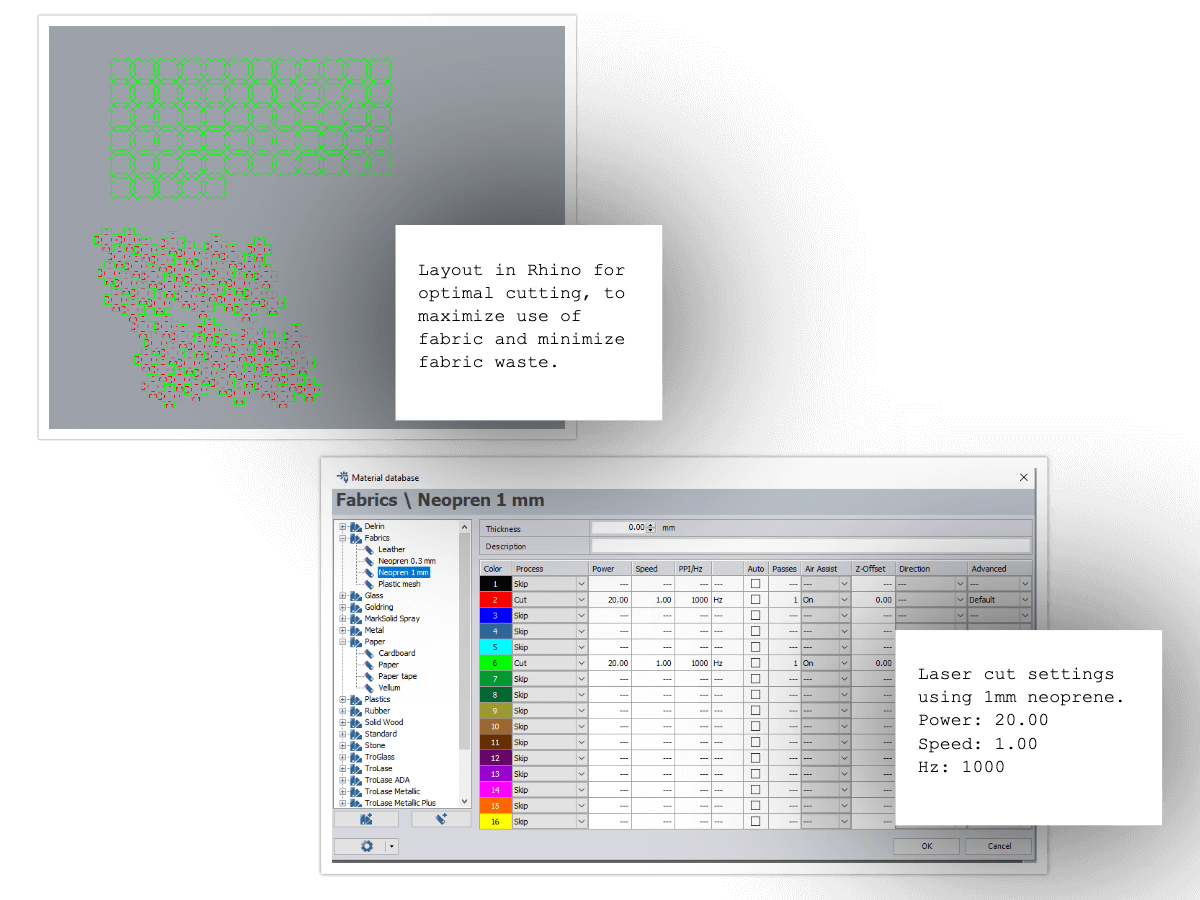
When my initial shapes were ready in Rhino, I laser cut 4 pieces to see if they fit. I found that the female openings of the base shape were too large and the male connectors too small so I readjusted the file again.
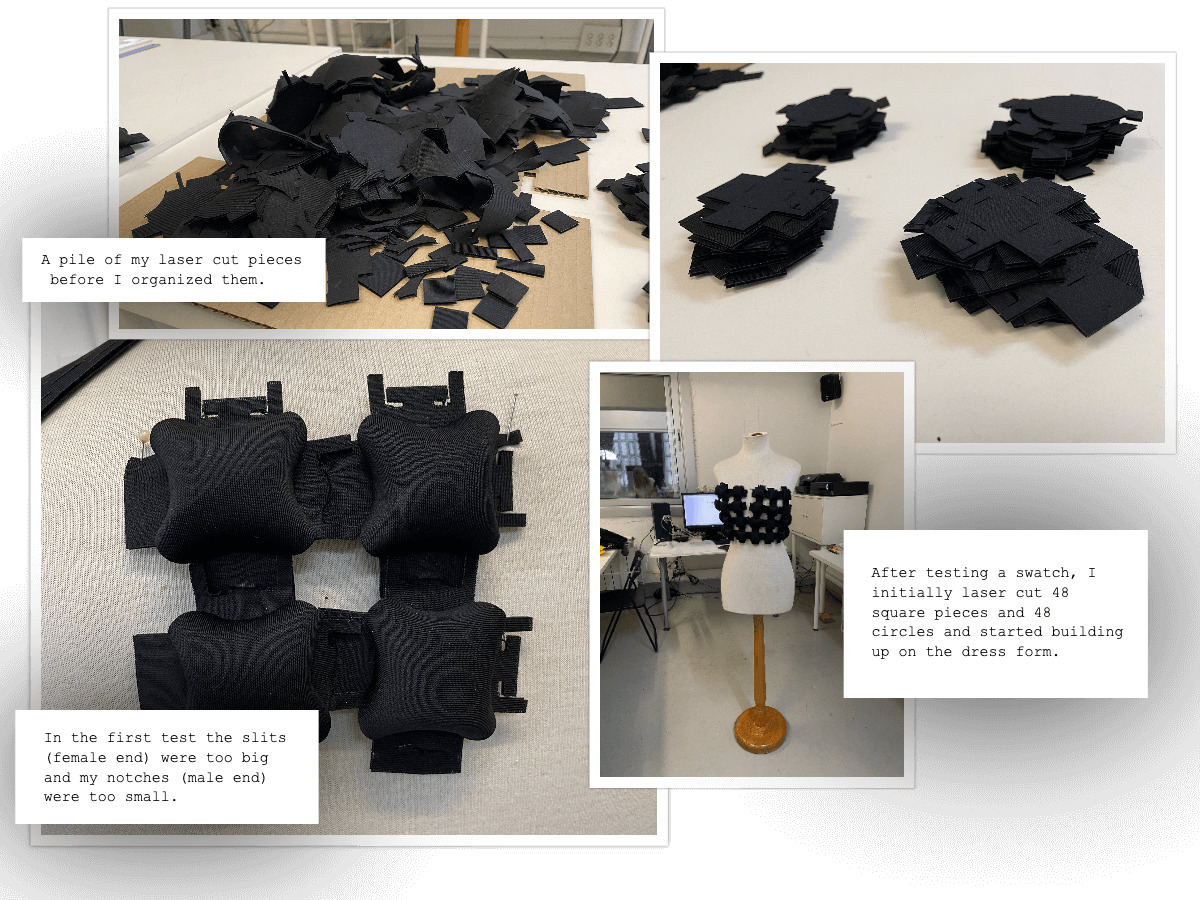
Step 5. Readjust file in Rhino.
After I felt my pieces were in better shape I laser cut 48 base pieces and 48 top pieces. My instructors Ana and Petra showed me how to organize my pieces in Rhino to maximize the use of the neoprene fabric I used and minimize waste.
Step 6. Interlock the pieces.
When I was finished laser cutting I connected all of my top pieces with my base pieces one-by-one to make one piece. Then I connected those pieces together.
Connect base and top pieces to make one piece
Interlocking pieces to make garment
Step 7. Create the Garment.
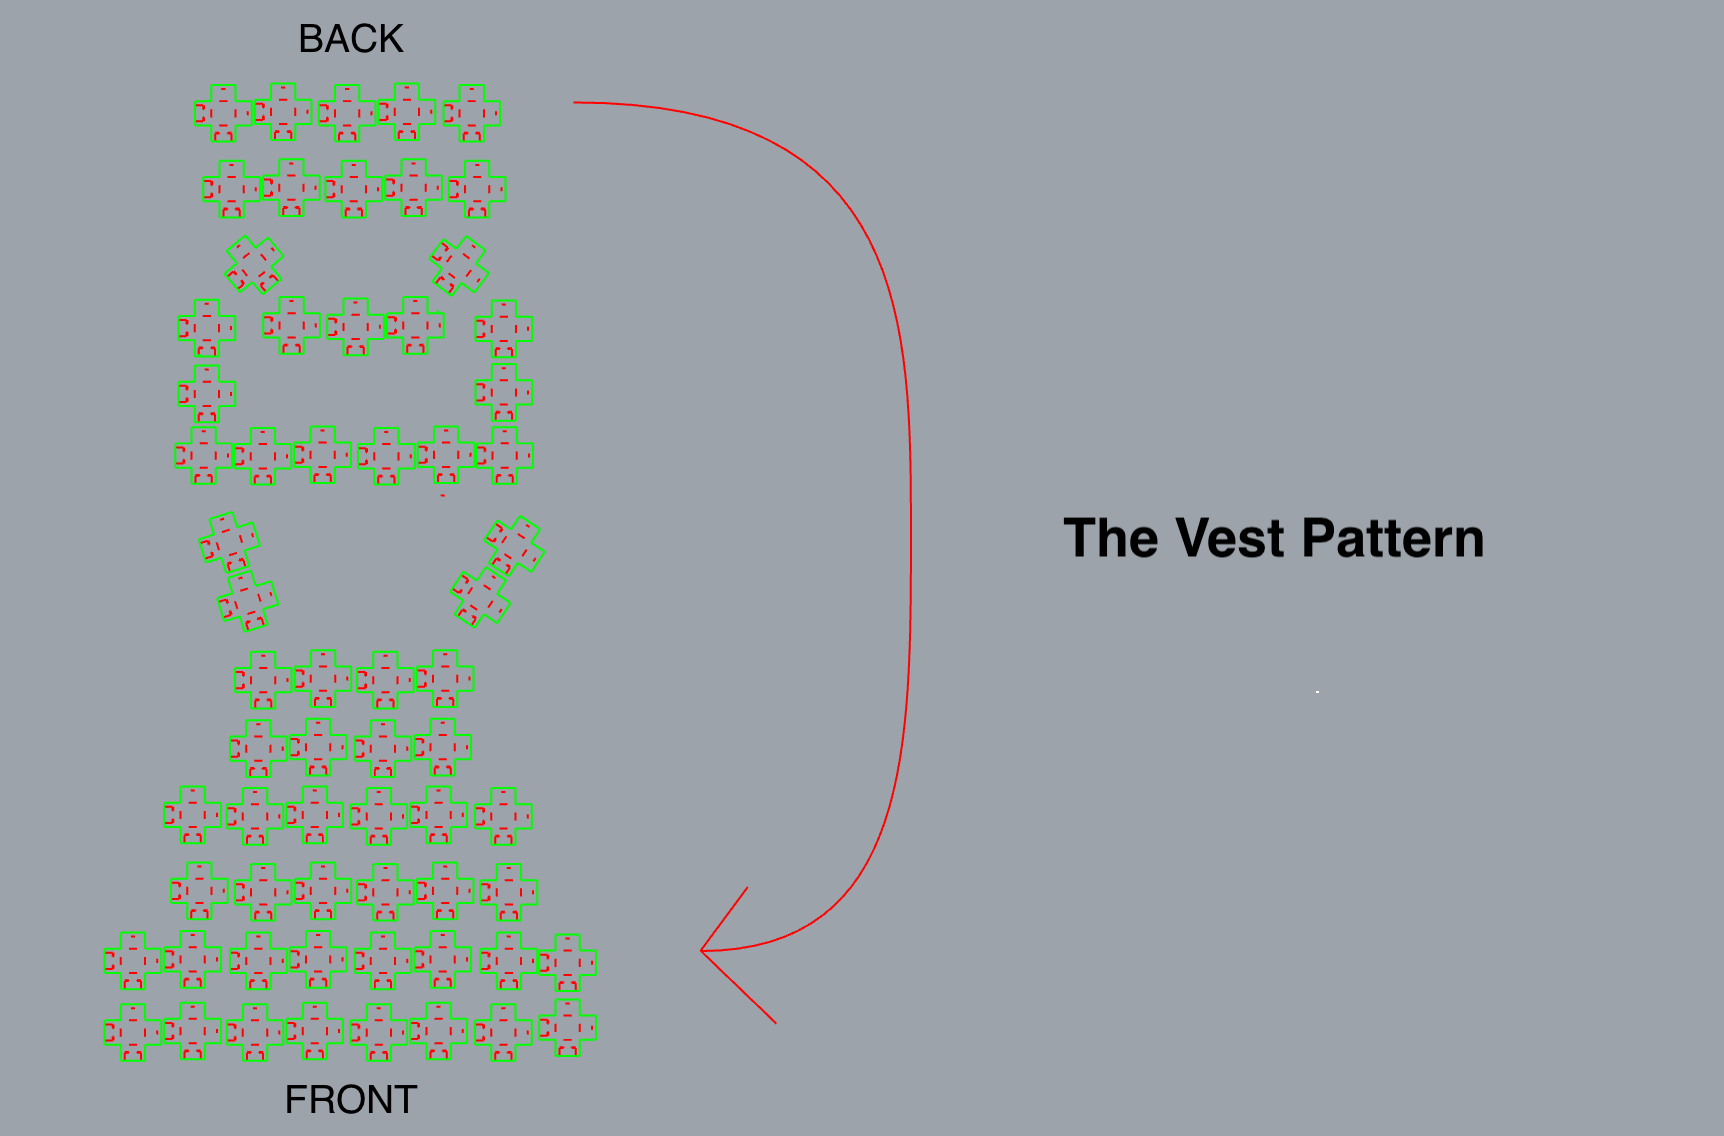
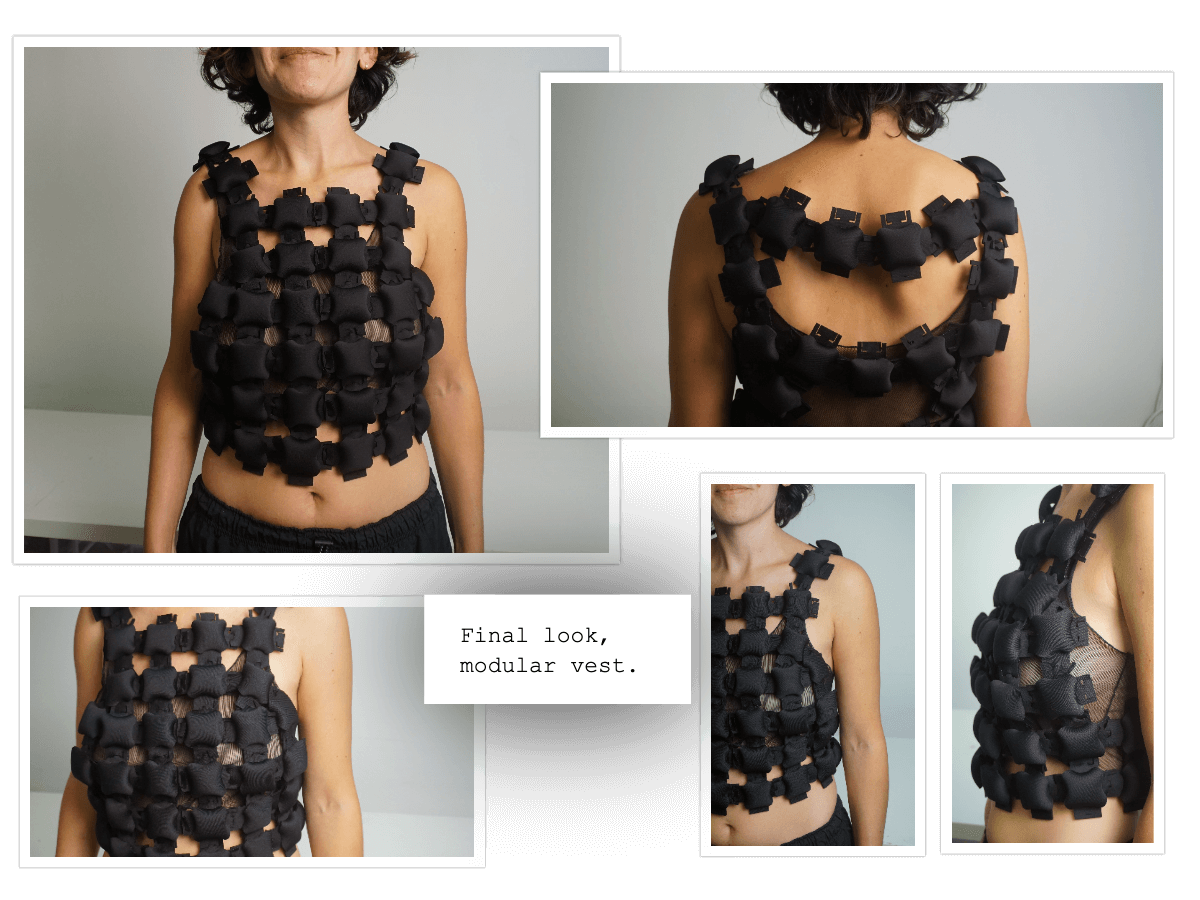
With some suggestions from my classmates, I decided to make a vest, in the style of a utility vest. The final look has 65 pieces – meaning 130 top and base pieces were laser cut.
Step 8. Try it on!
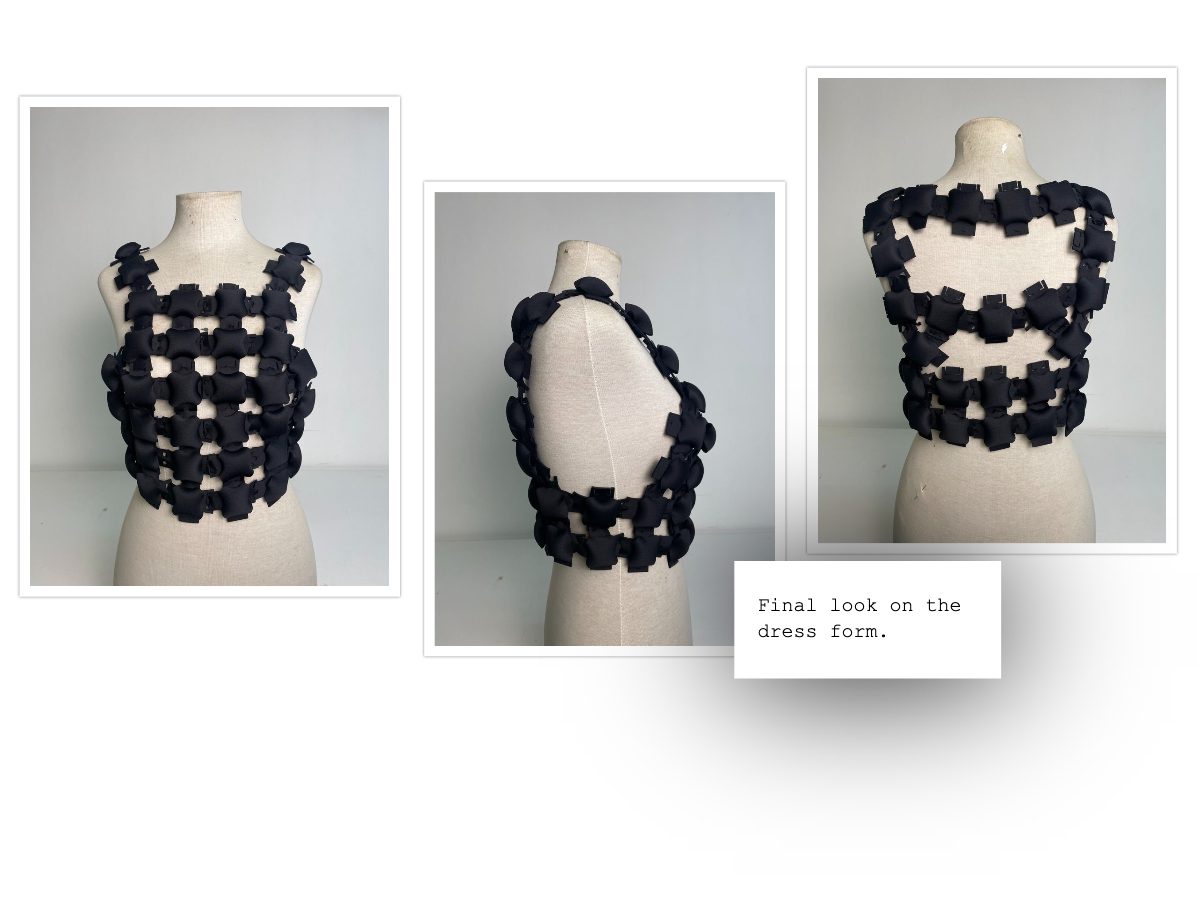
Change things around as you like! Here’s the final look.
Reflection
Overall I was so happy with how this piece came out and I will definitely wear it! The garment is still a little fragil and doesn’t have the strongest hold so I want to keep adjusting the the measurements of the pieces to get the right fit.
Tools
Fabrication files
-
File: Modular Vest Laser Cut File ↩