4. BioChromes
Overview:
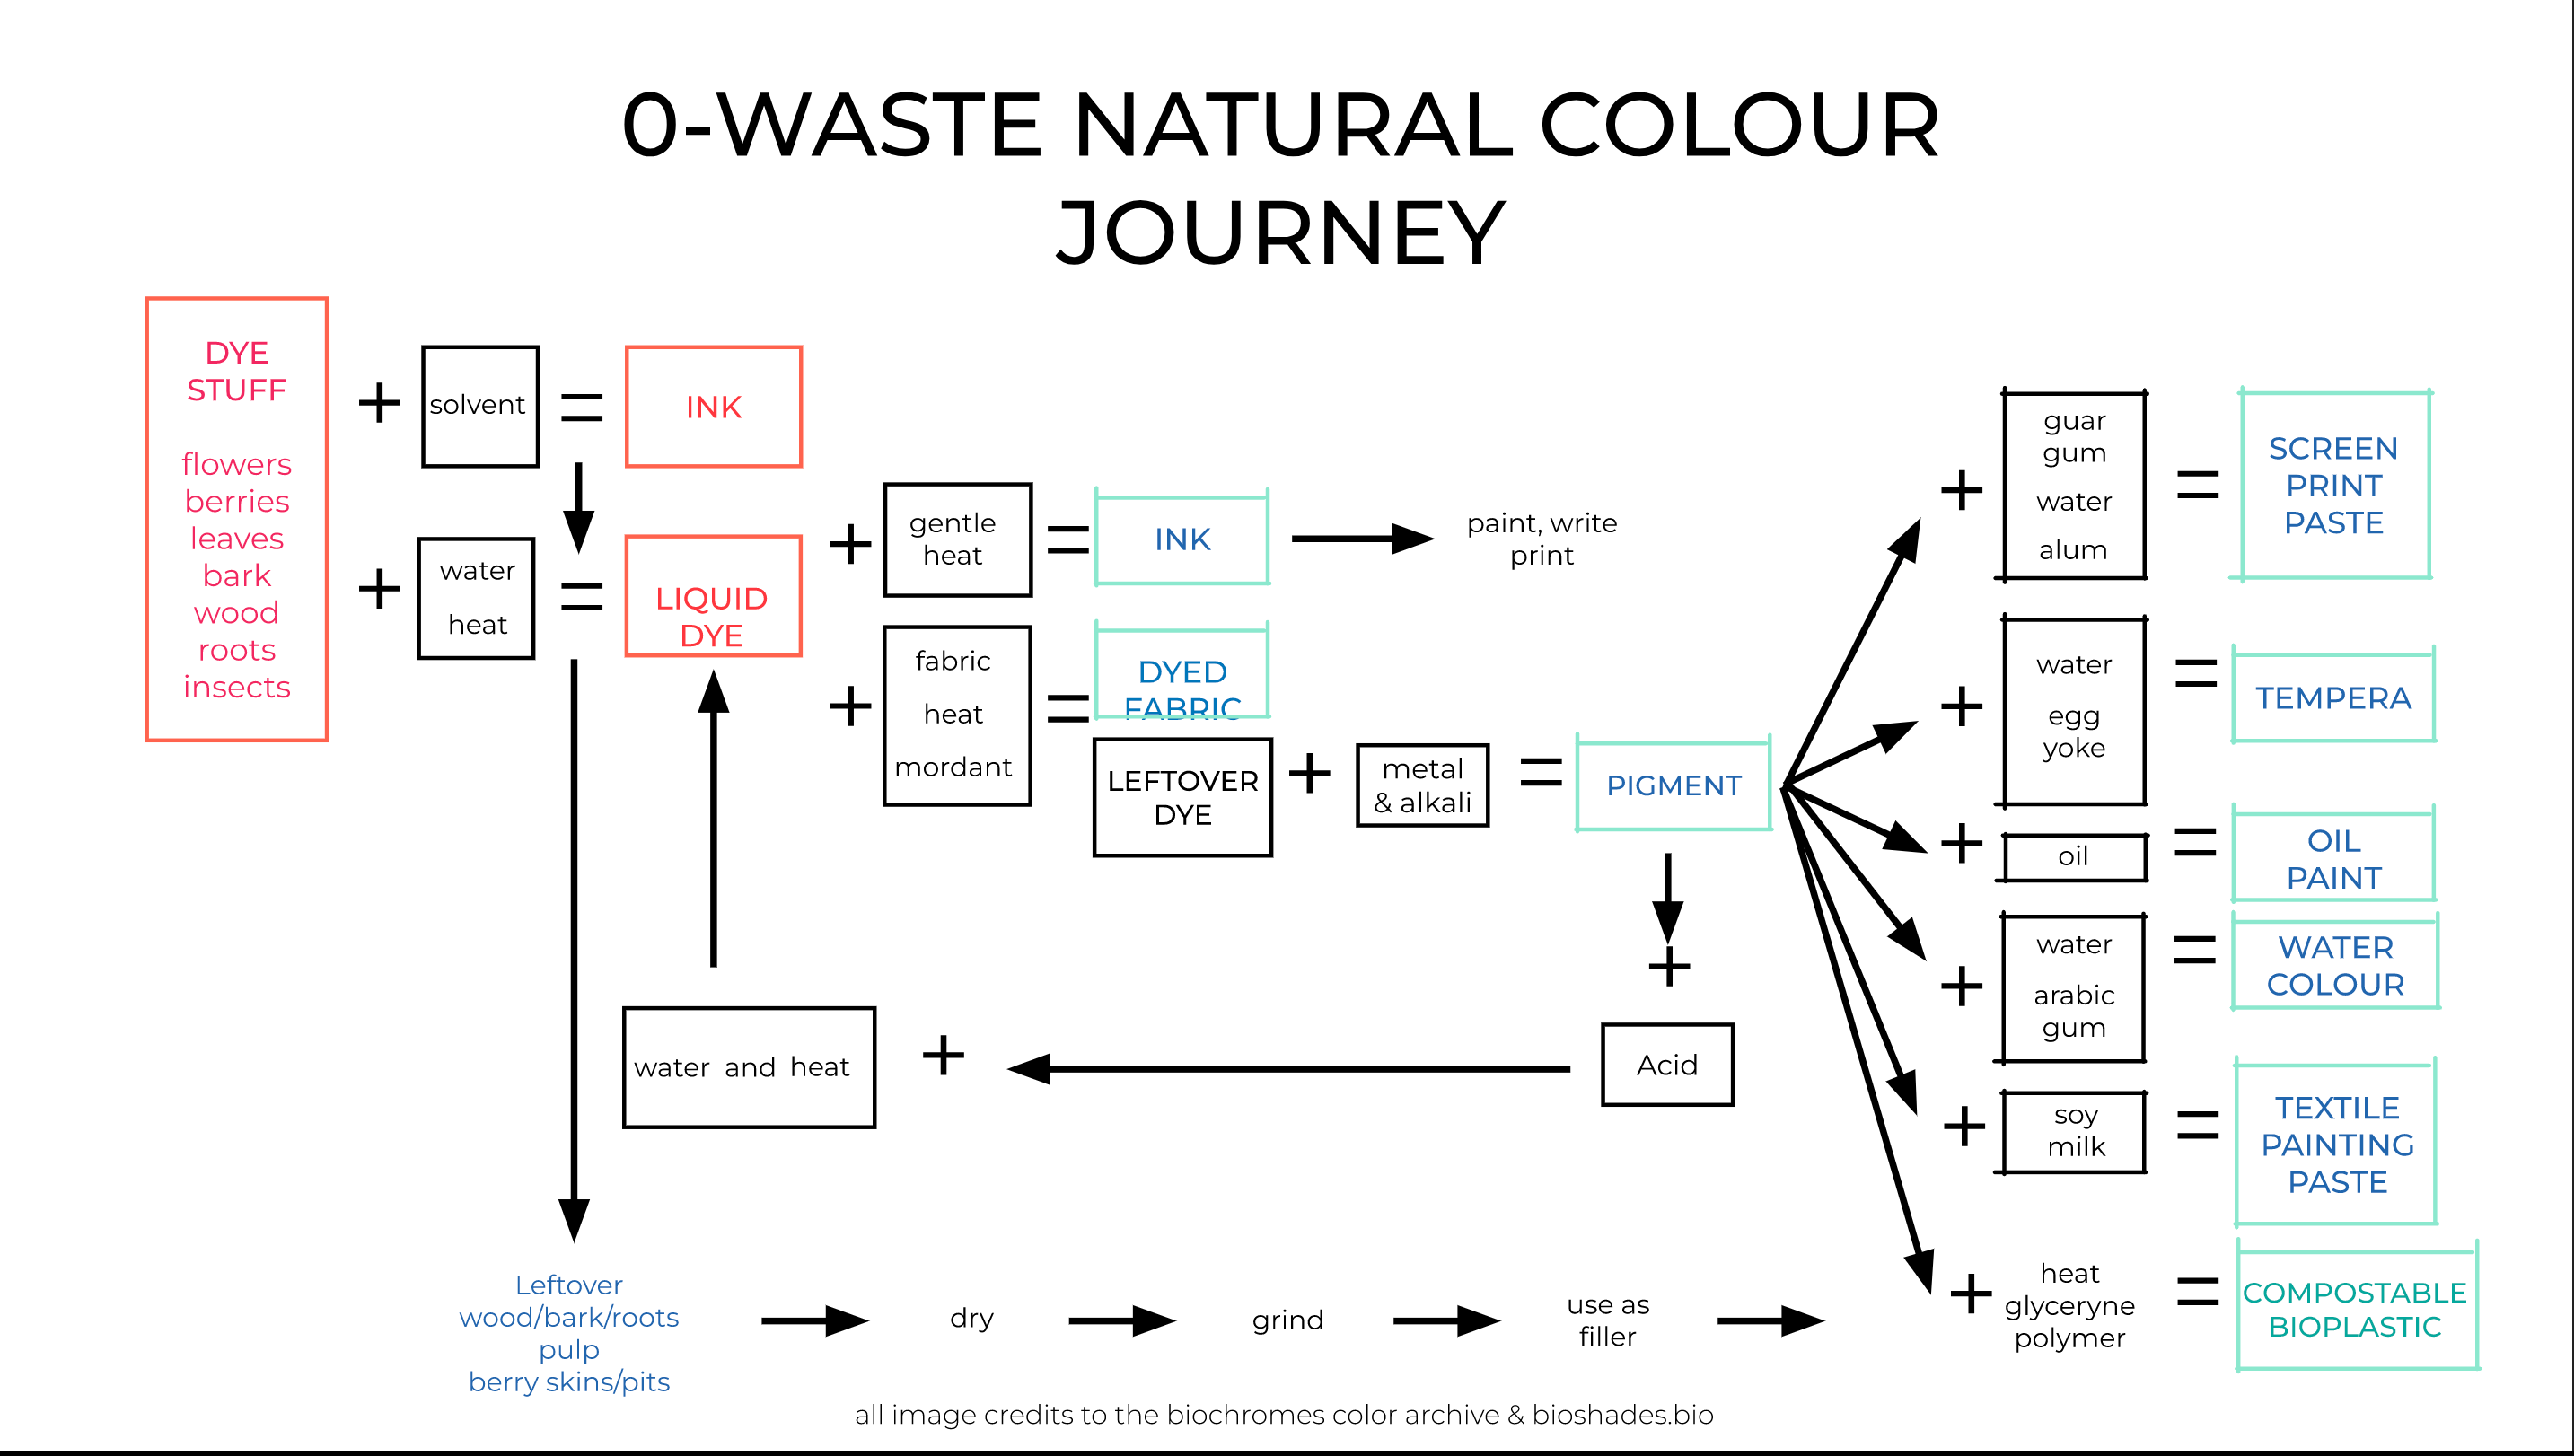
This week we were introduced to natural dyes, bacterial dying, and how to make natural inks and pigments. It was more of a collaborative process this week where we got to experiment in our white lab coats, and put together a large pantone of natural dye colors. What’s really cool is that this is a zero waste process – your dye bath can be preserved to make pigments, ink, and make bio materials.
Some key terms/things to know:
- Biochromes: any pigment produced by a living organism (bio: living + chromes: colors)
Sources of biochromes:
- Animal: insects, mollusks
- Botanical: seeds, fruits, leaves, berries, flowers, bark, wood, roots
- Bacterial
- Fungal: mushrooms
- Mineral: Oxides, clays, soils
What is the difference between dye, ink, pigment?
- Ink: dense liquid
- Dye: liquid bath
- Pigment: powder
Bacteria Dye: Some bacteria can actually produce beautiful colors when grown on fabric! There are two types of these bacteria:
- Serratia (makes a pink color)
- janthinobacterium lividum (makes purple/blue color)
Research and Inspiration
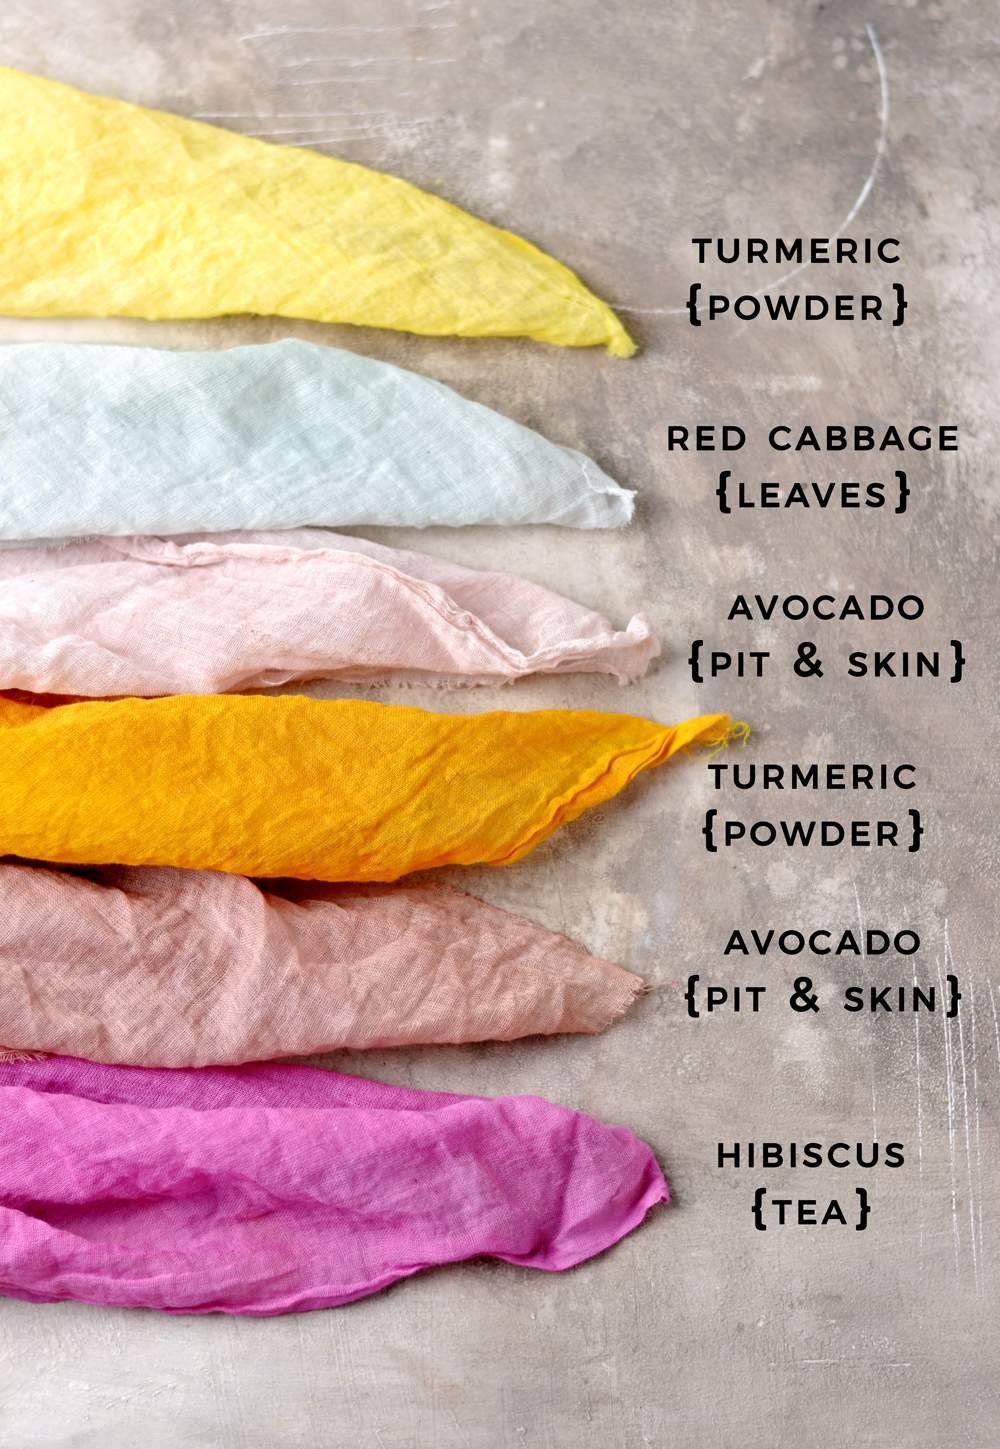
This summer I explored natural dyeing for the first time and used blogs like this one from Dreams Factory to see what plants and food waste produced certain colors. I fell in love with the color that hibiscus tea made but decided to ultimately go with tumeric and marigold becuause I had those at home. But I did not follow the instructions completely and didn't mordant properly (I maybe didn't mordant at all) and so my dye came out a dull mustard yellow/brown.
Natural Dyeing
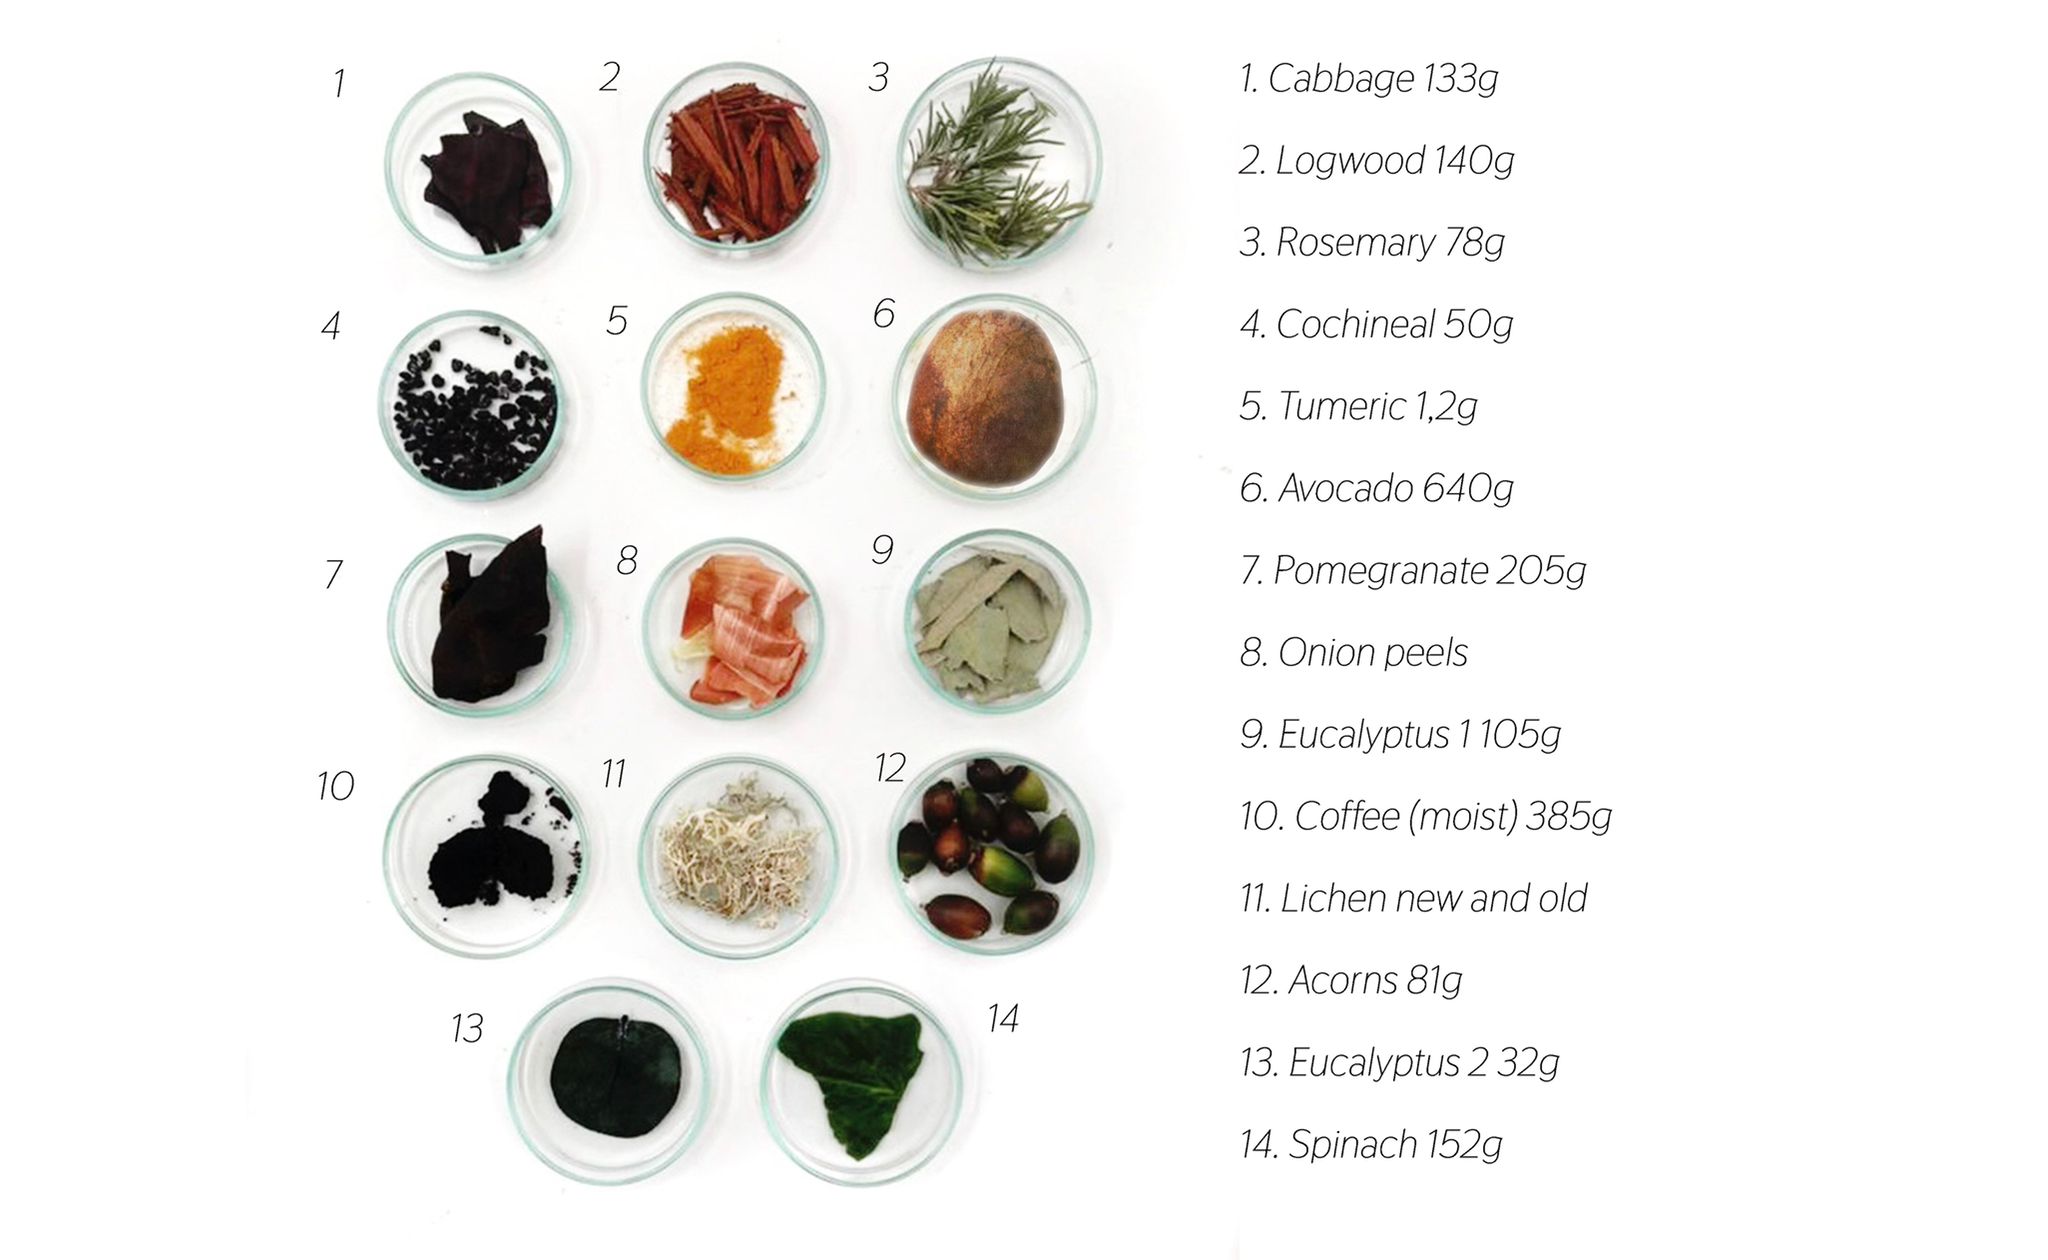
This week we dyed silk, cotton, viscose, wool, and yarn. Our dye stuff (the materials used to make the dye colors) included: log wood, red cabbage, two types of eucalyptus (long leaves and round leaves), spinach, rosemary, two different lichen (fresh and old), turmeric, pomegranate, onion skins, cochineal, avocado, acorns and coffee.
Before I get into the step-by-step process, here are some materials you will need:
- Scale
- Dye Stuff (the plants/insects/or minerals you will use to dye)
- Mordants: Alum and Iron
- Fabrics to dye. Separate plant-based fabrics (cotton, linen, viscose) from animal fabrics (silk, wool).
- Pots, pans, bowls, spoons
- Access to clean water
- Small measuring cups/containers
Dyeing Key Terms:
- Dye Stuff: the materials you will use to dye
- Mordanting: treating fabric/fibers with an in-organic oxide that helps the color bind to the fabric.
- Scouring: A pre-treatment process for plant-based fabrics/fibers using an oxide that helps remove waxes and dirts from materials.
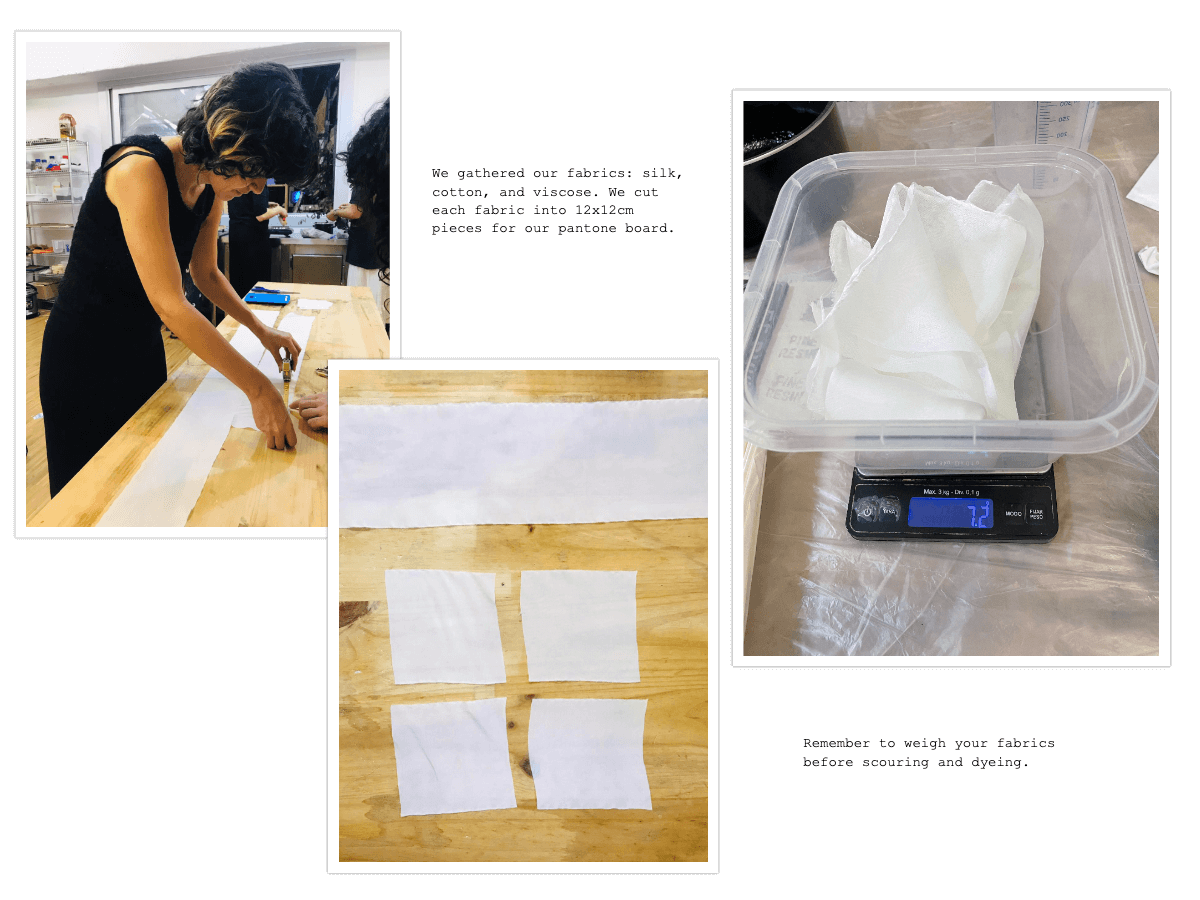
Step 1: Weigh your fabric and fibers
Using the scale, weigh your fabrics. This is a very important step because it will dictate how much mordant/scouring materials you will use. Remember to ‘tear’ if you place your fabrics in a container to weigh.
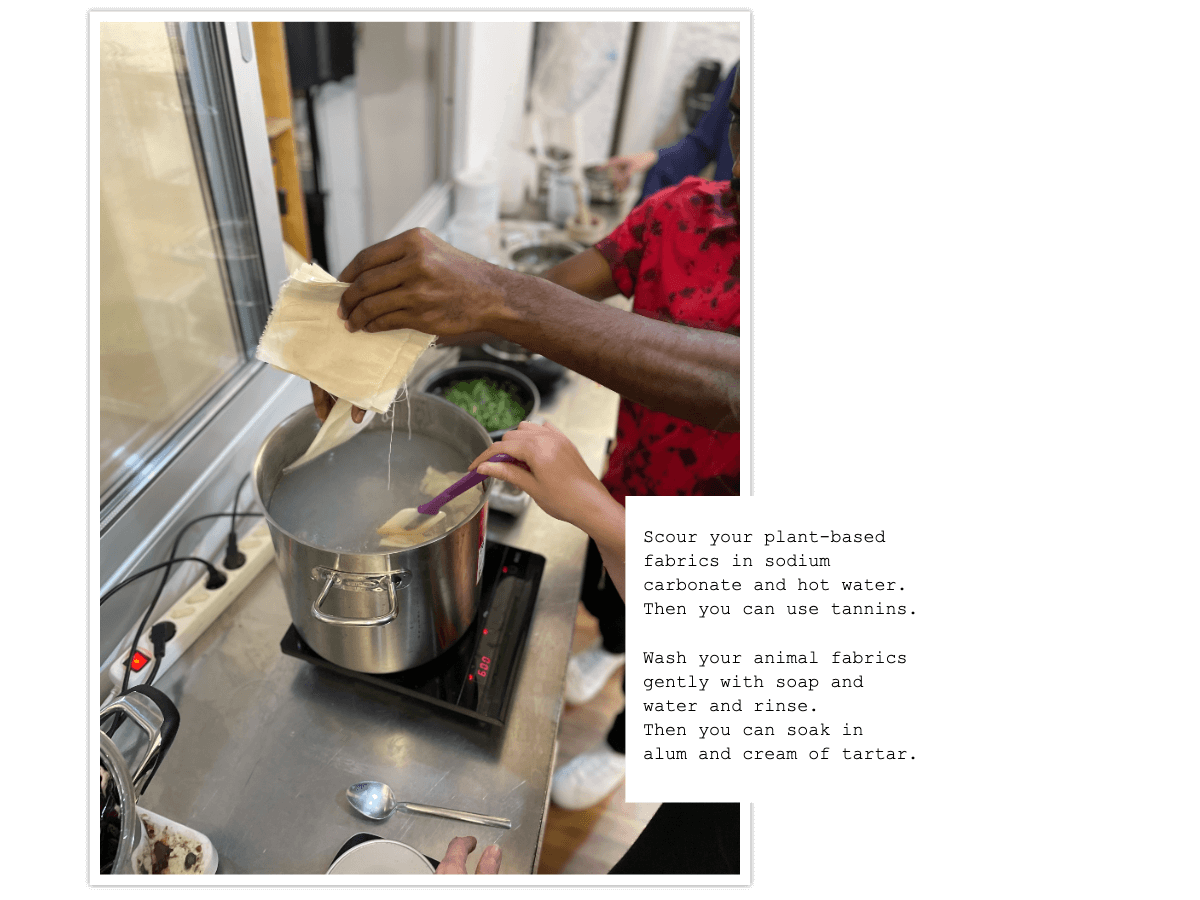
Step 2: Wash and scour your fabric and fibers.
Plant-based fabrics (cotton, viscose, linen) are scoured (hot water + sodium carbonate) for at least 1 hour. Fabrics from animals (silk, wool) are lightly washed by hand with mild soap, rinsed and then can soak in lukewarm water with alum and cream of tartar (pre-mordanting). During our dye process, we only pre-mordanted a few of our fabrics and found that the premordanted fabrics produced a brighter color (more on that later). It's good practice to use different pots and pans from what you normally use for cooking because the mordanting oxides you will use.
Step 3: Prepare dye baths.
Gather dye stuff and soak them individually in a pot full of water on low heat for up to 3 hours. Depending on the material, you may not have to soak that long so read up on what materials you are using and how to prepare them. If you have more than two pots going at a time, label them so you remember what is what.
Step 4: Remove Fabrics from scouring agent.
After the scouring and washing of fabrics is finished, remove fabrics from the pot and set aside. In our case we dyed silk, cotton, and viscose and some wool so we paired them together in sets of threes and set aside until we were ready to dye.
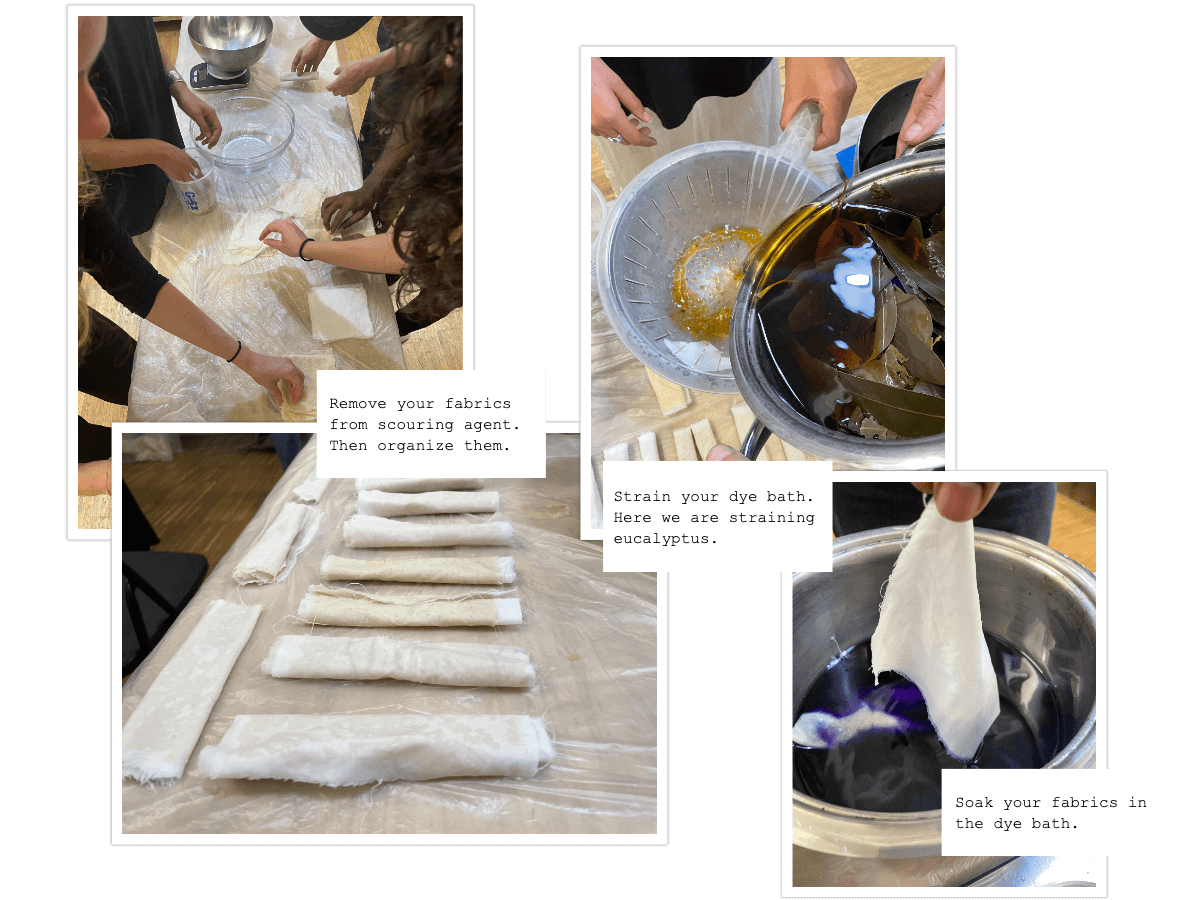
Step 5: Strain and add the mordant.
Once dye stuff has soaked on low heat for sufficient amount of time pour through a strainer or sieve into a large bowl or pot. Now you will add mordant to your dye baths. In our case we experimented with two types of mordant, Iron and Alum, so we split our dye bath into two pots and if there was left over we saved that pure dye for later use when we made inks and pigments. In general, Alum brightens the original color of the dye and Iron acts as a modifier, making the fabric darker/sadder. You know how much mordant to use based on the weight of your fabric, so look up the specifics of how much to use based on your fabric weight. * Note you can also mordant your fabrics before adding them to the dye bath, during the scouring process.
Step 6: Add your fabric to the dye bath and cook on low.
For each dyeing material, we had two baths: one for alum and one for iron. Then we added two sets of our three fabrics to each bath, one set to remove after 30 mins of soaking, and one set to remove after 1 hour of soaking. For most, there was very little difference between the 30 min and 1 hour soaks. For some materials like cochineal and tumeric didn't have to soak for very long to get a great color, while other materials like spinach need to soak and cook for longer. Remember to label your dye baths by what the material is + the mordant you used so you don’t forget which is which. Stir dye bath occasionally while they are cooking so that the dye seeps into the material evenly.
Step 7: Remove your fabric and rinse.
Once the fabric has soaked for the time you allotted, remove the fabrics and place in some kind of container to take to the sink and rinse. Remember to separate the alum and iron (or whatever mordant you use) from each other when removing and rinsing.
Step 8: Lay your fabric to air dry on a clothing rack or clothes line.
Make sure you place them so you’ll remember what dye bath was used, so arrange them and label them as you go.
Step 9: Save your dye bath for later use.
Put your dyes in glass containers and label them according to the dye material and the mordant used. You can use them to dye again to make pigment out of them.
Step 11: Enjoy your creations and keep them for your records.
Once the fabrics have been dried and labeled, you can organize them into a pantone palate or book for your records and for later use.
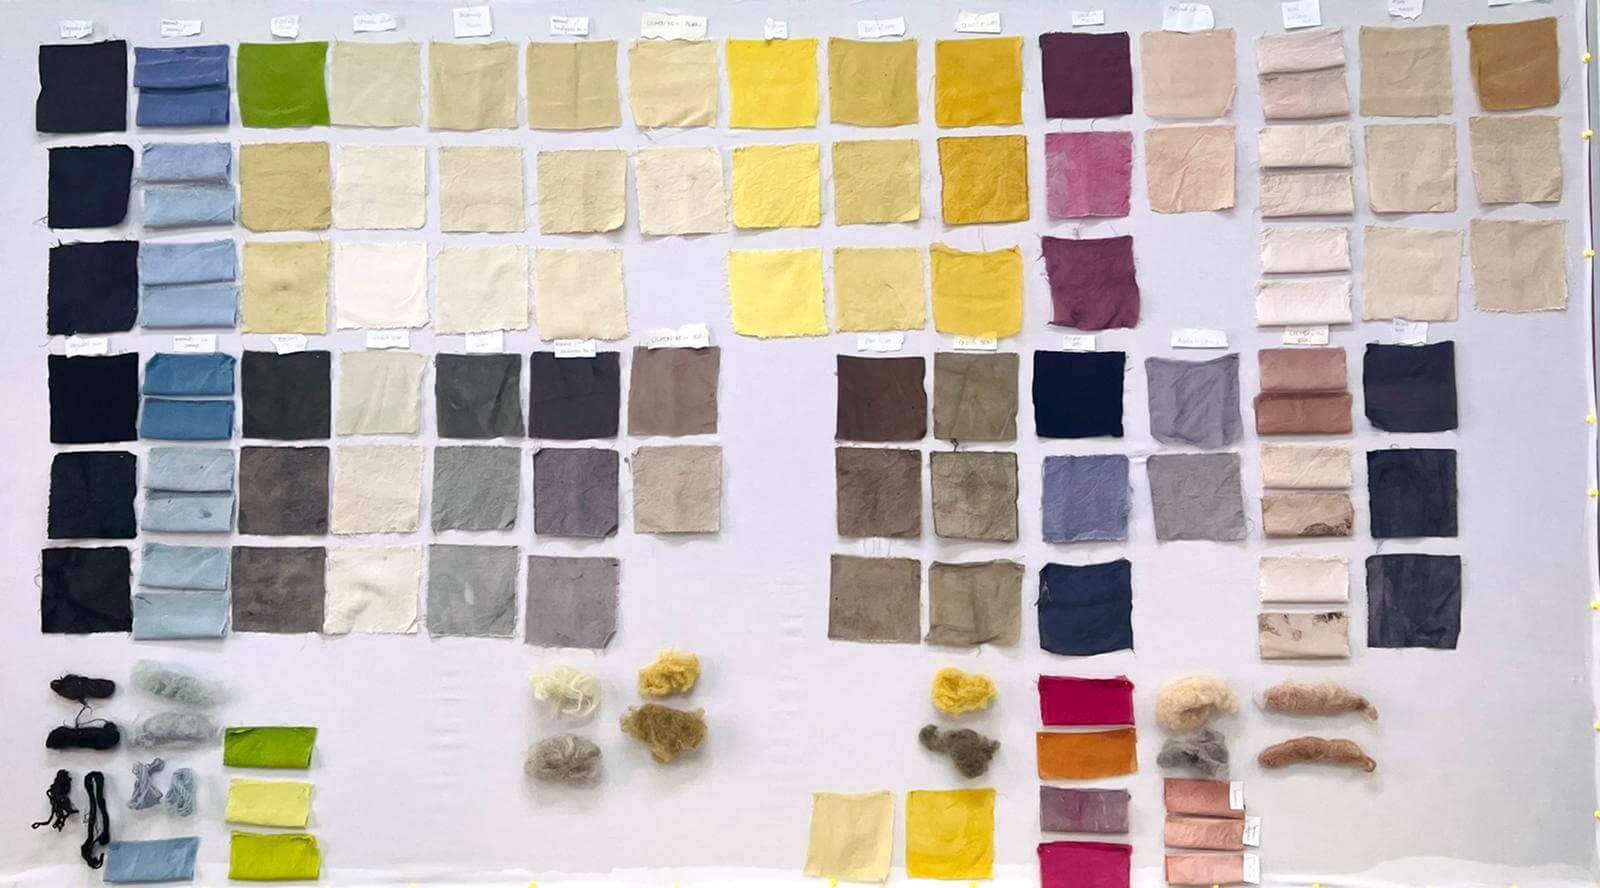
Results and Reflection:
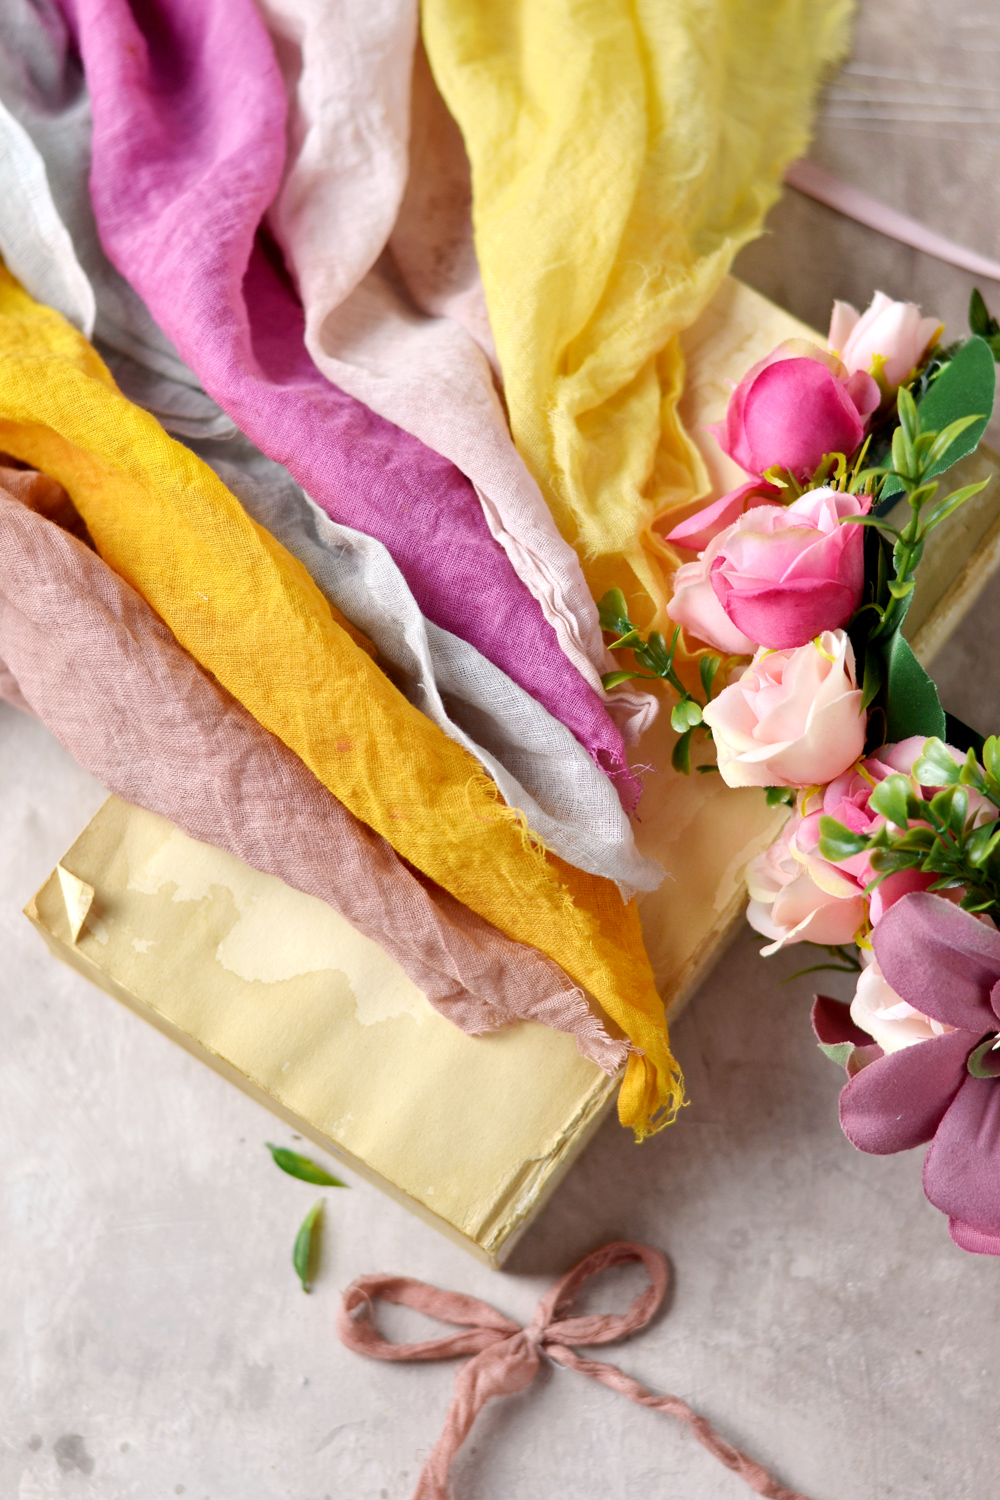
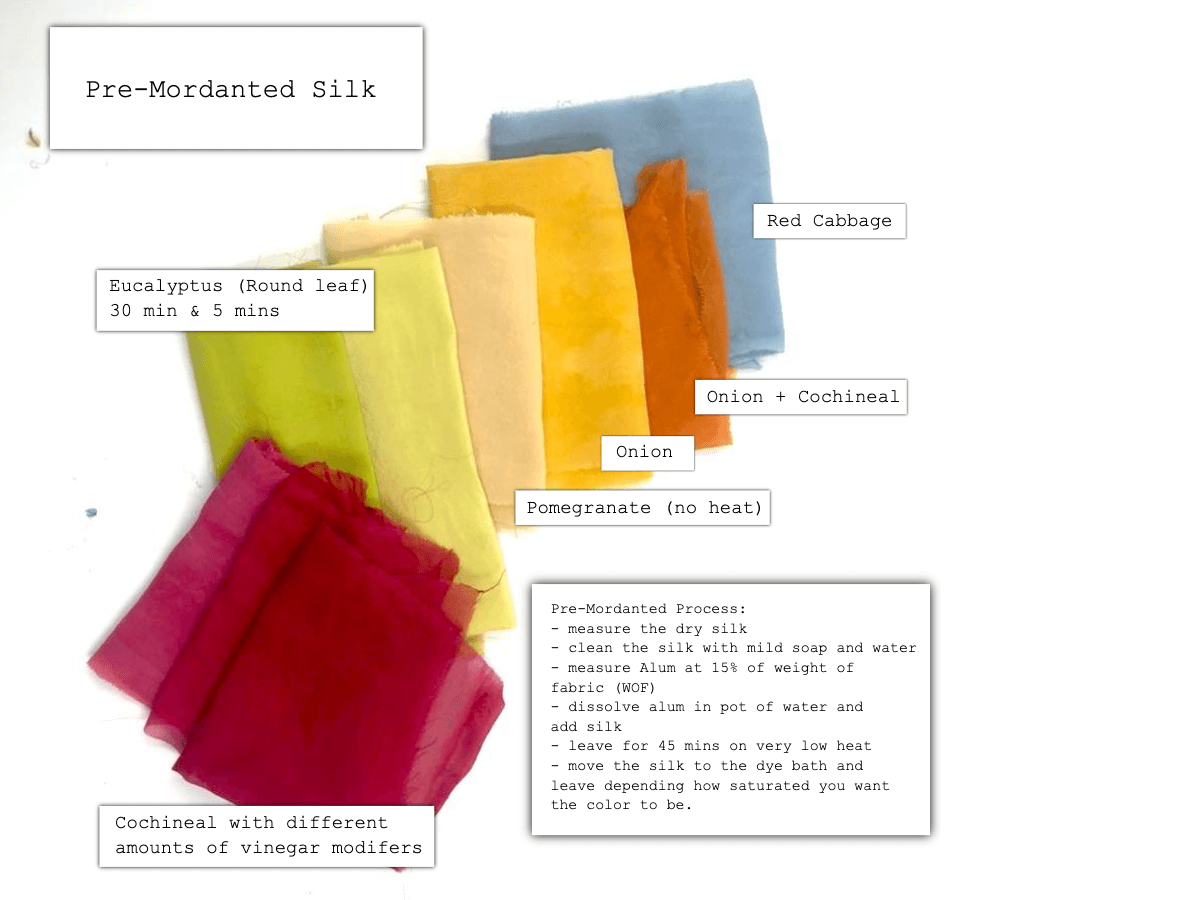
There was a lot to keep track of in this process when you are dying mulitple colors at the same time so it's super important to label everything! Silk takes the color best so I have so many ideas for silk garment ideas with natural dyes. We also noticed that pre-mordanting resulted in brighter colors. Here are the pre-mordanted dyes we created on silk.
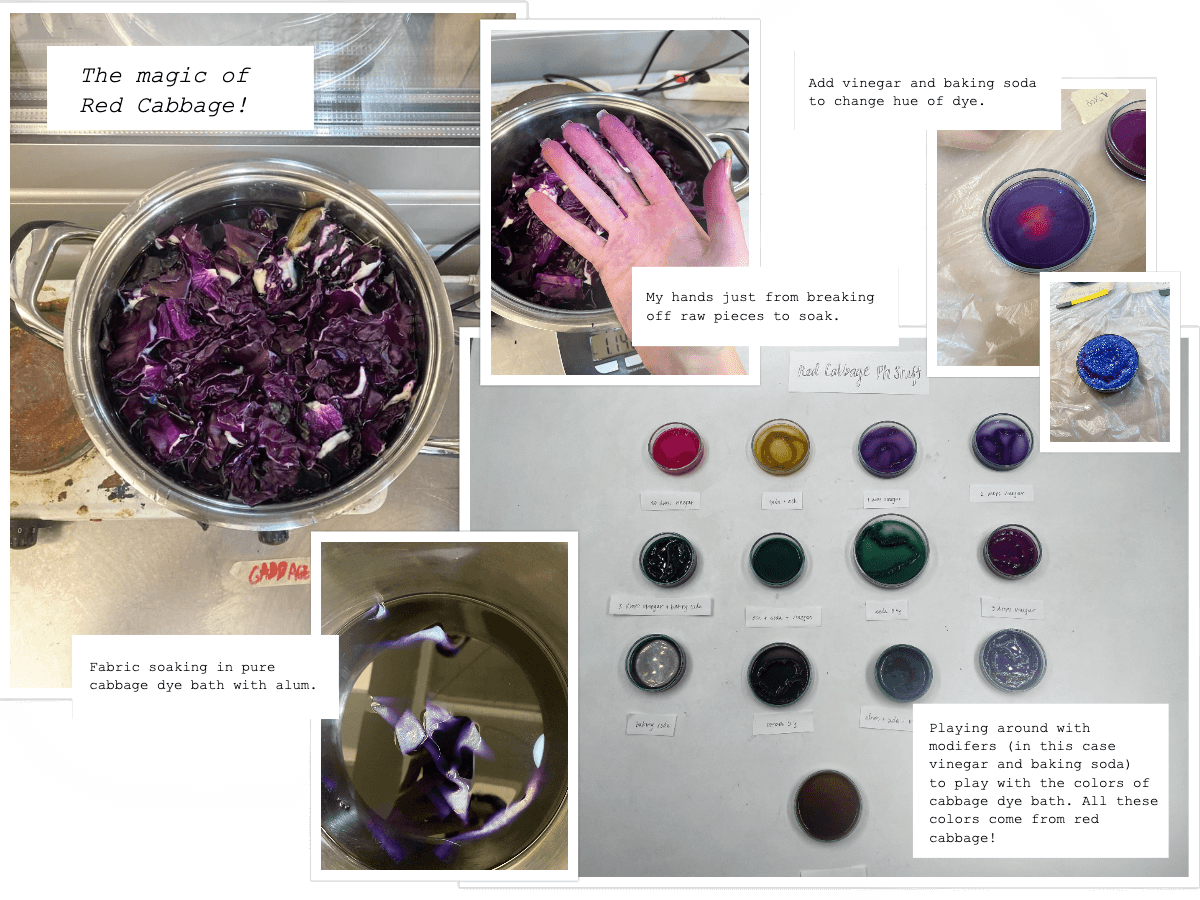
Some thoughts on Red Cabbage
This week I chose to focus on dying with red cabbage. The cool thing about red cabbage is that it can produce almost every color, from a light baby blue all the way to bright pinks, yellows, greens, and reds depending on the modifiers you use. We experimented with vinegar and baking soda. Vinegar makes the dye bath more acidic, in this case making the blue and purple of the natural dye bath pink and red depending on how much vinegar used. Baking soda makes the dye more basic resulting in darker hues of blue, green, and even black. We dyed small pieces of wool yarn in these modified dye baths but we didn't mordant any of the dye so the color didn't come out super bright on the yarn. It would be interesting to just focus on red cabbage and do all the mordanting and pre-mordanting neccessary to acheive a great color that will last.
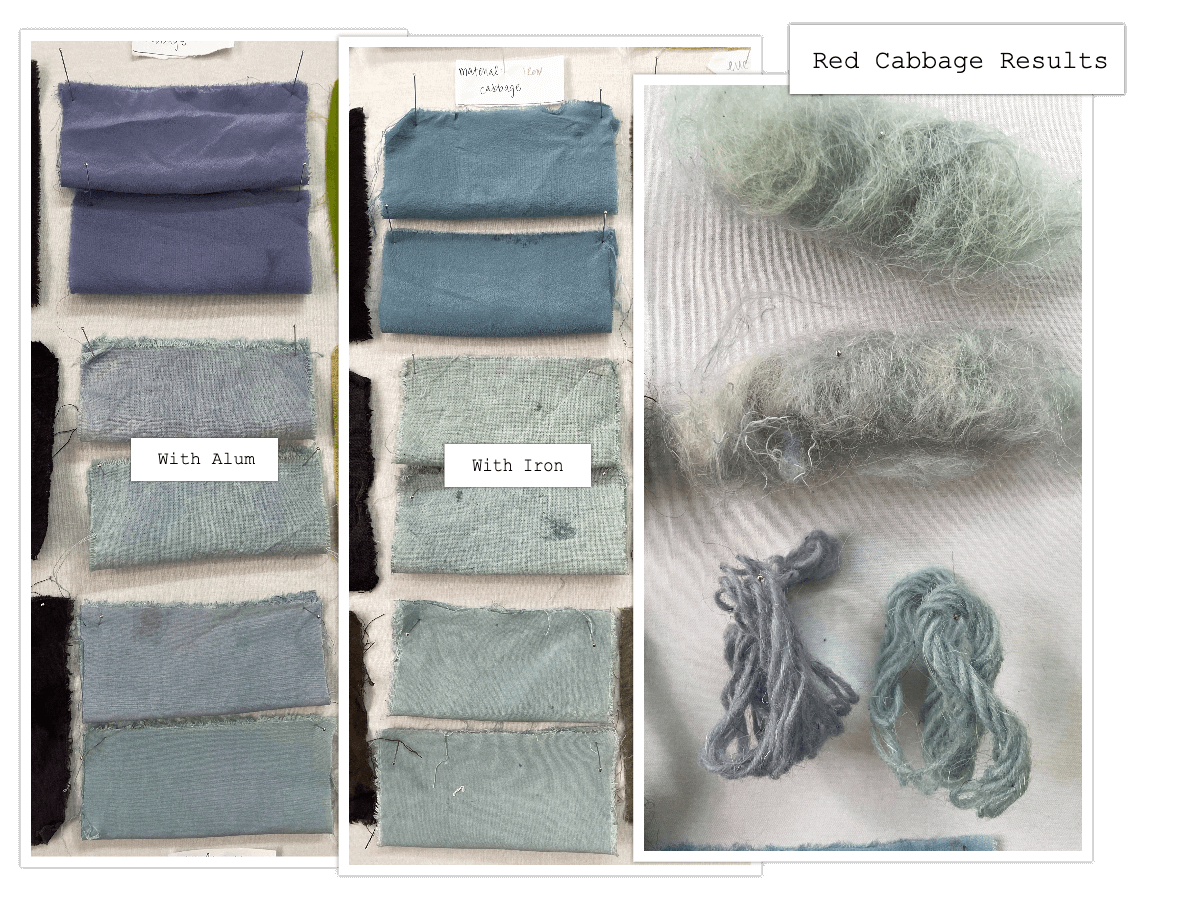 Here are the results of red cabbage on silk, cotton, viscose, wool, and yarn with both an alum and iron mordant, split between 30 and 60 mins of soaking. The alum brightened the color and we got more purple hues. The iron saddened the color and we got pretty blues.
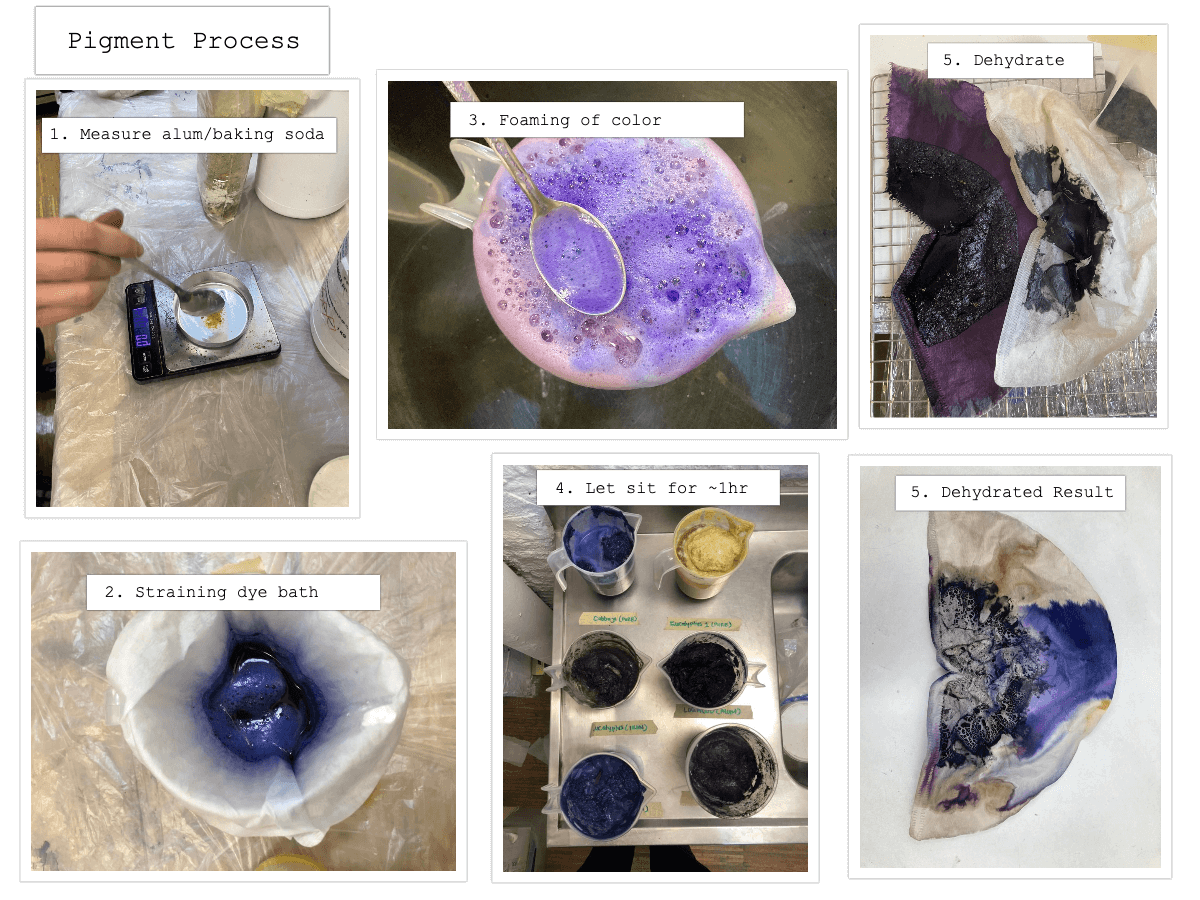
Natural Pigment
What’s so cool about this process is that you can use the leftovers from your dye baths to make pigments and inks.
Materials:
- Clear Containers
- Coffee filters
- Natural Dye baths
- Baking Soda
- Alum
- Spoons
- Hot Water
1. Let the dye batch cool down 2. Pour the dye batch into a container so o that it filled to 50-70%, the liquid will need some roam to foam during the process. 3 Dissolve the alum in hot water and soda carbonate into the dye batch. Stir until both are dissolved. 4 Pour hot water + alum mixture into dyebath with soda. There will be a chemical reaction, foaming and frothing of liquid. Pat the foam down gently with a spoon. 5 Label it what base dye bath you used and set aside until the foam subsides. 6 Put coffee filter into another container that is tall enough for there to be a space between filter and bottom of container. 7 Slowly pour the color mixture you made (dyebath + alum + soda + water) into the new container through the coffee filter. Let it filter. Then pour more. Repeat this process until their is a good amount of residue in the filter. 8 Carefully remove coffee filter. Lay it in on a dehydrator tray and open the filter abit. Let it cook/dry in the dehydrator for 24 hours. 9 Scrape the pigments off the filter and grind them in a mortar.
Receipe:
≈ 350 ml dye bath 50ml hot water 6 gram sodium carbonate 18 gram Alum

Ink
From pigments and the dye bath you can also make natural ink to paint and draw with! I didn't have time to experiment and conduct the ink making process so I've linked to my colleage Alve's documentation where you can see the process and the results.
Dying with Bacteria
You can make beautiful designs on fabric when dying with bacteria that produces color.
Materials needed:
- Petri dishes
- Bacteria: janthinobacterium lividum
- Pressure cooker
- ethanol for sanitization
- Fabric: silk works best.
- Lubria Broth (food for bateria)
- Camping gas and lighter
- Inoculation Loop
- Autoclave bag
- Distilled Water
- Lab coats, latex gloves, masks.
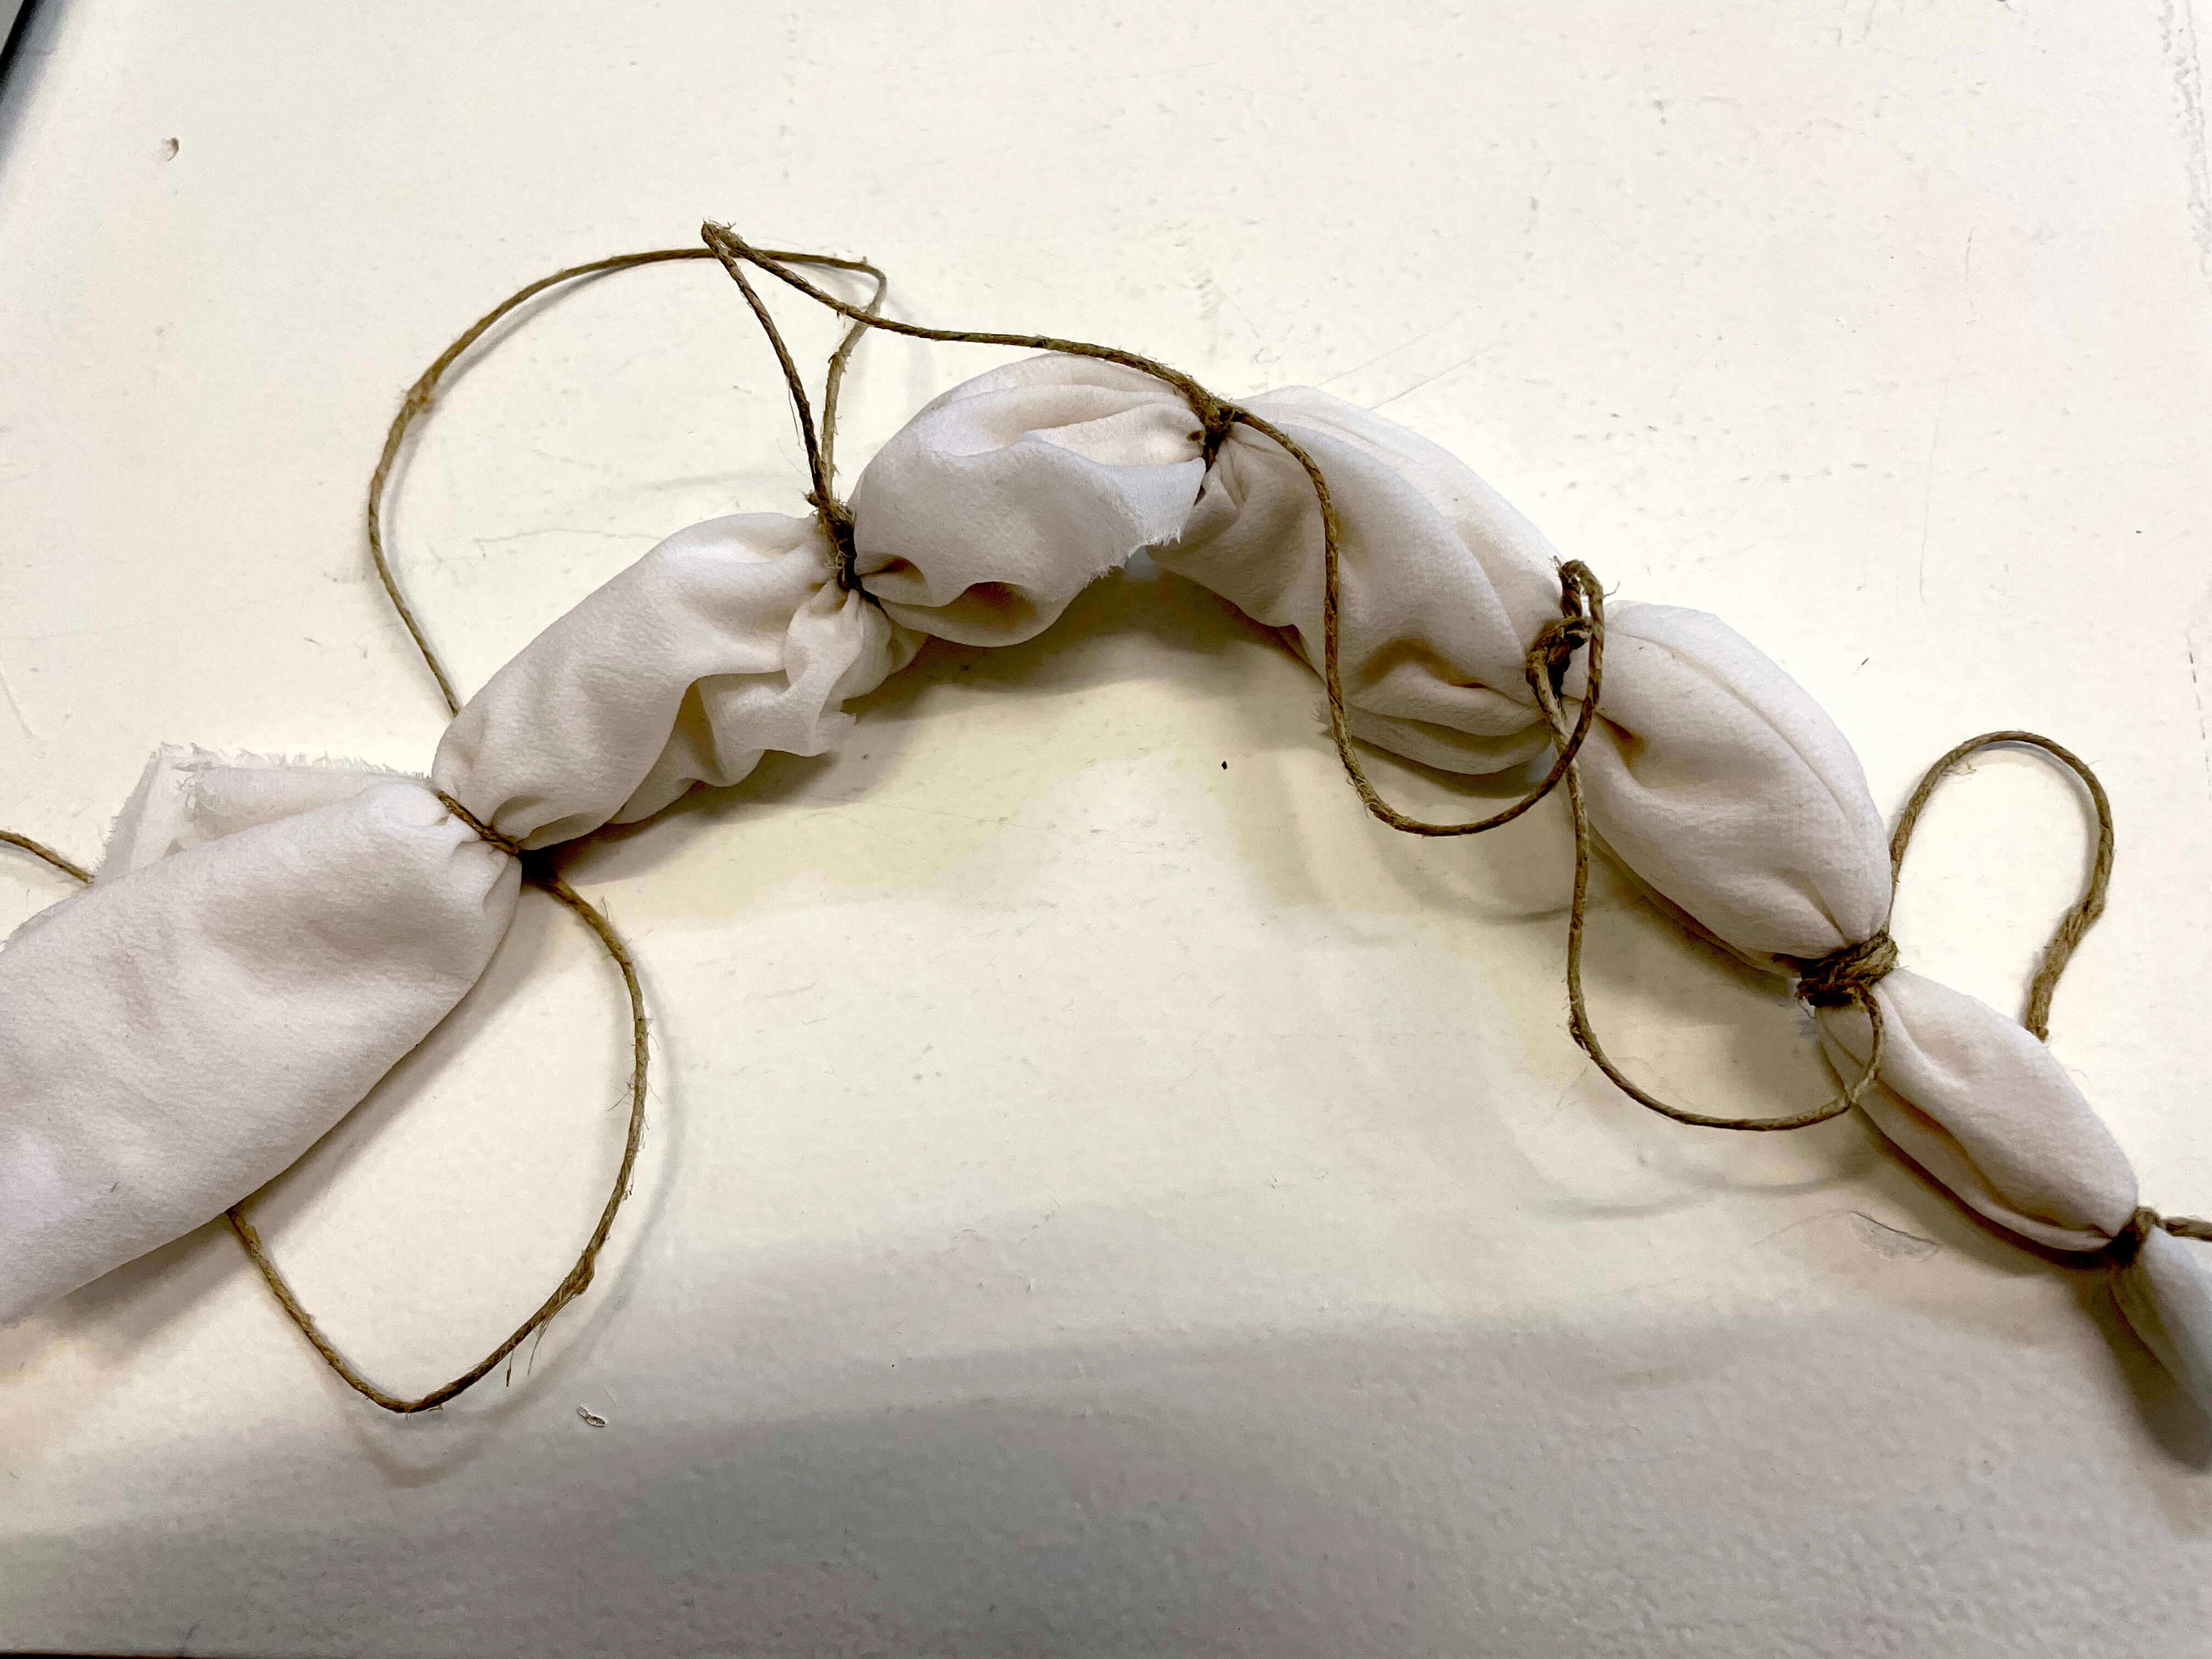
Step 1: Prepare your fabric.
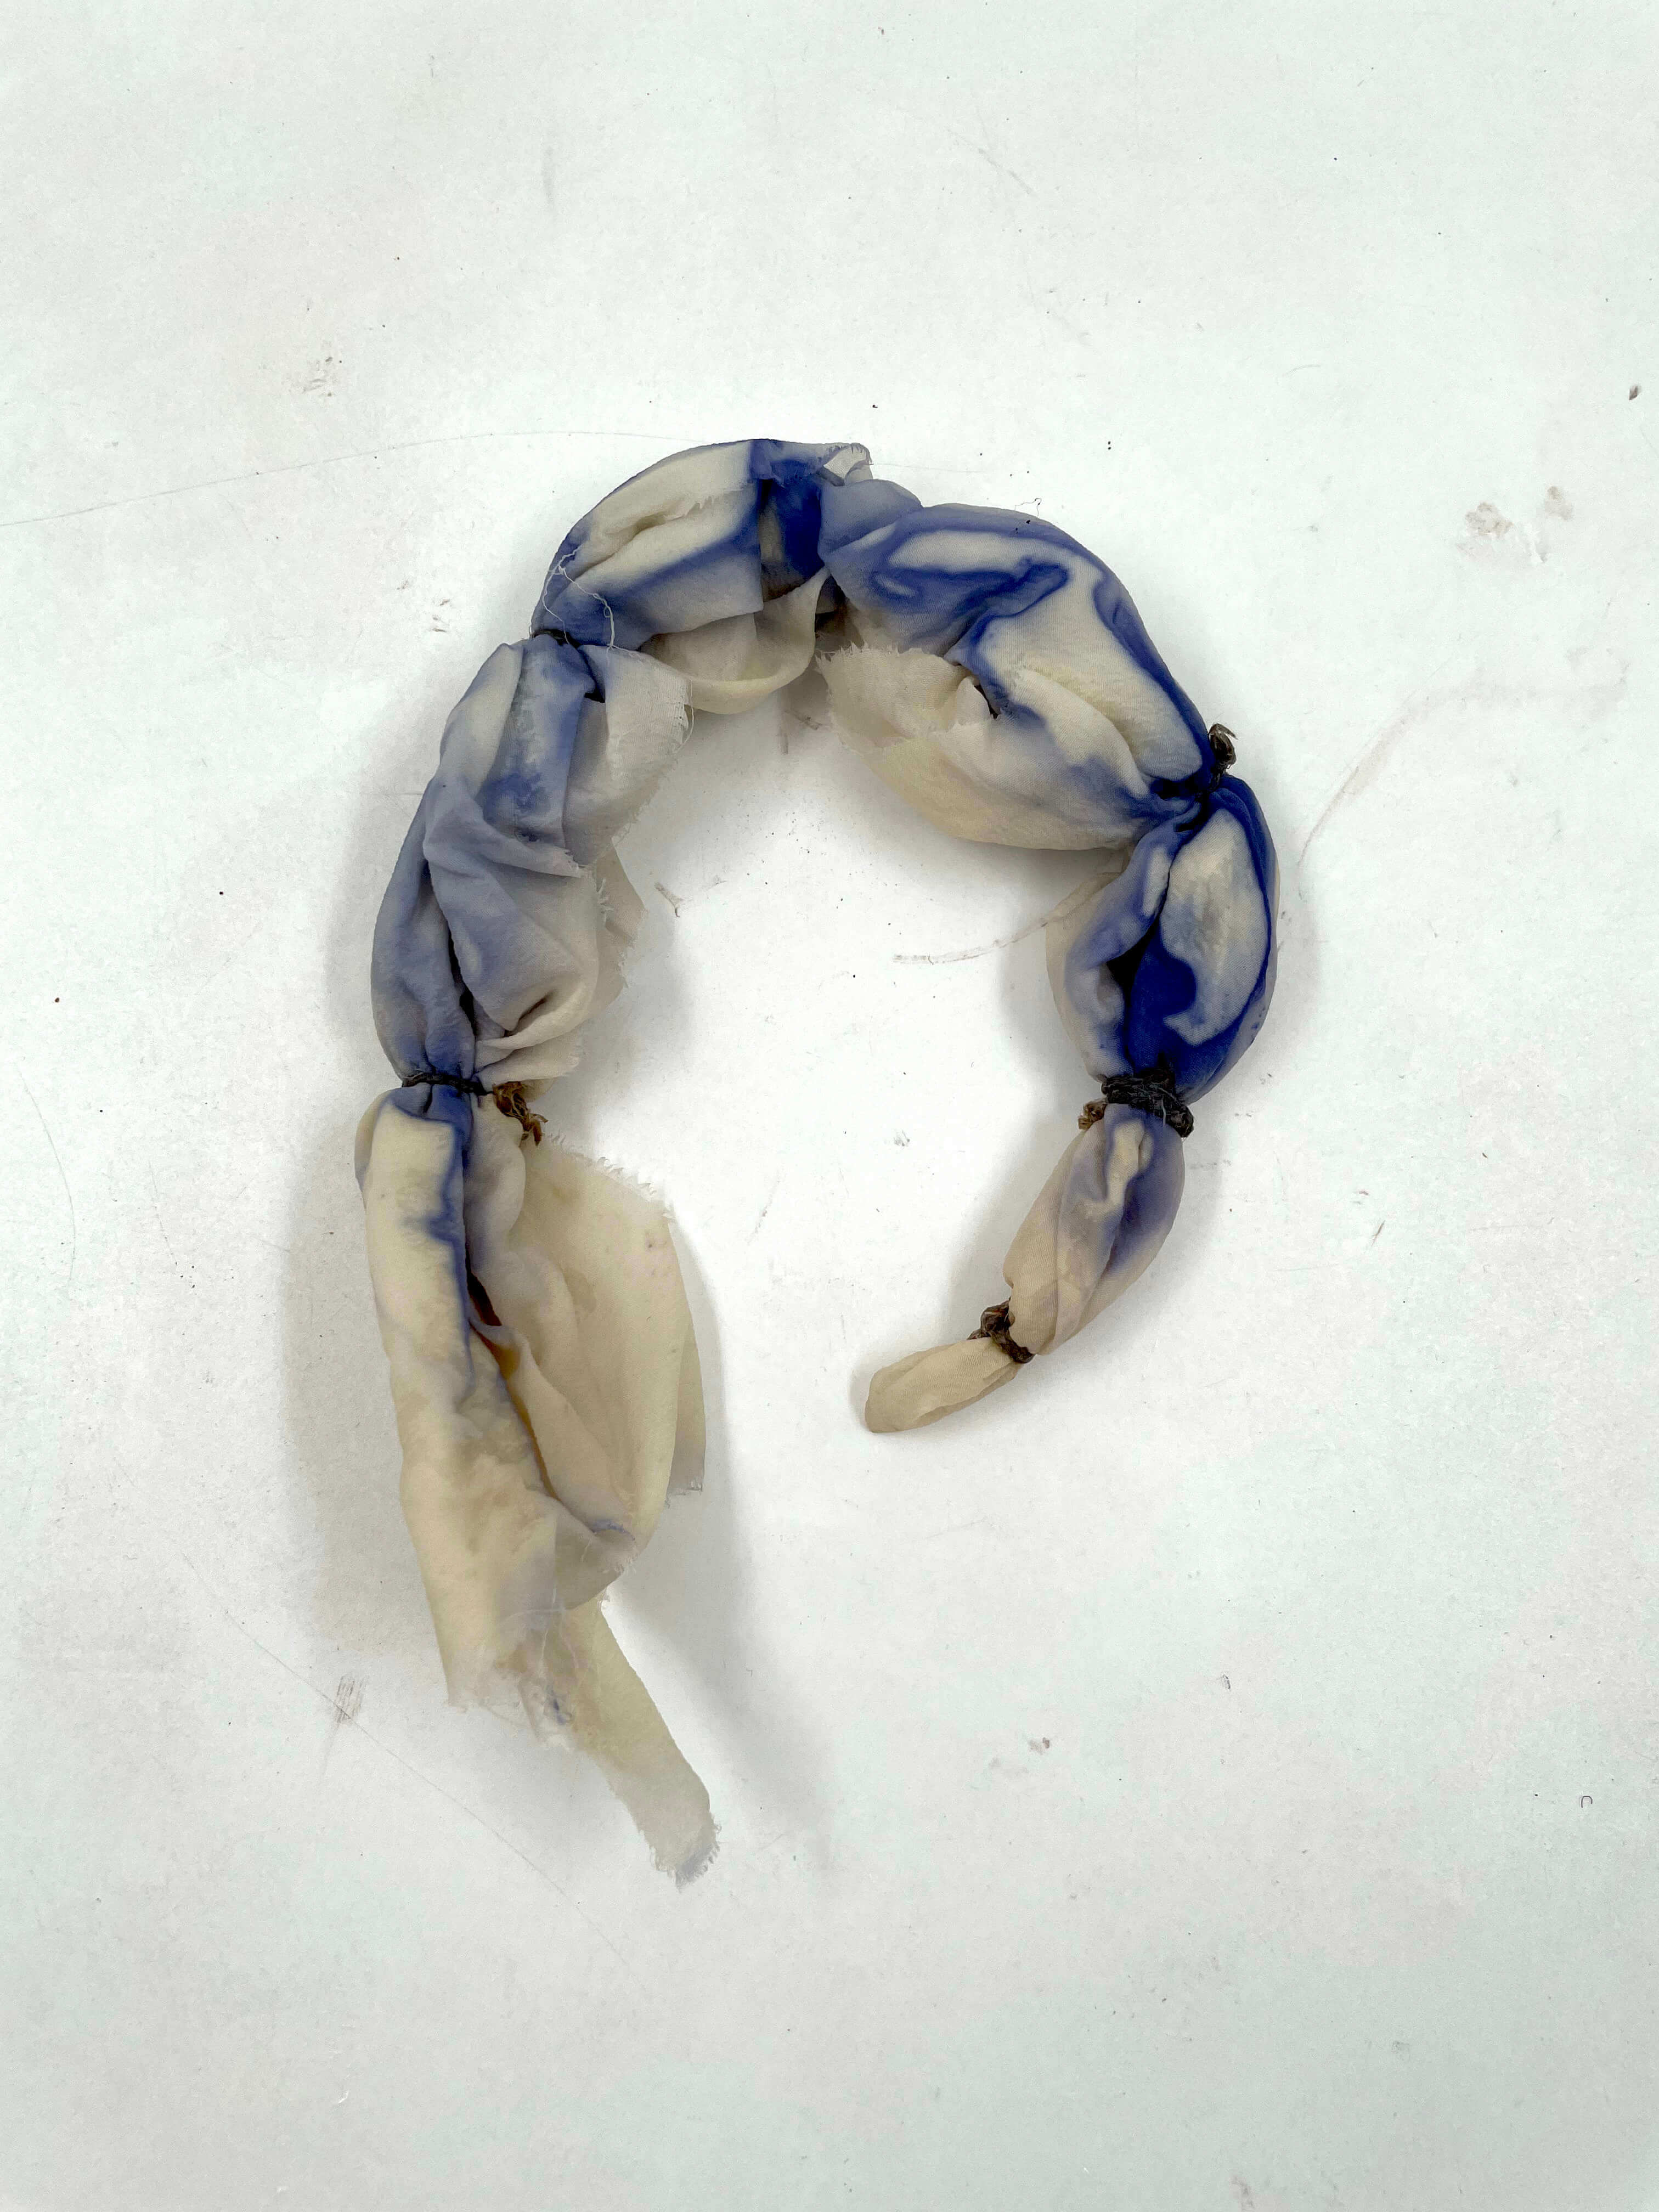
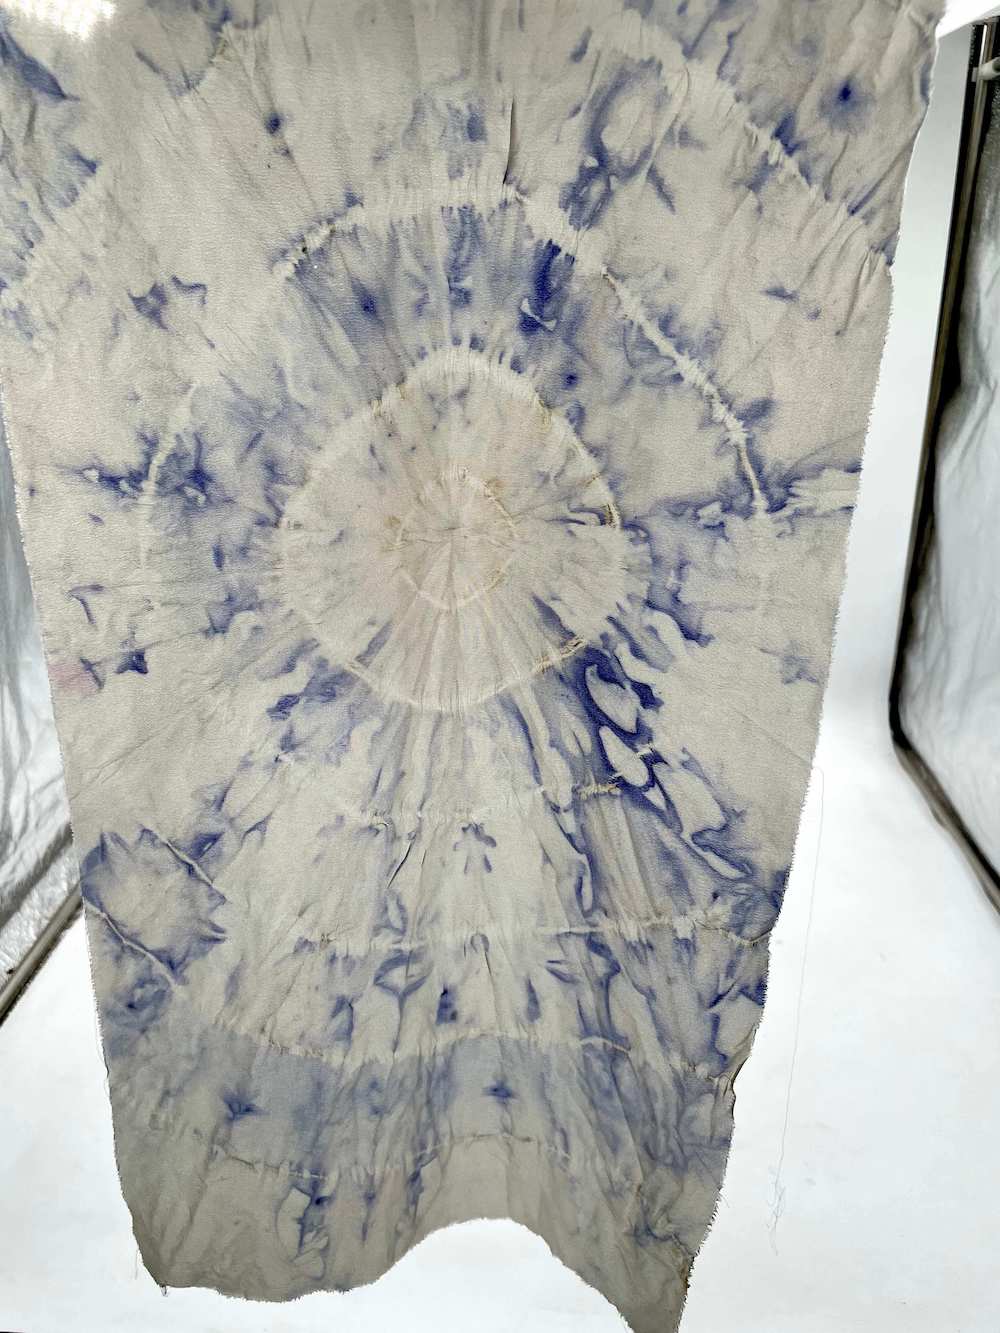
Choose the fabric that you’d like to dye with bacteria and fold it into an interesting pattern. You can use thread to sew it and hold the shape you want. Make sure it fits into the petri dishes you have without too much of it touching the top of the petri dish when closed so there is space for bacteria to grow. Silk works best when dying with bacteria.
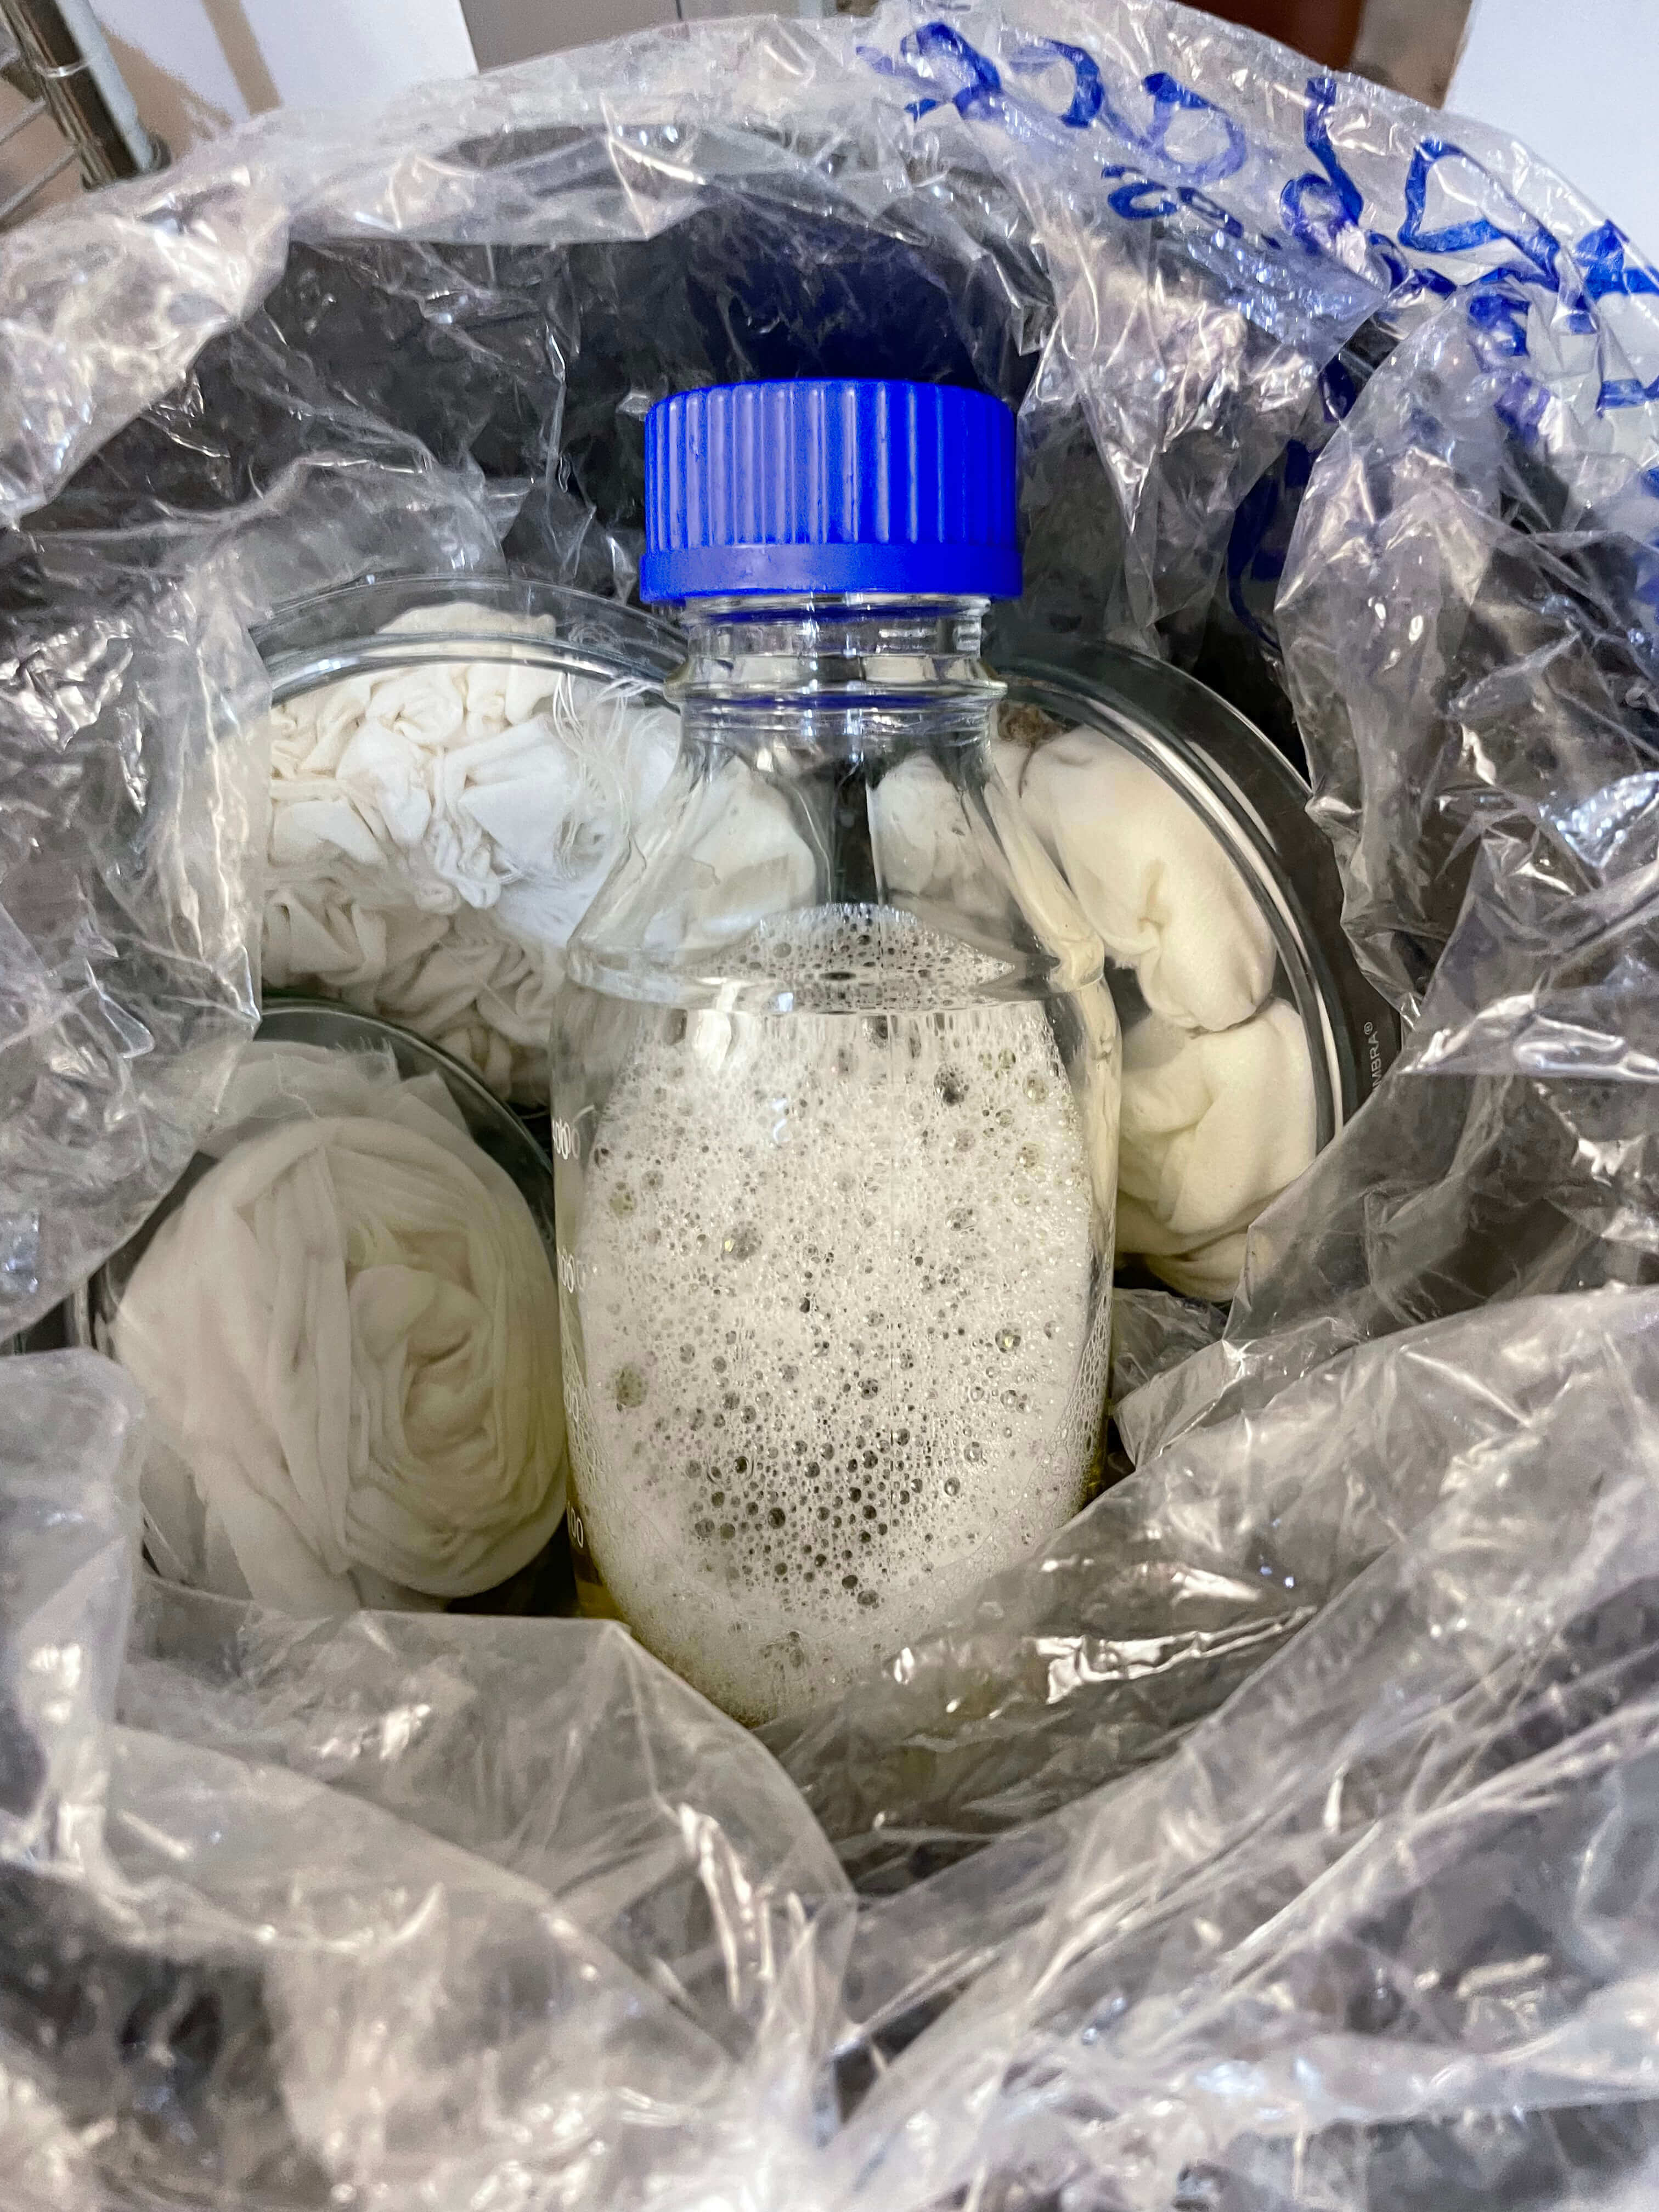
Step 2: Sterilize your fabric and Lubria Broth.
In a pressure cooker add a small amount of water to the bottom. Get your Autoclave bag and open it and put it in the pressure cooker. Put your fabric inside your petri dishes and place them in the bag inside. Your Lubria Broth should be in a glass container small enough to fit in the pressure cooker – place it inside the pressure cooker with your petri dishes. Grab the opening of the bag and twist it shut. Place the top of the pressure cooker on top, close it, and set it to pressure cook for 30 mins. We used the settings for meat/carne on our pressure cooker.
Step 3: Put on your lab coats, gloves, and face masks.
Step 4: Wipe down the surface you will use with ethanol.
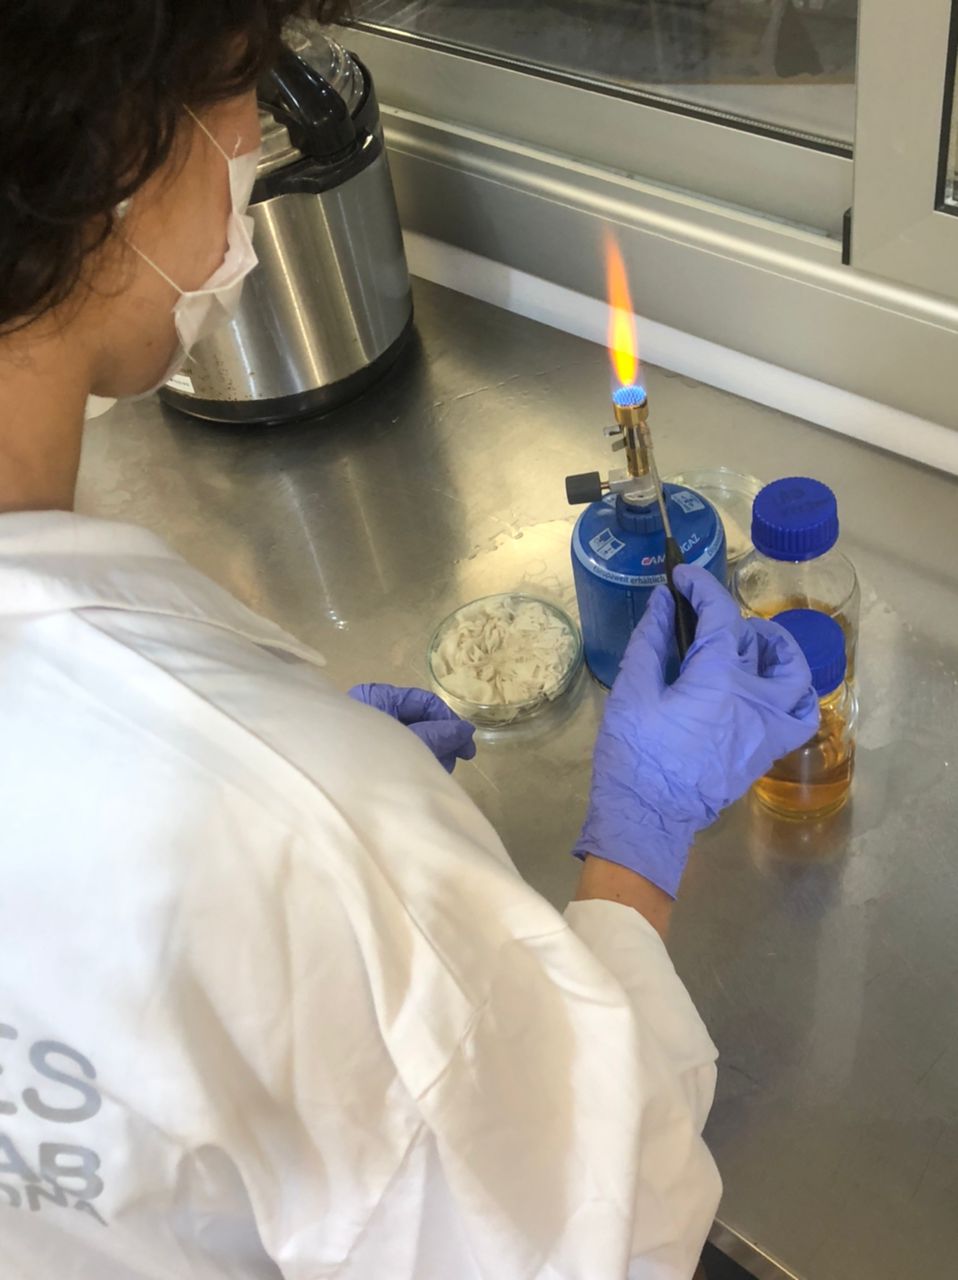
Step 5: Create your sanitization mushroom.
Place your camping gas on your surface and create a circle of ethanol around it. Light your camping gas with the lighter. This will create a mushroom barrier so that anything done within the circle remains sanitized.
Step 6: Remove your petri dishes from the pressure cooker.
When the pressure cooking time has elapsed remove your petri dishes and lubria broth and place in the sanitation barrier you created.
Step 7: Sanitize your bottle and pour.
Open your substance for pouring and hold the edge of the bottle very close to the fire to sanitize the opening. With your other hand, slightly open your petri dish and pour in some of the substance. You want to pour enough to cover the fabric. When done, close the petri, bring the bottle back up to the fire to sanitize the opening again then close the bottle. You can lift the petri dish and rock it just slightly to make sure you have the right amount of liquid in there. Remember to keep your hands within the sanitized mushroom circle you created for this whole process.
Step 8: Scrap the bacteria
Hold the tip of the inoculation loop in the flame and let it get molten hot. Remove it from the flame and let it cool for one second. Open your bacteria petri and put the poker on the clear gel first, you will hear a small sizzle. Then use the tip of the inoculation loop to lightly scrape up some bacteria. Close the bacteria petri and remove the inoculation loop.
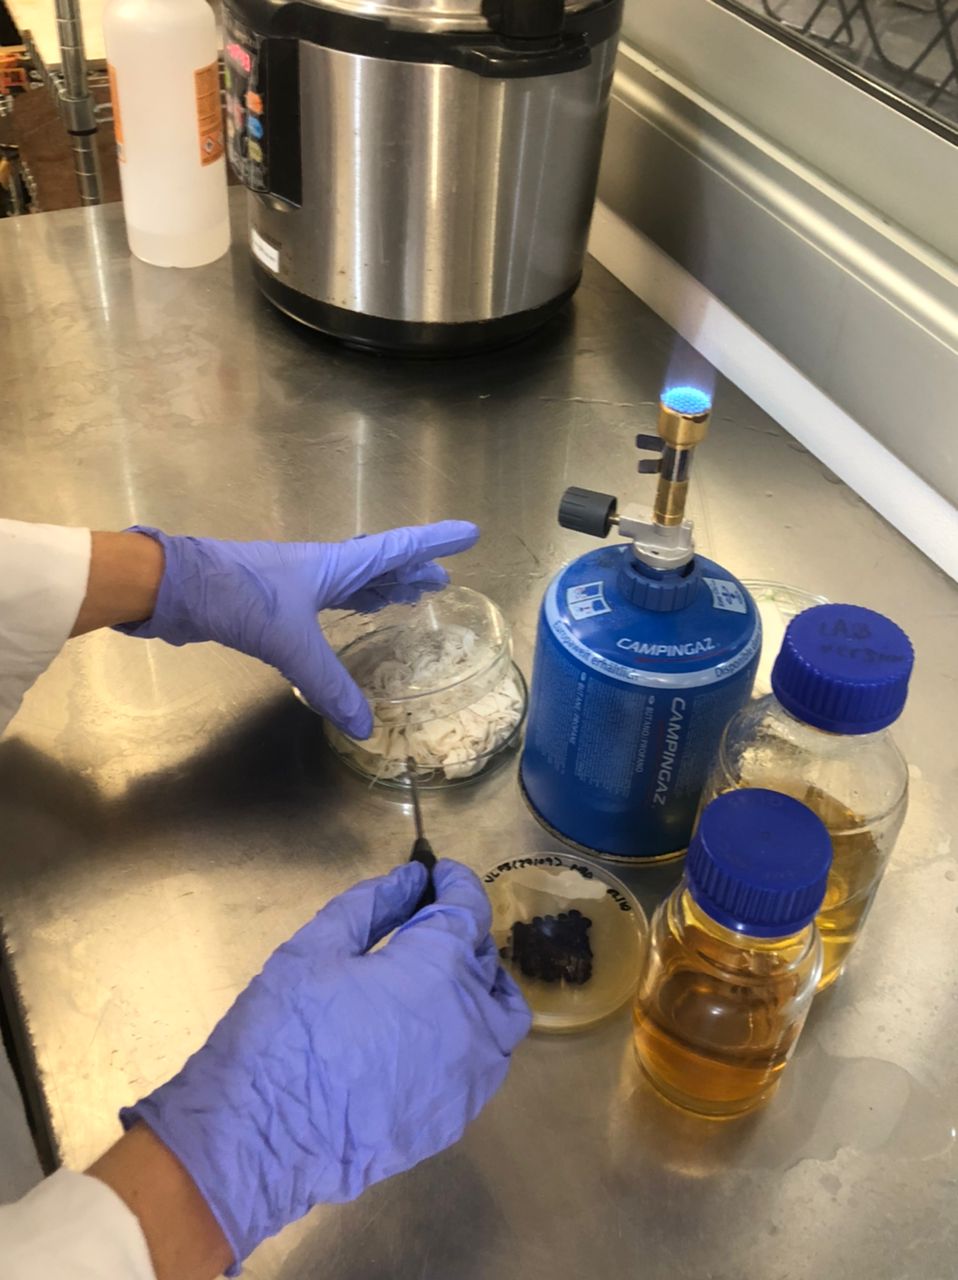
Step 9: Place bacteria on your fabric.
With the inoculation loop still in hand, open your fabric petri and lightly wipe the poker onto your fabric in different areas. Then close your petri with the fabric in it. Sterilize your poker in the fire again. You can repeat step 8 and 9 two or three times depending how much bacteria you want to grow on your fabric.
Step 10: Label your fabric petri with the date, the fabric type, and bacteria used and put it in the incubator for 5 days.
Step 11: Kill the bacteria.
After 5 days take your petri and repeat step 2 (minus adding in the lubria brother to the pressure cooker). Putting it back in the pressure cooker will kill the bacteria and stop it from growing more.
Step 12: Lay out to air dry.
After the fabric petri is done in the pressure cooker, lay out to air dry. Notice and enjoy all the patterns the bacteria made on the fabric! You can repeat this whole process with the same fabric if you want more colors/patterns.
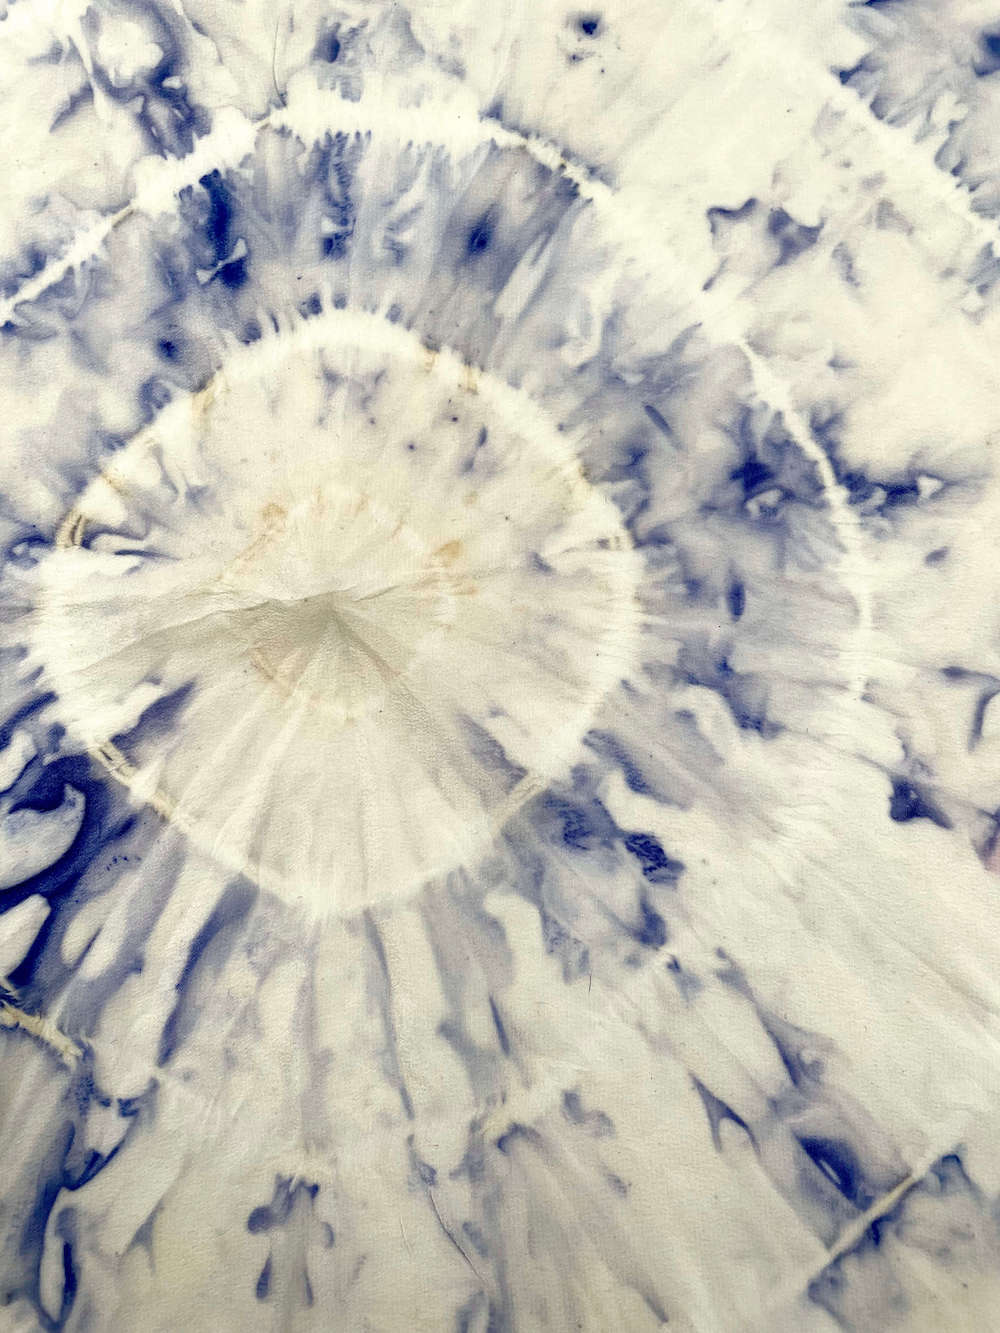
Results and Reflection
I loved this process. When we opened our petri dishes after 5 days, we didn’t think it would have much of a pattern because we didnt see much blue but when we opened each of our up they all had amazing patterns. Here are the final results: