10. Open Source Hardware - From Fibers to Fabric
Overview
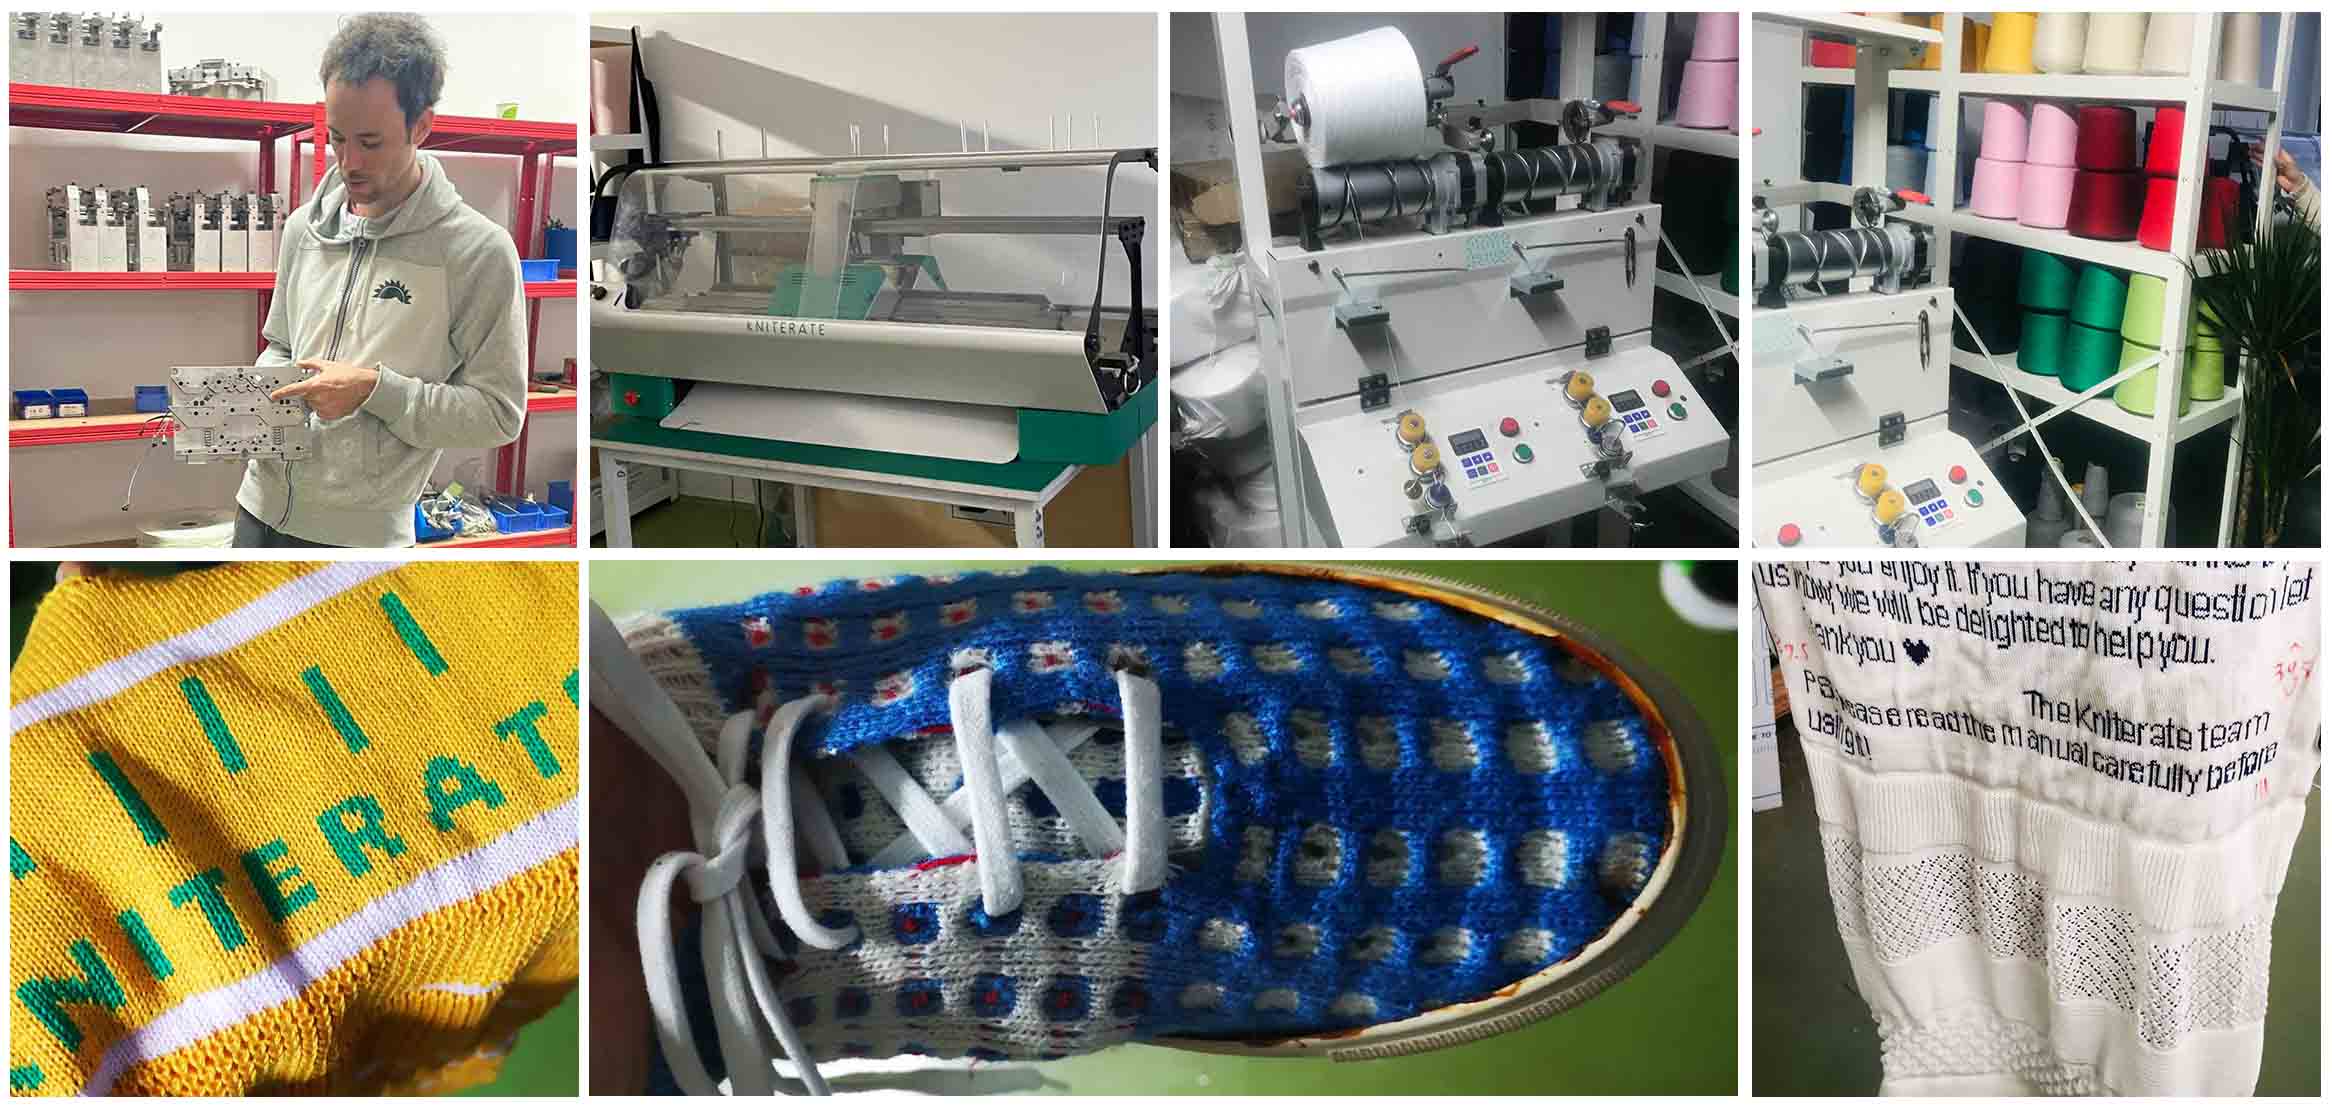
This week we had to build a machine. Our goal was to create a piece of hardware that could be used in our local labs, and share the documentation so that anyone would be able to build it. We worked in groups / partners for this project and I worked with Dinesh Kumar to build a bio gun, a device for hand-held 3D printing bio materials.
We started the week off by visiting Kniterate, a knitting machine company based here in Barcelona. The founder Gerard Rubio showed us how the machines work and shared stories about the very first prototype created in a Fablab and how it has gotten to where it is now.
Research and Inspiration
Our instructors compiled a List of potential projects we could work on this week. We decided to work on the bio gun because it was something we needed for our bio lab, for better control when 3D printing by hand. We used Markos Georgiou’s design and documentation for inspiration, and we were excited for the fairly “easy” steps involved – all we thought we needed to do was 3D print his files. But we were wrong
Markos Georgiou’s BioGun Design
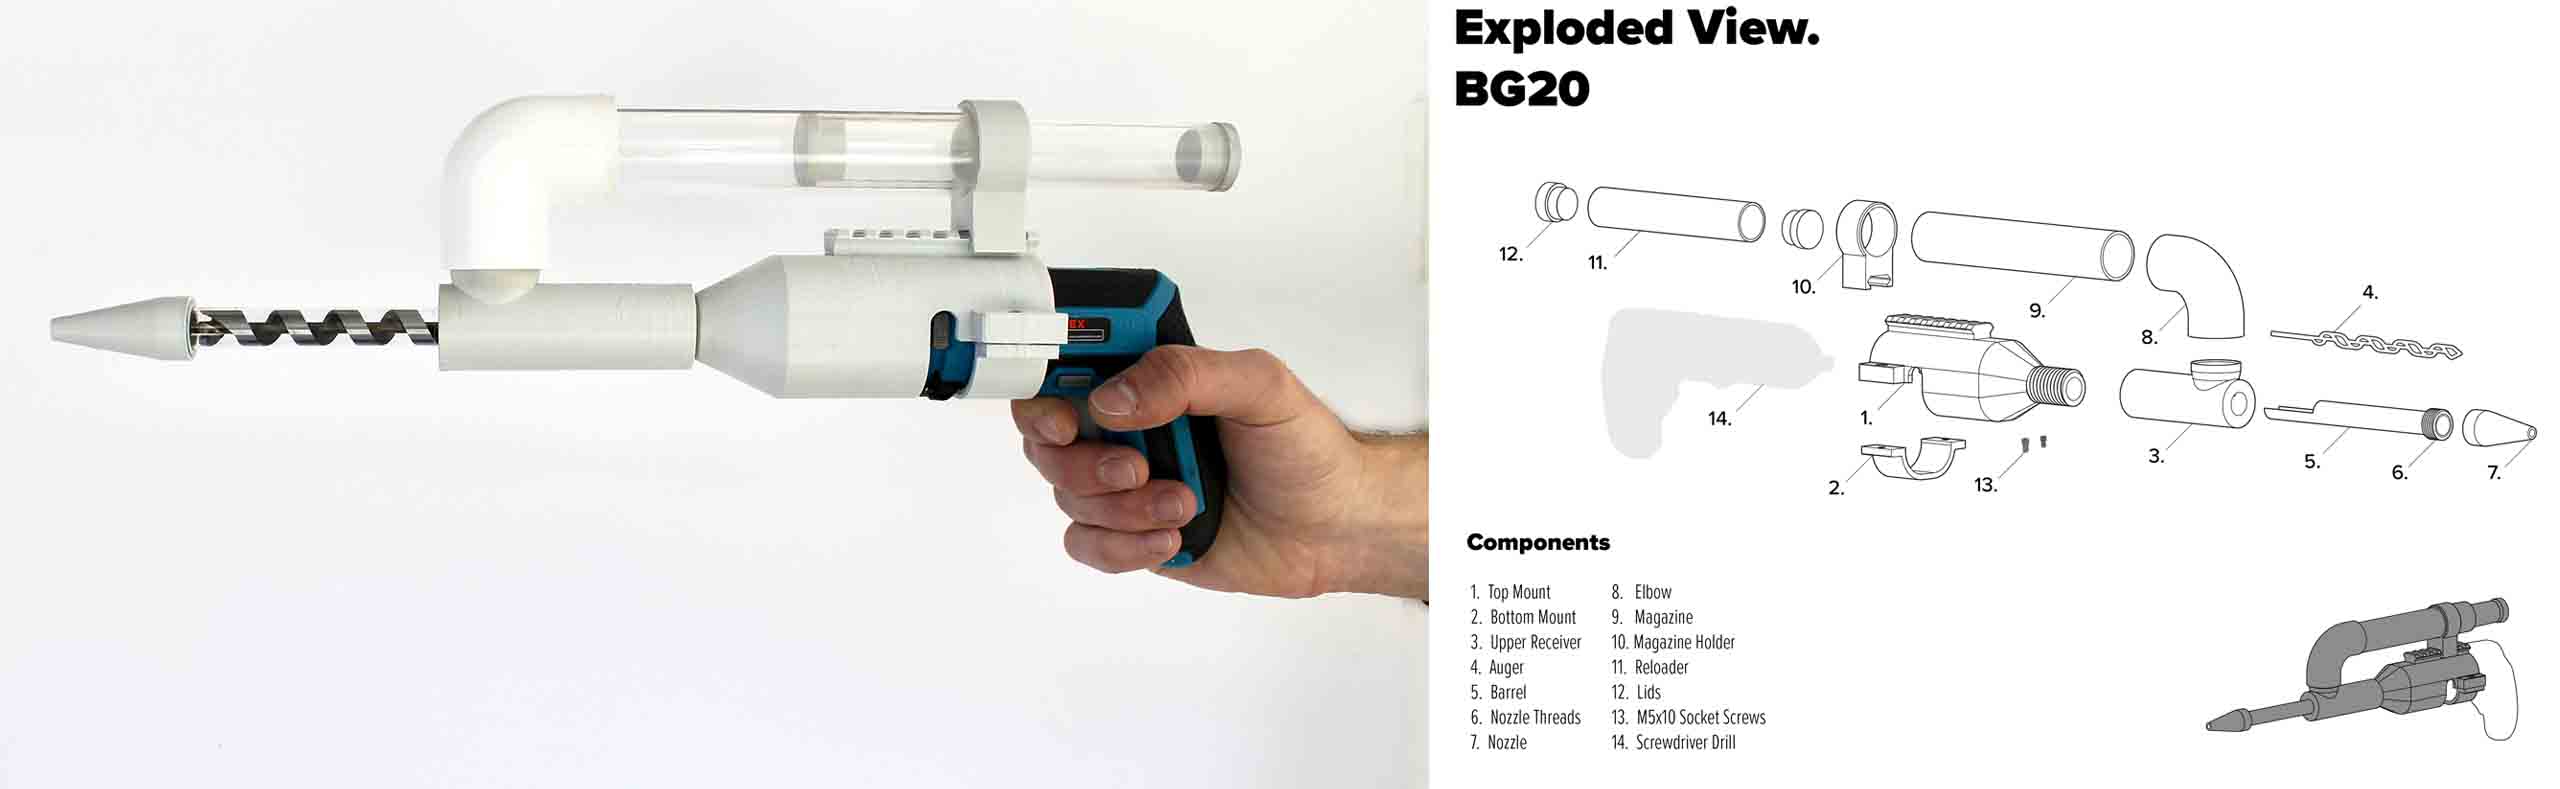 Markos Georgiou’s BioGun Design
Hacks
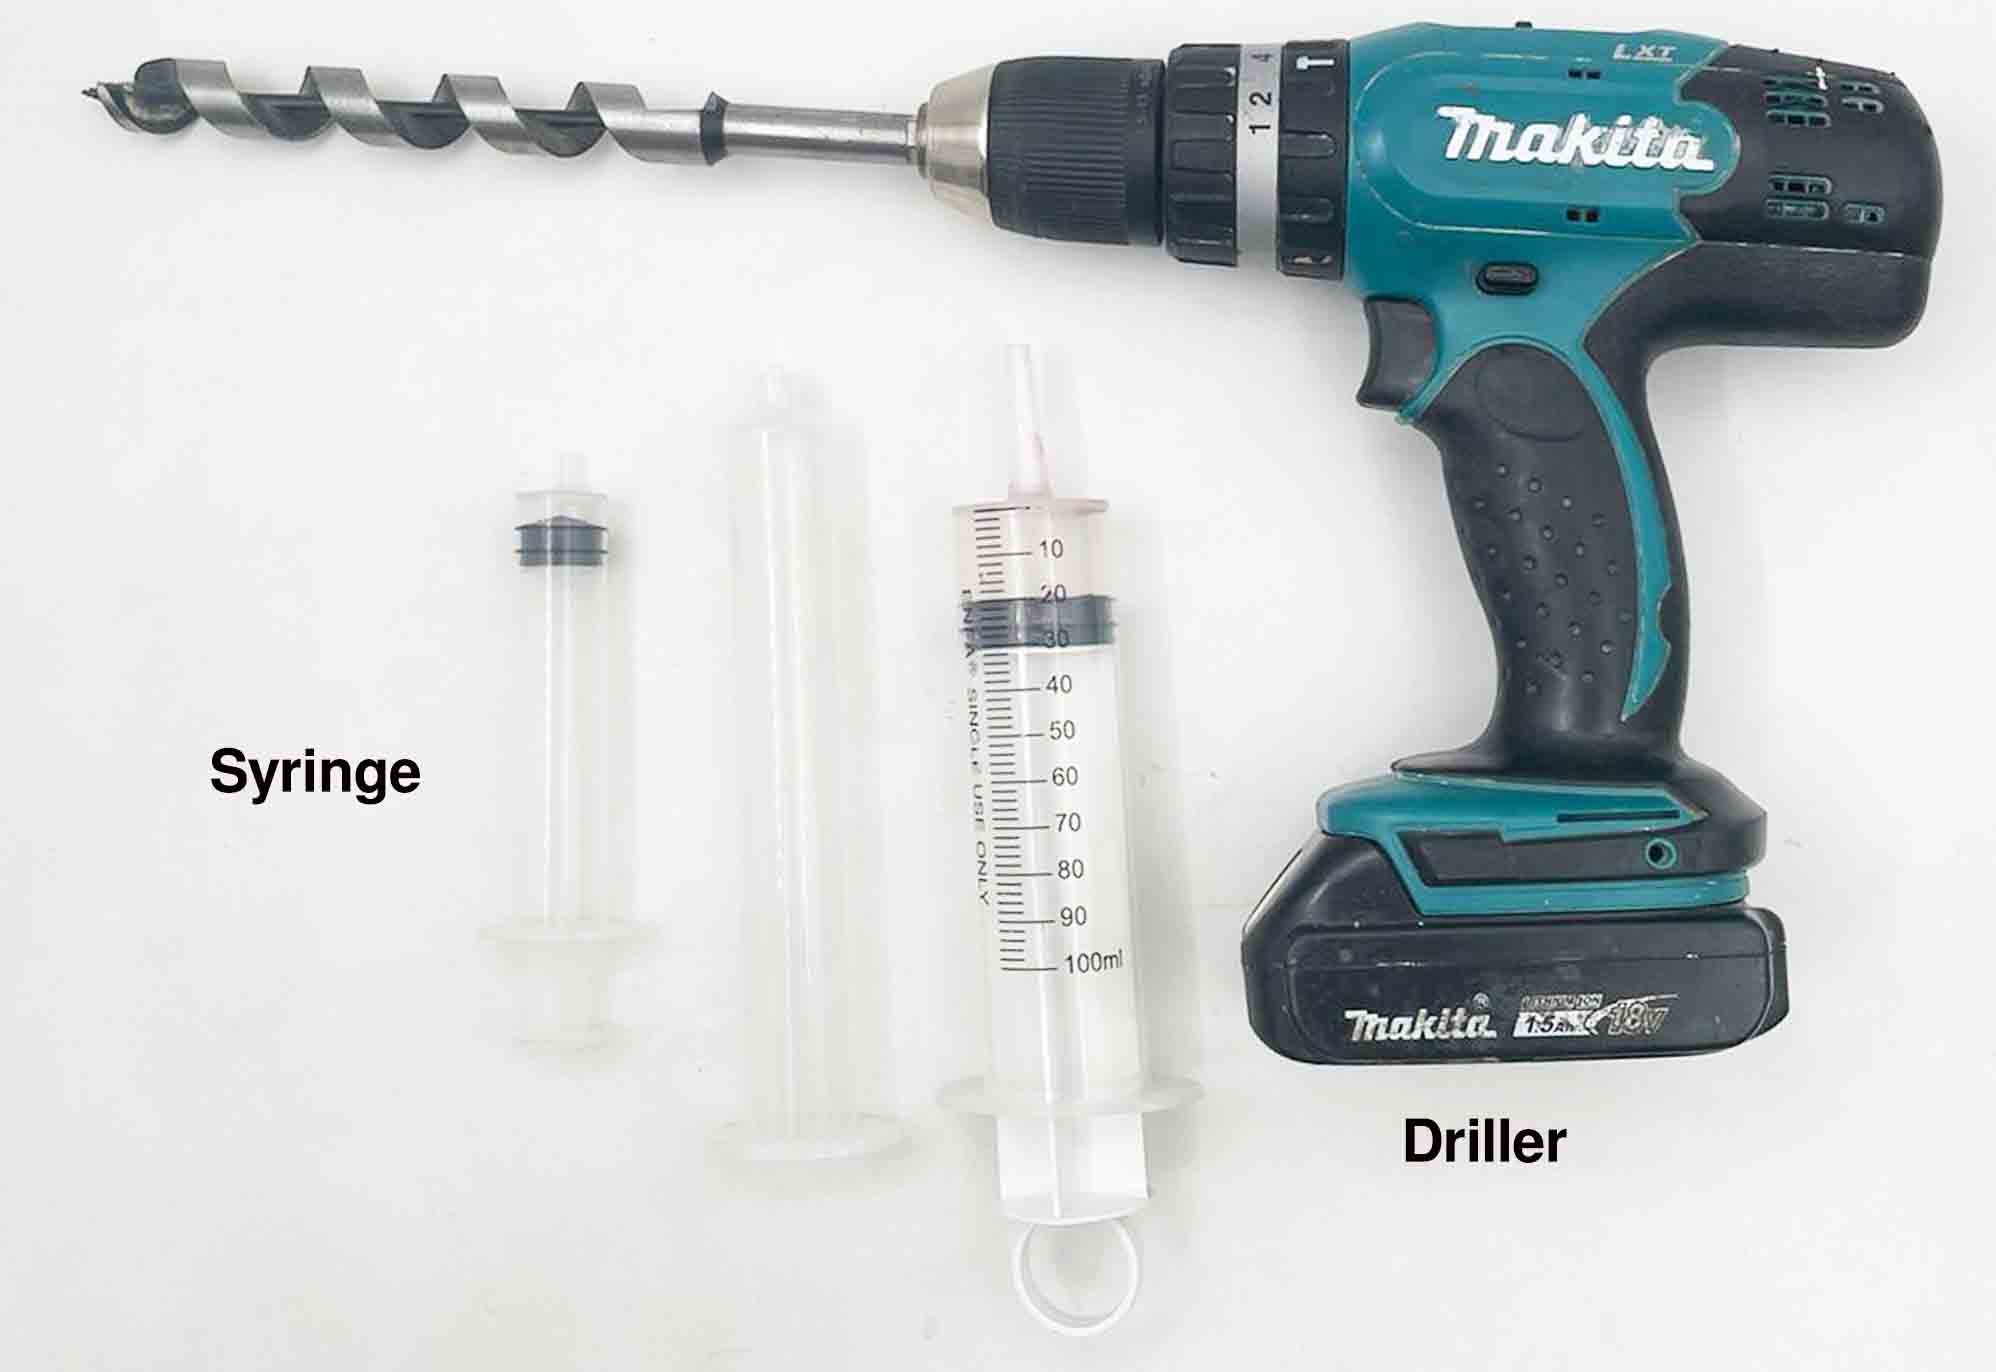
We had some limitations when getting started: we had a larger drill, larger drill bit, and larger syringes/clear tubes than the original design so we had to accommodate that. Because of this we had to re-3D model all of our pieces for this project. Our instructors sat with us and helped us develop an initial sketch of the pieces we had to design and 3D print.
BioGun Design
Rough Sketches
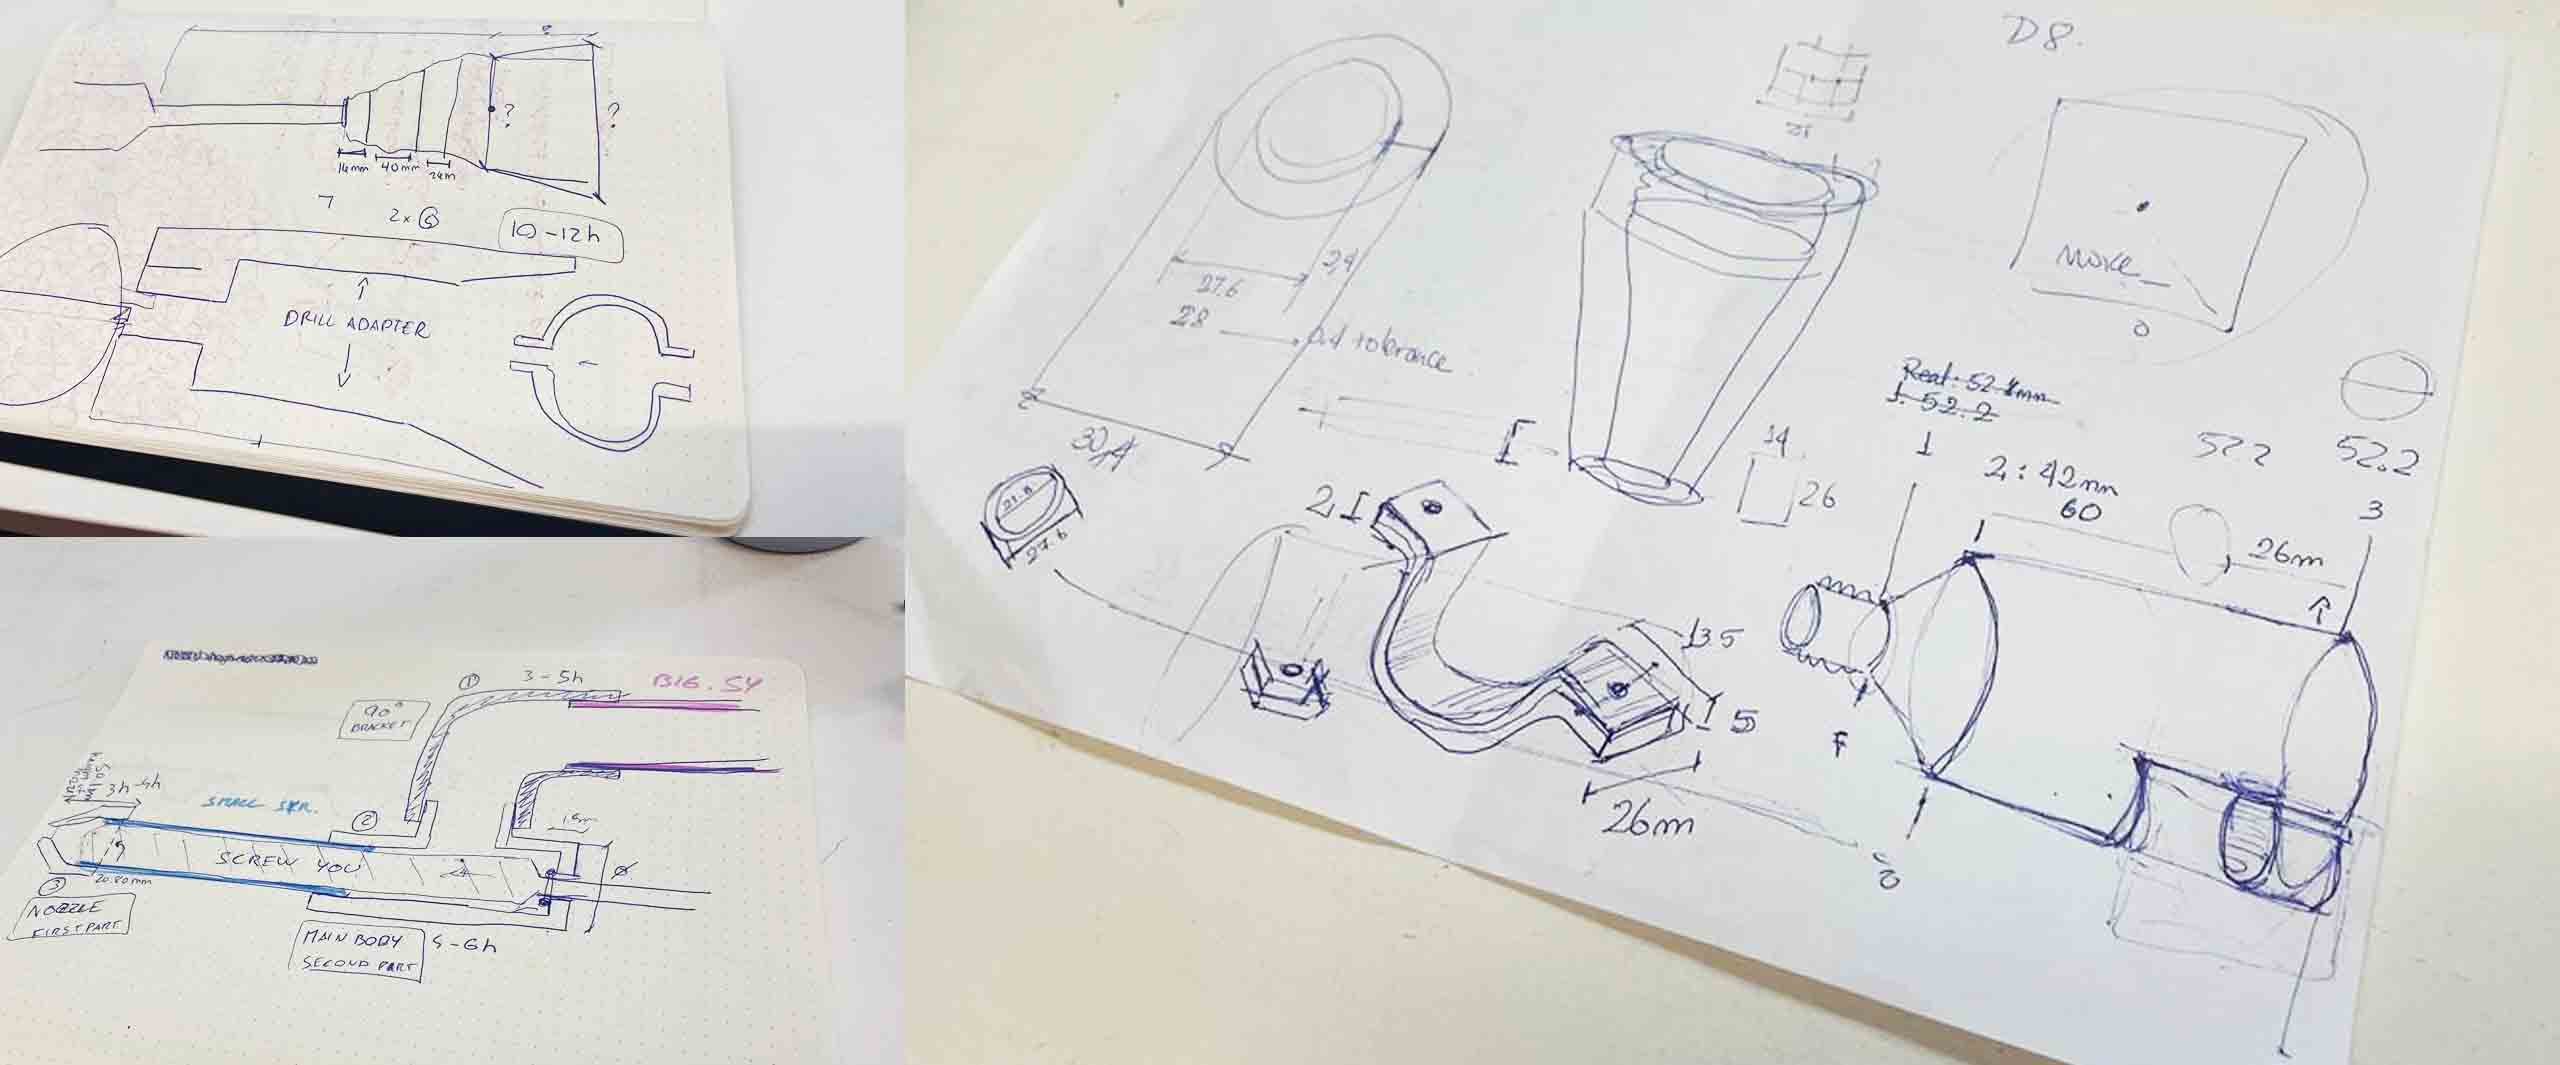
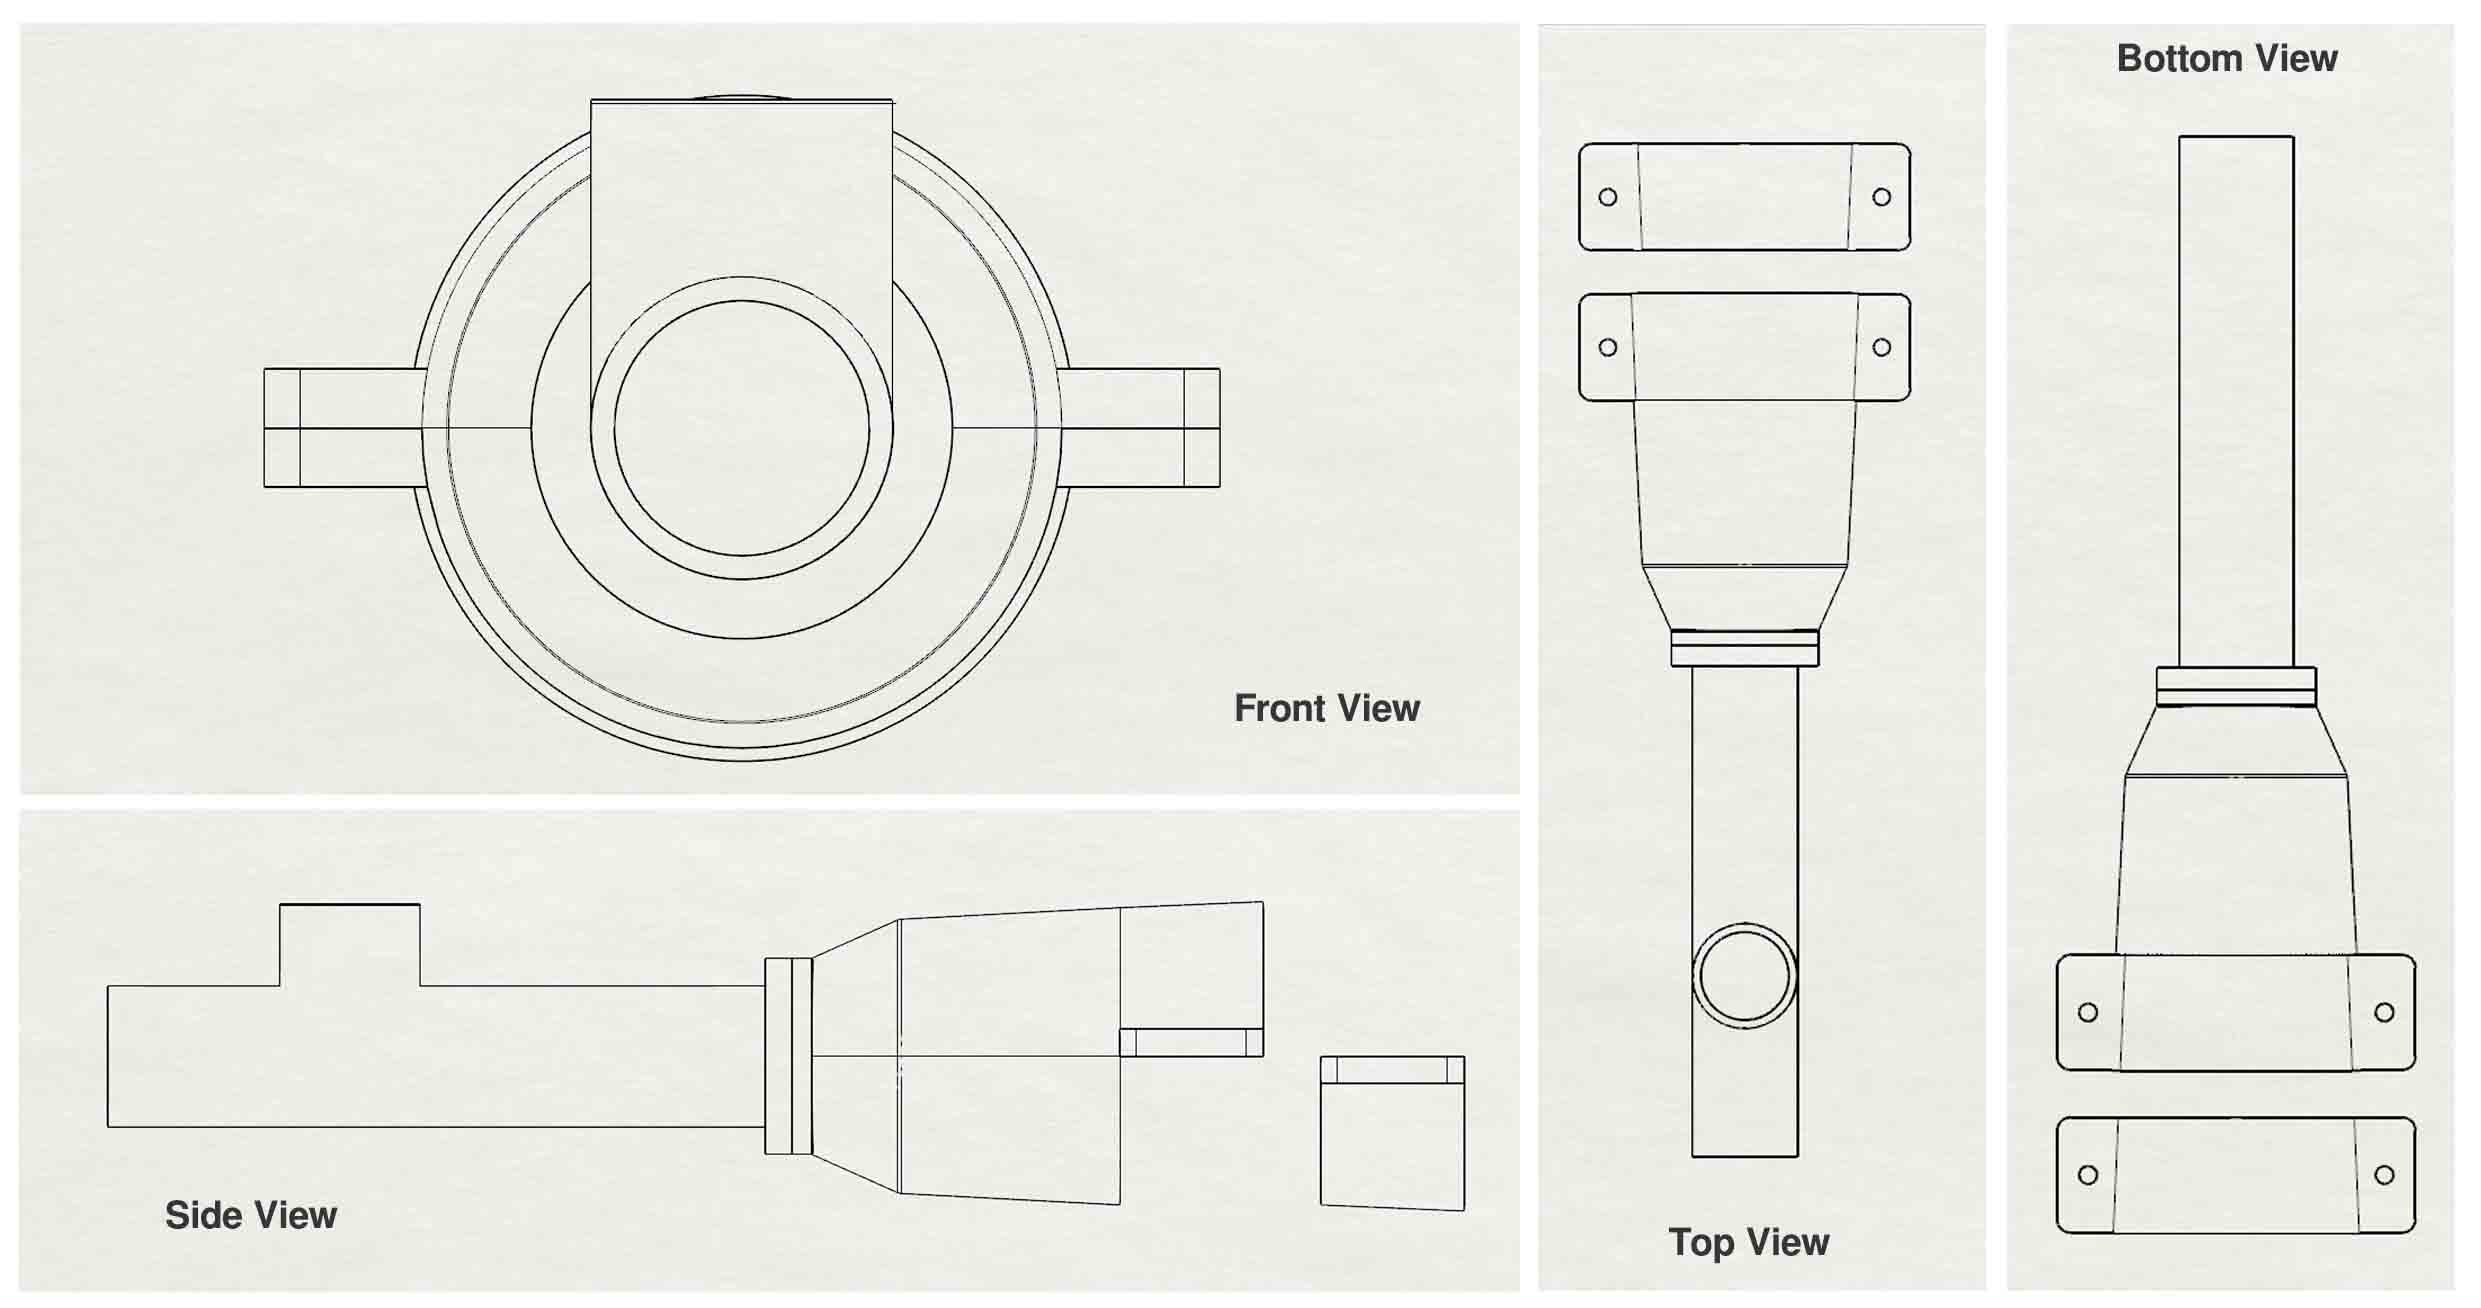
Technical Drawings
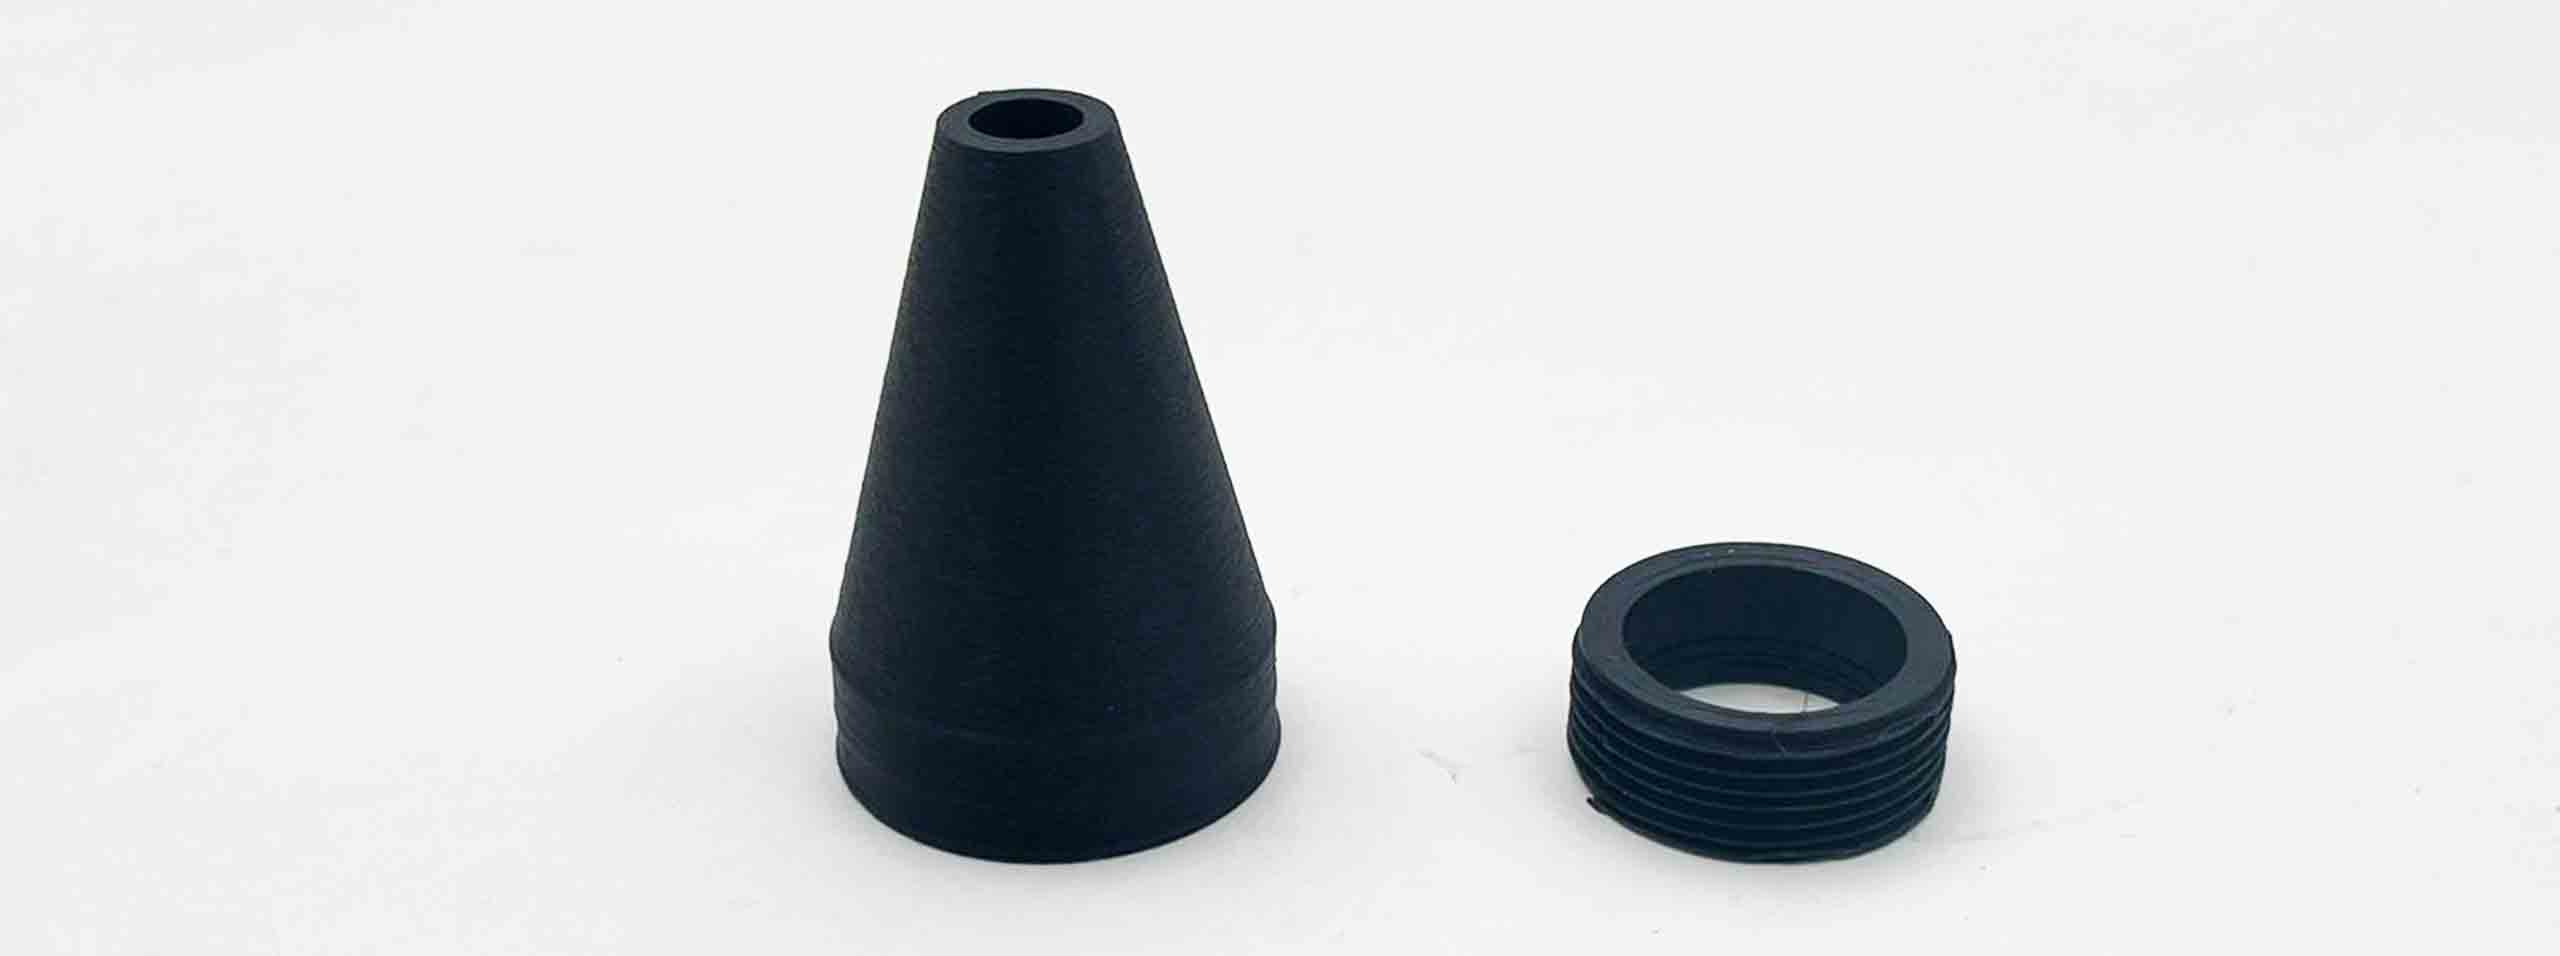
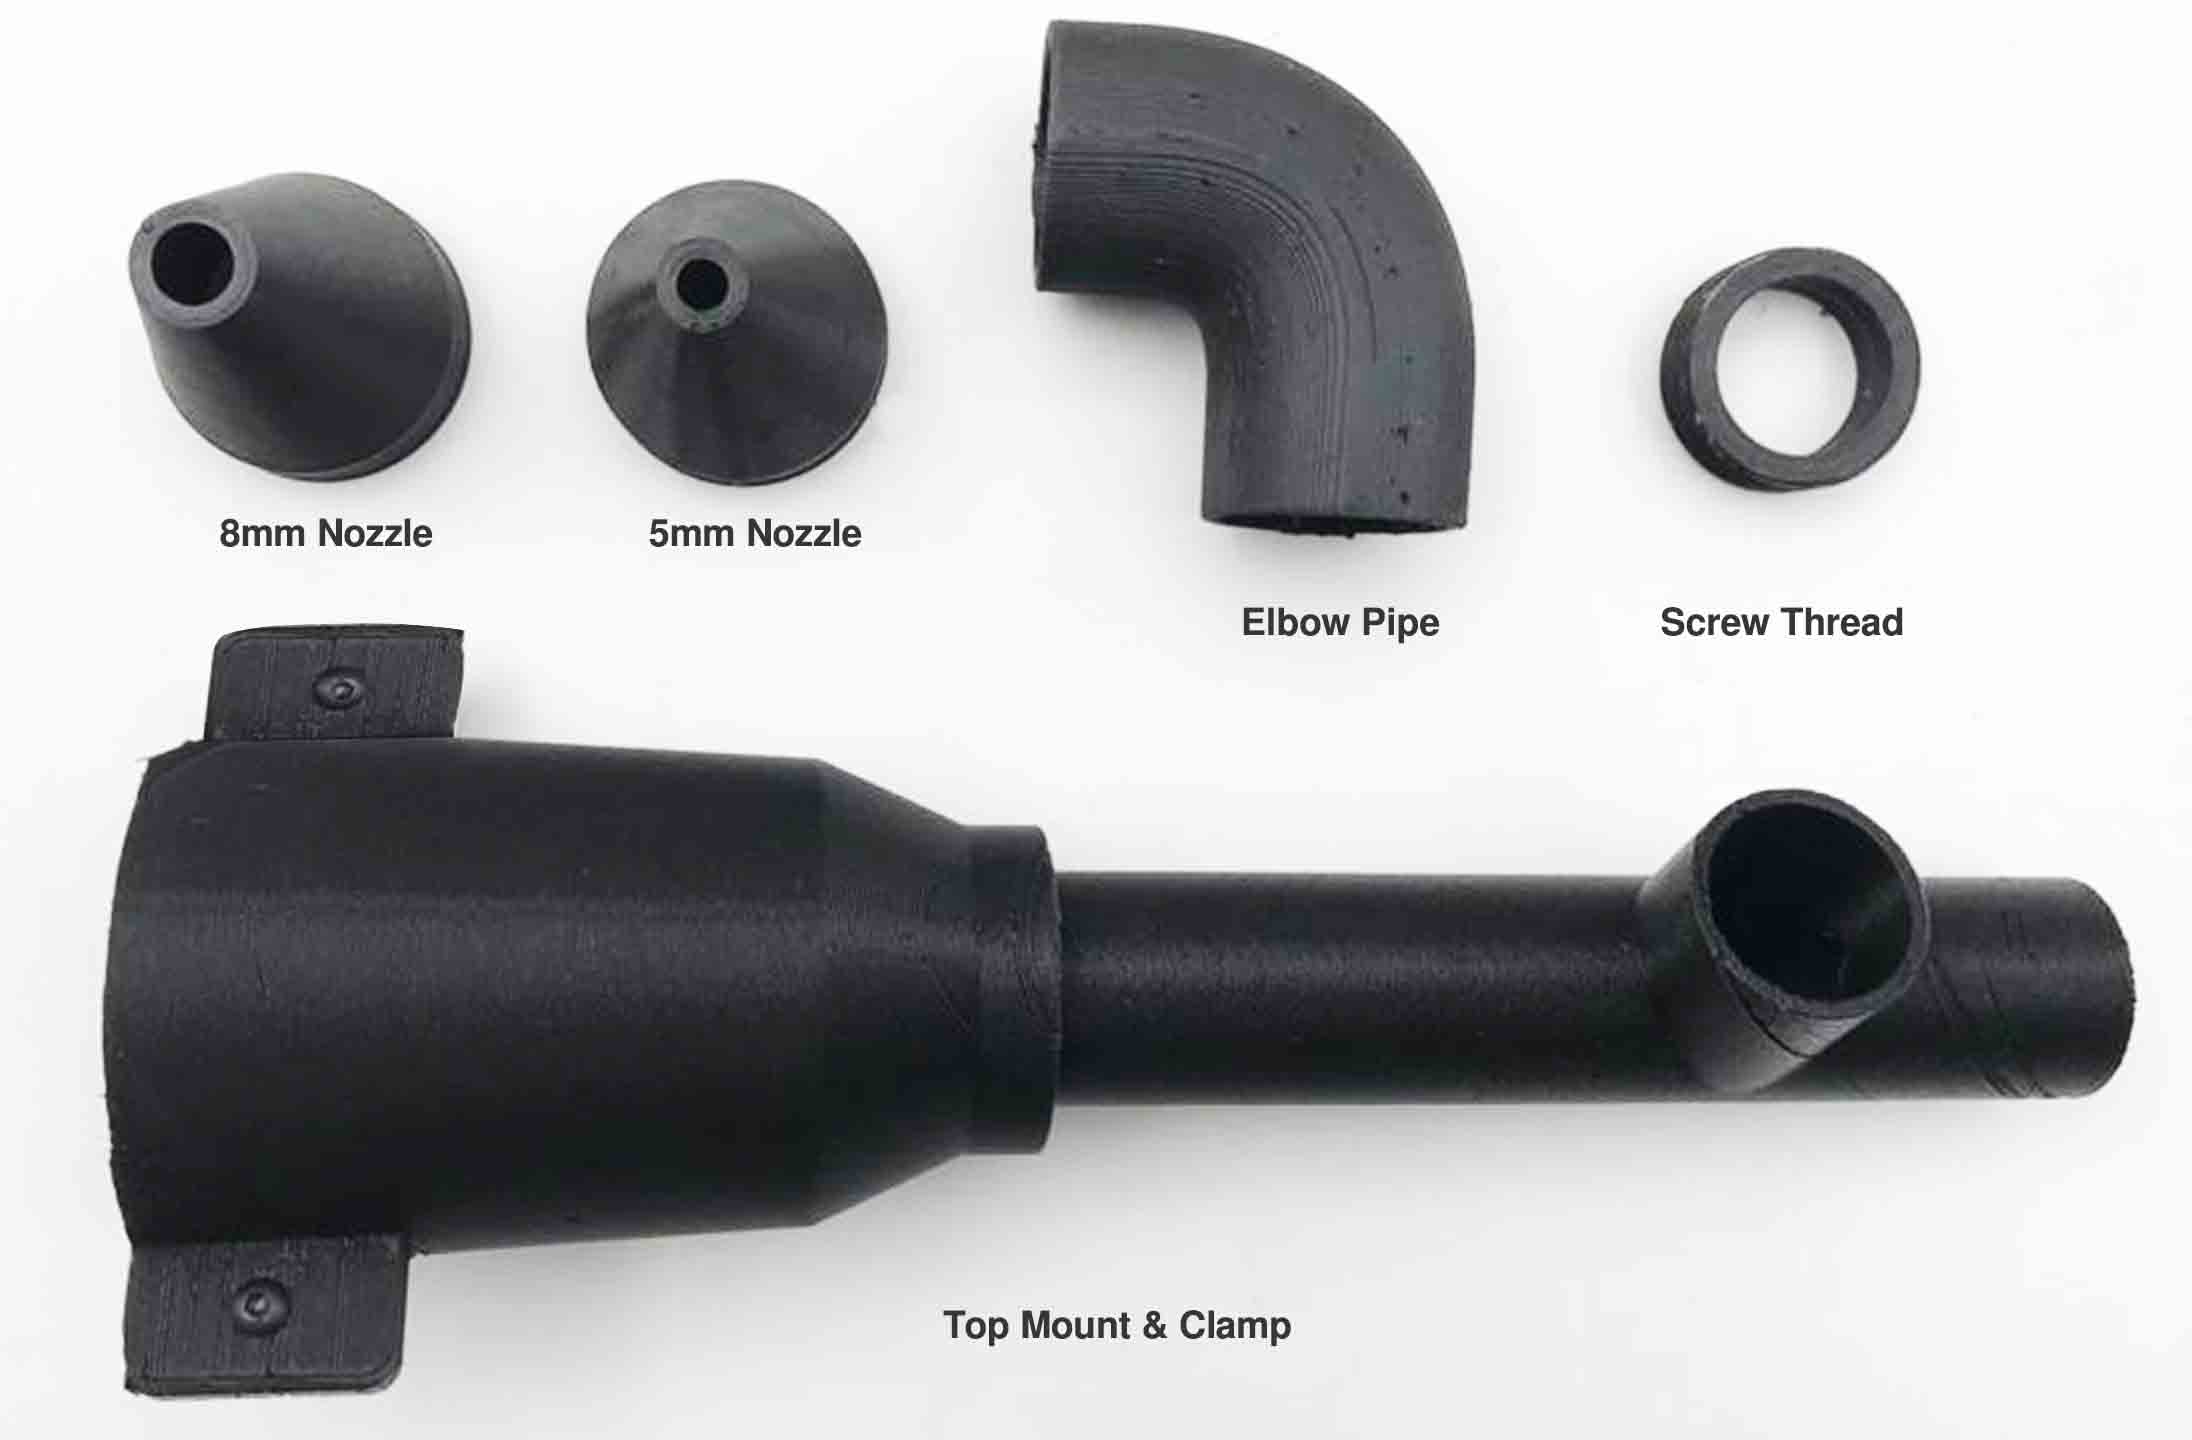
Nozzle & Screw Thread
Design
Final Nozzle & Screw Thread File
Nozzle & Screw Thread 3D Printing
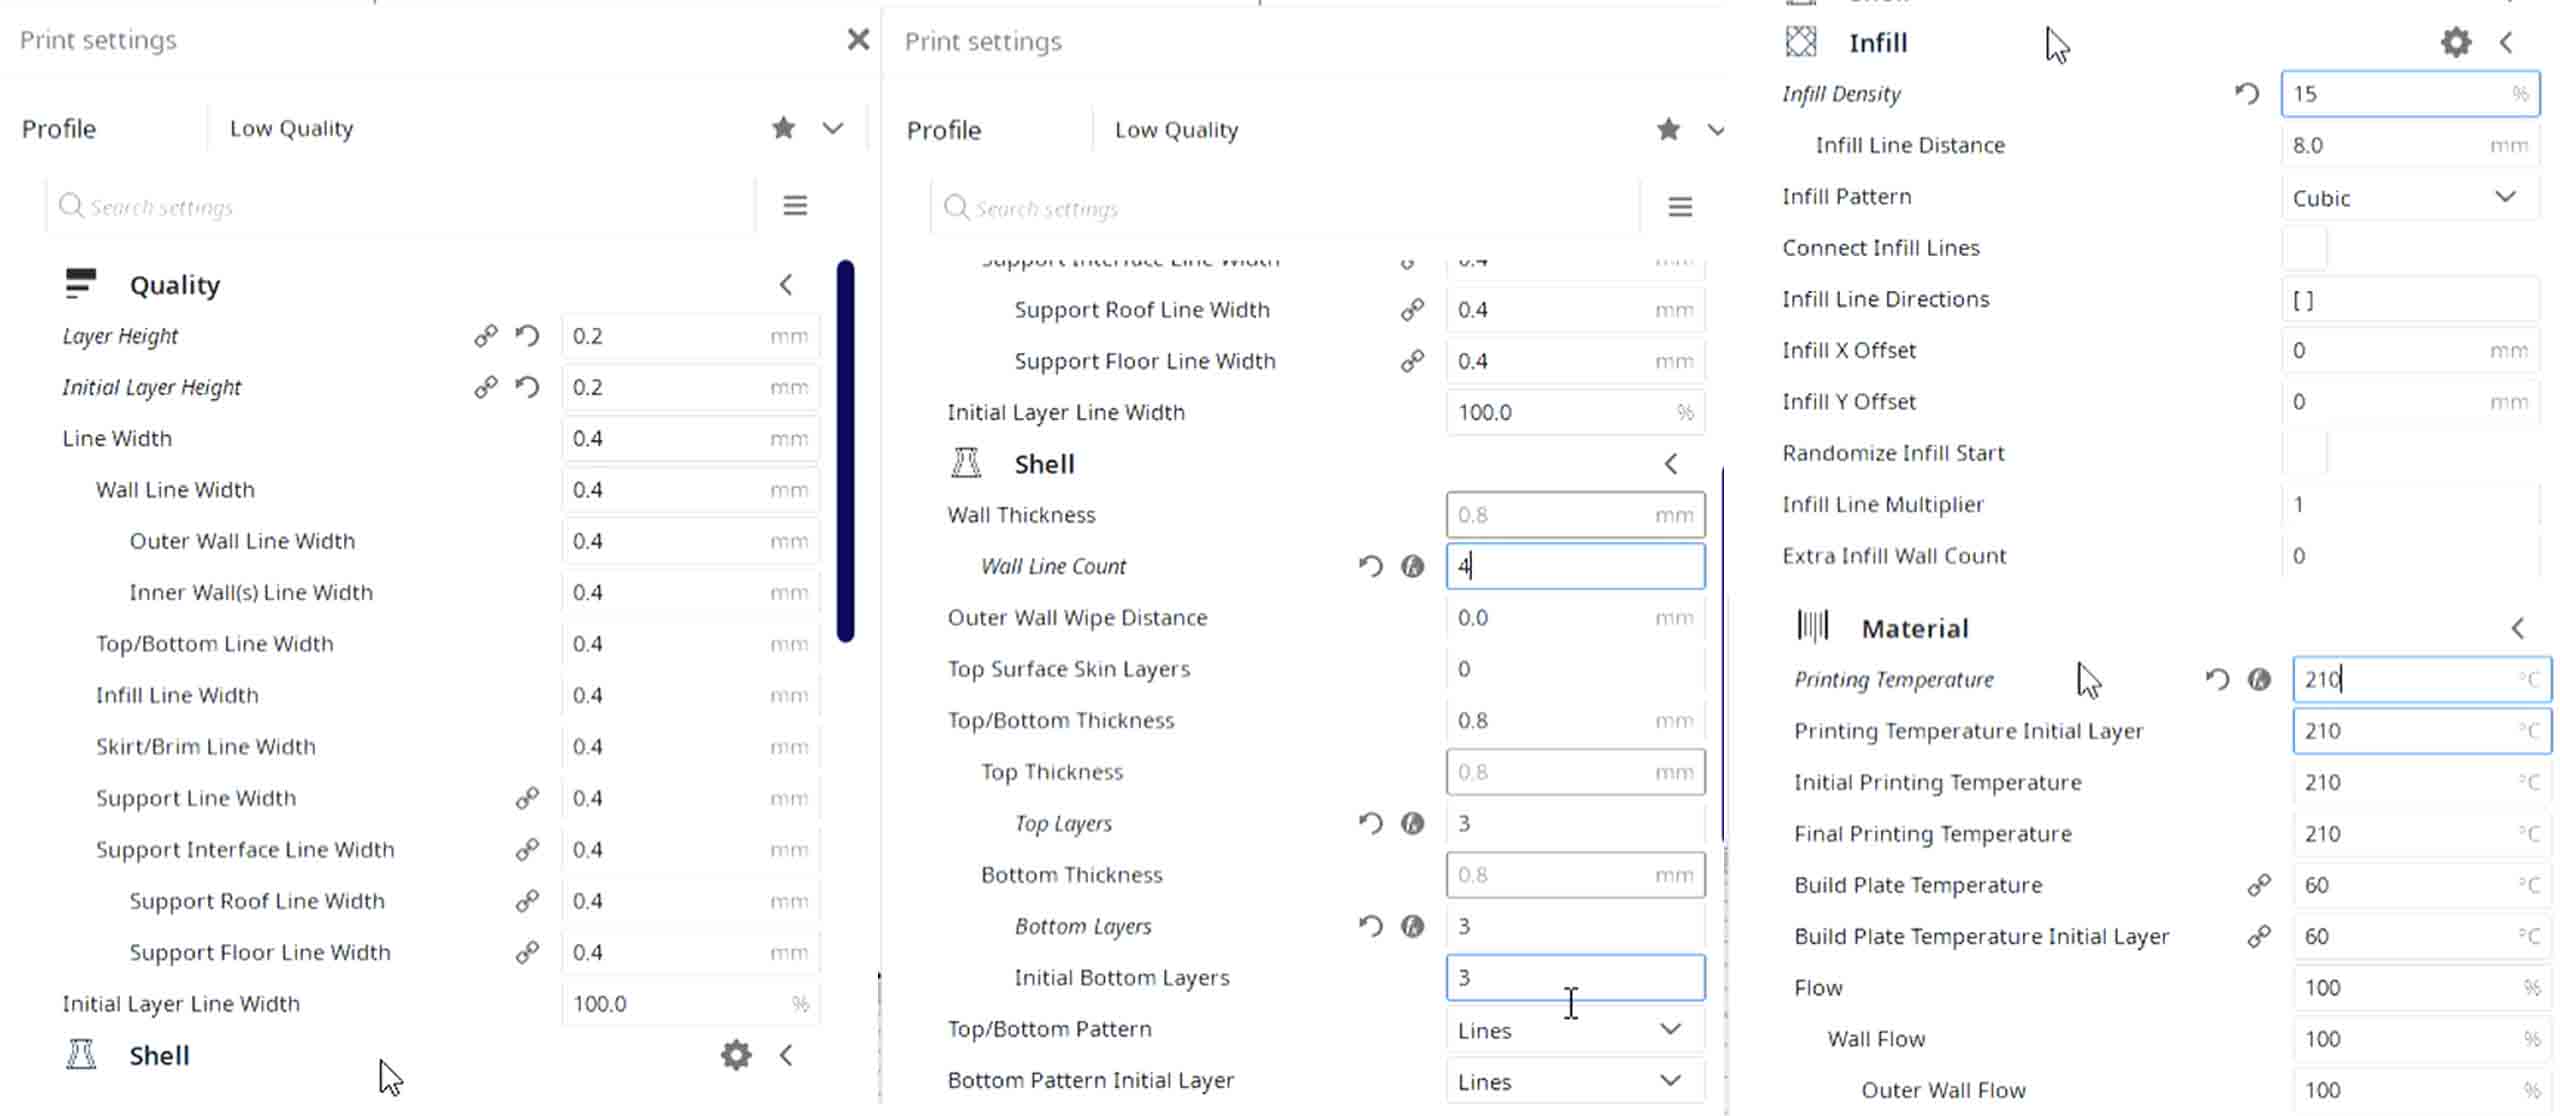
Settings
Slicing
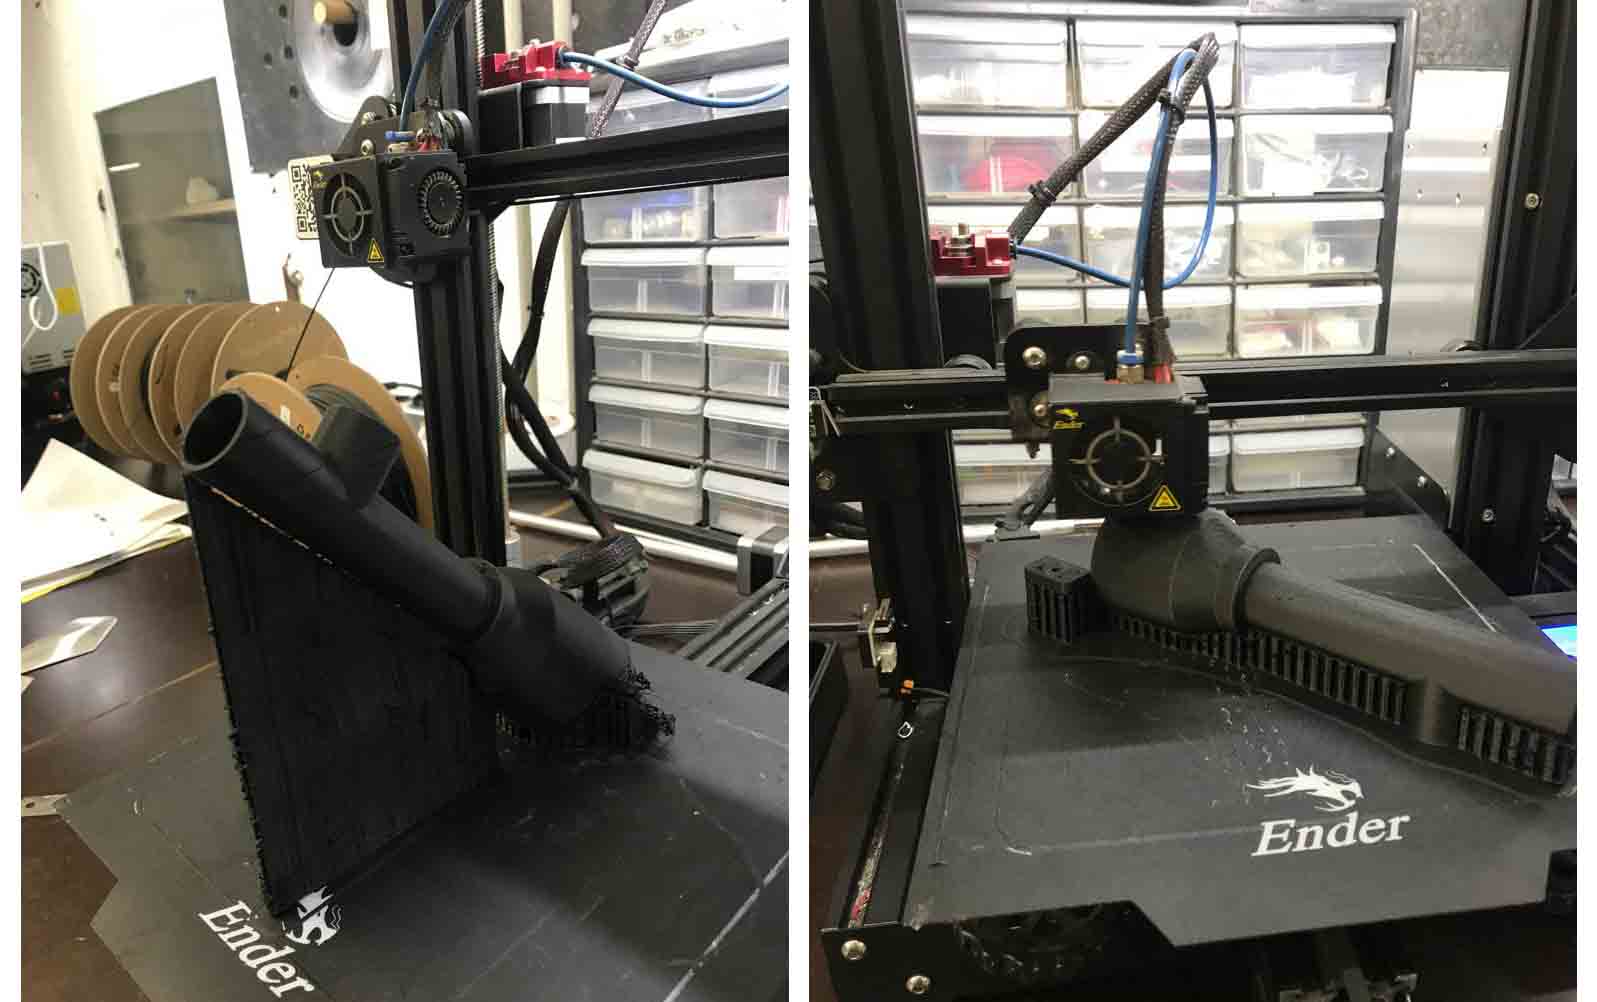
Printing
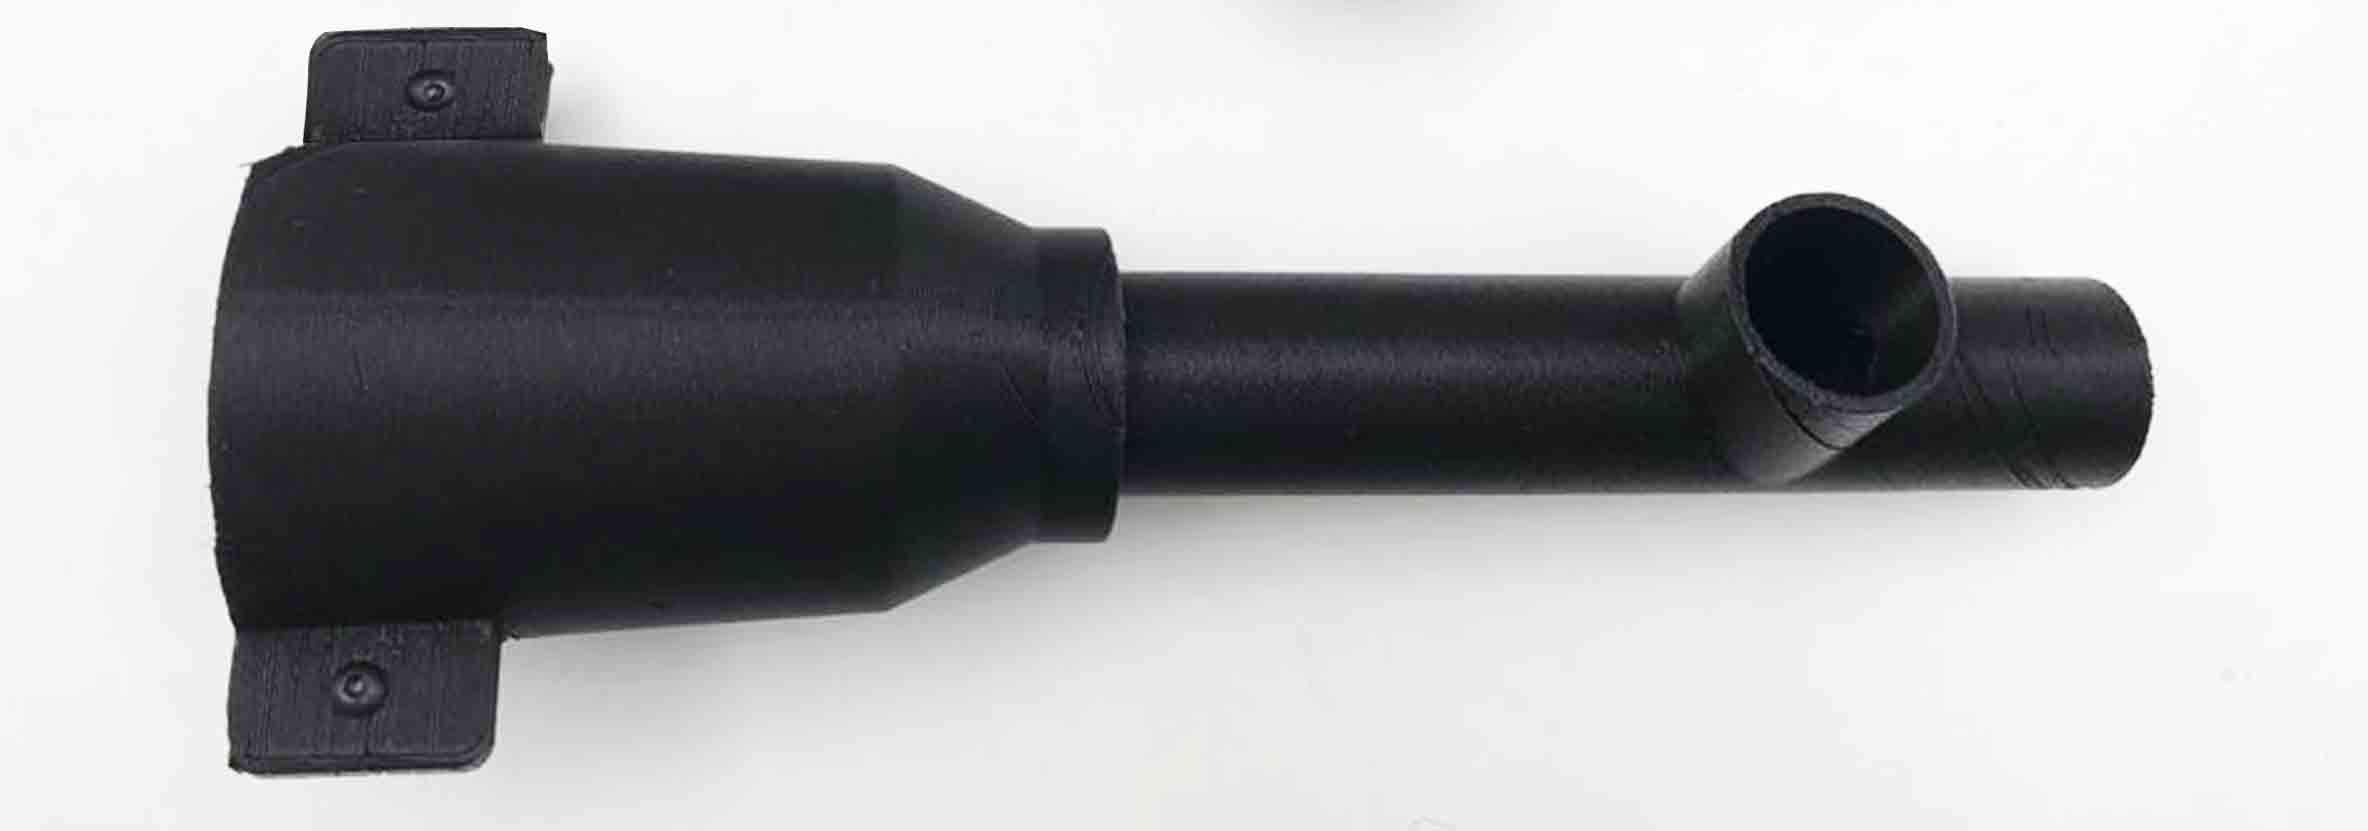
Final Look
Mistakes and Solutions
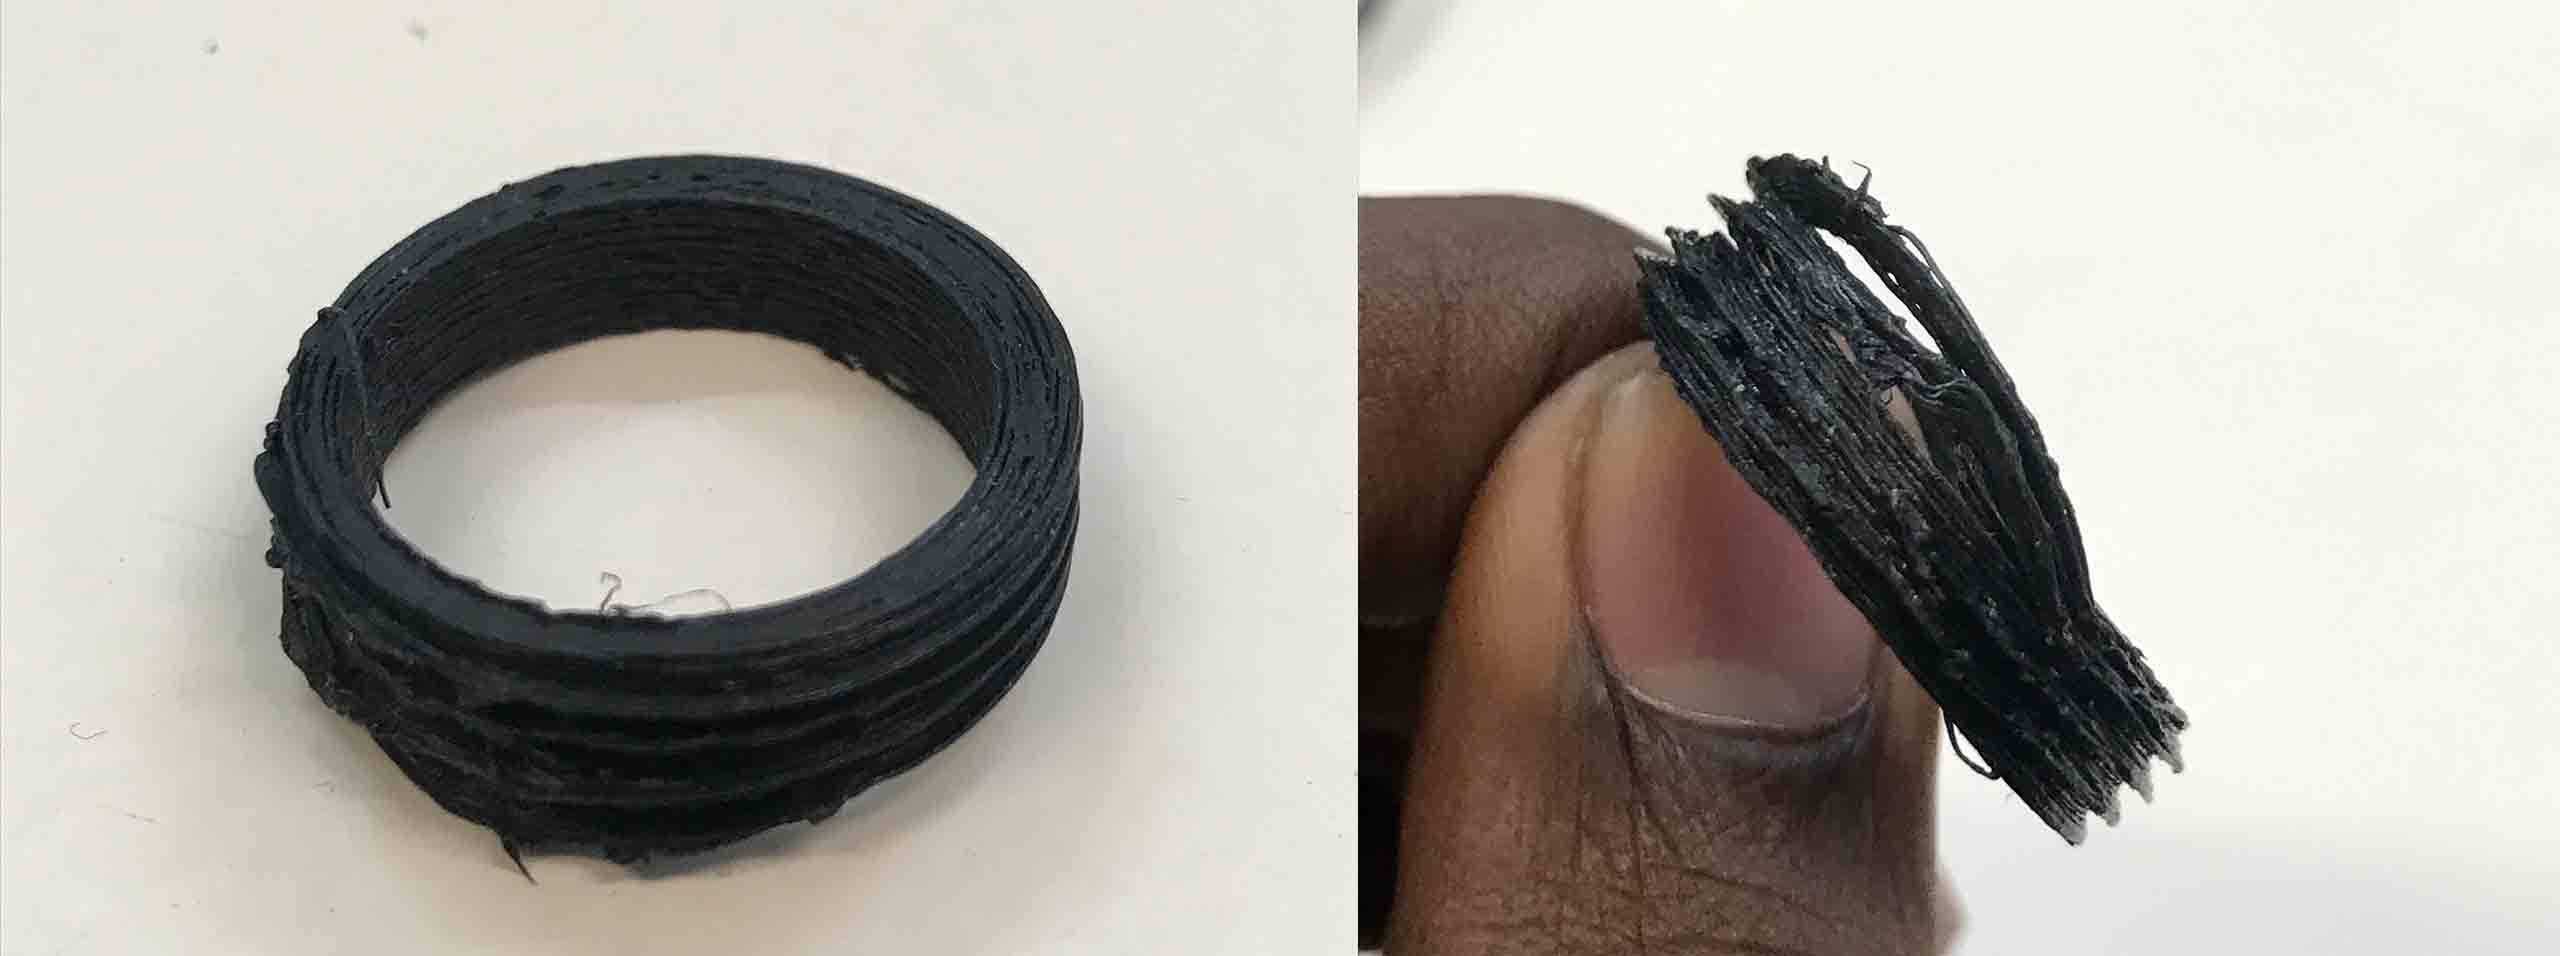
Our first print and first mistake was with the barrel thread, we made the diameter of the circle too big: we sized it at 21.8mm to fit over our syringe which is 20.8mm in diameter. When the piece was 3D printed it was too loose and fell down our syringe. When we redesigned the barrel thread, we made the measurement 21mm, downsized by 0.2mm. It fit over the syringe but with some force. Fortunately the first nozzle 3D printed nicely and fit over our barrel thread perfectly. If we were to make another iteration we could make the tolerance of the barrel thread 0.3 or 0.4 larger than the diameter of the syringe for a better fit.
Top Mount & Clamp
Design
Final Top Mount & Clamp File
Top Mount & Clamp 3D Printing
Settings
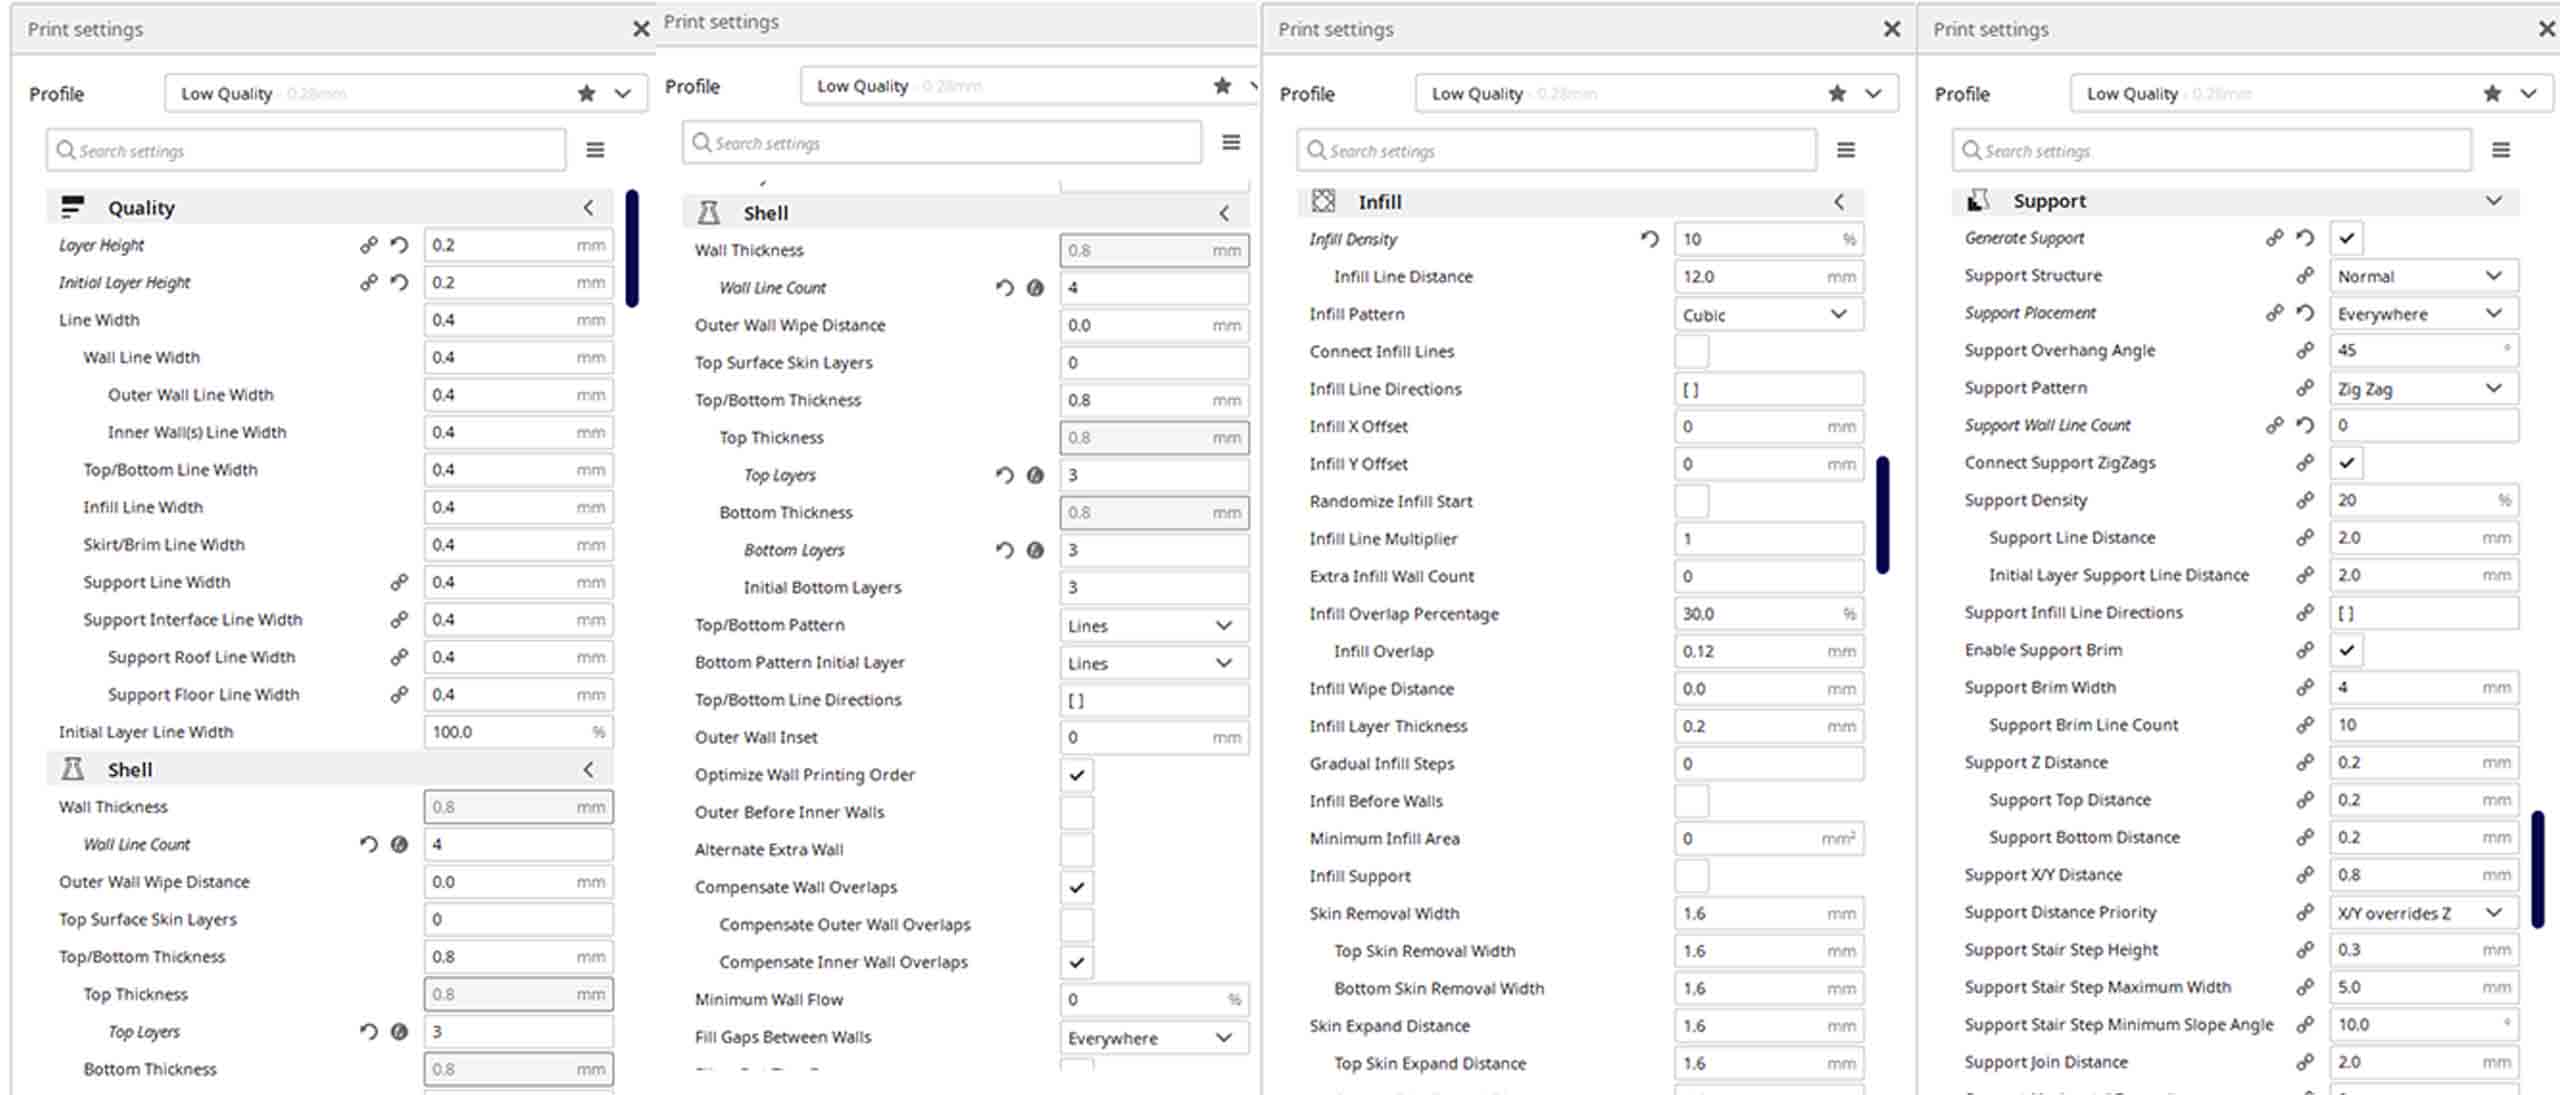
Slicing
Printing
Final Look
Mistakes and Solutions
-
It was designed in the biogun reference guide, but we had some trouble when connecting the screw thread – it seemed like a closed mesh and okay to 3D print but when we examined the file closer it had holes in it. So we needed to remodel it.
-
Then we realized that we could actually connect the top mount with the reloader piece to make one piece instead of two pieces. This would save time in 3D modeling and in 3D printing. To design this piece we measured our drill at the This process had several iterations. First we started to design the piece asdifferent diameters it has and used the Rhino command “loft” to connect each diameter. We created the reloader barrel piece using measurements from our syringes, making sure the barrel was big enough that the drill bit would not hit it when rotating.
-
We created the clamp by designing a rectangle with a whole in it, mirroring it so was the same on both sides of the top mount and then cutting each in half using another rectangle and the Rhino command “boolean split”.
-
The print of this one took 21 hours. Unfortunately the first time we printed this piece, one of the wings for securing the piece with screws did not print properly so we had to print it again.
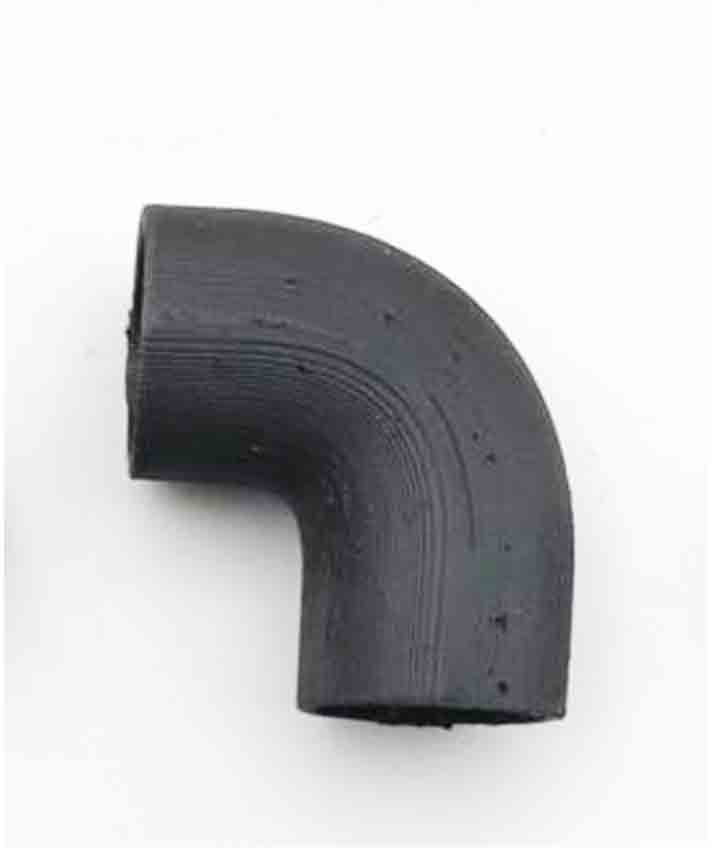
Elbow Pipe
Design
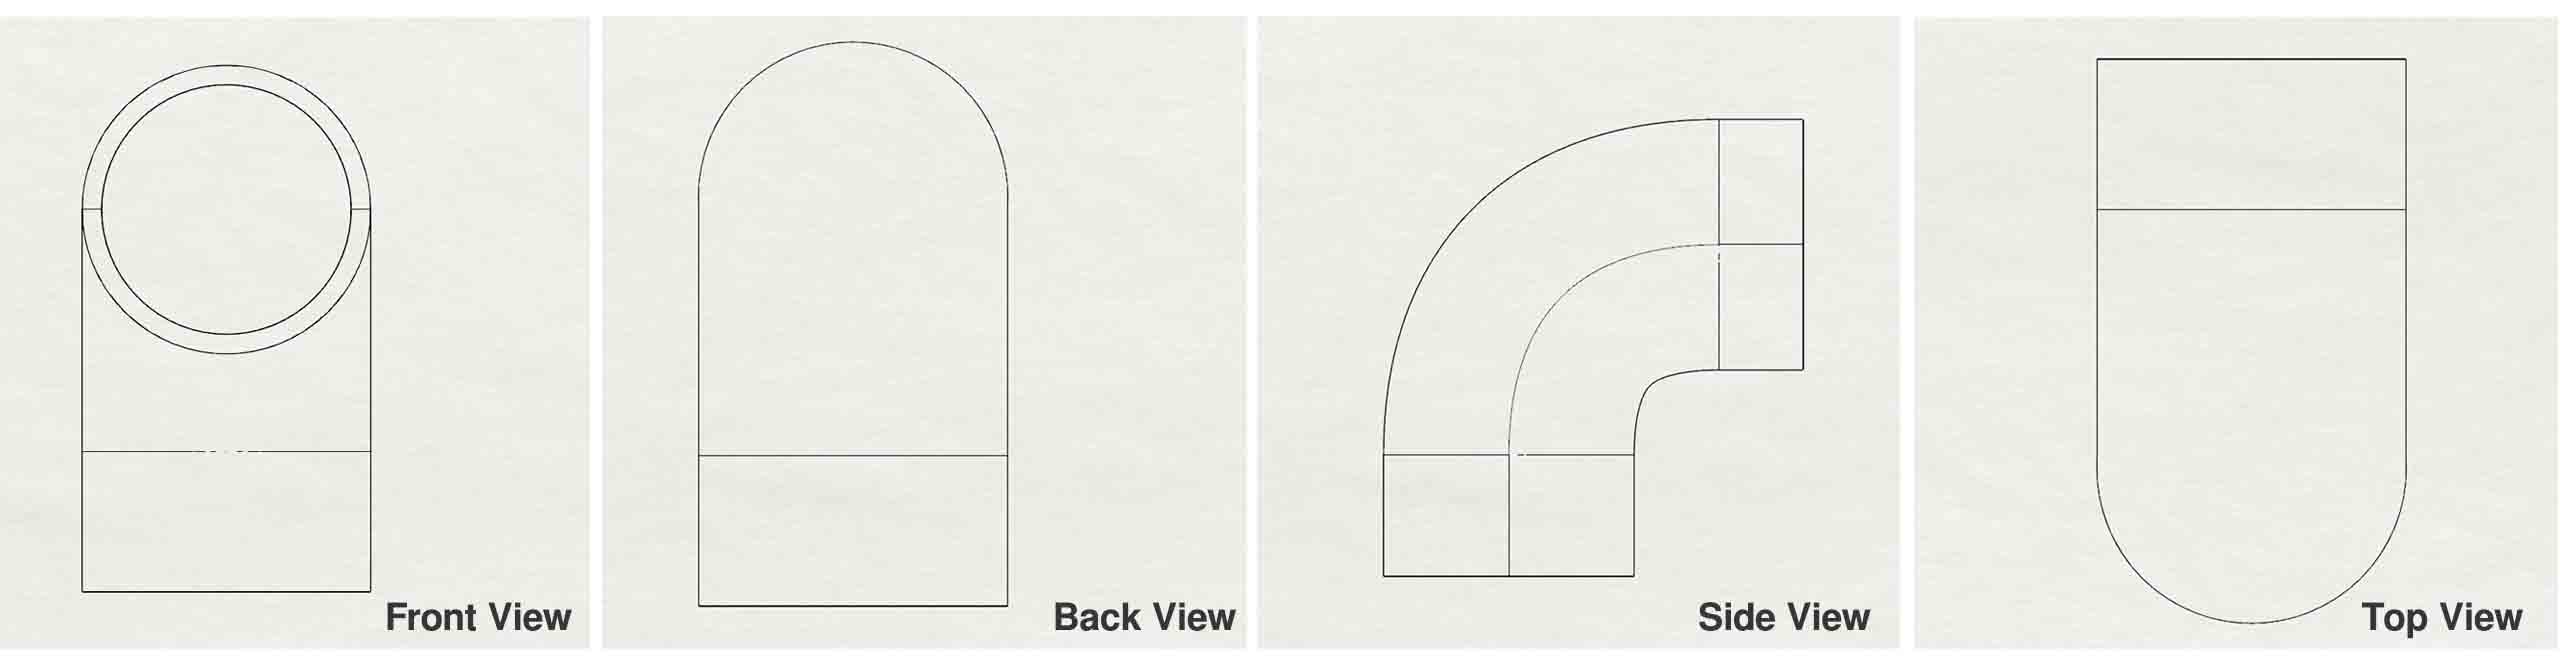
Final Elbow Pipe File
Elbow Pipe 3D Printing
Settings
Slicing
Final Look
Mistakes and Solutions
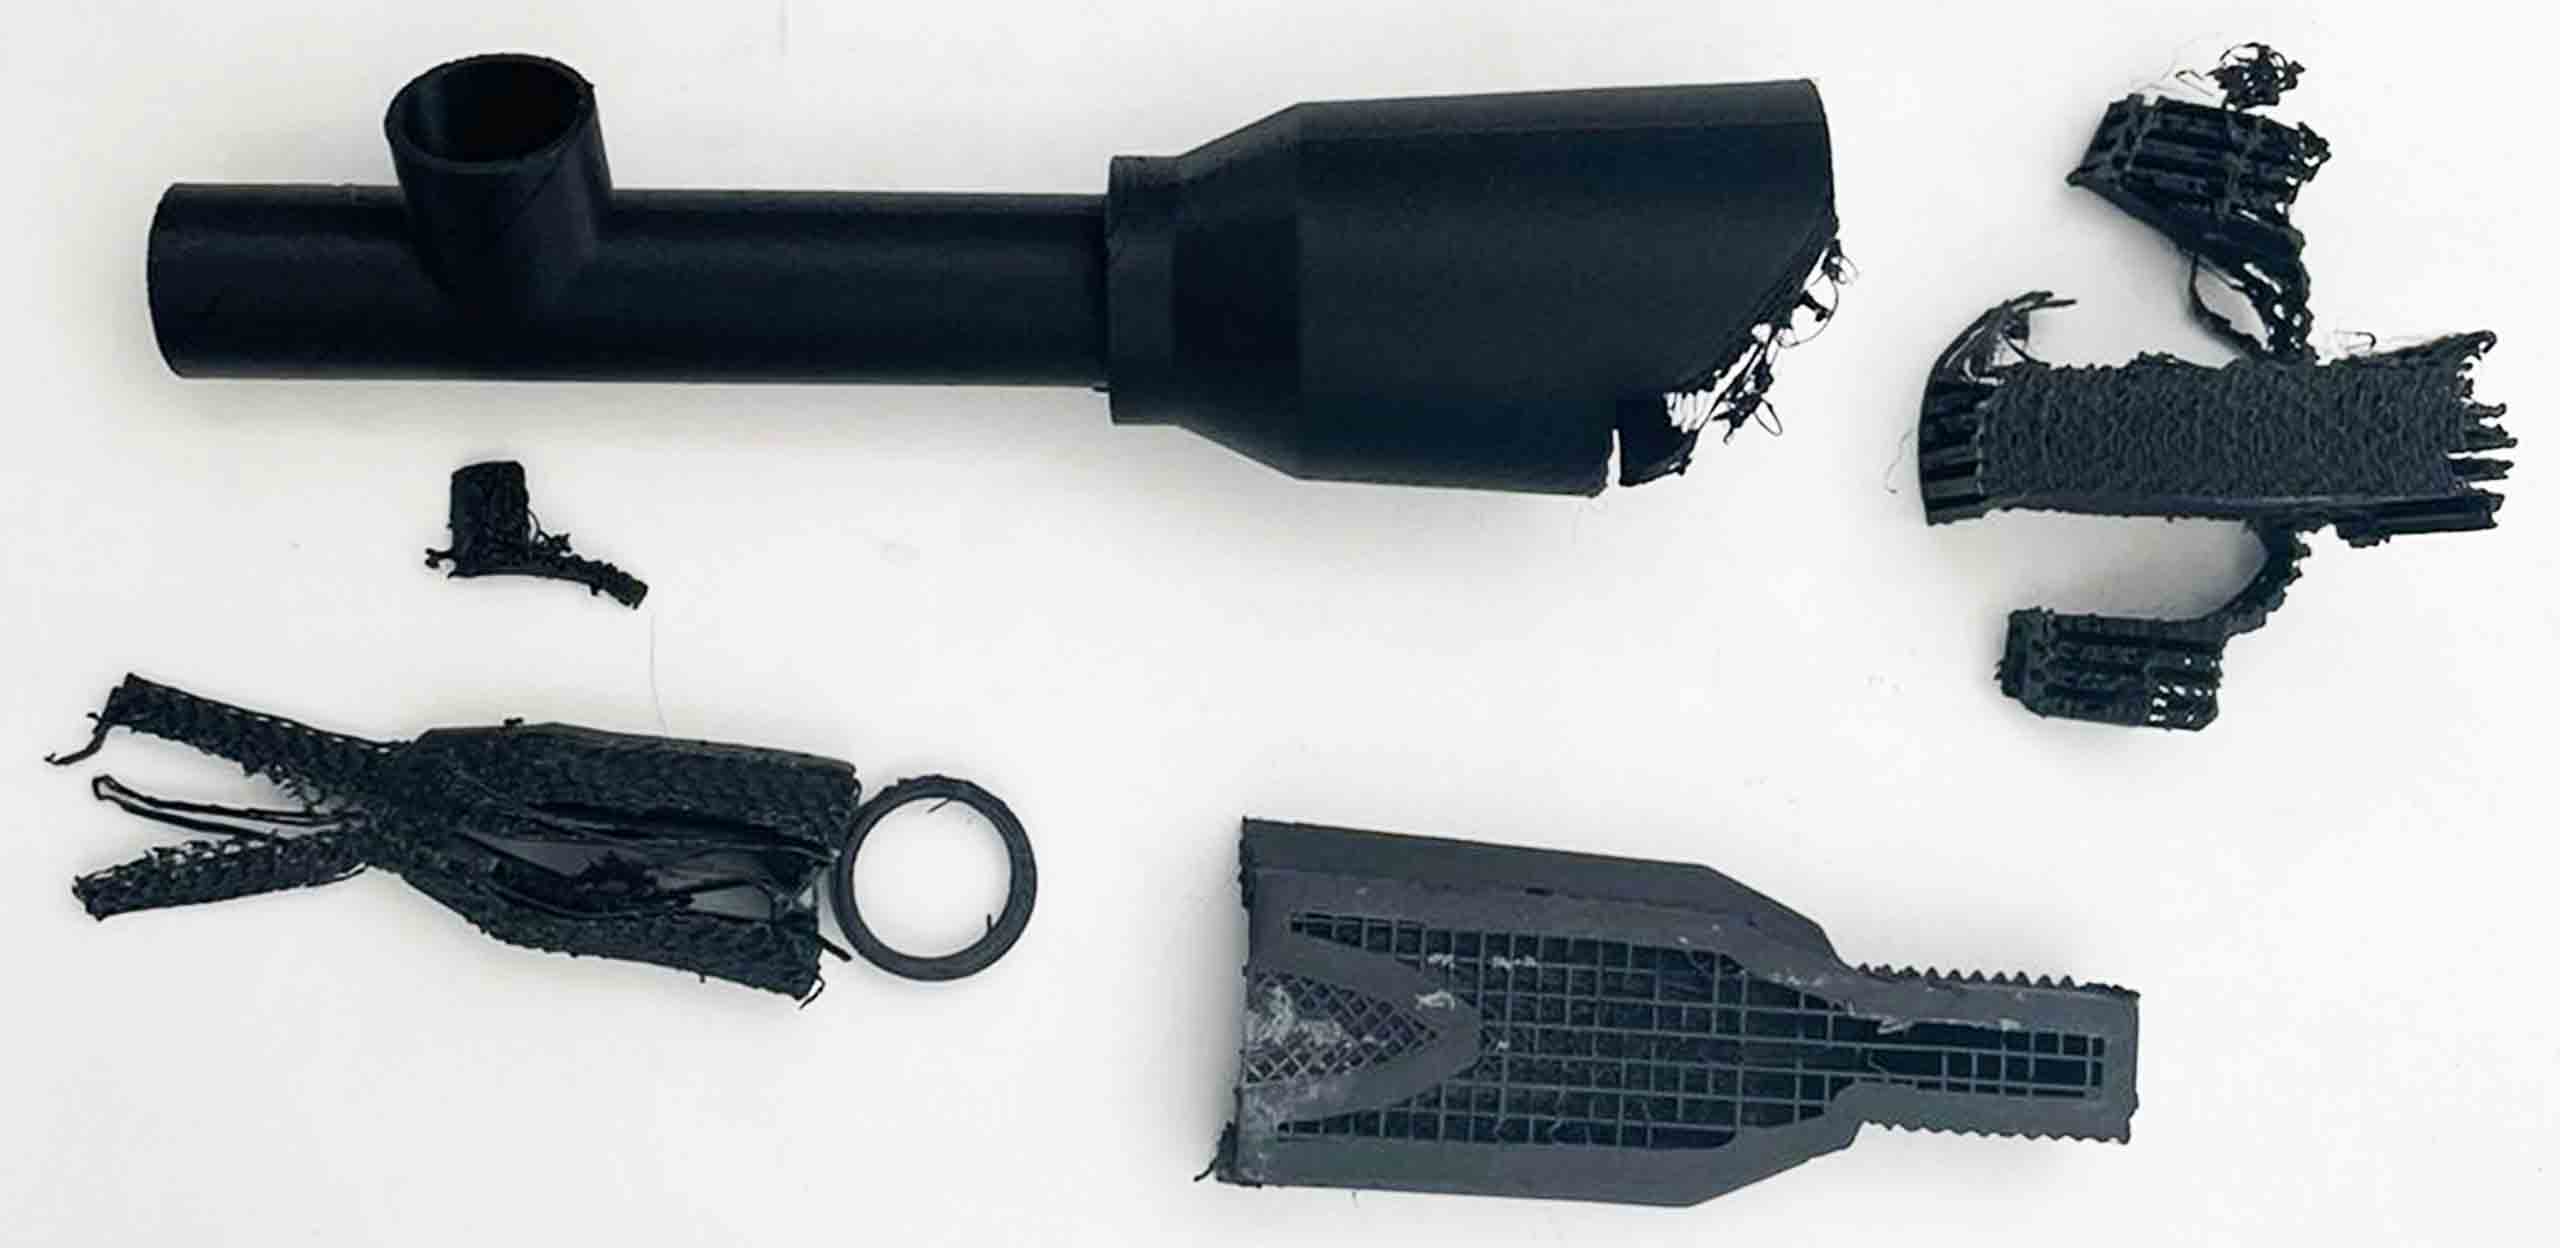
- We designed the elbow pipe using the measurements of our compression syringe. We made the elbow by measuring the height and angle we wanted and using the Rhino “pipe” command. We extruded each end to make them longer and have more grip over the pieces they were connecting to. Our mistake was in the way we placed the piece on the 3D printing bed – it didn’t allow for the strongest structure, so when we connected the pieces it snapped a little bit. Whe printed it again, this time placing the piece at an angle.
Final Bio Gun Look
Final Pieces
Assembling video
BioGun Assembly Video by Dinesh kumar and Olivia Cueva
Final Result Picture of assembled piece

Bill Of Materials

Testing bio material
To see the final process video please see the video here
Reflection
Though there were times when we regretted committing to this project, we both learned so much and gained a lot more confidence in the tools we were using to design and build this. So in the end it was all worth it and we hope this tool can come in handy in our lab for students moving forward.
Thank you