2. Digital bodies
Overview
This week was all about Digital Bodies and how to manipulate the physical body into the digital sphere, and back again. We were introduced to 3D scanning, 3D modeling, and laser cutting and were instructed to create our own “digital body”, taking the form of either a mannequin or a body part. In Barcelona, our training also included getting 3D-scanned by a giant robot arm and an Xbox Kinect.
Me being 3D scanned by a giant robot named Kuka
Research & Ideation
My process began by looking through all of the documentation from the previous years to see what had been attempted and how I could make something different. Here’s a list of several past projects I was inspired by:
At first I had so many ideas. Should I 3D scan my foot? Should I attempt to make a cyborg mannequin (what would that look like)? Or should I explore the traditional mannequin size and try to hack it? Here’s a link to my moodboard so you can see where my mind was going with this.
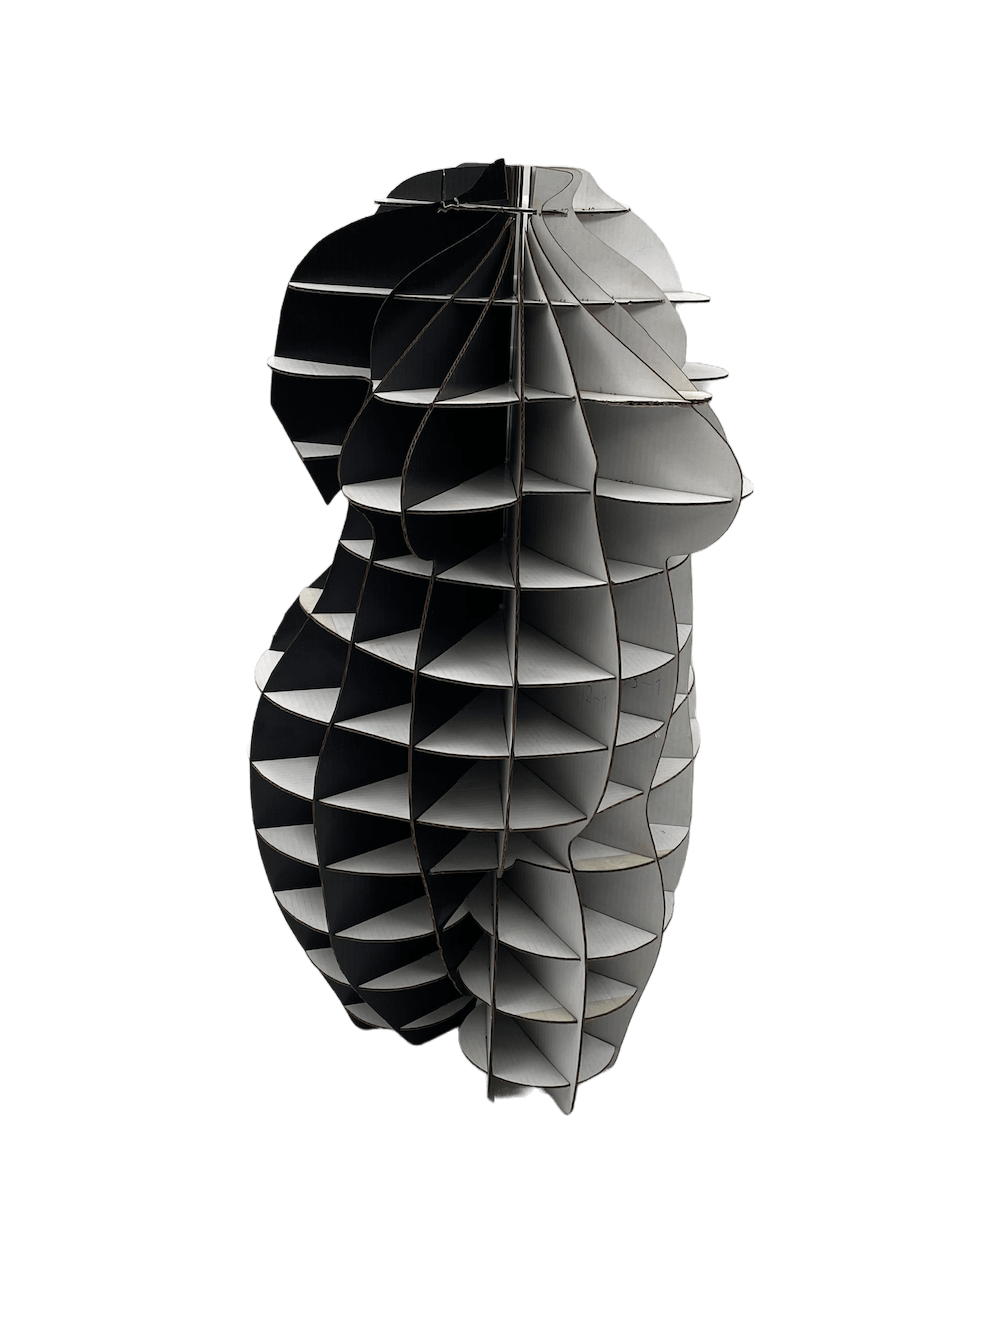
I actually created two 3D models and let the best one win. The first was of a leg and foot – thinking that I could use this later to model footwear for my final project. The second was of a body inspired by the Venus/Goddess of Wilendorff, an ancient figurine of a naked, full, round, and curvy woman’s body, with belly rolls and full sagging breasts, thought by some to have represented fertility. To me the Goddess of Wilendorff represents feeling proud of, feeling free and in control of, and just the general celebration of, our bodies!
In a time where women and people with uteruses are still fighting to the death to have control over our own bodies – to name just a couple: I’m referencing here the roll back of Roe v. Wade and the fight for abortion access in the U.S. as well as women all over Iran this week RIGHT NOW risking their lives and dying to protest the death of Mahsa Amini, a 22 year old woman who was killed by Iranian police for not wearing her head scarf correctly – I felt compelled to create a bigger bodied mannequin that to me symbolizes boldness, freedom, and bodily autonomy. And plus, I’m bored of the traditional mannequins we see everywhere: tall and slim, and effectively curve less. Time for something new.
My Process:
This week (as I imagine every week will be) we were introduced to and expected to create with several new software and hardware. I’ve had some experience 3D scanning using an iPhone (check out this cool project I worked on here and well as with the Kinect and similar depth sensor scanners. I've also worked with a laser cutter though it was helpful to have the refresher. 3D modeling is a pretty brand new tool for me. This week we were introduced to Rhino, a free and open source 3D modeling software, MakeHuman, a free 3D humanoid avatar builder, and Slicer for Fusion 360, a free 3D modeling software that transforms 3D models into slices so it can be cut on a laser cutter or 3D printer. All of this in 4 days lol.
So here’s what I did:
Step 1: MakeHuman
Because we had such a small window to cut and build our digital bodies, I decided to make my 3D models in MakeHuman instead of 3D scanning myself. MakeHuman is a free and open source 3D modeling software used to create digital humanoids, mostly for video games. There are built-in humanoid templates that you can play around with and adjust so you don’t have to build the model from scratch. There are a lot of options and you can even input your own measurements.
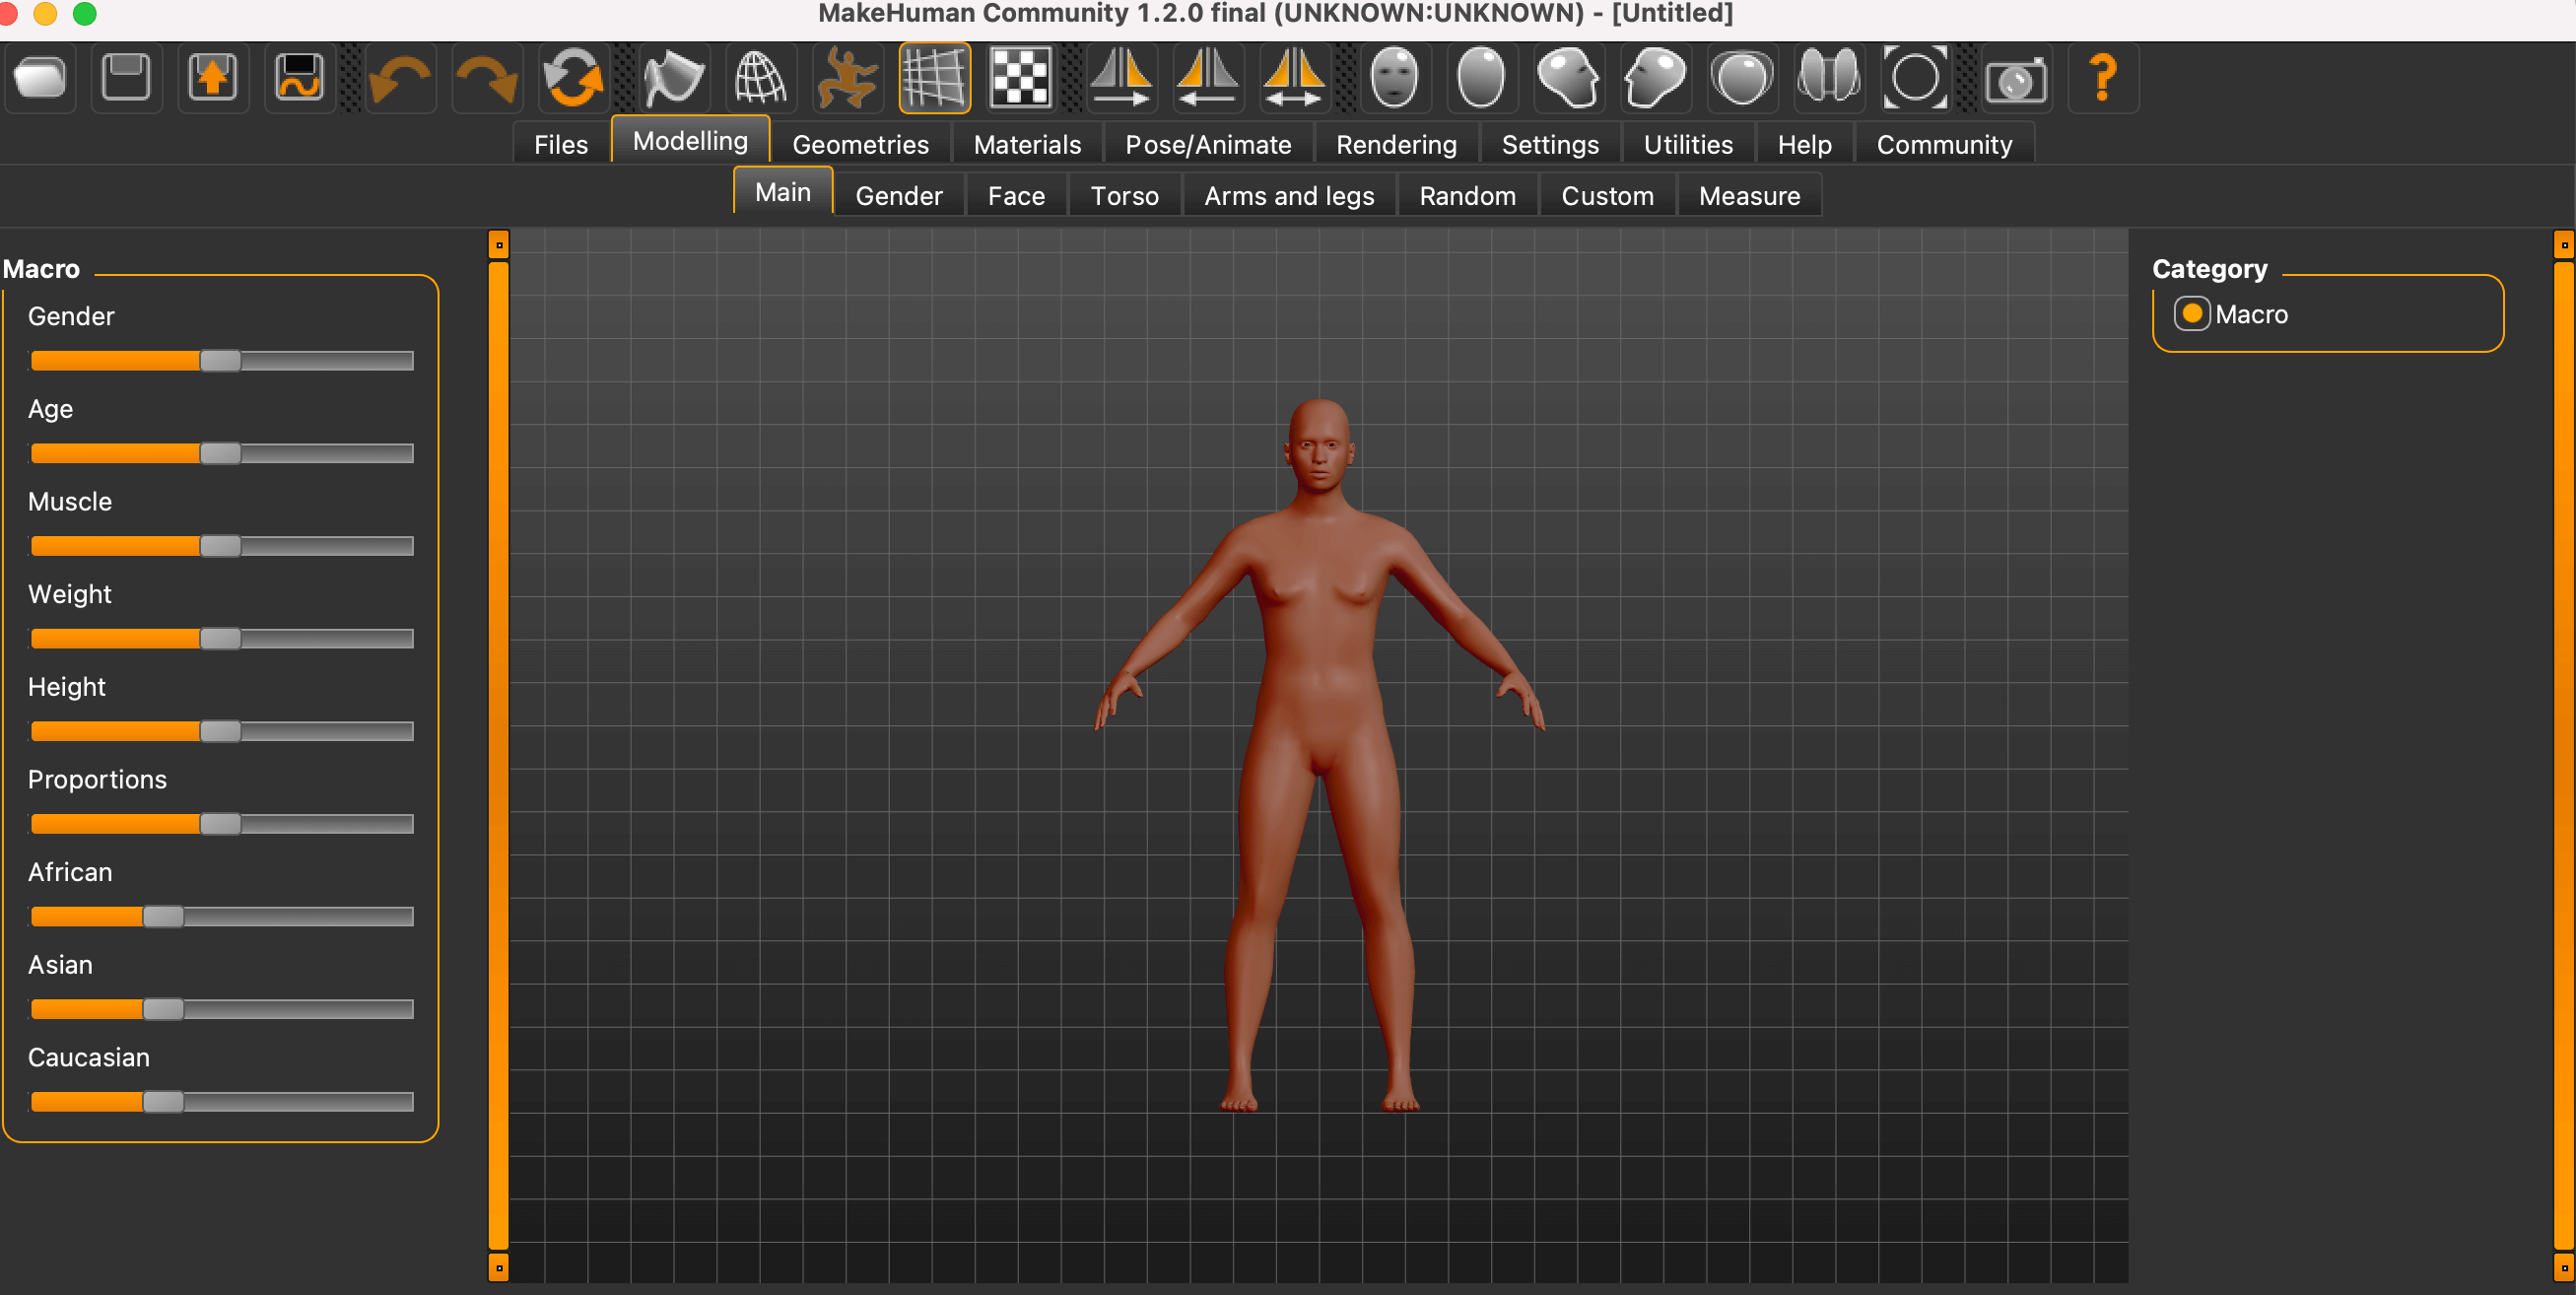
The racial categories had me raising an eyebrow though 🧐 – the options are African, Asian, and Causcasion and you can toggle to adjust how much or little you want of each to design the face you want. I thought this was weird and racist so I looked up who designed it. You can read more about it here, but today the software is managed and developed by a group of developers and artists and anyone can contribute to the assets library, like with clothing, hairstyles, jewelry, etc. Anyways, this all made me think of my friend A.M Darke and their project Afro Hair Library which is about paying Black 3D artists to design and contribute to an open source library of Black hair textures and styles. It’s so cool you can learn more here!
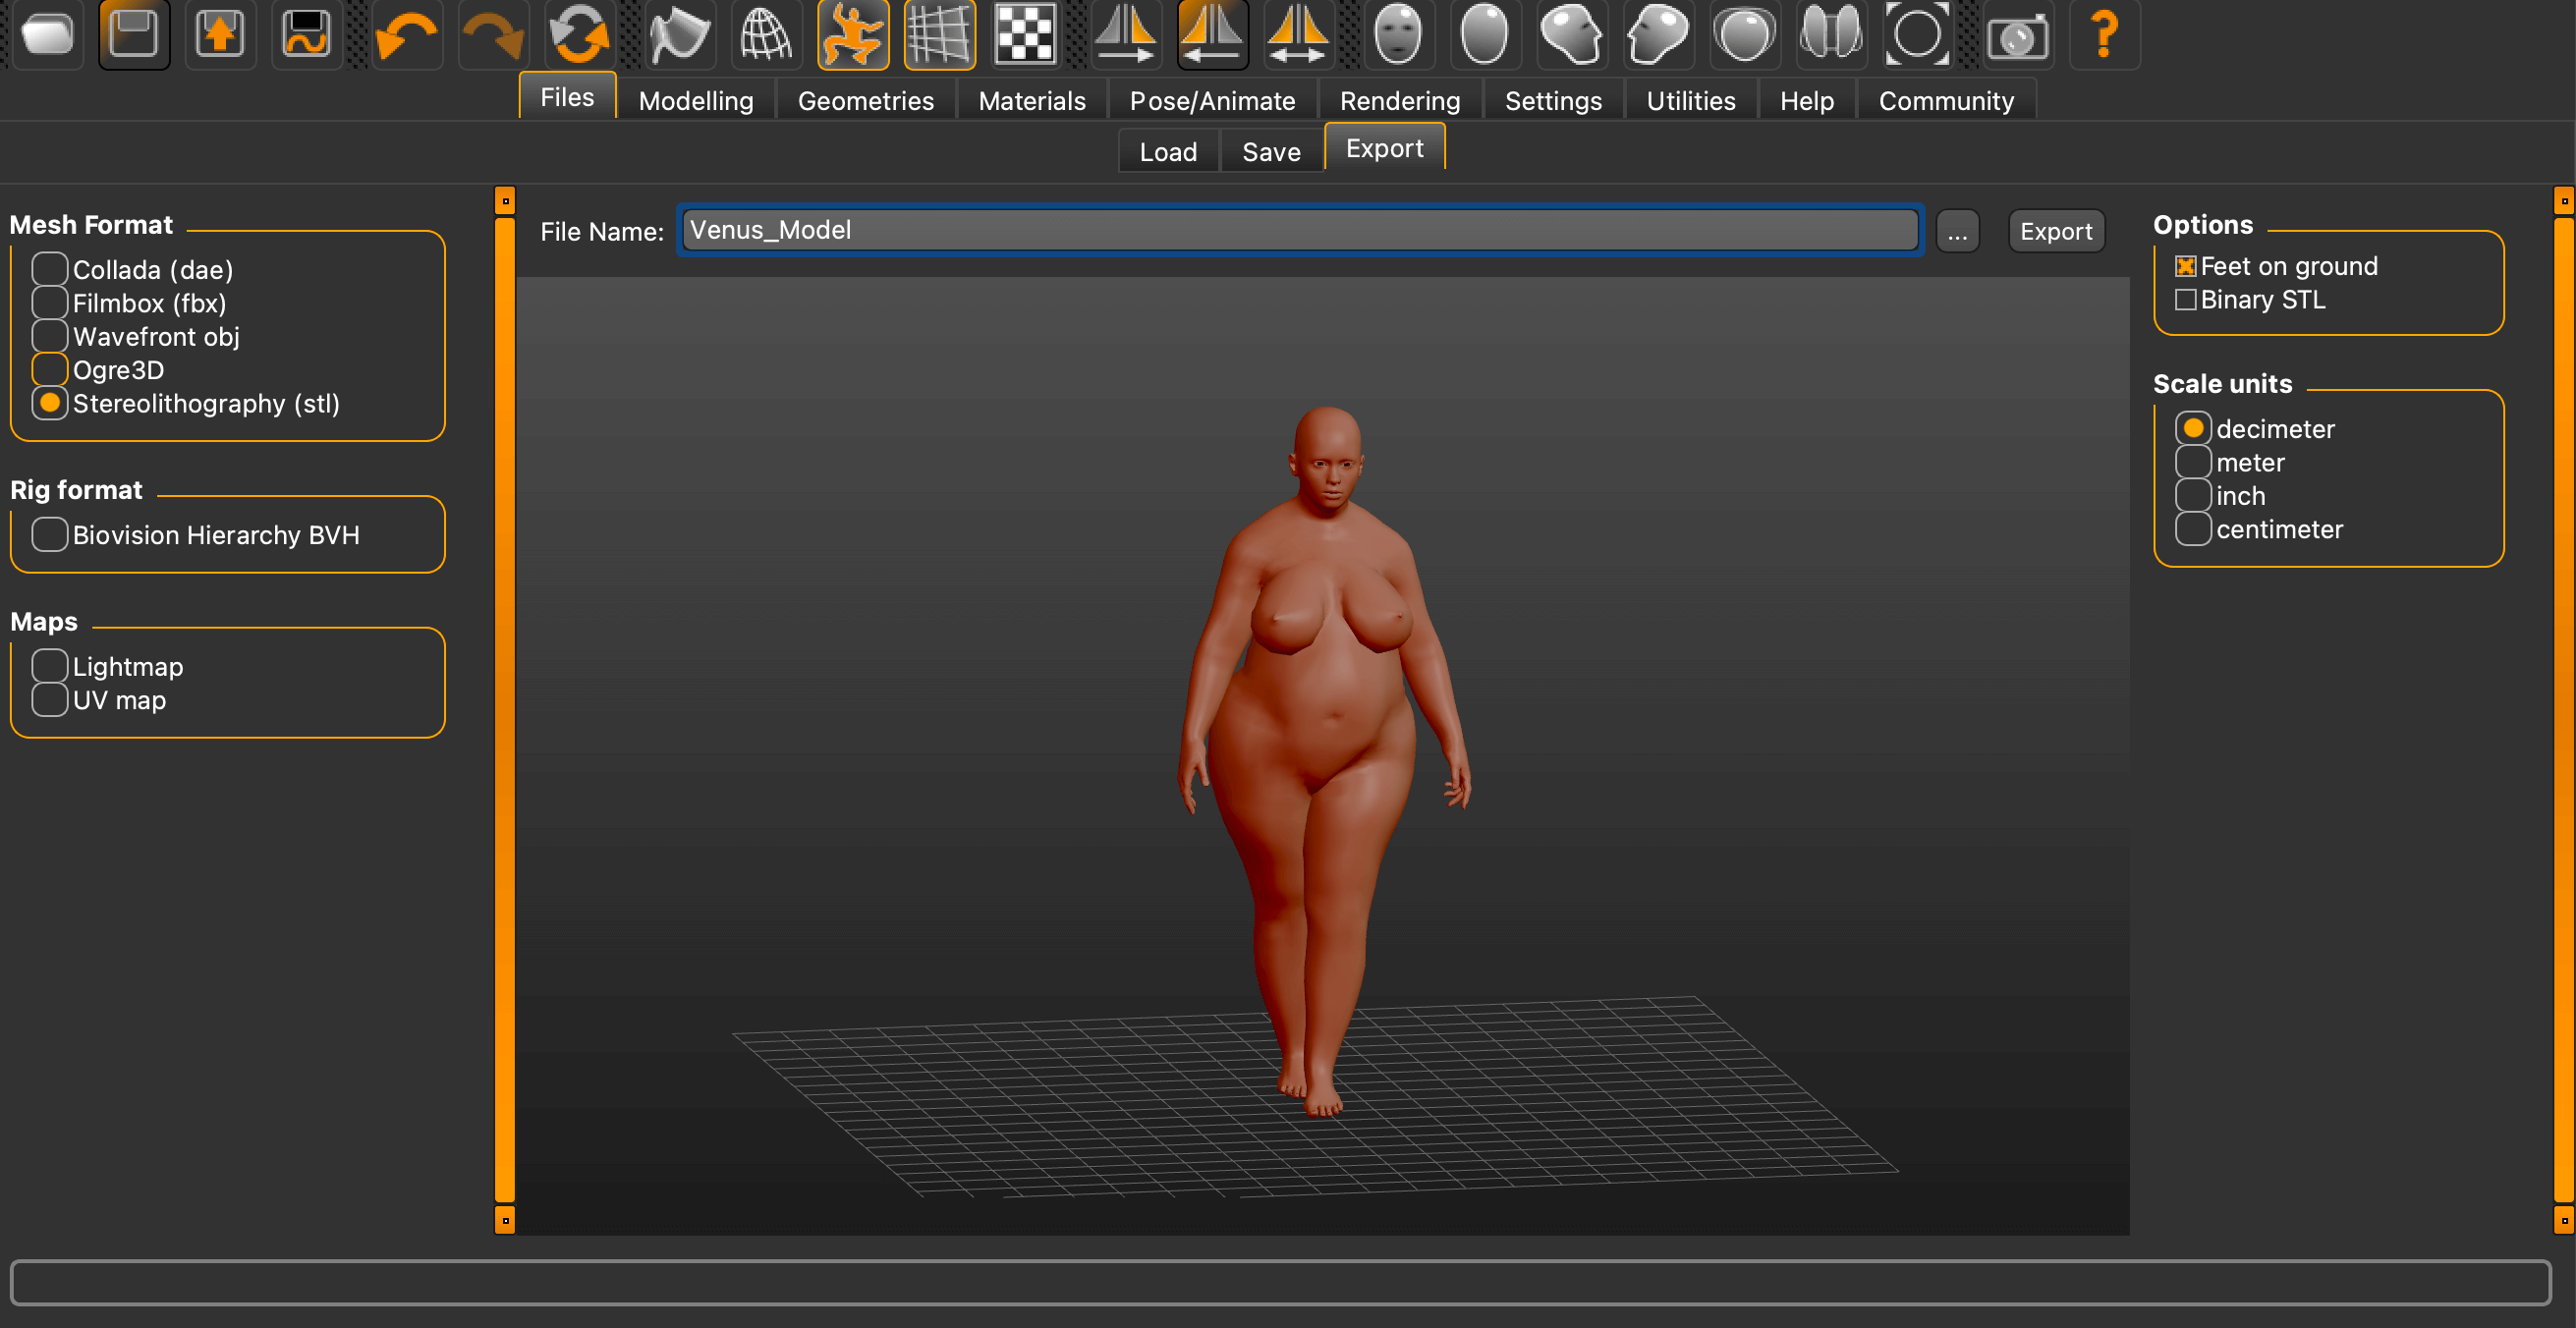
Step 2: Rhino 3D
Once I created my model in MakeHuman I exported it as an .stl file and brought it into Rhino 3D. Here is where I adjusted the size, sliced off some body parts, closed the holes and created a mesh that I could bring into Slicer to adjust for laser cutting.
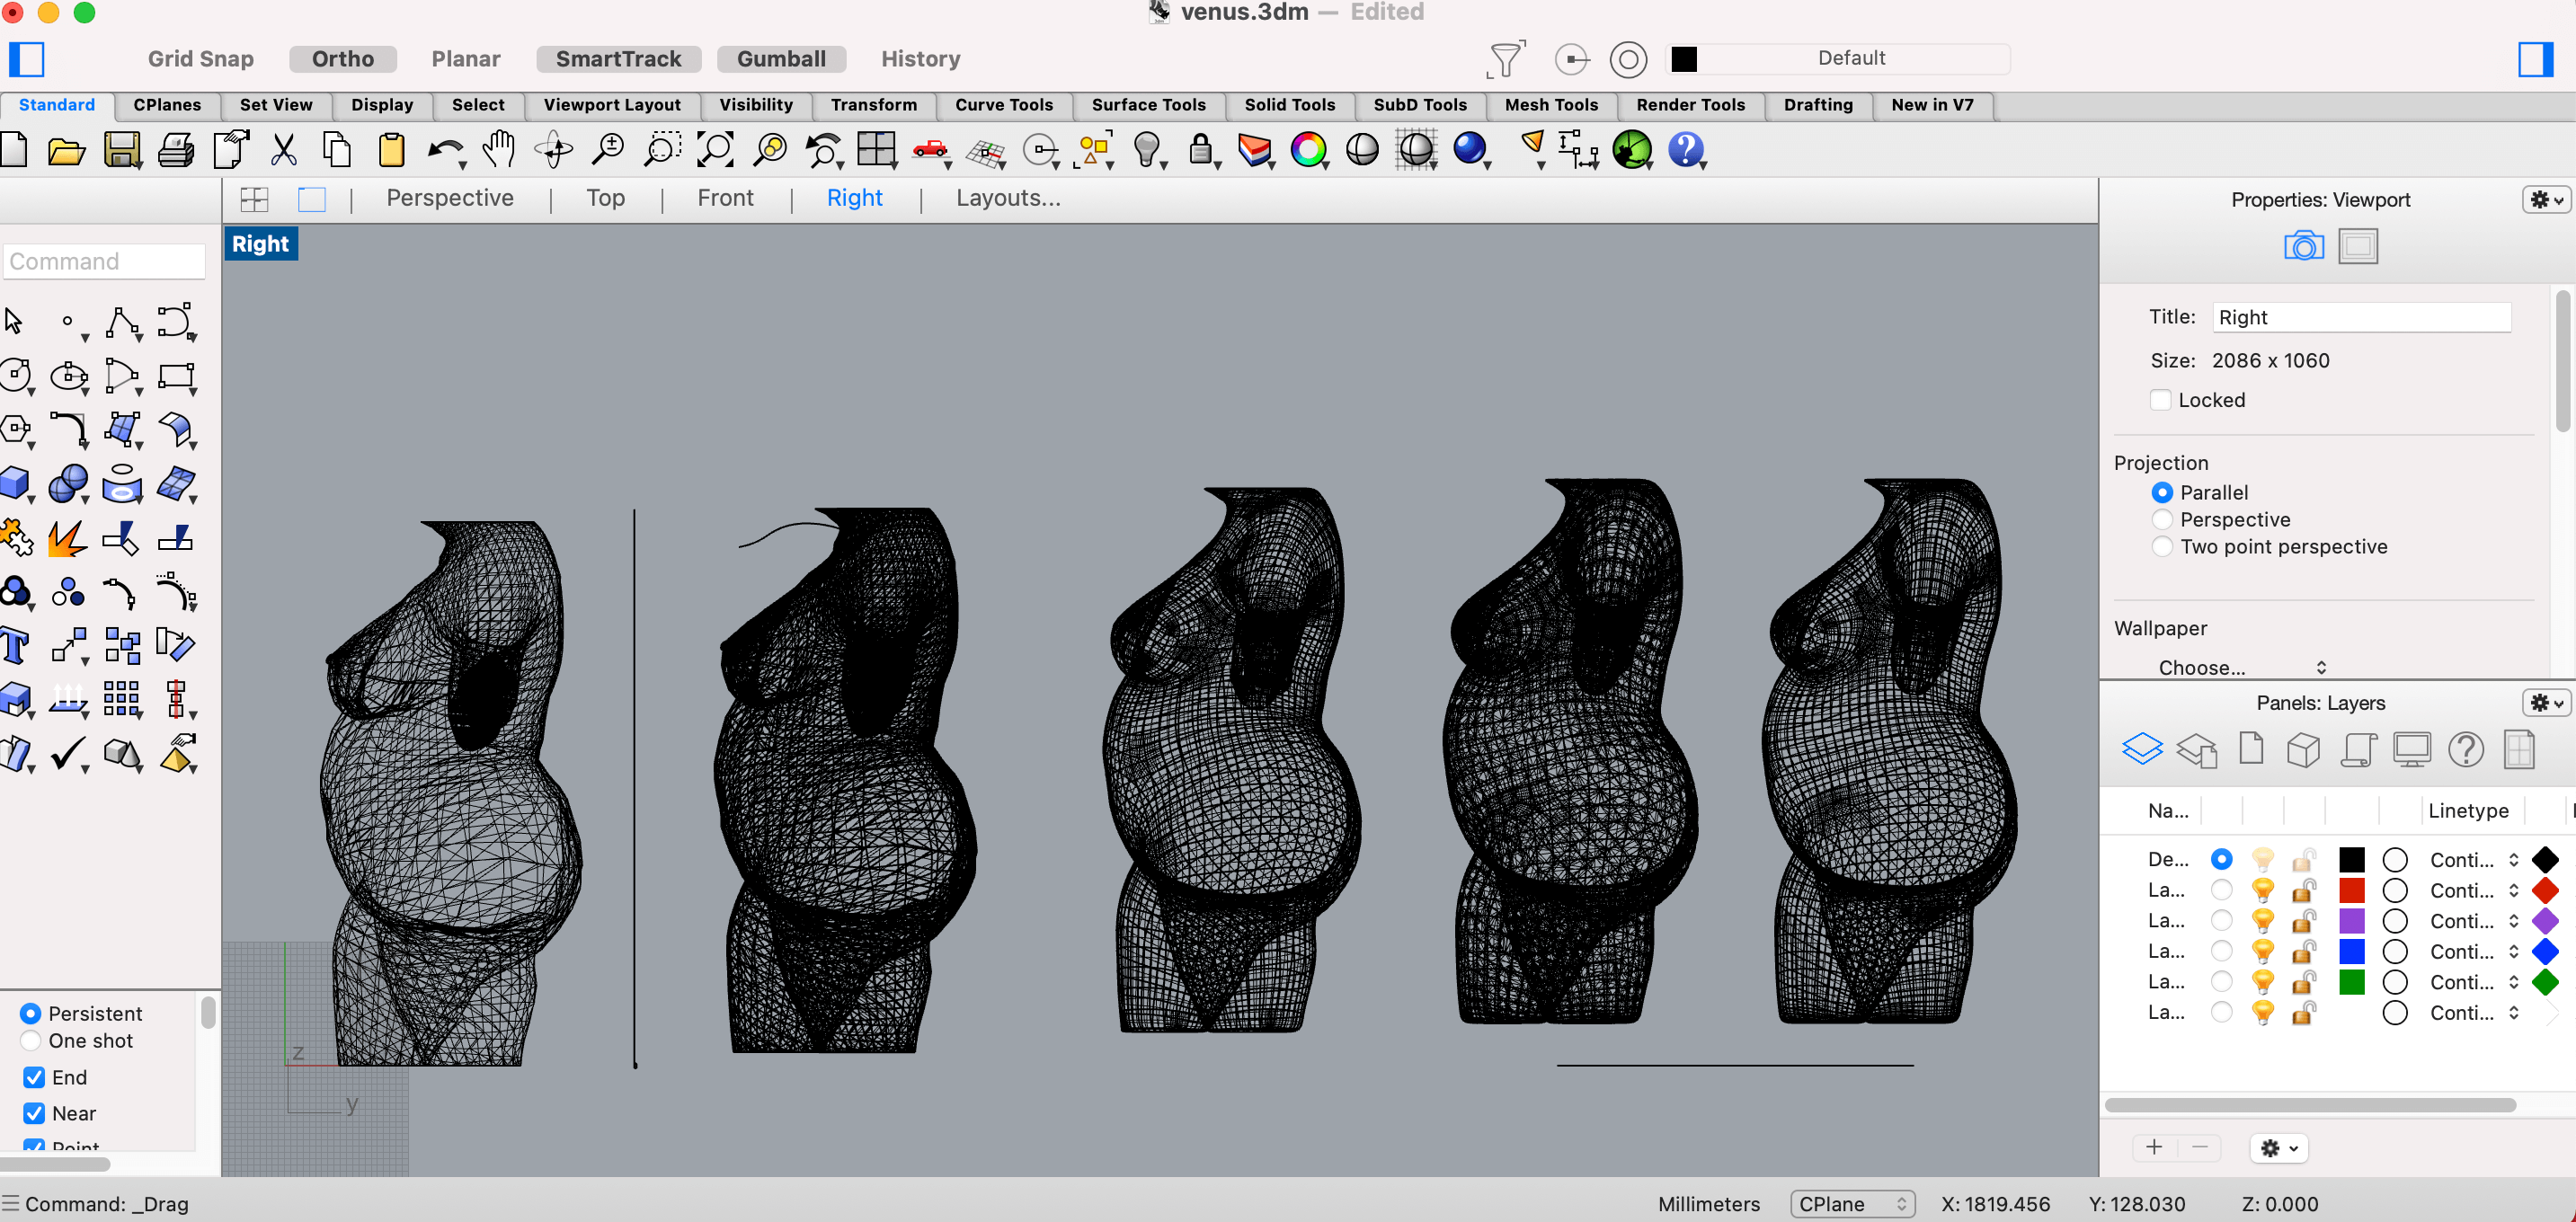
Playing around in Rhino with my model
First I scaled the model way up to be lifesize by measuring my own body, about 800 mm for me. Then I had to cut off body parts I didn’t want like the head, the legs, and arms. I practiced cutting with shapes and then polylines but that left me with gaping holes in my model that couldn’t be brought into Slicer. This part was actually quite difficult and frustrating because I didn’t know what I was doing lol. But with the help of Petra, our assistant teacher, and some classmates, I was able to turn the model into an object, re-cut it with a surface object, then turn it back into a mesh for exporting.
Step 3: Slicer
Slicer for Fusion 360 is a free software that allows you to slice and convert your 3D models into 2D patterns that you can then laser cut out of any flat material, like plywood, cardboard, or acrylic. Here I got to choose what style I wanted my mannequin to be sliced in and the plans for how to put it together.
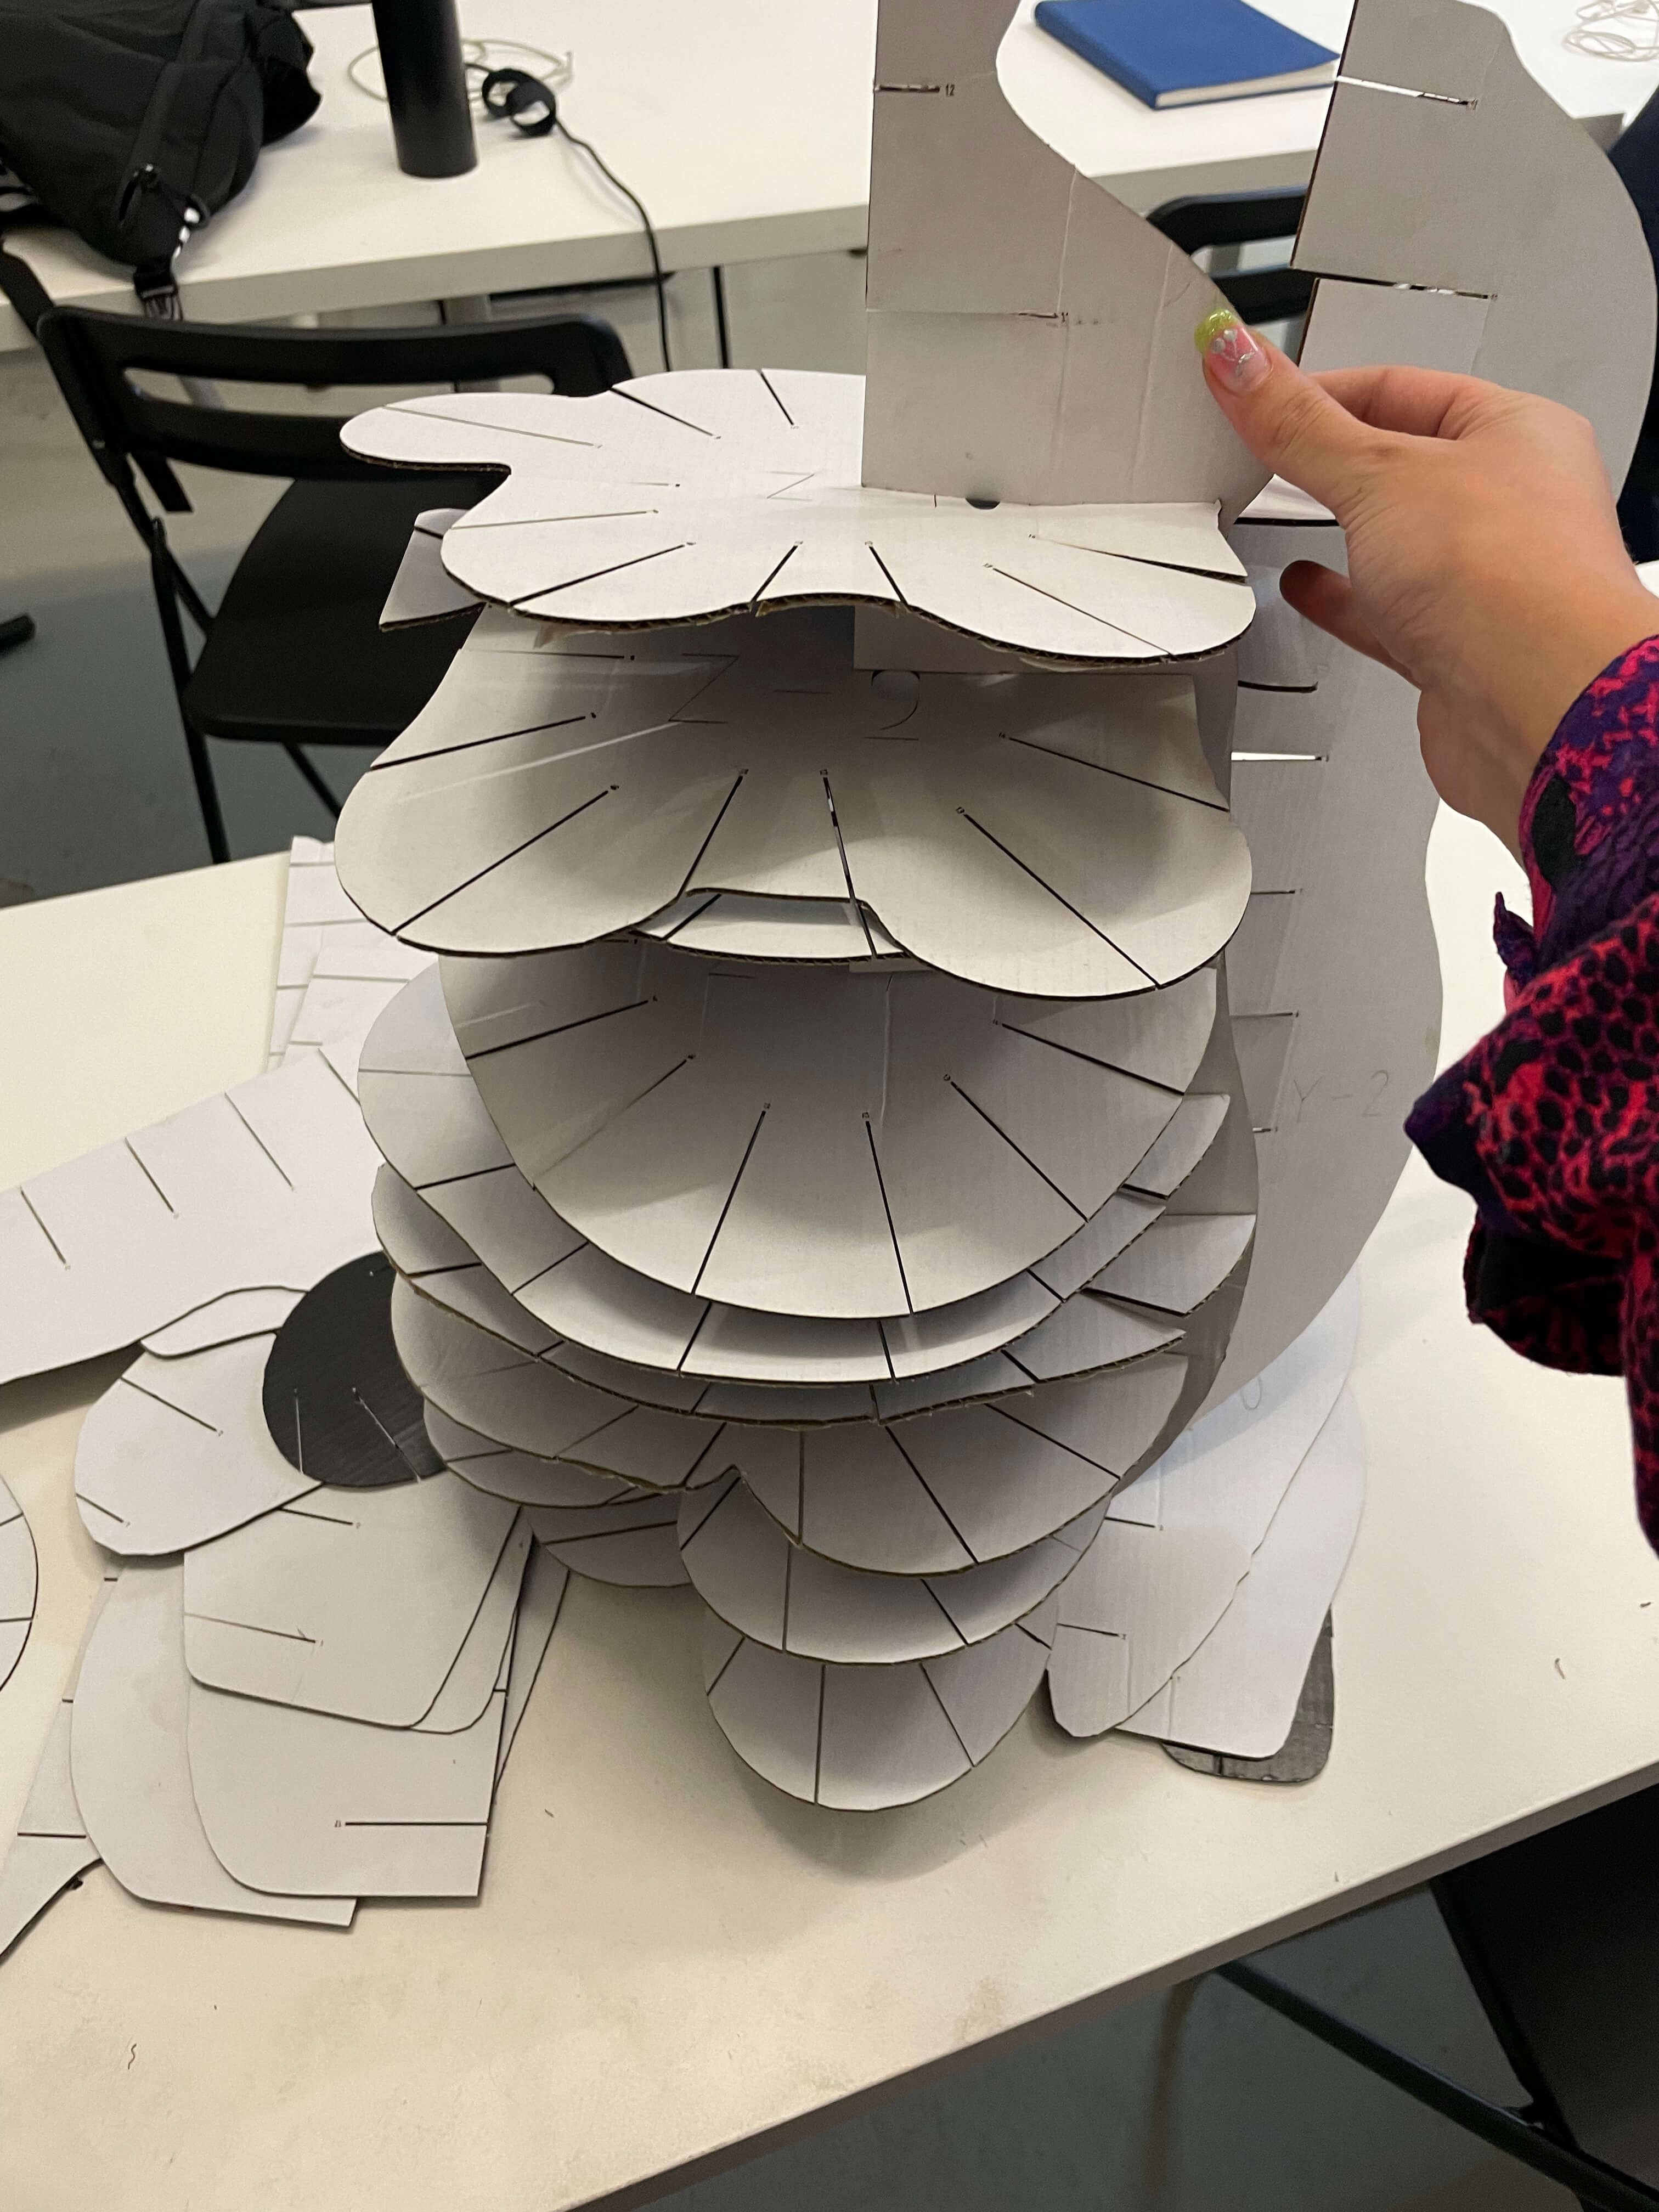
But here is where I hit a major error – we were told that the cardboard we were using was 1mm but it was actually 1.6mm. So in Slicer, I made my notches too small and because I was the first of my classmates to laser cut, it didn’t fit together. That's why they say measure twice, cut once. Or measure three or 4 times just to be sure lol.
A timelapse of me attempting to piece togeter my mannequin and failing
Step 4: Back to Rhino
After I got the measurements correct, I exported my plans and imported them back into Rhino 3D, made them 2D, closed and ungrouped all the shapes, and then changed the colors to correspond with the cutting and engraving colors in the laser cutting software. I also made sure to check that the notches were at their new size of 2.1mm.
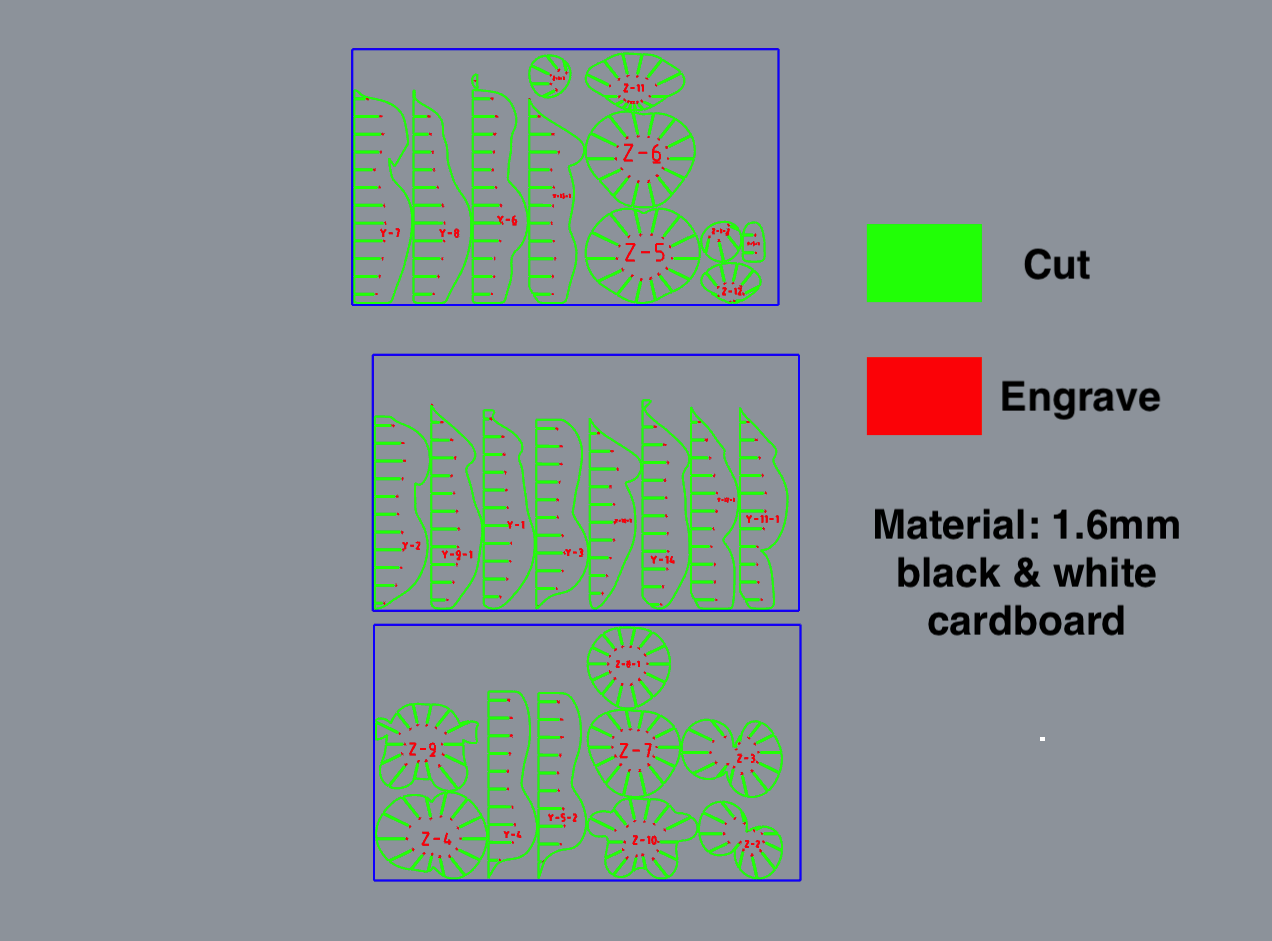
Step 5:Laser Cutting
Once the file was ready for cutting, I set the cutting and engraving settings using the guides on our maker space wall and from what worked with other students who had cut before me.
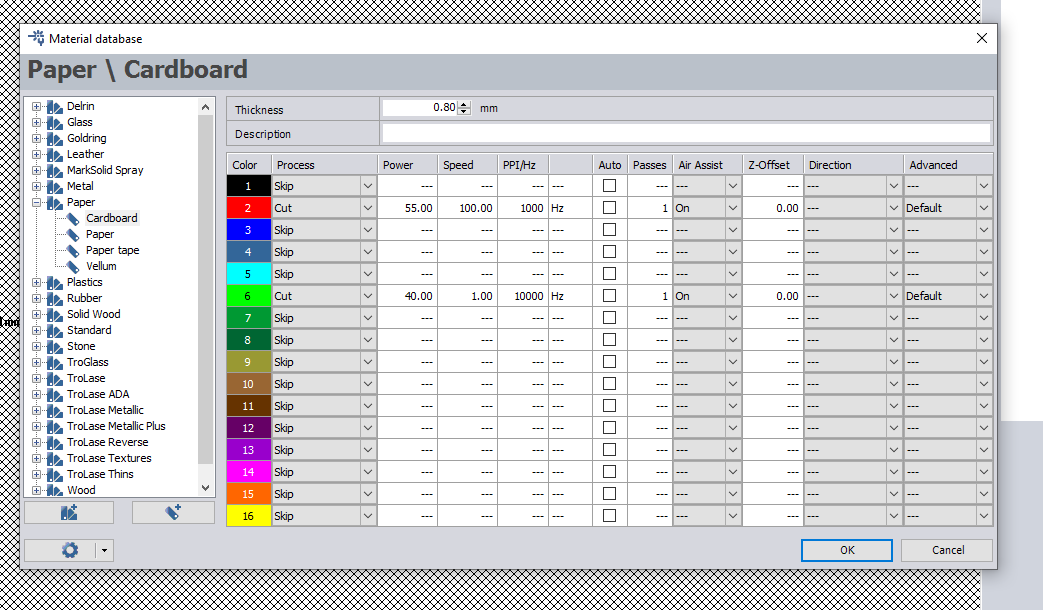
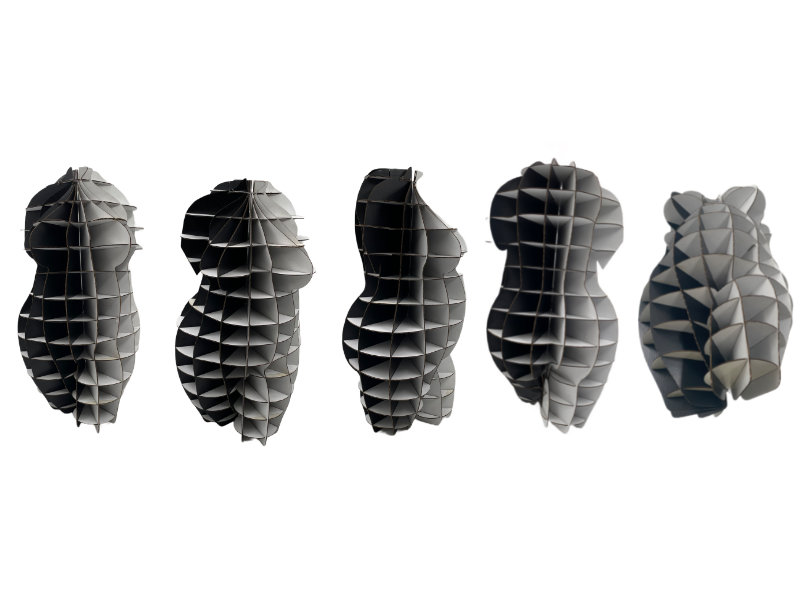
On the laser cutter, I measured the focus of the laser and set my material to be laser cut. We cut a test swatch first. Ultimately l ended up changing my Slicer file, and corresponding Rhino 2D file 3 times to adjust for sizing. Even in the final version the notchers could have been a bit smaller but in the end it all fit and SHE LOOKS AMAZING.
Final Documentation
Tools
Fabrication files
-
File: Laser cut sheets ↩
-
File: Slicer Project ↩