5. E-textiles

INTERACTIVE ART
Digital technologies are changing how we present ourselves, how we communicate with one another and how we experience the world.
Working with technology can be amazing. It is another language that we need to learn and practice… For a few years now, technology has been participating in art so artists are creating spectacular works and installations. Digitalisation it is getting an impact in our physical and virtual interactions. Of course electronic and interactive art has become one of my best reference!
INSPIRATION
Expression Wall
Expression Wall from Red Paper Heart on Vimeo.
The Expression Wall is an ongoing installation at Deloitte University that gives attendees a way to express themselves. Each expression is stored in an ever growing gallery that reflects the moods, opinions and interests of D.U. attendees. This unique touch surface was created with 100 procedurally generated slats of plexiglass which are backlit by LED light. The natural flex of the plexiglass provides a surprising surface for drawing.
Here my Pinterest inspo folder: Arteractive
CONDUCTIVE WEEK
During this week we learned how to apply electricity to textiles. They gave us some tutorials on basic technology and Arduino, which for me has been a new software which has been complicated at first but super interesting to learn.
There are many tutorials and open source that can help design your circuit and program it. This Arduino platform is very complete to seek help or answer questions about any circuit issue. ARDUINO DOCUMENTATION. You can find really useful tips on how to use the code and what tools it has; And if you want to give your programming a much more artistic look, you can interact in the digital world by making digital art with your physical sensor.
I introduce a video where it shows the book Generative Gestaltung. Generative design is an Innovation Tool, a new way of approaching the way the world around us is built and created. It is a tool that has been gaining strength in fields such as engineering, art, architecture and design.
DIGITAL ART
On the other hand, I find it interesting to know that there is another open code; Draw digitaly.
There are two types of programs for this:
WEEK EXCERSISE
ANALOG SENSORS
Thanks to these analog simple exercises I have been able to understand in a simple way how electronics and voltage works.Silver foil is conductive which allows electricity to pass through. With this simple material we can already start making circuits!
| MATERIALS | |||
|---|---|---|---|
| Piece of Velostat | Aluminum foil | Sheet of paper | Multimeter |
On/OFF the Circuit with an analog sensor:
In this exercise we have joined the two concepts, the circuit will turn on with the analog sensor that we have built.
ARDUINO
Arduino has 2 main functions that execute specific instructions with descriptive variables.
-
setup () It is executed once when the program is started. Here the pins are made to be INPUT (interruptors) or OUTPUT (LEDs) using the pinMode function.
-
loop () Executed continuously. It checks if there is voltage at the inputs and where you connect and disconnect the outputs.
Here one example: We play turning on 3 seconds and turning off 3 seconds with pins 13 and 7
void setup() {
  // put your setup code here, to run once:

pinMode(13, OUTPUT);

pinMode(7, OUTPUT);
}

void loop() {
  // put your main code here, to run repeatedly:

digitalWrite(13, HIGH);

digitalWrite(13, HIGH); // sets the LED on
  delay(3000);                // waits for a second
  digitalWrite(13, LOW);  // sets the LED off
  delay(3000);                // waits for a second

digitalWrite(7, HIGH); // sets the LED on
  delay(3000);                // waits for a second
  digitalWrite(7, LOW);  // sets the LED off
  delay(3000);                // waits for a second
}
void setup() {
  // put your setup code here, to run once:

pinMode(13, OUTPUT);

pinMode(7, OUTPUT);

}
FINAL EXCERSISE
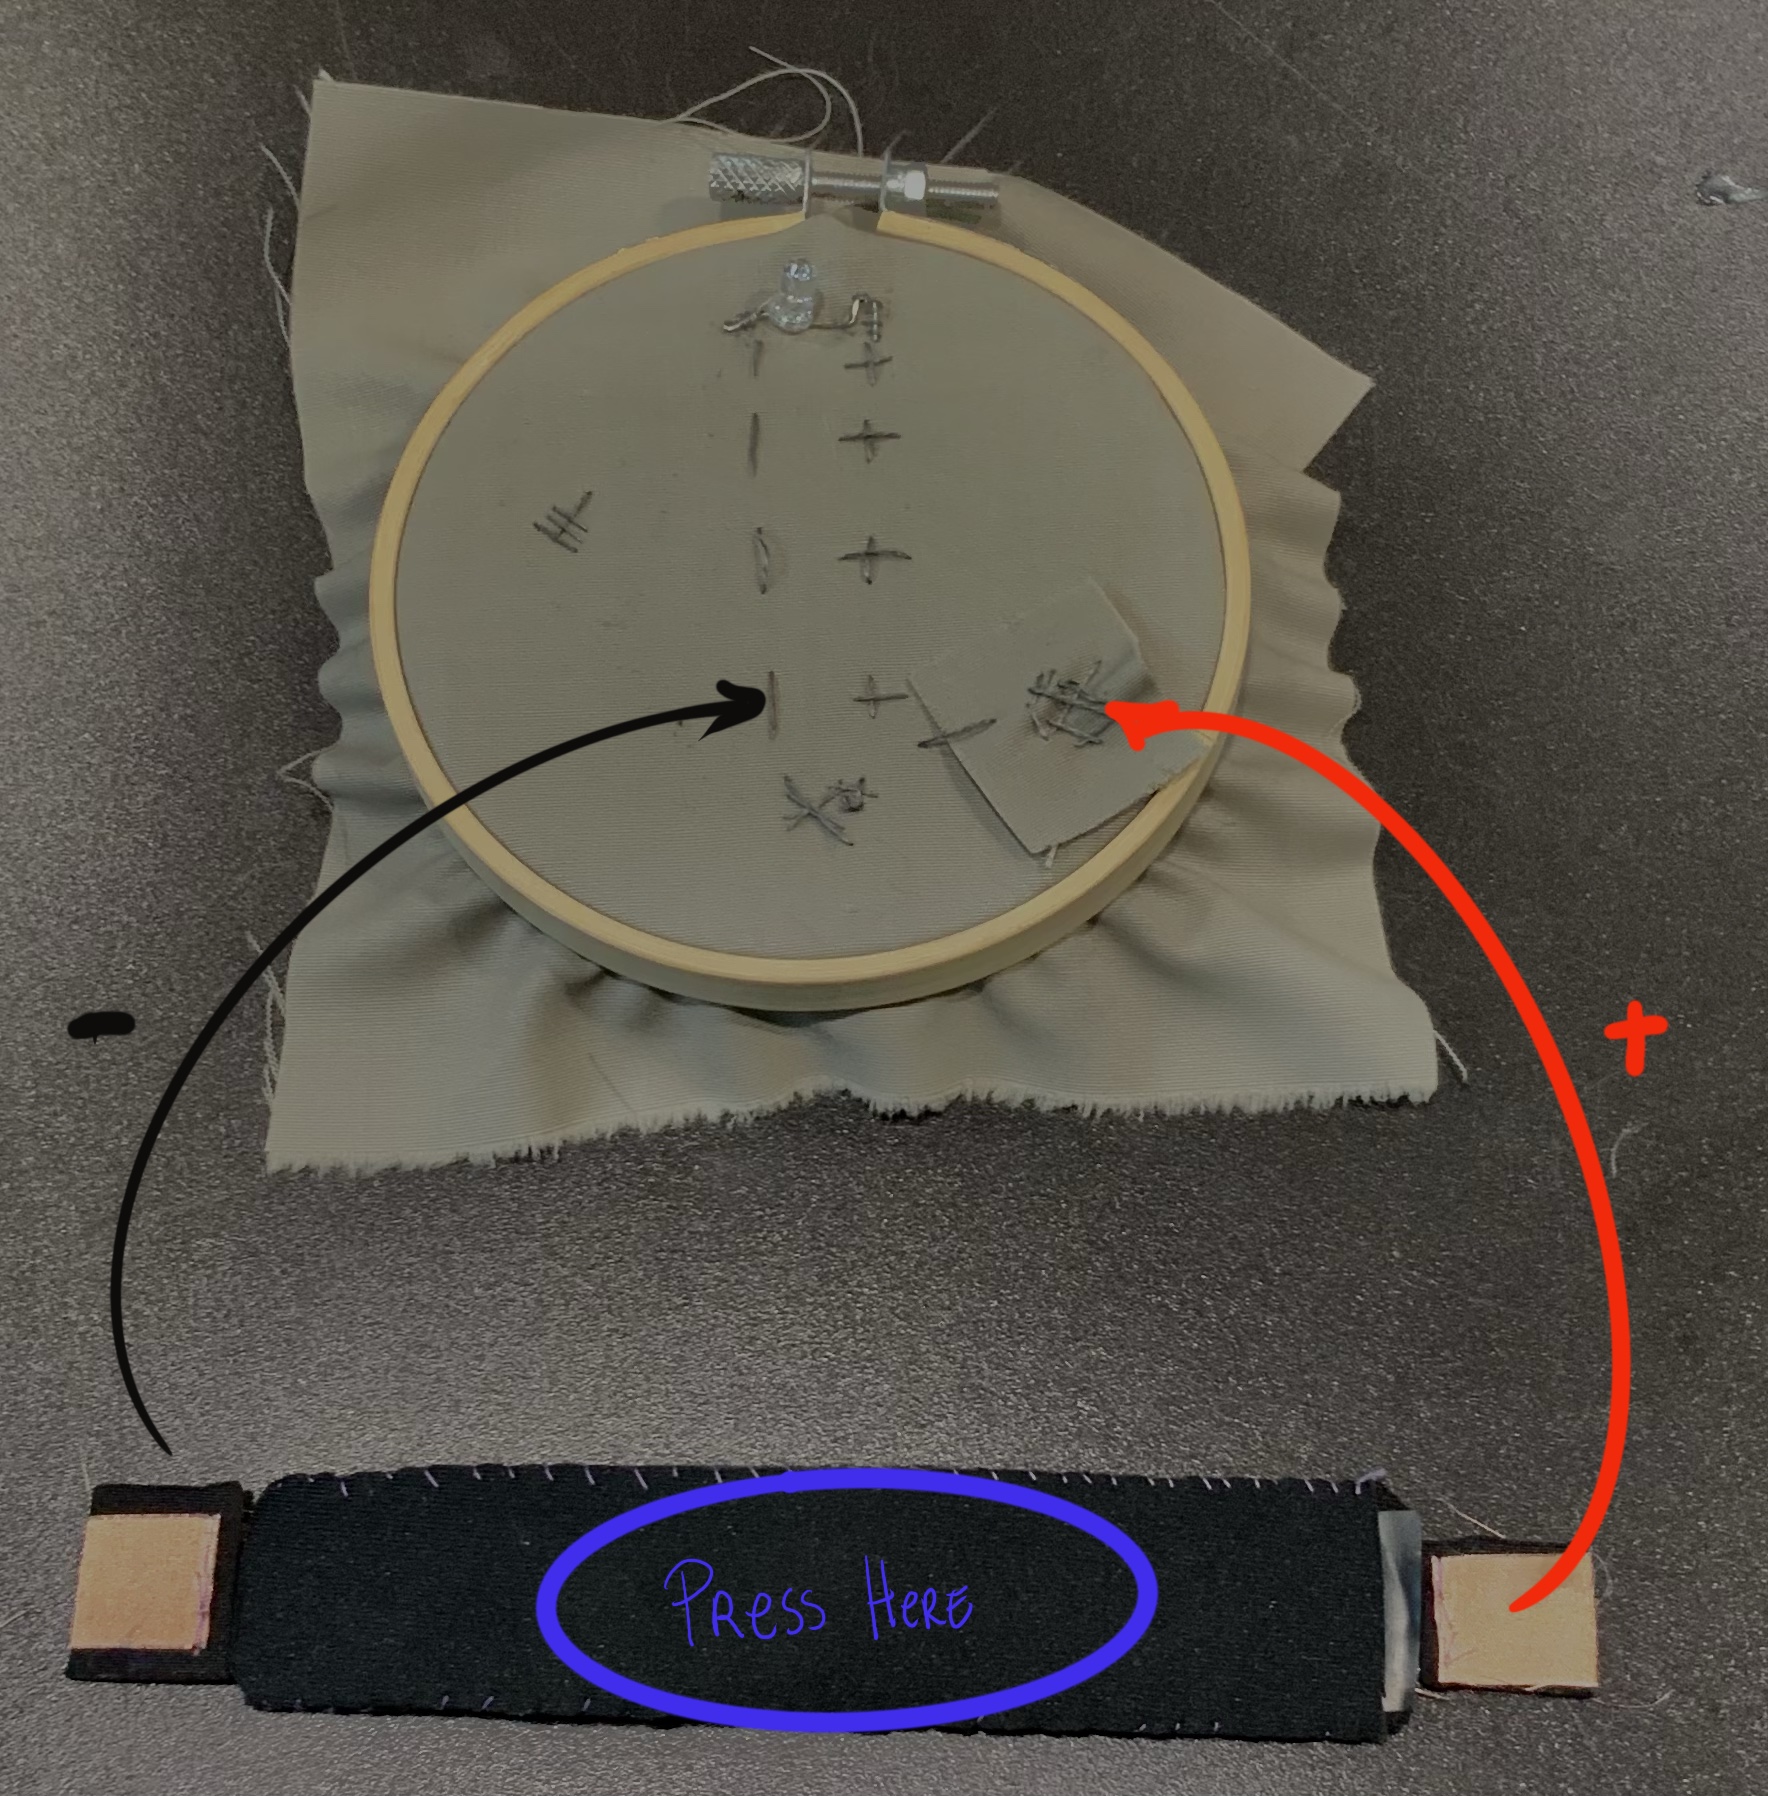
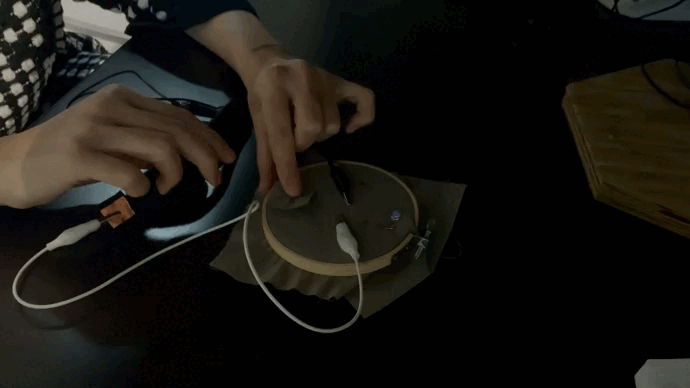
 For this first exercise, the objetive is to light a led without wiring. Working with soft materiales makes all the interaction different. I was really impressed in how we could create different sensors using conductive fabrics.
For this, we will need the list of materials that appear in the image on the right.
For this first exercise, the objetive is to light a led without wiring. Working with soft materiales makes all the interaction different. I was really impressed in how we could create different sensors using conductive fabrics.
For this, we will need the list of materials that appear in the image on the right.
Next, I indicate how we have managed to build this E-textile by steps:
-
1) Prepare the fabric in the way you can sew easily.
-
2) Separate the legs of the LED and tie them to the different conductive fabrics. REMEMBER that the long leg of the Led is POSITIVE.
-
3) Then you have to create two diferent direction, In my example it seems clearly the Positive one and the Negative one. Two paths must be sewn separately and not touch between threads.

TABLE OF MATERIALS
| MATERIALS |
|---|
| conductive threa |
| fabric as a template |
| 3-5V Battery |
| Leds |
| copper cloth as conductive in the battery |