9. Textile Scaffold
This week I have not been able to perform the exercises as I would like. I have been delayed and I have not been able to carry out and finish what I would have liked.
Equally, I want to present you the subject and all the possibilities that fabric has to explore and create. I have worked on crystallization for the first time and it has left me very excited to work on it again at some other time. On the other hand, I have worked with the mycelium for the first time, and this has been amazing, especially knowing all the possibilities and characteristics it has.
And of course, the CNC machine, which has also been a great surprise to see that we can carry out a large part of the casting and sculpting work. at the same time it makes me think about the costly process of the artist and of course appreciate much more the manual work of the sculptor
This week we focus on exploring materials applications using different techniques.
Textile Scaffold Lecture Notes
CNC MILLING
We are lucky to have a good milling cutter in class. Its measurements are more than 2 meters long by 1 meter 20 wide. We have heads of different sizes for different cuts. They are prepared to cut different types of materials except iron.
The CNC machine uses a subtractive process, our Machine Fresadora operating in 2 axis, while other machines can offer multiple angles of extraction. The technician operating the machine selects different milling bits for different phases of material subtraction often from rougher cuts to more fine milling.
 Picture taken from Lisa documentation
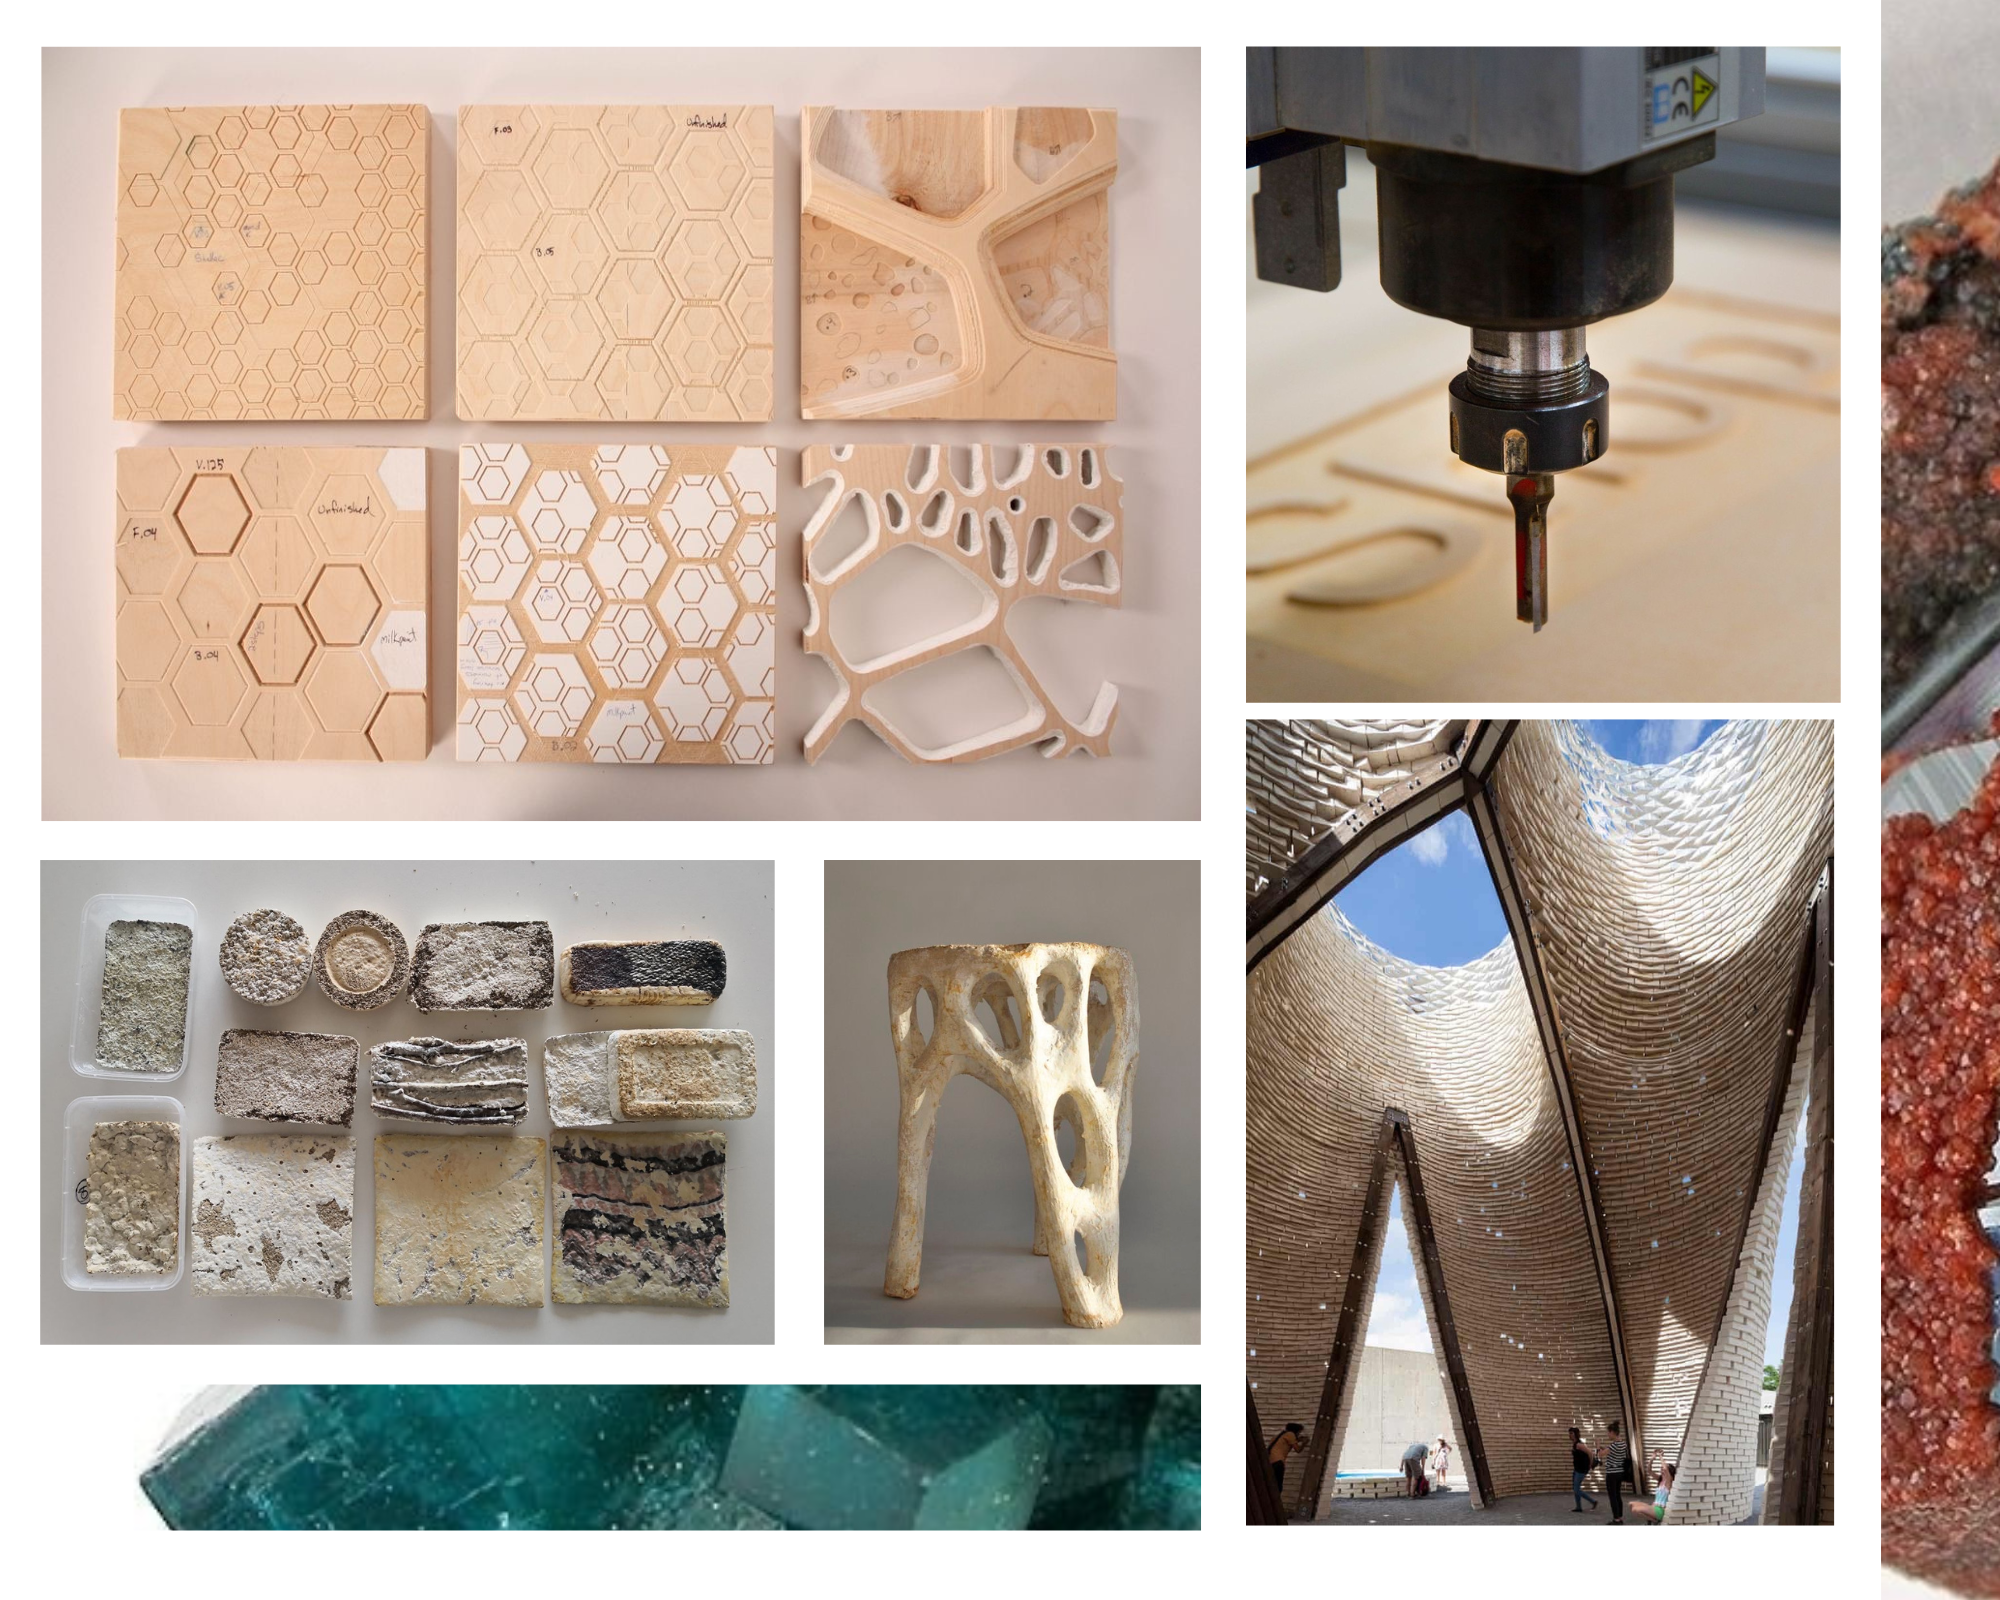
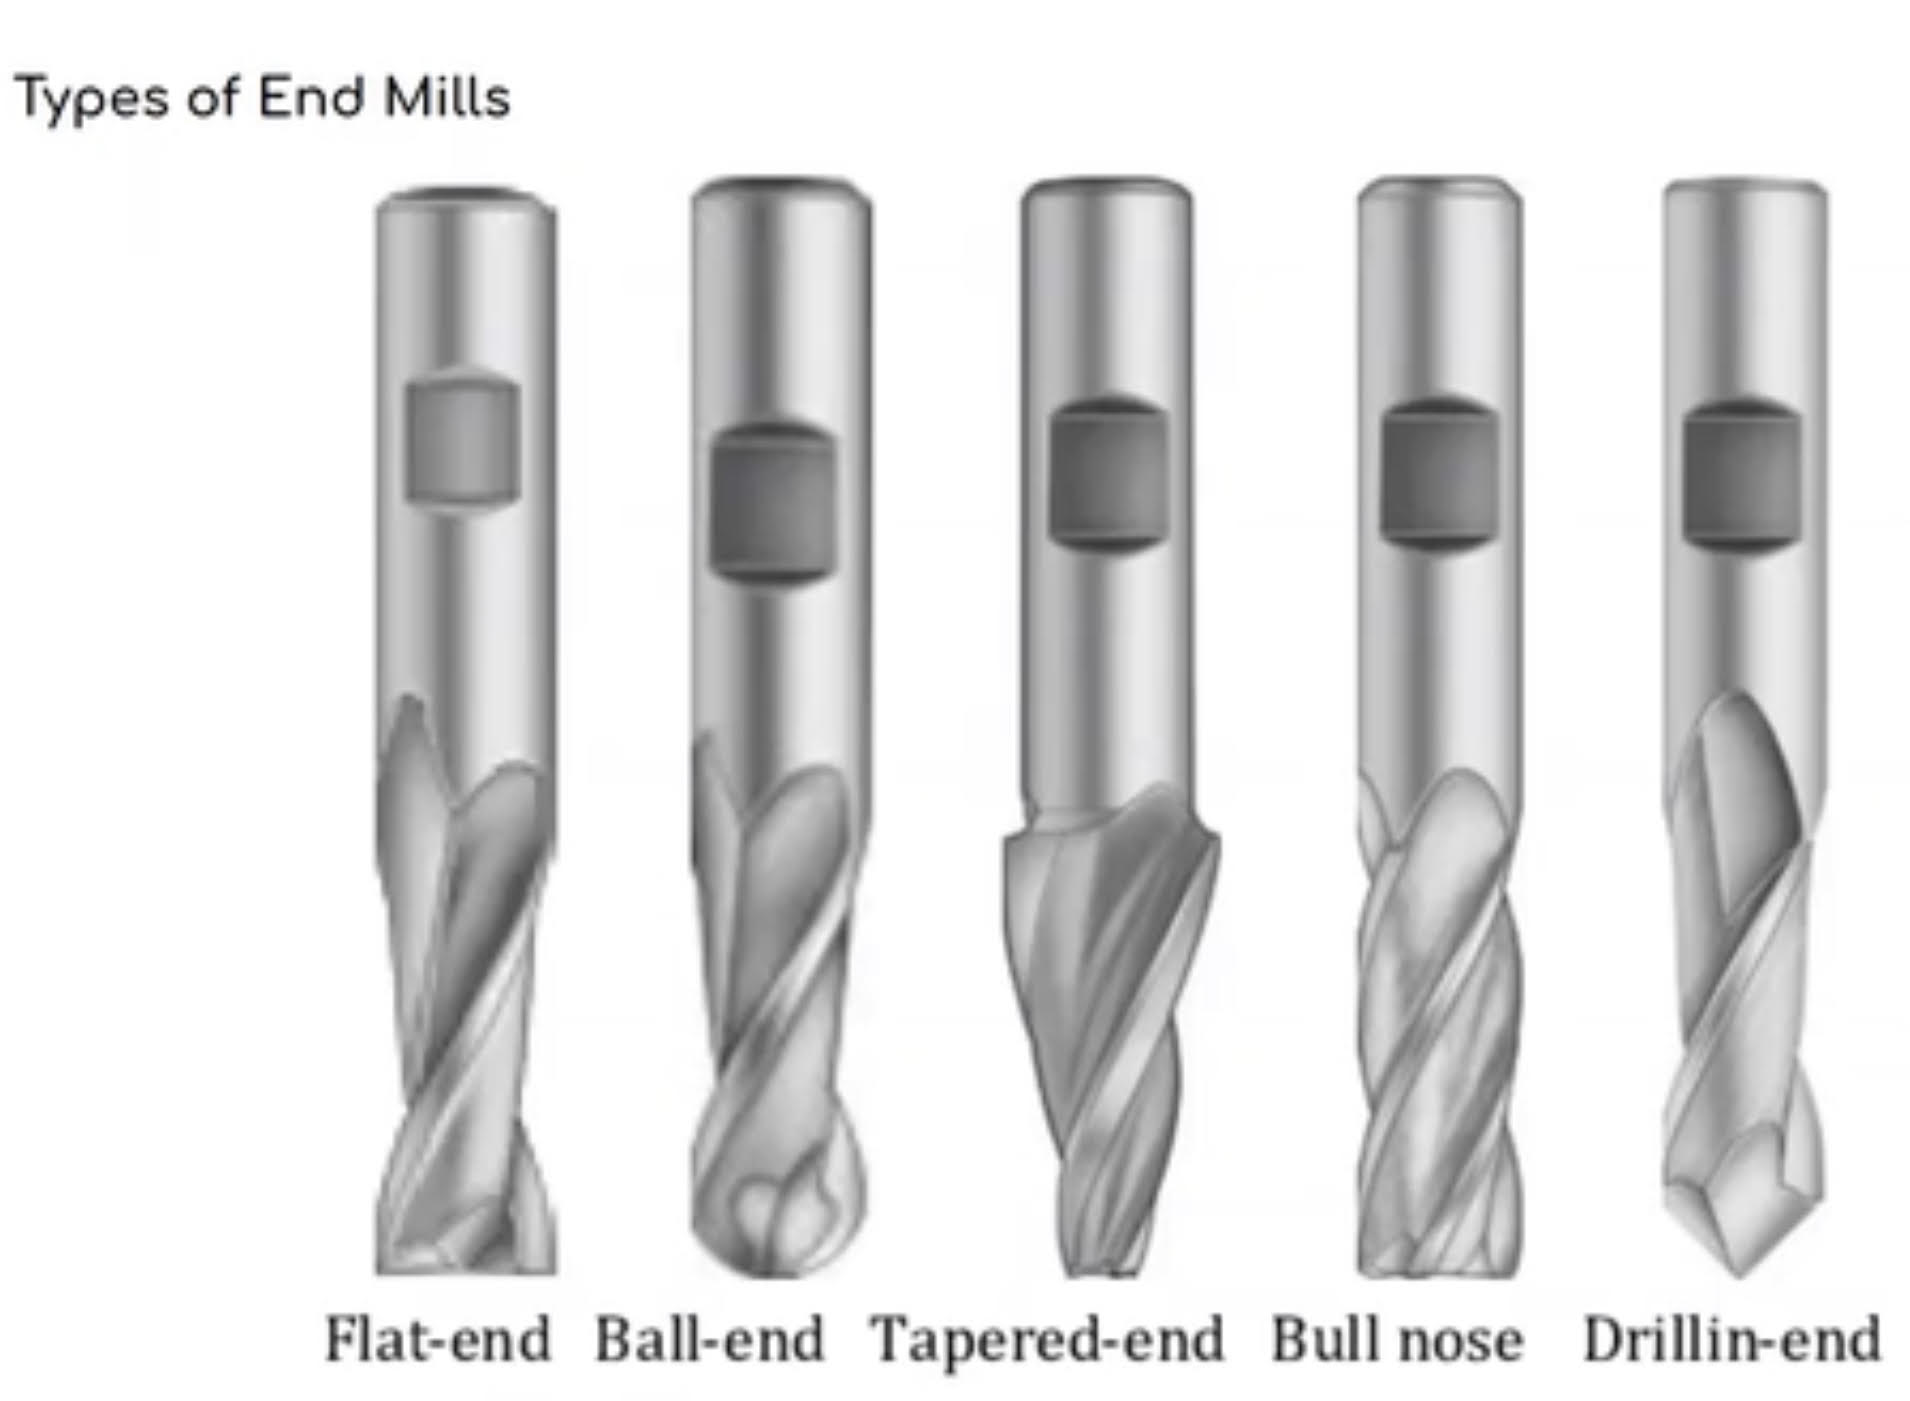
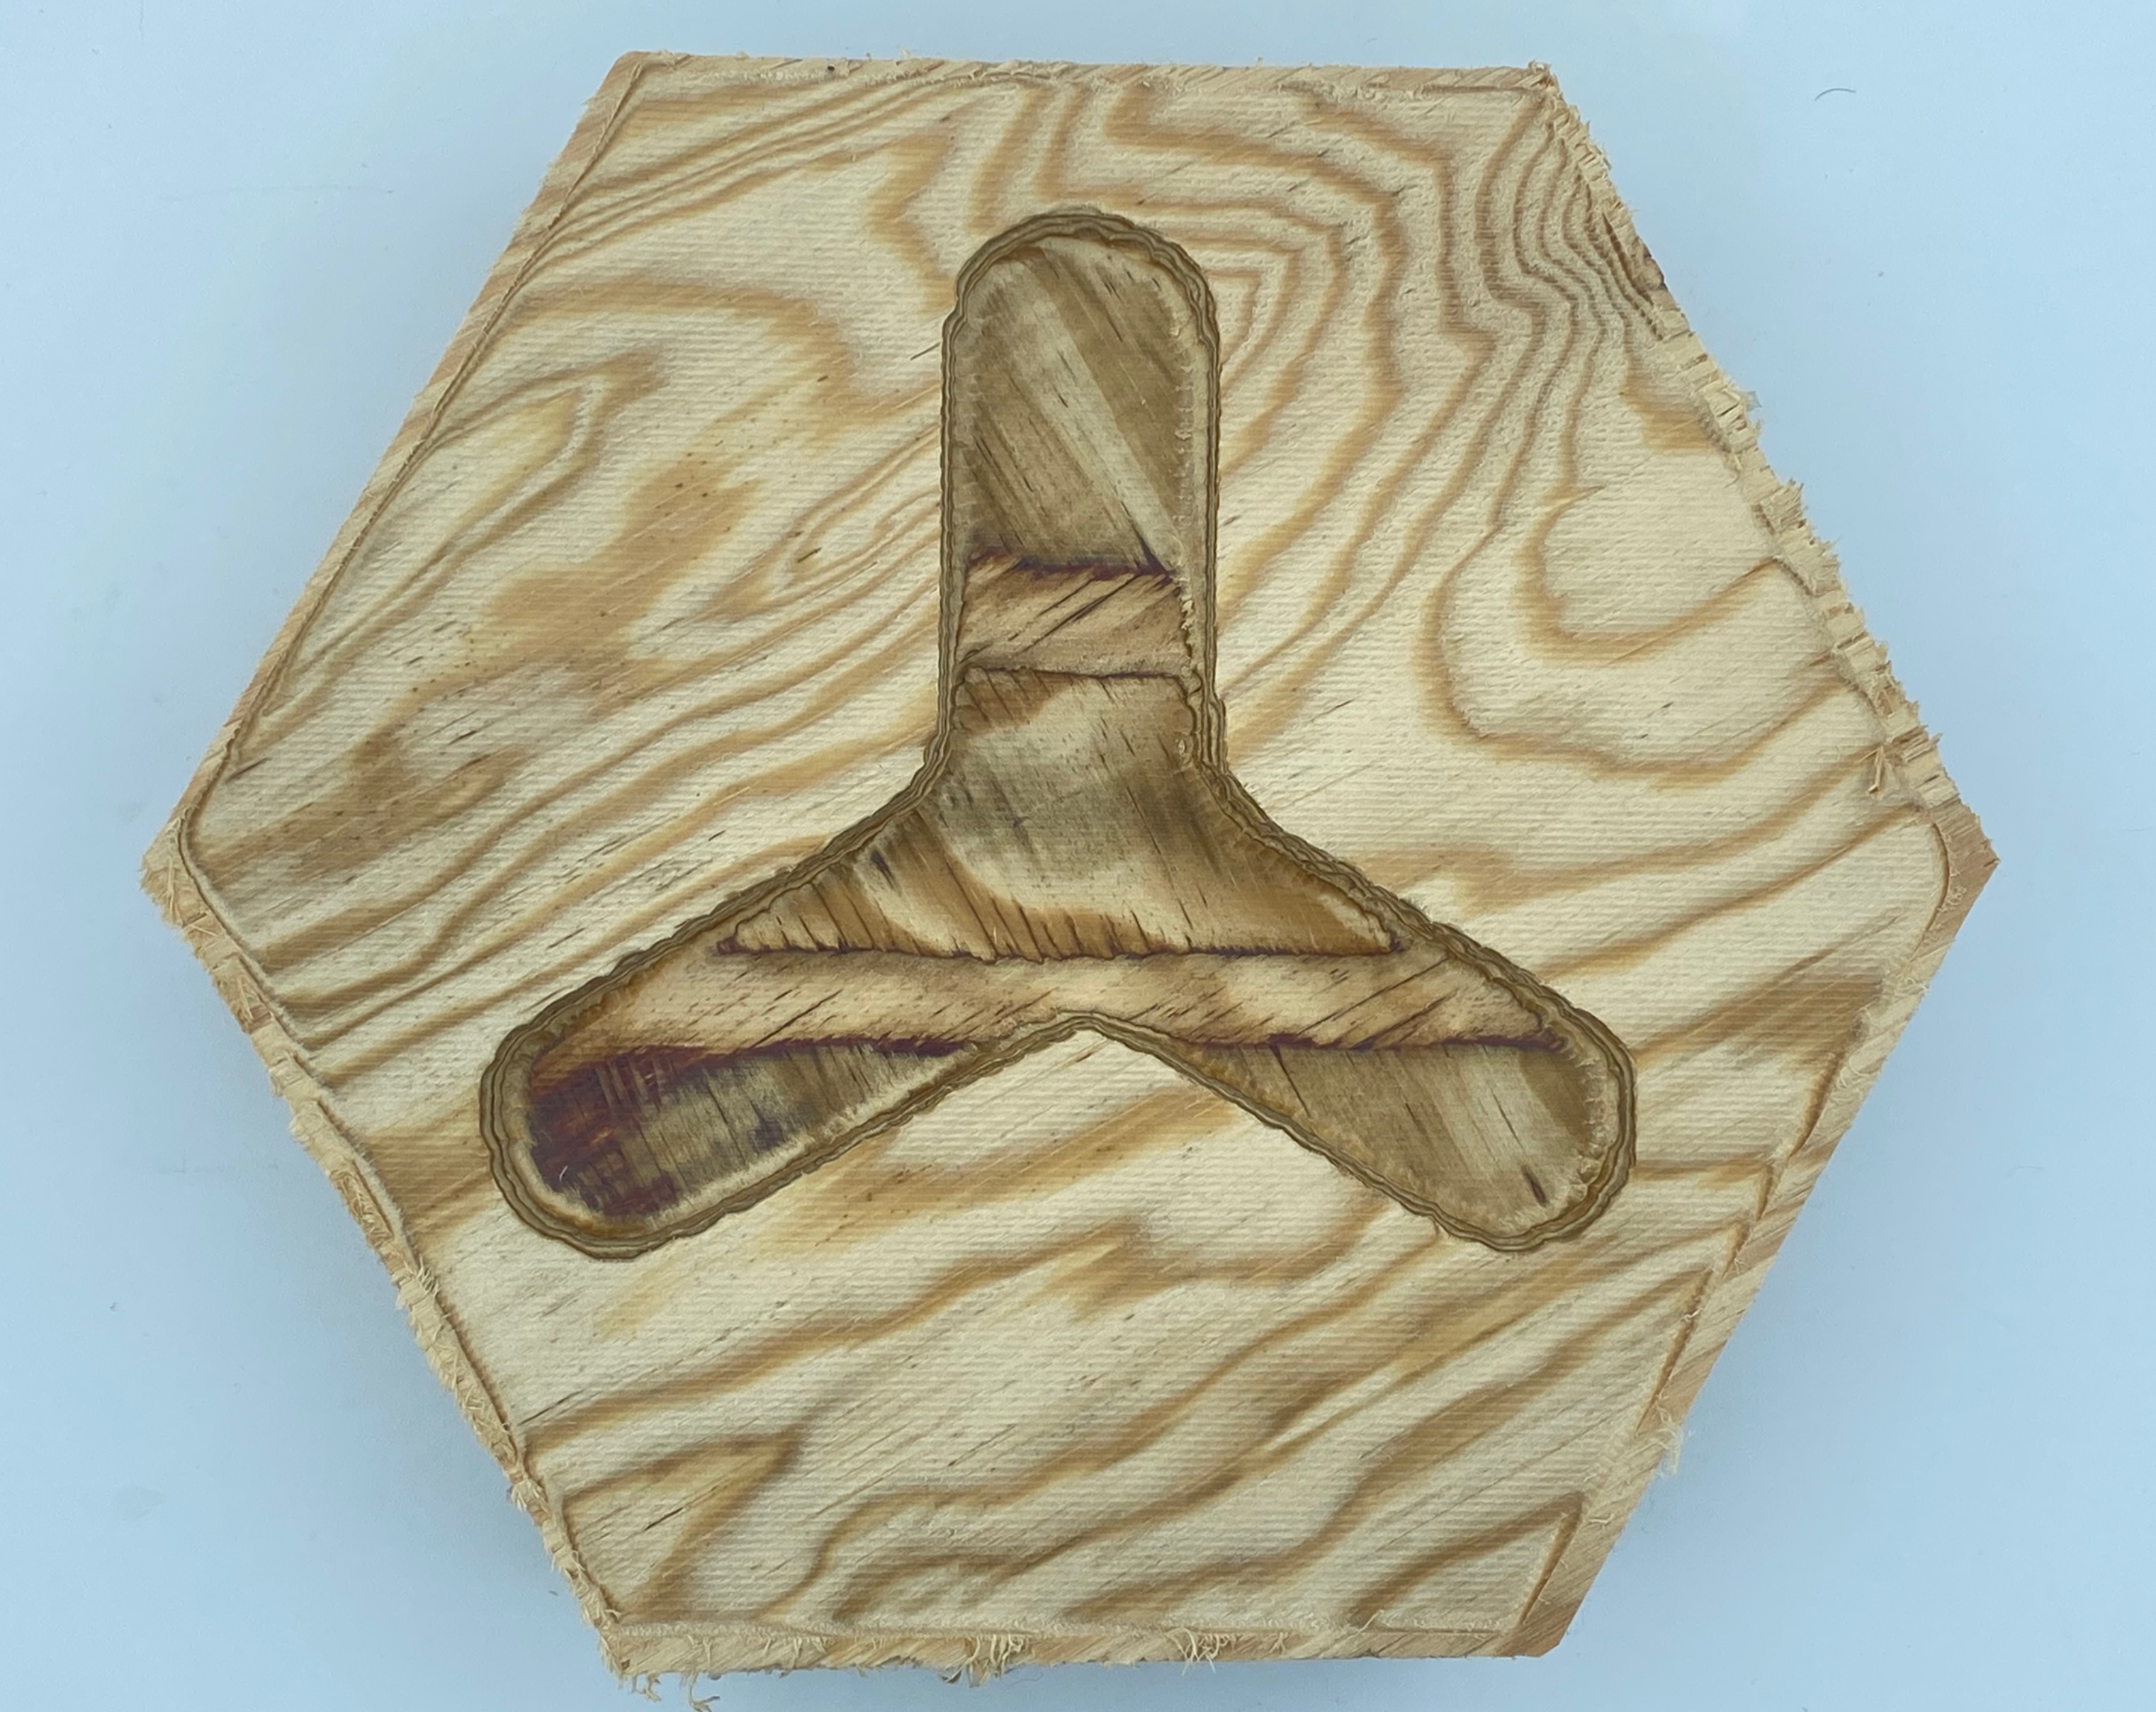
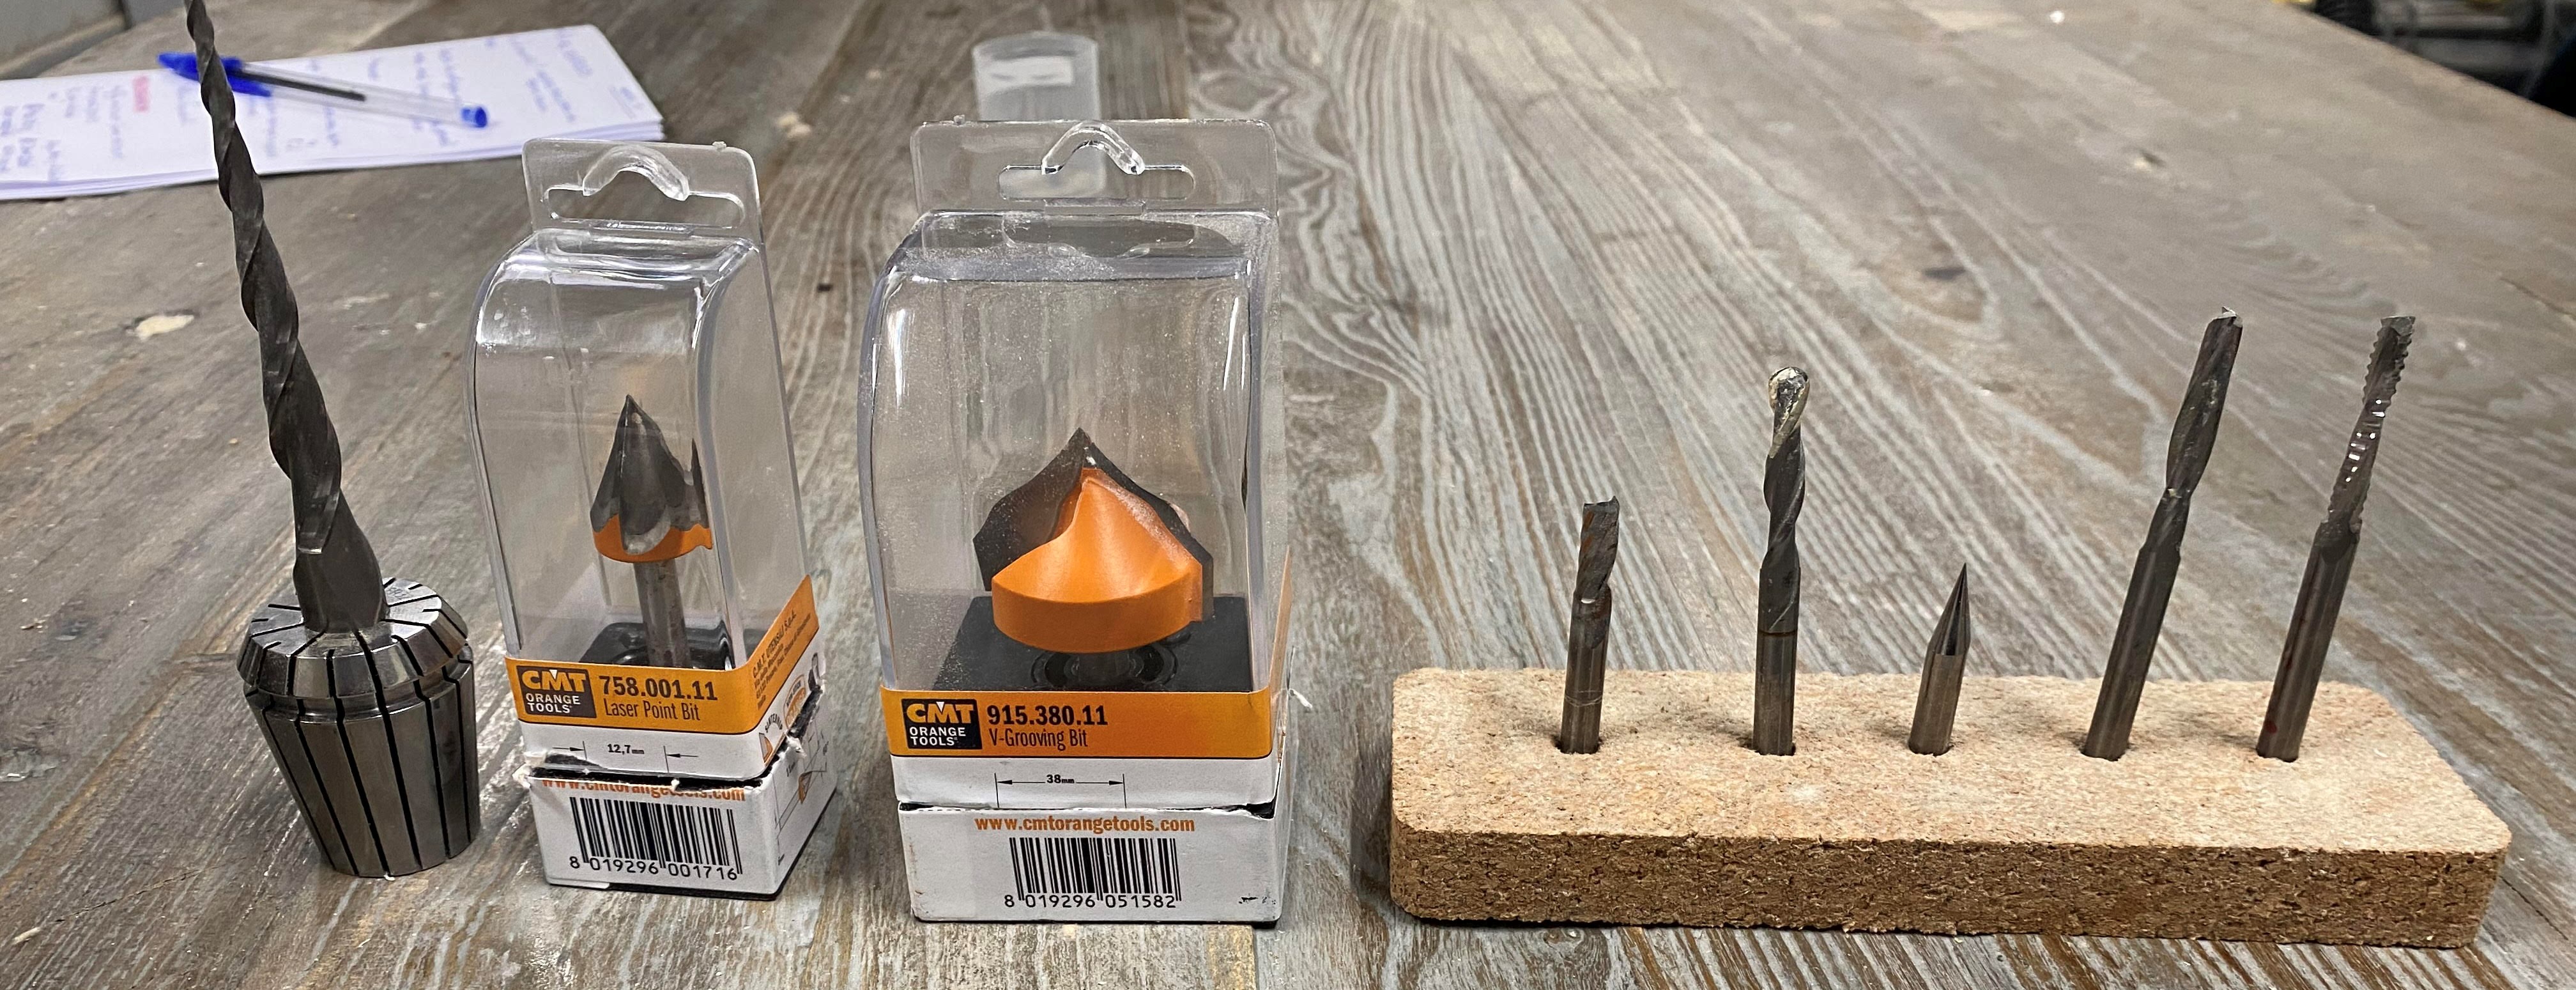 We have used two different types of heads for slicing and dicing. 6mm ball nose for 3d carving and 6mm endmill bit for profiling the hexagon.
 Depending on the shape the finish will be different
SECURITY MEASURE
 As with all machines, care must be taken and safety measures must be respected. With this cnc we have to be careful as it can be dangerous as it works at high speed and it is a wide structure
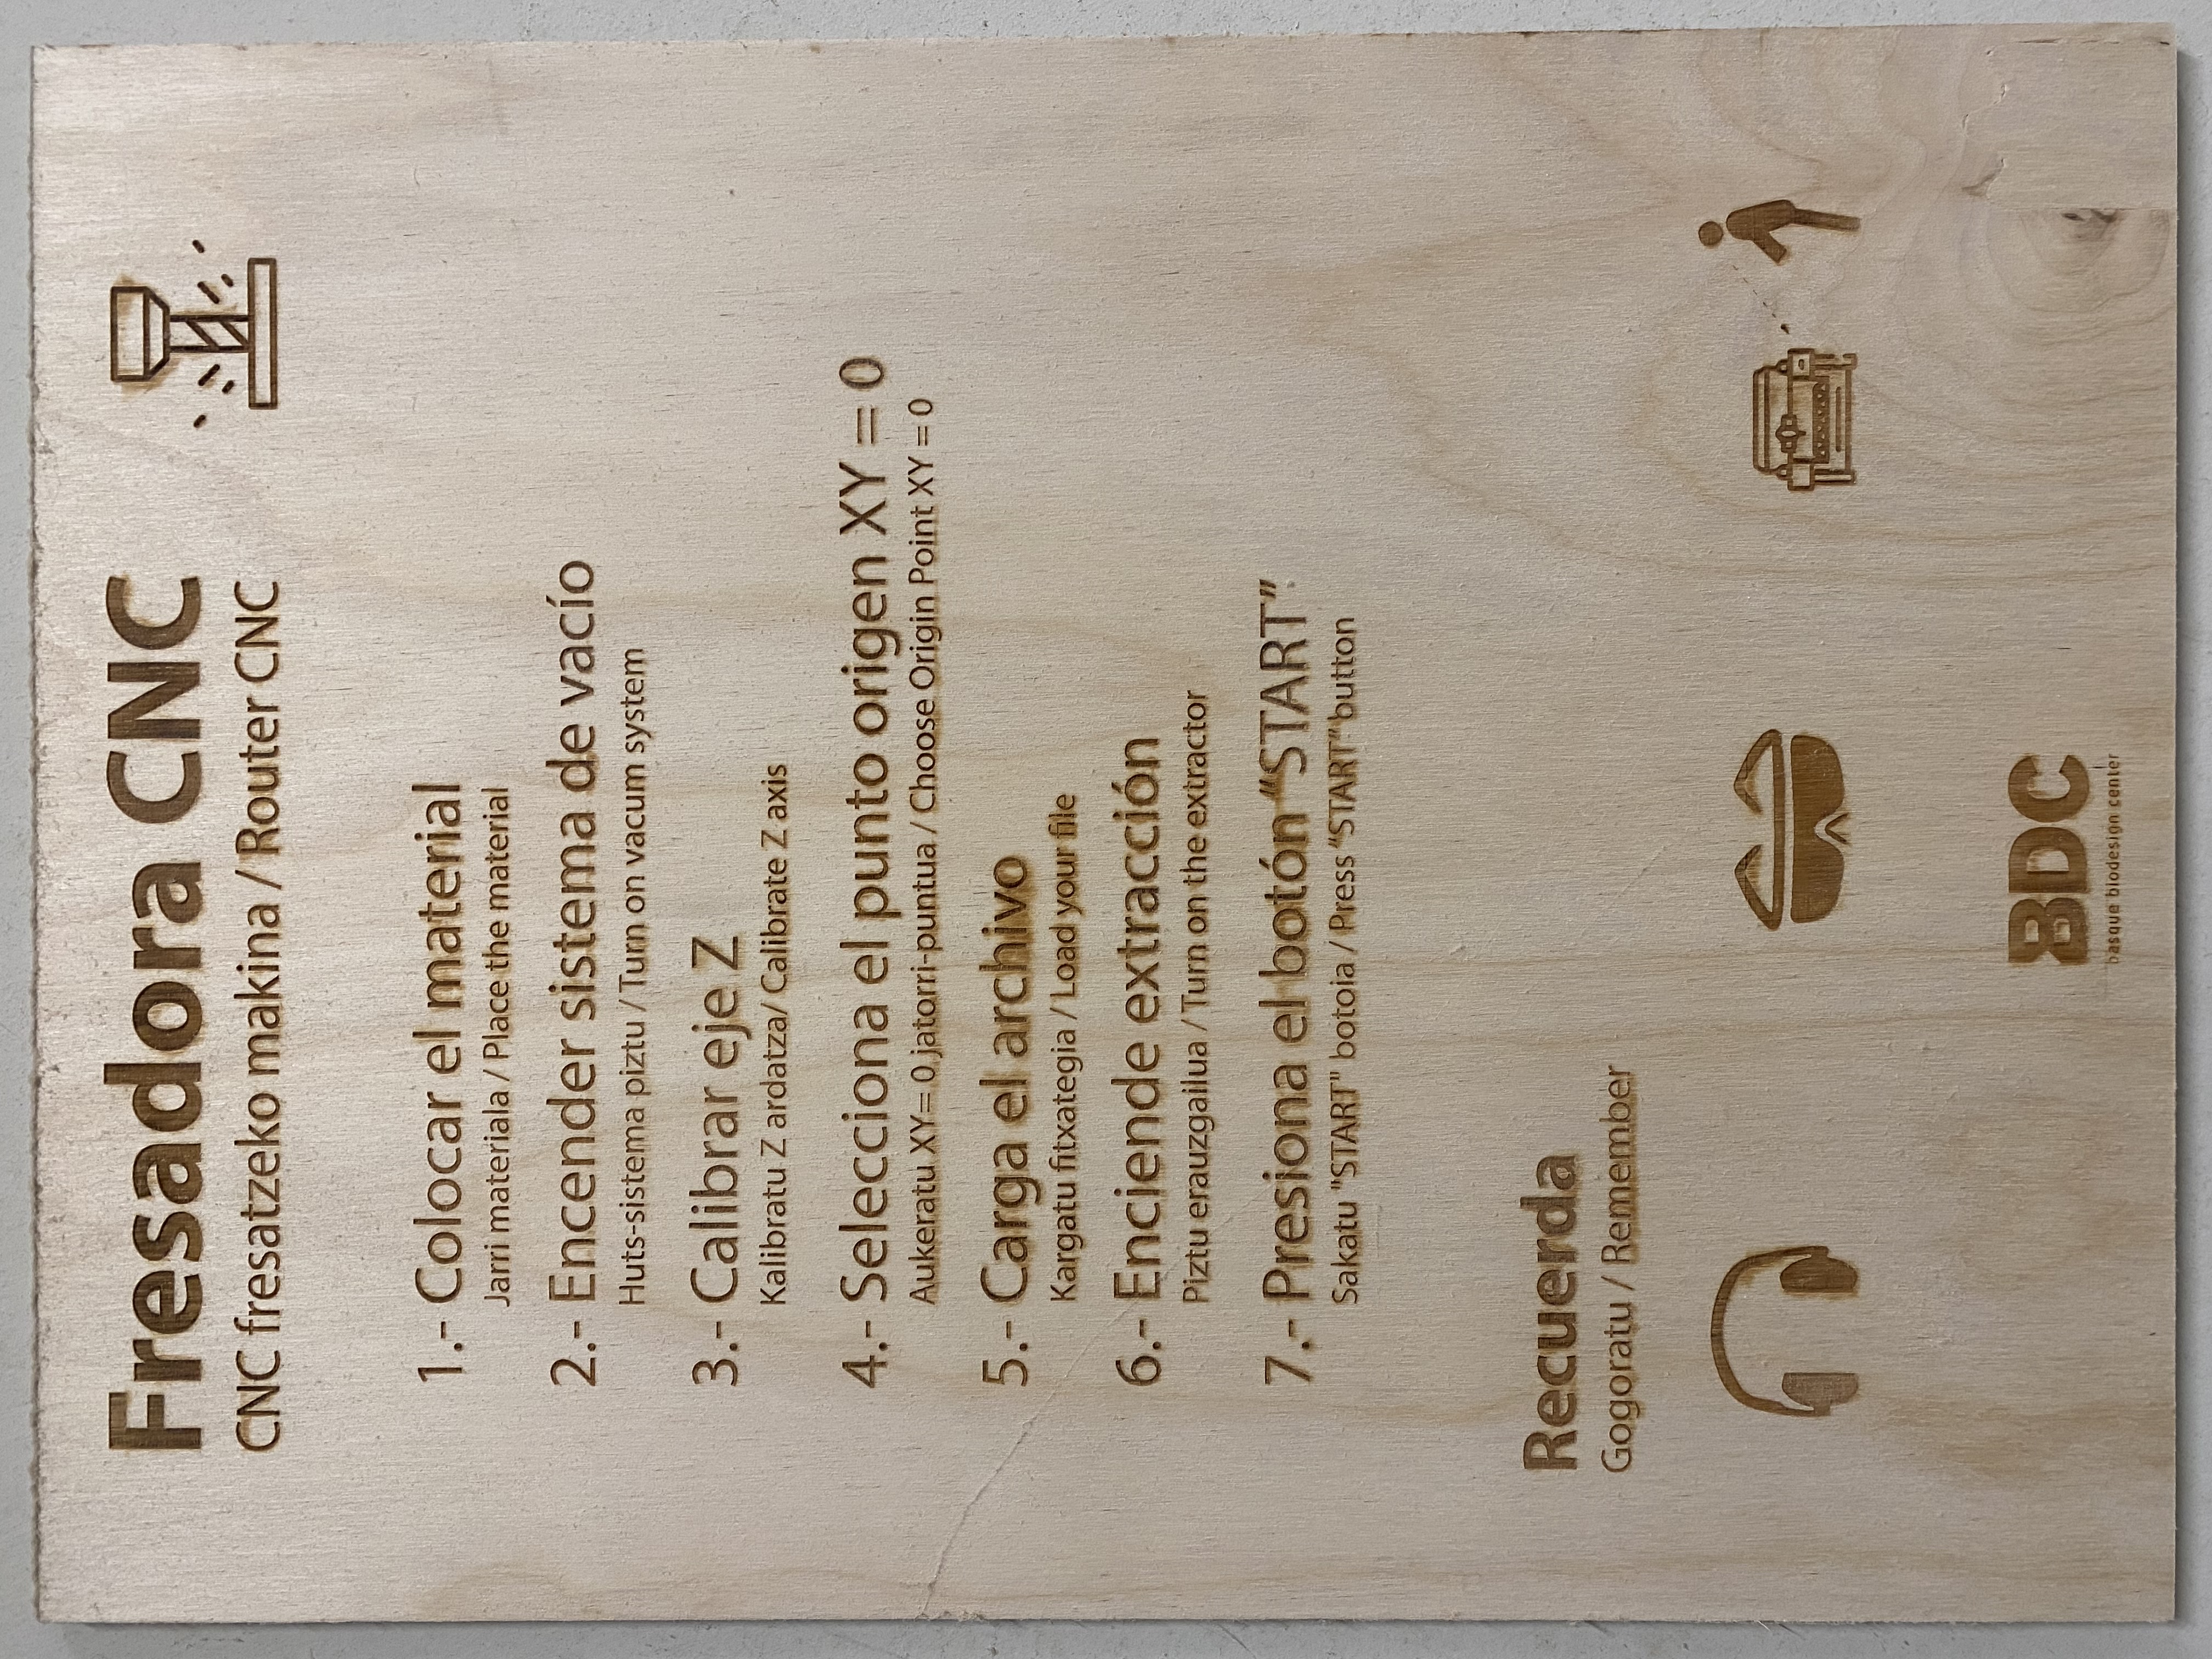
CUTTING PROCESS
-
Upload the file in .stl to the CNC.
-
Put the material you will cut into the cutting table
-
Put the endmill.
-
The automatic sensor tool determines the thickness of the material.
-
Determine the 0,0 point, the origin point.
-
Switch on the vacuums: the one from the cutting table and the one that absorbs the material waste.
-
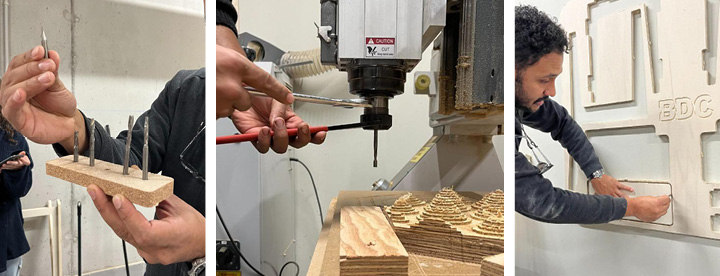
1) Layer: Engraving (screws) 3mm deep- 5 holes for screws to attach the polywood to the CNC board. Use a drill to put screws to the board.
-
2) Layer: Horizontal Roughing - to mill three layers. Change the drill for round 3.175mm and calibrate Z axis again
-
3) Layer: Parallel Finishing - smoothing part. Change the drill for once again - 6mm and calibrate the Z axis again.
-
4) Layer: Profiling - cutting the milled pieces out of the polywood board.
In order to operate the machine an STL file is translated into G-Code using, in our case, the Aspire Software.
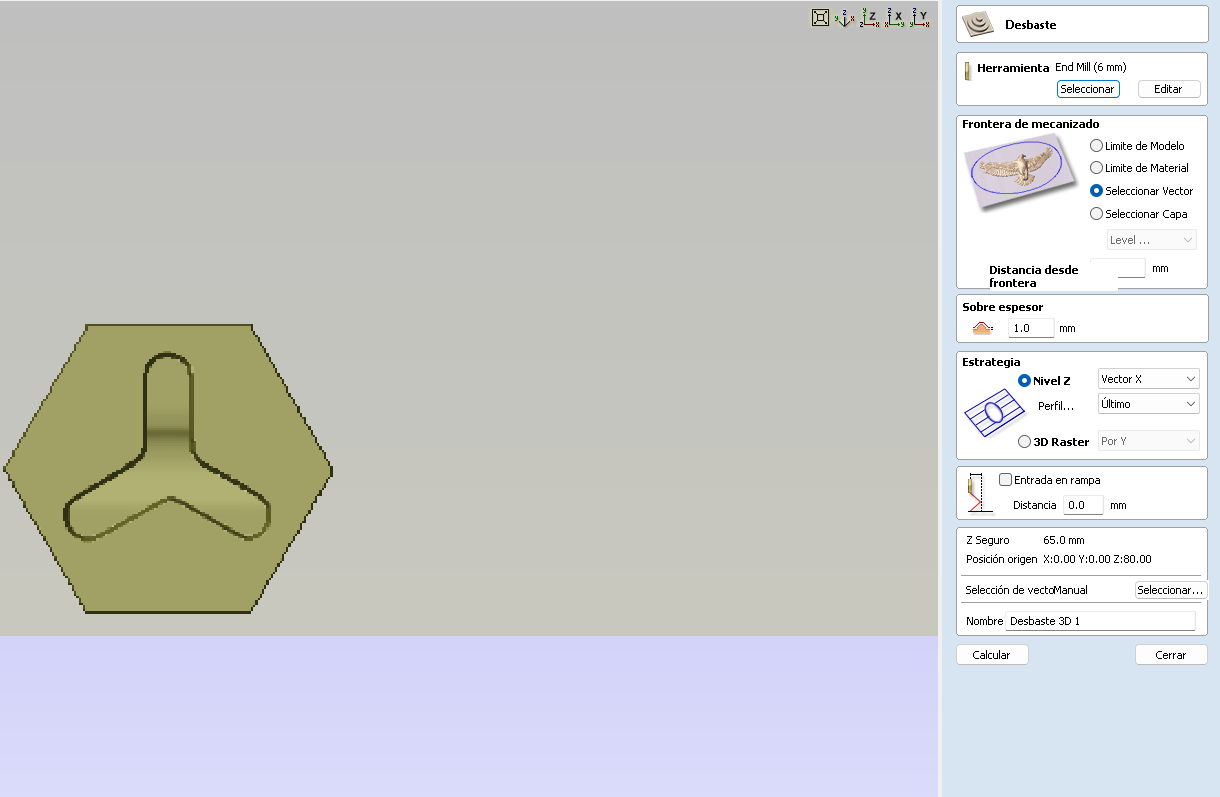

HOW TO USE ASPIRE
Aspire provides a powerful but intuitive software solution for creating and cutting parts on a CNC router. There are tools for 2D design and calculation of 2D toolpaths such as Profiling, Pocketing, and Drilling as well as 2.5D toolpaths including; V-Carving
DESIGN
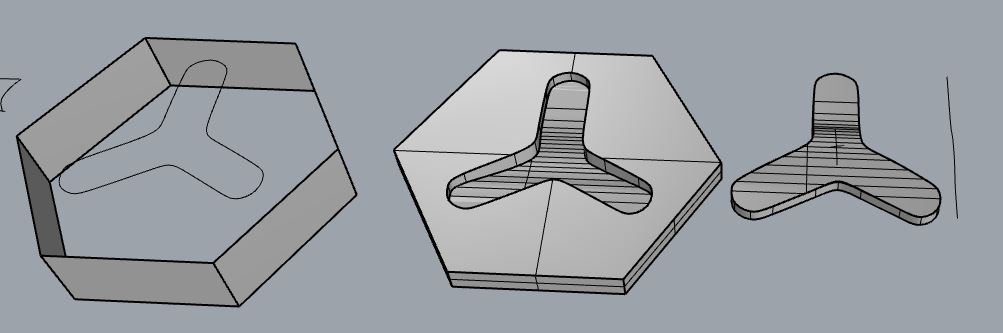

FINAL MOLD
The idea is to build a modular form. In this way, I will test different biomaterials in this mold until I get a panel of hexagons (like a honeycomb) with material tests.

DOWNNLOAD FILES
Please check this interesting tutorial to know how CNC machine works and also how to create a mold in Rhino.
MYCELIUM
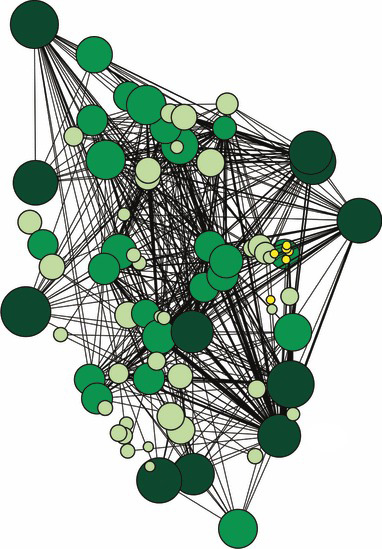
Diagram of a fungi network linking a group of trees, showing the presence of Mother Trees
Fungi are the primary decomposers and recyclers in the natural world. Normally, when we imagine a mushroom we visualize the upper part (fruitful), but its most vegetative part of the life cycle is underground (mycelium). Without the mycelium there would be no fungus. Los hongos subterráneos son beneficiosos para los arboles y las plantas ya que forman una asociación simbiótica bajo tierra mediante el micelio e hilos intercambiando agua y nutrientes.
REFERENCES & INSPIRATION
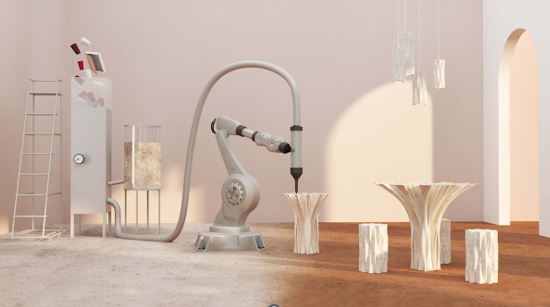
BLAST STUDIO WEB SITE
Their collect cardboard to contaminated by food, sawdust and other discarded materials to transform them into a biomaterial that we 3d print into unique furniture and architecture pieces. 3d printing gives us the possibility to create complex shapes adapted to all living organisms from humans to plants and fungi.
HY-FY WEB SITE
“Reinventing the brick”
Hy-Fi offers a captivating physical environment and a new paradigm for sustainable architecture. In 2014, we tested and refined a new low-energy biological building material, manufactured 10,000 compostable bricks, constructed a 13-meter-tall tower, hosted public cultural events for three months, disassembled the structure, composted the bricks, and returned the resulting soil to local community gardens. This successful experiment offers many possibilities for future construction.

Working with mycelium is a great decision since it provides many good properties and is very grateful when introducing it in design or construction due to its immense characteristics:
-
Excellent insulators
-
Resistant to moisture once dry
-
Fire resistant
-
Biodegradable + compostable
-
Stronger than concrete pound for point
-
Non toxic
-
Scalable
-
Versitile (foam, bricks, textiles)
IN THE MAKING
MATERIALS WE NEED
| MATERIALS |
|---|
| Pressure cooler |
| Sterile workplace |
| Agar agar |
| Malt extract syrup or powder |
| Petri plates |
| Scalpel |
| Open dlam/bunsens burner |
| Gloves |
| Alcohol |
| Mushroom grow bags |
| Ziplock bags |
| Plastic wrap |
| Mircopore or parafilm |
| Large container |
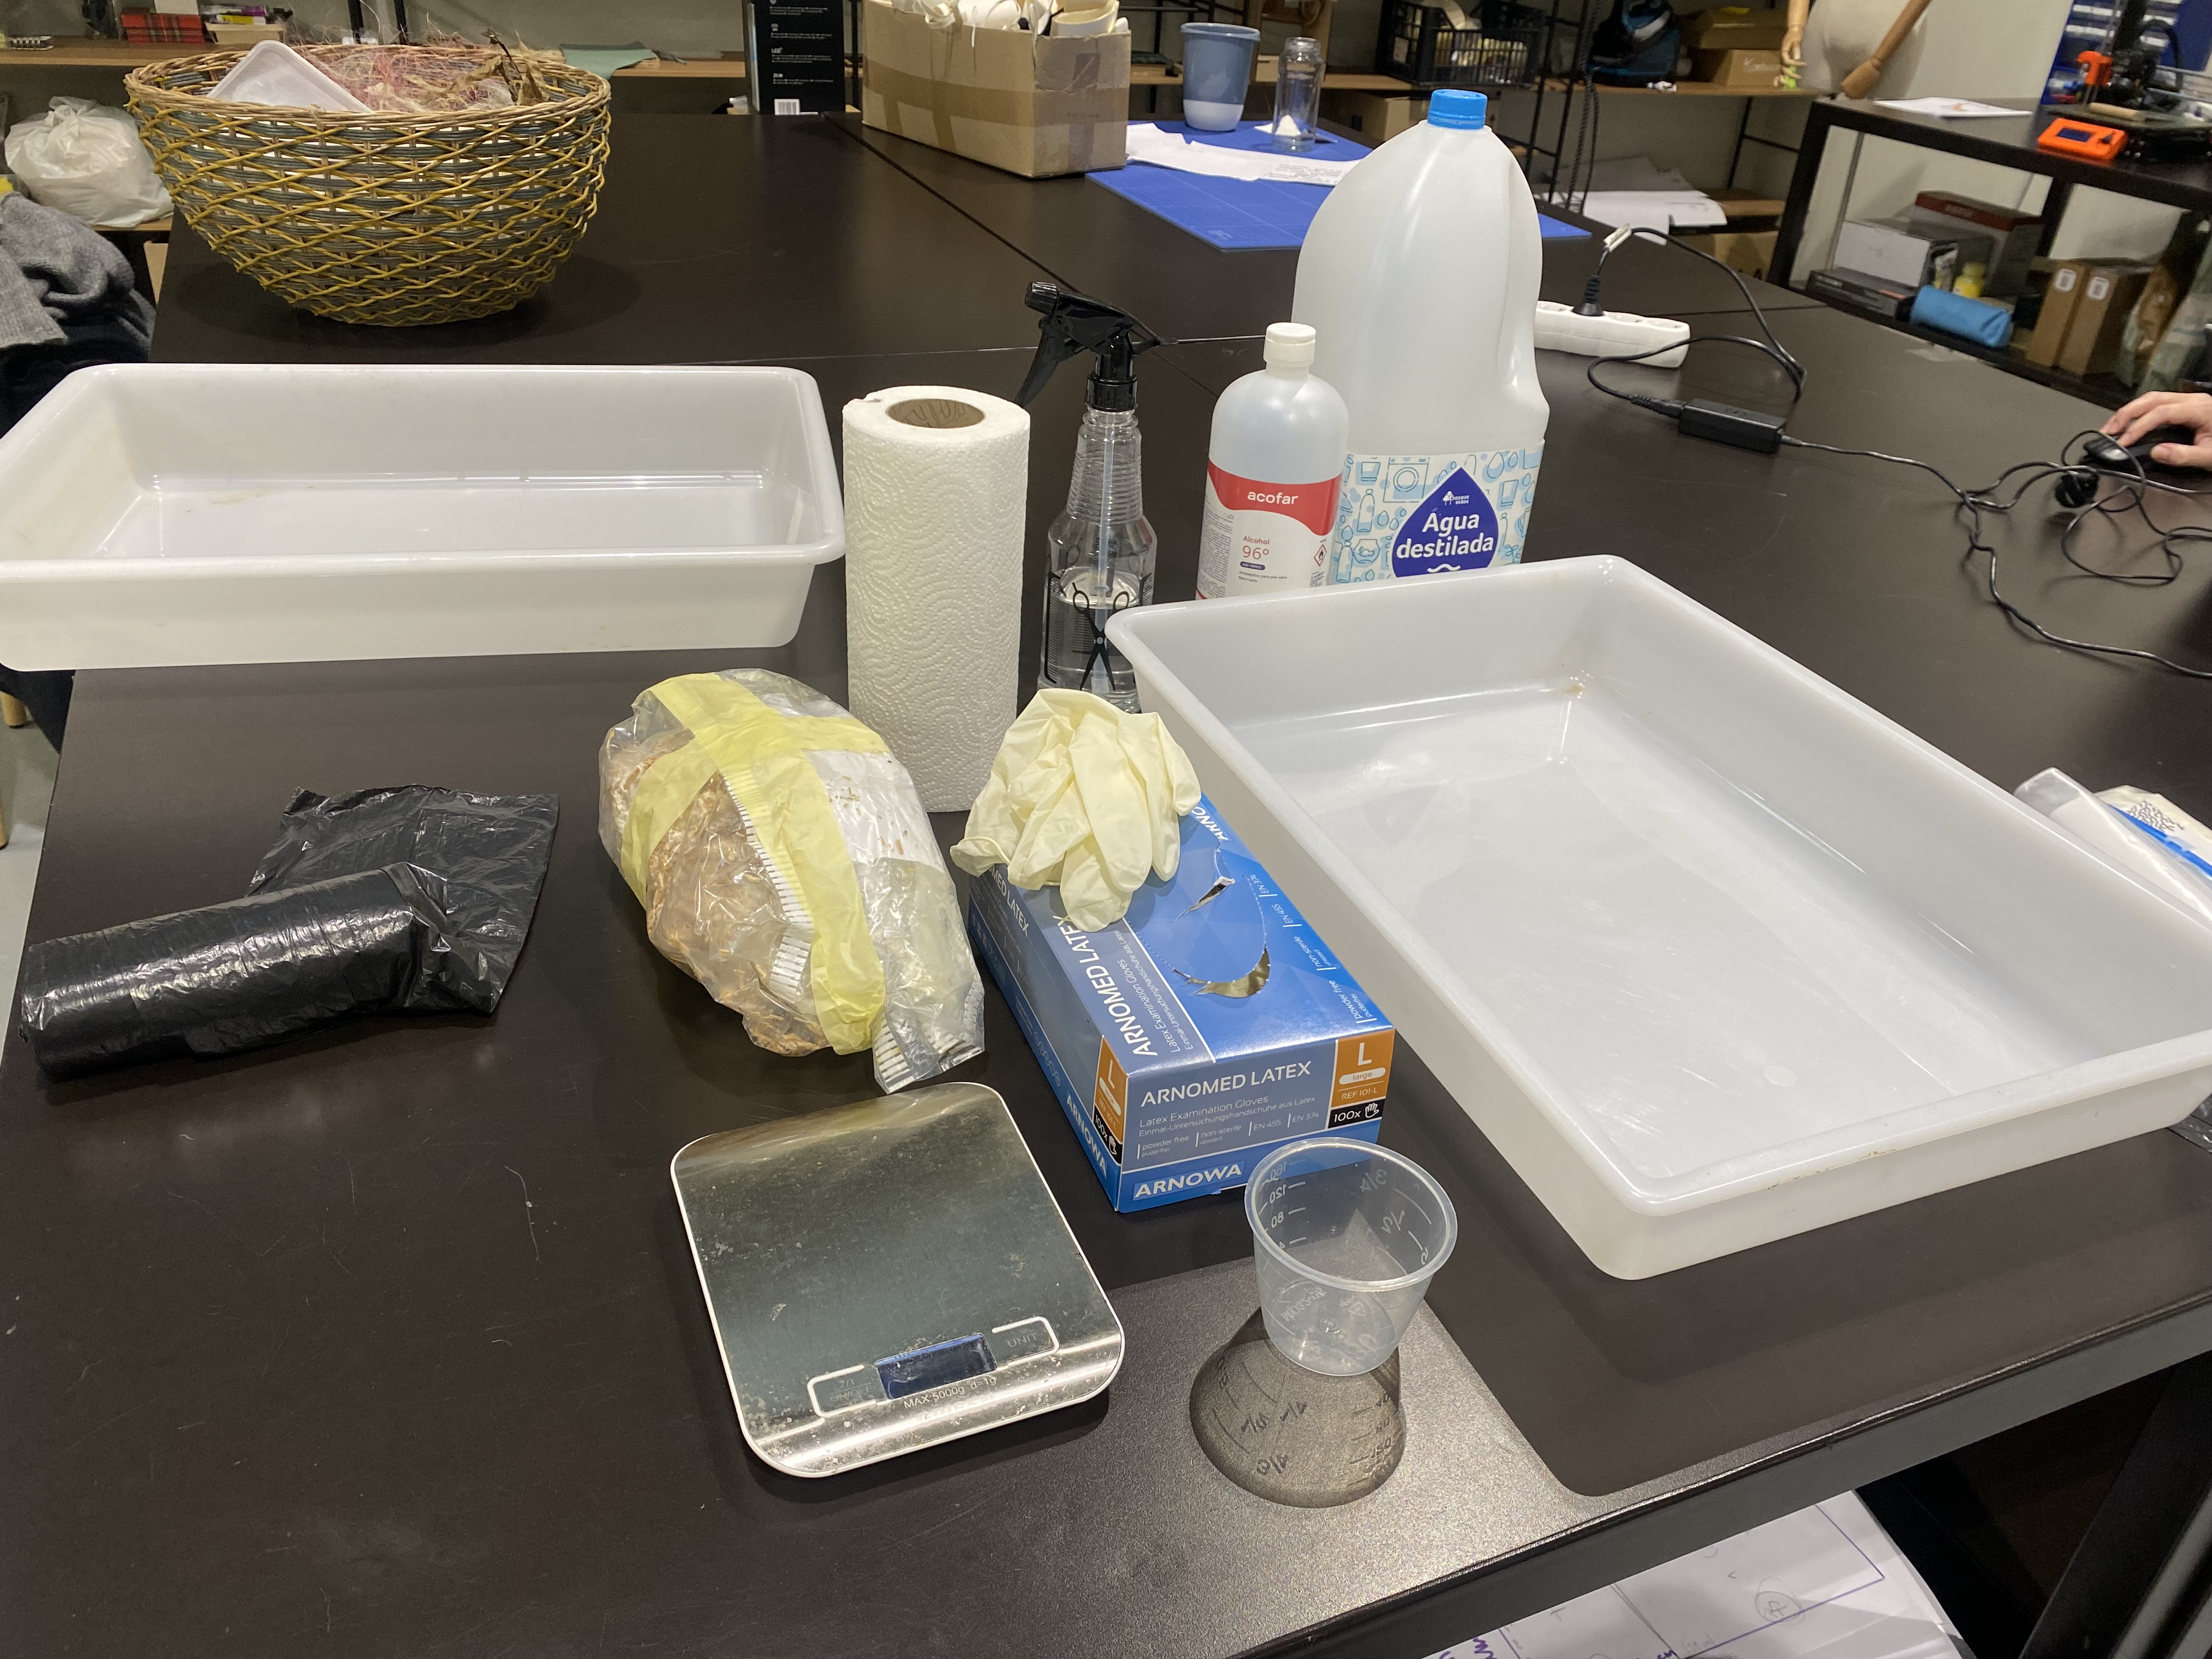
This is a mycelium substrate that we have bought online at GROWTH BIO
SUBSTRATES
The mycelium releases enzymes to digest organic matter, it is capable of fusing natural substrates, such as a natural glue or binder. This cycle of Realms operates starting with spores, then spore germination, mycelium primordia and finally grows to generate a fruiting body (moist, cool, dark optimized) the fungus!
Needs to be pasturized not sanitized (70/80*c for an hour in a boiling pot, in the oven or with steam)
Humidity/moisture content: maintain 70%(use squeeze test - if it drips, it's too much!)
MIXTURE
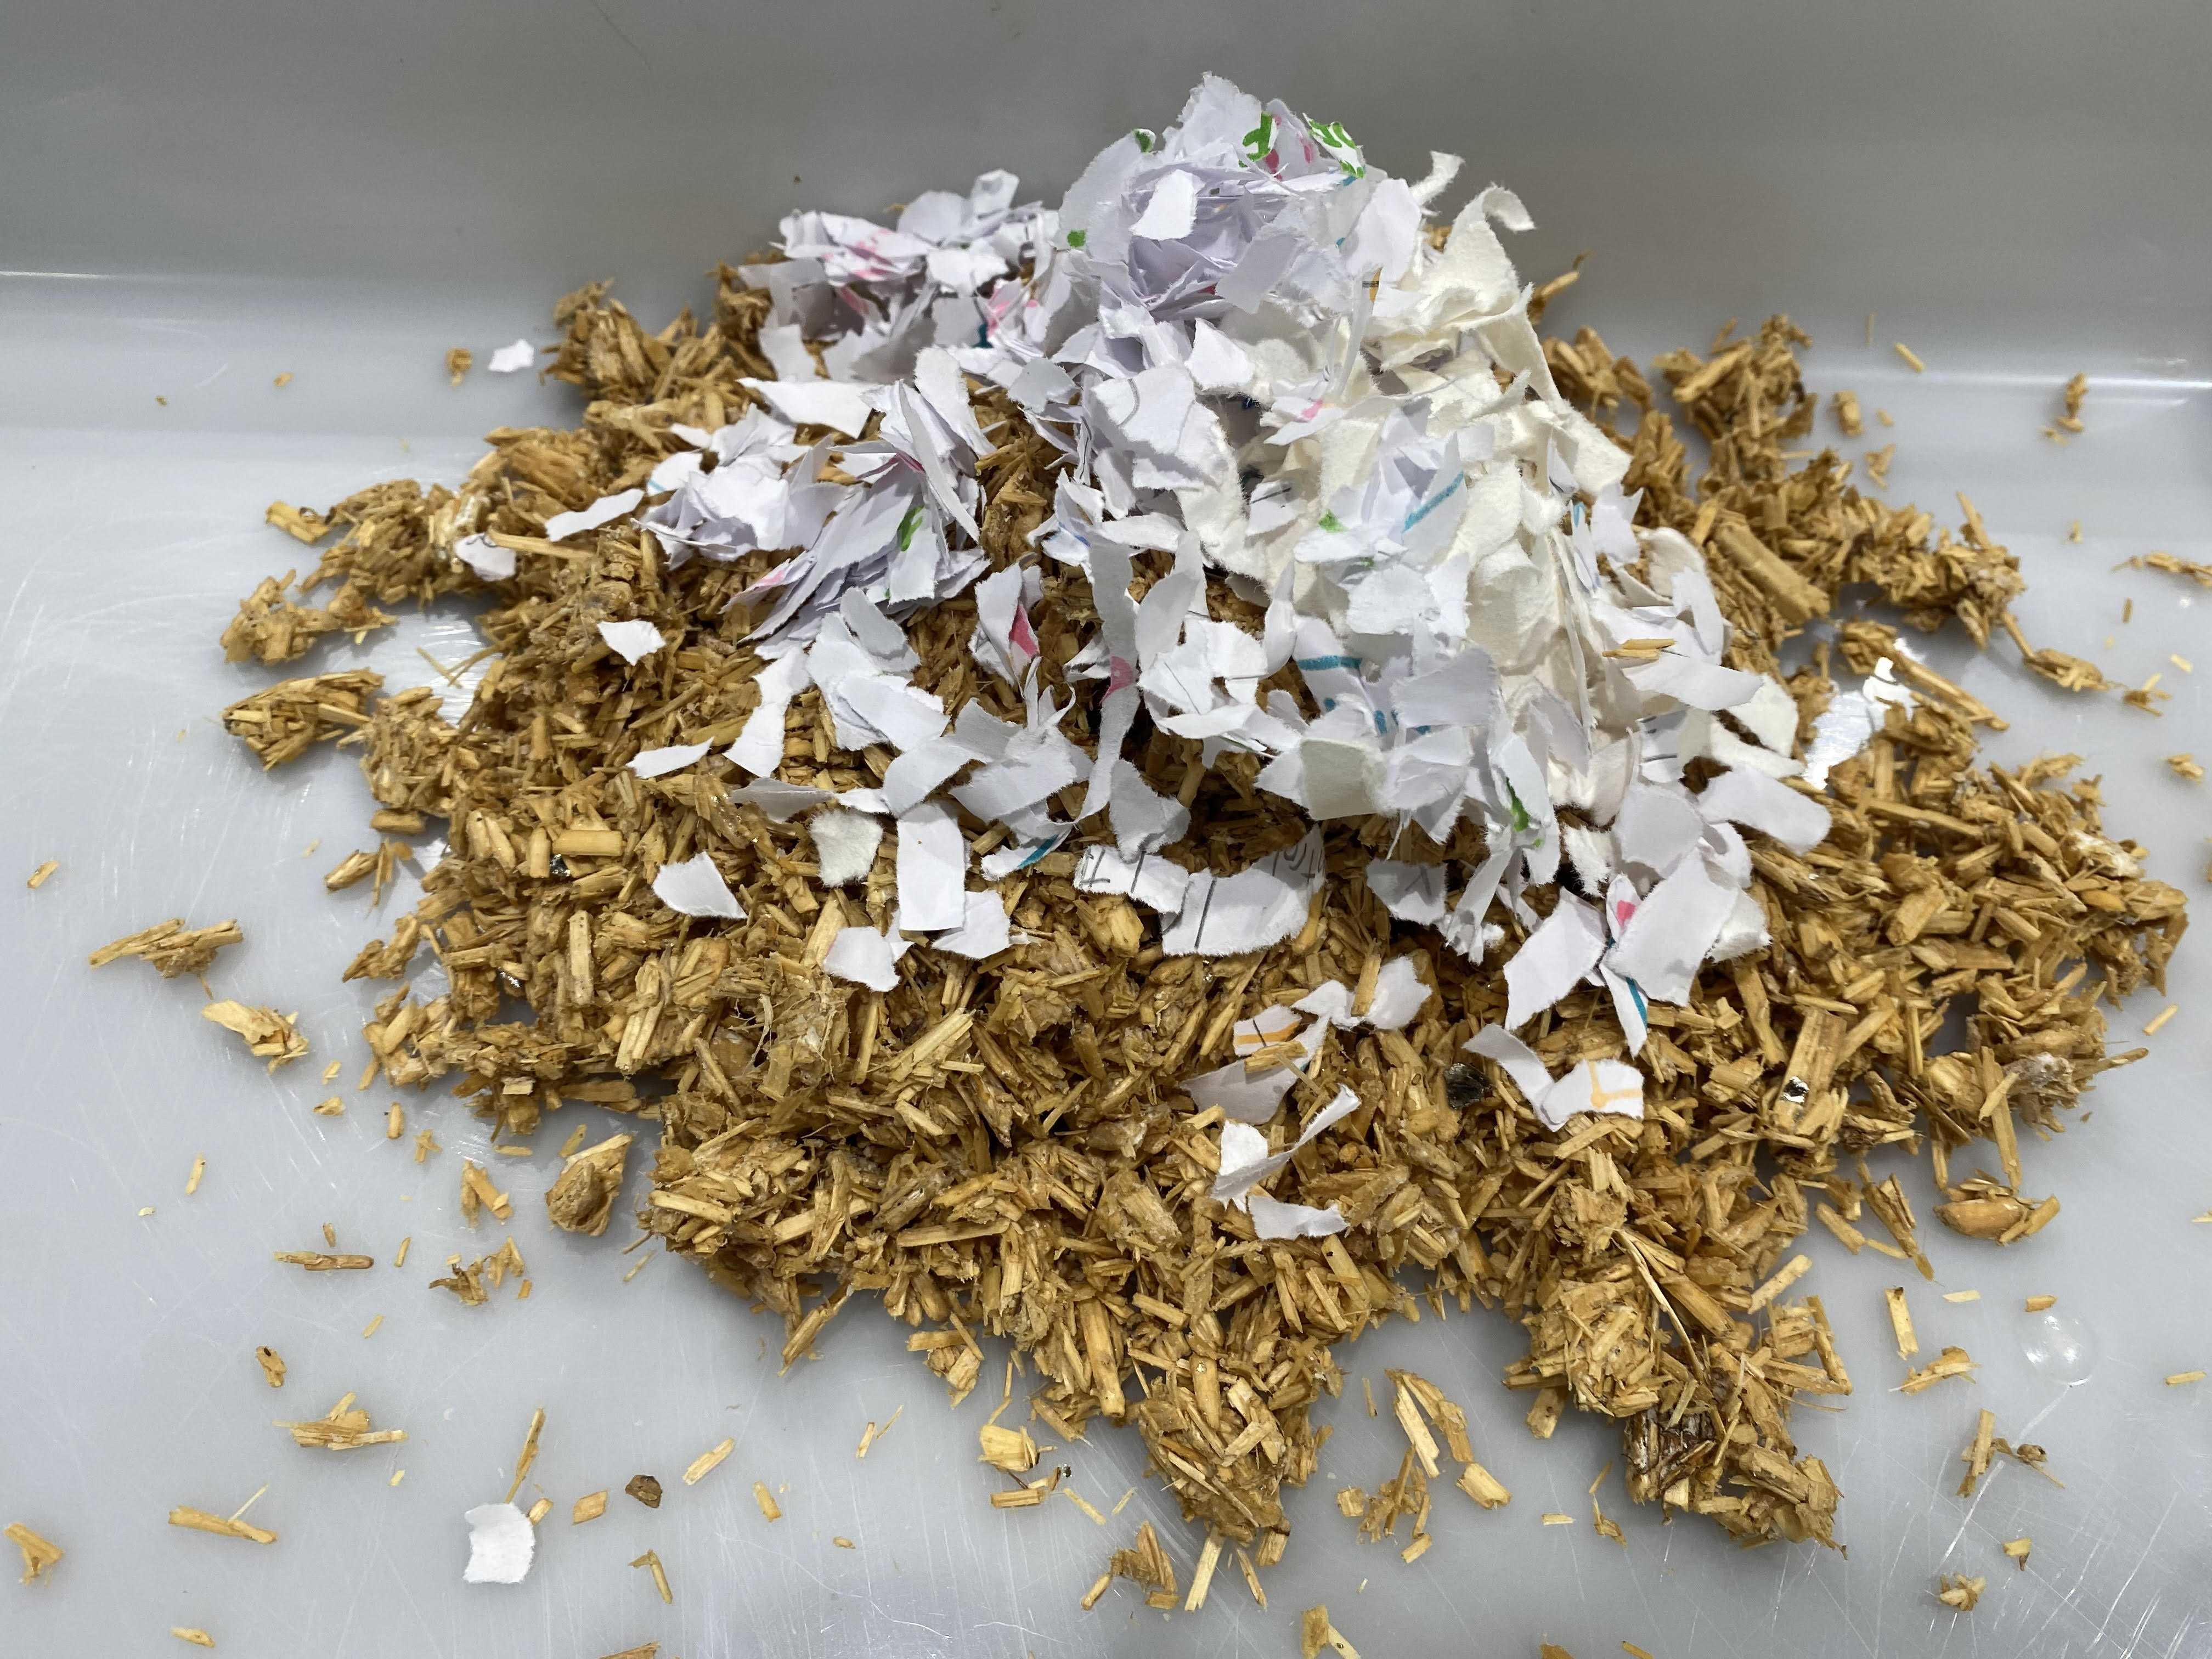
We add 150g of mycelio 3% flour and a little water until it is easy to knead the mixture (careful not to drown it) Our substrate was store purchased making the processs a little more fool-proof. After following the below proceedure we broke apart the large volume of substrate into the smallest pieces possible in order to have a more flexiblematerial to stuff into our moulds
-
Decontaminate everything in pressure cooker
-
sanitize surfaces with alcohol use bunsen burner to create steryl space
-
Make malt extract agar: 200ml DIstilled water, 4g agar, 4g malt extract, 0.5g charcol (optional)´
-
Mycelium transfer into cooled MEA
-
Seal plates then lable (date, strain and type of media)
-
Incubation: 24/25*, fresh clean aire, controlled humdity, Sterile Environment

- Then we undo it in small chunks and we will mix it with another material to get more volume, in my case I will mix it with small pieces of recycled paper
MOULD DESIGN
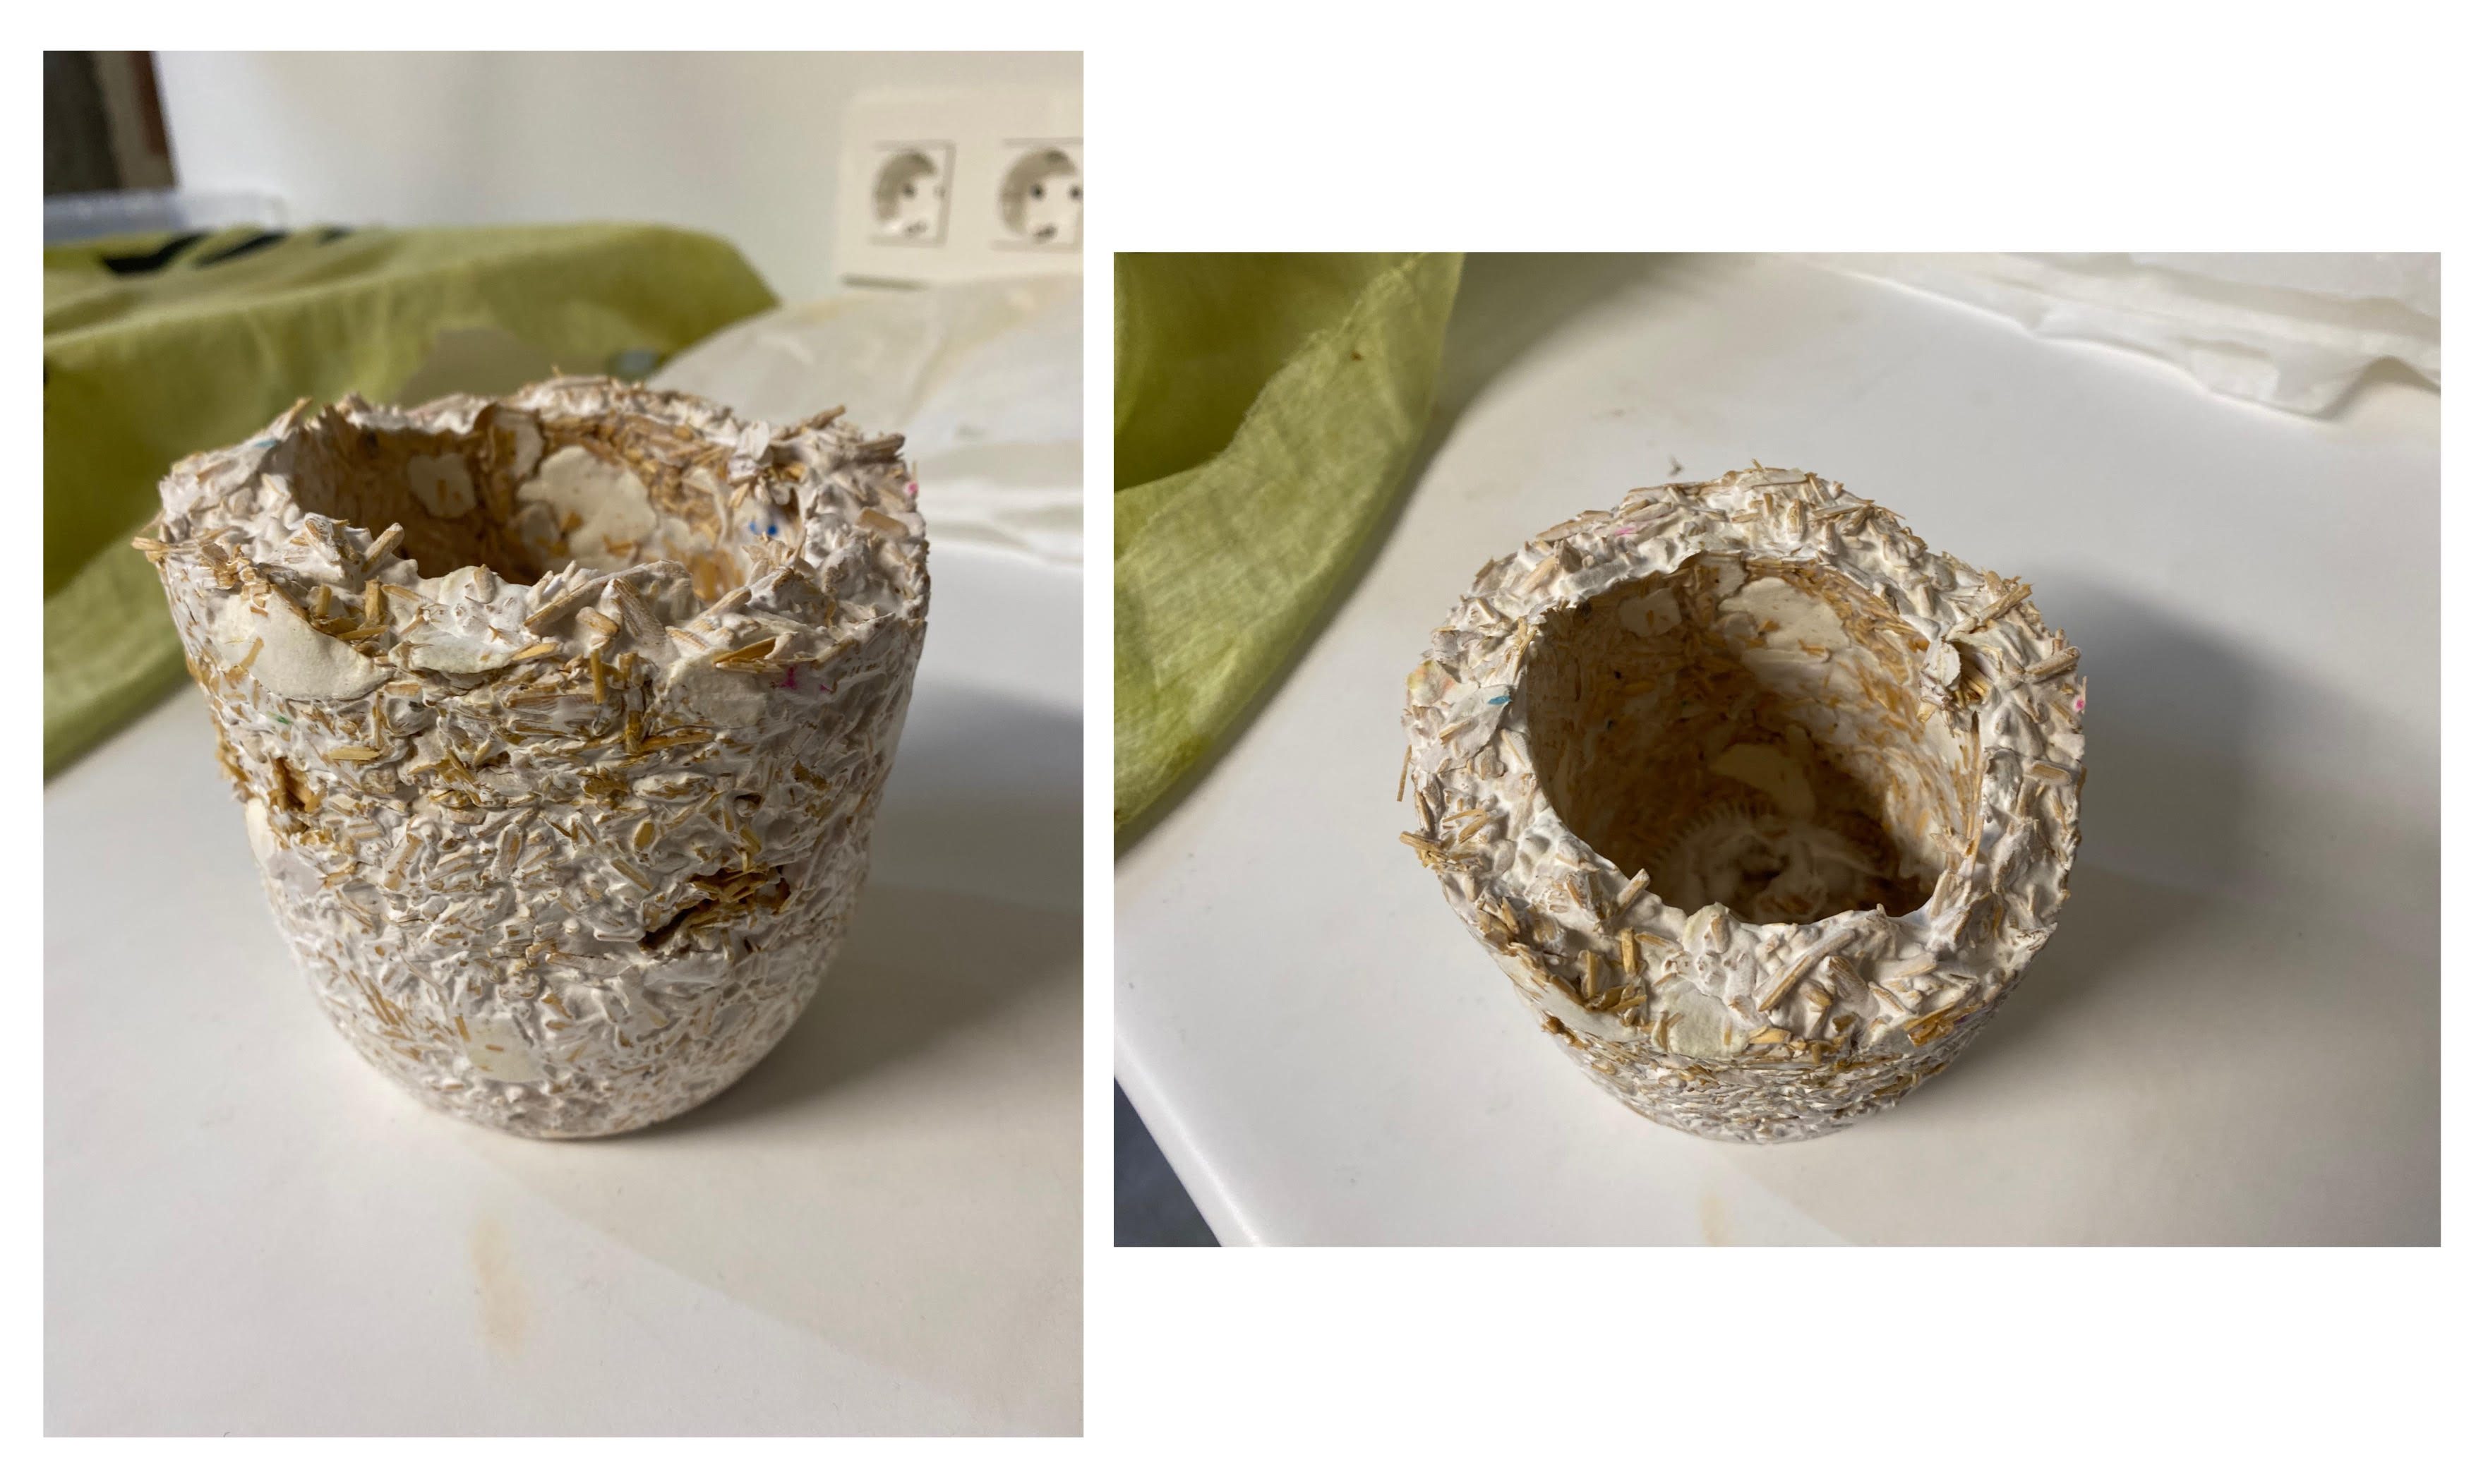
A simple mold to build a pot or pencilpot.
-
Take two containers, disinfect with alcohol and insert one inside the other.
-
It is better if the first container is not transparent so that light does not enter, even if later we are going to cover it with black plastic. All prevention is little!
INCUBATE
The next step will be to save the mycelium.
The ideal way would be to keep it in an incubator, but at the moment we cannot use ours (if you want to grow your mycelium check my documentation Open Source Hardwareto see how to build an incubator) which the best way is to keep it in a dark DISINFECTED bag to prevent too much light from entering but above all to protect from spores and other bacterias!
DEHYDRATATION
-
Remove once white and fluffy
-
Smaller samples dehydrate 50-70*C for 1-2 hours, larger in the sun with airflow
-
Volume reduces by 10% as a result of water loss
-
Two images side-by-side
FINAL RESULT
CRYSTALLIZATION
Strangely, this seeminly simple textile scaffold was the most challenging for me. My crystals just didn't want to grow! My inspiration here stemmed from all the salted Cod I see in the shops here in Bilbao. It had me thinking, could we use salt crystals and bag forms to support fermentation or food preservation systems?
You can opt for different salts to crystallize, in my case I can only show you the result of Potassium Alum
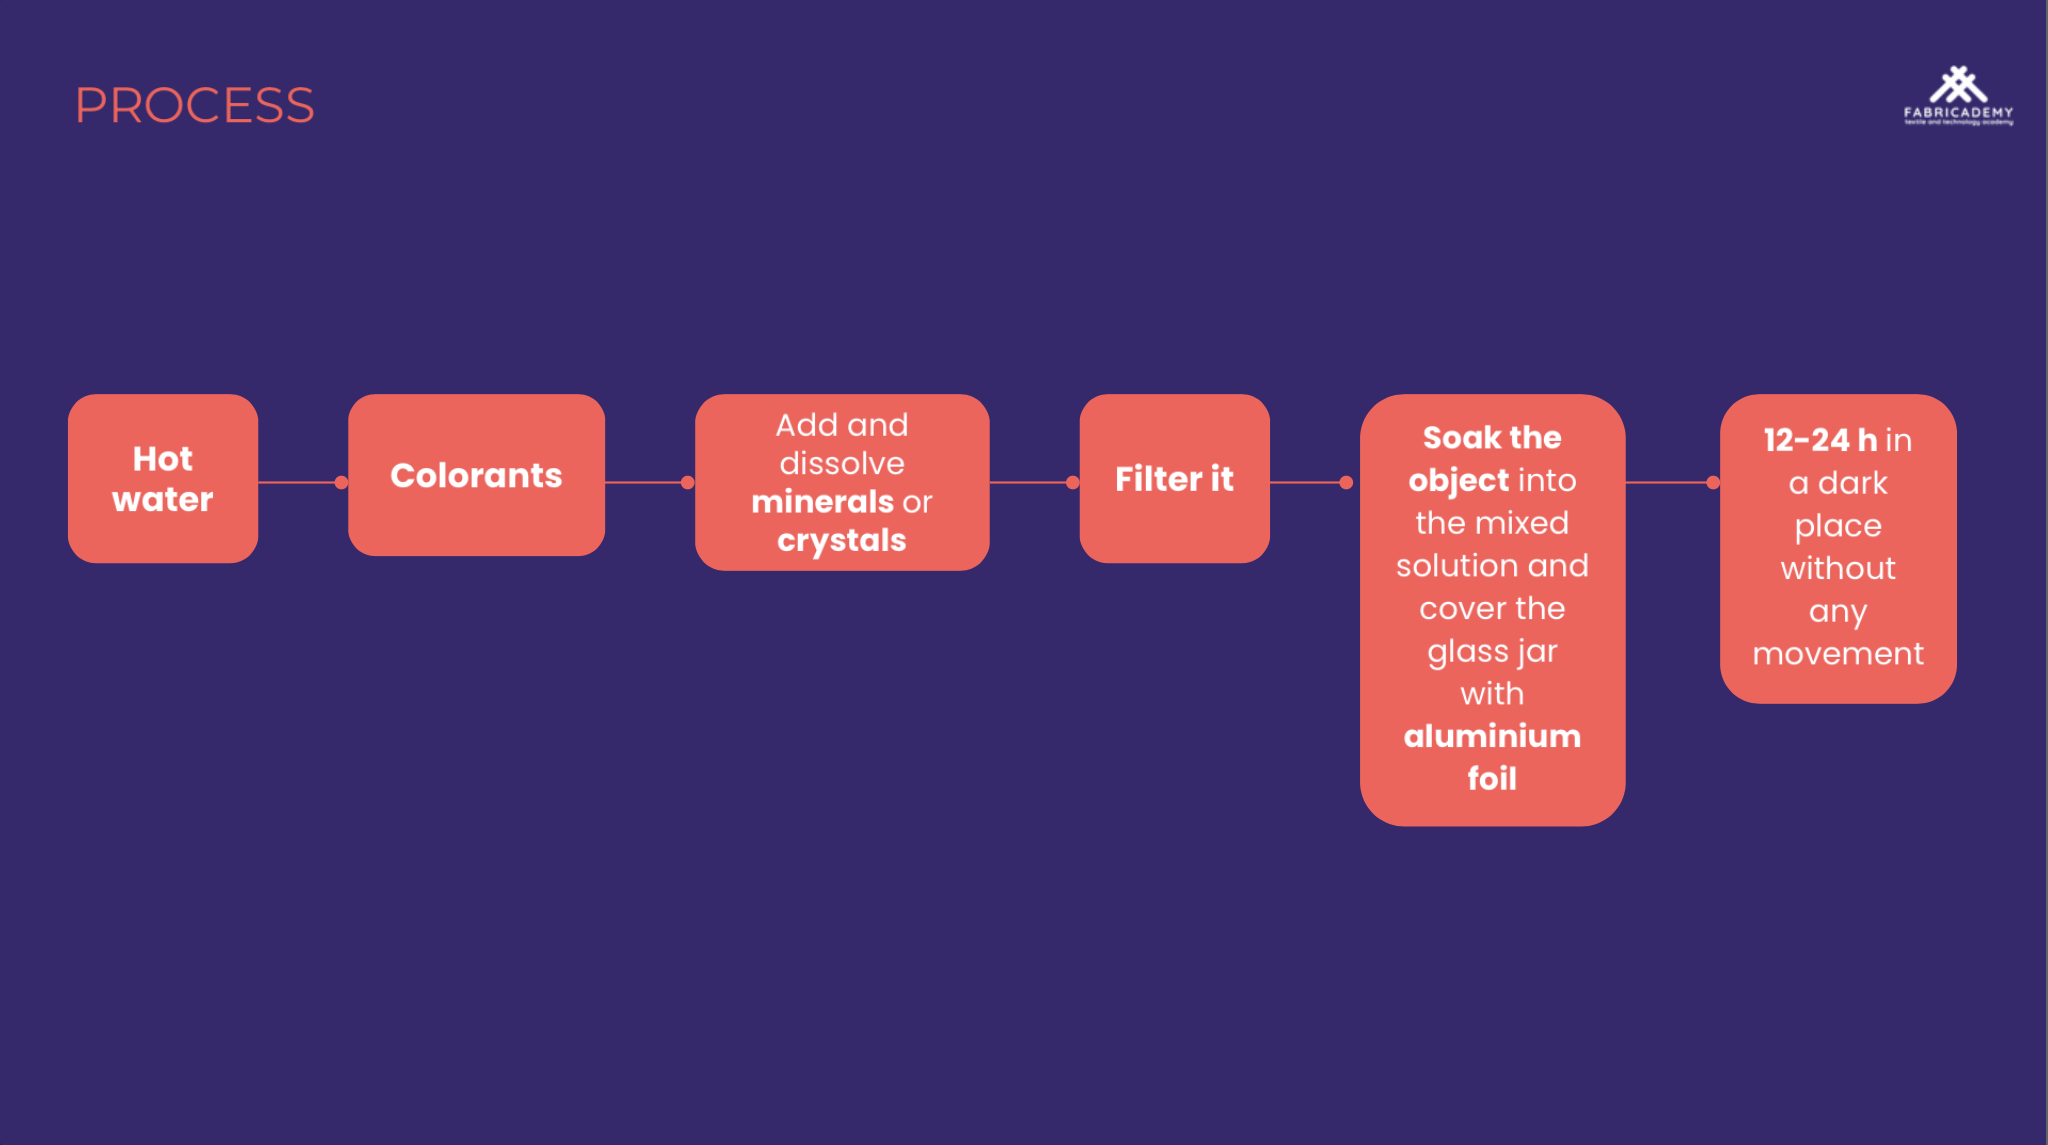
RECIPES
-
Warm water to just below boiling point
-
Add salt until it will no longer dissolve (about 0.25cups of salt to 1.5cups of water)
-
Place form within salt bath ensuring that it doesnt touch the sides or bottom such that it doesnt attach permenantly
-
Allow to cool and within days crytals should appear. If not, try adding more salt

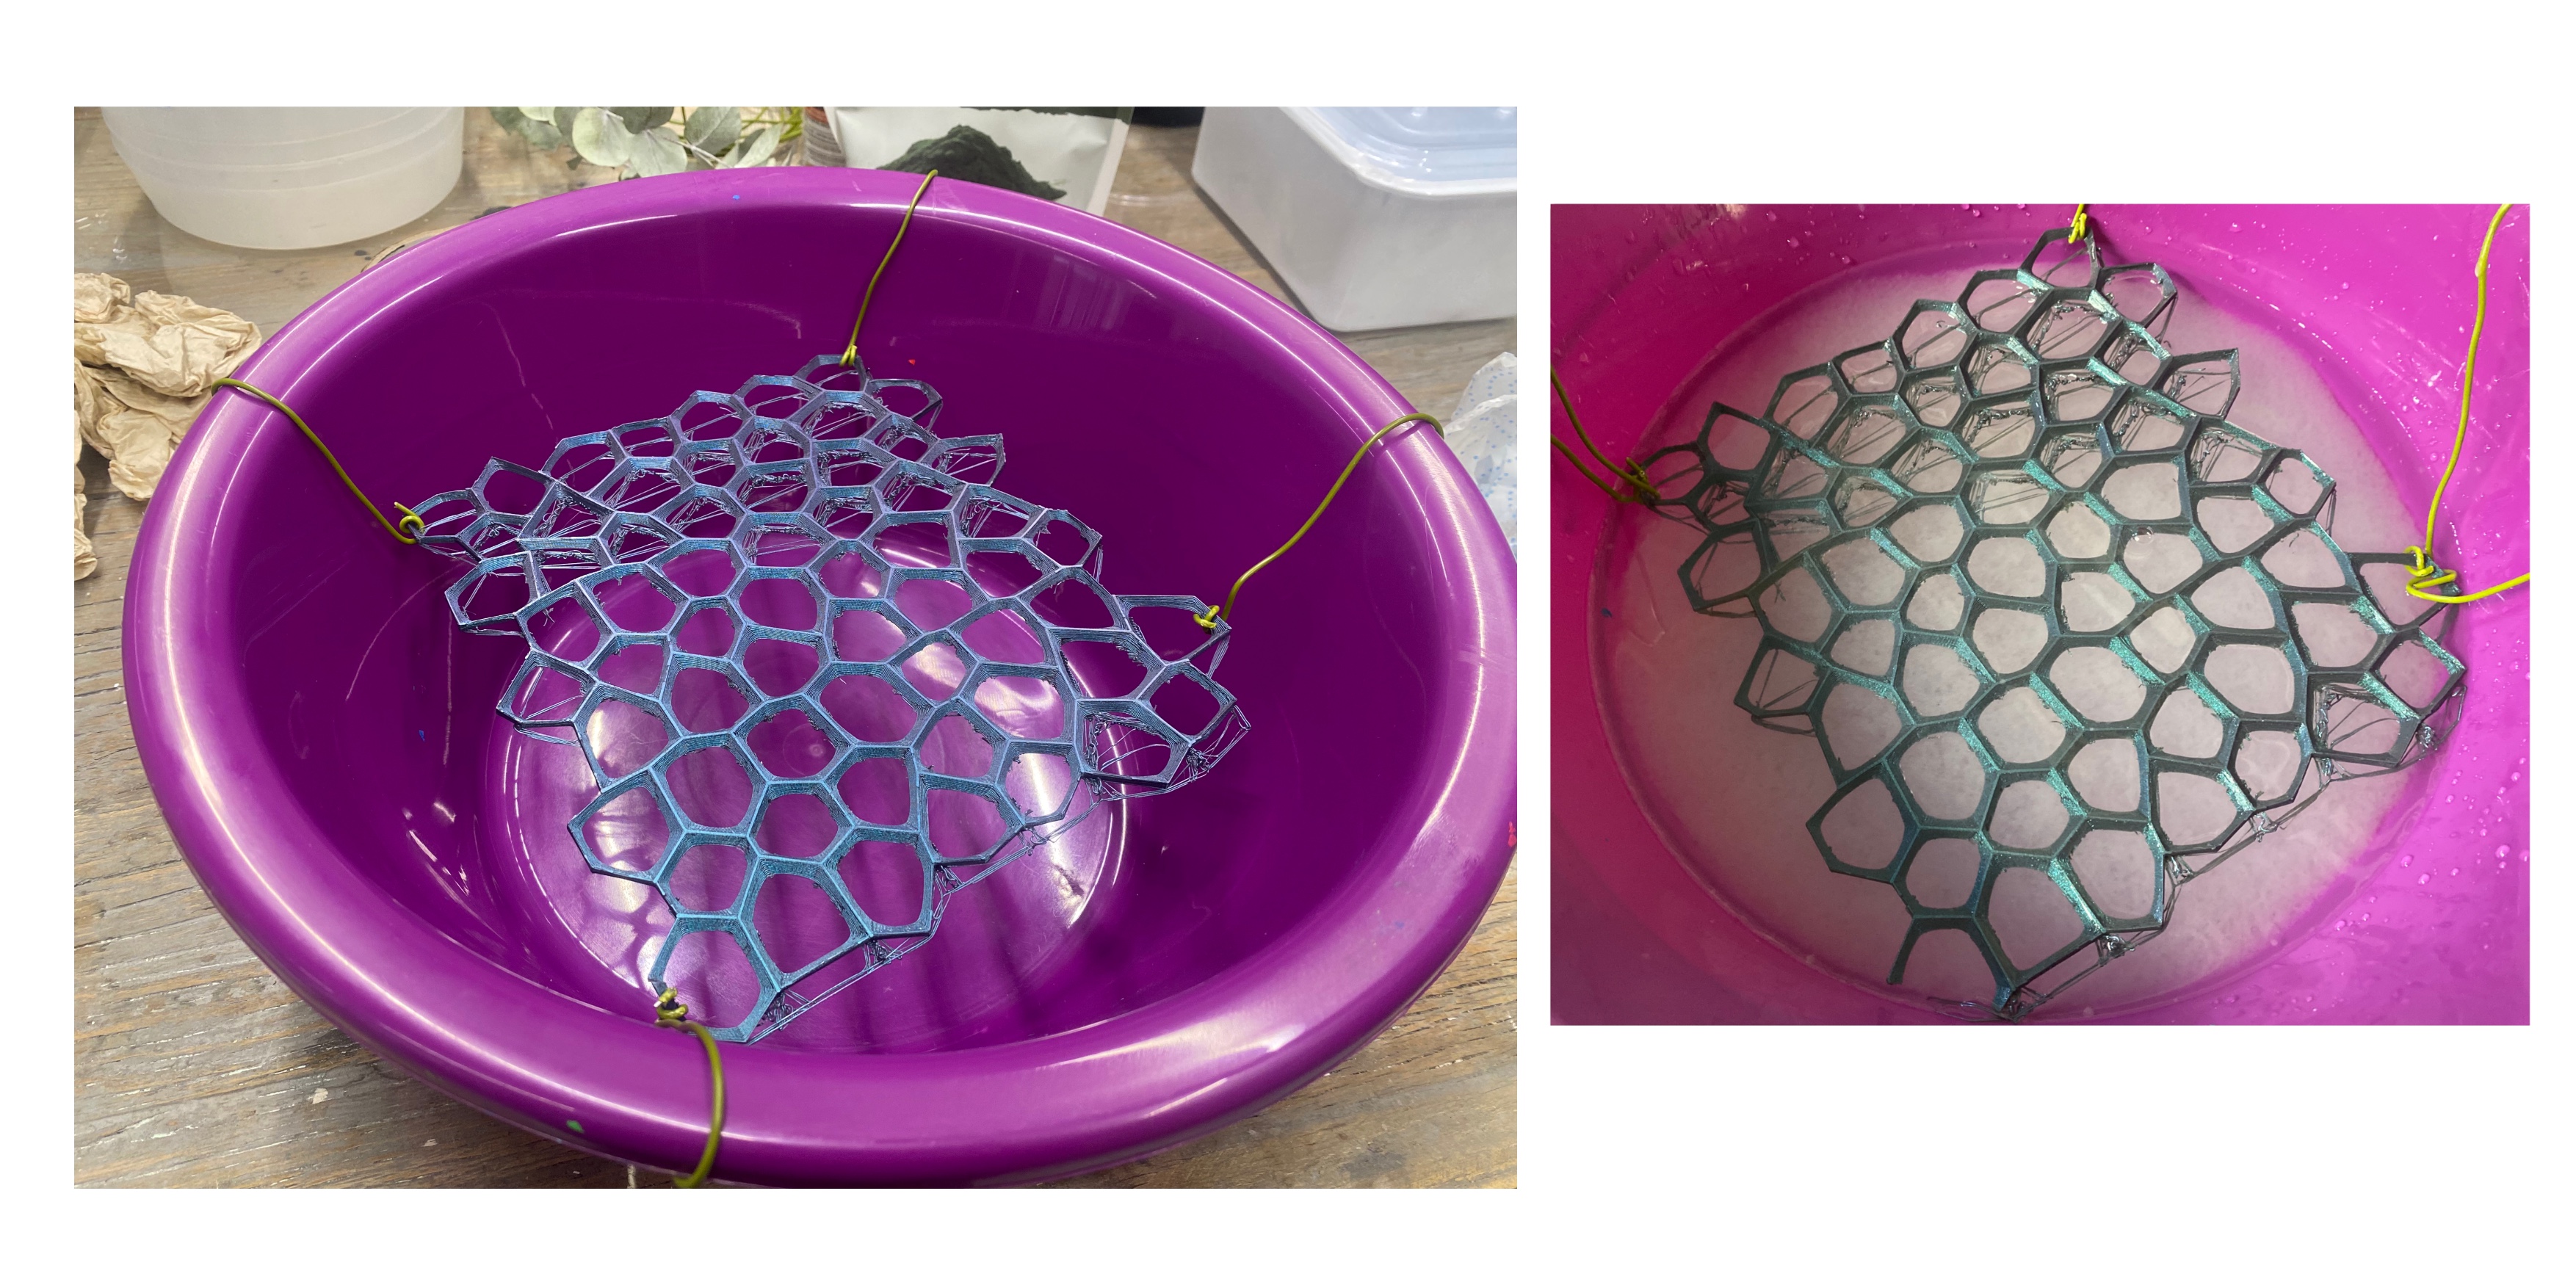
FINAL RESULT

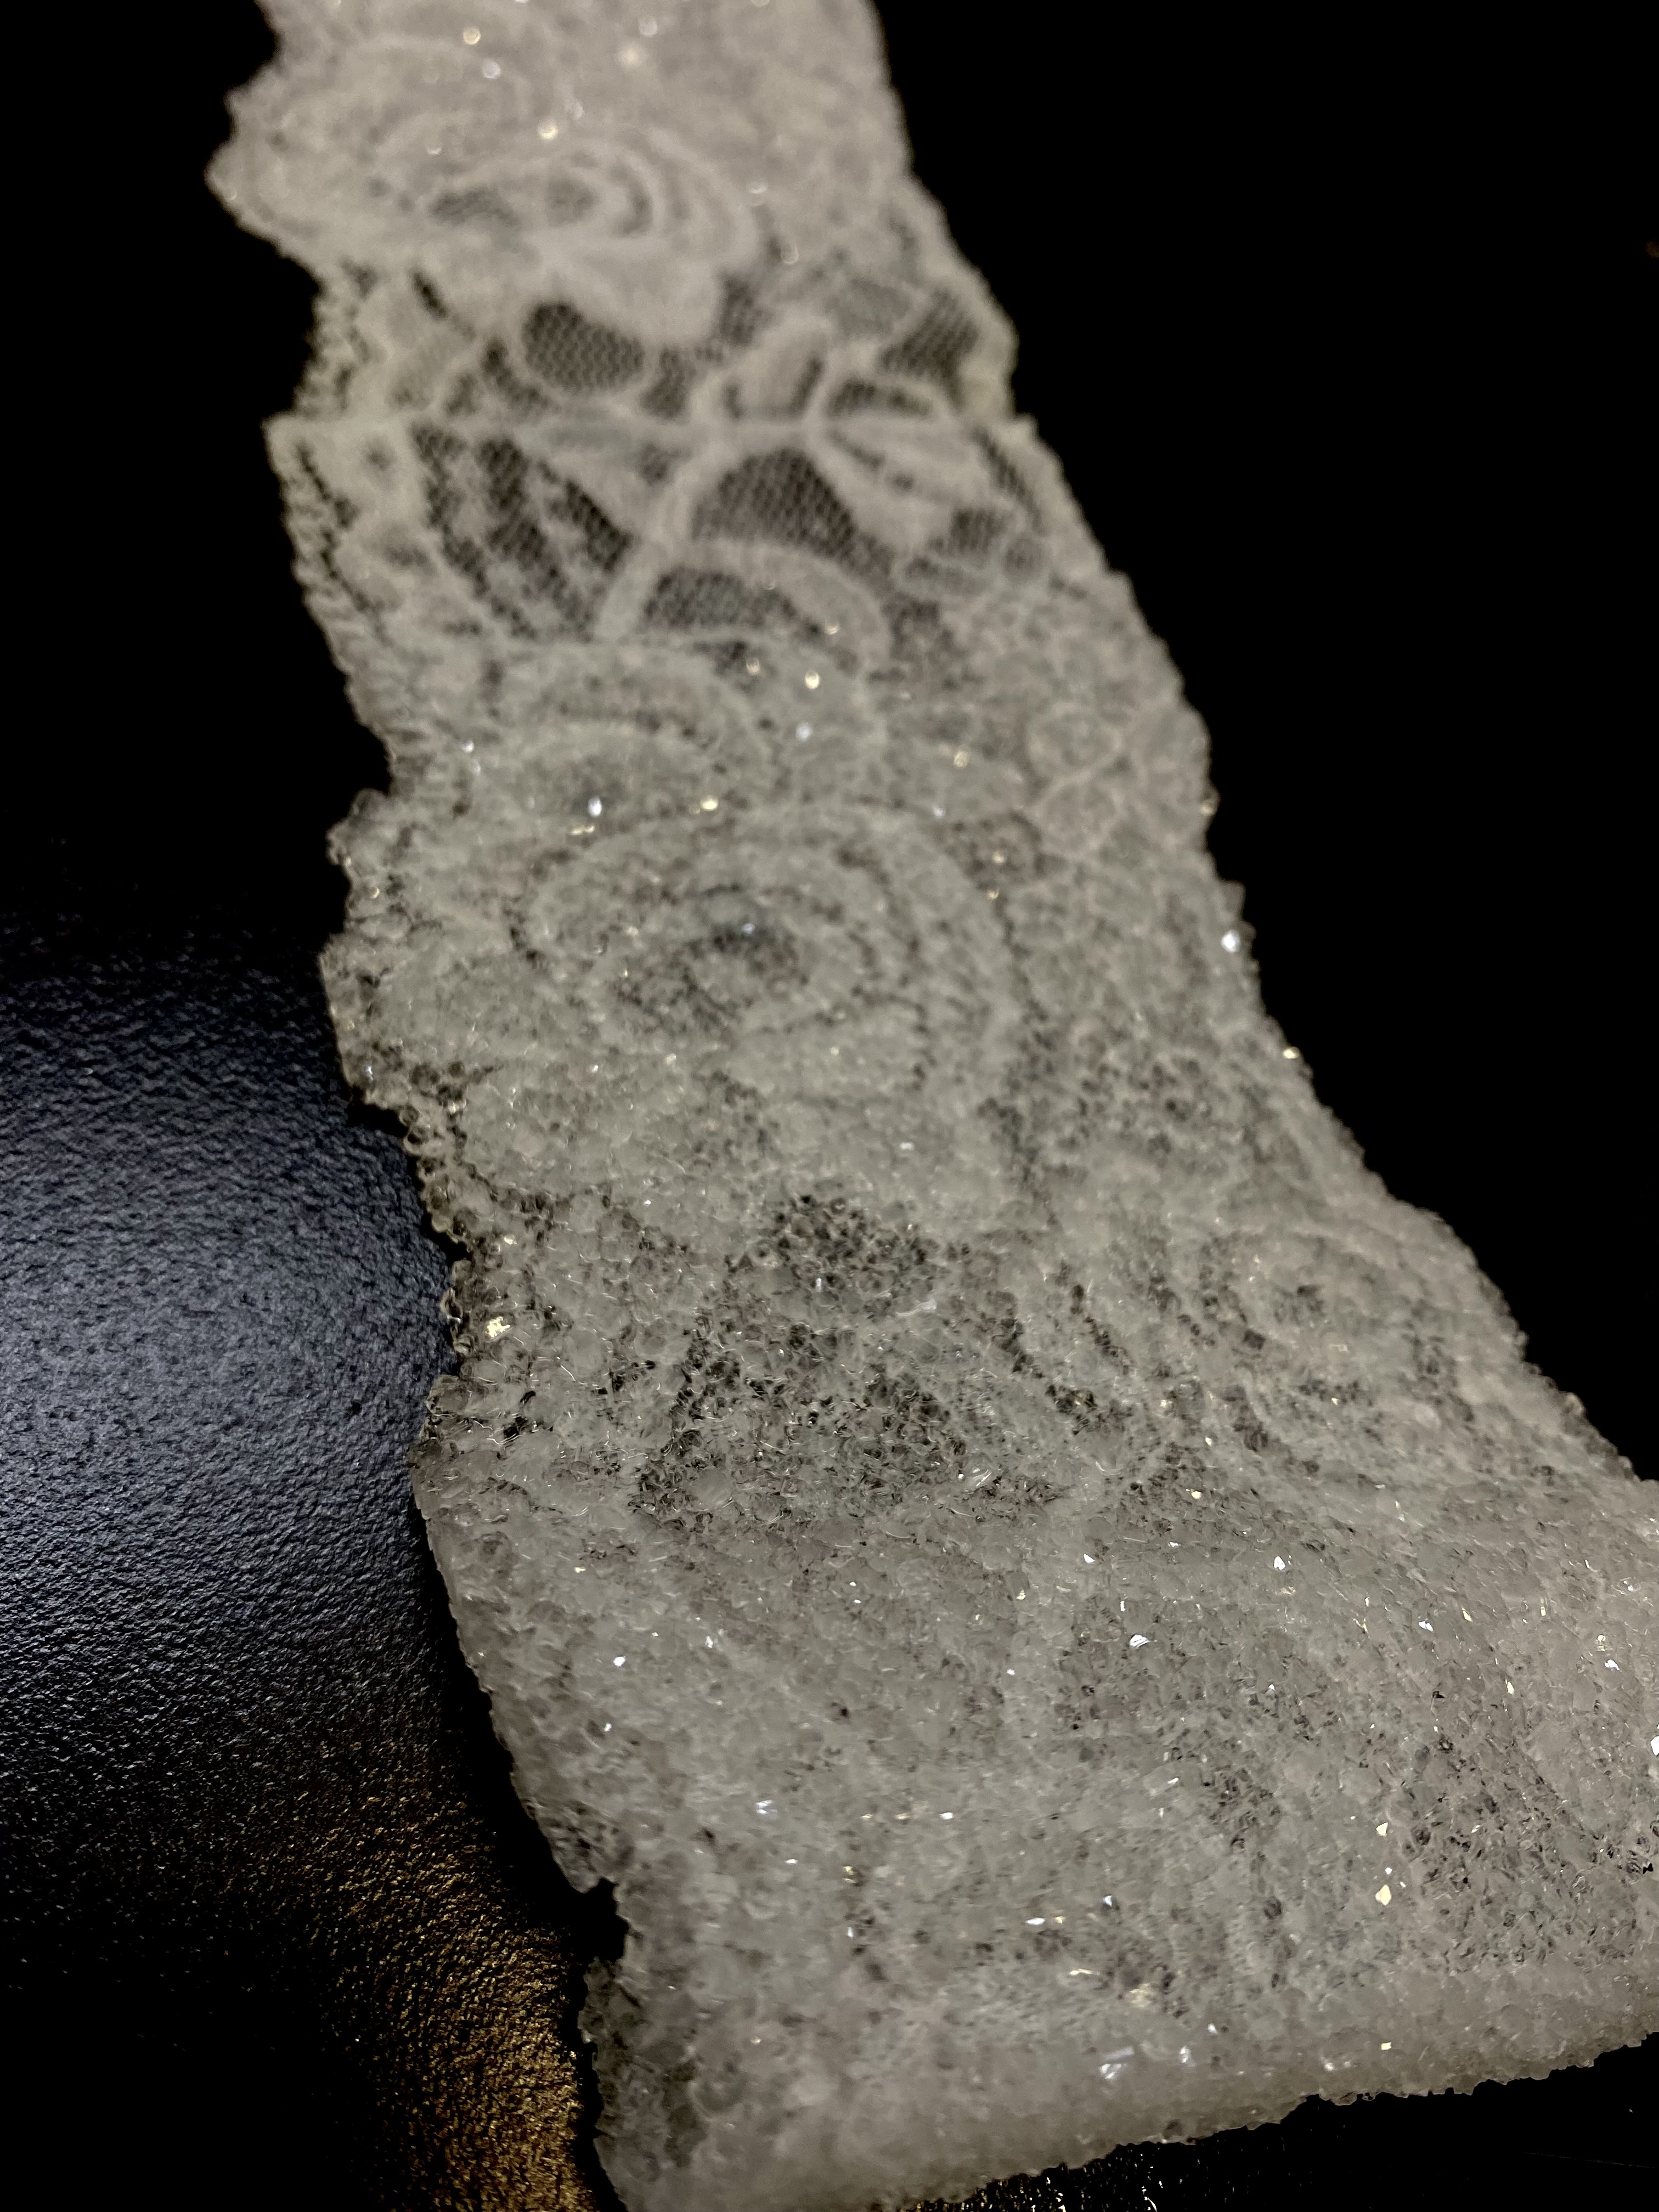
This model did not work well because the material was plastic and the crystallization did not have enough holes to hold on
TOOLS
fabric formwork ART INSPO/LECTURE NOTES
Textile + Wood LECTURE NOTES