7. Computational Couture
NEW WAY OF CONSTRUCTION
This asigments has reminded me how interested I am in architecture and interior installations. A super creative world in which many artists build spectacular works.
Oh lovely open source...
I have to say that this week has been one of the most complicated for far. Learn a computer language in a single week?? Crazy!
Grasshopper is another program that I would like to work with in my career to create anything imaginable, from small jewels to the most huge constructions, whit caotic volumes or with a simple elegance. But working with open source software is not an eassy job, it requires great effort, concentration and perseverance (the three secrets for success).
Some designers and architects are launching projects under open source licenses. In this way the plans, 3d renderings and technical documentation can be used freely to contribute to other works. This initiative comes from the hand of movements that have been changing the relationship between consumption and design for some time, such as the DIY culture or the popularization of 3D printers.
INSPIRATION
Every week I try to research different possible ways to use each program and of course get inspiration from creators. Below I present some amazing projects)
ARCHITECTURE
LAVA merges future technologies with the patterns of organisation found in nature to build a smarter, friendlier, more socially and environmentally responsible future
GRASSHOPPER HELPFUL
In this video he explains different projects and installations that have been worked with 3d design and using VERONOI 3D. The most interesting thing is that explains Voronoi DIagram based on a project located in Mexico which uses the Voronoi cells in the facade Design. First studyed the facade and how it’s fabricated and then he remodel something similar in Grasshopper.
CLAY 3D PRINTING
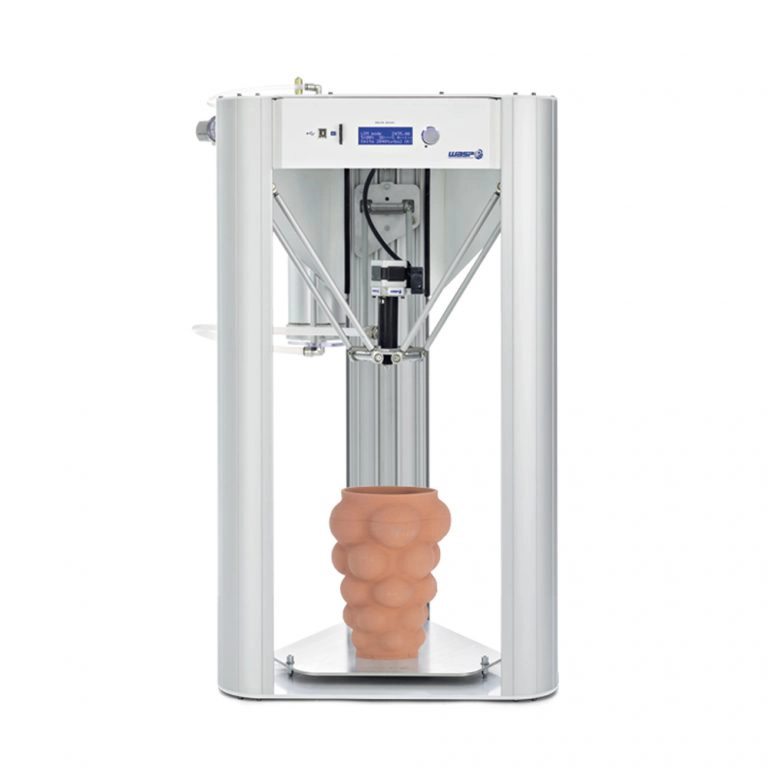
I use Delta WASP 2040 . It prints up to 40cm high 20cm width.
To print with ceramics, one of the most important steps is how to prepare the clay to fill the tank. Here the steps to prepare the clay in a proper way:
-
Make a hole in the clay
-
Add between 5% to 10% of water corresponding to the weight of the material
-
Mix the water in the hole so that the water enter to the clay
-
Shape the dough evenly following the same rate
-
Once you feel the clay is whith the perfect wet, we will follow the next step
-
Then, the clay goes inside the deposit. Pushed with the hands carefully
-
When the tank is full, you need to put some petroleum jelly into the plastic piece (which goes on the top of the clay)
-
Then you need too assemble the tank, with the piece which goes below
-
Then close it in the top, and put it on the machine and connect it with the air compressor.
This book forms a connection between both worlds of Grasshopper® and 3D printing, explaining how to transform a design into a series of curves and paths for a 3D printer to use.
Watch this video to understand how to use Delta WASP 2040 printing machine step by step.
INSPIRATION
Godot Studio Their Website
Their design-and-build studio’s mission is to provide sustainable solutions combining computational design, digital manufacturing, and craftsmanship.
Jimmy Jian His Website
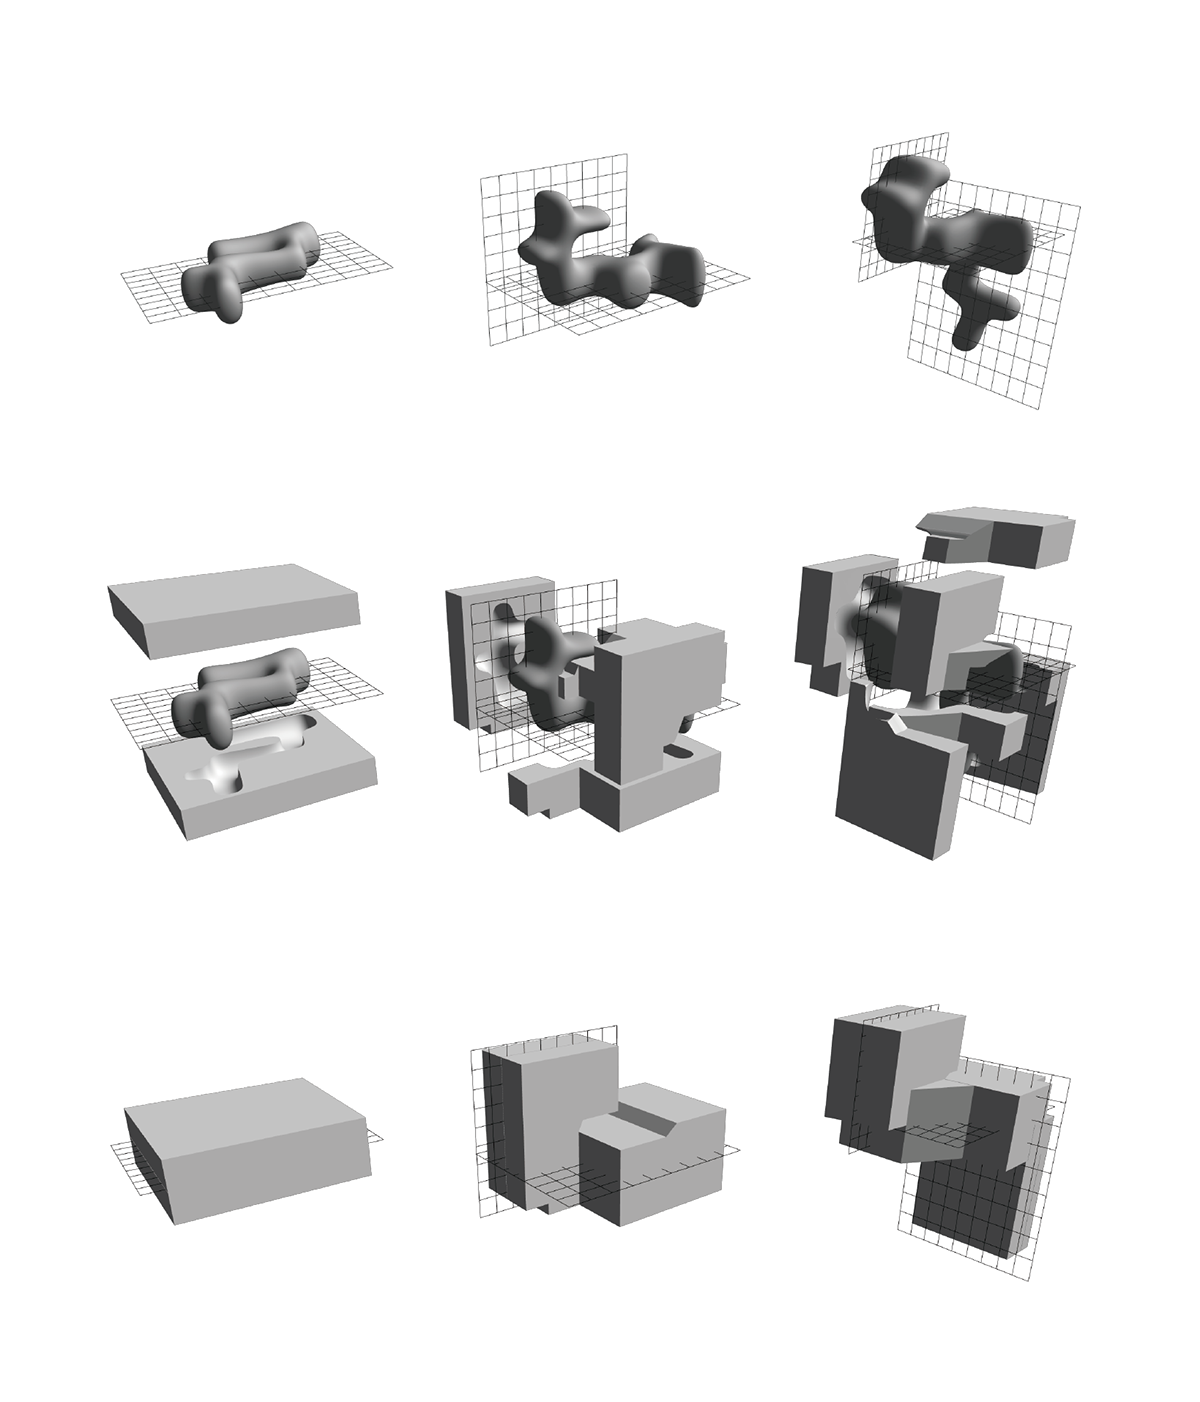 Also check here his Grasshoper Coral designs. "The prototype of the Coral system comes from the basic principle in mold design. By setting the models to grow randomly on a predetermined plane, it’s promised that these models can be split by two separated moulds. Then, the system extends to the three planes of X, Y, and Z, and even to not oriented planes in order to increase the complexity of the forms it generates, while challenging the traditional mold splitting method."
GRASSHOPPER
Without a doubt this week has been the most complicated when it comes to understanding a new software, Grasshopper has increased the difficulty. I will try in the best possible way to explain with the examples of class how I have been able to build the exercises.
CHECK THIS LINK to go to a good Grasshopper library where you can find information about the lists and more.
HAT
Exercise 1: Understand the logic of designing in Grasshoper building a hat
With this exercise we wanted to build a Hat understanding the functions of each PLOGIN. At first can be a bit messy.
I would like to start the explanation from the beginning and then give some notes or tricks that have served me best.
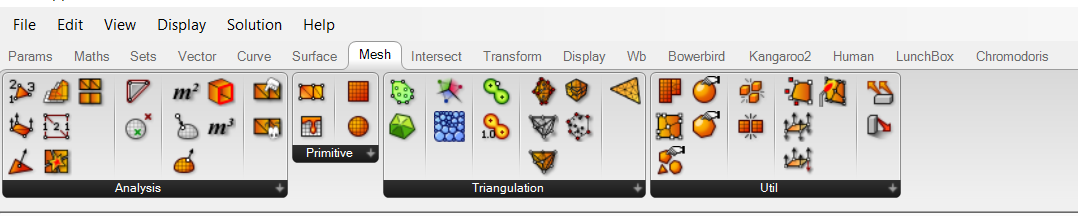 These are lists of tools you can find them at the top. Each list gives you different tools, for example for this first exercises the mein ones where DISPLAY -> Imputs/ Maths/ Sets. My advance is to have a look at them before start working.
-
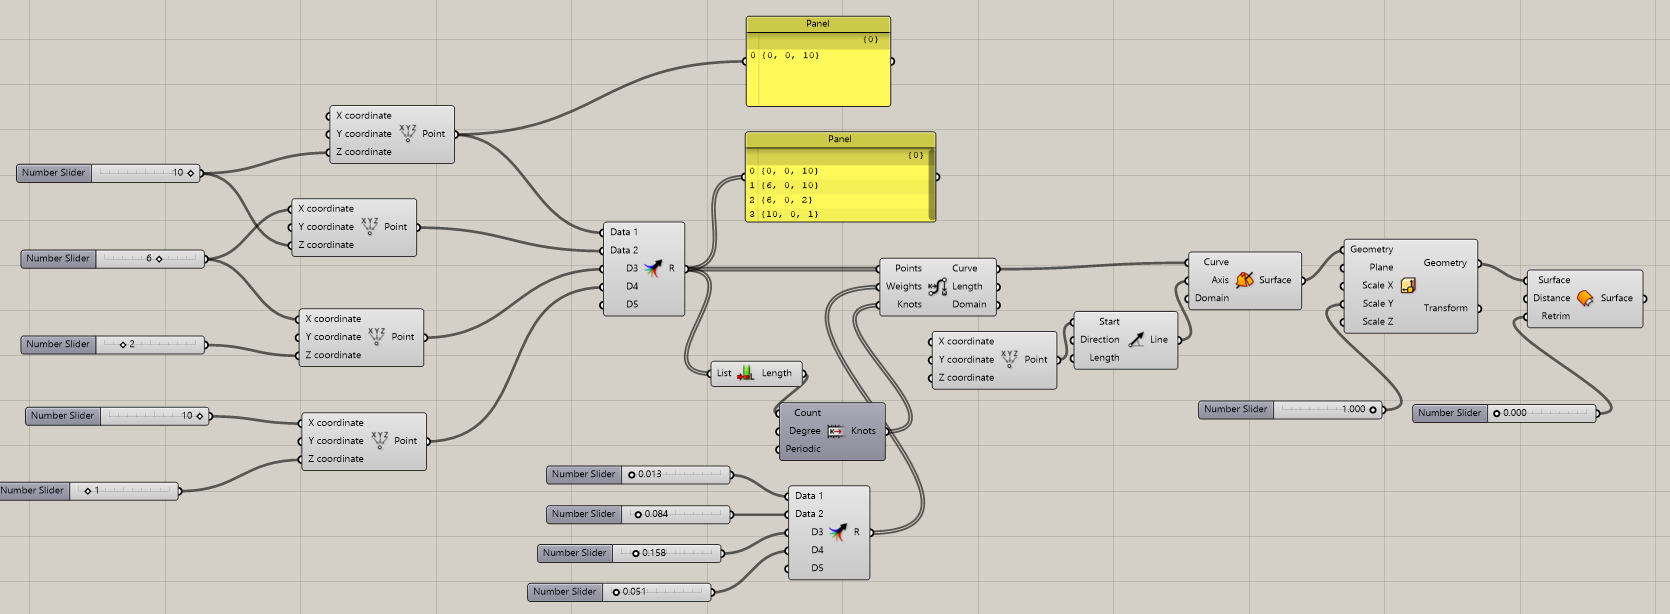
First create points to then shape (CONSTRUCT POIN)
-
You Need a NUMBER SLIDER (SPACE+ 0...10) to redirect points that have been created in the middle of the space.
-
In this case we create 4 construct point. Then we must coordinate them depending on the coordinates X, Y, Z. Try different options and you will visualize how do they works each cordinates.
-
Create a MARGE and conect all the construc points in datas.
-
Create the NURBS CURVE PWK plogin and SURFACE and conect (CURVE WITH CURVE) your line will become volume. After this you can edit the number slider at the beginning of the diagram and see what shape you want to give to your hat.
-
Now let's focus on the OUTPUT Axis. This we must connect to another plogin called Line SDL.
-
The OUTPUT Start conect whit another plogin CONSTRUCT POINT
-
Now again we resort to surface and this will be connected to SCALE NU
-
We must edit Scale NU the Y CORDINATE. So create a new __NUMBER SLIDER (SPACE+ 0...10) in my case i move to number 1 for a reasonable form.
-
To finish I created off set surface
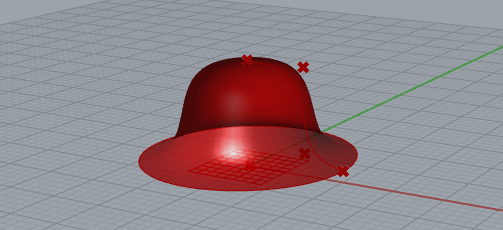
VASE
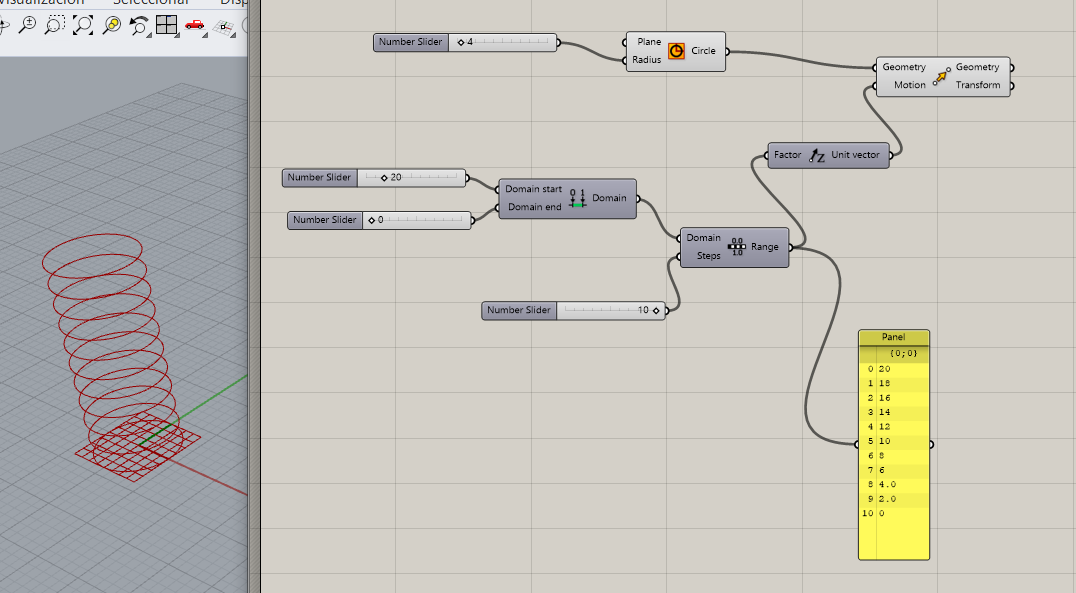
EXERCISE 2: Design a Vase
Try following the steps mentioned below:
-
Create NUMBER SLIDER (Space + 0...10)
-
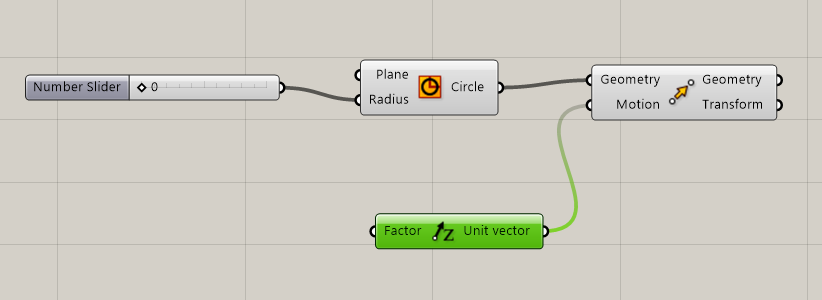
CIRCLE conect to OUTPUT Radius (I am playing with the central point)
-
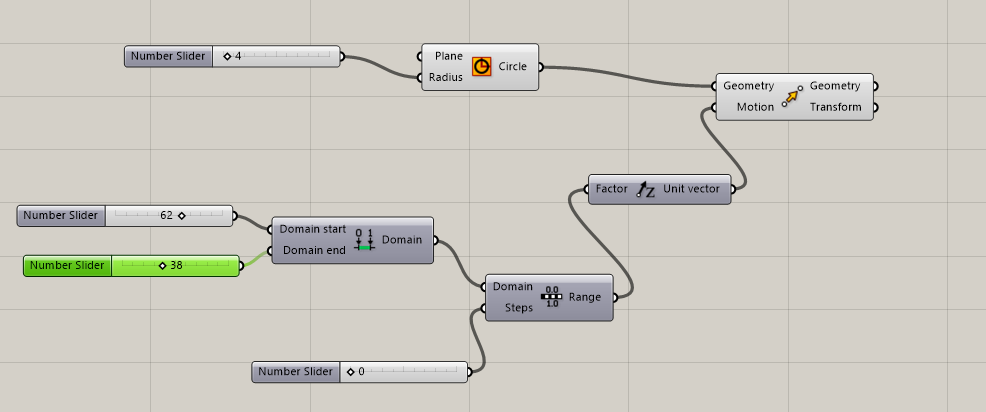
MOVE INPUT Motion conect with UNIT Z (we need Z vector to move the figure)
-
RANGE (this plogin give numbers to the Z movemnts) Is necessary a MAX and MIN-> Conection with CONSTRUCT DOMAIN
-
The other INPUT of Range we conect to STEPS (to edit the floors) in this case is better to play whit short range of floors (0...10)
-
Fot better visuaization conect to a panel
Up to here would be the movement parameters of the base
-
LIST LENGTH (floor range length list) conect to INPUT Range
-
SUBSTRACCTION (substract a number from a rage list)
-
new RANGE to shape each individual floor they could size what we want. For that we need GRAPH MAPPER will edit and modulate as we want all the vase.
-
We leave this line of outputs and return to the MOVE plugin to connect the AREA geometries between them.
-
AREA also has centroid output which be conected with SCALE (in this way the vase is edited from the center to the outside)
-
To finish we will create a LOFT to join the floors with the wall of the vase.
-
Clik right BAKE (it is necessary to bake the figure so that it can be imported to the 3d printer)
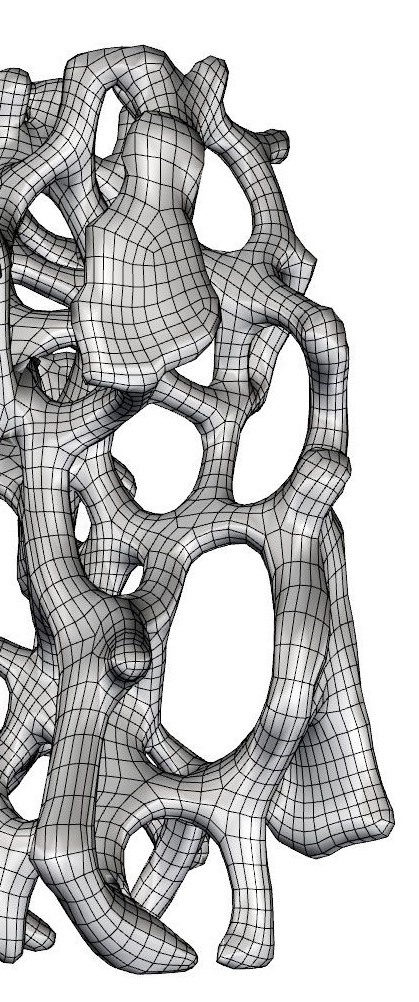
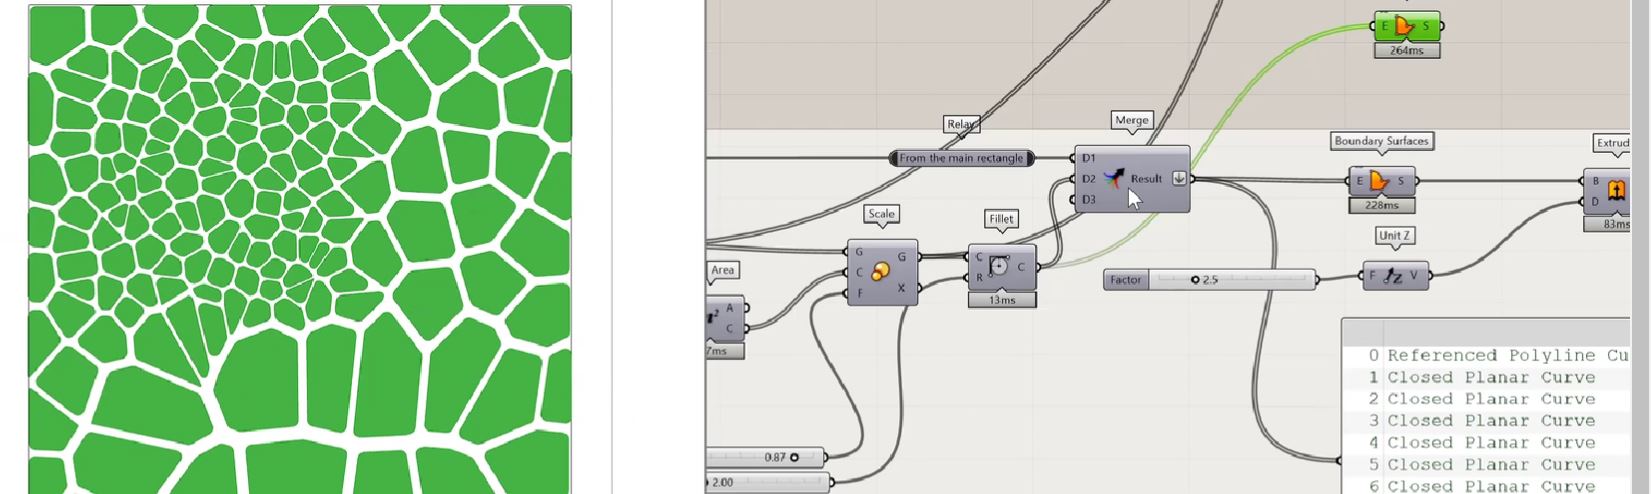
VORONOI
EXERCISE 3: Voronoi Pattern
In this exercise I wanted to design a voronoi pattern.
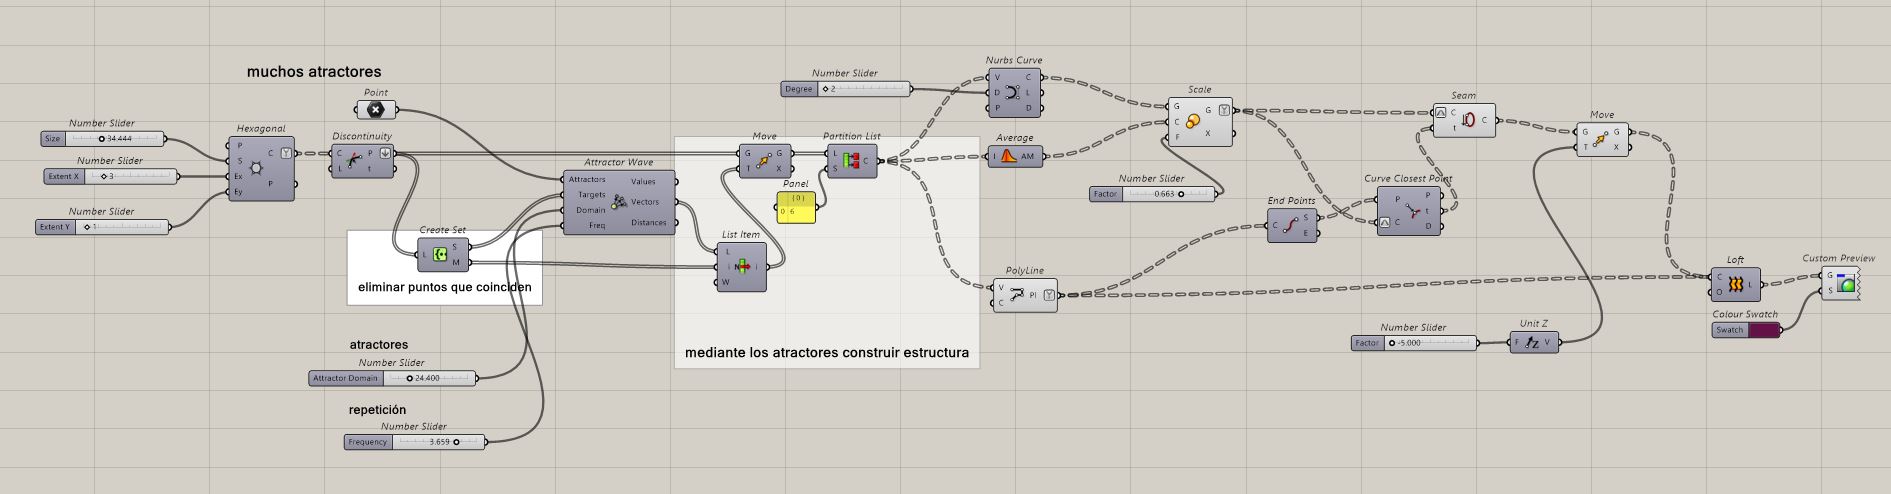
Voronoi diagram are simple, yet they have incredible properties which have found applications in fields ranging from cartography, biology, computer science, statistics, archaeology, all way to architecture and arts. More about Voronoi
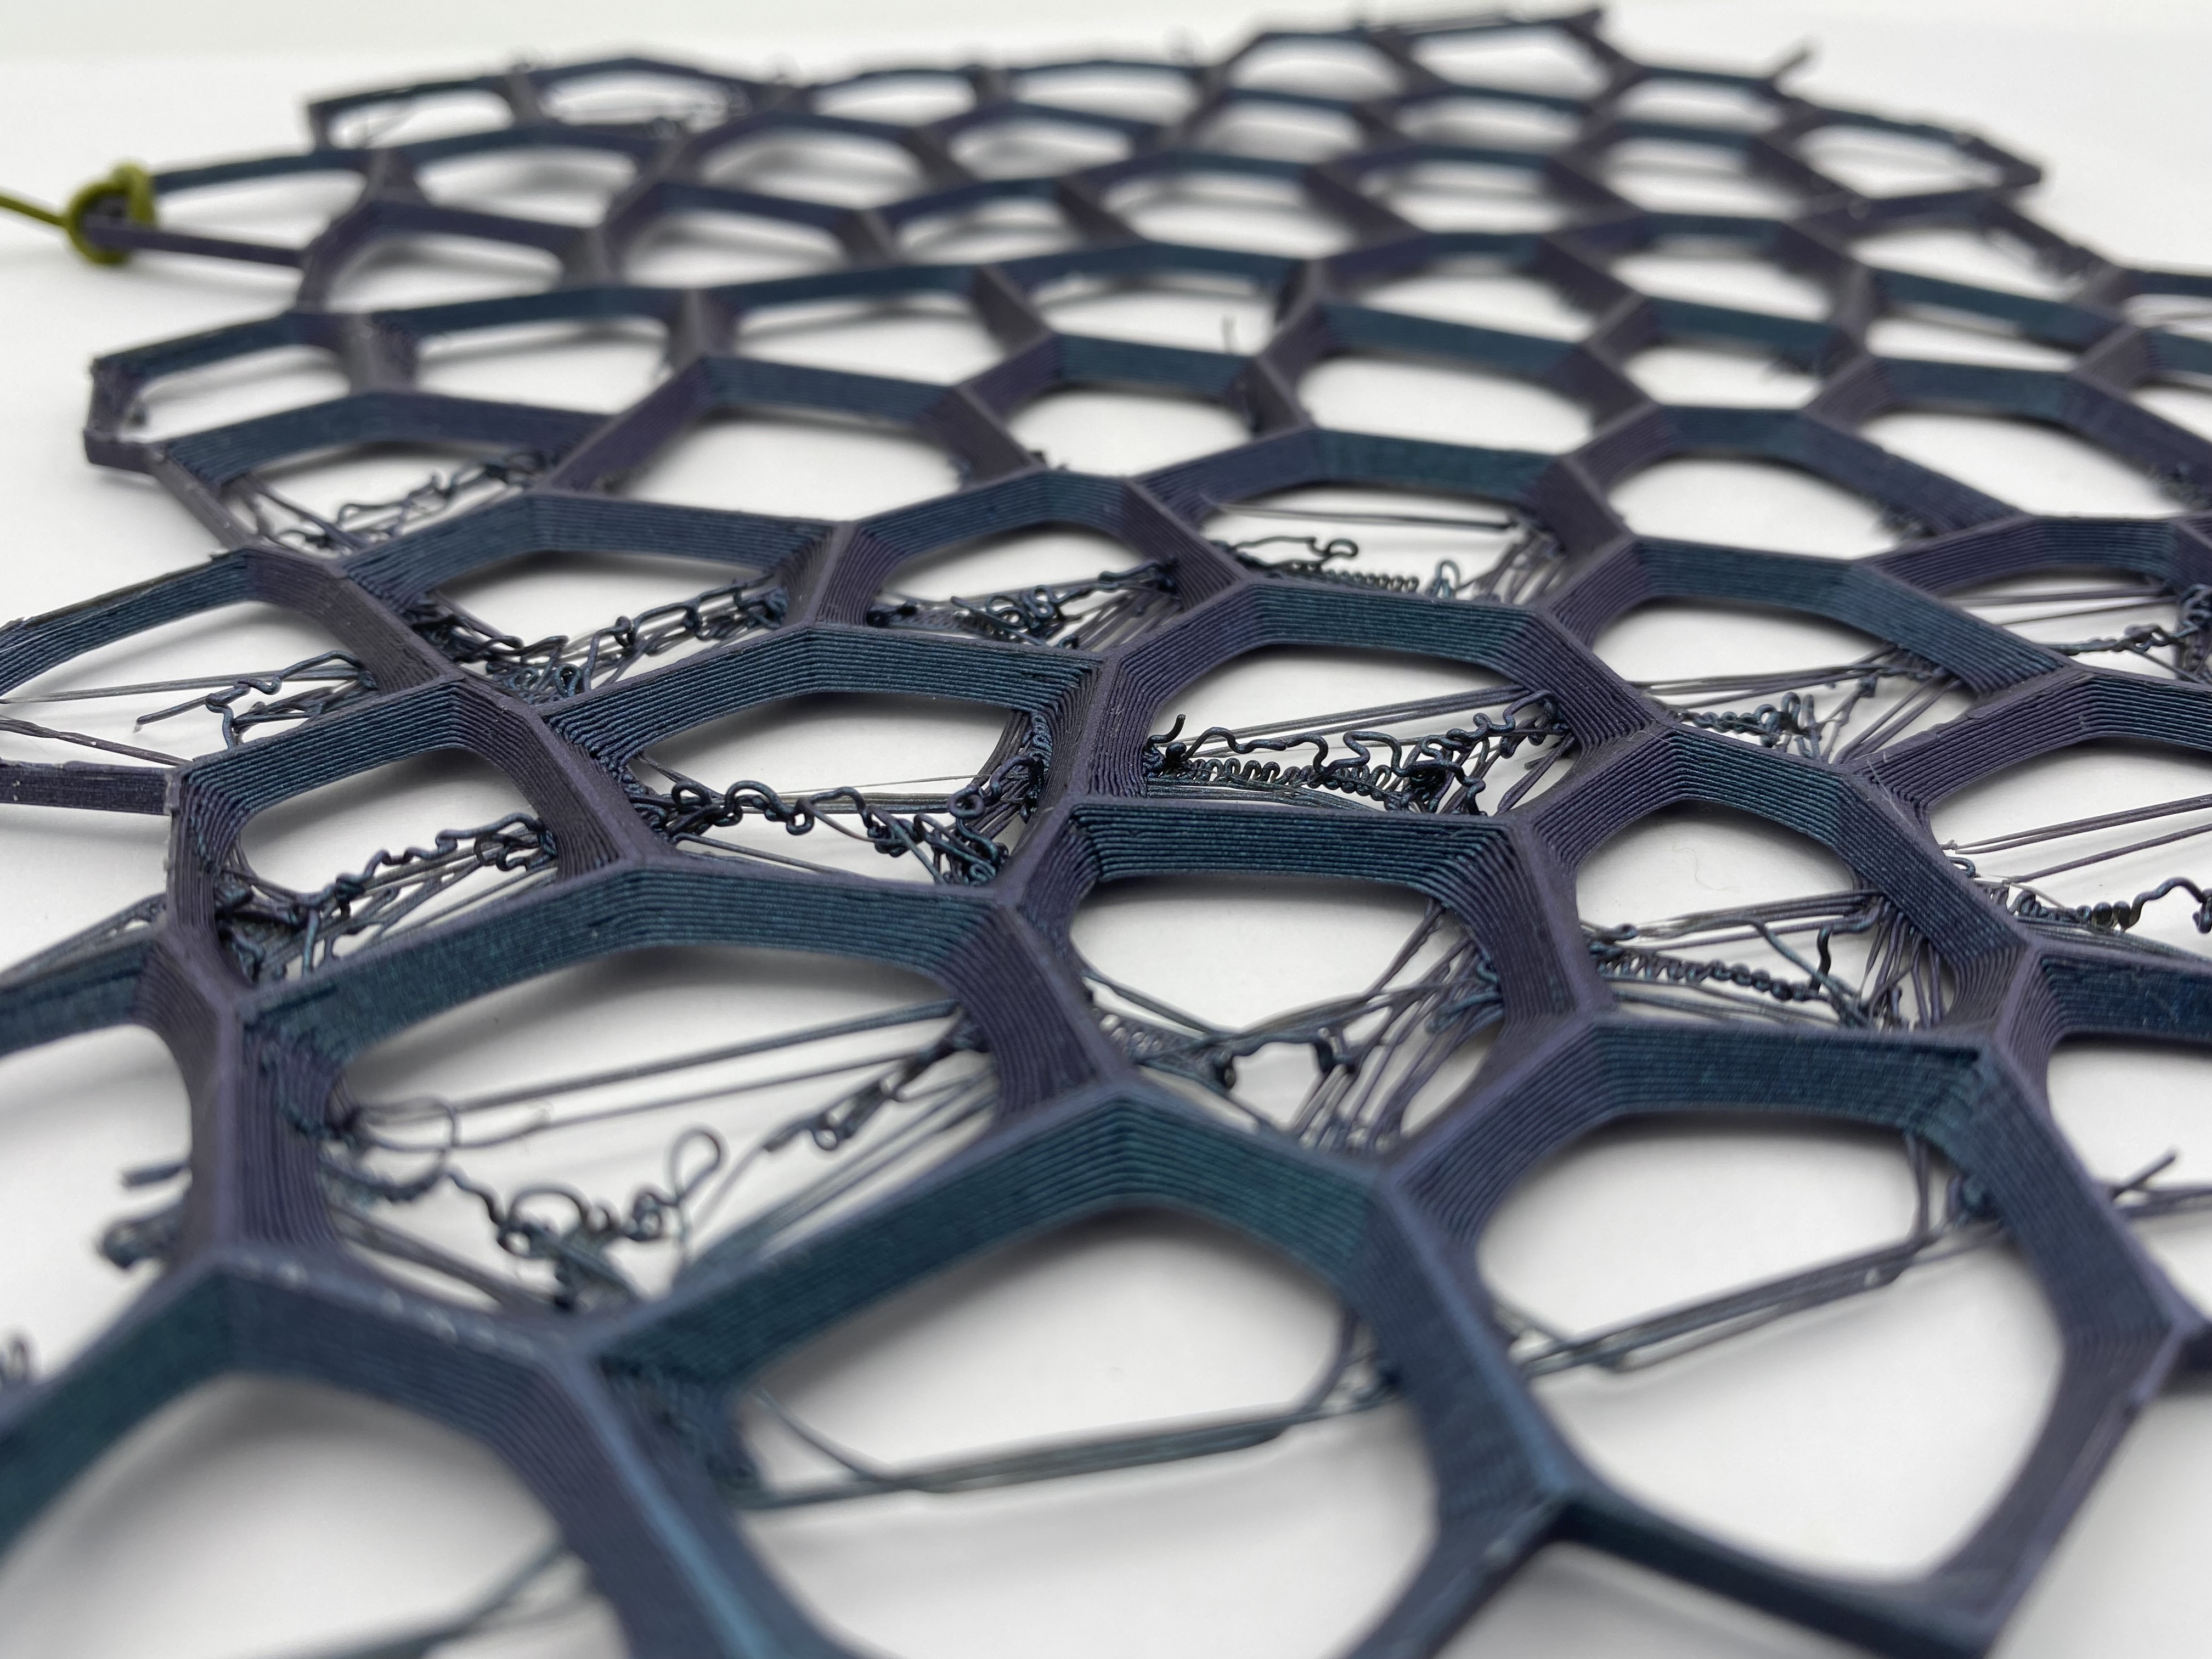
3D PRINTER
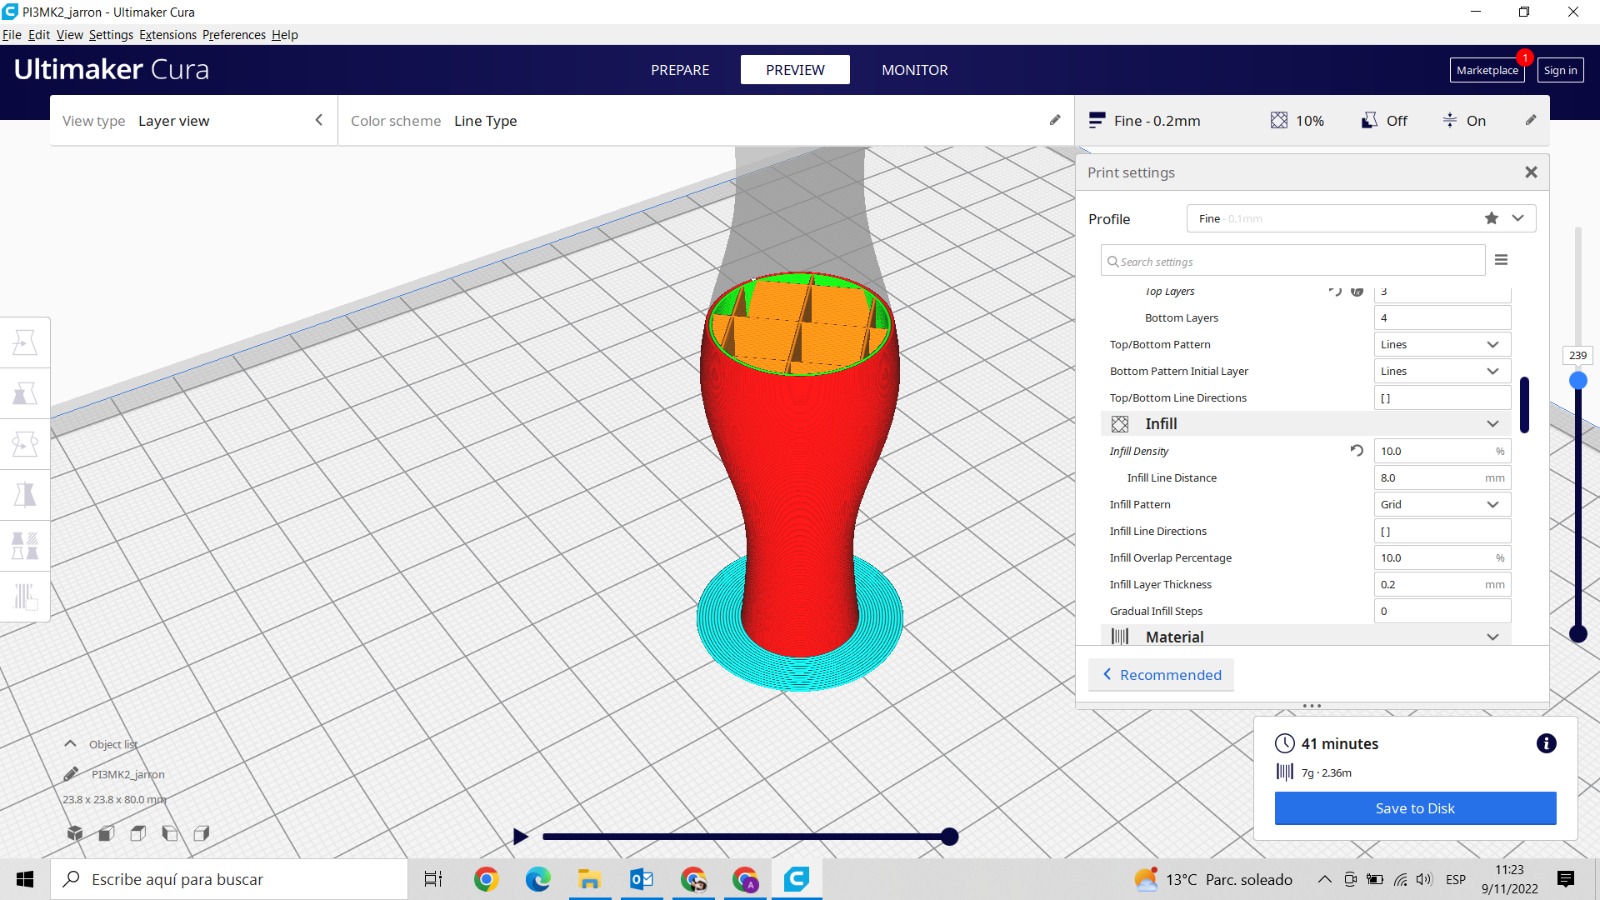
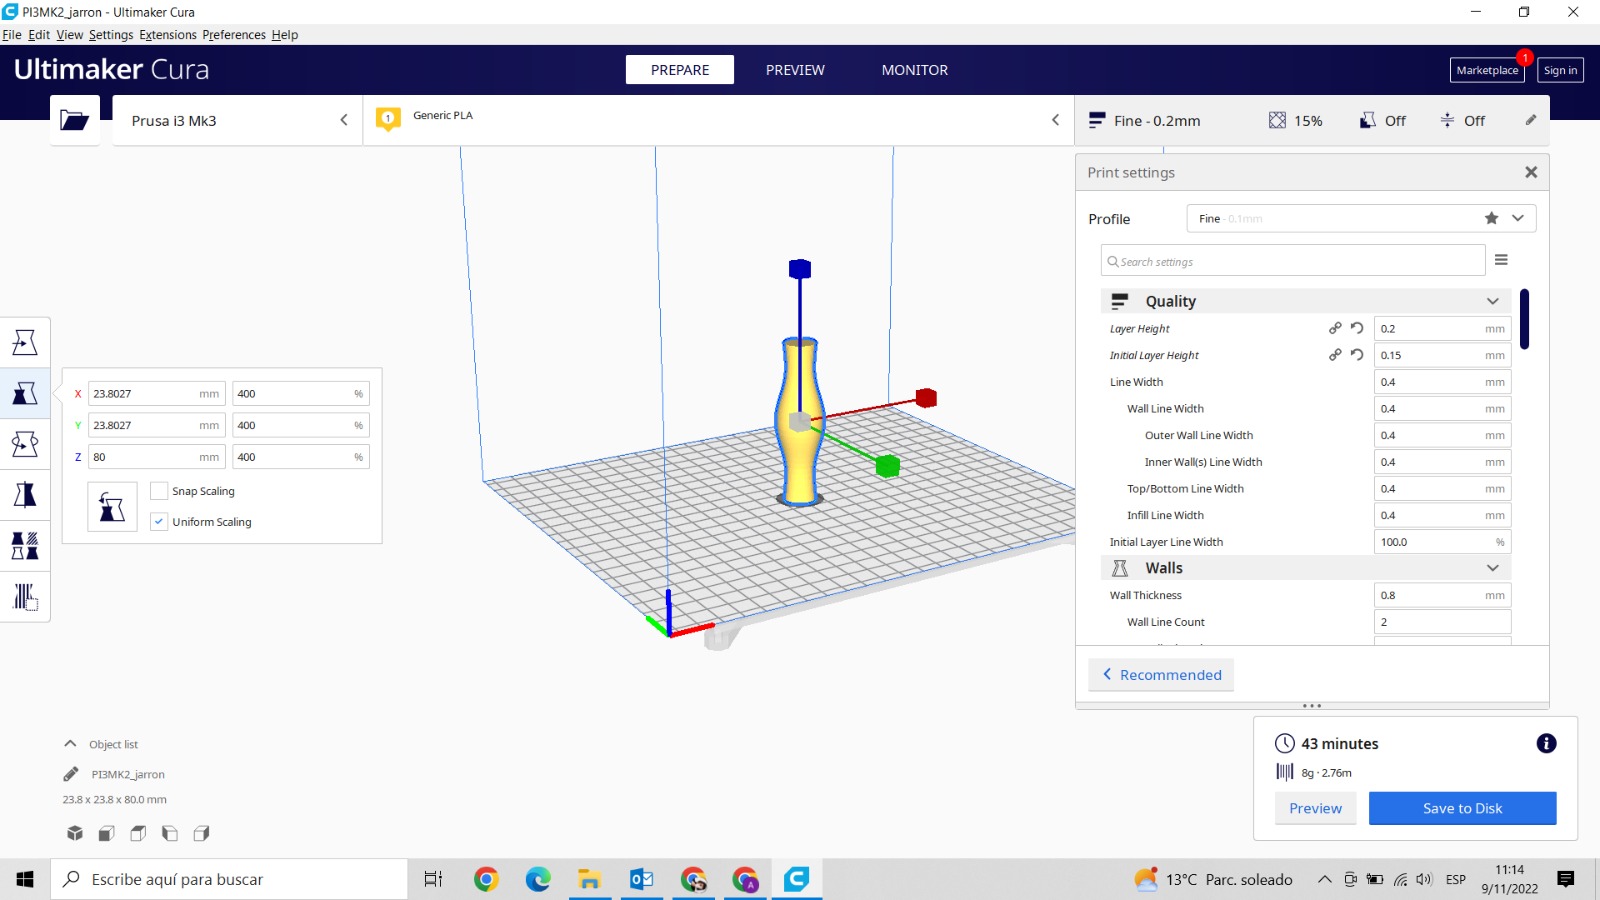
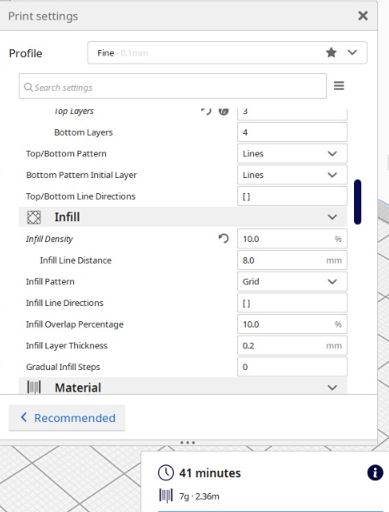 Before start printing, take into acount these parameters. Line Distance Infill Density Layer Thickness.
Depending on how you edit the internal construction, the printing will need more or less time, in my case I have waited 41 minutes and I anly spend 7g of the filament.
Before start printing, take into acount these parameters. Line Distance Infill Density Layer Thickness.
Depending on how you edit the internal construction, the printing will need more or less time, in my case I have waited 41 minutes and I anly spend 7g of the filament.
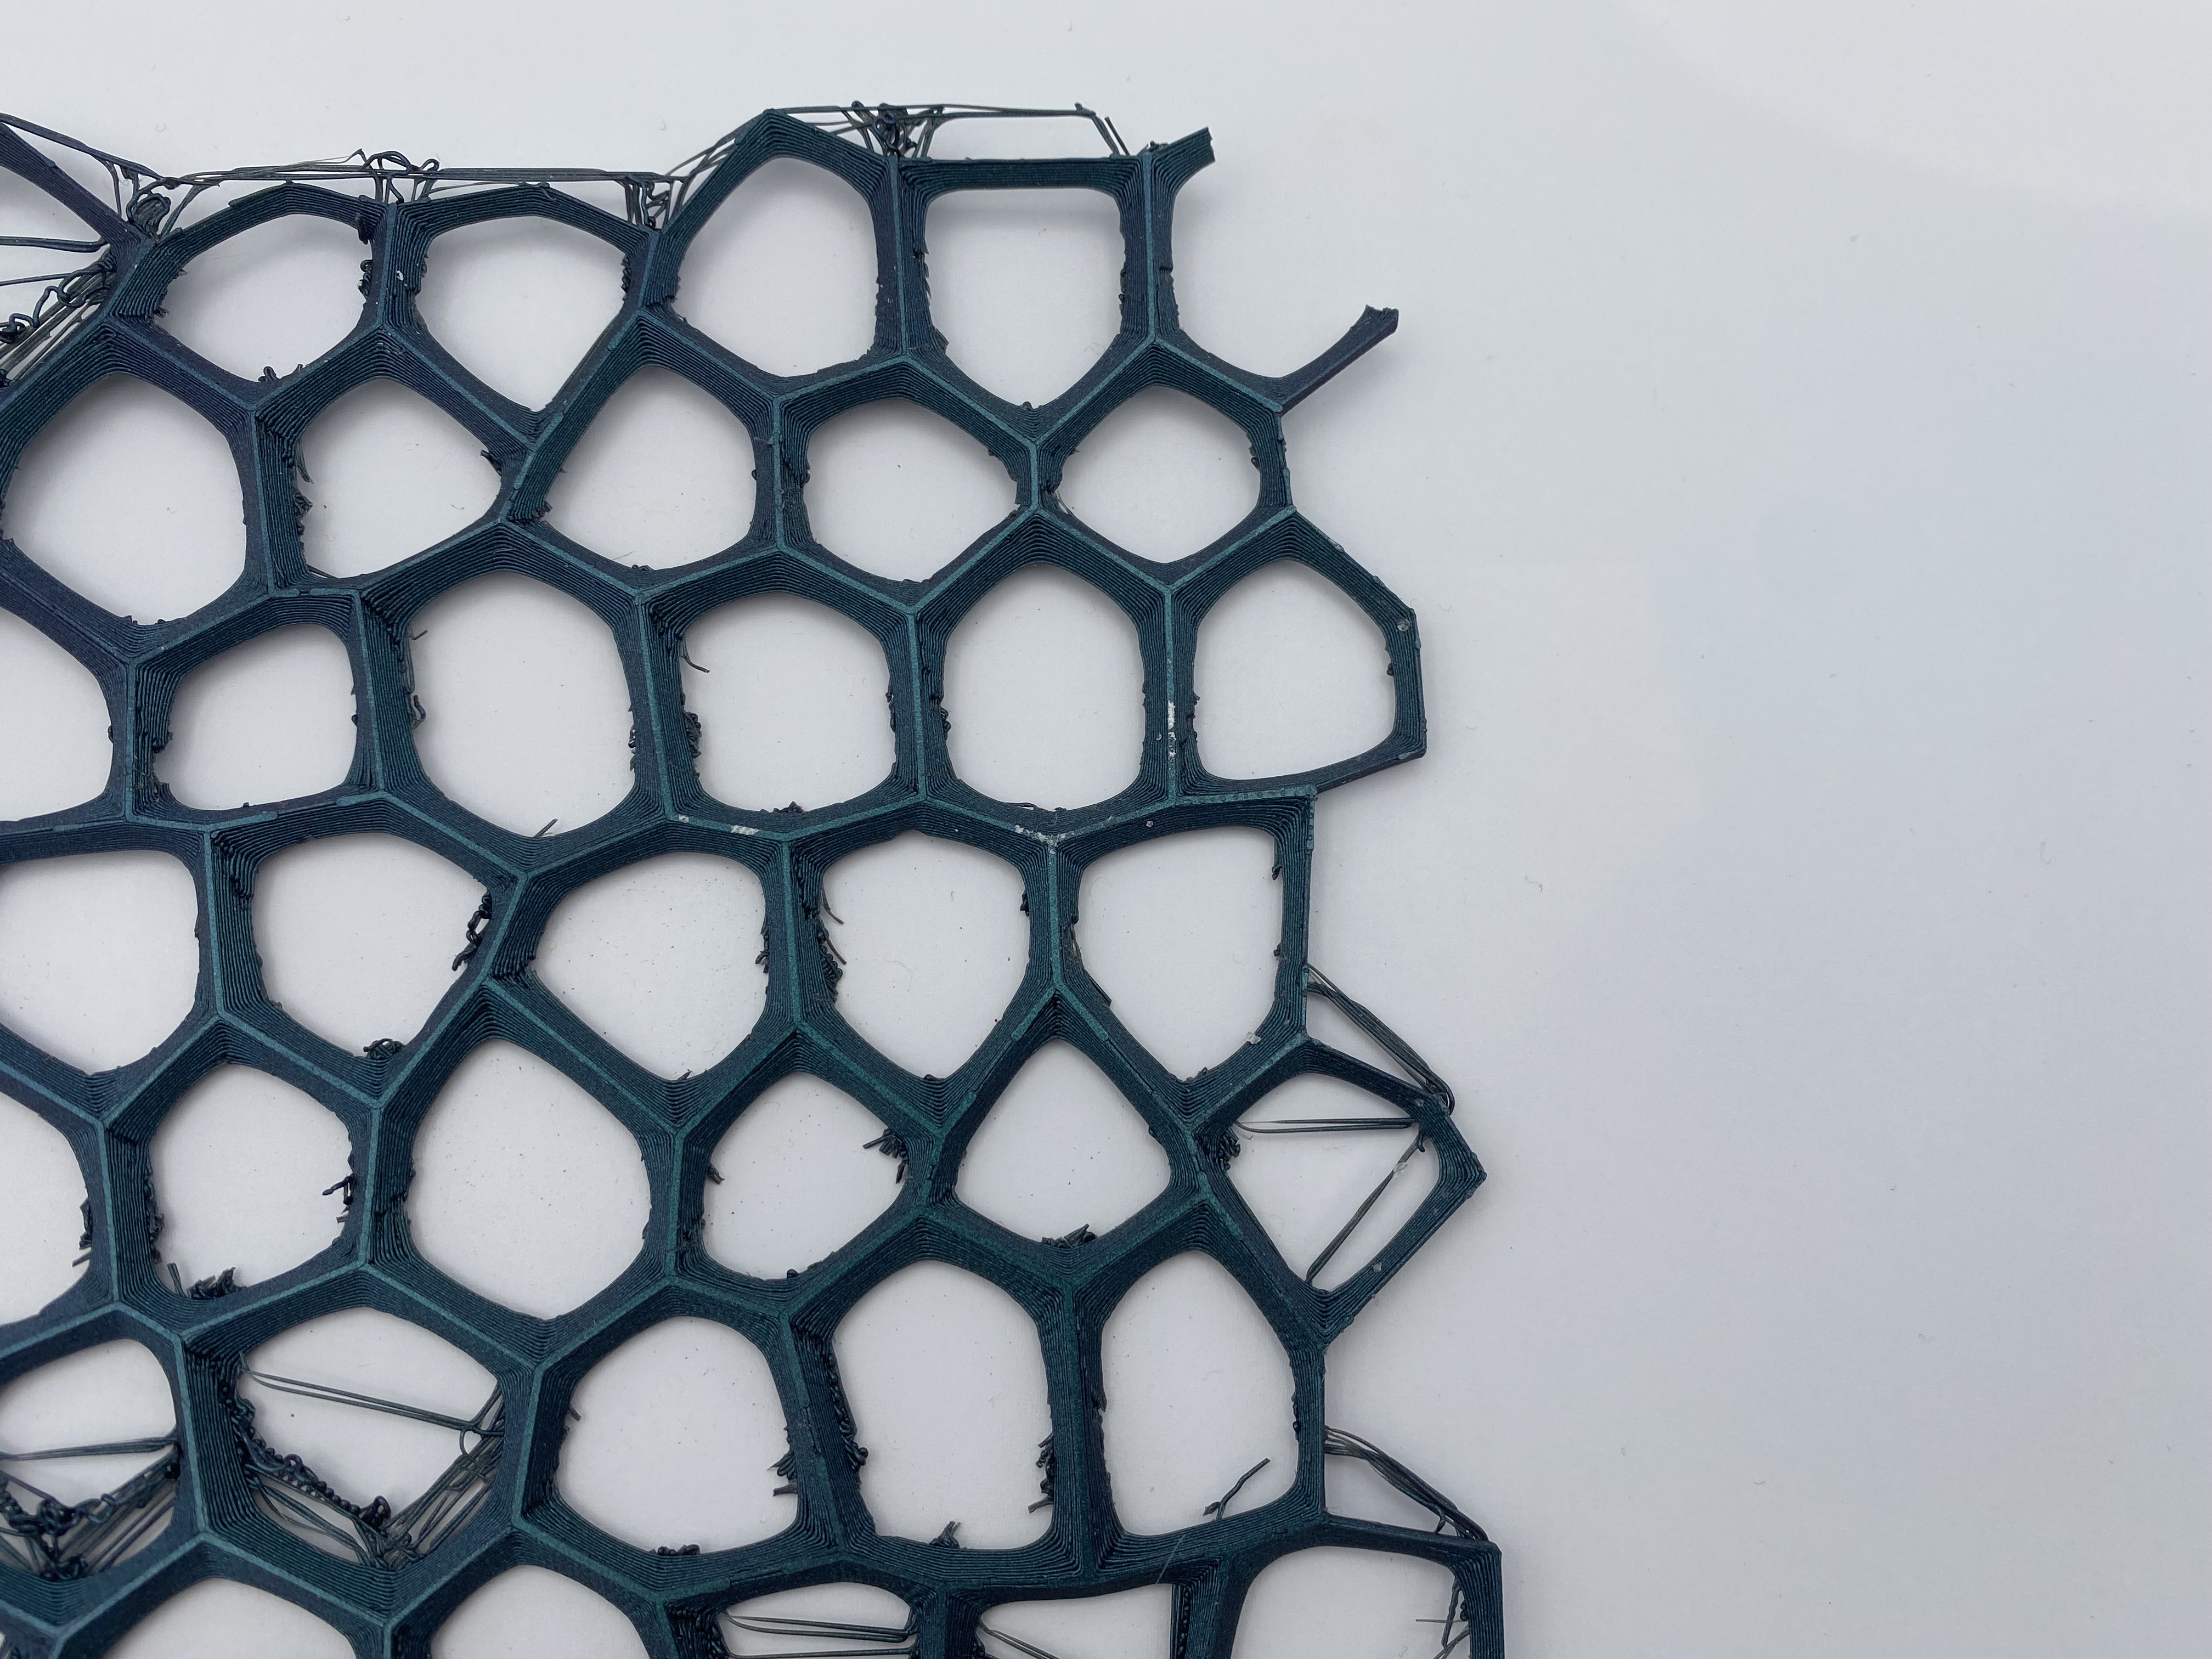
FINAL WORK
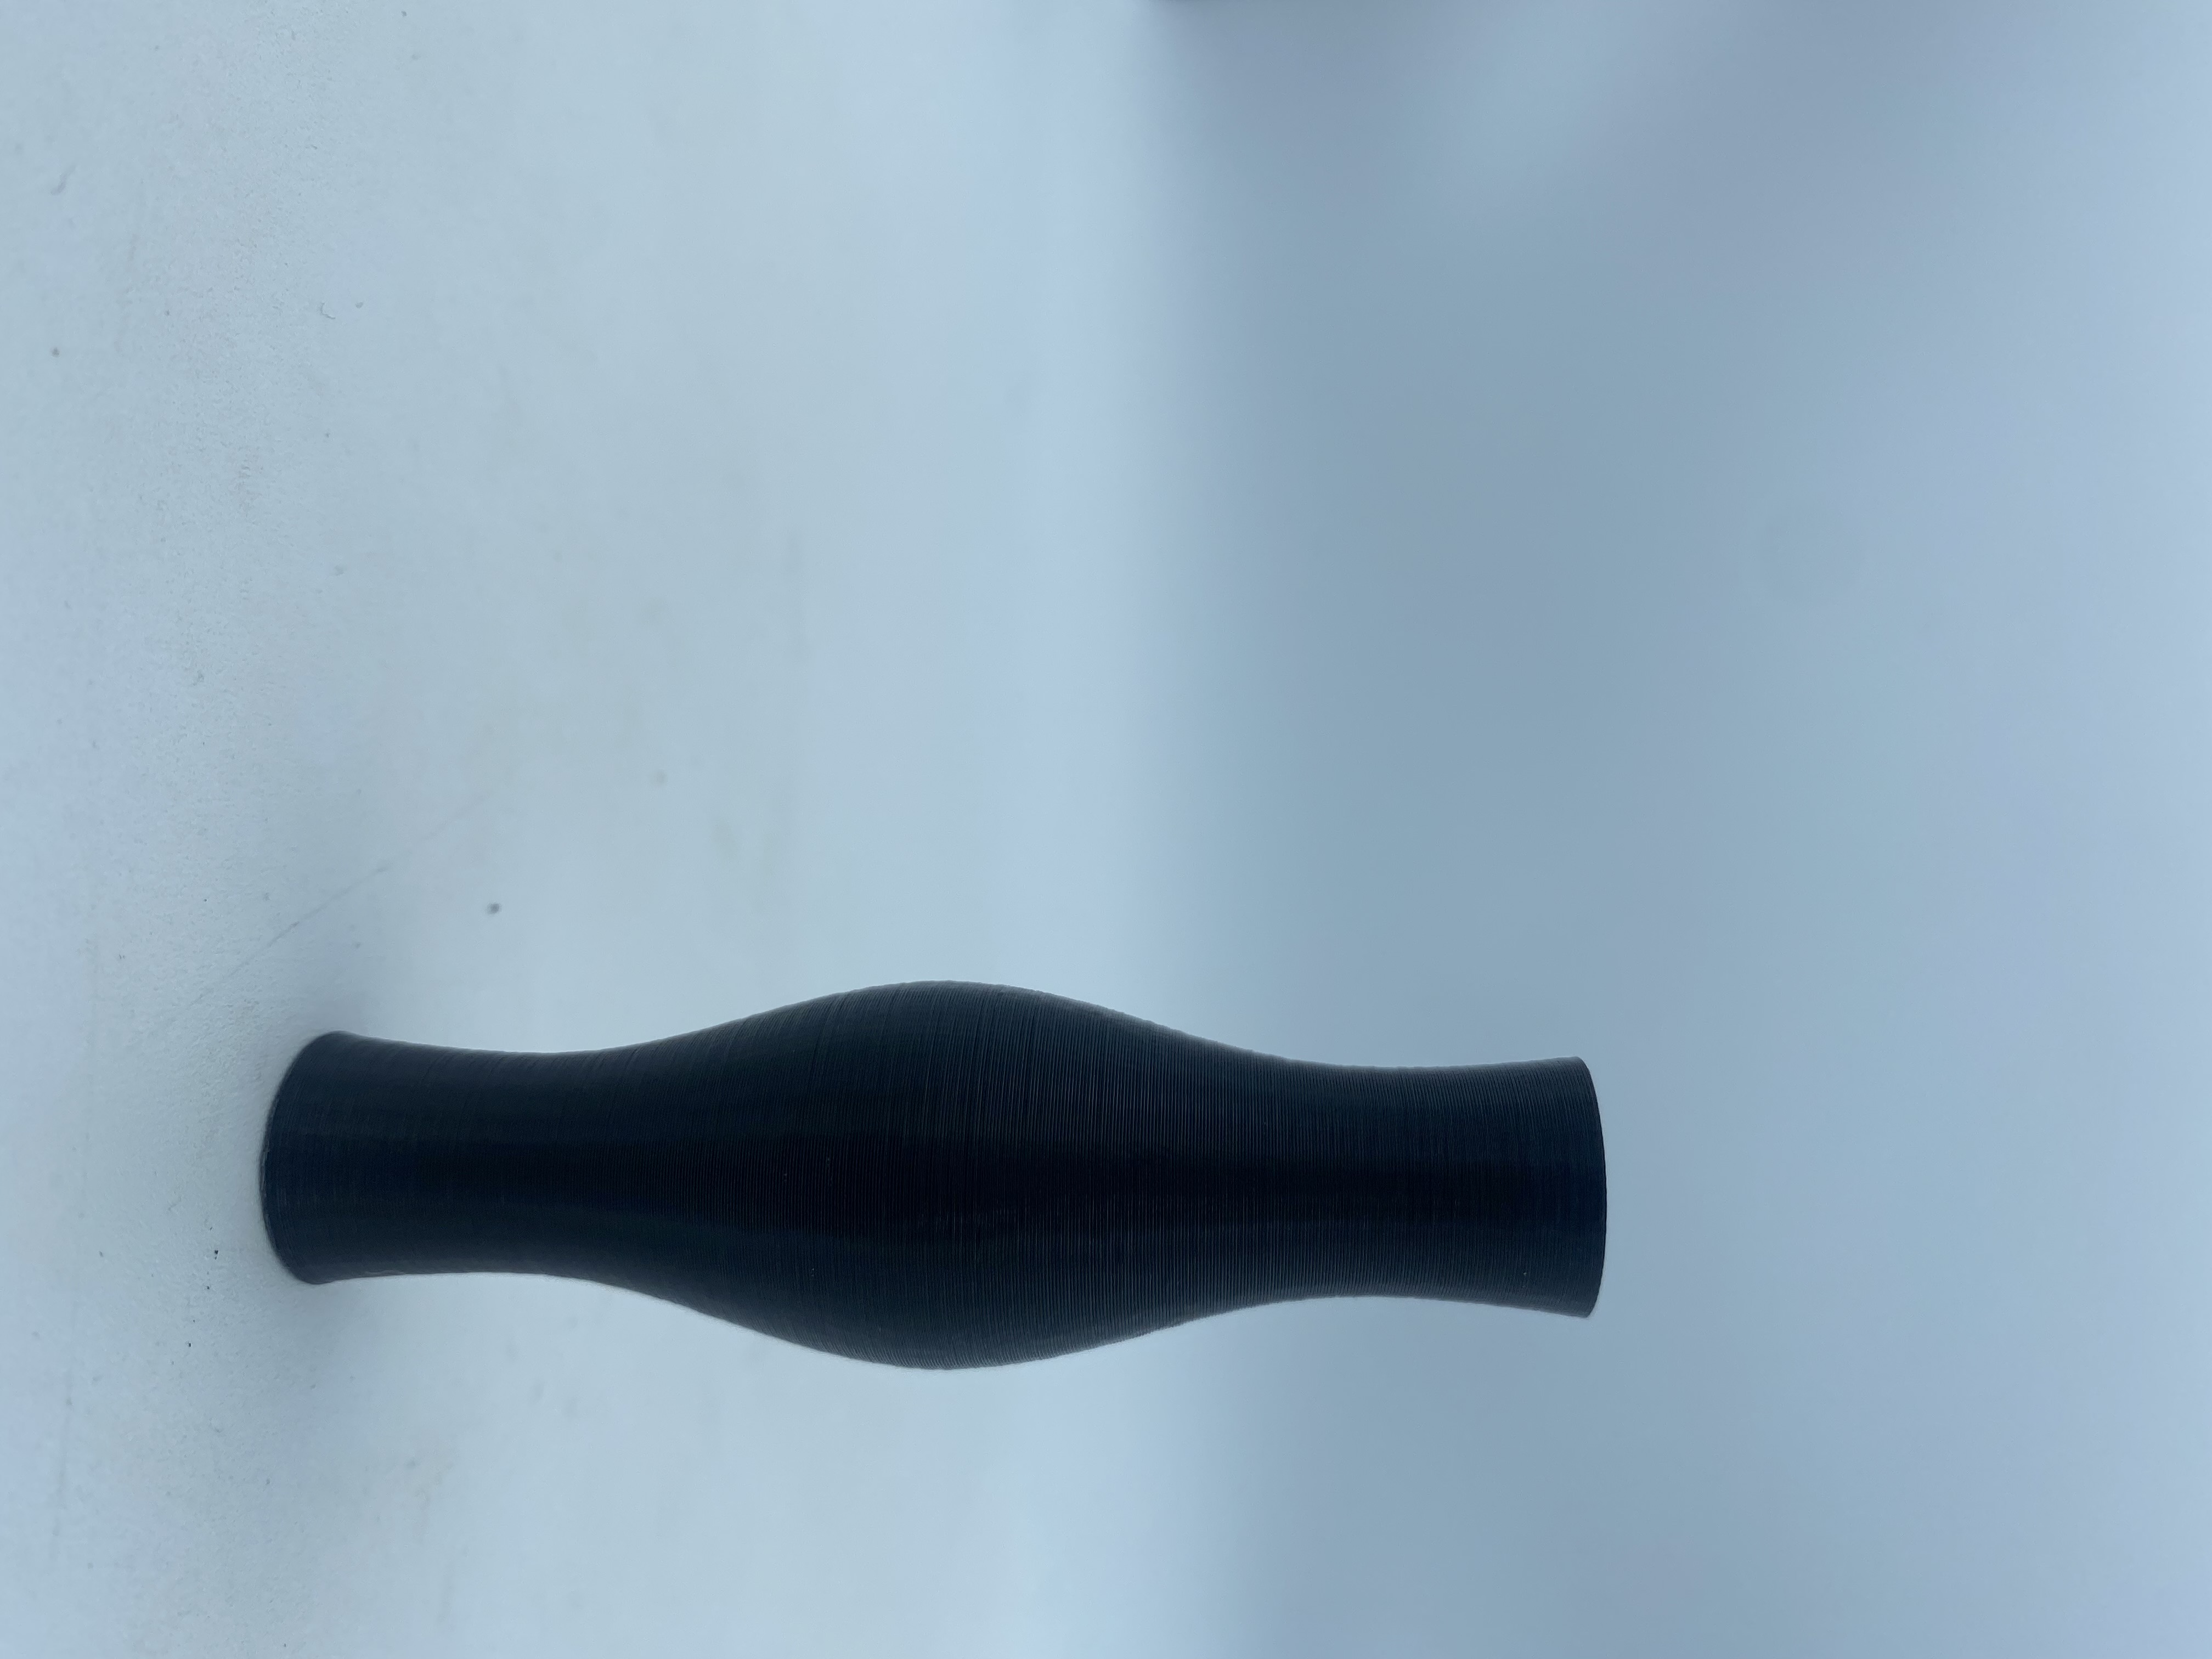
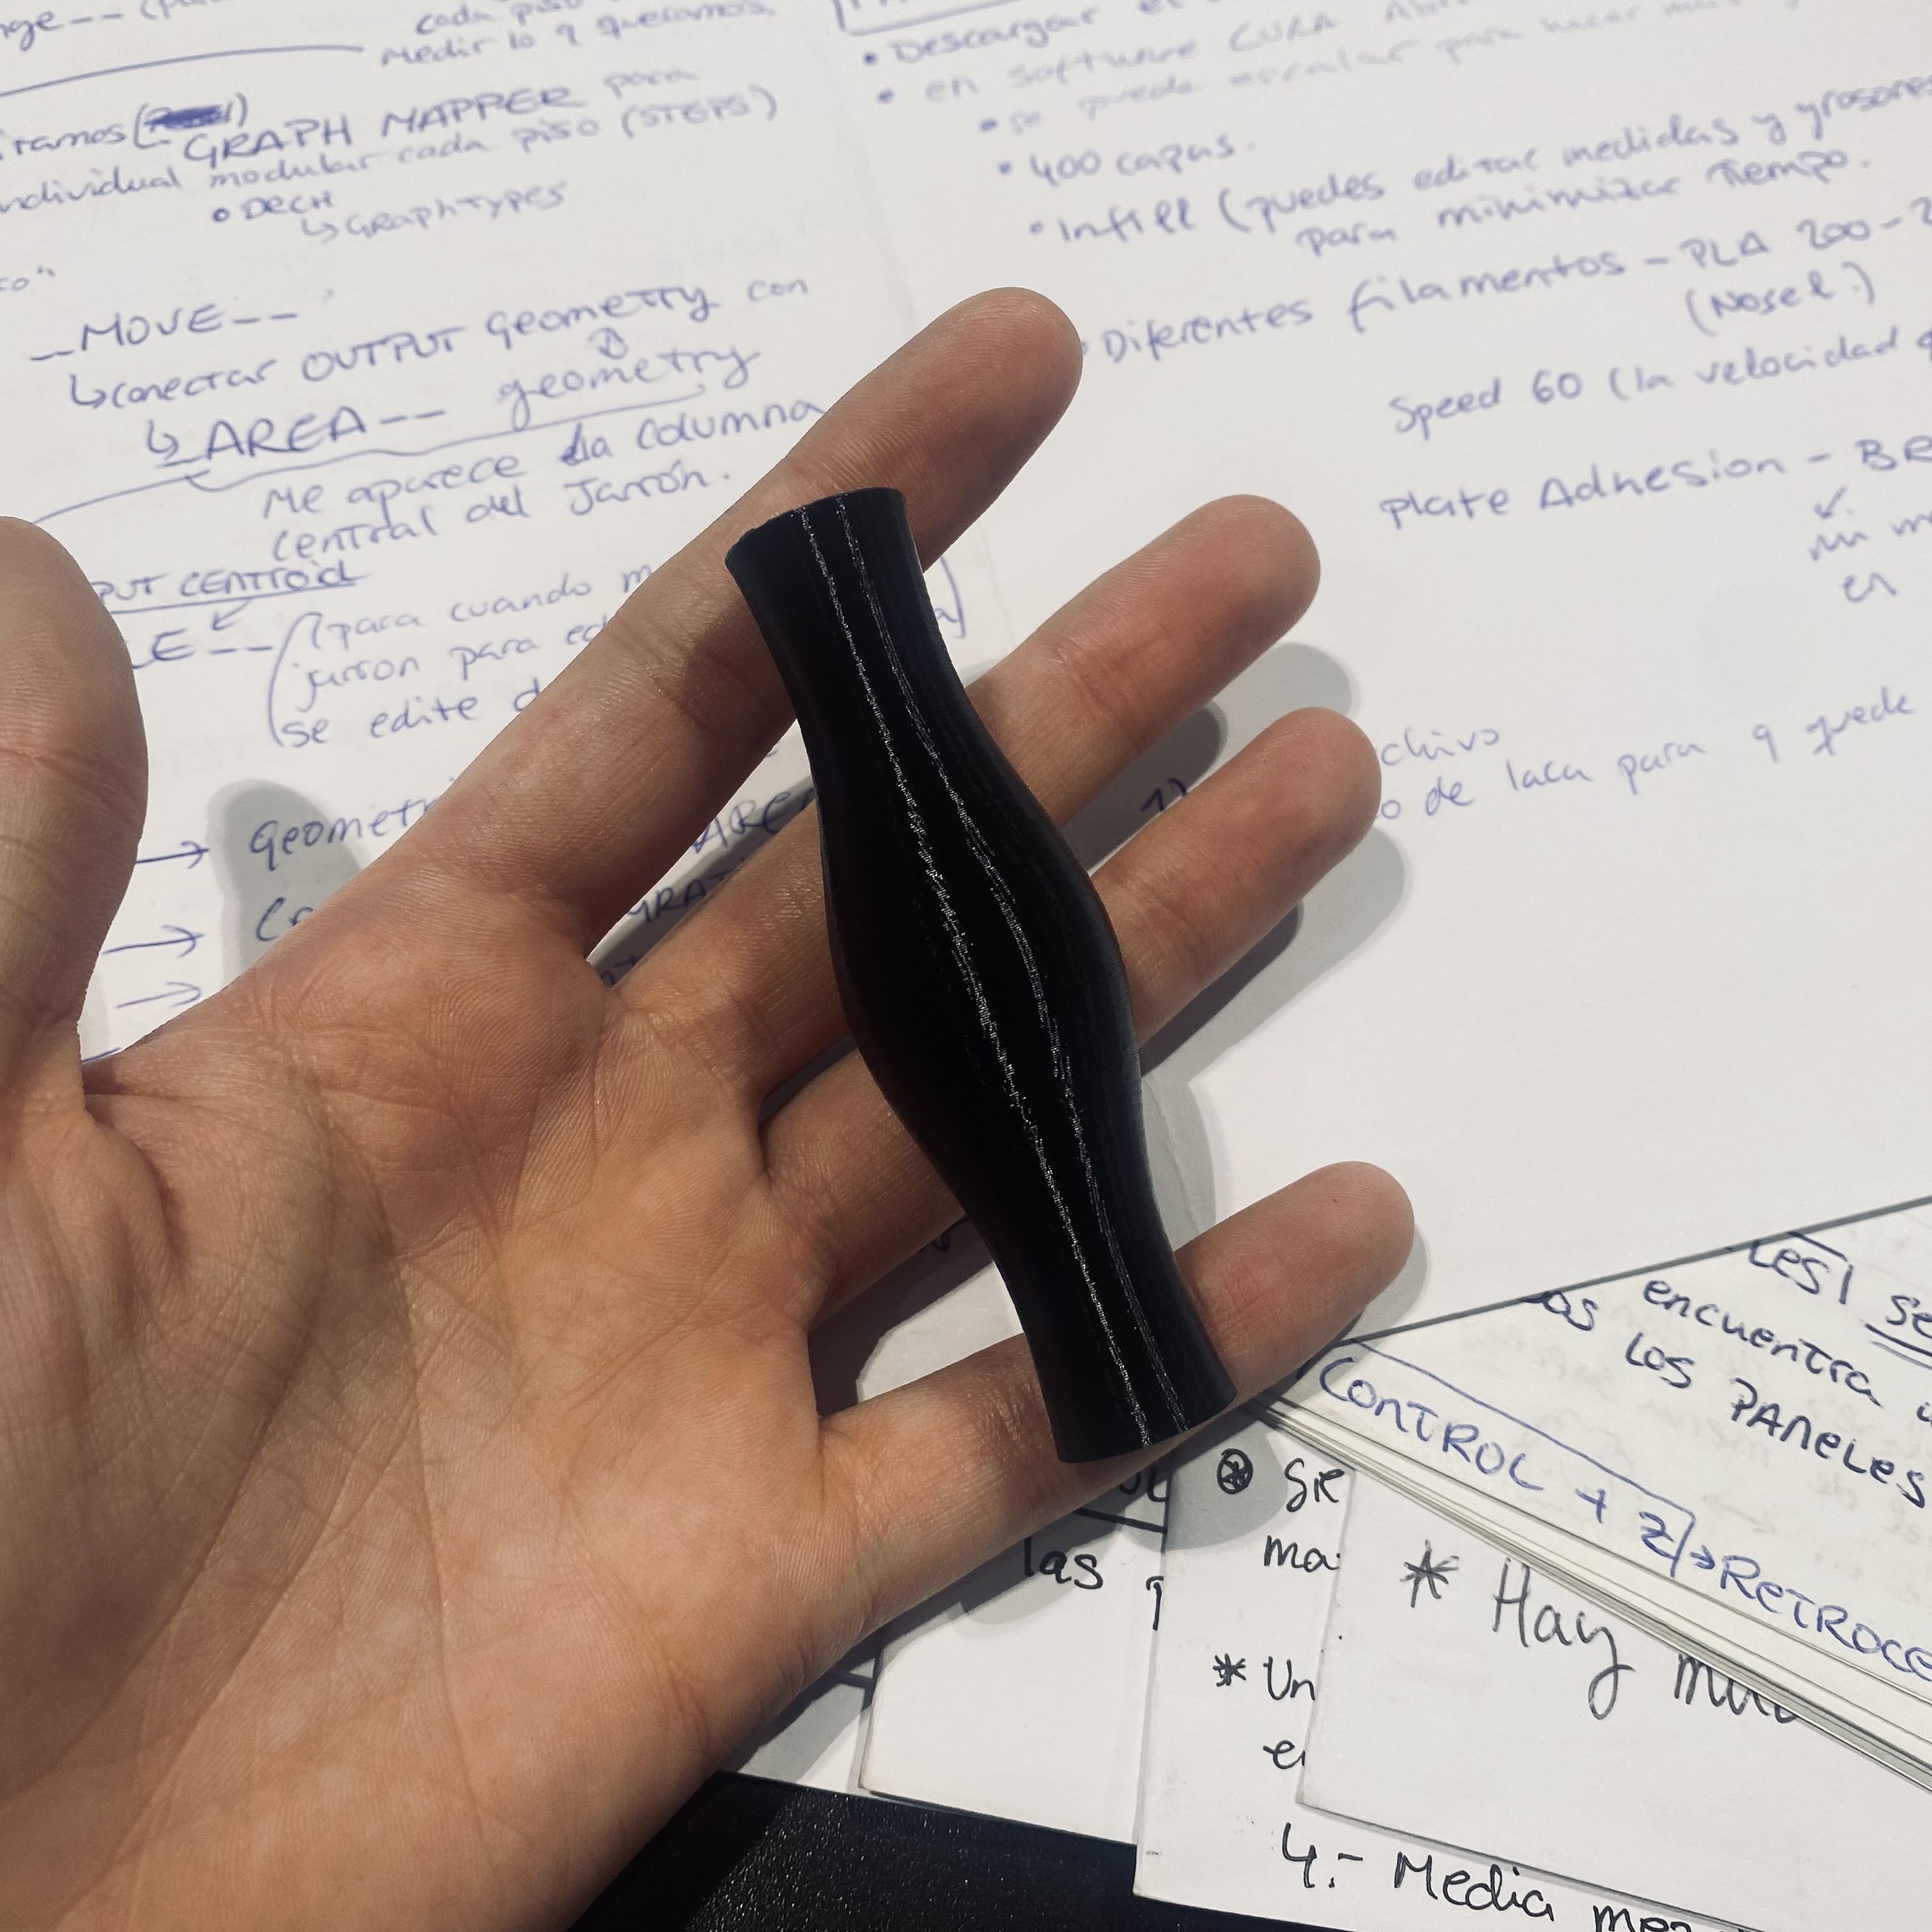
Here the result. This week has been quite complicated because of all the new concepts and tools that have had to be worked on. Although the final work has been to build a small sample, the most satisfactory thing has been the process. Working with Grasshoper has not been easy but this exercise has allowed me to learn the basic steps.
In the following table I introduce the printing parameters with the material and the characteristics for a good impression
| MATERIAL | LAYER HEIGHT | ECTRUDE TEMPERATURE | BED TEMPERATURE | SPEED RETRACTION | RETRACTON DISTANCE |
|---|---|---|---|---|---|
| PLA 0,2mm | 210ºC | 60ºC | 40mm/seg | 35mm/seg | 0,8mm/seg |
DOWNLOADABLE FILES
TOOLS
- Get inspired by the documentation of Olatz Pereda
- How to Download and Install PLUGINS in Rhino
- Assigment Lecture