Textile Development
Exploring the Seam:
Initial Samples
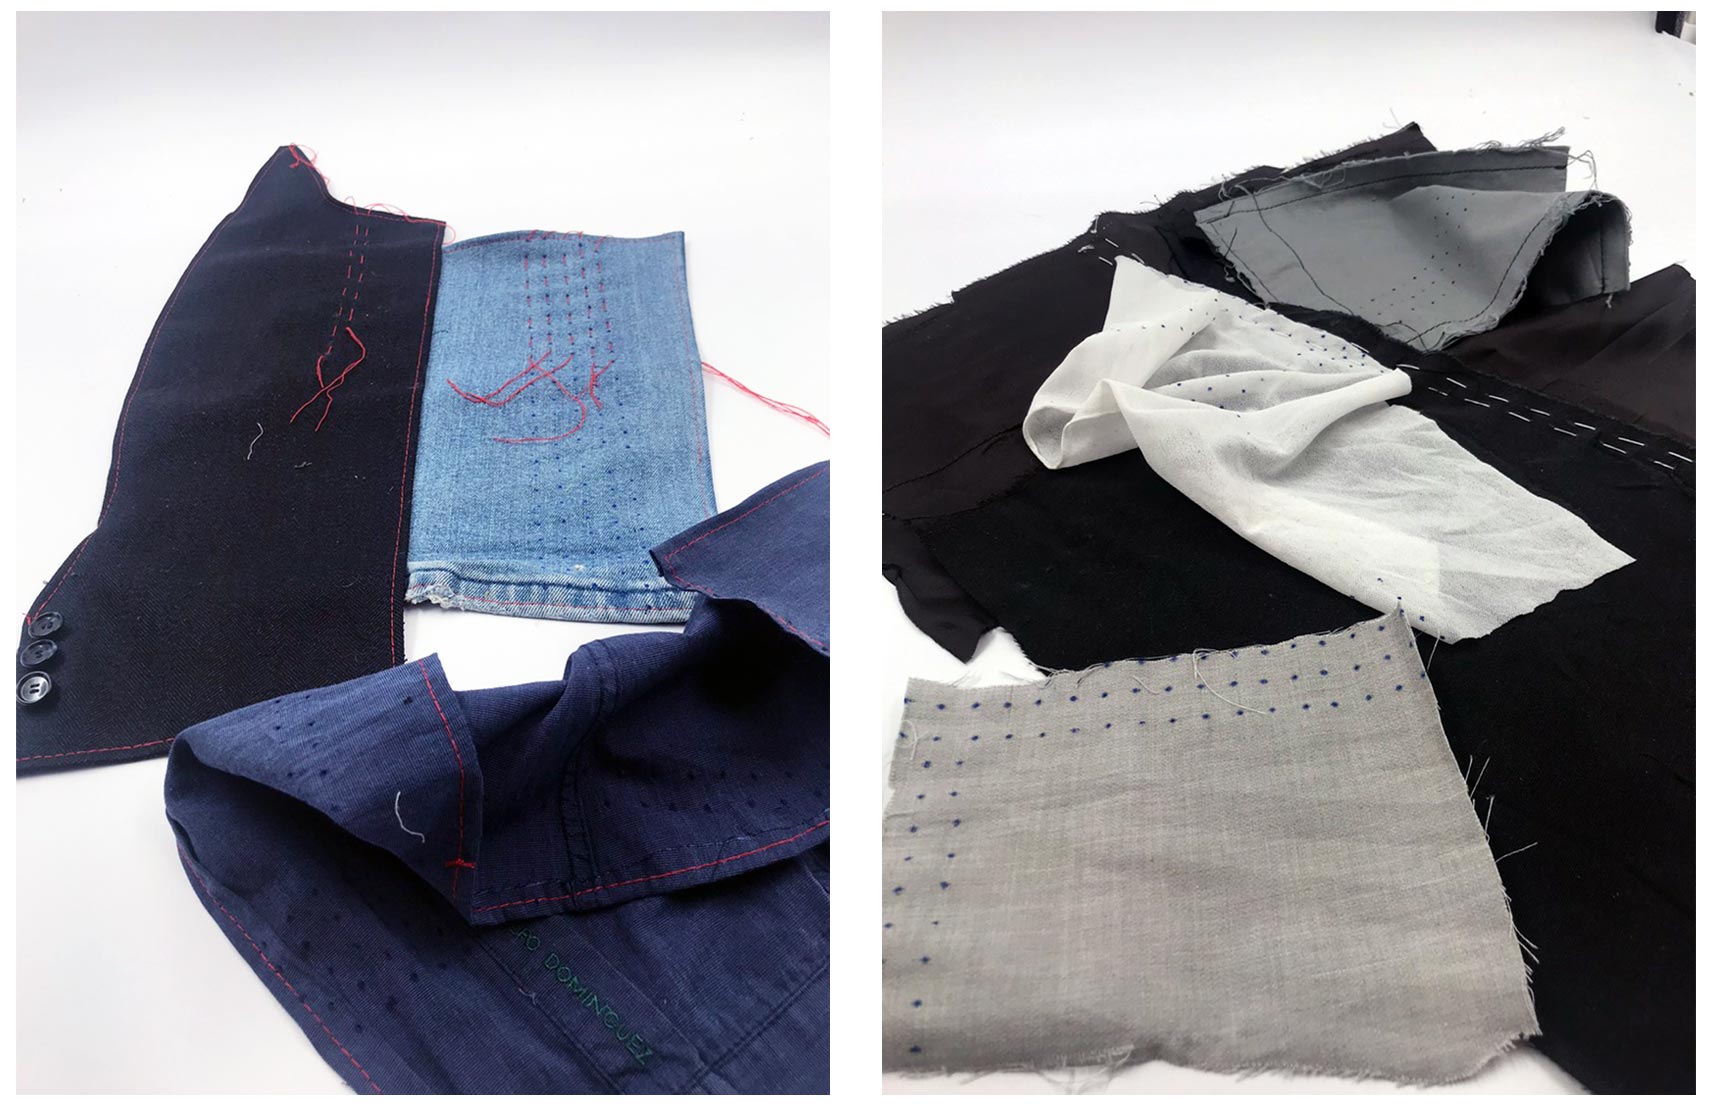
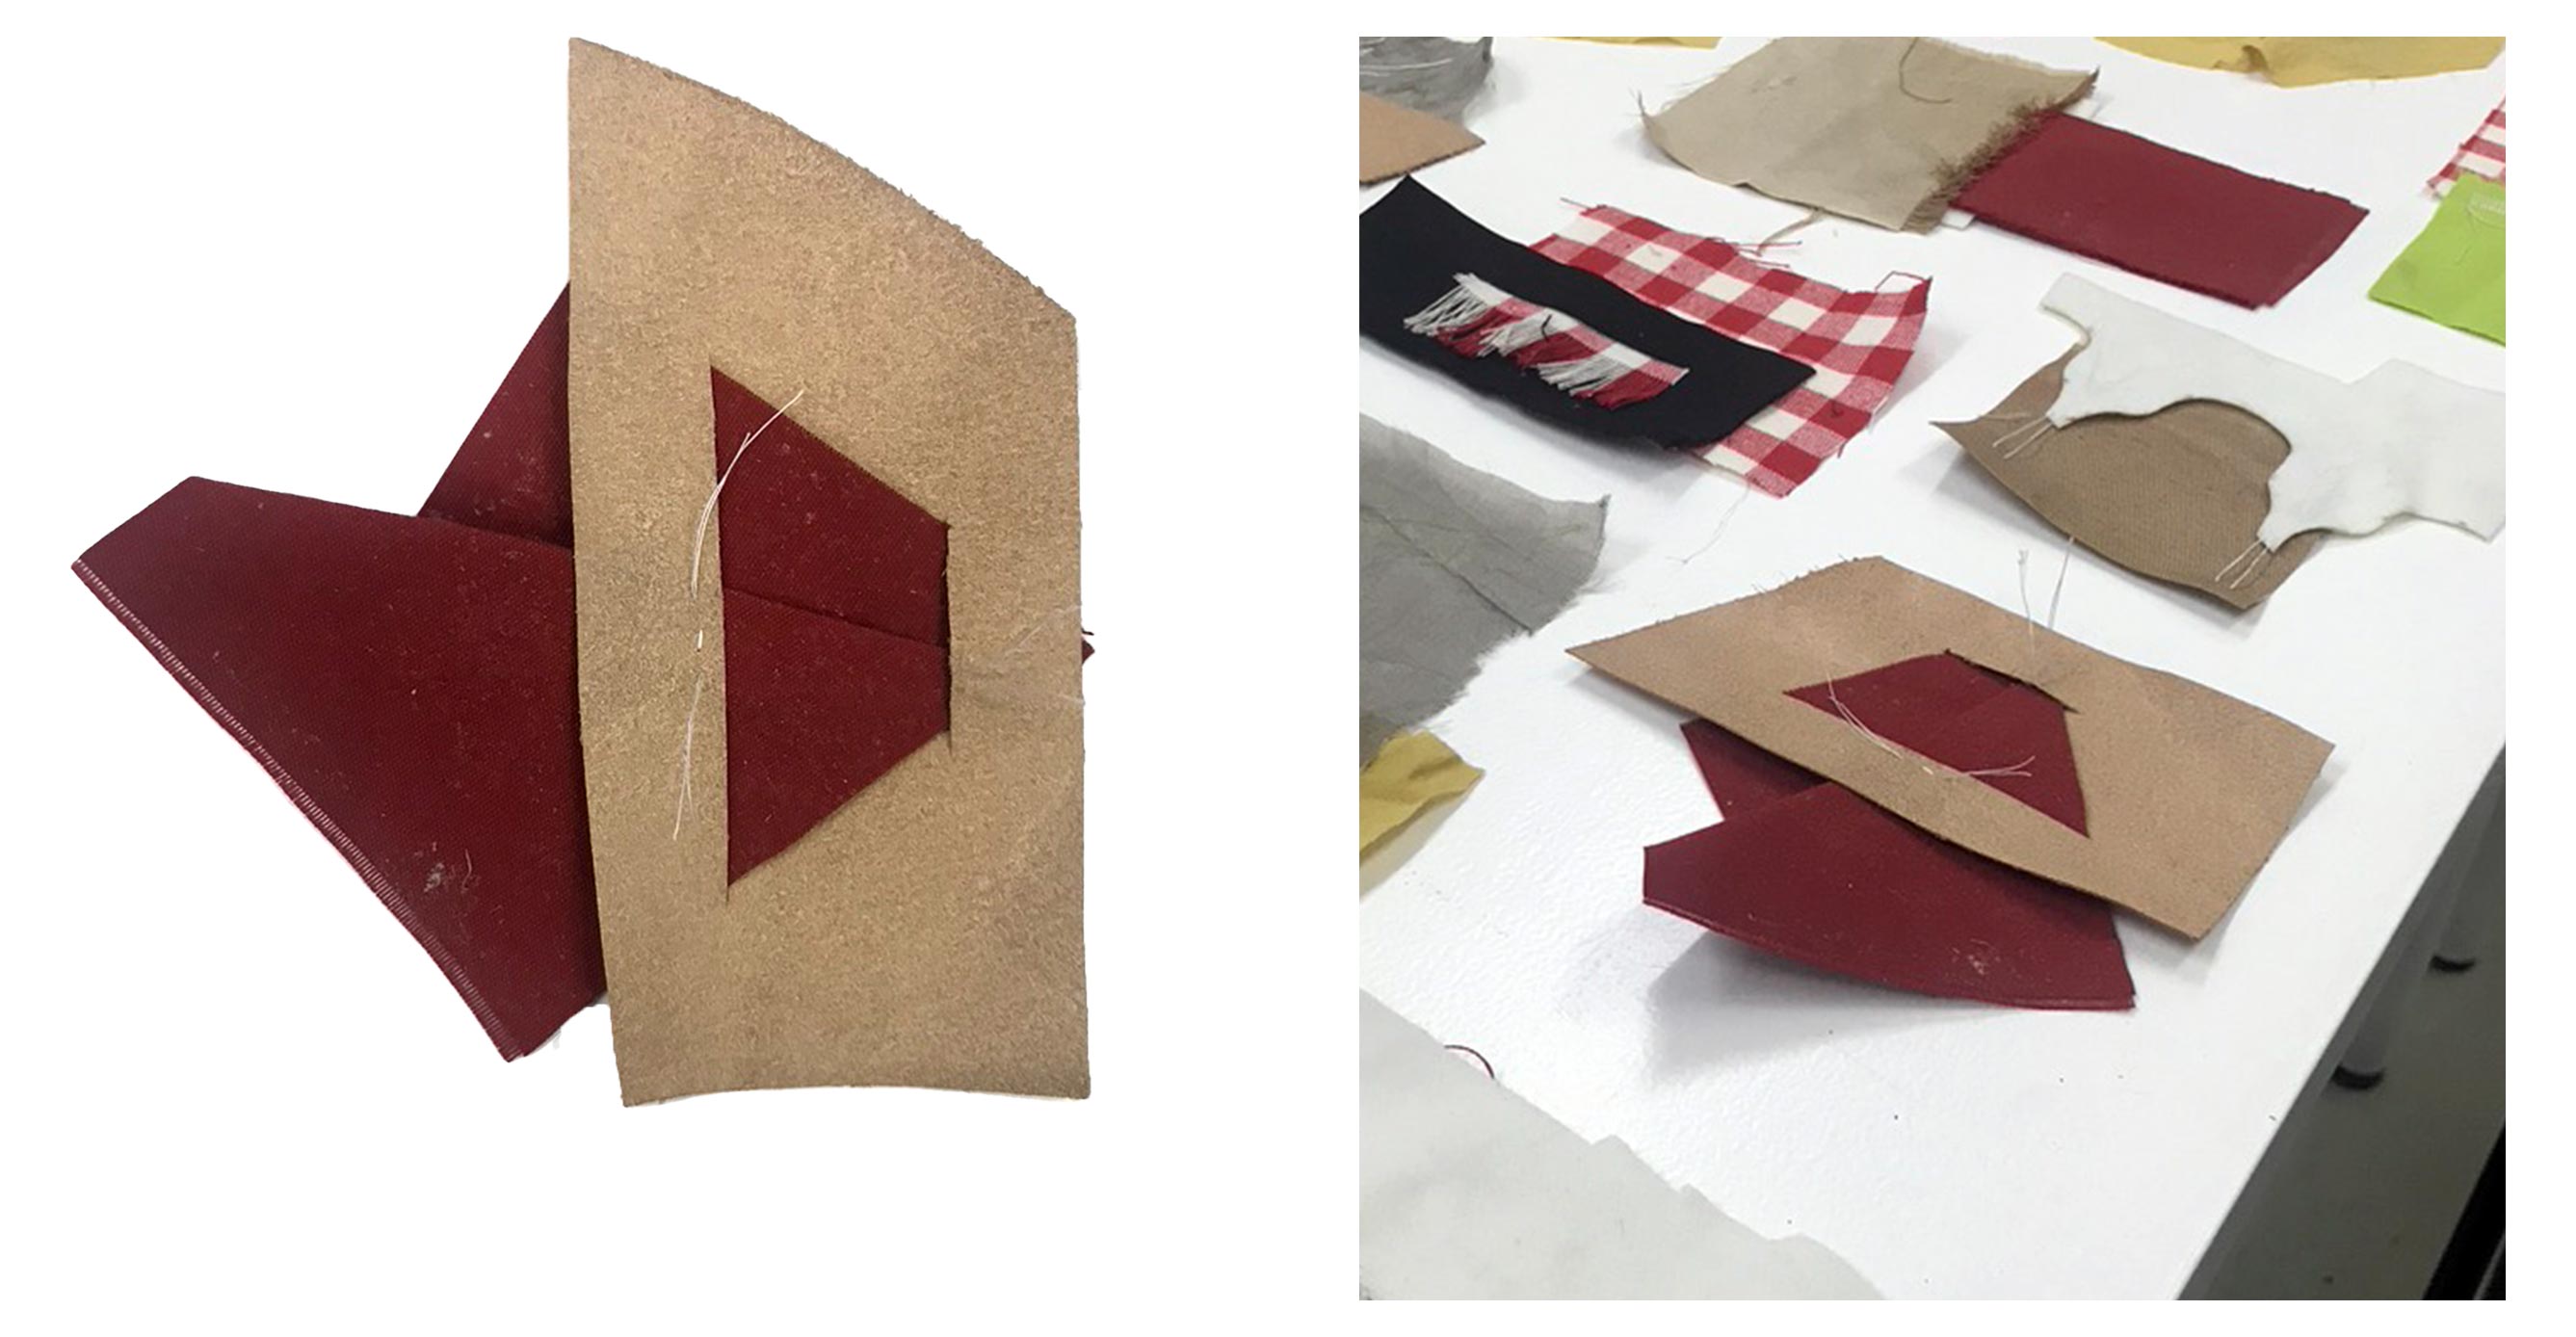
To start the project off, I wanted to explore the ways we traditionally join fabrics together to form garments. For the vast majority of garments, the main joining method is the basic plain seam but there is a wide variety of seam types used even in traditional garment making. I wanted to explore the ways these would affect disassembly as well as some other non-conventional joining methods. To start this, I made a selection of rapid textile samples with a mix of scraps we had in the lab. When examining these, I was looking to compare the simplicity of the join to achieve, the easy of deconstruction and the security of the join while in place.

| Thes 3 were the quickest to deconstruct and none of them were secure, the 3rd one especially was very time consuming to make compared to its strength | |
| These 3 also came apart very easily, I really liked the 2nd one but would like to try to find some way to use the fraying for more security | |
| These were more time consuming to disassemble, I liked that the 1st one forced shaping on the red textile while it was constructed and the misleading joint on the second one | |
| These 3 were more similar to traditional seaming methods and so took quite a while to deconstruct, I liked the way the seam was supportd by the back piece in the 1st one, the 2nd one could be interesting but could be simplified a lot | |
| These were the most difficult to deconstruct and the most similar to traditional stitiching methods, the 1st closely resembles a flatlock seam and the second, boro stitching. I think the options for security in the second ar very interesting |
Form this, I wanted to be more scientific about engineering the disassembly of the joints. To do this, I focused on two aspects of deconstruction, the time taken and the movement required.
Time Samples
For the samples exploring the time, I mainly kept to different stitching shapes and densities to try to create a catalogue of samples each requiring a different specified time frames to undo. I wanted these time frames to all be very short - to the point that they would be basically unsiutable for extended wear - and for no cutting or extra tools to be required.
| 1 second seam disassembly | |
| 2 second seam disassembly | |
| 5 second seam disassembly | |
| 10 second seam disassembly |
Movement Samples
For the samples exploring movement, I moved away from textile samples briefly trying out different paper joins designed around different possible release movements.
Table of movement based samples and notes: !!!
Deconstruction Samples


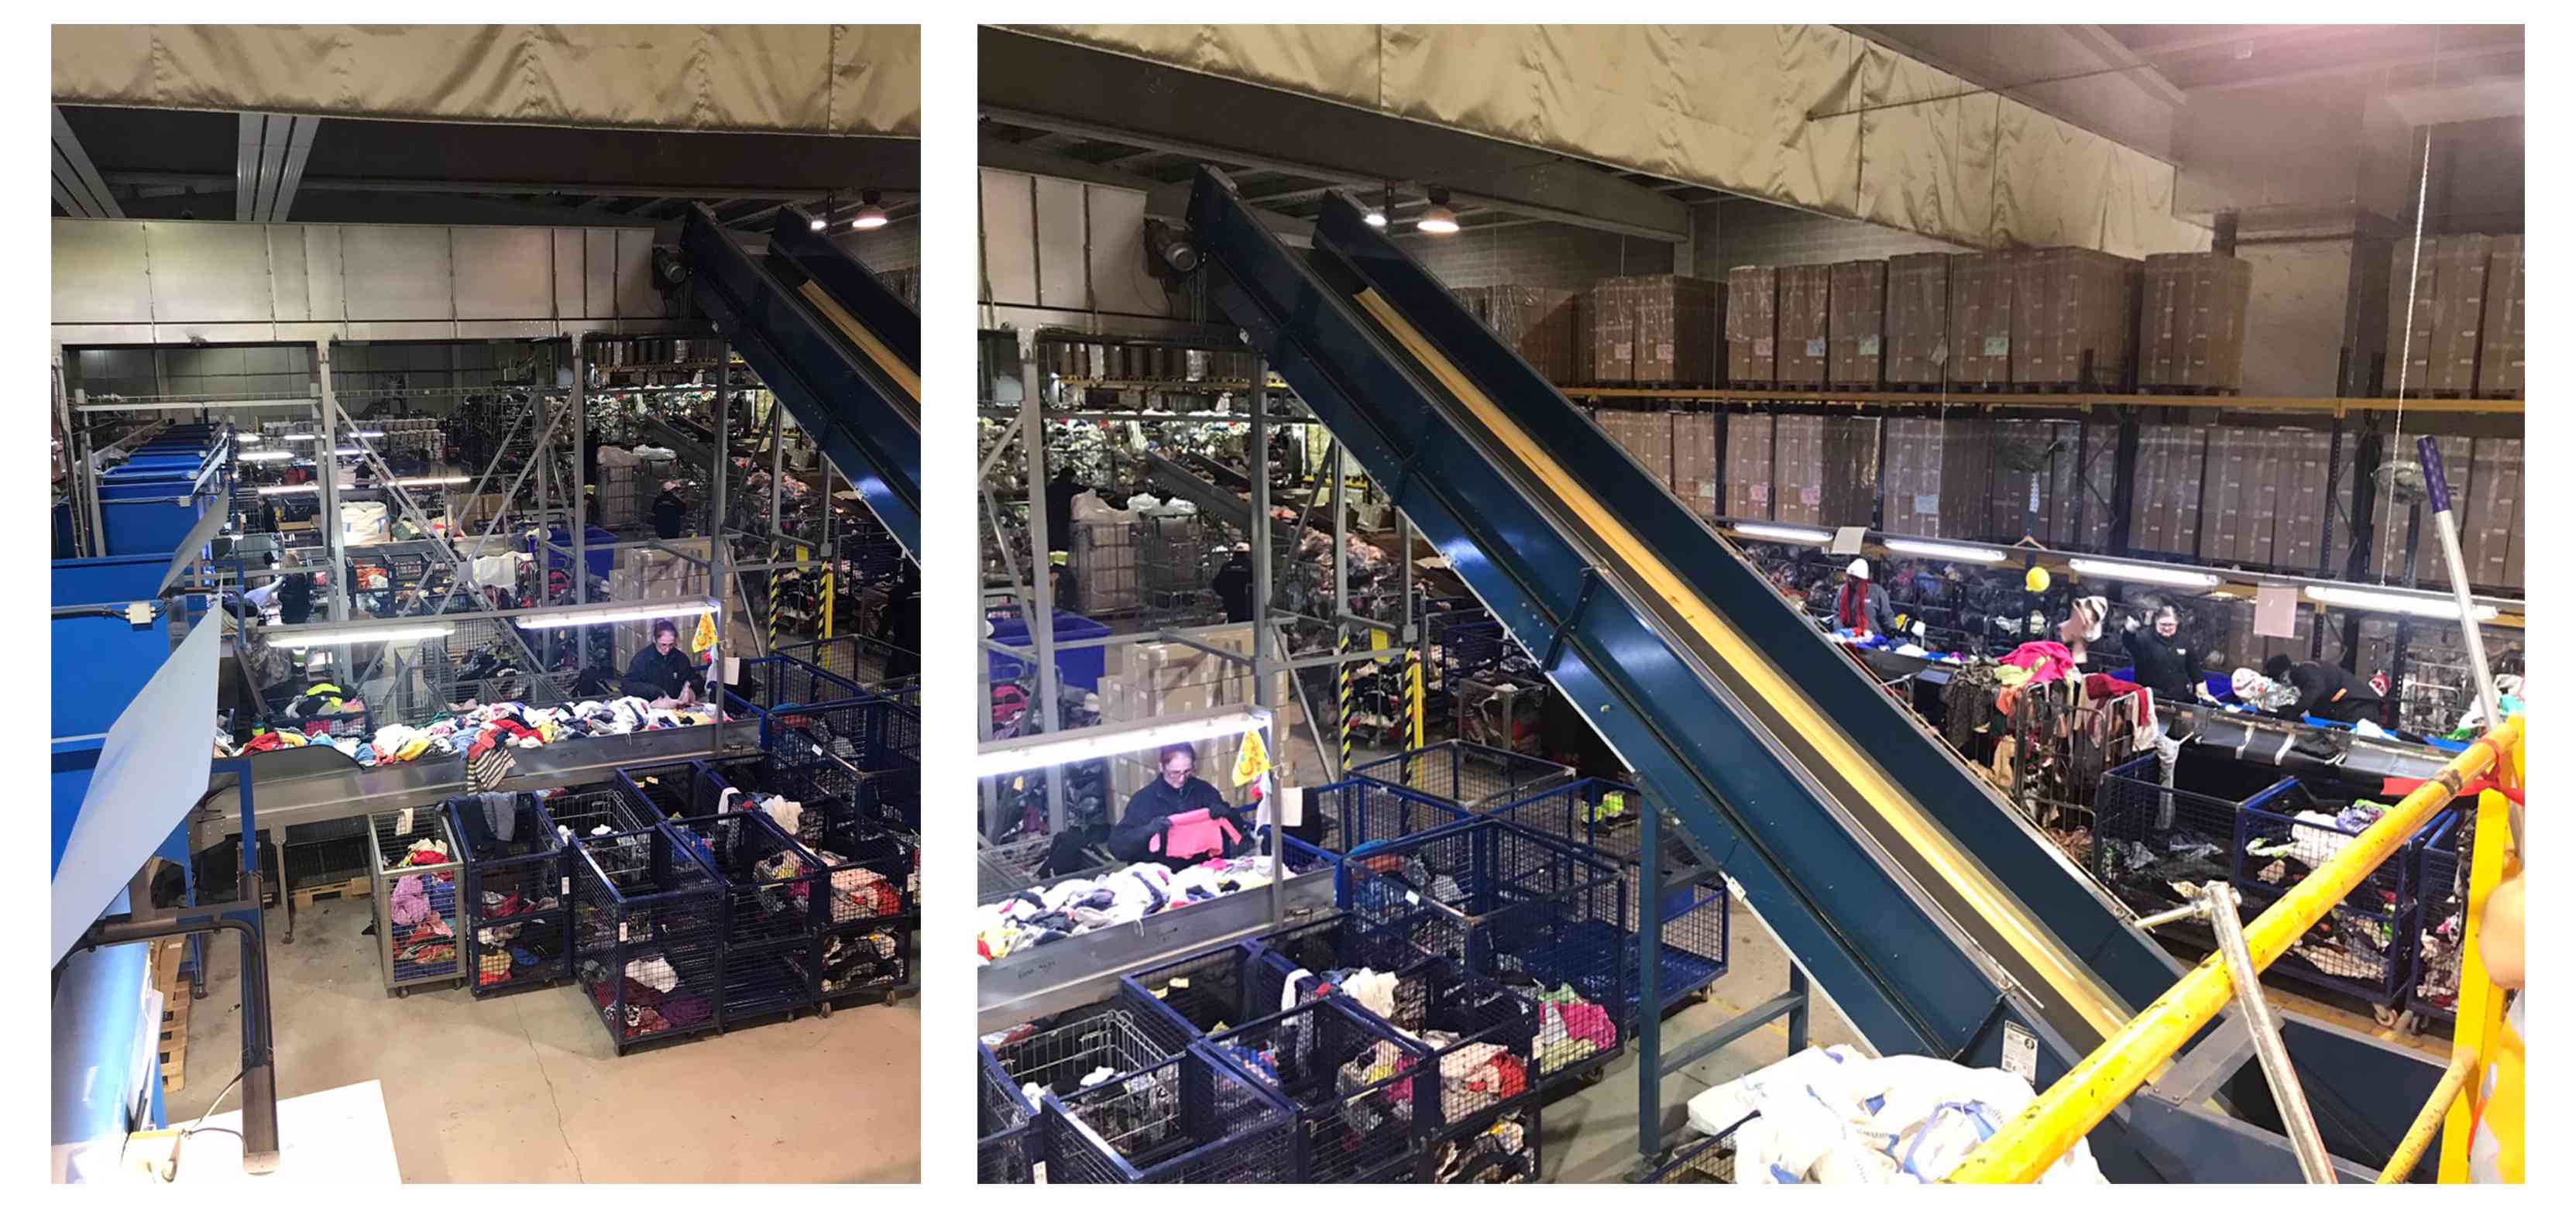
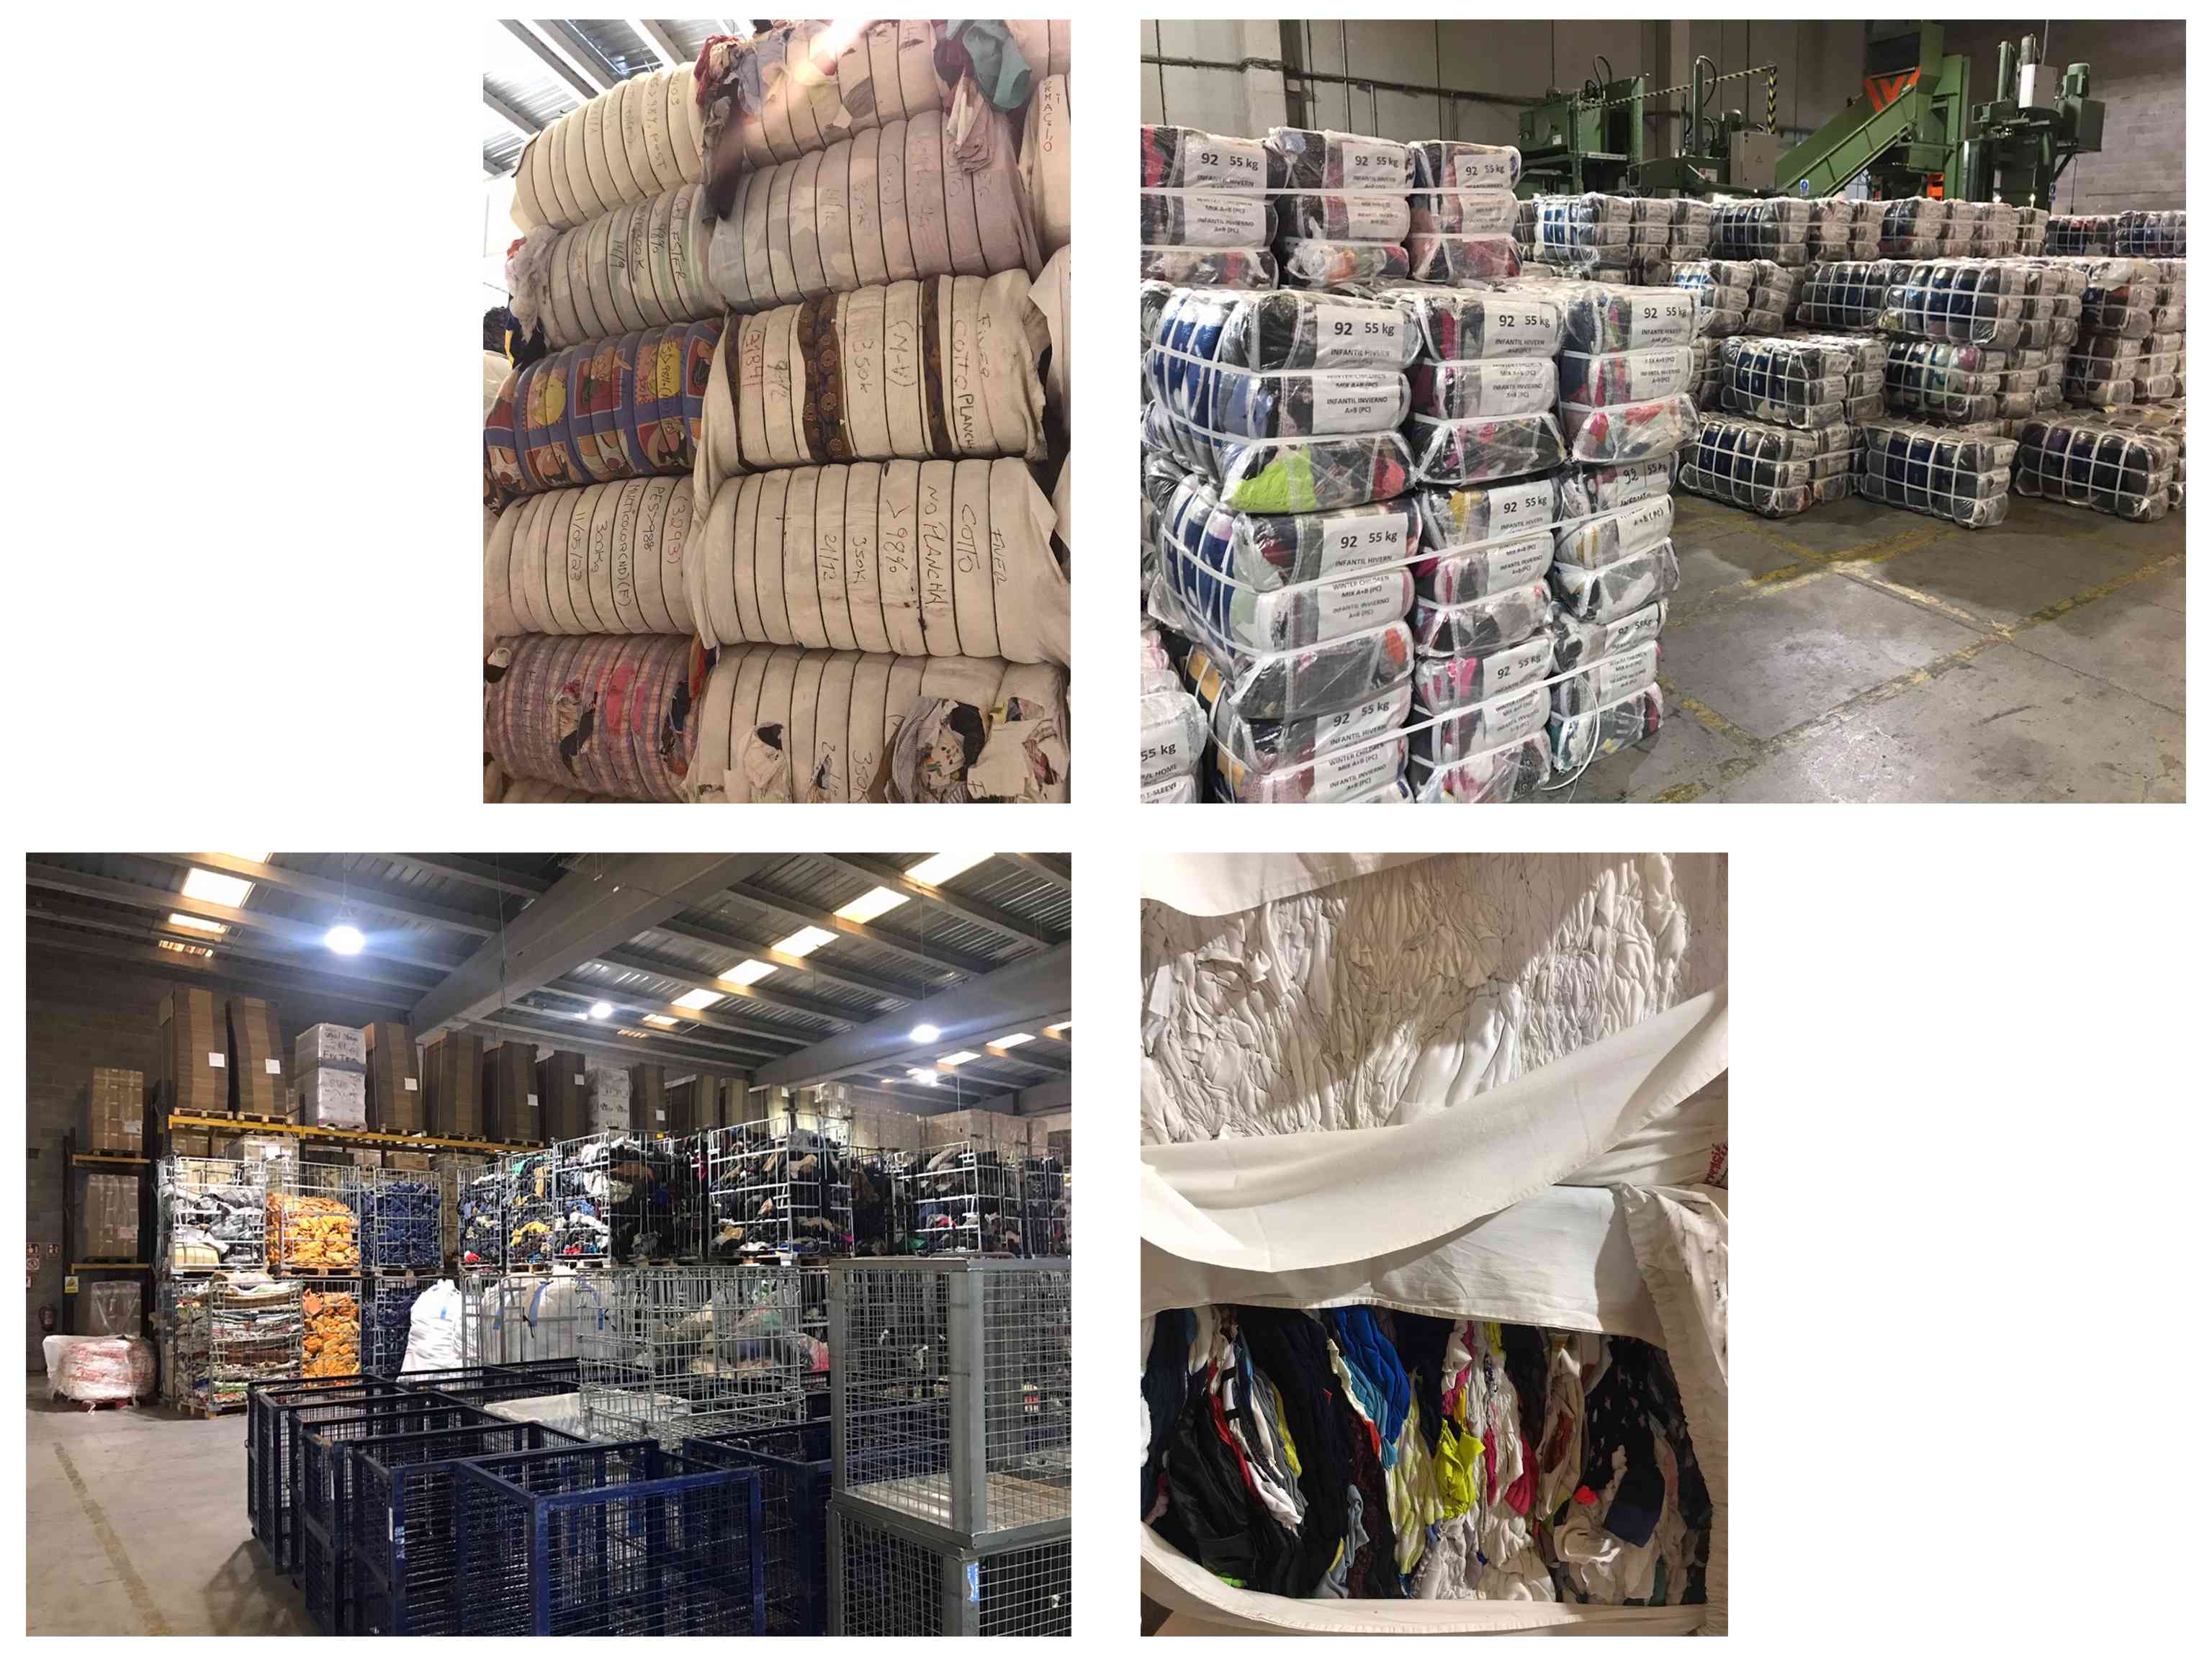
Textile Recycling Factory Visit
Week 2 Tutorial Feedback:
- project may be more conceptual - like a manifesto rather than a garment
- explore the seam in close detail
- develop an unmaking language for people of different sewing knowledge levels
- do deconstruction samples in more technical way and explore nesting
- incorporate research and literature more to make it clearer
- test temporary joints as garment samples, to see how they manage the movment of the body
- explore 'unmaking' literature more
- what should be done with deconstructed samples after - laser cut, resewn etc?
- look at links to traditional pattern cutting for removing overlaps and negative spaces - e.g. underarm vents
Temporary textile manipulations:
To allow me to minimize the cutting required for garment creation as much as possible, textile manipulations would be essential for basically all of the shaping I wanted to do. To fit this into the idea of fluid making and unmaking, I needed these manipulations to be easy to rapidly create and release.
I initially started to experiment with this idea by trying to make ‘hardware’ of some sort to attach to or around the fabric to give it new shape. This was initially inspired by this joining sample below that through the difference in the rigidity of the fabrics cased a pleating affect in the thinner one.
I decided to focus on pleating and started exploring how this is traditionally done to see how it could be adapted to a temporary process.
Boro toolkit:
Boro stitching is a subsection of sashiko, which refers to a range of traditional Japanese stitching technique. ‘Sashiko—frequently translated as “little stabs”—was born in Edo period Japan (1603–1868), when rural women attempted to prolong the life of their families’ tattered garments and bedding, giving rise to a humble form of white-on-indigo patchwork known as boro.’ (Halliday, 2020). It is a visible mending technique traditionally used for pathworking scraps together to extend their use.
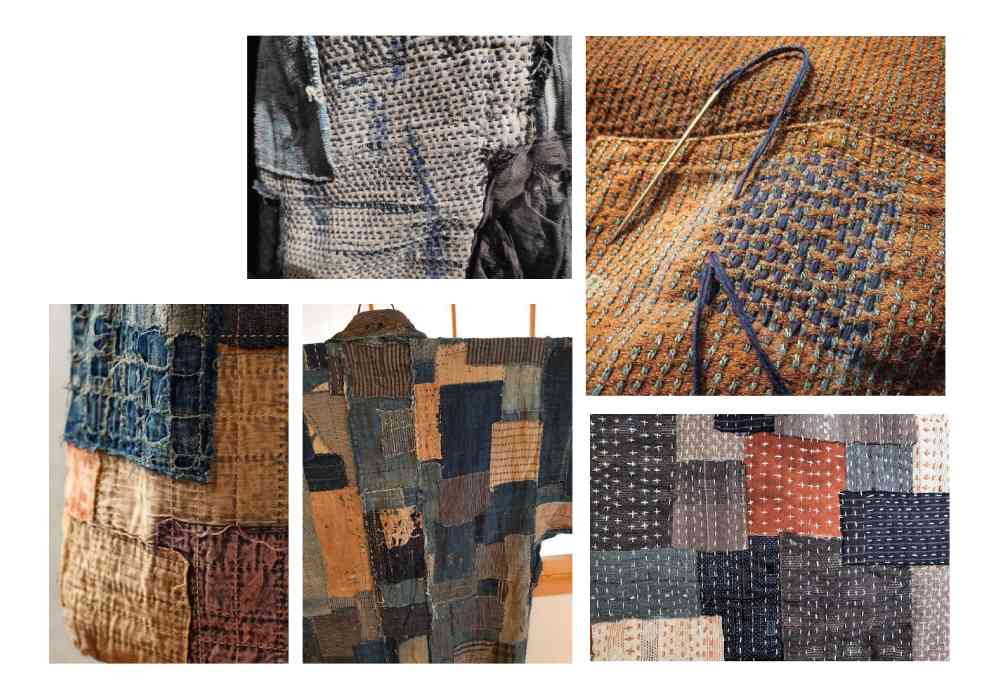
There is a selection of boro tools available to buy to make this process more accessible. These all focus on helping to mark the position of the stitching points to then be sewn by hand, examples can be found here. I wanted to try to make a tool in this project that would help simplify or speed up the actual stitching required for boro patchworking.

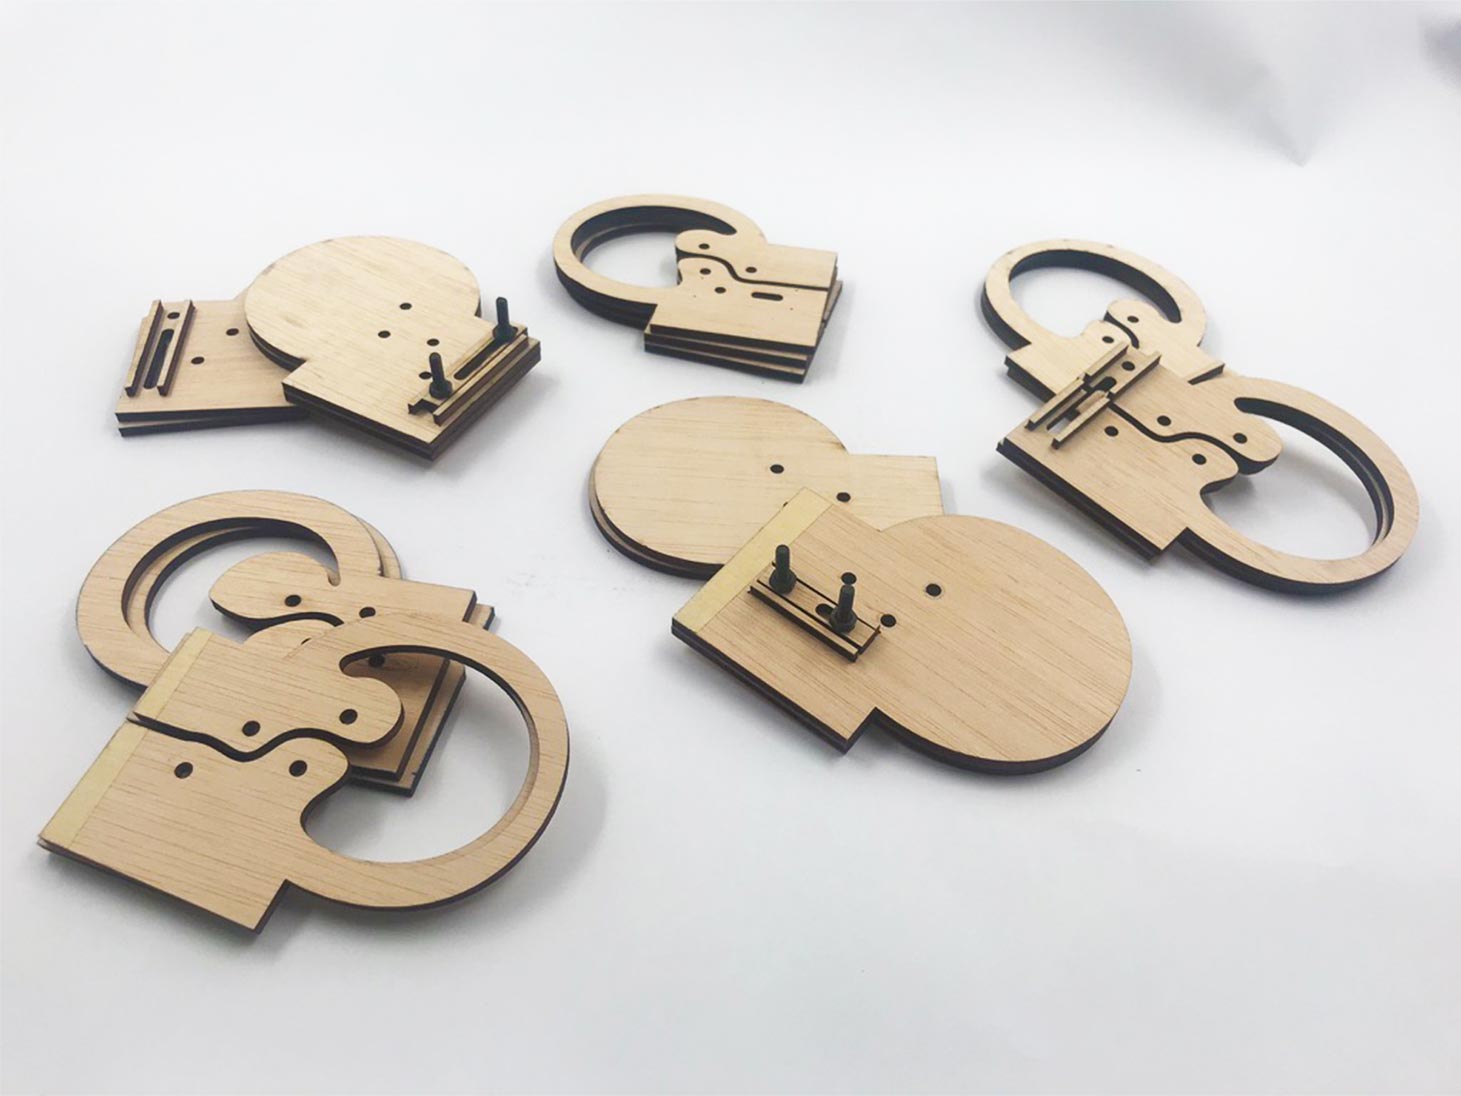
Pleating boards:
I tried out using two sheets of paper folded in a basic accordion style to pleat fabric, this was fairly easy if the fabric was thin enough and on a small section of the fabric. I also wanted to try to use the pleating boards to make it easy to add running stitches to the fabric. I did some rapid samples of this to test out different positions for the stitching lines, within or along the edges of the board.
Next, I made a prototype of a larger scale pleating board, with a series of holes and slits added for the needle to be easily passed through the board and the board to then be removed without getting caught on the stitching.
This worked quite well but was not very easy to gather the fabric initially and then the holes would need to be adjusted to account for the thickness of the fabric or if there were multiple layers inside.
Pleating machines:
I found an open source pleating machine designed to be added on to a sewing machine HERE. I scaled it down a bit and doubled the number of channels for the pleats then 3d printed it.

This device worked quite well at gathering the fabric into pleats when there was enough tension applied to the fabric and enough pressure out on the teeth holding the fabric in the channels. Despite this, it required another step after this – such as stitching – to secure the pleats or they fell out again pretty soon after being pulled away from the device edge.
After this I started looking at smocking machines, which do the rows of parallel running stitches used to do the gathers for smocking.
Machine development:
Research
- Thread all the needles you need.
- Roll the fabric tightly round a wooden or plastic rod, and place inside.
- Fit the open end of the fabric between the rollers.
- Then turn one or both of the handles to steadily feed the fabric onto the needles.
- And hey presto, out comes the pleated result.
- The sides are open, so any width of fabric can be used. And the large handles give complete control. Pleat depth is about 8mm, depending on fabric thickness.
Instructions for using a Princess Pleating Machine
I couldn’t find any open source versions of this machine online at all so I was starting from scratch with my attempt. It was also quite difficult to find any of the dimensions or any detailed information about the way it functioned apart from videos of it in use.
1st Prototype
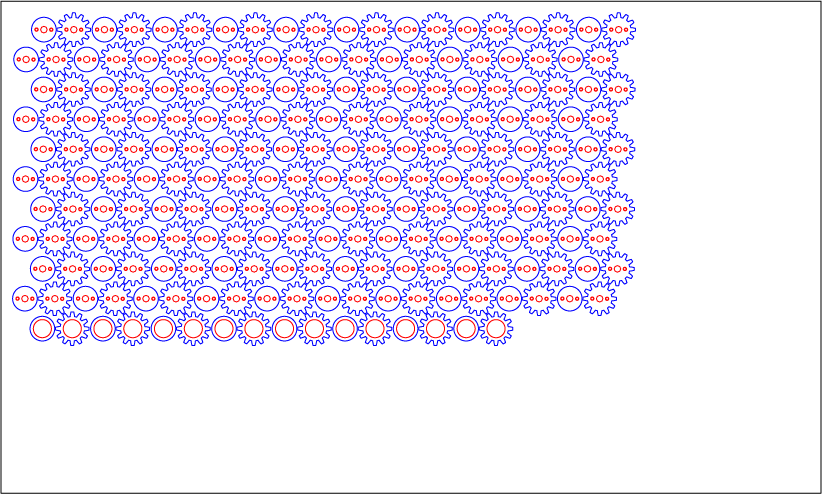
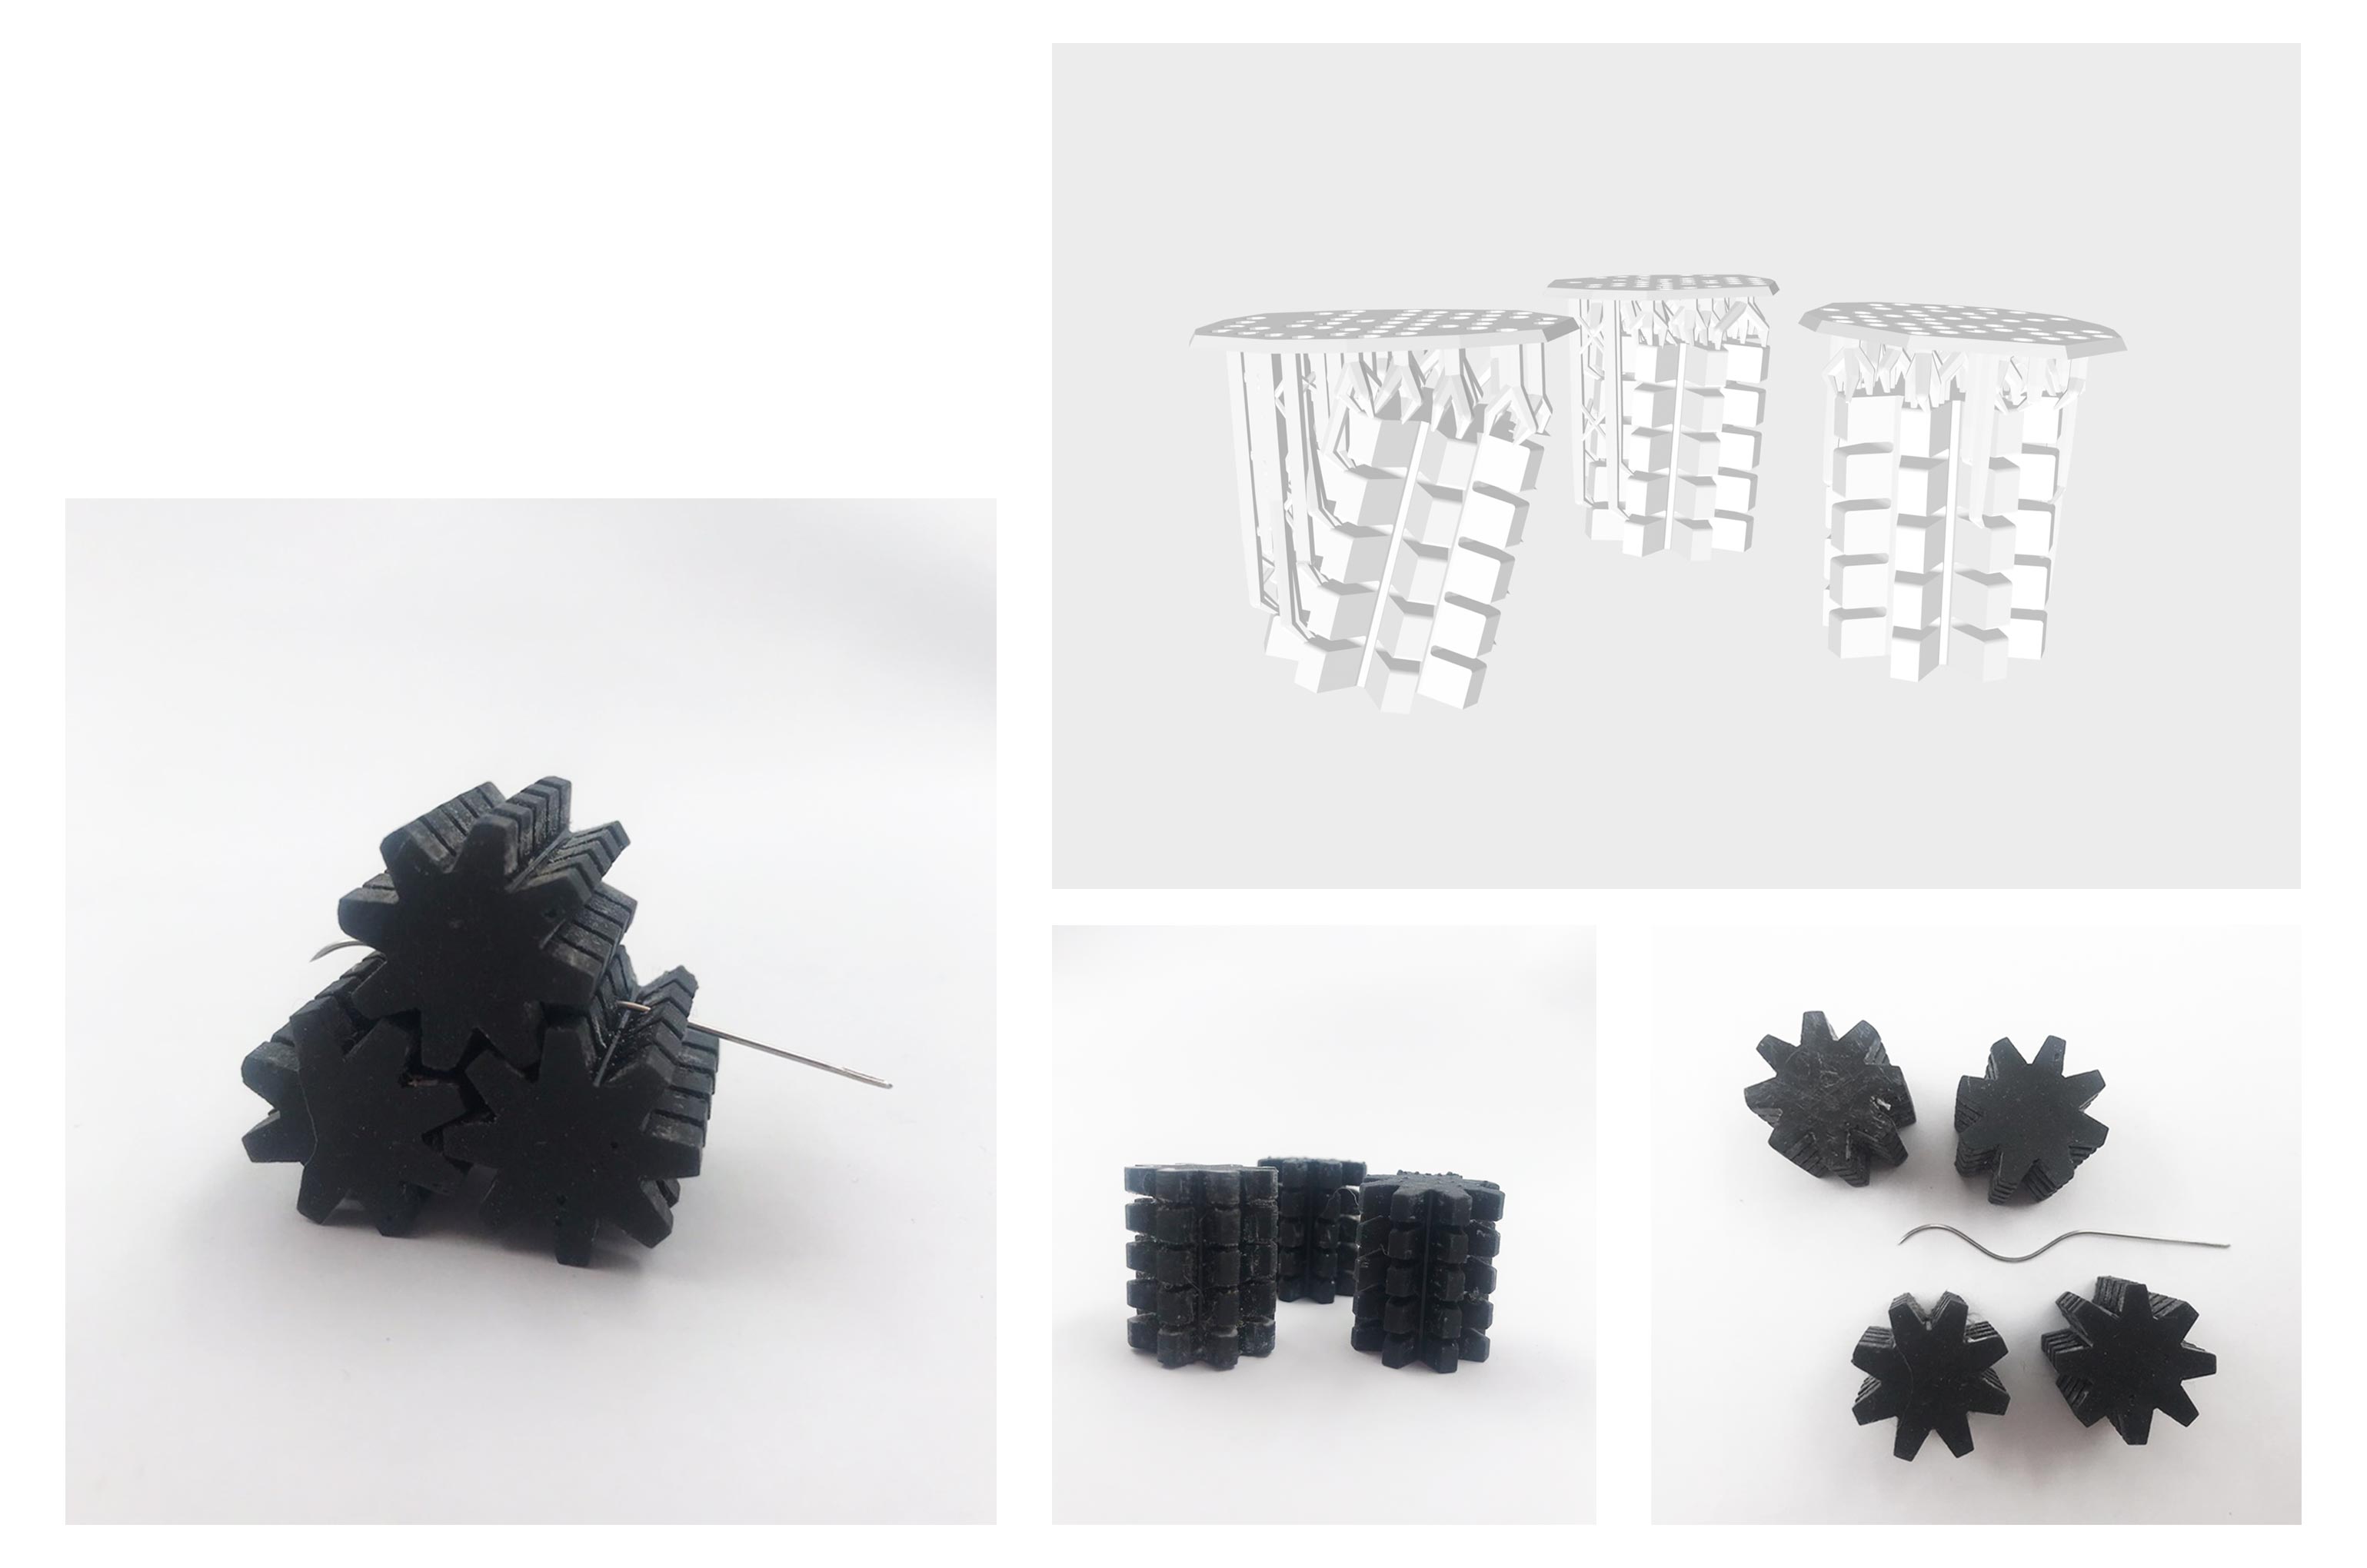
I began by designing the basic gear shape for the 4 wheels in rhino and printing 2 small test sections of them to check they turned correctly. Once I was sure that they would move smoothly, I started working on developing the sides of the machine and the position of the four wheels.
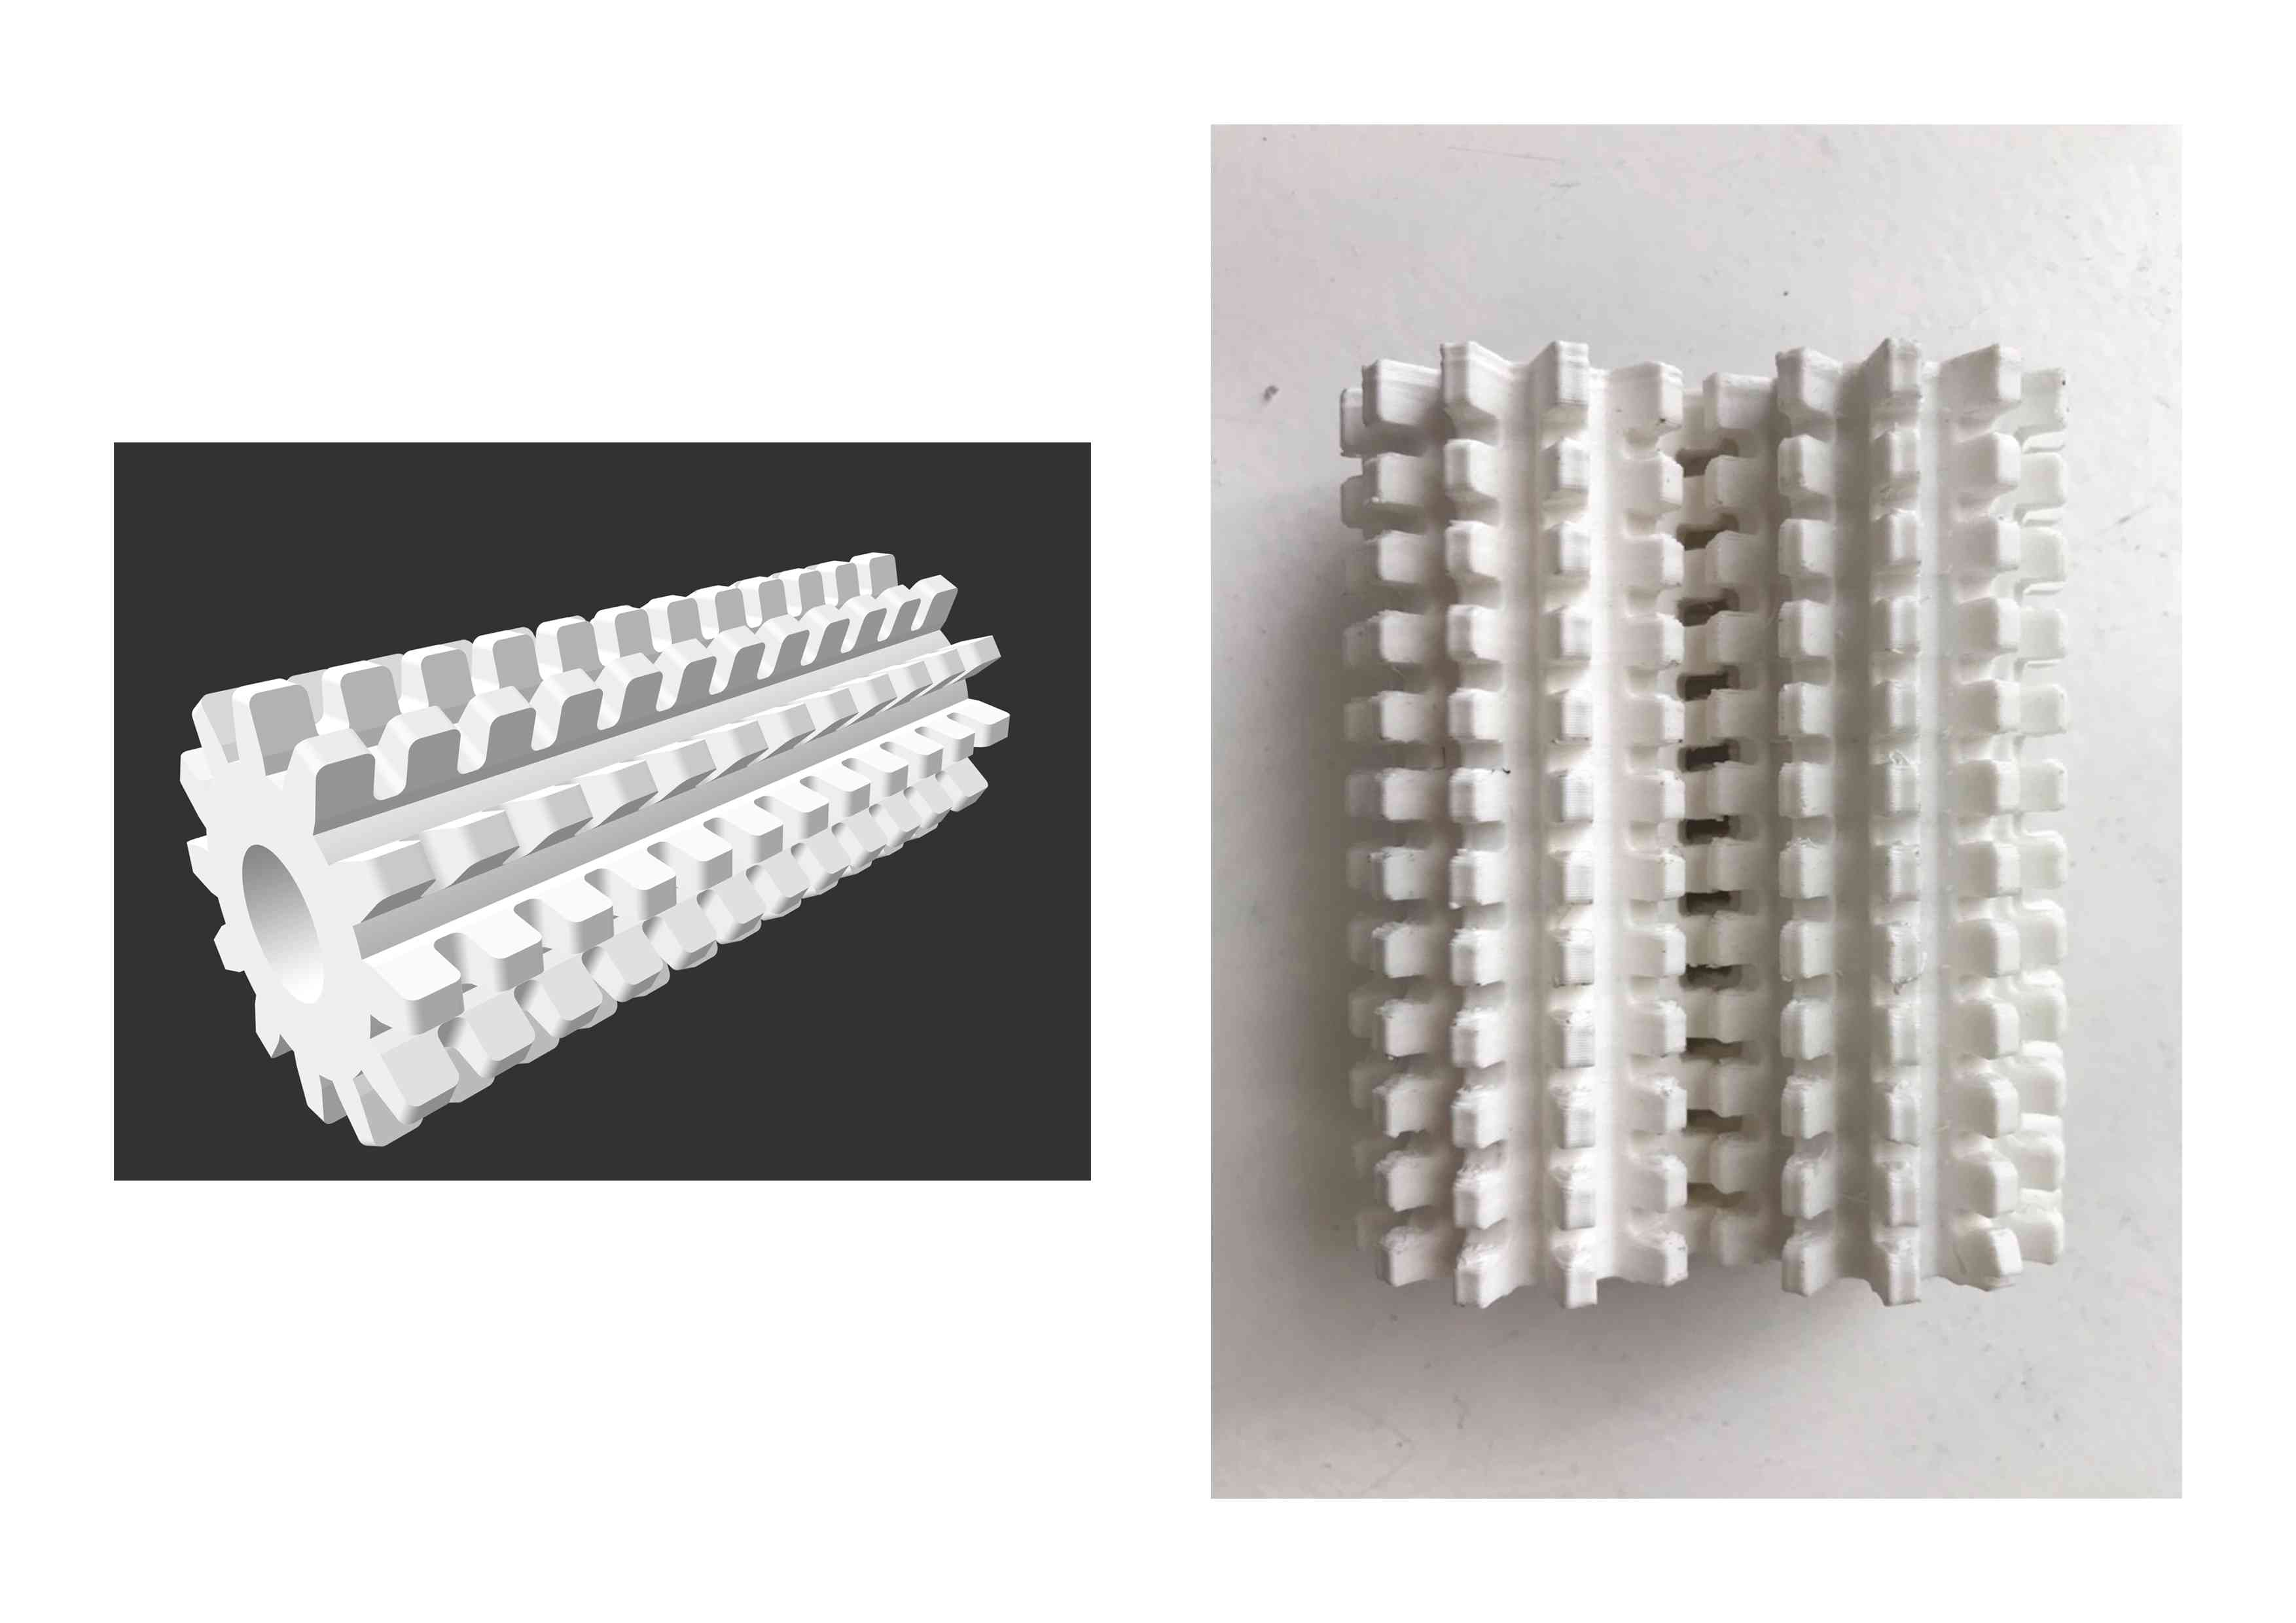
Despite the success of the initial test prints, I had some difficulties getting the printers to work with the full-length wheels so for the first prototype I laser cut them from plywood. This machine turned very smoothly and the fabric passed through very easily.

In an attempt to make my own needles for the machine, I bought some long doll making needles and tried to bend these into the correct shape. I tried this both just by hand with plyers and using the hydraulic press and a mould I made with the CNC machine.
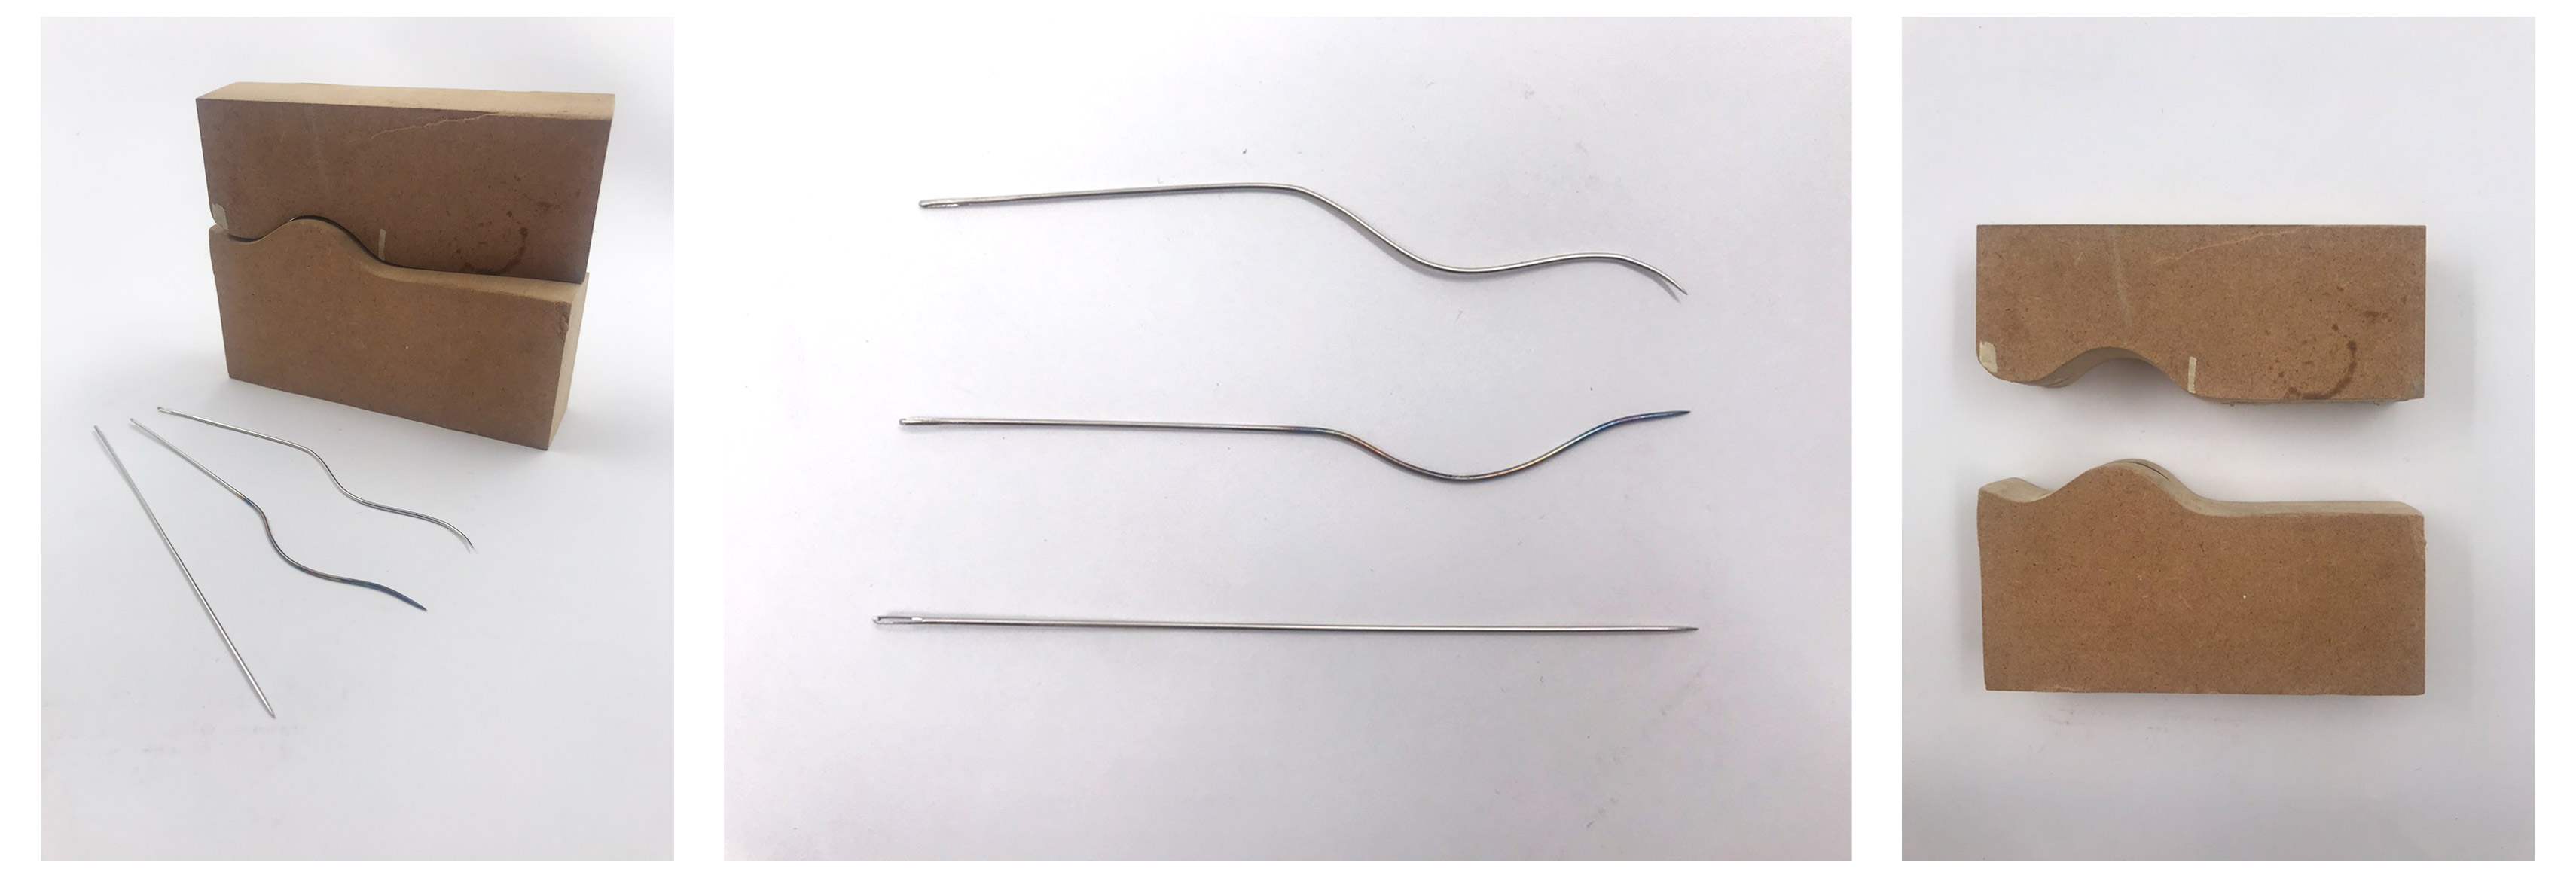
I managed to get these quite close to the shape I needed and the slotted in between the wheels nicely however they wouldn’t stay in place when I rotated them. Additionally, the gaps between the teeth were too wide to hold the needles securely.
2nd Prototype
To try to simplify the process, instead of trying to make my own needles, I bought a pack of smocking machine needles online - available here

These were a lot smaller than I was expecting and would nowhere near the right size for the prototype I had made. As a result, I had to scale the model way down in rhino, trying the get the inner circumference (between the teeth) to the same size as the curve of the needles. I printed 3 small tests of this new size to check they fit the needle correctly. We had some issues with the SLA printer and they came out very curved but they worked for confirming the size.
After a few more attempts with different printing settings, I managed to get 4 full length gears printed in this new smaller size and then laser cut a proportional version of the sides I made for the first prototype.
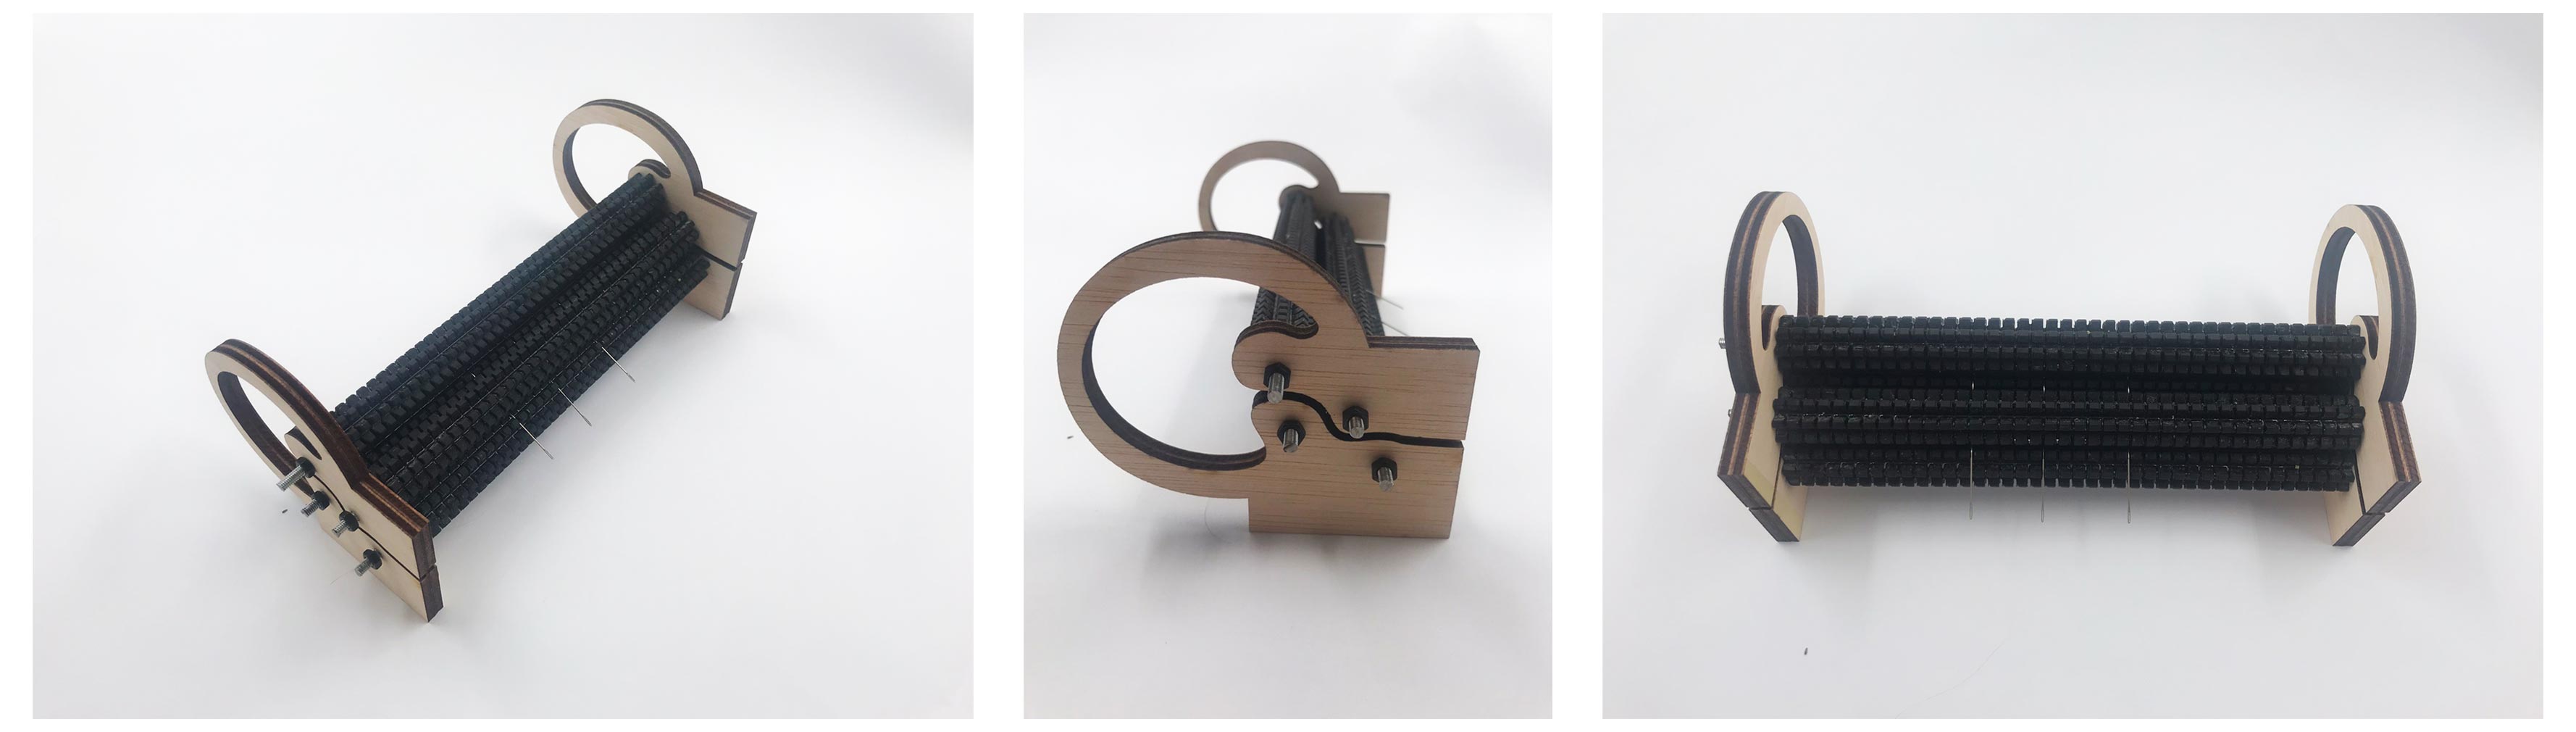
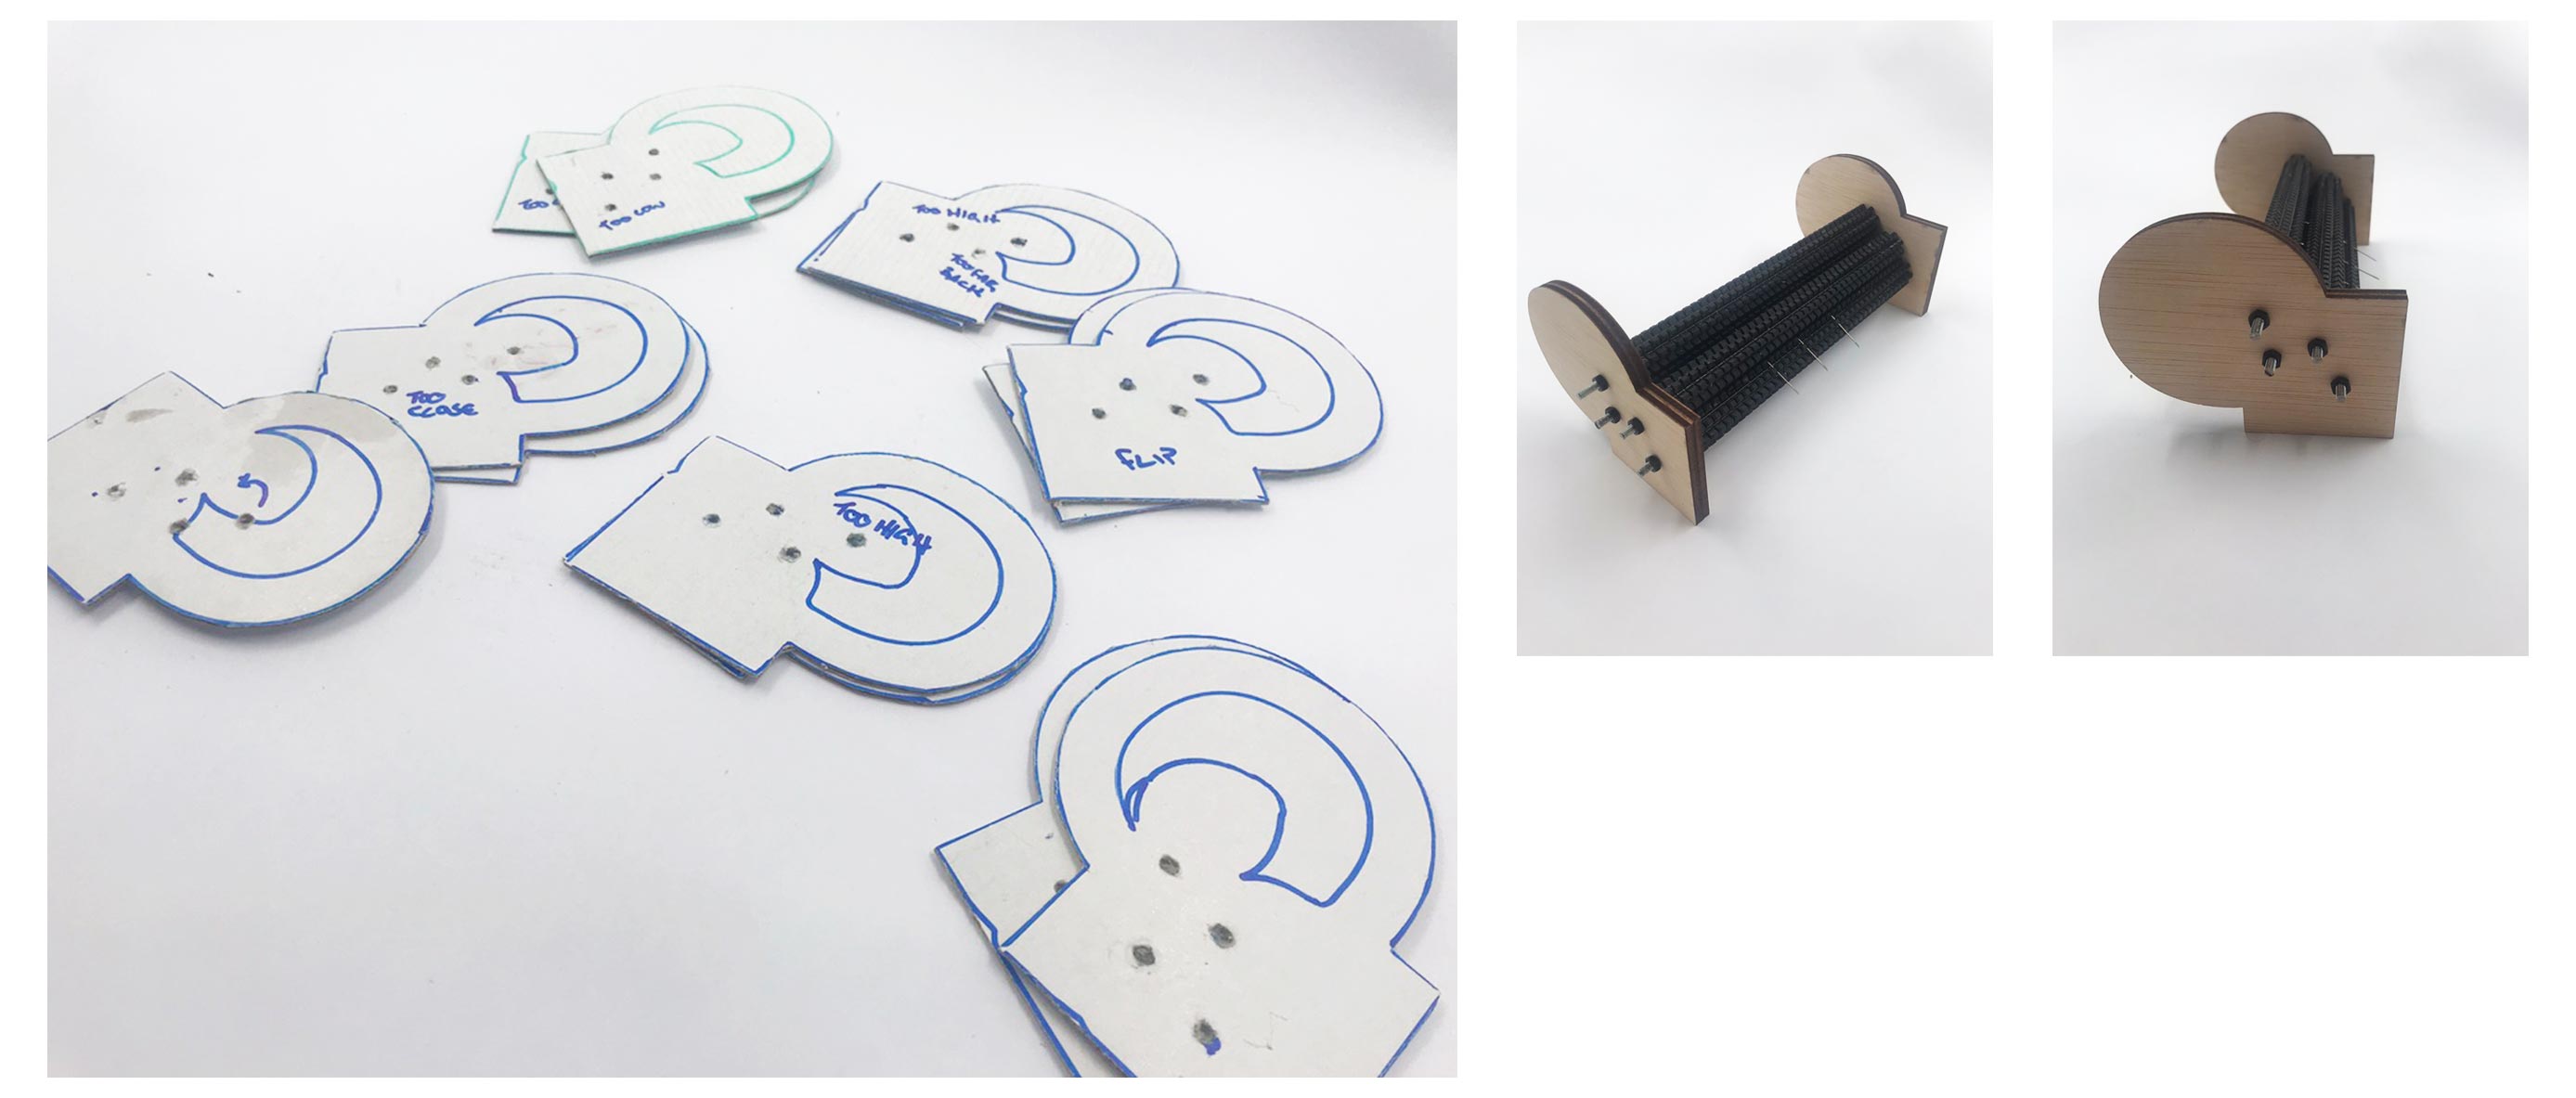
When it was all constructed, the scaling down, did severely limit the number of layers and the thickness of textile that could be passed through the machine. Also, when I put the needles in, the gears didn’t turn as smoothly and the needles tended to fall out after a few rotations. After looking at the some of the videos of the machine again, I realised that I needed to reposition the gears so that the needles would be less horizontal to try to secure them better. I tested out a few different positions and angles until I had a setup that worked better.
Possible Additions
After some advice from people around the lab, we also made some tests that would allow the bottom from gear to move slightly to adapt to different textile thicknesses. We also tried adding an axis for a bar to hold the needles in place. I did not have time in this project to get this working fully.

In conclusion, I think that for the machine to be most useful for this project, I would need to get the size of the 1st prototype working. This is because to patchwork, I will need to pass through at least 2 layers of fabric at most times and the smaller machine would not be capable of handling this. My next steps for developing it would be to try either printing the gears with the gaps in between the teeth at about 1mm or to laser cut again with a different material for the sections in the teeth at this thickness. I would also like to maybe cast my own needles at exactly the right shape and size for the machine.
The fabrication files for the machines can be found here
Textile samples:
Movement tests
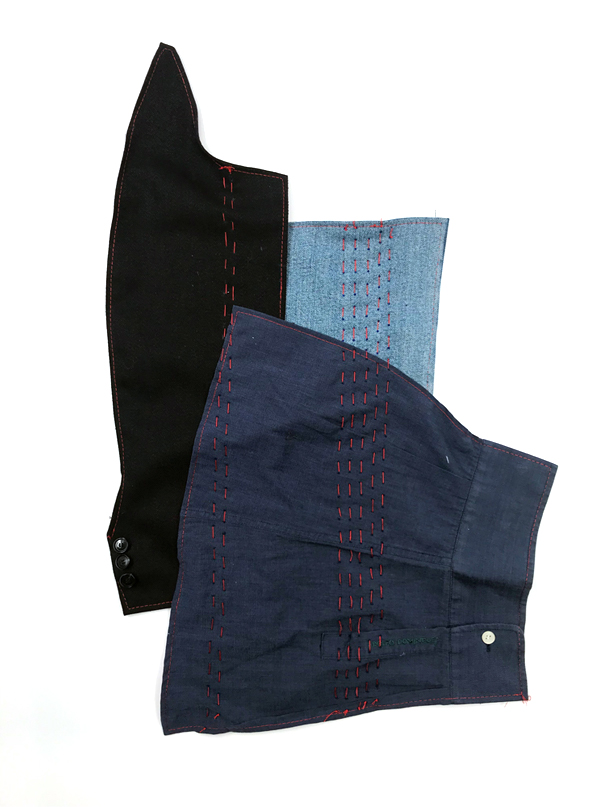
To test that the stitching from the smocking machine would function as I was intending as a way to shape and combine textiles, I made a selection of small scale samples by hand. I wanted to test a range of different textile types and thickness with these as well as trying to narrow down the aesthetics.
I was happy with the range of movement achievable with the samples I made. When pulling from the end of the stitching, they were very easy to manipulate. When trying to shape them at a point in the middle off the textile, it was slightly more difficult to start but once you had a grip of the threads, it worked the same.
In order to be able to control exactly where the gathering started and finished along the axis of the stitching, I would need to develop some kind of locking device or button. I tried initially knotting the excess thread that I had pulled out but this was very difficult to undo as the threads were too thin and I had to cut them afterwards.
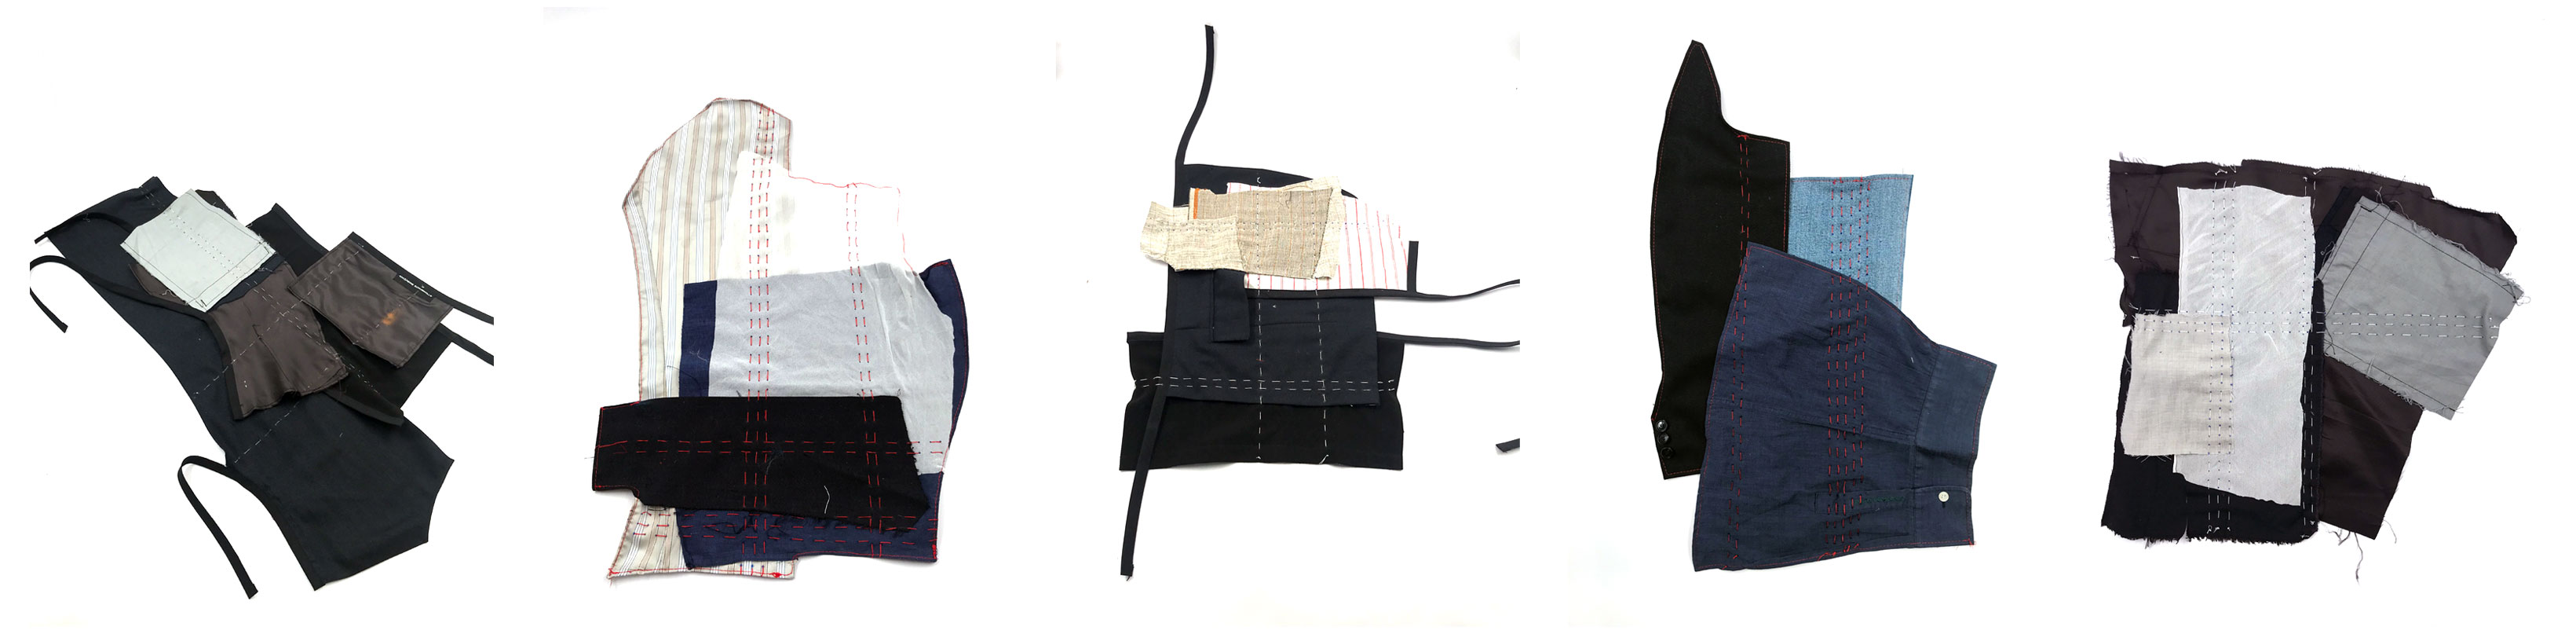
Finishing Tests
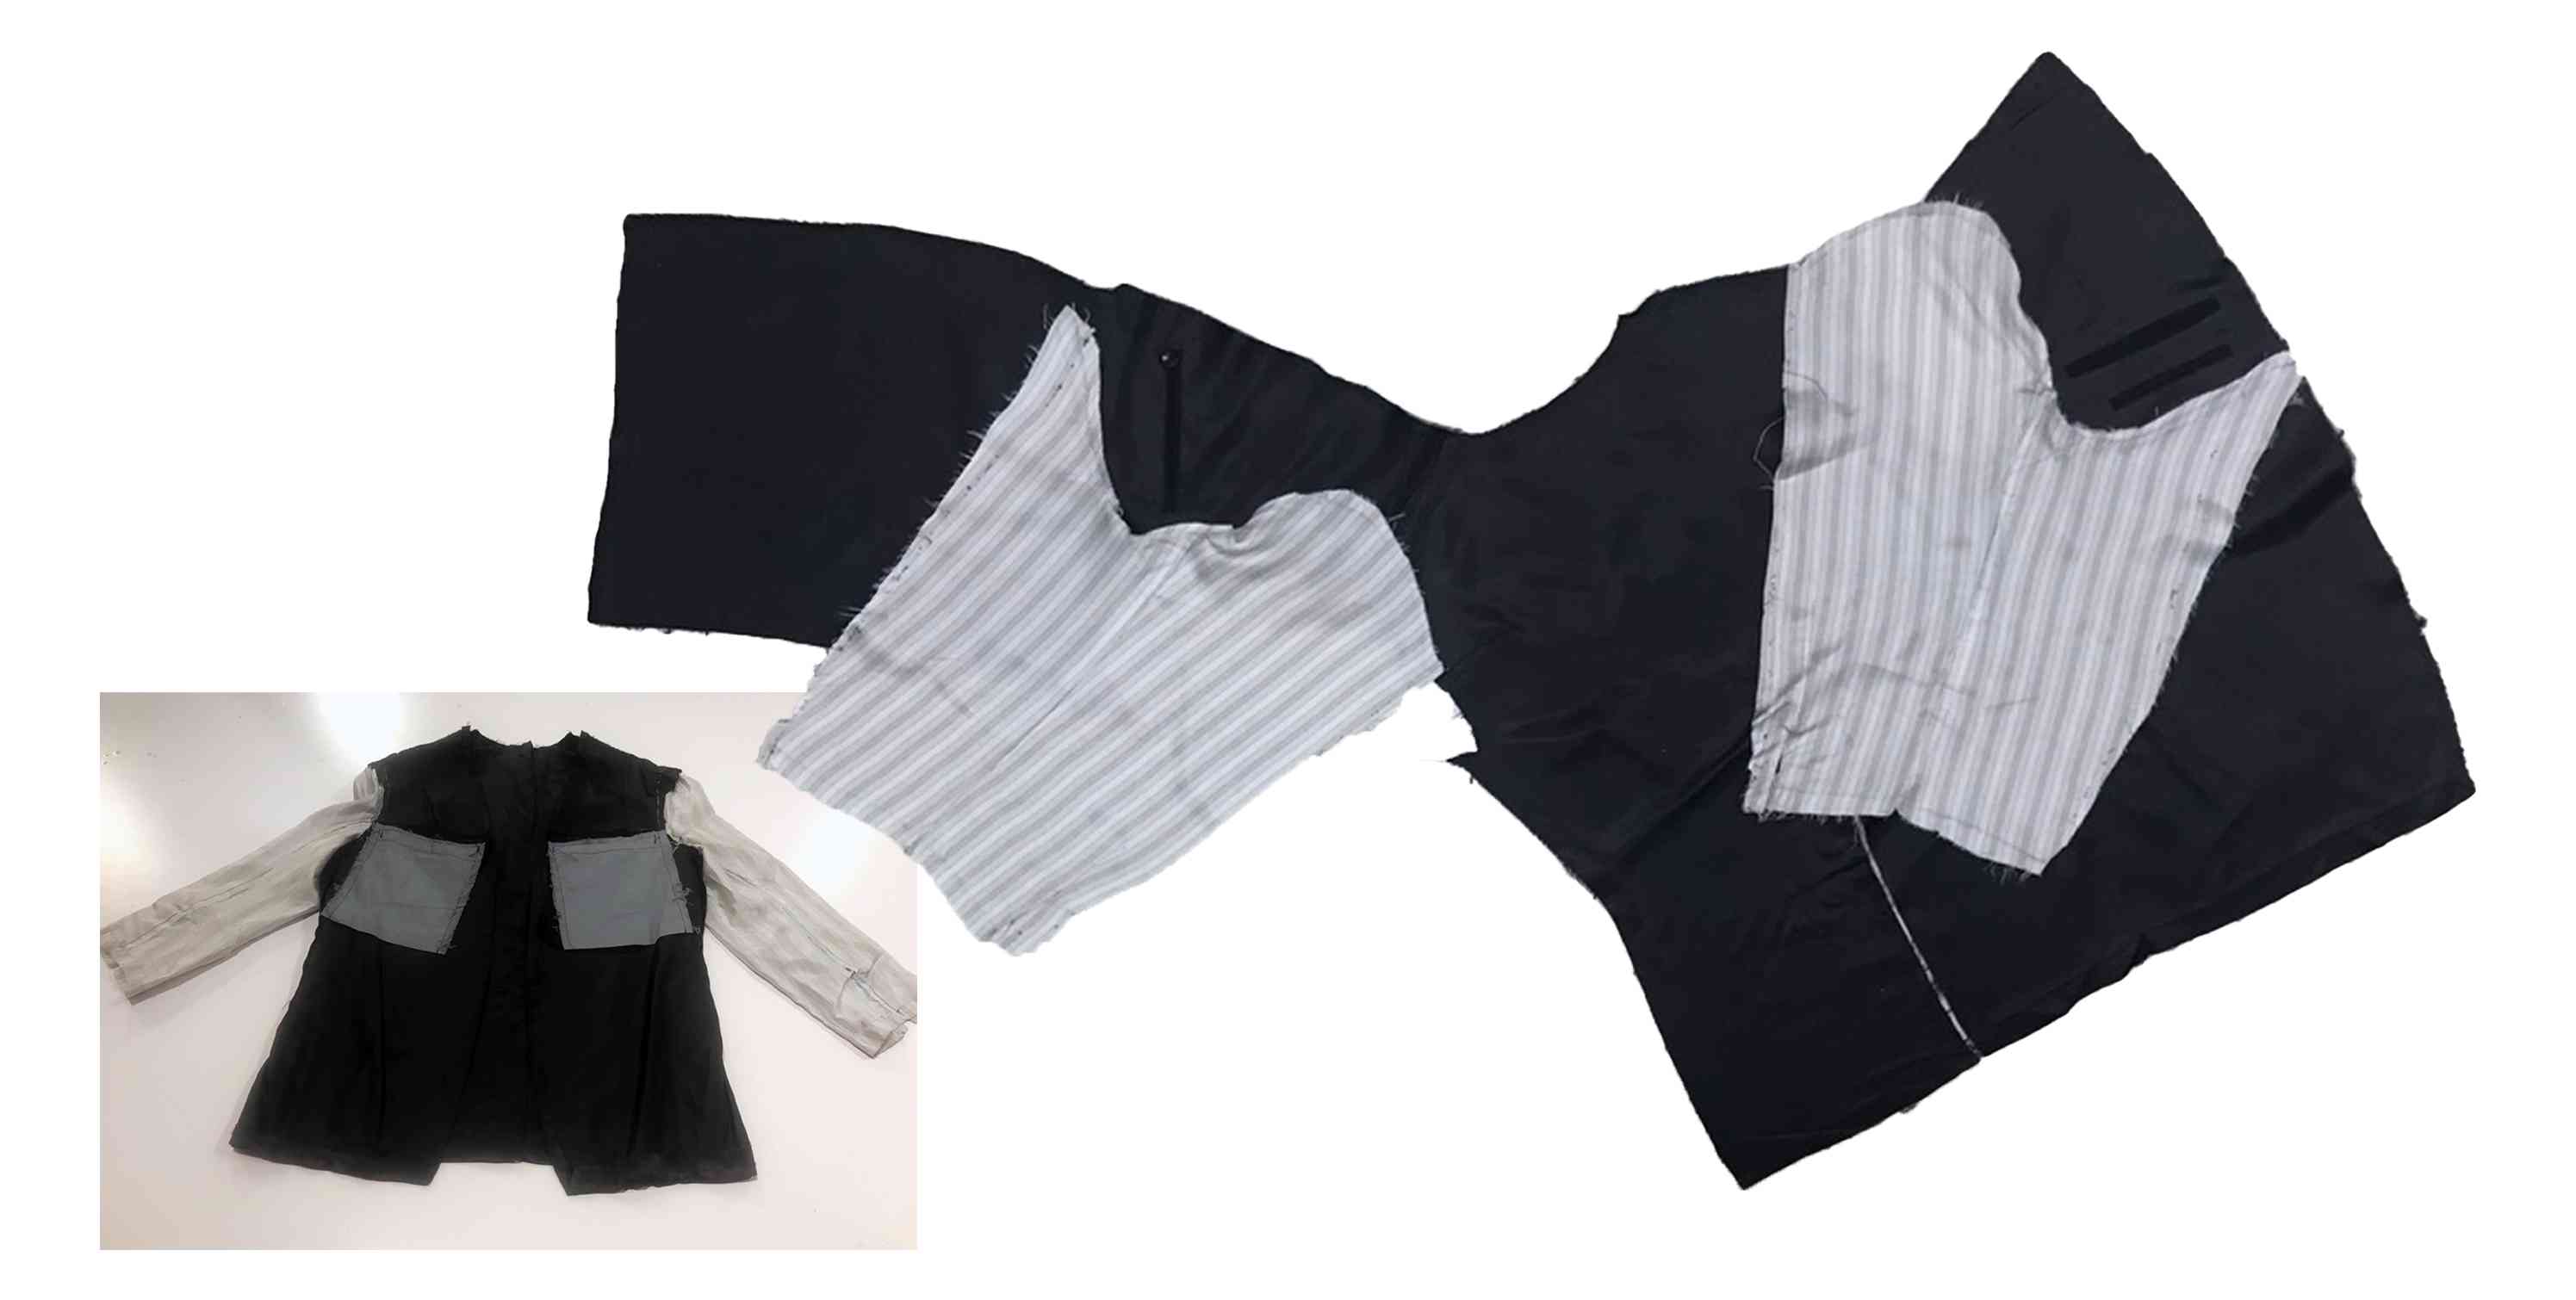
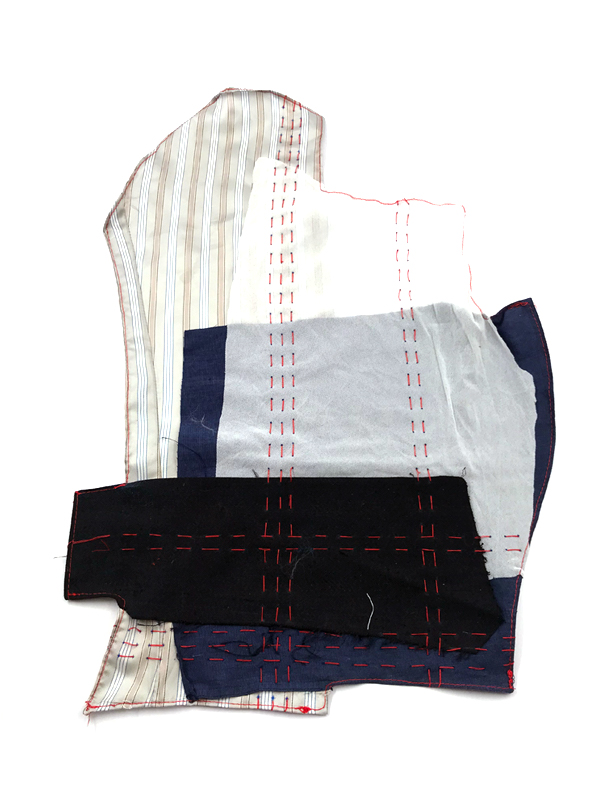
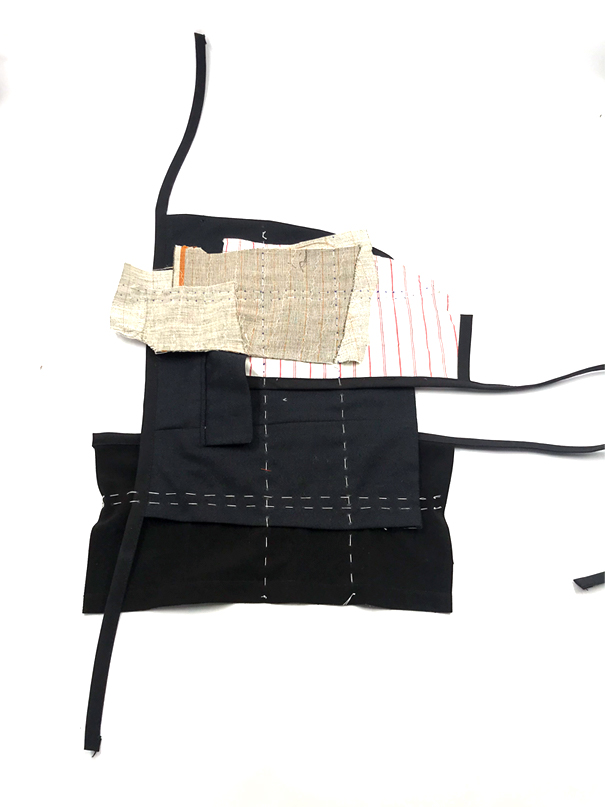
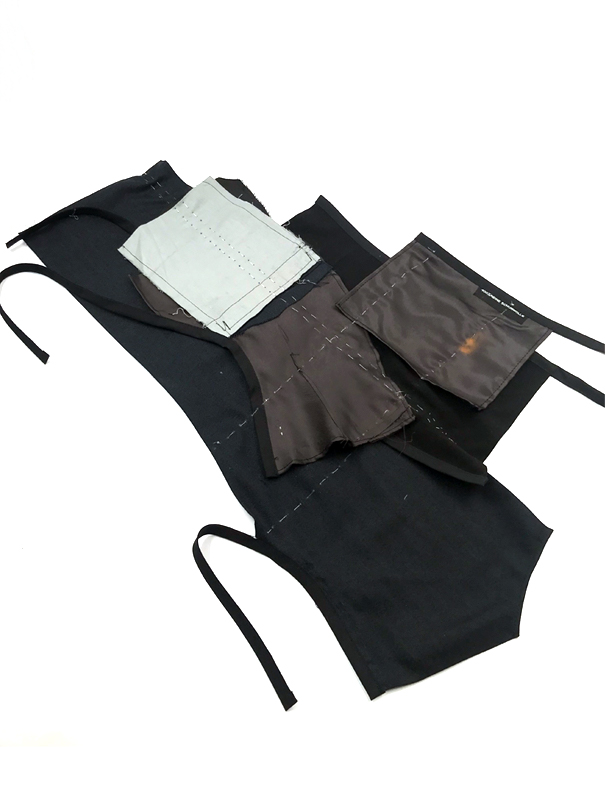
I also wanted to test out different finishing techniques so, once I was happy with the compositions, I assigned each of the 5 patchworks a different level of finishing. I wanted these to range from none at all, to keep the stitching throughout the process to a minimum, to more professional. In the end, I trialled all raw edges, hemming the pieces individually, hemming the finished composition as one, binding only the raw edges and binding the majority of the composition.
 |
Raw Edges: time - minimal, skill - minimal, fraying - max |
 |
Hem Individually: time - above verage, skill - below average, fraying - average |
 |
Hem As One: time - below average, skill - above average, fraying - average |
 |
Bind Raw Edges: time - average, skill - max, fraying - min |
 |
Bind and Hem Edges: time - max, skill - max, fraying - min |
Of these I felt that the ones with the binding looked the best but that unless the binding served some other function in the construction of the garment, I didn’t feel like the added skill required worked well within the concept as it counteracted the simplification and temporality done by the machine. I tested using excess binding coming off some of the hems as straps to try to incorporated them into the process of shaping the garment too a bit. I was quite happy with the way that this worked but I wanted to see how the patterns worked to decide if it would be a beneficial add on to the textile.
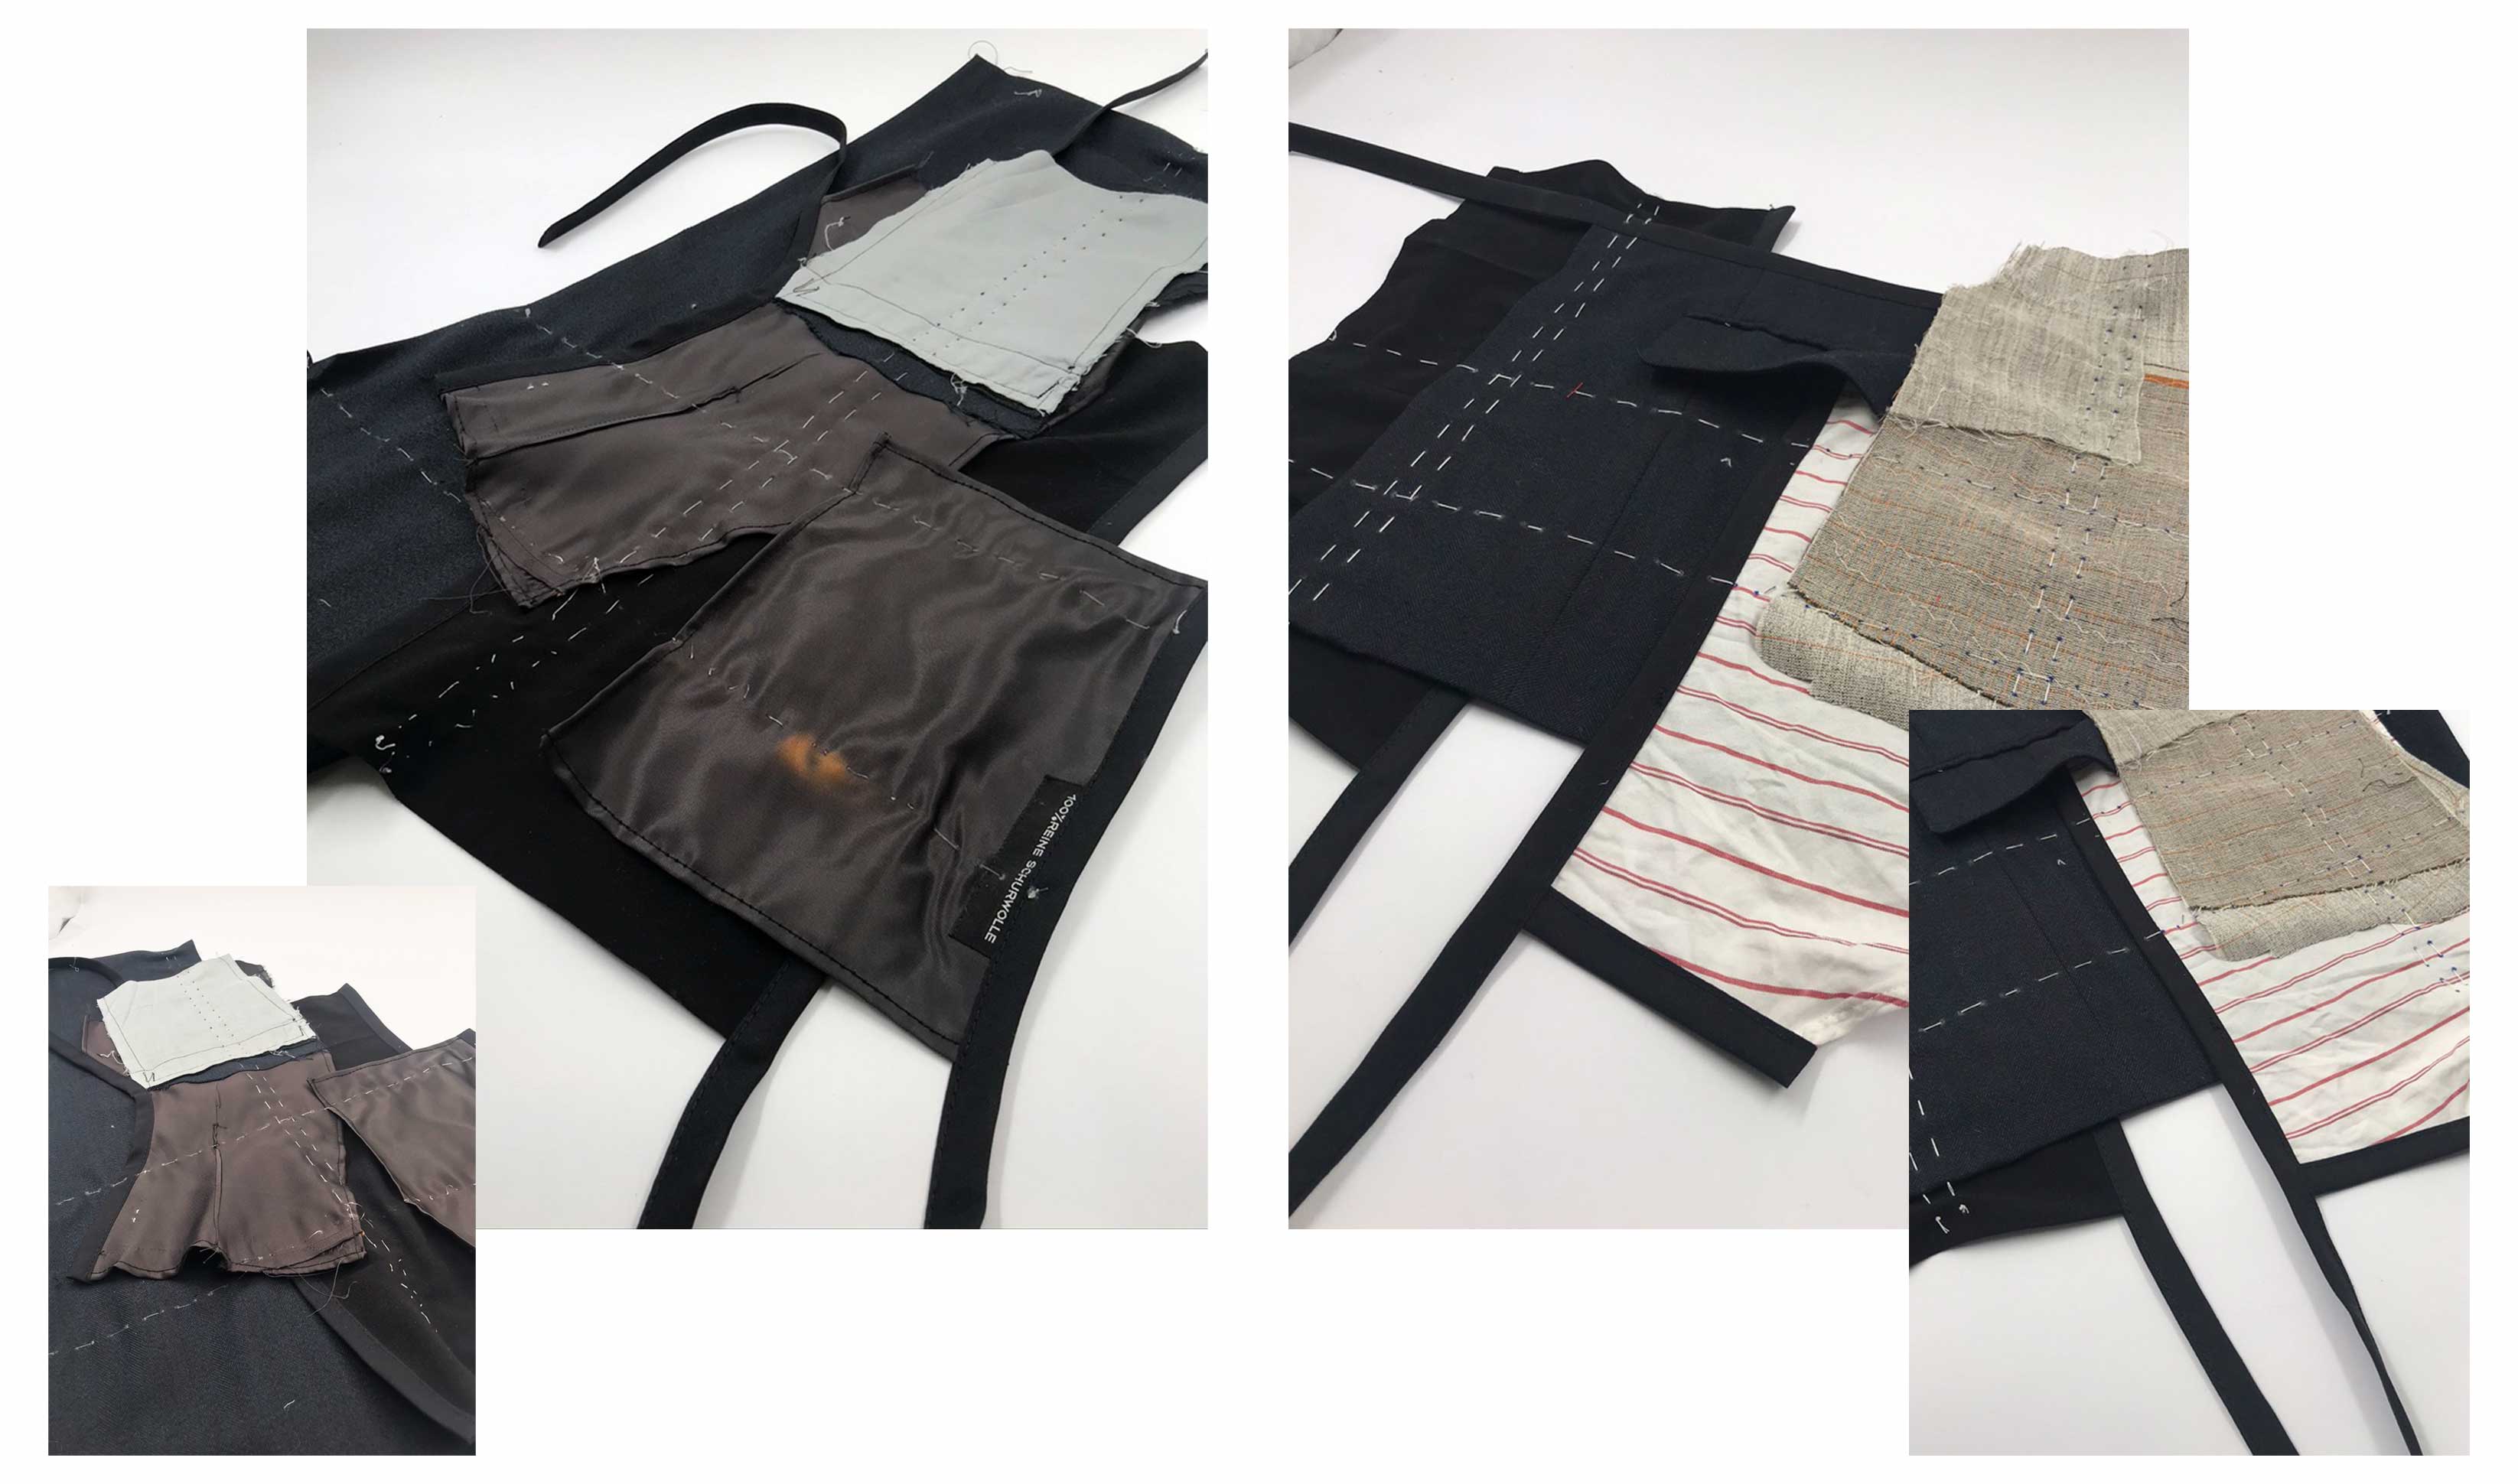
I felt that the sample that had the individual pieces hemmed where necessary was probably the best one to implement in the rest of the construction process. This worked as it allowed you to use the layering process of deciding the textile composition to hide as many of the raw edges as possible and so limit any sewing to a bare minimum.

Disassembly Tests
I also tried out different disassembly methods dependant on the stitching. One method I trialled was using fishing line as the thread and using heat to dissolve it. This was inspired by threads like Resortecs’ Heat Dissolvable Thread and I thought could have been good for helping to keep the work required for disassembly to a minimum.

For this sample, I used the heat gun to try to dissolve the threads, this was quite successful as it did distort and snap the threads in some places and make it very easy to rip by hand where it didn’t completely break. Despite this, it did require quite a lot of heat and when I was focussing it on the section of the textile that was synthetic, it also burnt the textile. Overall, it wasn’t any quicker or easier than just cutting and pulling the threads out and would not be applicable for synthetic textiles so I decided to not move forward with this technique.
I wanted to ensure that the textile patchworks could be disassembled in parts. For example, that you could remove one piece and replace it with another if desired without having the take apart the whole patchwork. This worked very well when all of the stitching was only done in one direction and was more time consuming but still do able if the stitch was more random.