2. Digital bodies

weekly assignment
Check out the weekly assignment here or login to your NuEval progress and evaluation page.
get inspired!
Check out and research alumni pages to betetr understand how to document and get inspired
- Alessia Pasquini
- Laora Guillerm
- Marie-Charlotte Desforges TextileLab Lyon 2021-22
- Kate Reed Dassault Systems 2020-21
- Sara Alvarez TextileLab Amsterdam 2020-21
- Betiana Pavon _FabLab Barcelona 2019-20
- Haneem Jaafreh Techworks Amman 2021-22
- Ana Correa _FabLab Barcelona 2019-20
Digital Bodies Lecture Notes
Technical Notes
- TinyPNG to optimize images
- Try Skanect for easy 3D scanning
- MakeHuman good to quickly generate a human 3D object
- Blender or Rhino easiest for beginner
- Seamly2D / Valentina free fashion modelling or get free Clo3D again
- Meshlab + Regard3D – used in 3rd year for photogrammetry
- Thingiverse offers free 3D files
- MagicWeaver photogrammetry but with 2 photos
- Biometric Data – identification from physical data, look into specifics of anti AI makeup
- Kscan3d – open source 3d scanning
- ReconstructMe – video based 3d scanning
- Qlone.pro – 3d scanning with phone
- Waffle script grasshopper and rhino add on
- Ralph Pucci mannequin producer
- Hans Boodt mannequin producer
Research
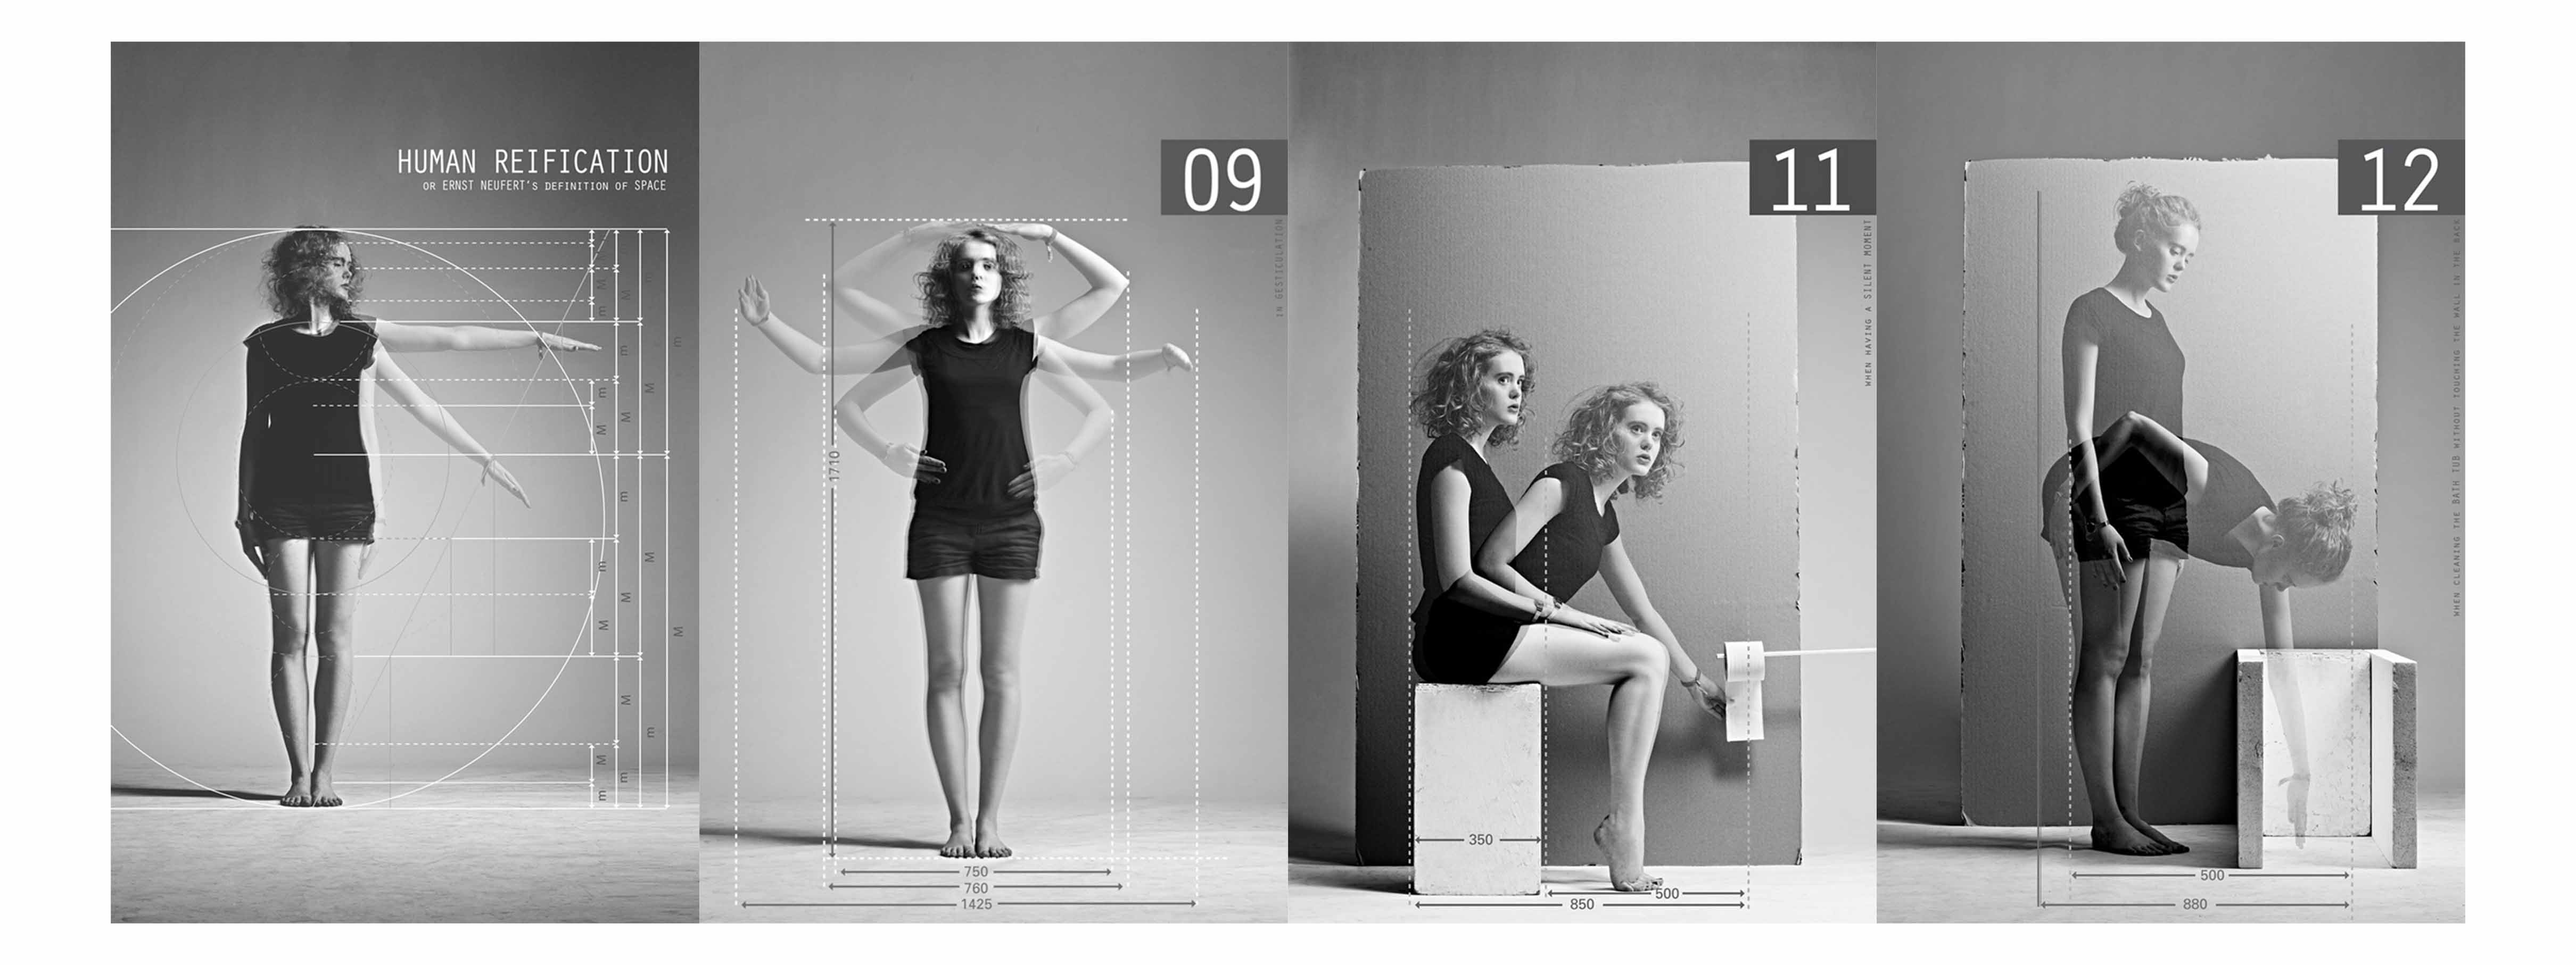
After the lecture, I started looking in to the modulor man by Le Corbusier. I thought that although this was developed as an architectural tool, it seemed like something that resonated with fashion design too as both have to design around the human body and standardising the shape and proportions of this was a major innovation in the industrialisation of fashion. I think this appealed as something to look into due to the current dissuasions around the continued place of standardised sizing in fashion at the minute, due to both sustainability and inclusivity concerns.
I think the simplicity of the modulor man was very appealing and I liked the concept of abstracting the human body to this extent. I also found it interesting that he presented this concept almost as an early example of iterative design. Additionally, Le Corbusier presented some "Panel Exercises" in his well-known book "Modulor" to illustrate that the Modulor was a system capable of producing infinite combinations and did not restrict the degree of freedom in design. I though it could be interesting to try representing different perspective and positions of the body through a similar kind of abstraction process.
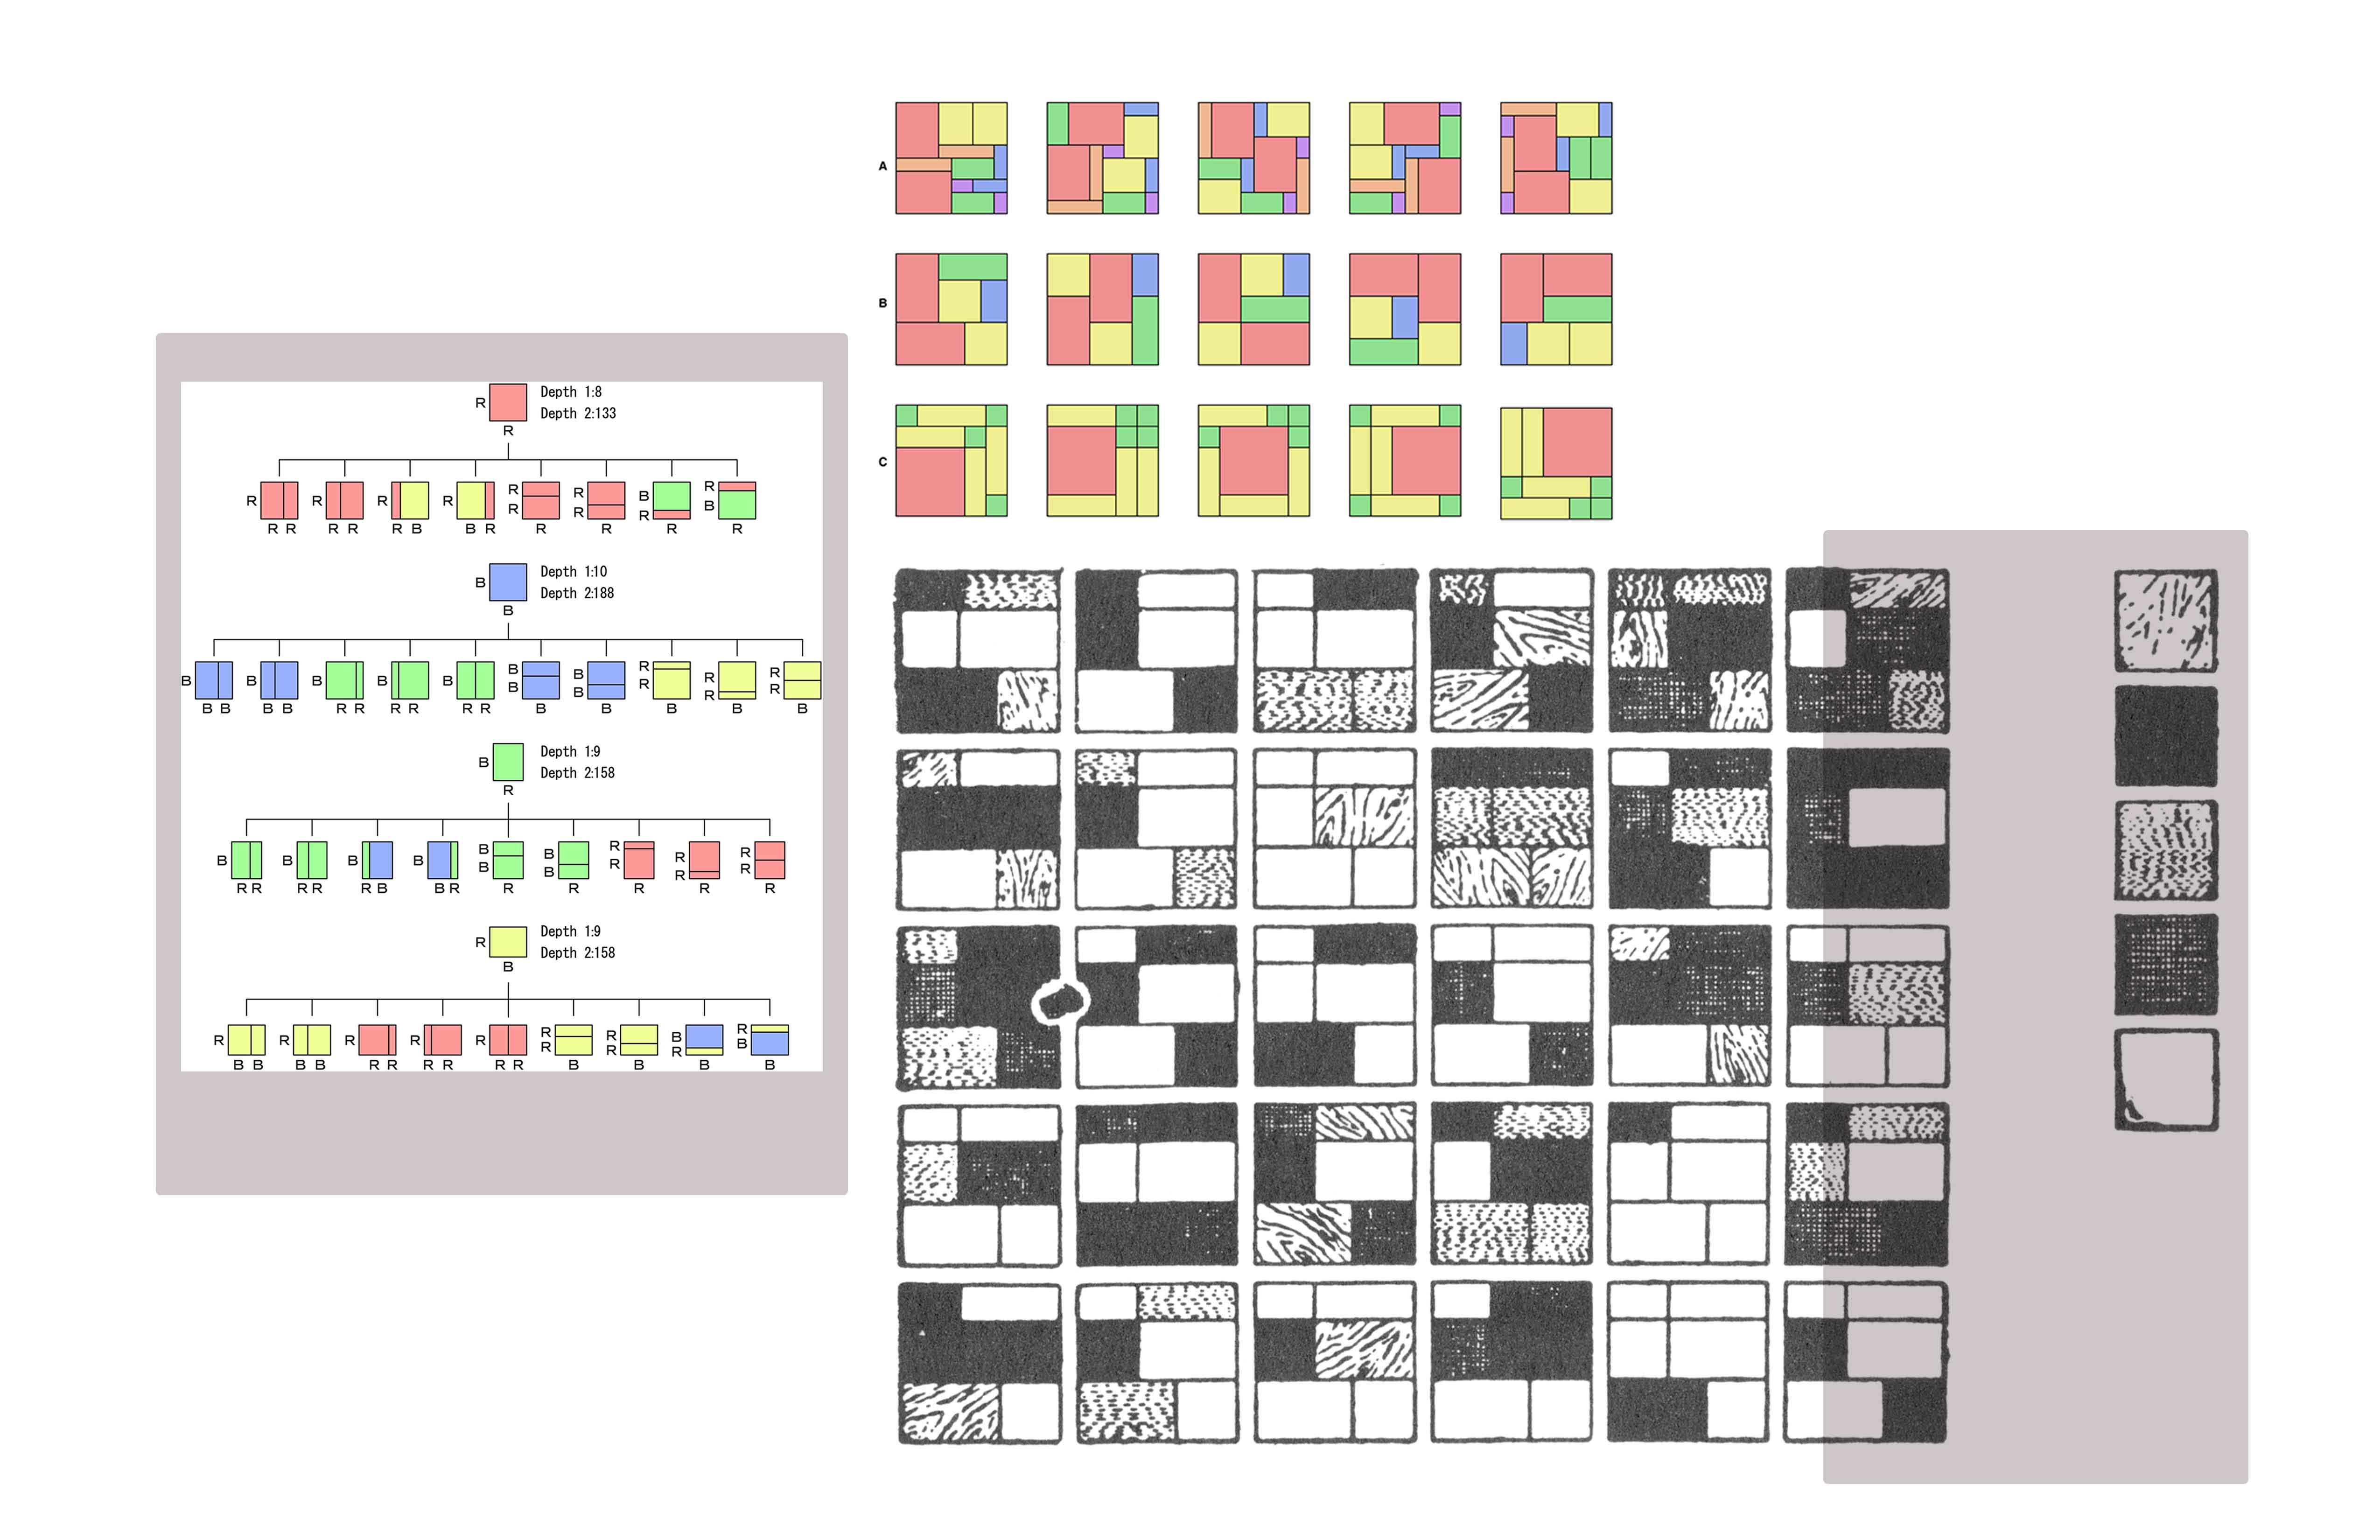
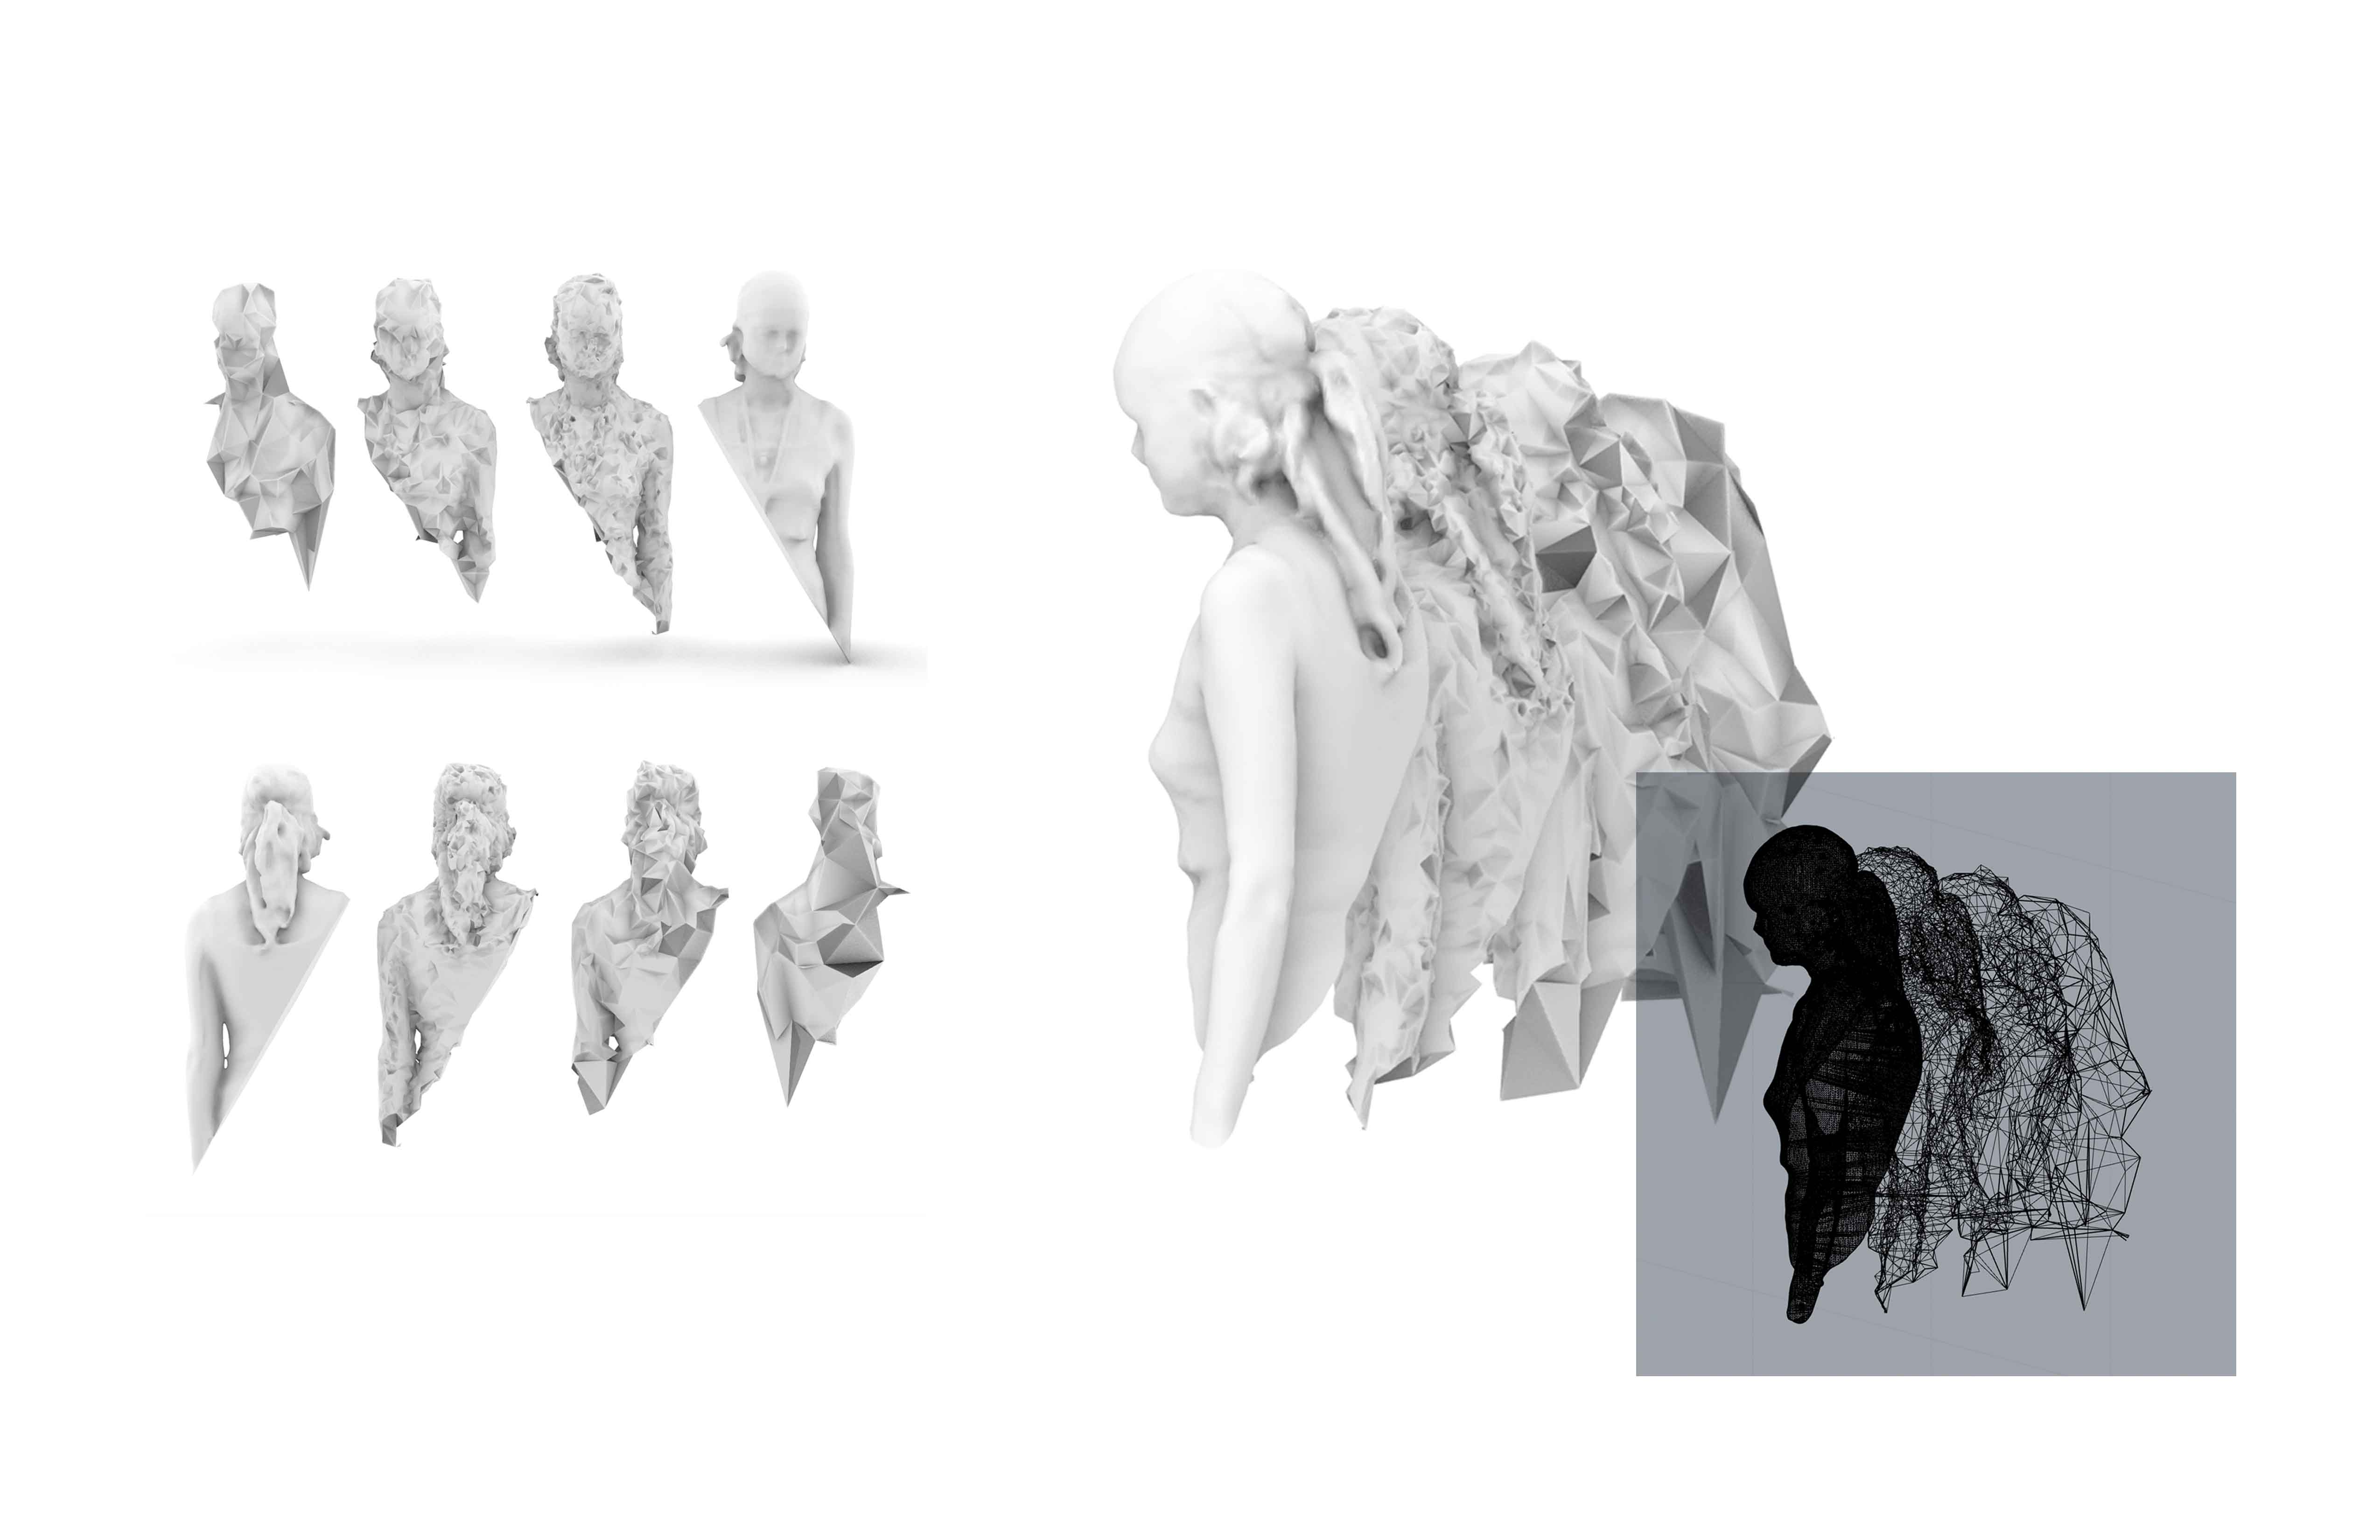
From here, I also looked at the idea of Anthropometry and how other people had tackled trying to catalogue and categorise the body. I found this photo series inspired by the limitations of trying to generate or design around the ‘normal’ body and the way that different bodies or even the same body at different times do not occupy space in the same way. This idea of multiple bodies occupying the same space became what I decided to focus on to make my model and how we could use the digital to represent separate interactions with the same space at once.
- "Neufert's formulation of man as a "target," however, is much more complex. On the surface of the matter (and ergonomics is about surfaces), the target to which Neufert refers is a universally applicable average and ideal: a norm. As is well known, normativity is not limited to bell curves, nor to the simple settling of averages; as the medical-philosopher George Canguilhem has shown in his pathbreaking work on The Normal and the Pathological, "the normal...increases the rule at the same time that it points it out. It asks for everything outside, beside, and against it that still escapes it. A norm draws its meaning, function, and value from the fact of the existence, outside itself, of what does not meet the requirement it serves. The normal is not a static or peaceful, but a dynamic and polemic concept." Harwood, John. Chapter 4 The Interface: Ergonomics and the Aesthetics of Survival, Governing by Design: Architecture, economy and Politics in the Twentieth Century. Published by the University of Pittsburgh Press, Pittsburgh, Pa., 2012.
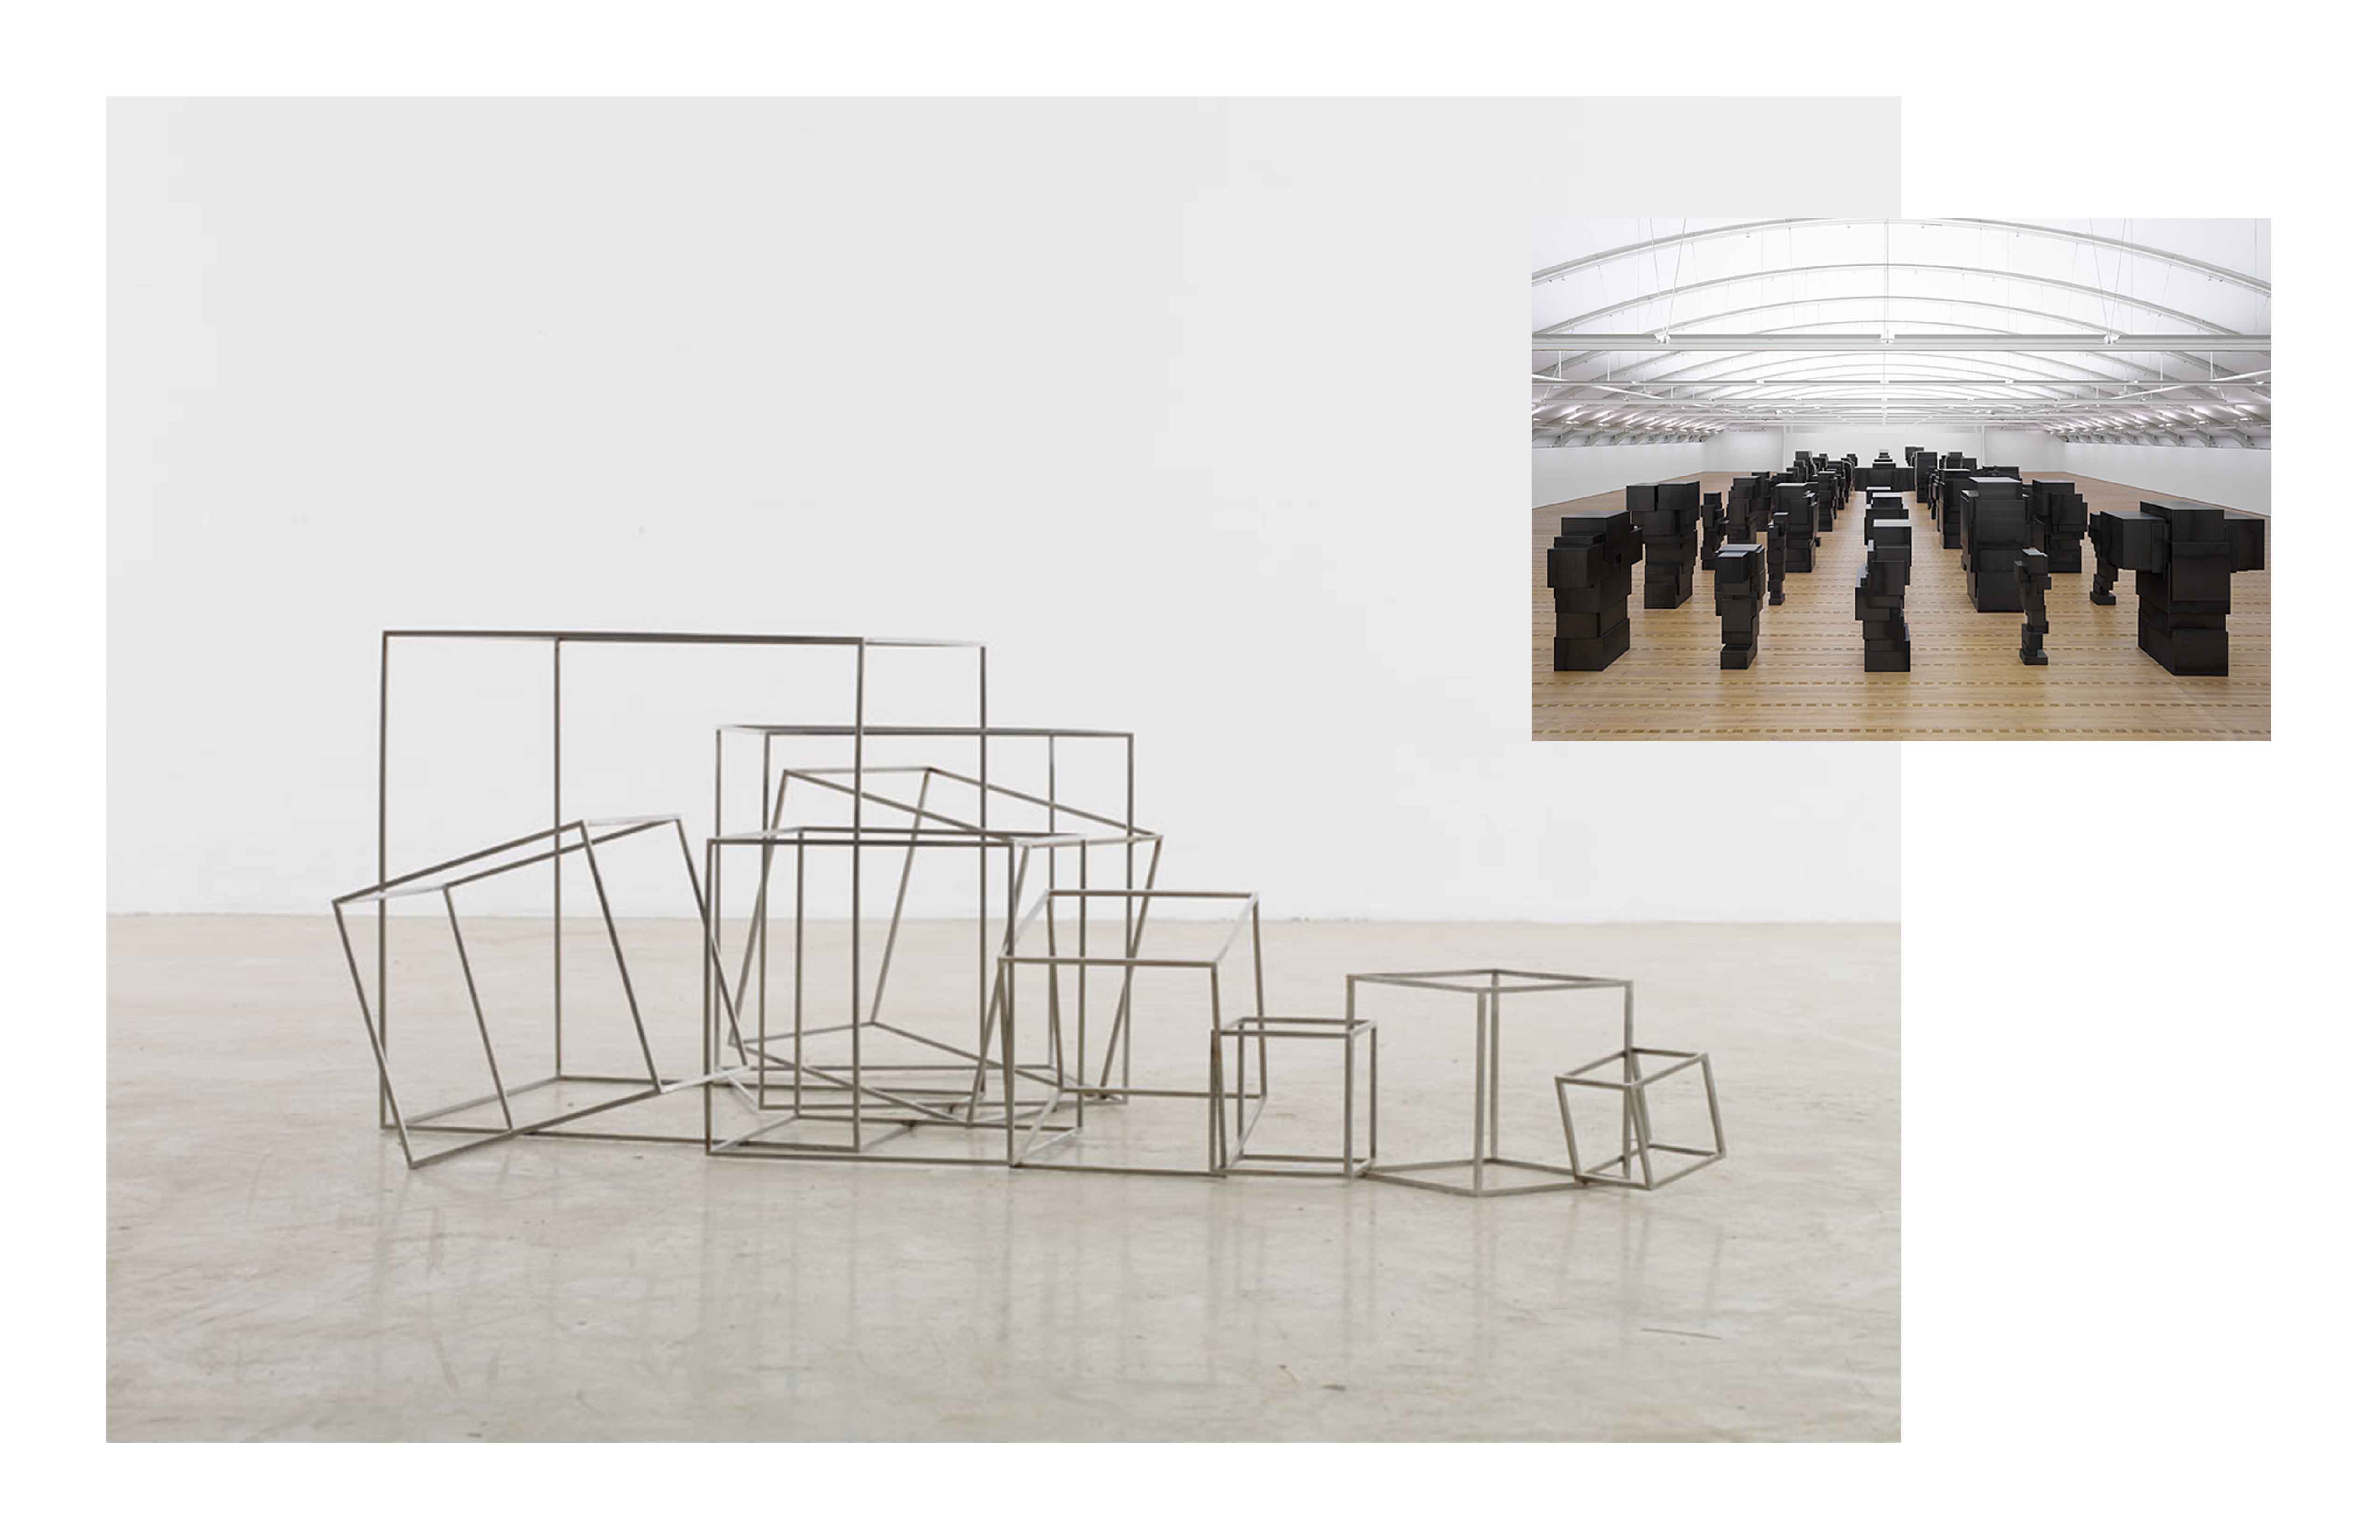
Antony Gormley’s work also inspired me here as it often looks to abstract the figure of the body to various extents. It is also often very environment specific, requiring the sculpture to interact with it’s surroundings in some way. I also like his use of negative space inside his representations of the body.
3D Scanning:

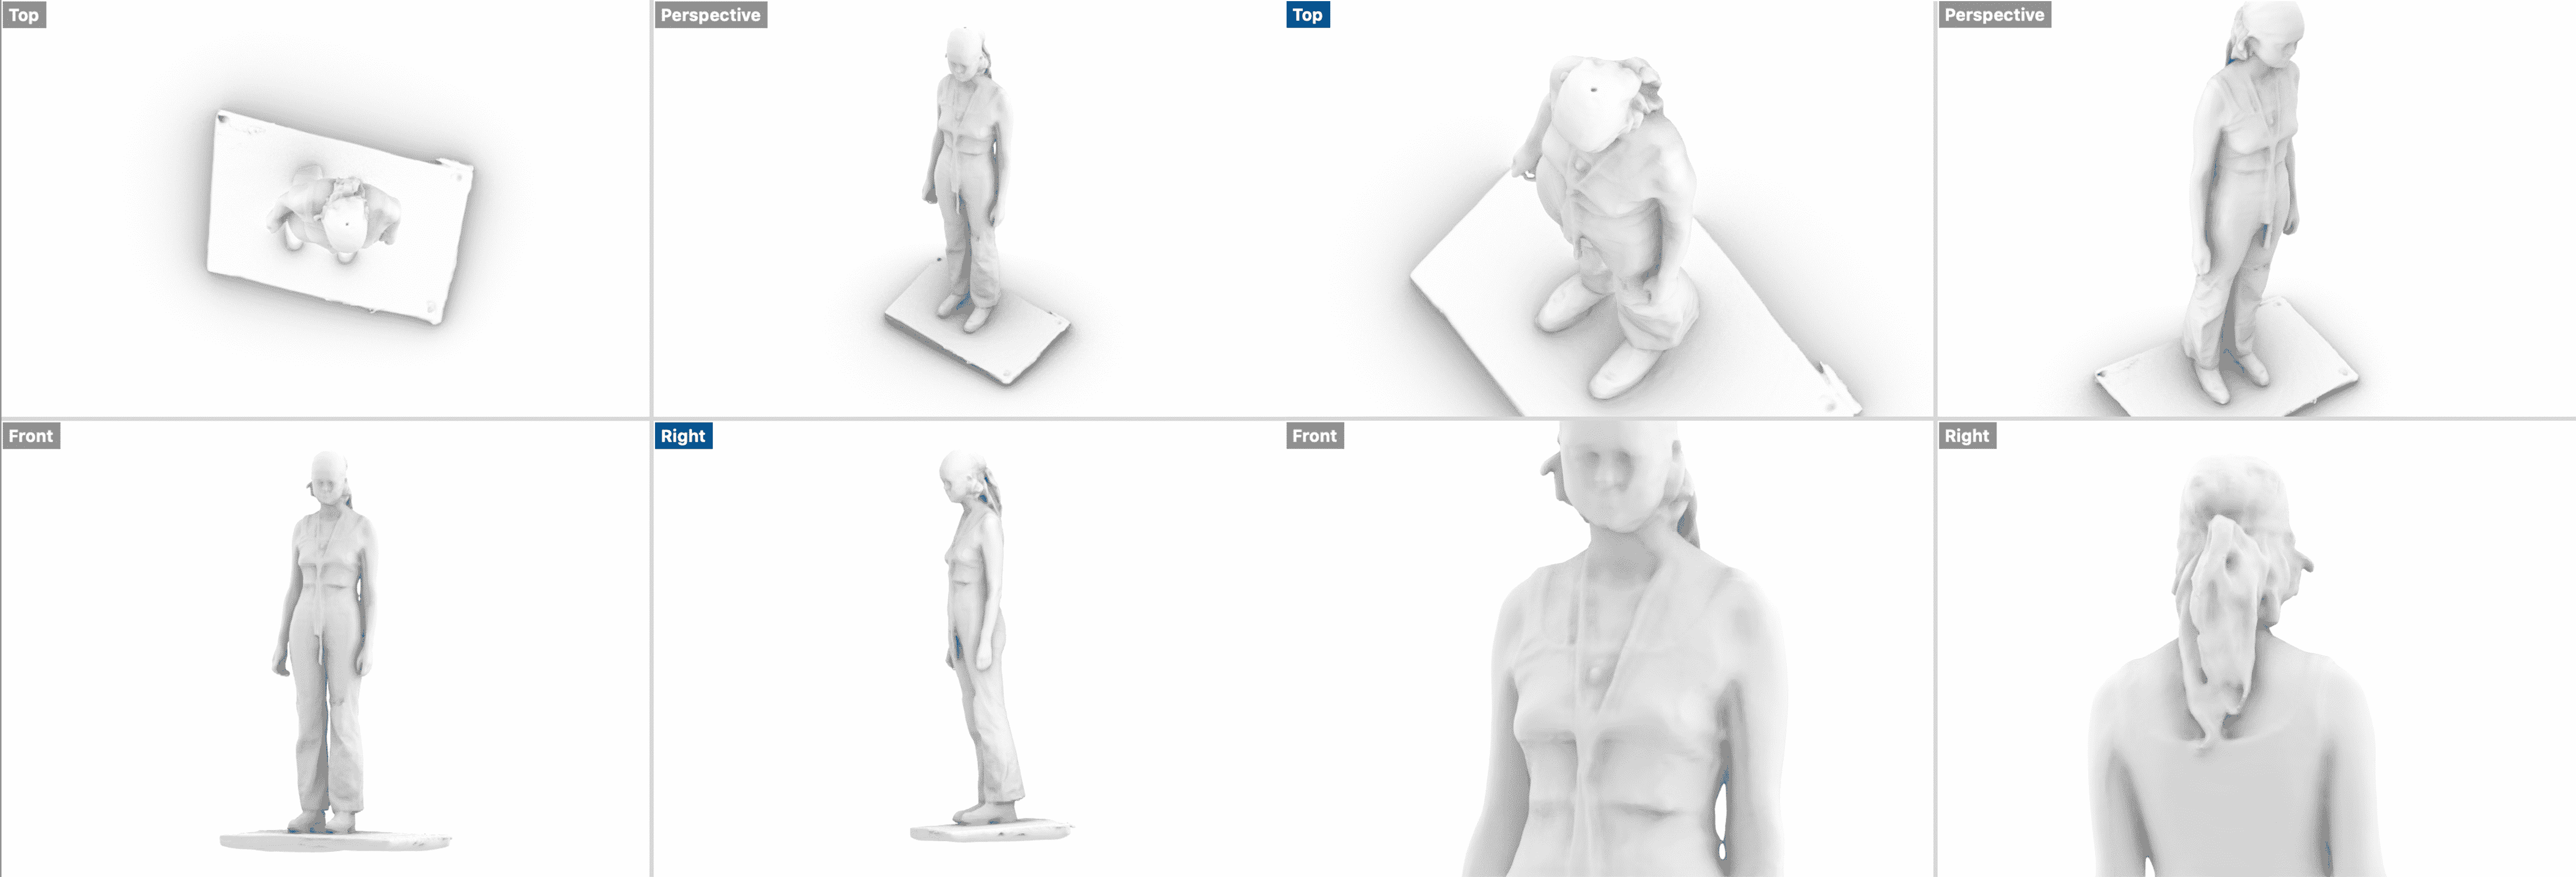
To begin the week, we used the robot arm with an Xbox Kinect attached to get a 3d scan of all of us. This just required one of us sitting or standing on a rotating platform in front of the robot for a few different rotations at different angles. At first we just did this standing still in and all of these scans camo out very clearly. Then we tried a few different poses to get more comfortable with the functions and limitations of the machines. We tried it with Barbara doing two different yoga poses. The first of these came back with a few deformations on the arms and legs as she had been moving too much during the scans for it to pick up the details, the second however came out much clearer. As she was sat down in both of these, the scanning time was much quicker than when stood up as we needed to do less rotations at different heights.
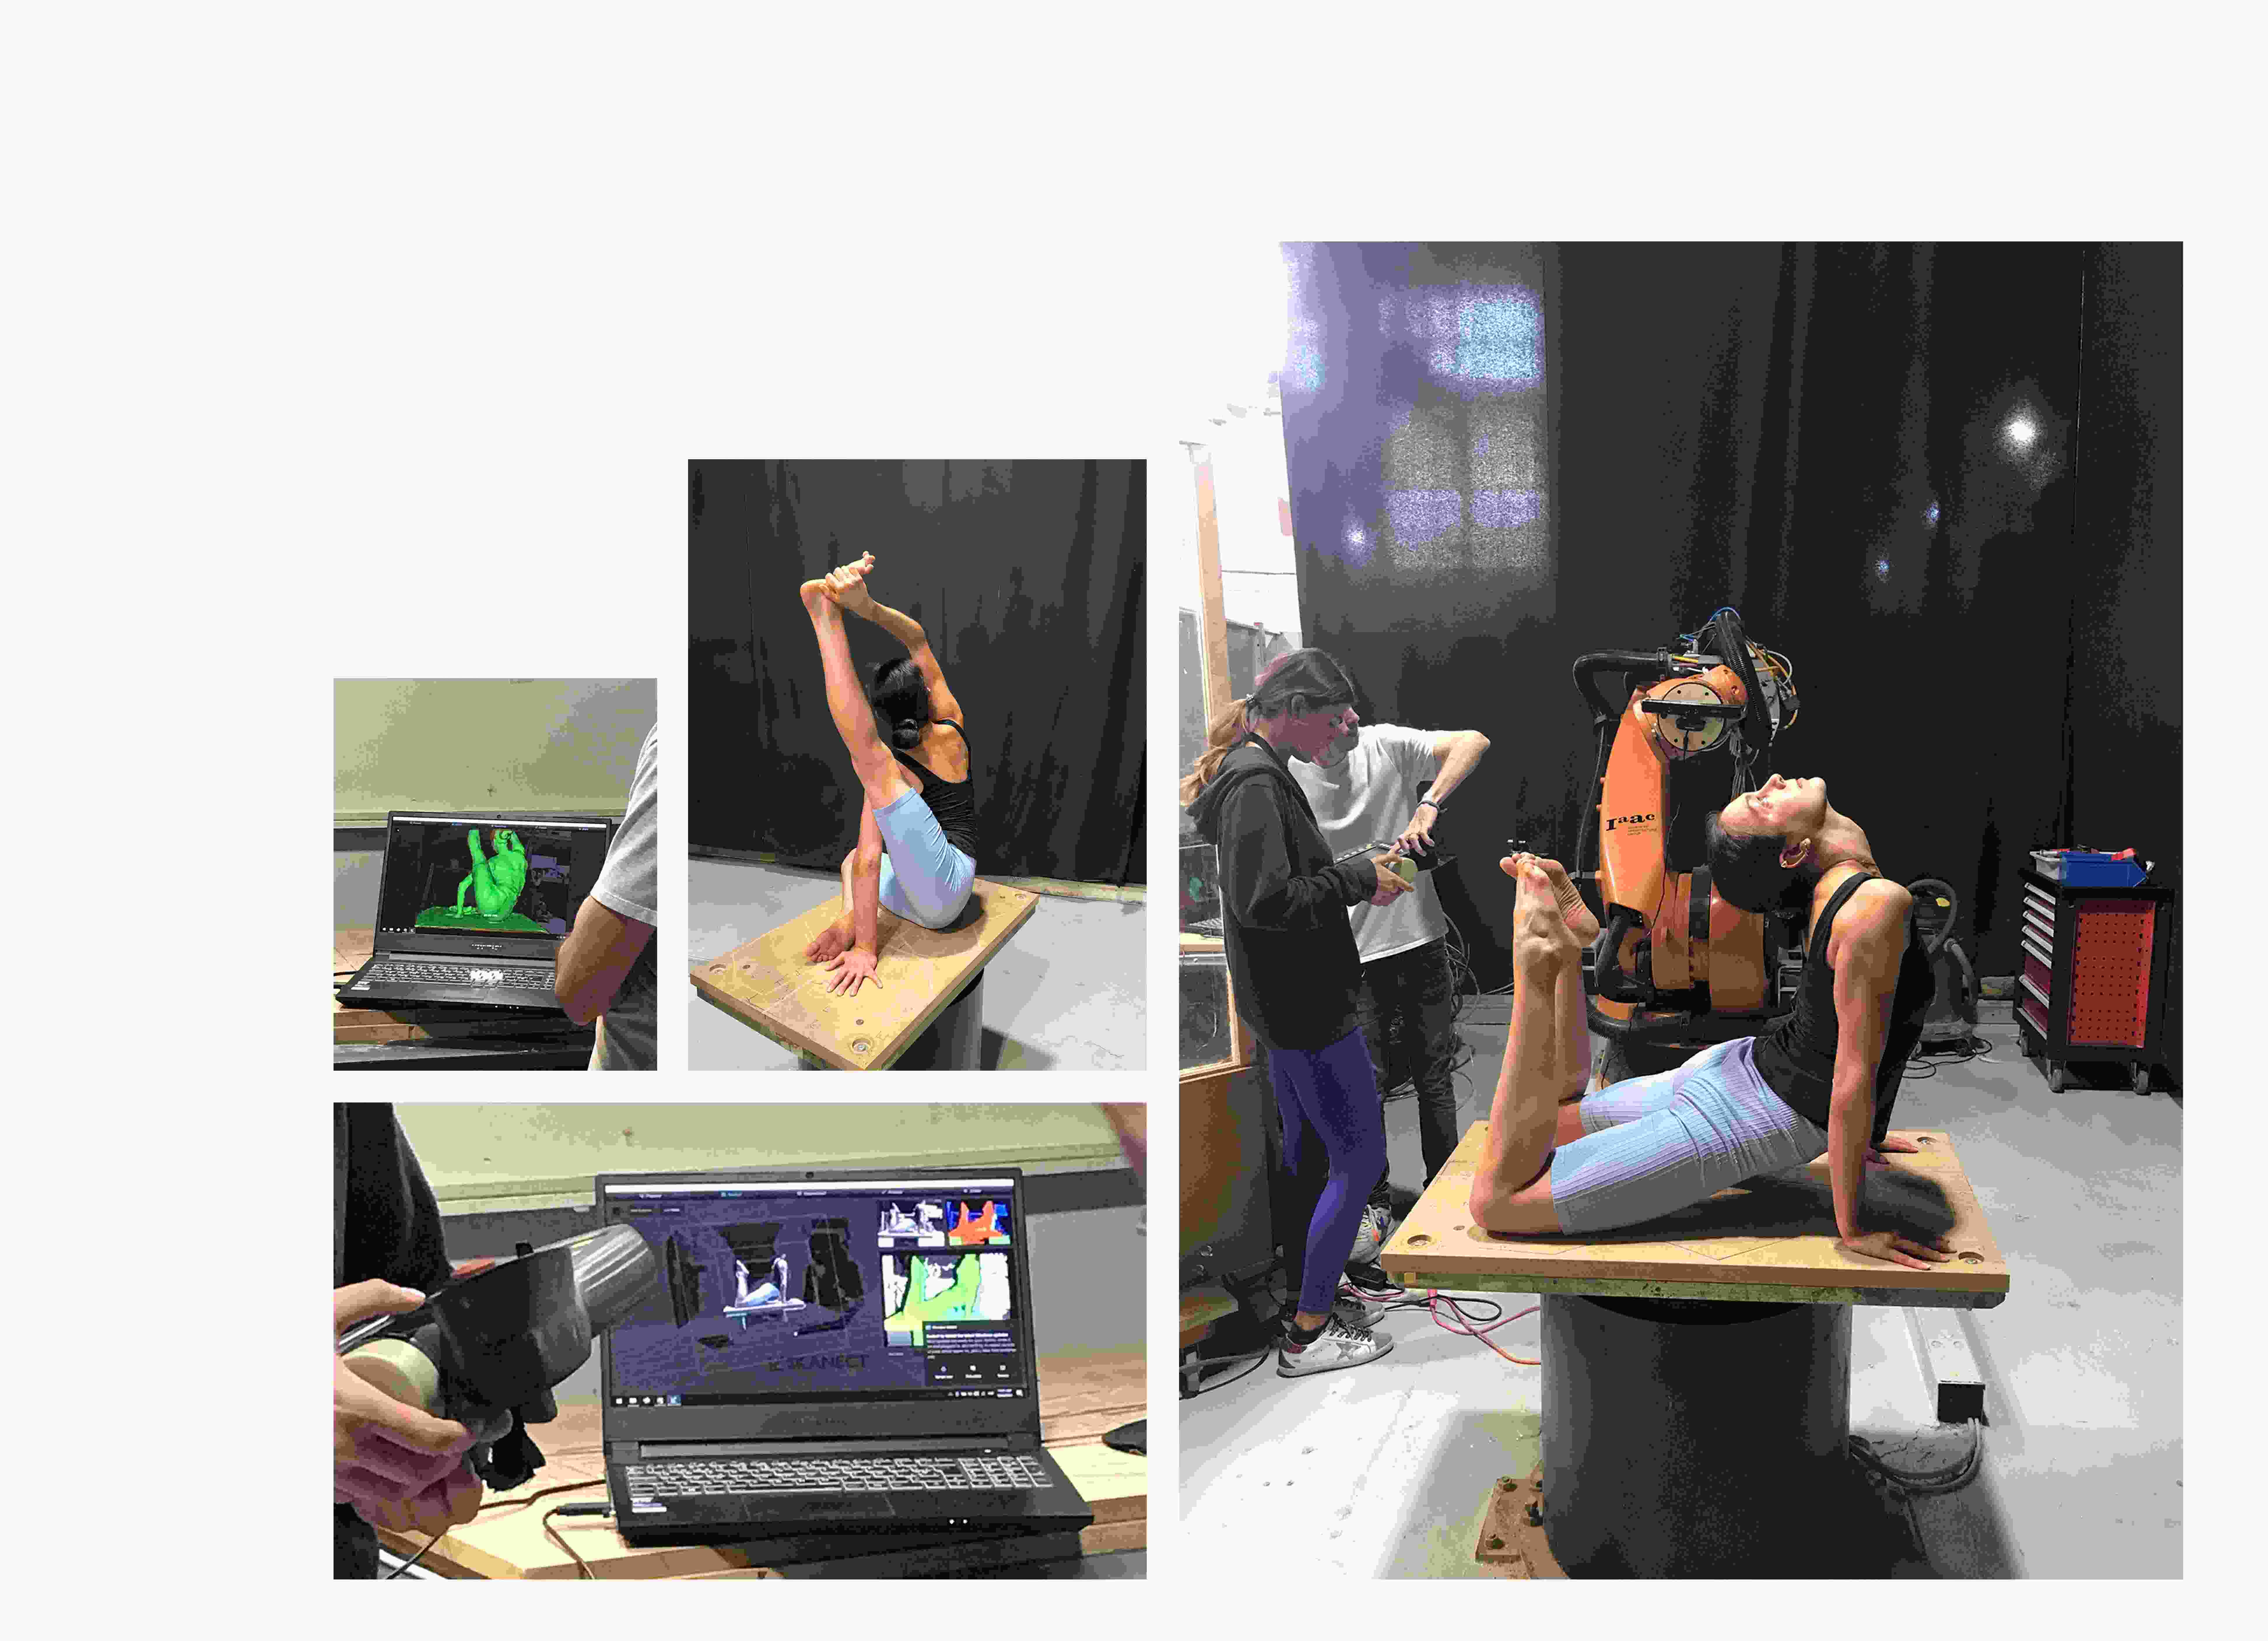
Finally, we tried one of me sitting and moving my arm while I was being scanned. I had initially thought that this would either give the scan one very wide arm or it would split my arm into a few versions as this could be something quite fun to play around with. It didn’t do either of these in the end, it just meant that the mesh was very incomplete and had a lot of details missing.

Overall, I thought the robot was surprisingly easy to operate, at least for the very basic movements that we need from it, and that the scans were very clear. I had tried 3D scanning before in my BA but this was done with my phone in my kitchen and the results were a mess
Laser Cutter:
I have had quite a lot of experience using laser cutters in the past so this wasn’t anything super new to me. I have only used one before with a technician so there were a few steps that I hadn’t had to think of.
Main focus points: - Need the file to be in rhino 5 format - Need the different steps (eg. engrave, cut 1st, cut 2nd) to be in different layers - Red = cut, Blue = vector engrave, Black = raster engrave - Might need to tape down the corners of materials like cardboard that can bent - Focus the laser by putting the little metal thing on the side of the laser and moving the bed up until it falls off - The settings for different materials are on the wall but still test on a small amount
3D Modelling Softwares
I have very limited experience with 3D modelling, in the past I have briefly used a few softwares such as blender and unreal engine but not getting to a point where I am comfortable using them or really at this point would remember how to. As a result, this week involved a lot of trying to get to grips with the various programmes we were using, after the intro tutorials we had I spent quite a while just aimlessly playing around with all the buttons to see what they all did.
Make Human:
- Go to modelling tab to change macro elements with sliding tabs (main to arms+legs)
- To return to a basic cameras angle use buttons along topmenu
- To mirror changes made use buttons along topmenu
- Entre specific messeauamente using ->modelling->measure tab
- Community tab can be used to download other options for customising
- Click floppy disk then save tab to save
- To use in any other software, need to export in stl or obj formats
Rhino:
- Import 3dfile, can put perspective view in rendered format and others in shaded (arrow next to view name)
- Command Polyline where you want to cut
- Command Meshsplit then select object then cutting line
- To close mesh – only work with flat cuts – command Cap, select object then press enter
- To add holes, add polygons through object, command MeshBoolean and select objects, mesh will already be closed
- Export, select object, use stl or obj formats, save, do not tick any of the option boxes

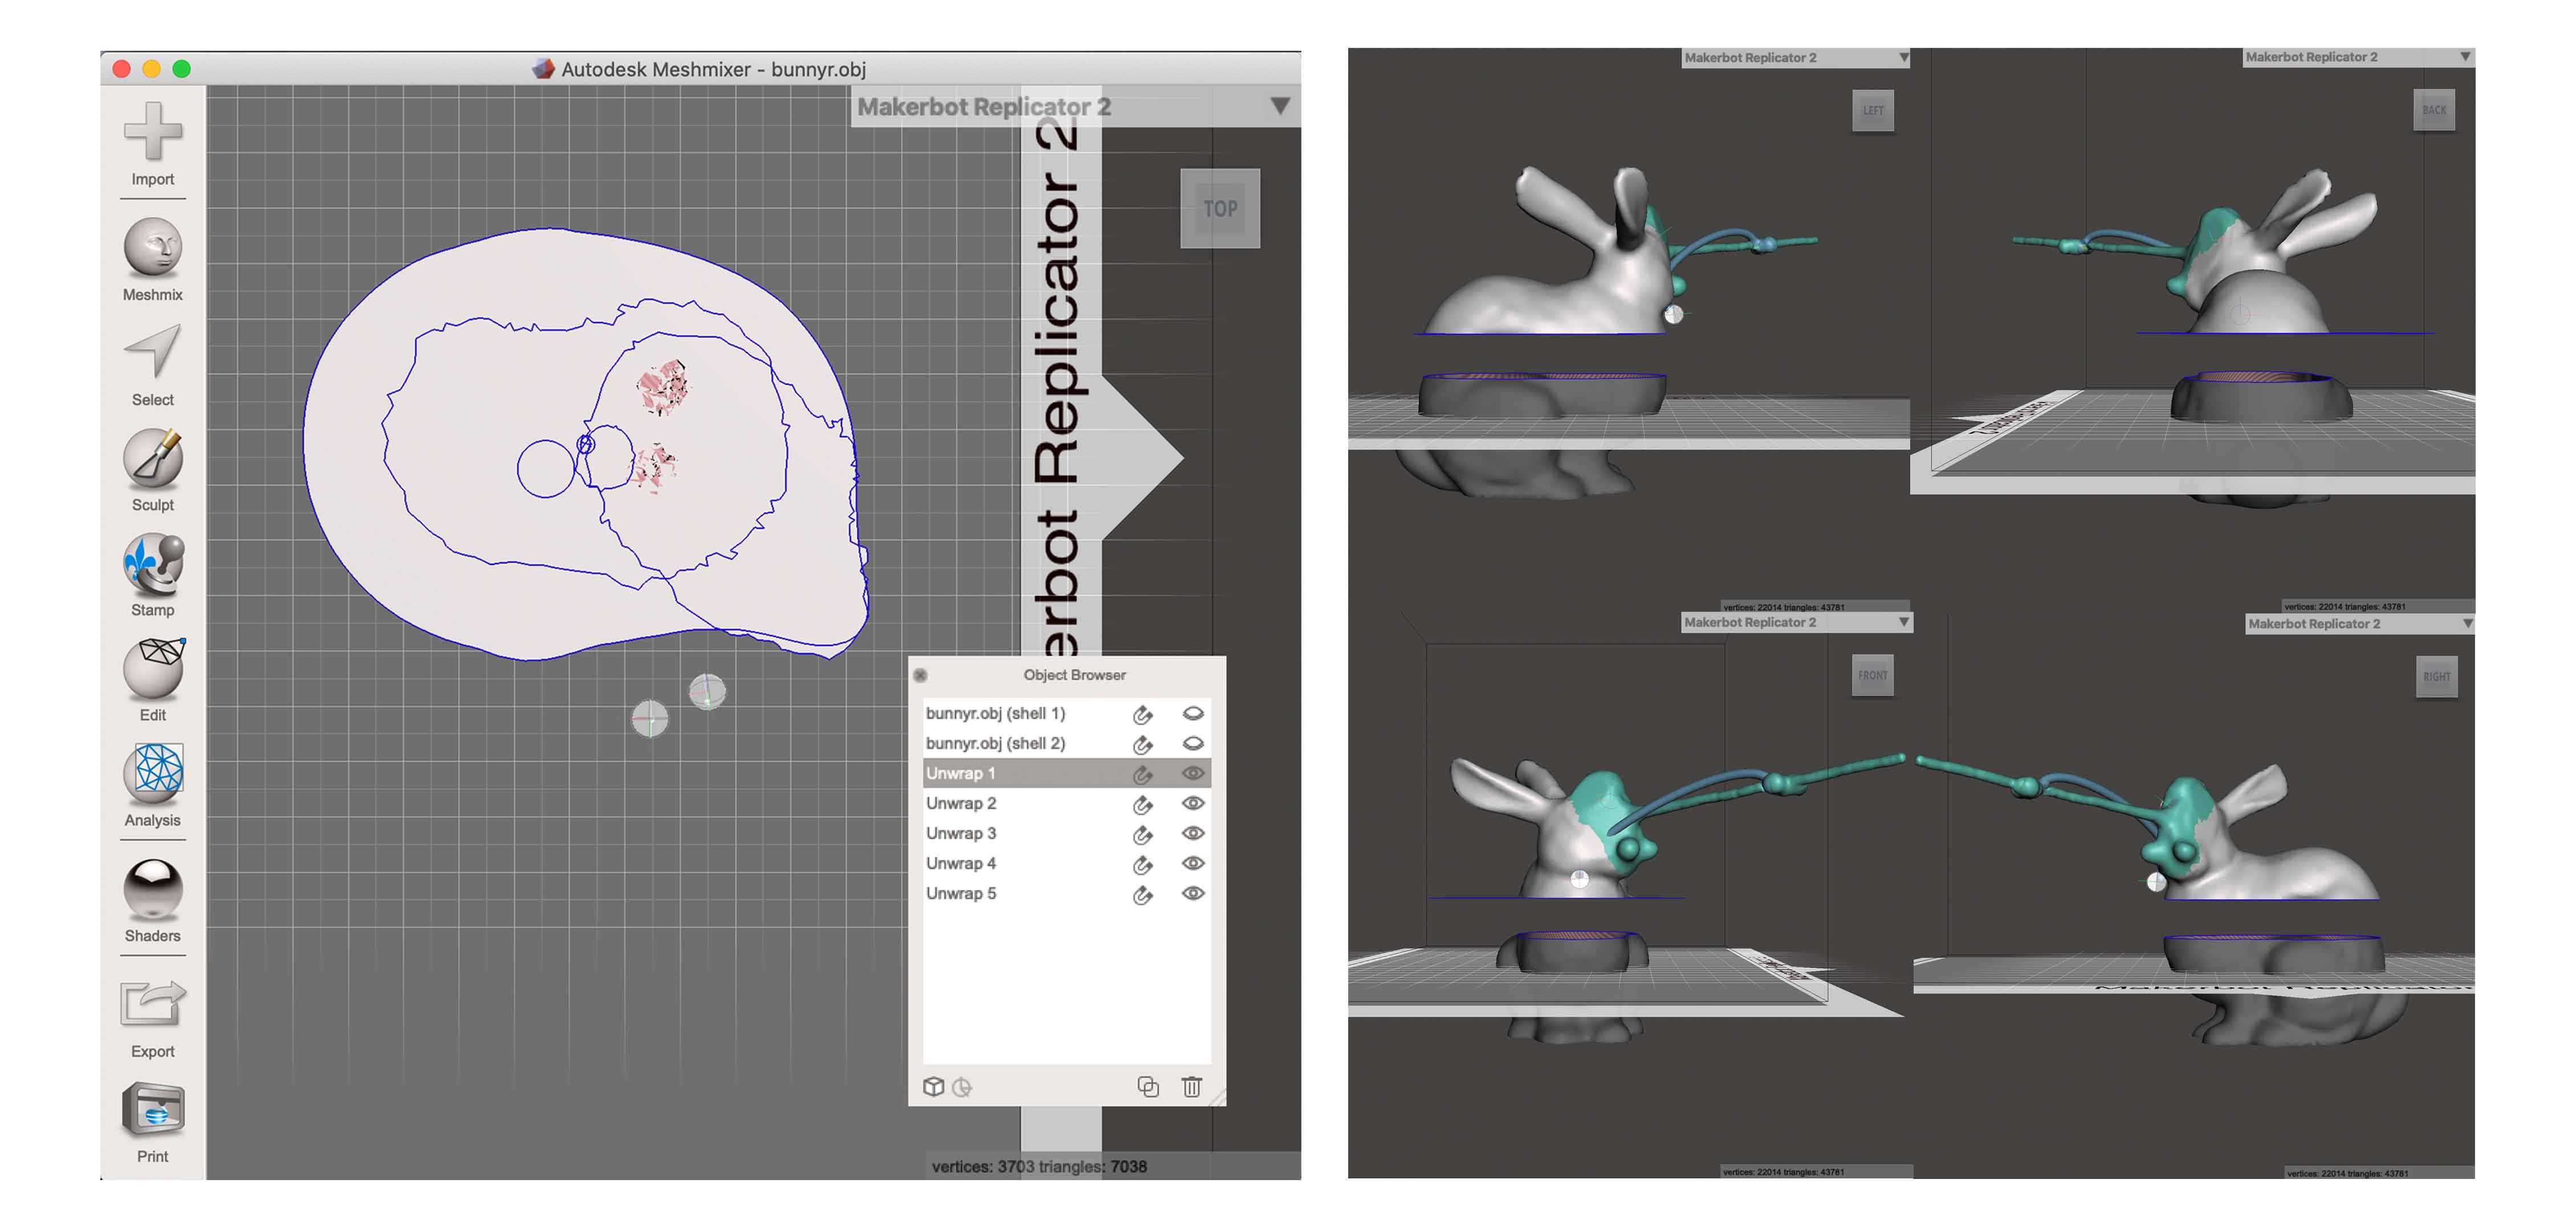
Meshmixer
- Use to sculpt pre made 3d objects
- Has a selection of different tools to deform and augment
Slicer
- Import object, change up axis to z to align correct
- Change unit size to mm and click original size – or alter to fit – click uniform scale
- Manufacture settings – select size of machine you will be using and material
- Construction techniques – select techniques and the parts necessary will be shown on the right
- Blue parts will not stay when built, e.g. too small
- Assembly steps shows step by step process of putting the parts together
- With stacked technique - select slice direction to add dowels to hold together without glue and it add the holes for them, can change settings, can make the pieces hollow
- Different techniques have different setting to alter
- Red pieces mean either the piece is too big for the material sheet or it will not hold when built, need to alter the construction
- Can select and move the individual pieces until they are all grey to make construction work – may need to go back to 3d object to change shape there
- Use axis around the object to change the direction of the slices
- With interlocked slices, select manufacturing settings – change slot offset to make them fit when cut out
- Folded panels technique – don’t do full scale, change vertexes for definition, can remove specific seams, can change the joint type
- Save to computer to save file to keep working on, and so you can access the assembly steps
- Click get plans in bottom left corner to export plans, as dxf (will export a zip of all the files) or pdf
Rhino/Inkscape/Illustrator to optimize the plans:
- Fit pieces on as little material as possible
- Remove unnecessary holes from pieces using basic selection tools
- Can add engraving or extra details if wanted
- Select area to make test cut of important parts like slots (pieces don’t actually need to go together as all slots are same widths)
Weekly project:
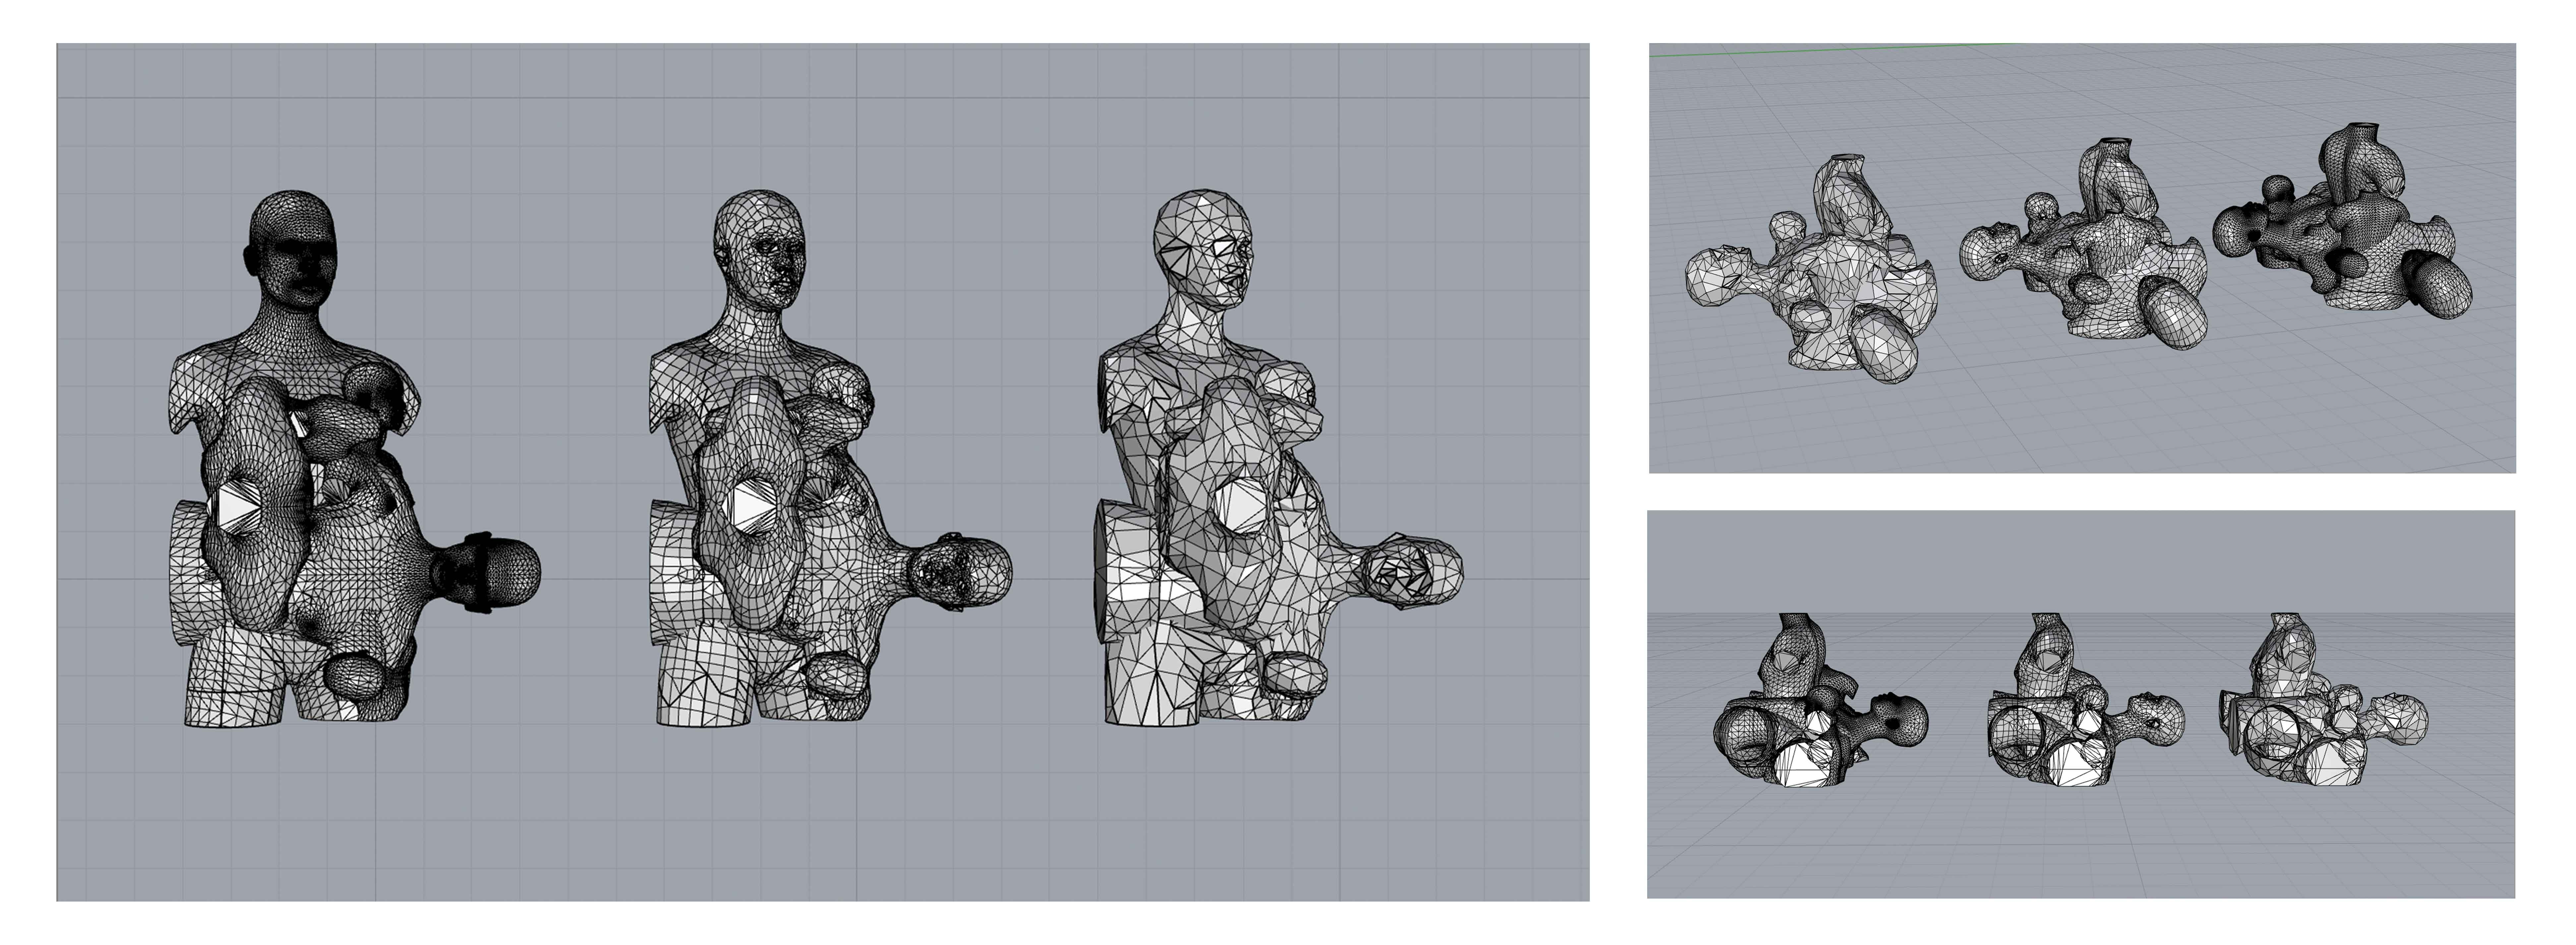
For my mannequin this week, I wanted to play around with layering different perspectives of the human body in the same space to explore different interactions between each other and their environment. To start, I began by importing the 3d scan we did of myself to Rhino and trying to break it up into different iterations by slicing and abstracting it. I did like the way this looked but I found the scan of myself a bit complicated and wanted to try with a more basic model.
To try layering and combining, I imported a basic model from MakeHuman to Rhino. I made a few copies of the model in different orientations and sizes and began slicing them into smaller sections. I trialled a few different ways of combing a selection of the slices to see if I could make model I liked out of these but I found that the sharpness of the slices didn’t really work and it was hard to make them seem like one object and not just lots of separate parts sat near each other.
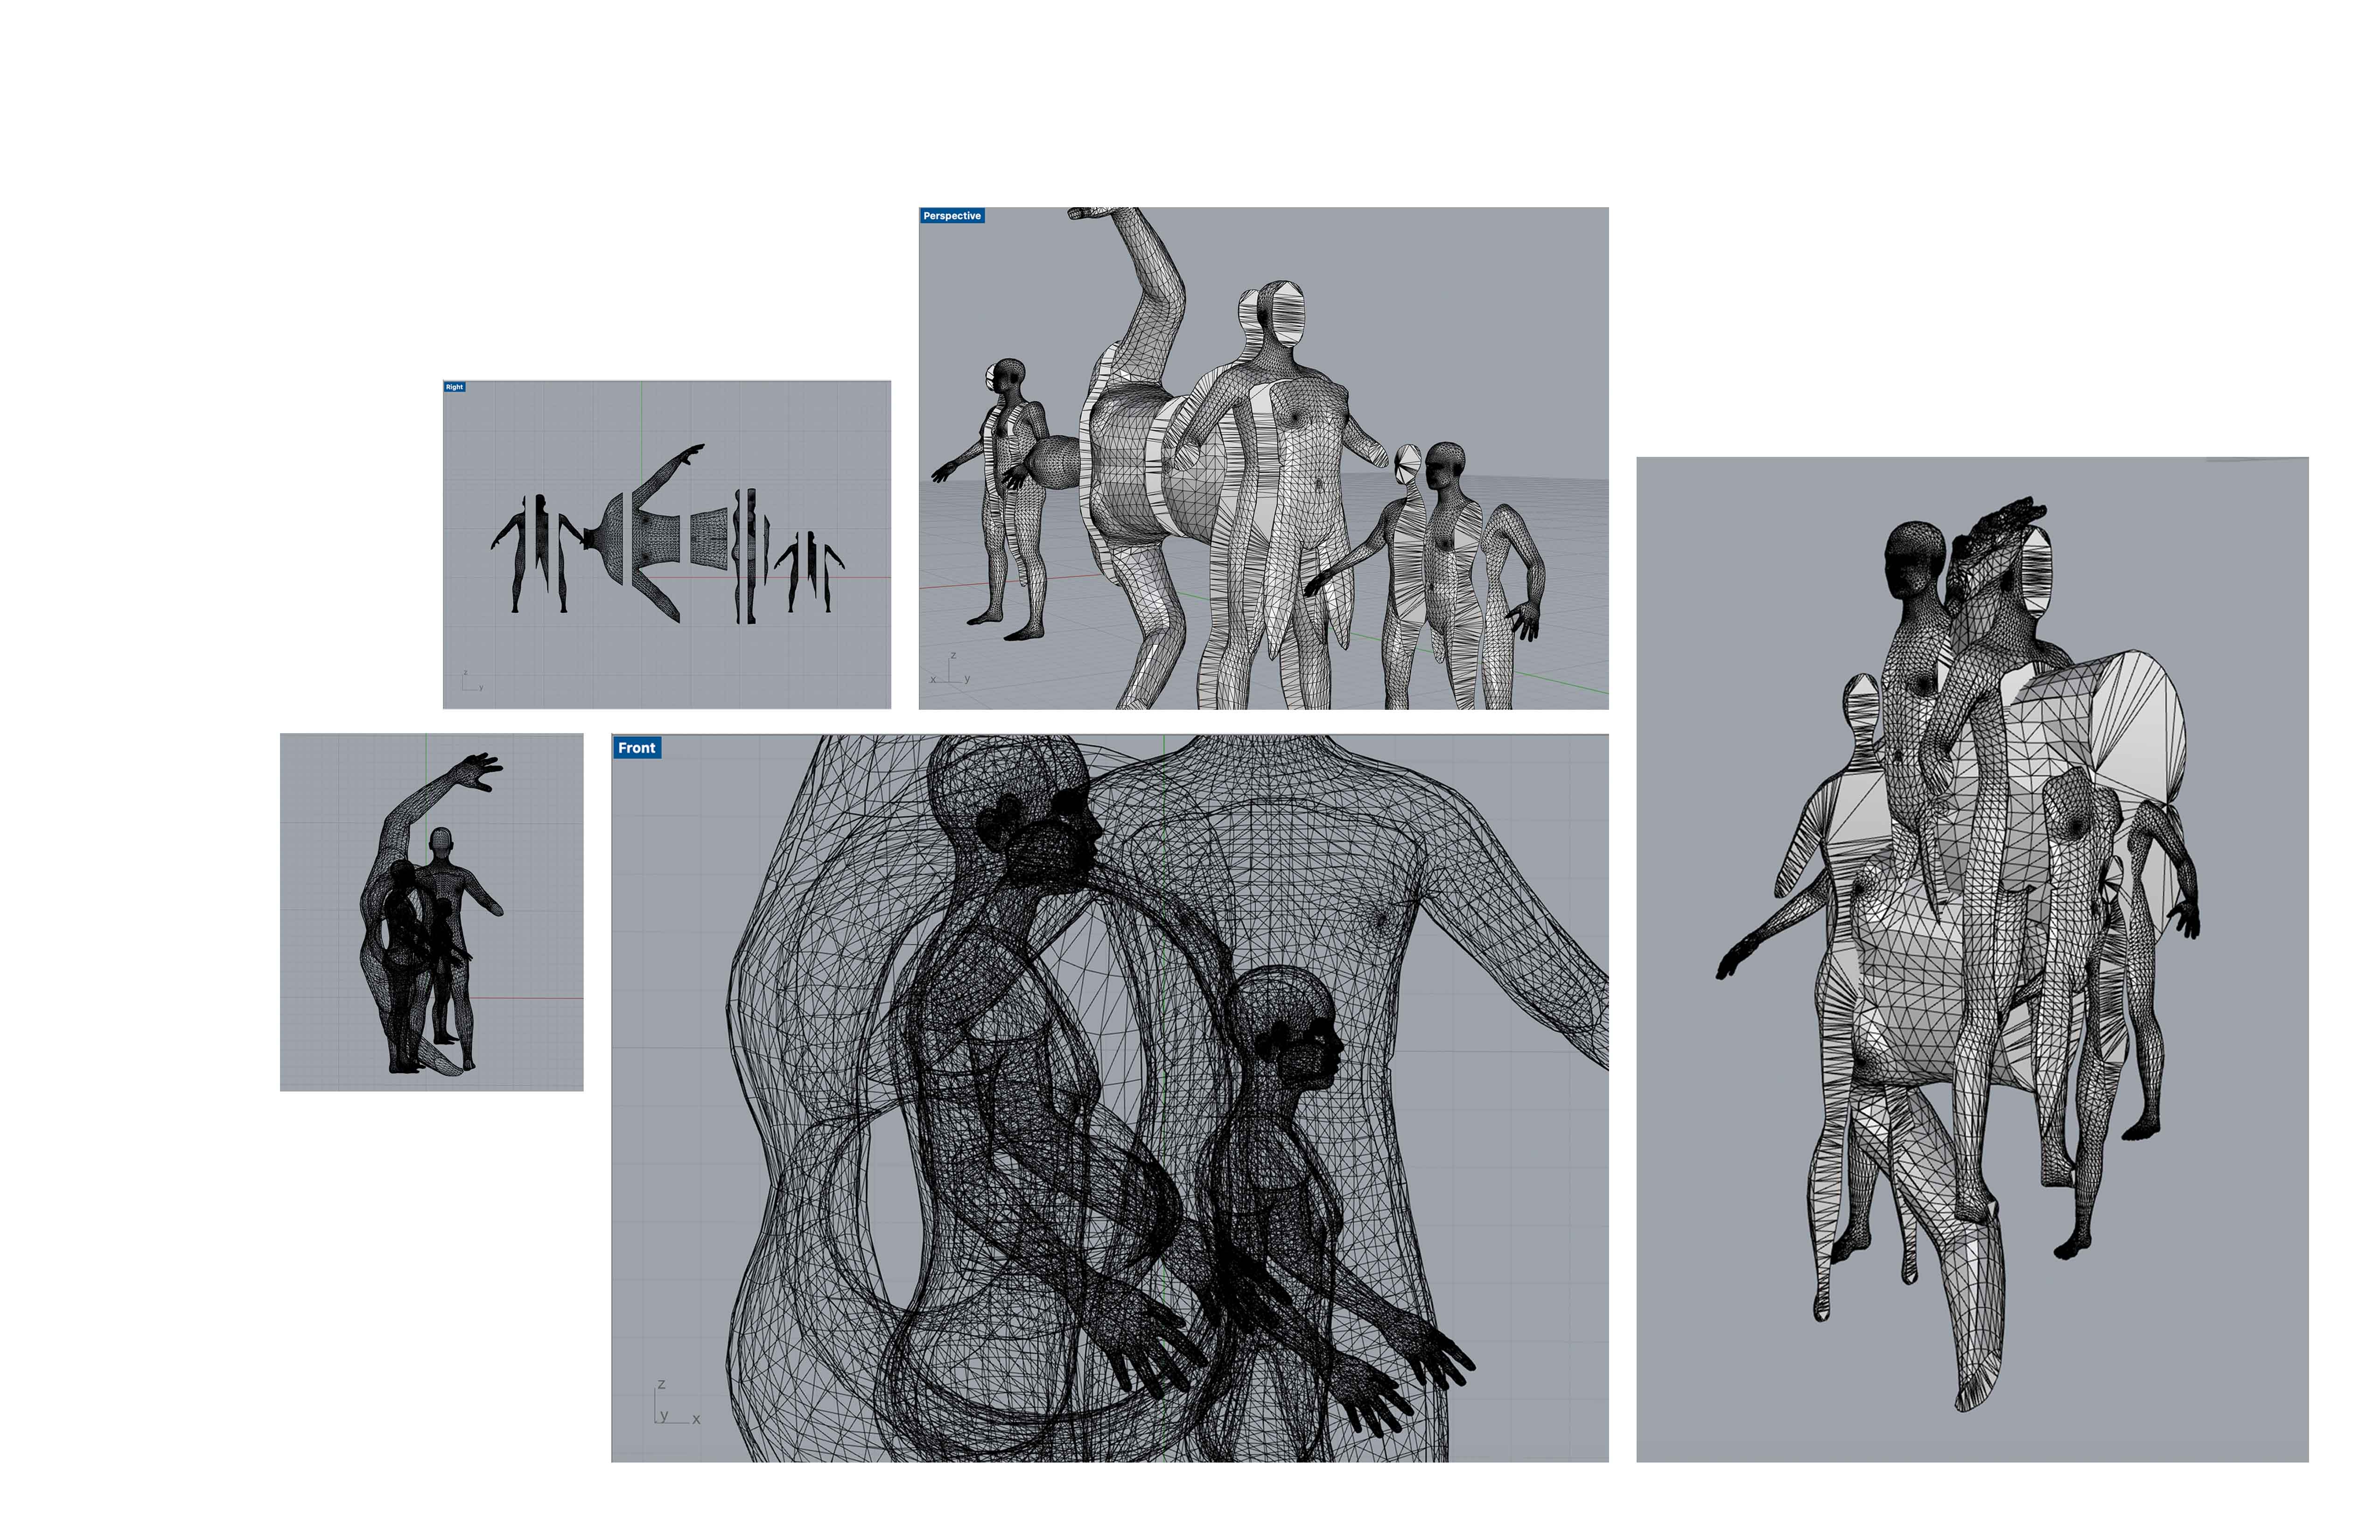
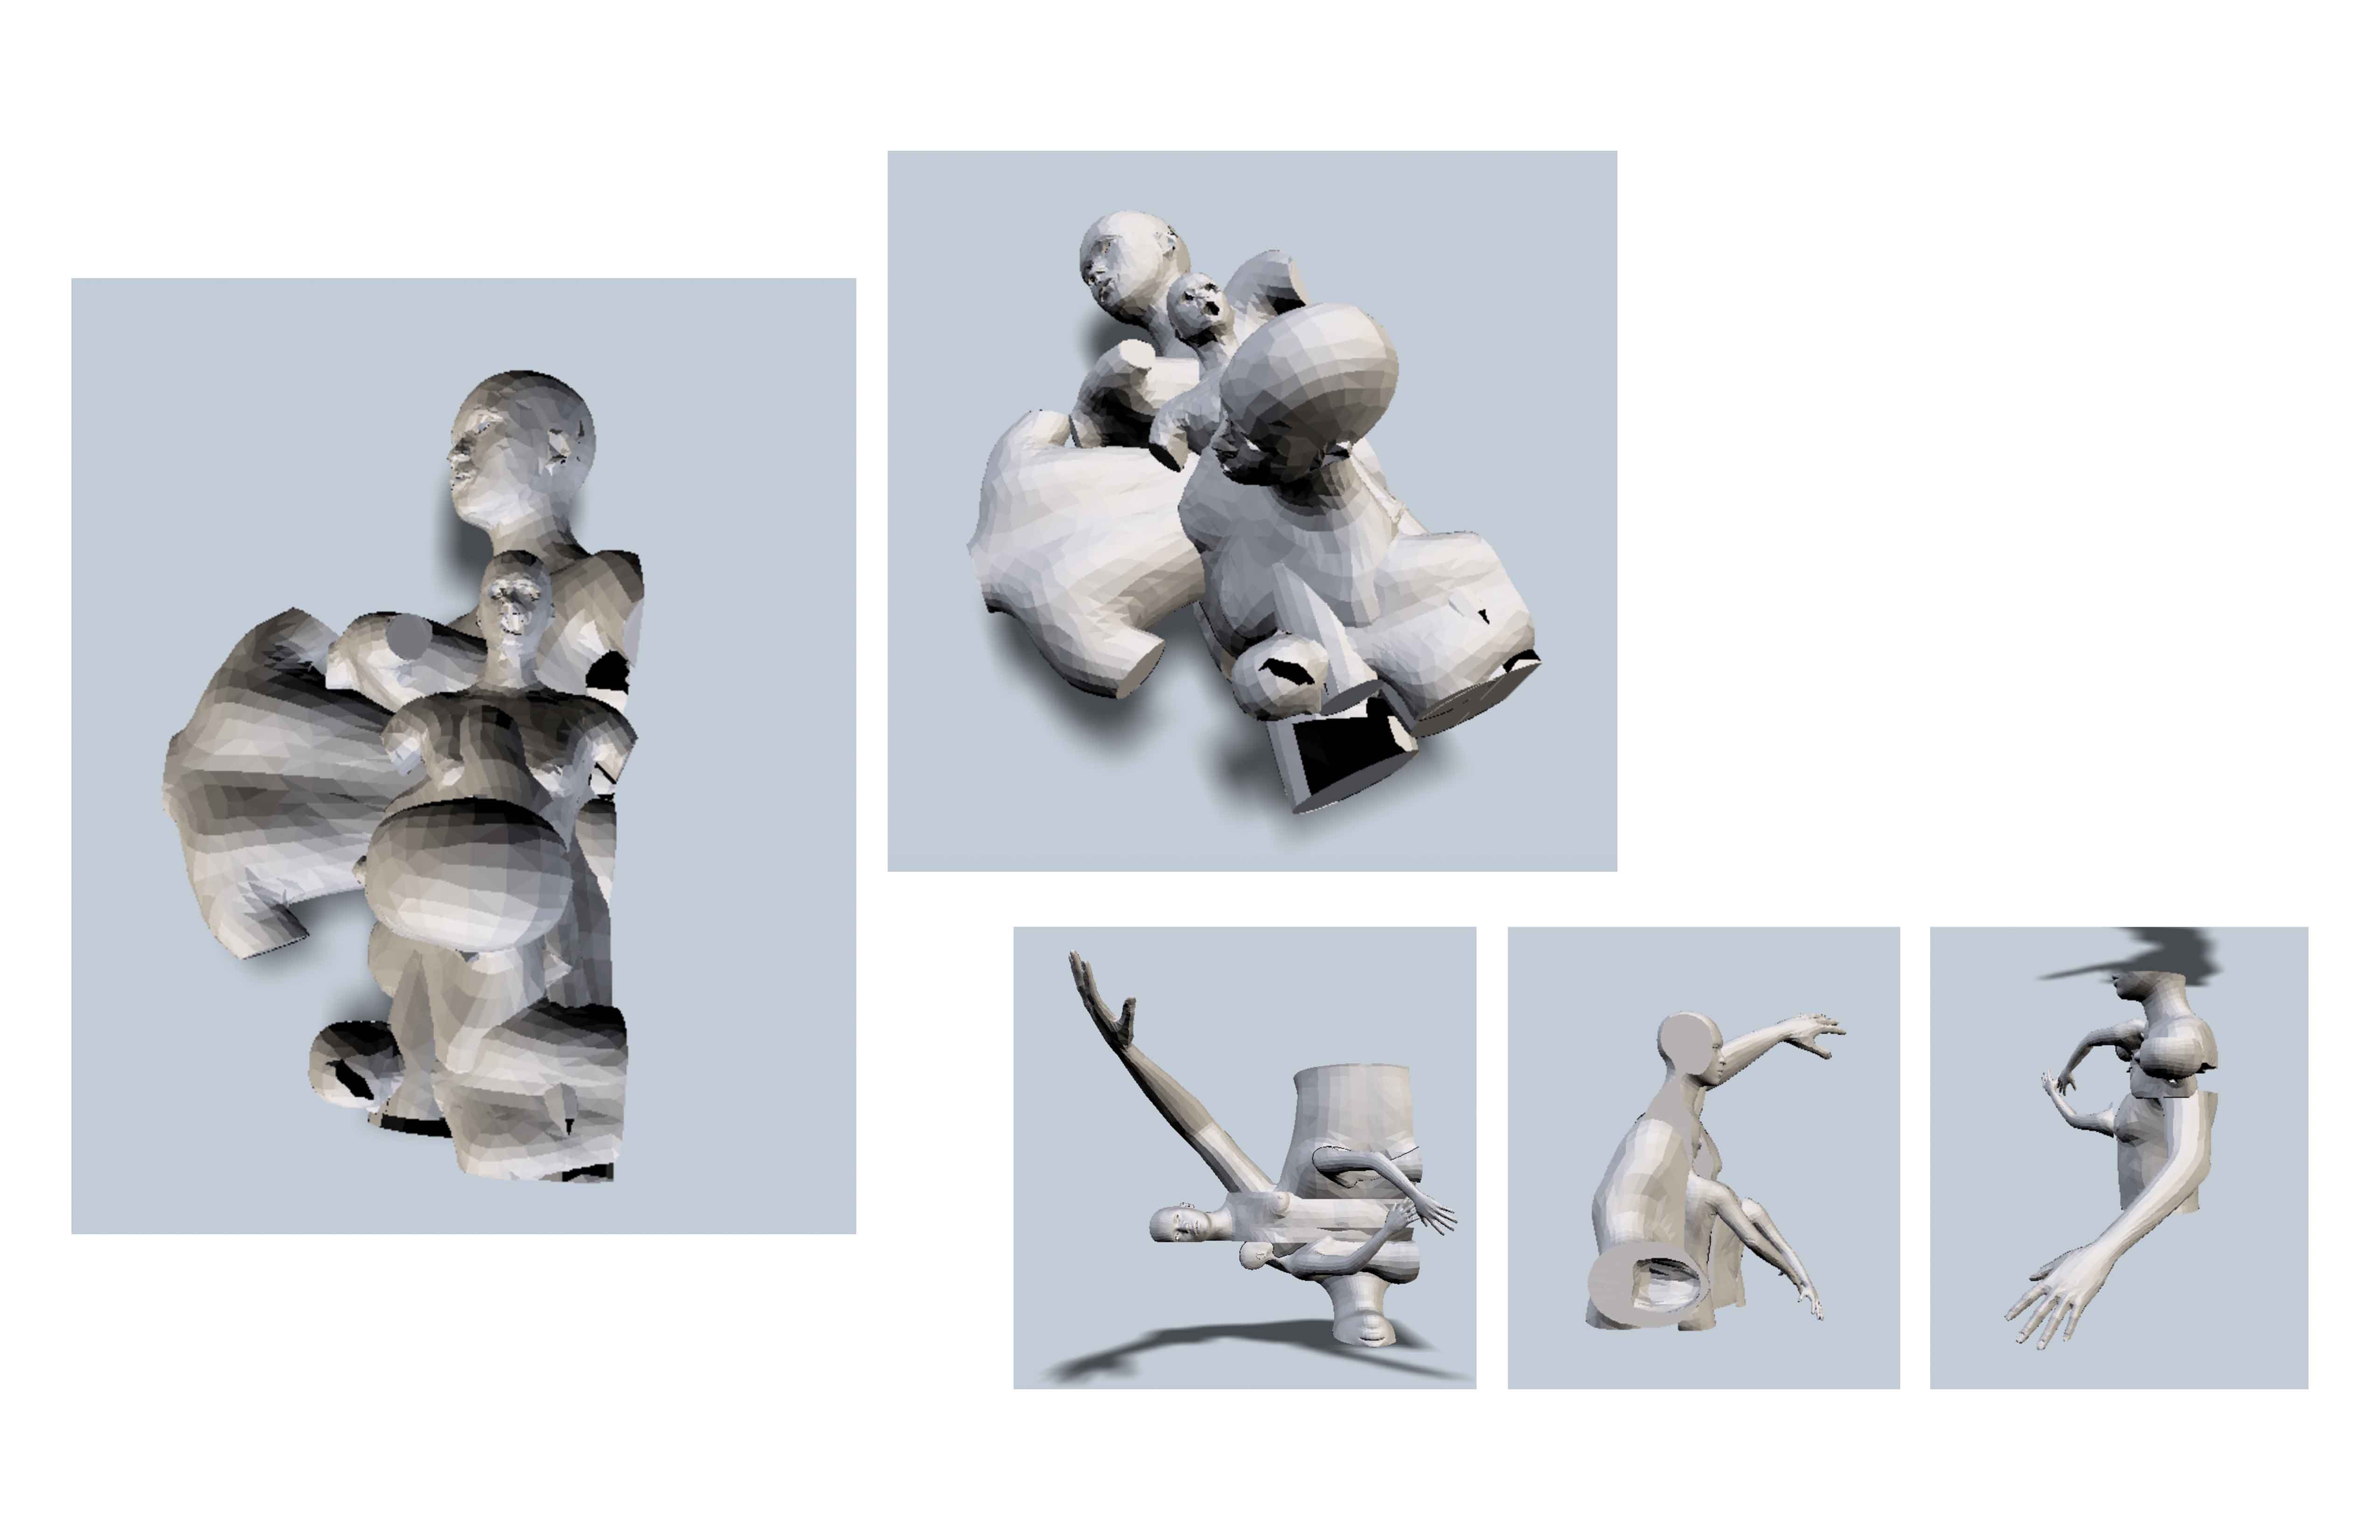
To try to smooth out the model a bit, I stared again with a few different sized full models and began to combine them so that there were smaller bodies sort of protruding out of larger ones. I really liked the effect of this and did want to try to physically make this model but there was a lot of problems with the mesh that I didn’t know how to fix.
When I imported both of these types of combined meshes into slicer to see if I could use them, there were a lot of problems with the models. As the meshes I had made were very complicated and I had no previous experience in rhino, they weren’t very well made and it meant that the models had a lot of holes and didn’t have the desired shapes. As I was running out of time in the week by this point, I decided to try to simplify things a bit and start again one more time.
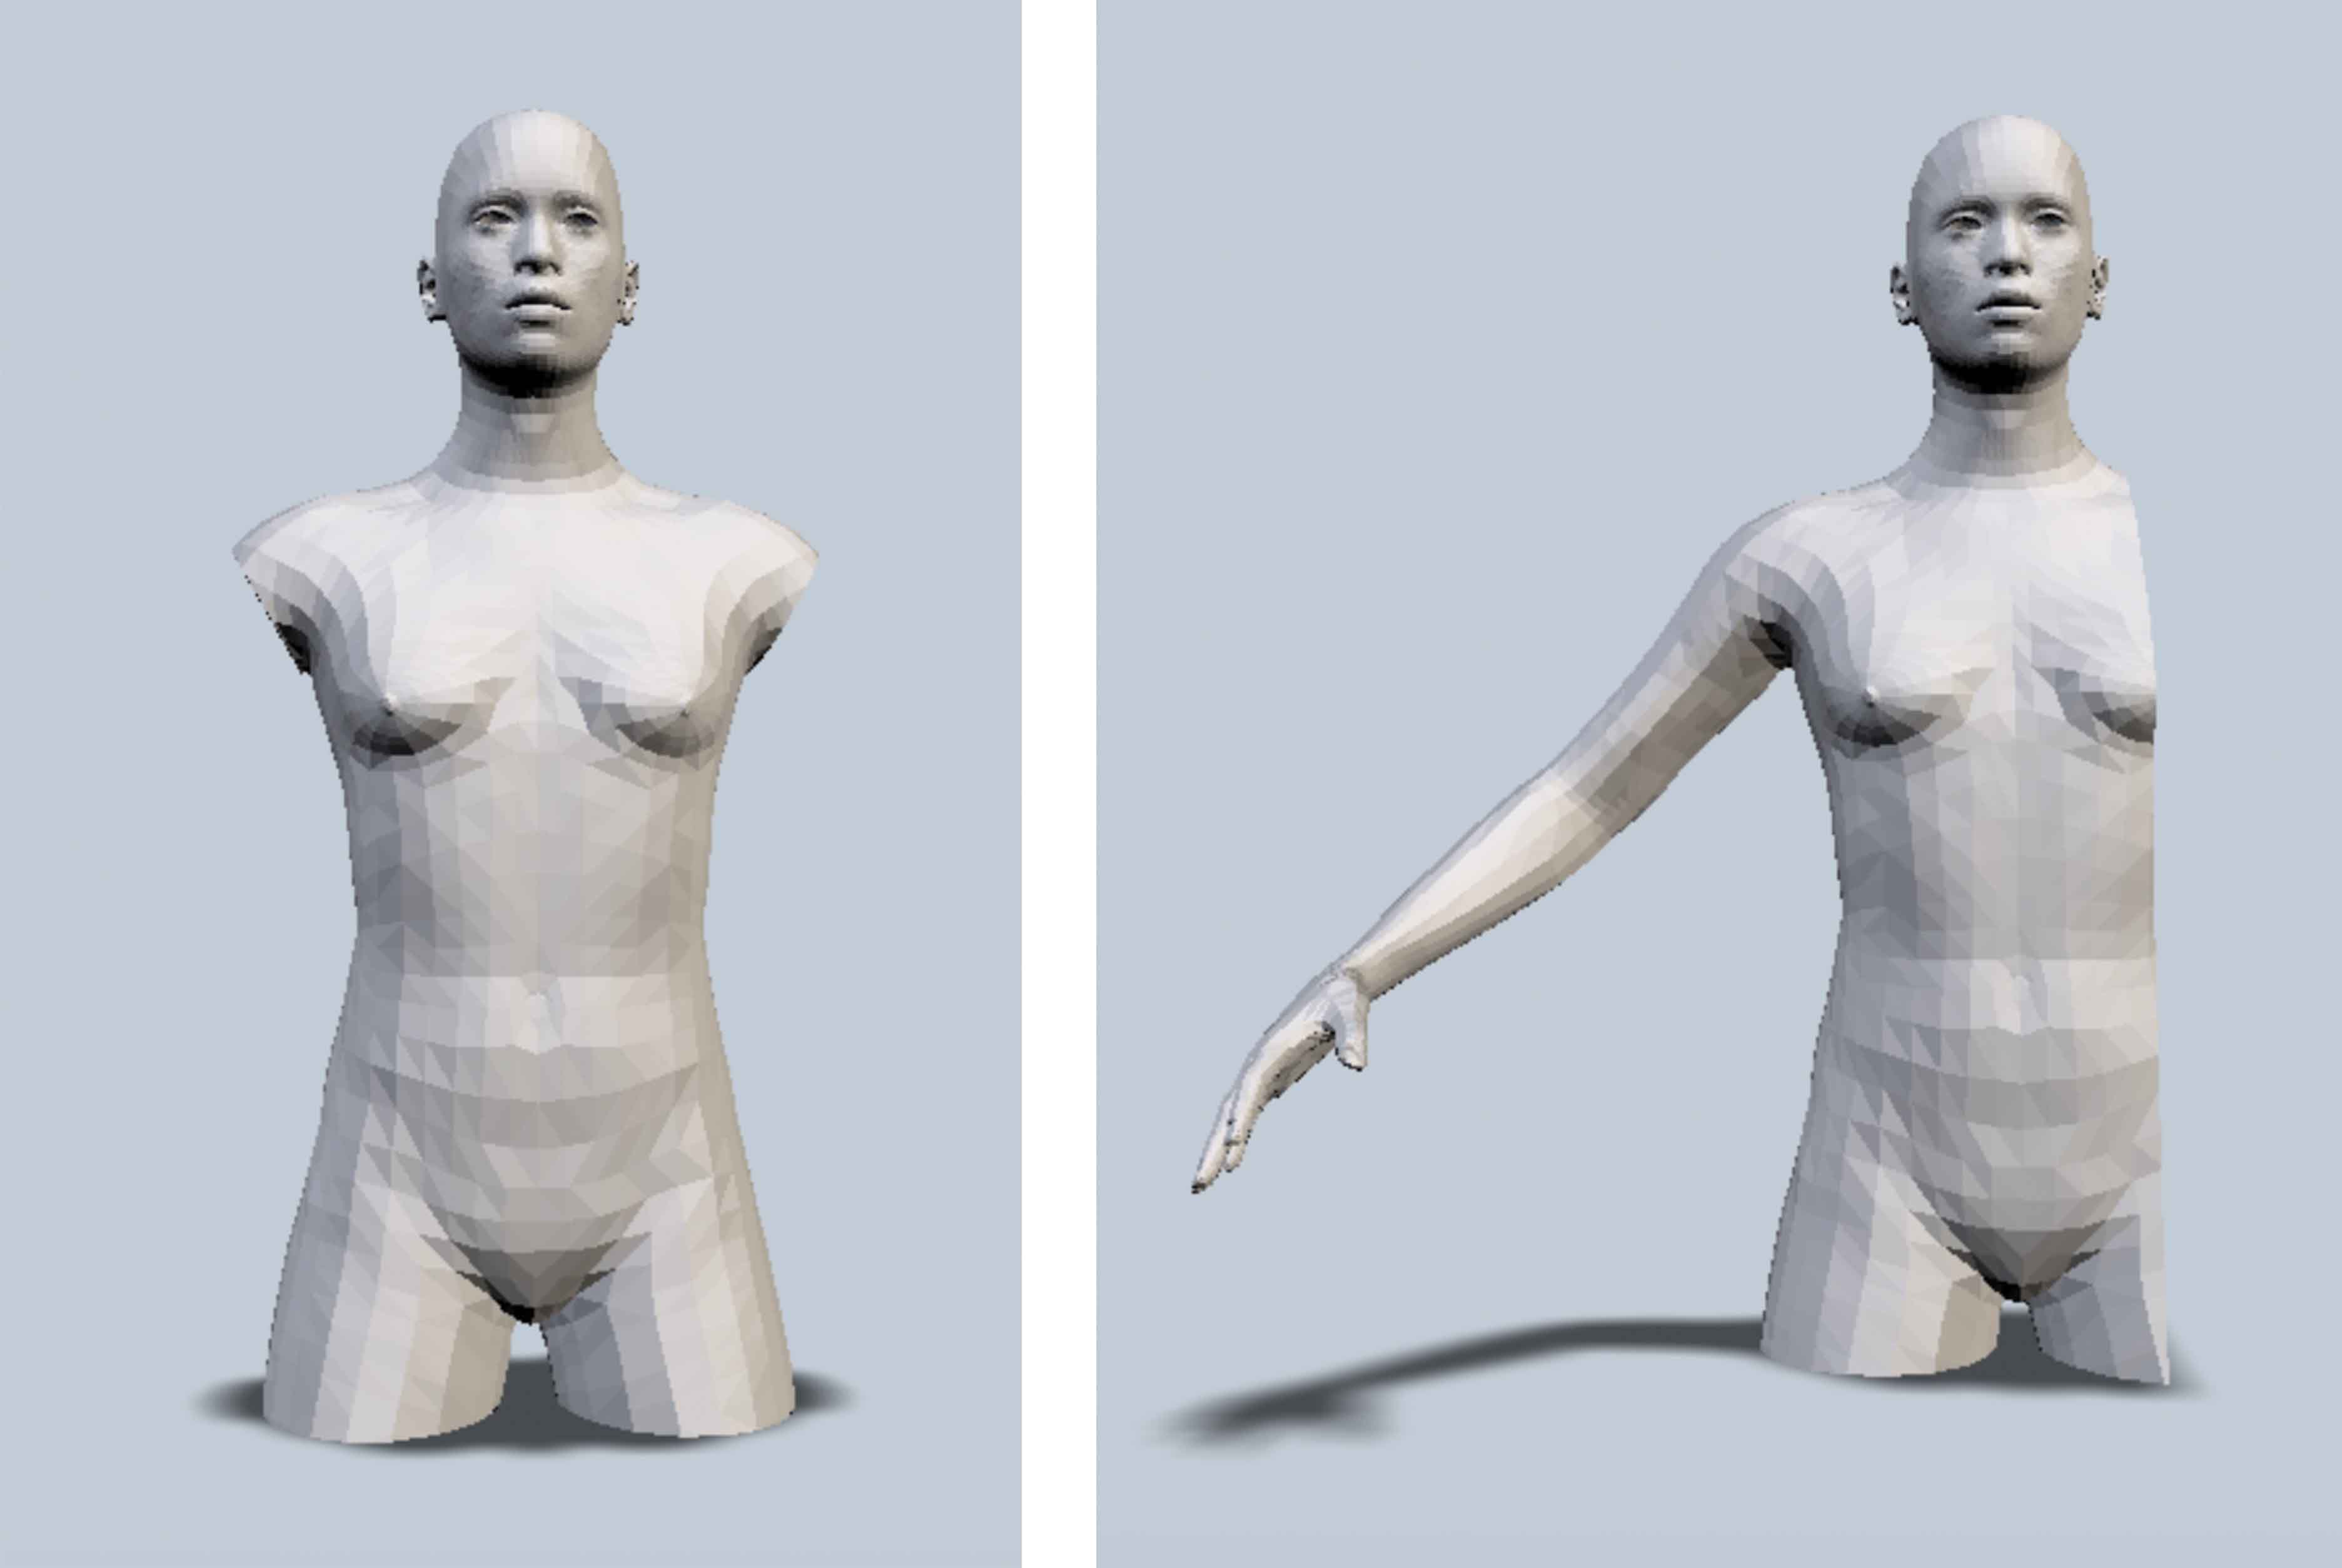
In the end, I decided to try doing the combination physically rather than in rhino. I decided to use 2 simple models from MakeHuman that I hadn’t edited too much so I knew the mesh would be ok and extracted 7 different stacked plans from these. I then went through these 7 sets of plans and cut them down to about ¼ of the pieces each so I wouldn’t have too many pieces to combine but it was still more than 1 model’s worth of pieces.
I then laser cut these selected pieces in 3mm cardboard and began playing around with the construction of my mannequin.
The settings I used for the laser cutter were:
| Power | Speed | Hz |
| 30 | 1 | 1000 |
I did the layering very intuitively just positioning the pieces until I found a way I liked. In the end, I made 4 half mannequins that I needed to join together somehow.


I wanted to try to keep some of the idea of movement and changing perspective in the final piece, so I wanted to join the 4 parts in a way that wasn’t too static. I did this by joining the end 2 mannequins with screws so they could be moved into different positions to show they different layers of the mannequin.
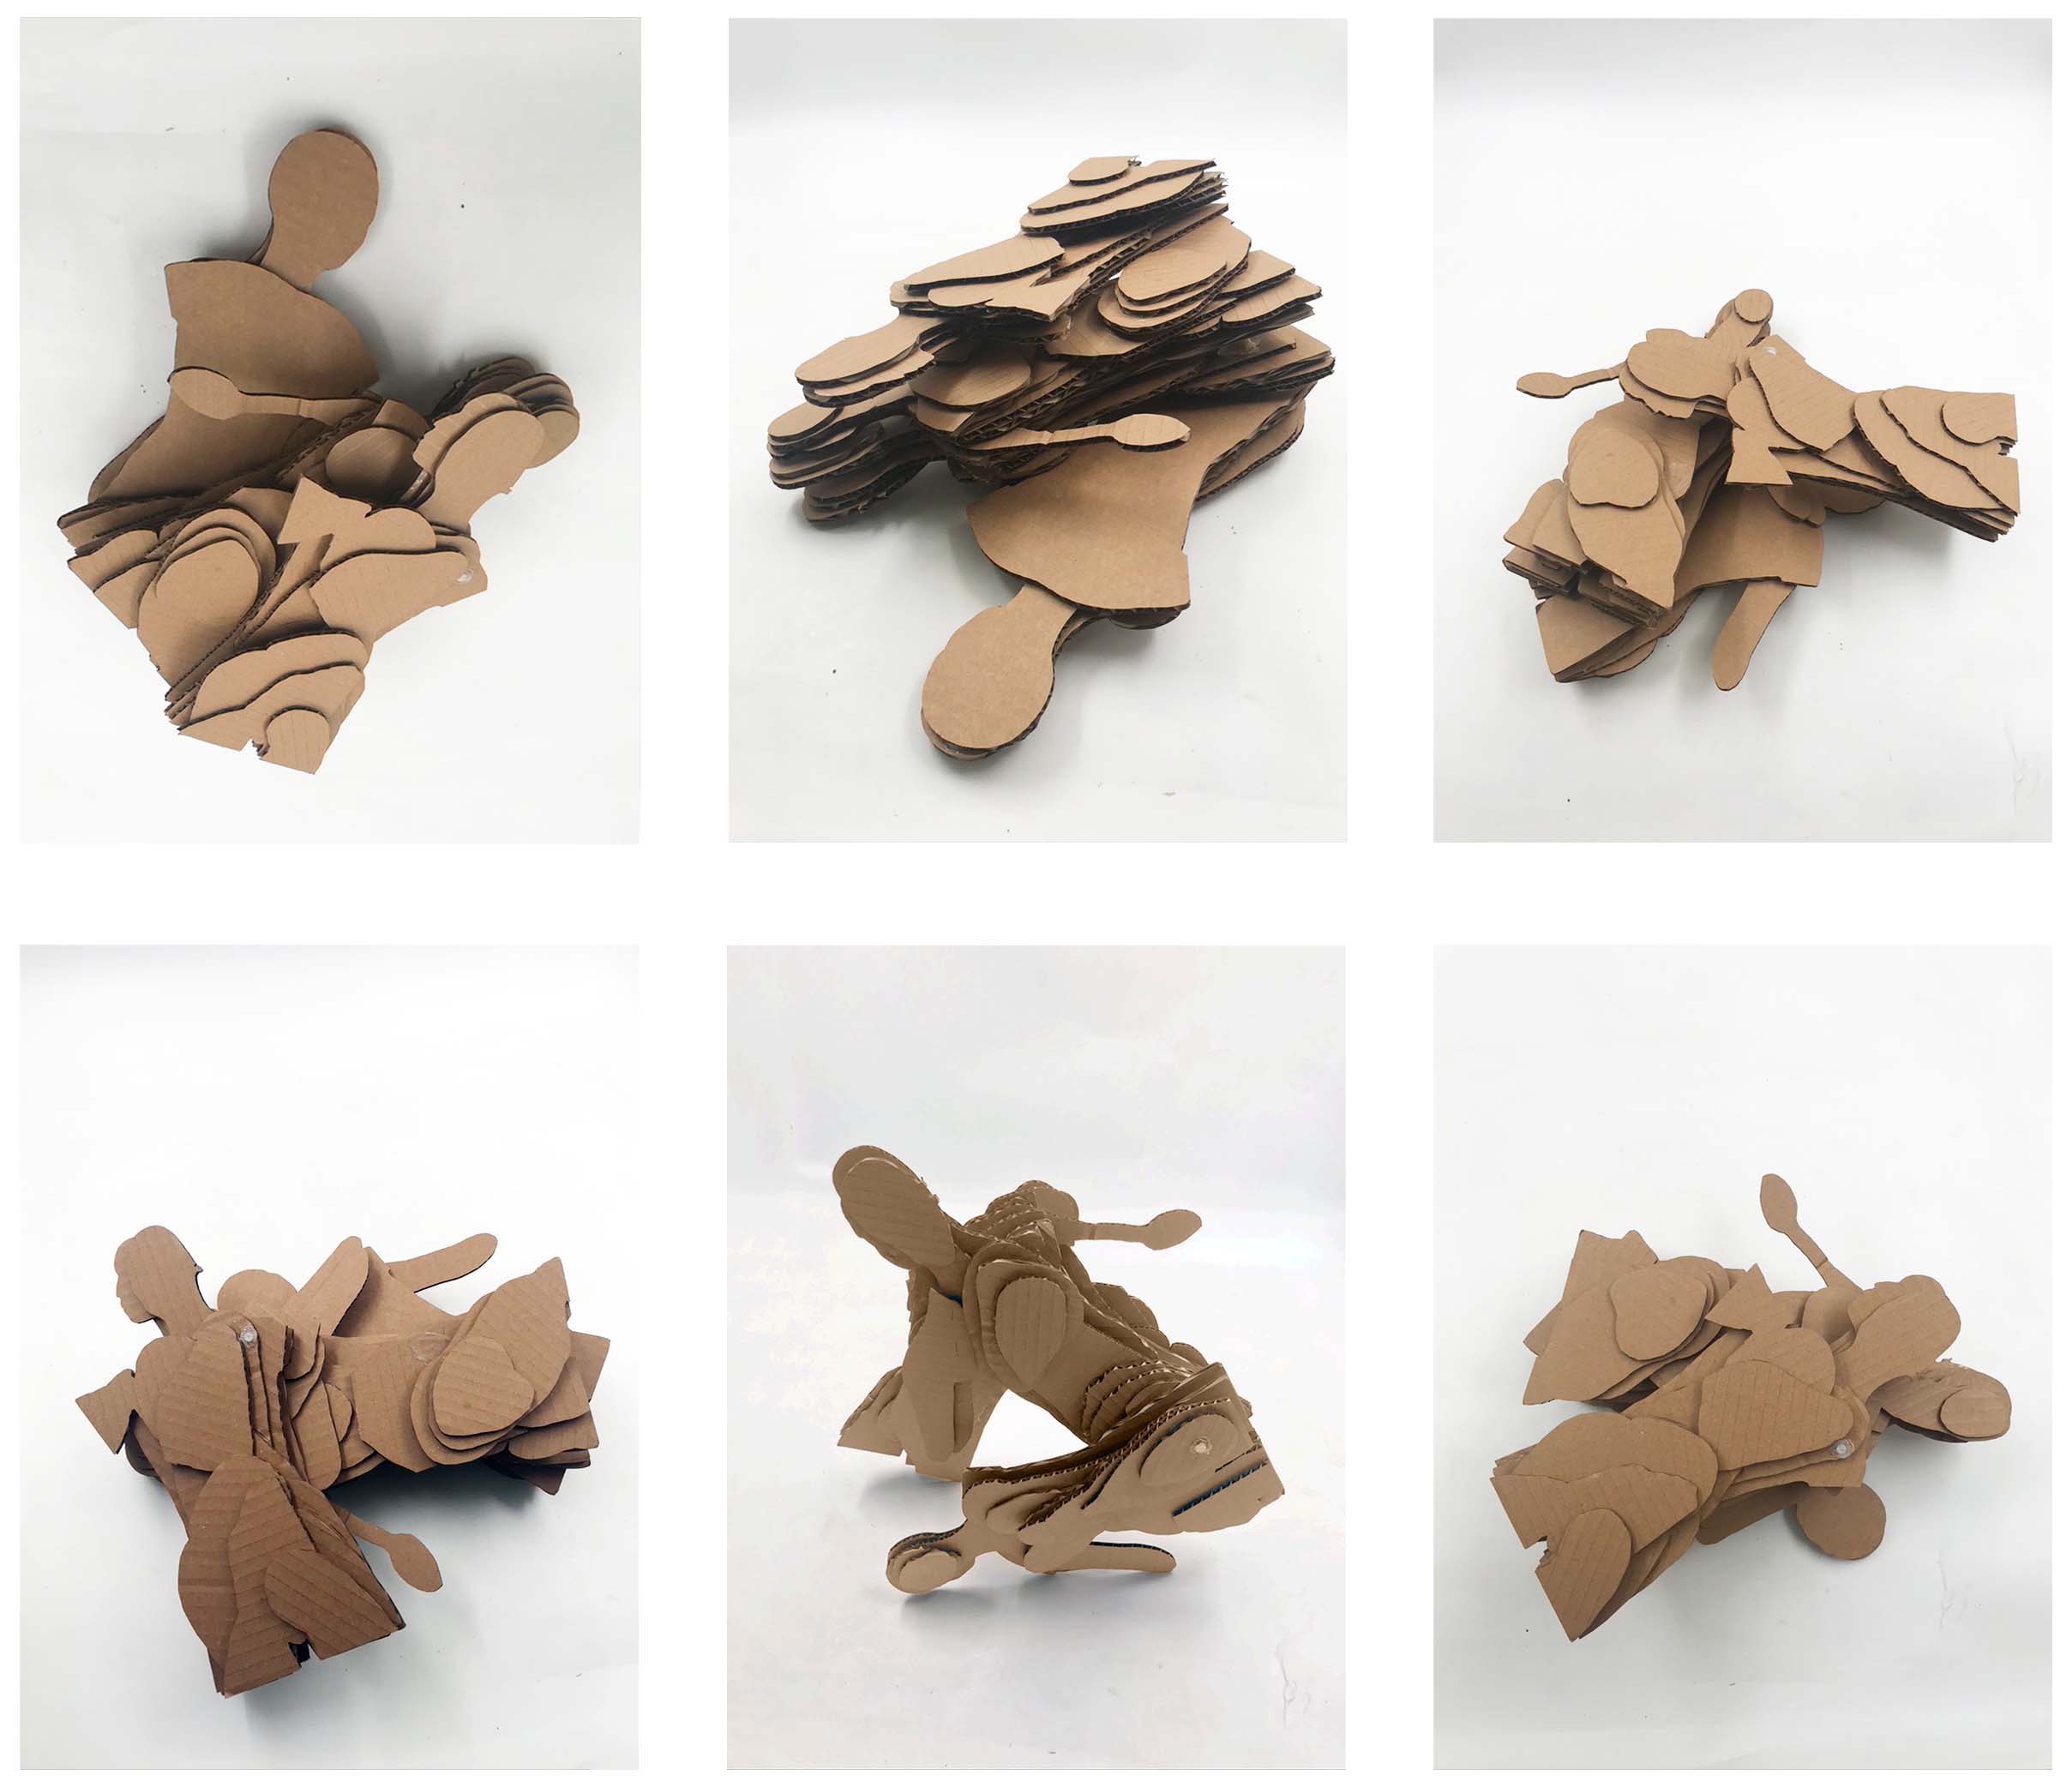
Overall, I wasn’t very happy with the outcome of this week, I thought it was quite static and flat and didn’t really express any of the things I had wanted to explore initially. I also would have liked to have done more of the actual construction work using the softwares not just relegating it to physical. Despite this, I was quite happy with how much I learnt about all the softwares we used as I had no idea about any of them at the start of the week so it was always going to be slow.
---
Fabrication files
Fabrication files uploaded here: Plans to Laser Cut