7. Computational Couture
weekly assignment
Check out the weekly assignment here or login to your NuEval progress and evaluation page.
get inspired!
Check out and research alumni pages to betetr understand how to document and get inspired
- Dinesh Kumar
- Margret Guttormsdottir
- Ala Janbek
- Laura Civetti Barcelona 2019-20_
- Sara Alvarez TextileLab Amsterdam 2020-21_
- Loes Bogers TextileLab Amsterdam 2019-20_
- Batoul Rashdan Techworks Amman 2021-22_
- Haneem Jaafreh Techworks Amman 2021-22_
- Louise Massacrier Lyon TextileLab 2021-22
- Kate Reed
- Margret Guttormsdorrir
Computational Couture Notes: Julia Kroener
3D Printing Lecture Notes
References & Inspiration
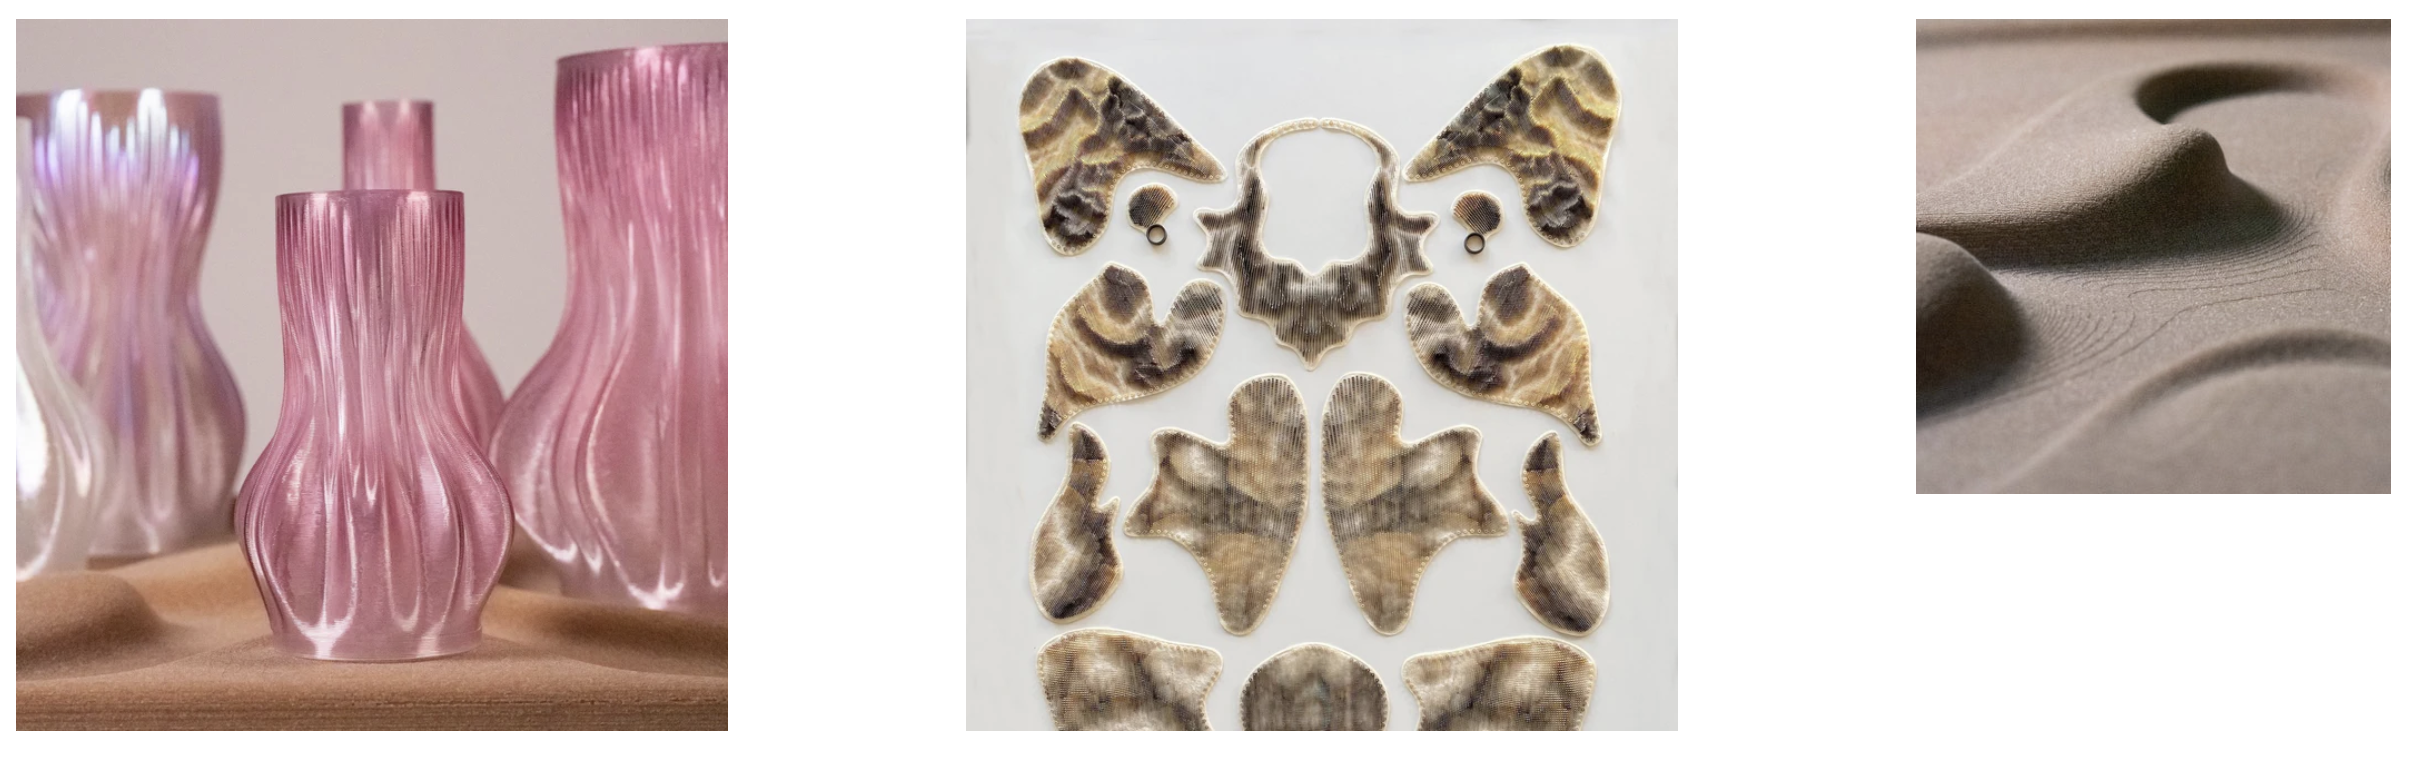
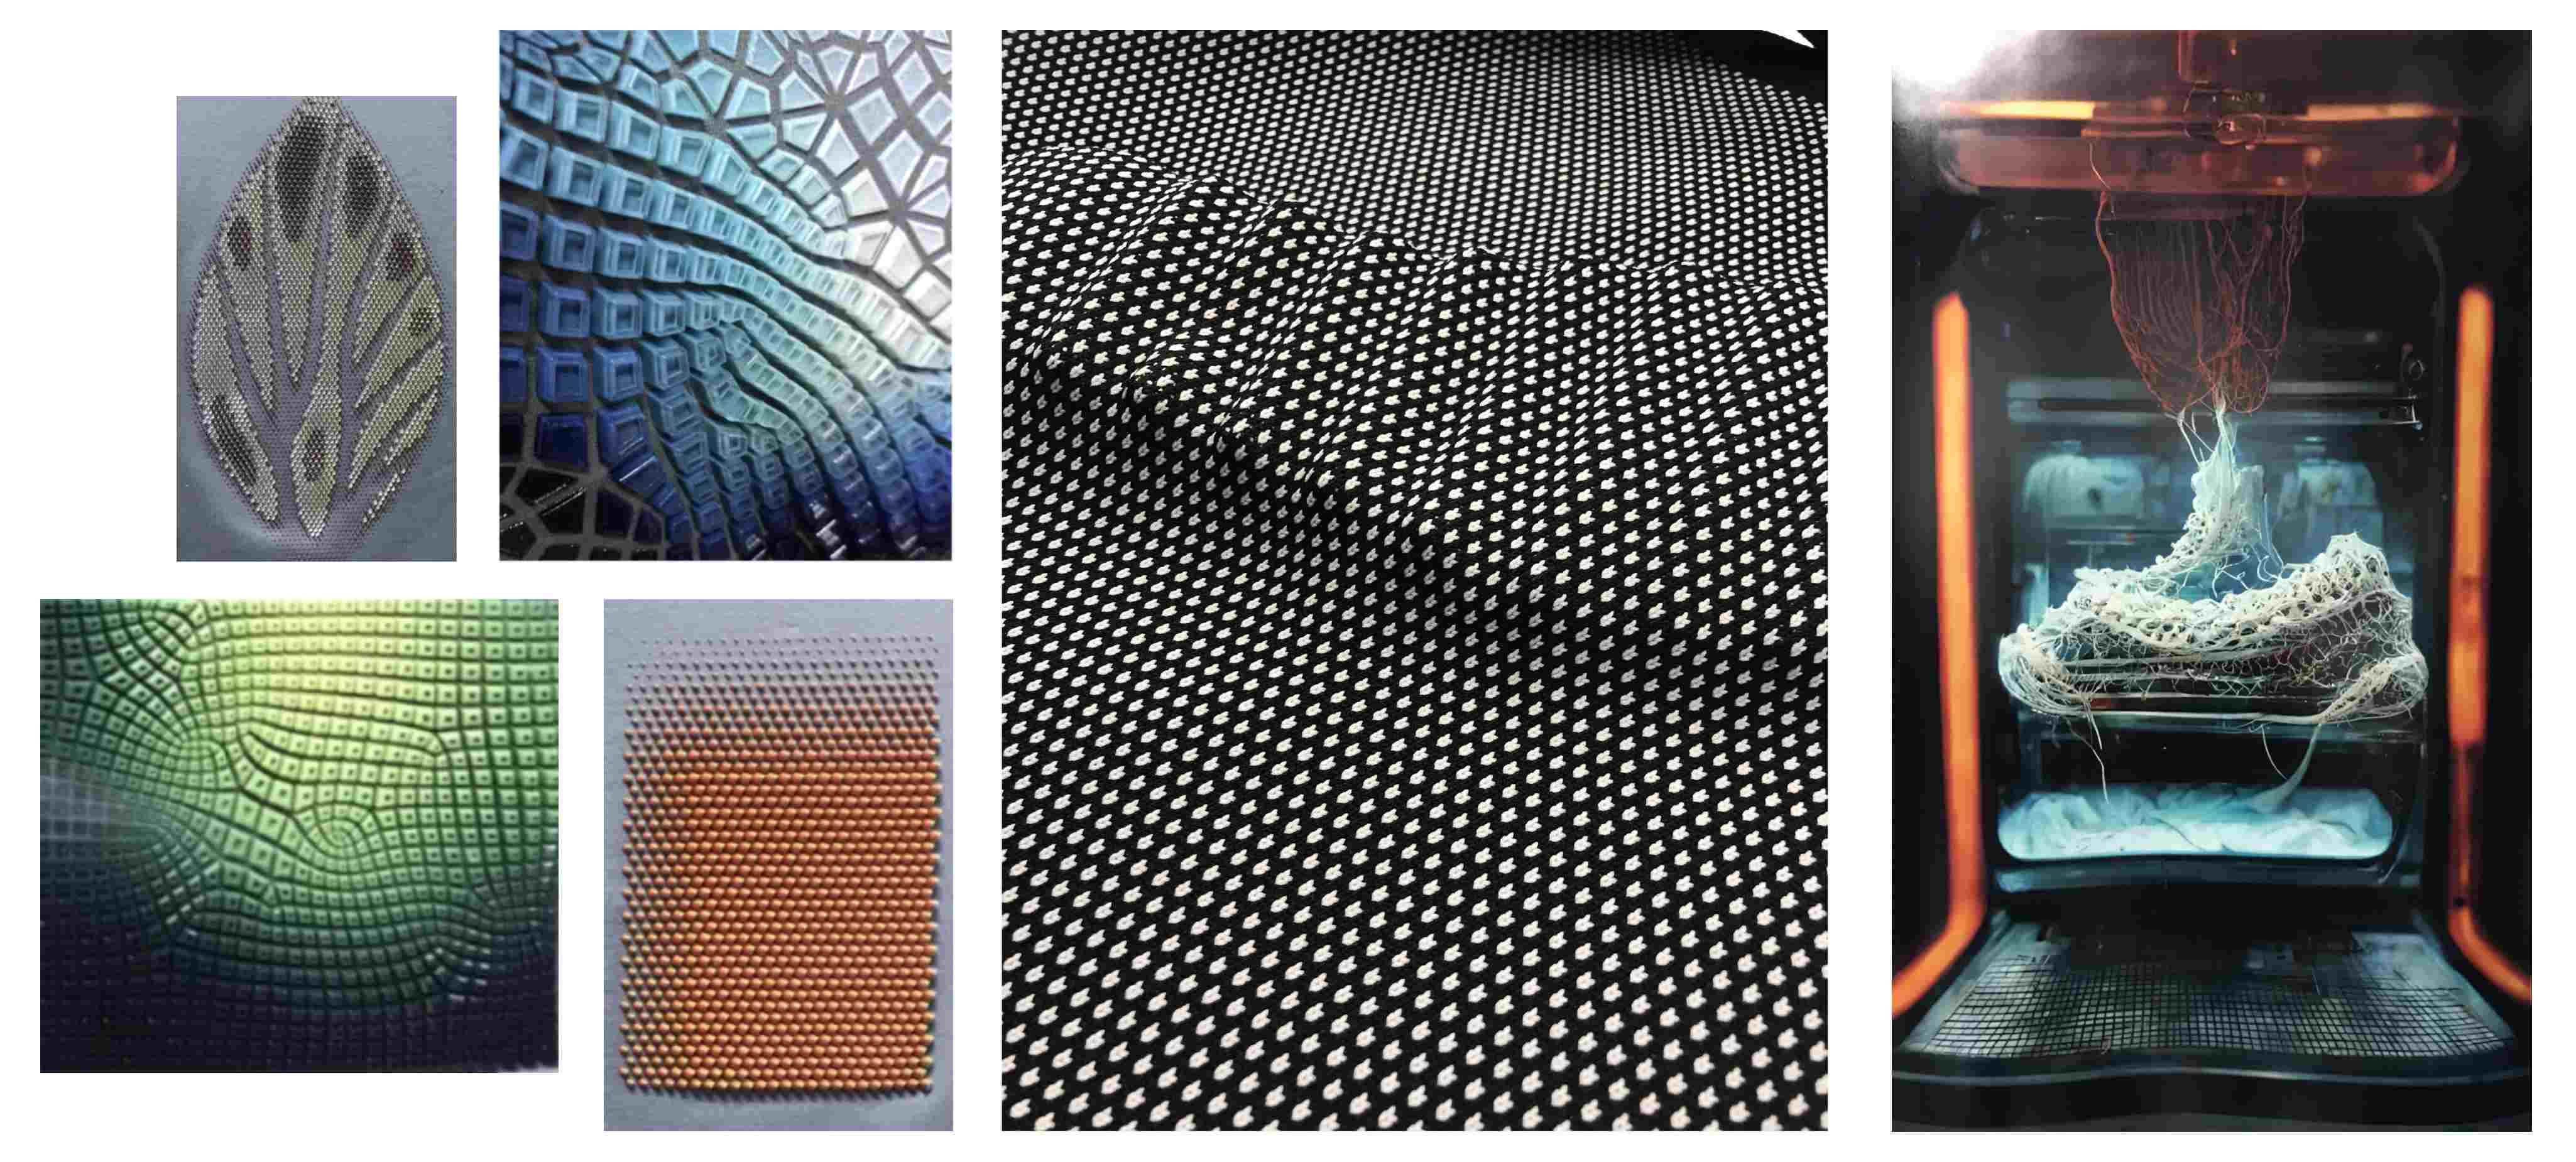
I found that my research for this week mainly fell into 3 categories: 3d printing whole garments, 3d printing materials that could replace traditional textiles, and 3d printing on to existing textiles. Most 3d printed fashion at the minute I think tends to be there first but all 3 are interesting.
3d printing textiles:
While 3d printing isn’t a super new technology, it has only become kind of accessible in the last 10 years or so, so 3d printed fashion is still quite novel and tends to be in the realm of couture or sculpture. I was quite surprised to find in Julia’s lecture how new and uncommon it was, I had thought that some brands, especially Iris Van Herpen, had been doing this regularly for a while. Some of the artists I looked at this week included:
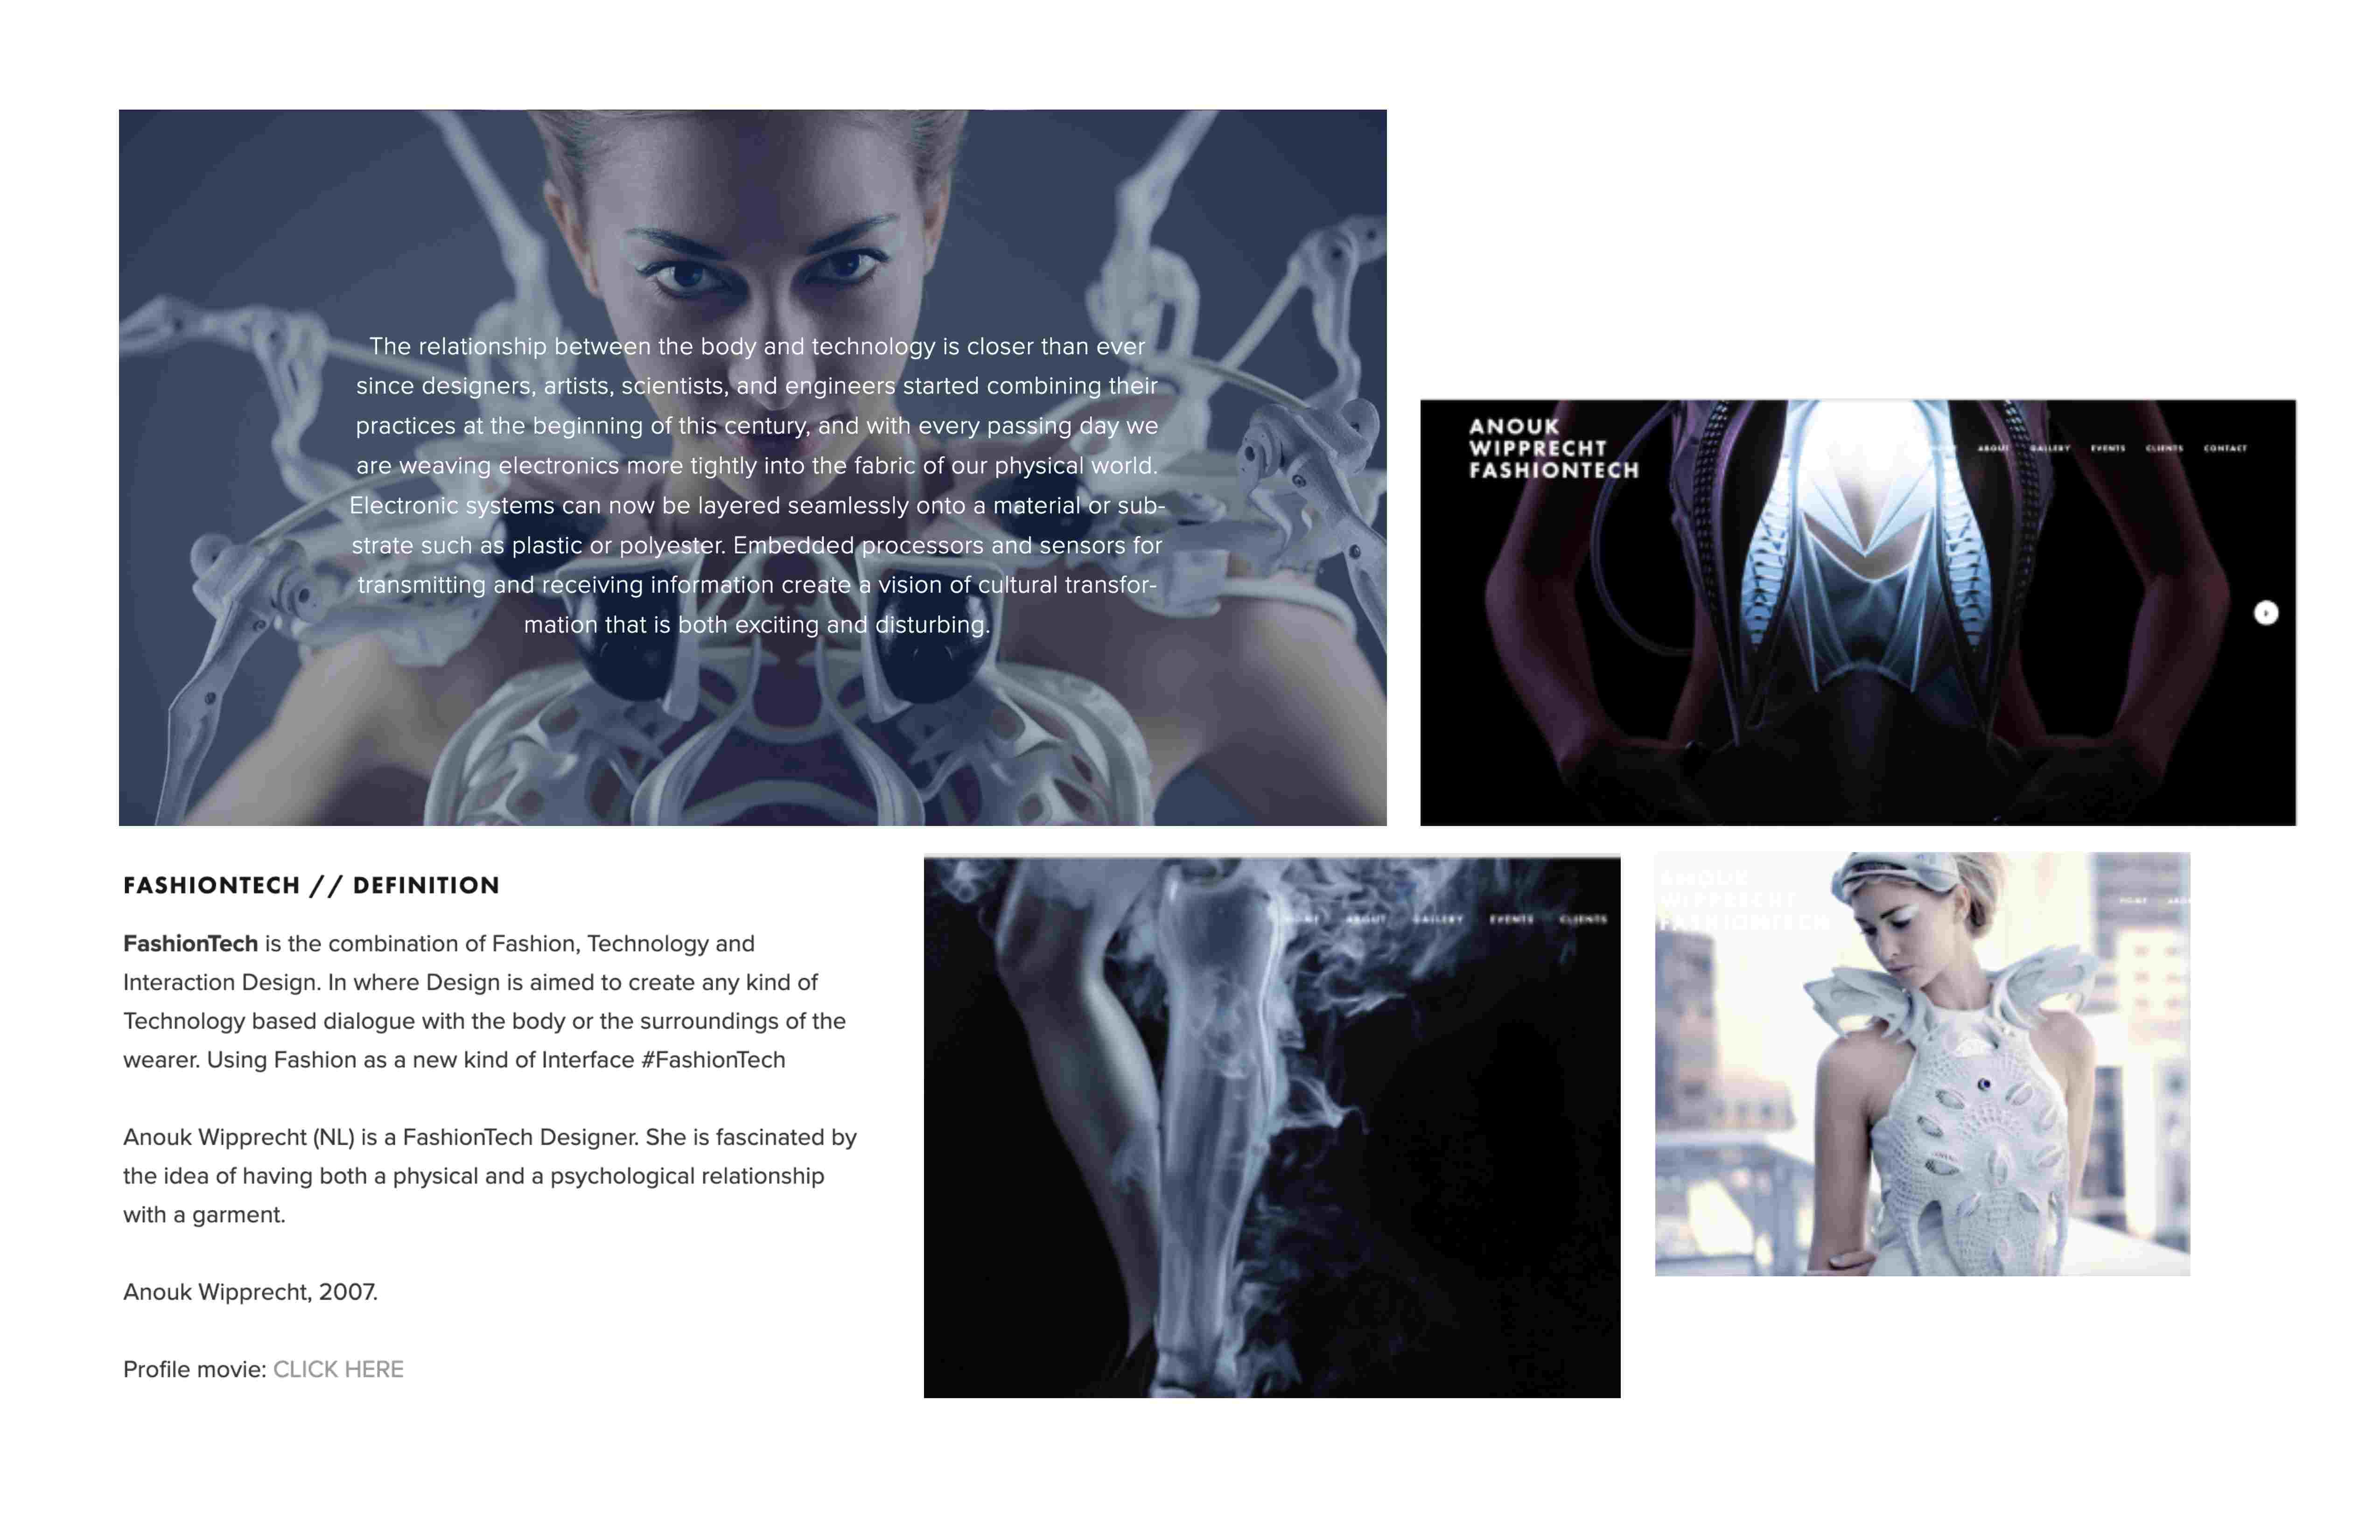
Annouk Wipprecht – I thought that there were some very interesting quotes on her website about the role of designer in a more tech based industry. Aesthetically, this is what I would have typically imagined when I thought of 3d printed fashion. I find the construction and theory very interesting but the aesthetics aren’t really for me.
Mathew Barney – I found his work very inspiring (not specifically for this week) particularly around ideas about how tech can blur and expand the limits of the body. I found his work here so interesting as I think he looks at this through a very different lens to a lot of other artists in this realm as the tech is barely visible it more serves the storytelling and aesthetic.

Julia Kroener –
ThreeASFOUR – digital collecition

Behnza Farahi - masks
3D Printing Textiles:
Aleksandar Bursać -
3D Printing ON Textiles:
Arantza Vilas: Unfolding the Fold – I found this project very interesting for the way it grounded the technologies in traditional crafts.
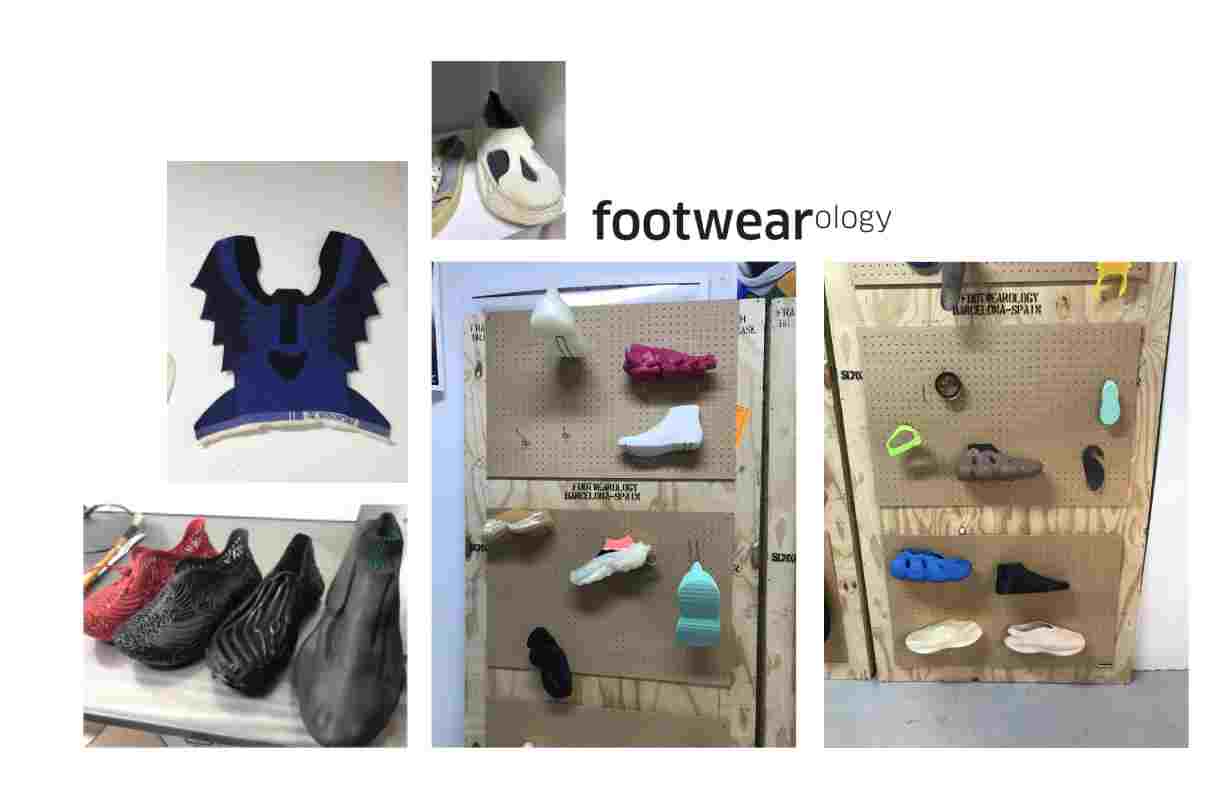
Footwear-ology Visit:
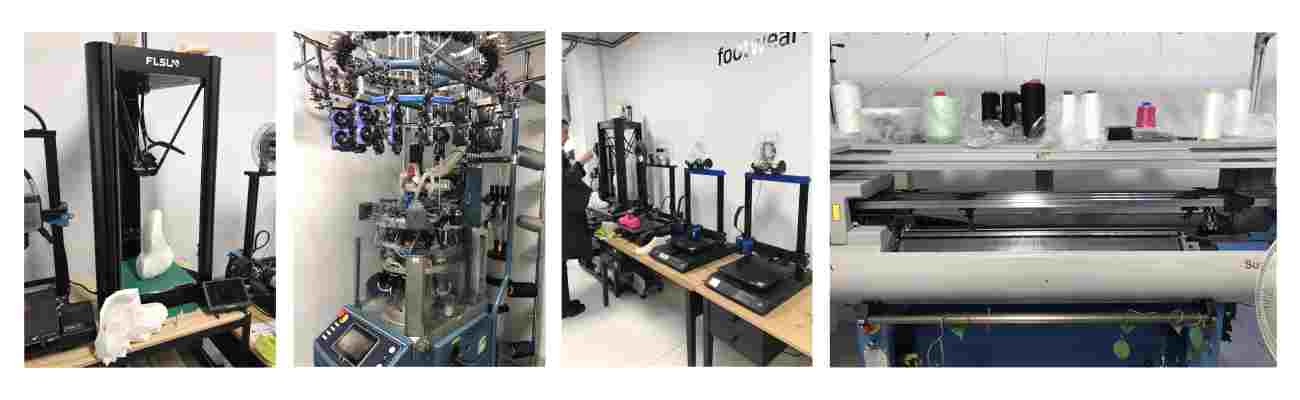
Technical Tools
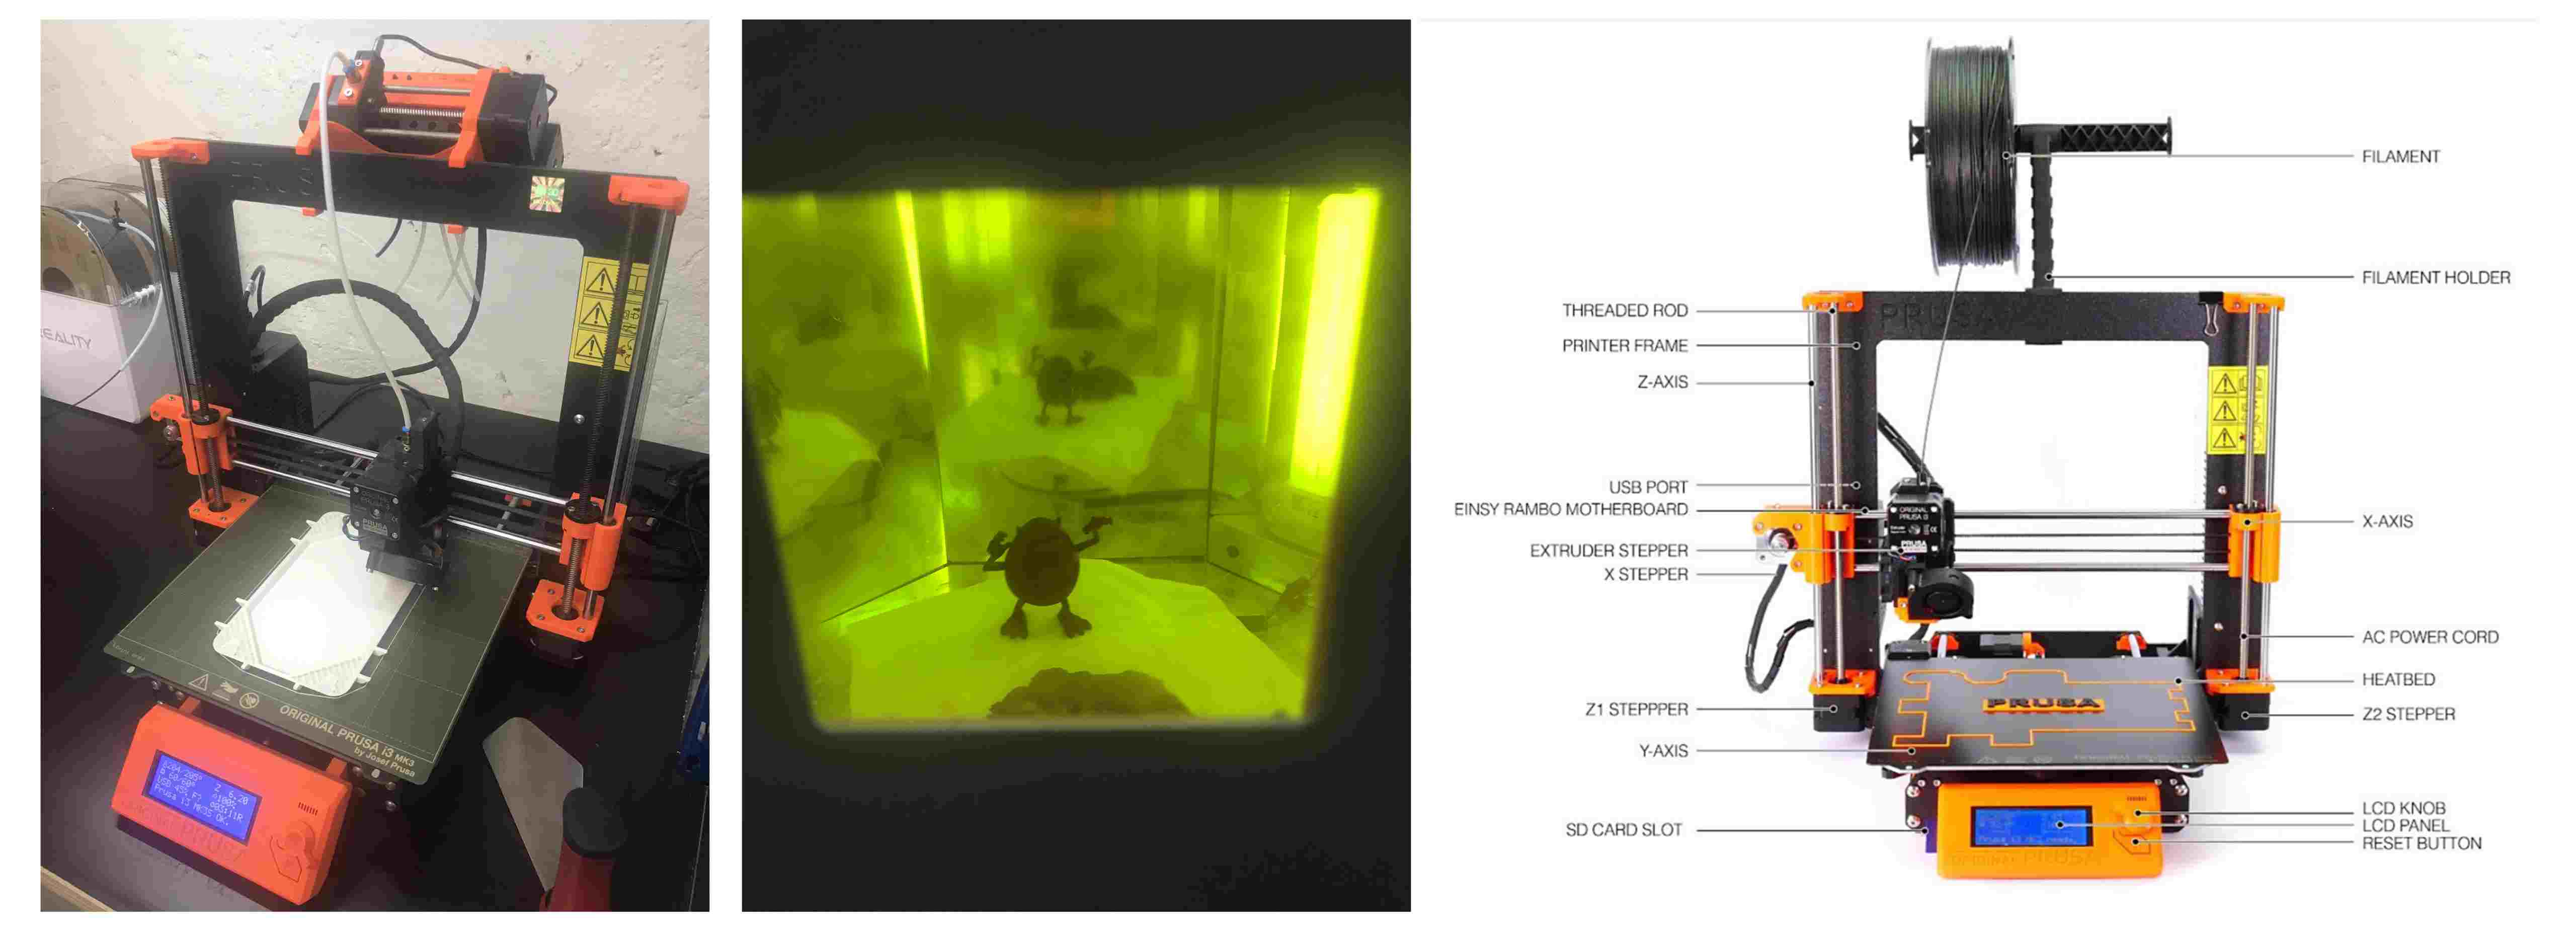
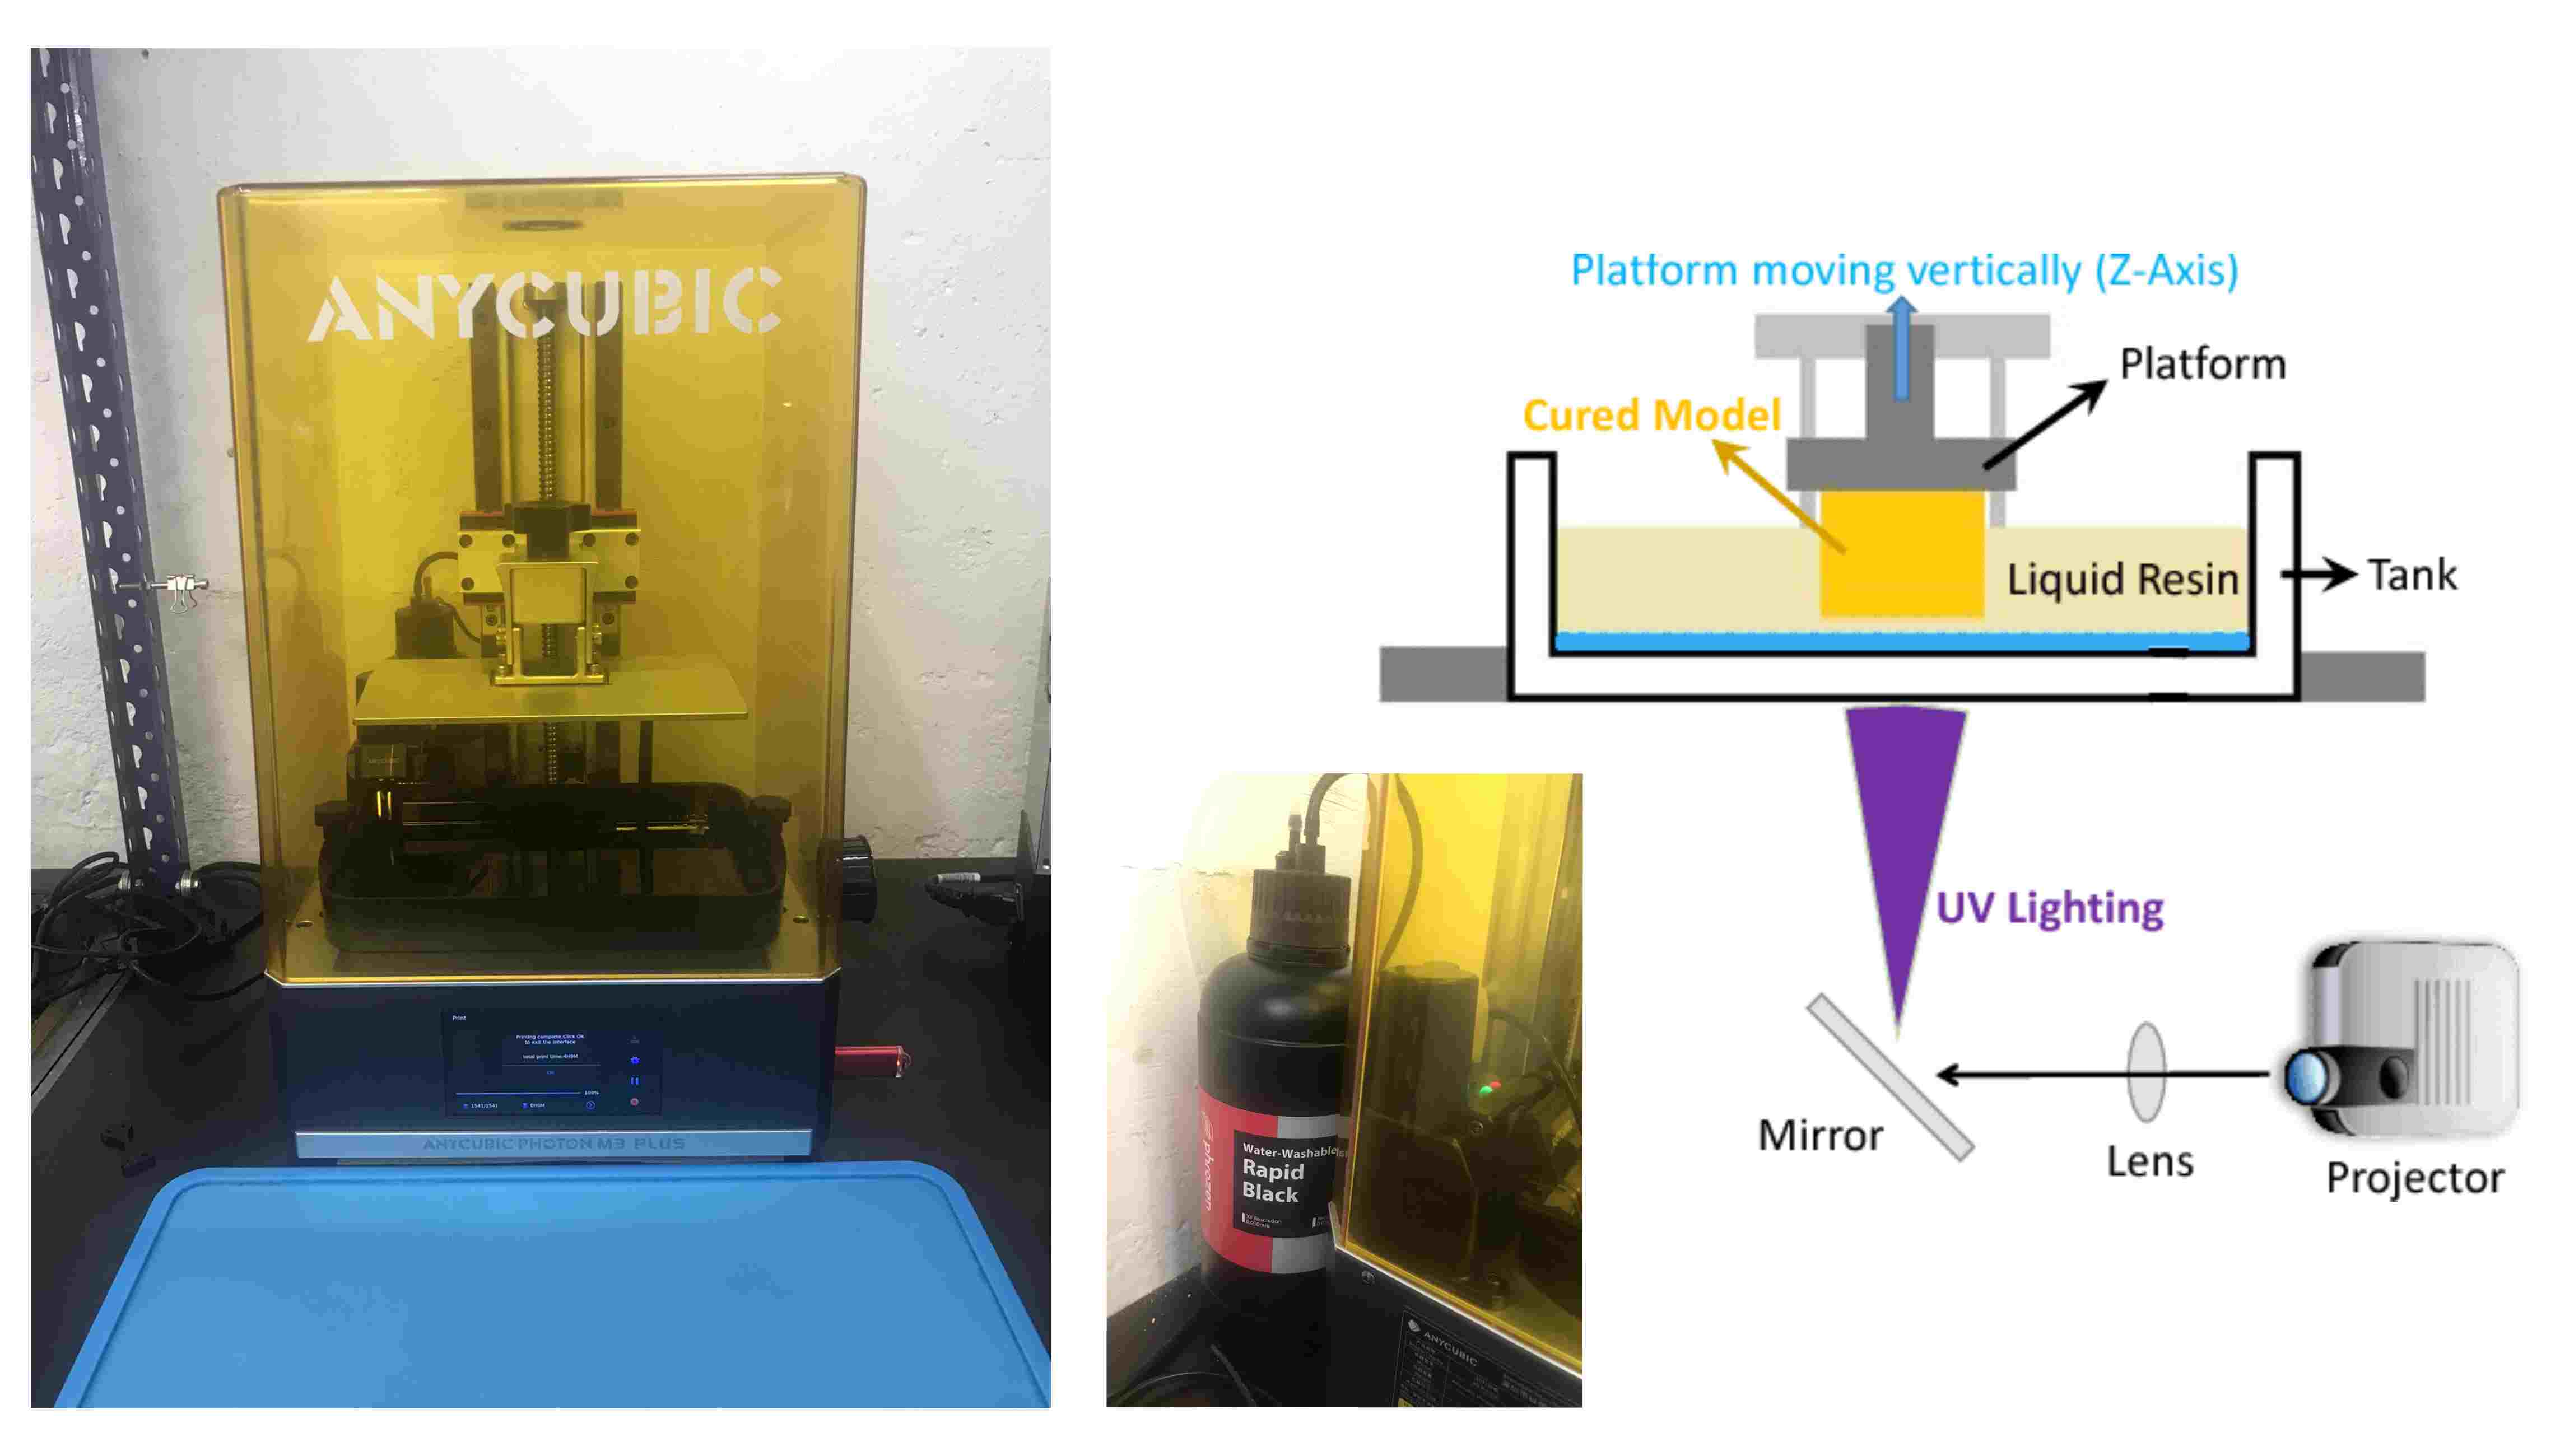
3D Printers in the Lab
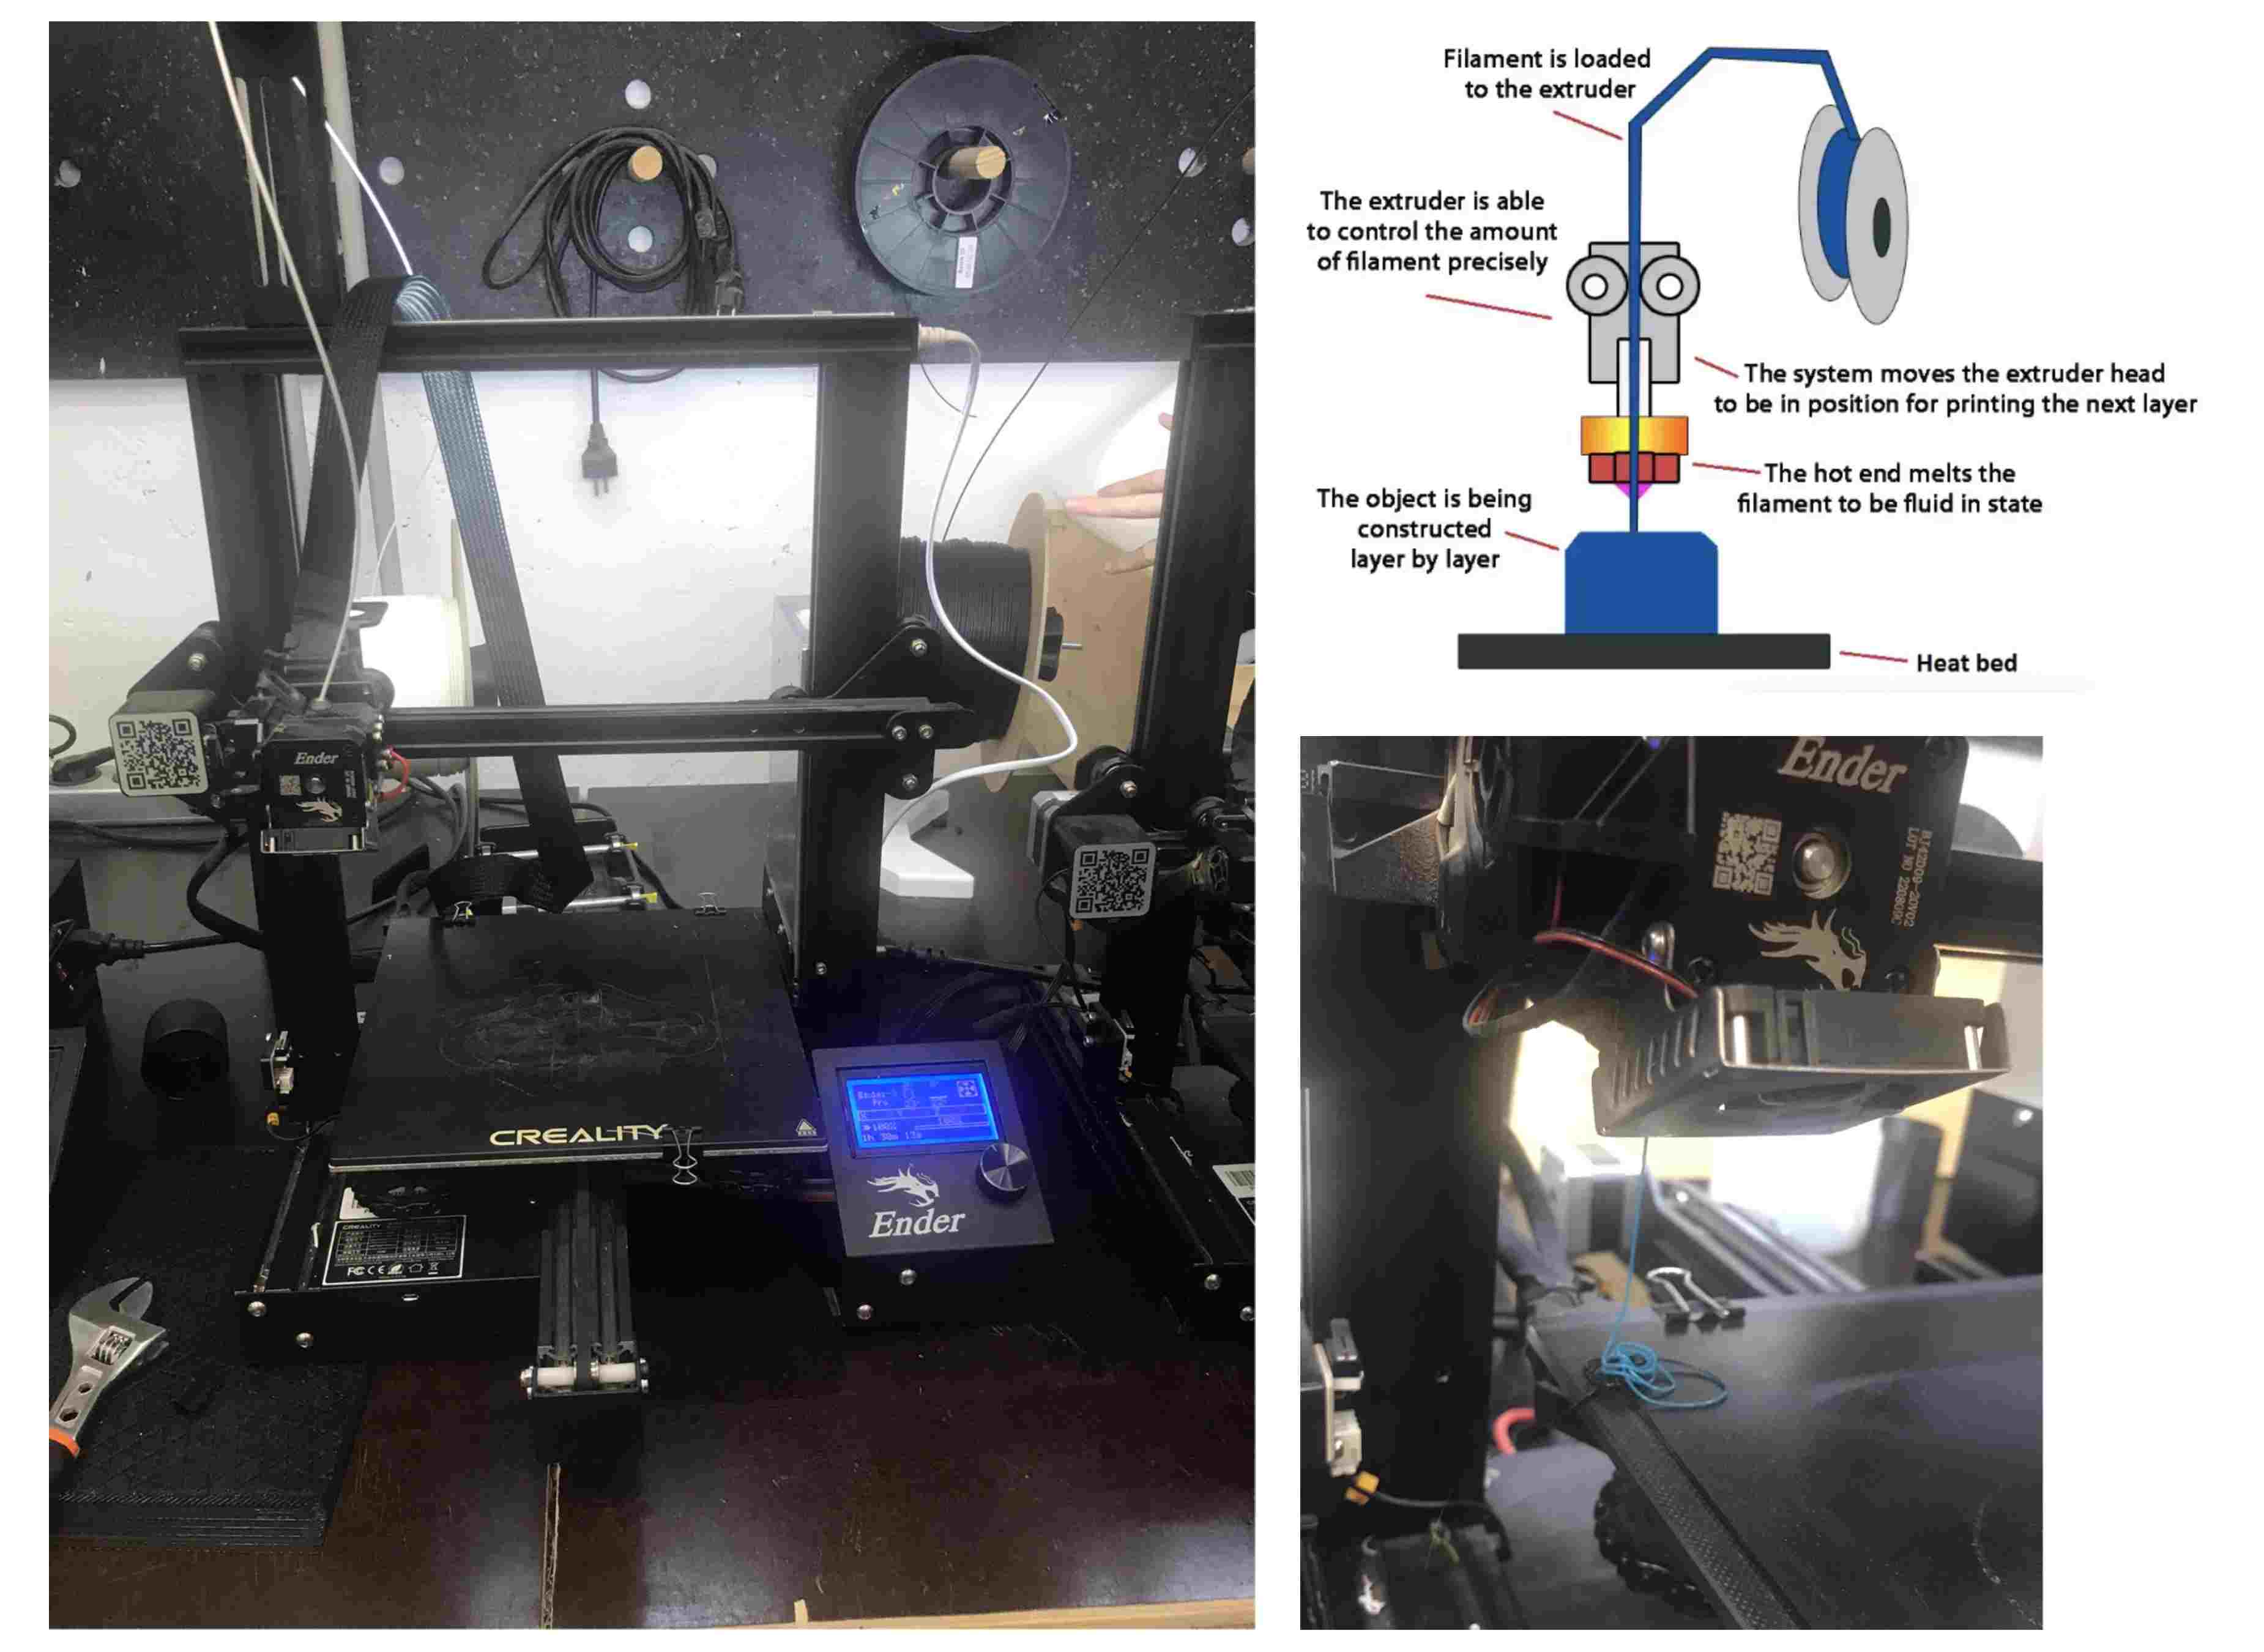
Fused Deposition Modelling (FDM) printer – this is the most common type of 3d printer and the only one we used this week. It prints by drawing thin layers of plastics on top of each other from the bottom up.
PRUSA printer – this printer is a type of FDM but it makes better models and can have multiple filament inputs so you can print different colours in the same model.
Stereolithography (SLA) resin printer – this printer works by a light solidifying layers of liquid resin on the bed that has been dipped into it. It prints for the top down.
Grasshopper Basics:
Grasshopper Tutorial Notes
Grasshopper Notes: - Food4rhino – different extensions to download - Discourse.mcneel.com – Q&A about how to use and help with rhino - Grasshopper docs – list of components and how to use them and plugins - Points on - to deform an object from selected points - To create a component, click on it on the top menu and drag to the canvas - Click on a point and reference the point on rhino - To join two points into a line, search the primitives for the line component and drag to the canvas, then drag from the points to the line component - Click on the component and click preview to see in rhino - If I component is visible, the box is white, if it is not visible, it is grey and if it is not computing it is faded out - You can also make a point by providing the individual coordinates and join them to one point - Type xy and click the xy plane or go to V at the top and click the xy plane component - Select the flow you want to find right click and click zoom to find it in rhino - To scale, you need a scale component and a factor slider component - To mirror, construct a shape, build a plan in 2 directions at one edge of it and add a mirror component (G)
I found grasshopper very difficult to get to grips with as it is a completely different way of thinking about building a project. To help with the very basics of it, I followed along with the tutorials form 2022 - found here - as these explained a few of the basic functions of the software. I had a few issues following these but Petra or someone else in the lab was able to help point out where I had gone wrong.
I also had a look at some tutorials on YouTube for specific things that I wanted to try such as this one:
Blender Basics:
I have used blender a little bit before and it feels much more similar to other softwares that I am very comfortable with so this was a lot easier to follow than grasshopper for me. I found this tutorial very helpful and it was good to see how quickly you can create clothes in blender. In future I would maybe still use CLO for generating the clothes and then import them to animate here just because using patterns feels very intuitive to me now but this is a great free software.
Blender Tutorial Notes
A = select all X = delete Shift A = add menu Shift click pan = pan side to side not round G = move (G Y = move only on y axis, G X = move only on x axis, G Z = move only on z axis) S = scale R = rotate (can press X, Y or Z after to select axis and type an number to specify angle) Tab = move between object and edit mode Two square diagonal to each other in top menu = xray mode Second option next to edit mode bar = select a side not whole object Modifiers – add – generate – mirror (add clipping to make one piece) Command R = dissect face Modifiers - add – physics – cloth Spacebar = start animation Select avatar – modifiers – add – physics – collision Shift + left arrow = return to frame 1 X – delete only faces = leaves connection lines to simulate sewing Alt M – recalculate outside Physics – cloth – quality steps > 15 Physics – cloth – shape – shrink factor – 1 Physics – cloth – collision – quality > 15 Physics – cloth - collision – distance = as small as possible Physics – cloth collision – select self-collision Modifiers – add – generate – subdivision surface – levels viewport = 2 Put the cloth modifier at the bottom of the modifier stack Down arrow next to the mirror modifier – apply Right click on the cloth – shade smooth Key frame at about 40 – arrow next to cloth modifier - apply – turns it into a mesh F3 – fill holes (have to be in vertex selection mode) O = proportional editing – select circle of influence, then move vertexes with the mouse or G X/Y/Z Modifier – cloth – thickness Material – new – change properties Assets – garment asset – hide – select avatar – file – export – obj – mixamo.com – import avatar – select motion – download – import in blender – scale up – select the triangle above the head – go to pose mode – t pose – select armature – drag animation to 30 frames – select avatar – I – key frame - object mode – hide armature – select avatar – apply collision modifier – unhide garment – play
Parametric Design:
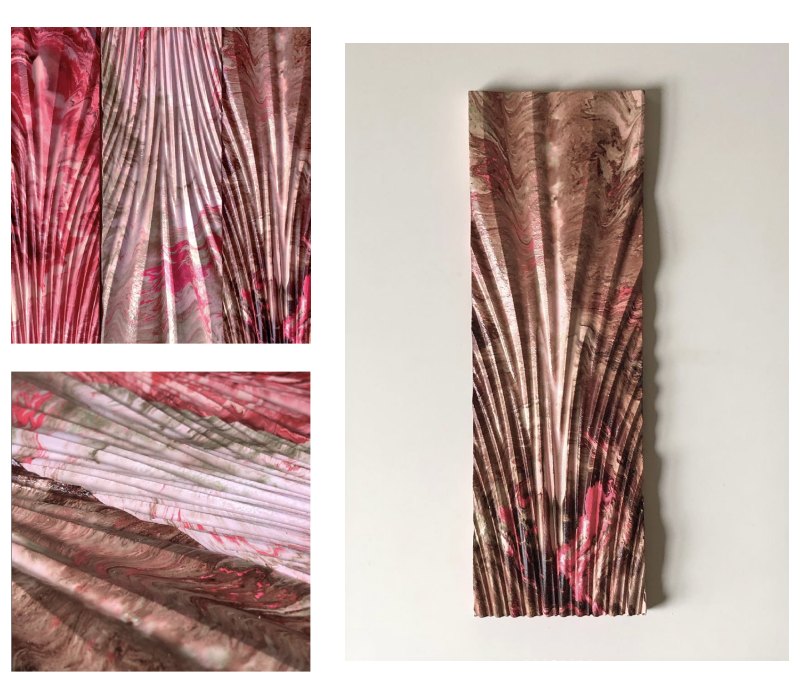
I knew that this week, I wanted to try printing on to textiles to distort them as this was the application that I found the most physically interesting as it had a bit more of the unpredictability and instability of textiles than printing full garments etc. in quite rigid plastic forms. For this, I just needed to be able to generate 2d patterns that I would very slightly extrude. To start with, I made a very small design using the Tween Two Lines’ tool and played around with how changing the different parametrics on these two lines gave different results.
button 1 from Ruby Lennox on Vimeo.
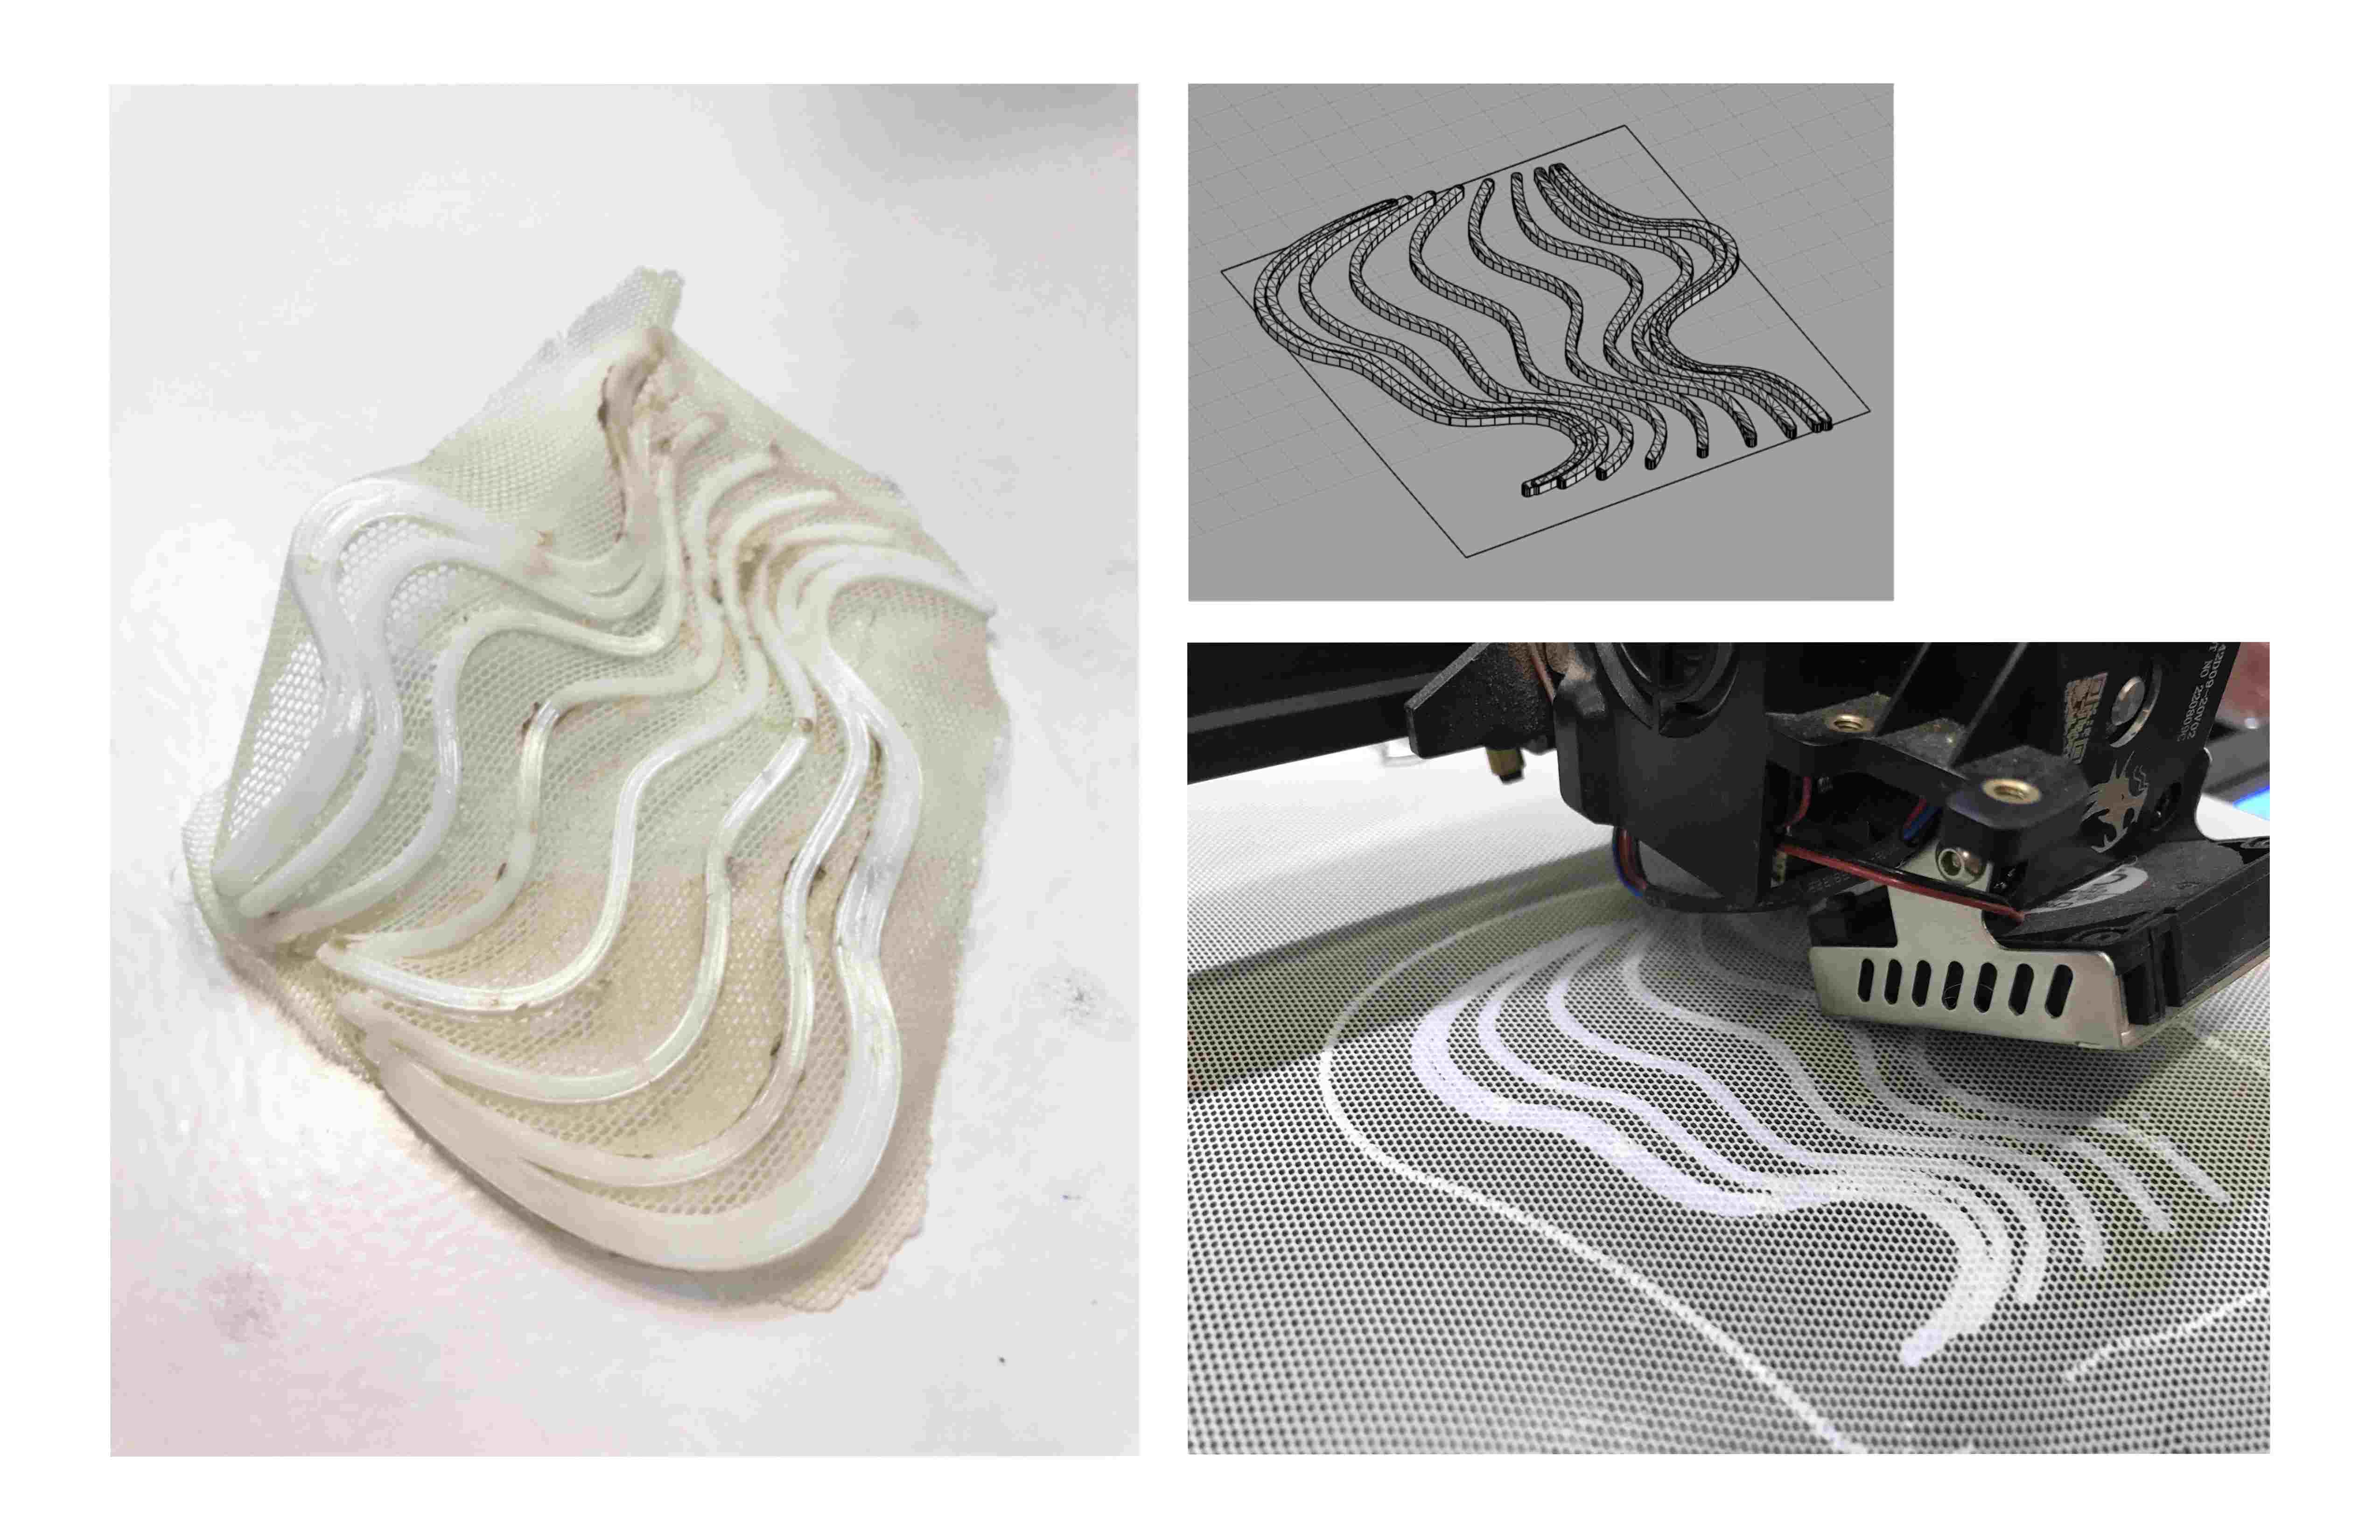
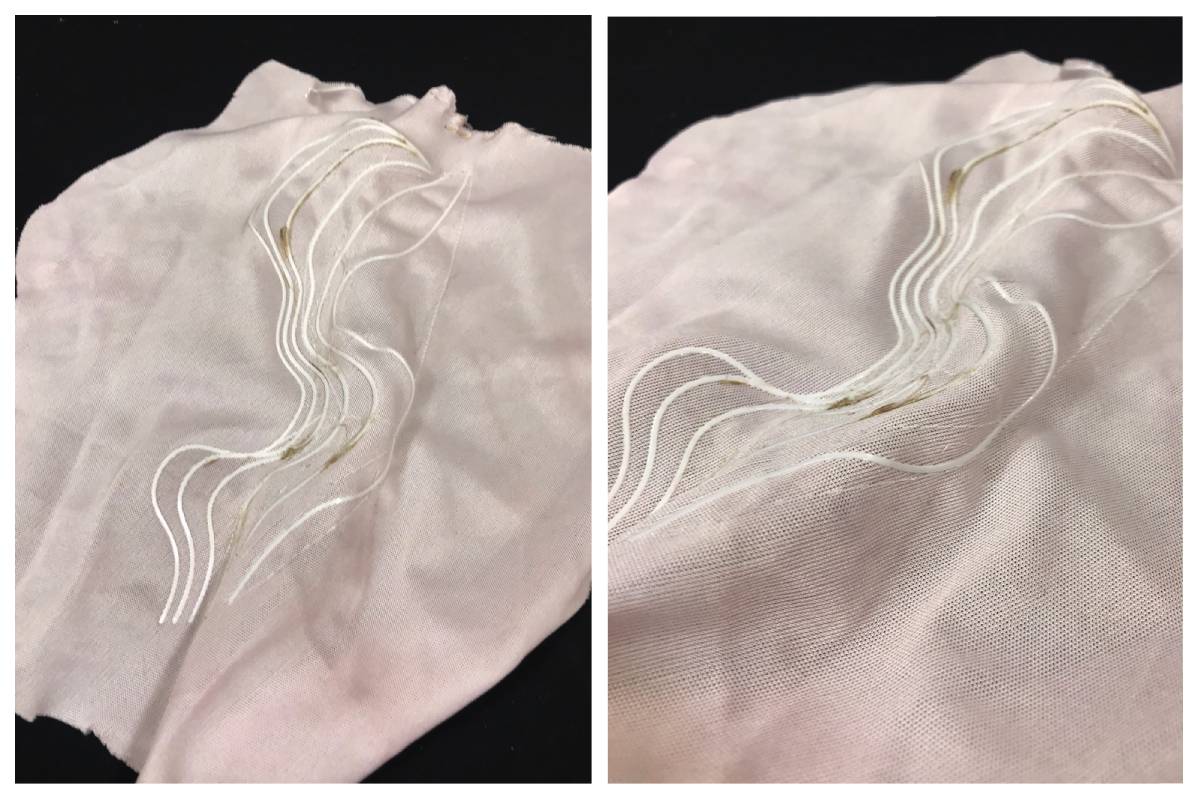
1st Textile Sample:
Once I had made a pattern that I liked, I needed to turn it into a mesh, bake it and export it as an STL. The code I needed for grasshopper is here:

Once I had the STL, I opened it in 3D Builder to check there were no problems with the mesh (I had to do this on the uni computers as it isn’t available for mac). Once I was sure it was good, I open it in CURA to slice it for the printer, using these settings:
| Layer Height | Infill Density | Number of Layers |
| 0.2 | 0% | 4 |
As I wanted it to distort the fabric, I needed to stretch it over the bed of the printer. This took quite a while to get stable and in the end, I did not stretch it enough as the print came out very 2d. Overall it was a quite a successful first print but I think it was too small and dense to pull the fabric much.
Print Testing:
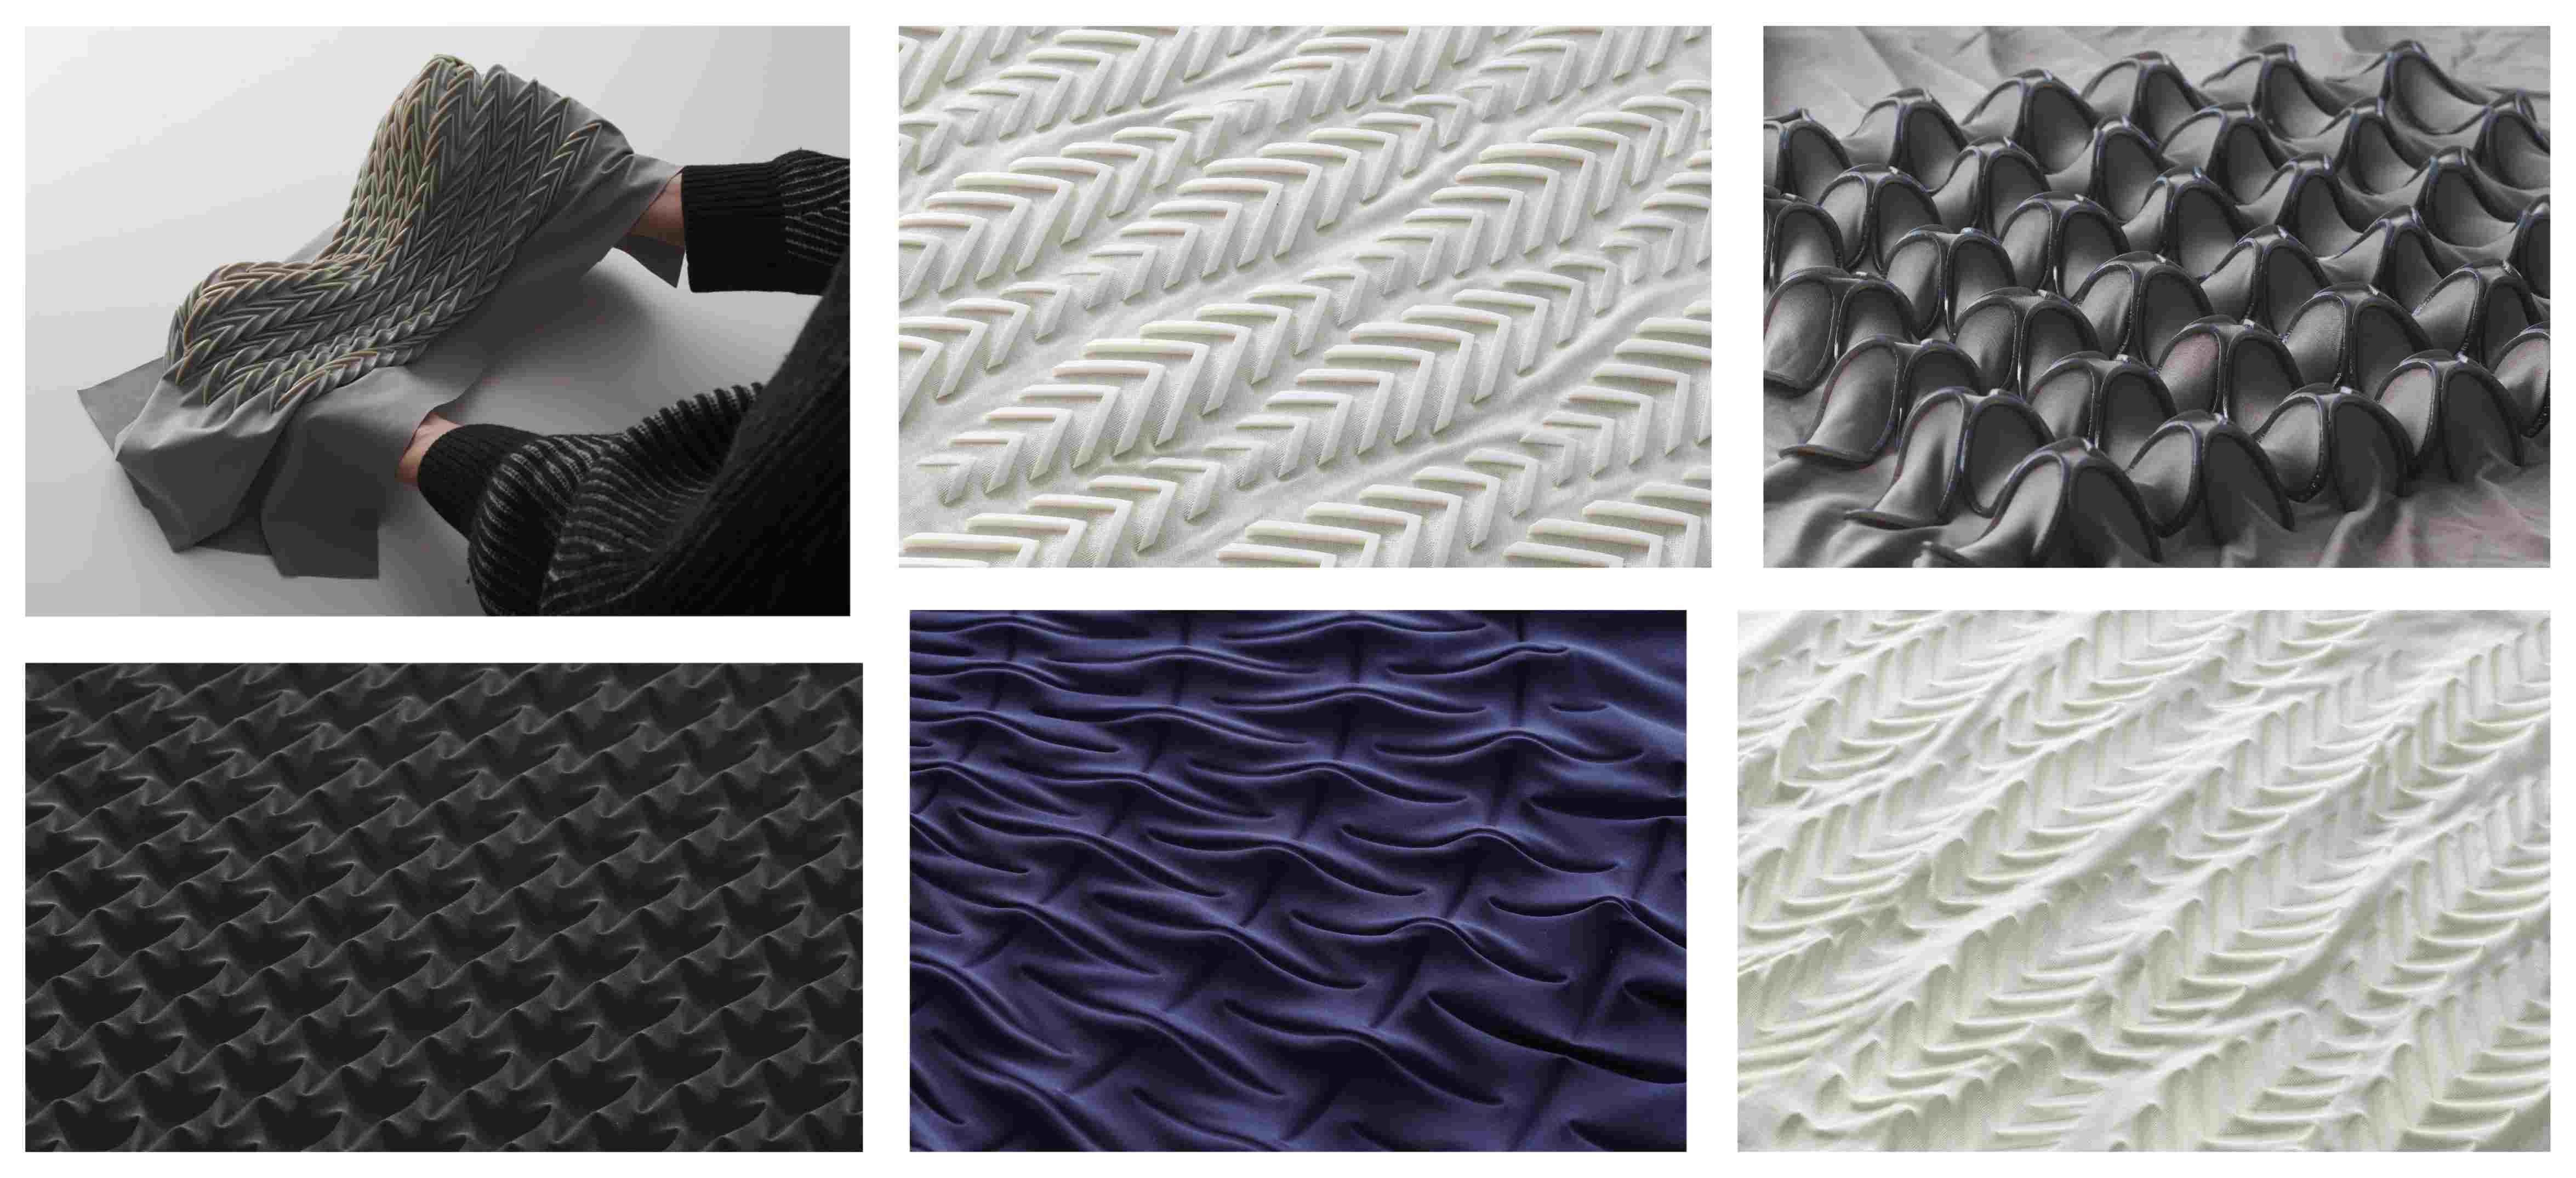
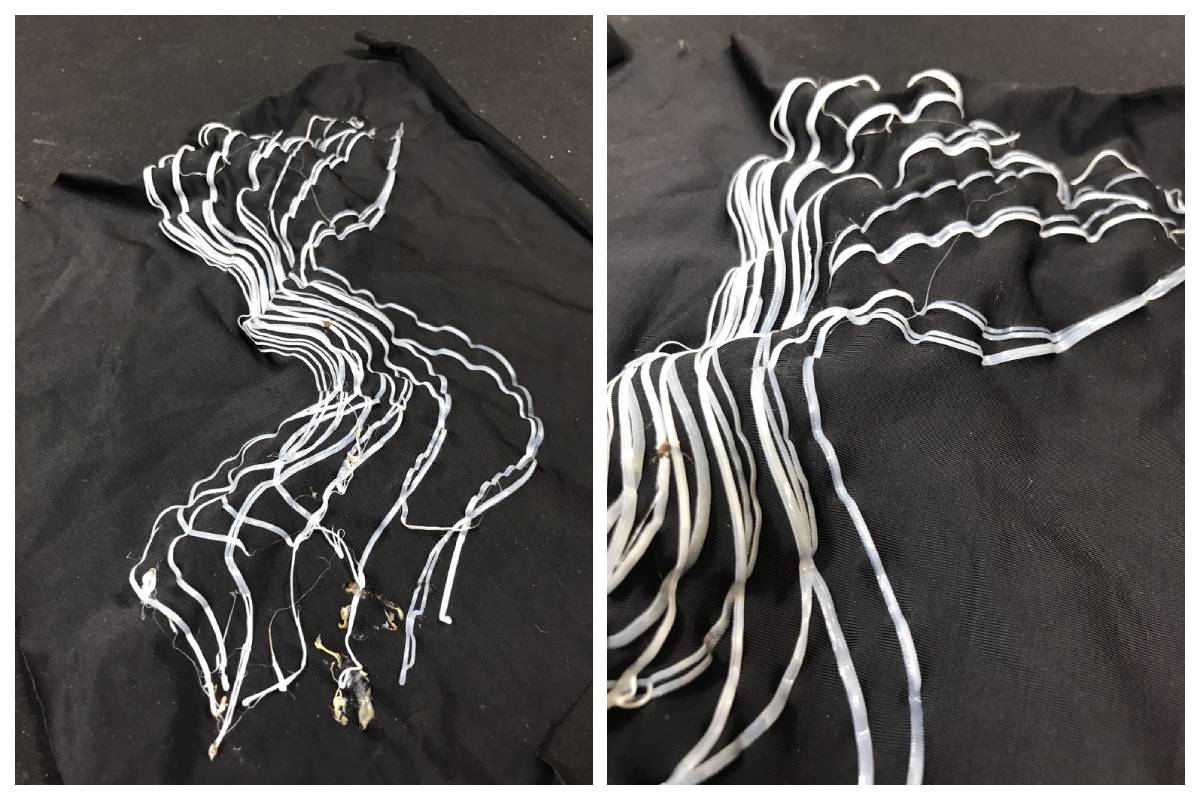
For the next sample, I tried to print longer, thinner line onto a thin lycra. I stretched it over the base of the printer and secured with some clips. Unfortunately, these clips caught on the frame of the machine while it was printing which pulled the fabric and distroted this print. As it only got 1 layer into the print, the PLA did not stich to the lycra.
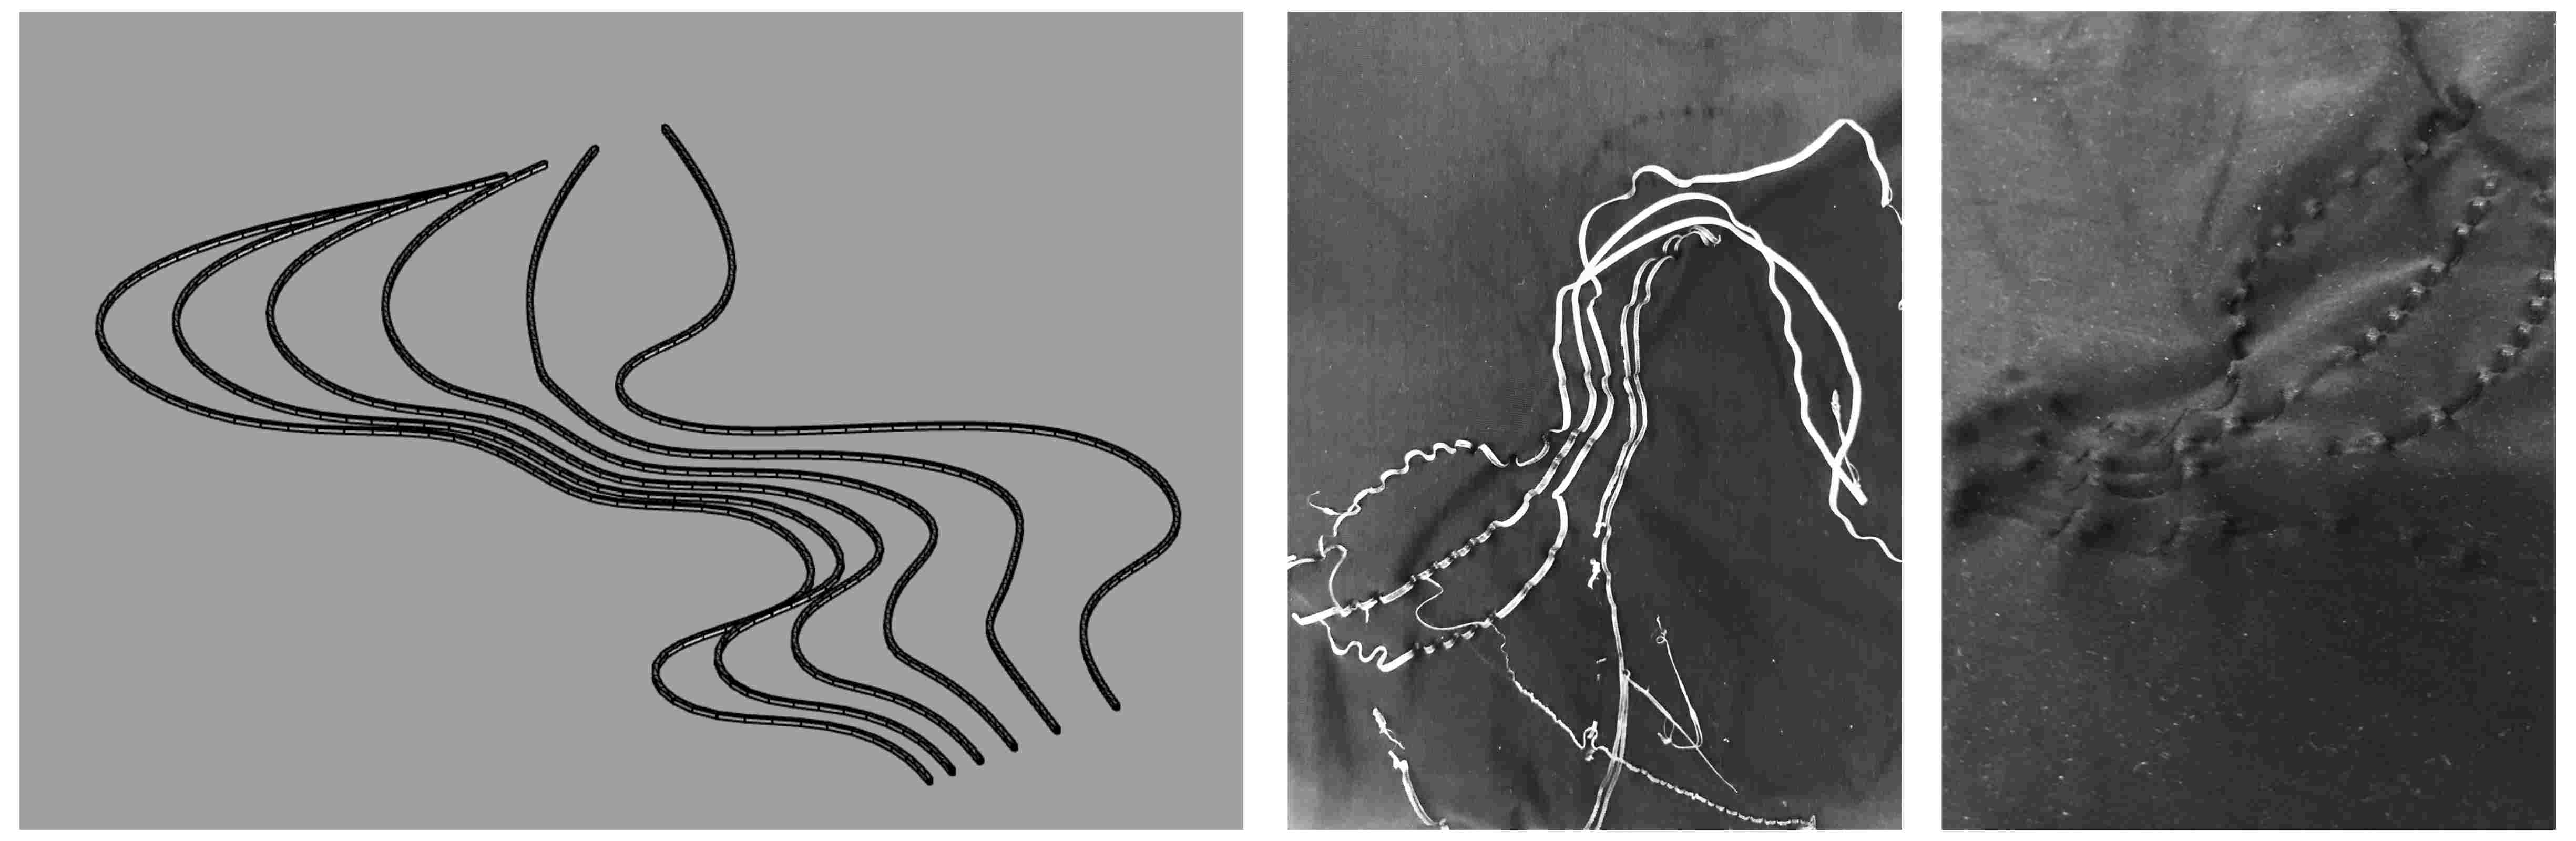
Next, I tried the same print again with the clips positioned differently. This one worked better but the fabric still moved a little but during the print so the different layers didn't align perfectly.
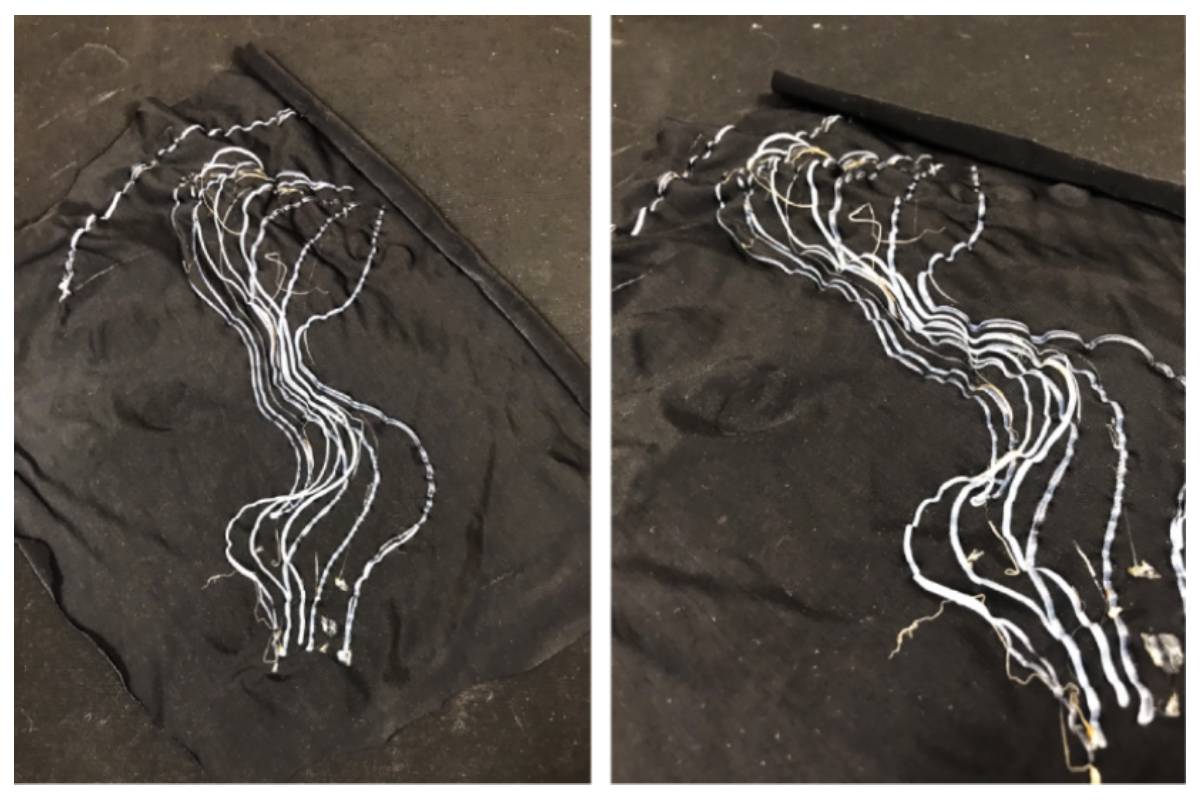
As I was struggling to get the lycra to stay in place when fully stretched, I wanted to try with a different fabric with less stretch to see if I could get a perfect print when there was less tension in the fabric. For this, I used a pint cotton jersey that had a bit of stretch but a lot less than the lycra. This print worked out very well apart from some slight burning of the PLA but it did not gather the fabric much due to the minimal stretch.
I then tried the print one last time with the lycra. This one worked out quite well, it was still not perfectly aligned but it did gather the fabric quite nicely.
Digital Smocking
I wanted to have a go at a making a sample that resembled smocking. For this, I made a basic grid of crosses in Rhino and printed it on to the stretched lycra. This print worked out quite well I think but the result was more like a pleating or gathering sample than smocking as the print only pulled the fabric in one direction.
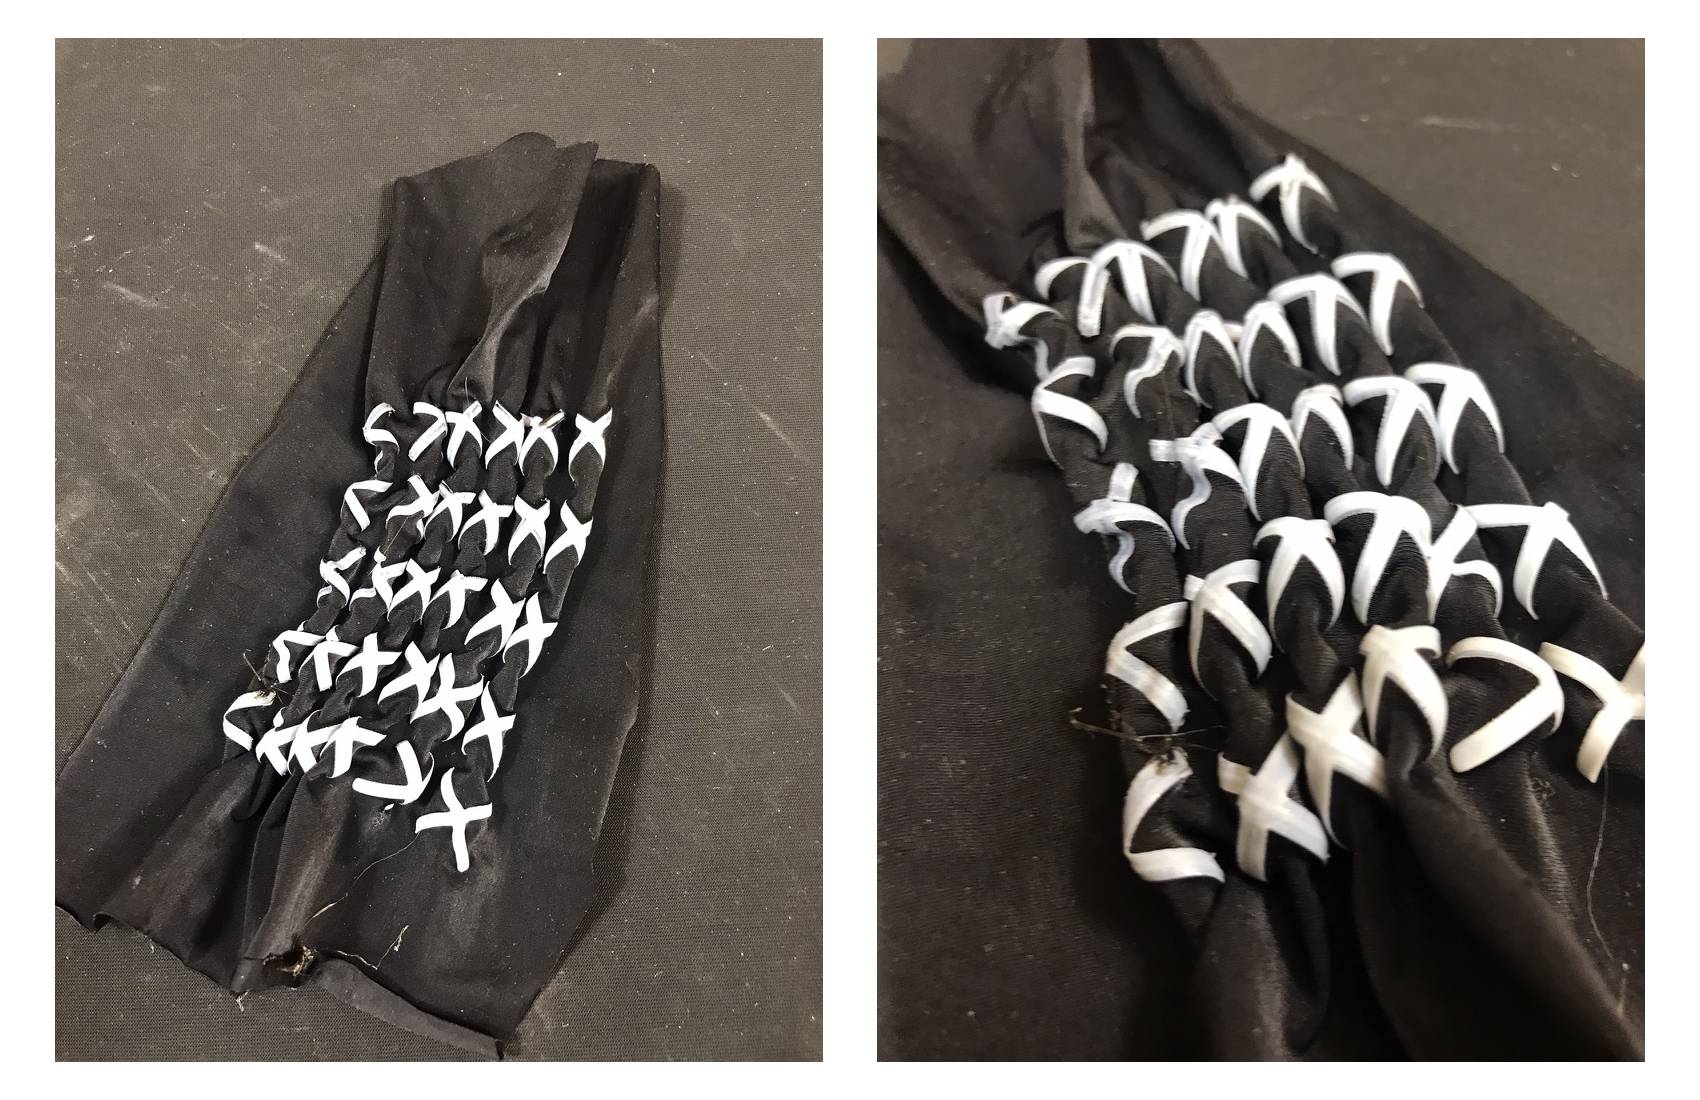
Next, i tried a different version of the grid to see how the size and distribution of the crosses would affect the way they pulled the fabric. Again, I had some issues with the fabric moving during the print so it is not perfectly aligned and some of the PLA burnt but the fabric manipulation was quite interesting.

Reflections
Overall, this week was quite a challange as I found Grasshopper very difficult to get to grips with so this did take up a lot of my time. Additionally, I think the textile samples I made are not super successful but they are a good starting point for exploring digitally aided textile manipulations.