11. Textile Scaffold
Research & Concept
weekly assignment
Check out the weekly assignment here or login to your NuEval progress and evaluation page.
get inspired!
Check out and research alumni pages to betetr understand how to document and get inspired
- Diane Wakim Le TextileLab Lyon 2020-21
- Ana San Roman FabLab Barcelona 2018-19
- Laetitia Thomas Le TextileLab Lyon 2020-21
- Catherin Euale FabLab Barcelona 2018-19
- Teresa van Twuijver TextileLab Amsterdam 2018-19
Textile Scaffold Notes
References & Inspiration
This week I wasn’t super sure where I wanted to go with the project but we did a group brainstorm about the different options mentioned in the lecture that helped to understand what we could do within the week.
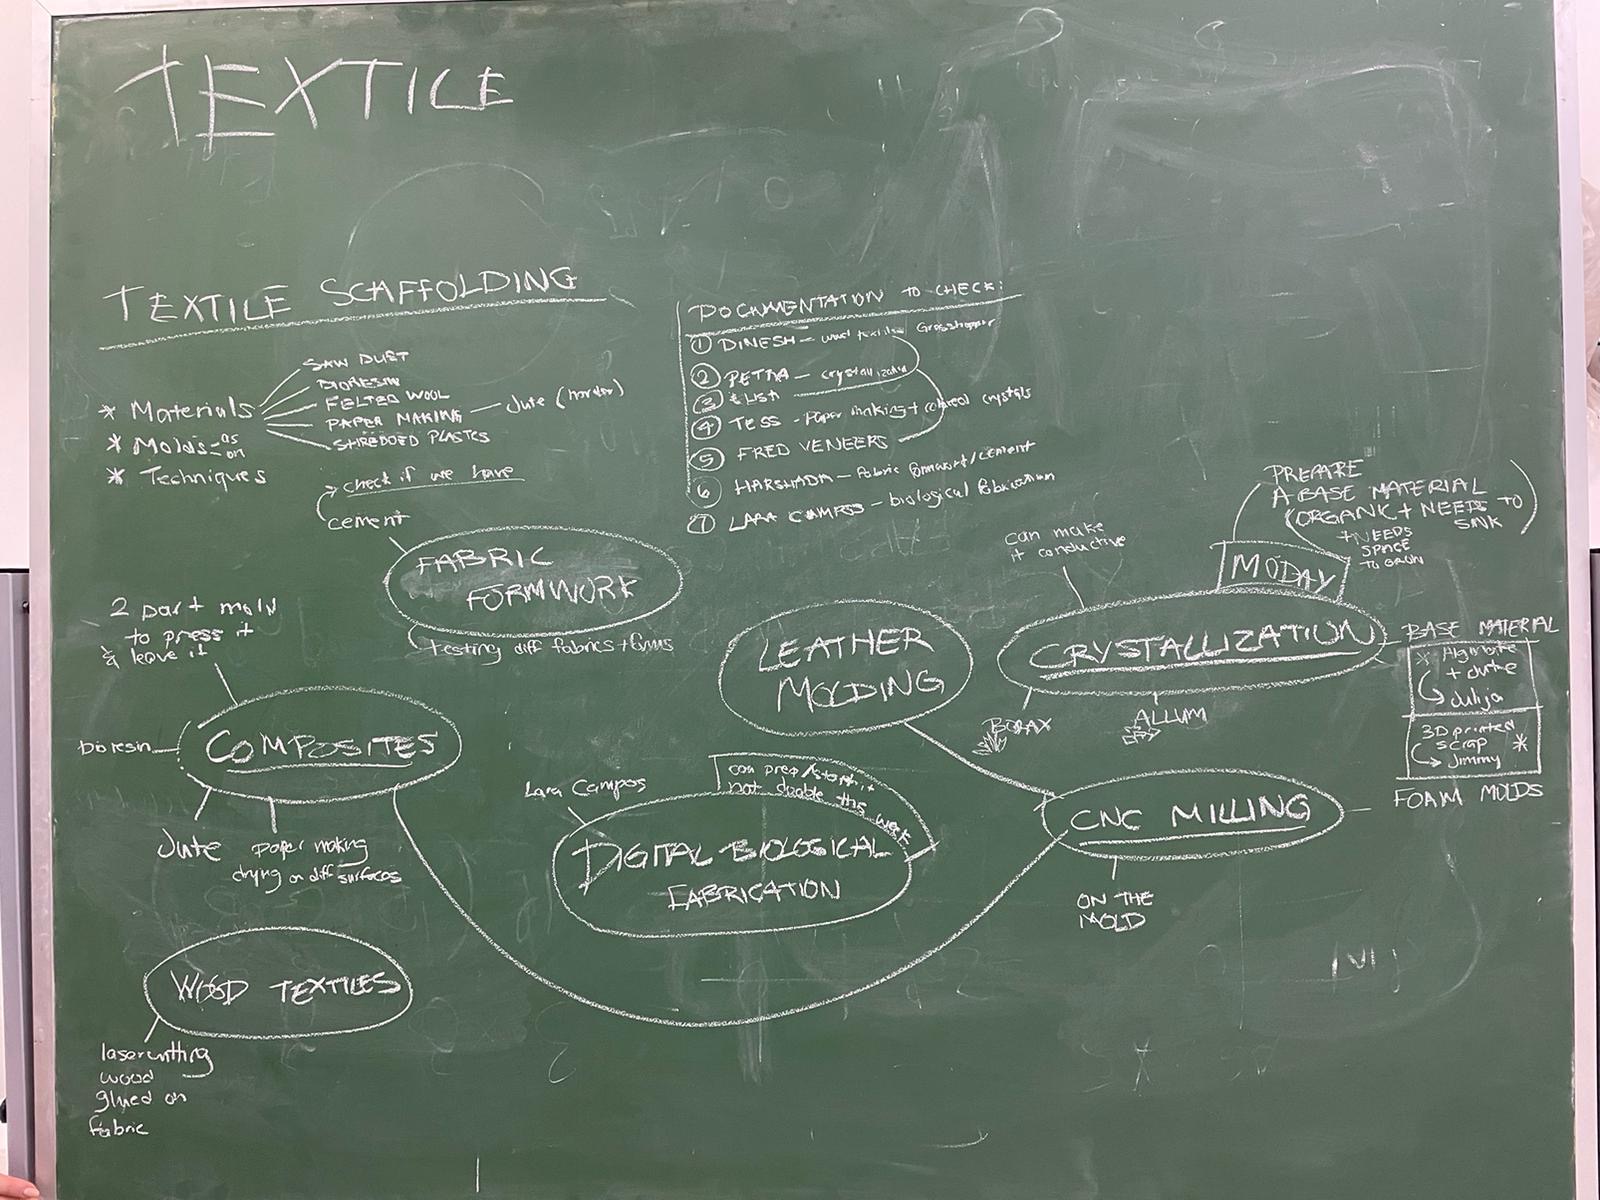
The main topic that interested me was the leather moulding (or just textile moulding in general). I thought this might be a fun way to create interesting quite rigid shapes in a garment that wasn’t too dependent on the body of the wearer.
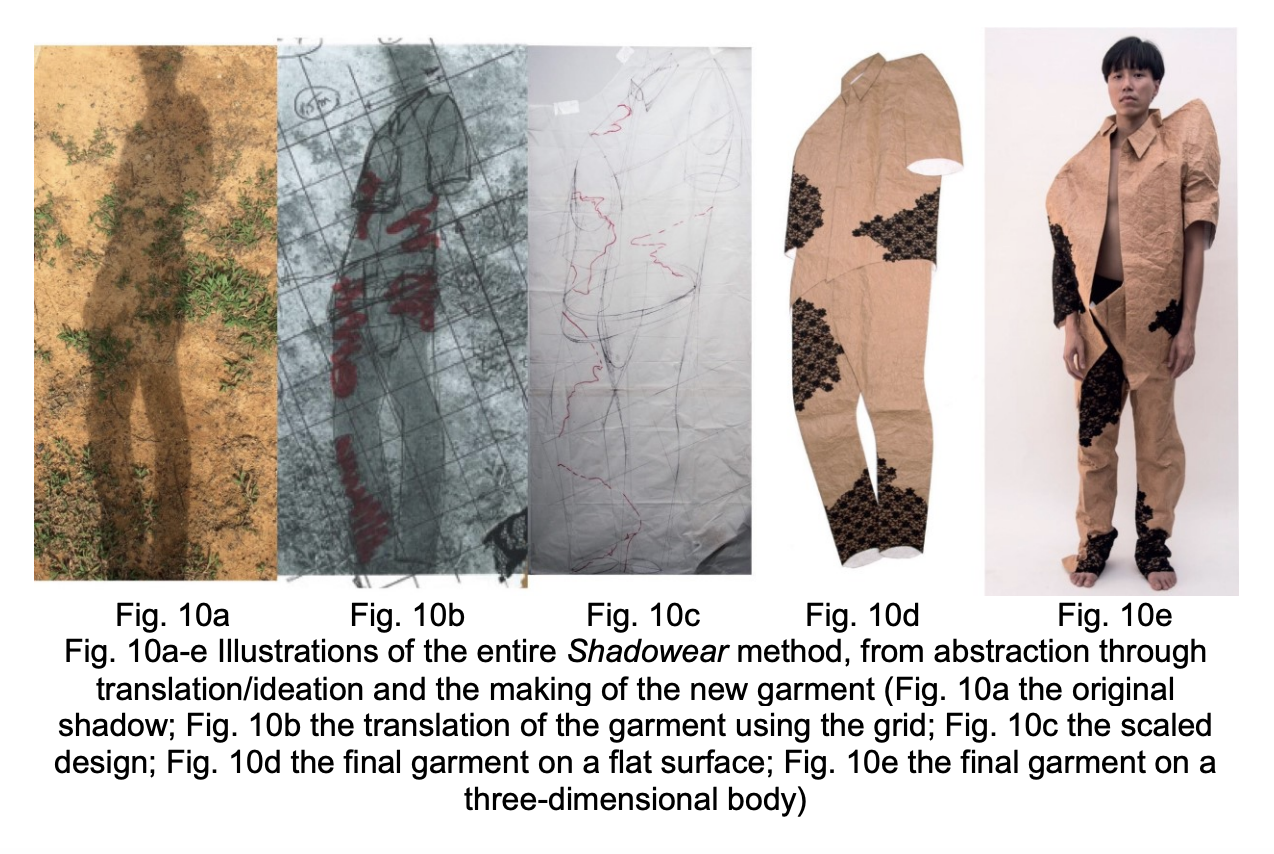
Shadowear:
Using this thought as my starting point, I did a bit of visual research for inspiration of the shape combinations I wanted to try. I found this project called shadowear that used the 2d projection of the body as the base for the garment shape. I thought this was a really interesting approach and I really liked the dialogue between the 2d projection and 3d objects it created.
3d Shaping Textiles:
I also had a look at some other examples of 3D textile composities. I think whats most interestin about these is the option to form them straight away in the inteneded shape and remove a lot of the steps we traditionally think of as necessary when working with textiles.

Fashion Examples:
For shape ideas, I looked for examples of garments that spacially augmented or changed the body in some way or werent bound by the confines of the body for their shape.
Leather Moulding:
CNC Tutorial:
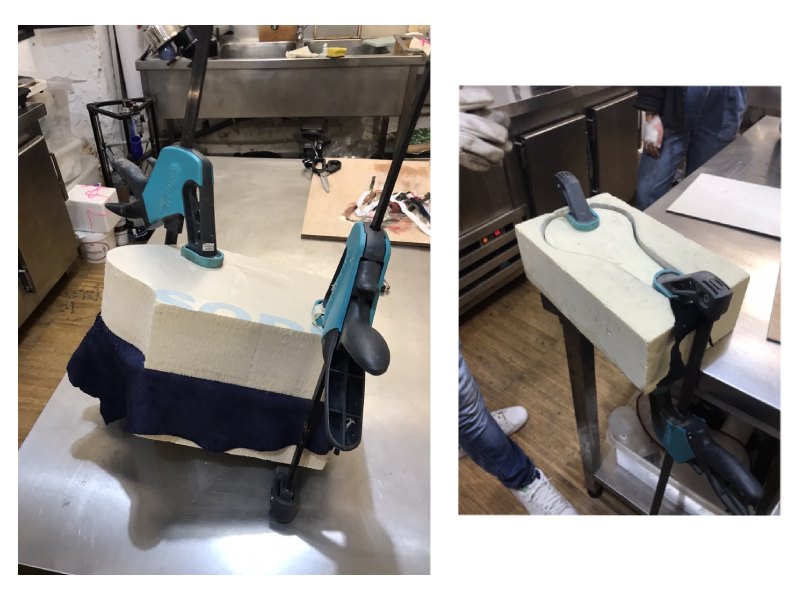
To understand how to use the CNC machine, we had a tutorial with Josep where we made a smalle example mould. He showed us briefly how to design the positive and negative moulds in Rhino and then took us through all the settings we needed to use for RhinoCAM to get the file ready for the CNC.

Once the files was ready, we needed to secure the foam we would be cutting it out of to the bed of the machine. We did this by drilling 4 small bits of wood to the bed around it, 2 flat to align it and 2 at a 45 degree angle to stop the foam rising when it was being milled.
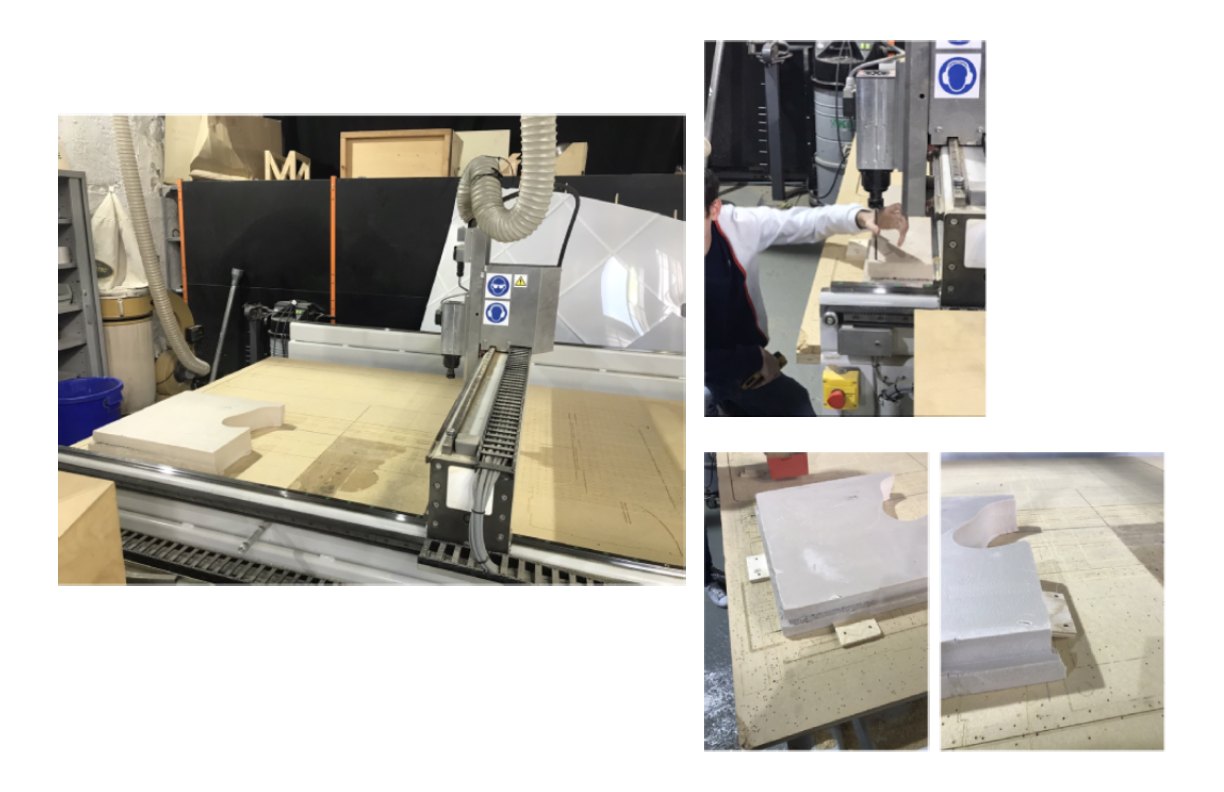
For the example mould we used a 12mm size drill for the roughing setting and and a 6mm for the finishing. We then also had to do a bounding box around it with the profiling setting to cut the moulds out of the bigger bit of foam once they were done, we also used a 12mm drill for this.
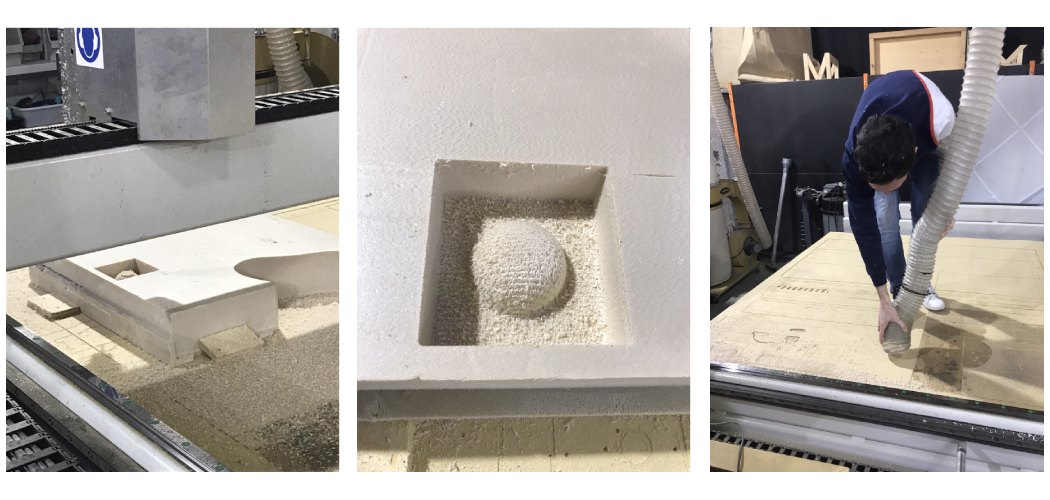
As we had some issues with the foam the first time we tried to cut the mould we ended up with one half version that was only roughed an not finished before we made the complete mould (left below). However after this we managed to cut out the both parts of the mould perfectly.
Designing the Mould:
For my mould, I wanted to add some 3D indents of the body into some 2D pattern pieces to see how these would change the shape of the pattern when it was eventually made into 3D. For the shapes to combine, I used a basic bodice and seelve pattern and a mesh from MakeHuman that I sliced and combined in a few variations.
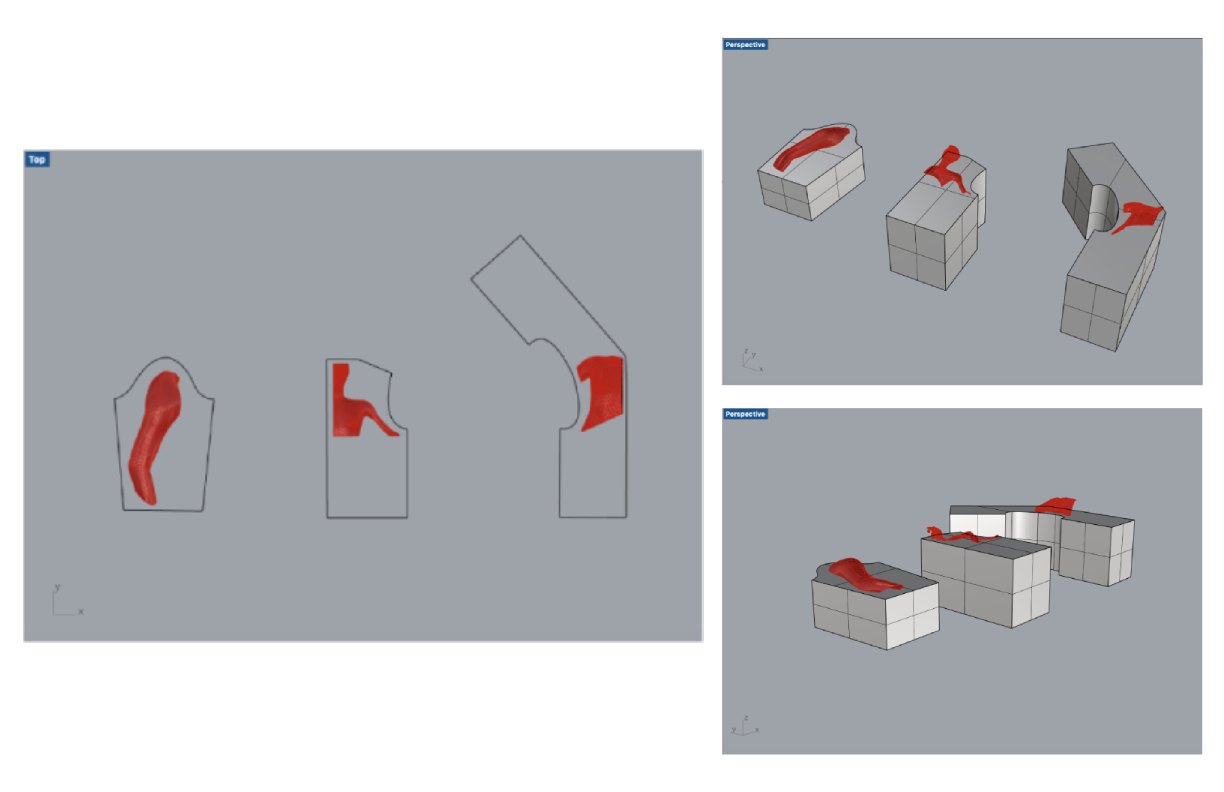
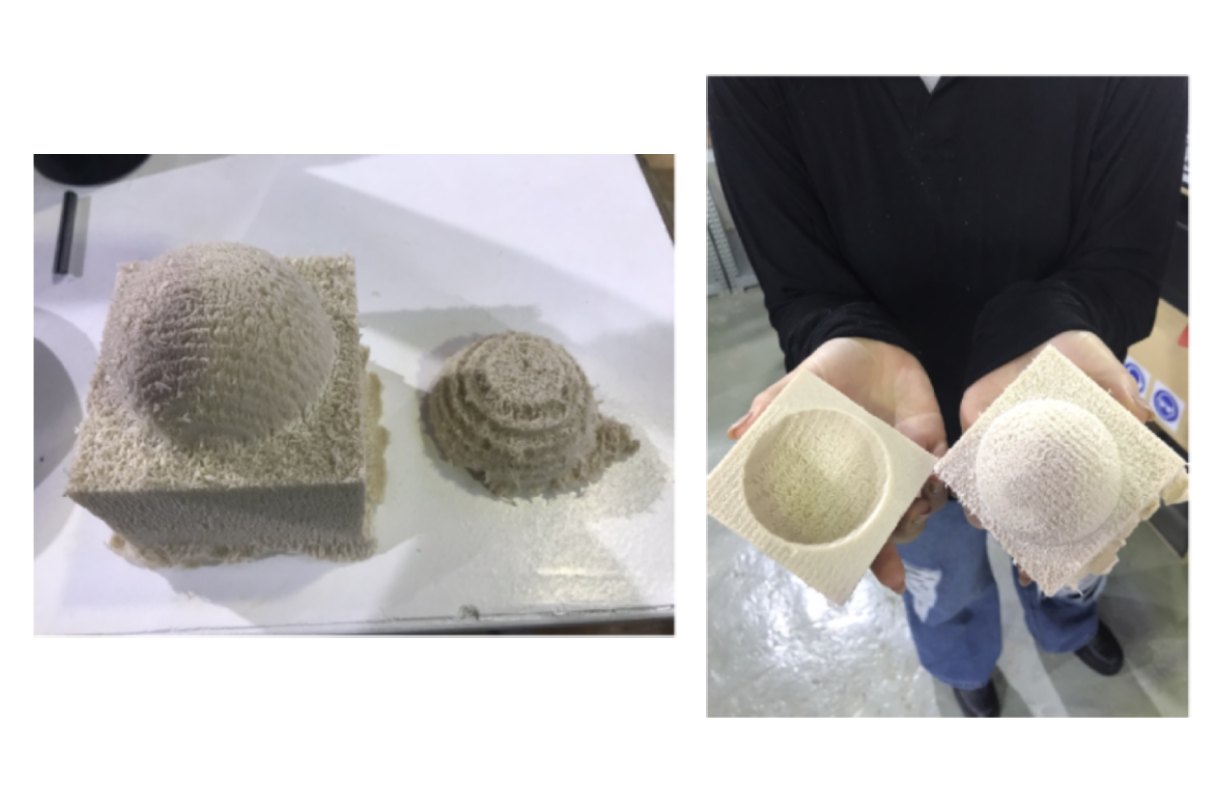
Of the three I made above, I chose the sleeve with an arm indent as the one to test first. This was probably the simplest one and the quickest as we had a long queue for the CNC machine. With Petra's help, I then combined the mesh and the sleeve plane in a neater way and made the negative mould. I scaled these to just under half size.

After the design was done, I sent it to the uni computer to put it through RhinoCAM and Hala and Julia helped me with the right settings.
Cutting the mould:
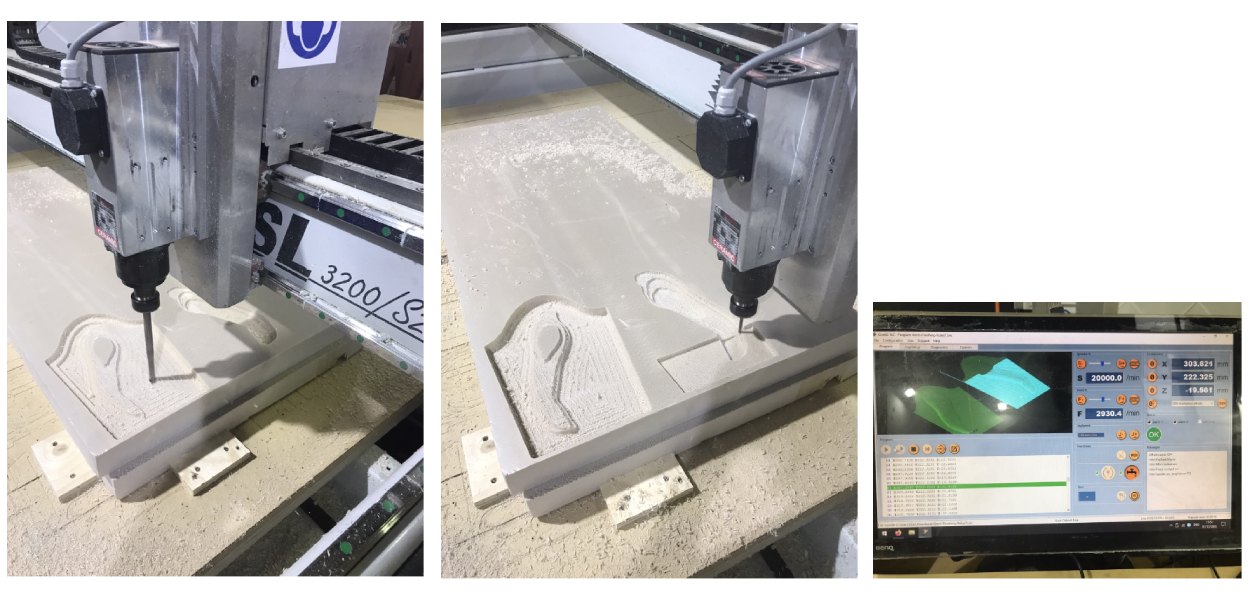
I had three files to cut for the mould - 12mm roughing, 6mm finishing and 12mm profiling - to get the right finish for the mould.
Roughing - the first quick cut to roughly get rid of a lot of excess material Finishing - the second slower cut that cut the actual shape desired in a smooth, detailed way Profiling - the last cut that cuts the outline of mould out of the bigger piece of material
Leather:
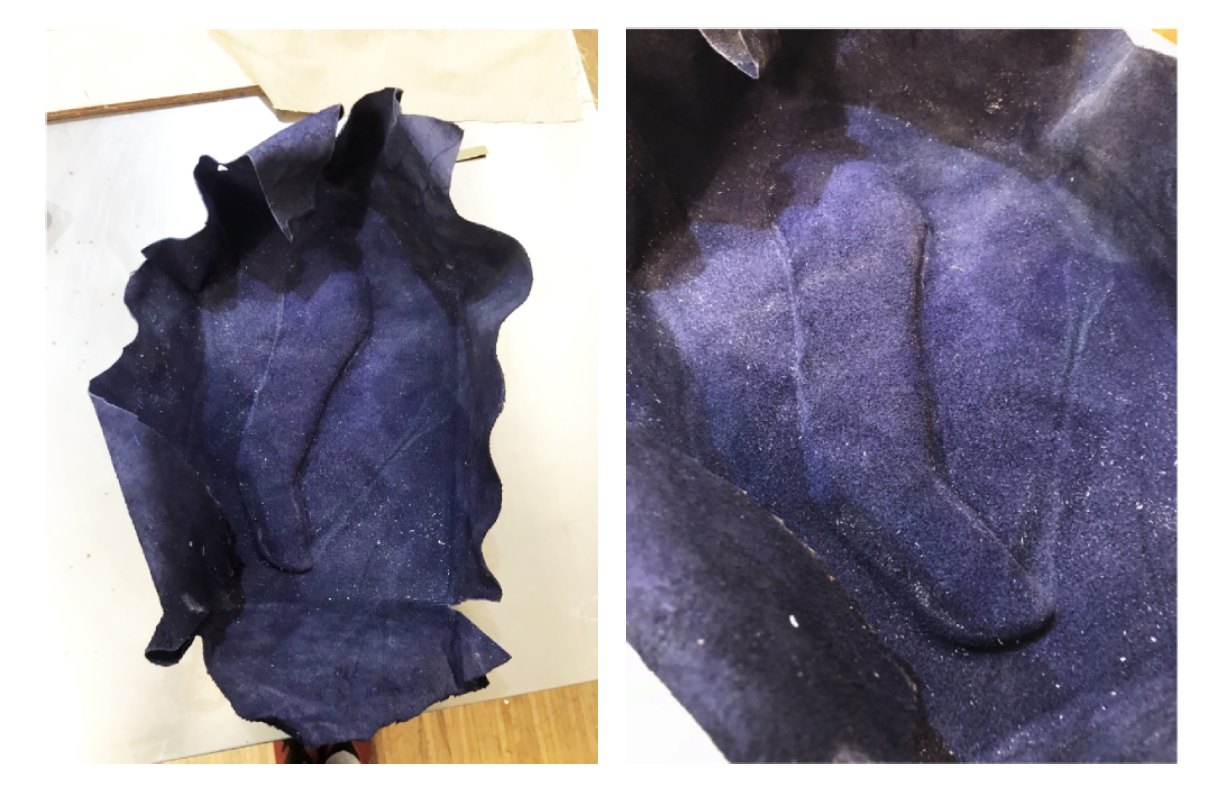
While I was cutting the mould, I left the leather I was going to use to soak in warm water for about 2 hours to make it more flexible and help it better take to the mould. Just before I put it in the mould, I tranferred it to boiling water for a few minutes. Then i stretched it over the mould and clamped it together.
I left it to dry over the weekend and when i took it out, it kept the shape well. Also the extra leather around the mould also kept the draped shape from it falling around the mould which I thought was quite nice and someting I would maybe want to explore to create solid draped forms. However, it wasnt helpful for what I had wanted for this mould so I did trim it down.
Sewing:
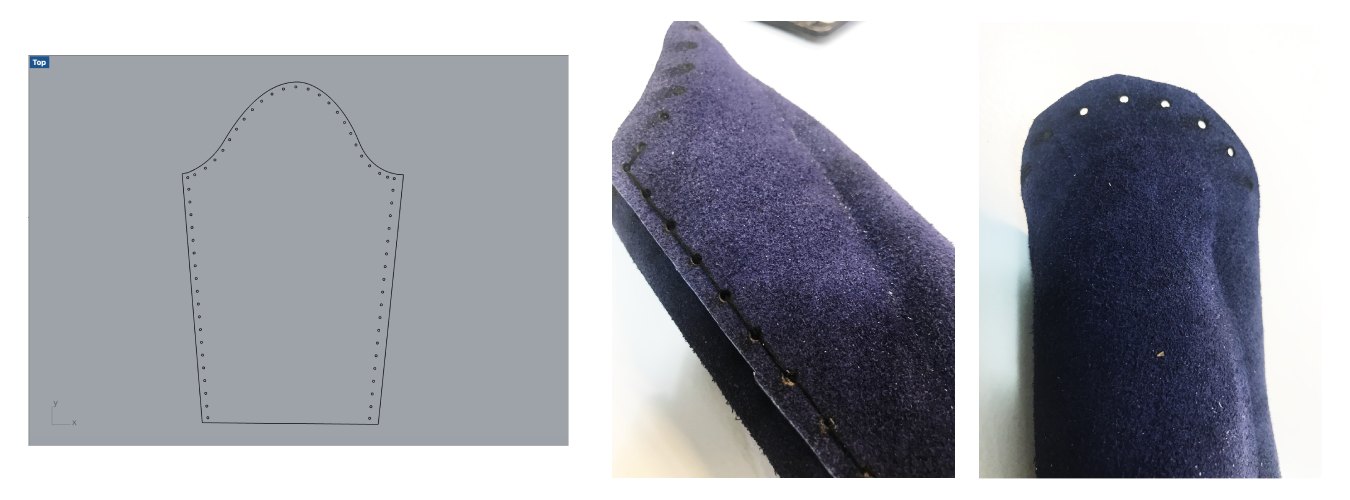
Once I had cut out the pattern piece, I needed to find a way to sew it as the leather was too thick for hand or the domestic machine we have at the lab. To do this, I decided to try to laser cut holes around the piece so i could easily sew it by hand. I didnt get the alignment of the laser cutting document and the leather exactly right but it was close enough and I could trim it to shape.
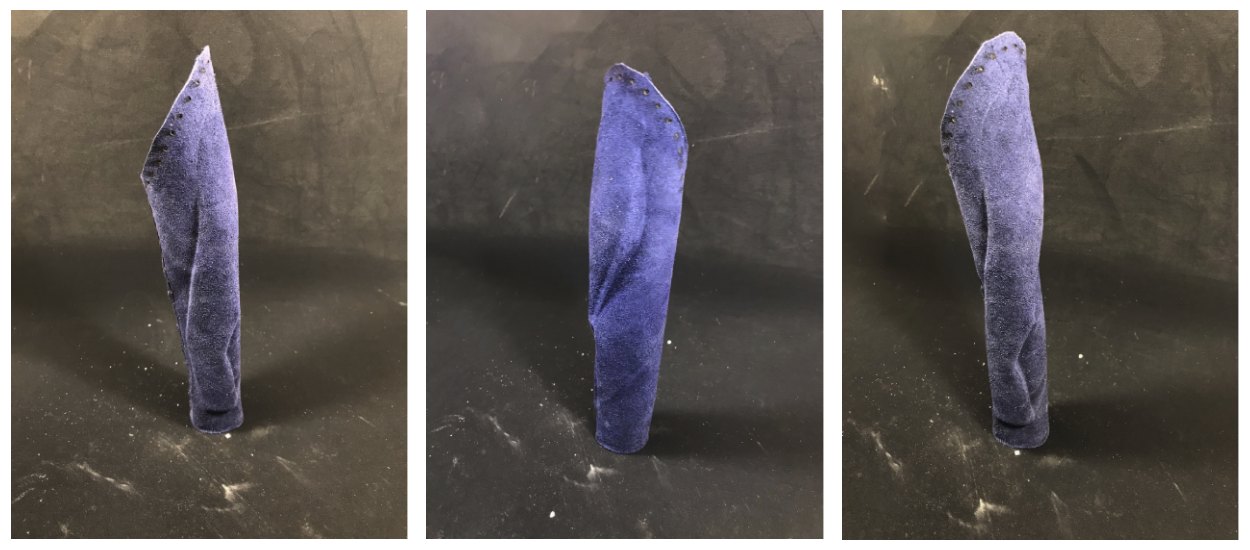
Here is the finsihed sleeve, I didnt have time to stitch it to a bodice or a mannequin small enough to test it on or with movement but overall I am quite happy with it. I would maybe use a more exaggerated mould in future as it is quite subtle but I like the way it distorts the arm shape and looks almost muscular.
Composites:
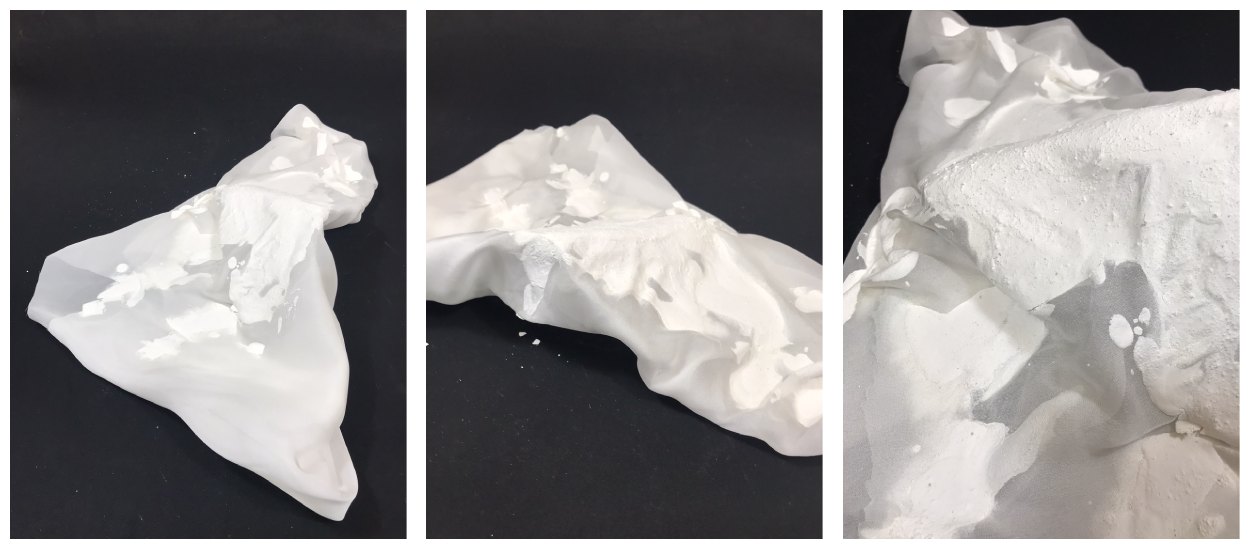
I also wanted to try out some different ways of using composities to upcycle / recycle textiles (particulary scraps). I did a few experiments with biomaterials to try to combine textiles into bigger sheets in different methods to see how strong they would be.
Resin and Jute:

Textile scraps:
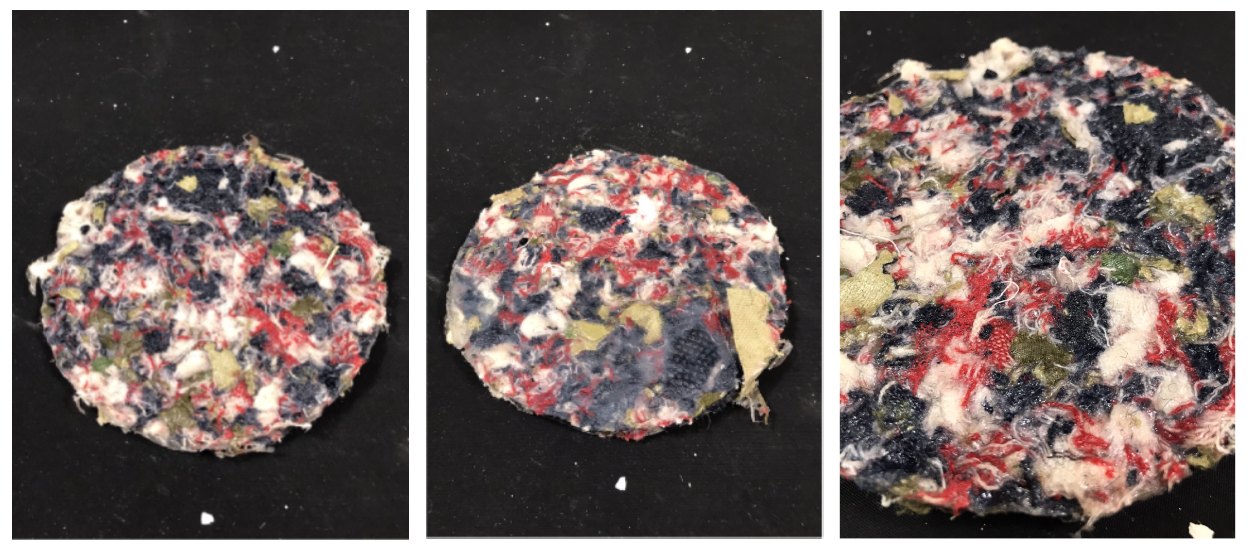
I for this sample, I shredded some textile scraps that we had in the lab into little pieces. I used the shredded fabric in a shallow mould and poured agar agar over it until all the scraps were completely covered and left it over night to dry.

This sample was quite sturdy and all the scraps held together well, I dont think it could take too much pressure due to the nature of agar but it was a solid block of material.
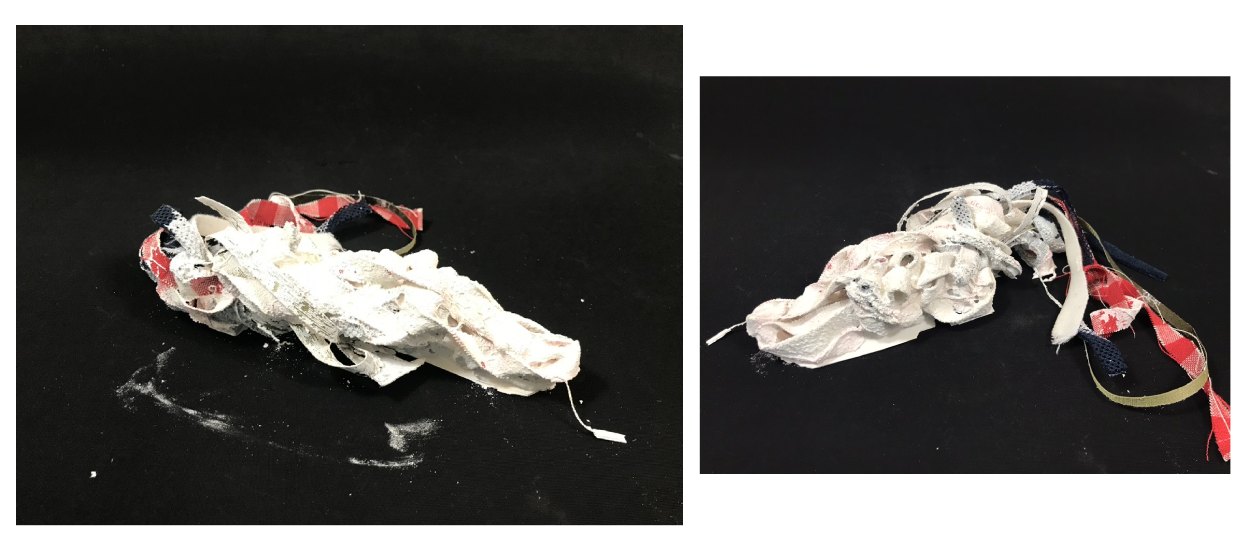
Textiles strips:


Concrete:
Fabrication files
All fabrication files uploaded here: Textile Scaffold Files