3. Circular Open Source Fashion

Research & Ideation
Kosuke Tsumura is a Japanese fashion designer renowned for his innovative and experimental approach to clothing design. He is the creator of the brand Final Home, founded in 1992, which explores the relationship between fashion, functionality, and survival. His work is deeply influenced by social and environmental concerns.
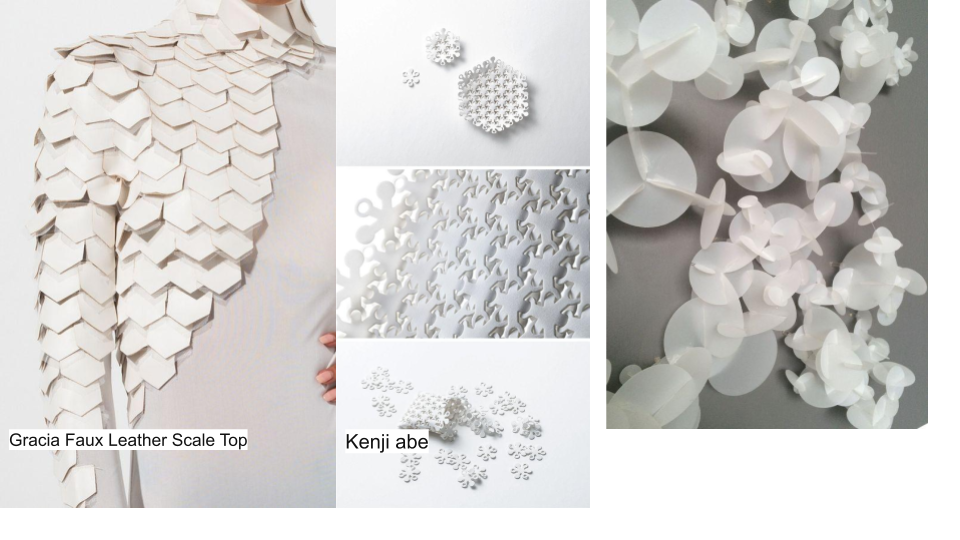
Figure 1: Gracia Fraux and Kenji Abe (2021) retrieved from Kenji Abe
Key Aspects of His Work
- Final Home: The brand's most iconic piece is a jacket with numerous pockets designed as a personal shelter for use in emergency or disaster situations. The pockets can be filled with newspapers, clothes, food, or other items, providing insulation and storage. This design embodies his vision of fashion as a practical and adaptable tool for survival.
- Purposeful Design: Tsumura diverges from traditional fashion norms to focus on how design can address essential human needs, such as safety, shelter, and protection.
- Sustainability and Minimalism: Many of his creations use recycled or repurposed materials, emphasizing the importance of conscious and sustainable design.
- Relationship Between Technology and the Body: Tsumura experiments with how clothing can function as an extension of the human body, incorporating concepts of technology, utility, and emotional connectivity.
References & Inspiration
Cy Bo
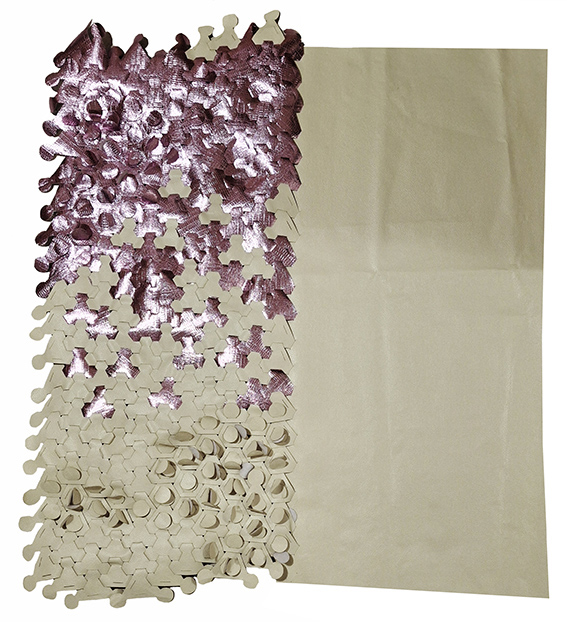
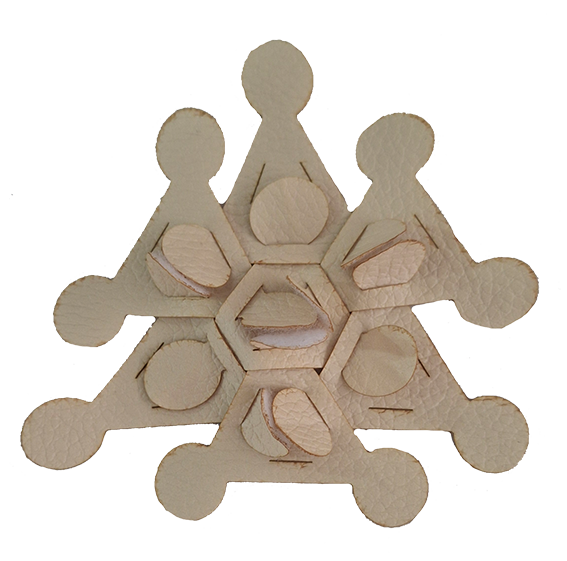
This concept describes an innovative cytological packaging material that transcends traditional boundaries by offering versatility and sustainability. The material is sponge-like, providing high cushioning when layered, making it suitable for protecting fragile items like fruits, dishes, and more. Its water-resistant and heat-resistant properties allow for various applications beyond packaging, such as pen cases, baskets, coasters, or even lamp shades.
Key features include:
- Reusability: It can be rearranged into different shapes multiple times, expanding its potential uses.
- Sustainability: Designed to minimize plastic waste by encouraging reuse.
- Versatility: Suitable for both practical and creative purposes, adapting to user needs with limitless possibilities.
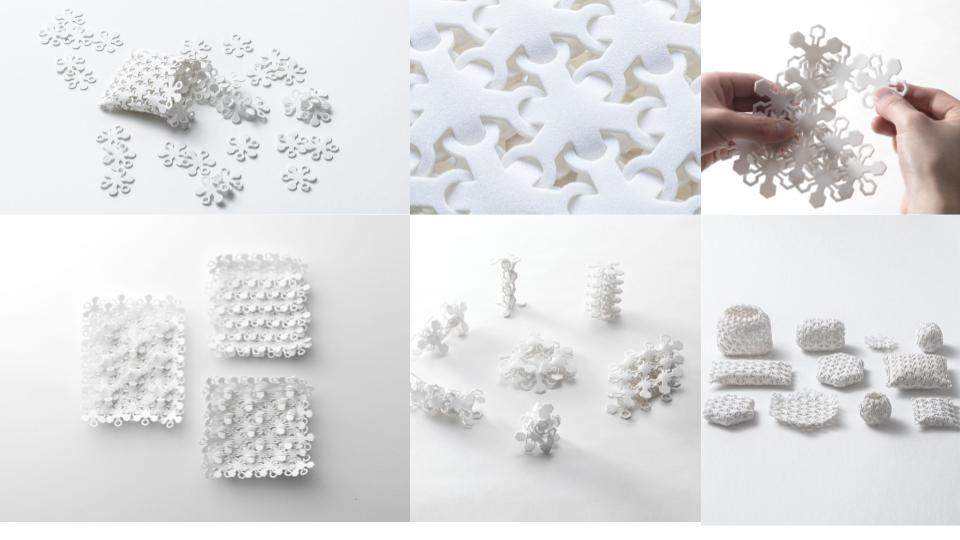
Figure 2: Gracia Fraux and Kenji Abe (2021).Retrieved from Kenji Abe
Download reference:
Tools
Process and Workflow
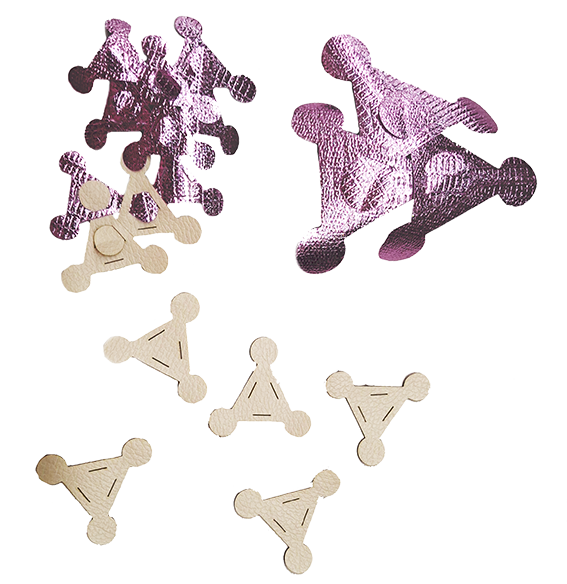
For this project, I primarily worked with PVC-free synthetic leather, choosing a material that would be safer during the fabrication process. I selected a thickness of around 2 mm, as it offers a good balance between flexibility and structural stability, making it suitable for modular pieces. While it can be laser cut, its behavior can vary depending on its specific composition, so running preliminary tests is always important. The fact that it is PVC-free is particularly relevant, as it helps prevent the release of toxic fumes during cutting.
For the design stage, I used Adobe Illustrator as my main tool. This vector-based software allows for precise 2D drawing, which is essential when working with digital fabrication processes like laser cutting or CNC machining. Because it works with vectors, designs can be scaled without losing quality, making it easier to adjust dimensions and tolerances without affecting the final outcome. This makes it especially effective in workflows where design and fabrication are closely connected.
- Version: Any recent version
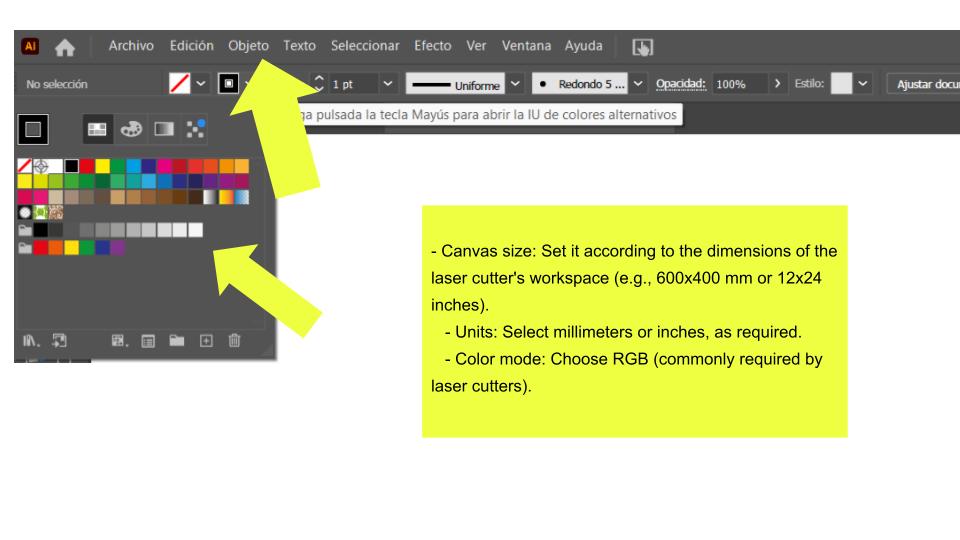
- Configuration: RGB mode, units in millimeters
- Main tools used:
- Rectangle Tool (M)
- Ellipse Tool (L)
- Pen Tool (P)
- Pathfinder Panel
How to Design Modules in Illustrator and Prepare Them for a Laser Cutter
I started the process by setting up the design in Adobe Illustrator, creating a new document that matched the working area of the laser cutter. I adjusted the canvas size to fit the machine's bed—typically something like 600 × 400 mm—so that everything would be properly scaled from the beginning. I also made sure to set the correct units (millimeters or inches, depending on the setup) and selected RGB color mode, since that's usually required for laser cutting workflows.
To improve precision while designing, I enabled guides and a grid system inside Adobe Illustrator. By turning on View > Show Grid and Snap to Grid, I was able to align elements more accurately and maintain consistent spacing throughout the design. This helped ensure that all modules stayed properly structured and ready for fabrication without misalignment issues.
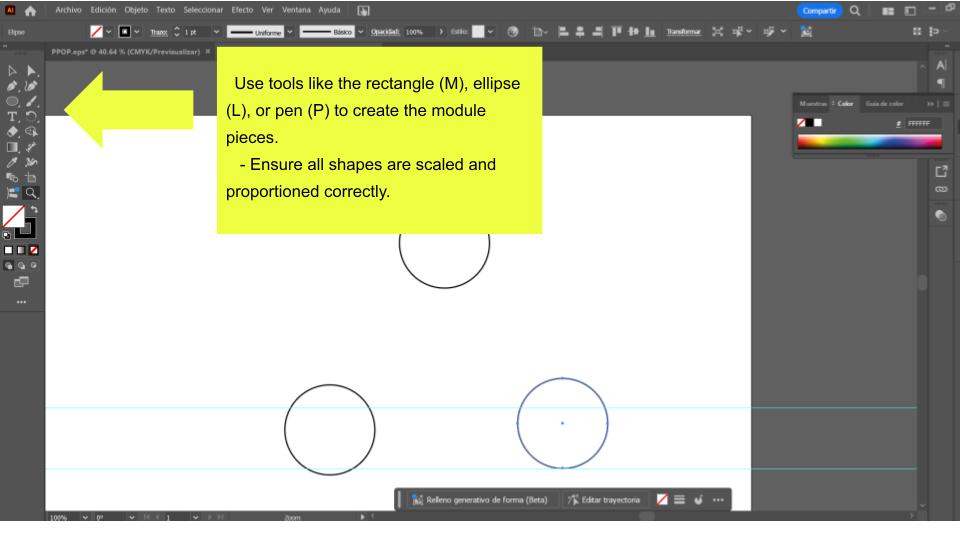
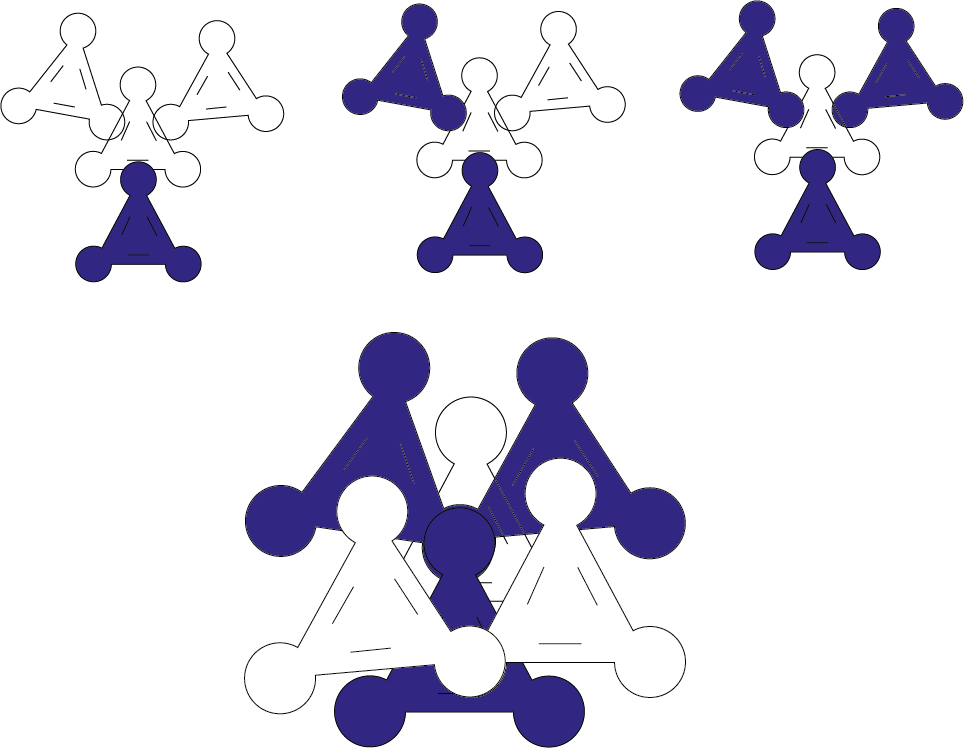
I began building the module by drawing the basic geometry using tools like the rectangle (M), ellipse (L), and pen tool (P). I focused on keeping the shapes clean, scaled, and proportioned from the start, since any inconsistency here would directly affect the fabrication later.
I added the assembly slots by drawing small rectangles or lines along the edges of each piece. I made sure these slots matched the material thickness—around 3 mm in this case—so the parts could fit together properly during assembly without being too loose or too tight.
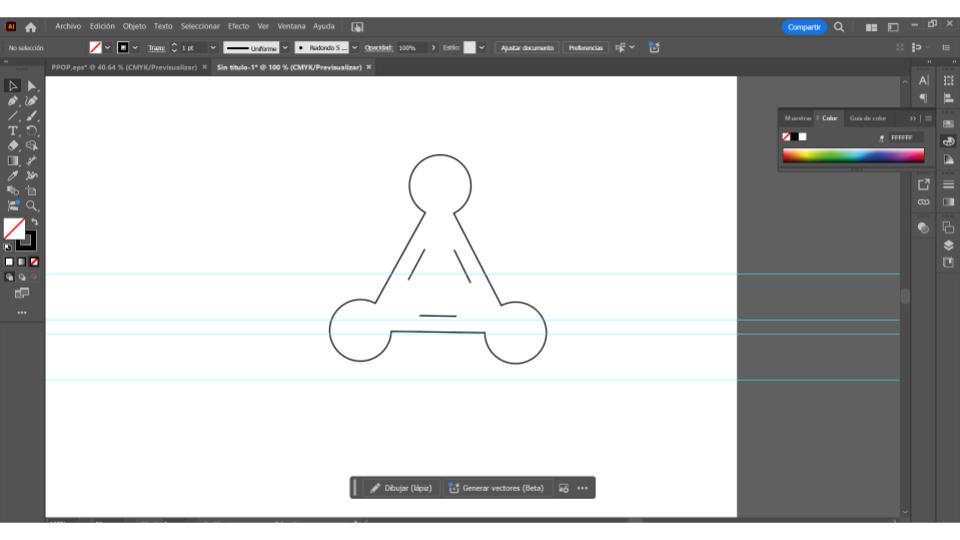
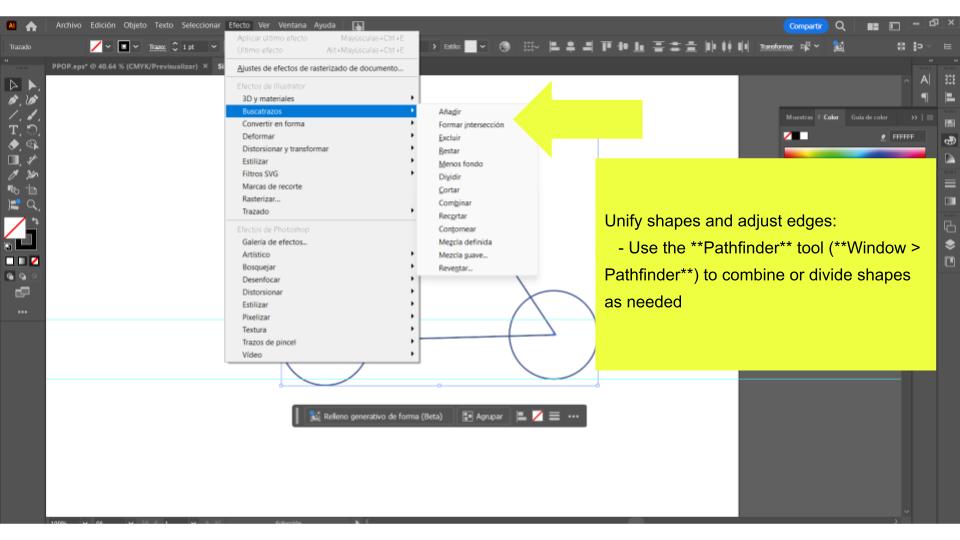
I refined the geometry by using the Pathfinder tool (Window > Pathfinder) to combine, subtract, or divide shapes depending on the structure I needed. This step helped me clean up the design, unify overlapping elements, and ensure that all edges were properly defined for fabrication.

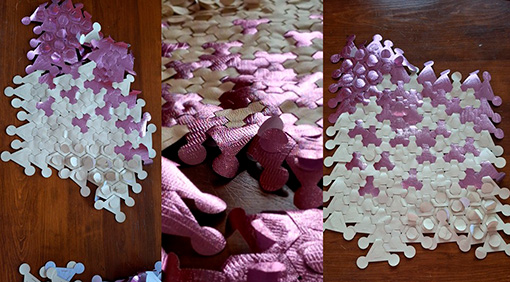
Preparing and Laser Cutting Molds (Synthetic Leather with Slot-Fit Assembly)
Before starting the design, I first measured the actual thickness of the synthetic leather using a caliper, since relying on nominal values can lead to poor fitting joints. This measurement became the basis for defining the slot-fit connections. Instead of matching the material thickness exactly, I designed the slots slightly smaller to achieve a tighter fit—typically around 0.1 mm less than the measured thickness. For example, if the material was 2 mm thick, I designed the slot to be 1.9 mm wide. From there, I adjusted tolerances depending on the type of fit I was aiming for: reducing between 0.05 and 0.1 mm for a tight, friction-based fit, or increasing between 0.1 and 0.2 mm for a looser assembly.
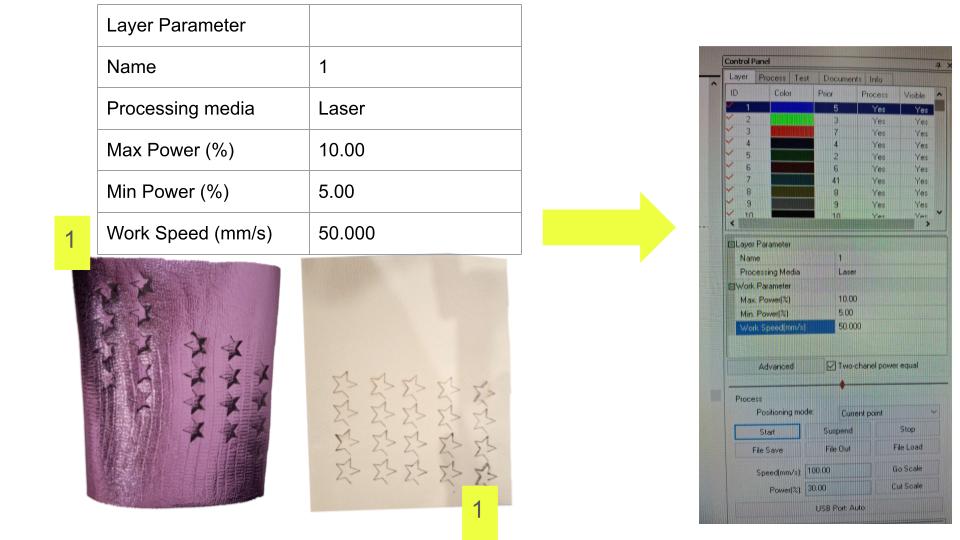
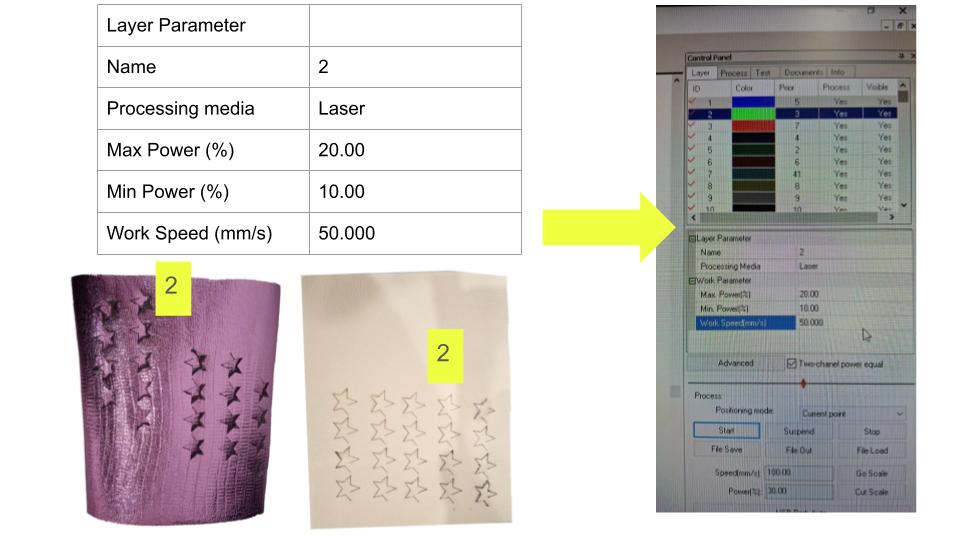
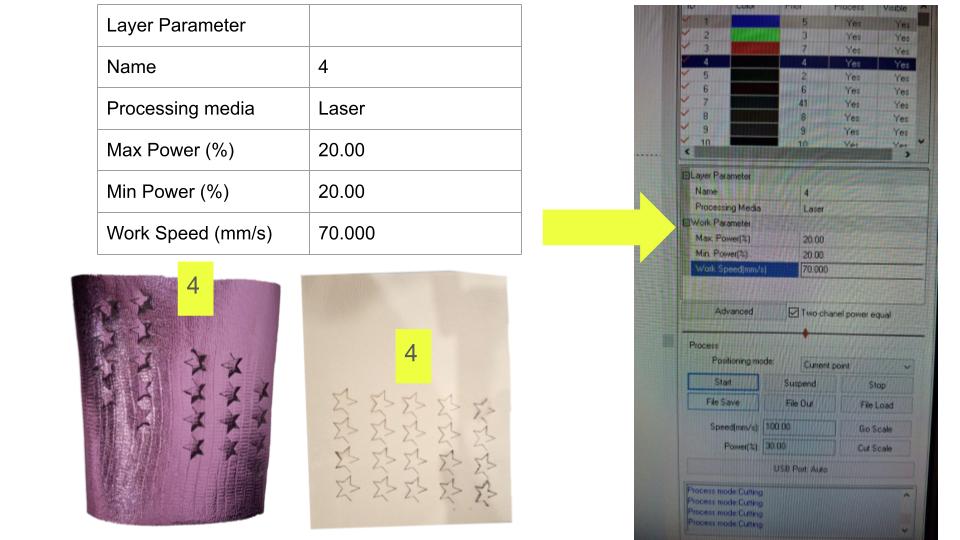
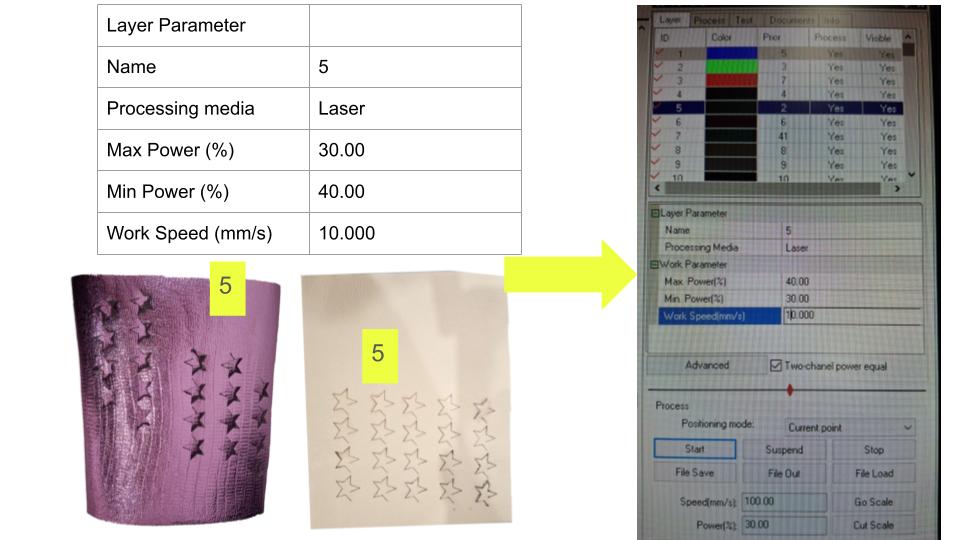
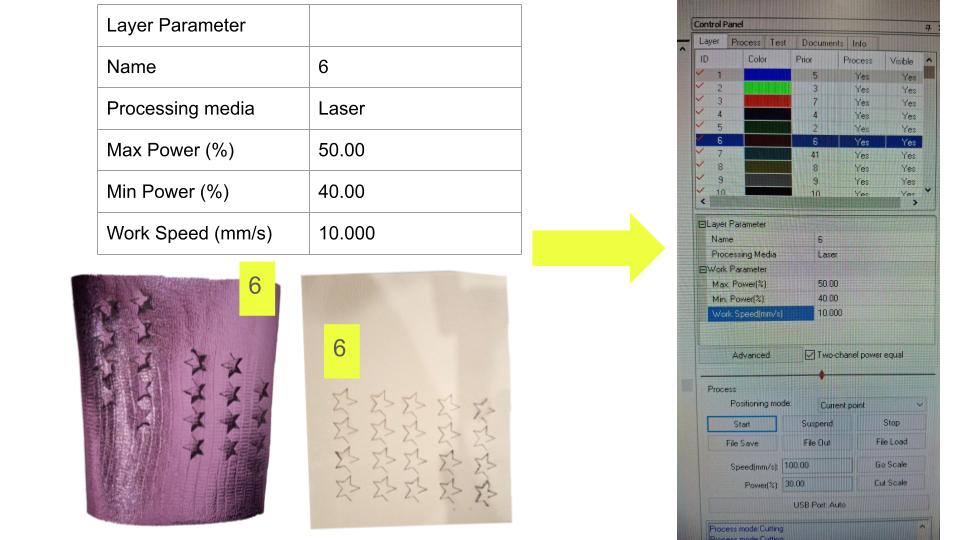
Once the design was ready, I prepared the laser cutter by making sure the cutting bed was clean and free of debris, removing any leftover material from previous jobs to avoid interference during cutting. For this particular material, I worked with approximate parameters of 20 mm/s at 60% power for cutting, and 300 mm/s at 15% power for scoring fold lines. These values served as a starting point and were adjusted as needed based on the behavior of the material during testing.
Prepare the Material
Once everything was ready, I placed the synthetic leather flat on the cutting bed, making sure it was properly aligned. Because this type of material can sometimes curl or lift slightly, I secured the edges with masking tape to keep it stable during the cutting process. After that, I adjusted the laser's focal distance to ensure the beam was properly concentrated, which is key for achieving clean and precise cuts.
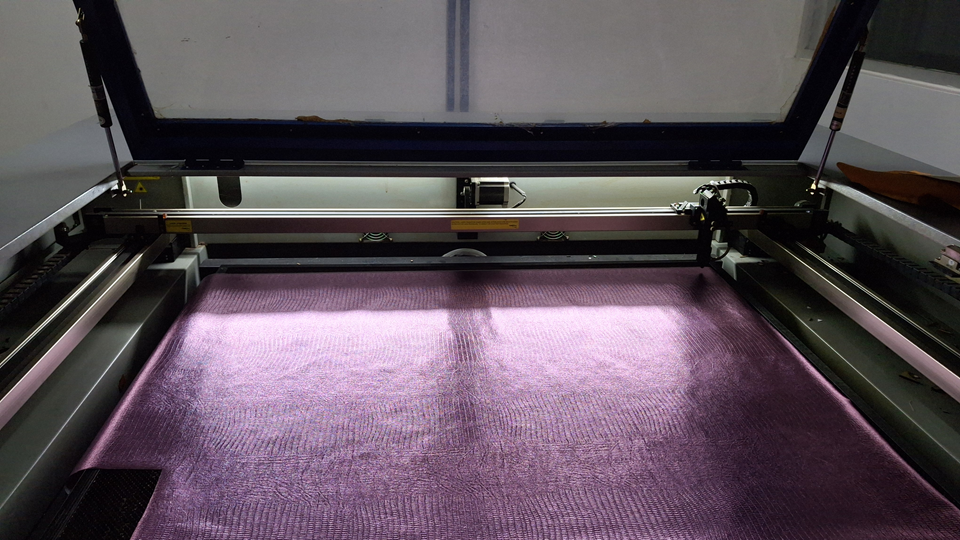
Before committing to the full job, I ran a small test cut to check that the slots and tabs matched the actual thickness of the material and that the tolerances were working as expected. Once I was confident with the settings, I sent the full design to the laser cutter, keeping a close eye on the process to avoid issues like over-burning or misalignment. After the cut was complete, I inspected each piece carefully, checking that the edges were clean and that the slots were well-defined and ready for assembly.
Slot-Fit Assembly Techniques
Insert the Tabs into the Slots
- Manual fit: Slightly bend the tabs if needed to ease insertion.
Fabrication Files

Pro Tips
- Simplify the design: Use the fewest parts possible for faster assembly.
- Adjust tolerances: Always perform fit tests before the final cut.
- Prototype first: Test your design on cardboard or MDF of the same thickness before cutting the vinyl leather.
Assembly Videos
Final Result