5. E-textiles

Assignment
Explore and experiment with electronic textiles, integrating electronic components into flexible materials, and document the process, tests, and results.
Research
Electronic textiles, also known as soft electronics, integrate electronic components into fabrics, enabling textiles to sense, react, or communicate.
Applications include:
- Temperature sensing
- Heart rate monitoring
- Light emission
- Interactive interfaces
E-textiles are widely used in fashion, medicine, sports, and art, maintaining textile flexibility while adding electronic functionality.
References and Inspiration
Amor Muñoz
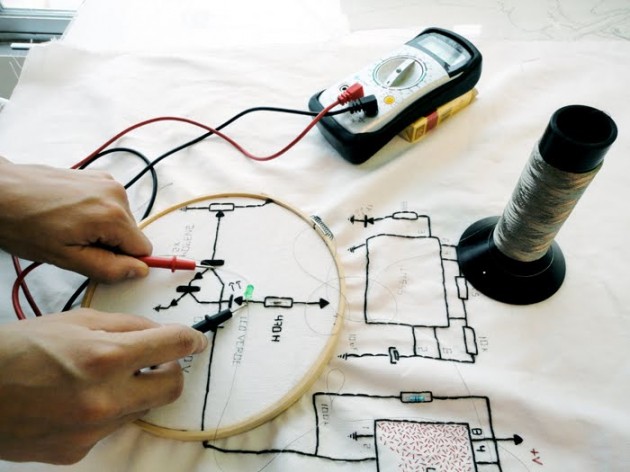
Figure 1: Amor Muñoz, textile interaction
Amor Muñoz combines traditional textile techniques such as embroidery and knitting with electronics and activism. Her work addresses labor, economy, and gender through collaborative textile-based electronic systems.
Projects like Laboratorio de Conciencia Electrónica explore how manual labor intersects with technology, emphasizing craftivism, collective production, and social awareness.
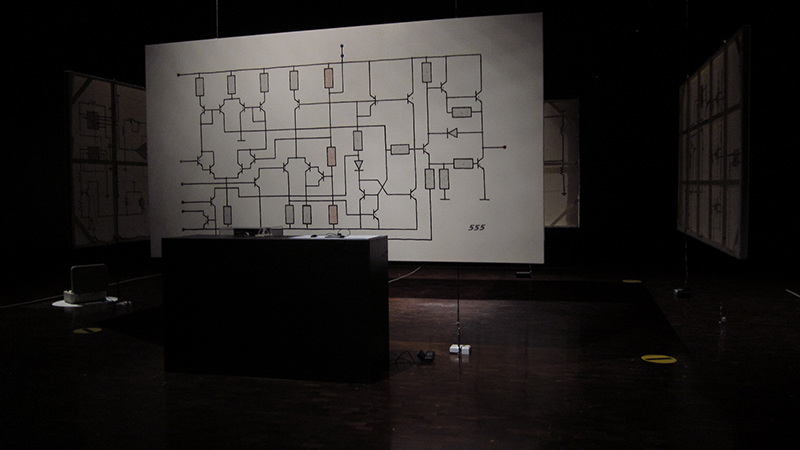
Figure 2: Amor Muñoz – Textile Art Installation retrieved from Amor Muñoz
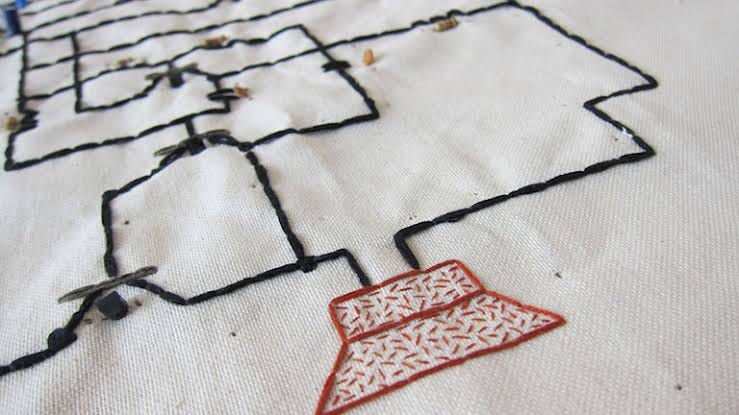
Figure 3: Amor Muñoz, Electronic embroidery detail retrieved from Amor Muñoz
Claudia González Godoy

Figure 4: Claudia González - Concertina Project retrieved from Claudia González
Claudia González Godoy works at the intersection of art, design, and technology. Her project Concertina: Máquinas de Papel explores sound electronics through paper-based mechanisms using:
- Conductive tapes
- Conductive inks
- Conductive threads
- Smart fabrics
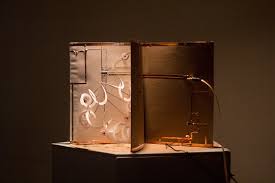
Figure 5: Claudia González - Paper Electronics Detail retrieved from Claudia González
The project merges artist books, DIY electronics, and paper engineering, demonstrating how unconventional materials can function as electronic interfaces.
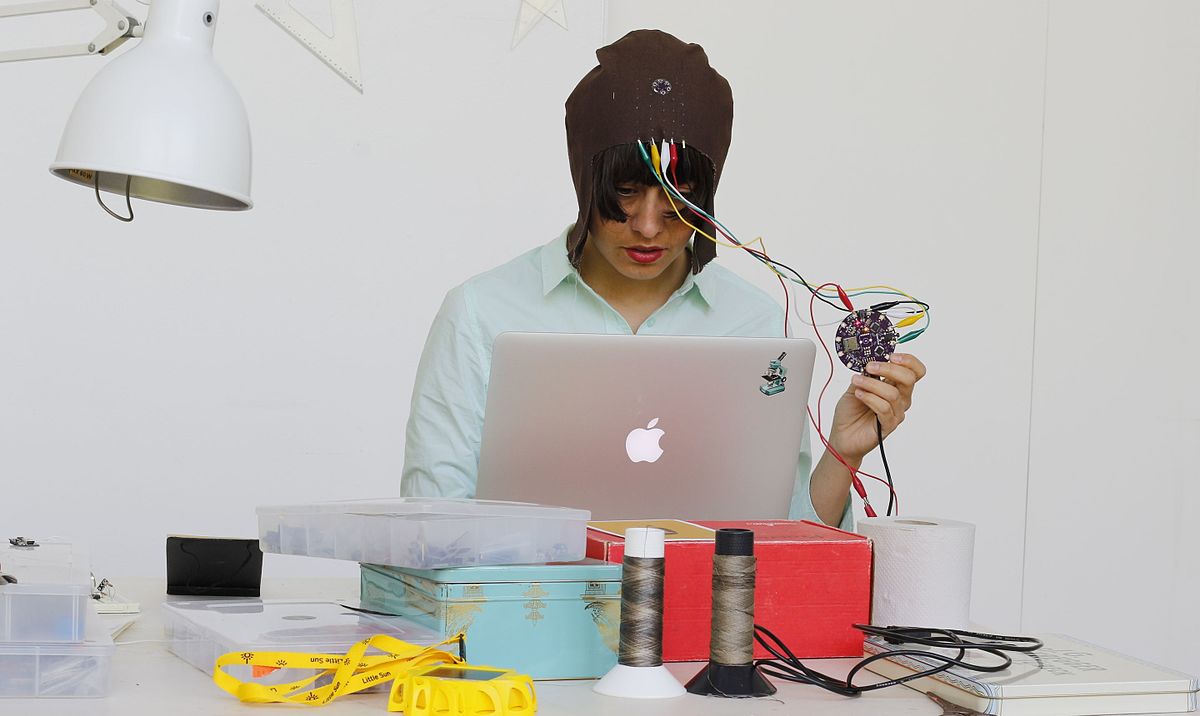
Figure 6: Amor Muñoz - Workshop Documentation retrieved from Amor Muñoz
Tools and Materials
Electronics
- Arduino Uno
- Seeed Studio XIAO RP2040
- 5 mm LEDs
- Resistors (220 kΩ)
- Piezo buzzer (5 V)
- Tactile push buttons
- Jumper wires
- Breadboard
Textile Materials
- Conductive fabric
- Copper conductive tape
- Non-conductive fabric (cotton, felt)
- Sewing thread and needle
- Fabric glue
Software
- Arduino IDE
- Fritzing
Process
Testing the Seeed Studio XIAO RP2040
I tested the Seeed Studio XIAO RP2040, a compact development board based on the RP2040 microcontroller.
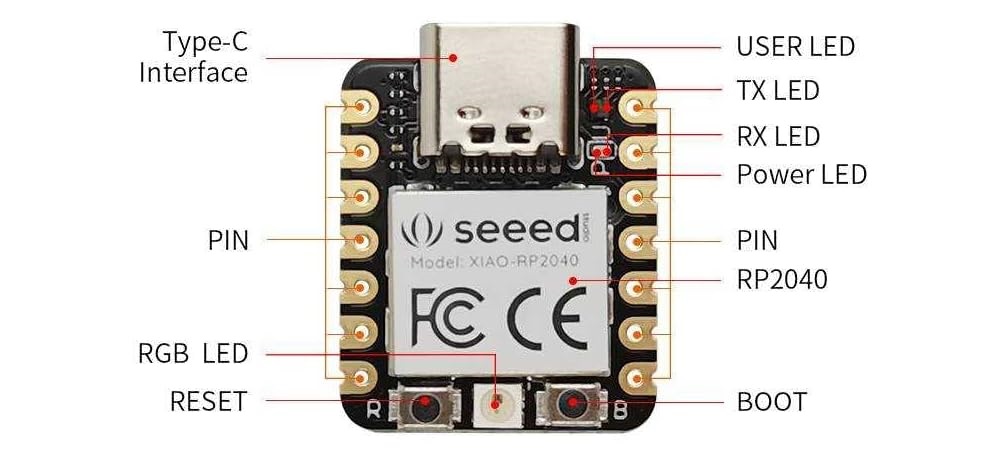
Figure 7: Seeed Studio XIAO RP2040 Development Board
Key characteristics:
- Dual-core ARM Cortex-M0+
- 264 KB SRAM
- 2 MB Flash
- USB-C connectivity
- Small form factor suitable for wearables
NeoPixel Test
I programmed the onboard NeoPixel to test color control and power management.
Workflow:
- Designed schematic in Fritzing
- Programmed using Arduino IDE
- Tested RGB values
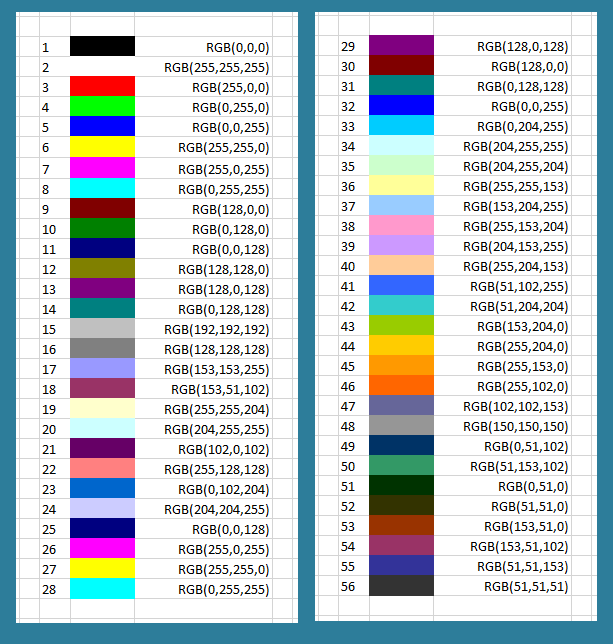
Figure 8: RGB Color Reference Chart
#include <Adafruit_NeoPixel.h>

#define NUMPIXELS 1
#define DATA_PIN 12
#define POWER_PIN 11

Adafruit_NeoPixel pixels(NUMPIXELS, DATA_PIN, NEO_GRB + NEO_KHZ800);

void setup() {
  pixels.begin();
  pinMode(POWER_PIN, OUTPUT);
  digitalWrite(POWER_PIN, HIGH);
}

void loop() {
  pixels.clear();
  pixels.setPixelColor(0, pixels.Color(255, 255, 0)); // Yellow
  pixels.show();
  delay(1000);

  pixels.clear();
  pixels.setPixelColor(0, pixels.Color(255, 0, 255)); // Purple
  pixels.show();
  delay(1000);
}
Fabric Button Testing
Parallel Circuit Design
The second part of the project involved testing different types of fabric buttons. I built a parallel circuit using:
- Five LEDs
- Various conductive materials
- Non-conductive textiles
Each button acted as a switch to light the LEDs when pressed, allowing exploration of how different fabrics perform in electronic applications.
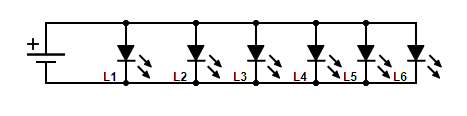
Figure 9: Parallel circuit schematic
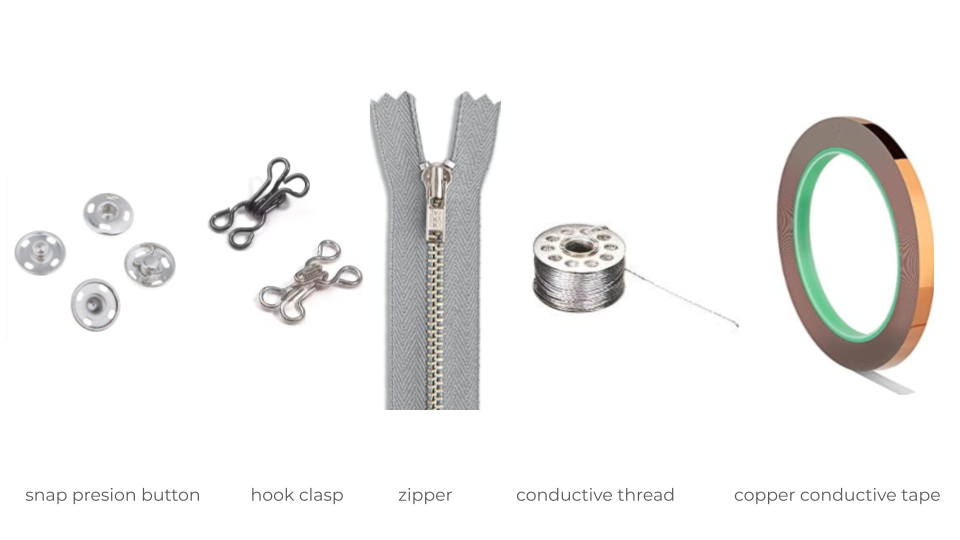
Figure 10: Materials used for testing
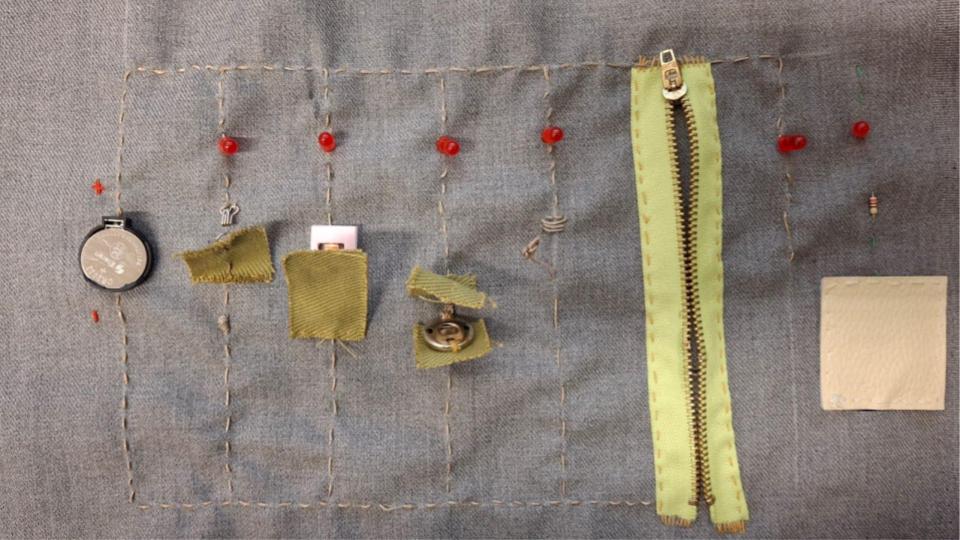
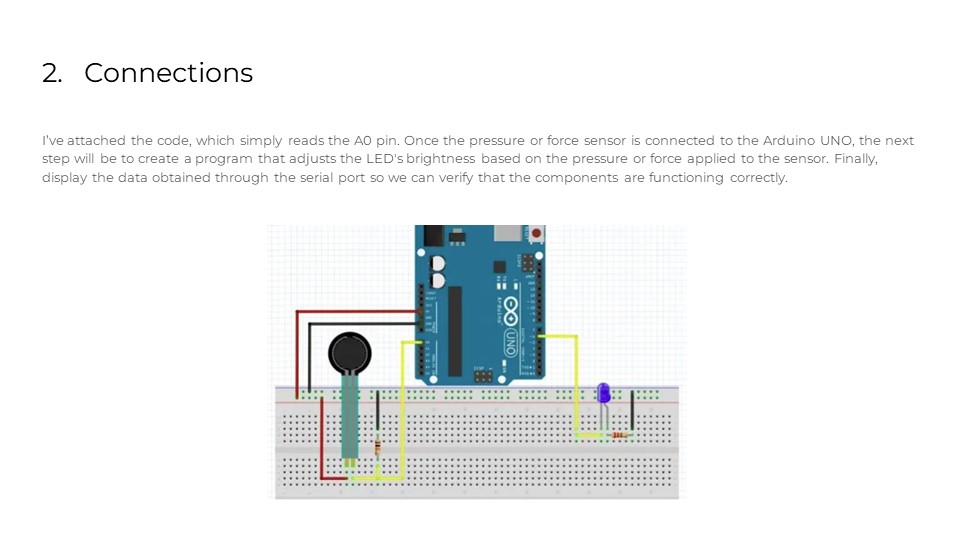
Figure 11: Parallel circuit with a digital button and pressure sensor
Button Types Tested
1. Digital Push Buttons
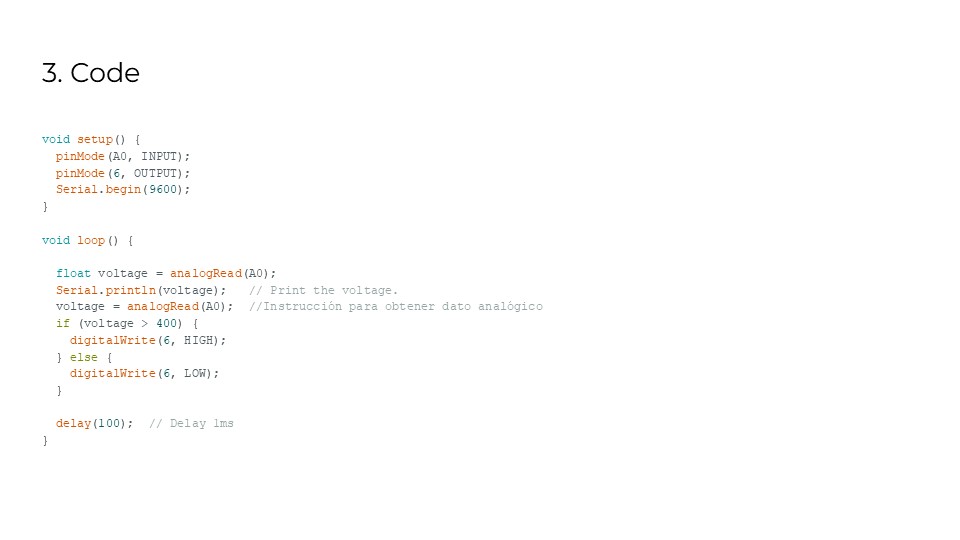
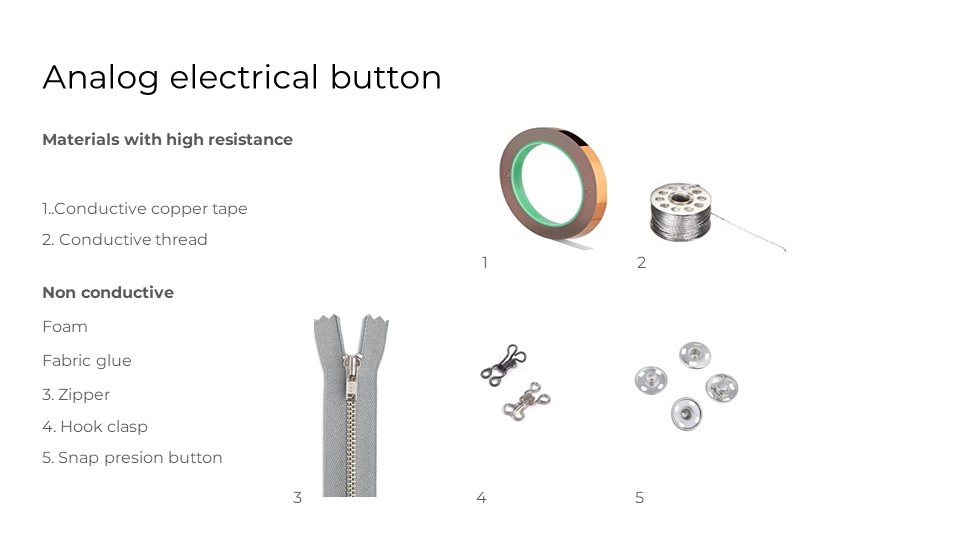
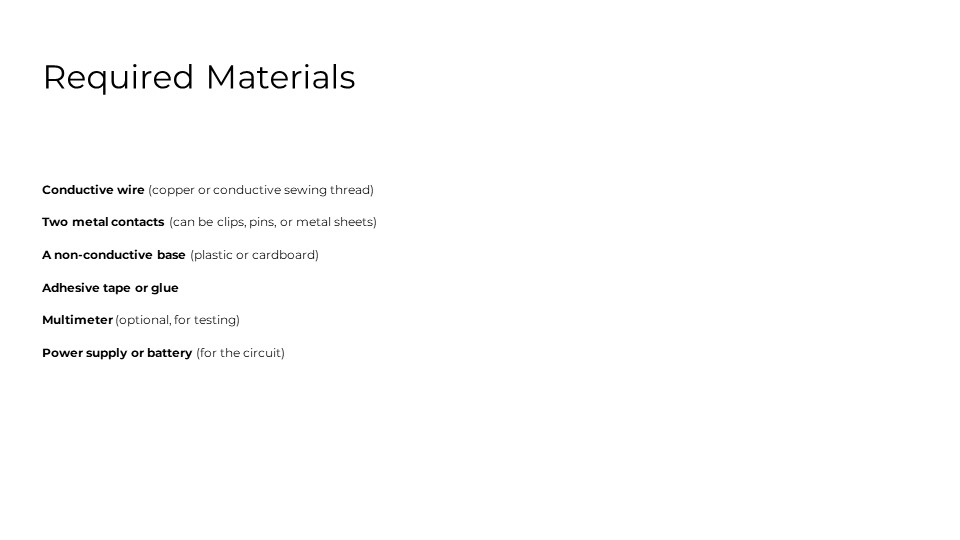
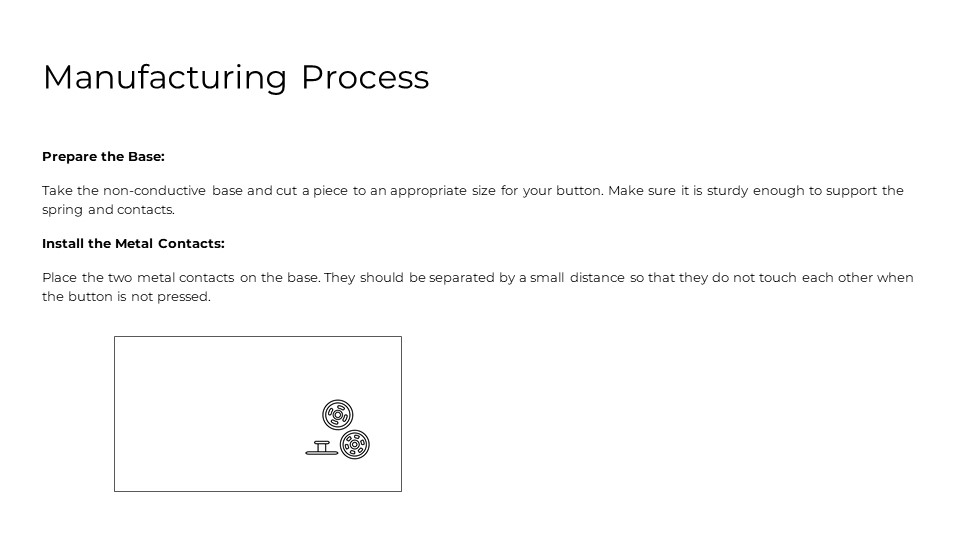
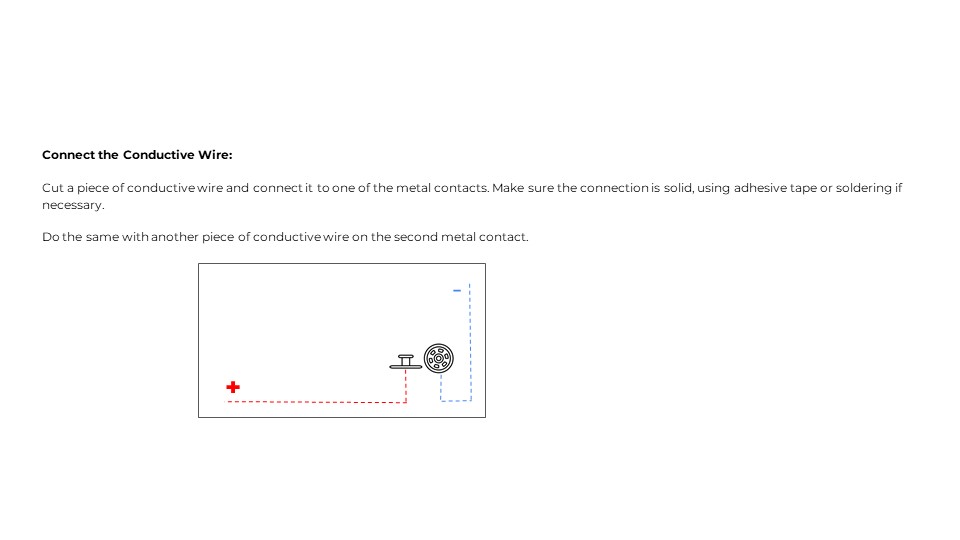
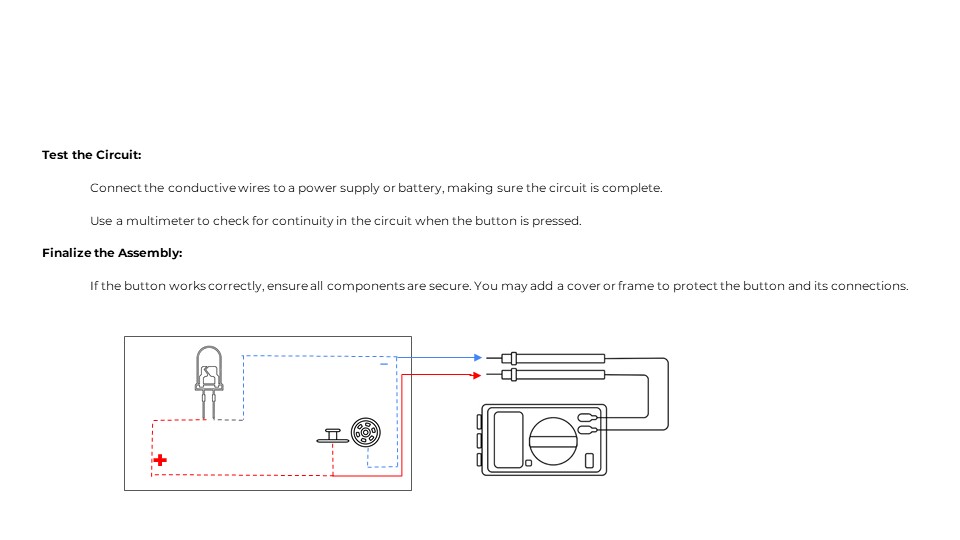
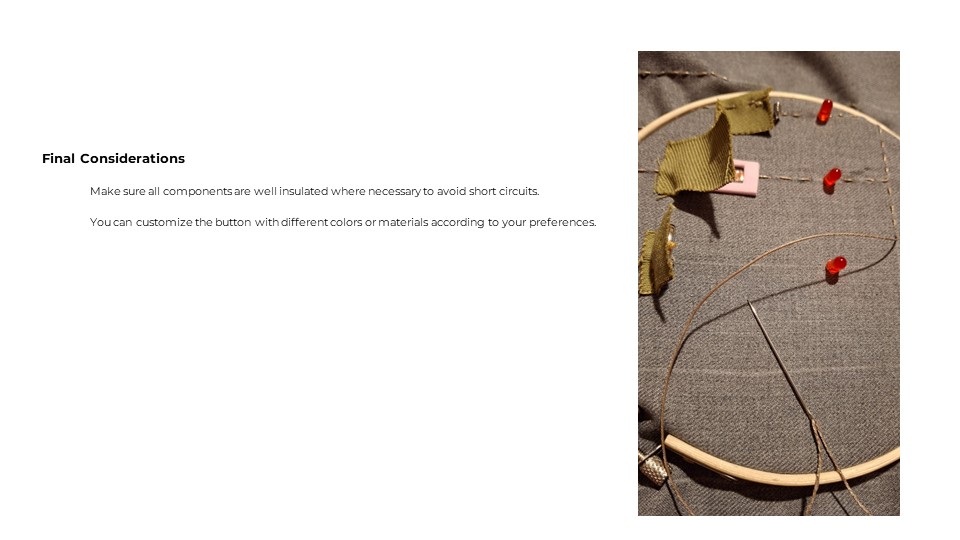
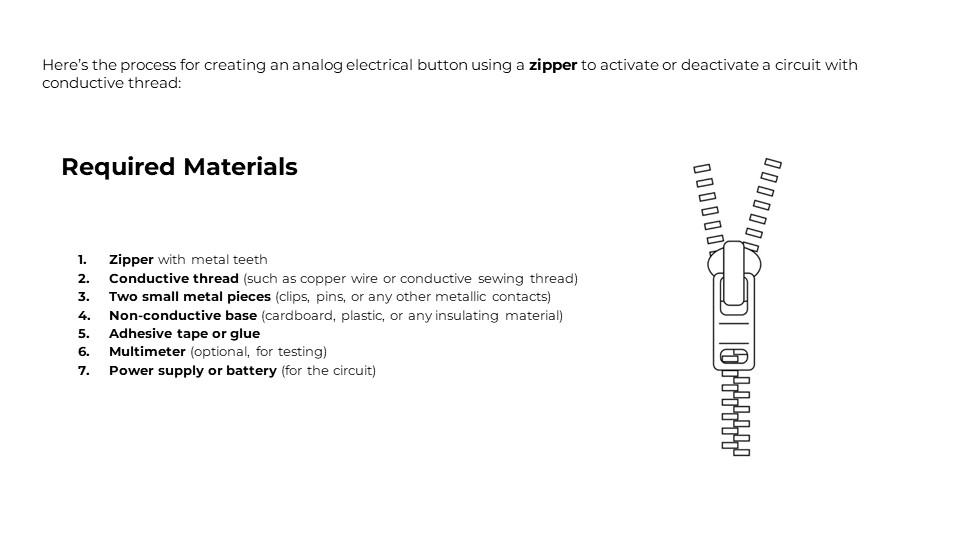
2. Analog Electrical Buttons
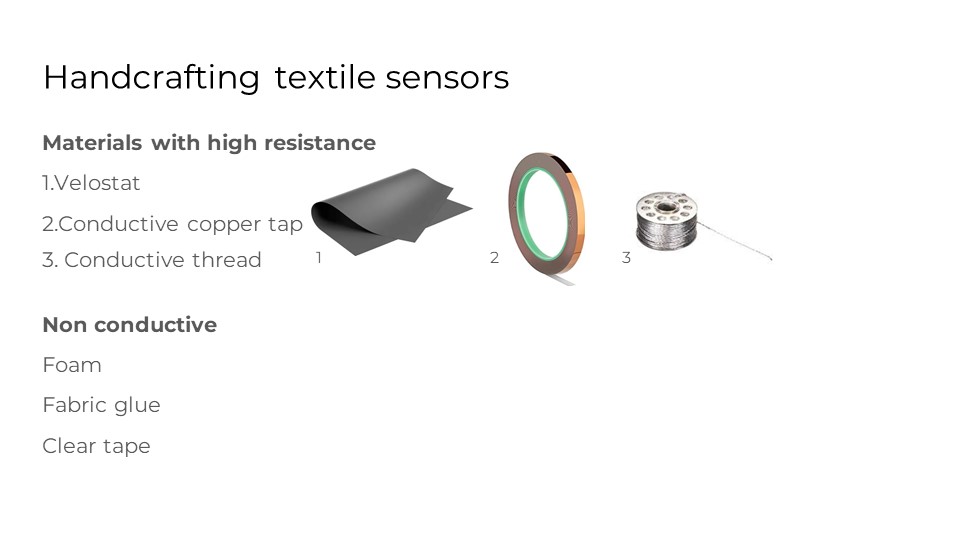
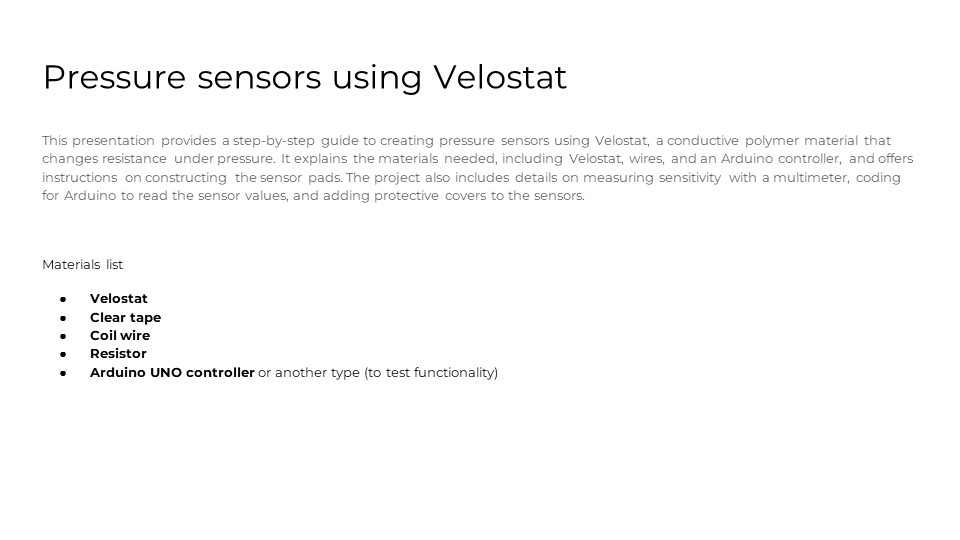
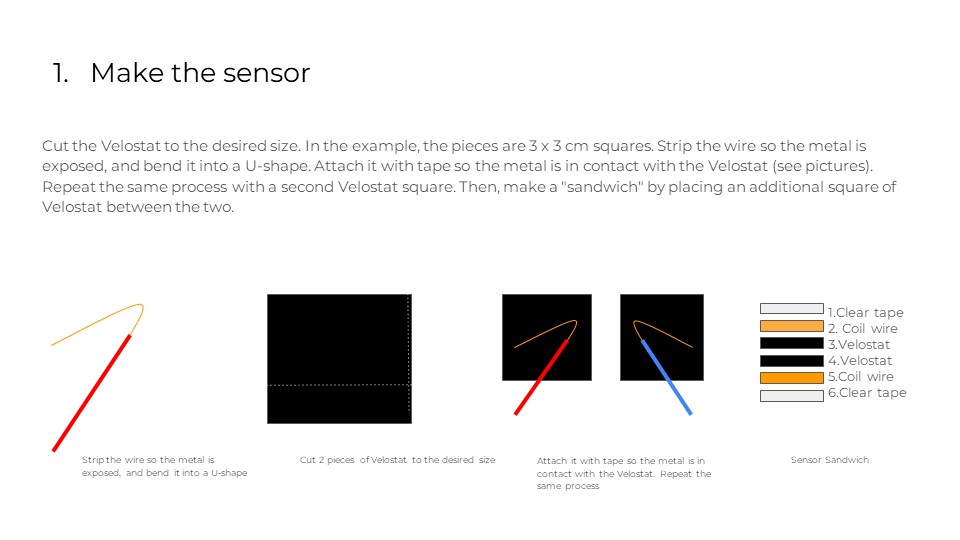
PDF – Handcrafting Textile Sensors
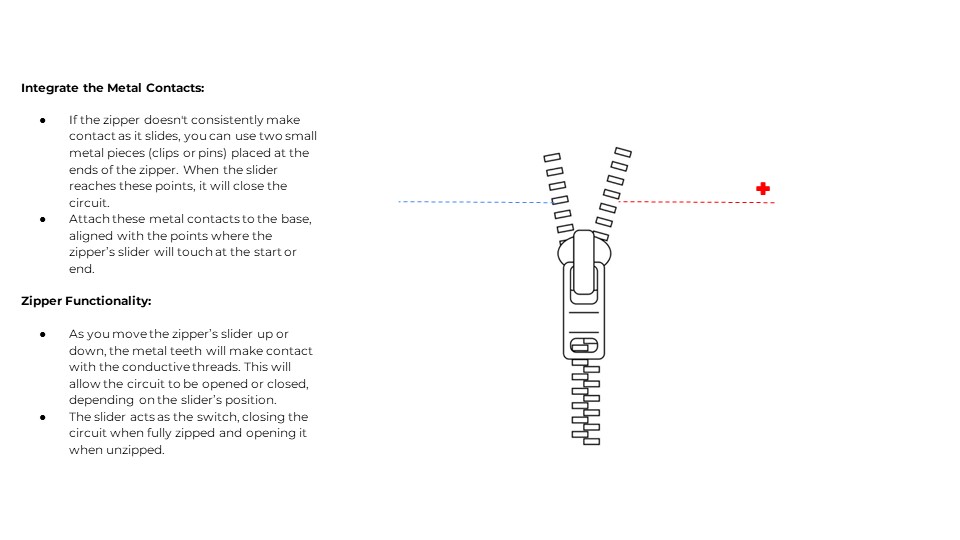
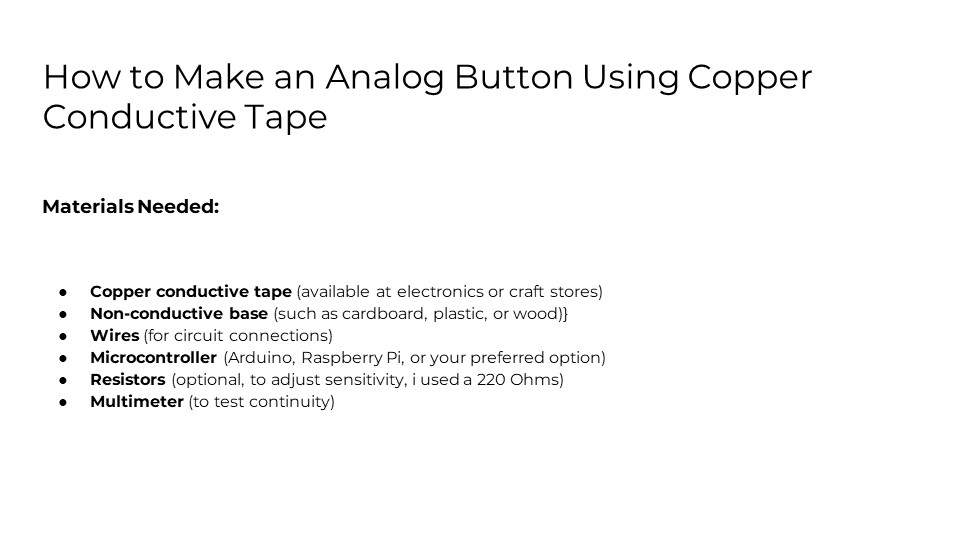
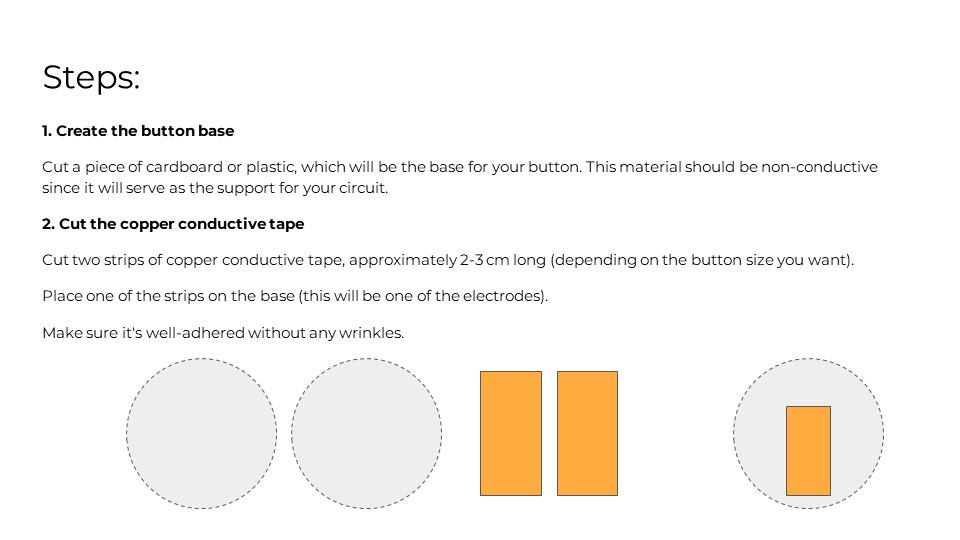
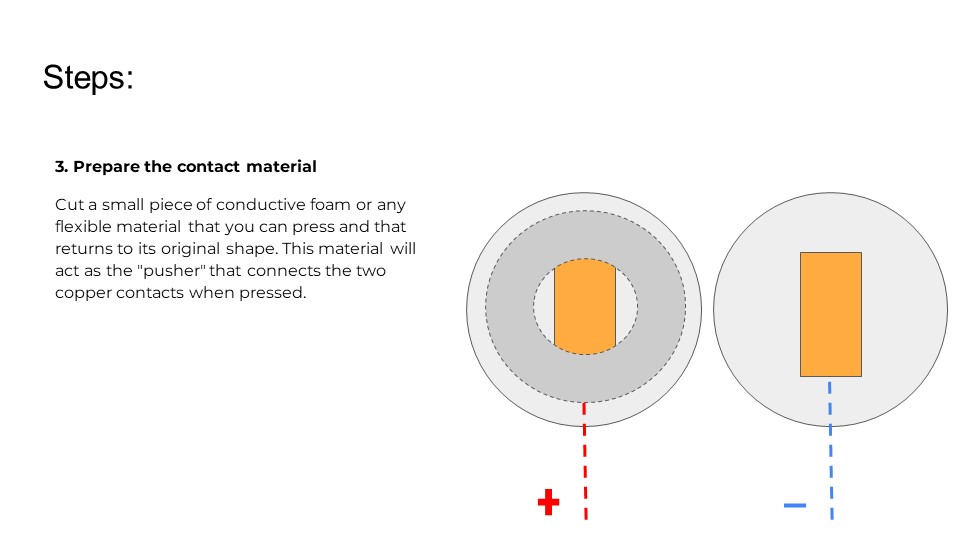
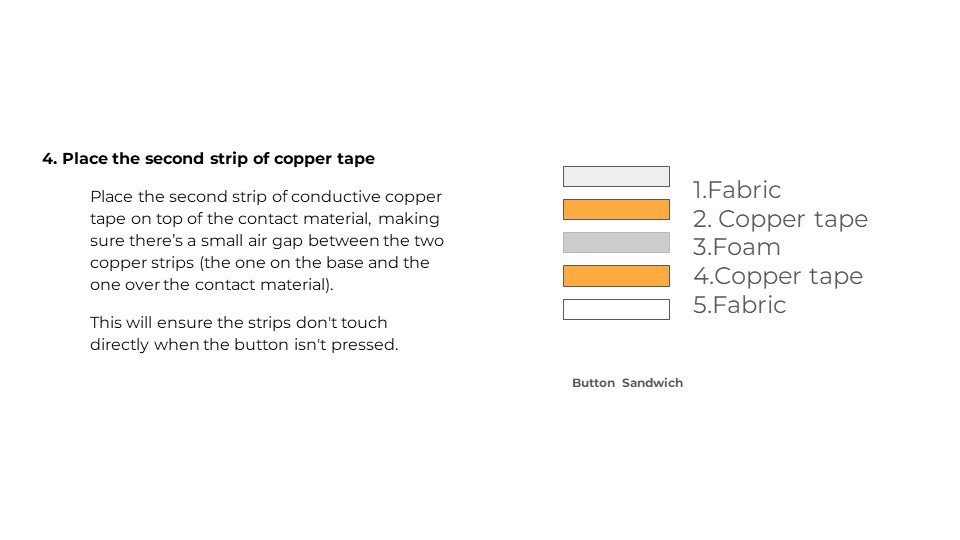
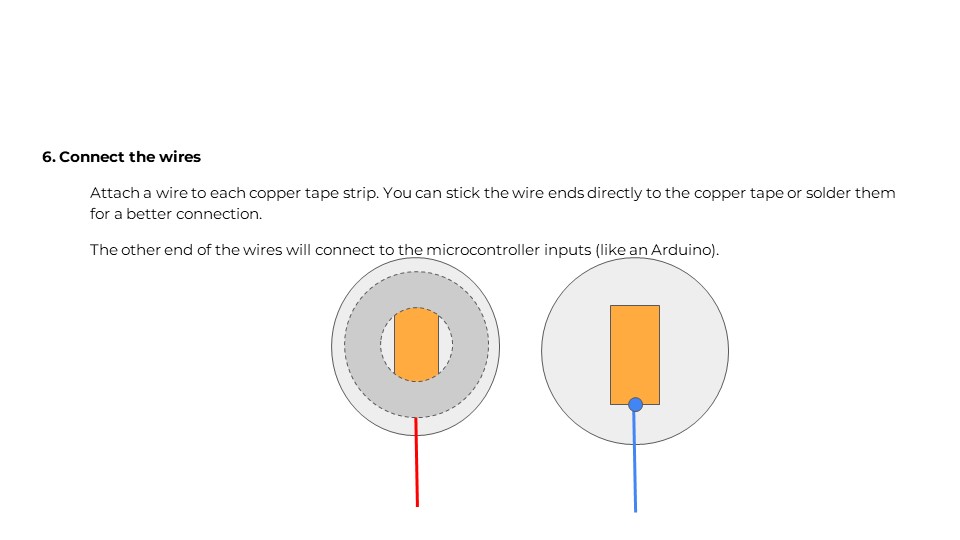
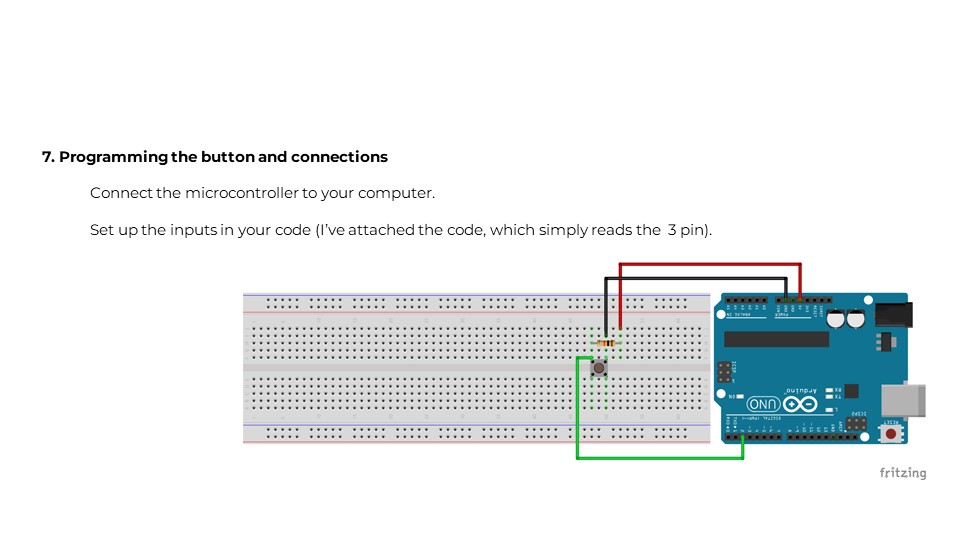
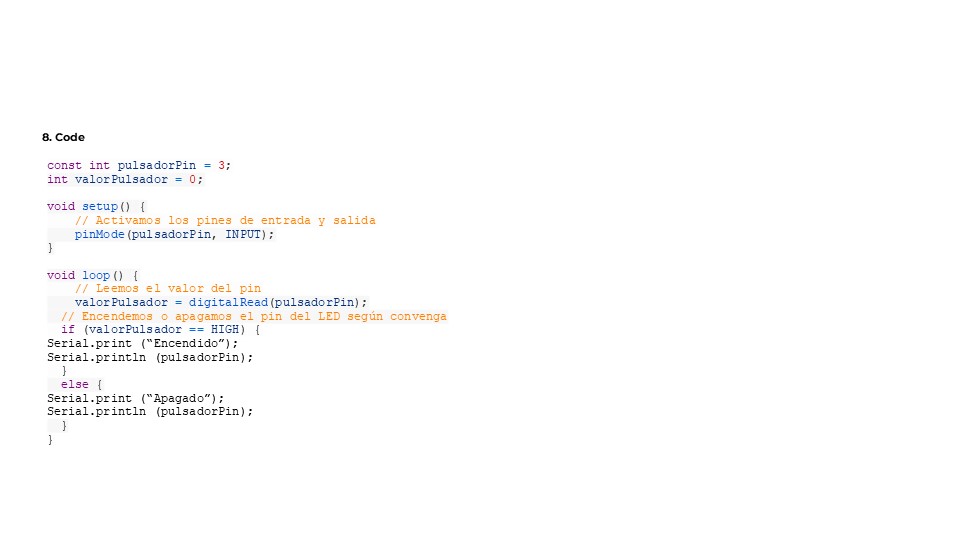
3. Copper Conductive Tape Buttons
PDF – Analog Button Using Copper Conductive Tape

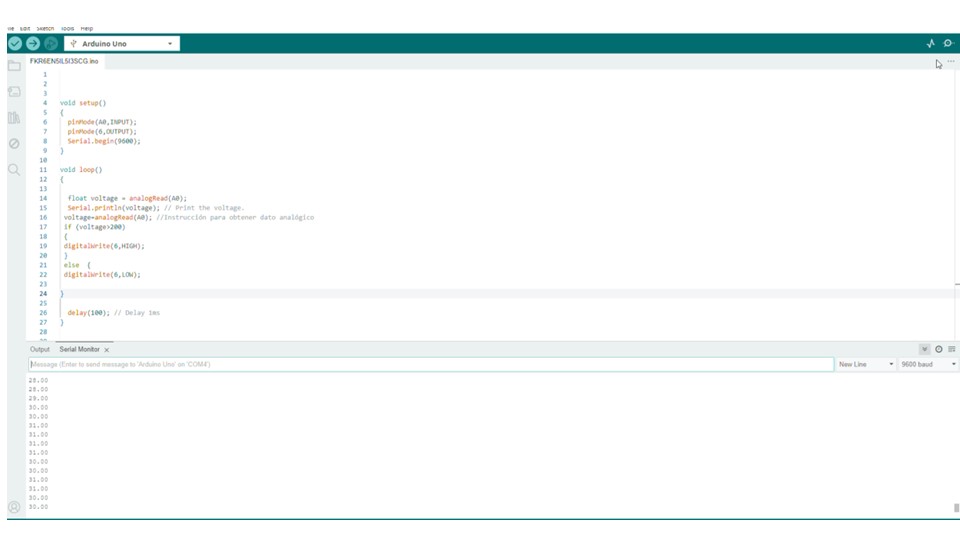
Testing Results
Textile Piano Interface
1. Initial Arduino Uno Version
I created an Arduino Uno piano using:
- Arduino Uno microcontroller
- Buzzer (5V)
- Tactile push buttons
- 220 kOhm resistors
This design lets me play seven different tunes. It's beginner-friendly, great for learning electronics and programming.
Component List
- Arduino Uno
- 5V Buzzer
- Tactile Switches
- 220 kΩ Resistors
- Jumper Wires
Circuit Connections
- Button → Pin 4
- Button → Pin 5
- Button → Pin 6
- Button → Pin 7
- Button → Pin 8
- Button → Pin 9
- Button → Pin 10
- Buzzer → Pin 3
Figure 12: Parallel circuit schematic
2. Textile Version with Seeeduino XIAO RP2040
I upgraded to the Seeed Studio XIAO RP2040 and created a fabric-based interface, maintaining the piano functionality in a flexible and wearable format.
Enhanced Components
- Seeed Studio XIAO RP2040
- Copper conductive tape
- Fabric base
- 5V Buzzer
- Analog buttons
- 220 kΩ Resistors
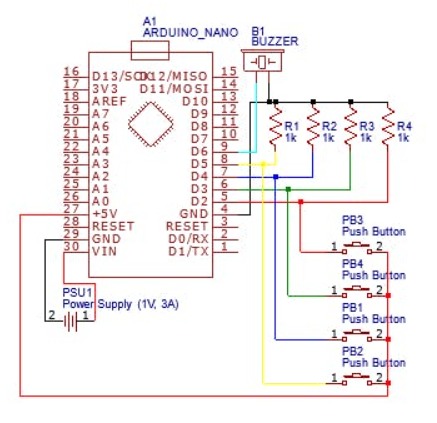
Figure 13: Electronic schematic
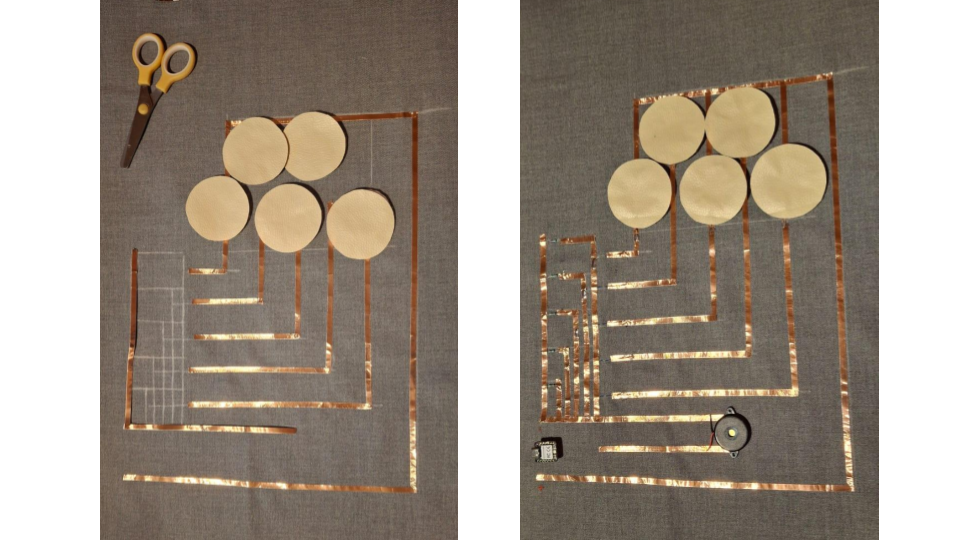
Figure 14: Making process
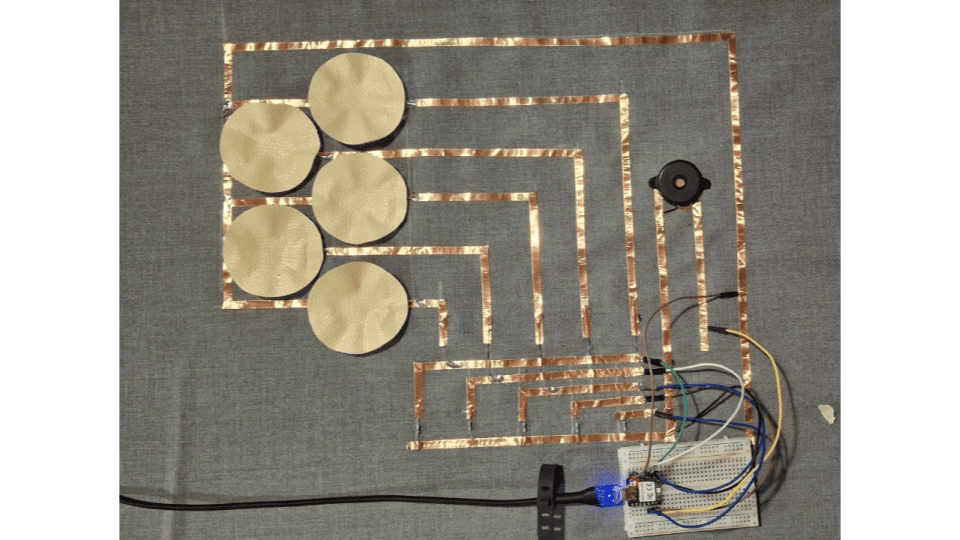
Figure 15: Completed textile piano
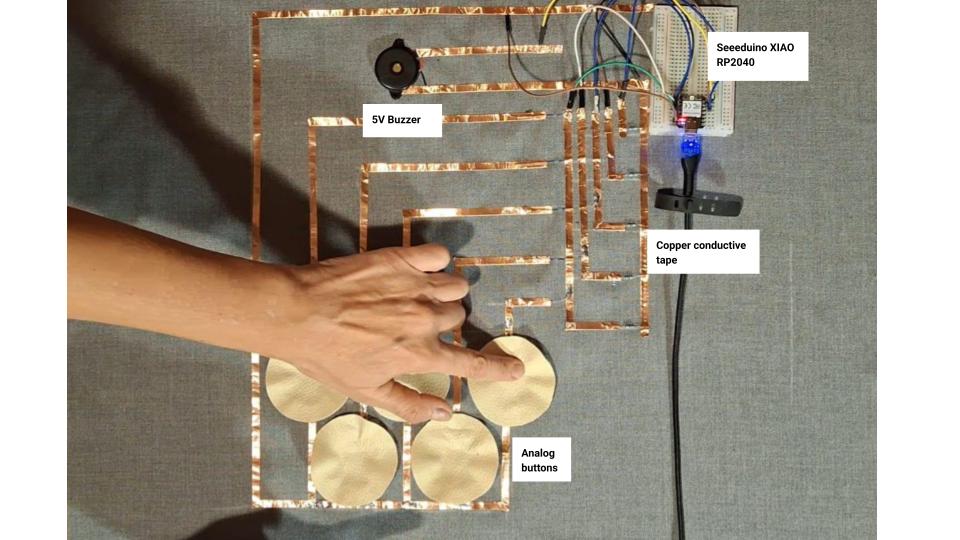
Figure 16: Completed textile piano with materials
Construction Process
Step 1: Drew the schematic on the fabric and marked paths with copper tape.
Step 2: Indicated polarity and overlap zones.
Step 3: Routed sensitive lines underneath to avoid short circuits.
This careful layout ensured a safe and functional design while keeping the circuit flexible.
Code Example – Textile Piano
int but1 = D4;
int but2 = D5;
int but3 = D7;
int but4 = D8;
int but5 = D9;
int buzzer = D6;

void setup() {
  pinMode(but1, INPUT);
  pinMode(but2, INPUT);
  pinMode(but3, INPUT);
  pinMode(but4, INPUT);
  pinMode(but5, INPUT);
  pinMode(buzzer, OUTPUT);
}

void loop() {
  int b1 = digitalRead(but1);
  int b2 = digitalRead(but2);
  int b3 = digitalRead(but3);
  int b4 = digitalRead(but4);
  int b5 = digitalRead(but5);

  if (b1 == 1) tone(buzzer, 200, 100);
  if (b2 == 1) tone(buzzer, 400, 100);
  if (b3 == 1) tone(buzzer, 500, 100);
  if (b4 == 1) tone(buzzer, 600, 100);
  if (b5 == 1) tone(buzzer, 700, 100);

  delay(10);
}