4. BioChromes

Research
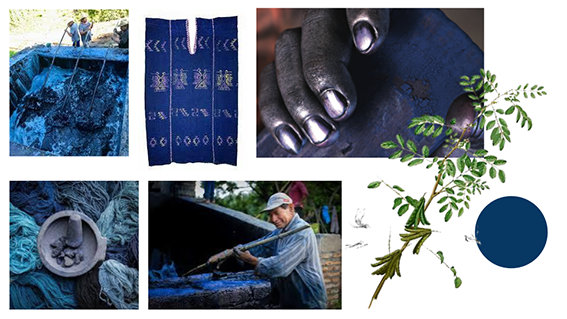
Figure 1: Indigo blue collage, own creation
The indigo plant, known as Indigofera tinctoria, is cultivated in Oaxaca, Mexico, where it is used to extract the blue dye called añil. This traditional dyeing process involves fermenting the leaves to produce a rich, vibrant blue color, which is highly valued in textile arts. Indigo dyeing has a long history in the region, contributing to the local culture and economy through artisanal crafts. The unique techniques and deep cultural significance of indigo dyeing continue to be celebrated in Oaxaca today.
References
References & Inspiration
Daria Fedorova is a multidisciplinary artist who creates unique works by cultivating microorganisms. She merges microbiological practices with artistic expression, utilizing various supplements to explore themes that can be described as grotesque, bizarre, romantic, ironic, hyperbolic, and extraordinary. Her innovative approach challenges conventional boundaries between art and science.
Daria Federova Mold Art
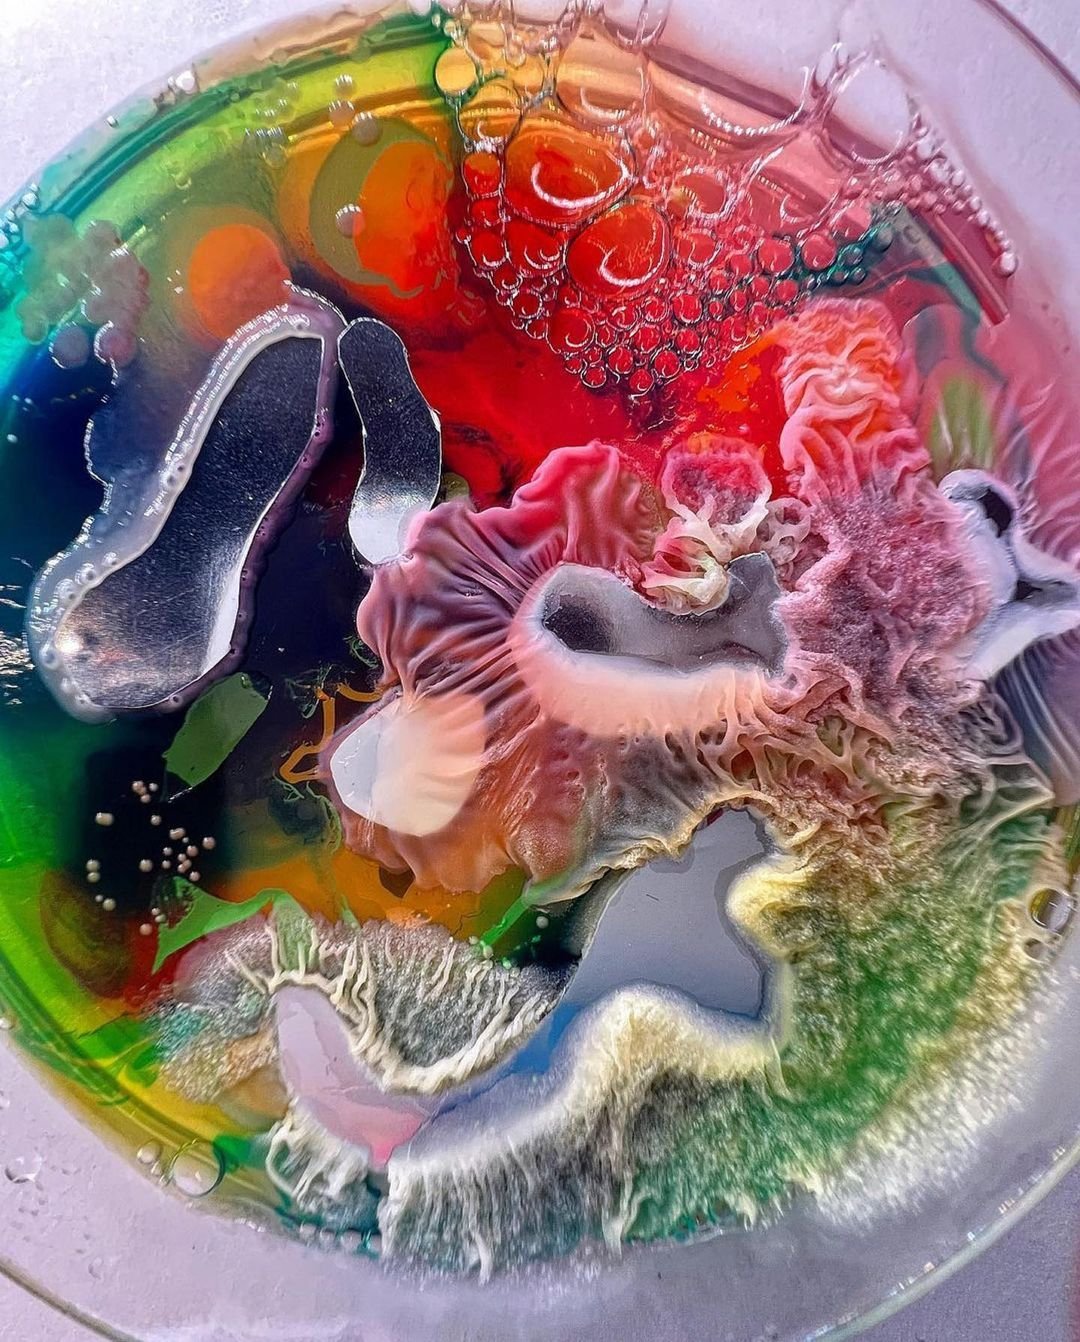
Figure 2: Daria Federova's microorganism art piece retrieved from Daria Feranova Official Website
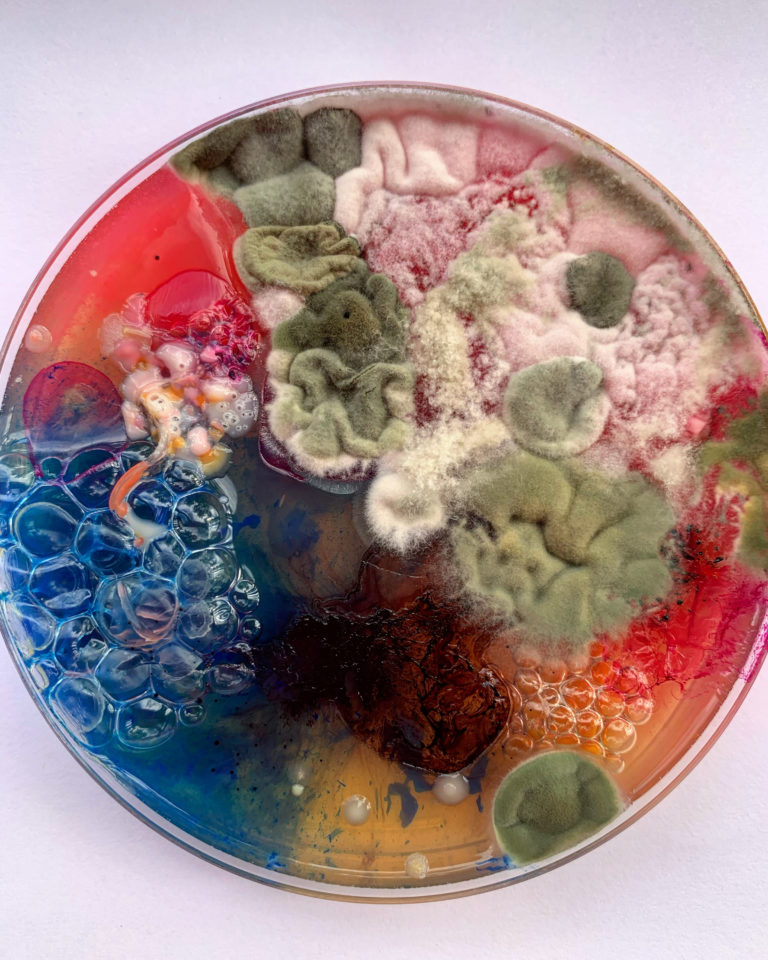
Figure 3: Daria Federova's microorganism art piece retrieved from Daria Feranova Official Website
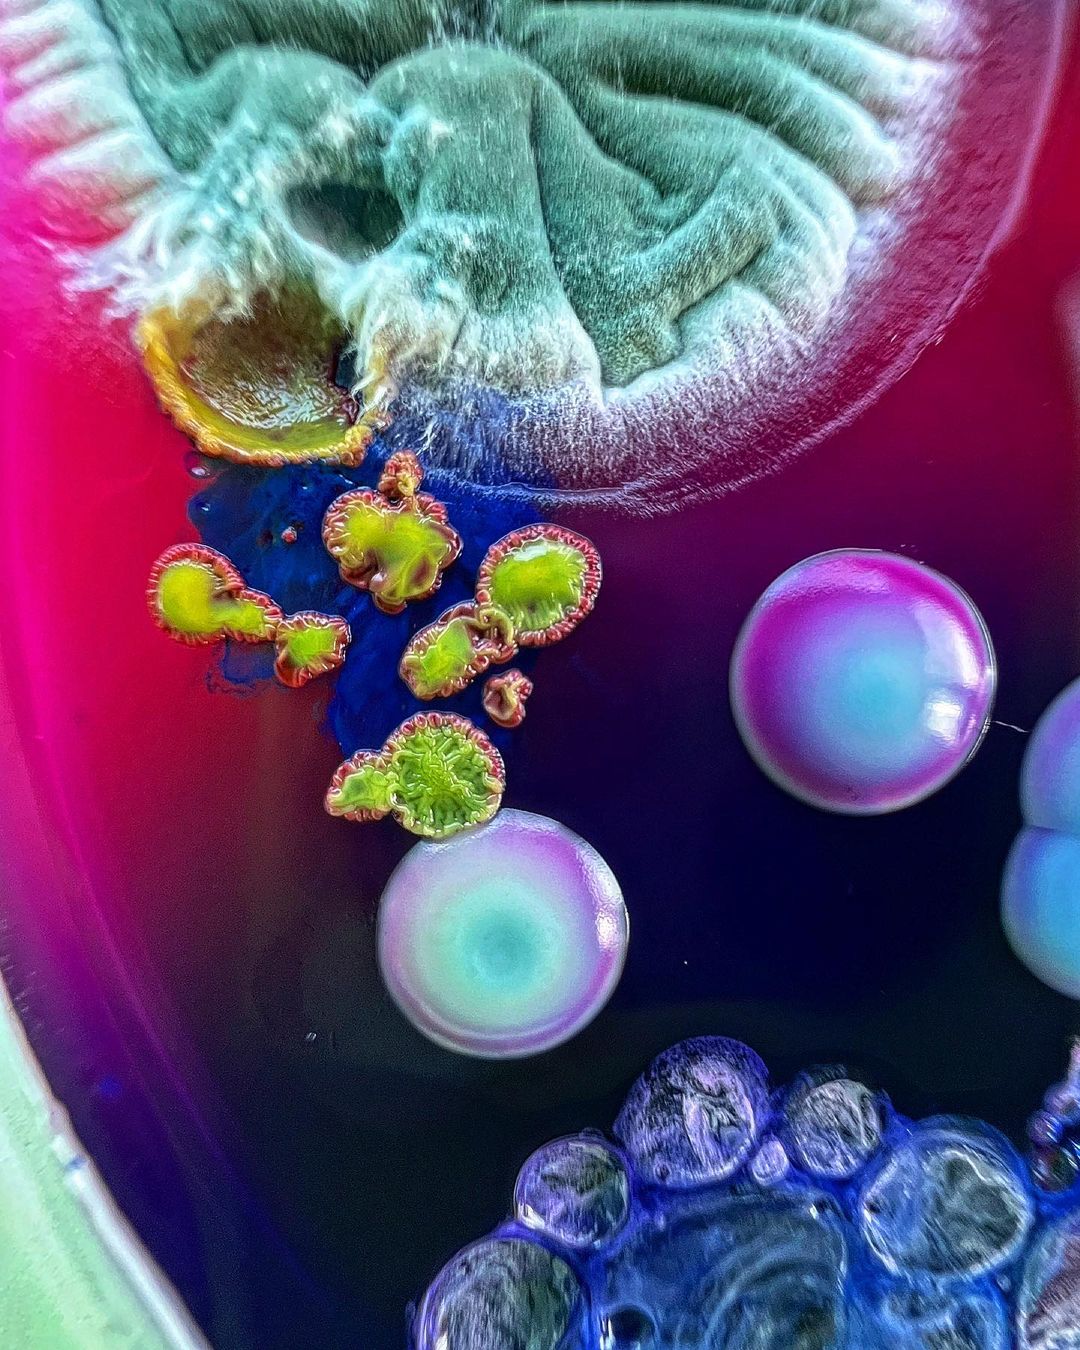
Figure 4: Daria Federova retrieved from Daria Feranova Official Website
References
Process and Workflow
Materials List – BioChromes
Natural Dye Materials
Plants and Organic Materials
- Indigo (Indigofera tinctoria) – For blue indigo dye
- Turmeric – For yellow dye
- Avocado (pits and skins) – For brown/pink dye
- Hibiscus (dried Flor de Jamaica) – For red/purple dye
- Muicle – For varied tones (used for absorption comparison)
Chemical Mordants
Primary Mordants
- Alum (Aluminum Sulfate) – Universal mordant
- Ferrous Sulfate (Iron) – For darker tones
- Tannic Acid – Natural mordant
pH Modifiers
- Sodium Hydroxide (NaOH) – Raises pH (alkaline)
- Hydrochloric Acid (HCl) – Lowers pH (acidic)
- Baking Soda (Sodium Bicarbonate) – For bluish/purple tones
Textile Materials
Natural Fibers
- Wool – Animal fiber (sheep)
- Cotton – Plant-based fiber
- Manta – Basic cotton cloth
Equipment and Tools
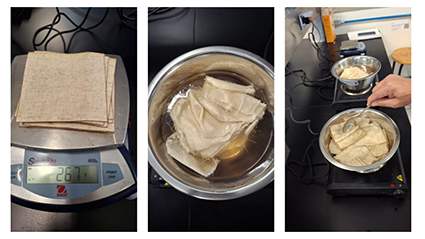
To carry out the natural dye and ink experiments, I worked with a fairly accessible setup that combines basic kitchen tools, simple lab equipment, and some specific materials depending on the recipe. For the cooking process, I used heat-resistant containers placed over a stove or burner, occasionally supported by a thermometer to keep track of temperature. Filtering was done using strainers, fabric filters, or muslin cloth, along with wooden spoons to stir mixtures during extraction. For measuring, I relied on a scale to weigh materials and standard measuring cups and spoons to maintain consistency across experiments. Once the dyes or inks were ready, I stored them in airtight glass containers, always labeling them with dates and contents to keep track of each batch.
As I experimented with different natural dyes—such as avocado, turmeric, and hibiscus—I followed general proportions to keep results consistent. For example, avocado dye worked well with around 100 grams of material per 500 ml of water, while turmeric required a few tablespoons per liter. Hibiscus was more concentrated, typically using equal parts flowers and water, with vinegar added to stabilize the color. Mordants were also used in varying percentages relative to the fabric weight, depending on the material and desired fixation.
Mordant application process diagram
How to Use Mordants to Fix Dyes to Fabrics
Mordants are essential chemical agents that help dyes adhere to fabric fibers, ensuring color permanence and vibrancy.
1. Alum Application
- Dissolve in hot water
- Soak the damp fabric in the solution
- Let it sit for adequate time to ensure the mordant adheres
- Rinse before dyeing
2. Iron (Ferrous Sulfate) Application
- Prepare a solution and soak the fabric
- Repeat the process to achieve the desired color intensity
- Rinse well afterward
3. Tannic Acid Application
- Apply directly or dilute in water
- Soak the fabric and allow it to dry before dyeing
Important Note: Each mordant will influence the final color tone significantly.
Ingredients & Recipes
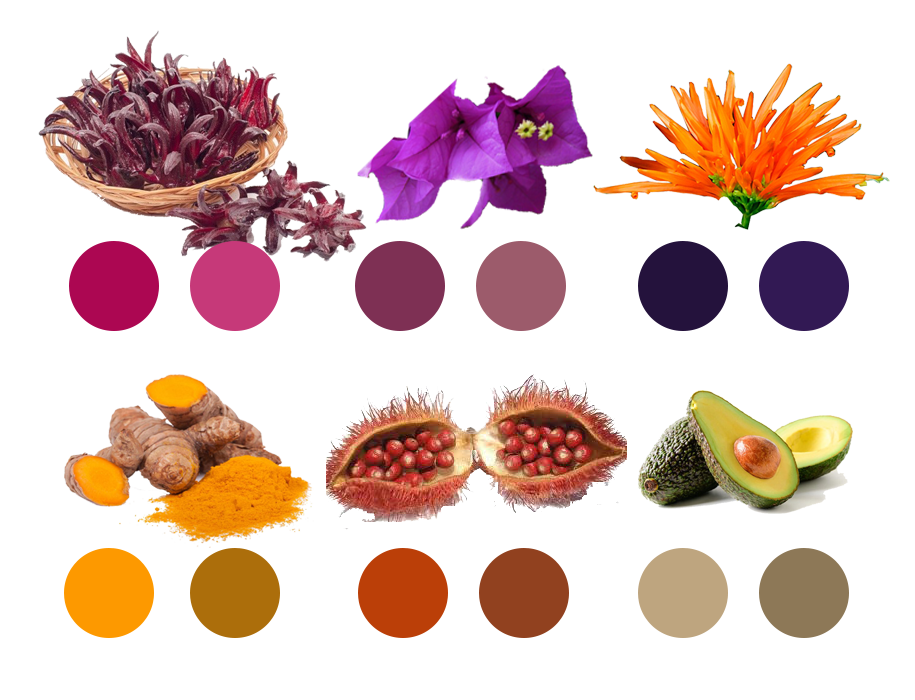
Natural dye color spectrum
Brown Dye with Avocado
Avocado pit and skin dye preparation
Materials Needed
- 1–2 avocado pits or skins from several avocados
- 100 grams per 500 ml of water ratio
Process
- Collect Materials: Use avocado pits and skins
- Prepare the Dye: Boil the pits and skins in water for 30–60 minutes until the water turns pinkish
- Strain the Dye: Remove solid parts to get a clear dye solution
- Prepare the Fabric: Pre-soak fabric in a mordant solution (like alum)
- Dye the Fabric: Soak fabric in dye bath for 30 minutes to 1 hour, stirring occasionally
- Rinse and Dry: Rinse fabric in cool water and let it dry
Yellow Dye with Turmeric
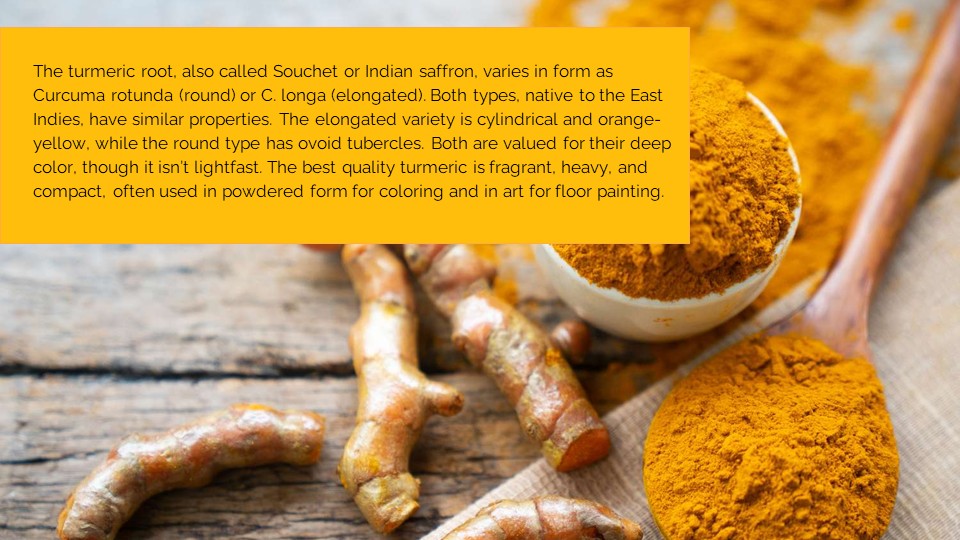
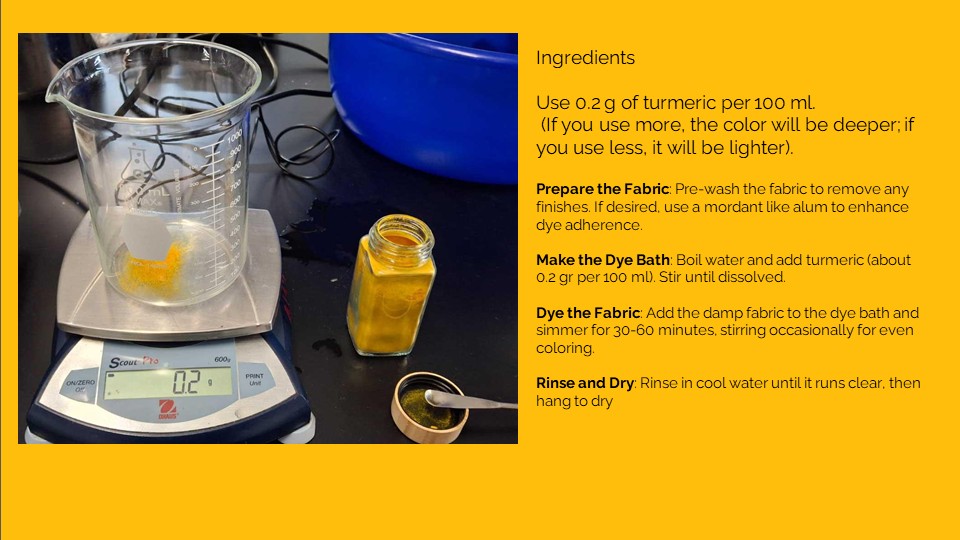
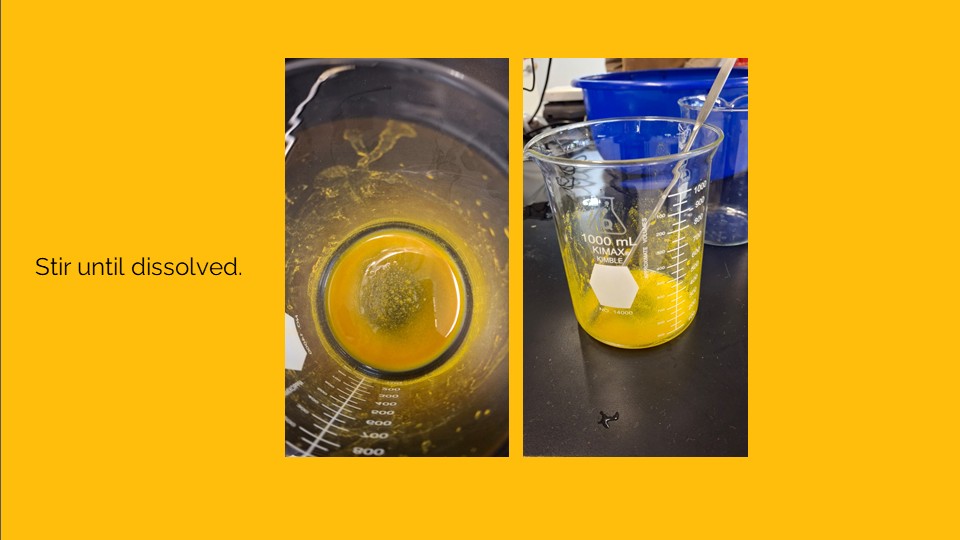
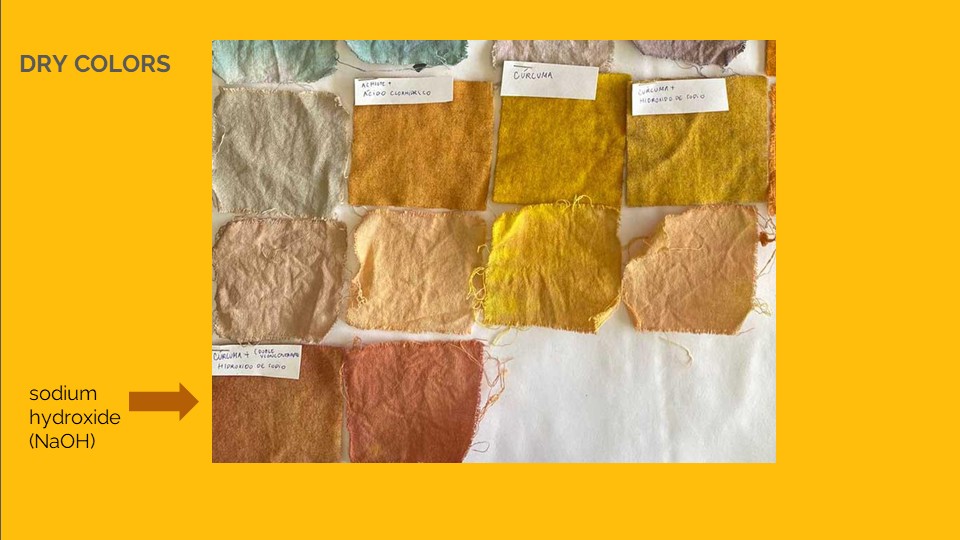
Turmeric dyeing process step-by-step
Documenting Experiments
pH Effects on Natural Dyes
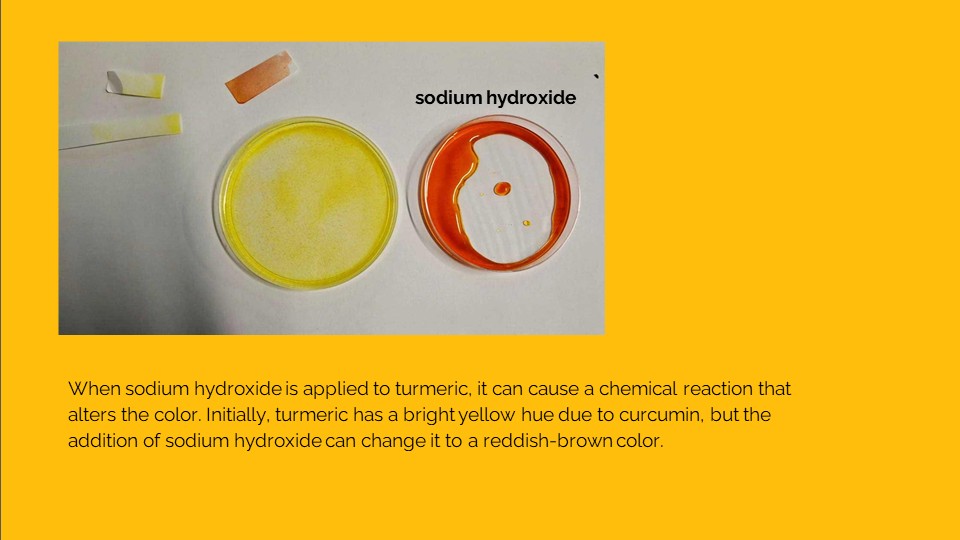
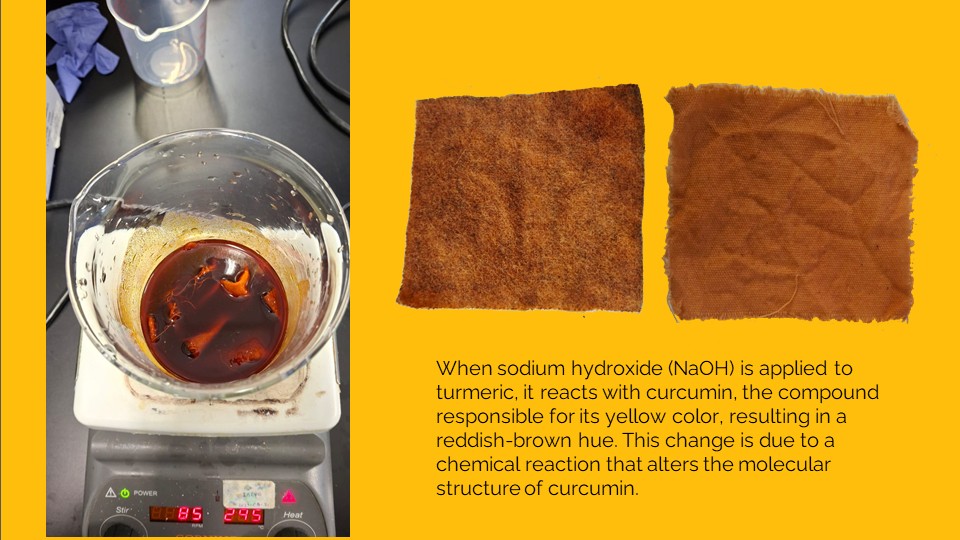
When sodium hydroxide (NaOH) or hydrochloric acid (HCl) is applied to pH-neutral dyed fabrics, it can significantly affect the color:
Sodium Hydroxide Effects
- Increases pH levels
- Results in color change to reddish-brown for dyes like turmeric
- Alters the dye's molecular structure
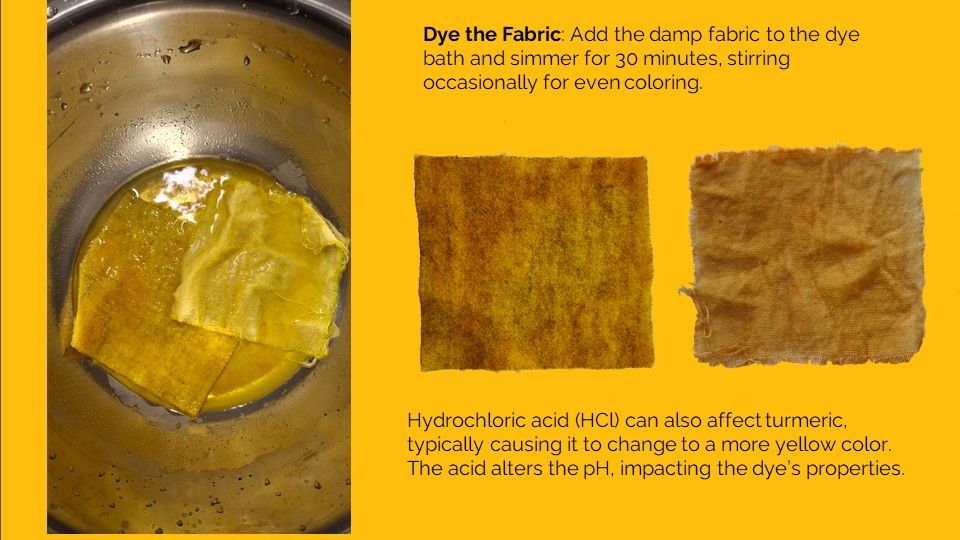
Hydrochloric Acid Effects
- Decreases pH levels
- Can intensify yellow color of turmeric
- Stabilizes the dye structure
Important: Both substances can shift color properties of natural dyes, leading to different shades based on pH changes.
Hibiscus Experiment
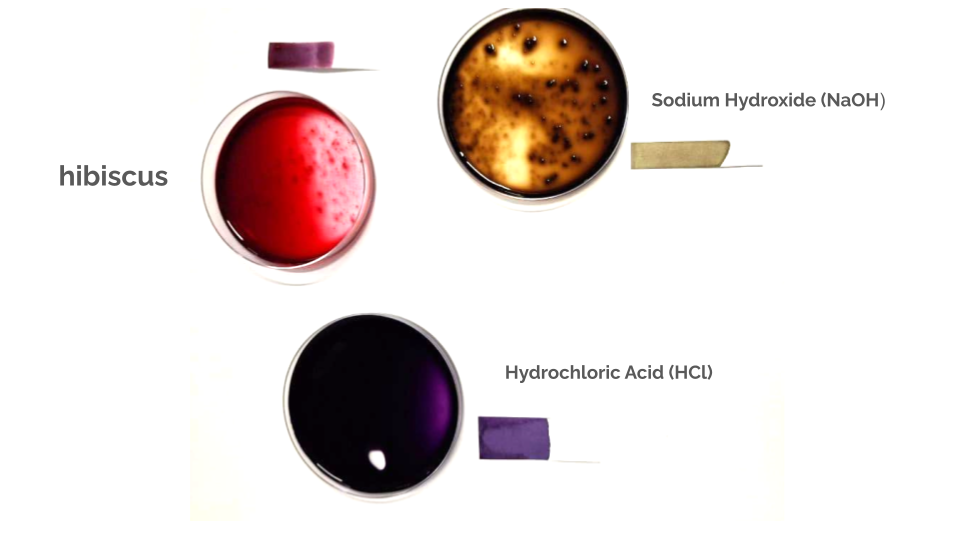
Hibiscus pH color change experiment
When sodium hydroxide (NaOH) or hydrochloric acid (HCl) is applied to an acidic hibiscus dye solution:
Sodium Hydroxide (NaOH)
- Raises pH levels
- Shifts color from natural pinkish-red (acidic) to greenish or bluish tone (alkaline)
- Hibiscus is pH-sensitive, producing significant color shifts in alkaline environments
Hydrochloric Acid (HCl)
- Lowers pH further
- Intensifies reddish tones
- Increased acidity deepens red color, enhancing hibiscus's natural hue
Fabric Testing Results
Material Comparison Table
| Material | Composition | Breathability | Moisture-Wicking | Heat Retention | Stretchability | Washing Temp |
|---|---|---|---|---|---|---|
| Wool | Animal fibers - sheep | Highly breathable | High | Excellent | Moderate | Cool or warm |
| Cotton | Plant fibers - cotton plant | Highly breathable | Moderate | Low | Low | Warm |
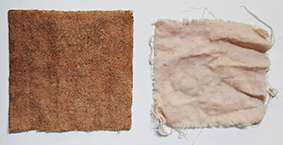
Dye Absorption Results
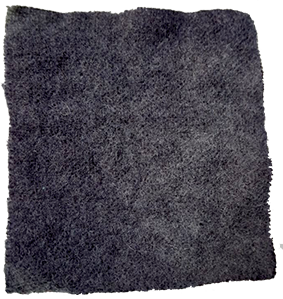
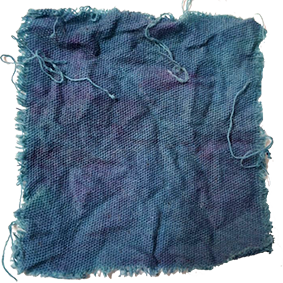
Wool vs Cotton dye absorption comparison using muicle
Key Finding: Both wool and cotton can be dyed with muicle, but wool retains the color more effectively, resulting in a darker hue.
Final Results – Natural Dye Color Palette
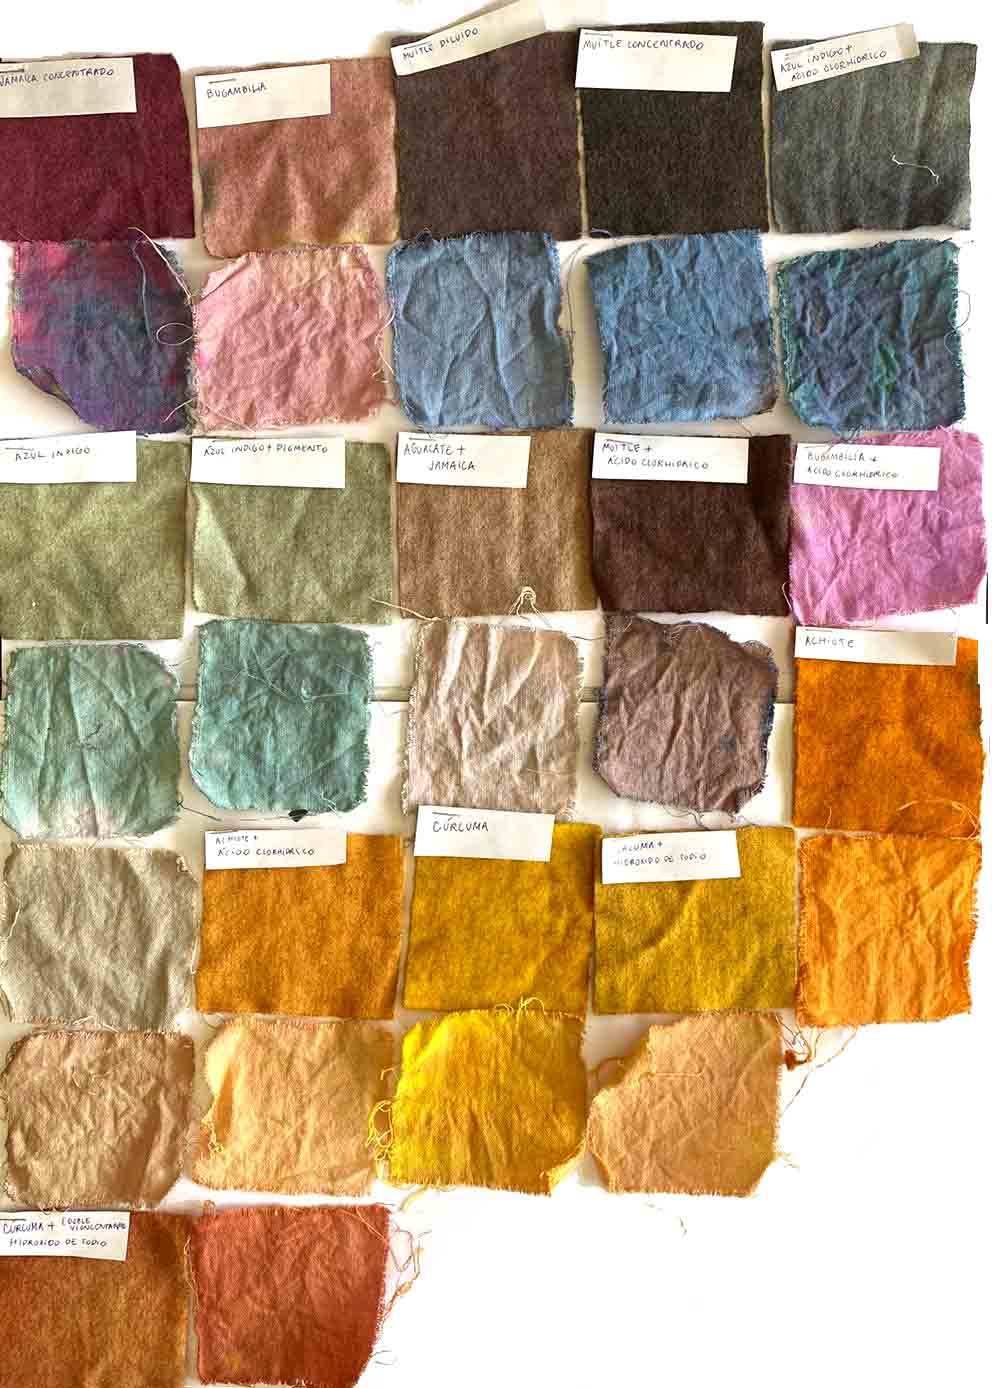
Complete natural dye color palette achieved
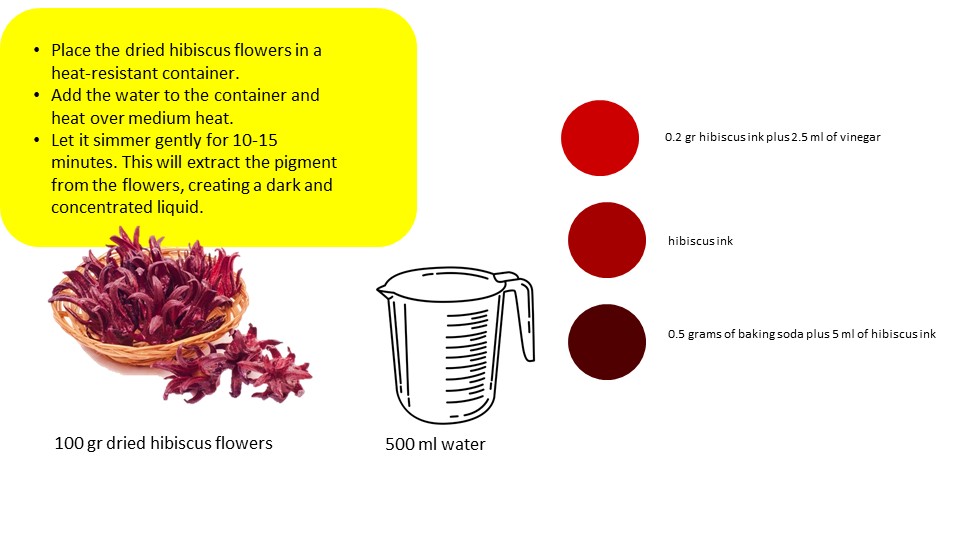
How to Make Homemade Hibiscus Ink
Making homemade ink using hibiscus flowers (dried flor de jamaica) is a simple and natural process that produces a reddish or purplish hue, depending on the materials and methods used.
Materials Needed
Essential Ingredients
- Dried hibiscus flowers (flor de jamaica): About 1 cup
- Water: 1 cup
- White vinegar: 1–2 tablespoons (to fix color and prevent fading)
- Salt: 1/4 teaspoon (as preservative)
Equipment
- Heat-resistant container
- Strainer or cloth filter
- Jar or container with lid for storage
Optional Ingredients
- Gum arabic: To improve consistency and adhesion
- Mortar or blender: To release more pigment from flowers
Step-by-Step Process
To prepare the hibiscus ink, I began by placing the dried flowers in a heat-resistant container and adding water, then heating the mixture over medium heat. I let it simmer gently for about 10 to 15 minutes, allowing the pigment to fully release and create a dark, concentrated liquid. Once the color was extracted, I removed the container from the heat and let it cool slightly before straining the mixture through a cloth or fine filter. Pressing the flowers helped extract as much pigment as possible, making the color richer.
With the liquid ready, I stabilized the ink by adding a small amount of white vinegar, along with a pinch of salt to help preserve it and prevent mold. If I needed a thicker consistency, I incorporated a bit of gum arabic while the mixture was still warm, stirring until it dissolved completely. Finally, I transferred the ink into a clean, airtight jar and stored it in a cool, dark place to extend its shelf life.
The result is a versatile natural ink that works well for a range of artistic applications. It can be used for drawing or writing with a brush, fountain pen, or dip pen, and it performs especially well in projects that explore watercolor-like effects or expressive detailing. It's also a great option for calligraphy, offering a rich, organic tone that brings a distinctive character to decorative writing.
Tips and Variations
I adjusted the ink tones depending on the effect I wanted to achieve, since small changes in the recipe can significantly shift the final color. For darker results, I either reduced the liquid through longer boiling or increased the amount of hibiscus flowers from the start. When I wanted lighter tones, I simply diluted the mixture with additional water, which softened the intensity without losing the character of the pigment.
I also explored subtle color shifts by modifying the pH of the mixture. Adding a small pinch of baking soda pushed the tones toward bluish or purplish hues, while increasing acidity with a bit more vinegar deepened the reds. These variations made the ink more responsive and opened up a wider range of expressive outcomes.
For storage, I found that adding vinegar and salt helped extend the shelf life by slowing down degradation. Even so, the ink works best when used within one to two months. I always check for changes in smell or texture before using it, since those are clear signs that the mixture is no longer stable.
Throughout the process, I kept safety in mind, especially when working with additives or mordants. I made sure to work in a well-ventilated space, used gloves when handling any chemical components, and labeled all containers clearly with their contents and dates. Proper disposal was also important, making sure any chemical residues were handled responsibly according to local guidelines.
Conclusion
Natural dyeing with BioChromes offers sustainable alternatives to synthetic dyes while connecting us to traditional textile practices. The experiments documented here demonstrate the rich color possibilities achievable through natural materials, from the deep blues of indigo to the vibrant reds of hibiscus ink.
The combination of traditional knowledge and scientific understanding of pH effects, mordant chemistry, and fiber properties opens new possibilities for contemporary textile artists and sustainable fashion practitioners.