7. BioFabricating Materials

Research
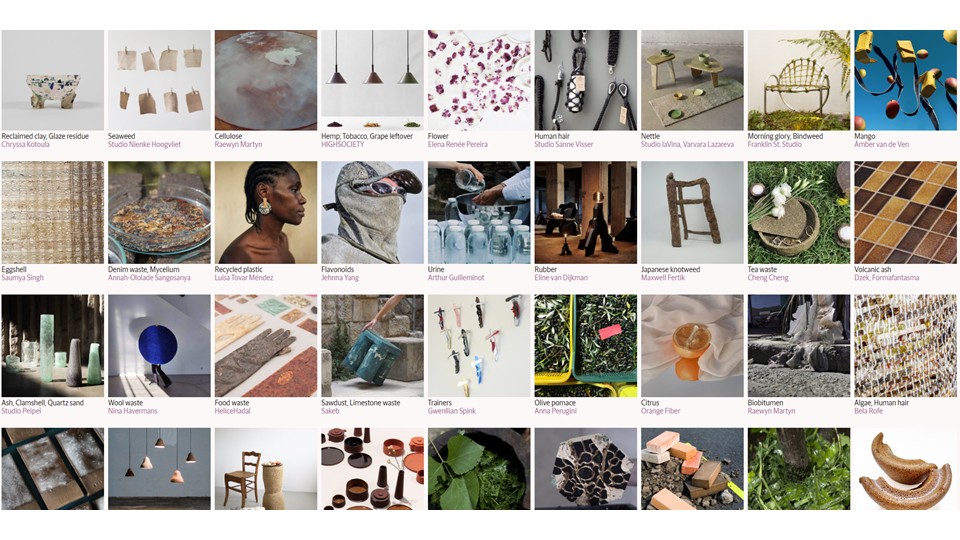 Figure 1: Future material bank retrieved by Future Bank
Biomaterials in design refer to natural or engineered materials derived from biological sources, often applied to create eco-friendly, sustainable products. Common biomaterials include mycelium, algae, and bioplastics, which designers use to replace non-renewable materials like plastics and metals. These materials offer unique qualities, such as biodegradability, low environmental impact, and, in some cases, regenerative properties. In design, biomaterials are increasingly used for products like packaging, furniture, textiles, and even architecture, promoting circular economy principles and reducing waste in various industries.
References & Inspiration
Tina Gorjanc is a conceptual designer known for exploring ethical and environmental issues in biotechnology and material science. Her work often investigates the intersection of design and science, challenging conventions through projects that use speculative materials and processes. One of her most recognized projects involved creating leather-like materials from human DNA, raising questions about ethics, sustainability, and the future of biotechnology in design. Her work exemplifies how design can prompt conversations on technological and biological advancements.
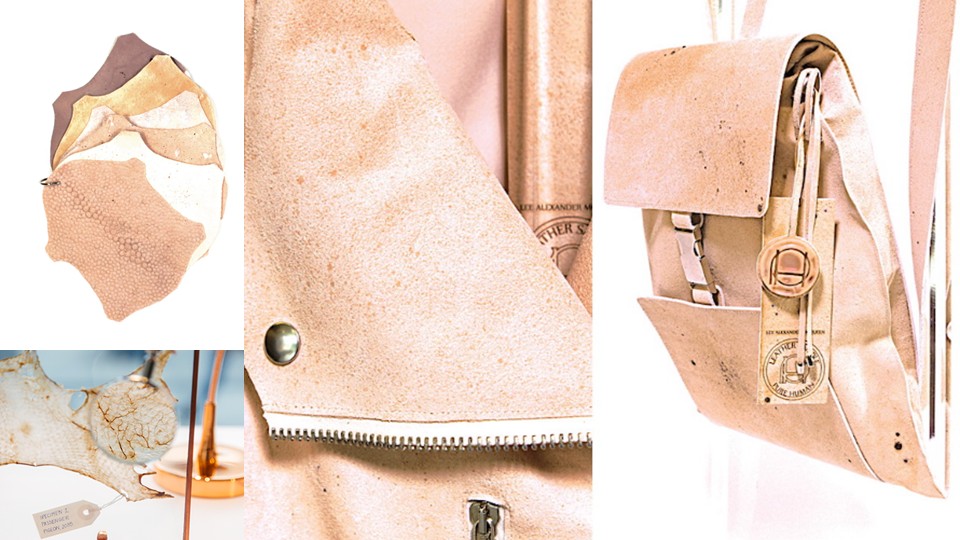 Figure 2: Tina Gorjanc / Pure Human retrieved from Tina Gorjanc
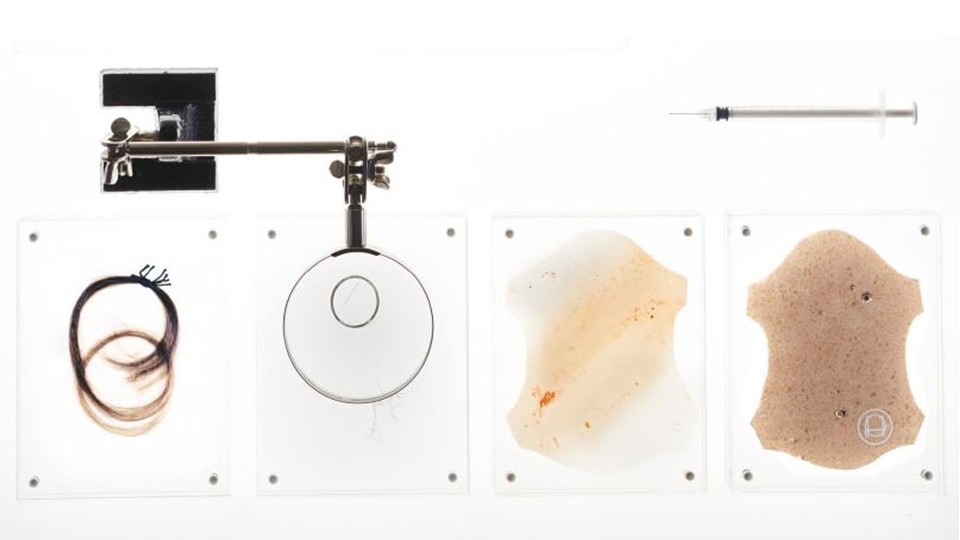 Figure 3: Tina Gorjanc / Pure Human retrieved from Tina Gorjanc
Edith Medina is a bio-artist and founder of Biology Studio in Mexico, a space that merges biology, design, and ancestral knowledge. Her studio focuses on biomaterials, artisanal techniques, and innovative scientific processes, particularly in textiles and sustainable materials. The studio's philosophy combines technology, tradition, and local science to foster interdisciplinary learning and new creative practices.
 Figure 3: Edith Medina / Biology Studio retrieved from Edith Medina
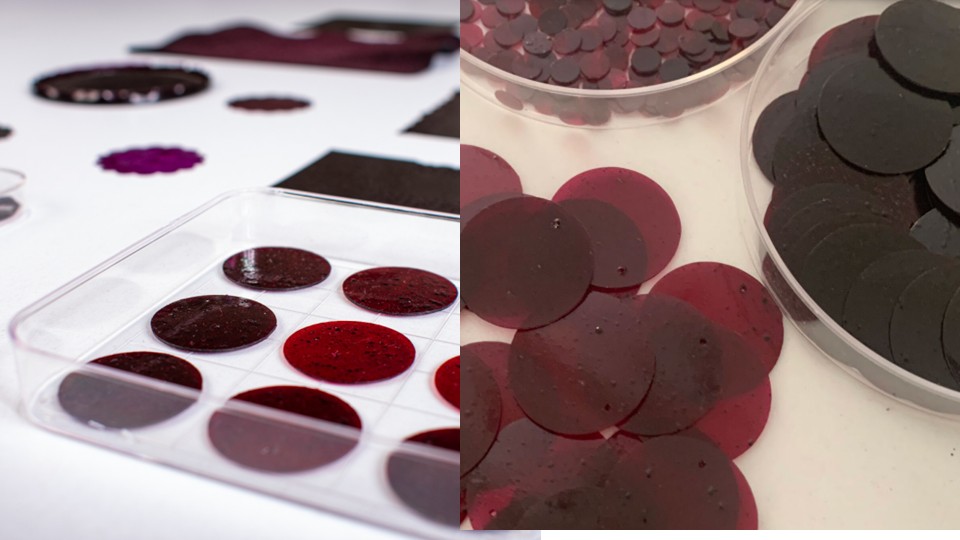 Figure 4: Edith Medina / Biology Studio retrieved from Edith Medina
References
Process and Workflow
Ingredients & Recipe for Bioceramics with Eggshells
Adapted from experimental biomaterial recipes for calcium-based bioceramics.
Ingredients
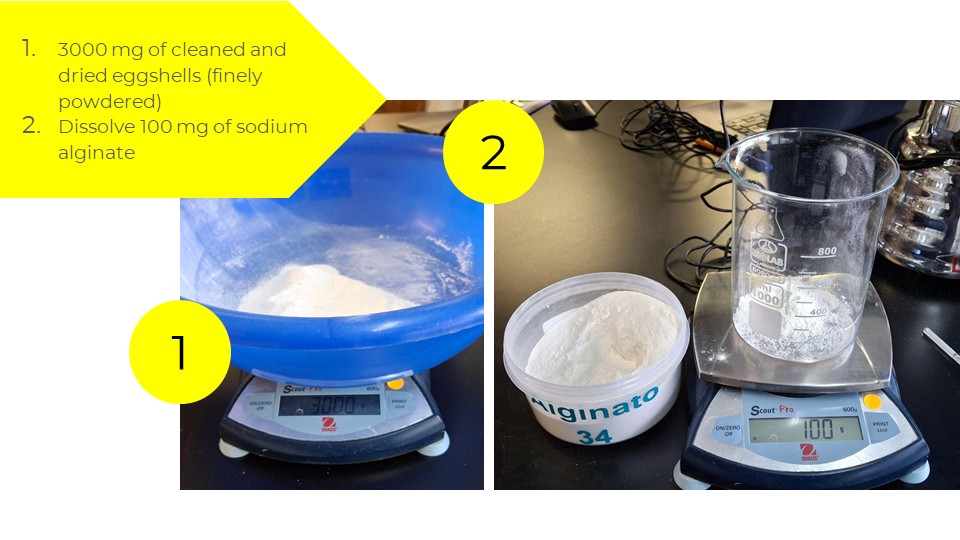
- Eggshells: 300 g
- Sodium alginate: 10 g
- Water: 200 ml
Tools
- Grinder: Used to finely crush and powder the cleaned eggshells, ensuring a consistent texture for optimal mixing with other ingredients.
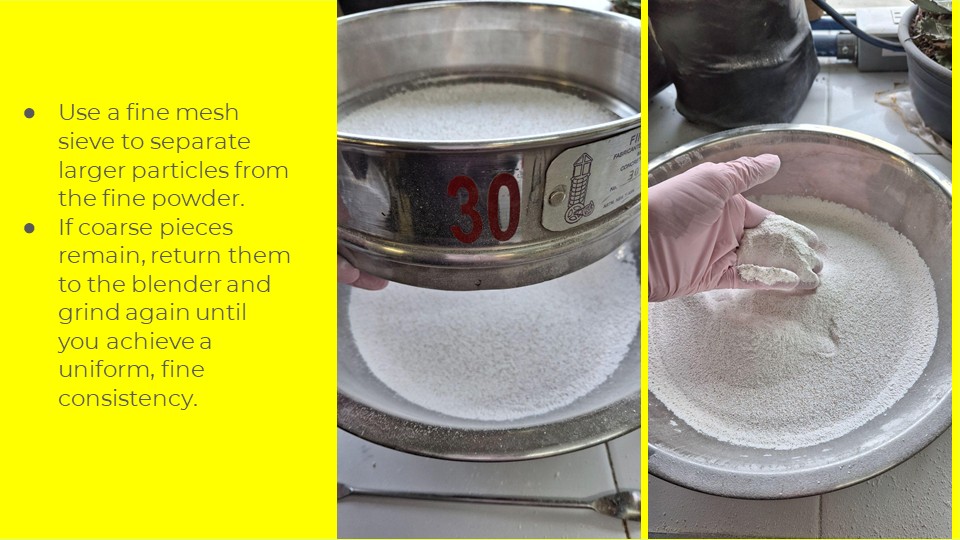
- Strainer: Used to sift the powdered eggshells after grinding. This ensures a uniform texture by removing any larger particles or impurities that could affect the consistency of the final mixture.
- Scale: Essential for accurately measuring the sodium alginate and eggshell powder, ensuring the correct proportions for the biocomposite.
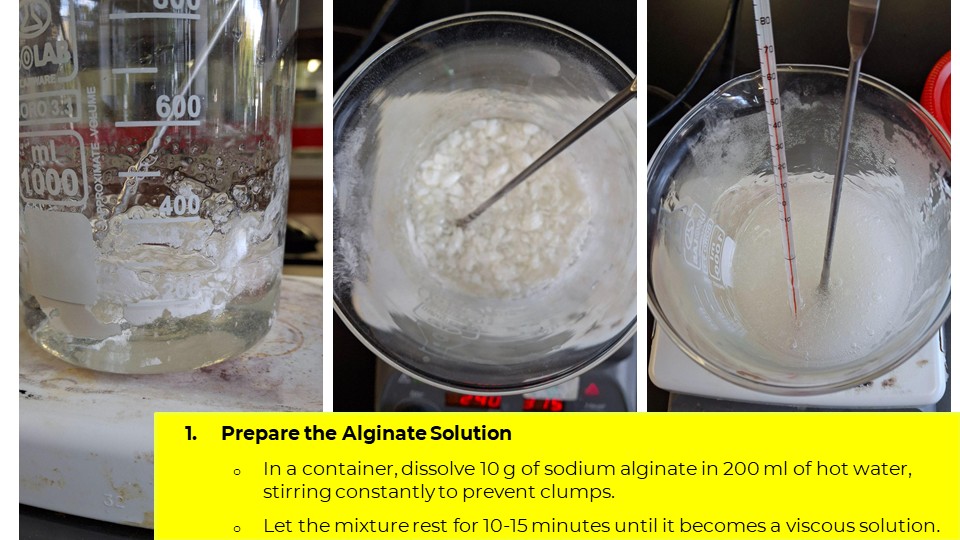
- Thermometer: Important for checking the temperature of the water, ensuring it reaches 95°C for the effective dissolution of the sodium alginate.
Recipe
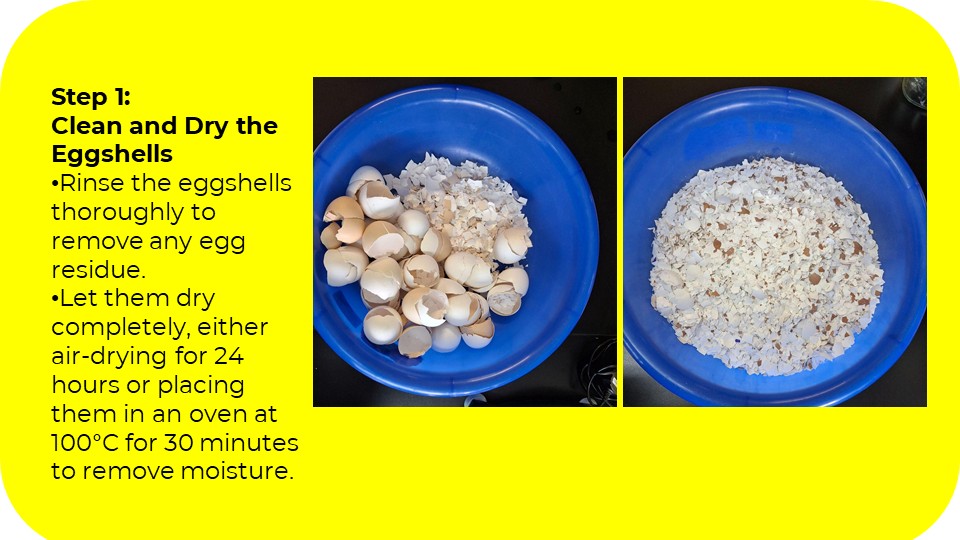
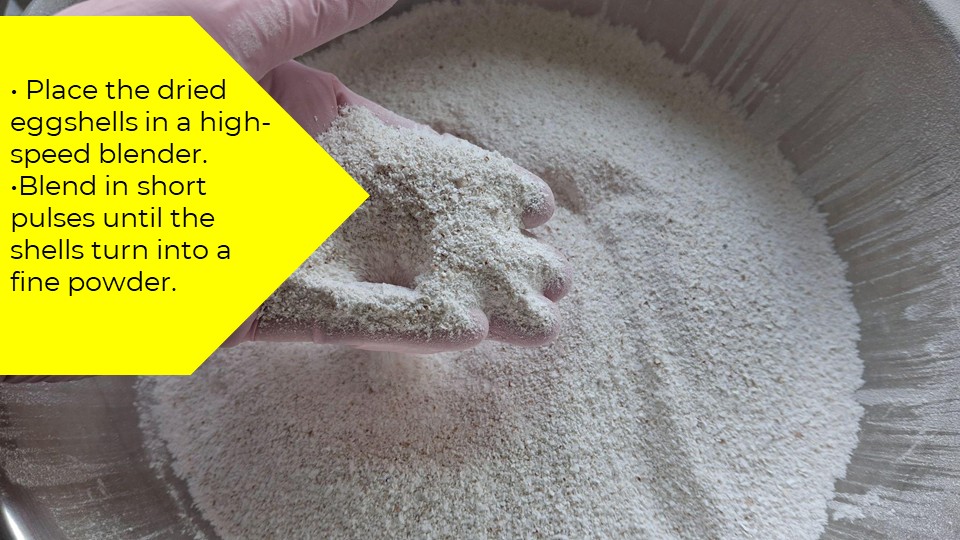
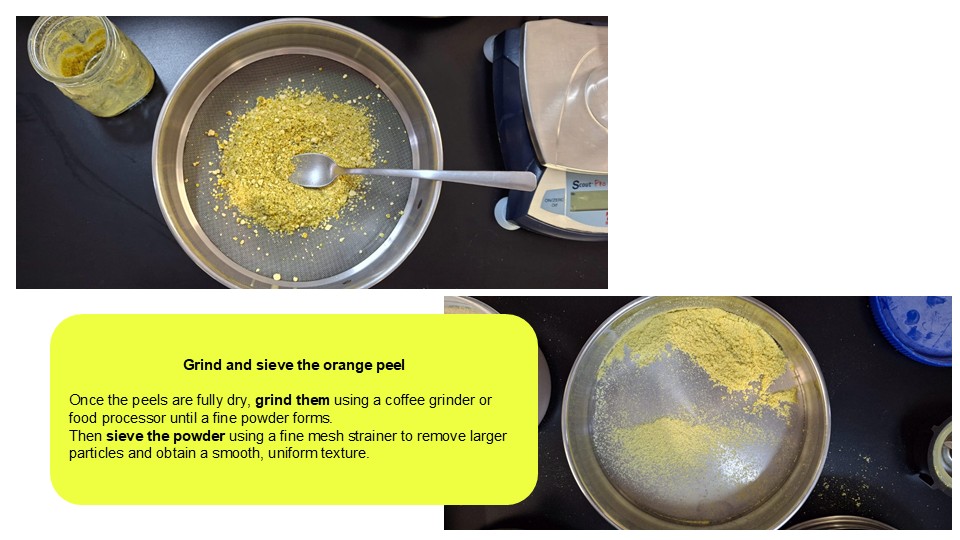
- Prepare the eggshells: Clean and dry the eggshells, then grind them into a fine powder.
- Dissolve the sodium alginate: In a bowl, mix 10 g of sodium alginate with 200 ml of hot water (95°C), stirring until fully dissolved.
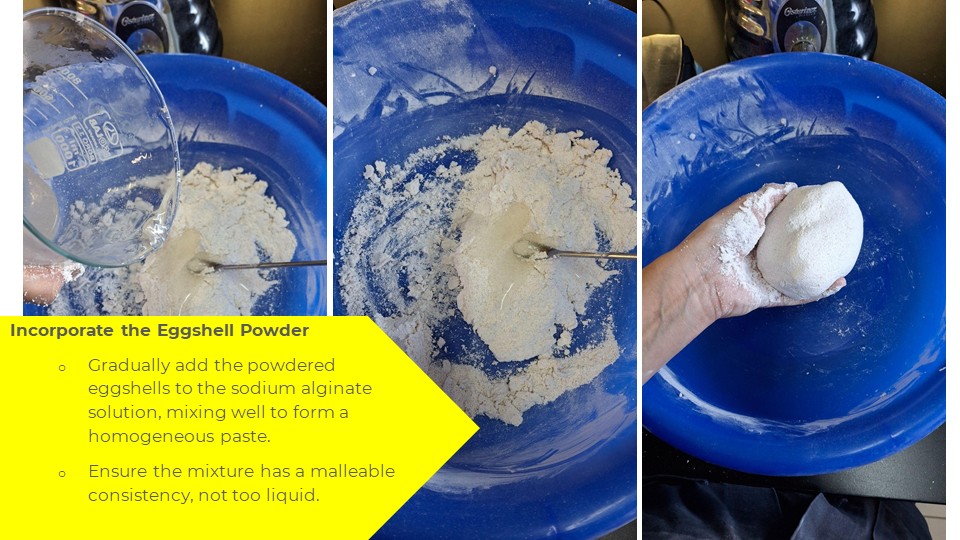
- Combine the ingredients: Gradually add the eggshell powder to the sodium alginate solution while stirring, until a homogeneous mixture is achieved.
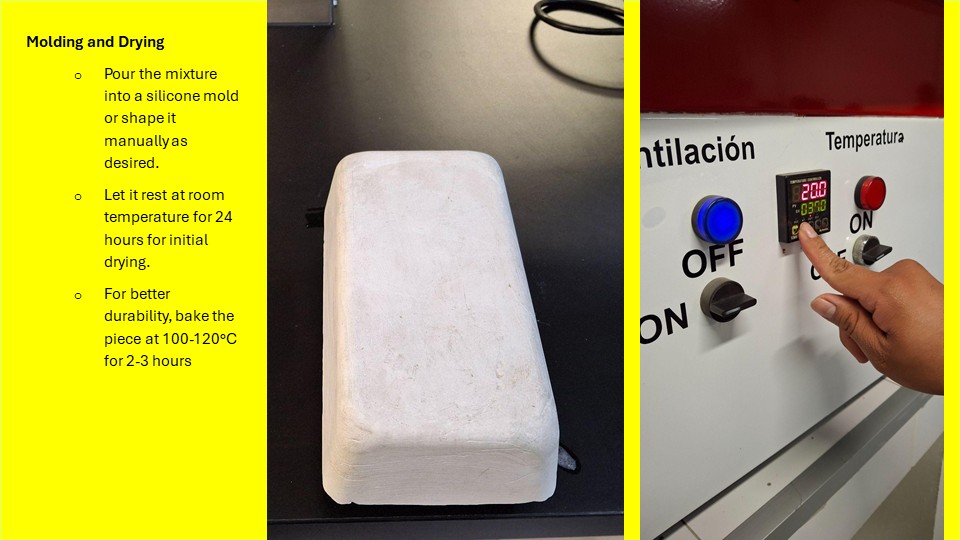
- Molding: Pour the mixture into molds or shape it as desired.
- Setting: Allow it to cool and set until firm; this may take several hours.
- Drying: Once set, dry the material in a warm area to improve strength and durability.
Ingredients & Recipe for Bioplastic Threads
Adapted from experimental biomaterial recipes for alginate-based fibers.
Ingredients
- Sodium alginate: 2–3 g
- Calcium chloride (CaCl₂): 5–10 g
- Distilled water: 200 ml total
- Natural blue dye:
- Blue spirulina (phycocyanin) – 1 g dissolved in water, or
- Red cabbage extract (adjusted with baking soda to turn blue)
Tools
- Syringe or pipette
- Beaker or mixing container
- Magnetic stirrer or spoon for mixing
Recipe
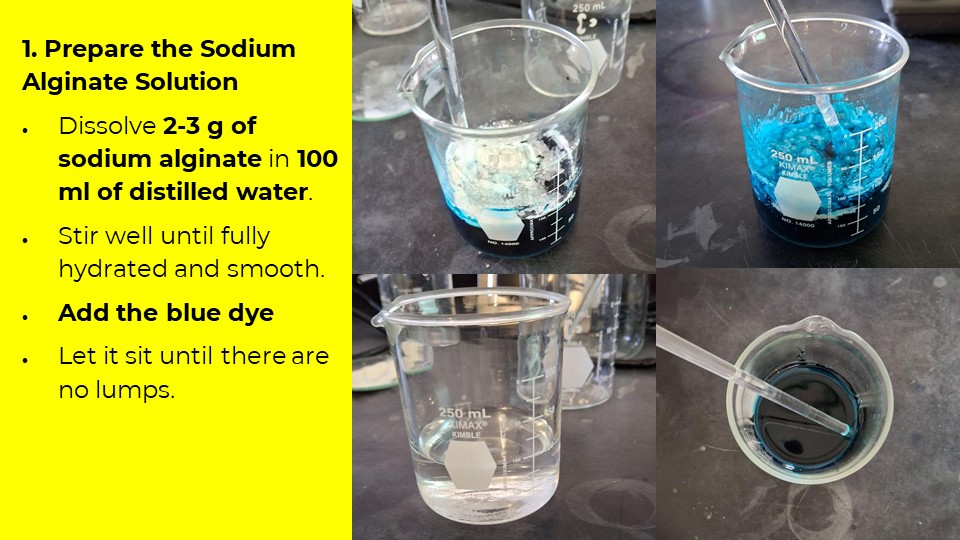
- Prepare the alginate solution: Dissolve 2–3 g of sodium alginate in distilled water (use part of the 200 ml). Stir until fully homogeneous.
- Prepare the calcium chloride bath: Dissolve 5–10 g of calcium chloride in the remaining distilled water, mixing until completely dissolved.
- Color the alginate solution: Add the natural blue dye (spirulina or adjusted red cabbage extract) and mix thoroughly.
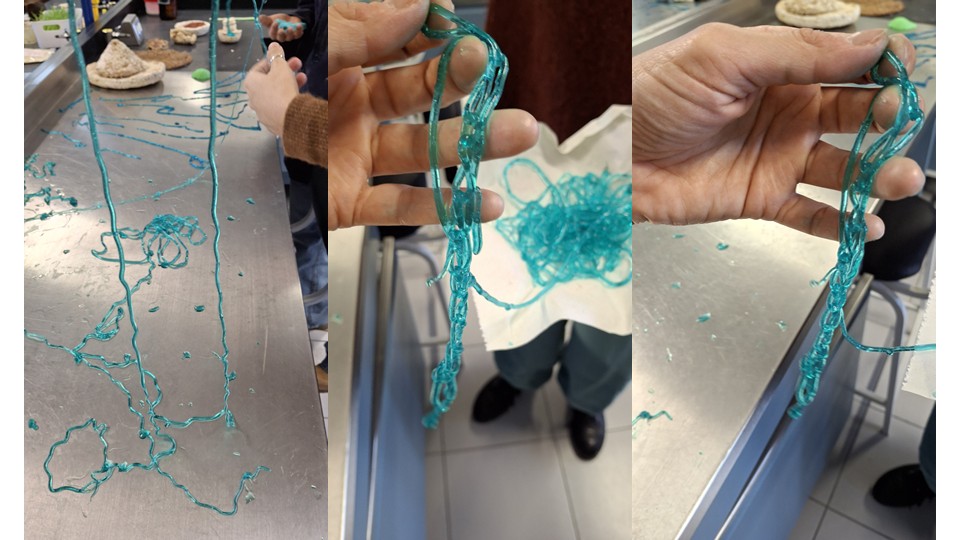
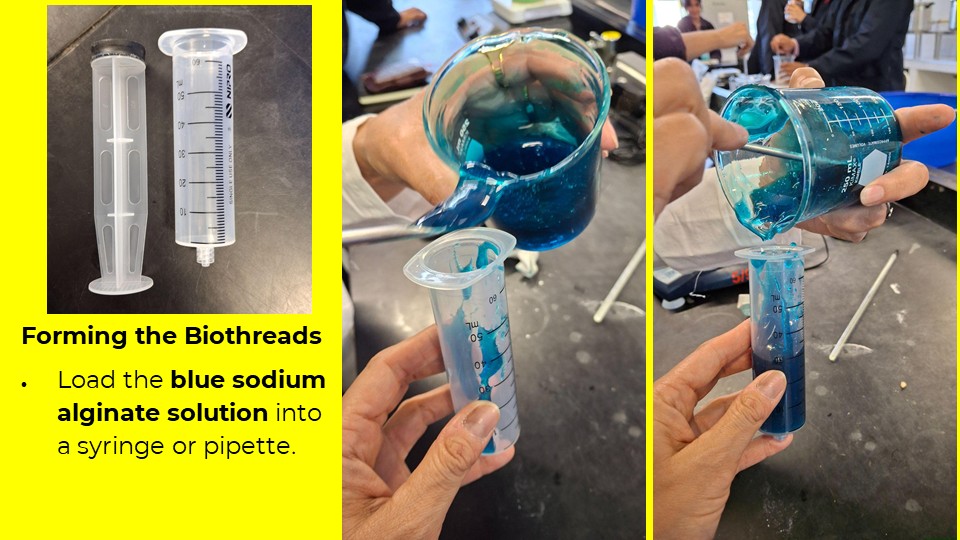
- Form the fibers: Load the alginate solution into a syringe or pipette.
- Gelation: Drip or extrude the alginate solution directly into the calcium chloride bath.
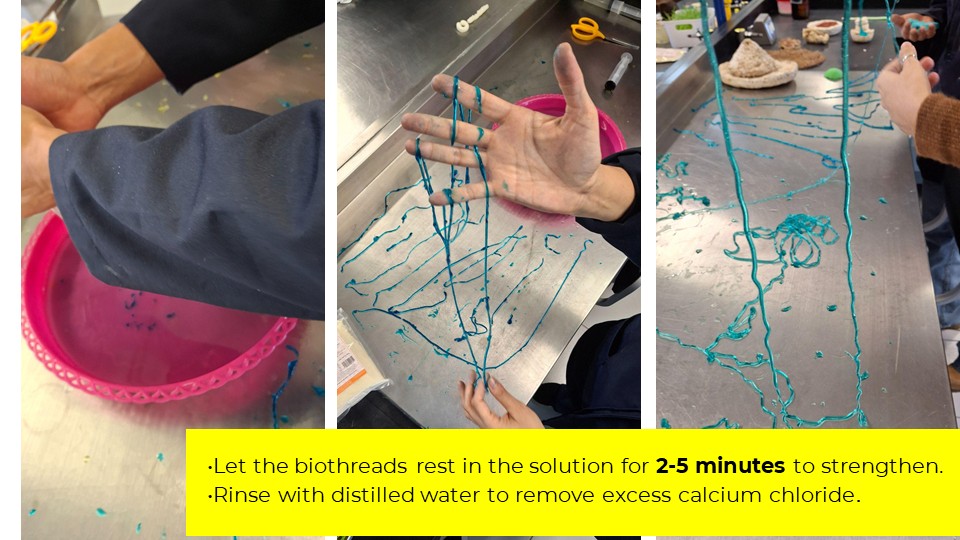
- Setting: Allow the fibers to remain in the calcium chloride solution for 10–20 minutes until fully gelled.
- Rinse (optional): Remove the fibers and rinse gently with clean water to remove excess calcium chloride.
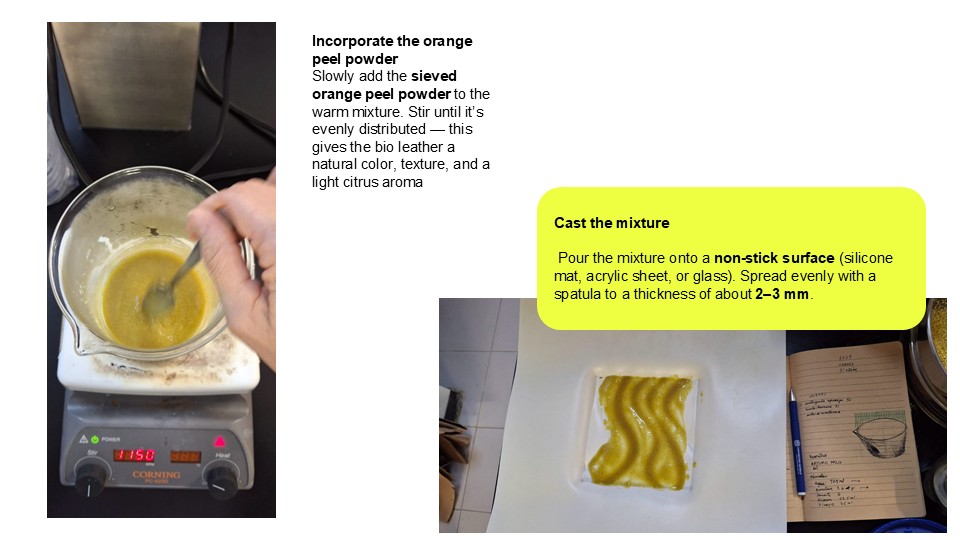
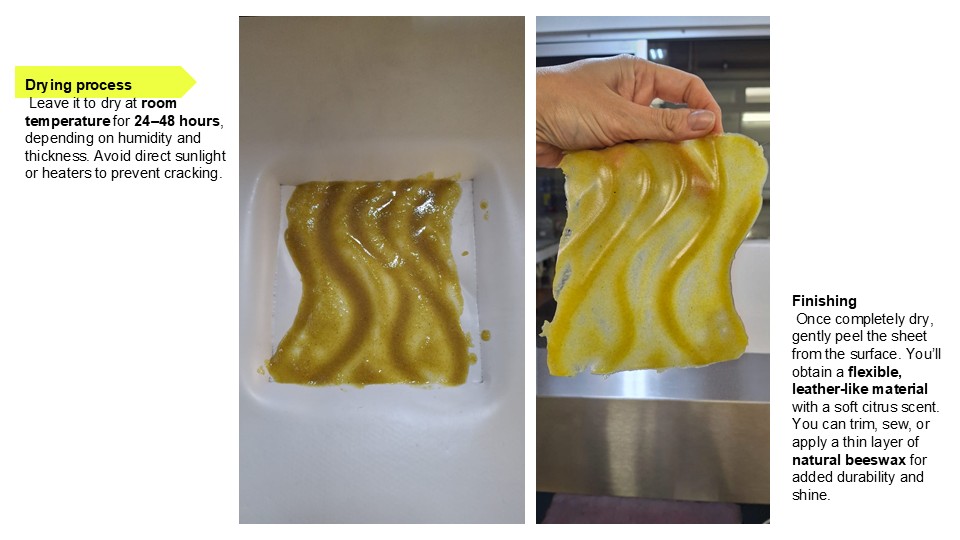
Ingredients & Recipe for Orange Peel Bioleather


Documenting and Comparing Experiments
Test Series: Bio-plastic
| Material | Name | Polymer | Plasticizer | Filler | Emulsifier |
|---|---|---|---|---|---|
 |
Bio-leather | Gelatin 3.6 g | Glycerol 23.5 ml | Coffee powder 6 g | Water 17.5 ml |
 |
Bio-resin | Gelatin 2.8 g | Glycerol 0.75 ml | — | Water 14 ml and vinegar 2.8 ml |
 |
Bio-ceramic | Gelatin 3.6 g | Glycerol 23.5 ml | Eggshell powder 6 g | Water 17.5 ml |
 |
Bio-ceramic | Alginate 3.6 g | — | Eggshell powder 12 g | Water 17.5 ml |
 |
Bio-leather | Gelatin 3.6 g | Glycerol 23.5 ml | Kombucha 6 g and orange peel powder 6 g | Water 17.5 ml |
 |
Bio-leather | Gelatin 3.6 g | Glycerol 23.5 ml | Kombucha 6 g | Water 17.5 ml |
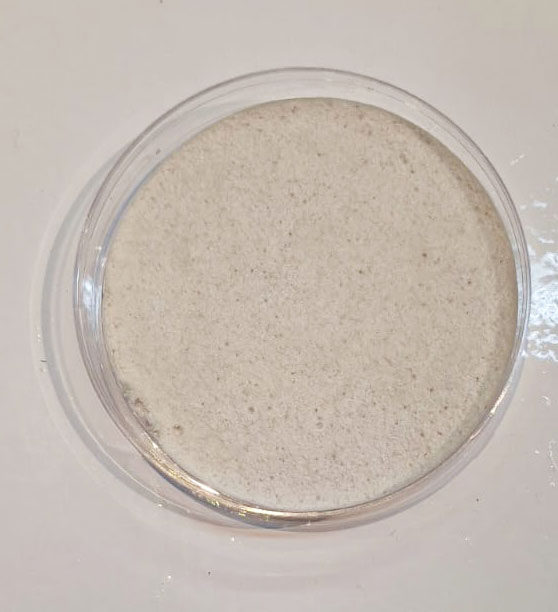
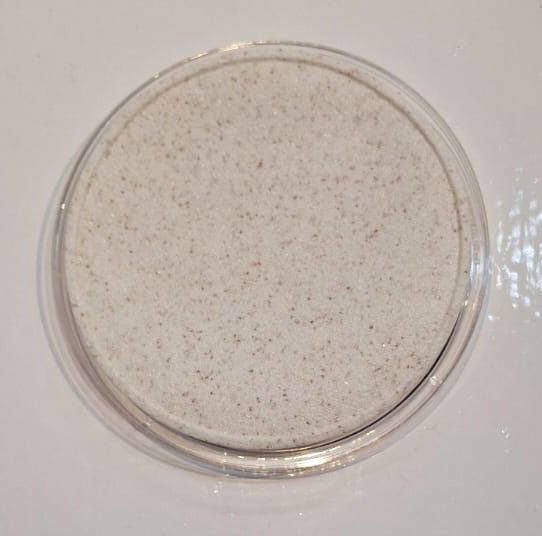
Results
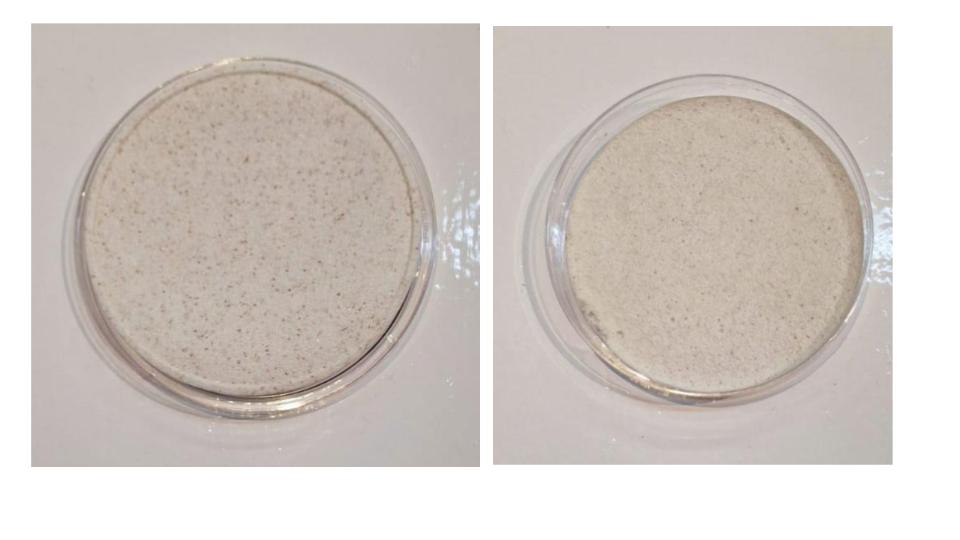
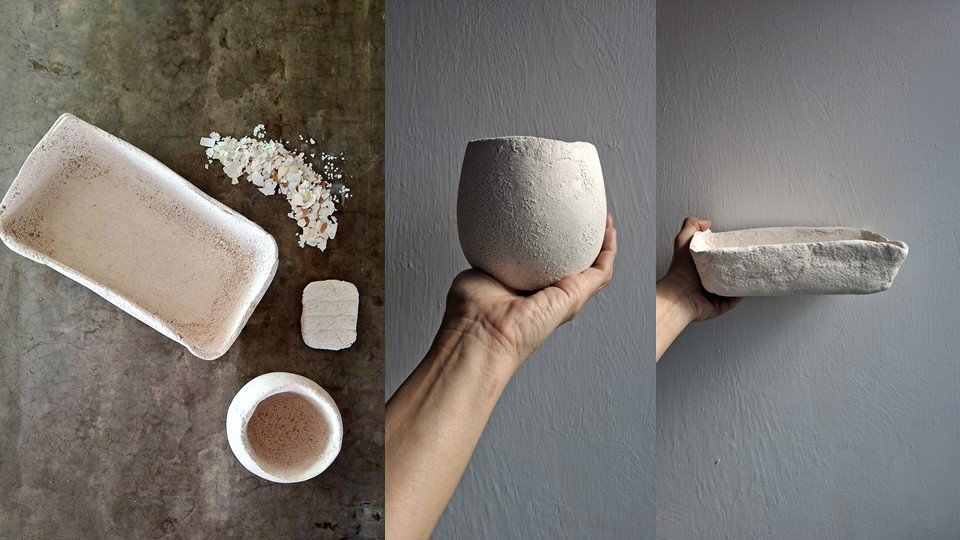
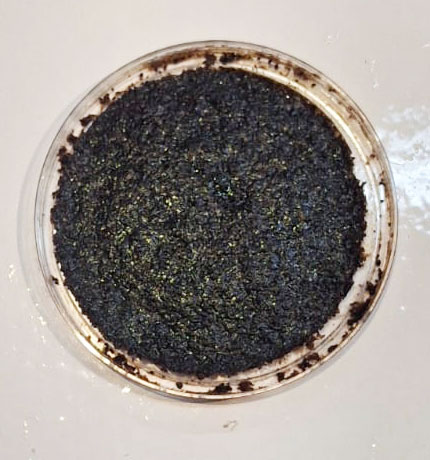
On the left, an image of a sample made with gelatin and a smaller amount of eggshell powder. This composition is more flexible. On the right, an image of a sample made with alginate and twice the amount of eggshell powder. This version is more rigid, and the color looks more opaque.
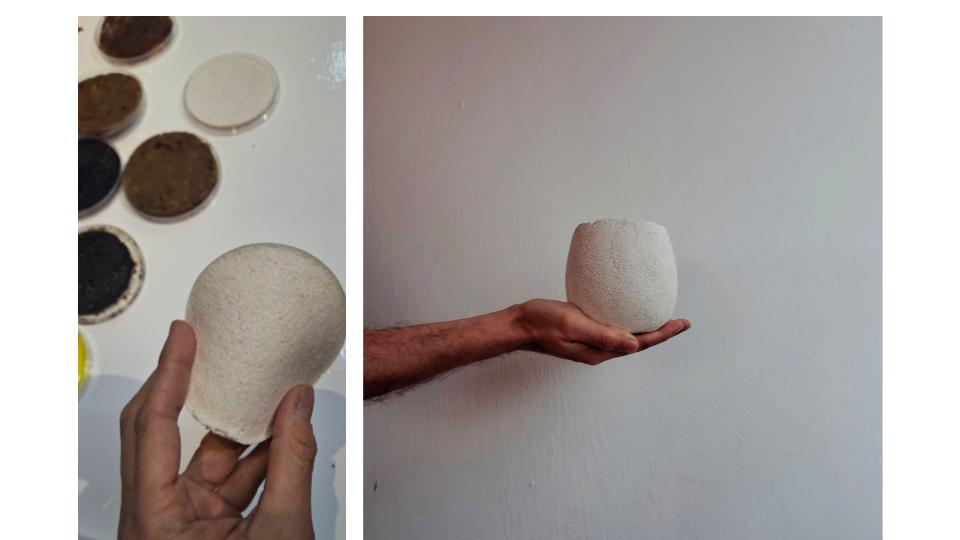
Experiment on mycelium growth
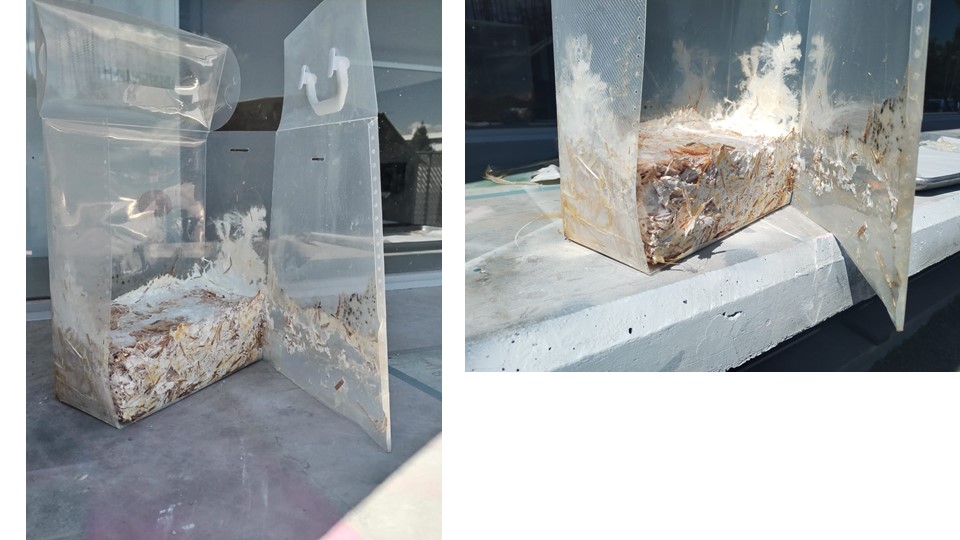
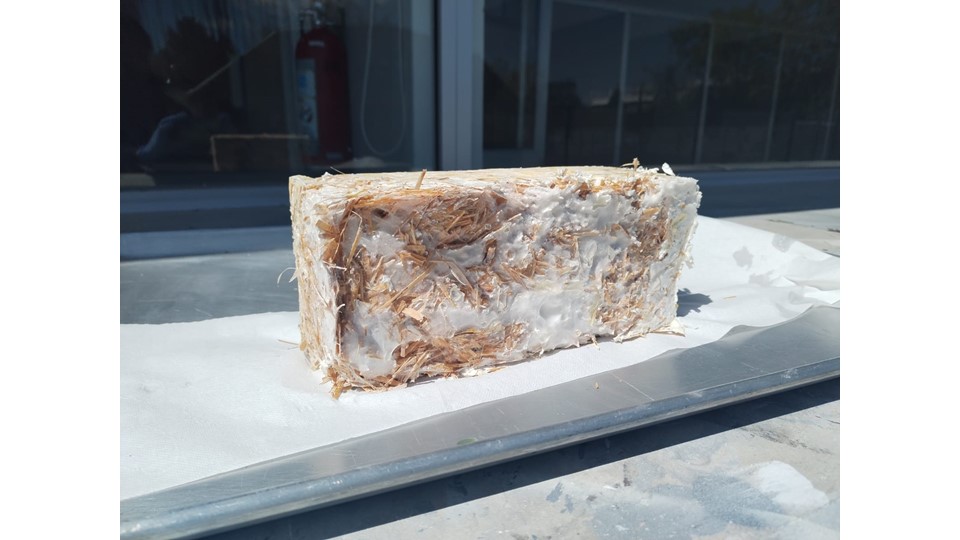
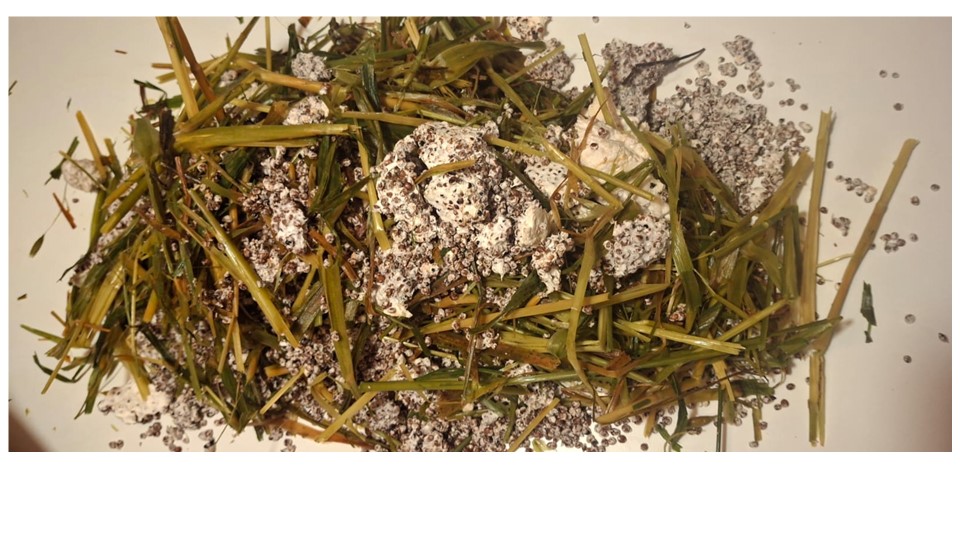
For this process, I start with fairly accessible materials: I use dry straw (wheat, oat, or barley), spawn—usually from oyster mushrooms of the genus Pleurotus—clean water, a large container such as a pot or drum, durable plastic bags or another type of container, as well as alcohol or disinfectant and, if possible, gloves to maintain basic hygiene during handling. First, I prepare the straw by cutting it into pieces of about 3–5 cm, since this increases the available surface area and allows the mycelium to colonize more efficiently; I’ve noticed that if I leave the fibers too long, the process becomes less efficient and creates more spaces where contamination can develop. I then hydrate the straw by soaking it in water for 12–24 hours, ensuring it absorbs moisture completely.
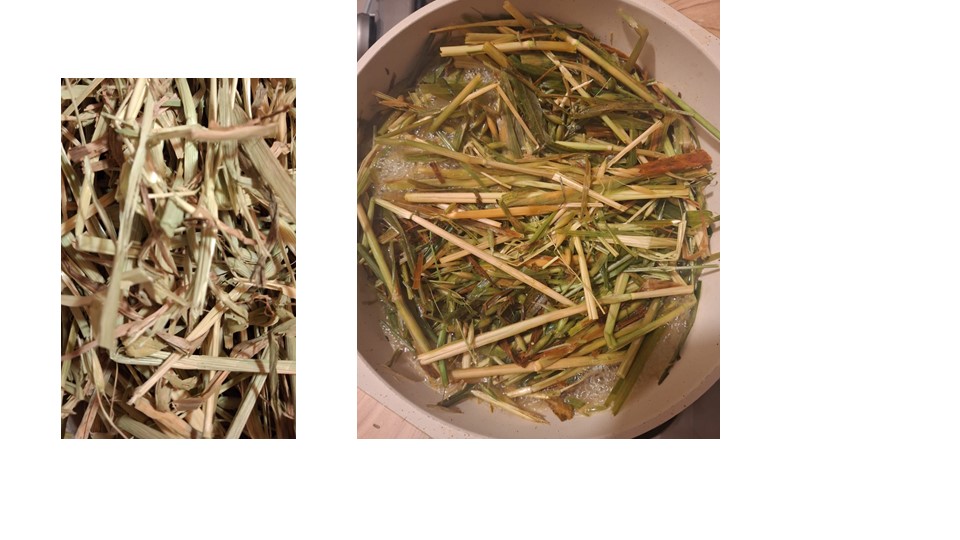
Once hydrated, I move on to pasteurization, which I consider a critical step: I heat water to around 60–70°C (avoiding boiling) and submerge the straw for one to two hours. This doesn’t fully sterilize the material, but it significantly reduces competing microorganisms; I’ve learned that boiling can be counterproductive, as it eliminates everything and leaves the substrate vulnerable to later contamination. After that, I drain the straw and let it cool until it is moist but not dripping—if it’s too wet, it tends to rot, and if it’s too dry, the mycelium will not grow.
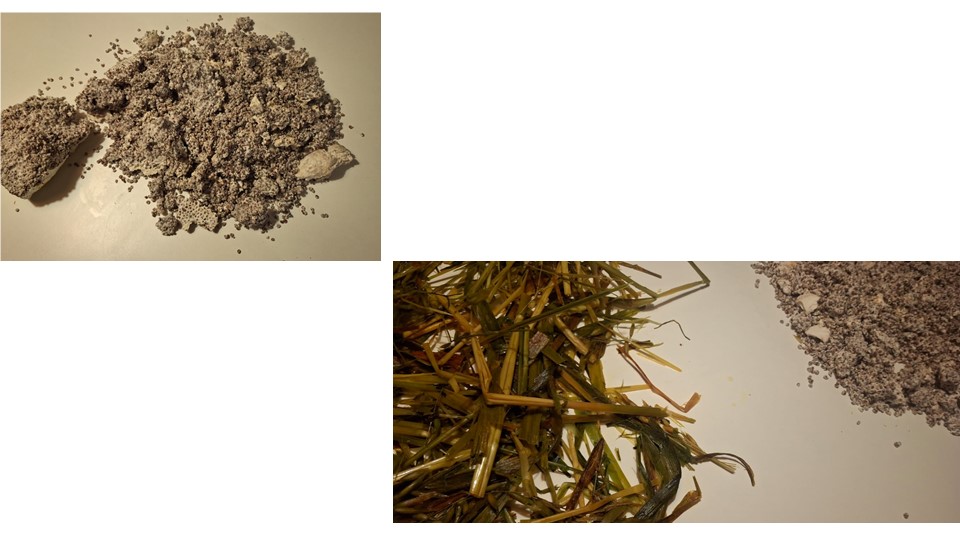
When the straw is at the right moisture level, I proceed with inoculation: I clean my hands thoroughly (or use gloves) and mix the spawn into the straw at about 5–10% of the total volume, trying to distribute it evenly or in layers. I understand that this step largely determines the success of the process, since any contamination at this stage can compromise everything. I then place the mixture into plastic bags and make small holes to allow for air exchange.
Finally, I leave the bags to incubate in a low-light environment at a temperature between 20 and 28°C for about two to three weeks. During this time, I observe how the straw gradually turns white, indicating that the mycelium is colonizing the substrate. If I choose to proceed to fruiting, I then expose the material to indirect light, increase humidity, and ensure proper ventilation—conditions under which the mushrooms begin to develop.